Embed Size (px)
Citation preview

16 April 2020
New Customs Act ProgrammeRegistration, Licensing and Accreditation –Accessing RLA via eFiling
eFiling registration / login screen
New Customs Acts Programme (NCAP)
1
Screen orientation
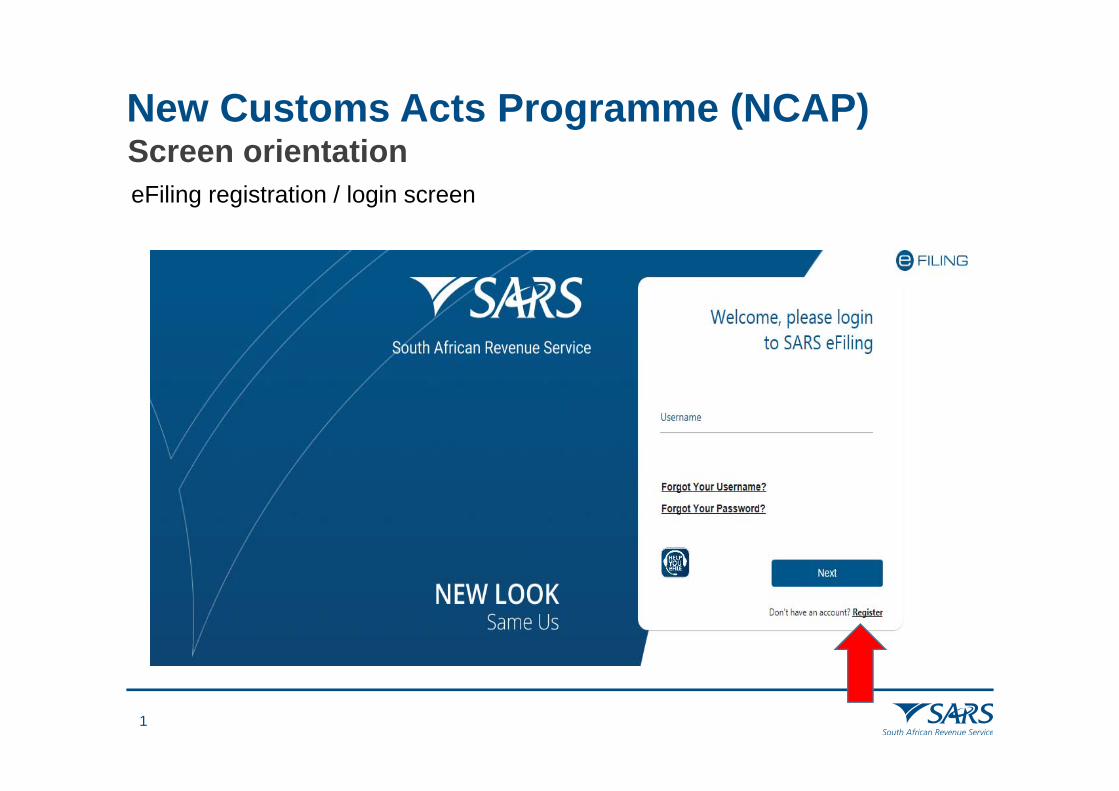
Registration, Licensing and Accreditation (RLA)
2
Changing your eFiling profile from Individual to Organisation Click “Home” on top menu. Then “User” on left menu, then “Change Website Profile”
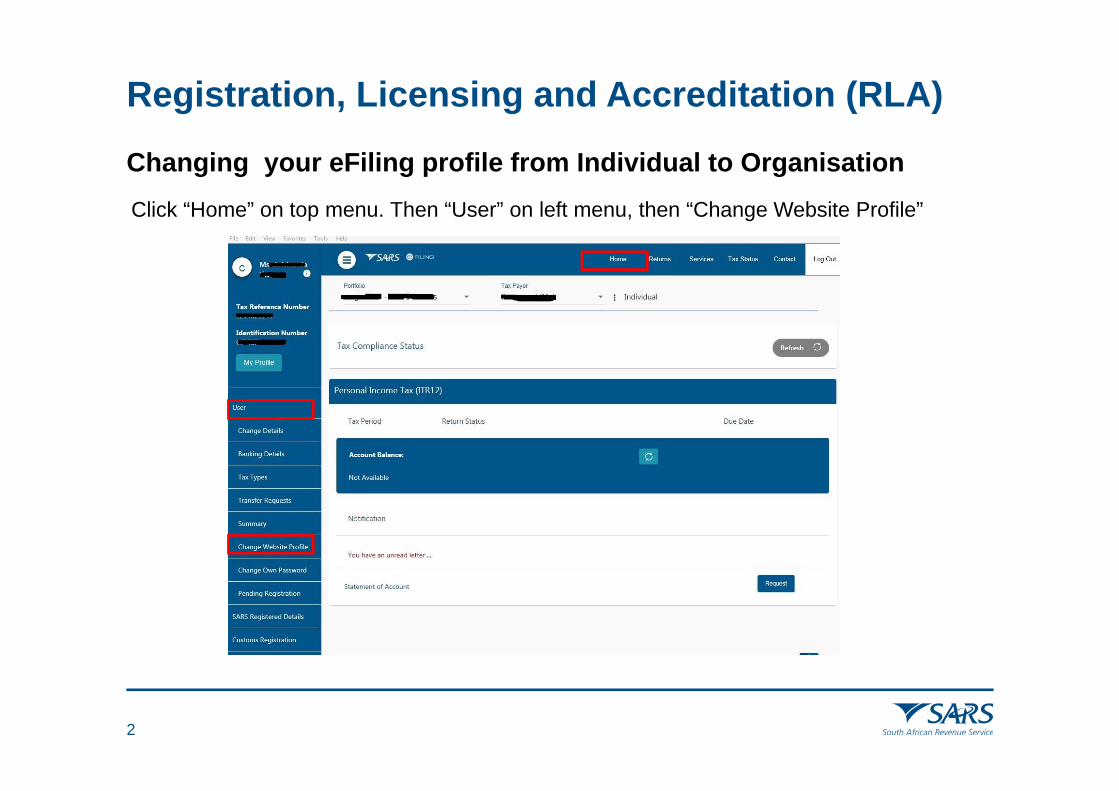
Registration, Licensing and Accreditation (RLA)
3
Changing your eFiling profile from Individual to Organisation
Registration, Licensing and Accreditation (RLA)
4
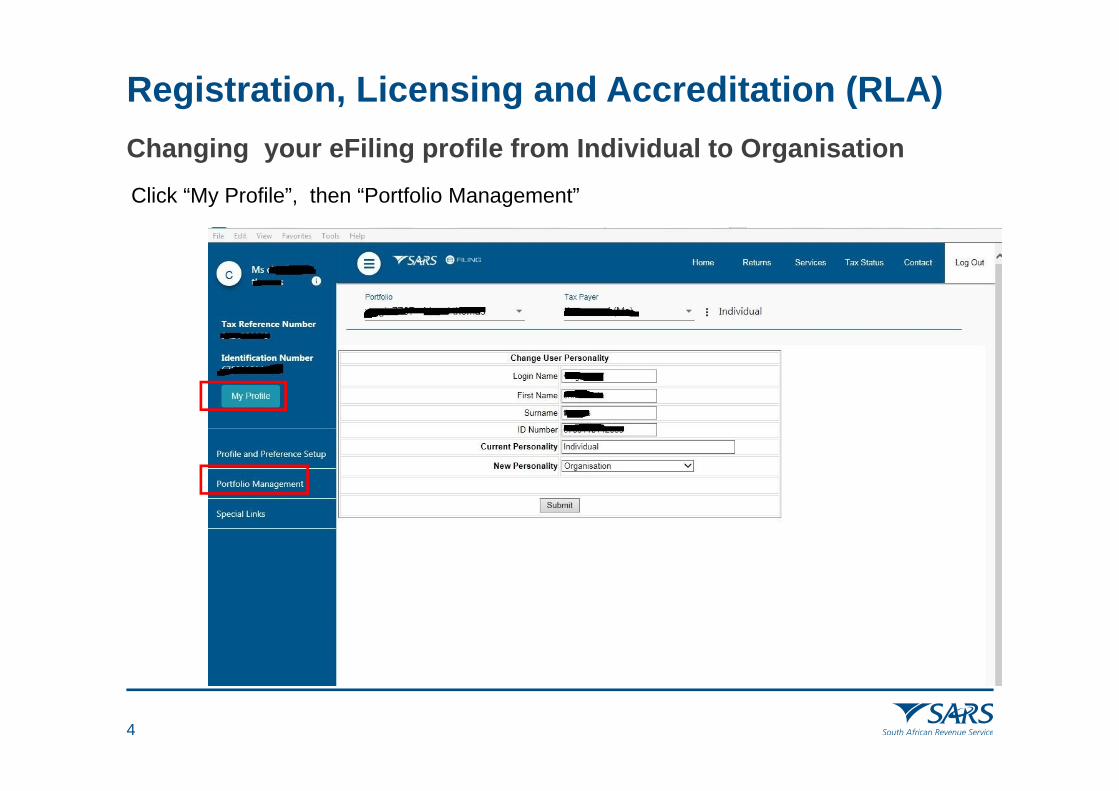
Changing your eFiling profile from Individual to OrganisationClick “My Profile”, then “Portfolio Management”
Registration, Licensing and Accreditation (RLA)
5
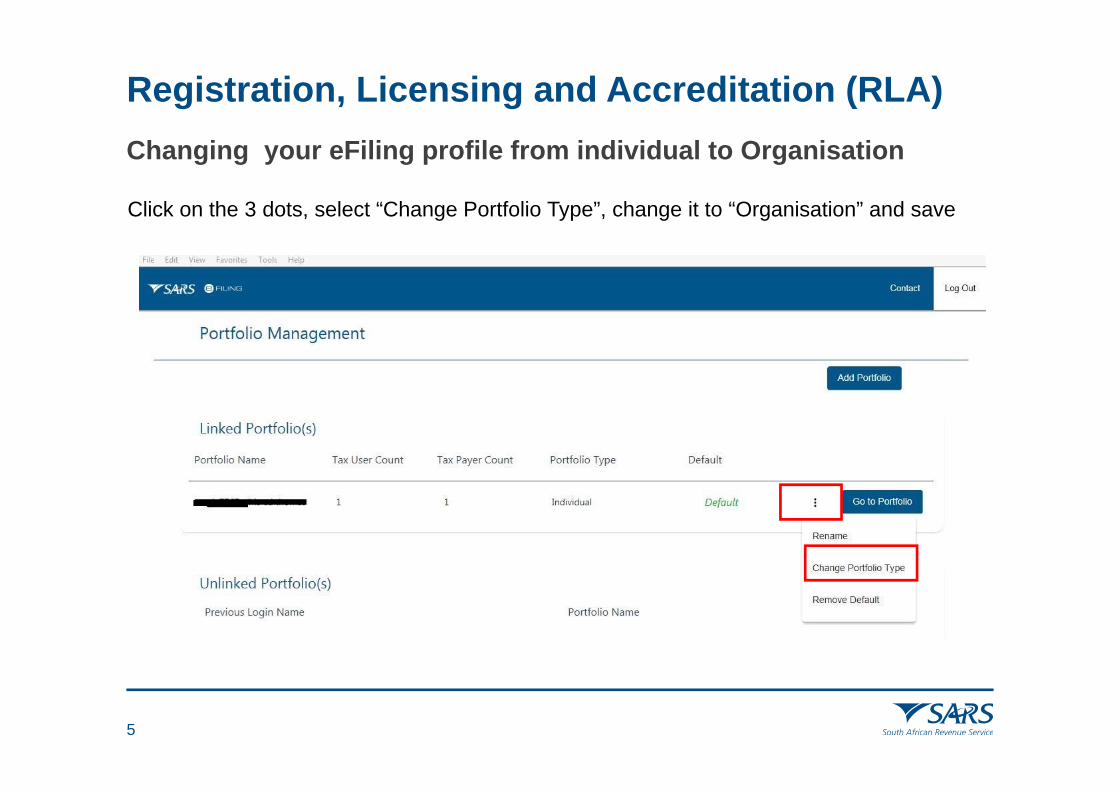
Changing your eFiling profile from individual to Organisation
Click on the 3 dots, select “Change Portfolio Type”, change it to “Organisation” and save
Registration, Licensing and Accreditation (RLA)
6
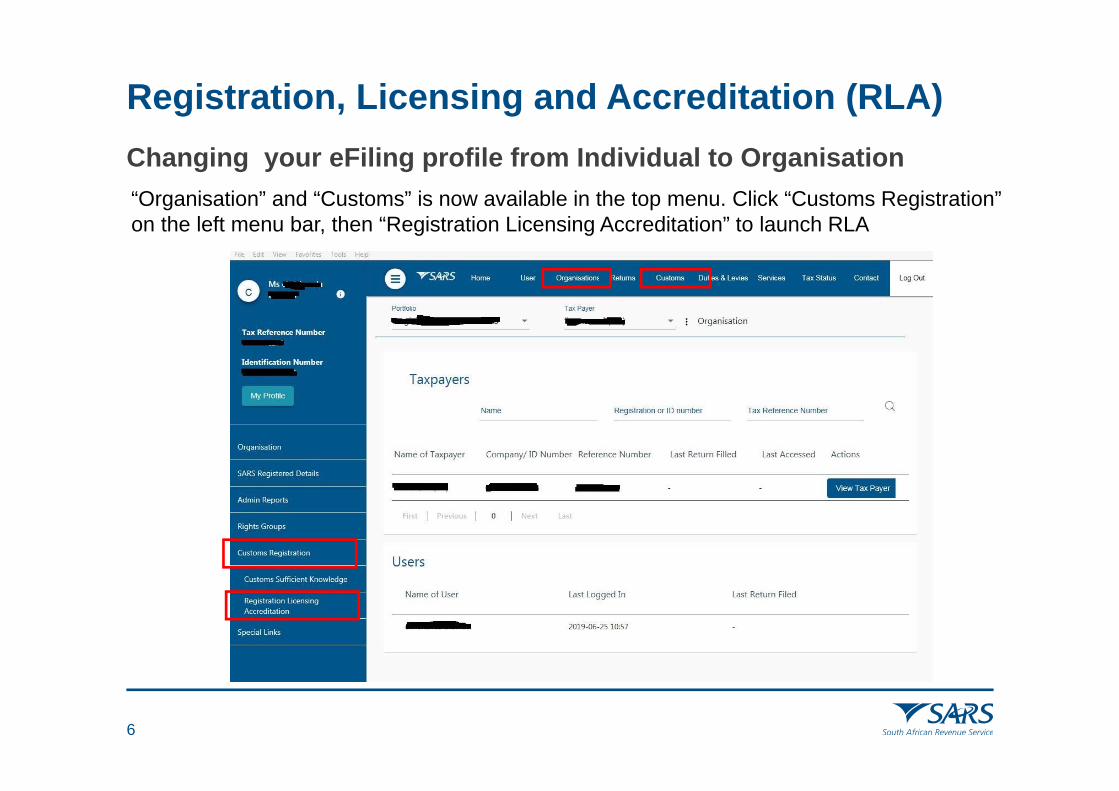
Changing your eFiling profile from Individual to Organisation“Organisation” and “Customs” is now available in the top menu. Click “Customs Registration” on the left menu bar, then “Registration Licensing Accreditation” to launch RLA
Registration, Licensing and Accreditation (RLA)
7
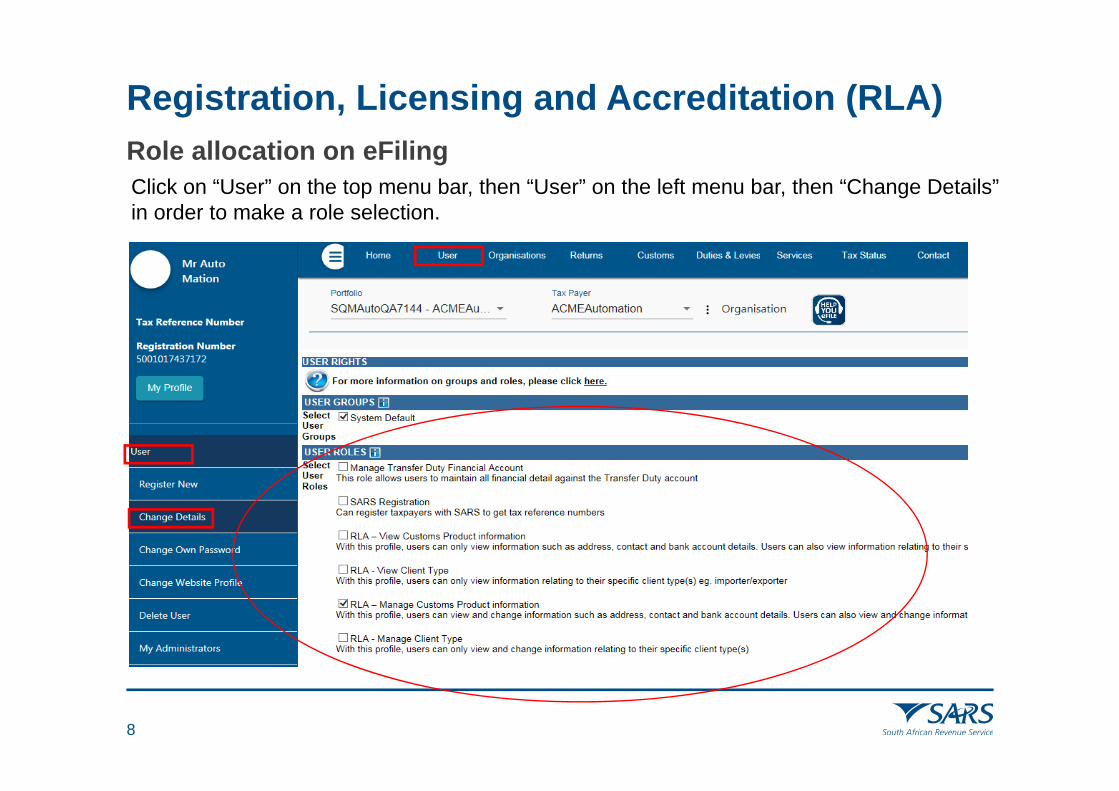
Role allocation on eFiling• Once registered on eFiling, the user will need to ensure that roles were allocated correctly,
in order to apply via RLA. This can be done via your internal eFiling administrator.
• The user will be allowed to select only ONE of the following user roles:
• RLA View Customs Product
• RLA View Client Type
• RLA Manage Customs Product (This role allows full submission rights)
• RLA Manage Client Type
• Note the description of each of the roles, as not all roles allow submission of applications on
RLA:
• RLA View role – only view access and no submission capabilities;
• RLA Manage role allows submission capabilities.
• Please also select the “allow RLA user” (if available) role in conjunction with one of the 4
RLA roles
Registration, Licensing and Accreditation (RLA)
8
Role allocation on eFilingClick on “User” on the top menu bar, then “User” on the left menu bar, then “Change Details” in order to make a role selection.
Registration, Licensing and Accreditation (RLA)
9
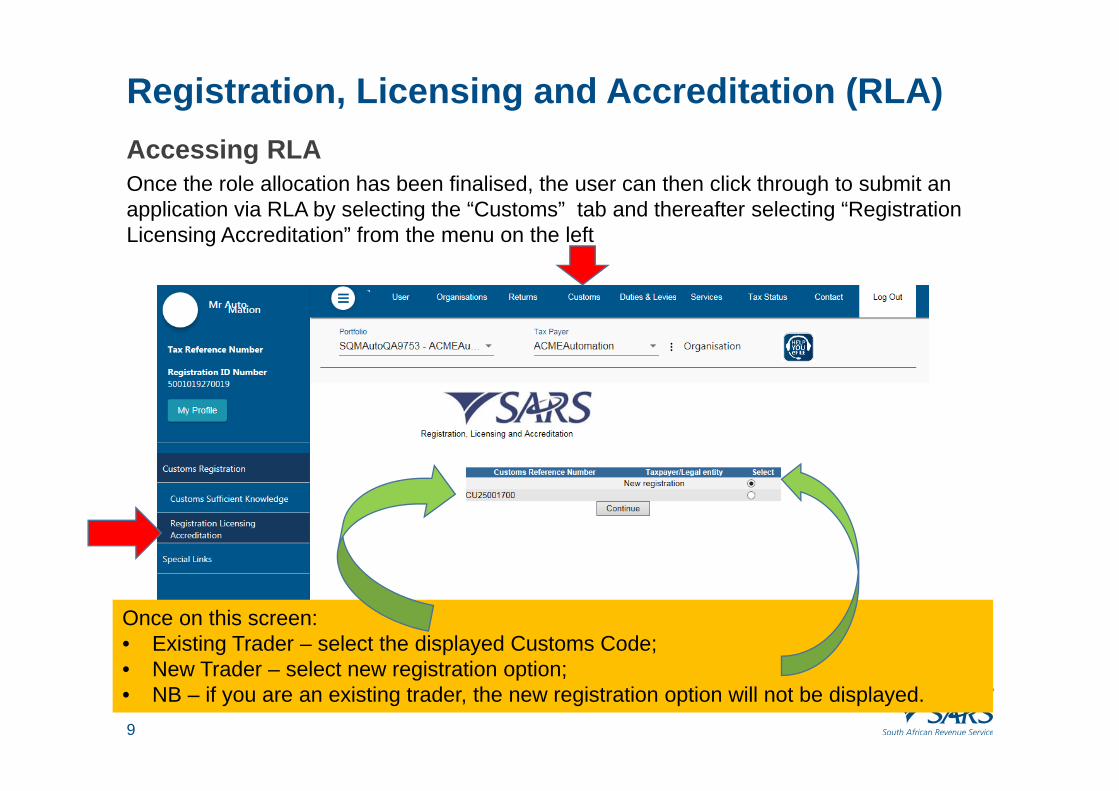
Accessing RLAOnce the role allocation has been finalised, the user can then click through to submit an application via RLA by selecting the “Customs” tab and thereafter selecting “Registration Licensing Accreditation” from the menu on the left
Once on this screen:• Existing Trader – select the displayed Customs Code;• New Trader – select new registration option;• NB – if you are an existing trader, the new registration option will not be displayed.
Registration, Licensing and Accreditation (RLA)
10
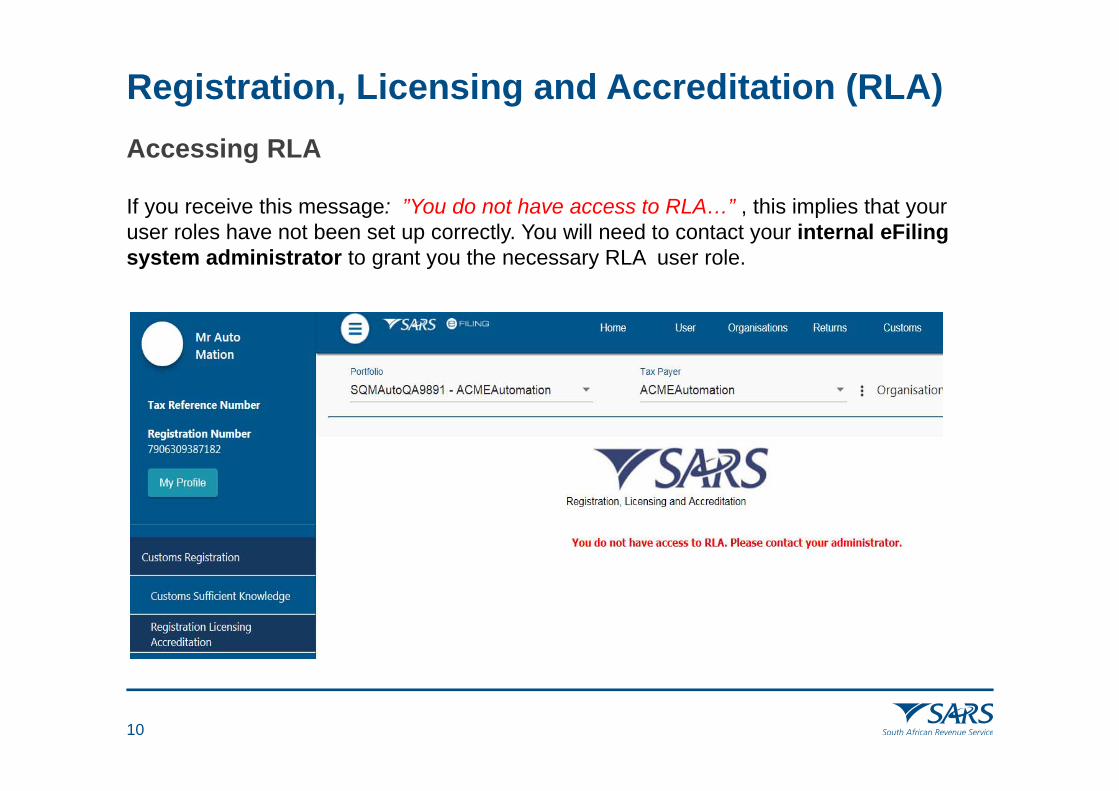
Accessing RLA
If you receive this message: ”You do not have access to RLA…” , this implies that your user roles have not been set up correctly. You will need to contact your internal eFilingsystem administrator to grant you the necessary RLA user role.

Registration, Licensing and Accreditation (RLA)
11
Registration for RLA via eFilingOnce the client has selected “Registration, Licensing and Accreditation” from the eFilingmenu, the client will be presented with the Customs Trader Portal (CTP) dashboard, which on first access will be blank
New Customs Acts Programme (NCAP)
12
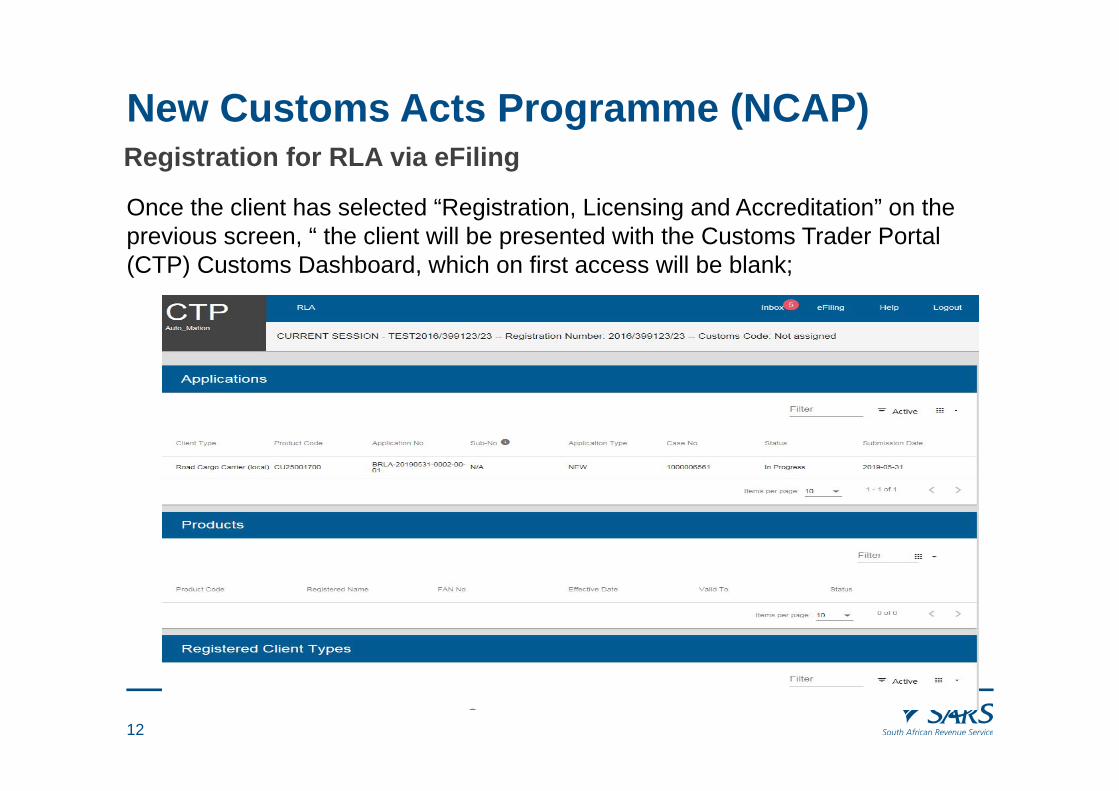
Registration for RLA via eFiling
Once the client has selected “Registration, Licensing and Accreditation” on the previous screen, “ the client will be presented with the Customs Trader Portal (CTP) Customs Dashboard, which on first access will be blank;
Registration, Licensing and Accreditation (RLA)
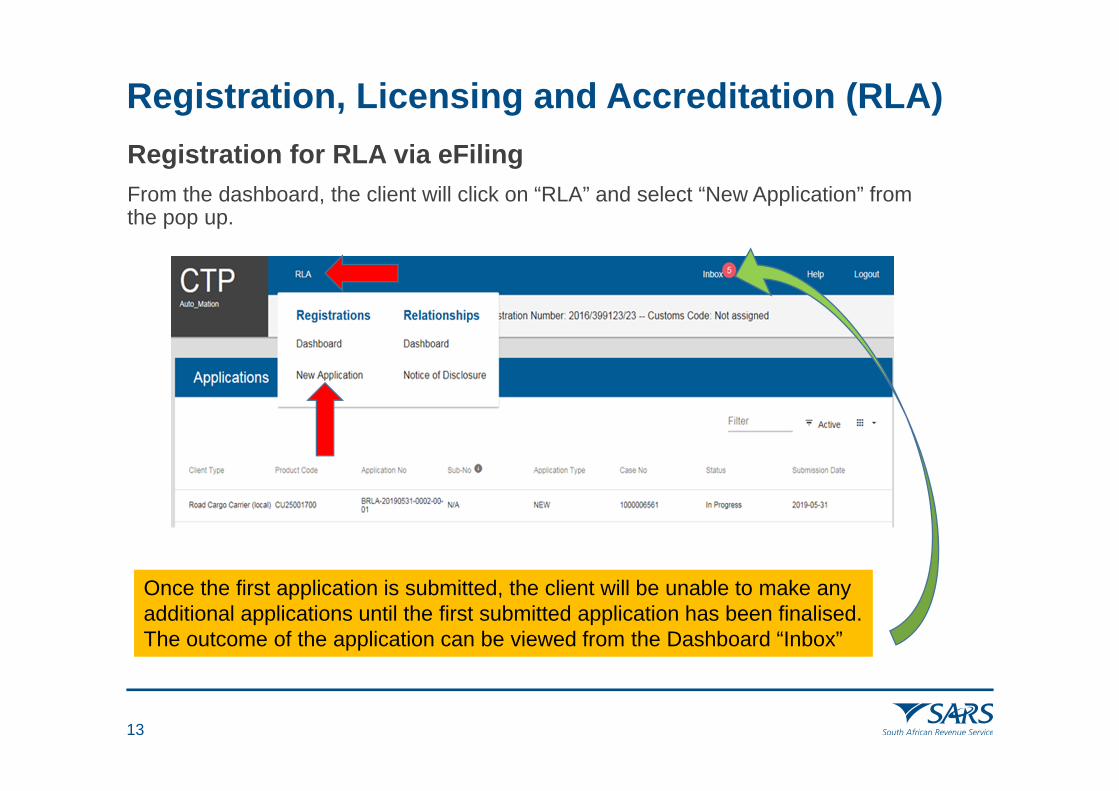
13
Once the first application is submitted, the client will be unable to make any additional applications until the first submitted application has been finalised.The outcome of the application can be viewed from the Dashboard “Inbox”
From the dashboard, the client will click on “RLA” and select “New Application” from the pop up.
Registration for RLA via eFiling
Registration, Licensing and Accreditation (RLA)
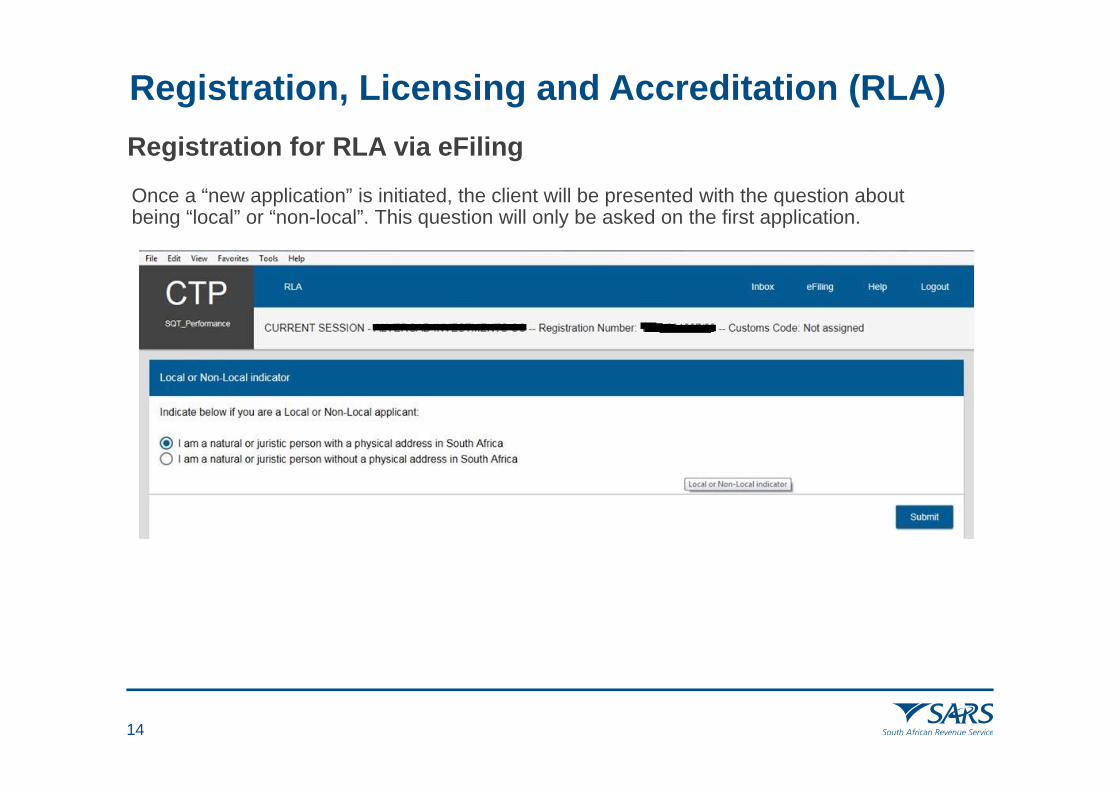
14
Once a “new application” is initiated, the client will be presented with the question about being “local” or “non-local”. This question will only be asked on the first application.
Registration for RLA via eFiling
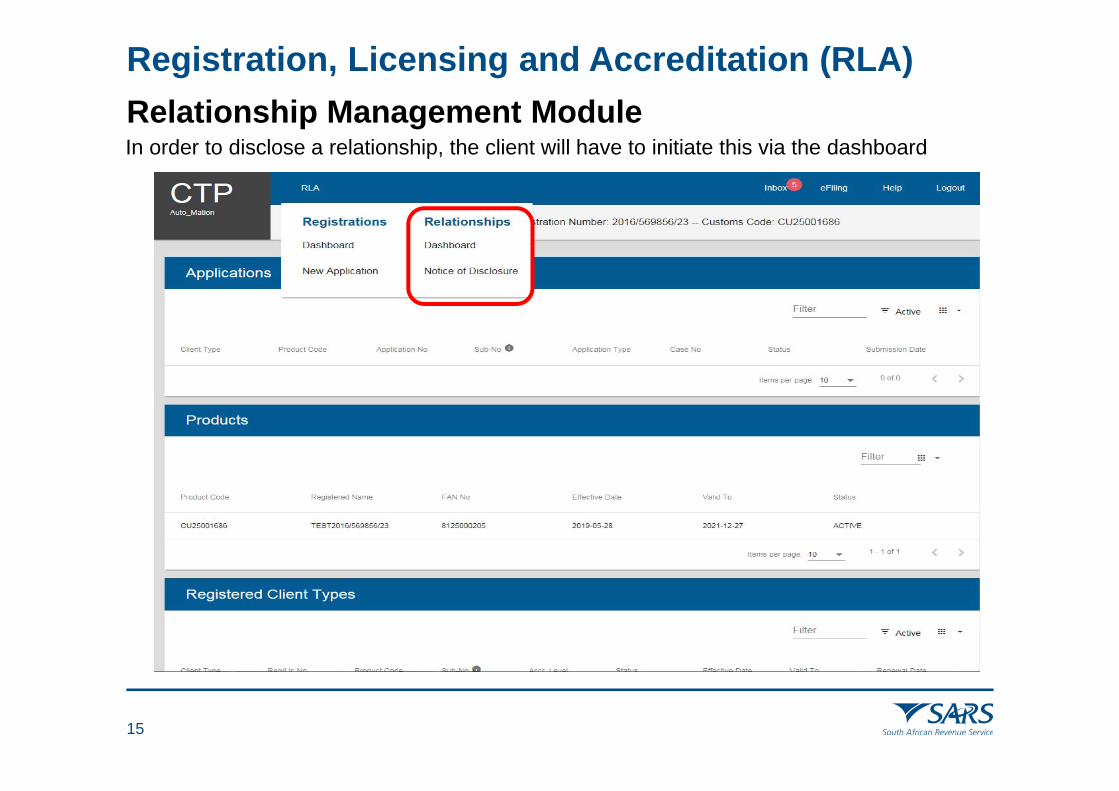
Relationship Management Module
15
Registration, Licensing and Accreditation (RLA)
In order to disclose a relationship, the client will have to initiate this via the dashboard