Embed Size (px)
Citation preview
Network eManager Basic User Guide Page 1
Network eManger Basic User Guide
Connecting To Your Phone System
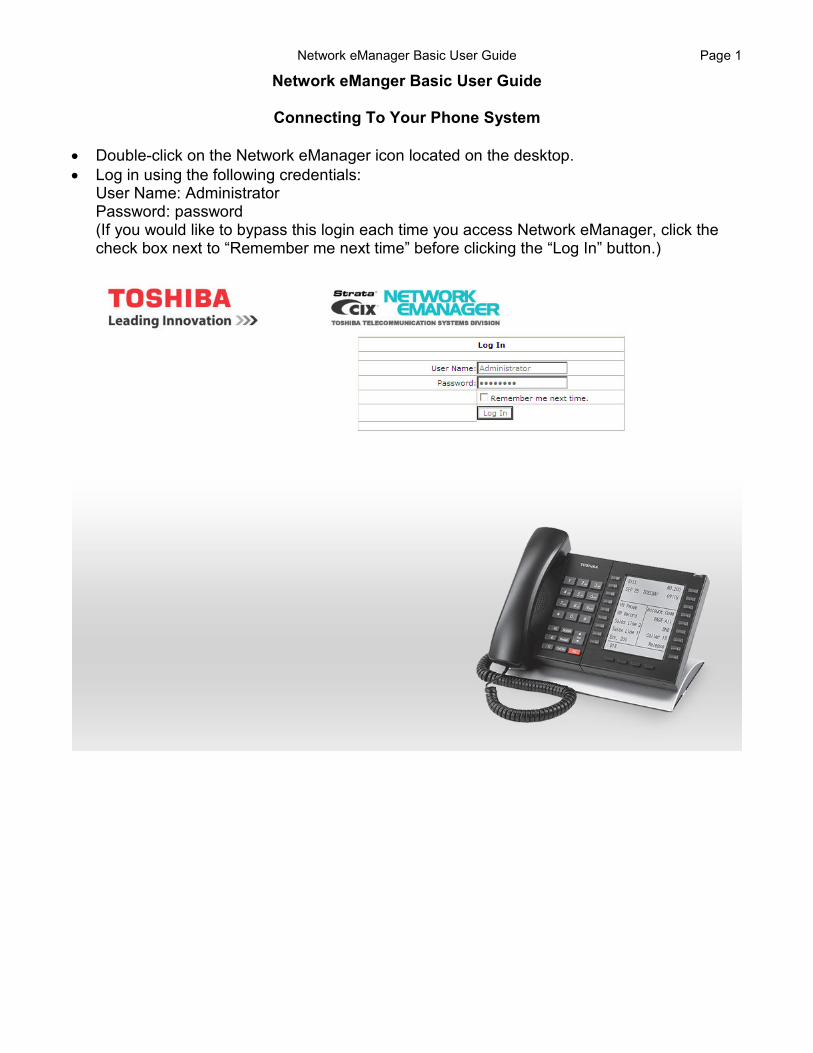
• Double-click on the Network eManager icon located on the desktop.
• Log in using the following credentials: User Name: Administrator Password: password (If you would like to bypass this login each time you access Network eManager, click the check box next to “Remember me next time” before clicking the “Log In” button.)
Page 2 Network eManager Basic User Guide
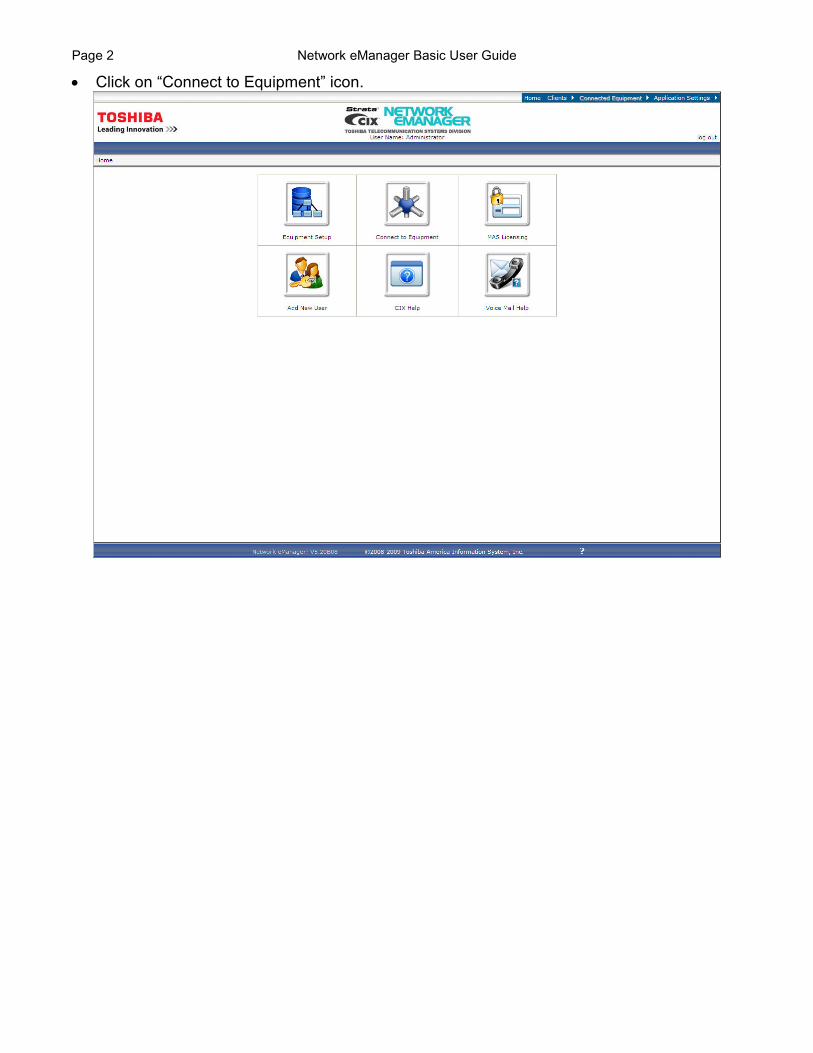
• Click on “Connect to Equipment” icon.

Network eManager Basic User Guide Page 3
• Click the checkbox next to the phone system you would like to connect to. (There is usually only one to select. If there are multiple systems networked, you may have to expand the list by click on the + to the left of the system. This will allow you to select a specific system to connect to.)
• Click the “Connect” button.
Page 4 Network eManager Basic User Guide
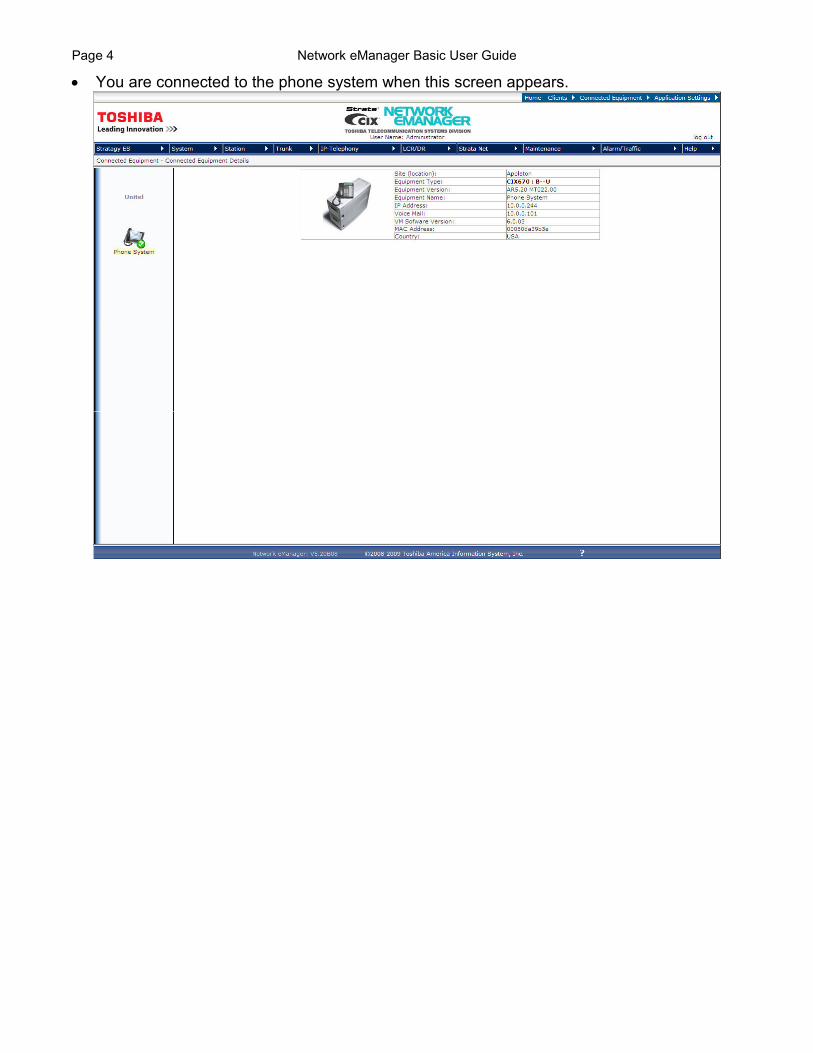
• You are connected to the phone system when this screen appears.

Network eManager Basic User Guide Page 5
Changing A Person’s Name Displayed On A Phone
• Go to Station > Station Assignments.
• All phone extensions appear on the right-hand side of the screen. Select the extension in which you would like to change the name.
• Locate “09 Name to Display” in the center screen. Enter in the new name.
• Click on the “Submit” button in the bottom left to save the changes made.
Page 6 Network eManager Basic User Guide
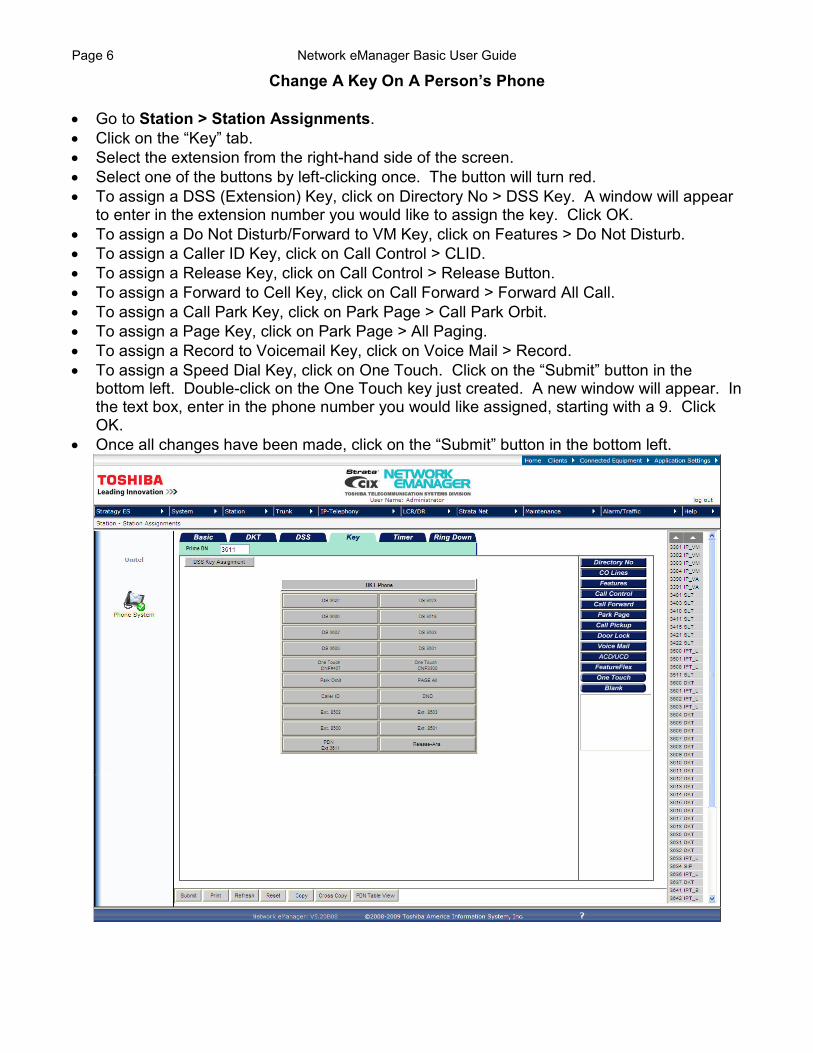
Change A Key On A Person’s Phone
• Go to Station > Station Assignments.
• Click on the “Key” tab.
• Select the extension from the right-hand side of the screen.
• Select one of the buttons by left-clicking once. The button will turn red.
• To assign a DSS (Extension) Key, click on Directory No > DSS Key. A window will appear to enter in the extension number you would like to assign the key. Click OK.
• To assign a Do Not Disturb/Forward to VM Key, click on Features > Do Not Disturb.
• To assign a Caller ID Key, click on Call Control > CLID.
• To assign a Release Key, click on Call Control > Release Button.
• To assign a Forward to Cell Key, click on Call Forward > Forward All Call.
• To assign a Call Park Key, click on Park Page > Call Park Orbit.
• To assign a Page Key, click on Park Page > All Paging.
• To assign a Record to Voicemail Key, click on Voice Mail > Record.
• To assign a Speed Dial Key, click on One Touch. Click on the “Submit” button in the bottom left. Double-click on the One Touch key just created. A new window will appear. In the text box, enter in the phone number you would like assigned, starting with a 9. Click OK.
• Once all changes have been made, click on the “Submit” button in the bottom left.
Network eManager Basic User Guide Page 7
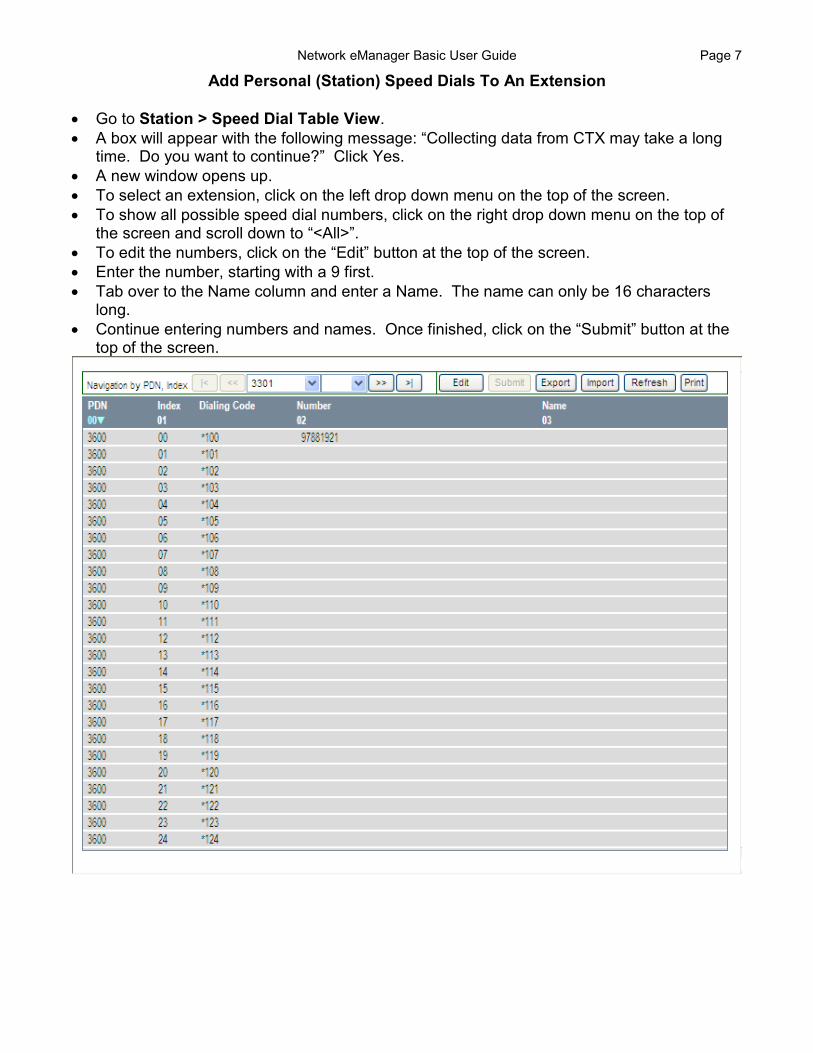
Add Personal (Station) Speed Dials To An Extension
• Go to Station > Speed Dial Table View.
• A box will appear with the following message: “Collecting data from CTX may take a long time. Do you want to continue?” Click Yes.
• A new window opens up.
• To select an extension, click on the left drop down menu on the top of the screen.
• To show all possible speed dial numbers, click on the right drop down menu on the top of the screen and scroll down to “<All>”.
• To edit the numbers, click on the “Edit” button at the top of the screen.
• Enter the number, starting with a 9 first.
• Tab over to the Name column and enter a Name. The name can only be 16 characters long.
• Continue entering numbers and names. Once finished, click on the “Submit” button at the top of the screen.

Page 8 Network eManager Basic User Guide
Add System Speed Dials
• Go to System > System Speed Dial Table View.
• A box will appear with the following message: “Collecting data from CTX may take a long time. Do you want to continue?” Click Yes.
• A new window opens up.
• The screen will only show 24 numbers at a time. To show all possible speed dial numbers, click on the drop down menu on the top of the screen and scroll down to “<All>”.
• To edit the numbers, click on the “Edit” button at the top of the screen.
• Enter the number, starting with a 9 first.
• Tab over to the Name column and enter a Name. The name can only be 16 characters long.
• Continue entering numbers and names. Once finished, click on the “Submit” button at the top of the screen.
Network eManager Basic User Guide Page 9
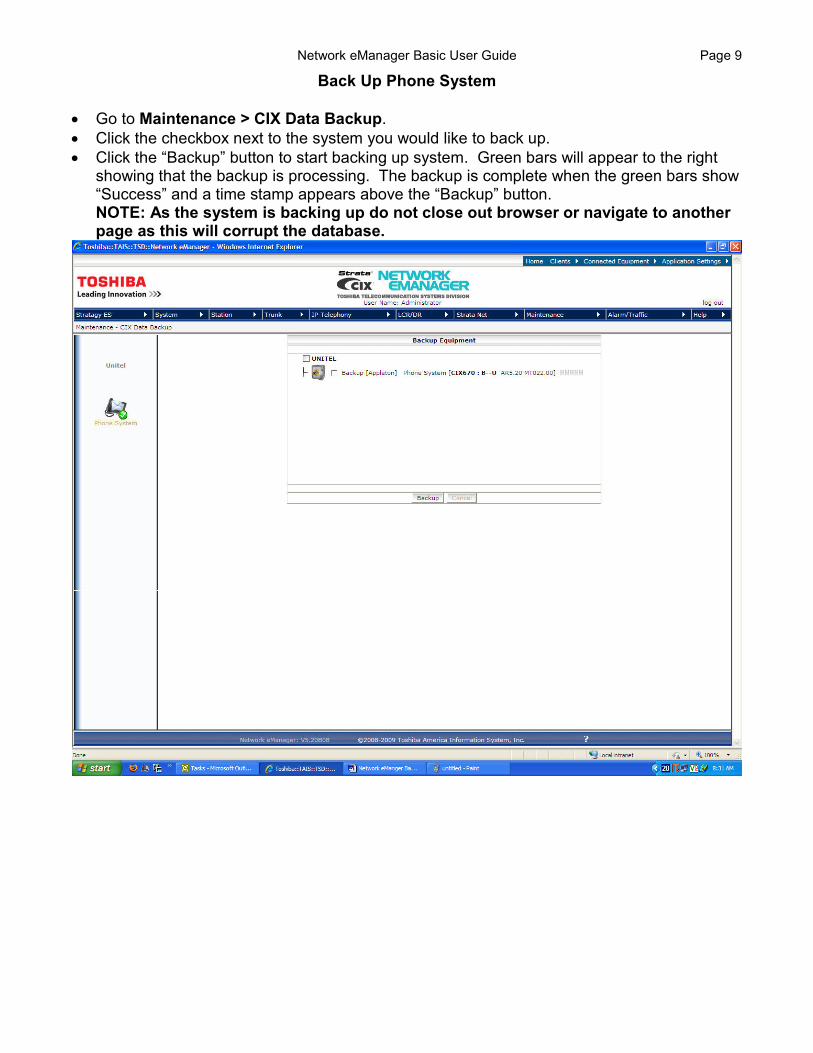
Back Up Phone System
• Go to Maintenance > CIX Data Backup.
• Click the checkbox next to the system you would like to back up.
• Click the “Backup” button to start backing up system. Green bars will appear to the right showing that the backup is processing. The backup is complete when the green bars show “Success” and a time stamp appears above the “Backup” button. NOTE: As the system is backing up do not close out browser or navigate to another page as this will corrupt the database.
Page 10 Network eManager Basic User Guide
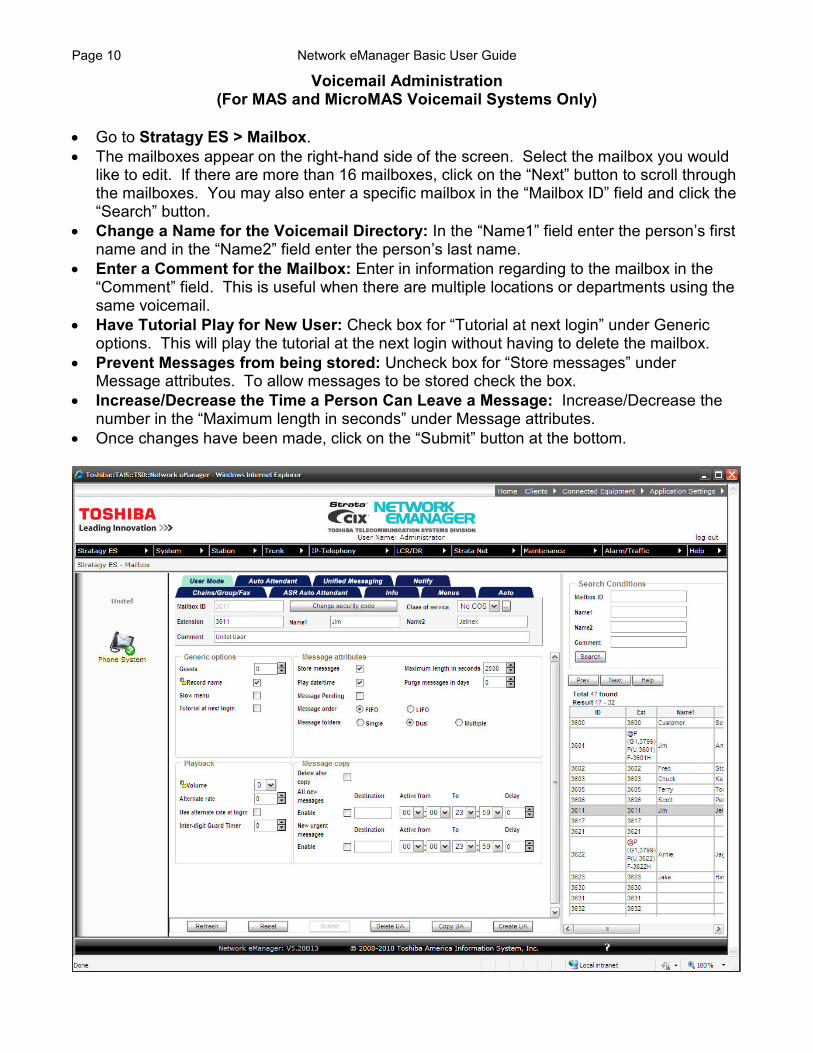
Voicemail Administration (For MAS and MicroMAS Voicemail Systems Only)
• Go to Stratagy ES > Mailbox.
• The mailboxes appear on the right-hand side of the screen. Select the mailbox you would like to edit. If there are more than 16 mailboxes, click on the “Next” button to scroll through the mailboxes. You may also enter a specific mailbox in the “Mailbox ID” field and click the “Search” button.
• Change a Name for the Voicemail Directory: In the “Name1” field enter the person’s first name and in the “Name2” field enter the person’s last name.
• Enter a Comment for the Mailbox: Enter in information regarding to the mailbox in the “Comment” field. This is useful when there are multiple locations or departments using the same voicemail.
• Have Tutorial Play for New User: Check box for “Tutorial at next login” under Generic options. This will play the tutorial at the next login without having to delete the mailbox.
• Prevent Messages from being stored: Uncheck box for “Store messages” under Message attributes. To allow messages to be stored check the box.
• Increase/Decrease the Time a Person Can Leave a Message: Increase/Decrease the number in the “Maximum length in seconds” under Message attributes.
• Once changes have been made, click on the “Submit” button at the bottom.
Network eManager Basic User Guide Page 11
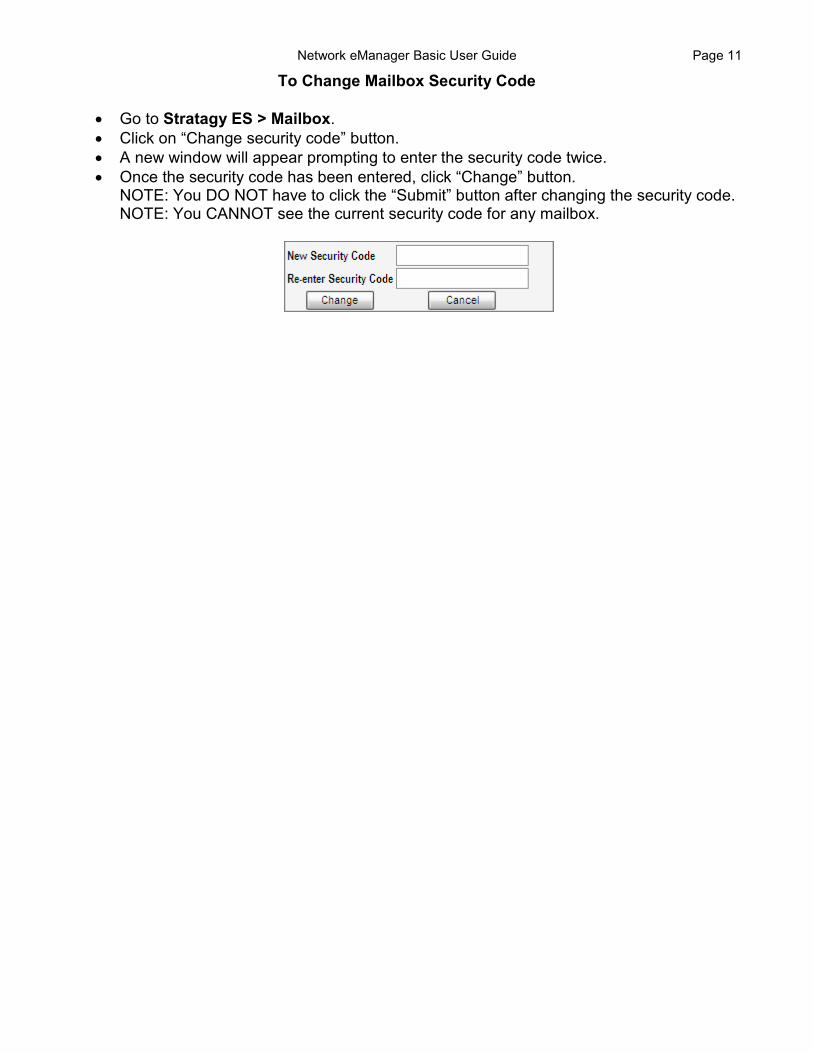
To Change Mailbox Security Code
• Go to Stratagy ES > Mailbox.
• Click on “Change security code” button.
• A new window will appear prompting to enter the security code twice.
• Once the security code has been entered, click “Change” button. NOTE: You DO NOT have to click the “Submit” button after changing the security code. NOTE: You CANNOT see the current security code for any mailbox.
Page 12 Network eManager Basic User Guide
Changes and Updates
2011-01-28 Added voicemail section of user guide (Pages 10-11). Included changing name, adding a comment, playing the tutorial, preventing messages from being stored, increasing/decreasing time to leave messages and changing security code. Bolded the navigation lines that were missed on pages 6-8. Added Changes and Updates section.
2009-11-16 Created Network eManager Basic User Guide.