Embed Size (px)
Citation preview
nsrc@walc 2008 Mérida, Venezuela nsrc@walc 2008 Mérida, Venezuela
nsrc@PacNOG 6 Nadi, Fiji
Network and Server Statistics using Cacti
PacNOG 6 November 2009
Hervey Allen Carlos Vicente
nsrc@walc 2008 Mérida, Venezuela nsrc@walc 2008 Mérida, Venezuela
nsrc@PacNOG 6 Nadi, Fiji
Introduction
• A tool to monitor, store and present network and system/server statistics
• Designed around RRDTool with a special emphasis on the graphical interface
• Almost all of Cacti's functionality can be configured via the Web.
http://www.cacti.net/
nsrc@walc 2008 Mérida, Venezuela nsrc@walc 2008 Mérida, Venezuela
nsrc@PacNOG 6 Nadi, Fiji
Introduction Cacti: Uses RRDtool, PHP and stores
data in MySQL. It supports the use of SNMP and graphics with MRTG.
“Cacti is a complete frontend to RRDTool, it stores all of the necessary information to create graphs and populate them with data in a MySQL database. The frontend is completely PHP driven. Along with being able to maintain Graphs, Data Sources, and Round Robin Archives in a database, cacti handles the data gathering. There is also SNMP support for those used to creating traffic graphs with MRTG.”
nsrc@walc 2008 Mérida, Venezuela nsrc@walc 2008 Mérida, Venezuela
nsrc@PacNOG 6 Nadi, Fiji
General Description of Cacti 1. Cacti is written as a group of PHP scripts. 2. The key script is “poller.php”, which runs every 5 minutes
(by default). It resides in /usr/share/cacti/site. 3. To work poller.php needs to be in /etc/cron.d/cacti like
this: MAILTO=root
*/5 * * * * www-data php /usr/share/cacti/site/poller.php >/dev/null 2>/var/log/cacti/poller-error.log
4. Cacti uses RRDtool to create graphs for each device and data that is collected about that device. You can adjust all of this from within the Cacti web interface.
5. The RRD data is stored in a MySQL database along with descriptions of each device that is monitored.
6. The RRD files are located in /var/lib/cacti/rra.
nsrc@walc 2008 Mérida, Venezuela nsrc@walc 2008 Mérida, Venezuela
nsrc@PacNOG 6 Nadi, Fiji
Advantages You can measure Availability, Load, Errors and more
all with history. – Cacti con view your router and switch interfaces and their traffic,
including all error traffic as well. – Cacti can measure drive capacity, CPU load (network h/w and
servers) and much more. It can react to conditions and send notifications based on specified ranges.
Graphics – Allows you to use all the functionality of rrdgraph to define graphics
and automate how they are displayed. – Allows you to organize information in hierarchical tree structures. Data Sources – Permits you to utilize all the functions of rrdcreate and rrdupdate
including defining several sources of information for each RRD file.
nsrc@walc 2008 Mérida, Venezuela nsrc@walc 2008 Mérida, Venezuela
nsrc@PacNOG 6 Nadi, Fiji
Advantages cont. Data Collection – Supports SNMP including the use of php-snmp or net-snmp – Data sources can be updated via SNMP o by defining scripts to do
this. – An optional component, cactid, implements SNMP routines in C with
multi-threading. Important for very large installations, but not tested formally.
Templates – You can create templates to reutilize graphics definitions, data and
device sources User Management – You can manage users locally or via LDAP and you can assign
granular levels of authorization by user or groups of users.
nsrc@walc 2008 Mérida, Venezuela nsrc@walc 2008 Mérida, Venezuela
nsrc@PacNOG 6 Nadi, Fiji
Disadvantages Configuration of Interfaces is Tedious – The first time you add an interfaces, add graphics for each interface
and place these graphics correctly on a hierarchical menu requires considerable time and effort.
– It’s very important that you keep your Cacti configuration up-to-date with your network. You must either assign someone to do this, or create appropriate scripts and data shares for this purpose.
– If you make a configuration error it can be tedious to correct it.
But, in reality, for continuous use or large installations it is likely that you will be using scripts and tools to automate the configuration of Cacti.
nsrc@walc 2008 Mérida, Venezuela nsrc@walc 2008 Mérida, Venezuela
nsrc@PacNOG 6 Nadi, Fiji
Installation: Ubuntu Server 9.04
– Available in RPM form and packages for Gentoo, Red Hat, Fedora, SuSE, FreeBSD, etc.
– It is necessary to install cactid separately if you wish to use this for larger installations. Again, this code has not been formally measured for improved performance.
– In Ubuntu/Debian…
# apt-get install cacti
nsrc@walc 2008 Mérida, Venezuela nsrc@walc 2008 Mérida, Venezuela
nsrc@PacNOG 6 Nadi, Fiji
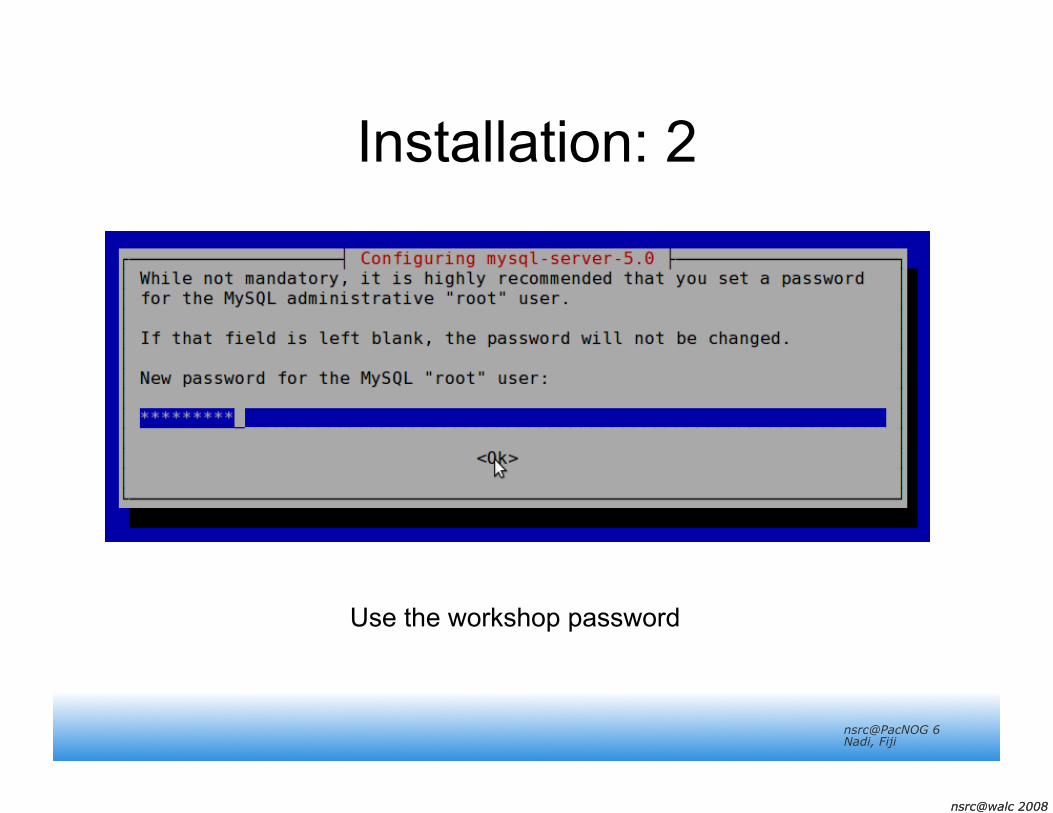
Installation: 2
Use the workshop password
nsrc@walc 2008 Mérida, Venezuela nsrc@walc 2008 Mérida, Venezuela
nsrc@PacNOG 6 Nadi, Fiji
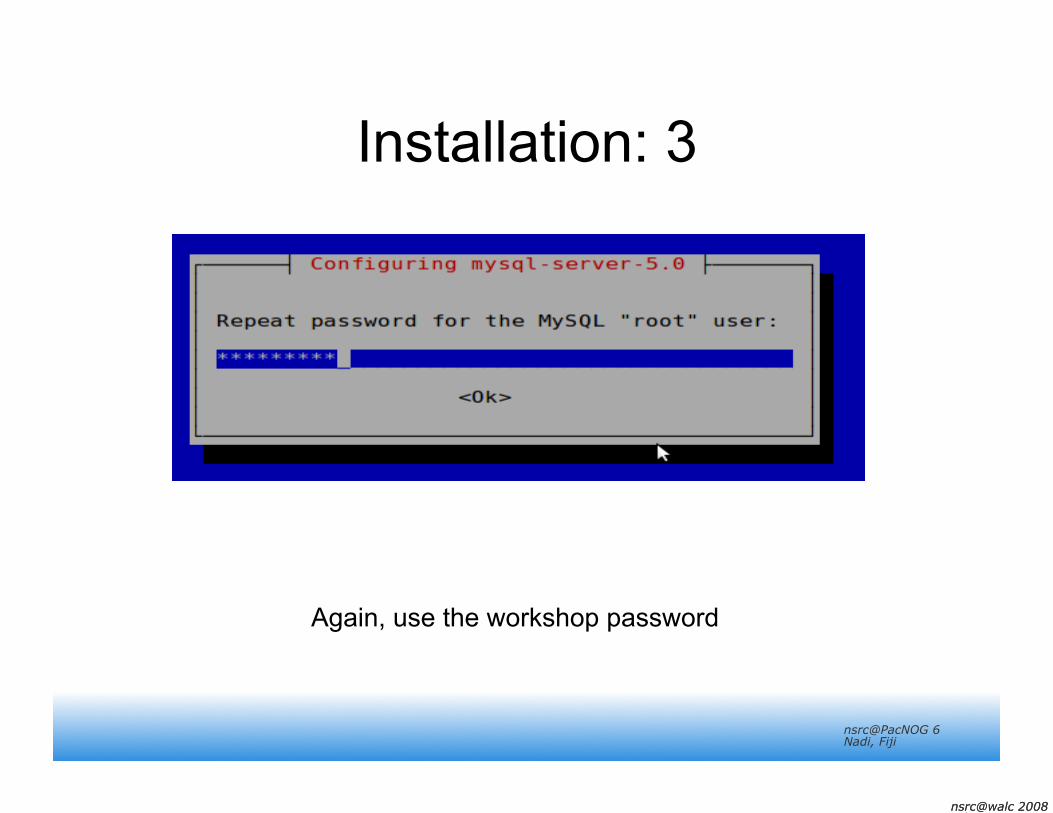
Installation: 3
Again, use the workshop password
nsrc@walc 2008 Mérida, Venezuela nsrc@walc 2008 Mérida, Venezuela
nsrc@PacNOG 6 Nadi, Fiji
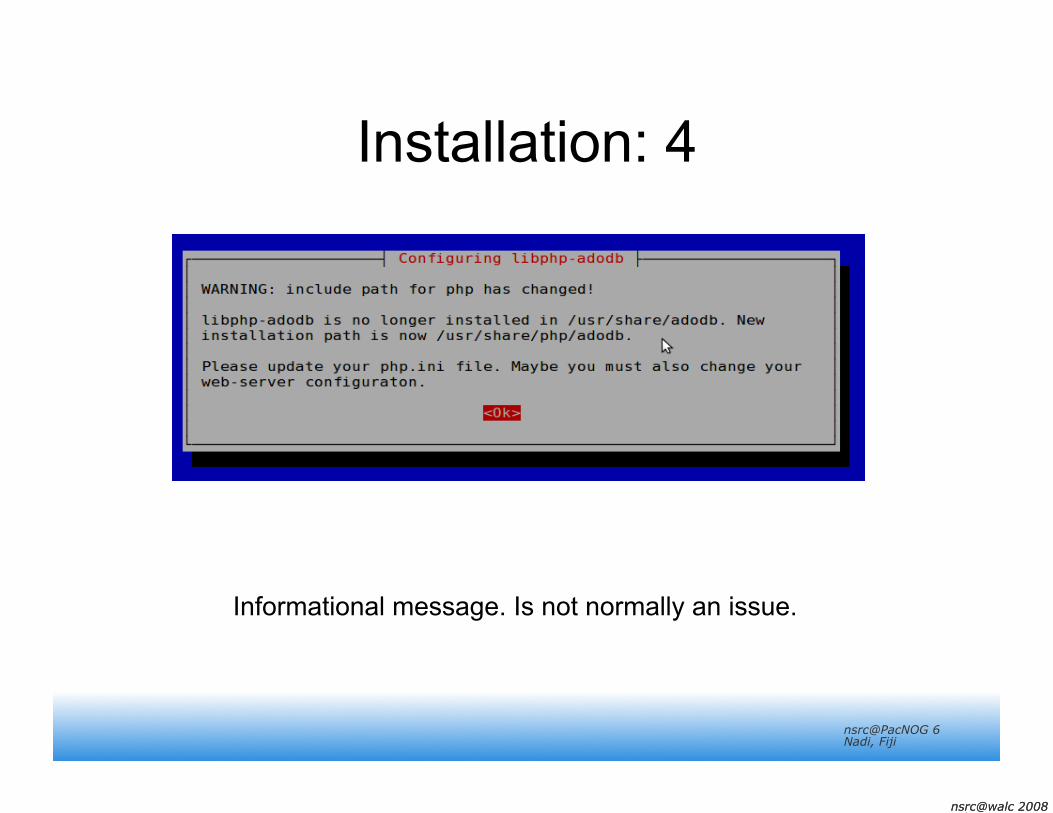
Installation: 4
Informational message. Is not normally an issue.
nsrc@walc 2008 Mérida, Venezuela nsrc@walc 2008 Mérida, Venezuela
nsrc@PacNOG 6 Nadi, Fiji
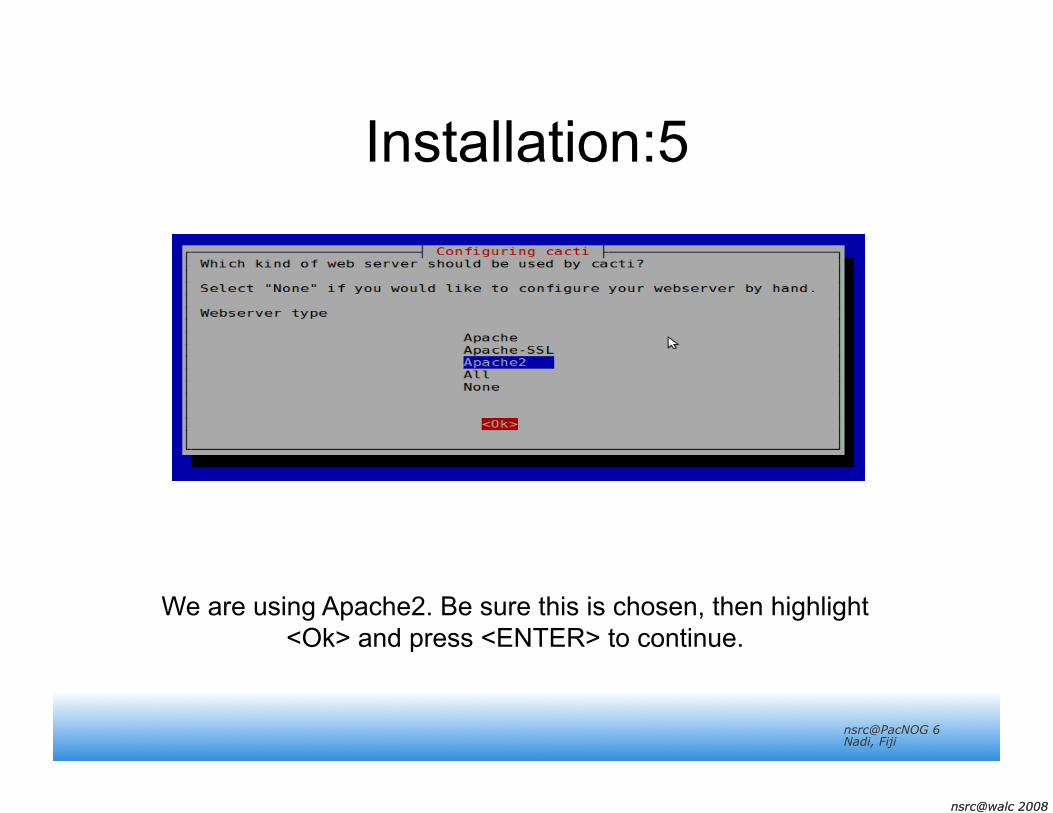
Installation:5
We are using Apache2. Be sure this is chosen, then highlight <Ok> and press <ENTER> to continue.
nsrc@walc 2008 Mérida, Venezuela nsrc@walc 2008 Mérida, Venezuela
nsrc@PacNOG 6 Nadi, Fiji
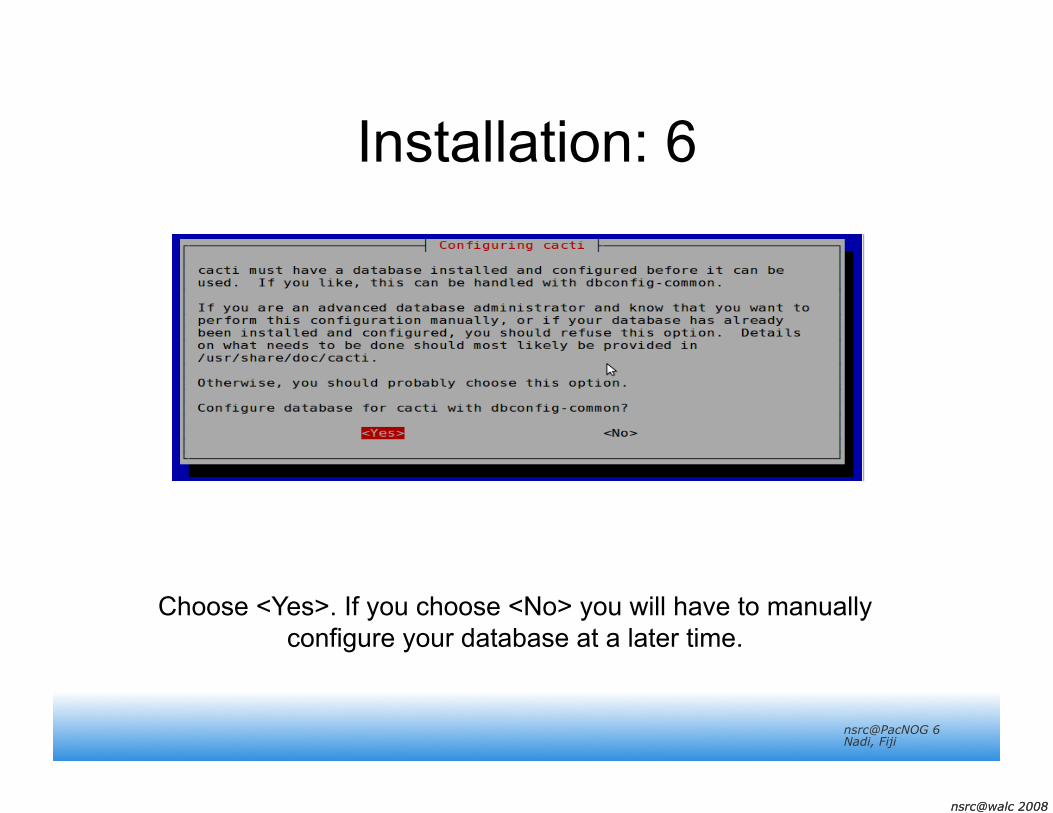
Installation: 6
Choose <Yes>. If you choose <No> you will have to manually configure your database at a later time.
nsrc@walc 2008 Mérida, Venezuela nsrc@walc 2008 Mérida, Venezuela
nsrc@PacNOG 6 Nadi, Fiji
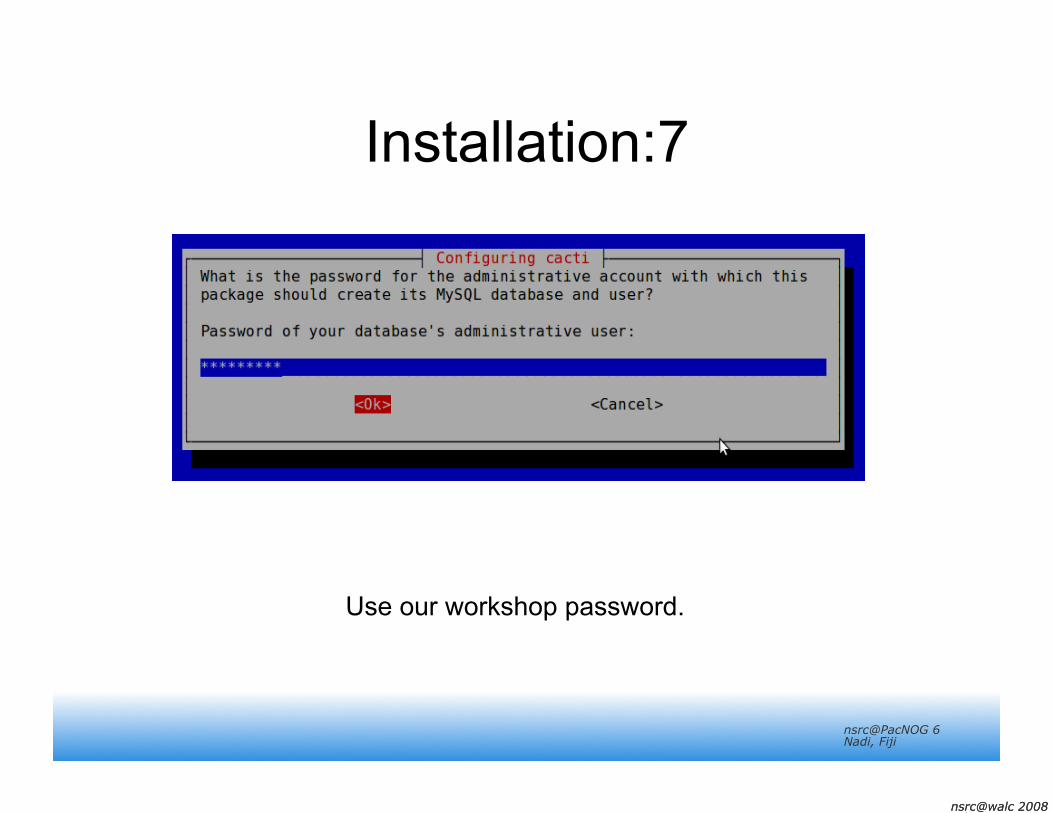
Installation:7
Use our workshop password.
nsrc@walc 2008 Mérida, Venezuela nsrc@walc 2008 Mérida, Venezuela
nsrc@PacNOG 6 Nadi, Fiji
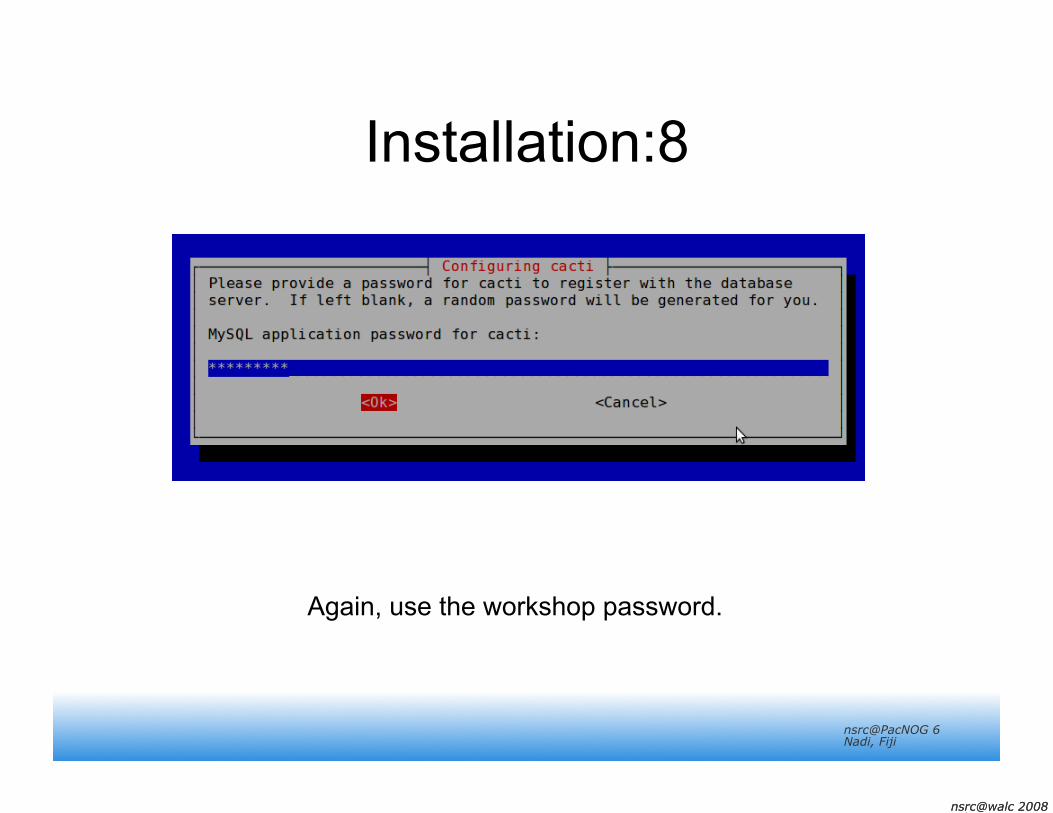
Installation:8
Again, use the workshop password.
nsrc@walc 2008 Mérida, Venezuela nsrc@walc 2008 Mérida, Venezuela
nsrc@PacNOG 6 Nadi, Fiji
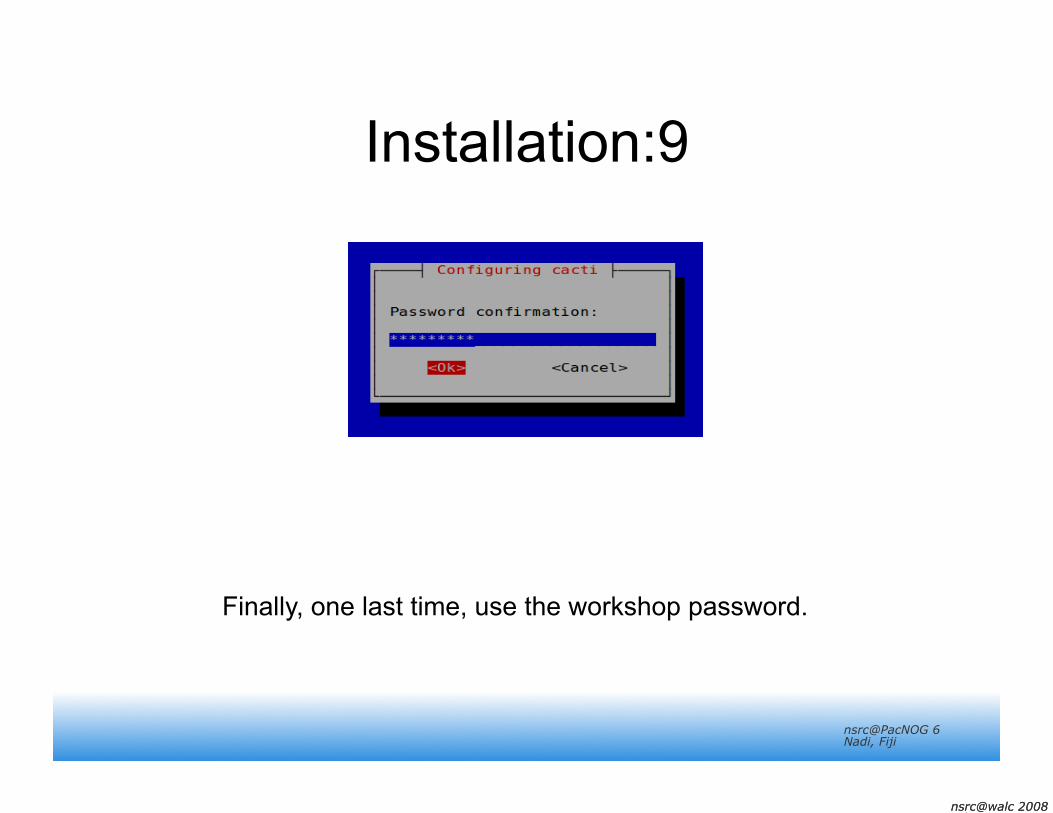
Installation:9
Finally, one last time, use the workshop password.
nsrc@walc 2008 Mérida, Venezuela nsrc@walc 2008 Mérida, Venezuela
nsrc@PacNOG 6 Nadi, Fiji
cacti: Installation Now use a web browser and open the
following address:
http://localhost/cacti
You will see the following...
nsrc@walc 2008 Mérida, Venezuela nsrc@walc 2008 Mérida, Venezuela
nsrc@PacNOG 6 Nadi, Fiji
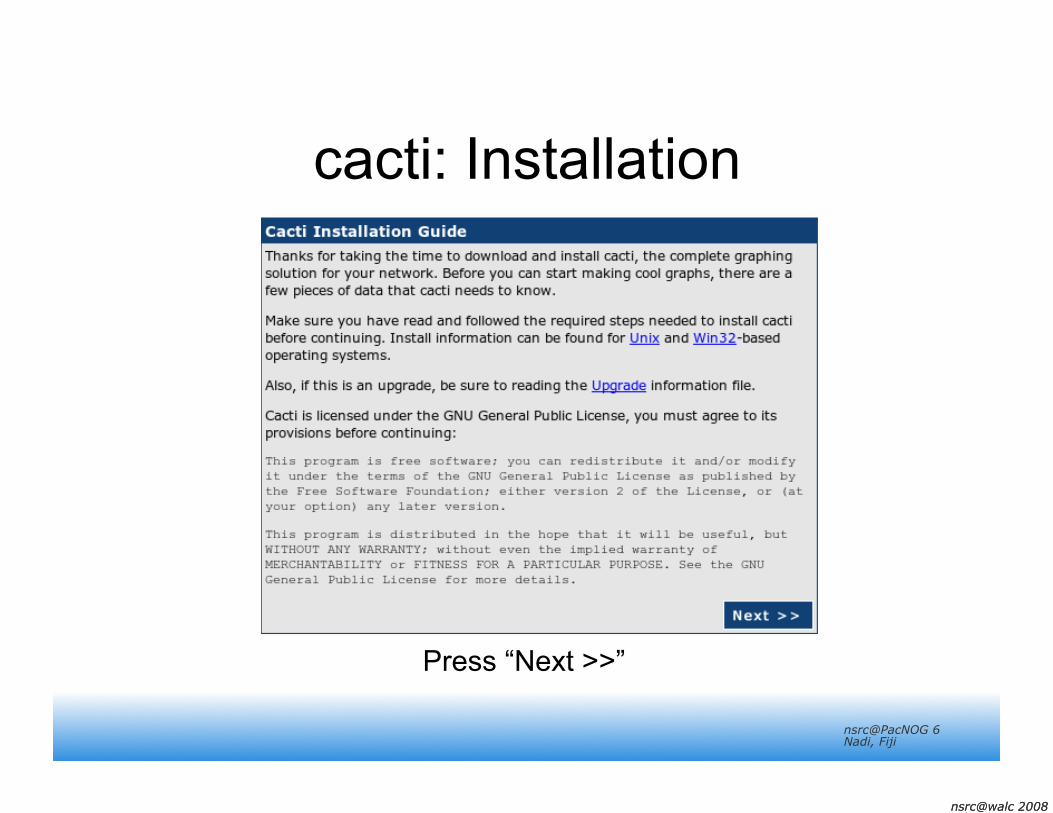
cacti: Installation
Press “Next >>”
nsrc@walc 2008 Mérida, Venezuela nsrc@walc 2008 Mérida, Venezuela
nsrc@PacNOG 6 Nadi, Fiji
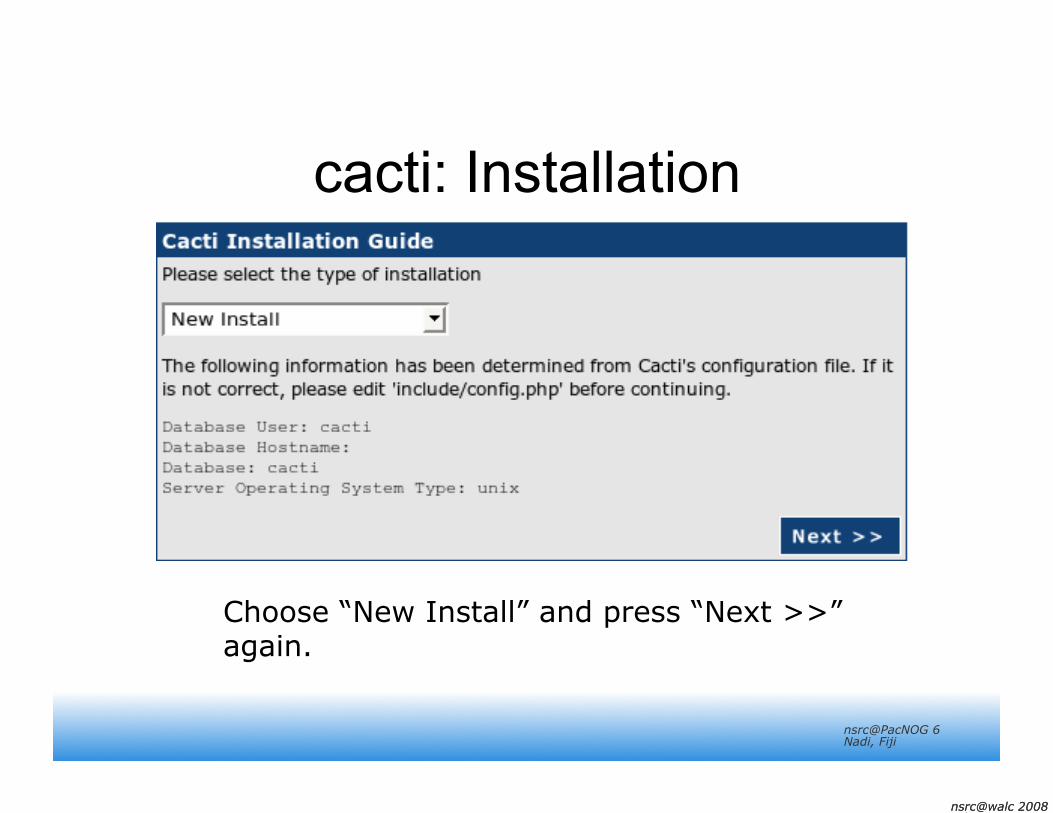
cacti: Installation
Choose “New Install” and press “Next >>” again.
nsrc@walc 2008 Mérida, Venezuela nsrc@walc 2008 Mérida, Venezuela
nsrc@PacNOG 6 Nadi, Fiji
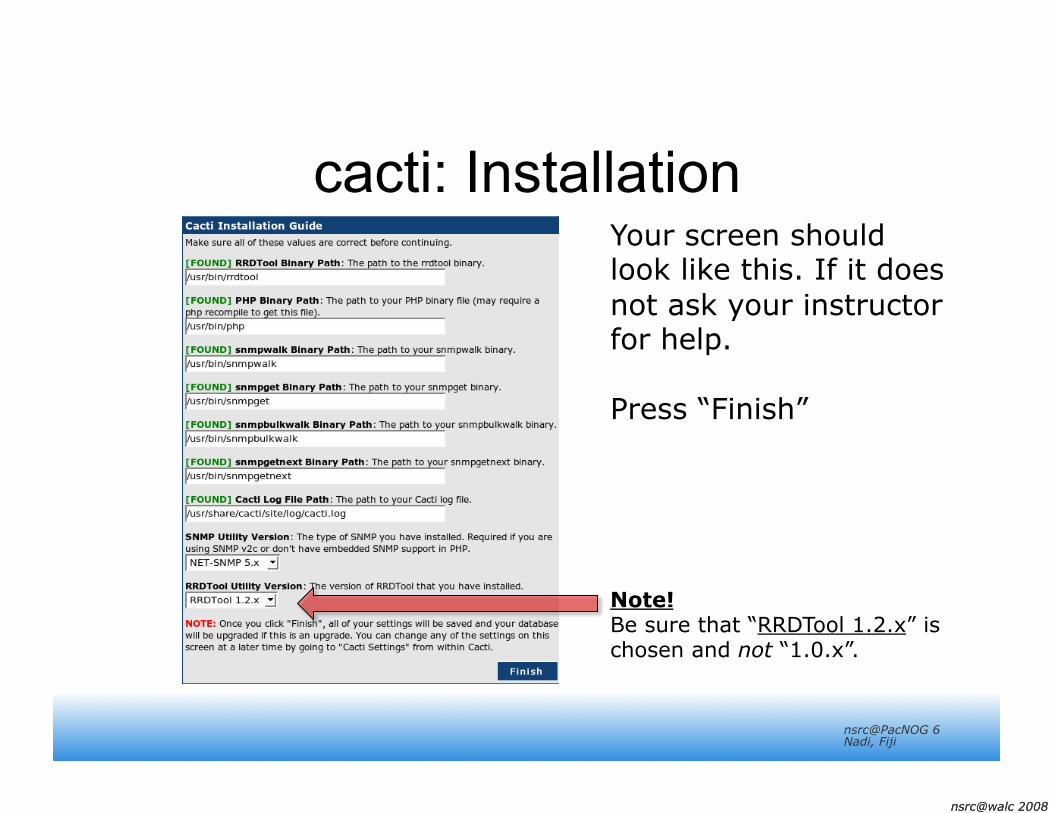
cacti: Installation Your screen should look like this. If it does not ask your instructor for help.
Press “Finish”
Note! Be sure that “RRDTool 1.2.x” is chosen and not “1.0.x”.
nsrc@walc 2008 Mérida, Venezuela nsrc@walc 2008 Mérida, Venezuela
nsrc@PacNOG 6 Nadi, Fiji
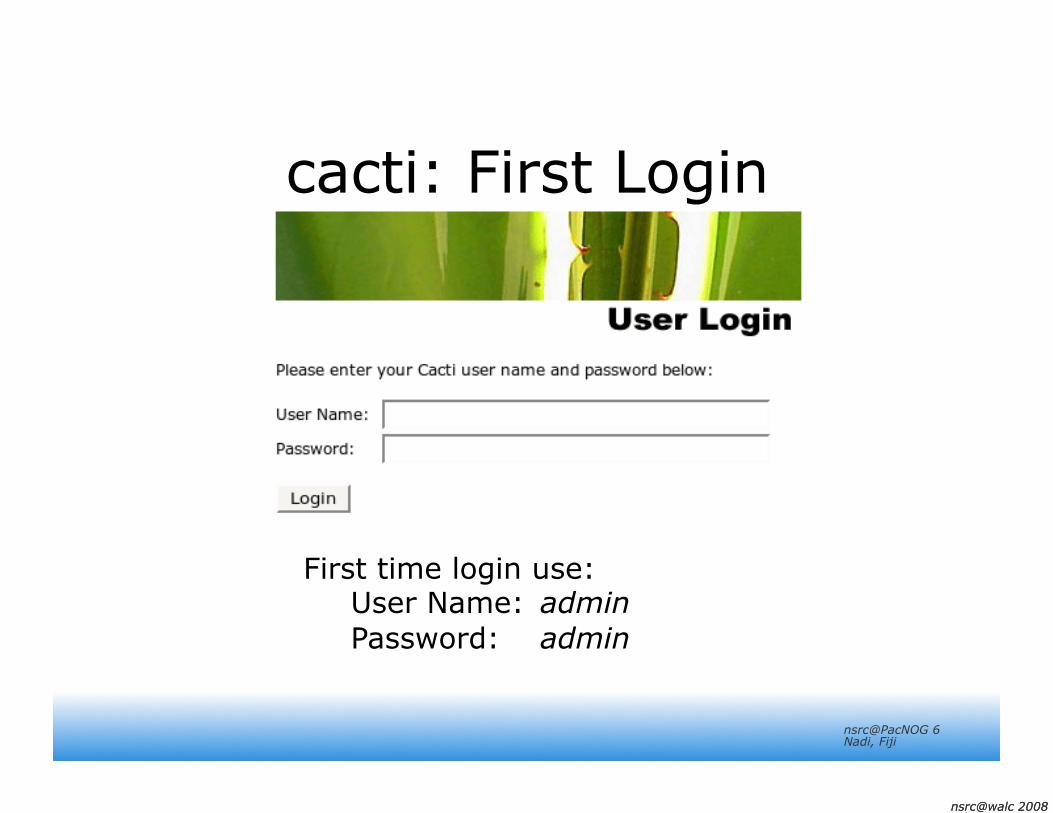
cacti: First Login
First time login use: User Name: admin Password: admin
nsrc@walc 2008 Mérida, Venezuela nsrc@walc 2008 Mérida, Venezuela
nsrc@PacNOG 6 Nadi, Fiji
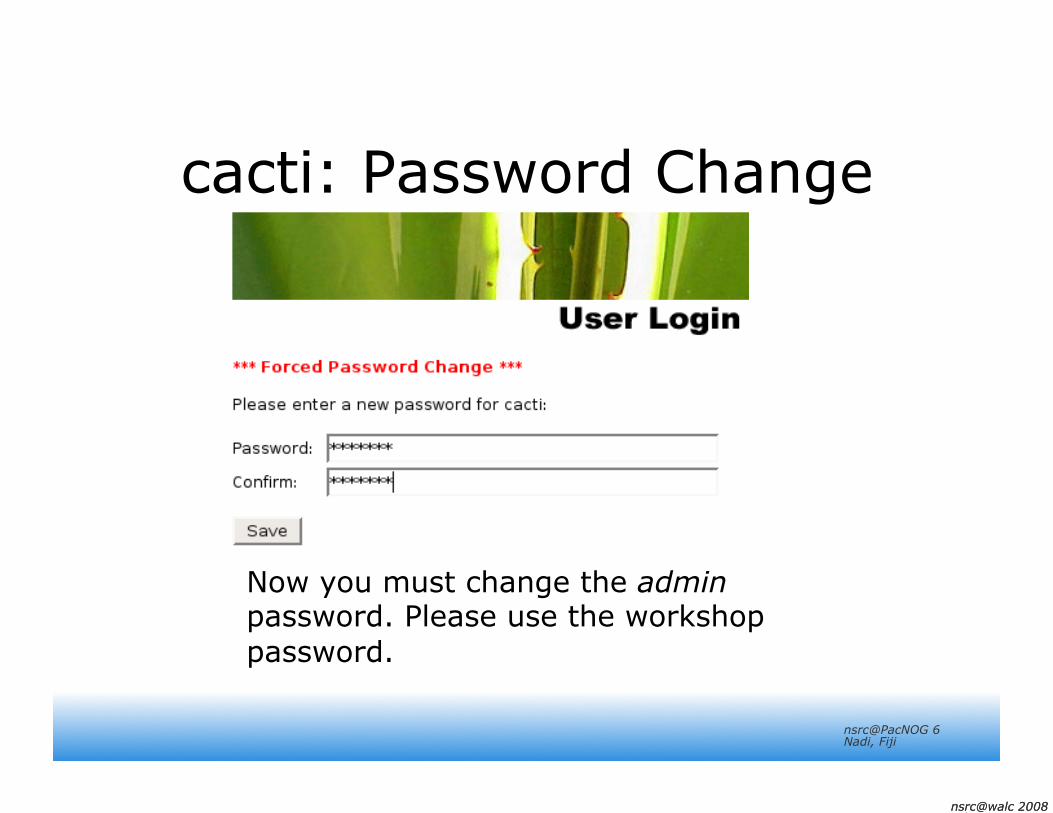
cacti: Password Change
Now you must change the admin password. Please use the workshop password.
nsrc@walc 2008 Mérida, Venezuela nsrc@walc 2008 Mérida, Venezuela
nsrc@PacNOG 6 Nadi, Fiji
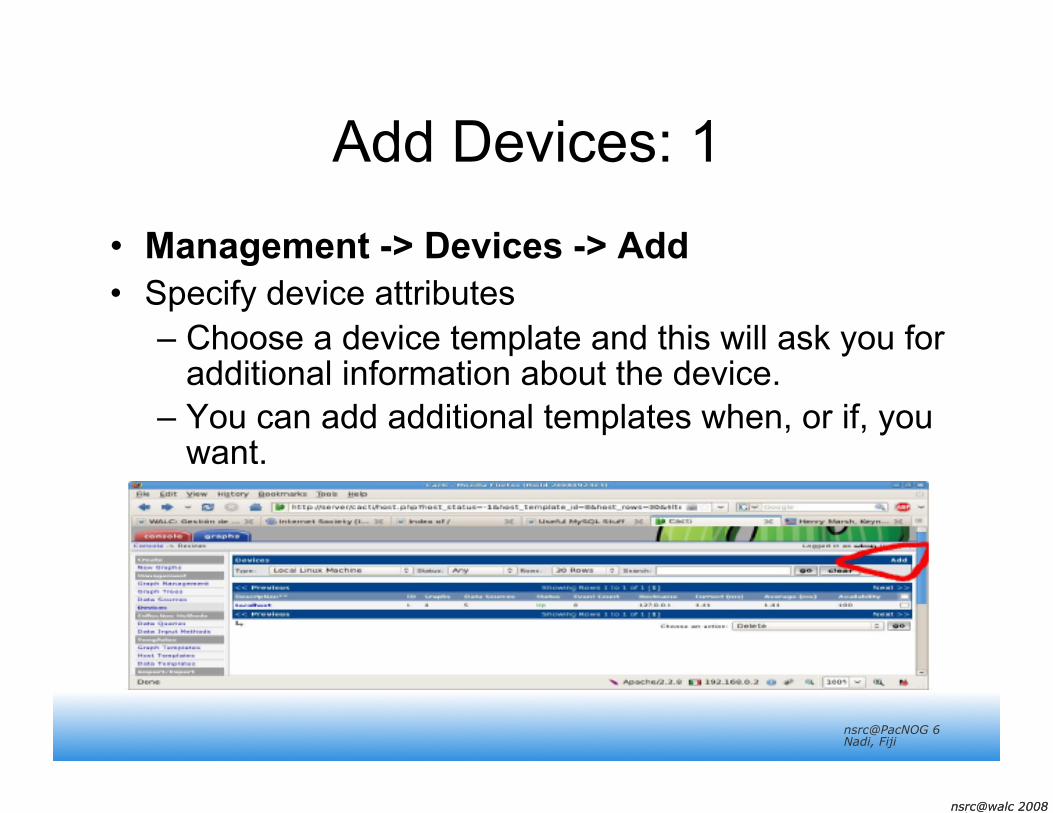
Add Devices: 1
• Management -> Devices -> Add • Specify device attributes
– Choose a device template and this will ask you for additional information about the device.
– You can add additional templates when, or if, you want.
nsrc@walc 2008 Mérida, Venezuela nsrc@walc 2008 Mérida, Venezuela
nsrc@PacNOG 6 Nadi, Fiji
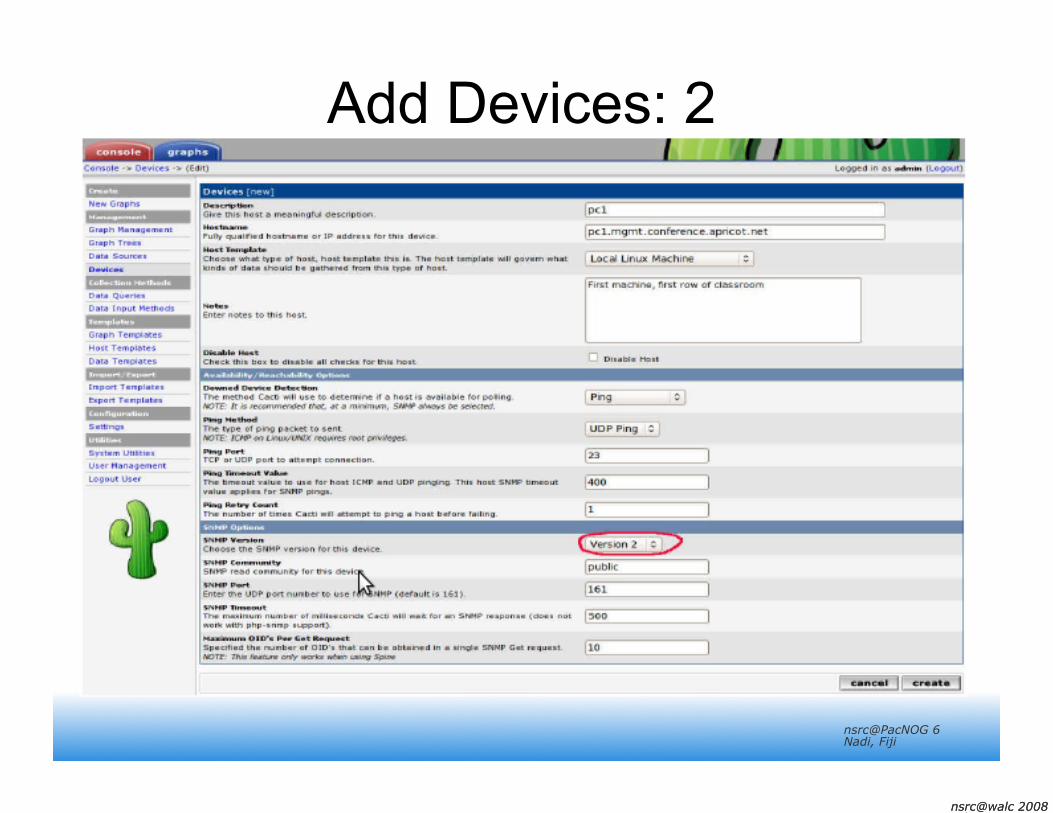
Add Devices: 2
nsrc@walc 2008 Mérida, Venezuela nsrc@walc 2008 Mérida, Venezuela
nsrc@PacNOG 6 Nadi, Fiji
Add Devices: 3
Choose SNMP version 2 for this workshop. At your own location you can use SNMP
version 3 if your devices support this. SNMP access is a security issue:
- Version 2 is not encrypted - Watch out for globally readable “public” communities - Be careful about who can access r/w communities.
nsrc@walc 2008 Mérida, Venezuela nsrc@walc 2008 Mérida, Venezuela
nsrc@PacNOG 6 Nadi, Fiji
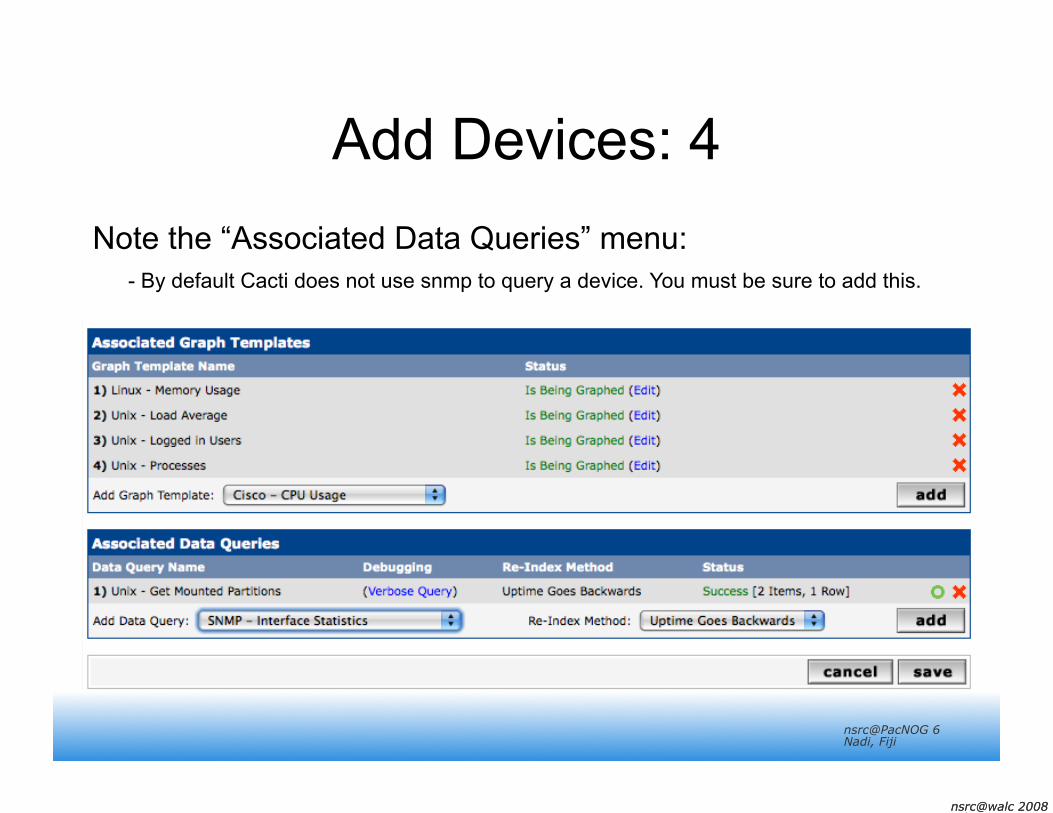
Add Devices: 4 Note the “Associated Data Queries” menu:
- By default Cacti does not use snmp to query a device. You must be sure to add this.
nsrc@walc 2008 Mérida, Venezuela nsrc@walc 2008 Mérida, Venezuela
nsrc@PacNOG 6 Nadi, Fiji
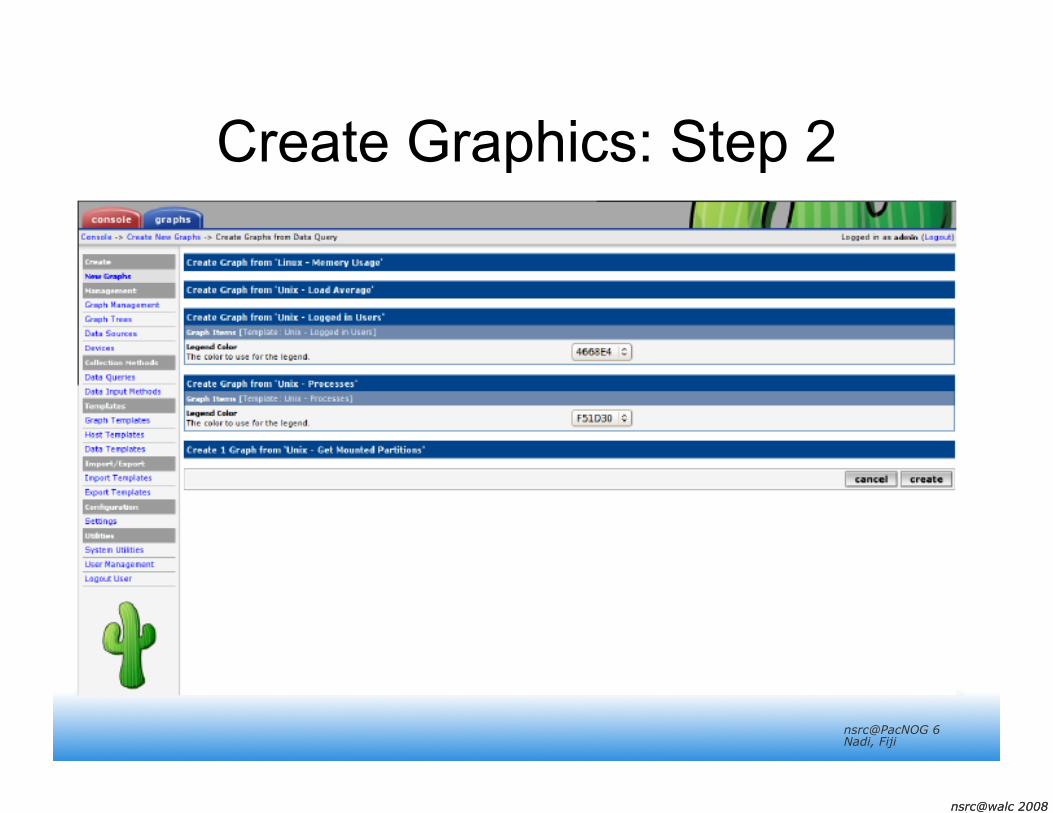
Create Graphics
• Chose the “Create graphs for this host” • Under Graph Templates generally check
the top box that chooses all the available graphs to be displayed.
• Press Create. • You can change the default colors, but the
predefined definitions generally work well.
nsrc@walc 2008 Mérida, Venezuela nsrc@walc 2008 Mérida, Venezuela
nsrc@PacNOG 6 Nadi, Fiji
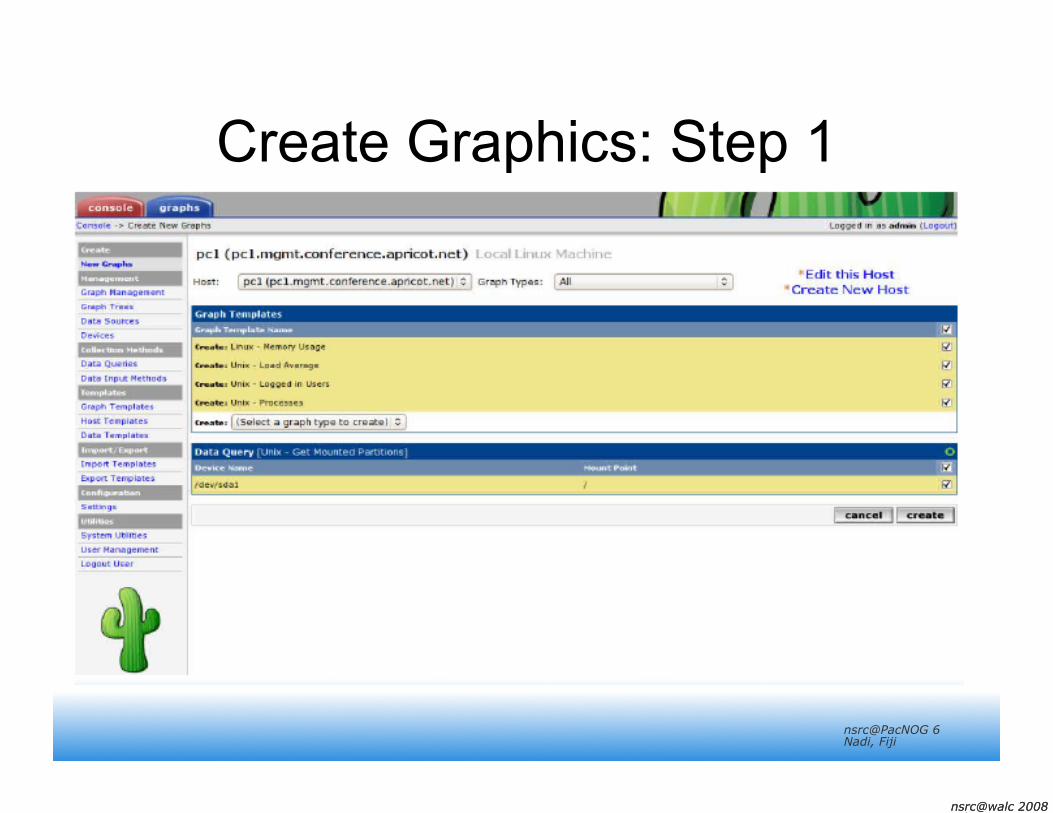
Create Graphics: Step 1
nsrc@walc 2008 Mérida, Venezuela nsrc@walc 2008 Mérida, Venezuela
nsrc@PacNOG 6 Nadi, Fiji
Create Graphics: Step 2
nsrc@walc 2008 Mérida, Venezuela nsrc@walc 2008 Mérida, Venezuela
nsrc@PacNOG 6 Nadi, Fiji
View the Graphics
• Place the new device in its proper location in your tree hierarchy.
• Building your display hierarchy is your decision. It might make sense to try drawing this out on paper first. – Under Management Graph Trees
select the Default Tree hierarchy (or, create one of your own).
nsrc@walc 2008 Mérida, Venezuela nsrc@walc 2008 Mérida, Venezuela
nsrc@PacNOG 6 Nadi, Fiji
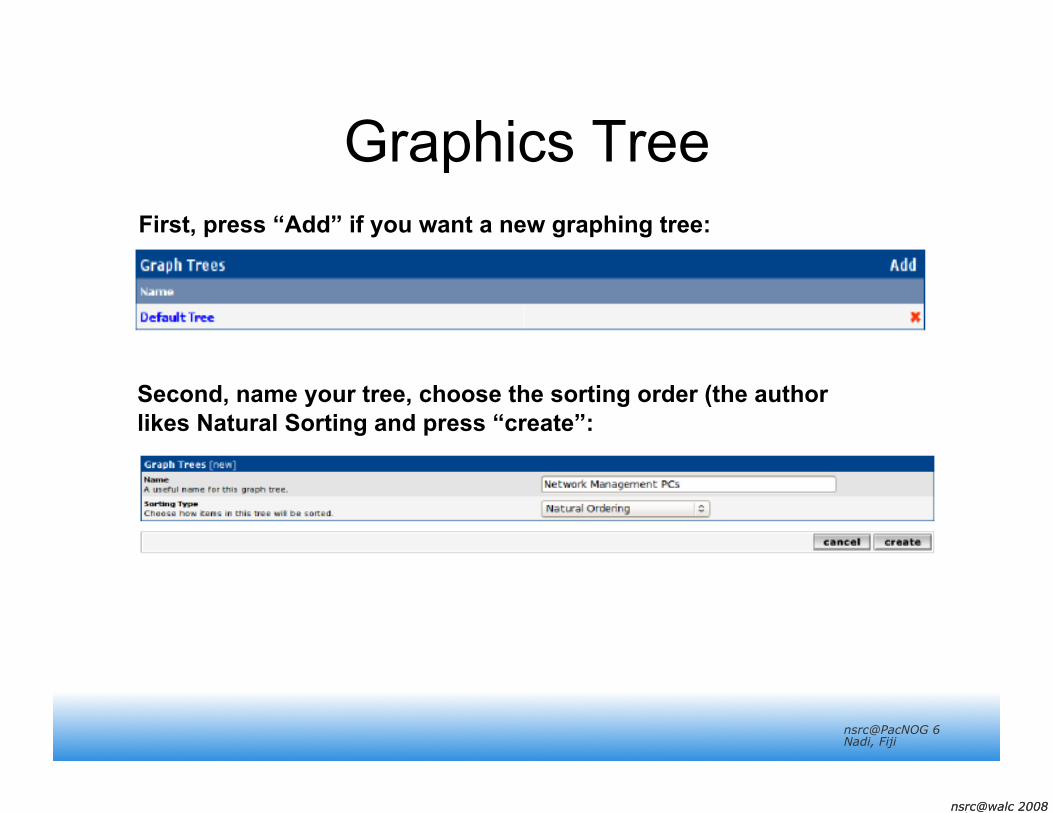
Graphics Tree First, press “Add” if you want a new graphing tree:
Second, name your tree, choose the sorting order (the author likes Natural Sorting and press “create”:
nsrc@walc 2008 Mérida, Venezuela nsrc@walc 2008 Mérida, Venezuela
nsrc@PacNOG 6 Nadi, Fiji
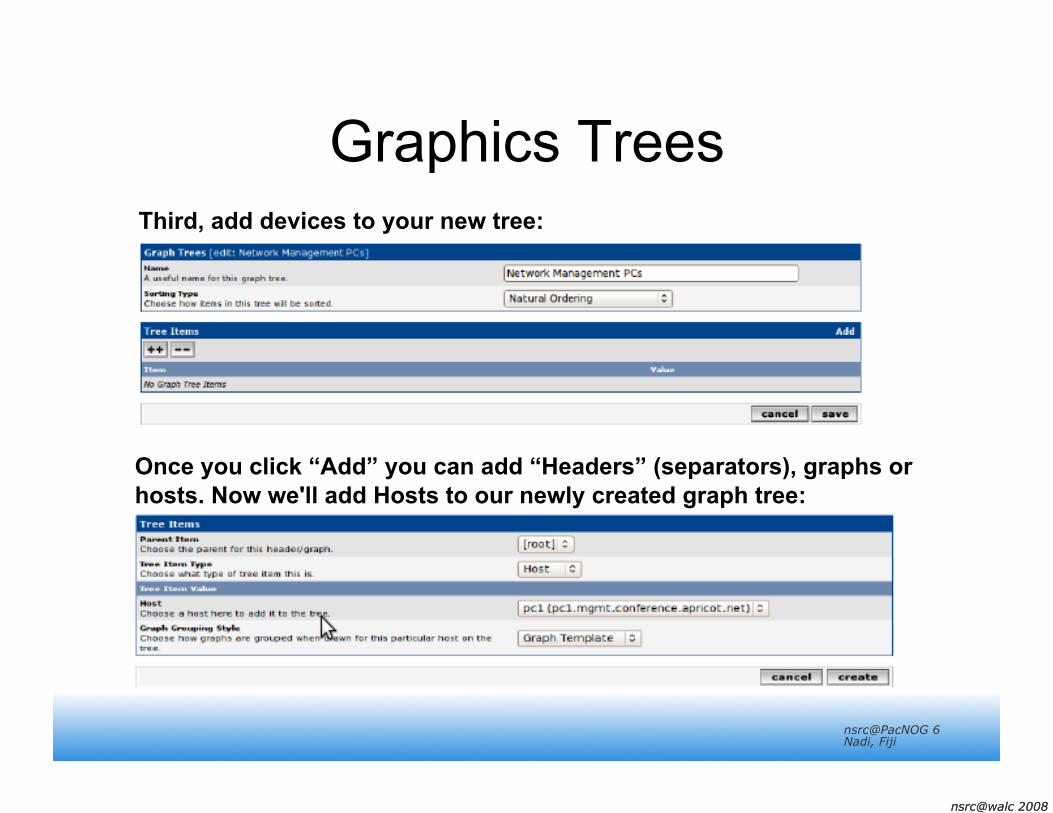
Graphics Trees Third, add devices to your new tree:
Once you click “Add” you can add “Headers” (separators), graphs or hosts. Now we'll add Hosts to our newly created graph tree:
nsrc@walc 2008 Mérida, Venezuela nsrc@walc 2008 Mérida, Venezuela
nsrc@PacNOG 6 Nadi, Fiji
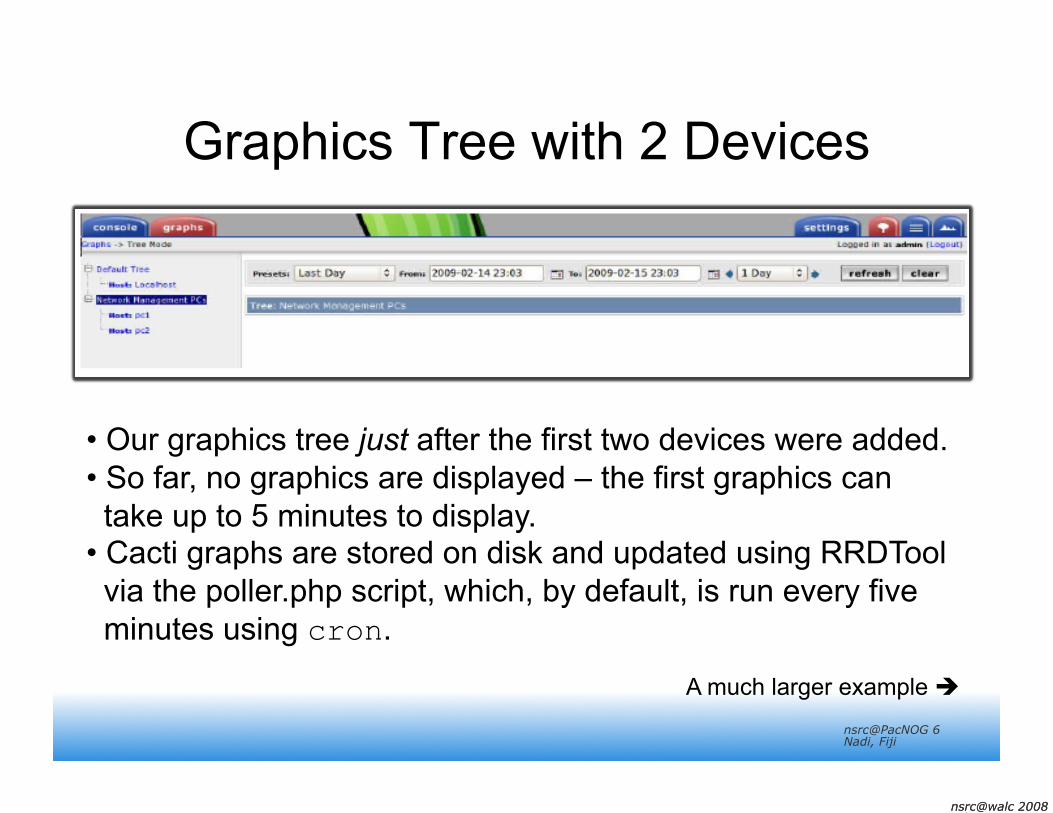
Graphics Tree with 2 Devices
• Our graphics tree just after the first two devices were added. • So far, no graphics are displayed – the first graphics can take up to 5 minutes to display. • Cacti graphs are stored on disk and updated using RRDTool via the poller.php script, which, by default, is run every five minutes using cron.
A much larger example
nsrc@walc 2008 Mérida, Venezuela nsrc@walc 2008 Mérida, Venezuela
nsrc@PacNOG 6 Nadi, Fiji
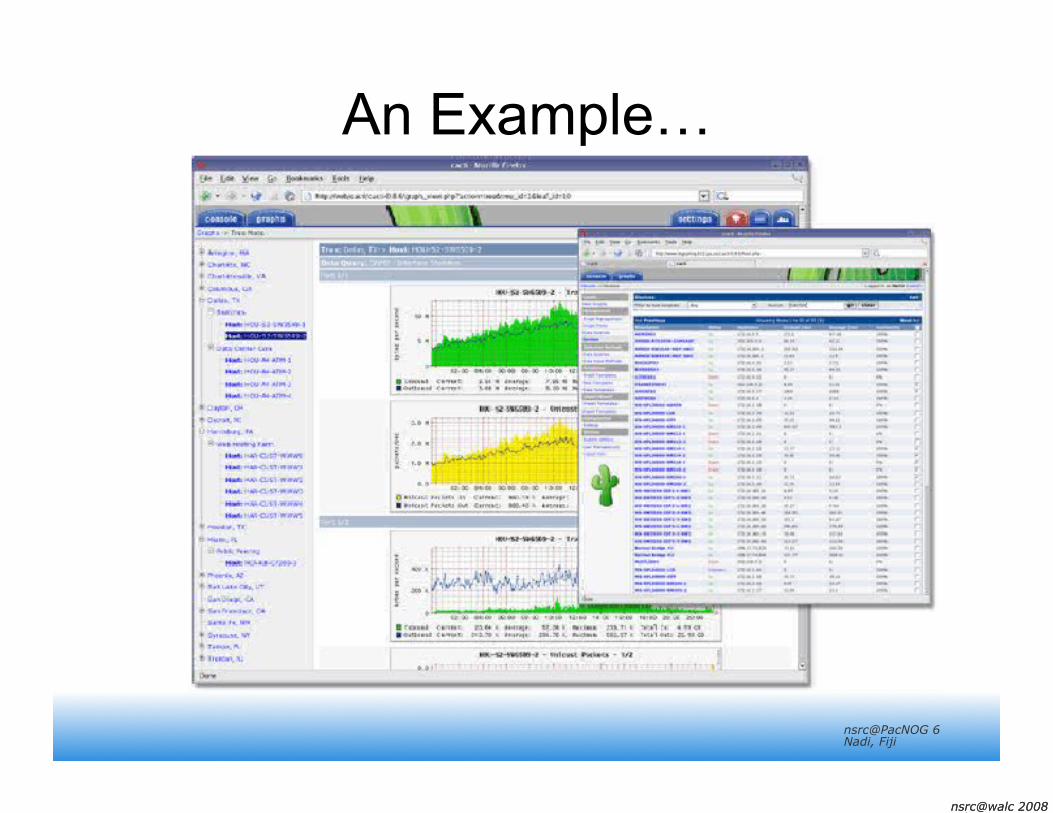
An Example…
nsrc@walc 2008 Mérida, Venezuela nsrc@walc 2008 Mérida, Venezuela
nsrc@PacNOG 6 Nadi, Fiji
Conclusions • Cacti is very flexible due to its use of templates. • Once you understand the concepts behind RRDTool,
then how Cacti works should be (more or less) intuitive. • The visualization hierarchy of devices helps to organize
and discover new devices quickly. • There are very few to no statistics available about the
performance of cactid (volunteers are welcome!). • It is not easy to do a rediscover of devices. • To add lots of devices requires lots of time and effort.
Software such as Netdot, Netdisco, IPPlan, TIPP can help – as well as local scripts that update the Cacti back-end MySQL database directly.
nsrc@walc 2008 Mérida, Venezuela nsrc@walc 2008 Mérida, Venezuela
nsrc@PacNOG 6 Nadi, Fiji
References
• Cacti Web Site: http://www.cacti.net/
• Cacti Discussion Group: http://forums.cacti.net/
nsrc@walc 2008 Mérida, Venezuela nsrc@walc 2008 Mérida, Venezuela
nsrc@PacNOG 6 Nadi, Fiji
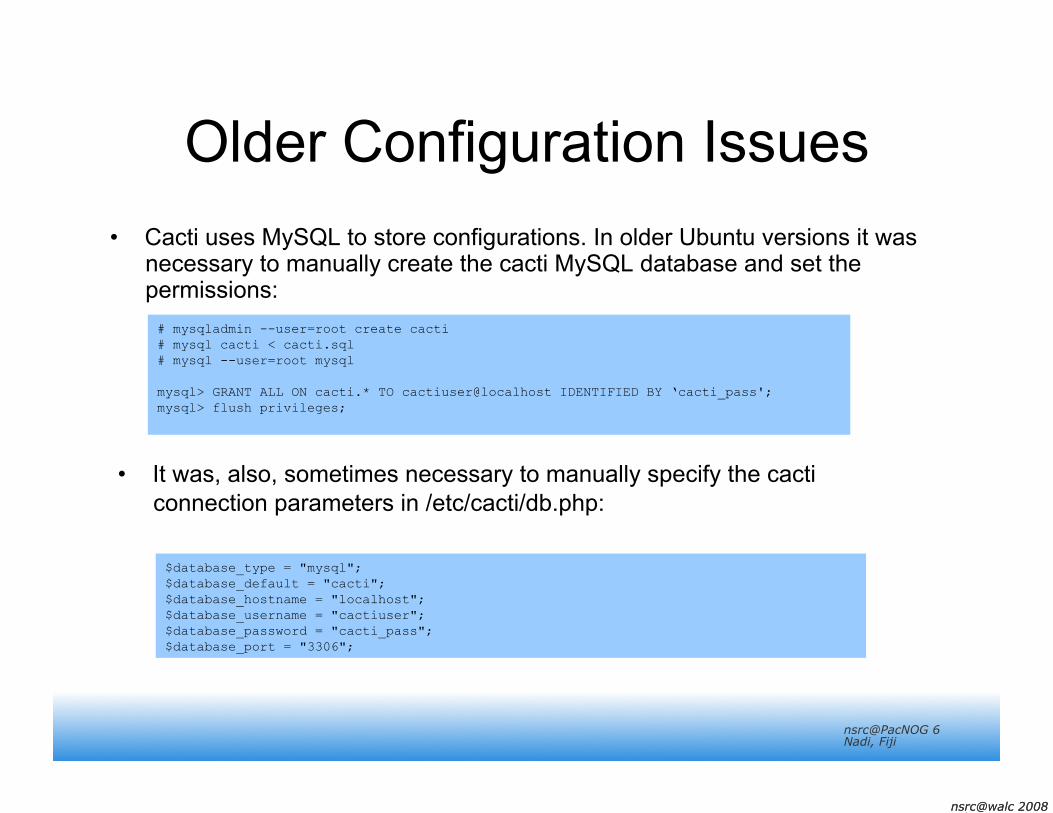
Older Configuration Issues • Cacti uses MySQL to store configurations. In older Ubuntu versions it was
necessary to manually create the cacti MySQL database and set the permissions:
$database_type = "mysql"; $database_default = "cacti"; $database_hostname = "localhost"; $database_username = "cactiuser"; $database_password = "cacti_pass"; $database_port = "3306";
# mysqladmin --user=root create cacti # mysql cacti < cacti.sql # mysql --user=root mysql
mysql> GRANT ALL ON cacti.* TO cactiuser@localhost IDENTIFIED BY ‘cacti_pass'; mysql> flush privileges;
• It was, also, sometimes necessary to manually specify the cacti connection parameters in /etc/cacti/db.php:
nsrc@walc 2008 Mérida, Venezuela nsrc@walc 2008 Mérida, Venezuela
nsrc@PacNOG 6 Nadi, Fiji
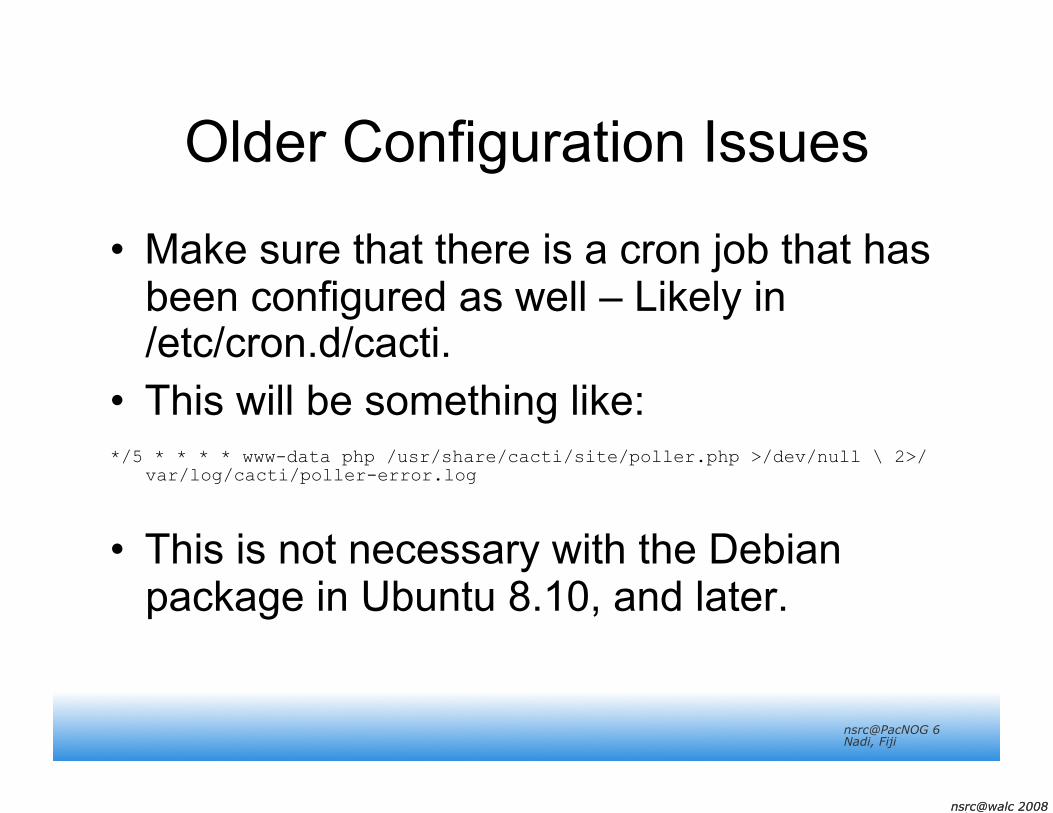
Older Configuration Issues
• Make sure that there is a cron job that has been configured as well – Likely in /etc/cron.d/cacti.
• This will be something like: */5 * * * * www-data php /usr/share/cacti/site/poller.php >/dev/null \ 2>/
var/log/cacti/poller-error.log
• This is not necessary with the Debian package in Ubuntu 8.10, and later.
nsrc@walc 2008 Mérida, Venezuela nsrc@walc 2008 Mérida, Venezuela
nsrc@PacNOG 6 Nadi, Fiji
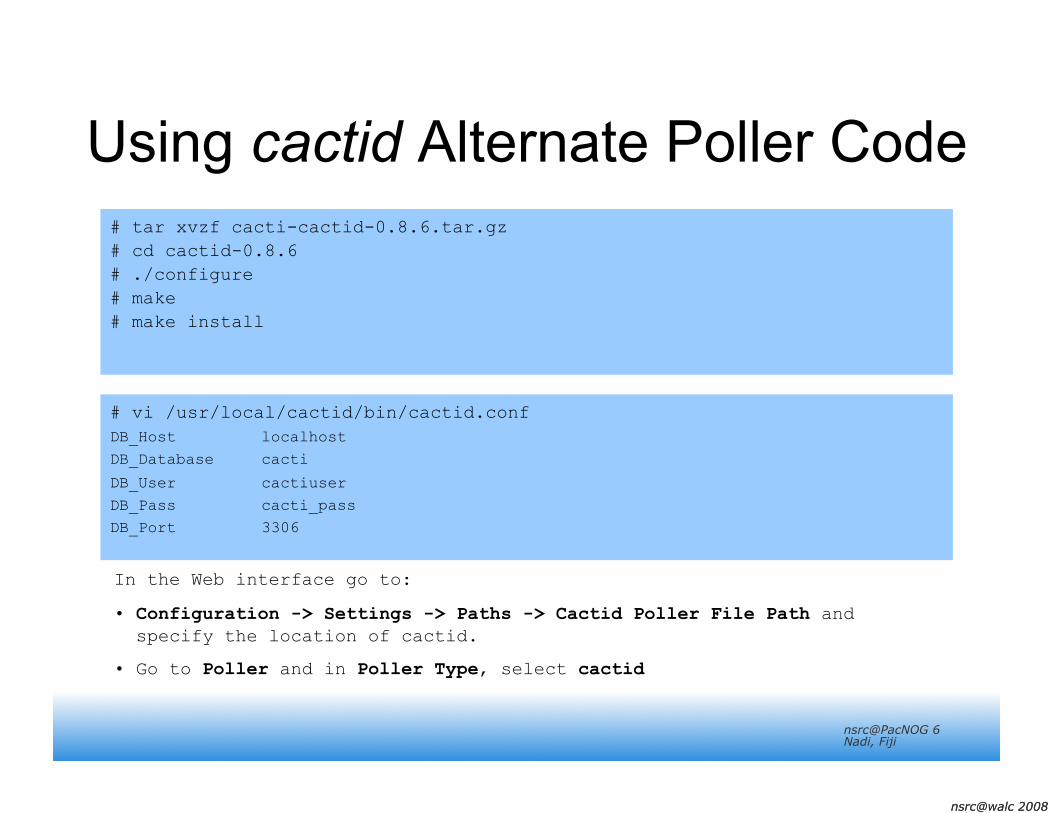
Using cactid Alternate Poller Code # tar xvzf cacti-cactid-0.8.6.tar.gz # cd cactid-0.8.6 # ./configure # make # make install
# vi /usr/local/cactid/bin/cactid.conf DB_Host localhost DB_Database cacti
DB_User cactiuser DB_Pass cacti_pass DB_Port 3306
In the Web interface go to:
• Configuration -> Settings -> Paths -> Cactid Poller File Path and specify the location of cactid.
• Go to Poller and in Poller Type, select cactid