Embed Size (px)
Citation preview
© 2011 Fellowship Technologies a part of Active Network
.NET 2.0 Installation Guide
.NET 2.0 Installation Guide
Page 2 of 6 September 7, 2011
© 2011 Fellowship Technologies a part of Active Network
.NET Installation
Before installation it is required that the appropriate Windows .NET Framework is installed. Check-in
requires .NET v2.0.
.NET v2.0 is installed differently on Windows XP than it is installed on Windows Vista and Windows 7.
Windows XP requires the installation .NET 2.0, while Windows Vista and Windows 7 provide for .NET 2
installation using built in Windows Resources that come preinstalled in Windows.
This guide will describe both installation processes.
.NET v2.0 Installation on Windows XP
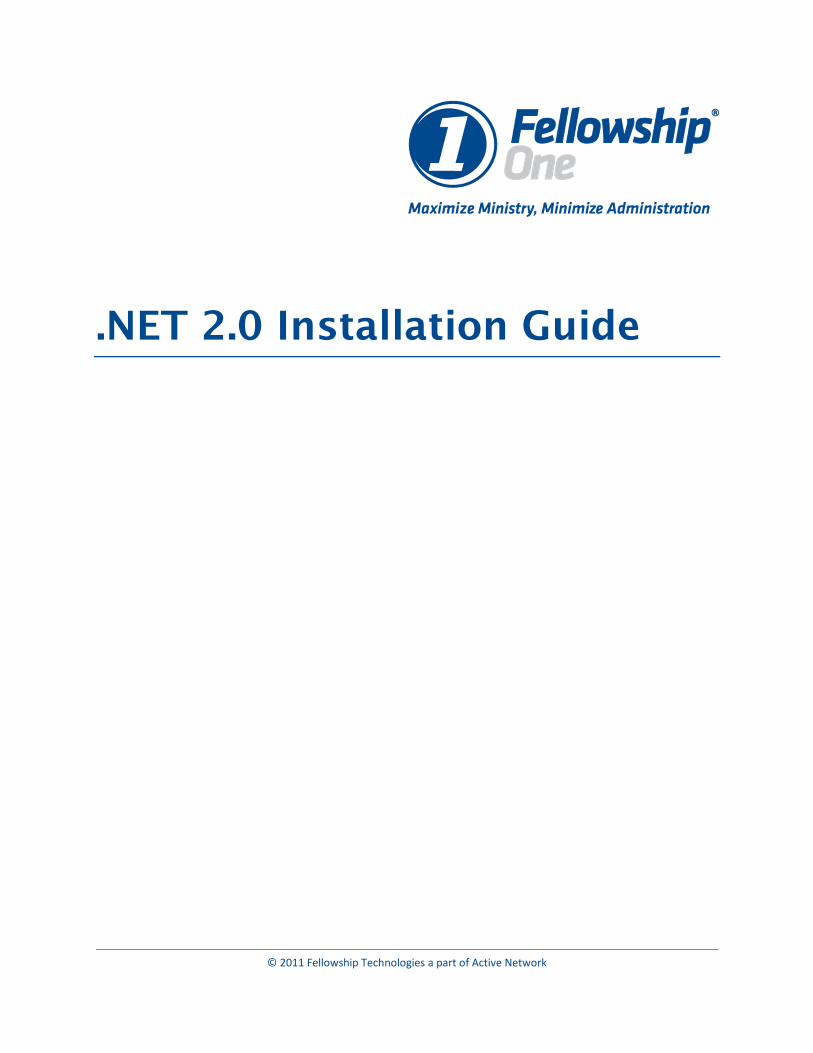
1. The .NET v2.0 installation files may be downloaded from the Fellowship One Support site.
2. The installation will begin. Click Next.
.NET 2.0 Installation Guide
Page 3 of 6 September 7, 2011
© 2011 Fellowship Technologies a part of Active Network
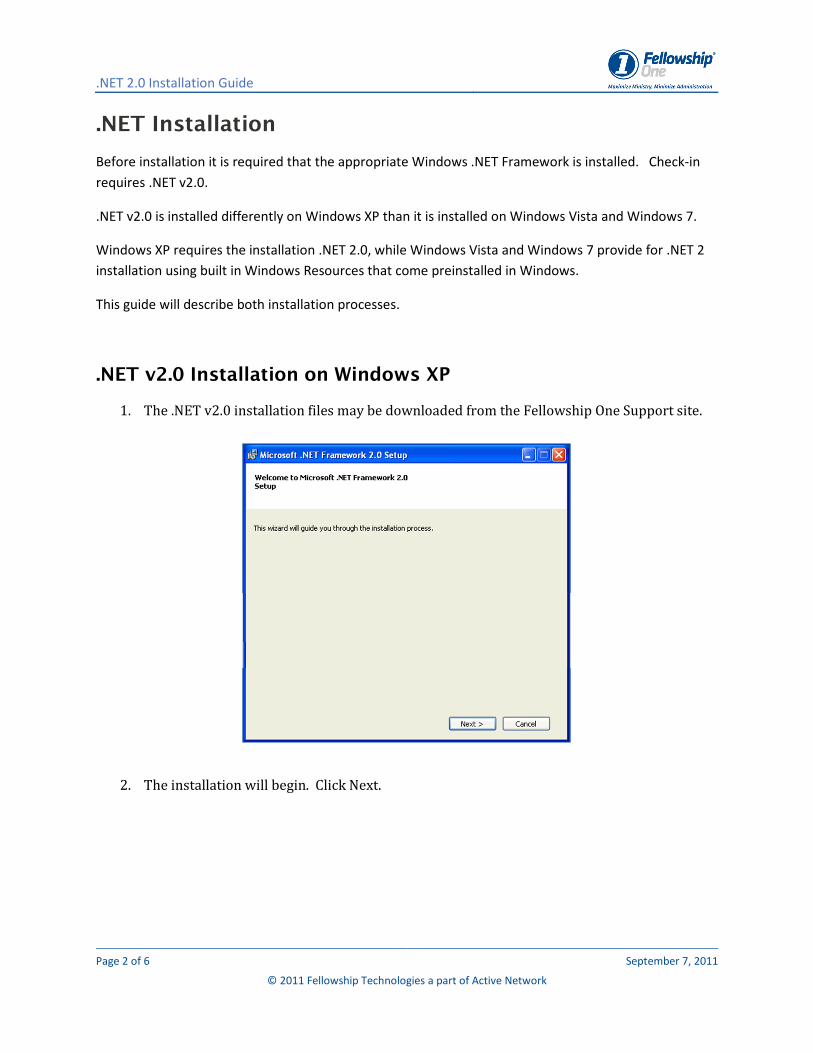
3. Click the checkbox to accept the terms of the License Agreement.
4. The installation will install the files.
.NET 2.0 Installation Guide
Page 4 of 6 September 7, 2011
© 2011 Fellowship Technologies a part of Active Network
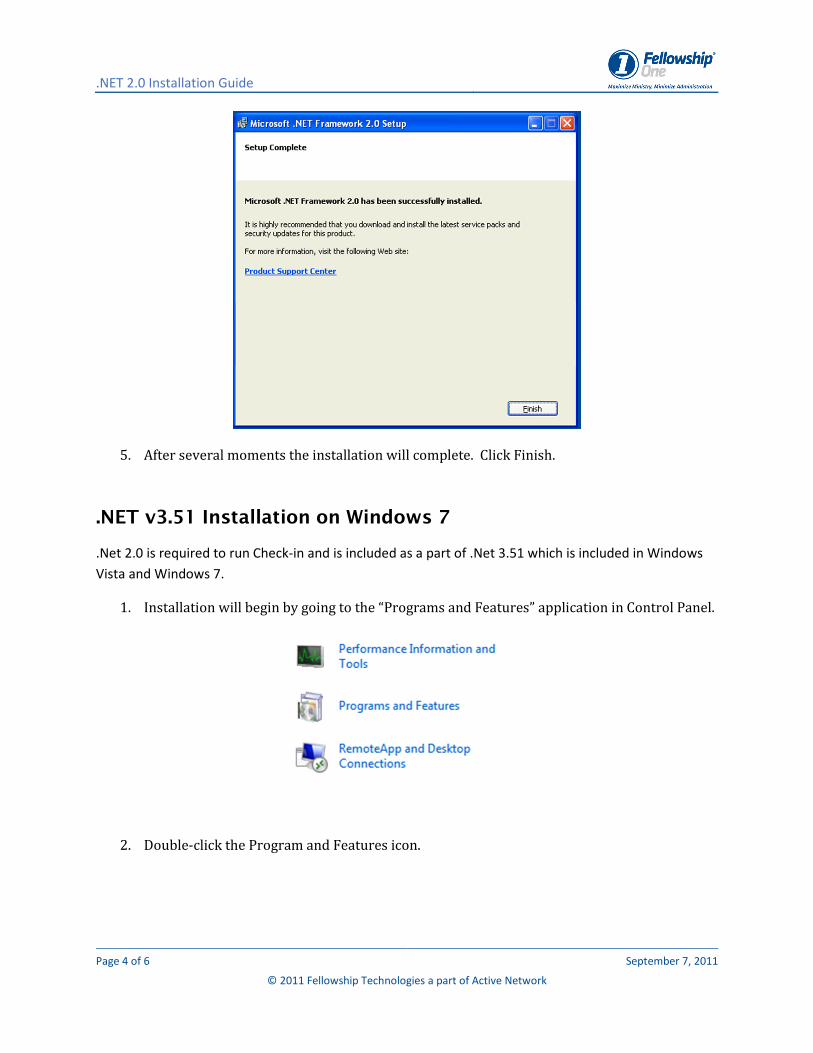
5. After several moments the installation will complete. Click Finish.
.NET v3.51 Installation on Windows 7
.Net 2.0 is required to run Check-in and is included as a part of .Net 3.51 which is included in Windows
Vista and Windows 7.
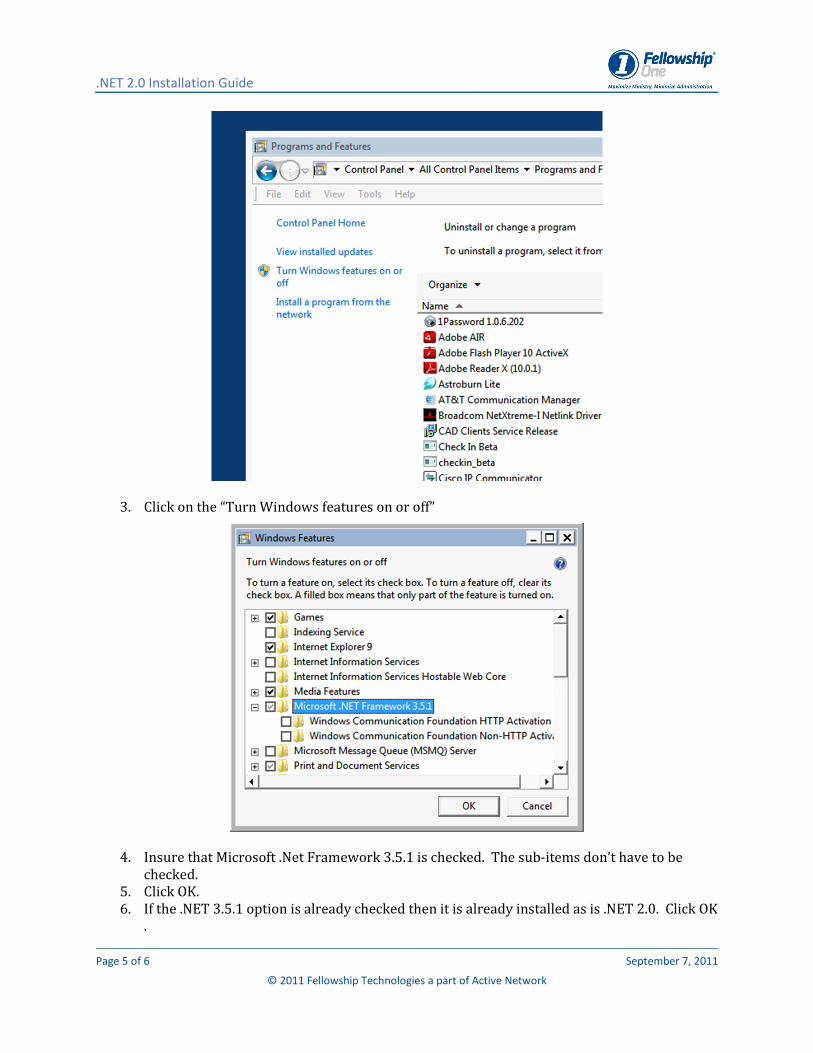
1. Installation will begin by going to the “Programs and Features” application in Control Panel.
2. Double-click the Program and Features icon.
.NET 2.0 Installation Guide
Page 5 of 6 September 7, 2011
© 2011 Fellowship Technologies a part of Active Network
3. Click on the “Turn Windows features on or off”
4. Insure that Microsoft .Net Framework 3.5.1 is checked. The sub-items don’t have to be
checked.
5. Click OK.
6. If the .NET 3.5.1 option is already checked then it is already installed as is .NET 2.0. Click OK
.
.NET 2.0 Installation Guide
Page 6 of 6 September 7, 2011
© 2011 Fellowship Technologies a part of Active Network
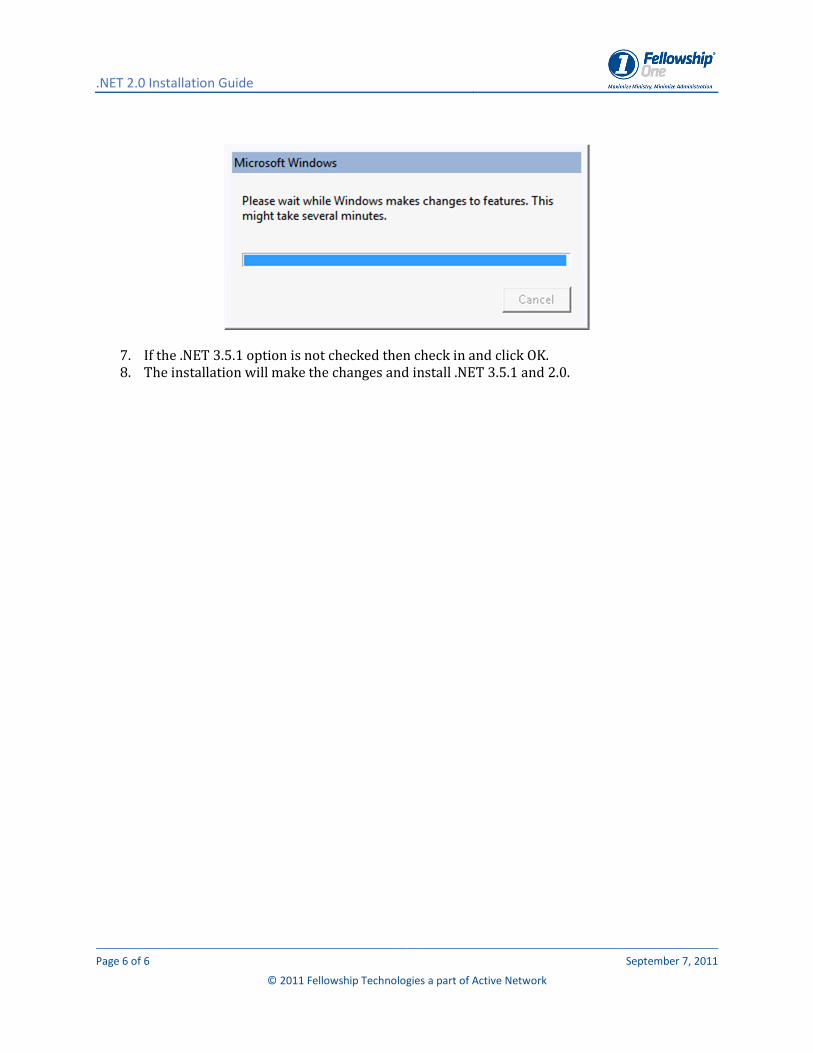
7. If the .NET 3.5.1 option is not checked then check in and click OK.
8. The installation will make the changes and install .NET 3.5.1 and 2.0.