Embed Size (px)
Citation preview
SAVE THESE INSTRUCTIONS
Multi-Sport Instant Cage®
ASSEMBLYINSTRUCTIONS

• Adultsupervisionisrequiredforsetupanduseofthiscage.FollowAssemblyInstructions.
• Nylonnettingwillfray,tearorbreakfromnormaluseorabuse.
BEFORE EACH USE:
• Thoroughlyinspectthecagenettingforanyholesorsignsofwear.
• Besurethatallframetubingisundamagedandproperlyassembledonalevelsurface.
• Thenettingisdesignedtodeflectwhenitisimpactedbyballsorotherobjects.Therefore,besurethatbystanders,otherwaitingparticipants,anystructuresorvehiclesarenonearerthan8feetfromtheoutersidesofthecagewhenitissetupandinuse.
• Besureonlyoneparticipantatatimeusesthecage.
• Besuretheplayer’spositionisinlinewith,andinthecenterof,thecageopening.
• Toavoidinjuriesoraccidents,dismantleandstoreyourJUGSMulti-SportInstantCage®whenwindvelocitiesareanticipatedtobegreaterthan15mph.Seewarrantyinformation.
WARNING

JUGS Multi-Sport Instant Cage®
ASSEMBLYINSTRUCTIONS
Remove the frame sections and netting from your carrying bag and group them as you see in the inventory below. Then follow these easy steps.
carryingbag
snap button
PARTS INVENTORY
QTY. DESCRIPTION
3 carryingbag&netting
6 3-wayfitting
2 4-wayfitting
close-up
14 3-ft.tube
7 6-ft.bungiedtube
4 9-ft.bungiedtube
4 foottube
4 groundanchorloop
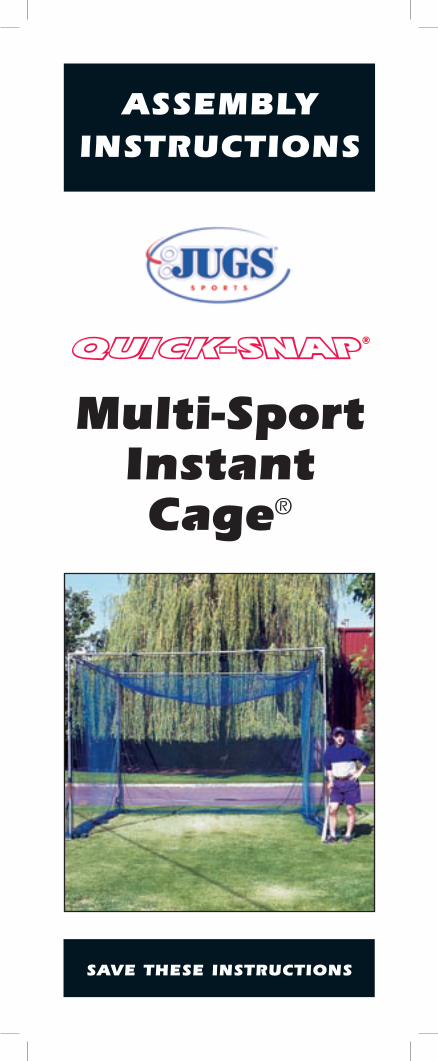
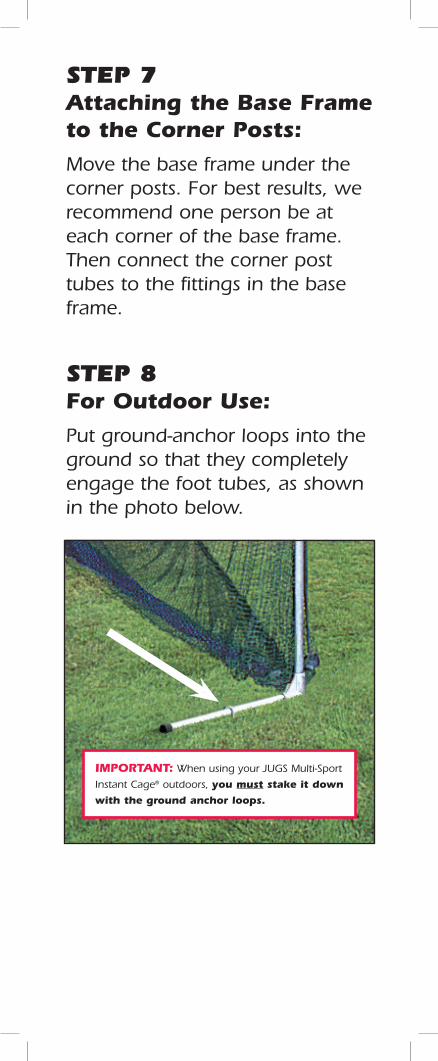
IMPORTANT: When using your JUGS Multi-Sport Instant Cage® outdoors, you must stake it down with the ground-anchor loops.
9-foot
bun
gie
dt
ube
3-wayfitting
4-wayfitting
4-wayfitting
3-wayfitting
3-way
fittin
g
3-wayfitting
3-wayfitting3-w
ayfi
tting
3-foottube6-footbungiedtube3-foottube
foottube
foottube
gro
un
da
nch
or
loop
gro
un
da
nch
or
loop
gro
un
da
nch
or
loop
gro
un
da
nch
or
loop
Notubehere.
foottube
foottube
warninglabel
warninglabel
9-foot
bun
gie
dt
ube
9-foot
bun
gie
dt
ube
9-foot
bun
gie
dt
ube
IMPORTANT: (BE SURE THE 9-FOOT BUNGIED TUBES WITH THE WARNING LABELS ARE ON THE FRONT SIDE OF THE CAGE AND THAT THE LABELS ARE RIGHT-SIDE UP.)

The JUGS Multi-Sport Instant Cage® frame is guaranteed for five (5) years, and The JUGS Multi-Sport Instant Cage® netting is guaranteed for one (1) year, against defects in material or workmanship, unless it is damaged by misuse, negligence, or accident—or exposed to extremes of weather such as snow, ice, high winds, or other acts of God.
ImportantWarrantyNote:For easy set-up and dismantling, your JUGS Multi-Sport Instant Cage® is made of lightweight materials. If left outside, it will be exposed, like all outdoor structures, to stresses from wind, snow and ice. However, it is not designed to withstand wind more than a moderate breeze. In order to prevent your cage from being damaged, you must dismantle it and store it indoors whenever wind velocities for your area are anticipated to be in excess of 15 miles per hour. Never leave your cage set up outside during snow storms or in freezing rain. Failure to comply with these restrictions will void your warranty.
9-foot
bun
gie
dt
ube
3-wayfitting
4-wayfitting
4-wayfitting
3-wayfitting
3-way
fittin
g
3-wayfitting
3-wayfitting3-w
ayfi
tting
3-foottube6-footbungiedtube3-foottube
foottube
foottube
gro
un
da
nch
or
loop
gro
un
da
nch
or
loop
gro
un
da
nch
or
loop
gro
un
da
nch
or
loop
Notubehere.
foottube
foottube
warninglabel
warninglabel
9-foot
bun
gie
dt
ube
9-foot
bun
gie
dt
ube
9-foot
bun
gie
dt
ube
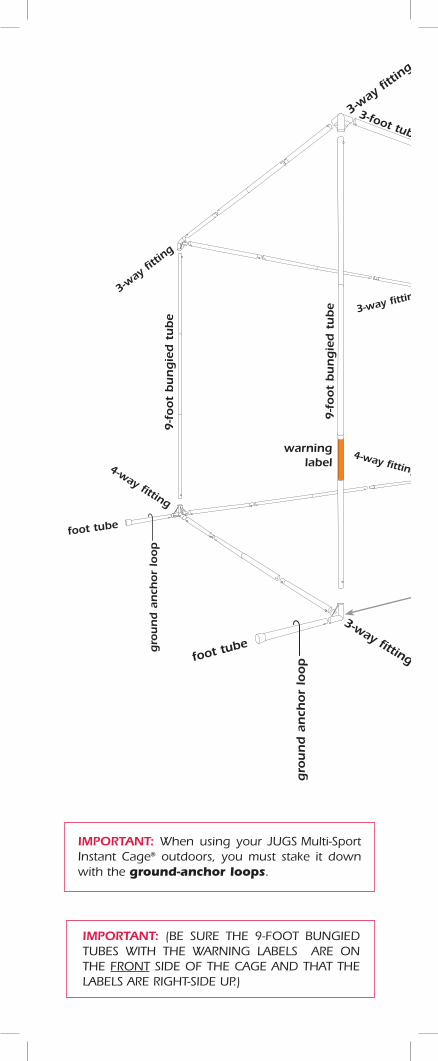
QUICK-SNAP® BASICSWhen erecting the Multi-Sport Instant Cage®, connect the sections of bungied tubes together, as shown below.
Twist them to align the lock button with the lock hole, as shown below.
Depress the lock button and slide the two sections of tubing together. Be sure the lock button springs back securely inside the lock hole.
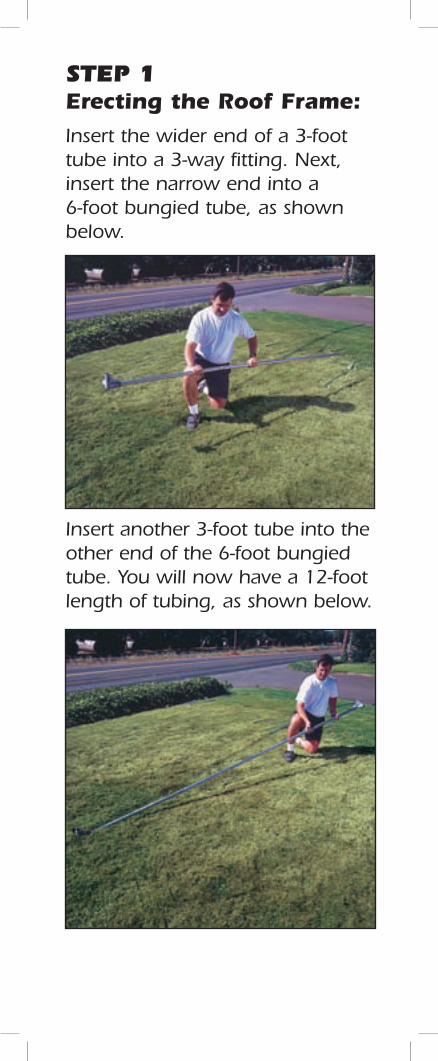
STEP 1 Erecting the Roof Frame:
Insert the wider end of a 3-foot tube into a 3-way fitting. Next, insert the narrow end into a 6-foot bungied tube, as shown below.
Insert another 3-foot tube into the other end of the 6-foot bungied tube. You will now have a 12-foot length of tubing, as shown below.
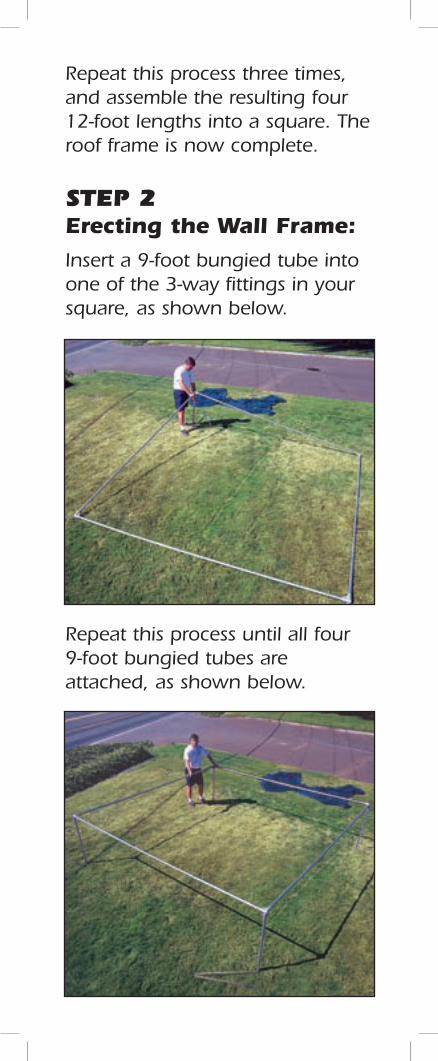
Repeat this process three times, and assemble the resulting four 12-foot lengths into a square. The roof frame is now complete.
STEP 2 Erecting the Wall Frame:
Insert a 9-foot bungied tube into one of the 3-way fittings in your square, as shown below.
Repeat this process until all four 9-foot bungied tubes are attached, as shown below.

STEP 3 Attaching the Netting:
Remove the netting from the box. The netting is marked to identify “TOP FRONT,” “TOP REAR” and “BOTTOM REAR.” Position the netting over the square frame according to these markings, as shown below.
Using the hooks attached to the net, fasten all four corners of the top of the net to the top holes in the 3-way fittings, as shown below.

After attaching the four corners of the net to the frame, it should look like the one below.
Attach the remainder of the top part of the net, by wrapping the Velcro® strips (sewn onto the edges of the net) around the frame. It should look like the one in the photo below.
STEP 4Erecting the Corner Posts
Connect the middle section of the 9-foot bungied tube to the top section of the 9-foot bungied tube as shown below.
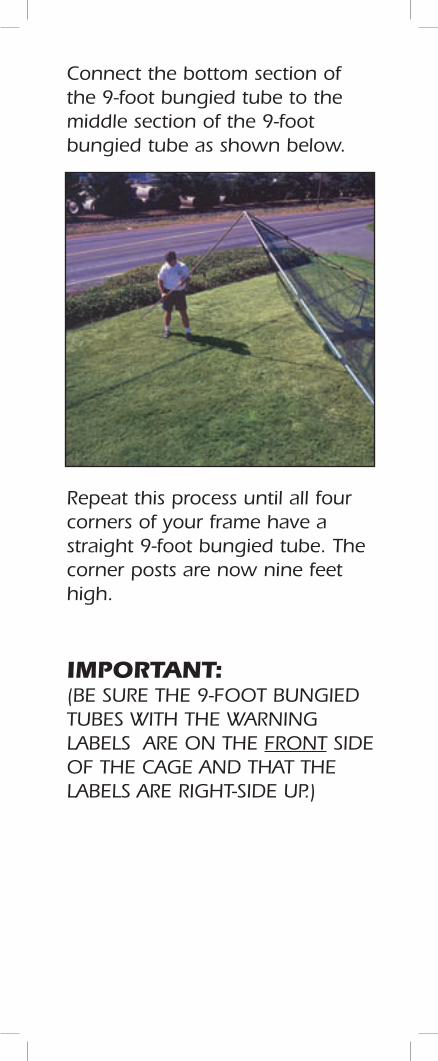
Connect the bottom section of the 9-foot bungied tube to the middle section of the 9-foot bungied tube as shown below.
Repeat this process until all four corners of your frame have a straight 9-foot bungied tube. The corner posts are now nine feet high.
IMPORTANT: (BE SURE THE 9-FOOT BUNGIED TUBES WITH THE WARNING LABELS ARE ON THE FRONT SIDE OF THE CAGE AND THAT THE LABELS ARE RIGHT-SIDE UP.)
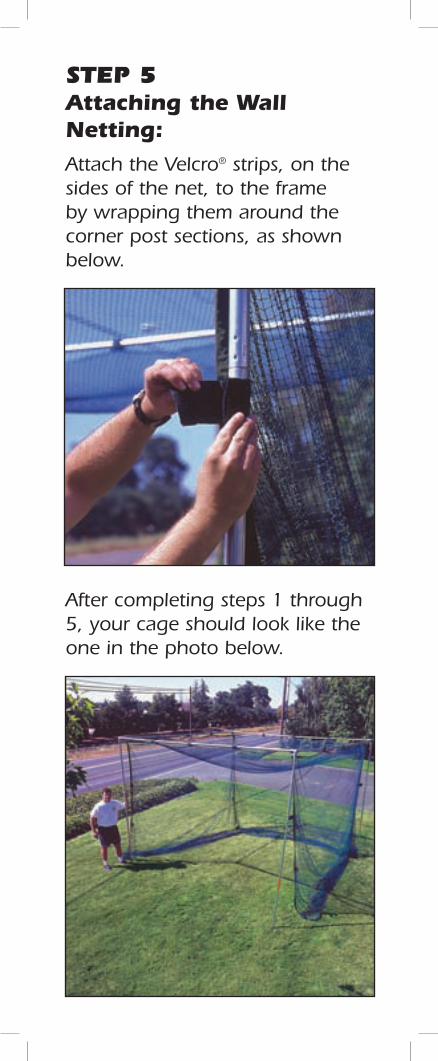
STEP 5 Attaching the Wall Netting:
Attach the Velcro® strips, on the sides of the net, to the frame by wrapping them around the corner post sections, as shown below.
After completing steps 1 through 5, your cage should look like the one in the photo below.
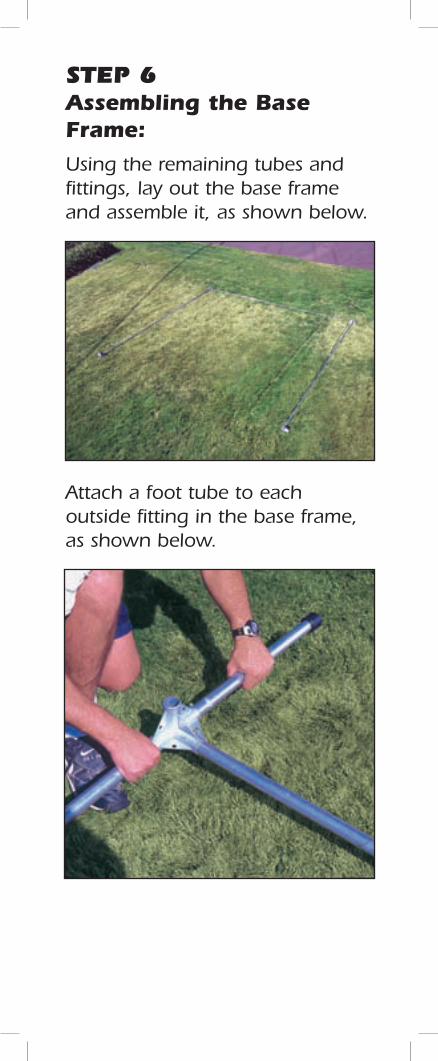
STEP 6Assembling the Base Frame:
Using the remaining tubes and fittings, lay out the base frame and assemble it, as shown below.
Attach a foot tube to each outside fitting in the base frame, as shown below.
IMPORTANT: When using your JUGS Multi-Sport
Instant Cage® outdoors, you must stake it down
with the ground anchor loops.
STEP 7Attaching the Base Frame to the Corner Posts:
Move the base frame under the corner posts. For best results, we recommend one person be at each corner of the base frame. Then connect the corner post tubes to the fittings in the base frame.
STEP 8For Outdoor Use:
Put ground-anchor loops into the ground so that they completely engage the foot tubes, as shown in the photo below.

Below, is a view of the Multi-Sport Instant Cage®, fully assembled.

If you need more information about
this productor any other
JUGS product or service, please contact
the manufacturer:
In the USA and Canada,call toll-free:
1-800-547-6843.
For International Orders,call collect:
0-503-692-1635.
Our fax number is1-503-691-1100.
Visit our website atwww.jugssports.com.
Se habla español.
© 2008 JUGS Sports QSMSICI-1108