Embed Size (px)
Citation preview
MSDS / HMIS User's Guide
1. Introduction.
Welcome to the MSDS / HMIS CD-ROM system. The original HMC&M was developed at the direction of the Commander, Naval Supply Systems Command (COMNAVSUPSYSCOM), Washington, DC.
The MSDS / HMIS discs provide access to six references: (1) The Hazardous Material Information System (HMIS) which is the Department of Defense repository for Material Safety Data Sheet (MSDS) information, (2) The Ships Hazardous Materials List (SHML) which provides ships the capability to maintain an inventory of chemicals and substances used aboard ships, (3) The Hazardous Material User's Guide (HMUG) which provides protective information to supplement the technical data found in the MSDS's, (4) The Shipboard Safety Equipment Shopping Guide which provides national stock numbers for common safety equipment and personal protective clothing approved for shipboard use, ( 5 ) The Shelf Life Extension Criteria Manual which provides storage condition and inspectionhest instructions for Navy-managed hazardous material shelf-life items, and (6) The Glossary of Hazardous Terms which provides definitions of terms commonly used in MSDSs as well as technical data on materials.
*
2.1 Contents of Package. .........................
MSDS / HMIS program disc includes two Compact Discs containing:
_-
1) HMIS, SHML, Nuclear Water, and SPIN databases 2) Electronic Documents
- Hazardous Materials User's Guide - Shipboard Safety Equipment Shopping Guide - Shelf Life Extension Criteria Manual - Glossary of Hazardous Terms
- CD-ROM Hardware Installation - Software Usage - Shelf Life Management
3) Tutorials
4) Ships Parts Control Center SHML Feedback Report 5) Environmental Reporting database 6 ) Registry of Lists database
2.2 System Requirements.
MSDS / HMIS requires an MS-DOS operated microcomputer containing:
- 640K bytes of RAM (at least 540K must be available to hlly execute MSDS / HMIS; use the MS-DOS command CHKDSK to determine total bytes of free memory)
- DOS 3.3 or greater - a minimum of 30 MB hard disk space - an operational CD-ROM unit (A dual drive player is highly
- a printer (EPSON FX-80 or ALPS P2000 compatible for printing recommended.)
labels)
To install the MSDS / HMIS CD-ROM two disc set:
1) Insert the MSDS / HMIS disc Disc 1 into the CD-ROM drive. Put the discs in the drives in alphabetical order i.e., Disc 1 in drive "S" and Disc 2 in drive i.e. "T". If you only have 1 drive you will have to swap the discs in and out.
2) Change to the CD-ROM drive that contains the Disc 1 by typing
<Drive Letter?
3) Type INSTALL
NOTE: You may abort the installation process at any time by pressing <ESC>.
4) Follow the on-screen instructions.
5) Use the SPACE BAR to toggle between YES and NO for install choices.
6) After installation is complete, you will be in the HMCM directory.
2.4 Starting the System.
To start the system on the installed hard drive, type CDEIMCM and press <Enter>. Type HMENU and the MSDS / HMIS menu will be displayed. Should problems arise, switch to HMENU2. Other options available besides MSDS / HMIS are:
- Software Tutorial - Hardware Tutorial - Shelf Life Tutorial - Ships Parts Control Center SHML Feedback Report - Ship Hazardous Material List (SHML) - Shipboard Safety Equipment Shopping Guide
--
- Hazardous Material User's Guide (HMUG) - Shelf Life Extension Criteria Manual - Glossary of Hazardous Terms - Environmental Reporting File - Registry of Lists
Help will be provided with unusual installation andor operational problems, but all callers should respect the below-listed requests. They are designed to save telephone time and to give you timely and accurate problem diagnosis.
- Please carefully review your SETUP AND INSTALLATION instructions before calling. Help will be more meaningful if the instructions have been read first.
- Always call from a phone beside your computer. In most cases you will be required to enter and read some DOS or MSDS / HMIS
* screens.
- If you, the caller, were not the installer, then please get this person to come to the phone with you for the first call only. It's tough to diagnose without a review of the installation procedure.
- Be ready with the following information before you call: 1 ) Make and model number of computer, printer, and CD-ROM
2) DOS version number; 3) Total installed random-access memory (RAM), as well as free
bytes RAM available (use DOS CHKDSK command for this check);
drive;
4) A printed copy of your AUTOEXEC.BAT and CONFIG.SYS files; 5 ) Your exact mailing address; and 6) Your commercial phone number.
- Your cooperation in having this information ready before you call will be greatly appreciated.
2.6 Technical Support. .......................
- Concerning MSDS / HMIS CD-ROM, call SOLUTIONS Software Corporation.
Voice: (407) 321-7912 Fax: (407) 323-4898
-- . E-Mail: [email protected]
2.7 SubLicenses.
The installation program used to install MSDS / HMIS, INSTALL, is based on licensed software provided by Knowledge Dynamics Corp, Highway Contract 4 Box 185-H, Canyon Lake, Texas 78133-3508 (USA), 1-512- 964-3994. INSTALL is Copyright(c) 1987- 1990 by Knowledge Dynamics Corp which reserves all copyright protection worldwide. INSTALL is provided to you for the exclusive purpose of installing HMC&M. NCTAMS LANT has made modifications to the software as provided by Knowledge Dynamics Corp, and thus the performance and behavior of INSTALL program shipped with MSDS / HMIS may not represent the performance and behavior of INSTALL as shipped by Knowledge Dynamics Corp. NCTAMS LANT is exclusively responsible for the support of HMC&M, including support during the installation phase. In no event will Knowledge Dynamics Corp be able to provide any technical support for MSDS / HMIS.
3. System Overviews.
* 3.1 HMIS System.
3.1 1 Introduction.
HMIS provides the basic reference data for use by DoD activities, federal civilian activities, and other approved organizations to comply with the more stringent regulatory controls established for hazardous materials. A list of the searchable and non-searchable data fields is provided elsewhere in this manual. In order to access this CD-ROM you will need, in addition to a personal computer and compact disc drive, Microsoft Extensions 2.0 or higher. Both the search software and the HMIS database are provided on the CD-ROM.
The HMIS database provides reference data to assist those personnel in the management of hazardous materials so that the risk involved to personnel in performing their jobs is minimized. The data is intended to supplement existing regulations and procedures and will assist in efforts to comply fully with the various laws that apply to safety and health, transportation and the environment by providing knowledge as to the specific hazards associated with the individual items. The very fact that these items are hazardous dictates the extra degree of caution imposed by the types of laws cited above, although the relative degree of hazard can vary considerably between items.
-- . There is a wide range of data in the system related to safety, health, packaging, labeling, transportation, and disposal.
Although the data in the system is designed to support a wide range of job areas that cause people to come into contact with hazardous
materials, the system was designed with the intent of providing primary support in three major areas: HealtWSafety, Transportation, and DisposaUEnvironment. Although people using this system will have access to all of the elements of data contained herein, you should not attempt to apply this information without the proper training and procedures related to specific hazards. For example, health and safety data such as reactions to exposure, use of protective equipment, accidental spills and the like should only be applied with the knowledge and procedures of your local safety or industrial hygiene personnel. The transportation data provides, among other things, the proper shipping name and hazard class for the major modes of transportation used by the DoD. Using the various shipping regulations, the appropriate basic paragraph is obtained for the shipping name and class indicated. Caution is necessary in that depending on the number and size of containers being prepared for shipment, labeling and packaging requirements may differ for the same material. Therefore, it is necessary to review the subparagraphs under the basic paragraph of the appropriate regulation for the correct certification information. The disposal (environmental) section of the database is primarily intended to provide information needed to dispose of the material in an environmentally safe manner. However, caution is necessary because local or state laws or other regulations may override the information provided.
*
Although there are many types of data in the HMIS, the primary source of the information comes from the Material Safety Data Sheet (MSDS). The primary purpose of the HMIS is to provide a mechanized means of distributing the MSDS information throughout the DoD and other Federal Agencies. The MSDS's are obtained during the procurement process. That is, the MSDS is bought when the product itself is bought. The MSDS is then forwarded to the appropriate service/agency focal point. The focal point reviews the MSDS for technical accuracy, consistency, and reasonableness. The data is enhanced as appropriate after consultation with the manufacturer and/or other technical references. The data is then edited to fit the fixed field constraints of the data system and are transcribed into the HMIS database. The HMIS contains all of the data fields required by 29CFR19 10.1200, the Hazard Communications Standard. However, since the HMIS predated the Hazard Communications Standard, a number of records exist that contain the data required by the old OSHA Form 20. As new MSDS's are received through the procurement process, the appropriate records are updated. Also, as new MSDS's previously not in the database are received, they are entered in the system.
The safety and health data (the MSDS data) in the system can only be used in the workplace through the interpretive procedures that must be developed by safety and health or industrial hygiene professionals. The MSDS information in the system contains raw technical and precautionary information on items, but the actual hazards which may be encountered depend on the manner in which the item is used (normal usage, accidental breakage, the quantity of items encountered, frequency of use, etc.). Distribution of this
-- .
data to work sites should be in keeping with DoD and ServicelAgency directives and the Occupational Safety and Health Administration (OSHA) Hazard Communications Standard (29CFR1910.1200). The data is primarily for use by the local safety and health and industrial hygiene staff to develop local operating procedures for government employees at various sites on the installation. Such procedures are designed to apprise employees of the hazards associated with the items they come in contact with, the precautions for safe use or handling of the item, the specific personal protective equipment requirements, and the appropriate emergency. These locally developed procedures would apply for exposure, whether by actual use or in some indirect way such as storing, transporting, or disposing of the item. Personnel who have access to the data in the Hazardous Materials Information System (HMIS) must contact the local safety and health or industrial hygiene staff concerning the use of the safety and health data in the system.
In addition to the specific data contained in the system, there is always the potential of coming into contact with a hazardous item for which the data system has no data or insufficient data to ensure that proper precautions can be taken concerning the hazards associated with a specific item. If an item is suspected of presenting a serious hazard to your personnel, the user should contact his respective focal point as listed in Appendix C for the purpose of confirming whether or not the item is hazardous. Where the manufacturer has provided an emergency telephone number, this is to be used in emergency situations only. Inquiries to the focal points should be during normal duty hours and should be directed within your respective service or agency.
*
The user should understand that the appearance of an item in the HMIS does not automatically mean that the item is hazardous under all circumstances. Generally, if the item has a chemical associated with it and if the manufacturer provides an MSDS, a record is developed in the system. Also, Federal Standard 3 13 requires an MSDS for certain Federal Supply Classes regardless of their hazard. Hence, non-hazardous chemicals may appear in the HMIS because it is just as important to advise a user that the item is not hazardous as it is to advise him that it is hazardous.
3.121 Purpose. -__________----
The purpose of QUICKSTART is to provide users with a clear, customized tutorial that will rapidly explain the most used --
. features.
3.122 Limitations.
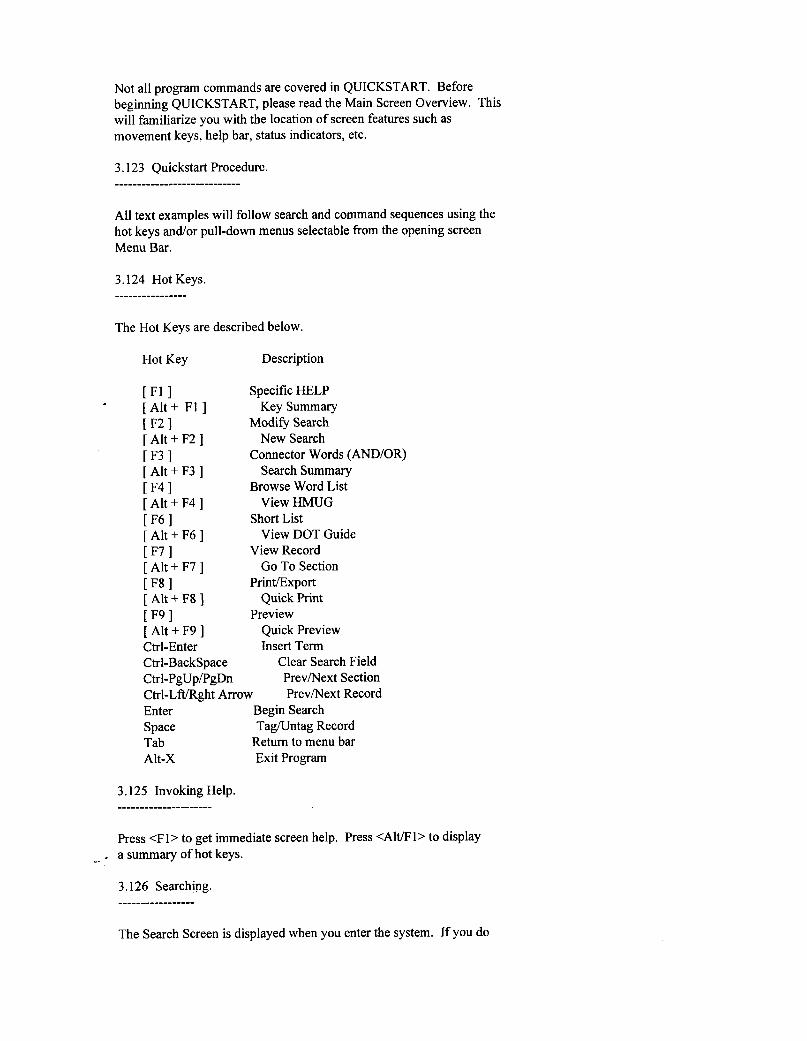
Not all program commands are covered in QUICKSTART. Before beginning QUICKSTART, please read the Main Screen Overview. This will familiarize you with the location of screen features such as movement keys, help bar, status indicators, etc.
3.123 Quickstart Procedure. ............................
All text examples will follow search and command sequences using the hot keys andor pull-down menus selectable from the opening screen Menu Bar.
3.124 Hot Keys. ____------------
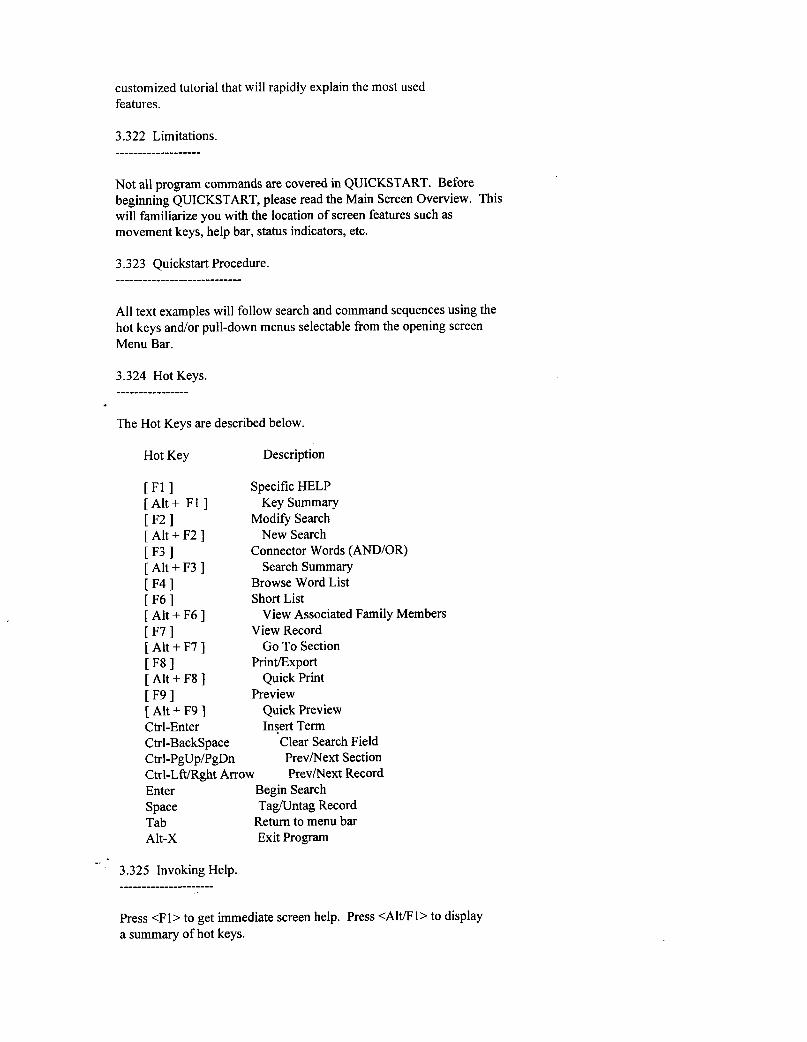
The Hot Keys are described below.
Hot Key Description
[ F l I Specific HELP [Al t+ F l ] Key Summary IF21 Modify Search [ Alt + F2 ] New Search [F3 1 Connector Words (AND/OR) [ Alt + F3 ] Search Summary [ F4 1 Browse Word List [ Alt + F4 ] View HMUG
Short List [ Alt + F6 ] View DOT Guide [ F7 1 View Record [ Alt + F7 ] Go To Section [F8 1 Print/Export [ Alt + F8 Quick Print [ ~ 9 1 Preview [ Alt + F9 3 Quick Preview Ctrl-Enter Insert Term Ctrl-Backspace Clear Search Field Ctrl-PgUpPgDn PrevINext Section Ctrl-LftlRght Arrow PrevINext Record Enter Begin Search Space Tagfuntag Record Tab Return to menu bar Alt-X Exit Program
[ F6 1
Press <F1> to get immediate screen help, Press <Alt/Fl> to display -- - a summary of hot keys.
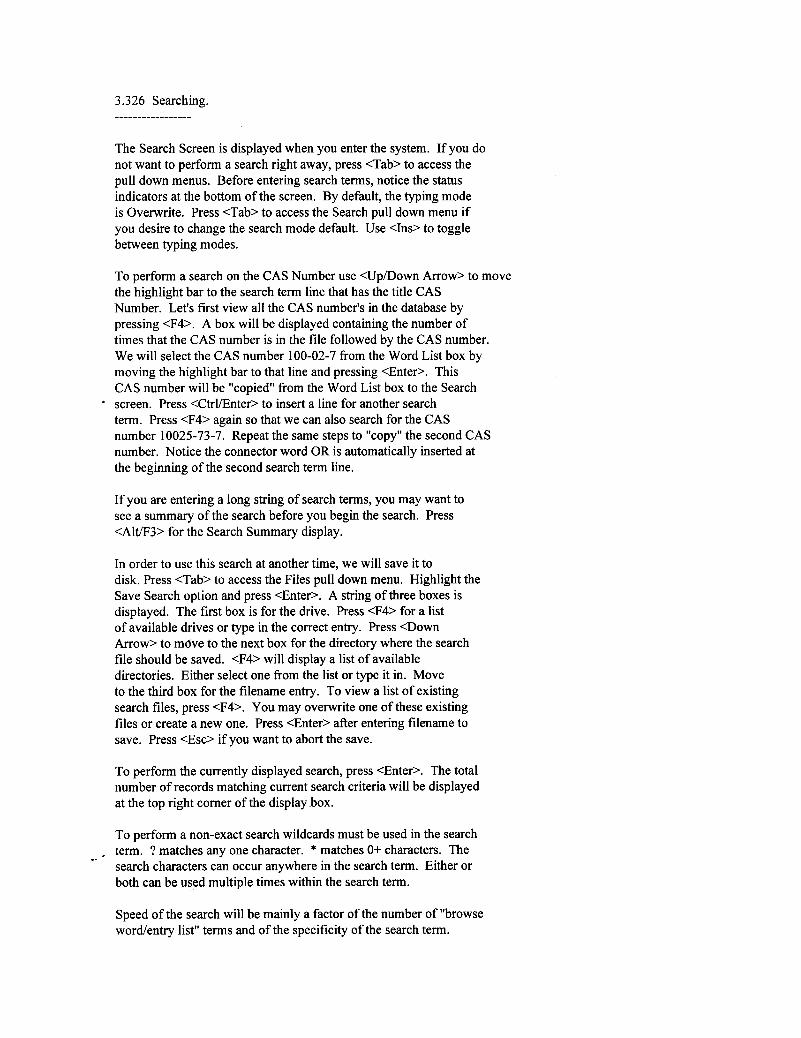
3.126 Searching. _____------------
The Search Screen is displayed when you enter the system. If you do

not want to perform a search right away, press <Tab> to access the pull down menus. Before entering search terms, notice the status indicators at the bottom of the screen. By default, the typing mode is Overwrite. Press <Tab> to access the Search pull down menu if you desire to change the search mode default. Use <Ins> to toggle between typing modes. The database selection default [ HMIS/SHML ] will be displayed. The Files pull down menu will allow you to change the current database.
To perform a search on the FSC's use <Up/Down Arrow> to move the highlight bar to the search term line that has the title FSC. Let's first view all the FSC's in the database by pressing <F4>. A box will be displayed containing the number of times that FSC is in the file followed by the FSC. We will select the FSC 1336 from the Word List box by moving the highlight bar to that line and pressing <Enter>. This FSC will be "copied" from the Word List box to the Search screen. Press <Ctrl/Enter> to insert a line for another search term. Press <F4> again so that we can also search for the FSC 2840. Repeat the same steps to "copy" the second FSC. Notice the connector word OR is automatically inserted at the beginning of the second search term line. *
If you are entering a long string of search terms, you may want to see a summary of the search before you begin the search. Press <Alt/F3> for the Search Summary display.
In order to use this search at another time, we will save it to disk. Press <Tab> to access the Files pull down menu. Highlight the Save Search option and press <Enter>. A string of three boxes is displayed. The first box is for the drive. Press <F4> for a list of available drives or type in the correct entry. Press <Down Arrow> to move to the next box for the directory where the search file should be saved. <F4> will display a list of available directories. Either select one from the list or type it in. Move to the third box for the filename entry. To view a list of existing search files, press <F4>. You may overwrite one of these existing files or create a new one. Press <Enter> after entering filename to save. Press <Est> if you want to abort the save.
To perform the currently displayed search, press <Enter>. The total number of records matching current search criteria will be displayed at the top right comer of the display box.
To perform a non-exact search wildcards must be used in the search term. ? matches any one character. * matches O+ characters. The search characters can occur anywhere in the search term. Either or both can be used multiple times within the search term. These characters must be preceeded with a blackslash if you wish to search
-- - for them literally.
VA* matches VA, VAPOR, VA* VA\* only matches VA*
Speed of the search will be mainly a factor of the number of "browse wordentry list" terms and of the specificity of the search term.
For example, PAINT* will search faster than P*; P* will operate faster on a part number indicator search than on an entire word search.
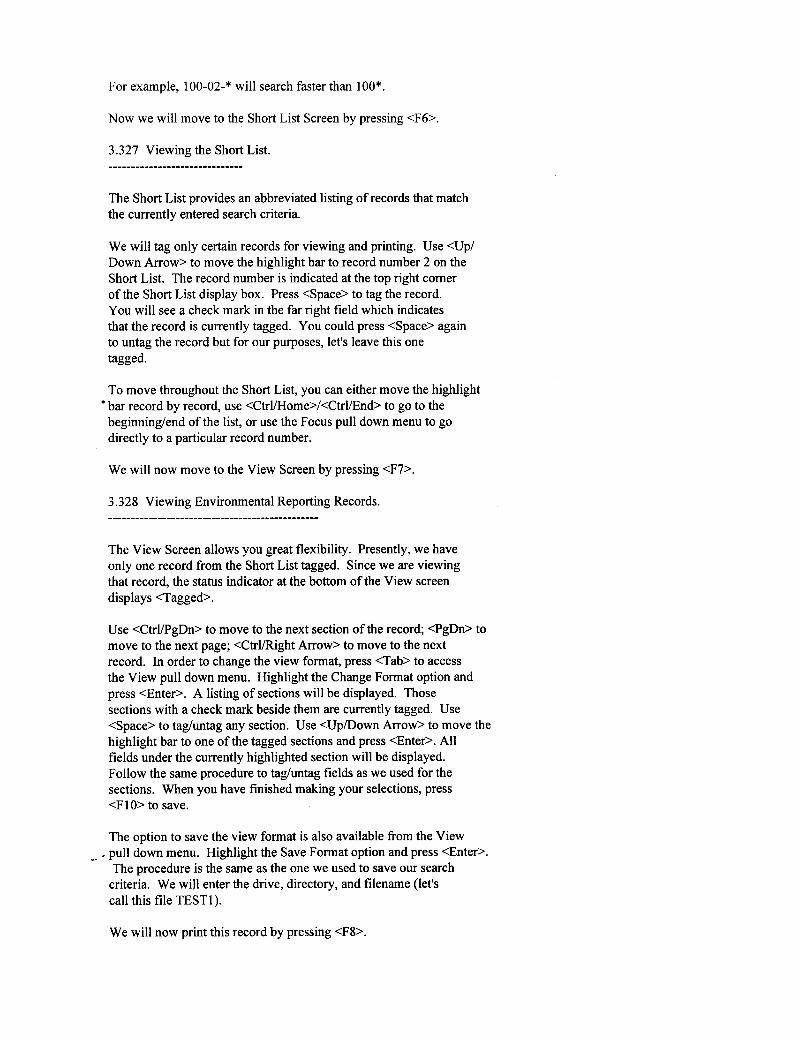
Now we will move to the Short List Screen by pressing <F6>.
The Short List provides an abbreviated listing of records that match the currently entered search criteria.
We will tag only certain records for viewing and printing. Use <Up/ Down Arrow> to move the highlight bar to record number 2 on the Short List. The record number is indicated at the top right comer of the Short List display box. Press <Space> to tag the record. You will see a check mark in the far right field which indicates that the record is currently tagged. You could press <Space> again to untag the record but for our purposes, let's leave this one tagged.
To move throughout the Short List, you can either move the highlight bar record by record, use <Ctrl/Home>/<CtrVEnd> to go to the beginnindend of the list, or use the Focus <AltR7> pull down menu to go directly to a particular record number.
We will now move to the View Screen by pressing <F7>.
The View Screen allows you great flexibility. Presently, we have only one record from the Short List tagged. Since we are viewing that record, the status indicator at the bottom of the View screen displays <Tagged>.
Use <Ctrl/PgDn> to move to the next section of the record; <PgDn> to move to the next page; <Ctrl/Right Arrow> to move to the next record. In order to change the view format, press <Tab> to access the View pull down menu. Highlight the Change Format option and press <Enter>. A listing of sections will be displayed. Those sections with a check mark beside them are currently tagged. Use <Space> to taduntag any section. Use <Up/Down Arrow> to move the highlight bar to one of the tagged sections and press <Enter>. All fields under the currently highlighted section will be displayed. Follow the same procedure to taduntag fields as we used for the sections. When you have finished making your selections, press <F10> to save.
Note: Nuclear Water defaults to off unless the Nuclear Water Item is selected on ?he search menu. To select Nuclear Water, tag the Nuclear Water section on the change format option.
*- .
The option to save the view format is also available fiom the View
pull down menu. Highlight the Save Format option and press <Enter>. The procedure is the same as the one we used to save our search criteria. We will enter the drive, directory, and filename (let's call this file TEST1).
We will now print this record by pressing <F8>.
3.129 Printing MSDS/SHML/Shortlist Records. ............................................
The PrintExport option displays the Print Options box for entering specifications for printing or exporting record(s).
DO NOT USE <Enter> TO MOVE FROM OPTION TO OPTION. <Enter> IS USED TO BEGIN PRINTING! USE <Up/Down Arrow> TO MOVE AROUND WITHIN THE OPTION BOX.
The MSDS Version option can only be edited by users with the LR version. Otherwise, L will be automatically assigned for the version. Press <Down Arrow> to go to the Format option.
Use <Space> to browse through the available Print Format options. We will use the Custom option. Press <Down Arrow> to move to the Custom Format File option.
The Custom Format File option is a required entry for the Custom Print Format only. Enter the drive, directory, and filename (TESTI) now. Press <Down Arrow> to go to the Scope Option.
Again, use <Space> to browse through available choices for scope. We will select the Current Record Only option. Press <Down Arrow> to move to the Output To option. We will not be prompted for the First and Last Record options; this is only used when the Range of Records Scope Option is selected.
Again, use <Space> to browse through available choices for output file. We will select the Printer LPTl option. The options to send output to a file in fixed length records or dBase III+ format are available for exporting data to other systems. Document format will send the output to a file formatted just as it is displayed. We will not be prompted for the Output File option; it is used only if one of the file options was selected for Output To print option.
Use <F 1 O> to save printer defaults currently displayed on screen. You will be required to enter the drive, directory, and filename just as we did for the search criteria and view format files.
We will print only one copy of the record. Now press <Enter> to *- - begin printing. You have just completed a run-through of the basics
of the MSDS / HMIS system. .
Two formats exist for the Shortlist - 80 columns and 140 columns. With the HMIS/SHML and HMIS Only databases, these formats match the short list in the 80 column version. The 140 column version has the
same fields, but prints out the complete manufacturer's and part numbedtrade names. With the SHML database, the 80 column format matches the short list. The 140 column format adds the COG, SMCC, Unit of Issue, and the Unit of Measure fields. Both formats will output to Printer - LPT1, File - Document, or File - Fixed Length.
If the fields on the short list are all that is needed for export into other systems, the 80 column form on HMISBHML and HMIS Only is a very good choice for users who are having speed and memory problems with other formatdoutputs. This report operates directly off of the short list files.
3.1210 Summary. ----------------
There are several sources of assistance available with the MSDS / HMIS system for mastering the software. Rely on the Help by using <Fl>; the Summary of MSDS / HMIS Key Assignments by using <Alt/Fl>; and the Help Bar at the bottom of each screen.
Good Luck!
3.13 System Overview. ......................
3.1311 MenuLine.
Contains titles of submenus. Located at the top of the screen.
3.13 12 Menu Options.
Menu options which are displayed in vivid tones are available for selection. The "grayed" options are not. For example, if you have not performed a successful search, then the option to view a record will not be available. To select an option on the Pull Down Menus, use <Up/Down Arrow> to highlight the menu option you want and press <Enter> (or press the highlighted letter in the menu bar option title).
-- . Keys used to navigate through the currently displayed screen. Located near the bottom of the screen in the right comer.
3.13 14 Status Indicators.
Displays typing mode (overwrite or insert), current database selection (HMIS or SHML), and on the View Screen, tag information (tagged or tagged only). Located near the bottom of the screen, in the left comer and center areas.
3.1315 Help Bar. ________________-
Provides information on most commonly used keys and/or describes the highlighted menu option. These messages are very useful when learn- ing the system!
3.1321 Change Database. ____________________----
a This option allows you to select the database that has the data in which you are interested.
HMIS - Hazardous Material Information System SHML - Ships Hazardous Materials List
Selection of [ HMIS/SHML 3 files will allow you to search and retrieve in the HMIS database and view related data in the SHML database. Selection of [ HMIS ] restricts search, retrieval, print, and view to HMIS data only. Selection of [ SHML 3 restricts search, retrieval, print and view to the SHML only.
3.1322 View Guides.
This option allows you to browse through the guide containing the data in which you are interested.
DOT Guide - Department of Transportation Guide HMUG - Hazardous Material Users' Guide
3.1323 View Definitions. .........................
This option allows you to view the definitions for various codes used throughout the system such as:
Special Material Content codes Unit of Issue codes
Shelf Life Action codes
Type of Storage codes COG codes
*-
. Shelf Life codes Quantity Per Pack Unit codes
3.1324 Information.
This option offers multiple options for display of relevant infor- mation about the MSDS / HMIS program.
3.1325 Key Summary <Alt/Fl>.
This option will display a listing of the MSDS / HMIS key assignments.
This option displays a menu with three choices:
- Select a new color scheme - Reset the settings to the color defaults - Reset the settings to the monochrome defaults
3.1327 Save Search.
This option allows you to save search criteria to disk for future use. You will be required to enter a drive, directory, and file- name. You may overwrite an existing file or create a new one.
This option allows you to load search criteria previously saved to disk. You will be required to enter a drive, directory, and file- name.
This option allows you to begin entering search criteria on a "clean slate". Do not select this option if you want to build on previously entered search criteria that has not been saved to disk!
3.1332 Modify Search <F2>.
Select this option to build on previously entered search criteria. --
. 3.1333 Browse Word List <F4>. ____________________----------
Selection of this option will display a box of entries which are available for the highlighted search field. The number of occur-
I
rences is listed first followed by the available entry. Most search fields have only one search method, but for certain search fields, you will be required to select either Words or Entries search method. The Words option will display a list of available words such as:
ACCORDING
The Entries option will display a list of available entries such as:
BOUGHT ACCORDING TO SPECS
3.13 34 Insert Term <Ctrl/Enter>.
This option allows you to enter more than one item for a search field.
3.1335 Connector <F3>. .......................
This option allows you to toggle back and forth between connector words (And/or).
3.1336 Clear Search Field <Ctrl/BackSpace>. __________________-_____________________----
This option will clear the search term for the currently highlighted search field.
3.1337 Search Summary <Alt/F3>.
This option displays a summary of the current search criteria.
This option will activate the current search criteria. Upon com- pletion of the search, the computer will beep and the number of rec- ords found will be displayed at the top right comer of the Search Criteria Box.
3.134 1 Short List <F6>. --
Selection of this option will display summary information. When searching [ HMIS/SHML 3 or [ HMIS 3 , this information includes the SHML status/Service Code, NSN, Manufacturer's Name and Item Name for all the records which meet the current search criteria. When
searching [ SHML 1, the NSN, Nomenclature and Manufacturer's Cage are displayed.
3.1342 View Record <F7>. .........................
Selection of this option will display the detailed view of selected record. Use <F7> to view record without going to the menu. HMIS fields with an asterisk (*) beside them have changed since the last data release.
This option allows you to choose which data is to be displayed when you view or print a record.
3.1344 Save Format.
This option allows you to save a format to disk by indicating the directory, drive, and filename. This format can be restored through the Load Format option for either viewing or printing the record.
3.1345 Load Format.
This option allows you to restore a format previously saved to disk by indicating the drive, directory, and filename. The restored for- mat can be used for viewing or for printing a record.
3,1346 View Associated DOT Guide <Alt/F6>.
Selection of this option will allow you to view the related DOT Guide information.
In order to view the associated DOT guide, these conditions must be met:
- [ HMIS/SHML ] databases are selected and SHML item must exist OR - [ SHML 3 database is currently selected AND - SHML item must have a valid Special Material Content Code.
3.13 5 Focus Menu Overview.
This option allows you to move directly to a particular section.
3.1352 Previous Section <Ctrl/PgUp>.
This option allows you to move to the previous section.
This option allows you to move to the next section.
3.1354 Previous Record <Ctrl/Left Arrow>.
This option allows you to view the previous record.
This option allows you to view the next record.
This option allows you to go directly to the particular record that you wish to view.
3.1357 Tag/Untag <Space>.
This option allows you to select particular records using the Space Bar as a toggle key. When the record is tagged, a check mark (a) is displayed by it on the Short List. The tag mode is displayed at the bottom of the screen.
3.1358 Show Tagged Only or Show All Records Toggle.
This option affects the display of the Short List and View Screens by restricting movement to tagged records only or allowing movement to all selected records. The tag mode is displayed at the bottom of the View Screen.
This option allows you to remove all the tags.
3.136 1 Print/Export <F8>.
This option allows you to print or export the currently selected
record(s) in one of a variety of formats.
Available Print Format options are:
Default MSDS
Custom Current Display Full MSDS (includes all sections) SHML Full MSDS With SHML Short List - 80 columns Short List - 140 columns
(excludes Transportation, Disposal, and Label sections)
Available Scope options are:
Current Record All Records Range of Records Tagged Records
Available Output To options are:
Printer - LPTl File - Document Format File - Fixed Length Records File - dBase III+
3.1362 Quick PrintRxport <Alt/F8>. ....................................
This option allows you to print the current record only. If you have selected the SHML database, the current SHML record will be printed. Otherwise, the output will be the current record in the default MSDS format.
3.1363 Preview <F9>. .....................
This option allows you to preview the currently selected record(s) in one of a variety of formats. The option to print is available after the preview.
3.1364 Quick Preview <Alt/F9>. ...............................
This option allows you to preview the current record only. If you have selected the SHML database, the current SHML record will be
-- - previewed. Otherwise, the output will be the current record in de- fault MSDS format.
3.1365 Label.
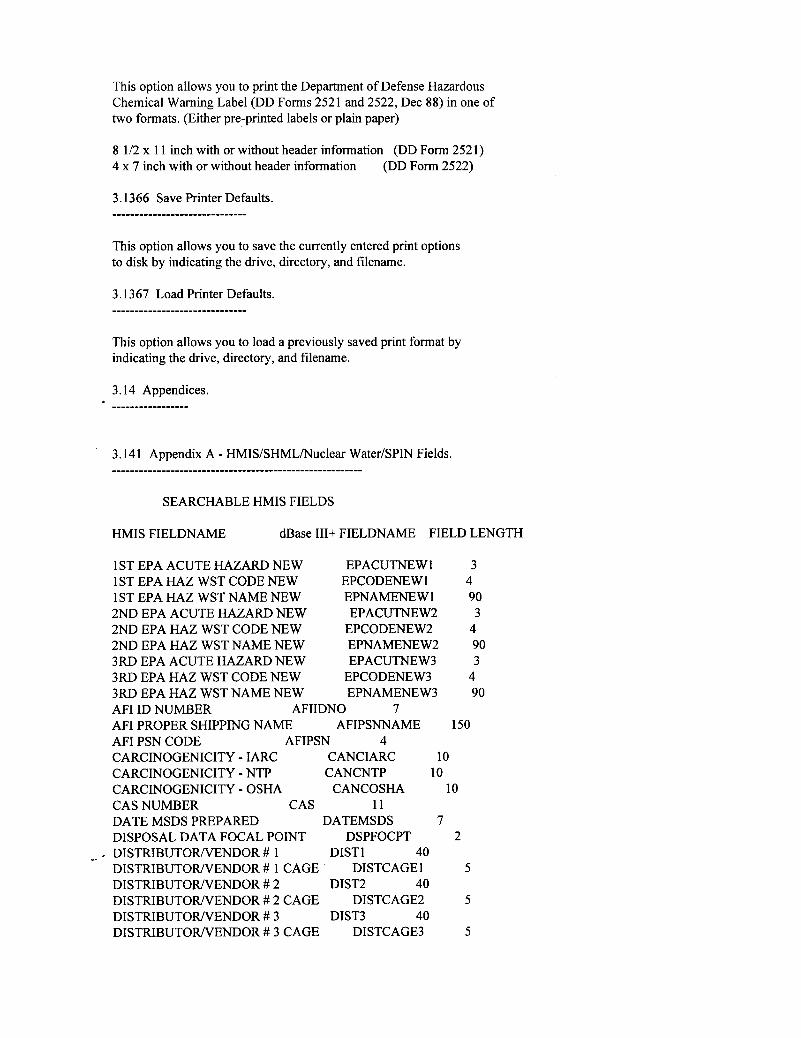
This option allows you to print the Department of Defense Hazardous Chemical Warning Label (DD Forms 2521 and 2522, Dec 88) in one of two formats. (Either pre-printed labels or plain paper)
8 1/2 x 11 inch with or without header information (DD Form 2521) 4 x 7 inch with or without header information (DD Form 2522)
3.1366 Save Printer Defaults.
This option allows you to save the currently entered print options to disk by indicating the drive, directory, and filename.
3.1367 Load Printer Defaults. _________________-------------
This option allows you to load a previously saved print format by indicating the drive, directory, and filename.
3.14 Appendices.
3.141 Appendix A - HMIS/SHML/Nuclear WatedSPIN Fields.
SEARCHABLE HMIS FIELDS
HMIS FIELDNAME dBase III+ FIELDNAME FIELD LENGTH
1 ST EPA ACUTE HAZARD NEW EPACUTNEW 1 3 1 ST EPA HAZ WST CODE NEW EPCODENEW 1 4 1 ST EPA HAZ WST NAME NEW EPNAMENEWl 90 2ND EPA ACUTE HAZARD NEW EPACUTNEW2 3 2ND EPA HAZ WST CODE NEW EPCODENE W2 4 2ND EPA HAZ WST NAME NEW EPNAMENE W2 90 3RD EPA ACUTE HAZARD NEW EPACUTNEW3 3 3RD EPA HAZ WST CODE NEW EPCODENEW3 4 3RD EPA HAZ WST NAME NEW EPNAMENE W3 90 AFI ID NUMBER AFIIDNO 7 AFI PROPER SHIPPING NAME AFIPSNNAME 150 AFI PSN CODE AFIPSN 4 CARCINOGENICITY - IARC C ANCIARC 10 CARCINOGENICITY - NTP CANCNTP 10 CARCINOGENICITY - OSHA CANCOSHA 10 CAS NUMBER CAS 11 DATE MSDS PREPARED DATEMSDS 7 DISPOSAL DATA FOCAL POINT DSPFOCPT 2
-- - DISTRIBUTORNENDOR # 1 DISTl 40 DISTRIBUTORNENDOR # 1 CAGE DISTCAGEl 5 DISTRIBUTORNENDOR # 2 DIST2 40 DISTRIBUTORNENDOR # 2 CAGE DISTCAGE2 5 DISTRIBUTORNENDOR # 3 DIST3 40 DISTRIBUTORNENDOR # 3 CAGE DISTCAGE3 5
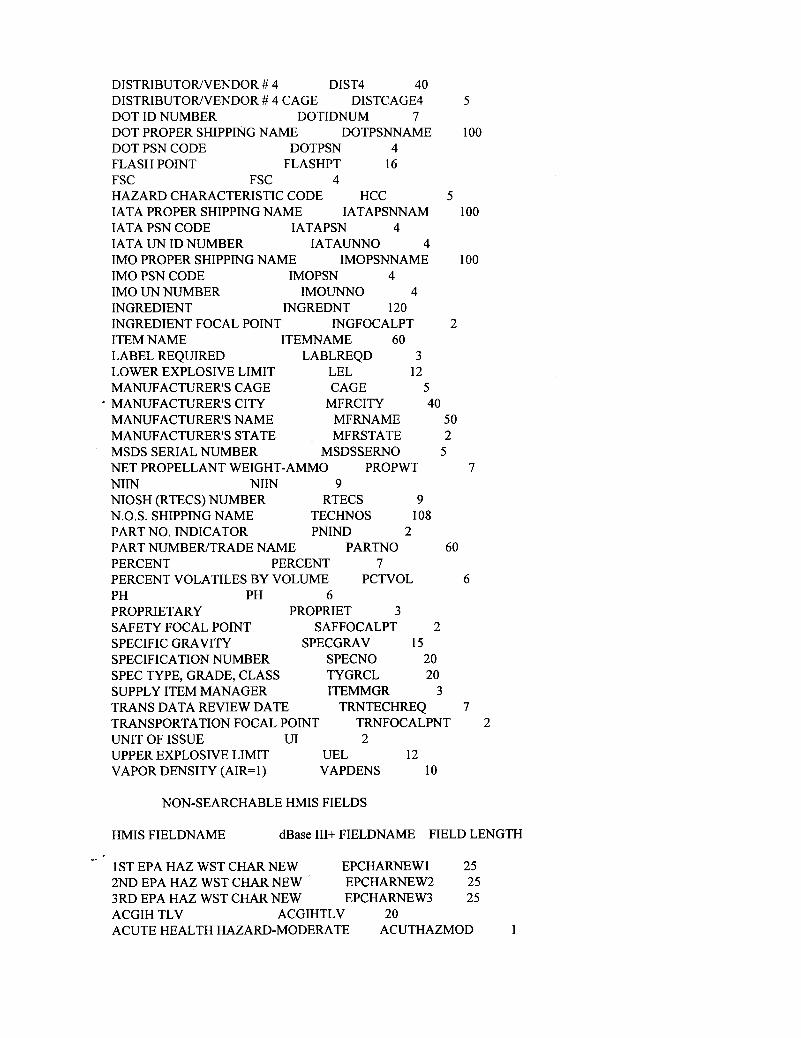
DISTRIBUTORNENDOR # 4 DIST4 40 DISTRIBUTORNENDOR # 4 CAGE DISTCAGE4 DOT ID NUMBER DOTIDNUM 7 DOT PROPER SHIPPING NAME DOTPSNNAME DOT PSN CODE DOTPSN 4 FLASH POINT FLASHPT 16 FSC FSC 4 HAZARD CHARACTERISTIC CODE HCC 5 IATA PROPER SHIPPING NAME IATAPSNNAM IATA PSN CODE IATAPSN 4 IATA UN ID NUMBER IATAUNNO 4 IMO PROPER SHIPPING NAME IMOPSNNAME IMO PSN CODE IMOPSN 4 IMO UN NUMBER IMOUNNO 4 INGREDIENT INGREDNT 120 INGREDIENT FOCAL POINT INGFOCALPT 2 ITEM NAME ITEMNAME 60 LABEL REQUIRED LABLREQD 3 LOWER EXPLOSIVE LIMIT LEL 12 MANUFACTURER'S CAGE CAGE 5 MANUFACTURER'S CITY MFRCITY 40 MANUFACTURER'S NAME MFRNAME 50 MANUFACTURER'S STATE MFRSTATE 2 MSDS SERIAL NUMBER MSDSSERNO 5 NET PROPELLANT WEIGHT-AMMO PROPWT NIIN NIIN 9 NIOSH (RTECS) NUMBER RTECS 9 N.O.S. SHIPPING NAME TECHNOS 108 PART NO. INDICATOR PNIND 2 PART NUMBEWTRADE NAME PARTNO 60 PERCENT PERCENT 7 PERCENT VOLATILES BY VOLUME PCTVOL PH PH 6 PROPRIETARY PROPRIET 3 SAFETY FOCAL POINT SAFFOCALPT 2 SPECIFIC GRAVITY SPECGRAV 15 SPECIFICATION NUMBER SPECNO 20 SPEC TYPE, GRADE, CLASS TYGRCL 20 SUPPLY ITEM MANAGER ITEMMGR 3 TRANS DATA REVIEW DATE TRNTECHREQ TRANSPORTATION FOCAL POINT TRNFOC ALPNT UNIT OF ISSUE UI 2 UPPER EXPLOSIVE LIMIT UEL 12 VAPOR DENSITY (AIR=l) VAPDENS 10
5
100
100
100
7
6
7 2
NON-SEARCHABLE HMIS FIELDS
HMIS FIELDNAME dBase III+ FIELDNAME FIELD LENGTH
1 ST EPA HAZ WST CHAR NEW EPCHARNEWl 25 2ND EPA HAZ WST CHAR NEW ' EPCHARNE W2 25 3RD EPA HAZ WST CHAR NEW EPCHARNEW3 25 ACGIH TLV ACGIHTLV 20 ACUTE HEALTH HAZARD-MODERATE ACUTHAZMOD 1
--

ACUTE HEALTH HAZARD-NONE ACUTHAZNON 1 ACUTE HEALTH HAZARD-SEVERE ACUTHAZSEV 1 ACUTE HEALTH HAZARD-SLIGHT ACUTHAZSLT 1 ADDITIONAL TRANS DATA ADDDATA 254
ADDDATA 8 AFI BASIC PAC REF AFIBASIC 15 AFI CLASS AFICLASS 4 AFI LABEL AFILABEL 60 AFI PACK GROUP AFIPACK 8 AFI SPECIAL PROV AFISPEC 25 AFI SYMBOLS AFISYM 4 APPEARANCE AND ODOR APPODOR 80 AUTOIGNITION TEMPERATURE AUTOIGN 6 BOILING POINT BOILPT 11 CHRONIC HAZARD CHRONICHAZ 3 COAST GUARD AMMUNITION CODE CGAMMOCD 3 COMMON NAME COMMNAME 60 COND TO AVOID (POLY) CONDPOLY 120 COND TO AVOID (STABILITY) CONDSTAB 120 CONTACT HAZARD-MODERATE CONTHAZMOD 1 CONTACT HAZARD-NONE CONTHAZNON CONTACT HAZARD-SEVERE CONTHAZSEV CONTACT HAZARD-SLIGHT CONTHAZSLT
DECOMPOSITION TEMPERATURE DECOMTEM DISPOSAL DATA ACTION CODE DSPACTCD DISPOSAL DATA REVIEW DATE DSPTECHREV DISPOSAL SUPPLEMENTAL DATA DSPSUPDATl
DOT CLASS DOTCLASS 9 DOT LABEL DOTLABEL 38 DOT PACK GROUP DOTPACK 8 DOT SYMBOL DOTSYM 4 DOTDOD EXEMPTION NUMBER DOTEXEMF' EMERGENCYEIRST AID PROC EMERPROC
CORROSION RATE (IPY) CORRATE 8
DSPSUPDAT2 46
EMERPROC2 146
1 1
1
11 1
7 254
12 254
EMERGENCY PH. NO. FROM LABEL LABLEMRPHN 35 EVAPORATION RATE AND REF EVAPRATE 25 EXPLANATION CARCINOGENICITY EXPLCANC 120 EXTINGUISHING MEDIA EXTMEDI A 120 EYE PROTECTION EYEPROT 40 FIRE HAZARD-MODERATE FIREHAZMOD 1 FIRE HAZARD-NONE FIREHAZNON 1 FIRE HAZARD-SEVERE FIREHAZSEV 1 FIRE HAZARD-SLIGHT FIREHAZSLT 1 FLASH POINT METHOD FLPTMETH 6 FORM (RADIOACTIVE MATL) FORM 8 HAZARDOUS DECOMP PRODUCTS DECOMPROD 120
HEALTH HAZ ACUTE AND CHRONIC HLTHHAZ 254 HLTHHAZ2 66
IATA LABEL IATALABEL 30 IATA SUBSIDIARY RISK CLASS IATARISKCL 7 IATA UN CLASS IATAUNCLAS 4
-- - HAZARDOUS POLY OCCUR HAZPOLY 3
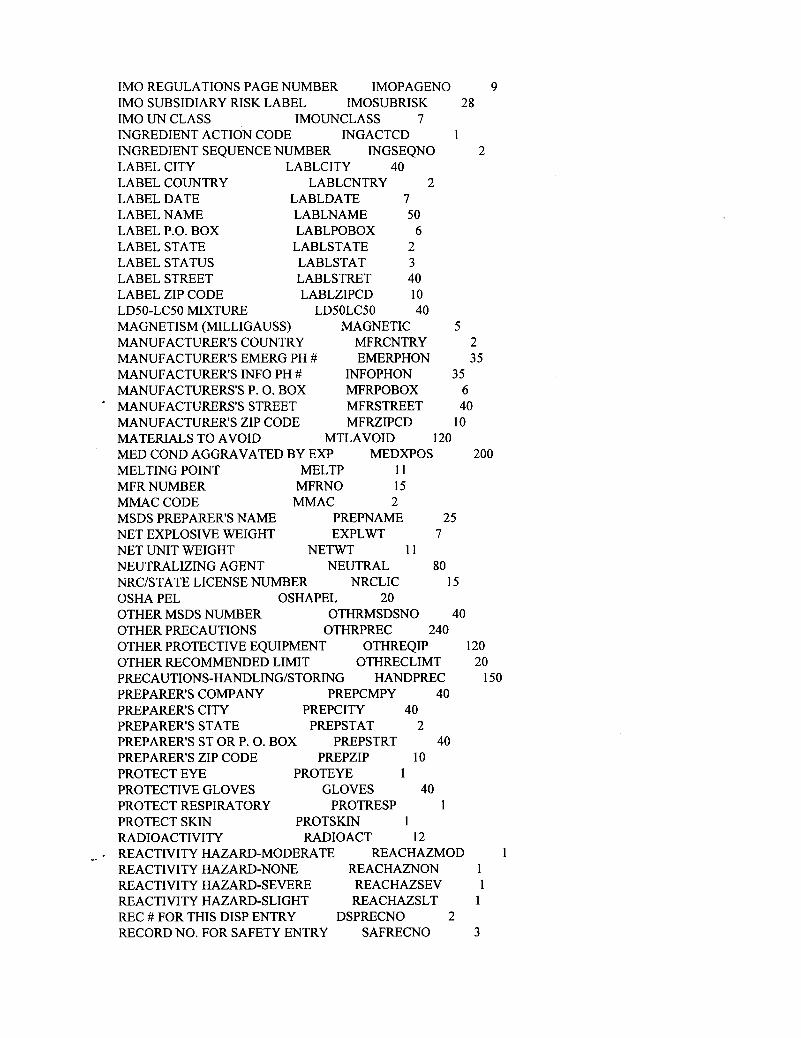
IMO REGULATIONS PAGE NUMBER IMOPAGENO 9 IMO SUBSIDIARY RISK LABEL IMOSUBRISK 28 IMO UN CLASS IMOUNCLASS 7 INGREDIENT ACTION CODE INGACTCD 1 INGREDIENT SEQUENCE NUMBER INGSEQNO 2 LABEL CITY LABLCITY 40 LABEL COUNTRY LABLCNTRY 2 LABEL DATE LABLDATE 7 LABEL NAME LABLNAME 50 LABEL P.O. BOX LABLPOBOX 6 LABEL STATE LABLSTATE 2 LABEL STATUS LABLSTAT 3 LABEL STREET LABLSTRET 40 LABEL ZIP CODE LABLZIPCD 10 LD50-LC50 MIXTURE LD50LC50 40 MAGNETISM (MILLIGAUSS) MAGNETIC 5 MANUFACTURERS COUNTRY MFRCNTRY 2 MANUFACTURERS EMERG PH # EMERPHON 35 MANUFACTURERS INFO PH # INFOPHON 35 MANUFACTURERS'S P. 0. BOX MFRPOBOX 6
* MANUFACTURERS'S STREET MFRSTREET 40 MANUFACTURER'S ZIP CODE MFRZIPCD 10 MATERIALS TO AVOID MTLAVOID 120 MED COND AGGRAVATED BY EXP MEDXPOS 200 MELTING POINT MELTP 11 MFR NUMBER MFRNO 15 MMAC CODE MMAC 2 MSDS PREPARER'S NAME PREPNAME 25 NET EXPLOSIVE WEIGHT EXPLWT 7 NET UNIT WEIGHT NETWT 11 NEUTRALIZING AGENT NEUTRAL 80 NRC/STATE LICENSE NUMBER NRCLIC 15 OSHA PEL OSHAPEL 20 OTHER MSDS NUMBER OTHRMSDSNO 40 OTHER PRECAUTIONS OTHRPREC 240
OTHER RECOMMENDED LIMIT OTHRECLIMT 20 PRECAUTIONS-HANDLINGBTORING HANDPREC 150 PREPARER'S COMPANY PREPCMPY 40 PREPARER'S CITY PREPCITY 40 PREPARER'S STATE PREPSTAT 2 PREPARER'S ST OR P. 0. BOX PREPSTRT 40 PREPARER'S ZIP CODE PREPZIP 10 PROTECT EYE PROTEYE 1 PROTECTIVE GLOVES GLOVES 40 PROTECT RESPIRATORY PROTRESP 1 PROTECT SKIN PROTSKIN 1 RADIOACTIVITY RADIOACT 12
-- - REACTIVITY HAZARD-MODERATE REACHAZMOD 1 REACTIVITY HAZARD-NONE REACHAZNON 1 REACTIVITY HAZARD-SEVERE REACHAZSEV 1 REACTIVITY HAZARD-SLIGHT REACHAZSLT 1 REC # FOR THIS DISP ENTRY DSPRECNO 2 RECORD NO. FOR SAFETY ENTRY SAFRECNO 3
OTHER PROTECTIVE EQUIPMENT OTHREQIP 120
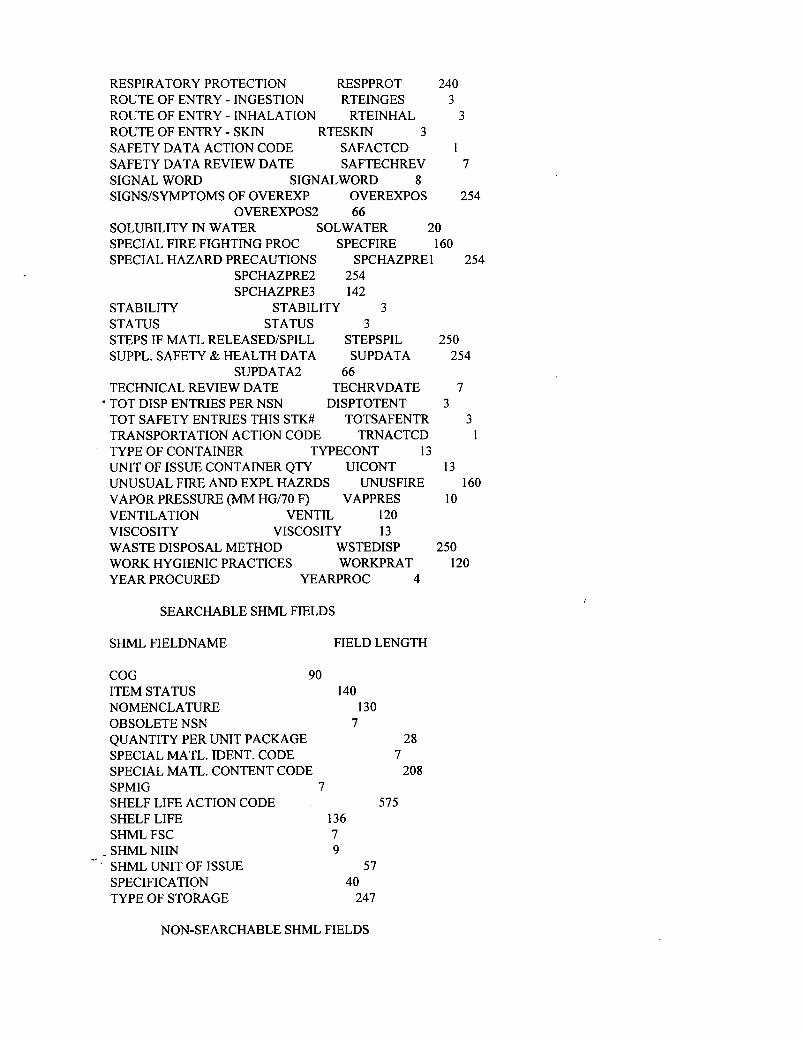
RESPIRATORY PROTECTION RESPPROT 240 ROUTE OF ENTRY - INGESTION RTEINGES 3 ROUTE OF ENTRY - INHALATION RTEINHAL 3 ROUTE OF ENTRY - SKIN RTESKIN 3 SAFETY DATA ACTION CODE SAFACTCD 1 SAFETY DATA REVIEW DATE SAFTECHREV 7 SIGNAL WORD SIGNALWORD 8 SIGNS/SYMPTOMS OF OVEREXP OVEREXPOS 254
OVEREXPOS2 66 SOLUBILITY IN WATER SOLWATER 20 SPECIAL FIRE FIGHTING PROC SPECFIRE 160 SPECIAL HAZARD PRECAUTIONS SPCHAZPREl 254
SPCHAZPRE2 254 SPCHAZPRE3 142
STABILITY STABILITY 3 STATUS STATUS 3 STEPS IF MATL RELEASED/SPILL STEPSPIL 250 SUPPL. SAFETY & HEALTH DATA SUPDATA 254
SUPDATA2 66 TECHNICAL REVIEW DATE TECHRVDATE 7 TOT DISP ENTRIES PER NSN DISPTOTENT 3 TOT SAFETY ENTRIES THIS STK# TOTSAFENTR 3 TRANSPORTATION ACTION CODE TRNACTCD 1 TYPE OF CONTAINER TYPECONT 13 UNIT OF ISSUE CONTAINER QTY UICONT 13 UNUSUAL FIRE AND EXPL HAZRDS UNUSFIRE 160 VAPOR PRESSURE (MM HG/70 F) VAPPRES 10 VENTILATION VENTIL 120 VISCOSITY VISCOSITY 13 WASTE DISPOSAL METHOD WSTEDISP 250 WORK HYGIENIC PRACTICES WORKPRAT 120 YEAR PROCURED YEARPROC 4
SEARCHABLE SHML FIELDS
SHML FIELDNAME FIELD LENGTH
COG 90 ITEM STATUS 140 NOMENCLATURE 130 OBSOLETE NSN 7 QUANTITY PER UNIT PACKAGE 28 SPECIAL MATL. IDENT. CODE 7 SPECIAL MATL. CONTENT CODE 208 SPMIG 7 SHELF LIFE ACTION CODE 575 SHELF LIFE 136 SHML FSC 7
- SHML NIIN 9 SHML UNIT OF ISSUE 57 SPECIFICATION 40 TYPE OF STORAGE 247
--
NON-SEARCHABLE SHML FIELDS
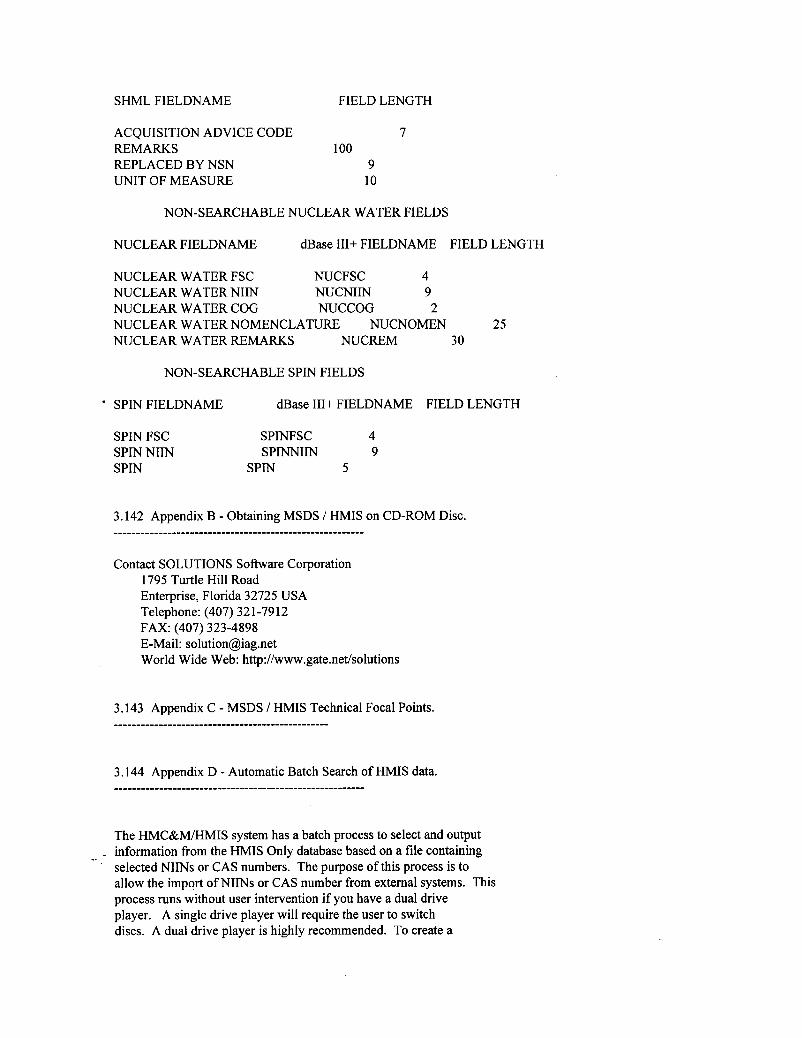
SHML FIELDNAME FIELD LENGTH
ACQUISITION ADVICE CODE 7 REMARKS 100 REPLACED BY NSN 9 UNIT OF MEASURE 10
NON-SEARCHABLE NUCLEAR WATER FIELDS
NUCLEAR FIELDNAME dBase III+ FIELDNAME FIELD LENGTH
NUCLEAR WATER FSC NUCFSC 4 NUCLEAR WATER NIIN NUCNIIN 9 NUCLEAR WATER COG NUCCOG 2 NUCLEAR WATER NOMENCLATURE NUCNOMEN 25 NUCLEAR WATER REMARKS NUCREM 30
NON-SEARCHABLE SPIN FIELDS
' SPIN FIELDNAME dBase III+ FIELDNAME FIELD LENGTH
SPIN FSC SPINFSC 4 SPIN NIIN SPINNIIN 9 SPIN SPIN 5
Contact SOLUTIONS Software Corporation 1795 Turtle Hill Road Enterprise, Florida 32725 USA Telephone: (407) 32 1-79 12
E-Mail: [email protected] World Wide Web: http://www.gate.net/solutions
FAX: (407) 323-4898
3.143 Appendix C - MSDS / HMIS Technical Focal Points.
The HMC&M/HMIS system has a batch process to select and output -- - information from the HMIS Only database based on a file containing
selected NIINs or CAS numbers. The purpose of this process is to allow the import of NIINs or CAS number from external systems. This process runs without user intervention if you have a dual drive player. A single drive player will require the user to switch discs. A dual drive player is highly recommended. To create a
.
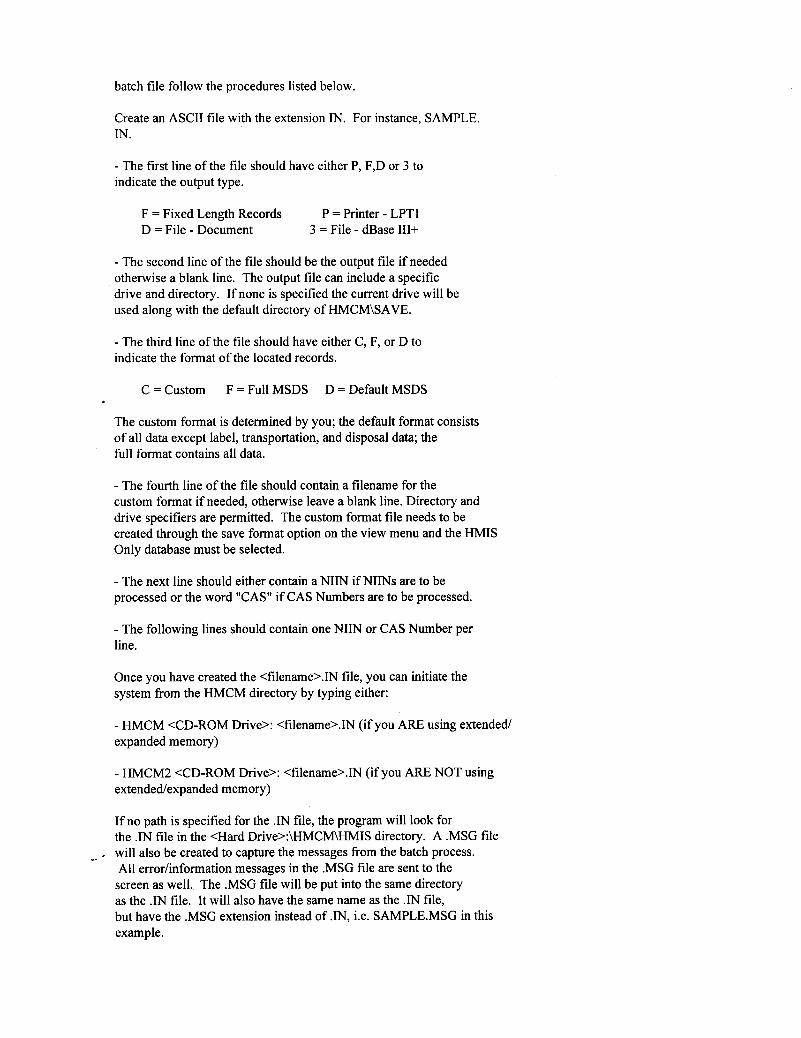
batch file follow the procedures listed below.
Create an ASCII file with the extension IN. For instance, SAMPLE. IN.
- The first line of the file should have either P, F,D or 3 to indicate the output type.
F = Fixed Length Records D = File - Document
P = Printer - LPTl 3 = File - dBase III+
- The second line of the file should be the output file if needed otherwise a blank line. The output file can include a specific drive and directory. If none is specified the current drive will be used along with the default directory of HMCWSAVE.
- The third line of the file should have either C, F, or D to indicate the format of the located records.
C = Custom F = Full MSDS D = Default MSDS
The custom format is determined by you; the default format consists of all data except label, transportation, and disposal data; the full format contains all data.
- The fourth line of the file should contain a filename for the custom format if needed, otherwise leave a blank line. Directory and drive specifiers are permitted. The custom format file needs to be created through the save format option on the view menu and the HMIS Only database must be selected.
- The next line should either contain a NIIN if NIINs are to be processed or the word "CAS" if CAS Numbers are to be processed.
- The following lines should contain one NIIN or CAS Number per line.
Once you have created the <filename>.IN file, you can initiate the system from the HMCM directory by typing either:
- HMCM <CD-ROM Drive>: <filename>.IN (if you ARE using extended expanded memory)
- HMCM2 <CD-ROM Drive>: <filename>.IN (if you ARE NOT using extendedexpanded memory)
If no path is specified for the .IN file, the program will look for the .IN file in the <Hard Drive>:\HMCM\HMIS directory. A .MSG file
-- - will also be created to capture the messages from the batch process. All errorhformation messages in the .MSG file are sent to the screen as well.. The .MSG file will be put into the same directory as the .IN file. It will also have the same name as the .IN file, but have the .MSG extension instead of .IN, i.e. SAMPLE.MSG in this example.
.
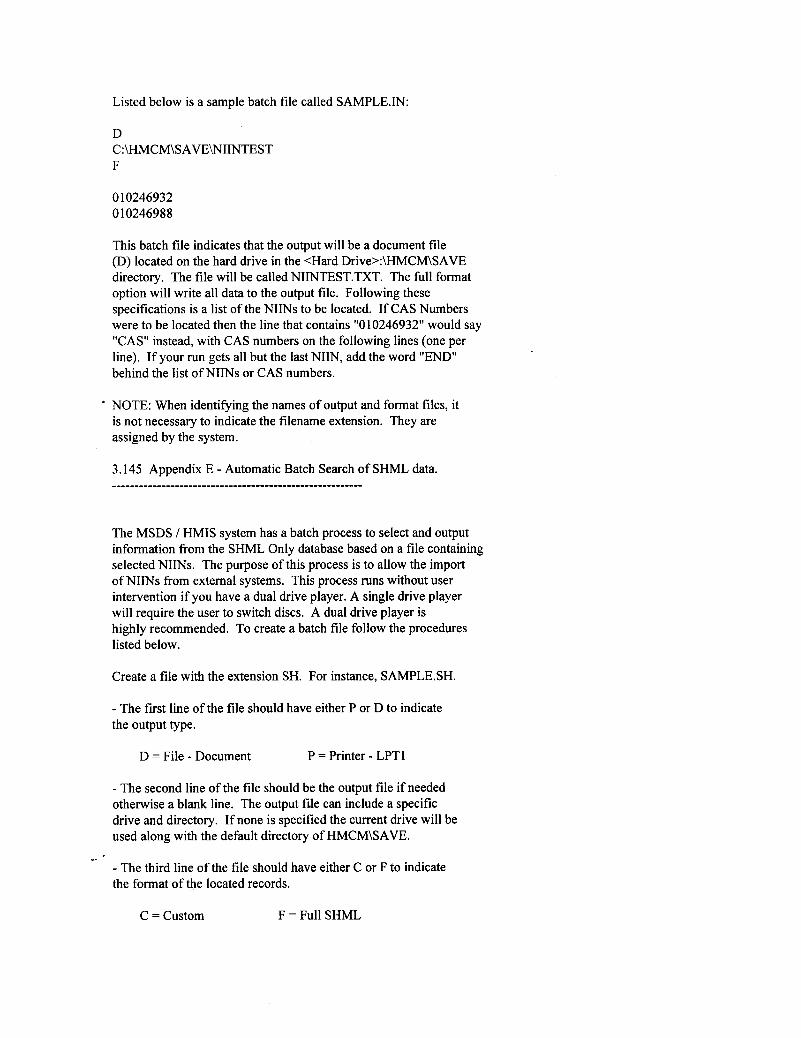
Listed below is a sample batch file called SAMPLE.IN:
D C:\HMCM\SAVE\NIINTEST F
0 10246932 0 10246988
This batch file indicates that the output will be a document file (D) located on the hard drive in the <Hard Drive>:\HMCM\SAVE directory. The file will be called NIINTEST.TXT. The full format option will write all data to the output file. Following these specifications is a list of the NIINs to be located. If CAS Numbers were to be located then the line that contains "0 10246932" would say "CAS" instead, with CAS numbers on the following lines (one per line). If your run gets all but the last NIIN, add the word "END" behind the list of NIINs or CAS numbers.
NOTE: When identifying the names of output and format files, it is not necessary to indicate the filename extension. They are assigned by the system.
The MSDS / HMIS system has a batch process to select and output information from the SHML Only database based on a file containing selected NIINs. The purpose of this process is to allow the import of NIINs from external systems. This process runs without user intervention if you have a dual drive player. A single drive player will require the user to switch discs. A dual drive player is highly recommended. To create a batch file follow the procedures listed below.
Create a file with the extension SH. For instance, SAMPLE.SH.
- The first line of the file should have either P or D to indicate the output type.
D = File - Document P = Printer - LPTl
- The second line of the file should be the output file if needed otherwise a blank line. The output file can include a specific drive and directory. If none is specified the current drive will be used along with the default directory of HMCWSAVE.
- The third line of the file should have either C or F to indicate the format of the located records.
-- .
C = Custom F = Full SHML
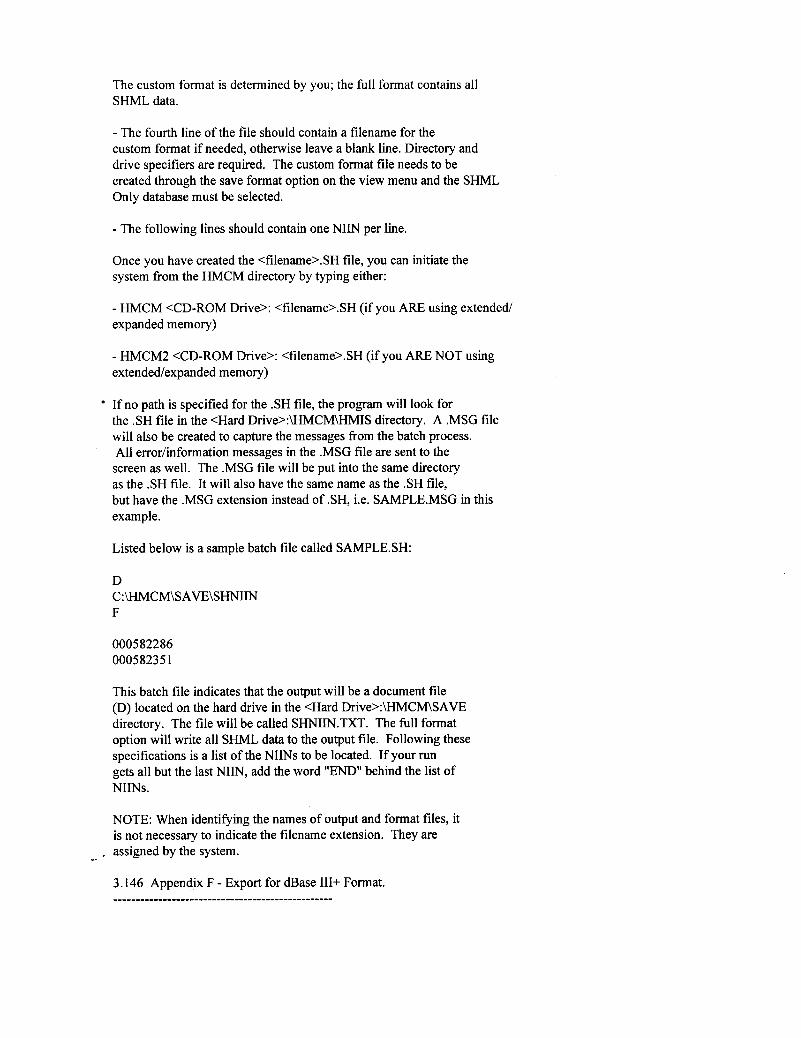
The custom format is determined by you; the full format contains all SHML data.
- The fourth line of the file should contain a filename for the custom format if needed, otherwise leave a blank line. Directory and drive specifiers are required. The custom format file needs to be created through the save format option on the view menu and the SHML Only database must be selected.
- The following lines should contain one NIIN per line.
Once you have created the <filename>.SH file, you can initiate the system from the HMCM directory by typing either:
- HMCM <CD-ROM Drive>: <filename>.SH (if you ARE using extended expanded memory)
- HMCM2 <CD-ROM Drive? <filename>.SH (if you ARE NOT using extendedexpanded memory)
If no path is specified for the .SH file, the program will look for the .SH file in the <Hard Drive>:\HMCM\HMIS directory. A .MSG file will also be created to capture the messages from the batch process. All errorhformation messages in the .MSG file are sent to the screen as well. The .MSG file will be put into the same directory as the .SH file. It will also have the same name as the .SH file, but have the .MSG extension instead of .SH, i.e. SAMPLE.MSG in this example.
Listed below is a sample batch file called SAMPLE.SH:
D C:WMCM\SAVE\SHNIIN F
000582286 000582351
This batch file indicates that the output will be a document file (D) located on the hard drive in the <Hard Drive>:\HMCM\SAVE directory. The file will be called SHNIIN.TXT. The full format option will write all SHML data to the output file. Following these specifications is a list of the NIINs to be located. If your run gets all but the last NIIN, add the word "END" behind the list of NIINs.
NOTE: When identifying the names of output and format files, it is not necessary to indicate the filename extension. They are
-- - assigned by the system.
3.146 Appendix F - Export for dBase III+ Format.
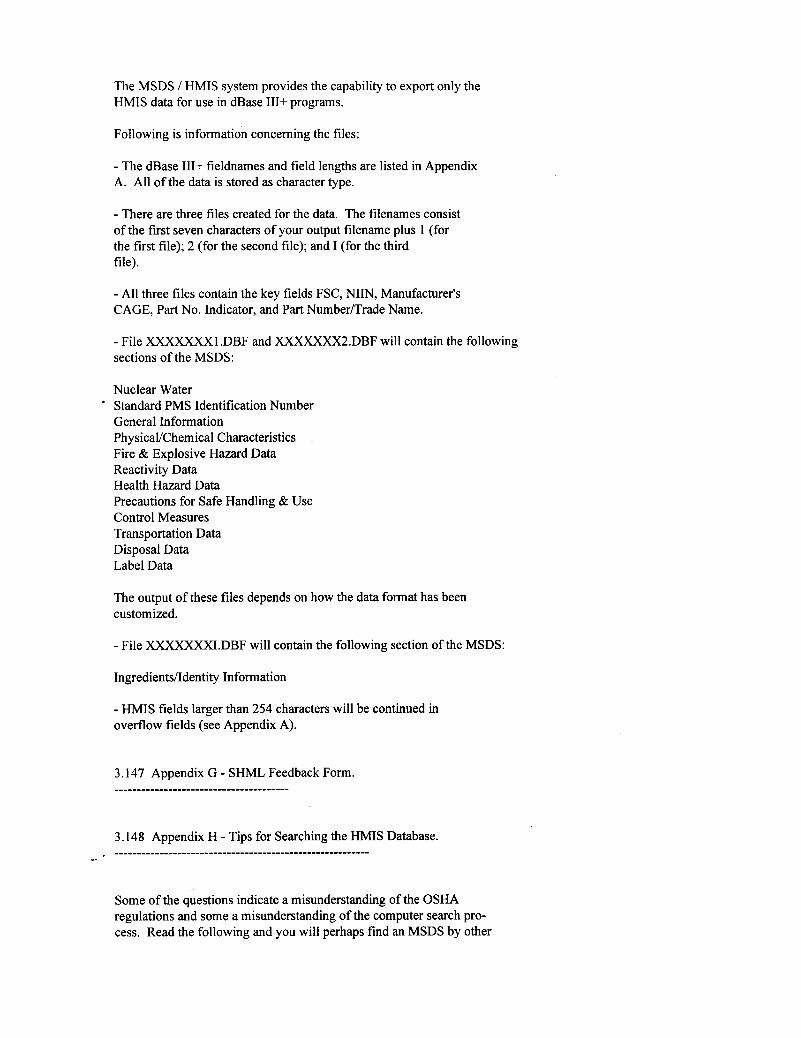
The MSDS / HMIS system provides the capability to export only the HMIS data for use in dBase III+ programs.
Following is information concerning the files:
- The dBase III+ fieldnames and field lengths are listed in Appendix A. All of the data is stored as character type.
- There are three files created for the data. The filenames consist of the first seven characters of your output filename plus 1 (for the first file); 2 (for the second file); and I (for the third file).
- All three files contain the key fields FSC, NIIN, Manufacturer's CAGE, Part No. Indicator, and Part NumbedTrade Name.
- File XXXXXXX1.DBF and XXXXXXX2.DBF will contain the following sections of the MSDS:
Nuclear Water Standard PMS Identification Number General Information PhysicaVChemical Characteristics Fire & Explosive Hazard Data Reactivity Data Health Hazard Data Precautions for Safe Handling & Use Control Measures Transportation Data Disposal Data Label Data
The output of these files depends on how the data format has been customized.
- File XXXXXXXI.DBF will contain the following section of the MSDS:
IngredientdIdentity Information
- HMIS fields larger than 254 characters will be continued in overflow fields (see Appendix A).
Some of the questions indicate a misunderstanding of the OSHA regulations and some a misunderstanding of the computer search pro- cess. Read the following and you will perhaps find an MSDS by other
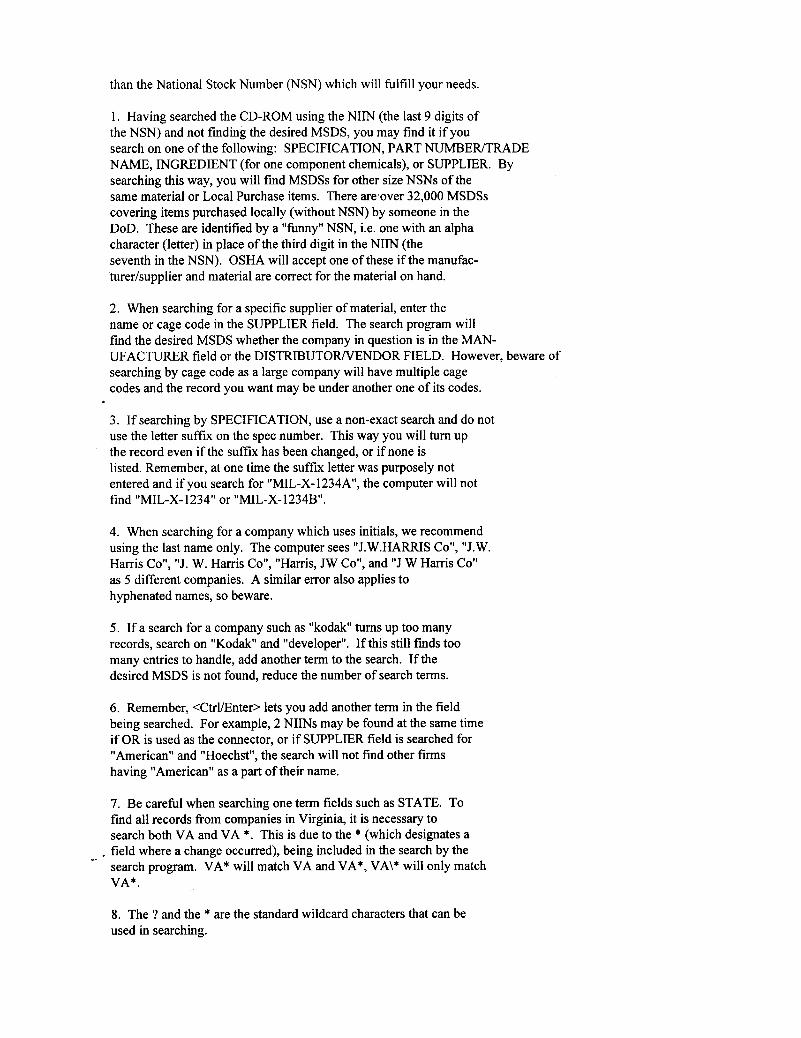
than the National Stock Number (NSN) which will fulfill your needs.
1. Having searched the CD-ROM using the NIIN (the last 9 digits of the NSN) and not finding the desired MSDS, you may find it if you search on one of the following: SPECIFICATION, PART NUMBEWTRADE NAME, INGREDIENT (for one component chemicals), or SUPPLIER. By searching this way, you will find MSDSs for other size NSNs of the same material or Local Purchase items. There are'over 32,000 MSDSs covering items purchased locally (without NSN) by someone in the DoD. These are identified by a "funny" NSN, i.e. one with an alpha character (letter) in place of the third digit in the NIIN (the seventh in the NSN). OSHA will accept one of these if the manufac- turerhpplier and material are correct for the material on hand.
2. When searching for a specific supplier of material, enter the name or cage code in the SUPPLIER field. The search program will find the desired MSDS whether the company in question is in the MAN- UFACTURER field or the DISTRIBUTORNENDOR FIELD. However, beware of searching by cage code as a large company will have multiple cage codes and the record you want may be under another one of its codes.
3. If searching by SPECIFICATION, use a non-exact search and do not use the letter suffix on the spec number. This way you will turn up the record even if the suffix has been changed, or if none is listed. Remember, at one time the suffix letter was purposely not entered and if you search for "MIL-X-l234A", the computer will not find "MIL-X-1234" or "MIL-X- 1234B".
4. When searching for a company which uses initials, we recommend using the last name only. The computer sees "J.W.HARRIS Cot', "J.W. Harris Co'l, "J. W. Harris Co", "Harris, JW Co", and "J W Harris Co" as 5 different companies. A similar error also applies to hyphenated names, so beware.
5. If a search for a company such as "kodak" turns up too many records, search on "Kodak" and 'Ideveloper''. If this still finds too many entries to handle, add another term to the search. If the desired MSDS is not found, reduce the number of search terms.
6. Remember, <Ctrl/Enter> lets you add another term in the field being searched. For example, 2 NIINs may be found at the same time if OR is used as the connector, or if SUPPLIER field is searched for "American" and "Hoechst", the search will not find other f m s having "American" as a part of their name.
7. Be careful when searching one term fields such as STATE. To find all records from companies in Virginia, it is necessary to search both VA and VA *. This is due to the * (which designates a
- field where a change occurred), being included in the search by the . search program. VA* will match VA and VA*, VA\* will only match
-- VA*.
8. The ? and the * are the standard wildcard characters that can be used in searching.
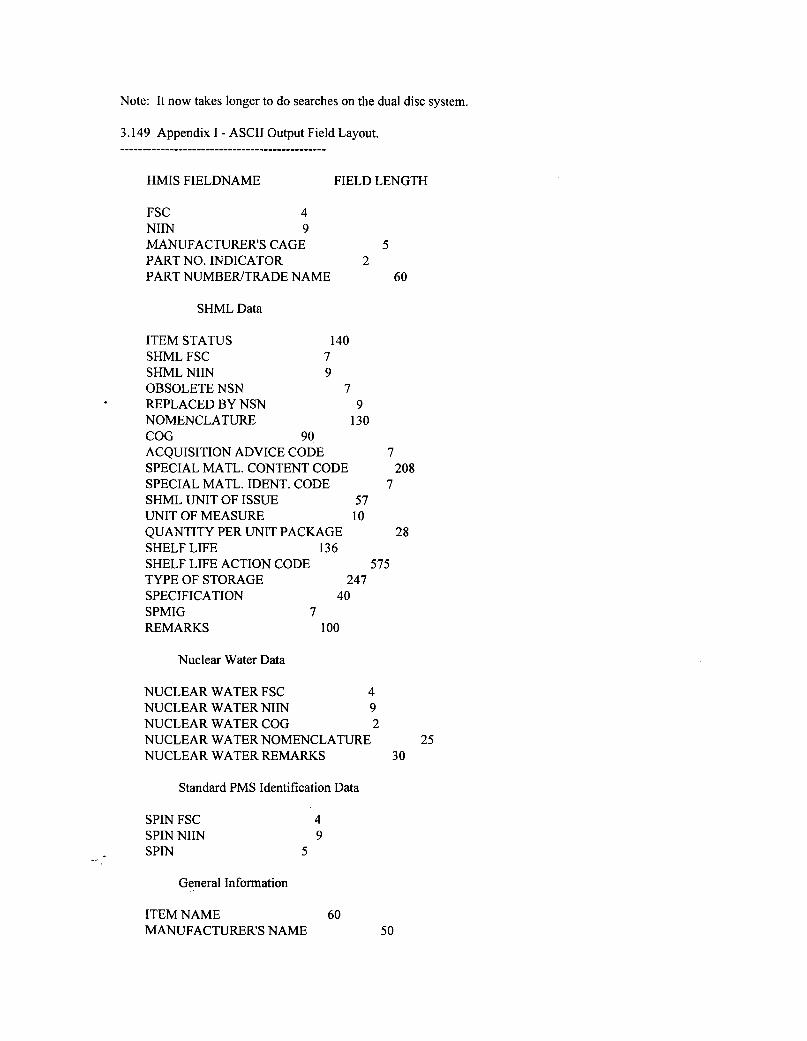
Note: It now takes longer to do searches on the dual disc system.
HMIS FIELDNAME FIELD LENGTH
FSC 4 NIIN 9 MANUFACTURERS CAGE 5 PART NO. INDICATOR 2 PART NUMBENTRADE NAME 60
SHML Data
ITEM STATUS 140 SHML FSC 7 SHML NIIN 9 OBSOLETE NSN 7 REPLACED BY NSN 9 NOMENCLATURE 130 COG 90
SPECIAL MATL. CONTENT CODE 208 SPECIAL MATL. IDENT. CODE 7 SHML UNIT OF ISSUE 57 UNIT OF MEASURE 10 QUANTITY PER UNIT PACKAGE 28 SHELF LIFE 136 SHELF LIFE ACTION CODE 575 TYPE OF STORAGE 247 SPECIFICATION 40 SPMIG 7 REMARKS 100
ACQUISITION ADVICE CODE 7
Nuclear Water Data
NUCLEAR WATER FSC 4 NUCLEAR WATER NIIN 9 NUCLEAR WATER COG 2 NUCLEAR WATER NOMENCLATURE 25 NUCLEAR WATER REMARKS 30
Standard PMS Identification Data
SPIN FSC SPIN NIIN SPIN --
General Information
4 9
5
ITEM NAME 60 MANUFACTURER'S NAME 50
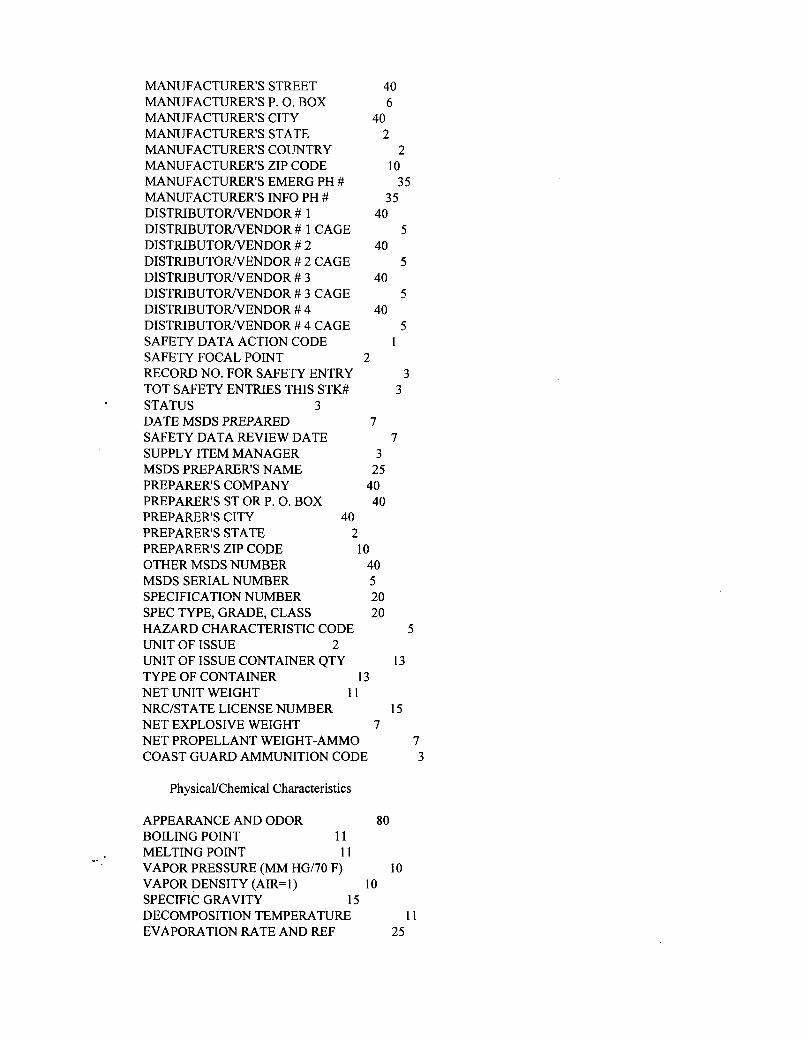
MANUFACTURER'S STREET MANUFACTURER'S P. 0. BOX MANUFACTURER'S CITY MANUFACTURER'S STATE MANUFACTURER'S COUNTRY MANUFACTURER'S ZIP CODE MANUFACTURER'S EMERG PH # MANUFACTURER'S INFO PH # DISTRIBUTORNENDOR # 1 DISTRIBUTORNENDOR # 1 CAGE DISTRIBUTORNENDOR # 2 DISTRIBUTORNENDOR # 2 CAGE DISTRIBUTORNENDOR # 3 DISTRIBUTORNENDOR # 3 CAGE DISTRIBUTORNENDOR # 4 DISTRIBUTORNENDOR # 4 CAGE SAFETY DATA ACTION CODE SAFETY FOCAL POINT RECORD NO. FOR SAFETY ENTRY TOT SAFETY ENTRIES THIS STK# STATUS 3 DATE MSDS PREPARED SAFETY DATA REVIEW DATE SUPPLY ITEM MANAGER MSDS PREPARER'S NAME PREPARER'S COMPANY PREPARER'S ST OR P. 0. BOX PREPARER'S CITY 40
40 6
40 2
2
35 10
35 40
40
40
40
5
5
5
5 1
2 3
3
7 7
3 25
40 40
PREPARER'S STATE 2 PREPARER'S ZIP CODE 10 OTHER MSDS NUMBER 40 MSDS SERIAL NUMBER 5 SPECIFICATION NUMBER 20 SPEC TYPE, GRADE, CLASS 20 HAZARD CHARACTERISTIC CODE 5 UNIT OF ISSUE 2 UNIT OF ISSUE CONTAINER QTY TYPE OF CONTAINER 13 NET UNIT WEIGHT 11 NRC/STATE LICENSE NUMBER 15 NET EXPLOSIVE WEIGHT 7 NET PROPELLANT WEIGHT-AMMO 7 COAST GUARD AMMUNITION CODE 3
13
PhysicaVChemical Characteristics
APPEARANCE AND ODOR 80 BOILING POINT 11 MELTING POINT 11 VAPOR PRESSURE (MM HG/70 F) VAPOR DENSITY (AIR=l) 10 SPECIFIC GRAVITY 15 DECOMPOSITION TEMPERATURE 11 EVAPORATION RATE AND REF 25
10
I
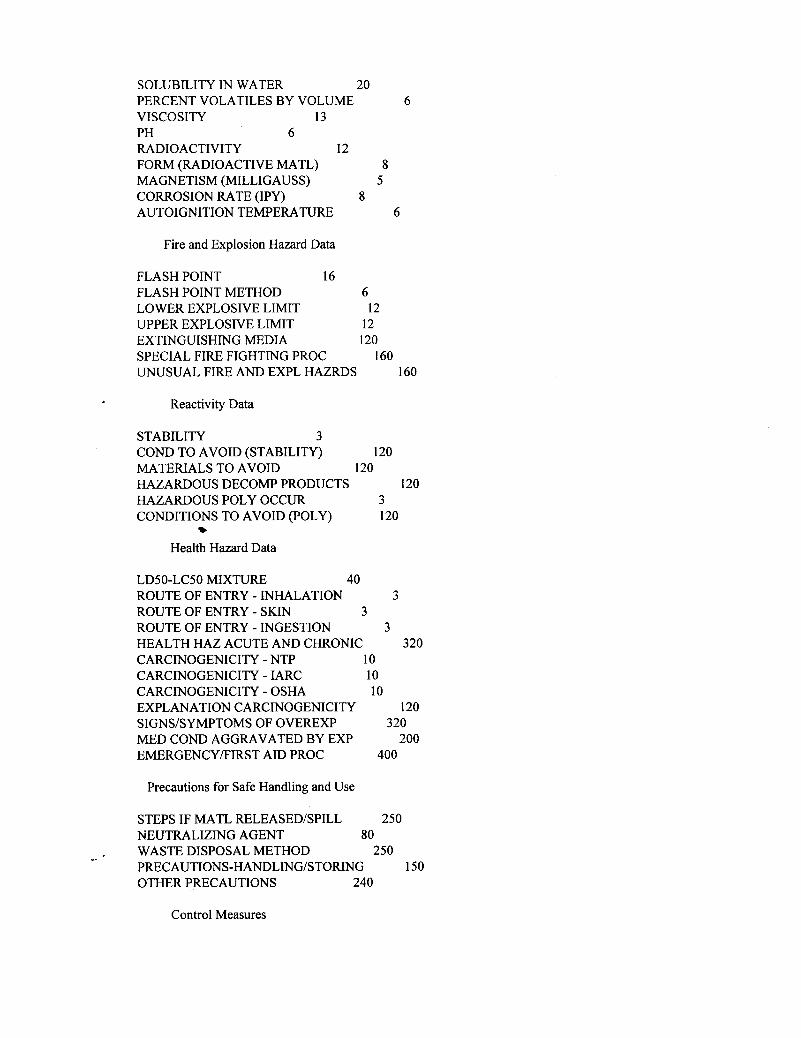
SOLUBILITY IN WATER 20 PERCENT VOLATILES BY VOLUME 6 VISCOSITY 13 PH 6 RADIOACTIVITY 12 FORM (RADIOACTIVE MATL) 8 MAGNETISM (MILLIGAUSS) 5 CORROSION RATE (IPY) 8 AUTOIGNITION TEMPERATURE 6
Fire and Explosion Hazard Data
FLASH POINT 16 FLASH POINT METHOD 6 LOWER EXPLOSIVE LIMIT 12 UPPER EXPLOSIVE LIMIT 12 EXTINGUISHING MEDIA 120 SPECIAL FIRE FIGHTING PROC 160 UNUSUAL FIRE AND EXPL HAZRDS 160
Reactivity Data
STABILITY 3 COND TO AVOID (STABILITY) 120 MATERIALS TO AVOID 120 HAZARDOUS DECOMP PRODUCTS 120 HAZARDOUS POLY OCCUR 3 CONDITIONS TO AVOID (POLY) 120
w
Health Hazard Data
LD50-LC50 MIXTURE 40 ROUTE OF ENTRY - INHALATION ROUTE OF ENTRY - SKIN 3 ROUTE OF ENTRY - INGESTION HEALTH HAZ ACUTE AND CHRONIC CARCINOGENICITY - NTP 10 CARCINOGENICITY - IARC 10 CARCINOGENICITY - OSHA 10 EXPLANATION CARCINOGENICITY 120 SIGNS/SYMPTOMS OF OVEREXP 320 MED COND AGGRAVATED BY EXP 200 EMERGENCY/FIRST AID PROC 400
3
3 320
Precautions for Safe Handling and Use
STEPS IF MATL RELEASED/SPILL 250 NEUTRALIZING AGENT 80
PRECAUTIONS-HANDLING/STORING 150 OTHER PRECAUTIONS 240
- WASTE DISPOSAL METHOD 250 --
Control Measures
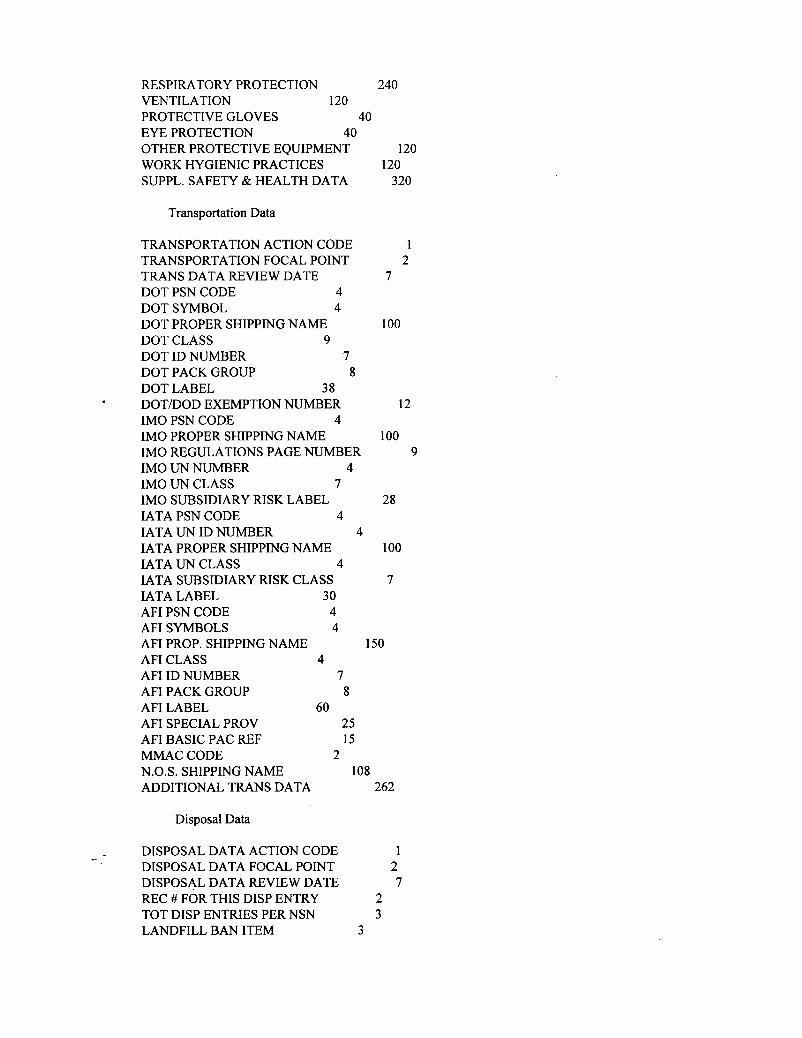
RESPIRATORY PROTECTION 240 VENTILATION 120 PROTECTIVE GLOVES 40 EYE PROTECTION 40 OTHER PROTECTIVE EQUIPMENT WORK HYGIENIC PRACTICES SUPPL. SAFETY 8z HEALTH DATA
Transportation Data
TRANSPORTATION ACTION CODE TRANSPORTATION FOCAL POINT TRANS DATA REVIEW DATE DOT PSN CODE 4 DOT SYMBOL 4 DOT PROPER SHIPPING NAME DOT CLASS 9 DOT ID NUMBER 7 DOT PACK GROUP 8 DOT LABEL 38 DOTDOD EXEMPTION NUMBER IMO PSN CODE 4 IMO PROPER SHIPPING NAME IMO REGULATIONS PAGE NUMBER IMO UN NUMBER 4 IMO UN CLASS 7 IMO SUBSIDIARY RISK LABEL IATA PSN CODE 4 IATA UN ID NUMBER 4 IATA PROPER SHIPPING NAME IATA UN CLASS 4 IATA SUBSIDIARY RISK CLASS IATA LABEL 30 AFI PSN CODE 4
120 120
320
1 2
7
100
12
LOO 9
28
100
7
AFI SYMBOLS 4 AFI PROP. SHIPPING NAME 150 AFI CLASS 4 AFI ID NUMBER 7 AFI PACK GROUP 8 AFI LABEL 60 AFI SPECIAL PROV 25 AFI BASIC PAC REF 15 MMAC CODE 2 N.O.S. SHIPPING NAME 108 ADDITIONAL TRANS DATA 262
Disposal Data
DISPOSAL DATA ACTION CODE 1 DISPOSAL DATA FOCAL POINT 2 DISPOSAL DATA REVIEW DATE 7 REC # FOR THIS DISP ENTRY TOT DISP ENTRIES PER NSN LANDFILL BAN ITEM 3
--
2 3
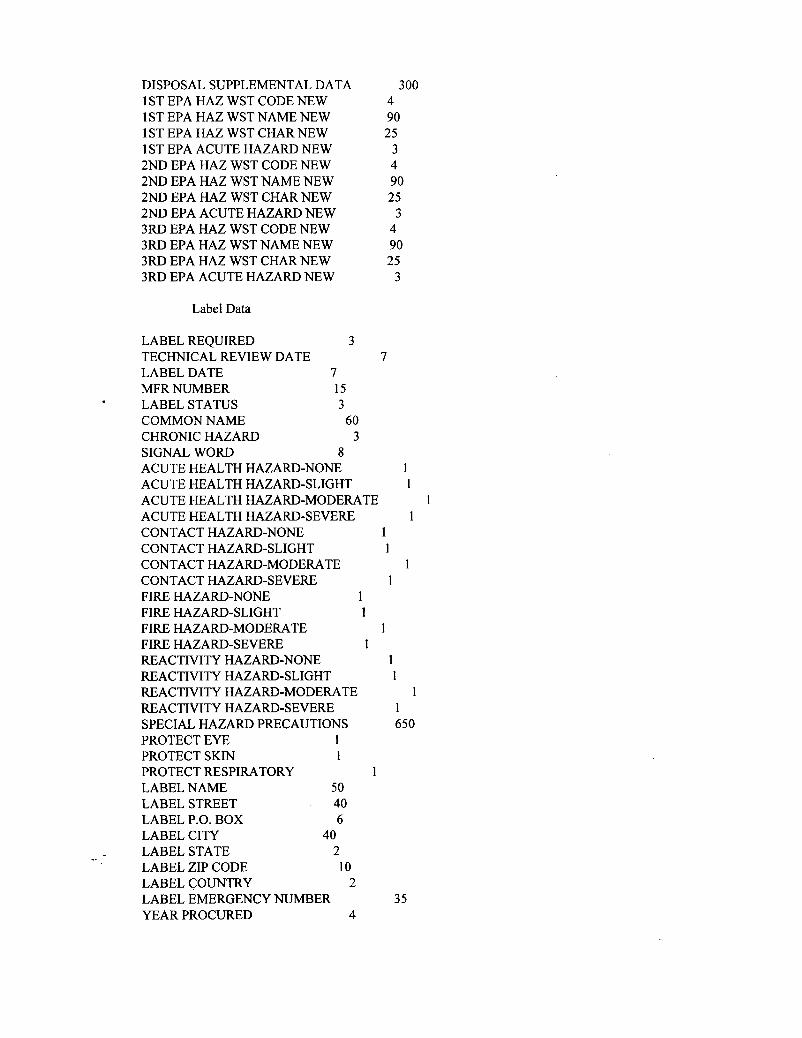
DISPOSAL SUPPLEMENTAL DATA 1 ST EPA HAZ WST CODE NEW 1 ST EPA HAZ WST NAME NEW 1 ST EPA HAZ WST CHAR NEW 1 ST EPA ACUTE HAZARD NEW 2ND EPA HAZ WST CODE NEW 2ND EPA HAZ WST NAME NEW 2ND EPA HAZ WST CHAR NEW 2ND EPA ACUTE HAZARD NEW 3RD EPA HAZ WST CODE NEW 3RD EPA HAZ WST NAME NEW 3RD EPA HAZ WST CHAR NEW 3RD EPA ACUTE HAZARD NEW
Label Data
LABEL REQUIRED 3 TECHNICAL REVIEW DATE LABEL DATE 7 MFR NUMBER 15 LABEL STATUS 3 COMMON NAME 60 CHRONIC HAZARD 3 SIGNAL WORD 8 ACUTE HEALTH HAZARD-NONE ACUTE HEALTH HAZARD-SLIGHT
300 4 90 25
3 4 90 25
3 4 90 25
3
7
1 1
ACUTE HEALTH HAZARD-MODERATE 1 ACUTE HEALTH HAZARD-SEVERE 1 CONTACT HAZARD-NONE 1 CONTACT HAZARD-SLIGHT 1 CONTACT HAZARD-MODERATE 1 CONTACT HAZARD-SEVERE 1 FIRE HAZARD-NONE 1 FIRE HAZARD-SLIGHT 1 FIRE HAZARD-MODERATE 1 FIRE HAZARD-SEVERE 1 REACTIVITY HAZARD-NONE REACTIVITY HAZARD-SLIGHT REACTIVITY HAZARD-MODERATE REACTIVITY HAZARD-SEVERE SPECIAL HAZARD PRECAUTIONS PROTECT EYE 1 PROTECT SKIN 1 PROTECT RESPIRATORY LABEL NAME 50 LABEL STREET 40 LABEL P.O. BOX 6 LABEL CITY 40 LABEL STATE 2 LABEL ZIP CODE lo LABEL COUNTRY 2 LABEL EMERGENCY NUMBER YEAR PROCURED 4
--
1 1
1 1 650
1
35
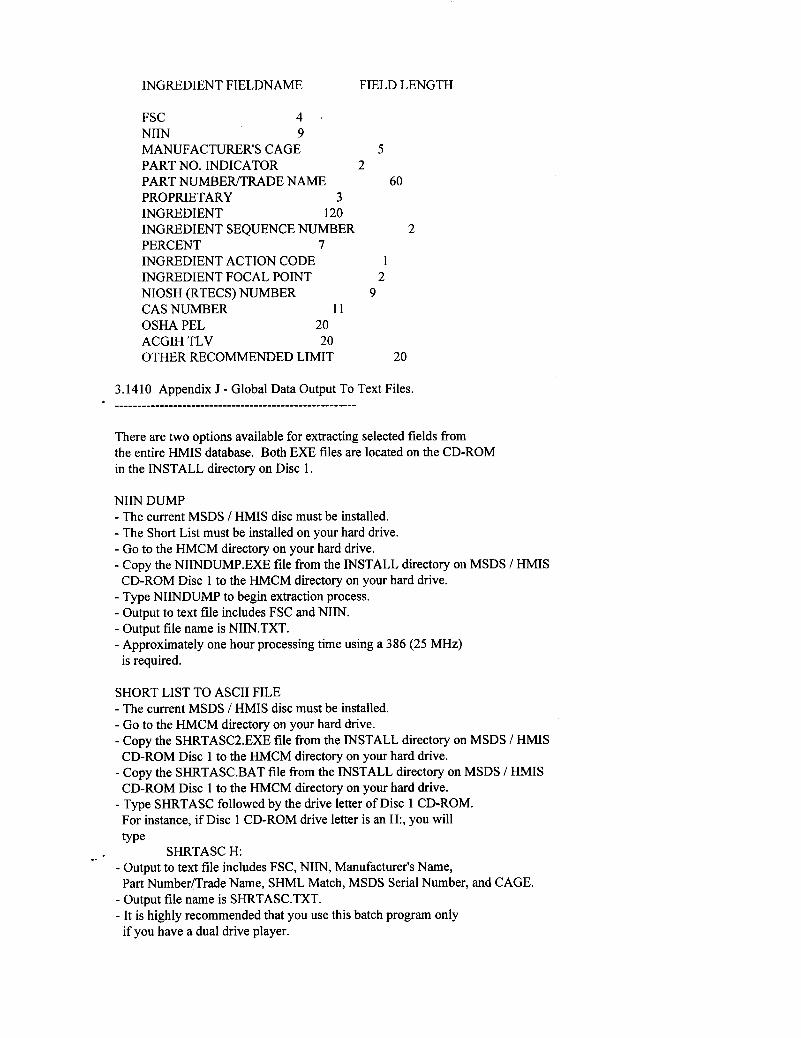
INGREDIENT FIELDNAME FIELD LENGTH
FSC 4 ' NIIN 9 MANUFACTURER'S CAGE 5 PART NO. INDICATOR 2 PART NUMBER/TRADE NAME 60 PROPRIETARY 3 INGREDIENT 120 INGREDIENT SEQUENCE NUMBER 2 PERCENT 7 INGREDIENT ACTION CODE 1 INGREDIENT FOCAL POINT 2 NIOSH (RTECS) NUMBER 9 CAS NUMBER 11 OSHA PEL 20 ACGIH TLV 20 OTHER RECOMMENDED LIMIT 20
3.1410 Appendix J - Global Data Output To Text Files.
There are two options available for extracting selected fields from the entire HMIS database. Both EXE files are located on the CD-ROM in the INSTALL directory on Disc 1.
NIIN DUMP - The current MSDS / HMIS disc must be installed. - The Short List must be installed on your hard drive. - Go to the HMCM directory on your hard drive. - Copy the NIINDUMP.EXE file from the INSTALL directory on MSDS / HMIS
- Type NIINDUMP to begin extraction process. - Output to text file includes FSC and NIIN. - Output file name is NIIN.TXT. - Approximately one hour processing time using a 386 (25 MHz)
CD-ROM Disc 1 to the HMCM directory on your hard drive.
is required.
SHORT LIST TO ASCII FILE - The current MSDS / HMIS disc must be installed. - Go to the HMCM directory on your hard drive. - Copy the SHRTASC2.EXE file from the INSTALL directory on MSDS / HMIS
- Copy the SHRTASC.BAT file fiom the INSTALL directory on MSDS / HMIS
- Type SHRTASC followed by the drive letter of Disc 1 CD-ROM.
CD-ROM Disc 1 to the HMCM directory on your hard drive.
CD-ROM Disc 1 to the HMCM directory on your hard drive.
For instance, if Disc 1 CD-ROM drive letter is an H:, you will type
SHRTASC H: -- . - Output to text file includes FSC, NIIN, Manufacturer's Name,
- Output file name is SHRTASC.TXT. - It is highly recommended that you use this batch program only
Part NumbedTrade Name, SHML Match, MSDS Serial Number, and CAGE.
if you have a dual drive player.

- Approximately 24 hours of processing time is required using a 486 (33 MHz).
The Reference (REF) system is a CD-ROM application designed to give quick access to various documents.
The database contains the following documents:
Hazardous Material User's Guide Shipboard Safety Equipment Shopping Guide Glossary of Hazardous Terms Shelf Life Extension Criteria Manual
3.22 Quickstart.
3.22 1 Purpose.
The purpose of QUICKSTART is to provide users with a clear, cus- tomized tutorial that will rapidly explain the most used features.
Not all program commands are covered in QUICKSTART. Before begin- ning QUICKSTART, please read the Main Screen Overview. This will familiarize you with the location of screen features such as movement keys, help bar, status indicators, etc.
All text examples will follow search and command sequences using the hot keys and/or pull-down menus selectable from the opening screen Menu Bar.
The Hot Keys.are described below:
Hot Key Description
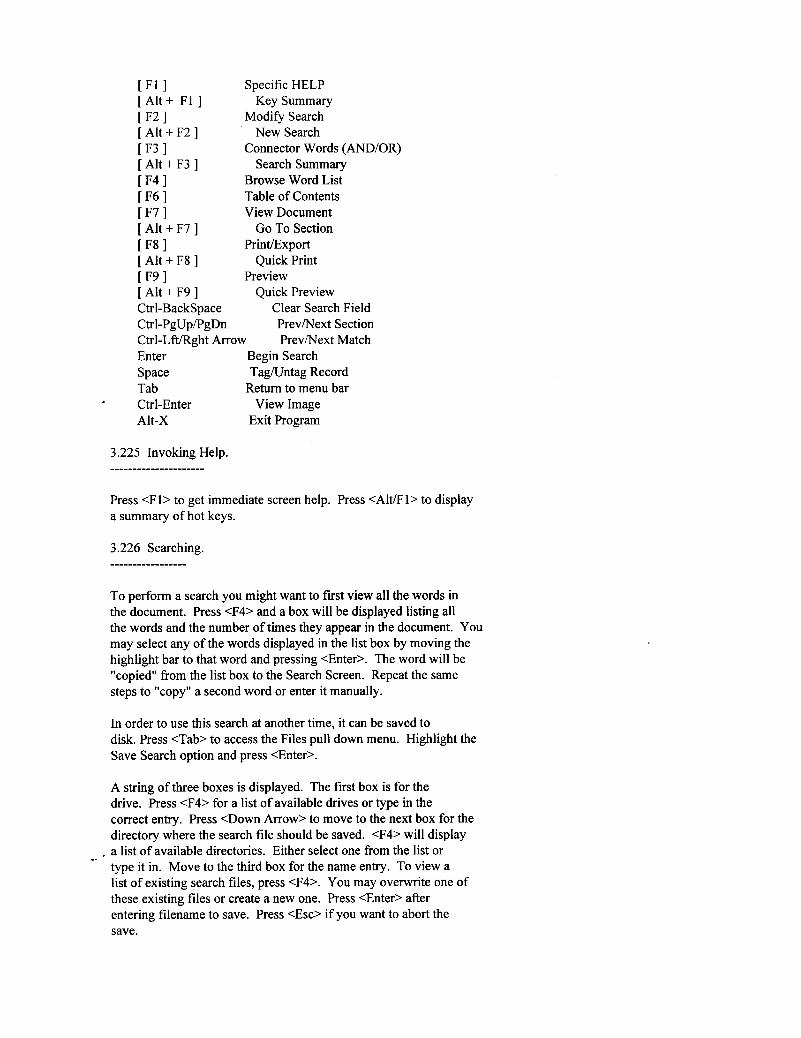
[ F l l Specific HELP [Al t+ F l ] Key Summary [ F2 1 Modify Search [ Alt + F2 ] New Search [F3 1 Connector Words (AND/OR) [ Alt + F3 ] Search Summary [ F4 1 Browse Word List [F61 Table of Contents ~ 7 1 View Document [ Alt + F7 ] Go To Section [ F 8 1 PrintExport [ Alt + F8 ] Quick Print [ F9 1 Preview [ Alt + F9 ] Quick Preview Ctrl-Backspace Clear Search Field Ctrl-PgUpRgDn Prev/Next Section Ctrl-Lft/Rght Arrow Prev/Next Match Enter Begin Search Space Tag/Untag Record Tab Return to menu bar Ctrl-Enter View Image Alt-X Exit Program
Press <F1> to get immediate screen help. Press <Alt/Fl> to display a summary of hot keys.
To perform a search you might want to first view all the words in the document. Press <F4> and a box will be displayed listing all the words and the number of times they appear in the document. You may select any of the words displayed in the list box by moving the highlight bar to that word and pressing <Enter>. The word will be "copied" from the list box to the Search Screen. Repeat the same steps to "copy" a second word or enter it manually.
In order to use this search at another time, it can be saved to disk. Press <Tab> to access the Files pull down menu. Highlight the Save Search option and press <Enter>.
A string of three boxes is displayed. The first box is for the drive. Press <F4> for a list of available drives or type in the correct entry. Press <Down Arrow> to move to the next box for the directory where the search file should be saved. <F4> will display
- a list of available directories. Either select one from the list or . type it in. Move to the third box for the name entry. To view a
--
list of existing search files, press <F4>. You may overwrite one of these existing files or create a new one. Press <Enter> after entering filename to save. Press <Ex> if you want to abort the save.
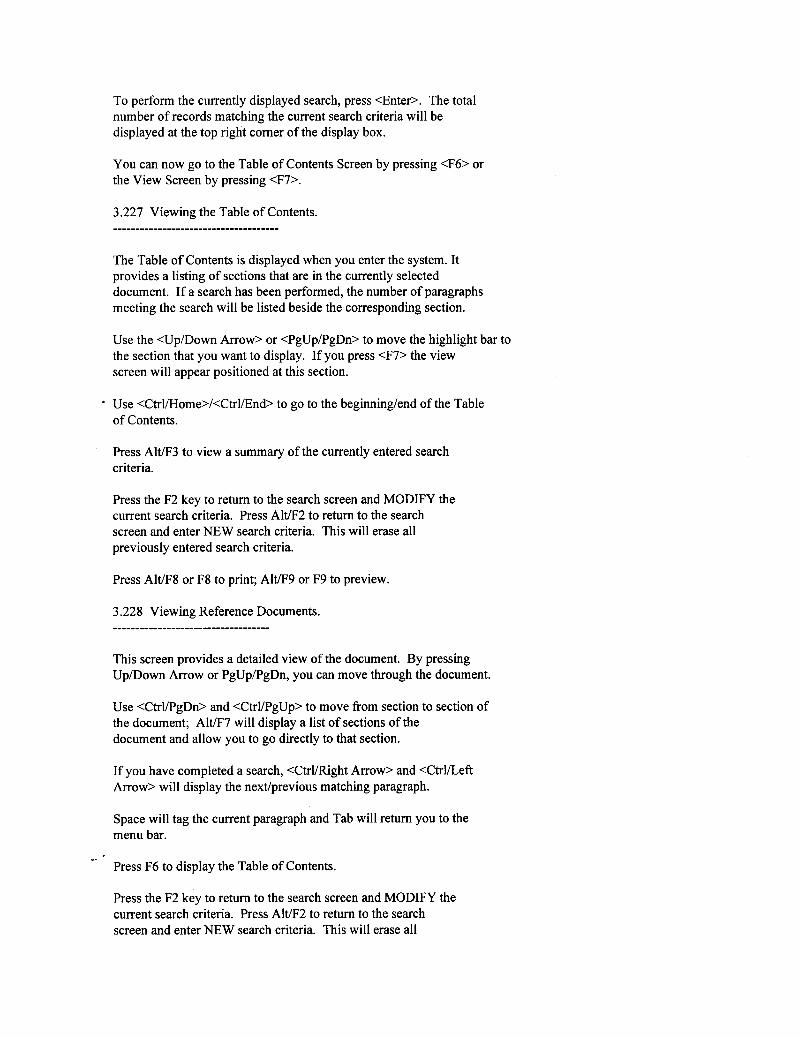
To perform the currently displayed search, press <Enter>. The total number of records matching the current search criteria will be displayed at the top right corner of the display box.
You can now go to the Table of Contents Screen by pressing <F6> or the View Screen by pressing <F7>.
The Table of Contents is displayed when you enter the system. It provides a listing of sections that are in the currently selected document. If a search has been performed, the number of paragraphs meeting the search will be listed beside the corresponding section.
Use the <Up/Down Arrow> or <PgUpPgDn> to move the highlight bar to the section that you want to display. If you press <F7> the view screen will appear positioned at this section.
a Use <CtrVHome>/<Ctrl/End> to go to the beghindend of the Table of Contents.
Press Alt/F3 to view a summary of the currently entered search criteria.
Press the F2 key to return to the search screen and MODIFY the current search criteria. Press A l e 2 to return to the search screen and enter NEW search criteria. This will erase all previously entered search criteria.
Press Alt/F8 or F8 to print; Alt/F9 or F9 to preview.
3.228 Viewing Reference Documents.
This screen provides a detailed view of the document. By pressing Upmown Arrow or PgUpPgDn, you can move through the document.
Use <CtrVPgDn> and <Ctrl/pgUp> to move from section to section of the document; A l e 7 will display a list of sections of the document and allow you to go directly to that section.
If you have completed a search, <CtrVRight Arrow> and <Ctrl/Lefi Arrow> will display the nextlprevious matching paragraph.
Space will tag the current paragraph and Tab will return you to the menu bar.
-- . Press F6 to display the Table of Contents.
Press the F2 key to return to the search screen and MODIFY the current search criteria. Press Alt/F2 to return to the search screen and enter NEW search criteria. This will erase all
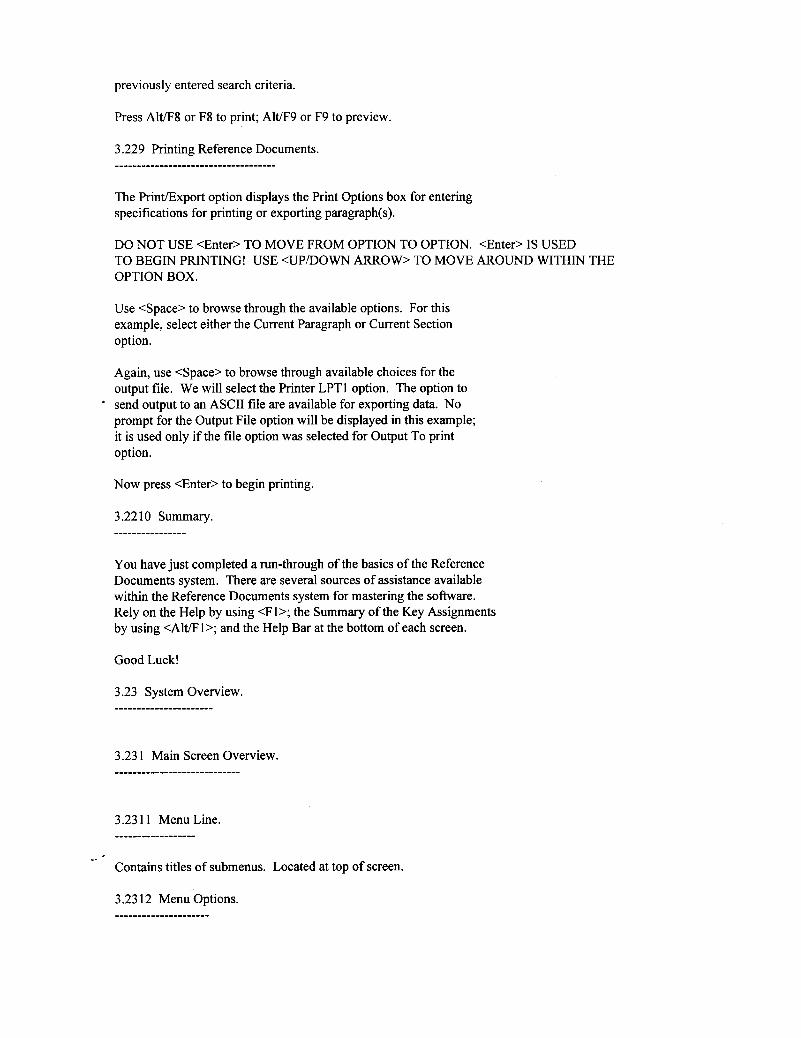
previously entered search criteria.
Press Alt/F8 or F8 to print; Alt/F9 or F9 to preview.
3.229 Printing Reference Documents.
The Print/Export option displays the Print Options box for entering specifications for printing or exporting paragraph@).
DO NOT USE <Enter> TO MOVE FROM OPTION TO OPTION. <Enter> IS USED TO BEGIN PRINTING! USE <UP/DOWN ARROW> TO MOVE AROUND WITHIN THE OPTION BOX.
Use <Space> to browse through the available options. For this example, select either the Current Paragraph or Current Section option.
Again, use <Space> to browse through available choices for the output file. We will select the Printer LPTl option. The option to send output to an ASCII file are available for exporting data. No prompt for the Output File option will be displayed in this example; it is used only if the file option was selected for Output To print option.
Now press <Enter> to begin printing.
3.22 10 Summary.
You have just completed a run-through of the basics of the Reference Documents system. There are several sources of assistance available within the Reference Documents system for mastering the software. Rely on the Help by using < F P ; the Summary of the Key Assignments by using <Alt/Fl>; and the Help Bar at the bottom of each screen.
Good Luck!
3.23 System Overview. ......................
*- . Contains titles of submenus. Located at top of screen.
Menu options which are displayed in vivid tones are available for selection. The grayed options are not. For example, if you have not performed a successful search, then the option to view a record will not be available. To select an option on the Pull Down Menus, use <Up/Down Arrow> to highlight the menu option you want and press <Enter> (or press the highlighted letter in the menu bar option title).
3.2313 Movement Keys. --________________----
Keys used to navigate through the currently displayed screen. Located near the bottom of the screen in the right comer.
3.23 14 Status Indicators. ..........................
Displays current document selection and typing mode (overwrite or insert). Located near the bottom of the screen, in the left comer and center areas.
3.23 15 Help Bar. ----------_____-_
Provides infomiation on most commonly used keys and/or describes the highlighted menu option. These messages are very useful when learning the system! Located at the very bottom of the screen.
3.232 1 Information.
This option offers multiple options for display of relevant informa- tion about the Reference Document program.
This option will display a listing of the key assignments.
3.2323 Configure Colors.
This option displays a menu with three choices: - Select a new color scheme
- - Reset the settings to the color defaults . - Reset the settings to the monochrome defaults
*-

This option allows you to save search criteria to disk for future use. You will be required to enter a drive, directory, and file- name. You may overwrite an existing file or create a new one.
3.2325 Load Search. -__________________-
This option allows you to load search criteria previously saved to disk. You will be required to enter a drive, directory, and file- name.
3.233 Search Menu Overview.
3.2331 New Search <Alt/F2>.
This option allows you to begin entering search criteria on a "clean slate". Do not select this option if you want to build on previously entered search criteria that has not been saved to disk!
Select this option to build on previously entered search criteria.
3.2333 Browse Word List <F4>.
Selection of this option will display a box of entries which are available for the highlighted search field. The number of occur- rences is listed first followed by the available entry.
3.2334 Insert Term <Ctrl/Enter>. .................................
This option allows you to enter more than one item for a search field.
3.2335 Connector <F3>.
This option allows you to toggle back and forth between connector words (And/or).
*- . This option will clear the search term for the currently highlighted search field.
3.2337 Search Summary <Alt/F3>.
This option displays a summary of the current search criteria.
This option will activate the current search criteria. Upon comple- tion of the search, the computer will beep and the number of para- graphs found will be displayed at the top right comer of the Search Criteria Box.
3.234 1 Table of Contents <F6>.
Selection of this option will display the Table of Contents information.
3.2342 View <F7>.
Selection of this option will display the detailed view of the selected document. Use <F7> to view the document without going to the menu.
3.235 Focus Menu Overview.
3.2351 Go to Section <Alt/F7>.
This option allows you to move directly to a particular section.
3.2352 Previous Section <Ctrl/PgUp>. .....................................
This option allows you to move to the previous section.
3.2353 Next Section <Ctrl/PgDn>. .................................
This option allows you to move to the next section.
3.2354 Previous Match <CtrVLeft Arrow>. ......................................... -- This option allows you to move to the previous match.
This option allows you to move to the next match.
This option allows you to select particular paragraphs using the Space Bar as a toggle key. When the paragraph is tagged, a marker will be displayed beside all lines in the corresponding paragraph.
3.2357 Remove All Tags. ........................
This option allows you to remove all the tags.
3.236 1 PrintExport <F8>.
This option allows you to print or export document information. The following choices are available:
Available Scope options are: Entire Document - output the whole document in standard screen order. All Matching Paragraphs - output all the paragraphs that match the selection criteria. Current Section - output the section currently displayed. Current Paragraph - output the paragraph currently displayed. Tagged Paragraphs - output all the paragraphs that have been tagged. Table of Contents - output the table of contents in screen order.
Note: Current Section and Table of Contents are only available from the Table of Contents screen. Current Paragraph, Tagged Paragraphs, and All Matching Paragraphs are only available from the View screen.
Available Output To options are: Printer - LPTl File - ASCII Format
3.2362 Quick PrintExport <Alt/F8>.
- This option will print the current paragraph if called from the view . --
screen or current section if called from the table of contents screen.
3.2363 Preview <F9>.
I
This option allows you to preview document information before printing or exporting. The following choices are available:
Available Scope options are: Entire Document - output the whole document in standard screen order. All Matching Paragraphs - output all the paragraphs that match the selection criteria. Current Section - output the section currently displayed. Current Paragraph - output the paragraph currently displayed. Tagged Paragraphs - output all the paragraphs that have been tagged. Table of Contents - output the table of contents in screen order.
Note: Current Section and Table of Contents are only available from the Table of Contents screen. Current Paragraph, Tagged Paragraphs, and All Matching Paragraphs are only available from the View screen.
This option will preview the current paragraph if called from the view screen or current section if called from the table of contents screen.
3.3 Environmental Reporting System.
3.3 1 Introduction.
The Environmental Reporting database contains all products with a chemical in which a CAS number is identified under a specific EPA report. Input of a CAS number will identify all products containing that CAS number on an EPA report(s). In some instances the CAS numbers are identified as a Family member. To identify all CAS numbers associated with the particular Family pick View Associated Family List off the View menu. The cumulative quantities of all family members must be determined for environmental reporting. For this initial version, only the Manufacturer's CAGE is visible on the Short List screen (summary screen). Plans are being made to enhance the Environmental Reporting data visibility in future versions.
--
3.321 Purpose. _______--_-----
The purpose of QUICKSTART is to provide users with a clear,
customized tutorial that will rapidly explain the most used features.
3.322 Limitations.
Not all program commands are covered in QUICKSTART. Before beginning QUICKSTART, please read the Main Screen Overview. This will familiarize you with the location of screen features such as movement keys, help bar, status indicators, etc.
All text examples will follow search and command sequences using the hot keys andor pull-down menus selectable from the opening screen Menu Bar.
3.324 Hot Keys. ________________ The Hot Keys are described below.
Hot Key Description
[ F l I Specific HELP [Al t+ F I ] Key Summary [ F2 1 Modify Search [ Alt + F2 3 New Search [F3 1 Connector Words (AND/OR) [ Alt + F3 ] Search Summary
Browse Word List [ F6 1 Short List [ Alt + F6 3 [ ~ 7 1 View Record [ Alt + F7 ] [ F8 1 PrintExport [ Alt + F8 ]
[ Alt + F9 ] Ctrl-Enter Insert Term Ctrl-Backspace Clear Search Field Ctrl-PgUpFgDn Prev/Next Section Ctrl-LWRght Arrow Prev/Next Record Enter Begin Search Space Tag/Untag Record Tab Retum to menu bar Alt-X Exit Program
F4 1 View Associated Family Members
Go To Section
Quick Print
Quick Preview F9 1 Preview
Press <F1> to get immediate screen help. Press <Alt/Fl> to display a summary of hot keys.
The Search Screen is displayed when you enter the system. If you do not want to perform a search right away, press <Tab> to access the pull down menus. Before entering search terms, notice the status indicators at the bottom of the screen. By default, the typing mode is Overwrite. Press <Tab> to access the Search pull down menu if you desire to change the search mode default. Use <Ins> to toggle between typing modes.
To perform a search on the CAS Number use <Up/Down Arrow> to move the highlight bar to the search term line that has the title CAS Number. Let's first view all the CAS number's in the database by pressing <F4>. A box will be displayed containing the number of times that the CAS number is in the file followed by the CAS number. We will select the CAS number 100-02-7 fiom the Word List box by moving the highlight bar to that line and pressing <Enter>. This CAS number will be kopied" from the Word List box to the Search screen. Press <Ctrl/Enter> to insert a line for another search term. Press <F4> again so that we can also search for the CAS number 10025-73-7. Repeat the same steps to "copy" the second CAS number. Notice the connector word OR is automatically inserted at the beginning of the second search term line.
If you are entering a long string of search terms, you may want to see a summary of the search before you begin the search. Press <Alt/F3> for the Search Summary display.
In order to use this search at another time, we will save it to disk. Press <Tab> to access the Files pull down menu. Highlight the Save Search option and press <Enter>. A string of three boxes is displayed. The first box is for the drive. Press <F4> for a list of available drives or type in the correct entry. Press <Down Arrow> to mdve to the next box for the directory where the search file should be saved. <F4> will display a list of available directories. Either select one from the list or type it in. Move to the third box for the filename entry. To view a list of existing search files, press <F4>. You may overwrite one of these existing files or create a new one. Press <Enter> after entering filename to save. Press <Ex> if you want to abort the save.
To perform the currently displayed search, press <Enter>. The total number of records matching current search criteria will be displayed at the top right corner of the display .box.
To perform a non-exact search wildcards must be used in the search term. ? matches any one character. * matches O+ characters. The search characters can occur anywhere in the search term. Either or both can be used multiple times within the search term.
-- .
Speed of the search will be mainly a factor of the number of "browse wordentry list" terms and of the specificity of the search term.
For example, 100-02-* will search faster than loo*.
Now we will move to the Short List Screen by pressing <F6>.
The Short List provides an abbreviated listing of records that match the currently entered search criteria.
We will tag only certain records for viewing and printing. Use <Up/ Down Arrow> to move the highlight bar to record number 2 on the Short List. The record number is indicated at the top right corner of the Short List display box. Press <Space> to tag the record. You will see a check mark in the far right field which indicates that the record is currently tagged. You could press <Space> again to untag the record but for our purposes, let's leave this one tagged.
To move throughout the Short List, you can either move the highlight
beginning/end of the list, or use the Focus pull down menu to go directly to a particular record number.
bar record by record, use <Ctrl/Home>/<CtrVEnd> to go to the
We will now move to the View Screen by pressing <F7>.
3.328 Viewing Environmental Reporting Records.
The View Screen allows you great flexibility. Presently, we have only one record from the Short List tagged. Since we are viewing that record, the status indicator at the bottom of the View screen displays <Tagged>.
Use <CtrVPgDn> to move to the next section of the record; <PgDn> to move to the next page; <Ctrl/Right Arrow> to move to the next record. In order to change the view format, press <Tab> to access the View pull down menu. Highlight the Change Format option and press <Enter>. A listing of sections will be displayed. Those sections with a check mark beside them are currently tagged. Use <Space> to tag/untag any section. Use <Up/Down Arrow> to move the highlight bar to one of the tagged sections and press <Enter>. All fields under the currently highlighted section will be displayed. Follow the same procedure to tag/untag fields as we used for the sections. When you have finished making your selections, press <F 1 O> to save.
The option to save the view format is also available from the View -- - pull down menu. Highlight the Save Format option and press <Enter>.
The procedure is the same as the one we used to save our search criteria. We will enter the drive, directory, and filename (let's call this file TEST1).
.
We will now print this record by pressing <F8>.
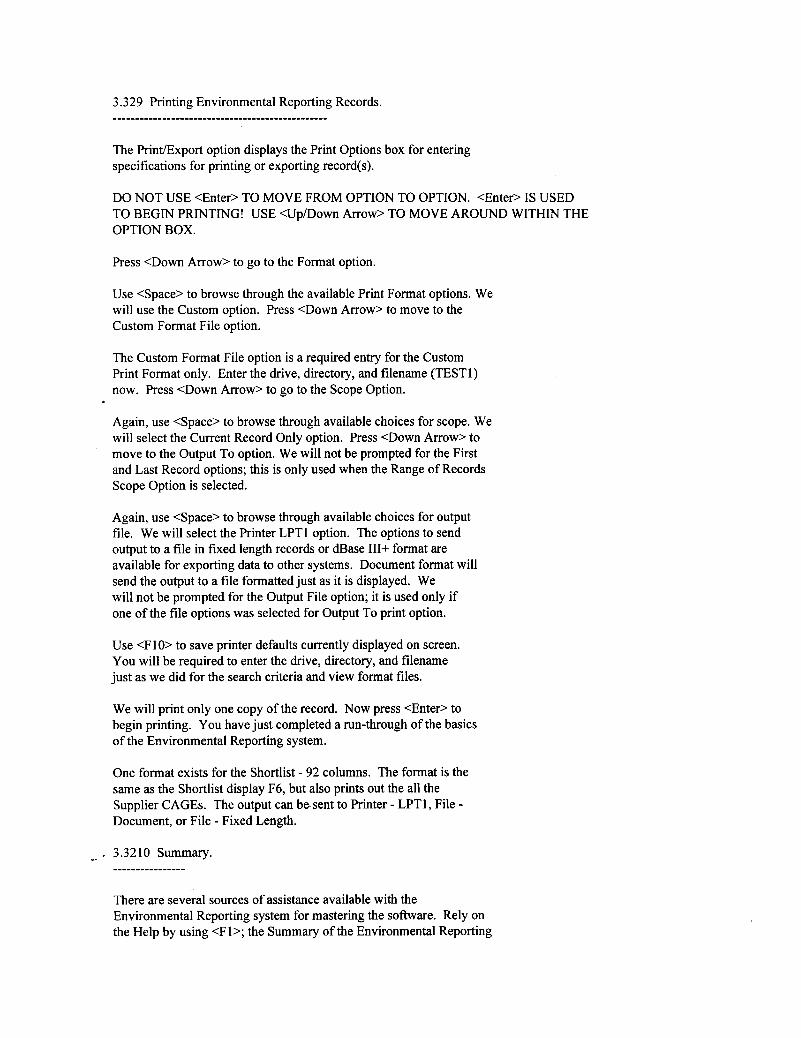
3.329 Printing Environmental Reporting Records. ................................................
The PrintExport option displays the Print Options box for entering specifications for printing or exporting record(s).
DO NOT USE <Enter> TO MOVE FROM OPTION TO OPTION. <Enter> IS USED TO BEGIN PRINTING! USE <Up/Down Arrow> TO MOVE AROUND WITHIN THE OPTION BOX.
Press <Down Arrow> to go to the Format option.
Use <Space> to browse through the available Print Format options. We will use the Custom option. Press <Down Arrow> to move to the Custom Format File option.
The Custom Format File option is a required entry for the Custom Print Format only. Enter the drive, directory, and filename (TESTI) now. Press <Down Arrow> to go to the Scope Option.
Again, use <Space> to browse through available choices for scope. We will select the Current Record Only option. Press <Down Arrow> to move to the Output To option. We will not be prompted for the First and Last Record options; this is only used when the Range of Records Scope Option is selected.
Again, use <Space> to browse through available choices for output file. We will select the Printer LPTl option. The options to send output to a file in fixed length records or dBase III+ format are available for exporting data to other systems. Document format will send the output to a file formatted just as it is displayed. We will not be prompted for the Output File option; it is used only if one of the file options was selected for Output To print option.
Use <F10> to save printer defaults currently displayed on screen. You will be required to enter the drive, directory, and filename just as we did for the search criteria and view format files.
We will print only one copy of the record. Now press <Enter> to begin printing. You have just completed a run-through of the basics of the Environmental Reporting system.
One format exists for the Shortlist - 92 columns. The format is the same as the Shortlist display F6, but also prints out the all the Supplier CAGES. The output can be sent to Printer - LPTl , File - Document, or File - Fixed Length.
-- - 3.3210 Summary. ___________-----
There are several sources of assistance available with the Environmental Reporting system for mastering the software. Rely on the Help by using <F 1 >; the Summary of the Environmental Reporting
Key Assignments by using <Alt/F 1 >; and the Help Bar at the bottom of each screen.
Good Luck!
3.33 System Overview.
3.33 1 Main Screen Overview.
3.33 1 1 Menu Line.
Contains titles of submenus. Located at the top of the screen.
3.3312 Menu Options.
Menu options which are displayed in vivid tones are available for selection. The "grayed" options are not. For example, if you have not performed a successful search, then the option to view a record will not be available. To select an option on the Pull Down Menus, use <Up/Down Arrow> to highlight the menu option you want and press <Enter> (or press the highlighted letter in the menu bar option title).
3.33 13 Movement Keys.
Keys used to navigate through the currently displayed screen. Located near the bottom of the screen in the right comer.
Displays typing mode (overwrite or insert), current database selection, and on the View Screen, tag information (tagged or tagged only). Located near the bottom of the screen, in the left comer and center areas.
Provides information on most commonly used keys and/or describes the highlighted menu option. These messages are very useful when learn-
- ing the system! --
3.3321 Information. ....................
This option offers multiple options for display of relevant infor- mation about the Environmental Reporting program.
This option will display a listing of the Environmental Reporting key assignments.
3.3323 Configure Colors.
This option displays a menu with three choices:
- Select a new color scheme - - Reset the settings to the color defaults
- Reset the settings to the monochrome defaults
3.3324 Save Search. ....................
This option allows you to save search criteria to disk for fbture use. You will be required to enter a drive, directory, and file- name. You may overwrite an existing file or create a new one.
This option allows you to load search criteria previously saved to disk. You will be required to enter a drive, directory, and file- name.
3.333 1 New Search <Alt/F2>. ............................
This option allows you to begin entering search criteria on a "clean slate". Do not select this option if you want to build on previously entered search criteria that has not been saved to disk!
-- . Select this option to build on previously entered search criteria.

Selection of this option will display a box of entries which are available for the highlighted search field. The number of occur- rences is listed first followed by the available entry.
This option allows you to enter more than one item for a search field.
3.3335 Connector <F3>.
This option allows you to toggle back and forth between connector words (And/or).
3.3336 Clear Search.Field <Ctrl/BackSpace>. ............................................
This option will clear the search term for the currently highlighted search field.
3.3337 Search Summary <Alt/F3>.
This option displays a summary of the current search criteria.
3.3338 Begin Search <Enter>. .............................
This option will activate the current search criteria. Upon com- pletion of the search, the computer will beep and the number of rec- ords found will be displayed at the top right corner of the Search Criteria Box.
3.334 View Menu Overview. ..........................
3.3341 Short List <F6>. ........................
Selection of this option will display summary information. This information includes the CAS Number, Product ID, NSN, Multiple Formulation Code, Manufacturer's CAGE, and MSDS Date for all the records which meet the current search criteria.
3.3342 View Record <F7>. ......................... -- Selection of this option will display the detailed view of selected record. Use <F7> to view record without going to the menu. Fields with an asterisk (*) beside them have changed since the last data release.
3.3343 Change Format. ......................
This option allows you to choose which data is to be displayed when you view or print a record.
This option allows you to save a format to disk by indicating the directory, drive, and filename. This format can be restored through the Load Format option for either viewing or printing the record.
3.3345 Load Format. ....................
This option allows you to restore a format previously saved to disk by indicating the drive, directory, and filename. The restored for- mat can be used for viewing or for printing a record.
3.3346 View Associated Family List <Alt/F6>.
Selection of this option will allow you to view the related CAS members in the Family of the Regulatory List. You must have your cursor on the Family Member field and the indicator must be a Y indicating that there is a family list.
3.335 Focus Menu Overview.
3.3351 Go to Section <Alt/F7>.
This option allows you to move directly to a particular section.
3.3352 Previous Section <Ctrl/PgUp>. .....................................
This option allows you to move to the previous section.
3.3353 Next Section <Ctrl/PgDn>. .................................
This option allows you to move to the next section.
- 3.3354 Previous Record <CtrVLefi Arrow>. .......................................... --
This option allows you to view the previous record.
3.3355 Next Record <Ctrl/Right Arrow>.

This option allows you to view the next record.
3.3356 Go to Record Number. ............................
This option allows you to go directly to the particular record that you wish to view.
3.3357 Tag/Untag <Space>. ..........................
This option allows you to select particular records using the Space Bar as a toggle key. When the record is tagged, a check mark (a) is displayed by it on the Short List. The tag mode is displayed at the bottom of the screen.
3.3358 Show Only Tagged Records.
This option affects the display of the Short List and View Screens by restricting movement to tagged records only or allowing movement to all selected records. The tag mode is displayed at the bottom of the View Screen.
3.3359 Remove All Tags <->.
This option allows you to remove all the tags.
3.336 Print Menu Overview.
3.3361 PrintExport <Fa>.
This option allows you to print or export the currently selected record(s) in one of a variety of formats.
Available Print Format options are:
Custom Current Display Full Record Summary
-- - Available Scope options are:
Current Record All Records Range of Records Tagged Records
Available Output To options are:
Printer - LPTl File - Document Format File - Fixed Length Records File - dBase III+
This option allows you to print the current record only. The output will be the current record in the full format.
3.3363 Preview <F9>.
This option allows you to preview the currently selected record@) in one of a variety of formats. The option to print is available after the preview.
3.3364 Quick Preview <Alt/F9>. ...............................
This option allows you to preview the current record only. The output will be the current record in full format.
This option allows you to save the currently entered print options to disk by indicating the drive, directory, and filename.
3.3366 Load Printer Defaults.
This option allows you to load a previously saved print format by indicating the drive, directory, and filename.
3.34 Appendices. --_____________--
SEARCHABLE ENVIRONMENTAL REPORTING FIELDS
FIELDNAME dBase III+ FIELDNAME FIELD -- . LENGTH
CAS NUMBER CAS-NO 11 SARA302 REPORT SARA302 1 SARA3 13 REPORT SARA3 13 1
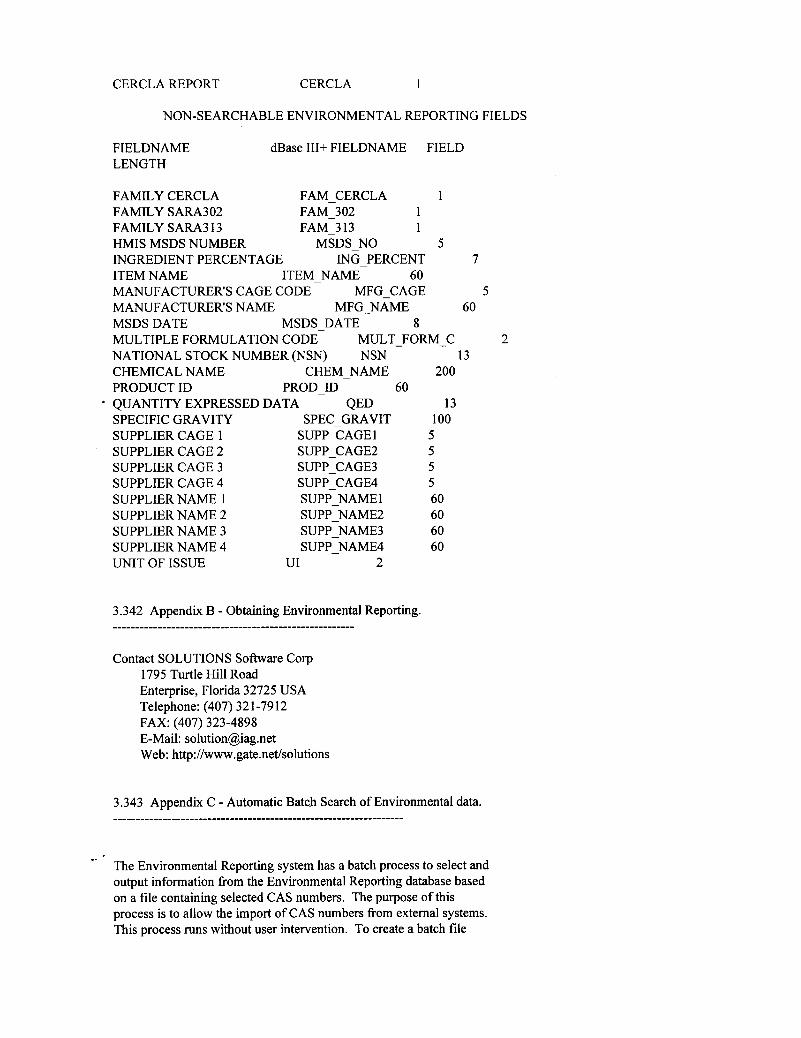
CERCLA REPORT CERCLA 1
NON-SEARCHABLE ENVIRONMENTAL REPORTING FIELDS
FIELDNAME dBase III+ FIELDNAME FIELD LENGTH
FAMILY CERCLA F AM-CERCLA 1 FAMILY SARA302 FAM-302 1 FAMILY SARA3 13 F A M 3 13 1 HMIS MSDS NUMBER MSDSNO 5 INGREDIENT PERCENTAGE ING-PERCENT 7
MANUFACTURERS CAGE CODE MFG-CAGE 5
MULTIPLE FORMULATION CODE MULT-FOW-C 2
CHEMICAL NAME CHEMNAME 200
QUANTITY EXPRESSED DATA QED 13 SPECIFIC GRAVITY SPEC-GRAVIT 100 SUPPLIER CAGE 1 SUPP-CAGE 1 5 SUPPLIER CAGE 2 SUPP-CAGE2 5 SUPPLIER CAGE 3 SUPP-CAGE3 5 SUPPLIER CAGE 4 SUPP-CAGE4 5
ITEM NAME ITEMNAME 60
MANUFACTURERS NAME MFG-N AME 60 MSDS DATE MSDS-DATE 8
NATIONAL STOCK NUMBER (NSN) NSN 13
PRODUCT ID PRODID 60
SUPPLIER NAME 1 SUPP-NAME 1 60 SUPPLIER NAME 2 SUPP-NAME2 60 SUPPLIER NAME 3 SUPP-NAME3 60 SUPPLIER NAME 4 SUPP-NAME4 60 UNIT OF ISSUE UI 2
3.342 Appendix B - Obtaining Environmental Reporting. ......................................................
Contact SOLUTIONS Software Corp 1795 Turtle Hill Road Enterprise, Florida 32725 USA Telephone: (407) 32 1-79 12
E-Mail: [email protected] Web: http://www.gate.netlsolutions
FAX: (407) 323-4898
3.343 Appendix C - Automatic Batch Search of Environmental data.
-- . The Environmental Reporting system has a batch process to select and output information from the Environmental Reporting database based on a file containing selected CAS numbers. The purpose of this process is to allow the import of CAS numbers from external systems. This process runs without user intervention. To create a batch file
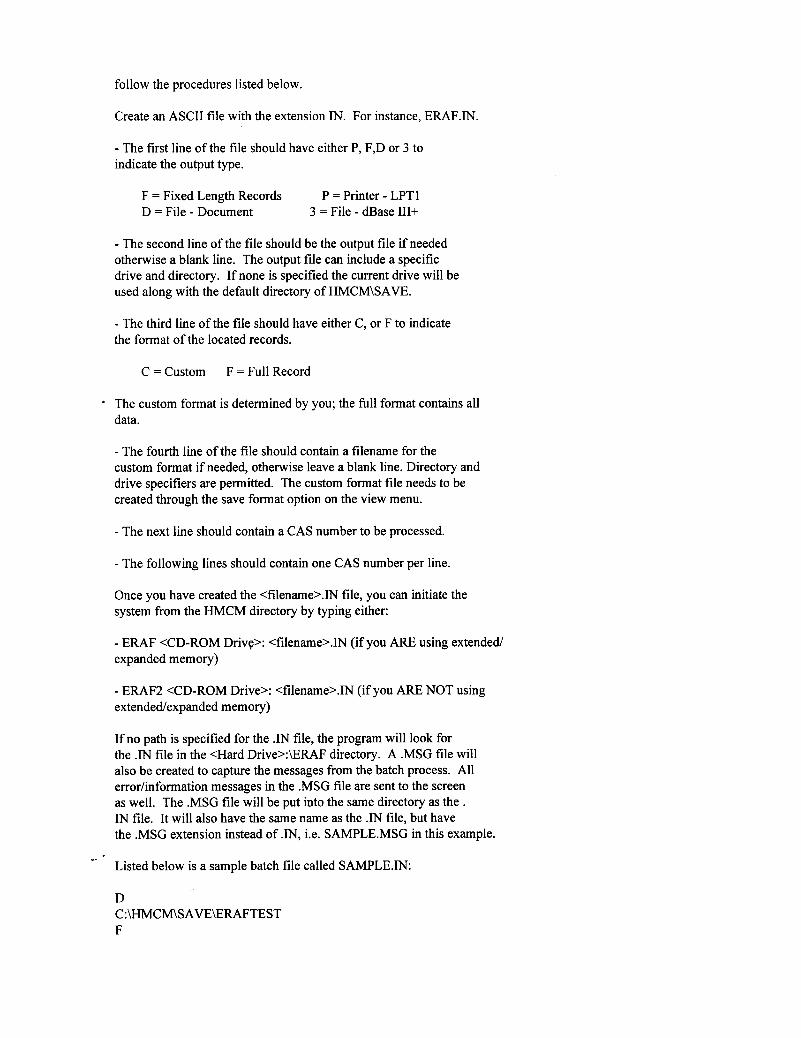
follow the procedures listed below.
Create an ASCII file with the extension IN. For instance, EMF.IN.
- The first line of the file should have either P, F,D or 3 to indicate the output type.
F = Fixed Length Records D = File - Document
P = Printer - LPTl 3 = File - dBase III+
- The second line of the file should be the output file if needed otherwise a blank line. The output file can include a specific drive and directory. If none is specified the current drive will be used along with the default directory of HMCMEAVE.
- The third line of the file should have either C, or F to indicate the format of the located records.
C = Custom F = Full Record
The custom format is determined by you; the full format contains all data.
- The fourth line of the file should contain a filename for the custom format if needed, otherwise leave a blank line. Directory and drive specifiers are permitted. The custom format file needs to be created through the save format option on the view menu.
- The next line should contain a CAS number to be processed.
- The following lines should contain one CAS number per line.
Once you have created the <filename>.IN file, you can initiate the system from the HMCM directory by typing either:
- E M F <CD-ROM Drive>: <filename>.IN (if you ARE using extended expanded memory)
- E M F 2 <CD-ROM Drive>: <filename>.IN (if you ARE NOT using extendedexpanded memory)
If no path is specified for the .IN file, the program will look for the .IN file in the <Hard Drive>:\ERAF directory. A .MSG file will also be created to capture the messages from the batch process. All errorhformation messages in the .MSG file are sent to the screen as well. The .MSG file will be put into the same directory as the . IN file. It will also have the same name as the .IN file, but have the .MSG extension instead of .IN, i.e. SAMPLE.MSG in this example.
Listed below is a sample batch file called SAMPLE.IN: -- .
D C:\HMCM\SAVE\ERAFTEST F
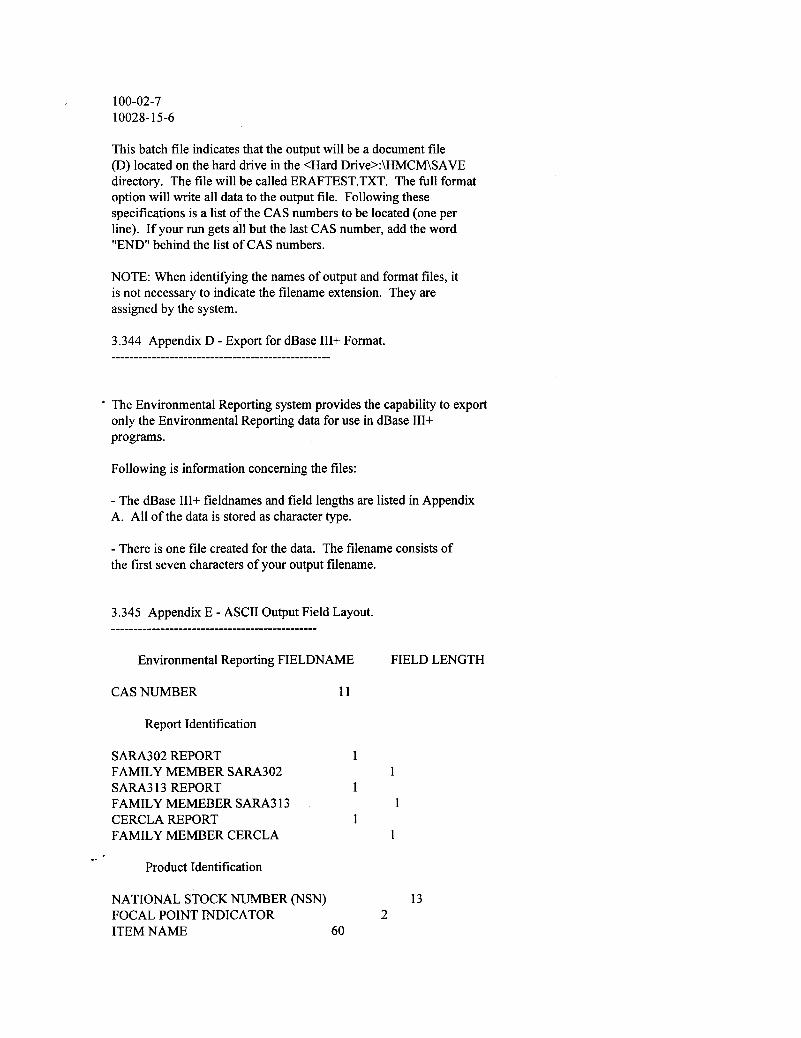
100-02-7 10028- 15-6
This batch file indicates that the output will be a document file (D) located on the hard drive in the <Hard Drive>:WMCM\SAVE directory. The file will be called ERAFTEST.TXT. The full format option will write all data to the output file. Following these specifications is a list of the CAS numbers to be located (one per line). If your run gets all but the last CAS number, add the word "END" behind the list of CAS numbers.
NOTE: When identifying the names of output and format files, it is not necessary to indicate the filename extension. They are assigned by the system.
3.344 Appendix D - Export for dBase III+ Format.
The Environmental Reporting system provides the capability to export only the Environmental Reporting data for use in dBase III+ programs.
Following is information concerning the files:
- The dBase III+ fieldnames and field lengths are listed in Appendix A. All of the data is stored as character type.
- There is one file created for the data. The filename consists of the first seven characters of your output filename.
3.345 Appendix E - ASCII Output Field Layout. ..............................................
Environmental Reporting FIELDNAME
CAS NUMBER 11
Report Identification
SARA302 REPORT 1 FAMILY MEMBER SARA302 SARA3 13 REPORT 1 FAMILY MEMEBER SARA3 13 CERCLA REPORT 1 FAMILY MEMBER CERCLA
-- Product Identification
NATIONAL STOCK NUMBER (NSN) FOCAL POINT INDICATOR ITEM NAME 60
FIELD LENGTH
13 2
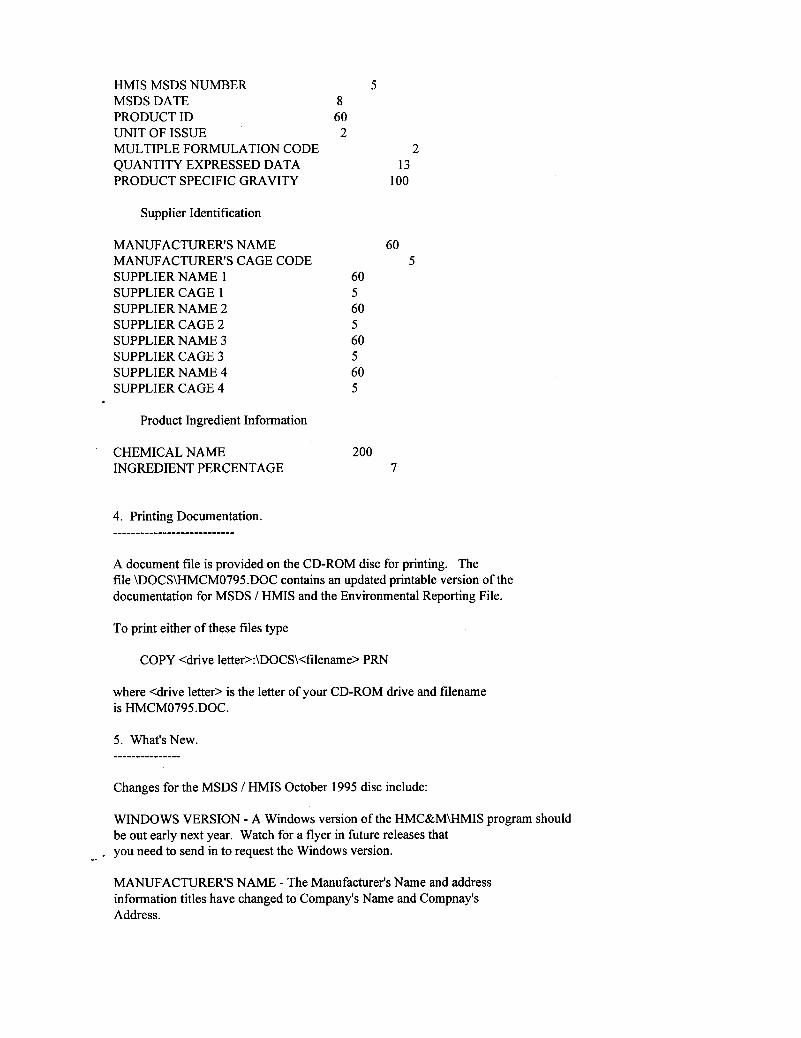
HMIS MSDS NUMBER MSDS DATE PRODUCT ID UNIT OF ISSUE MULTIPLE FORMULATION CODE QUANTITY EXPRESSED DATA PRODUCT SPECIFIC GRAVITY
Supplier Identification
MANUFACTURER'S NAME MANUFACTURER'S CAGE CODE SUPPLIER NAME 1 SUPPLIER CAGE 1 SUPPLIER NAME 2 SUPPLIER CAGE 2 SUPPLIER NAME 3 SUPPLIER CAGE 3 SUPPLIER NAME 4 SUPPLIER CAGE 4
Product Ingredient Information
CHEMICAL NAME INGREDIENT PERCENTAGE
5 8 60 2
60 5 60 5 60 5 60 5
200
2 13
100
60 5
7
A document file is provided on the CD-ROM disc for printing. The file DOCSWMCM0795.DOC contains an updated printable version of the documentation for MSDS / HMIS and the Environmental Reporting File.
To print either of these files type
COPY <drive letter>:\DOCS\<filename> PRN
where <drive letter> is the letter of your CD-ROM drive and filename is HMCM0795.DOC.
5. What'sNew. __________--__-
Changes for the MSDS / HMIS October 1995 disc include:
WINDOWS VERSION - A Windows version of the HMC&M\HMIS program should be out early next year. Watch for a flyer in future releases that
- you need to send in to request the Windows version. -- MANUFACTURER'S NAME - The Manufacturer's Name and address information titles have changed to Company's Name and Compnay's Address.
--
COMMENTS - Please send any comments you have on MSDS / HMIS to SOLUTIONS Software Corporation.
VOLUME ID - The volume ids for the L version is N68057H1 and N68057H2.
ERAF INFO FILES - The Environmental Reporting information files for SARA 302, SARA 3 13, and CERCLA have been changed to include the Family Name.