Embed Size (px)
Citation preview
MQTT, Adafruit IO & You!Created by lady ada
Last updated on 2017-11-02 07:52:03 PM UTC
245677
7999
10111515
1515161617
1719212121212222
232424242526
2628282829292929
31
Guide Contents
Guide ContentsOverviewWhy MQTT?What about HTTP (REST)?MQTT! So E-Z!
But what if I really want to use HTTP & REST?
MQTT Broker at your service!Getting Started on Adafruit IOStep #0 - adafruit.io key and feedsWhere to find your usernameWhere to find your adafruit.io keyCreate your first two feedsArduino+Library Setup
If you don't have any electronics...
Install Adafruit_MQTTFirst TestLoad up exampleConnection pinouts
Set up WiFi credentials
Publication testSubscription TestIntro to Adafruit_MQTT#includesWiFi and AuthenticationPublish & Subscribe
PublishingSubscribing
Sketch SetupMain Loop
Check ConnectionWait for subscription messagesPublish dataPinging the Server
That's it!More on SubscriptionsCreate New Slider Feed & DashOutput pins & new subscriptionAdd Ping()New Subscription Check & Parse
On Off ButtonSlider Subscription
QoS & Wills
© Adafruit Industries https://learn.adafruit.com/mqtt-adafruit-io-and-you Page 2 of 35

31313535
Quality of ServiceLast Will & TestamentHELP!
I'm having problems with MQTT, how do I debug the connection?
© Adafruit Industries https://learn.adafruit.com/mqtt-adafruit-io-and-you Page 3 of 35

OverviewThe Internet of Things! The Internet of Things! THE INTERNET OF THINGS! OK now that I've got your attention, lets talkabout this INTERNET OF THINGS (IoT). IoT is this idea that, hey - my toaster! my car! my dog's collar! - all those thingscan be connected to the Internet and each other.
Adding connectivity can make projects and products a lot more useful and fun. And if you're a developer, engineer,hacker or maker, this tutorial will delve deeper into the details of protocols and libraries!
In particular, we'll be focusing on MQTT (MQ Telemetry Transport). For much more detail, check out MQTT.org!
In this tutorial, we'll introduce MQTT, get you going with a demo, then explain the Adafruit_MQTT library
Let's begin!
© Adafruit Industries https://learn.adafruit.com/mqtt-adafruit-io-and-you Page 4 of 35

Why MQTT?
So you have a "Thing" that you want to connect to the the "Internet of". How do you do that technical 'connection'part?
If its a toaster, you could plug it into Ethernet and then run a cable to your router.
© Adafruit Industries https://learn.adafruit.com/mqtt-adafruit-io-and-you Page 5 of 35

But many things are wireless, so no Ethernet. Instead, they might use wireless protocols like WiFi (just about everything
that stays in a home or business), Bluetooth classic (older, pre-BLE devices), Bluetooth LE (wireless lightbulbs, any
things that connect to your cellphone), ZigBee, 802.15.4 (mesh networks, sensor nets), Cellular (e.g. vendingmachines, geotracking for cars, Kindles) etc..
The upshot is - while some devices are wired, there's a ton that are wireless. And honestly, wireless is pretty fun! BUTwireless means portable power, such as a battery, which means power requirements are important to think about. If wewant to connect this device to the Internet, it has to connect fast, send data, and disconnect fast. And if it's using a low-power data connection protocol like Bluetooth LE, it has to be extra-careful that it doesn't have too much overhead. Forcellular, where you really pay-by-the-byte, that's also important!
What about HTTP (REST)?
Chances are you're familiar with HTTP - its used for every website. HTTP is stateless, so you have to have a connectionper data transfer - one connection every time you want to write data, one connection for reading. HTTP is great forhuge amounts of data such as used for websites, and it can be used for IoT connections. But it's not lightweight and itsnot terribly fast.
Another problem with HTTP is that it's pull only - your toaster can only send data to the server whenever it wants (e.g."Toast is done!"). If it wants to pull data from the server, it has to constantly connect and ask ("Any updates to the Toastdarkness level?" "What about now?" "Anything now?") which is really data and time consuming. Pull updates are eitherslow (check only every few minutes) or data/power intensive (check constantly)
© Adafruit Industries https://learn.adafruit.com/mqtt-adafruit-io-and-you Page 6 of 35

MQTT! So E-Z!
For that reason, MQTT is a great protocol. It's extremely simple, and light-weight. Connecting to a server only takesabout 80 bytes. You stay connected the entire time, every data 'publication' (push data from device to server) and data'subscription' (push data from server to device) is about 20 bytes. Both occur near instantaneously.
Thus we have no 'build up and tear down' overhead, and we can stream data in and out of multiple 'topics' quickly andeasily. MQTT can run on top of any kind of network, whether it be a mesh network, TCP/IP, Bluetooth, etc. Since we'llbe connecting to adafruit.io, the MQTT style we'll be discussing runs on top of a TCP/IP connection.
Cellular and WiFi and Ethernet all connect pretty easily to TCP/IP so that makes it easy to connect directly to adafruit.io
If you are using Bluetooth, XBee, Bluetooth LE, or another non-Internet-connected protocol & device, you will need agateway! For example, the Adafruit Bluefruit Connect app has a BLE adafruit.io gateway for passing data back andforth.
But what if I really want to use HTTP & REST?
No problem, check out adafruit.io REST interface docs!
MQTT Broker at your service!
OK so we're using MQTT for speed and ease. Let's say you have this toaster at home (it has a WiFi chip, and is on yourhome network). And you have a geotracker in your car (a cellular+gps connection).
© Adafruit Industries https://learn.adafruit.com/mqtt-adafruit-io-and-you Page 7 of 35

There's 2 ways you could have the two 'talk' to each other
1. Have one of the devices run as a 'server' with an IP address, so that the other sensor can connect to it at any time2. Have a third 'server' somewhere, both toaster and car connect to that computer server and the computer sends
messages back and forth.
Option #1 is in a sense, the 'least expensive' because no extra computer is needed. However, it's crazy difficult to pulloff because the toaster or car have to be constantly waiting for a connection. And the other device needs to know theIP address of the listener. And then, what happens if a third device is involved?
Thus, we go with option #2 - the server that handles the messages? That's the MQTT Broker - and that's whatadafruit.io is, essentially. A neutral party that your Things can connect to to send and receive messages.
© Adafruit Industries https://learn.adafruit.com/mqtt-adafruit-io-and-you Page 8 of 35

Getting Started on Adafruit IOGoing forward in this tutorial we'll be assuming two or three things.
You are connecting to Adafruit IO's MQTT server (a.k.a broker) - you could use another broker and as long as itfits the MQTT 3 or 3.1.1 specs, it ought to work.
You are connecting via the Internet - WiFi, Ethernet, and cellular are king here. Other transports would need agateway
You are using an Arduino or compatible - Our code is fairly portable, but it order to keep the examples concrete,we'll be focusing on the Arduino library
You have already signed up for Adafruit IO and logged in
Honestly, if this is your first time using MQTT, the above is a pretty safe way to get started!
Step #0 - adafruit.io key and feeds
Before you can go crazy with Internetting your Things, you will need to do a little light config work to get adafruit.ioready for you.
To do this we'll introduce three new terms
Account username - This is the name of your account, which you set when creating your adafruit account.
Key - this is a long, unique identifier that you use to authenticate any devices using your account. This is your
password! Keep it safe! You get one key per account, but you can, at any time revoke and regenerate your key.
Feed - this is basically a set of data that you can read or write from like a sequential file. There is some historystored with feeds, with MQTT you cannot access historical data (REST does support it) but you can add data andyou can receive the latest added data.
Where to find your username
You can find your username by visiting https://accounts.adafruit.com/ and logging in. Your username is right there!
© Adafruit Industries https://learn.adafruit.com/mqtt-adafruit-io-and-you Page 9 of 35

Where to find your adafruit.io key
Visit https://io.adafruit.com and look in the top left. You will see a little navbar with a yellow key
Click it to see your key. If you regenerate your key, your old key will no longer be valid and you'll need to update allyour projects!
(The key above is just me bashing on the keyboard, don't use that number. Use only the key that is created for your
© Adafruit Industries https://learn.adafruit.com/mqtt-adafruit-io-and-you Page 10 of 35

account!)
Create your first two feeds
You can read up on how to do this here
https://learn.adafruit.com/adafruit-io-basics-feeds
Once you've read that. Go to your feeds page and create two feeds
1. photocell - this feed will store light data from your device to adafruit.io
2. onoff - this feed will act as an on/off switch, sending data to your device from adafruit.io
Create a dashboard
Like feeds, this has its very own, excellent tutorial. Read all about it here
https://learn.adafruit.com/create-an-internet-of-things-dashboard-with-adafruit-dot-io
Once you've read it, create a dashboard with a gauge connected to photocell
Use a thin type gauge with min value 0 and max value 1024 (this could store a 10 bit value)
© Adafruit Industries https://learn.adafruit.com/mqtt-adafruit-io-and-you Page 11 of 35

the block is now added to the dashboard
Next up, make another block, this time an on-off toggle switch. Tie it to the onoff feed
© Adafruit Industries https://learn.adafruit.com/mqtt-adafruit-io-and-you Page 12 of 35

Use the defaults for the 'on' and 'off' texts
OK now you have two blocks! You are ready to rock.
© Adafruit Industries https://learn.adafruit.com/mqtt-adafruit-io-and-you Page 13 of 35

Continue on to the next step!
© Adafruit Industries https://learn.adafruit.com/mqtt-adafruit-io-and-you Page 14 of 35

Arduino+Library SetupOK now that your online MQTT broker stuff is all set up, you can get your electronics ready
If you don't have any electronics...
You can also use your computer to play around with feeds! Check out this MQTT.fx tutorial for desktop client usage
Install Adafruit_MQTT
In order to 'talk' MQTT, we'll use the Adafruit MQTT library. It works with any MQTT broker and frankly we think its thebest low-footprint library out there. The library's code is stored here and you can download the zip of it by clickingbelow
Download Adafruit_MQTT
https://adafru.it/fp7
Rename the uncompressed folder Adafruit_MQTT and check that the Adafruit_MQTT folder contains
Adafruit_MQTT.cpp and Adafruit_MQTT.h
Place the Adafruit_MQTT library folder in your arduinosketchfolder/libraries/ folder.
You may need to create the libraries subfolder if its your first library. Restart the IDE.
We also have a great tutorial on Arduino library installation at:http://learn.adafruit.com/adafruit-all-about-arduino-libraries-install-use
First Test
We'll be using an Adafruit Feather Huzzah ESP8266 devboard for this demo. You can also use a HUZZAH ESP8266 +FTDI cable.
To start with, we won't be connecting any sensors or anything.
If you're using an ESP8266 (Feather or breakout), check out our tutorial and make sure you can get it compiling andprogrammed with the Arduino IDE and connected to your WiFi router.
© Adafruit Industries https://learn.adafruit.com/mqtt-adafruit-io-and-you Page 15 of 35

Load up example
OK depending on which one you picked, load up the Arduino IDE and select the matching example. For ESP8266 pick
mqtt_esp8266
before uploading, you need to set up a few things.
Connection pinouts
If you're using the ATWINC1500 or whatever, check to make sure these pins are correct!
© Adafruit Industries https://learn.adafruit.com/mqtt-adafruit-io-and-you Page 16 of 35

Set up WiFi credentials
Dont forget you need to tell the Arduino how to connect to your local network, so set up the WiFi credentials:
Finally, set your adafruit.io username (hey you remember that from the last chapter right?) and adafruit.io key
NOW you can upload the sketch to your Arduino or ESP8266.
Publication test
Open up the serial console as soon as the sketch is done uploading. You'll see something like this (I'm using anESP8266 here)
/************************* ATWINC1500 Pins *****************************/#define WINC_CS 8#define WINC_IRQ 7#define WINC_RST 4#define WINC_EN 2 // or, tie EN to VCC
/************************* WiFi Access Point *********************************/
#define WLAN_SSID "...your SSID..." // can't be longer than 32 characters!#define WLAN_PASS "...your password..."
#define AIO_SERVER "io.adafruit.com"#define AIO_SERVERPORT 1883#define AIO_USERNAME "...your AIO username (see https://accounts.adafruit.com)..."#define AIO_KEY "...your AIO key..."
© Adafruit Industries https://learn.adafruit.com/mqtt-adafruit-io-and-you Page 17 of 35

Now click back to your Adafruit IO dashboard, the one you made before. You'll see the photocell gauge clickingupwards
You can mouseover the gauge to get the last updated timestamp. And at the top of the page you'll see what looks likea bunch of blue dots. Those dots tell you that you've had data transferred in or out of your feeds, handy to get a quicksense of whether new data is streaming in!
© Adafruit Industries https://learn.adafruit.com/mqtt-adafruit-io-and-you Page 18 of 35

And, if you go back to your feeds page, you can see each value as it comes in, as well as download a spreadsheet ifyou like
Subscription Test
OK you have data going from your device to adafruit.io but wouldn't it be nice if you could have signals going back as
well? No problem! Lets use our onoff feed, we're already subscribed to it.
While keeping your serial console open, click on the slider button in your dashboard
© Adafruit Industries https://learn.adafruit.com/mqtt-adafruit-io-and-you Page 19 of 35

In the serial console, you'll see those messages are received:
the updates from button flip to message appearing should be under 1 second, showing the speed of MQTT!
© Adafruit Industries https://learn.adafruit.com/mqtt-adafruit-io-and-you Page 20 of 35

Intro to Adafruit_MQTTNow that you have a working demo, it's time to look 'under the hood' as it were, and see how the Adafruit_MQTTlibrary really works!
We'll go section by section at the mqtt example. In this case we'll use the ESP8266 version (mqtt_esp8266) but otherthan the connection function, the base code is indentical
#includes
The top of the sketch has the includes. We'll need whatever supporting header files and libraries but alsoAdafruit_MQTT.h and another header that tells the MQTT library which transport we are using. For example, theESP8266 demo has
That's because the core Adafruit_MQTT.cpp and header file do not actually contain the low level code for sending andreceiving packets. Instead, those are kept in the special header file. We use a header file instead of another .cpp sothat we don't have the annoyance of having to include every possible supported transport header. It's a bit of a cleverhack but it works very well! (Hat tip to tonyd)
WiFi and Authentication
After some pin definitions and other objects required for the transport layer such as WiFi credentials, Cellular APNdetails, etc. you'll have the adafruit.io credentials
We covered these already, but you can change brokers and port if you'd like. Username and key are required rightnow so don't forget them!
Later on, you'll see these #define's used to assign const char's - these use Flash memory not RAM so it saves a bit ofmemory on those constrained devices
Publish & Subscribe
You can do two things (for the most part) with MQTT. You can publish data to the broker, and you can subscribe data
from the broker.
#include <ESP8266WiFi.h>#include "Adafruit_MQTT.h"#include "Adafruit_MQTT_Client.h"
#define AIO_SERVER "io.adafruit.com"#define AIO_SERVERPORT 1883#define AIO_USERNAME "...your AIO username (see https://accounts.adafruit.com)..."#define AIO_KEY "...your AIO key..."
// Store the MQTT server, username, and password in flash memory.// This is required for using the Adafruit MQTT library.const char MQTT_SERVER[] PROGMEM = AIO_SERVER;const char MQTT_USERNAME[] PROGMEM = AIO_USERNAME;const char MQTT_PASSWORD[] PROGMEM = AIO_KEY;
© Adafruit Industries https://learn.adafruit.com/mqtt-adafruit-io-and-you Page 21 of 35

In this diagram you can see there's two of each
The car publishes its location
The toaster subscribes to the car location
The toaster publishes toasting status
The cell phone subscribes to the toaster status
"Car Location" and "Toasting Status" are topics.
You can have multiple subscribers to a 'topic' (e.g. the car location) and in theory you can have mulitple publishes too,although you cant tell who published it so it requires care.
Publishing
Lets look at how we publish to a topic. Start by creating the name
The name of the photo cell topic is AIO_USERNAME/feeds/photocell - that means if your username is ladyada, thefeed is called "ladyada/feeds/photocell". That way it doesnt get confused with anybody else's photocell feed. Only youhave access to publish to the feeds under your username.
We store the name of the feed in PHOTOCELL_FEED which is stored in flash for safekeeping.
Then we can create the Adafruit_MQTT_Publish object, which we also call photocell and create that withAdafruit_MQTT_Publish(&mqtt, NameOfTheFeed)
That's pretty much it! Now you can interact and publish just using the photocell object (which we will see later)
Subscribing
const char PHOTOCELL_FEED[] PROGMEM = AIO_USERNAME "/feeds/photocell";
Adafruit_MQTT_Publish photocell = Adafruit_MQTT_Publish(&mqtt, PHOTOCELL_FEED);
© Adafruit Industries https://learn.adafruit.com/mqtt-adafruit-io-and-you Page 22 of 35

Subscribing to a topic is similar. Create a string name to the feed name with
Likewise this feed is called ladyada/feeds/onoff
And you create an MQTT subscription object with:
Sketch Setup
We're done with configuration details, lets start setting up the sketch
This section will be slightly different depending on how you're connecting to the Internet, be it WiFi or Cellular orEthernet... Basically, just get connected!
Next, we want to subscribe to our topics:
We only have one subscription in this sketch, but you can subscribe to as many topics as you like (within your memory
constraints). Just add a new mqtt.subscribe(&feedobject) for each feed
Since we have to create memory objects to store the subscriptions, by default the # of subs allowed is 5. You can
increase that by going into Adafruit_MQTT.h and editing this line:
const char ONOFF_FEED[] PROGMEM = AIO_USERNAME "/feeds/onoff";
Adafruit_MQTT_Subscribe onoffbutton = Adafruit_MQTT_Subscribe(&mqtt, ONOFF_FEED);
void setup() { Serial.begin(115200); delay(10);
Serial.println(F("Adafruit MQTT demo"));
// Connect to WiFi access point. Serial.println(); Serial.println(); Serial.print("Connecting to "); Serial.println(WLAN_SSID);
WiFi.begin(WLAN_SSID, WLAN_PASS); while (WiFi.status() != WL_CONNECTED) { delay(500); Serial.print("."); } Serial.println();
Serial.println("WiFi connected"); Serial.println("IP address: "); Serial.println(WiFi.localIP());
// Setup MQTT subscription for onoff feed. mqtt.subscribe(&onoffbutton);}
© Adafruit Industries https://learn.adafruit.com/mqtt-adafruit-io-and-you Page 23 of 35

Then saving & recompiling.
Main Loop
This is the main program loop, all we're really doing is waiting for subscription notifications and then publishing anumber once in a while.
Check Connection
First up, always make sure you're connected to the MQTT server, we have a helper program called MQTT_connect()
This function is defined below. It checks to make sure that MQTT is connected, and if not, it reconnects.
Wait for subscription messages
OK so after the connection check, we mostly sit around and wait for subscriptions to come in.
// how many subscriptions we want to be able to track#define MAXSUBSCRIPTIONS 5
void loop() { // Ensure the connection to the MQTT server is alive (this will make the first // connection and automatically reconnect when disconnected). See the MQTT_connect // function definition further below. MQTT_connect();
// Function to connect and reconnect as necessary to the MQTT server.// Should be called in the loop function and it will take care if connecting.void MQTT_connect() { int8_t ret;
// Stop if already connected. if (mqtt.connected()) { return; }
Serial.print("Connecting to MQTT... ");
while ((ret = mqtt.connect()) != 0) { // connect will return 0 for connected Serial.println(mqtt.connectErrorString(ret)); Serial.println("Retrying MQTT connection in 5 seconds..."); mqtt.disconnect(); delay(5000); // wait 5 seconds } Serial.println("MQTT Connected!");}
© Adafruit Industries https://learn.adafruit.com/mqtt-adafruit-io-and-you Page 24 of 35

We start by creating a pointer to a Adafruit_MQTT_Subscribe object.
Adafruit_MQTT_Subscribe *subscription;
We'll use this to determine which subscription was received. In this case we only have one subscription, so wedon't really need it. But if you have more than one its required so we keep it in here so you dont forget
Next, we wait for a subscription message:
while ((subscription = mqtt.readSubscription(5000)))
mqtt.readSubscription(timeInMilliseconds) will sit and listen for up to 'time' for a message. It will either get a message
before the timeout, and reply with a pointer to the subscription or it will timeout and return 0. In this case, it will wait upto 5 seconds for a subscription message.
If the reader times out, the while loop will fail. However, say we do get a valid non-zero return. Then we will comparewhat subscription we got to our known subs:
if (subscription == &onoffbutton) {
For example, here we're comparing to the onoffbutton feed sub. If they match, we can read the last message. Themessage is in feedobject.lastread. You may have to cast this since MQTT is completely agnostic about what themessage data is.
Serial.print(F("Got: "));Serial.println((char *)onoffbutton.lastread);
The subscription only store one message (the last read one). Also, there's a limit to the size of the message. Sincesome people are using this library with small microcontrollers, we set the default to 20 bytes. If you want to, say, passaround twitter messages or chucks of binary data you'll want to expand this.
You can adjust it in Adafruit_MQTT.h
Publish data
If you've got any subscriptions, you should listen for them in the large bulk of the time you have 'available' in your loop.
Once you're done listening, you can send some data. Publication is much easier than subscribing, you just call the
// this is our 'wait for incoming subscription packets' busy subloop // try to spend your time here
Adafruit_MQTT_Subscribe *subscription; while ((subscription = mqtt.readSubscription(5000))) { if (subscription == &onoffbutton) { Serial.print(F("Got: ")); Serial.println((char *)onoffbutton.lastread); } }
// how much data we save in a subscription object// eg max-subscription-payload-size#define SUBSCRIPTIONDATALEN 20
© Adafruit Industries https://learn.adafruit.com/mqtt-adafruit-io-and-you Page 25 of 35

publish function of the feed object. You can send ints, floats, strings, etc!
You can check for success or failure of publication. The MQTT library does not retransmit if there's a failure so if youwant to send a message again - do it by hand!
Pinging the Server
One of the requirements of MQTT is that..
You can set it in Adafruit_MQTT.h - the default is 300 seconds (5 minutes)
If you are publishing once every 5 minutes, or more, then you're good to go.
If you are not publishing data, only subscribing, you must send a ping to let the broker know you're around!
Pinging is easy, just call ping()
There's one downside to pinging...that's that if a subscription packet happens to come in during the ping, it will getthrown out. So ping rarely! Note that you can also lose packets if they arrive during publication.
It's rare, and as long as you ping only 2 or so times per the keepalive, you ought not have it occur too often.
If the ping fails, it will disconnect from the MQTT socket, forcing a reconnect
That's it!
Not too bad eh?
// Now we can publish stuff! Serial.print(F("\nSending photocell val ")); Serial.print(x); Serial.print("..."); if (! photocell.publish(x++)) { Serial.println(F("Failed")); } else { Serial.println(F("OK!")); }
You must send something to the MQTT broker once every MQTT_CONN_KEEPALIVE seconds
// Adjust as necessary, in seconds. Default to 5 minutes.#define MQTT_CONN_KEEPALIVE 300
// ping the server to keep the mqtt connection alive // NOT required if you are publishing once every KEEPALIVE seconds /* if(! mqtt.ping()) { mqtt.disconnect(); }
© Adafruit Industries https://learn.adafruit.com/mqtt-adafruit-io-and-you Page 26 of 35

© Adafruit Industries https://learn.adafruit.com/mqtt-adafruit-io-and-you Page 27 of 35

More on SubscriptionsPublishing data is pretty simple, subscriptions are a tad more challenging.
Lets look at another demo sketch this time mqtt_esp8266_2subs
This demo has two subscriptions, no publication (so it has to ping), and shows two ways to parse subscription data
Create New Slider Feed & Dash
To test out this demo, create a new feed called slider and add a slider to your dashboard
Output pins & new subscription
The first difference is we define two pins for LED output (controlled by the on-off button) and PWM output (controlledby the slider
We also only set up 2 subs, no pubs
// the on off button feed turns this LED on/off#define LED 2 // the slider feed sets the PWM output of this pin#define PWMOUT 12
© Adafruit Industries https://learn.adafruit.com/mqtt-adafruit-io-and-you Page 28 of 35

Don't forget to subscribe to both feeds!
Add Ping()
Since there's no publish's in this code, you will have to ping every few minutes at least. Uncomment the ping code
New Subscription Check & Parse
The real changes come in the part of the loop that checks the subscriptions
On Off Button
First up, we've updated the On-Off button check. Now it not only prints out the received data but also compares the
data to determine whether the string received is ON or OFF
Since adafruit.io publishes the data as a string, using strcmp (string compare) is an easy way to determine whether yougot a particular value. Don't forget it returns 0 on success!
(The digital pin 2 LED is common anode so pull the pin low to turn on)
Slider Subscription
// Notice MQTT paths for AIO follow the form: <username>/feeds/<feedname>// Setup a feed called 'onoff' for subscribing to changes.const char ONOFF_FEED[] PROGMEM = AIO_USERNAME "/feeds/onoff";Adafruit_MQTT_Subscribe onoffbutton = Adafruit_MQTT_Subscribe(&mqtt, ONOFF_FEED);const char SLIDER_FEED[] PROGMEM = AIO_USERNAME "/feeds/slider";Adafruit_MQTT_Subscribe slider = Adafruit_MQTT_Subscribe(&mqtt, SLIDER_FEED);
// Setup MQTT subscription for onoff & slider feed. mqtt.subscribe(&onoffbutton); mqtt.subscribe(&slider);
// ping the server to keep the mqtt connection alive if(! mqtt.ping()) { mqtt.disconnect(); }
Adafruit_MQTT_Subscribe *subscription; while ((subscription = mqtt.readSubscription(5000))) { // Check if its the onoff button feed if (subscription == &onoffbutton) { Serial.print(F("On-Off button: ")); Serial.println((char *)onoffbutton.lastread); if (strcmp((char *)onoffbutton.lastread, "ON") == 0) { digitalWrite(LED, LOW); } if (strcmp((char *)onoffbutton.lastread, "OFF") == 0) { digitalWrite(LED, HIGH); } }
© Adafruit Industries https://learn.adafruit.com/mqtt-adafruit-io-and-you Page 29 of 35

We then check if we got a slider subscription
The data also shows up as a string, so we use atoi to convert it from ascii to integer. Then we can save it to slidervaland use that to analog/PWM write to our PWM pin
// check if its the slider feed if (subscription == &slider) { Serial.print(F("Slider: ")); Serial.println((char *)slider.lastread); uint16_t sliderval = atoi((char *)slider.lastread); // convert to a number analogWrite(PWMOUT, sliderval); }
© Adafruit Industries https://learn.adafruit.com/mqtt-adafruit-io-and-you Page 30 of 35

QoS & WillsJust two more topics to make you an expert!
Quality of Service
MQTT has some basic Quality of Service 'QoS' capability built in. Basically, say you were using MQTT over a radio, andyour toaster is sending radio signals to some base station...there's a chance those messages won't arrive. Heck, evenwith WiFi or Ethernet, there's a chance your message doesnt actually get to the MQTT broker.
Sending messages without knowing for sure they were received is called "QoS 0" (zero).
You may also want QoS 1, which lets you know the message was received. Basically, after each publication, thesubscriber says "OK". In MQTT-speak this is called the "PUBACK" (Publication Acknowledgement)
Turning it on is easy, in the Adafruit_MQTT_Publish creation, put MQTT_QOS_1 and that feed will be QoS 1. By
default, feeds are created with MQTT_QOS_0 and you don't need to specify QoS0
Whenever you call photocell.publish() it will return false if the publication was not PUBACK'd
There's also QoS 2, which not only guarantees your message was received but that it was only received once. This is abit more complex because you need to start tracking packet IDs so we'll leave that for a later time.
Last Will & Testament
OK this is a bit morbid but, you know already that when people pass away they may have a "final wish" for how theirmoney or posessions are distributed. That final wish is called their Will. Likewise MQTT connections also have theability to have a Will.
The Will is essentially "If the MQTT feed is disconnected, the broker shall create one last publication on my behalf".This is very handy when you want to notify that the MQTT client is offline.
Here's an example, we omitted the first half of the sketch where the WiFi settings and Adafruit config is done.
Adafruit_MQTT_Publish photocell = Adafruit_MQTT_Publish(&mqtt, PHOTOCELL_FEED, MQTT_QOS_1);
/****************************** Feeds ***************************************/// Setup a feed called 'photocell' for publishing.
© Adafruit Industries https://learn.adafruit.com/mqtt-adafruit-io-and-you Page 31 of 35
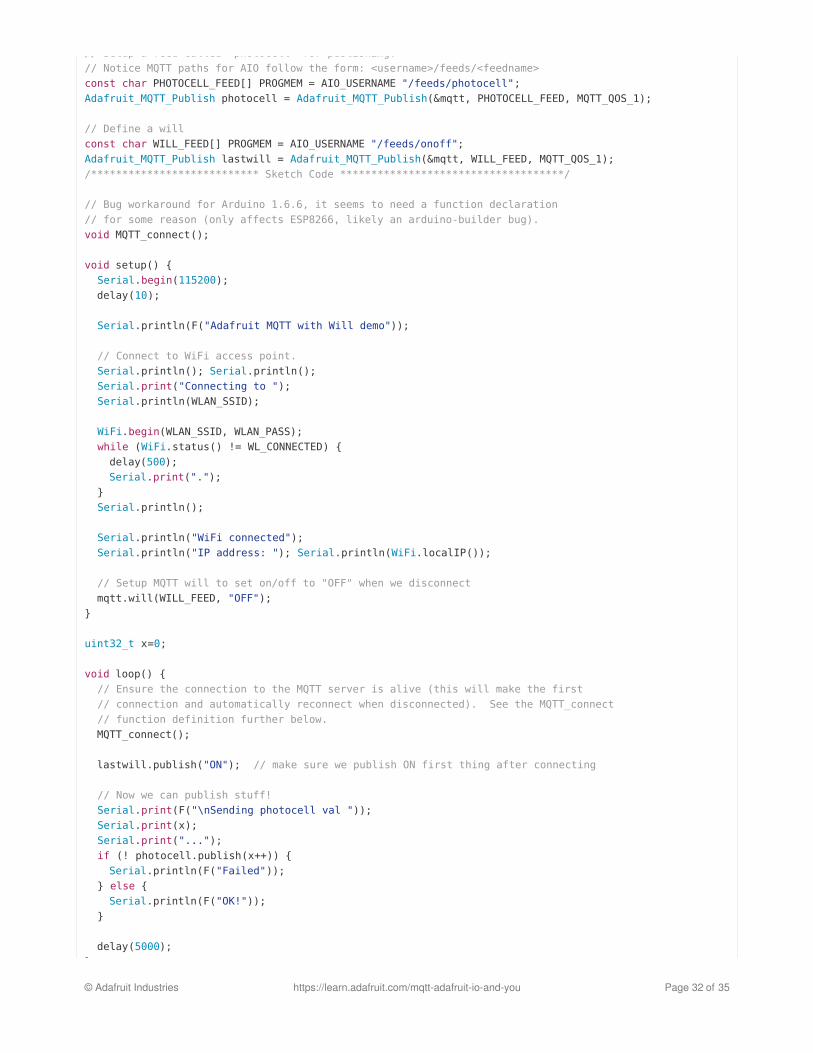
// Setup a feed called 'photocell' for publishing.// Notice MQTT paths for AIO follow the form: <username>/feeds/<feedname>const char PHOTOCELL_FEED[] PROGMEM = AIO_USERNAME "/feeds/photocell";Adafruit_MQTT_Publish photocell = Adafruit_MQTT_Publish(&mqtt, PHOTOCELL_FEED, MQTT_QOS_1);
// Define a willconst char WILL_FEED[] PROGMEM = AIO_USERNAME "/feeds/onoff";Adafruit_MQTT_Publish lastwill = Adafruit_MQTT_Publish(&mqtt, WILL_FEED, MQTT_QOS_1);/*************************** Sketch Code ************************************/
// Bug workaround for Arduino 1.6.6, it seems to need a function declaration// for some reason (only affects ESP8266, likely an arduino-builder bug).void MQTT_connect();
void setup() { Serial.begin(115200); delay(10);
Serial.println(F("Adafruit MQTT with Will demo"));
// Connect to WiFi access point. Serial.println(); Serial.println(); Serial.print("Connecting to "); Serial.println(WLAN_SSID);
WiFi.begin(WLAN_SSID, WLAN_PASS); while (WiFi.status() != WL_CONNECTED) { delay(500); Serial.print("."); } Serial.println();
Serial.println("WiFi connected"); Serial.println("IP address: "); Serial.println(WiFi.localIP());
// Setup MQTT will to set on/off to "OFF" when we disconnect mqtt.will(WILL_FEED, "OFF"); }
uint32_t x=0;
void loop() { // Ensure the connection to the MQTT server is alive (this will make the first // connection and automatically reconnect when disconnected). See the MQTT_connect // function definition further below. MQTT_connect(); lastwill.publish("ON"); // make sure we publish ON first thing after connecting
// Now we can publish stuff! Serial.print(F("\nSending photocell val ")); Serial.print(x); Serial.print("..."); if (! photocell.publish(x++)) { Serial.println(F("Failed")); } else { Serial.println(F("OK!")); } delay(5000);}
© Adafruit Industries https://learn.adafruit.com/mqtt-adafruit-io-and-you Page 32 of 35

We create a Will feed (we'll recycle the ONOFF button feed
and in the setup, configure the Will and the message you want reported
Then in every loop, right after we check connection, write ON to the feed
Then, you can test this out and unplug the client board from power. After MQTT_CONN_KEEPALIVE seconds, theonoff slider button will automatically slide to OFF
}
// Function to connect and reconnect as necessary to the MQTT server.// Should be called in the loop function and it will take care if connecting.void MQTT_connect() { int8_t ret;
// Stop if already connected. if (mqtt.connected()) { return; }
Serial.print("Connecting to MQTT... ");
uint8_t retries = 3; while ((ret = mqtt.connect()) != 0) { // connect will return 0 for connected Serial.println(mqtt.connectErrorString(ret)); Serial.println("Retrying MQTT connection in 5 seconds..."); mqtt.disconnect(); delay(5000); // wait 5 seconds retries--; if (retries == 0) { // basically die and wait for WDT to reset me while (1); } } Serial.println("MQTT Connected!");}
// Define a willconst char WILL_FEED[] PROGMEM = AIO_USERNAME "/feeds/onoff";Adafruit_MQTT_Publish lastwill = Adafruit_MQTT_Publish(&mqtt, WILL_FEED, MQTT_QOS_1);
// Setup MQTT will to set on/off to "OFF" when we disconnect mqtt.will(WILL_FEED, "OFF");
lastwill.publish("ON"); // make sure we publish ON first thing after connecting
© Adafruit Industries https://learn.adafruit.com/mqtt-adafruit-io-and-you Page 33 of 35

Don't forget to adjust
If you want a different timeout!
// Adjust as necessary, in seconds. Default to 5 minutes.#define MQTT_CONN_KEEPALIVE 300
© Adafruit Industries https://learn.adafruit.com/mqtt-adafruit-io-and-you Page 34 of 35

HELP!
I'm having problems with MQTT, how do I debug the connection?
In the Adafruit_MQTT library folder, find the file Adafruit_MQTT.h
Near the top of the file is a line:
Uncomment that #define and recompile/upload your Adafruit_MQTT example to get full debug output - its *very*detailed but shows all the packets sent and received
// Uncomment/comment to turn on/off debug output messages.//#define MQTT_DEBUG
© Adafruit Industries Last Updated: 2017-11-02 07:52:02 PM UTC Page 35 of 35