Embed Size (px)
Citation preview

User Guide

2 DNP IMS America Corp.

DNP IMS America Corp. 1
CONTENTSAbout the Software
What is Mobile Party Print? . . . . . . . . . . . . . . . . . . . . . . . . . . . . . . . . . . . . . . . . . . . . 3What’s New . . . . . . . . . . . . . . . . . . . . . . . . . . . . . . . . . . . . . . . . . . . . . . . . . . . . . . . 3
Using the Mobile Party Print SoftwareSoftware Requirements . . . . . . . . . . . . . . . . . . . . . . . . . . . . . . . . . . . . . . . . . . . . . . . 4Starting the MPP Software . . . . . . . . . . . . . . . . . . . . . . . . . . . . . . . . . . . . . . . . . . . . 4Accessing Help . . . . . . . . . . . . . . . . . . . . . . . . . . . . . . . . . . . . . . . . . . . . . . . . . . . . 5
Using the Mobile Party Print Admin InterfaceAccessing Administrative Options . . . . . . . . . . . . . . . . . . . . . . . . . . . . . . . . . . . . . . . . 7Touring the Interface . . . . . . . . . . . . . . . . . . . . . . . . . . . . . . . . . . . . . . . . . . . . . . . . . 8System Settings . . . . . . . . . . . . . . . . . . . . . . . . . . . . . . . . . . . . . . . . . . . . . . . . . . . . 8Server Settings . . . . . . . . . . . . . . . . . . . . . . . . . . . . . . . . . . . . . . . . . . . . . . . . . . . . 10Message Tab . . . . . . . . . . . . . . . . . . . . . . . . . . . . . . . . . . . . . . . . . . . . . . . . . . . . . 11
Troubleshooting MPP IssuesProblems Running the MPP Software . . . . . . . . . . . . . . . . . . . . . . . . . . . . . . . . . . . . 13
Using the Hot Folder Print SoftwareStarting the HFP Software . . . . . . . . . . . . . . . . . . . . . . . . . . . . . . . . . . . . . . . . . . . . 14Printing Photos Using the HFP Software . . . . . . . . . . . . . . . . . . . . . . . . . . . . . . . . . . 14Touring the HFP Operator Interface . . . . . . . . . . . . . . . . . . . . . . . . . . . . . . . . . . . . . . 15Stopping the HFP Software . . . . . . . . . . . . . . . . . . . . . . . . . . . . . . . . . . . . . . . . . . . 16Exiting the HFP Software . . . . . . . . . . . . . . . . . . . . . . . . . . . . . . . . . . . . . . . . . . . . . 16
Using the HFP Admin InterfaceTouring the HFP Admin Interface . . . . . . . . . . . . . . . . . . . . . . . . . . . . . . . . . . . . . . . 17Adding Borders . . . . . . . . . . . . . . . . . . . . . . . . . . . . . . . . . . . . . . . . . . . . . . . . . . . . 20Editing Borders . . . . . . . . . . . . . . . . . . . . . . . . . . . . . . . . . . . . . . . . . . . . . . . . . . . . 21Creating Borders . . . . . . . . . . . . . . . . . . . . . . . . . . . . . . . . . . . . . . . . . . . . . . . . . . . 21
Troubleshooting HFP IssuesTroubleshooting the System . . . . . . . . . . . . . . . . . . . . . . . . . . . . . . . . . . . . . . . . . . . 22

2 DNP IMS America Corp.
ACKNOWLEDGMENTSParty Print and Hot Folder Print™© DNP Photo Imaging America, Inc 2013. All Rights Reserved.
Party Print/Hot Folder Print™ Software Licensing Agreement
PLEASE READ THE FOLLOWING TERMS AND CONDITIONS CAREFULLY BEFORE USING THIS SOFTWARE. USING THIS SOFTWARE INDICATES YOUR ACCEPTANCE OF THESE TERMS AND CONDITIONS. IF YOU DO NOT AGREE WITH THESE TERMS AND CONDITIONS, PROMPTLY RETURN THIS SOFTWARE TO YOUR SUPPLIER.
This Software License Agreement is a legal document between you (a single entity) and DNP Photo Imaging America, Inc (the “Licensor”) for the Party Print (TM), Hot Folder Print (TM), and [Server] Software which comprise the Mobile Party Print System (the “Software”). The Software includes the installed software, the associated media, any printed materials, and any electronic documentation. By using the Software, you agree to the terms of this Software License Agreement.
The Licensor grants you a non-exclusive, non-transferable license to use one copy of the Software in object code only.
Ownership Retained By Licensor
DNP Photo Imaging America, Inc owns all title and copyrights in and to the Software and the Licensor has the full right and authority to grant the license granted herein. Your license does not give you any title or ownership in the Software, nor is it a sale of any rights in the Software. The only right granted to you is the right to use the Software in accordance with the terms of this Software License Agreement. All rights not specifically granted to you under this Software License Agreement are reserved by the Licensor.
You may make only a single copy of Software as a backup copy, provided that it includes all notices and markings, including copyright, trademark and other proprietary notices as on the original. Such backup copy of the Software may not be in use at any time unless the original Software is damaged beyond use, and it must remain in your possession and control.
You may not copy the software onto any public network. You may not, and you may not allow others to modify, disassemble, decompile, translate, reverse engineer, reproduce, make derivative works of or enhance the Software. You may not, and you may not allow others to rent, lease, sell, sub-license or otherwise transfer the Software to any other person.
In addition to any other rights it may have, the Licensor may terminate this Software License Agreement if you fail to comply with the terms and conditions hereof. In such event, you must cease all use of the Software and destroy all copies of the Software and all of its component parts.
At the Licensor’s sole discretion, the Licensor may from time to time provide you with updates to the Software. Any such updates shall become part of the Software licensed to you hereunder and subject to all of the terms and conditions of this Software License Agreement.
Disclaimer of Warranties
The Licensor expressly disclaims any and all warranties relative to the Software. THE SOFTWARE IS PROVIDED “AS IS,” WITHOUT WARRANTY OF ANY KIND, EXPRESS OR IMPLIED, INCLUDING, WITHOUT LIMITATION, THE IMPLIED WARRANTIES OF MERCHANTABILITY AND FITNESS FOR OF PARTICULAR PURPOSE AND NON-INFRINGEMENT AND THE ENTIRE RISK AS TO THE QUALITY AND PERFORMANCE OF THE LICENSED PRODUCT IS WITH YOU.
Limitation of Liability
In no event shall the Licensor be liable for any direct, special, incidental, indirect or consequential damages whatsoever to you (including, without limitation, damages for loss of profits, sales or data or for business interruption) arising out of the use of or inability to use the Software, even if the Licensor has been advised of the possibility of such damages. In any event, the Licensor’s entire liability under any provision shall be limited to the amount actually paid by you for the Software. Because some states and jurisdictions do not allow the exclusion or limitation of liability, the above limitation may not apply to you.
If any provision of the Software License Agreement is declared by a court of competent jurisdiction to be invalid for any reason, such invalidity shall not affect the remaining provisions hereof.
Governing Law
This Software License Agreement shall be governed by the laws of the North Carolina without regard to conflict of laws principles.
Term
This License Agreement is effective until terminated. You may terminate this License Agreement by returning the Licensed Product to Licensor. Licensor may terminate this License Agreement if you breach any of the terms and conditions. Upon termination of this License Agreement for any reason, you shall return the Licensed Product to Licensor. All provisions of this Agreement relating to disclaimers of warranties, limitation of liability, remedies, or damages, and Licensor’s proprietary rights shall survive termination.
YOU ACKNOWLEDGE YOU HAVE READ AND UNDERSTAND THIS AGREEMENT AND AGREE TO BE BOUND BY ITS TERMS. YOU FURTHER AGREE THAT THIS AGREEMENT IS THE COMPLETE AND EXCLUSIVE STATEMENT OF THE AGREEMENT BETWEEN YOU AND LICENSOR, AND SUPERSEDES ANY PROPOSAL OR PRIOR AGREEMENT, ORAL OR WRITTEN, AND ANY OTHER COMMUNICATIONS RELATING TO THE SOFTWARE ADDRESSED IN THIS AGREEMENT.
DNP IMS America, Corp. * 4524 Enterprise Dr NW * Concord, NC 28027 * USA
© 2012 - 2013 DNP IMS America, Cop. All rights reserved.

DNP IMS America Corp. 3
What is Mobile Party Print?
ABOUT THE SOFTWARE
WHAT IS MOBILE PARTY PRINT?Mobile Party Print is a portable photography solution that allows event guests to print photos on the spot using wireless technology. The Mobile Party Print solution consists of two software applications - Hot Folder Print Utility (HFP) and Mobile Part Print. Both software applications are used to create the overall Mobile Party Print event solution. HFP and MPP are installed on the Windows computer (sometimes called the server) where the printer is attached. The MPP mobile app is also downloaded from the appropriate app store
(iOS® or Google Play®) onto the user’s portable device. From their mobile phones or tablets, users can then take photos and print them immediately at the event for sharing!
Hot Folder Print™ Utility (HFP) is a utility that monitors file folders for compatible image files to send to an attached printer for output. The folders are named according to the size print that will be produced. HFP prints a single copy of each image and then moves the image file to an archive folder, which is named by the day HFP is utilized. HFP supports adding borders to prints using the HFP Admin controls.
Mobile Party Print (MPP) is a software application that provides people the ability to use Wi-Fi to transfer photographs from their mobile/digital devices using an app installed on their device. The MPP Server receives the images from wireless devices and saves the images to HFP to fulfill. MPP has a screensaver/attract loop to promote the service. MPP also has admin functions to configure the system.
Both Hot Folder Print Utility and Mobile Party Print allow for multiple languages and are installed as a package.
WHAT’S NEW
In this version of Mobile Part Print, the following features have been added:
Dynamic IP Scanning – Now, instead of having to manually set the IP address for the MPP system, the IP address is automatically found when the system is started. This means less configuration and setup time on the server.
Custom Help and Messaging – Three HTML help or messaging screens are now able to be customized to display your adjusted messaging.

4 DNP IMS America Corp.
Software Requirements
USING THE MOBILE PARTY PRINT SOFTWARENote
Before starting Mobile Party Print, make sure to start Hot Folder Print Utility.
SOFTWARE REQUIREMENTS
Your system must meet the following requirements before installing the Mobile Party Print system.
Windows 7 Pro or Windows 8 operating system - 32 or 64 bit
.NET version 4
LAN (Ethernet) input on the computer
No previous versions of Apache Tomcat installed
No 3rd Party firewall applications installed
Windows firewall supported
Dongle: The included Dongle is necessary for operation of Mobile Party Print. If the driver software for the dongle is not installed (or installed incorrectly), or the dongle is not plugged in, the mobile applications cannot connect to the server.
STARTING THE MPP SOFTWARE
1. If you have not already, double click on the Hot Folder icon on your desktop to start the Hot Folder Print Utility.
2. Double click on the Mobile Party Print icon on your desktop to start the program.
Mobile Party Print starts in full screen mode. Once the screensaver is running, the software is ready for use.

DNP IMS America Corp. 5
Accessing Help
From the main page, you can perform the following actions:
Access the administrative menu.
View the screensaver or photo slide show during the event.
Open the help file for more information about Mobile Part Print.
ACCESSING HELP
1. Selecting the Help button at the bottom of the screen displays the help screen.
2. Once the help screen is displayed, click the Print button to send a copy of the help instructions to the printer. The instructions print in the default print size.
Note
The instructions image is not saved in the archive folder.

6 DNP IMS America Corp.
Accessing Help
3. Click the OK button to close the Help Screen and return to the screensaver.

DNP IMS America Corp. 7
Accessing Administrative Options
USING THE MOBILE PARTY PRINT ADMIN INTERFACENote
Before starting Mobile Party Print, make sure to start Hot Folder Print Utility.
ACCESSING ADMINISTRATIVE OPTIONS
To access the Administrative Options, touch and hold the Mobile Party Print Icon in the top left corner. When the keypad appears, enter the password (default is 4103) and press OK.
From here you can access the following:
Admin: Open the Administrative Settings menu.
Shutdown System: Shut down the computer.
Restart System: Restart the computer.
Exit Application: Exit the application, and return to the desktop.
Cancel: Exit the Administrative Options menu, and return to the main screen.

8 DNP IMS America Corp.
Touring the Interface
TOURING THE INTERFACE
There are three screens in the current Admin interface:
System Settings: Use this tab to make changes to the Mobile Party Print application settings.
Server Settings: Changes settings for connecting devices to the system.
Message Settings: Allows for customized messaging.
The following buttons appear at the bottom of each Admin screen. Use the buttons to navigate the Admin interface a needed.
Revert Button: Reverses any changes made (does not revert once changes are saved).
Save & Exit Button: Saves & exits to main screen.
Save & Exit to Desktop Button: Saves and exits to desktop.
SYSTEM SETTINGS
Figure 1. System Settings tab
Password settings refer to the password required to access the Administrative Options.
Require Password
ON: Require password.
OFF: Do not require password.

DNP IMS America Corp. 9
System Settings
Admin Password: Password for Administrative Options screen.
Re-enter Password: If changing the password, re-enter the password before saving.
Slide Show Settings: Set what shows on the main screen.
Video/Pics: Switch between a video or picture slide-show. Supported formats are:
Image Files: JPG, TIF/TIFF, BMP, PNG
Movie Files: MOV, MWV, MP4
Path: Use Browse to select either the file (movie) or folder (slideshow) to use on the main screen.
Image Display Time: Used for the slideshow option to select the number of seconds each image is displayed.
Print Help: Show the print button (right) on the help screen.
Yes: Show Print button on help screen.
No: Do not show Print button on help screen.
Print: Print the help file using the default size.

10 DNP IMS America Corp.
Server Settings
SERVER SETTINGS
Figure 2. Server Settings tab
The server settings control how the Mobile Party Print server responds to requests to print from the Party Print application installed on mobile and/or Wi-Fi devices. From this screen you can define the allowable date/time range for photos selected for printing, define a how many images can be selected for printing at one time, and define the output folder for prints (also defines the print size).
Printing Period: Sets the start and end dates when photos can be submitted, including existing prints. This will prevent people using the mobile application from submitting photos taken before the start date/time, as well as photos taken after the end date/time (they will receive a “out of date range” error).
If set to OFF, the application does not check the date the photo was taken before printing. If set to ON:
Start Date: The earliest date/time when the photo to print was taken (determined by EXIF data)
End Date: The latest date/time when the photo to print was taken (determined by EXIF data)
Max Images Per Session: Sets maximum number of images that can be sent from the Party Print application on mobile/Wi-Fi devices.
ON: maximum number of images sent at one time will be set by number in Images box
OFF: there is no restriction on the number of images that will print
Images: user inputs the maximum number of images a user can send in one session.
Output Folder Path: Sets the print size by setting the folder to which the server will save images in the Hot Folder Print directory. For instance, to print 4” x 6” prints at an event:
1. Select Browse to open browsing window.
2. Navigate to the C:\DNP\HOTFOLDERPRINT\PRINTS\ directory.
3. Select the 4x6 folder.

DNP IMS America Corp. 11
Message Tab
4. Touch OK to select the folder.
5. The path C:\\DNP\\HOTFOLDERPRINT\\PRINTS\\4X6 will show in the Upload Path field.
Upload Path: Lists the directory path where the upload folder is located.
Browse: Select to open browsing window.
MESSAGE TAB
The new message tab allows you to add customized HTML messaging and help files for your events. The customization also accepts language-specific messages, so customizing your messaging for different language markets is easy. All three customized messages appear on the user’s device or phone.
Figure 3. Messages tab
There are three messages that can be customized:
Help: The on-device help page can be customized as needed with event-specific information or languages.
Special: The start-up screen that is shown when Mobile Party Print starts on the mobile device can also be customized or replaced.
Disclaimer: The copyright notice is also able to be customized.
Rules for New FilesThe following rules must be followed when creating or importing new files.
Imports are at folder-level, not file-level. When selecting the imported messages, you are selecting a folder, not individual files. All of the files that are needed for a message (text file, HTML file, image files, etc.) must be under one folder. For instance, if you want to import a new help file, then the HTML file and any configuration or image files should be in a unique folder. Sub folders are allowed.
Files are stored in language-specific folders. All of the imported message files are stored in the appropriate language folder in the following directory:C:/DNP/PARTYPRINT/[LANG] where [lang] is the language code. For instance, Spanish files would be stored in the C:/DNP/PARTYPRINT/ES directory.

12 DNP IMS America Corp.
Importing New Message Files
Priority for using customized files. If there is a connection to the Party Print sever, then the message files are shown in the following priority:
1. Selected language customized files.
2. Selected language default files.
3. Default language customized files.
4. Default language default files.
5. No message files.
Help files. All settings can be found in the default help file. The file must be named in the following manner:HELP_[OS]_[LANG].HTML where [OS] is the operating system for the device and [lang] is the two letter code for the language. For an English Android file, the file would be named Help_Android_en.html.
Special files. All settings can be found in the default special file. The file must be named in the following manner:STARTUP_[LANG].HTML where [lang] is the two letter code for the language. For an English file, the file would be named Startup_en.html.
Disclaimer files. All settings can be found in the default disclaimer file. The file must be named in the following manner:AGREEMENT_[LANG].HTML where [lang] is the two letter code for the language. For an English file, the file would be named Agreement_en.html.
Importing New Message Files1. Select the language for the type of file you want to import.
2. Under the proper heading - help, special, disclaimer - select the Import button.
3. Browse to the folder where your customized files are stored. Select the folder.
4. Click the OK button to import your files.
Note
Once you have imported custom files at least one time, you can use the Revert button to revert to the previously-saved files. This is useful if incorrect files are imported, or there is a corrupt file imported.

DNP IMS America Corp. 13
Problems Running the MPP Software
TROUBLESHOOTING MPP ISSUES
PROBLEMS RUNNING THE MPP SOFTWARE
Cannot see the Mobile Party Print server: There are multiple reasons why devices cannot connect to the Mobile Party Print server.
Check to make the server is configured correctly.
1. Check to make sure the router is plugged in and receiving power.
2. Check that the router is plugged in correctly and the computer is not plugged into the port for your internet connection. The router must be plugged into your server using a network cable.
3. Login to your router to check your settings.
Check that the computer has networking enabled.
Make sure firewall allows port 8080 to receive inbound traffic.
Make sure the Dongle is plugged in.
Cannot send pictures (date out of range): The date range is set so that the image cannot be sent.
1. Open the Administrative Settings menu to the Server tab.
2. Check to see if Printing Period is ON.
3. If you do not want to have date restrictions, toggle to OFF.
4. Check that the date range is set so that the current date and time is in range.
Cannot send pictures (no info): Party Print must have the dongle in place in order to work.
1. Check that the dongle is plugged in.
2. Try moving it to a different USB port.
3. Verify the dongle is operating by opening the UploadImageSettings shortcut on the desktop.
4. If the dongle is not working or seated properly, the web page that opens will show a message on the screen saying “Invalid Dongle”

14 DNP IMS America Corp.
Starting the HFP Software
USING THE HOT FOLDER PRINT SOFTWARENote
Before starting Hot Folder Print Utility, make sure your DS or RX series printer is connected to your printer via USB, and powered ON.
You may need to install the printer driver before your printer shows in your printer and devices application.
STARTING THE HFP SOFTWARE
Double click the Hot Folder Print icon on your desktop to start the Hot Folder Print Utility.
PRINTING PHOTOS USING THE HFP SOFTWARE
The folder browser allows you to select the HFP output folder. Copy images into a folder, and the image is automatically sent to the printer. The name of the folder indicates the print size.
You can select from the following sizes:
1. To print images, simply click the folder icon to open the print size folder location.
2. Using a different Windows Explorer window, browse to the location where your images are stored.
3. Copy the images you want to print. Use the CTRL or SHIFT keys to select multiple images.
4. Paste the images you want to print into the corresponding print size folder.
Note
If you have a border in that print size folder, then the default border will automatically print on the image.
3.5 x 5 4 x 6 5 x 7
6 x 8 6 x 9 8 x 10
8 x 12
DNP IMS America Corp. 15
Touring the HFP Operator Interface
TOURING THE HFP OPERATOR INTERFACE
Figure 4. Hot Folder Print Utility Interface
A - Printer Info BoxShows information about your printer at a glance.
Printer: Printer type (DS40, DS80, RX-1)
Status: Current status of the printer Idle, Printing, Error, etc.
Sheets Rem: # of prints left on the media.
S/N: Serial number of the printer
Firmware: Firmware installed
CVD: Firmware color configuration file
Media Type: Size of media installed
Life Counter: Total # prints run through the lifetime of the printer.
B - Application ControlsStops and resumes print folder monitoring.
: Stops, or pauses, the monitoring of the print size folders so that no further prints are made.
: Resumes monitoring of the print size folders.
Note
Stopping may not immediately stop printing. The printer first empties the prints in the print buffer.
C
A
B
DE

16 DNP IMS America Corp.
C - Admin Controls
C - Admin Controls
Touching the gear opens the Admin Control Menu. For more information on the Admin controls, see the HFP Admin
section.
D - Folder Explorer
Touching the folder icon opens the monitored folder in Windows Explorer.
E - Version NumberThe software version number is listed for technical support purposes.
STOPPING THE HFP SOFTWARE
You can stop, or pause, the monitoring of the print size folders by pressing the Stop button at the bottom of the main screen. When you are ready to resume printing, press the Continue, or resume, button.
EXITING THE HFP SOFTWARE
To exit the program, touch the X in the top right corner.

DNP IMS America Corp. 17
Touring the HFP Admin Interface
USING THE HFP ADMIN INTERFACEThe admin interface allows you to customize the HFP utility to better suit y our needs.
TOURING THE HFP ADMIN INTERFACE
Throughout the Admin interface, the following button definitions remain the same:
Save & Exit to Desktop: Saves and exits to desktop.
Save & Exit: Saves & exits to HFP interface.
Revert: Reverts any changes made. The Revert button does not revert once the changes are saved.
System Tab
Archive Images Slider
YES: Copy images sent to folder to archive
NO: Do not copy images sent to archive
Start Minimized Slider
YES: Program starts minimized
NO: Program starts normally
Auto Correct slider
YES: Applies auto-color correction
NO: No auto-color correction applied

18 DNP IMS America Corp.
Border Tab
Border Tab
Select Print Size – Drop down box with printable sizes, select a size to view those borders.
Add Border – Touch the button to open a dialogue box to add new horizontal and vertical borders in the selected Print Size.
Border Information
Name: Enter a border name.
Enabled: Check to print border on all prints of the selected print size.
Border Preview: Horizontal and vertical previews of the border.
Edit: Touch the button to open the border editing tool.
Delete: Press to remove the border from the system.
Color Adjust Tab
The color adjust tab adjusts the overall output color. Adjustments made here will show on all prints made.
Red Slider
Move the slider to the right to lessen red

DNP IMS America Corp. 19
Color Adjust Tab
move the slider to the left to intensify red
Green Slider
Move the slider to the right to lessen green
move the slider to the left to intensify green
Blue Slider
Move the slider to the right to lessen blue
Move the slider to the left to intensify blue

20 DNP IMS America Corp.
Adding Borders
ADDING BORDERS
1. To add a border, first select a print size.
2. Touch the + button on the Border tab. The Add Border dialogue opens.
3. Each border requires both a horizontal (landscape) and vertical (portrait) version of the border in order to print.
4. Press Load Horizontal to select the horizontal version of the border. Press Load Vertical to select the vertical version of the border. The software will auto detect the picture area—to adjust see “Editing Borders” on page 21.
5. You must enter a name in the Border Name field before saving the file.
6. Click OK to save the borders using the text entered under the Border Name field as the name. Click Cancel to return to the Border tab.
7. The borders will save in following folder:
C:\DNP\HOTFOLDERPRINT\BORDERS\[SIZE]\[NAME]
where [size] is the print size for the border, and [name] is the text entered in the Border Name field.
8. HFP automatically inserts your pictures into the correct border based on metadata from the image.

DNP IMS America Corp. 21
Editing Borders
EDITING BORDERS
1. To edit a border, first select a border on the Border tab. The Edit Border dialogue opens.
2. Each border requires both a horizontal (landscape) and vertical (portrait) version of the border in order to print.
3. You can adjust the size of the area in which the image will appear by grabbing and dragging the circles on the border. The darkened area indicates the area in which the image will appear.
4. To move the area overall, grab the box and move it where you want the image to appear.
5. Click OK to save the borders. Click Cancel to return to the Border tab.
6. Any part of the border within the darkened area will overlap your image once applied.
CREATING BORDERS
Borders must meet the following criteria:
Each border requires a full size, 300 dpi resolution file for horizontal & vertical orientations.
The full resolution file must be expected print size (e.g.: 4x6, 5x7) at 300 dpi. Both vertical & horizontal files must be saved in PNG format, RGB mode, with a transparent background & with a defined opening for the image.
In general, the opening in the border should have the same aspect ratio as the overall image (e.g.: 4:6), although the opening does not have to be strictly rectangular and may have various edge treatments. This can be edited with the Border Tool in the HFP Admin after the border is uploaded to the system.
All files should be UNCOMPRESSED (no LZW compression).
An example of a 4x6 border follows:
Border Orientation
Version Naming Size Resolution File Format
Color Mode
Horizontal(Landscape)
full size [name]_h.png 4”x6” 300 dpi PNG RGB
Vertical(Portrait)
full size [name]_v.png 6”x4” 300 dpi PNG RGB
22 DNP IMS America Corp.
Troubleshooting the System
TROUBLESHOOTING HFP ISSUES
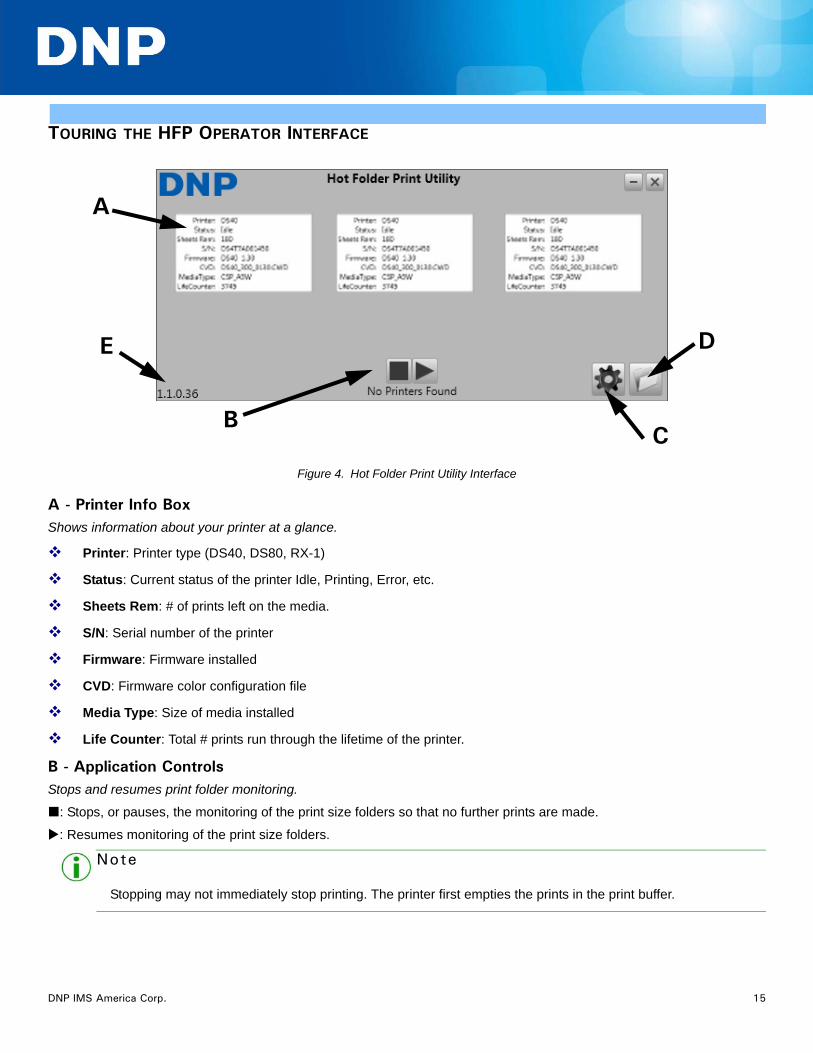
TROUBLESHOOTING THE SYSTEM
Software Installation IssuesYour system must meet the following requirements before installing the Mobile Party Print system.
Windows 7 Pro or Windows 8 operating system - 32 or 64 bit
.NET version 4
LAN (Ethernet) input on the computer
No previous versions of Apache Tomcat installed
No 3rd Party firewall applications installed
Windows firewall supported
Dongle: The included Dongle is necessary for operation of Mobile Party Print. If the driver software for the dongle is not installed (or installed incorrectly), or the dongle is not plugged in, the mobile applications cannot connect to the server.
Problems Running Hot Folder Print UtilityPrompted to Install .NET: HFP requires a minimum of Microsoft .NET version 4 in order to work properly. If you do not have this version on your computer, you will be prompted to install .NET v 4 when you try to run Hot Folder Print Utility.
Border will not print: There are multiple reasons the border may not be printing.
Check to make sure that the border is installed in the correct folder.
Open Admin Controls > Borders, and select the Print Size from the drop down menu if the border does not show in the list, install the border using the Add Border instructions.
Check to make sure that the border is enabled in the Admin controls/Border tab.
1. In Admin Controls > Borders, select the Print Size from the drop down menu.
2. Find the border in the list, and check to see if there is a check mark next to the Enabled indicator. If there is no check mark, select the box next to Enabled.
Border is not printing properly (image is too large/small in the border): The border’s alpha channel is not set properly.
Check to make sure that the border has well defined alpha channels in Admin Controls > Borders, select the Print Size from the drop down menu find the border in the list, and click on the pencil icon to edit.
Use the circles to define the image print area on the border. Border areas overlapping the box will cover the image. Click OK to save changes.
Border will not upload in the program: Borders must be saved in the correct format and have both horizontal and vertical borders provided to work.
1. Check to make sure that the border has a horizontal and vertical version, and is saved in the correct format.
2. Borders must have a horizontal (landscape) and vertical (portrait) version of the border in the correct ratio to work correctly.

DNP IMS America Corp. 23
Problems Running Hot Folder Print Utility
3. Borders should be in PNG format with a transparent background and a “hole” cut out where the image should appear.
4. When the border uploads, use the circles to define the image print area on the border (page 6). Border areas overlapping the box will cover the image.
5. Click OK to save changes.

24 DNP IMS America Corp.
Problems Running Hot Folder Print Utility


www.dnpphoto.com© 2000-2013 DNP IMS America Corp. Al l r ights reserved
Reproduction in whole or part without written permission is prohibited.
Specif icat ions subject to change without notice.Hot Folder Pr int Uti l i ty, DS-Series™, and RX-Series™ are trademarks of
DNP IMS America Corp. Al l other trademarks are properties of their respective owners.
PN: DOC-U-MPPREV: 10-2013