Embed Size (px)
Citation preview
1
Student Module Selection and Online Enrolment
MODULE SELECTION PROCESS
1. Log on to the University’s website from your homepage by entering:
www.UTechjamaica.edu.jm on the address line of your web browser.
Press enter or click go and the UTech
website homepage will appear as shown here.
2. Click where it says Student Portal
at the top right hand corner of the
UTech website homepage or to
the left of the page under the
caption ‘Current Students’
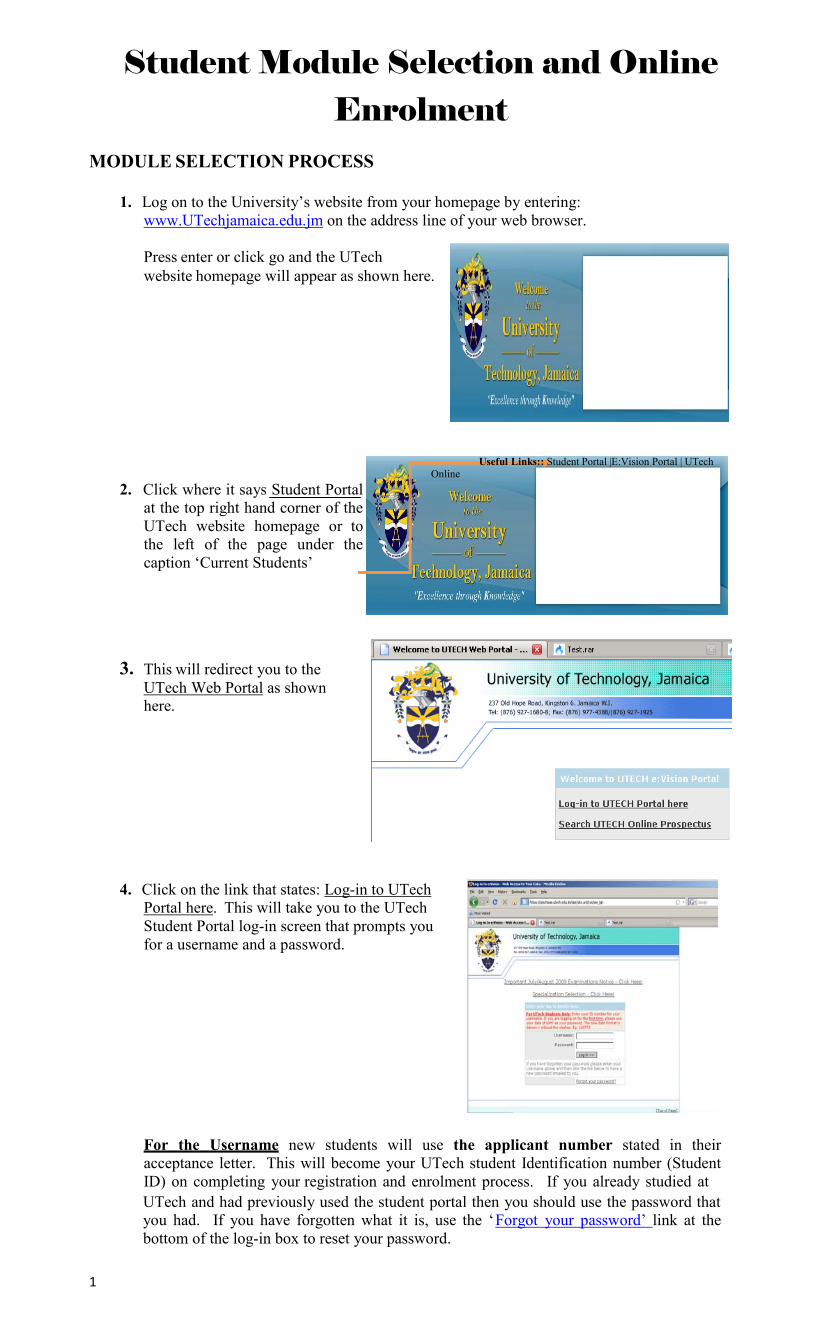
3. This will redirect you to the
UTech Web Portal as shown here.
Online
Useful Links:: Student Portal |E:Vision Portal | UTech
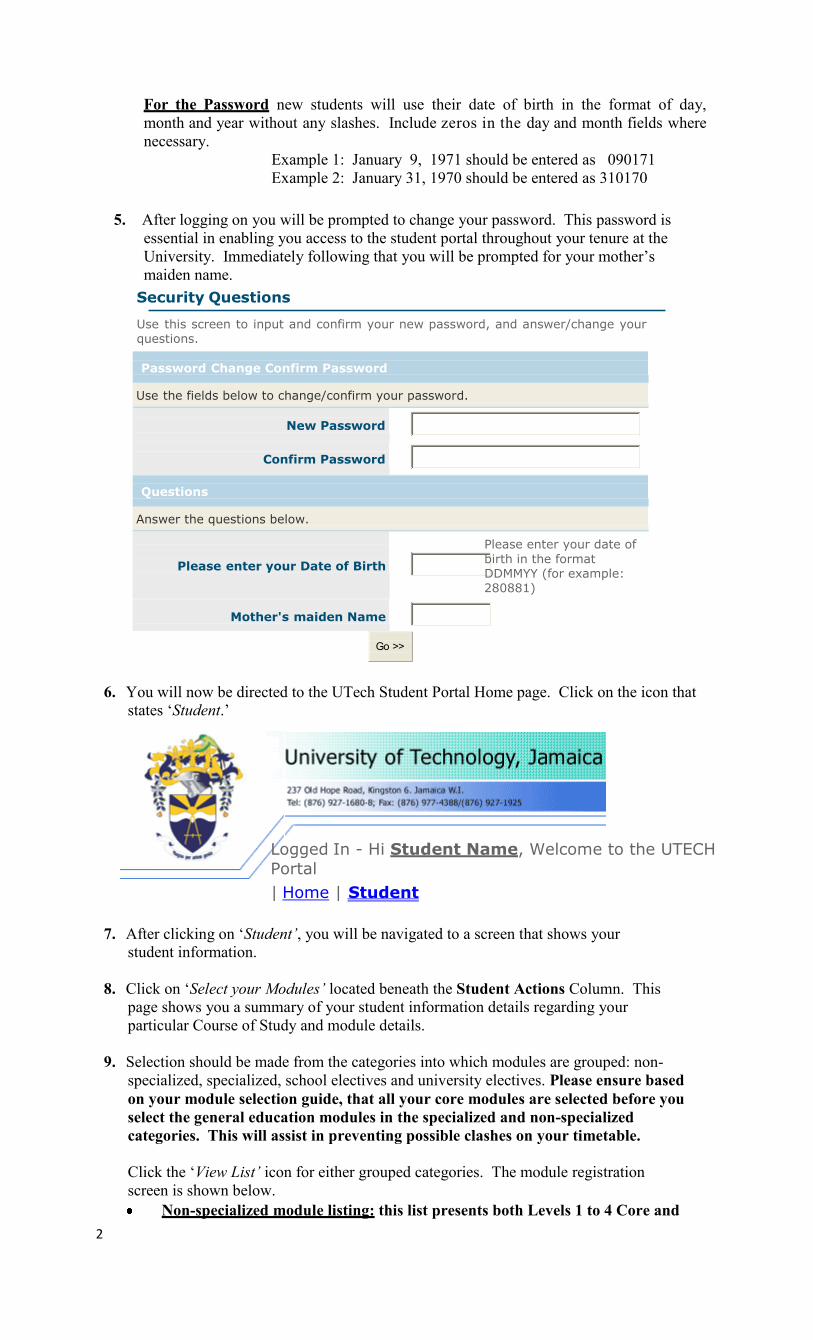
4. Click on the link that states: Log-in to UTech
Portal here. This will take you to the UTech
Student Portal log-in screen that prompts you
for a username and a password.
For the Username new students will use the applicant number stated in their
acceptance letter. This will become your UTech student Identification number (Student
ID) on completing your registration and enrolment process. If you already studied at
UTech and had previously used the student portal then you should use the password that
you had. If you have forgotten what it is, use the ‘Forgot your password’ link at the
bottom of the log-in box to reset your password.
2
For the Password new students will use their date of birth in the format of day,
month and year without any slashes. Include zeros in the day and month fields where
necessary.
Example 1: January 9, 1971 should be entered as 090171
Example 2: January 31, 1970 should be entered as 310170
5. After logging on you will be prompted to change your password. This password is
essential in enabling you access to the student portal throughout your tenure at the
University. Immediately following that you will be prompted for your mother’s
maiden name.
Security Questions
Use this screen to input and confirm your new password, and answer/change your questions.
Password Change Confirm Password
Use the fields below to change/confirm your password.
New Password
Confirm Password
Questions
Answer the questions below.
Please enter your Date of Birth
Please enter your date of
birth in the format DDMMYY (for example: 280881)
Mother's maiden Name
Go >>
6. You will now be directed to the UTech Student Portal Home page. Click on the icon that
states ‘Student.’
Logged In - Hi Student Name, Welcome to the UTECH
Portal
| Home | Student
7. After clicking on ‘Student’, you will be navigated to a screen that shows your
student information.
8. Click on ‘Select your Modules’ located beneath the Student Actions Column. This
page shows you a summary of your student information details regarding your
particular Course of Study and module details.
9. Selection should be made from the categories into which modules are grouped: non-
specialized, specialized, school electives and university electives. Please ensure based
on your module selection guide, that all your core modules are selected before you
select the general education modules in the specialized and non-specialized
categories. This will assist in preventing possible clashes on your timetable.
Click the ‘View List’ icon for either grouped categories. The module registration
screen is shown below.
Non-specialized module listing: this list presents both Levels 1 to 4 Core and
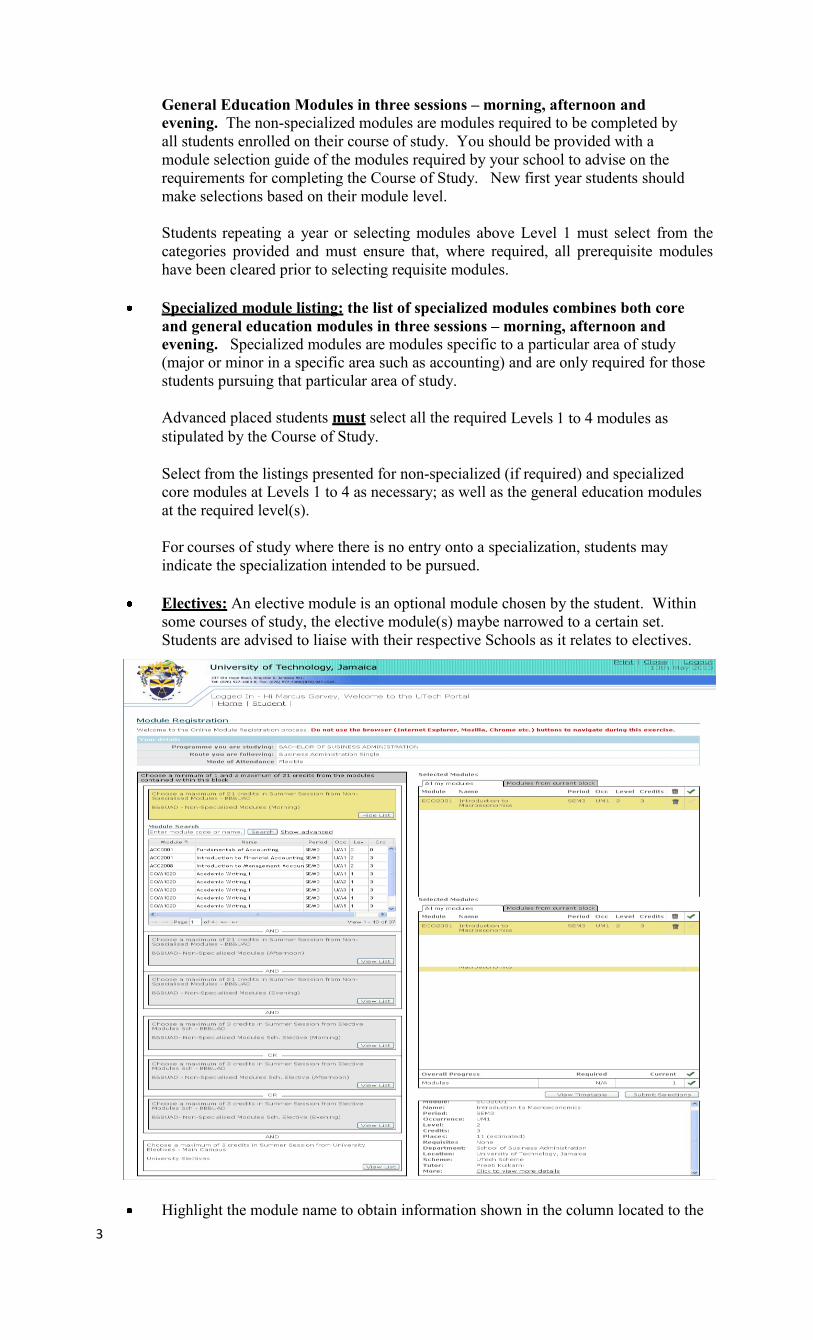
3
General Education Modules in three sessions – morning, afternoon and
evening. The non-specialized modules are modules required to be completed by
all students enrolled on their course of study. You should be provided with a
module selection guide of the modules required by your school to advise on the
requirements for completing the Course of Study. New first year students should
make selections based on their module level.
Students repeating a year or selecting modules above Level 1 must select from the
categories provided and must ensure that, where required, all prerequisite modules
have been cleared prior to selecting requisite modules.
Specialized module listing: the list of specialized modules combines both core
and general education modules in three sessions – morning, afternoon and
evening. Specialized modules are modules specific to a particular area of study
(major or minor in a specific area such as accounting) and are only required for those
students pursuing that particular area of study.
Advanced placed students must select all the required Levels 1 to 4 modules as
stipulated by the Course of Study.
Select from the listings presented for non-specialized (if required) and specialized
core modules at Levels 1 to 4 as necessary; as well as the general education modules
at the required level(s).
For courses of study where there is no entry onto a specialization, students may
indicate the specialization intended to be pursued.
Electives: An elective module is an optional module chosen by the student. Within
some courses of study, the elective module(s) maybe narrowed to a certain set.
Students are advised to liaise with their respective Schools as it relates to electives.
Highlight the module name to obtain information shown in the column located to the
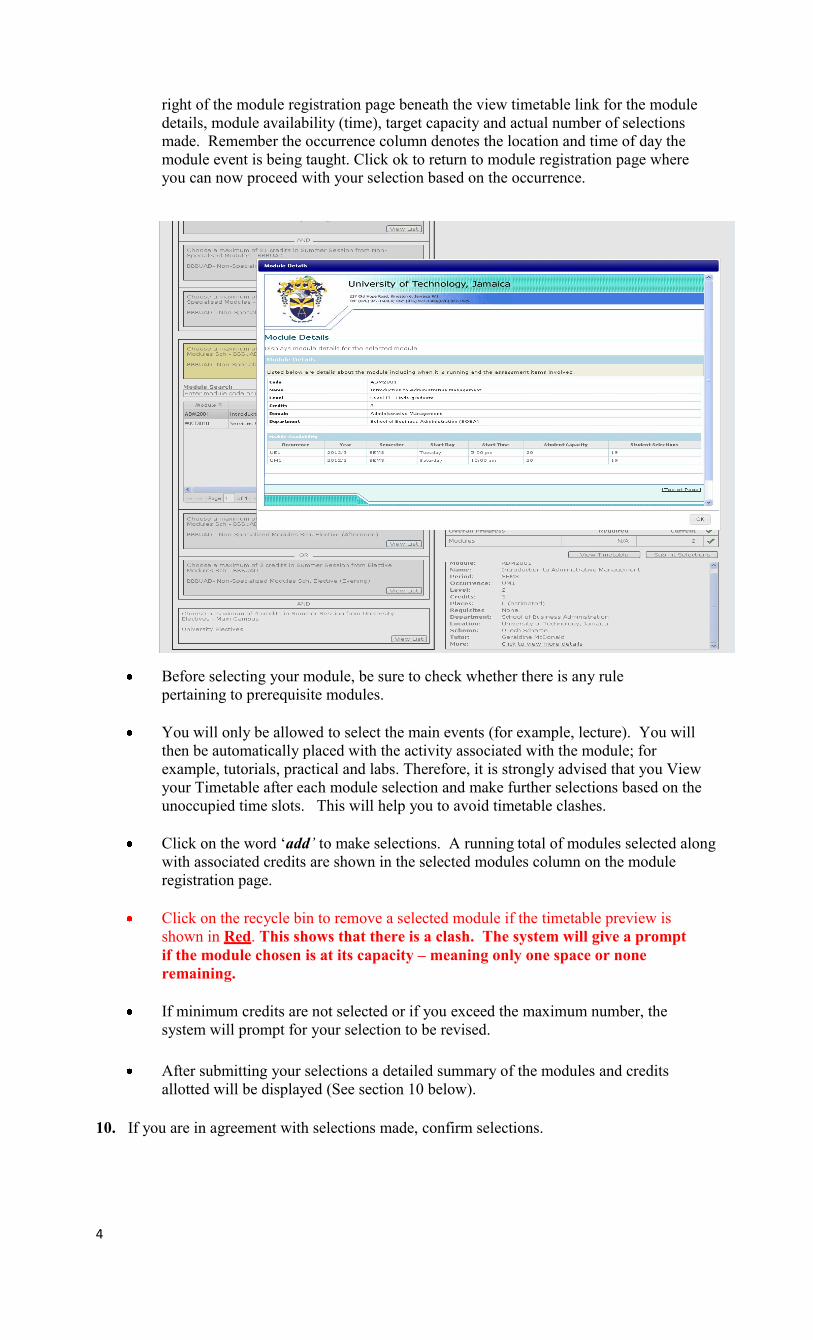
4
right of the module registration page beneath the view timetable link for the module
details, module availability (time), target capacity and actual number of selections
made. Remember the occurrence column denotes the location and time of day the
module event is being taught. Click ok to return to module registration page where
you can now proceed with your selection based on the occurrence.
Before selecting your module, be sure to check whether there is any rule
pertaining to prerequisite modules.
You will only be allowed to select the main events (for example, lecture). You will
then be automatically placed with the activity associated with the module; for
example, tutorials, practical and labs. Therefore, it is strongly advised that you View
your Timetable after each module selection and make further selections based on the
unoccupied time slots. This will help you to avoid timetable clashes.
Click on the word ‘add’ to make selections. A running total of modules selected along
with associated credits are shown in the selected modules column on the module
registration page.
Click on the recycle bin to remove a selected module if the timetable preview is
shown in Red. This shows that there is a clash. The system will give a prompt
if the module chosen is at its capacity – meaning only one space or none
remaining.
If minimum credits are not selected or if you exceed the maximum number, the
system will prompt for your selection to be revised.
After submitting your selections a detailed summary of the modules and credits
allotted will be displayed (See section 10 below).
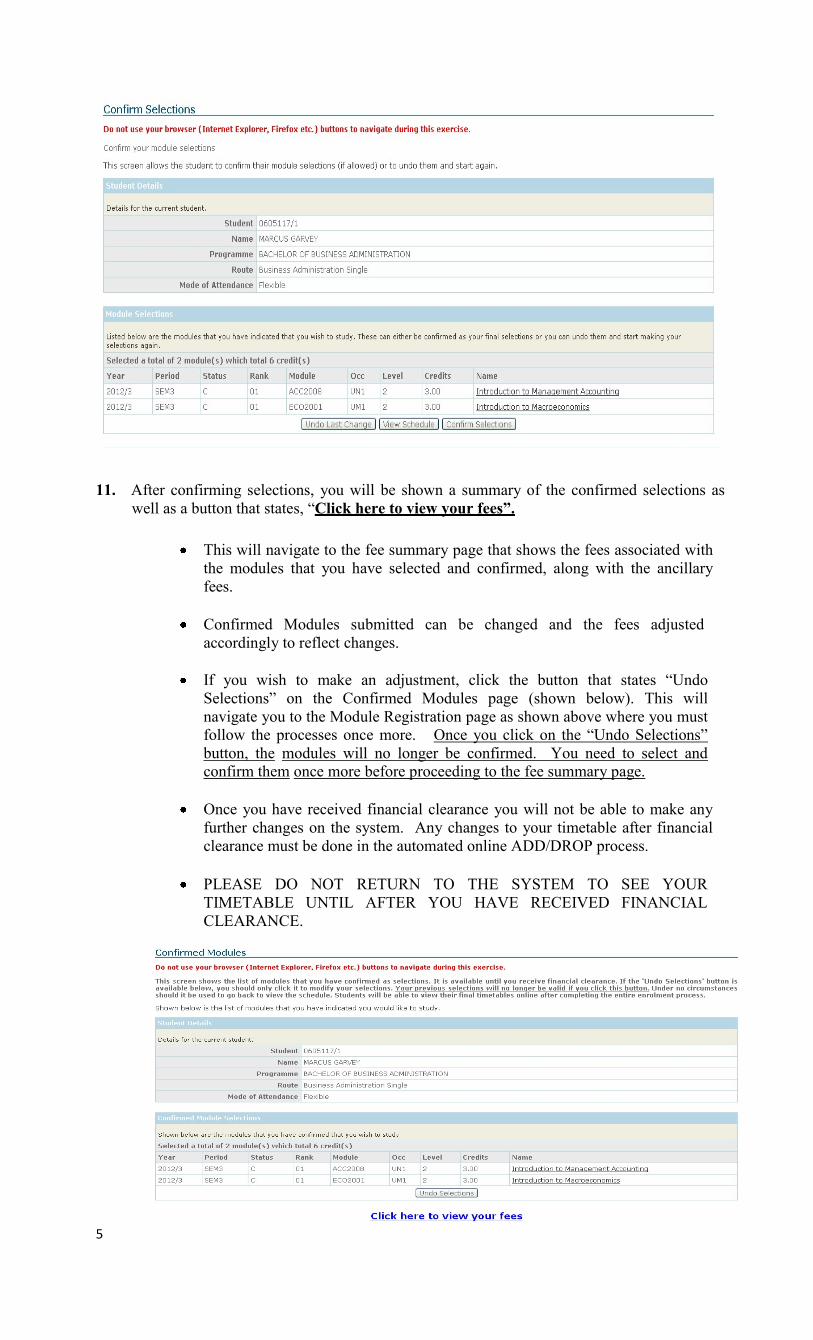
10. If you are in agreement with selections made, confirm selections.
5
11. After confirming selections, you will be shown a summary of the confirmed selections as
well as a button that states, “Click here to view your fees”.
This will navigate to the fee summary page that shows the fees associated with
the modules that you have selected and confirmed, along with the ancillary
fees.
Confirmed Modules submitted can be changed and the fees adjusted
accordingly to reflect changes.
If you wish to make an adjustment, click the button that states “Undo
Selections” on the Confirmed Modules page (shown below). This will
navigate you to the Module Registration page as shown above where you must
follow the processes once more. Once you click on the “Undo Selections”
button, the modules will no longer be confirmed. You need to select and
confirm them once more before proceeding to the fee summary page.
Once you have received financial clearance you will not be able to make any
further changes on the system. Any changes to your timetable after financial
clearance must be done in the automated online ADD/DROP process.
PLEASE DO NOT RETURN TO THE SYSTEM TO SEE YOUR
TIMETABLE UNTIL AFTER YOU HAVE RECEIVED FINANCIAL
CLEARANCE.
6
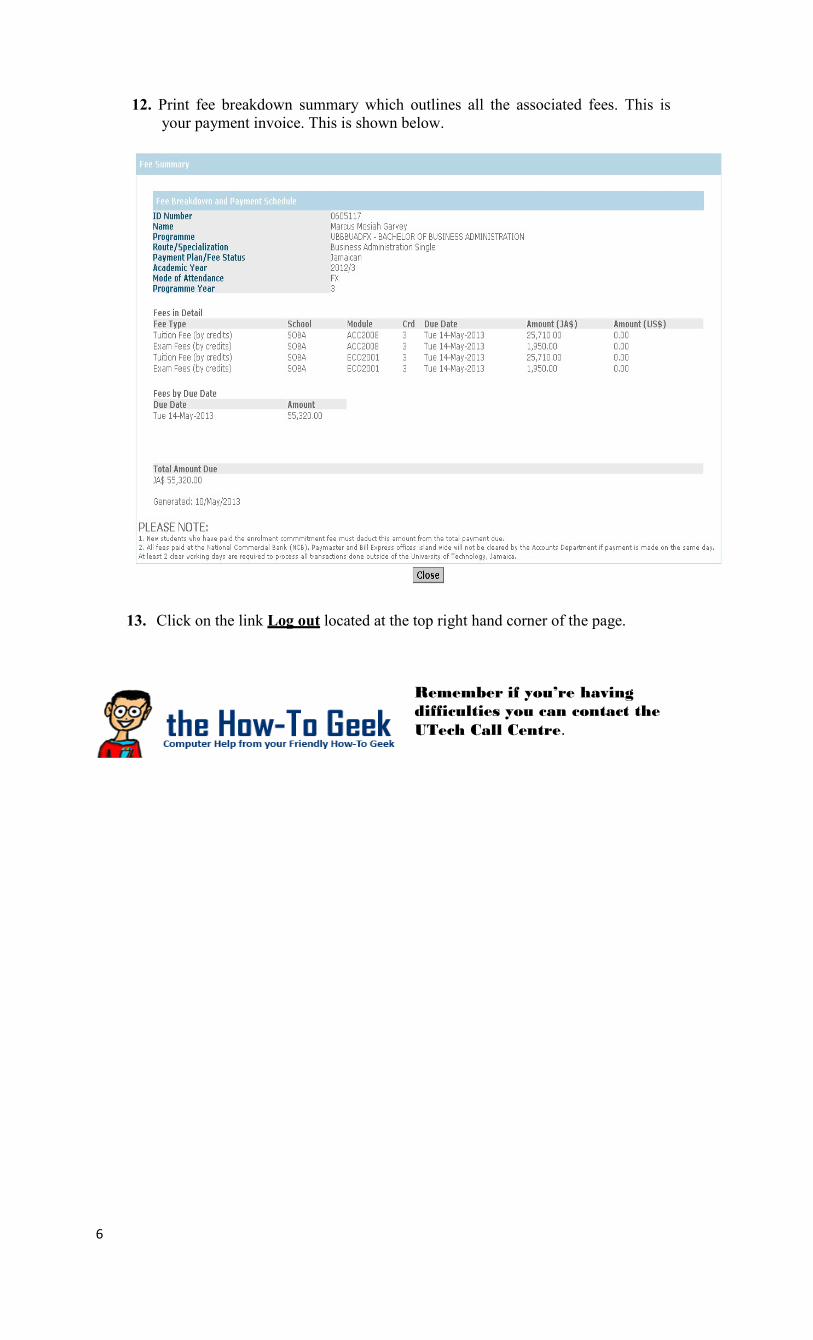
12. Print fee breakdown summary which outlines all the associated fees. This is
your payment invoice. This is shown below.
13. Click on the link Log out located at the top right hand corner of the page.
Remember if you’re having
difficulties you can contact the
UTech Call Centre.
7
Making Your Payments
General Payment Registration Guidelines
After printing the fee breakdown (invoice), you are now required to follow the applicable
procedure(s):
Procedure for Persons seeking boarding accommodation
1. Boarders will be required to pay both Tuition fees and Boarding fees at any of the payment
locations, separately, before proceeding to the Accommodations Office.
2. Pay all tuition/boarding/miscellaneous/registration fees required for enrolment.
Procedure for Student Loan Bureau (SLB) loan recipients
Student Loan Bureau (SLB) loan recipients, will be granted financial clearance, once their loans
have been approved and communication has been received by the University electronically. The
SLB covers tuition and assessment fees ONLY.
Note:
SLB will only pay for the maximum number of credits for each level. Students are required to
check that the number of credits for each semester does not exceed the amount approved by the
Bureau. Should they exceed agreed amount, student will be required to pay the difference.
Additionally, SLB does not cover the cost for pre-university modules.
Students should therefore be guided by the following steps:
1. Generate fee breakdown.
2. Pay all miscellaneous/registration fees required for enrolment (SLB covers Tuition and Exam fee
only)
3. Check student Intray for message.
4. Complete the enrolment steps
5. Follow up with the SLB to ensure that all guarantors’ documents have been submitted.
6. Ensure that payments are made to the University by the Student Loan Bureau.
Procedure for Staff member /Sponsored Students/Scholarship recipients/Co-dependents of
UTech Staff member
If you are a staff member or a co-dependent of a UTech staff member, you need to:
1. Submit your fee breakdown to the UTech Human Resource Department located on the Papine
Campus for approval.
2. Information will be transmitted electronically to the Students Receivable unit by HR
department for update to your account.
3. Pay all tuition/miscellaneous/registration fees required for enrolment:
If you are a sponsored student/receiving scholarship, you need to:
1. Proceed to the Financial Aid Office located on the Papine campus with the fee breakdown.
2. Pay all tuition/miscellaneous/registration fees required for enrolment.
3. Check student in tray for message.
8
General Payment Procedure
Make the necessary/required payments via any of the following available options:
Payment at NCB
1. If payments are being made via any branch of NCB the following are required:
i. UTech Fee breakdown (Tuition/Boarding Invoice) with Student’s Name, ID Number and
amount to be paid.
ii. A completed regular NCB Deposit voucher with the following details:
1. UTech’s Account Number:
a. 371360247 (JA$ Payments ONLY) OR
b. 376089223 (US$ Payments ONLY)
2. Student’s Full Name
3. Student’s Identification Number
4. The name of the person making the payment must be written in the section “PAID IN
BY___________”
5. “UTech School Fee Payment” must be written at the section “ACCOUNT
NAME____________”
6. Include the amount being paid.
7. Indicate the type of payment being made i.e. “Tuition Payment” OR “Boarding
Payment”
2. Via Tele-Midas at 1-888-622-3477-8 or by via E-Banking online at www.jncb.com (NCB
Customers ONLY) providing the following information where applicable:
a. UTech’s Account Number:
i. 371360247 (JA$ Payments ONLY) OR
ii. 376089223 (US$ Payments ONLY)
b. Student’s Full Name
c. Student’s Identification Number
3. Payments can be made via Wire-Transfer (from any bank that supports this facility) using the
following information:
a. UTech’s Account Number:
i. 376089223 (US$ Payments ONLY)
ii. 371360247 (JA$ Payments ONLY)
b. SWIFT CODE: JNCB JMKX
c. Student’s Full Name
d. Student’s Identification Number
e. Indicate the type of payment being made i.e. “Tuition Payment” OR “Boarding Payment”
Note: The above information should be indicated on the wire-transfer information and a copy of
completed transaction faxed to Fax #: 970 – 2302
9
Payment at Paymaster
Provide the payment representative with the following information:
Student identification card or Number
Student Full Name First, Last, Middle)
Amount being paid
Indicate that payment is being made to “UTech”.
Note: The above detail SHOULD be printed on the receipt when the transaction is completed.
Payment at Bill Express
Provide the payment representative with the following information:
Student identification card or Number
Student Full Name (First, Last, Middle)
Amount being paid
Indicate that payment is being made to “UTech”.
Note: The above detail SHOULD be printed on the receipt when the transaction is completed.
Online Payment via UTech’s Website
Payments can be made via the university’s website via the ‘Online Services’ section. Payments via
this method are possible with any of the following:
• Keycard
• Visa
• MasterCard
Upon payment a confirmation email will be sent to you as receipt of your payment.
Financial Clearance
Students will receive messages to their portal to inform them of their registration status. You should
monitor your portal ‘Intray’ for messages regarding financial clearance. If after two clear working
days following fee payment a financial clearance message does not appear in the ‘Intray’, please
contact Students Receivables by email: [email protected]. The notification message you
will receive in your Intray may include any of the following:
1. “You have been financially cleared . . .”
2. “You have not paid the requisite amount to be registered . . . The remaining balance must be
settled to avoid penalties.”
3. “Your financial status cannot be assessed because you have not confirmed your selections.”
Please pay special attention to the instructions displayed which indicates there is a problem with
your registration. Follow the recommended actions. You cannot be registered unless:
the requisite fees have been paid
financial clearance approval is given electronically based on your invoice and payment
agreement.
10
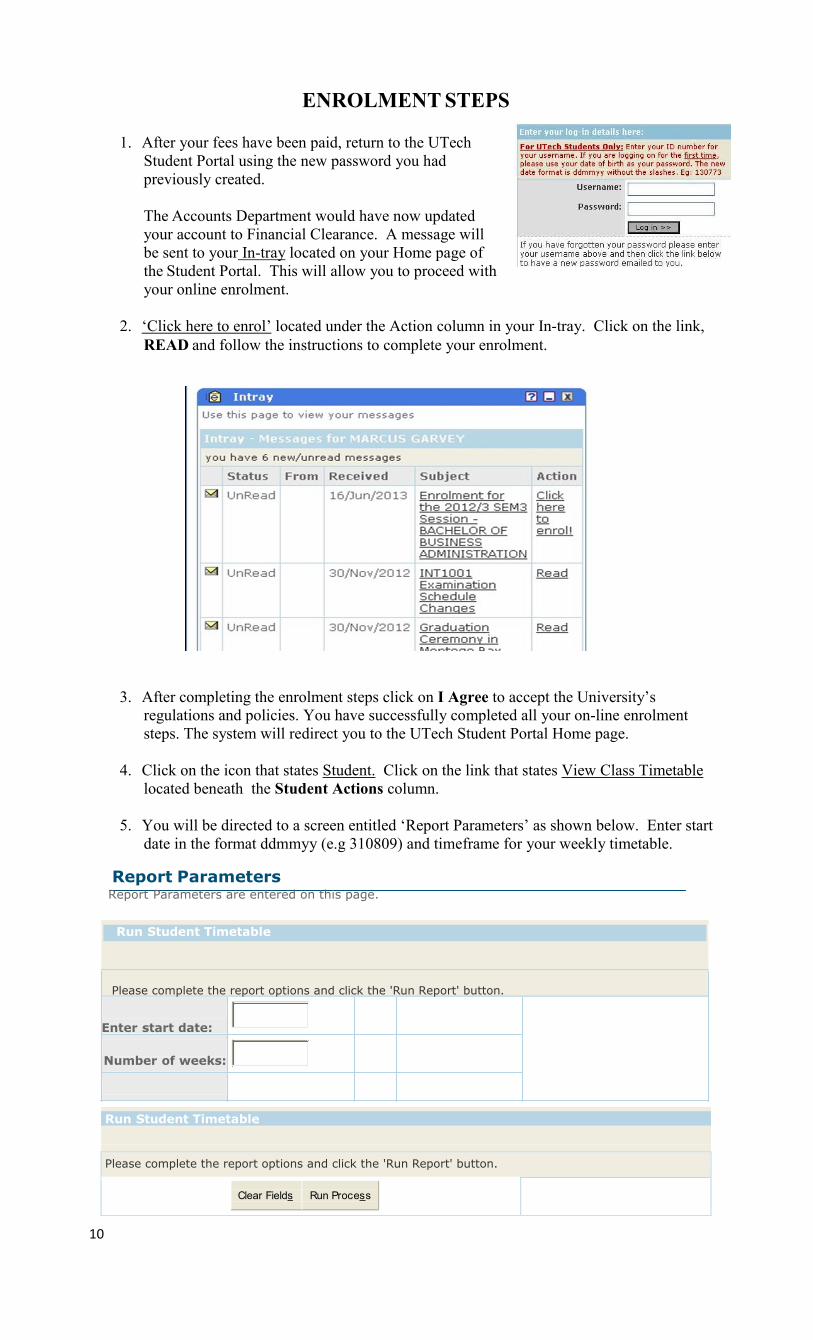
ENROLMENT STEPS
1. After your fees have been paid, return to the UTech
Student Portal using the new password you had
previously created.
The Accounts Department would have now updated
your account to Financial Clearance. A message will
be sent to your In-tray located on your Home page of
the Student Portal. This will allow you to proceed with
your online enrolment.
2. ‘Click here to enrol’ located under the Action column in your In-tray. Click on the link,
READ and follow the instructions to complete your enrolment.
3. After completing the enrolment steps click on I Agree to accept the University’s
regulations and policies. You have successfully completed all your on-line enrolment
steps. The system will redirect you to the UTech Student Portal Home page.
4. Click on the icon that states Student. Click on the link that states View Class Timetable
located beneath the Student Actions column.
5. You will be directed to a screen entitled ‘Report Parameters’ as shown below. Enter start
date in the format ddmmyy (e.g 310809) and timeframe for your weekly timetable.
Report Parameters Report Parameters are entered on this page.
Run Student Timetable
Please complete the report options and click the 'Run Report' button.
Enter start date:
Number of weeks:
Run Student Timetable
Please complete the report options and click the 'Run Report' button.
Clear Fields
Run Process
11
6. After printing your personalized timetable, you can now log out of the system.
7. Proceed to the medical centre to submit your medical form or to make arrangements for
the medical to be completed by the UTech Practitioner at the Papine campus. Failure to
complete your medical will bar you from being a beneficiary of the health scheme
and you will not be officially registered.
8. Boarding applicants are asked to visit the Accommodations Department before
proceeding to the Department of Safety and Security to process your
identification.
9. Proceed to the Department of Safety and Security located on the ground floor of the main
Administration building of the University to process your identification card. (See
opening hours below).
10. Collect your student Handbook at the Office of Admissions and Enrolment Management.
11. You are now a registered student of the University.
THE DEPARTMENT OF SAFETY AND SECURITY OPENING HOURS
Mondays, Tuesday and Fridays 8:00 am – 4:00 pm
Thursdays 12:00 noon – 8:30 pm
Saturdays 10:00 am – 3:00 pm
Wednesdays CLOSED
Remember if you’re having difficulties
you can contact the UTech Call Centre.