Embed Size (px)
Citation preview
Modifying the Generic Web Site Templates
We have provided a 5-page generic web site for your use in connecting to the CONTENTdm database if you do not have your own site established. The 5 pages include a front (index) page and 2 subpages (image rights, about this project). You may add more subpages or change the existing ones if you desire. The remaining 2 pages are for query results and viewing. They reside on the Libraries’ server. Libraries’ staff will provide only limited modications to them.
The 3 main pages (index, about this project, image rights) should be placed into a folder called “imls” on your server. Inside this folder you need to create a subfolder and label it “images”. Place the button image and the CONTENTdm logo inside this folder. Any other images you add to the pages, such as your logo, should be placed in this folder as well.
The 3 main pages have comments embedded in the html code to guide you in changing colors and text. You should make backup copies of the original template pages before you begin editing them.
Below, you will nd a brief overview of the editable regions:
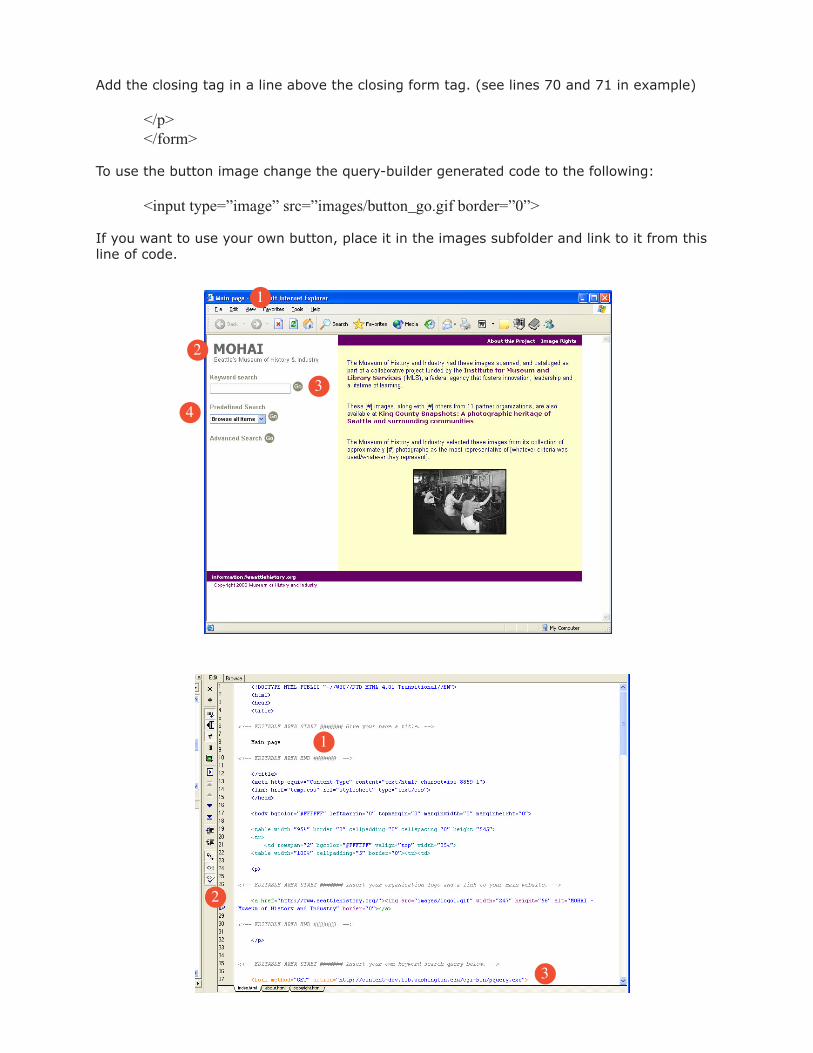
1. Give your page a title. The text you add here will be displayed in the top left portion of the user’s browser window.
2. Insert your organization logo or name here. If you have a graphic logo saved as either a jpg or gif you may add it here along with a link to your organization’s website.
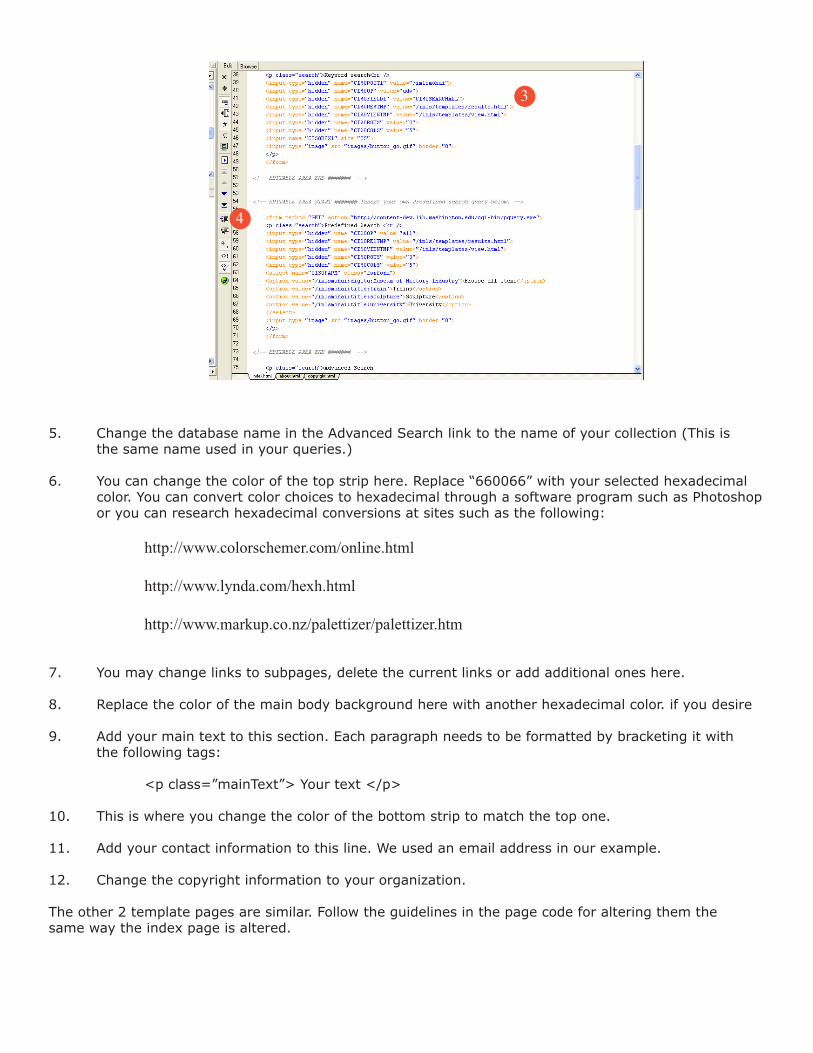
3. Add a keyword search for your collection here. If you want to retain the template formatting just replace the name of the collection in the following line:
<input type=”hidden” name=”CISOROOT1” value=/imlsmohai”>
Replace “imlsmohai” with your collection name which will be provided by the CONTENTdm Administrator.
You will also need to replace the two template le names with the names of those provided to you by the Libraries’ staff.
<input type=”hidden” name=”CISORESTMP” value=/imls/templates/yourfile”> <input type=”hidden” name=”CISOVIEWTMP” value=/imls/templates/yourfile”>
4. Insert your own Predened search query using a pull-down list box. Refer to the Building Queries document for help. Remember to add the full URL to the form action tag so the query will access your collection on the Libraries’ server.
<form method=”GET” action=”http://content-dev.lib.washington.edu/cgi-bin/pquery.exe>
Note: You will need to change this to
http://content.lib.washington/cgi-bin/pquery.exe
when your site goes live. The content-dev URL is for testing.
After pasting the query code into your html document you can add text above the pull-down box. We used “Predened Search” on line 57 of our example.
Type the following after the <form method…> line
<p class=search”>Predefined Search <br />
1
1
2
2
3
3
4
Add the closing tag in a line above the closing form tag. (see lines 70 and 71 in example)
</p> </form>
To use the button image change the query-builder generated code to the following:
<input type=”image” src=”images/button_go.gif border=”0”>
If you want to use your own button, place it in the images subfolder and link to it from this line of code.
3
4
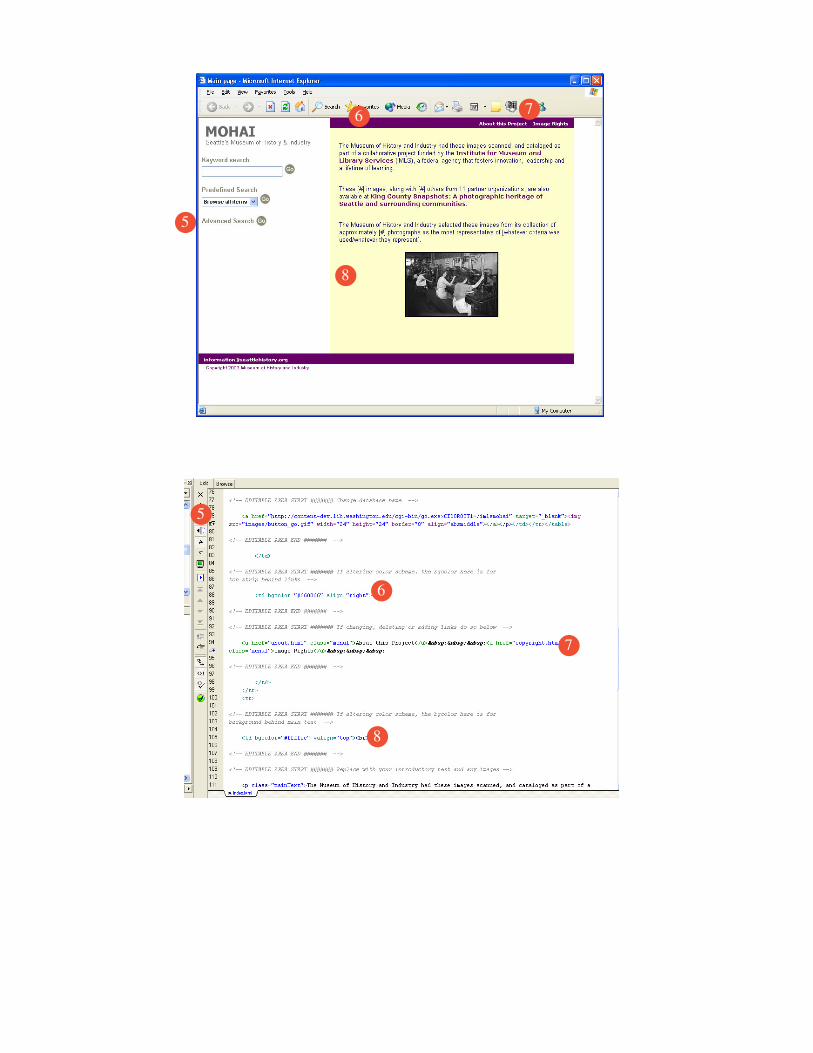
5. Change the database name in the Advanced Search link to the name of your collection (This is the same name used in your queries.) 6. You can change the color of the top strip here. Replace “660066” with your selected hexadecimal color. You can convert color choices to hexadecimal through a software program such as Photoshop or you can research hexadecimal conversions at sites such as the following:
http://www.colorschemer.com/online.html
http://www.lynda.com/hexh.html http://www.markup.co.nz/palettizer/palettizer.htm
7. You may change links to subpages, delete the current links or add additional ones here.
8. Replace the color of the main body background here with another hexadecimal color. if you desire
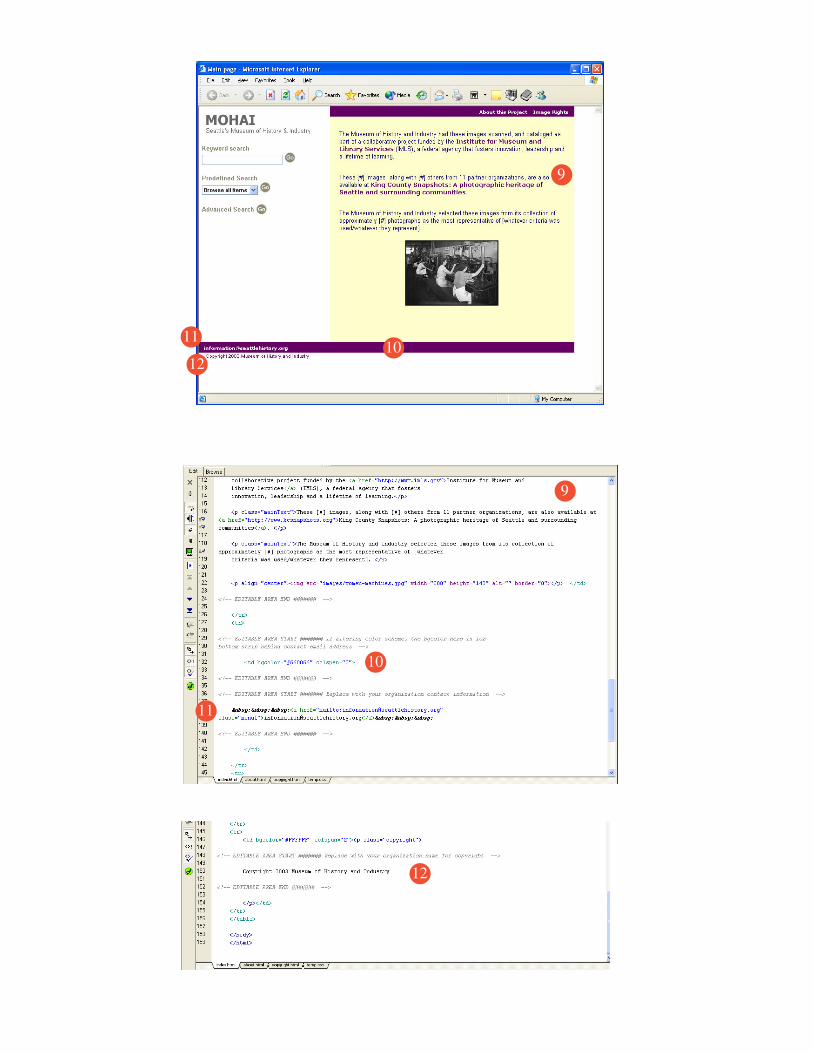
9. Add your main text to this section. Each paragraph needs to be formatted by bracketing it with the following tags:
<p class=”mainText”> Your text </p>
10. This is where you change the color of the bottom strip to match the top one.
11. Add your contact information to this line. We used an email address in our example.
12. Change the copyright information to your organization.
The other 2 template pages are similar. Follow the guidelines in the page code for altering them the same way the index page is altered.
5
5
6
6 7
7
8
8
9
9
10
10
11
11
12
12
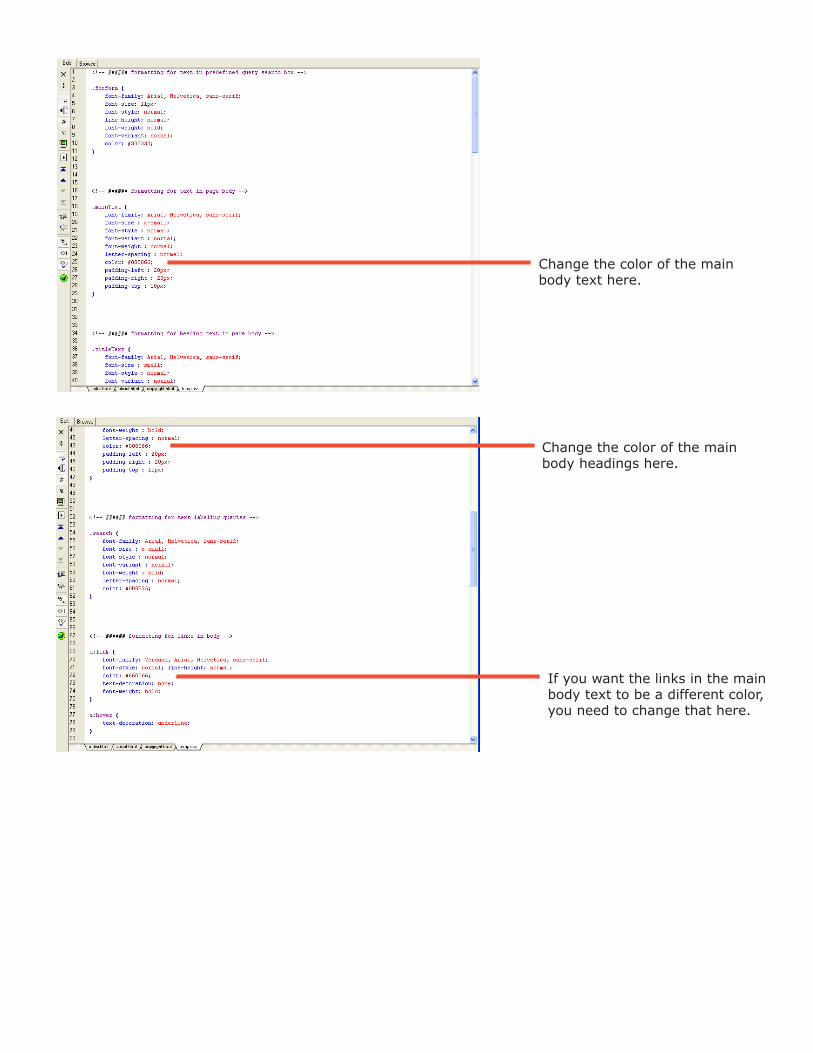
Change the color of the main body text here.
Change the color of the main body headings here.
If you want the links in the main body text to be a different color, you need to change that here.
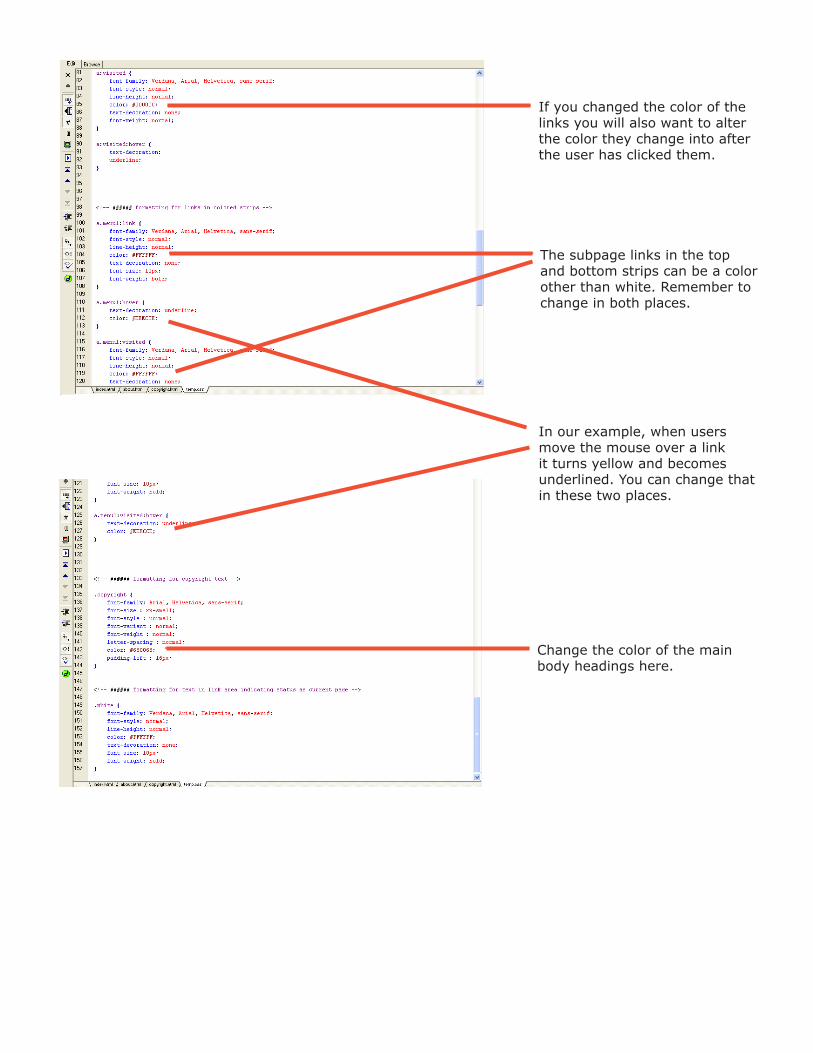
If you changed the color of the links you will also want to alter the color they change into after the user has clicked them.
The subpage links in the top and bottom strips can be a color other than white. Remember to change in both places.
Change the color of the main body headings here.
In our example, when users move the mouse over a link it turns yellow and becomes underlined. You can change that in these two places.