Embed Size (px)
Citation preview
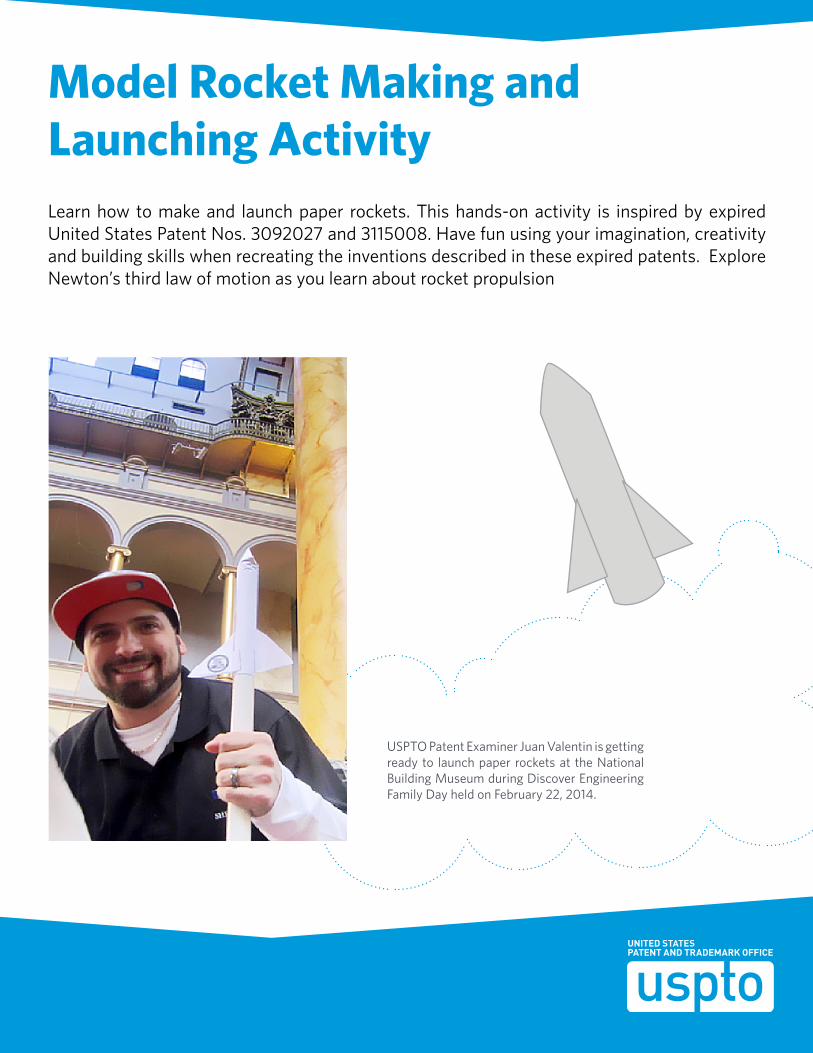
Model Rocket Making and Launching ActivityLearn how to make and launch paper rockets. This hands-on activity is inspired by expired United States Patent Nos. 3092027 and 3115008. Have fun using your imagination, creativity and building skills when recreating the inventions described in these expired patents. Explore Newton’s third law of motion as you learn about rocket propulsion
USPTO Patent Examiner Juan Valentin is getting ready to launch paper rockets at the National Building Museum during Discover Engineering Family Day held on February 22, 2014.
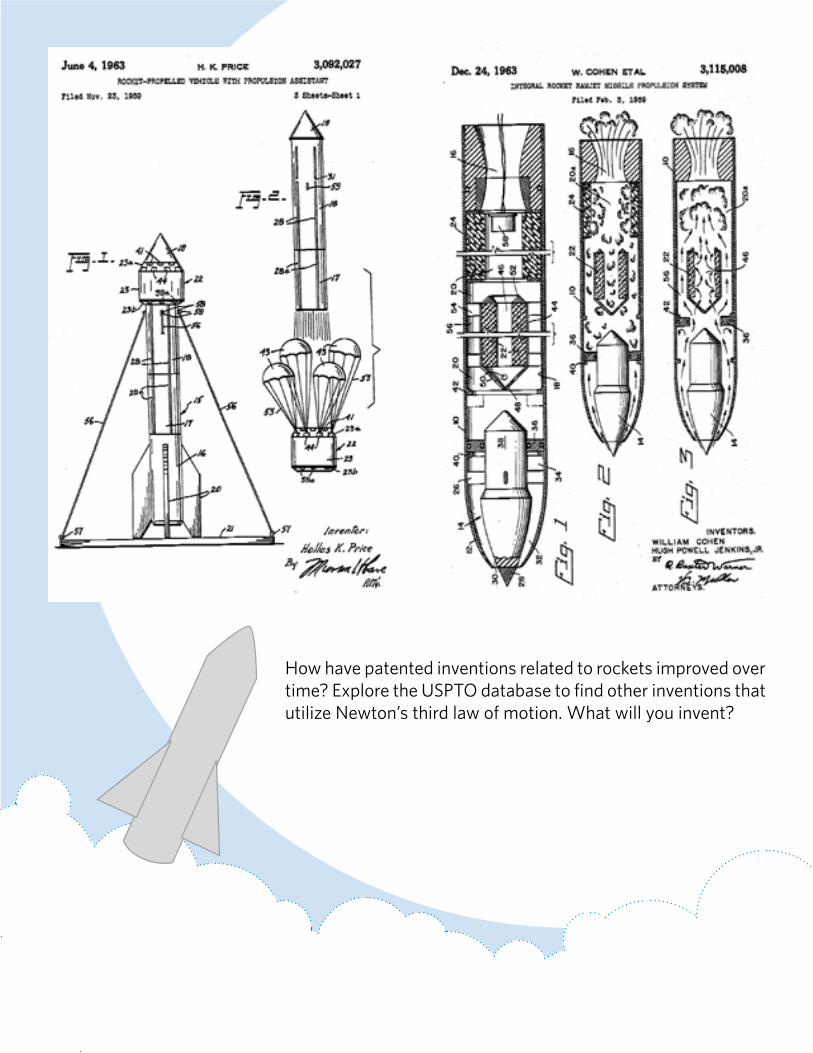
How have patented inventions related to rockets improved over time? Explore the USPTO database to find other inventions that utilize Newton’s third law of motion. What will you invent?
ROCKET PROPULSION: NEWTON’S 3RD LAW OF PHYSICS
PRINCIPAL CONCEPTS TAUGHT IN THIS ACTIVITY1. Concepts associated with Rocket Propulsion, Newton’s 3rd Law
Physics are:
i. Forces always happen in pairs
ii. They are always equal in magnitude
iii. They are always opposite from each other
iv. They always occur at the same time
2. A force is a push or pull upon an object resulting from the object’s interaction with another object. Where there is an interaction between two objects, there is a force upon each of the objects.
ACTIVITY PREPARATION/NOTES
• At least one rocket launcher needs to be made (more depending on amount of students participating). The directions are on the last page.
• Fins need to be cut out prior to the activity, see the Fin Template sheet for proper fin sizes.
• Designate a “Launch Site” with at least 5 feet uninterrupted radius around it, this is where students will individually launch their rockets from.
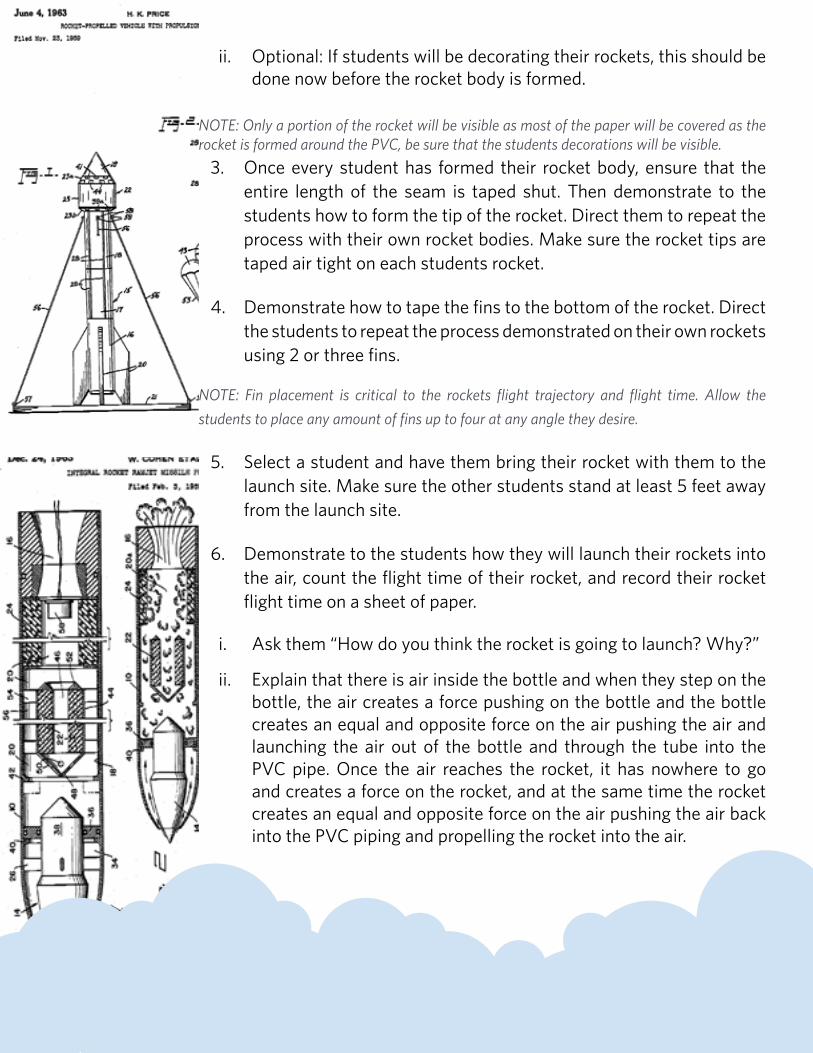
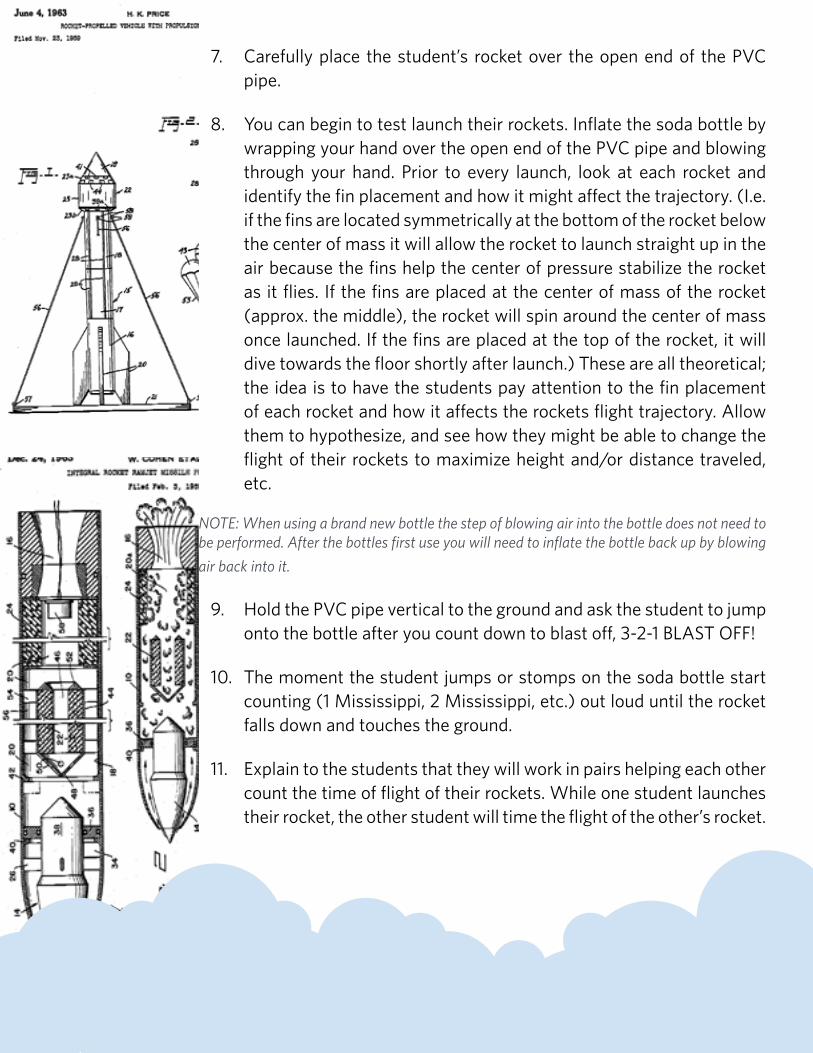
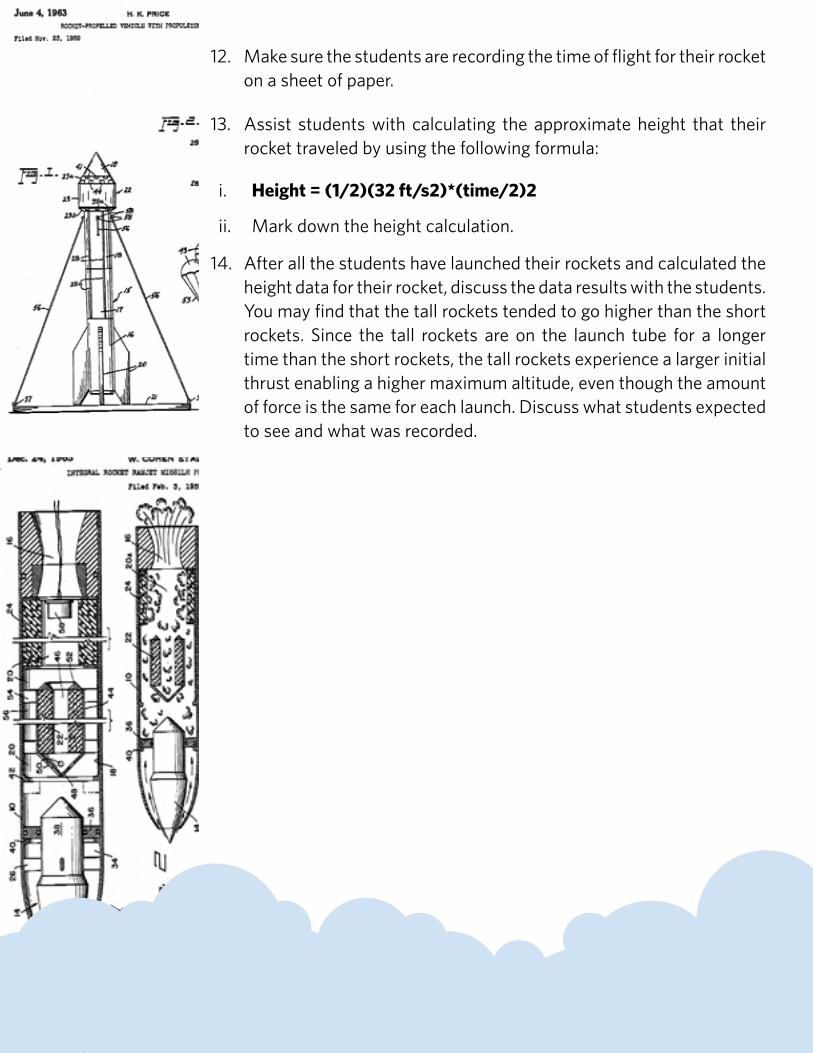
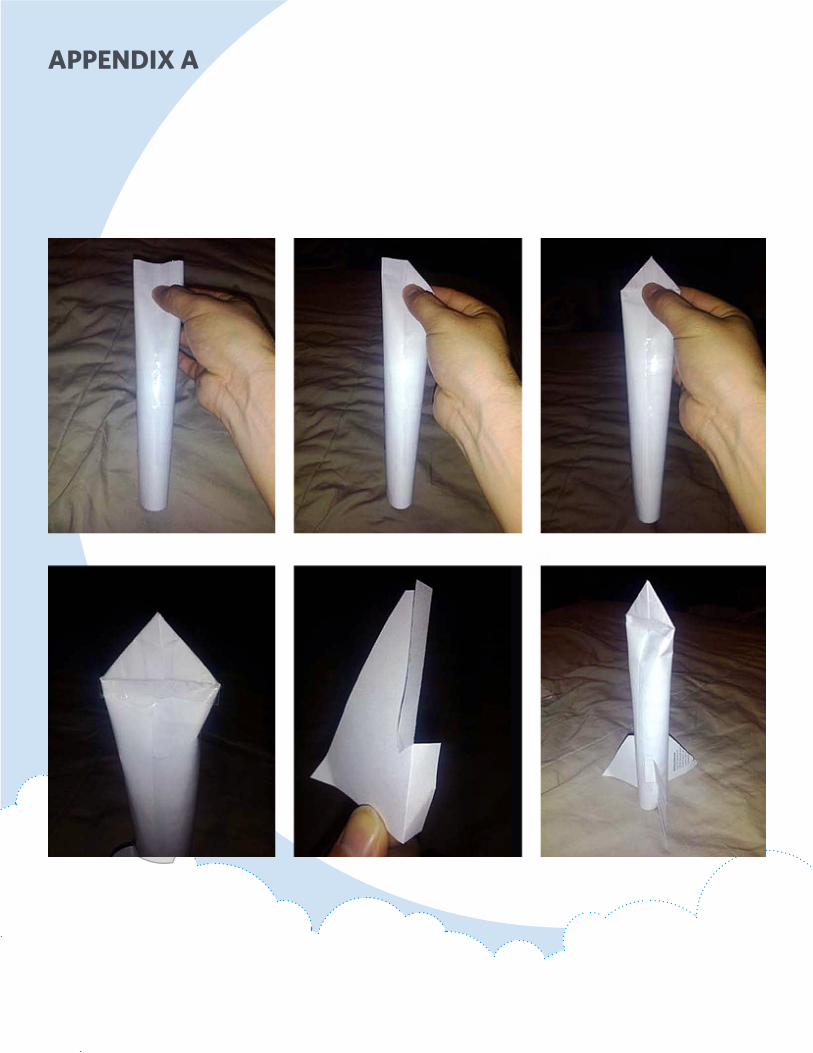
NOTE: The rockets are formed by wrapping a full sheet of 8 ½” x 11” paper around a ¾” piece of PVC piping. The paper should be wrapped snuggly (not to tight). The entire length of the seam should be taped air tight. No air should be able to escape. The top of the rocket is open, in order to form the rocket tip, pinch the top of the rocket and fold each side to the center of the rocket forming a triangle and tape air tight. The key to maximum rocket flight is an air tight rocket where air can only exit through the bottom of the rocket. Next tape three fins (see Fin Template) to the bottom of the rocket at equally spaced out intervals. See the accompanying figures in Appendix A for a picture of what the rocket should look like.
ROCKET PROPULSION: NEWTON’S 3RD LAW OF PHYSICS
MATERIALS LIST• 1 sheet of 8 ½” x 11” paper per student (construction paper works well
but not necessary).
• Safety scissors
• 3-4 fins per student
• Materials for decorating rockets
• Enough tape to create air tight seal on the seams of each students rocket
Materials to create 2 rocket launchers• 2 - 2 foot length of ¾” PVC piping
• 2 plastic 1liter or 16 ounce bottle
• 4 zip ties
• 1-1¼” bicycle inner tube (cut in half to create two separate sections of inner tube)
ACTIVITY : MAKING A PAPER ROCKET1. Hand out a 8 ½” x 11”sheet of paper to each student.
2. Demonstrate to the students how to create the rocket body. Direct the students to repeat the process with their sheet of paper.
i. Inform the students that they may make a short rocket or a long rocket. A short rocket can made by forming the rocket with the paper turned sideways. The long rocket can be made by forming the rocket with the paper kept vertical.
ii. Optional: If students will be decorating their rockets, this should be done now before the rocket body is formed.
NOTE: Only a portion of the rocket will be visible as most of the paper will be covered as the rocket is formed around the PVC, be sure that the students decorations will be visible.
3. Once every student has formed their rocket body, ensure that the entire length of the seam is taped shut. Then demonstrate to the students how to form the tip of the rocket. Direct them to repeat the process with their own rocket bodies. Make sure the rocket tips are taped air tight on each students rocket.
4. Demonstrate how to tape the fins to the bottom of the rocket. Direct the students to repeat the process demonstrated on their own rockets using 2 or three fins.
NOTE: Fin placement is critical to the rockets flight trajectory and flight time. Allow the students to place any amount of fins up to four at any angle they desire.
5. Select a student and have them bring their rocket with them to the launch site. Make sure the other students stand at least 5 feet away from the launch site.
6. Demonstrate to the students how they will launch their rockets into the air, count the flight time of their rocket, and record their rocket flight time on a sheet of paper.
i. Ask them “How do you think the rocket is going to launch? Why?”
ii. Explain that there is air inside the bottle and when they step on the bottle, the air creates a force pushing on the bottle and the bottle creates an equal and opposite force on the air pushing the air and launching the air out of the bottle and through the tube into the PVC pipe. Once the air reaches the rocket, it has nowhere to go and creates a force on the rocket, and at the same time the rocket creates an equal and opposite force on the air pushing the air back into the PVC piping and propelling the rocket into the air.
7. Carefully place the student’s rocket over the open end of the PVC pipe.
8. You can begin to test launch their rockets. Inflate the soda bottle by wrapping your hand over the open end of the PVC pipe and blowing through your hand. Prior to every launch, look at each rocket and identify the fin placement and how it might affect the trajectory. (I.e. if the fins are located symmetrically at the bottom of the rocket below the center of mass it will allow the rocket to launch straight up in the air because the fins help the center of pressure stabilize the rocket as it flies. If the fins are placed at the center of mass of the rocket (approx. the middle), the rocket will spin around the center of mass once launched. If the fins are placed at the top of the rocket, it will dive towards the floor shortly after launch.) These are all theoretical; the idea is to have the students pay attention to the fin placement of each rocket and how it affects the rockets flight trajectory. Allow them to hypothesize, and see how they might be able to change the flight of their rockets to maximize height and/or distance traveled, etc.
NOTE: When using a brand new bottle the step of blowing air into the bottle does not need to be performed. After the bottles first use you will need to inflate the bottle back up by blowing air back into it.
9. Hold the PVC pipe vertical to the ground and ask the student to jump onto the bottle after you count down to blast off, 3-2-1 BLAST OFF!
10. The moment the student jumps or stomps on the soda bottle start counting (1 Mississippi, 2 Mississippi, etc.) out loud until the rocket falls down and touches the ground.
11. Explain to the students that they will work in pairs helping each other count the time of flight of their rockets. While one student launches their rocket, the other student will time the flight of the other’s rocket.
12. Make sure the students are recording the time of flight for their rocket on a sheet of paper.
13. Assist students with calculating the approximate height that their rocket traveled by using the following formula:
i. Height = (1/2)(32 ft/s2)*(time/2)2
ii. Mark down the height calculation.
14. After all the students have launched their rockets and calculated the height data for their rocket, discuss the data results with the students. You may find that the tall rockets tended to go higher than the short rockets. Since the tall rockets are on the launch tube for a longer time than the short rockets, the tall rockets experience a larger initial thrust enabling a higher maximum altitude, even though the amount of force is the same for each launch. Discuss what students expected to see and what was recorded.
APPENDIX A
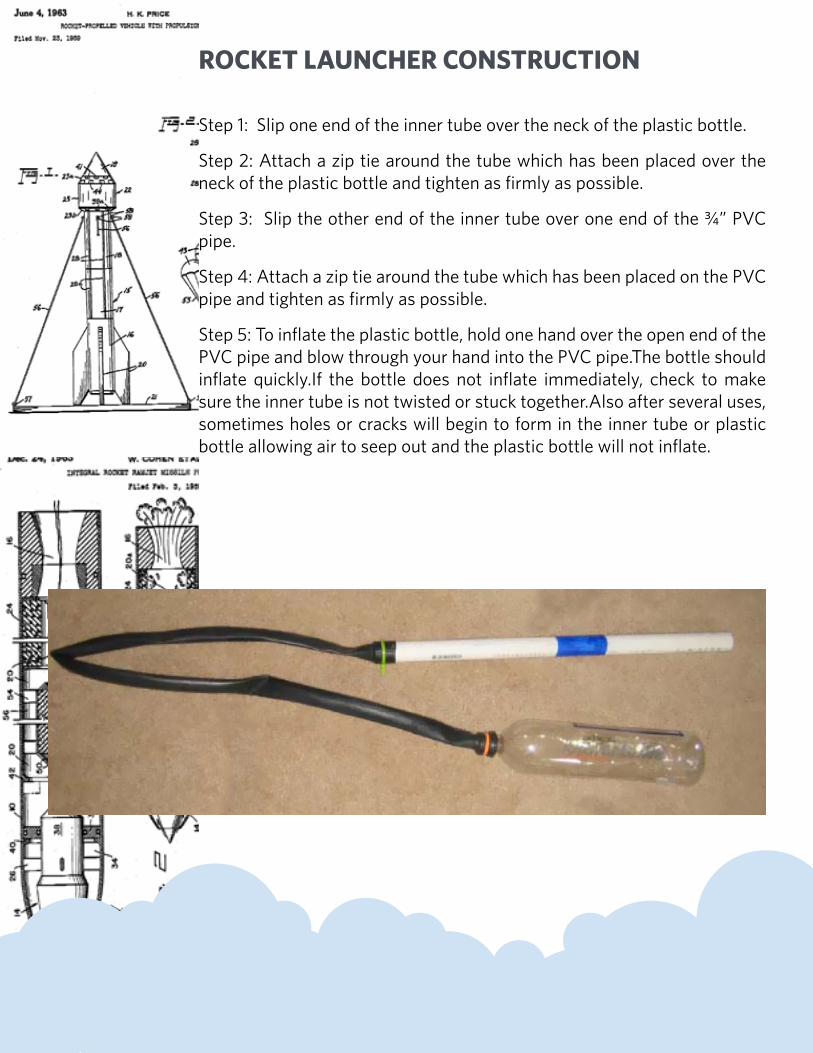
ROCKET LAUNCHER CONSTRUCTION
Step 1: Slip one end of the inner tube over the neck of the plastic bottle.
Step 2: Attach a zip tie around the tube which has been placed over the neck of the plastic bottle and tighten as firmly as possible.
Step 3: Slip the other end of the inner tube over one end of the ¾” PVC pipe.
Step 4: Attach a zip tie around the tube which has been placed on the PVC pipe and tighten as firmly as possible.
Step 5: To inflate the plastic bottle, hold one hand over the open end of the PVC pipe and blow through your hand into the PVC pipe.The bottle should inflate quickly.If the bottle does not inflate immediately, check to make sure the inner tube is not twisted or stuck together.Also after several uses, sometimes holes or cracks will begin to form in the inner tube or plastic bottle allowing air to seep out and the plastic bottle will not inflate.
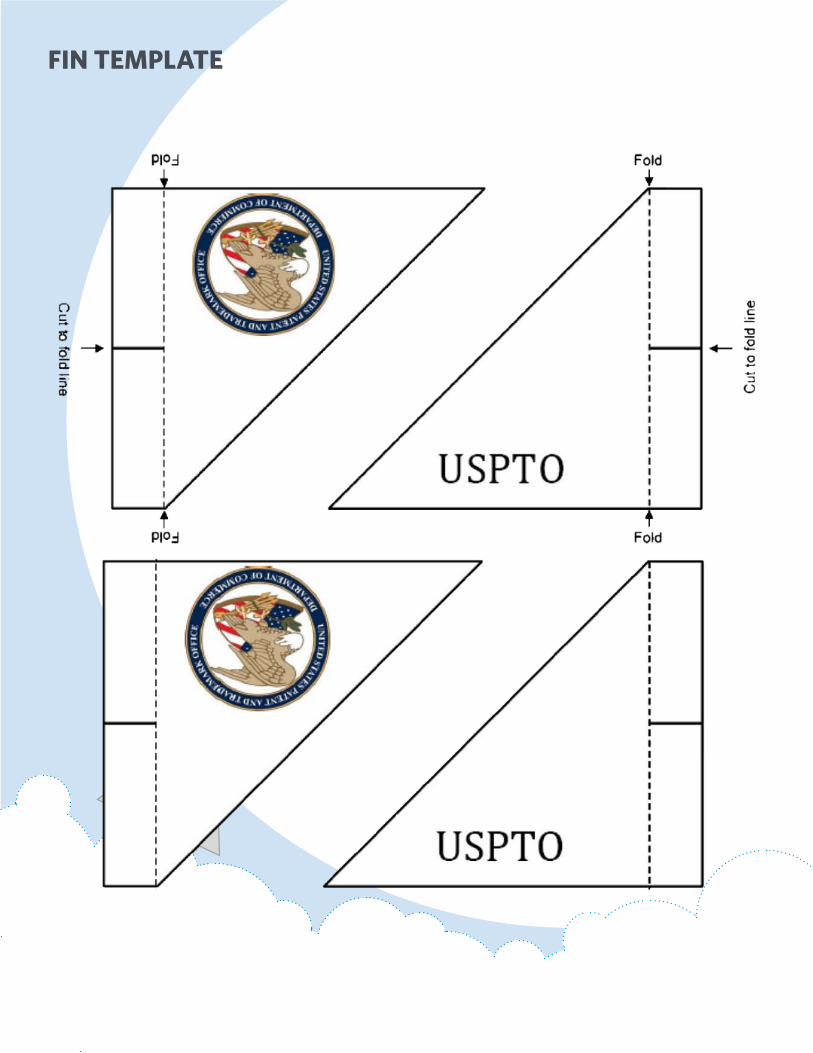
FIN TEMPLATE