Embed Size (px)
Citation preview
Vicki Collins, Independent Stampin’ Up! Demonstrator
24/07/2014
1 | P a g e
Mini Tea Bag Caddy Find me:
Blog: vickicollins71.wordpress.com
Facebook: Vicki Collins Independent Stampin Up Demonstrator
Stampin’ Up!: stampinup.net/esuite/home/vickicollins
Pinterest: pinterest.com/vickicollins940
Stamps, Supplies and Accessories
Cardstock, DSP, Sticky Strip, Snail, Stampin’ Trimmer, Ribbon, Embellishments, (Cardstock from
DSP packs)
Please note I used an A4 piece of cardstock to make my Tea Bag Caddy’s and the instructions are for
this but please remember the sizes are Australian A4 which is a little different to some countries
Instructions
Please Note: I cut a piece of heavy cardstock for the bottom of my Tea Bag Caddy for sturdiness. I use the cardstock that comes with the DSP Packets and cut a piece at 2 ¼” x 2 ¾”.
Vicki Collins, Independent Stampin’ Up! Demonstrator
24/07/2014
2 | P a g e
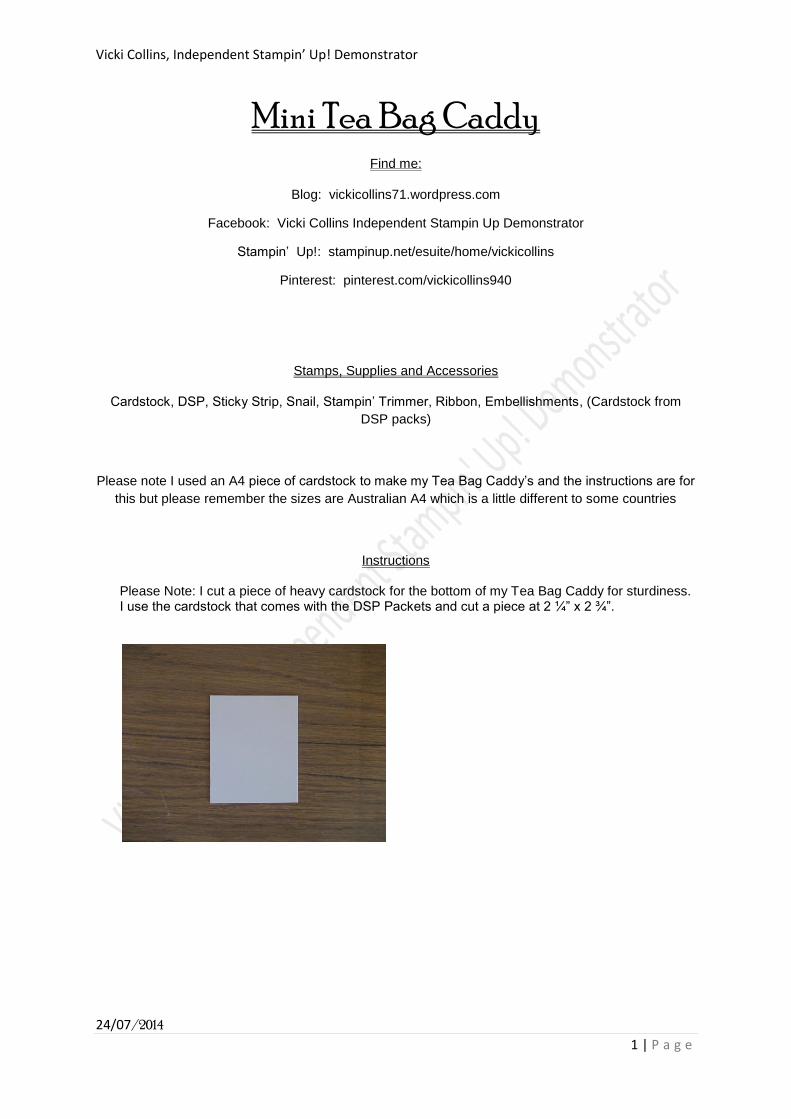
Step 1: Tea Bag Caddy Cut a piece of cardstock at 10 ½”x 4”.
Step 2: Score 10 ½”x 4”piece of card stock as follows Score 4” side at ½” at ONLY 1 end Score 10 ½”side at ½”, 2 ¾”, 5 ½”, 7 ¾”.
Step 3: If unsure of this step look at picture Place 4” side of cardstock back into trimmer at 5/8”and on the 3
rd panel from the ½”score mark,
cut from the 5 ½”score line to the 7 ¾”score line. (Which is really only 1/8”past the ½”score line you already scored)
Close up of the cut mark
Vicki Collins, Independent Stampin’ Up! Demonstrator
24/07/2014
3 | P a g e
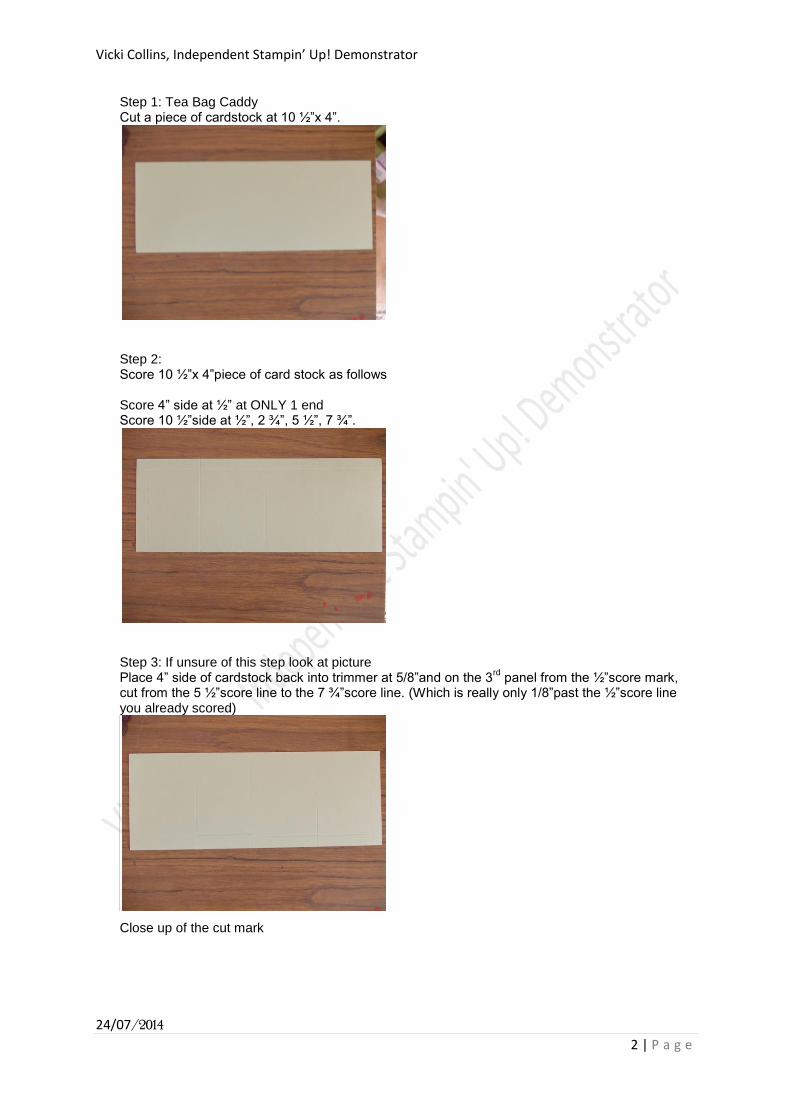
Step 4: Fold you score lines. Cut the tiny square out of the corner (see picture) Cut up the score line at the 2 ¾”score line ONLY up to ½”line. Cut up the score line at the 5 ½” and 7 ¾” score line up to the 5/8” line (see picture)
Step 5: Cut 2 pieces of DSP at 3 ¼”x 2 ½”. Cut 2 pieces of DSP at 3 ¼”x 2”.
Step 6: I place the 3
rd DSP first by lining the bottom of the DSP to the bottom of the cardstock and then do
the remaining 3 pieces by lining across the top so they are level. Place snail onto the back of the DSP pieces and stick on to the four matching sections.

Vicki Collins, Independent Stampin’ Up! Demonstrator
24/07/2014
4 | P a g e
Step 7: Using the 1 ¼”circle punch I place it at the 3
rd panel, it fits just snug, and punch out a 1/2 of the
circle punch (see picture)
Vicki Collins, Independent Stampin’ Up! Demonstrator
24/07/2014
5 | P a g e
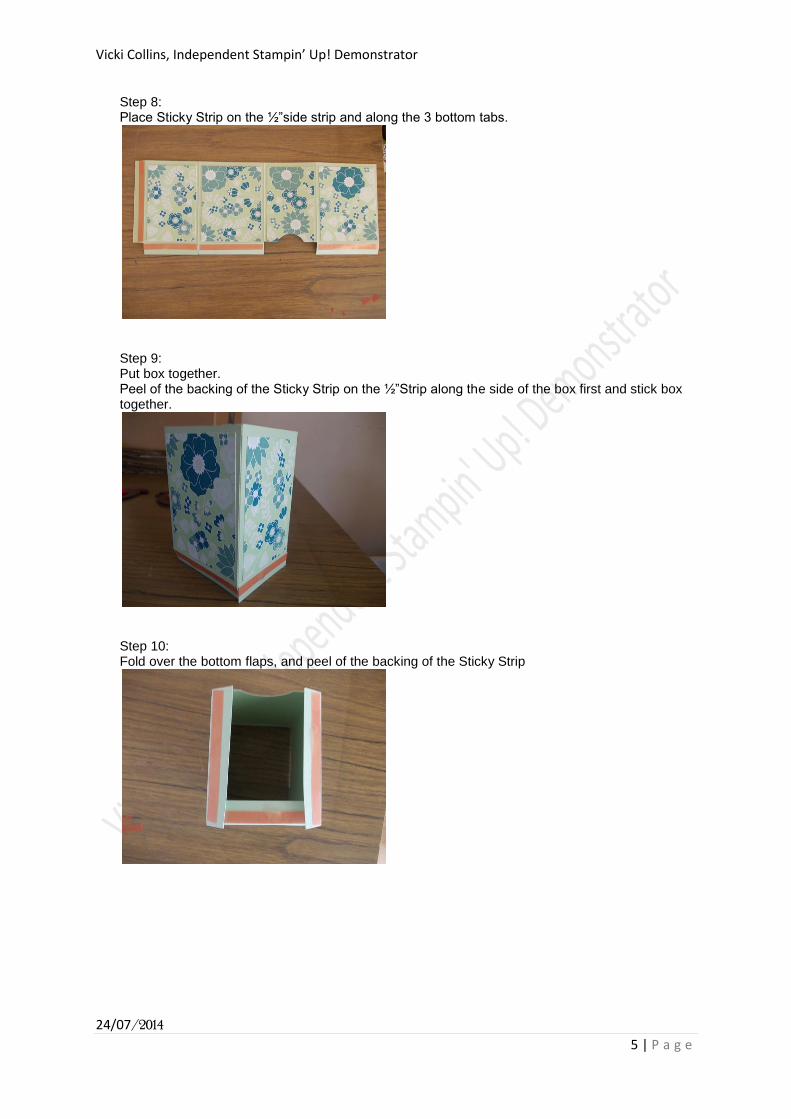
Step 8: Place Sticky Strip on the ½”side strip and along the 3 bottom tabs.
Step 9: Put box together. Peel of the backing of the Sticky Strip on the ½”Strip along the side of the box first and stick box together.
Step 10: Fold over the bottom flaps, and peel of the backing of the Sticky Strip
Vicki Collins, Independent Stampin’ Up! Demonstrator
24/07/2014
6 | P a g e
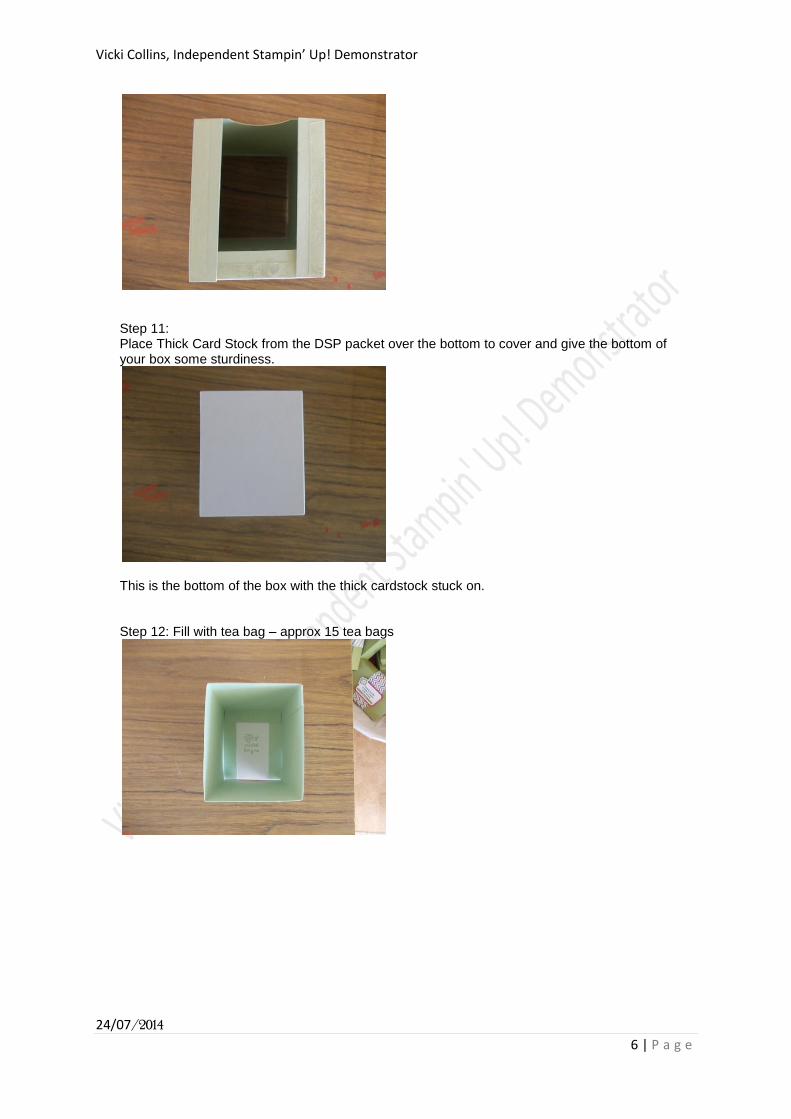
Step 11: Place Thick Card Stock from the DSP packet over the bottom to cover and give the bottom of your box some sturdiness.
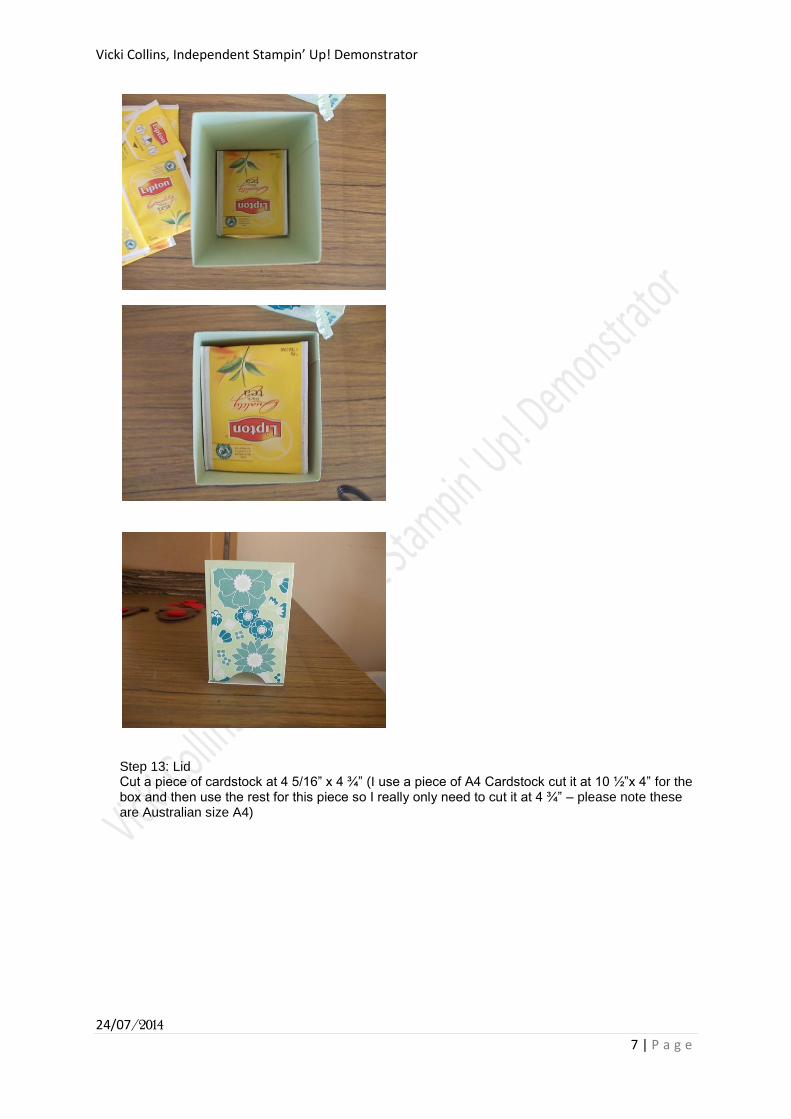
This is the bottom of the box with the thick cardstock stuck on. Step 12: Fill with tea bag – approx 15 tea bags
Vicki Collins, Independent Stampin’ Up! Demonstrator
24/07/2014
7 | P a g e
Step 13: Lid Cut a piece of cardstock at 4 5/16” x 4 ¾” (I use a piece of A4 Cardstock cut it at 10 ½”x 4” for the box and then use the rest for this piece so I really only need to cut it at 4 ¾” – please note these are Australian size A4)
Vicki Collins, Independent Stampin’ Up! Demonstrator
24/07/2014
8 | P a g e
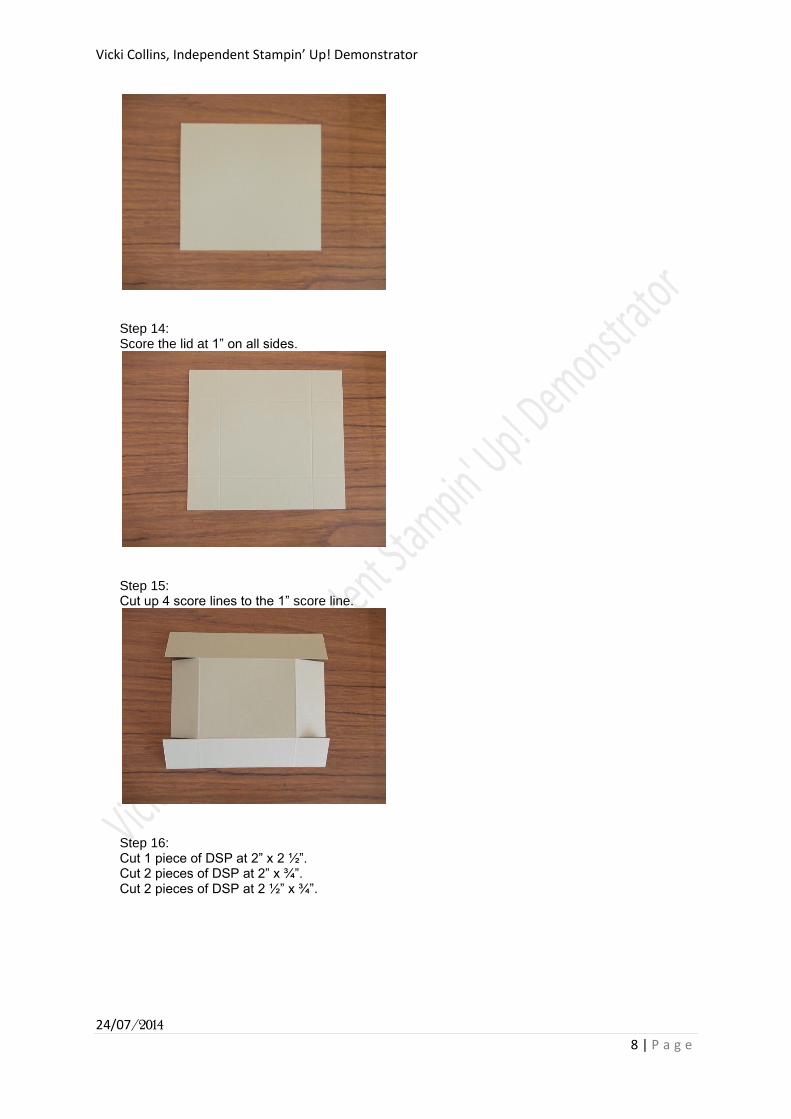
Step 14: Score the lid at 1” on all sides.
Step 15: Cut up 4 score lines to the 1” score line.
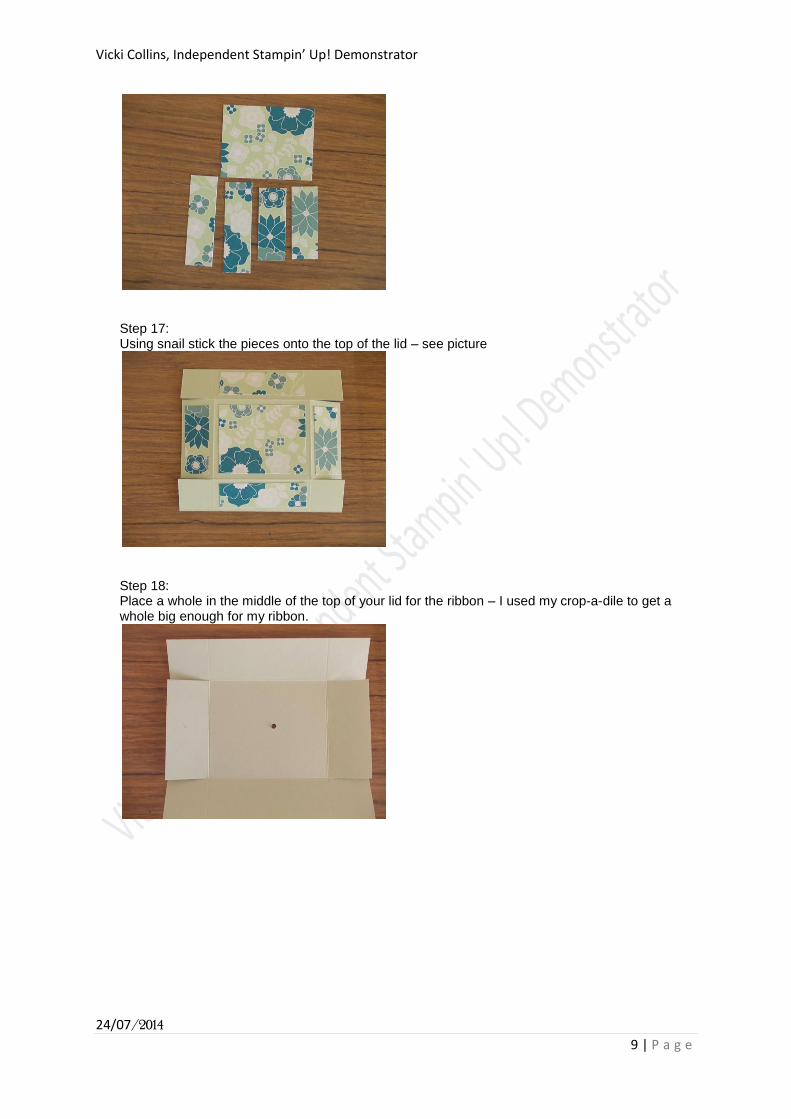
Step 16: Cut 1 piece of DSP at 2” x 2 ½”. Cut 2 pieces of DSP at 2” x ¾”. Cut 2 pieces of DSP at 2 ½” x ¾”.
Vicki Collins, Independent Stampin’ Up! Demonstrator
24/07/2014
9 | P a g e
Step 17: Using snail stick the pieces onto the top of the lid – see picture
Step 18: Place a whole in the middle of the top of your lid for the ribbon – I used my crop-a-dile to get a whole big enough for my ribbon.
Vicki Collins, Independent Stampin’ Up! Demonstrator
24/07/2014
10 | P a g e
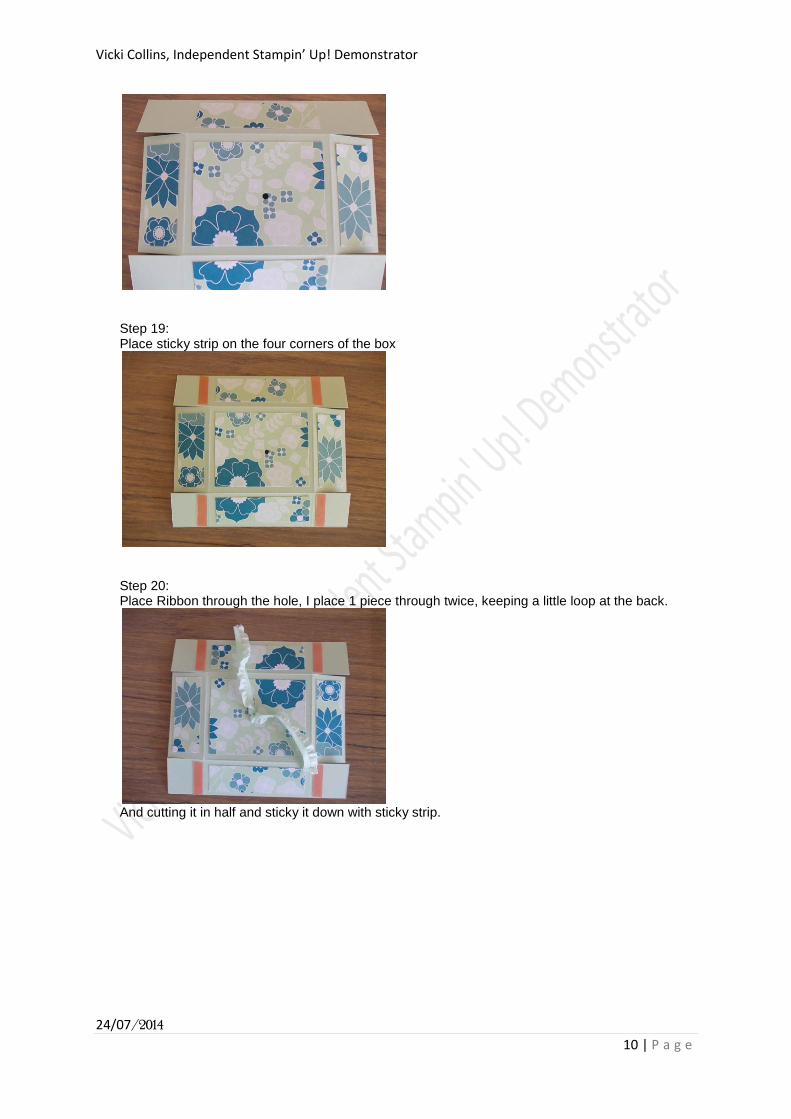
Step 19: Place sticky strip on the four corners of the box
Step 20: Place Ribbon through the hole, I place 1 piece through twice, keeping a little loop at the back.
And cutting it in half and sticky it down with sticky strip.
Vicki Collins, Independent Stampin’ Up! Demonstrator
24/07/2014
11 | P a g e
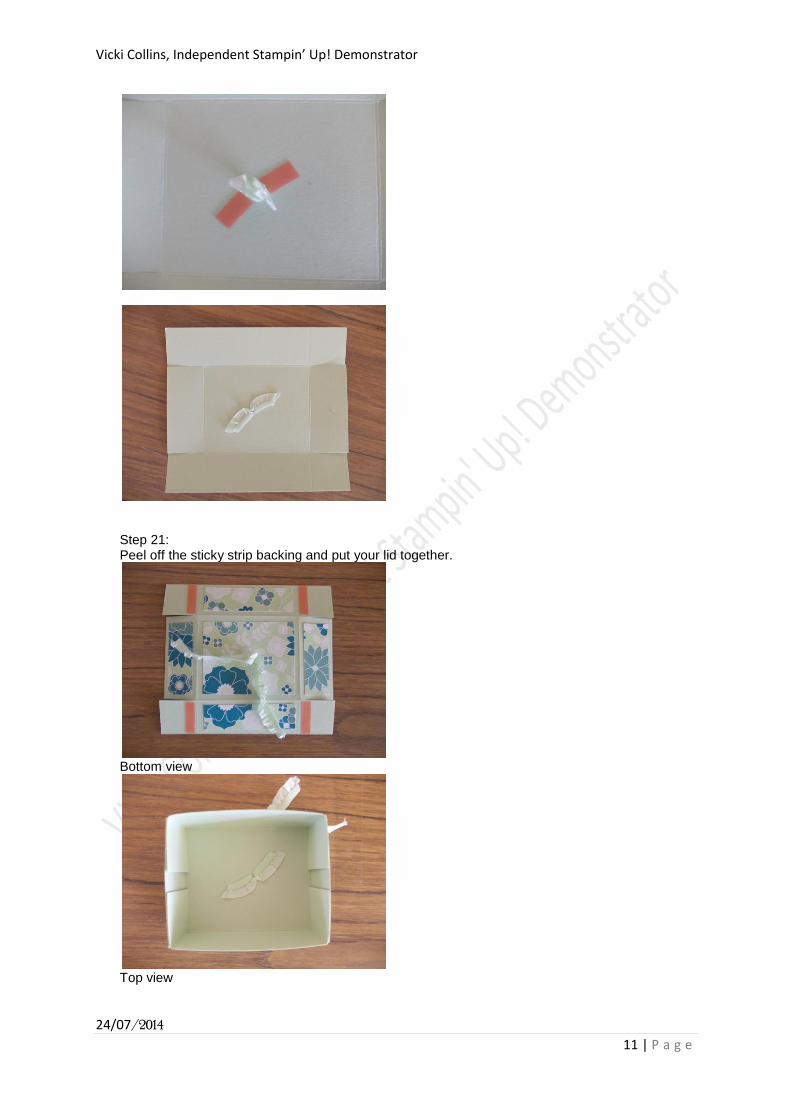
Step 21: Peel off the sticky strip backing and put your lid together.
Bottom view
Top view

Vicki Collins, Independent Stampin’ Up! Demonstrator
24/07/2014
12 | P a g e
Side view
Step 22: Put lid on filled box
Vicki Collins, Independent Stampin’ Up! Demonstrator
24/07/2014
13 | P a g e
Step 23: Embellish how you desire. Please note: you may use any colour ink, cardstock and DSP you prefer and any stamp set of your choice. The colours and stamp sets I use are my preference for this card.
Kind Regards Vicki