Embed Size (px)
Citation preview
Oracle® CloudMigrating Oracle Java Cloud ServiceInstances to Oracle Cloud InfrastructureUsing Migration Tools
Release 20.1.3F20594-08April 2020

Oracle Cloud Migrating Oracle Java Cloud Service Instances to Oracle Cloud Infrastructure Using MigrationTools, Release 20.1.3
F20594-08
Copyright © 2019, 2020, Oracle and/or its affiliates.
Primary Authors: TJ Palazzolo, Poh Lee Tan
This software and related documentation are provided under a license agreement containing restrictions onuse and disclosure and are protected by intellectual property laws. Except as expressly permitted in yourlicense agreement or allowed by law, you may not use, copy, reproduce, translate, broadcast, modify,license, transmit, distribute, exhibit, perform, publish, or display any part, in any form, or by any means.Reverse engineering, disassembly, or decompilation of this software, unless required by law forinteroperability, is prohibited.
The information contained herein is subject to change without notice and is not warranted to be error-free. Ifyou find any errors, please report them to us in writing.
If this is software or related documentation that is delivered to the U.S. Government or anyone licensing it onbehalf of the U.S. Government, then the following notice is applicable:
U.S. GOVERNMENT END USERS: Oracle programs (including any operating system, integrated software,any programs embedded, installed or activated on delivered hardware, and modifications of such programs)and Oracle computer documentation or other Oracle data delivered to or accessed by U.S. Government endusers are "commercial computer software" or “commercial computer software documentation” pursuant to theapplicable Federal Acquisition Regulation and agency-specific supplemental regulations. As such, the use,reproduction, duplication, release, display, disclosure, modification, preparation of derivative works, and/oradaptation of i) Oracle programs (including any operating system, integrated software, any programsembedded, installed or activated on delivered hardware, and modifications of such programs), ii) Oraclecomputer documentation and/or iii) other Oracle data, is subject to the rights and limitations specified in thelicense contained in the applicable contract. The terms governing the U.S. Government’s use of Oracle cloudservices are defined by the applicable contract for such services. No other rights are granted to the U.S.Government.
This software or hardware is developed for general use in a variety of information management applications.It is not developed or intended for use in any inherently dangerous applications, including applications thatmay create a risk of personal injury. If you use this software or hardware in dangerous applications, then youshall be responsible to take all appropriate fail-safe, backup, redundancy, and other measures to ensure itssafe use. Oracle Corporation and its affiliates disclaim any liability for any damages caused by use of thissoftware or hardware in dangerous applications.
Oracle and Java are registered trademarks of Oracle and/or its affiliates. Other names may be trademarks oftheir respective owners.
Intel and Intel Inside are trademarks or registered trademarks of Intel Corporation. All SPARC trademarks areused under license and are trademarks or registered trademarks of SPARC International, Inc. AMD, Epyc,and the AMD logo are trademarks or registered trademarks of Advanced Micro Devices. UNIX is a registeredtrademark of The Open Group.
This software or hardware and documentation may provide access to or information about content, products,and services from third parties. Oracle Corporation and its affiliates are not responsible for and expresslydisclaim all warranties of any kind with respect to third-party content, products, and services unless otherwiseset forth in an applicable agreement between you and Oracle. Oracle Corporation and its affiliates will not beresponsible for any loss, costs, or damages incurred due to your access to or use of third-party content,products, or services, except as set forth in an applicable agreement between you and Oracle.
Contents
1 Learn About Migrating to Oracle Cloud Infrastructure
Why Migrate to Oracle Cloud Infrastructure 1-1
About the Migration Scope 1-1
About Oracle WebLogic Server for Oracle Cloud Infrastructure 1-2
Compare Oracle Cloud Infrastructure to Classic 1-3
About Oracle Cloud Infrastructure Users and Groups 1-4
About the Migration Task Flow 1-5
Migrate to Oracle WebLogic Server for Oracle Cloud Infrastructure 1-5
Migrate to Java Cloud Service Using Application Migration Service 1-6
Migrate to Java Cloud Service Using Classic Tools 1-7
About the Migration Tooling 1-9
2 Prepare to Migrate Oracle Java Cloud Service to Oracle CloudInfrastructure
About Downtime Requirements 2-1
Select Oracle Cloud Infrastructure Shapes 2-1
Design the Oracle Cloud Infrastructure Network 2-2
Configure Security Rules for the Network 2-3
Migrate the Application Databases 2-3
Get Information About the Target Databases 2-4
3 Migrate an Instance to Oracle WebLogic Server for Oracle CloudInfrastructure
Get Information About the Target Environment 3-2
Launch the Migration Controller Instance in the Source Environment 3-3
Update the Secret File 3-5
Update the Default Profile File 3-6
Discover Resources in Your Source Environment 3-9
List Your Oracle Java Cloud Service Instances 3-10
Export Your Source Instance Configuration 3-10
iii
Perform Prerequisite Tasks for Oracle WebLogic Server for Oracle CloudInfrastructure 3-11
Create the Target Domain Using Oracle WebLogic Server for Oracle CloudInfrastructure 3-12
Migrate Oracle Fusion Middleware Security Resources 3-14
Migrate Oracle Identity Cloud Service Roles and Policies 3-15
Integrate Fusion Middleware Components with Oracle Identity Cloud Service 3-17
Edit the Domain Configuration File 3-18
Copy Supporting Files to the Target 3-22
Update the Target Domain 3-24
4 Migrate an Instance to Oracle Java Cloud Service Using ApplicationMigration Service
Perform Prerequisite Tasks for Oracle Java Cloud Service 4-2
Create a Source 4-2
Create a Migration 4-3
Configure and Run a Migration 4-3
Copy Supporting Files to the Target Instance 4-4
Recreate Oracle Fusion Middleware Security Resources 4-6
Migrate Oracle Identity Cloud Service Roles and Policies 4-9
5 Migrate an Instance to Oracle Java Cloud Service Using ClassicTools
Get Information About the Target Environment 5-1
Launch the Migration Controller Instance in the Source Environment 5-3
Update the Secret File 5-5
Update the Default Profile File 5-6
Discover Resources in Your Source Environment 5-9
List Your Oracle Java Cloud Service Instances 5-10
Export Your Source Instance Configuration 5-10
Perform Prerequisite Tasks for Oracle Java Cloud Service 5-11
Create the Target Instance on Oracle Cloud Infrastructure 5-11
Create the Target Instance Using the Console 5-12
Create the Target Instance Using Terraform 5-13
Migrate Oracle Fusion Middleware Security Resources 5-16
Migrate Oracle Identity Cloud Service Roles and Policies 5-16
Edit the Target Configuration File 5-19
Copy Supporting Files to the Target Instance 5-23
Import the Target Instance Configuration 5-25
iv
6 Complete the Post-Migration Tasks
Test the Target 6-1
Start the SMTP Service on the Target 6-1
Migrate FastConnect and VPN Connections to Oracle Cloud Infrastructure 6-2
Clean Up Resources in Oracle Cloud Infrastructure Classic 6-2
v
1Learn About Migrating to Oracle CloudInfrastructure
These topics help you learn about the benefits to migrating your existing Oracle JavaCloud Service instances to Oracle Cloud Infrastructure, and also provide an overviewof the migration process and tools.
Topics:
• Why Migrate to Oracle Cloud Infrastructure
• About the Migration Scope
• About Oracle WebLogic Server for Oracle Cloud Infrastructure
• Compare Oracle Cloud Infrastructure to Classic
• About Oracle Cloud Infrastructure Users and Groups
• About the Migration Task Flow
• About the Migration Tooling
Why Migrate to Oracle Cloud InfrastructureOracle encourages you to migrate your existing cloud resources to Oracle CloudInfrastructure regions. You can gain several advantages by doing so.
In Oracle Cloud, you provision resources in specific regions, which are localized togeographic locations. Certain regions support the Oracle Cloud Infrastructure platform.
Oracle Cloud Infrastructure is Oracle's modern cloud platform that's based on thelatest cloud technologies and standards. It provides more consistent performance andbetter features at lower costs. Oracle continues to invest in Oracle CloudInfrastructure, including the addition of new regions, services, and features. See DataRegions for Platform and Infrastructure Services.
You can benefit from these additional administrative features when you migrate yourcloud resources to Oracle Cloud Infrastructure:
• Organize cloud resources into a hierarchy of logical compartments.
• Create fine-grained access policies for each compartment.
To learn more, see Upgrade Your Classic Services to Oracle Cloud Infrastructure.
About the Migration ScopeBefore you migrate your existing Oracle Java Cloud Service instances to Oracle CloudInfrastructure, ensure that the service instance meets the prerequisites for themigration.
1-1
Oracle does not currently support the migration of Oracle Java Cloud Serviceinstances that meet any of these conditions:
• The service instance includes multiple domain partitions.
• The service instance is running Oracle WebLogic Server 11g and includes JavaMessage Service (JMS) migratable targets.
This guide does not include detailed procedures on the configuration of basic OracleCloud Infrastructure security, network and storage resources that might be required tosupport your new WebLogic Server domain. Instead, this guide provides references tothe Oracle Cloud Infrastructure documentation as appropriate.
Most service instances connect to one or more databases in order to access yourapplication schemas. This guide does not include the detailed procedure for migratingthese application databases from Oracle Cloud Infrastructure Classic to Oracle CloudInfrastructure. One option is the Oracle Cloud Infrastructure Classic Database BackupMigration Tool, which uses Recovery Manager (RMAN). Another option is Oracle DataGuard. See Select a Method to Migrate Database Instances in Migrating InfrastructureClassic Workloads to Oracle Cloud Infrastructure.
About Oracle WebLogic Server for Oracle CloudInfrastructure
Oracle WebLogic Server for Oracle Cloud Infrastructure is available as a set ofapplications in the Oracle Cloud Infrastructure Marketplace. After launching one ofthese applications, you use a simple wizard interface to configure and provision anOracle WebLogic Server domain along with any supporting cloud resources likecompute instances, networks and load balancers.
Note:
Oracle recommends migrating your existing domains in Oracle Java CloudService to Oracle WebLogic Server for Oracle Cloud Infrastructure.
After launching a domain using the Marketplace applications, you track and monitor itsprogress as a stack using Resource Manager in Oracle Cloud Infrastructure. A stackalso provides a convenient method of deleting the cloud resources for a domain whenyou no longer require them.
Like Oracle Java Cloud Service, you can administer the domain and deploy Java EEapplications to it just like on-premises domains. Use standard Oracle WebLogic Servertools like the administration console and WebLogic Scripting Tool (WLST). You canalso administer the operating system on the compute instances using a secure shell(SSH) client and standard Linux tools.
The following table compares the functionality of Oracle Java Cloud Service to OracleWebLogic Server for Oracle Cloud Infrastructure
Chapter 1About Oracle WebLogic Server for Oracle Cloud Infrastructure
1-2
Oracle Java Cloud Service Oracle WebLogic Server for Oracle CloudInfrastructure
Supports Oracle WebLogic Server 11g,12.2.1.3, and 12.2.1.4
Also supports Oracle WebLogic Server 12.1.3
Supports Oracle WebLogic Server 11g,12.2.1.3, and 12.2.1.4
Will not support major version new releases ofOracle WebLogic Server
Will support major version new releases ofOracle WebLogic Server
All domains include the Java Required Files(JRF) components and require a database
Create basic and JRF-enabled WebLogicServer 12c domains
All WebLogic Server 11g domains are JRF-enabled and require a database
Must use Oracle Java Cloud Service tobackup, scale, or patch a domain
Certain changes to the operation system anddomain are not supported (see AdministrationBest Practices)
Can choose any supported method to backup,scale, or patch a domain; the documentationprovides recommendations and best practices
No restrictions on changing the operatingsystem or domain after provisioning
Can provision an Oracle-managed loadbalancer in Oracle Cloud Infrastructure, or auser-managed load balancer running OracleTraffic Director
Can provision an Oracle-managed loadbalancer in Oracle Cloud Infrastructure
Limited customization of the Oracle-managedload balancer
Full customization of the Oracle-managed loadbalancer
Can use Oracle Identity Cloud Service forauthentication
A security application is created in OracleIdentity Cloud Service for each domain
Can use Oracle Identity Cloud Service forauthentication
Must create a confidential application in OracleIdentity Cloud Service prior to creating adomain
Confidential application, enterprise application,and App Gateway are created in OracleIdentity Cloud Service for each domain
See About the Components of Oracle WebLogic Server for Oracle Cloud Infrastructurein Using Oracle WebLogic Server for Oracle Cloud Infrastructure.
Compare Oracle Cloud Infrastructure to ClassicThis topic helps you get familiar with basic Oracle Cloud Infrastructure security,network, and storage concepts, and compare them to their equivalent concepts inOracle Cloud Infrastructure Classic.
Cloud resources in Oracle Cloud Infrastructure are created in logical compartments.You also create fine-grained policies to control access to the resources within acompartment.
You create instances within an Oracle Cloud Infrastructure region. You also specify anavailability domain (AD), if supported in the selected region. Oracle CloudInfrastructure Classic does not use availability domains.
A virtual cloud network (VCN) is comprised of one or more subnets, and an instance isassigned to a specific subnet. In Oracle Cloud Infrastructure Classic, you assigninstances to IP networks or the shared network. Typically, you create one subnet forthe shared network, and create a separate subnet for each IP network in Oracle Cloud
Chapter 1Compare Oracle Cloud Infrastructure to Classic
1-3
Infrastructure Classic. Note that unlike Oracle Cloud Infrastructure Classic, OracleCloud Infrastructure does not allow you to reserve IP addresses for platform services.
A subnet's security lists permit and block traffic to and from specific IP addresses andports. In Oracle Cloud Infrastructure Classic, an instance's access rules provide similarcapabilities, although security lists are configured at the subnet level.
Instances can communicate with resources outside of Oracle Cloud by using OracleCloud Infrastructure FastConnect, which provides a fast, dedicated connection to youron-premises network. This service is equivalent to Oracle Cloud InfrastructureFastConnect Classic. Alternatively, use IPSec VPN in Oracle Cloud Infrastructure as areplacement for VPN as a Service (VPNaaS) or Corente in Oracle Cloud InfrastructureClassic.
A bucket in Oracle Cloud Infrastructure Object Storage can be used to store files andshare them with multiple instances. A user's generated authentication token (authtoken) is required to access the bucket. Oracle Cloud Infrastructure Object StorageClassic provides the same service in Oracle Cloud Infrastructure Classic, but does notuse auth tokens.
To learn more, see Key Concepts and Terminology in the Oracle Cloud Infrastructuredocumentation.
You can create rules that automatically scale an Oracle Java Cloud Service instancethat's running in Oracle Cloud Infrastructure Classic. You must scale instances inOracle Cloud Infrastructure manually.
About Oracle Cloud Infrastructure Users and GroupsUse the Identity and Access Management (IAM) system in Oracle Cloud Infrastructureto manage users, groups, and policies.
For example, the following Oracle Cloud Infrastructure policy grants members of thegroup MyGroup all privileges to all resources in the compartment MyCompartment:
Allow group MyGroup to manage all-resources in compartment MyCompartment
By default, this system is also configured to use Oracle Identity Cloud Service as afederated identity provider. Therefore, when you define policies in Oracle CloudInfrastructure, you can reuse existing users and groups in Oracle Identity CloudService. You can either add users to a new group in Oracle Cloud Infrastructure, ormap an existing Oracle Identity Cloud Service group to an Oracle Cloud Infrastructuregroup.
While policies control access to resources and services in Oracle Cloud Infrastructure,administrator roles control access to platform services. Assign Oracle Identity CloudService users and groups to administrator roles in order to grant them access toplatform services.
• Common Policies in the Oracle Cloud Infrastructure documentation
• Federating with Oracle Identity Cloud Service in the Oracle Cloud Infrastructuredocumentation
• Add Users, Assign Policies and Roles in Getting Started with Oracle Cloud
Chapter 1About Oracle Cloud Infrastructure Users and Groups
1-4
About the Migration Task FlowGet an overview of the process that you use to migrate your existing Oracle JavaCloud Service instances to Oracle Cloud Infrastructure.
The process varies depending on the target service and the selected tools.
• Migrate to Oracle WebLogic Server for Oracle Cloud Infrastructure
• Migrate to Java Cloud Service Using Application Migration Service
• Migrate to Java Cloud Service Using Classic Tools
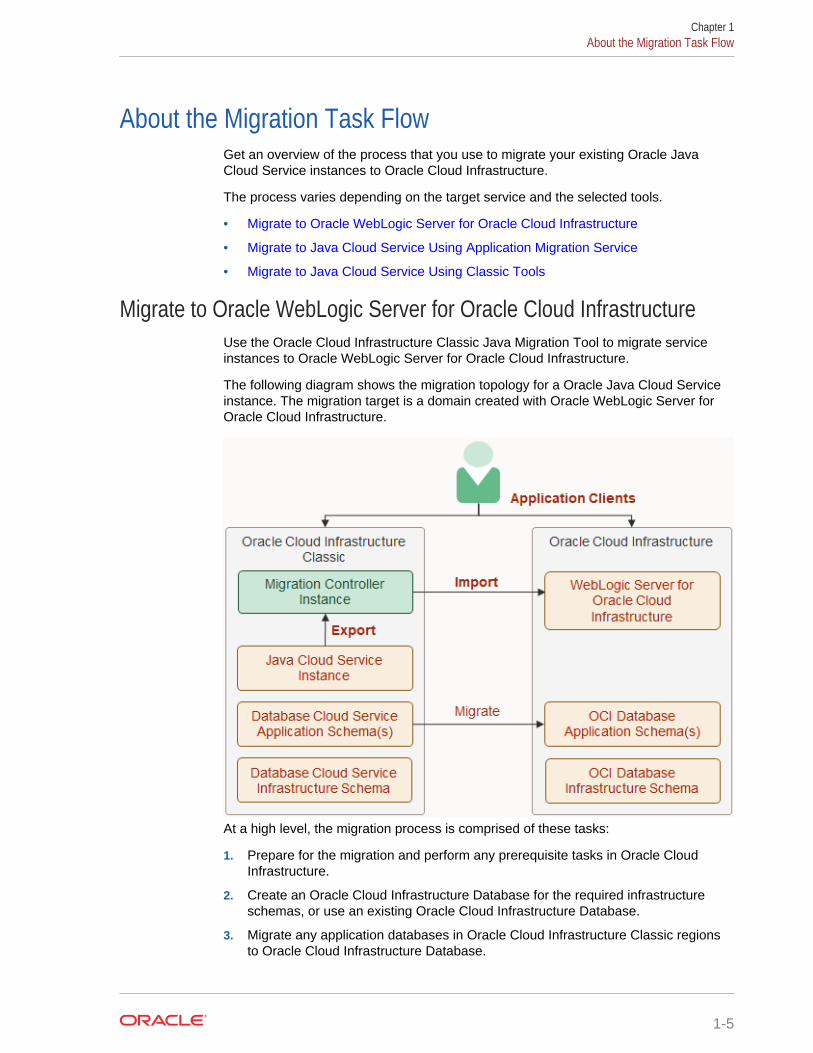
Migrate to Oracle WebLogic Server for Oracle Cloud InfrastructureUse the Oracle Cloud Infrastructure Classic Java Migration Tool to migrate serviceinstances to Oracle WebLogic Server for Oracle Cloud Infrastructure.
The following diagram shows the migration topology for a Oracle Java Cloud Serviceinstance. The migration target is a domain created with Oracle WebLogic Server forOracle Cloud Infrastructure.
At a high level, the migration process is comprised of these tasks:
1. Prepare for the migration and perform any prerequisite tasks in Oracle CloudInfrastructure.
2. Create an Oracle Cloud Infrastructure Database for the required infrastructureschemas, or use an existing Oracle Cloud Infrastructure Database.
3. Migrate any application databases in Oracle Cloud Infrastructure Classic regionsto Oracle Cloud Infrastructure Database.
Chapter 1About the Migration Task Flow
1-5
4. Create a migration controller instance, Control-S, in your Oracle CloudInfrastructure Classic account. The Oracle Cloud Infrastructure Classic JavaMigration Tool is installed on this compute instance.
5. Use the Oracle Cloud Infrastructure Classic Java Migration Tool to export thedomain configuration, applications and other supporting files from your sourceOracle Java Cloud Service instance.
6. Create the target domain using Oracle WebLogic Server for Oracle CloudInfrastructure.
7. Use the Oracle Cloud Infrastructure Classic Java Migration Tool to import thedomain configuration and applications to your target in Oracle Cloud Infrastructure.
8. Test your applications on the target instance, and perform any other post-migration tasks.
See Migrate an Instance to Oracle WebLogic Server for Oracle Cloud Infrastructure.
Migrate to Java Cloud Service Using Application Migration ServiceUse Application Migration in Oracle Cloud Infrastructure to migrate service instancesto Oracle Java Cloud Service on Oracle Cloud Infrastructure.
Application Migration does not support the migration of WebLogic Server domains thatinclude these types of resources:
• Custom Identity or Trust Keystore
• Foreign JNDI Provider
• Foreign JMS Server
• JMS Bridge Destination
• Storage-and-Forward (SAF) Context
• JavaMail Session
• WebLogic Diagnostic Framework (WLDF) REST Notification Endpoint
If your source Oracle Java Cloud Service instance uses these resource types, thenOracle recommends using the Oracle Cloud Infrastructure Classic Java Migration Toolinstead of Application Migration. See Migrate to Java Cloud Service Using ClassicTools.
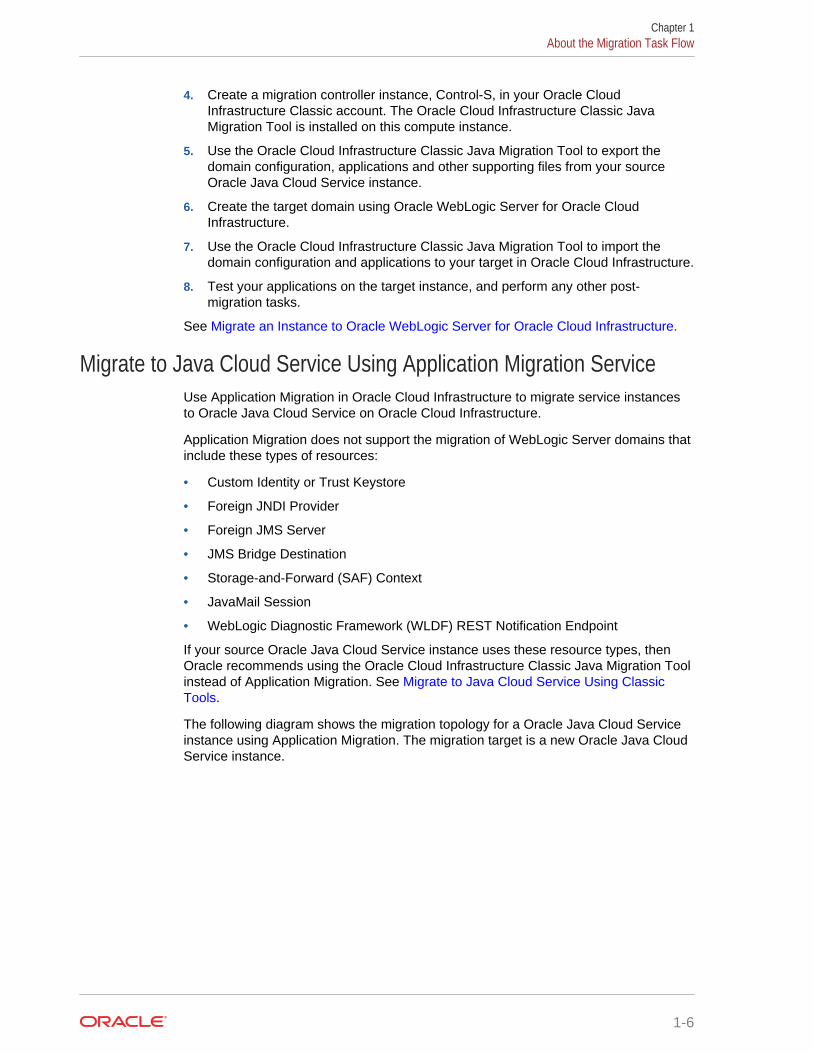
The following diagram shows the migration topology for a Oracle Java Cloud Serviceinstance using Application Migration. The migration target is a new Oracle Java CloudService instance.
Chapter 1About the Migration Task Flow
1-6
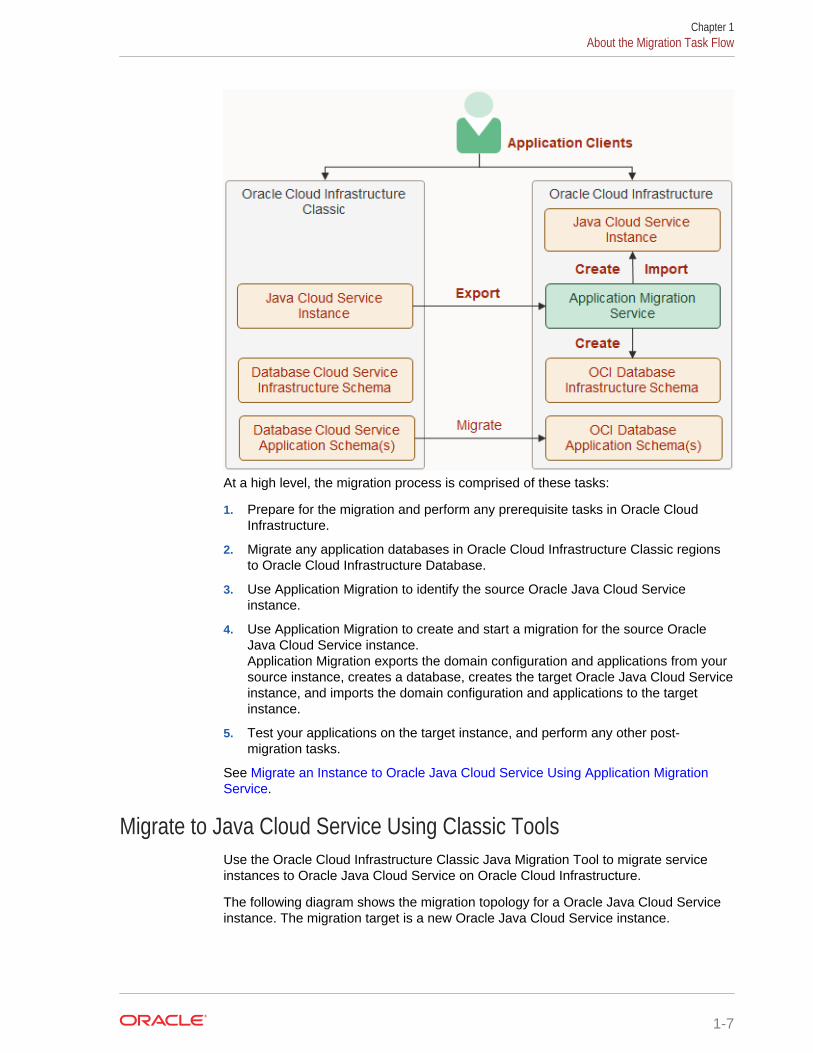
At a high level, the migration process is comprised of these tasks:
1. Prepare for the migration and perform any prerequisite tasks in Oracle CloudInfrastructure.
2. Migrate any application databases in Oracle Cloud Infrastructure Classic regionsto Oracle Cloud Infrastructure Database.
3. Use Application Migration to identify the source Oracle Java Cloud Serviceinstance.
4. Use Application Migration to create and start a migration for the source OracleJava Cloud Service instance.Application Migration exports the domain configuration and applications from yoursource instance, creates a database, creates the target Oracle Java Cloud Serviceinstance, and imports the domain configuration and applications to the targetinstance.
5. Test your applications on the target instance, and perform any other post-migration tasks.
See Migrate an Instance to Oracle Java Cloud Service Using Application MigrationService.
Migrate to Java Cloud Service Using Classic ToolsUse the Oracle Cloud Infrastructure Classic Java Migration Tool to migrate serviceinstances to Oracle Java Cloud Service on Oracle Cloud Infrastructure.
The following diagram shows the migration topology for a Oracle Java Cloud Serviceinstance. The migration target is a new Oracle Java Cloud Service instance.
Chapter 1About the Migration Task Flow
1-7
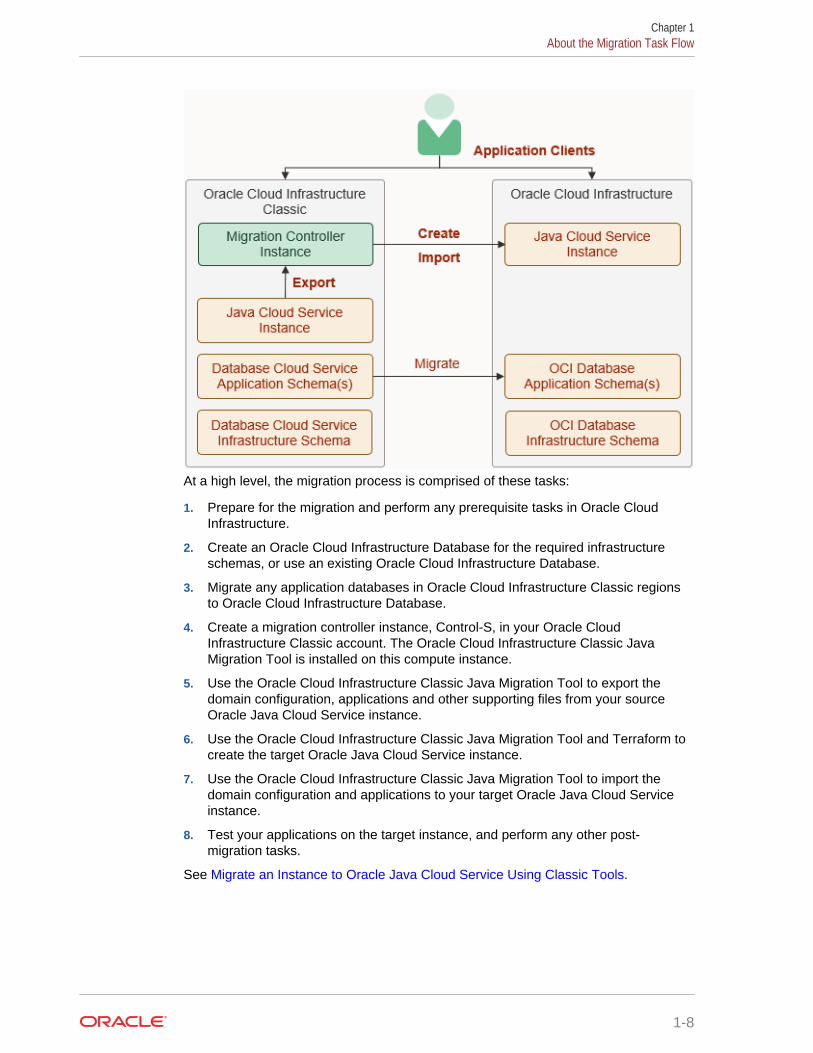
At a high level, the migration process is comprised of these tasks:
1. Prepare for the migration and perform any prerequisite tasks in Oracle CloudInfrastructure.
2. Create an Oracle Cloud Infrastructure Database for the required infrastructureschemas, or use an existing Oracle Cloud Infrastructure Database.
3. Migrate any application databases in Oracle Cloud Infrastructure Classic regionsto Oracle Cloud Infrastructure Database.
4. Create a migration controller instance, Control-S, in your Oracle CloudInfrastructure Classic account. The Oracle Cloud Infrastructure Classic JavaMigration Tool is installed on this compute instance.
5. Use the Oracle Cloud Infrastructure Classic Java Migration Tool to export thedomain configuration, applications and other supporting files from your sourceOracle Java Cloud Service instance.
6. Use the Oracle Cloud Infrastructure Classic Java Migration Tool and Terraform tocreate the target Oracle Java Cloud Service instance.
7. Use the Oracle Cloud Infrastructure Classic Java Migration Tool to import thedomain configuration and applications to your target Oracle Java Cloud Serviceinstance.
8. Test your applications on the target instance, and perform any other post-migration tasks.
See Migrate an Instance to Oracle Java Cloud Service Using Classic Tools.
Chapter 1About the Migration Task Flow
1-8
About the Migration ToolingYou can use various tools to automate many of the tasks involved in migrating anOracle Java Cloud Service instance to Oracle Cloud Infrastructure.
Oracle WebLogic Server Deploy Tooling is an open-source project. It provides scriptsthat enable you to discover and export the configuration and application files from oneOracle WebLogic Server domain, and then import the configuration and applicationsinto another existing domain.
Oracle WebLogic Server Deploy Tooling exports a domain configuration as ametadata file, and automatically excludes sensitive information like passwords. Whenupdating a domain, you also provide a metadata file. This file needs to describe onlythe resources that you want to add or update. If an application is already deployed, thetool compares the binaries and determines whether the application needs to beredeployed.
The Oracle Cloud Infrastructure Classic Java Migration Tool is included in a customcompute image named Oracle Cloud Infrastructure Classic Migration Tools. Itautomates the discovery of Oracle Cloud Infrastructure Classic resources in youraccount, and generates Terraform configuration files that you can use to recreatethese resources in Oracle Cloud Infrastructure. It also automates the installation andexecution of the Oracle WebLogic Server Deploy Tooling on both the source andtarget Oracle Java Cloud Service instances.
Note:
The Oracle Cloud Infrastructure Classic Java Migration Tool cannot create adomain with Oracle WebLogic Server for Oracle Cloud Infrastructure. Youmust create the target domain using Oracle Cloud InfrastructureMarketplace.
Application Migration Service provides a simple, graphical interface for migratingOracle Java Cloud Service instances. It is available from the Oracle CloudInfrastructure console and has similar capabilities to the Oracle Cloud InfrastructureClassic Java Migration Tool. Application Migration Service also automates the creationof the target Oracle Java Cloud Service instance and the required database.
Note:
Application Migration Service cannot migrate Oracle Java Cloud Serviceinstances to Oracle WebLogic Server for Oracle Cloud Infrastructure.
See:
• Oracle WebLogic Server Deploy Tooling project on GitHub
• Review the List of Available Migration Tools in Migrating Infrastructure ClassicWorkloads to Oracle Cloud Infrastructure
• Overview of Application Migration in the Oracle Cloud Infrastructuredocumentation
Chapter 1About the Migration Tooling
1-9
2Prepare to Migrate Oracle Java CloudService to Oracle Cloud Infrastructure
Before you migrate your service instances from Oracle Cloud Infrastructure Classic toOracle Cloud Infrastructure, understand how the migration affects your existinginstances, identify the necessary compute shapes, and create the network anddatabases to support your migrated service instances.
Topics:
• About Downtime Requirements
• Select Oracle Cloud Infrastructure Shapes
• Design the Oracle Cloud Infrastructure Network
• Configure Security Rules for the Network
• Migrate the Application Databases
• Get Information About the Target Databases
About Downtime RequirementsThe migration process does not affect the availability of your existing Oracle JavaCloud Service instance in Oracle Cloud Infrastructure Classic. This instance continuesto run and can serve client requests during this process.
You can discover and export the configuration from your source Oracle WebLogicServer domain while it is running. The migration tool does not modify your domain orsignificantly affect its performance.
After a service instance is migrated successfully, clients can be rerouted to the newinstance in Oracle Cloud Infrastructure.
Select Oracle Cloud Infrastructure ShapesIdentify the compute shapes that provide similar IaaS resources in Oracle CloudInfrastructure to the shapes that you're currently using for your service instances inOracle Cloud Infrastructure Classic.
A compute shape defines the IaaS resources, such as OCPUs and memory, that areavailable to a specific node in a service instance. Oracle Cloud Infrastructure andOracle Cloud Infrastructure Classic each has its own set of standard compute shapes.See:
• About Shapes in Using Oracle Cloud Infrastructure Compute Classic
• Compute Shapes in the Oracle Cloud Infrastructure documentation
2-1
Application Migration Service automatically selects a shape in Oracle CloudInfrastructure for your new instance that most closely matches the shape in the sourceinstance.
The Oracle Cloud Infrastructure Classic Java Migration Tool can generate a Terraformconfiguration to help you provision your new instance, and it automatically selects anOracle Cloud Infrastructure shape for this configuration.
To ensure that a migrated service instance has the same performance characteristicsas the original instance, and can support an equivalent workload, choose Oracle CloudInfrastructure shapes that most closely map to the Oracle Cloud Infrastructure Classicshapes that you specified when you created the instance.
You must also confirm that the chosen shapes are available in your Oracle Cloudtenancy. Oracle configures shape limits for an Oracle Cloud Infrastructure region, orfor a specific availability domain within a region. You can use the console to view thecurrent shape limits for your tenancy, and to request a limit increase if necessary. See Service Limits in the Oracle Cloud Infrastructure documentation.
Design the Oracle Cloud Infrastructure NetworkBefore you migrate your service instances from Oracle Cloud Infrastructure Classic toOracle Cloud Infrastructure, you must design and implement a virtual cloud network(VCN) to support your migrated service instances.
You can create new Oracle Cloud Infrastructure compartments, VCNs, and subnets foryour service instances, or you can use existing ones. See these topics in the OracleCloud Infrastructure documentation:
• Managing Compartments
• VCNs and Subnets
• Security Lists
Consider the following guidelines when you create or select a network for your serviceinstances:
• If instances communicate using the default shared network in Oracle CloudInfrastructure Classic, then use a single subnet for these instances.
• If instances are on separate IP networks in Oracle Cloud Infrastructure Classic,then use separate subnets for these instances.
• A VCN should have an address range that includes all of the IP networks in OracleCloud Infrastructure Classic that need to communicate. Alternatively, configurepeering between multiple VCNs.
• A subnet should have at least the same number of addresses as thecorresponding IP network in Oracle Cloud Infrastructure Classic.
• If an instance was created in Oracle Cloud Infrastructure Classic without public IPaddresses, then use a private subnet for this instance.
• If custom access rules were created for an instance in Oracle Cloud InfrastructureClassic to control communication to or from the instance, then create a security listin Oracle Cloud Infrastructure and assign the security list to the appropriatesubnets. To use custom security lists, you must assign the instance to a customsubnet, and not the default subnet.
Chapter 2Design the Oracle Cloud Infrastructure Network
2-2
Oracle Cloud Infrastructure Classic Java Migration Tool creates a bastion computeinstance in Oracle Cloud Infrastructure in order for the migration controller (Control-S)compute instance to access your target service instance. After updating the targetservice instance, the tool deletes the temporary bastion compute instance.
Before you create service instances in Oracle Cloud Infrastructure that use your newnetwork resources, you must create policies that grant your service access to theseresources. See Prerequisites for Oracle Platform Services in the Oracle CloudInfrastructure documentation.
Configure Security Rules for the NetworkIf your instance communicates with other resources in Oracle Cloud or on the Internet,create or update the security lists for your target Oracle Cloud Infrastructure network.
A security list is assigned to subnets within your virtual cloud network (VCN). Itincludes ingress and egress rules that specify the types of traffic allowed in and out ofthe instances within the subnet. You can update an existing security list, or create anew one and assign it to a subnet.
You might need to create security rules if your Oracle Java Cloud Service instancecommunicates with external resources, including these Oracle WebLogic Serverresources:
• JavaMail Session
• Foreign Java Naming and Directory Interface (JNDI) Provider
• Foreign Java Message Service (JMS) Server
• Messaging Bridge
• Store-and-Forward
• WebLogic Diagnostic Framework (WLDF) REST Action
See Security Lists in the Oracle Cloud Infrastructure documentation.
Migrate the Application DatabasesIf the applications in your Oracle Java Cloud Service instance use database instancesthat were created in an Oracle Cloud Infrastructure Classic region, migrate theseapplication databases to Oracle Cloud Infrastructure Database.
There are multiple methods of migrating your database. The Oracle CloudInfrastructure Classic Database Backup Migration Tool uses Recovery Manager(RMAN). Another option is Oracle Data Guard. See Select a Method to MigrateDatabase Instances in Migrating Infrastructure Classic Workloads to Oracle CloudInfrastructure.
1. Create the Oracle Cloud Infrastructure Database instances in the same region andvirtual cloud network (VCN) that you plan to create your target WebLogic Serverdomain.
2. If the databases and target WebLogic Server domain will be on different subnets,then configure security rules that allow the target's subnet to communicate with thedatabase ports.
Chapter 2Configure Security Rules for the Network
2-3
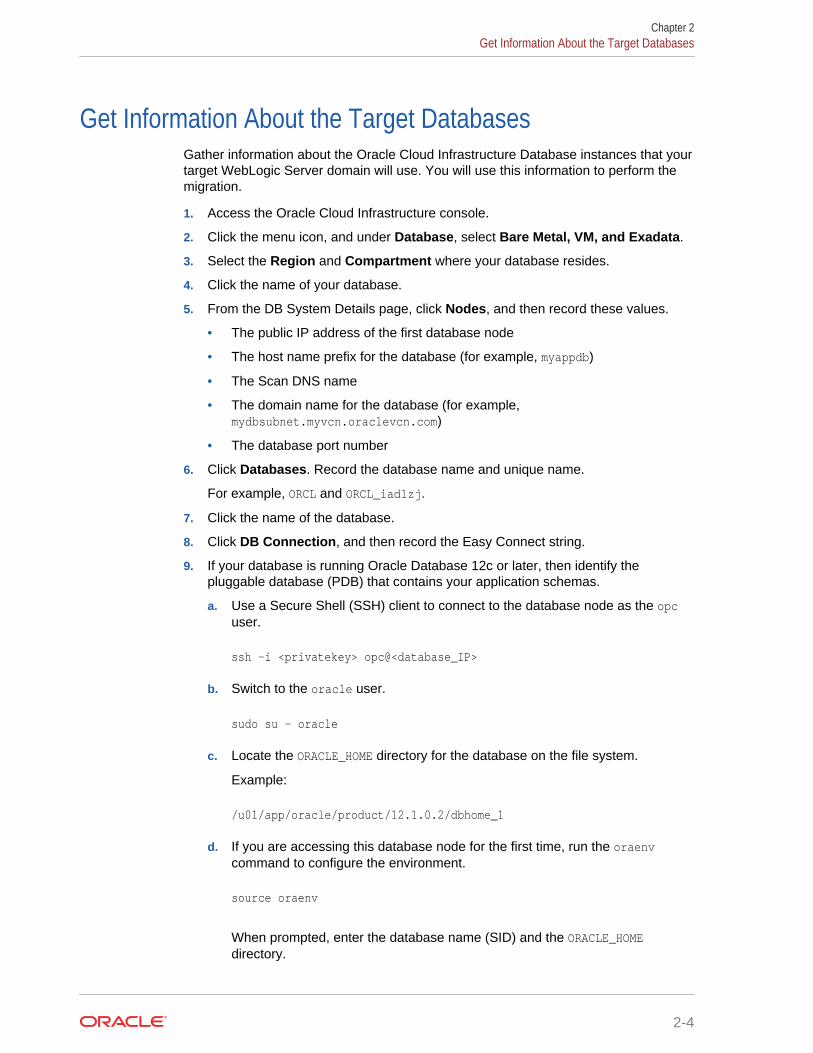
Get Information About the Target DatabasesGather information about the Oracle Cloud Infrastructure Database instances that yourtarget WebLogic Server domain will use. You will use this information to perform themigration.
1. Access the Oracle Cloud Infrastructure console.
2. Click the menu icon, and under Database, select Bare Metal, VM, and Exadata.
3. Select the Region and Compartment where your database resides.
4. Click the name of your database.
5. From the DB System Details page, click Nodes, and then record these values.
• The public IP address of the first database node
• The host name prefix for the database (for example, myappdb)
• The Scan DNS name
• The domain name for the database (for example,mydbsubnet.myvcn.oraclevcn.com)
• The database port number
6. Click Databases. Record the database name and unique name.
For example, ORCL and ORCL_iad1zj.
7. Click the name of the database.
8. Click DB Connection, and then record the Easy Connect string.
9. If your database is running Oracle Database 12c or later, then identify thepluggable database (PDB) that contains your application schemas.
a. Use a Secure Shell (SSH) client to connect to the database node as the opcuser.
ssh -i <privatekey> opc@<database_IP>
b. Switch to the oracle user.
sudo su - oracle
c. Locate the ORACLE_HOME directory for the database on the file system.
Example:
/u01/app/oracle/product/12.1.0.2/dbhome_1
d. If you are accessing this database node for the first time, run the oraenvcommand to configure the environment.
source oraenv
When prompted, enter the database name (SID) and the ORACLE_HOMEdirectory.
Chapter 2Get Information About the Target Databases
2-4
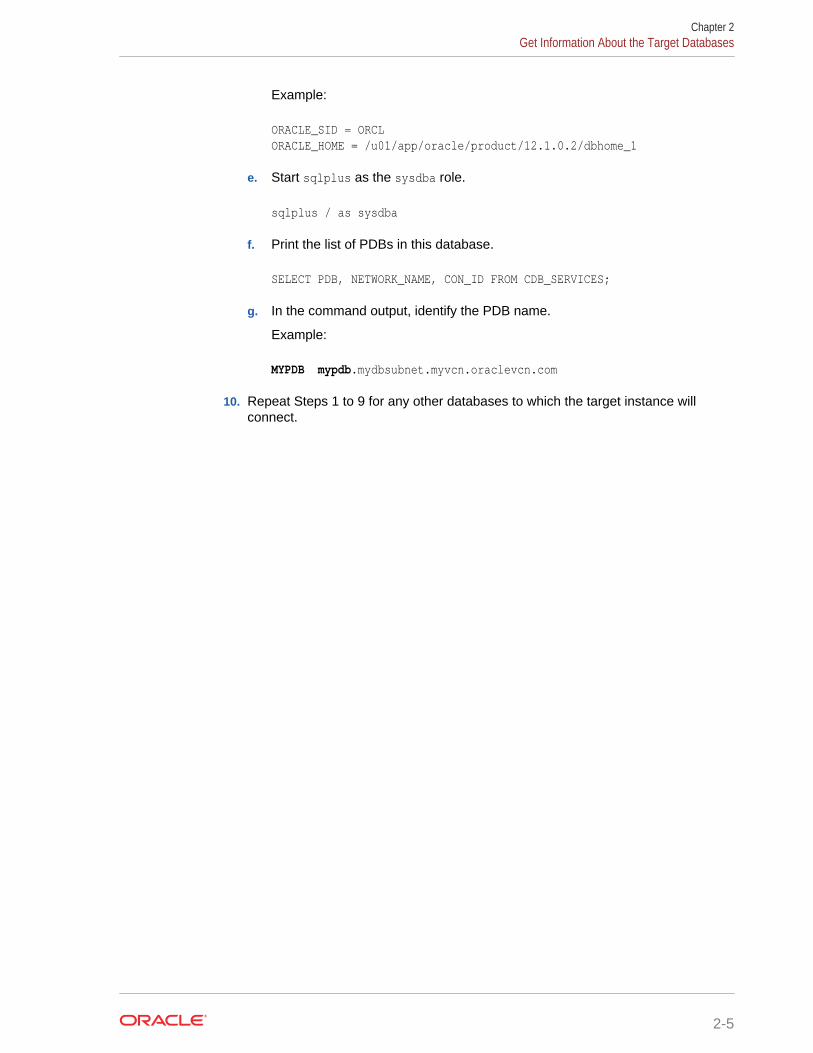
Example:
ORACLE_SID = ORCLORACLE_HOME = /u01/app/oracle/product/12.1.0.2/dbhome_1
e. Start sqlplus as the sysdba role.
sqlplus / as sysdba
f. Print the list of PDBs in this database.
SELECT PDB, NETWORK_NAME, CON_ID FROM CDB_SERVICES;
g. In the command output, identify the PDB name.
Example:
MYPDB mypdb.mydbsubnet.myvcn.oraclevcn.com
10. Repeat Steps 1 to 9 for any other databases to which the target instance willconnect.
Chapter 2Get Information About the Target Databases
2-5
3Migrate an Instance to Oracle WebLogicServer for Oracle Cloud Infrastructure
Use the Oracle Cloud Infrastructure Classic Java Migration Tool to migrate yourOracle WebLogic Server domain resources and applications from your existing OracleJava Cloud Service instance in Oracle Cloud Infrastructure Classic to a new domain inOracle WebLogic Server for Oracle Cloud Infrastructure.
Note:
Oracle recommends migrating your existing domains in Oracle Java CloudService to Oracle WebLogic Server for Oracle Cloud Infrastructure.
Before you begin the migration process, see Prepare to Migrate Oracle Java CloudService to Oracle Cloud Infrastructure.
When you migrate an Oracle Java Cloud Service instance, the following terms areused:
• Source: The Oracle Java Cloud Service instance in Oracle Cloud InfrastructureClassic.
• Target: The domain and related cloud resources in Oracle WebLogic Server forOracle Cloud Infrastructure.
Topics:
• Get Information About the Target Environment
• Launch the Migration Controller Instance in the Source Environment
• Update the Secret File
• Update the Default Profile File
• Discover Resources in Your Source Environment
• List Your Oracle Java Cloud Service Instances
• Export Your Source Instance Configuration
• Perform Prerequisite Tasks for Oracle WebLogic Server for Oracle CloudInfrastructure
• Create the Target Domain Using Oracle WebLogic Server for Oracle CloudInfrastructure
• Migrate Oracle Fusion Middleware Security Resources
• Migrate Oracle Identity Cloud Service Roles and Policies
• Integrate Fusion Middleware Components with Oracle Identity Cloud Service
• Edit the Domain Configuration File
3-1
• Copy Supporting Files to the Target
• Update the Target Domain
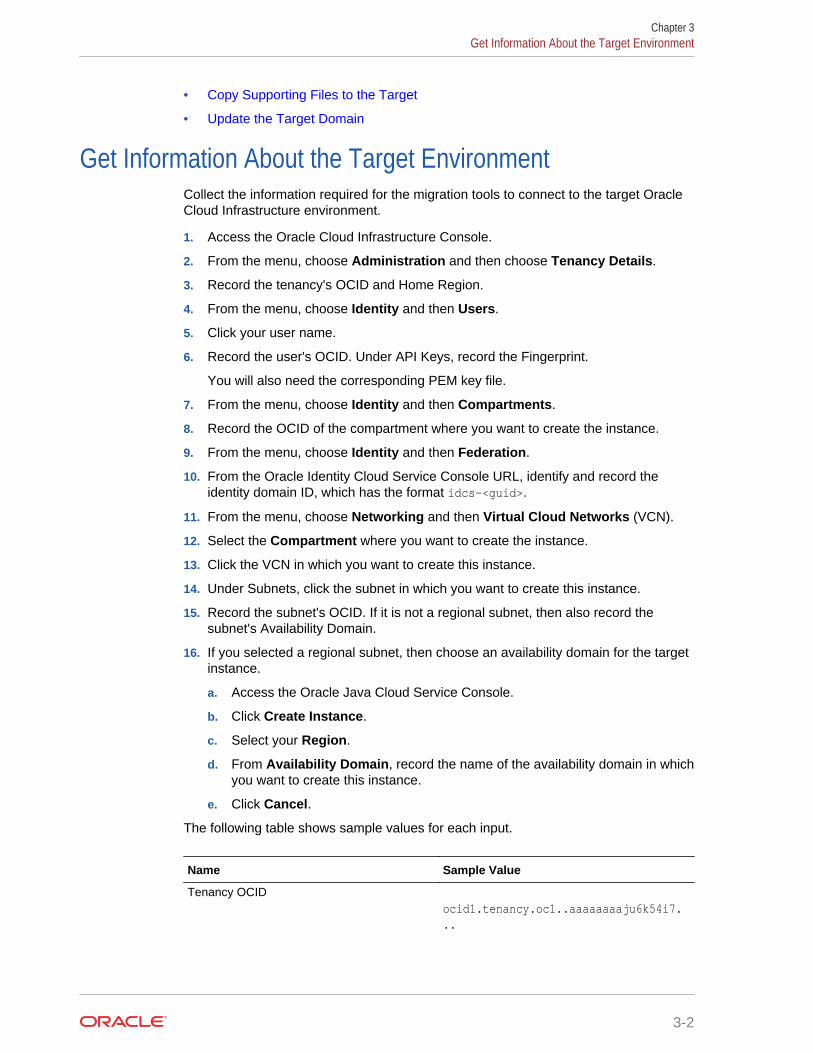
Get Information About the Target EnvironmentCollect the information required for the migration tools to connect to the target OracleCloud Infrastructure environment.
1. Access the Oracle Cloud Infrastructure Console.
2. From the menu, choose Administration and then choose Tenancy Details.
3. Record the tenancy's OCID and Home Region.
4. From the menu, choose Identity and then Users.
5. Click your user name.
6. Record the user's OCID. Under API Keys, record the Fingerprint.
You will also need the corresponding PEM key file.
7. From the menu, choose Identity and then Compartments.
8. Record the OCID of the compartment where you want to create the instance.
9. From the menu, choose Identity and then Federation.
10. From the Oracle Identity Cloud Service Console URL, identify and record theidentity domain ID, which has the format idcs-<guid>.
11. From the menu, choose Networking and then Virtual Cloud Networks (VCN).
12. Select the Compartment where you want to create the instance.
13. Click the VCN in which you want to create this instance.
14. Under Subnets, click the subnet in which you want to create this instance.
15. Record the subnet's OCID. If it is not a regional subnet, then also record thesubnet's Availability Domain.
16. If you selected a regional subnet, then choose an availability domain for the targetinstance.
a. Access the Oracle Java Cloud Service Console.
b. Click Create Instance.
c. Select your Region.
d. From Availability Domain, record the name of the availability domain in whichyou want to create this instance.
e. Click Cancel.
The following table shows sample values for each input.
Name Sample Value
Tenancy OCIDocid1.tenancy.oc1..aaaaaaaaju6k54i7...
Chapter 3Get Information About the Target Environment
3-2
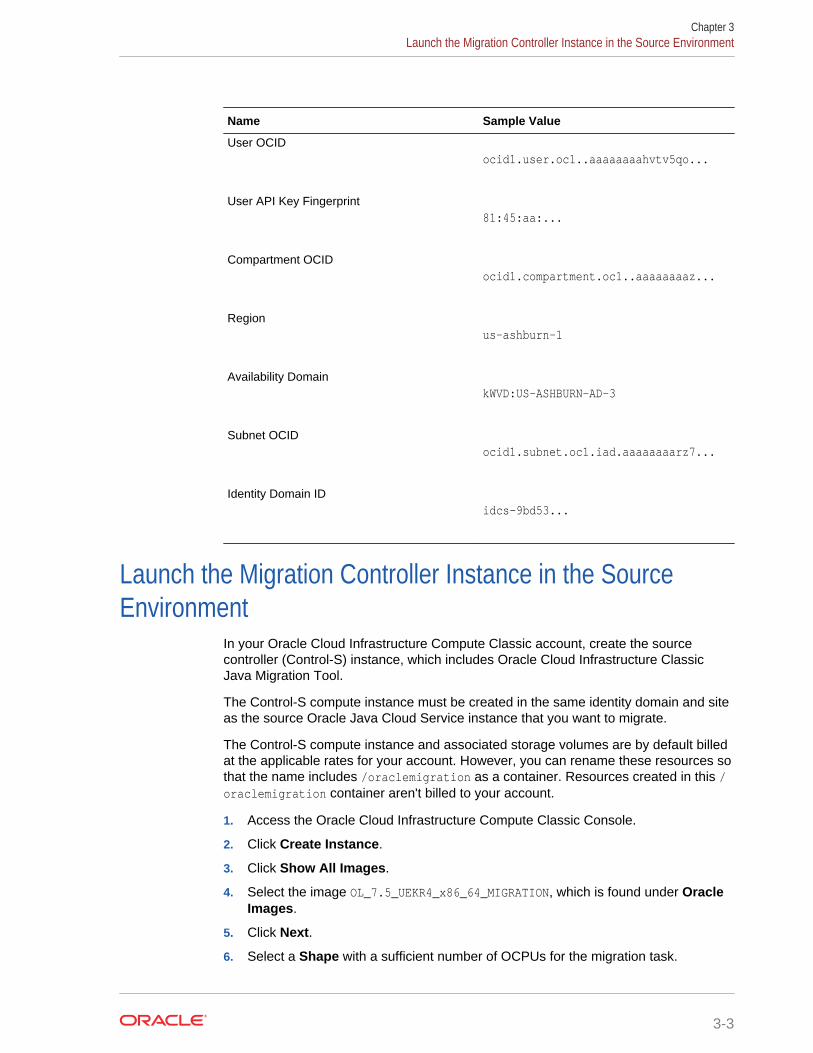
Name Sample Value
User OCIDocid1.user.oc1..aaaaaaaahvtv5qo...
User API Key Fingerprint81:45:aa:...
Compartment OCIDocid1.compartment.oc1..aaaaaaaaz...
Regionus-ashburn-1
Availability DomainkWVD:US-ASHBURN-AD-3
Subnet OCIDocid1.subnet.oc1.iad.aaaaaaaarz7...
Identity Domain IDidcs-9bd53...
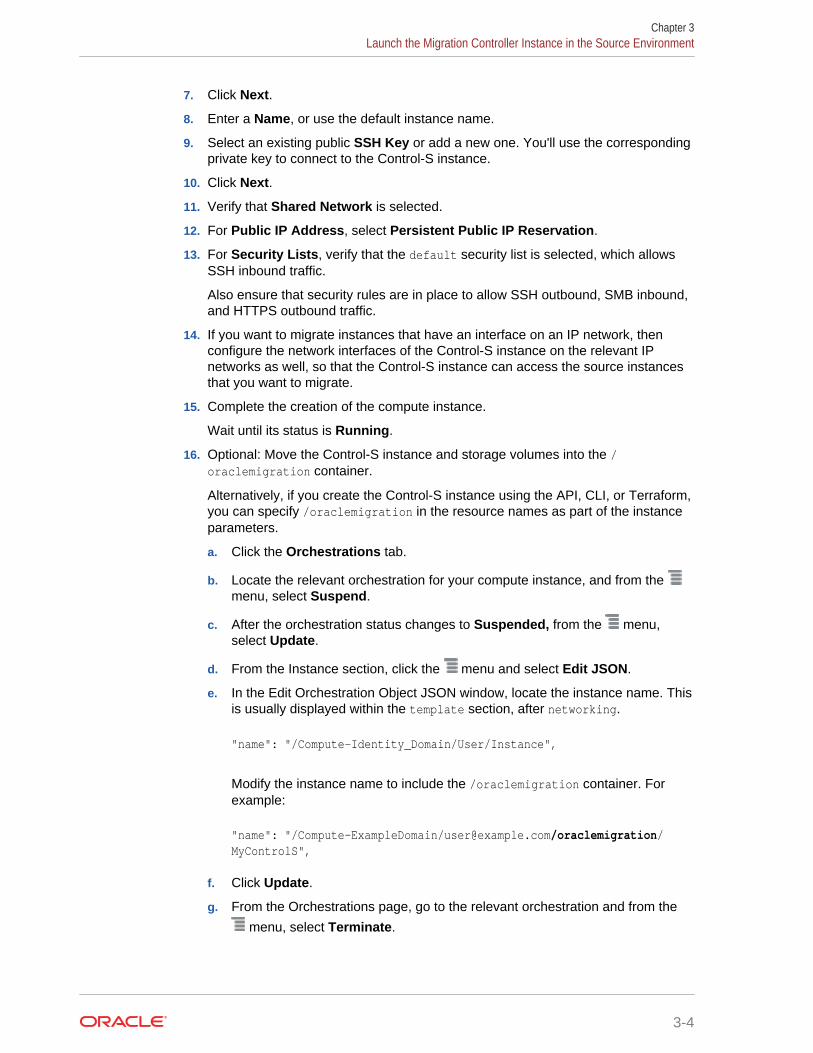
Launch the Migration Controller Instance in the SourceEnvironment
In your Oracle Cloud Infrastructure Compute Classic account, create the sourcecontroller (Control-S) instance, which includes Oracle Cloud Infrastructure ClassicJava Migration Tool.
The Control-S compute instance must be created in the same identity domain and siteas the source Oracle Java Cloud Service instance that you want to migrate.
The Control-S compute instance and associated storage volumes are by default billedat the applicable rates for your account. However, you can rename these resources sothat the name includes /oraclemigration as a container. Resources created in this /oraclemigration container aren't billed to your account.
1. Access the Oracle Cloud Infrastructure Compute Classic Console.
2. Click Create Instance.
3. Click Show All Images.
4. Select the image OL_7.5_UEKR4_x86_64_MIGRATION, which is found under OracleImages.
5. Click Next.
6. Select a Shape with a sufficient number of OCPUs for the migration task.
Chapter 3Launch the Migration Controller Instance in the Source Environment
3-3
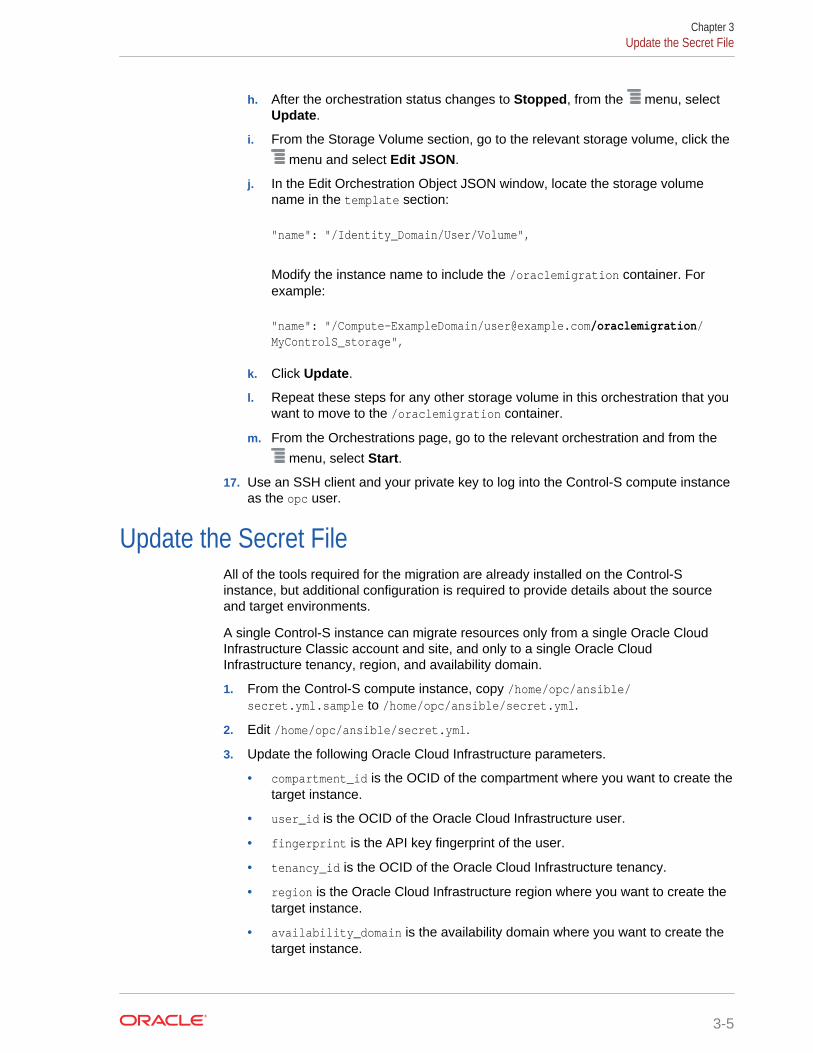
7. Click Next.
8. Enter a Name, or use the default instance name.
9. Select an existing public SSH Key or add a new one. You'll use the correspondingprivate key to connect to the Control-S instance.
10. Click Next.
11. Verify that Shared Network is selected.
12. For Public IP Address, select Persistent Public IP Reservation.
13. For Security Lists, verify that the default security list is selected, which allowsSSH inbound traffic.
Also ensure that security rules are in place to allow SSH outbound, SMB inbound,and HTTPS outbound traffic.
14. If you want to migrate instances that have an interface on an IP network, thenconfigure the network interfaces of the Control-S instance on the relevant IPnetworks as well, so that the Control-S instance can access the source instancesthat you want to migrate.
15. Complete the creation of the compute instance.
Wait until its status is Running.
16. Optional: Move the Control-S instance and storage volumes into the /oraclemigration container.
Alternatively, if you create the Control-S instance using the API, CLI, or Terraform,you can specify /oraclemigration in the resource names as part of the instanceparameters.
a. Click the Orchestrations tab.
b. Locate the relevant orchestration for your compute instance, and from the menu, select Suspend.
c. After the orchestration status changes to Suspended, from the menu,select Update.
d. From the Instance section, click the menu and select Edit JSON.
e. In the Edit Orchestration Object JSON window, locate the instance name. Thisis usually displayed within the template section, after networking.
"name": "/Compute-Identity_Domain/User/Instance",
Modify the instance name to include the /oraclemigration container. Forexample:
"name": "/Compute-ExampleDomain/[email protected]/oraclemigration/MyControlS",
f. Click Update.
g. From the Orchestrations page, go to the relevant orchestration and from the
menu, select Terminate.
Chapter 3Launch the Migration Controller Instance in the Source Environment
3-4
h. After the orchestration status changes to Stopped, from the menu, selectUpdate.
i. From the Storage Volume section, go to the relevant storage volume, click the
menu and select Edit JSON.
j. In the Edit Orchestration Object JSON window, locate the storage volumename in the template section:
"name": "/Identity_Domain/User/Volume",
Modify the instance name to include the /oraclemigration container. Forexample:
"name": "/Compute-ExampleDomain/[email protected]/oraclemigration/MyControlS_storage",
k. Click Update.
l. Repeat these steps for any other storage volume in this orchestration that youwant to move to the /oraclemigration container.
m. From the Orchestrations page, go to the relevant orchestration and from the
menu, select Start.
17. Use an SSH client and your private key to log into the Control-S compute instanceas the opc user.
Update the Secret FileAll of the tools required for the migration are already installed on the Control-Sinstance, but additional configuration is required to provide details about the sourceand target environments.
A single Control-S instance can migrate resources only from a single Oracle CloudInfrastructure Classic account and site, and only to a single Oracle CloudInfrastructure tenancy, region, and availability domain.
1. From the Control-S compute instance, copy /home/opc/ansible/secret.yml.sample to /home/opc/ansible/secret.yml.
2. Edit /home/opc/ansible/secret.yml.
3. Update the following Oracle Cloud Infrastructure parameters.
• compartment_id is the OCID of the compartment where you want to create thetarget instance.
• user_id is the OCID of the Oracle Cloud Infrastructure user.
• fingerprint is the API key fingerprint of the user.
• tenancy_id is the OCID of the Oracle Cloud Infrastructure tenancy.
• region is the Oracle Cloud Infrastructure region where you want to create thetarget instance.
• availability_domain is the availability domain where you want to create thetarget instance.
Chapter 3Update the Secret File
3-5
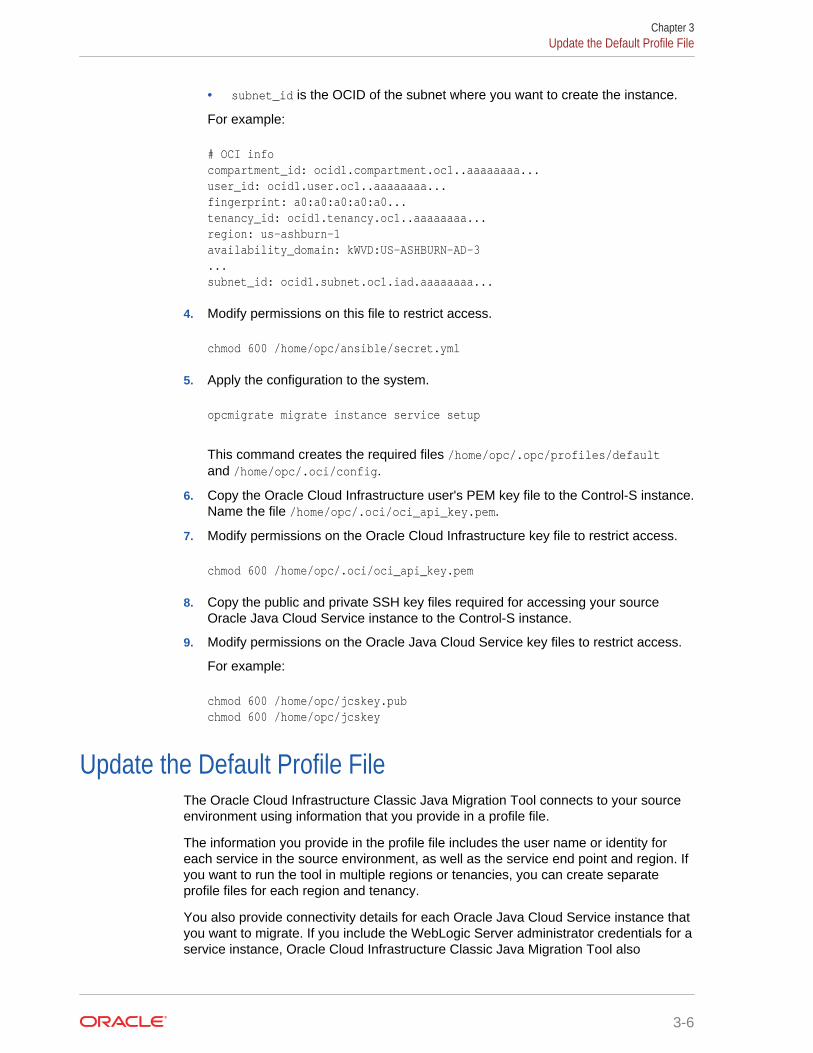
• subnet_id is the OCID of the subnet where you want to create the instance.
For example:
# OCI infocompartment_id: ocid1.compartment.oc1..aaaaaaaa...user_id: ocid1.user.oc1..aaaaaaaa...fingerprint: a0:a0:a0:a0:a0...tenancy_id: ocid1.tenancy.oc1..aaaaaaaa...region: us-ashburn-1availability_domain: kWVD:US-ASHBURN-AD-3...subnet_id: ocid1.subnet.oc1.iad.aaaaaaaa...
4. Modify permissions on this file to restrict access.
chmod 600 /home/opc/ansible/secret.yml
5. Apply the configuration to the system.
opcmigrate migrate instance service setup
This command creates the required files /home/opc/.opc/profiles/defaultand /home/opc/.oci/config.
6. Copy the Oracle Cloud Infrastructure user's PEM key file to the Control-S instance.Name the file /home/opc/.oci/oci_api_key.pem.
7. Modify permissions on the Oracle Cloud Infrastructure key file to restrict access.
chmod 600 /home/opc/.oci/oci_api_key.pem
8. Copy the public and private SSH key files required for accessing your sourceOracle Java Cloud Service instance to the Control-S instance.
9. Modify permissions on the Oracle Java Cloud Service key files to restrict access.
For example:
chmod 600 /home/opc/jcskey.pubchmod 600 /home/opc/jcskey
Update the Default Profile FileThe Oracle Cloud Infrastructure Classic Java Migration Tool connects to your sourceenvironment using information that you provide in a profile file.
The information you provide in the profile file includes the user name or identity foreach service in the source environment, as well as the service end point and region. Ifyou want to run the tool in multiple regions or tenancies, you can create separateprofile files for each region and tenancy.
You also provide connectivity details for each Oracle Java Cloud Service instance thatyou want to migrate. If you include the WebLogic Server administrator credentials for aservice instance, Oracle Cloud Infrastructure Classic Java Migration Tool also
Chapter 3Update the Default Profile File
3-6
migrates any Oracle Fusion Middleware security resources (custom users, groups,roles, policies, or credential maps) to the target domain.
1. Access the Oracle Cloud Infrastructure Compute Classic Console.
2. Click the Site select box.
3. Record the REST Endpoint.
4. Identify and record your Oracle Java Cloud Service REST Endpoint.
See Send Requests in REST API for Oracle Java Cloud Service.
5. Access the Oracle Java Cloud Service Console.
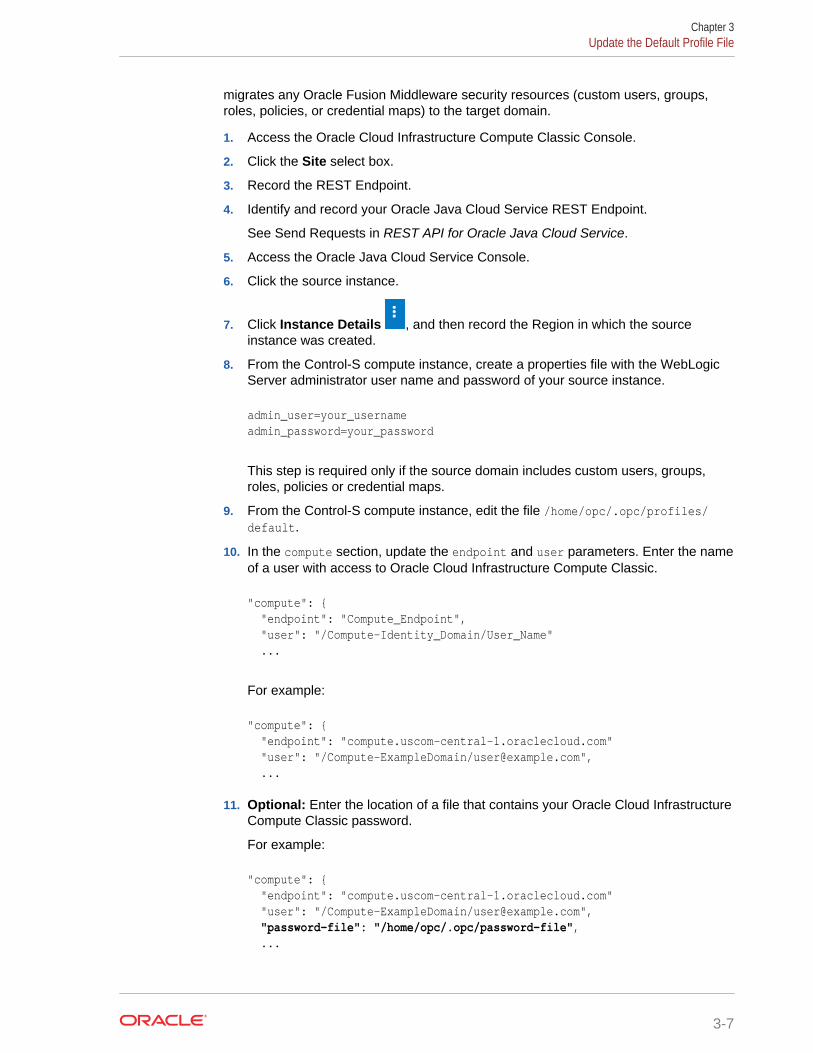
6. Click the source instance.
7. Click Instance Details , and then record the Region in which the sourceinstance was created.
8. From the Control-S compute instance, create a properties file with the WebLogicServer administrator user name and password of your source instance.
admin_user=your_usernameadmin_password=your_password
This step is required only if the source domain includes custom users, groups,roles, policies or credential maps.
9. From the Control-S compute instance, edit the file /home/opc/.opc/profiles/default.
10. In the compute section, update the endpoint and user parameters. Enter the nameof a user with access to Oracle Cloud Infrastructure Compute Classic.
"compute": { "endpoint": "Compute_Endpoint", "user": "/Compute-Identity_Domain/User_Name" ...
For example:
"compute": { "endpoint": "compute.uscom-central-1.oraclecloud.com" "user": "/Compute-ExampleDomain/[email protected]", ...
11. Optional: Enter the location of a file that contains your Oracle Cloud InfrastructureCompute Classic password.
For example:
"compute": { "endpoint": "compute.uscom-central-1.oraclecloud.com" "user": "/Compute-ExampleDomain/[email protected]", "password-file": "/home/opc/.opc/password-file", ...
Chapter 3Update the Default Profile File
3-7
If you don't specify a password file for a service, you'll be prompted to provide thepassword when you run the tool.
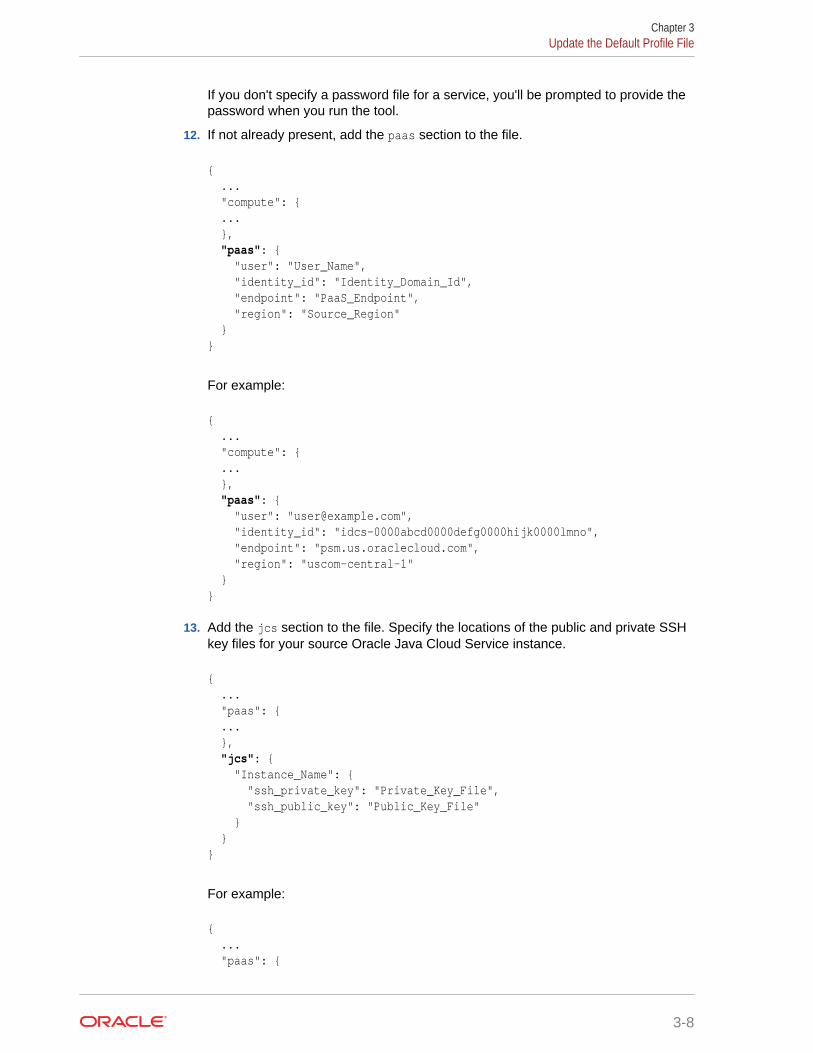
12. If not already present, add the paas section to the file.
{ ... "compute": { ... }, "paas": { "user": "User_Name", "identity_id": "Identity_Domain_Id", "endpoint": "PaaS_Endpoint", "region": "Source_Region" }}
For example:
{ ... "compute": { ... }, "paas": { "user": "[email protected]", "identity_id": "idcs-0000abcd0000defg0000hijk0000lmno", "endpoint": "psm.us.oraclecloud.com", "region": "uscom-central-1" }}
13. Add the jcs section to the file. Specify the locations of the public and private SSHkey files for your source Oracle Java Cloud Service instance.
{ ... "paas": { ... }, "jcs": { "Instance_Name": { "ssh_private_key": "Private_Key_File", "ssh_public_key": "Public_Key_File" } }}
For example:
{ ... "paas": {
Chapter 3Update the Default Profile File
3-8
... }, "jcs": { "MyJavaInstance": { "ssh_private_key": "/home/opc/jcskey", "ssh_public_key": "/home/opc/jcskey.pub" } }}
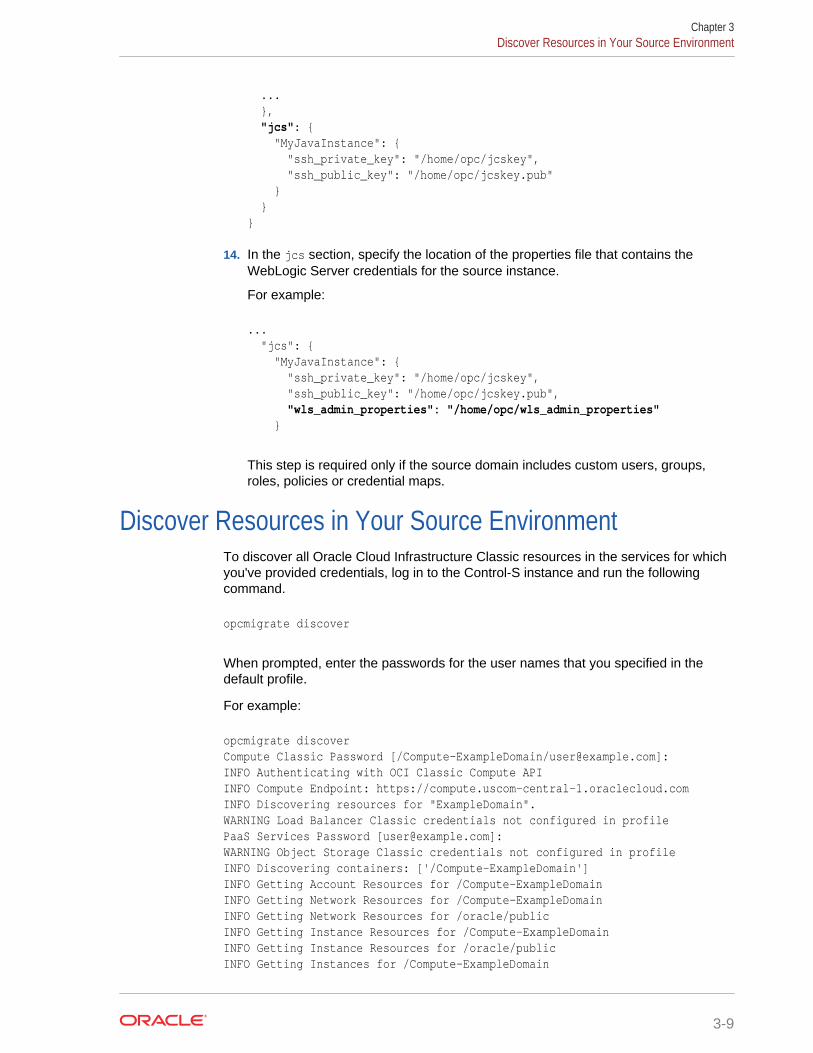
14. In the jcs section, specify the location of the properties file that contains theWebLogic Server credentials for the source instance.
For example:
... "jcs": { "MyJavaInstance": { "ssh_private_key": "/home/opc/jcskey", "ssh_public_key": "/home/opc/jcskey.pub", "wls_admin_properties": "/home/opc/wls_admin_properties" }
This step is required only if the source domain includes custom users, groups,roles, policies or credential maps.
Discover Resources in Your Source EnvironmentTo discover all Oracle Cloud Infrastructure Classic resources in the services for whichyou've provided credentials, log in to the Control-S instance and run the followingcommand.
opcmigrate discover
When prompted, enter the passwords for the user names that you specified in thedefault profile.
For example:
opcmigrate discoverCompute Classic Password [/Compute-ExampleDomain/[email protected]]:INFO Authenticating with OCI Classic Compute APIINFO Compute Endpoint: https://compute.uscom-central-1.oraclecloud.comINFO Discovering resources for "ExampleDomain".WARNING Load Balancer Classic credentials not configured in profilePaaS Services Password [[email protected]]:WARNING Object Storage Classic credentials not configured in profileINFO Discovering containers: ['/Compute-ExampleDomain']INFO Getting Account Resources for /Compute-ExampleDomainINFO Getting Network Resources for /Compute-ExampleDomainINFO Getting Network Resources for /oracle/publicINFO Getting Instance Resources for /Compute-ExampleDomainINFO Getting Instance Resources for /oracle/publicINFO Getting Instances for /Compute-ExampleDomain
Chapter 3Discover Resources in Your Source Environment
3-9
INFO Getting PaaS Resources for uscom-central-1INFO Storing discovered resources to 'resources-default.json'
List Your Oracle Java Cloud Service InstancesTo list the Oracle Java Cloud Service instances in the source environment, log in tothe Control-S instance and run the following command.
opcmigrate migrate jcs list
This command uses the output generated by the discover command to identify andlist the available Oracle Java Cloud Service instances.
For example:
opcmigrate migrate jcs listINFO Loaded resources from 'resources-default.json' ...Java Cloud Service Instances
Name Version State Description -------------------- -------------------- -------------------- ------------------------------------------------------------MyJavaInstance 11gR1 READY My first instanceAnotherInstance 12cR3 READY My second instance
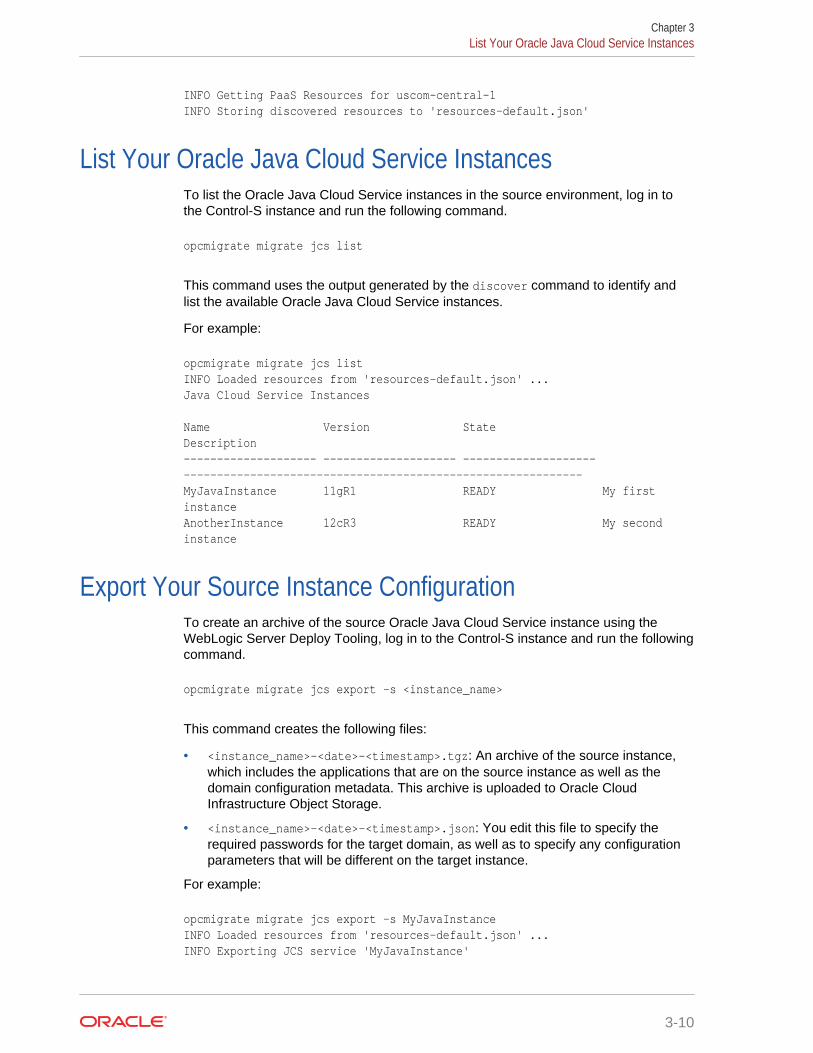
Export Your Source Instance ConfigurationTo create an archive of the source Oracle Java Cloud Service instance using theWebLogic Server Deploy Tooling, log in to the Control-S instance and run the followingcommand.
opcmigrate migrate jcs export -s <instance_name>
This command creates the following files:
• <instance_name>-<date>-<timestamp>.tgz: An archive of the source instance,which includes the applications that are on the source instance as well as thedomain configuration metadata. This archive is uploaded to Oracle CloudInfrastructure Object Storage.
• <instance_name>-<date>-<timestamp>.json: You edit this file to specify therequired passwords for the target domain, as well as to specify any configurationparameters that will be different on the target instance.
For example:
opcmigrate migrate jcs export -s MyJavaInstanceINFO Loaded resources from 'resources-default.json' ...INFO Exporting JCS service 'MyJavaInstance'
Chapter 3List Your Oracle Java Cloud Service Instances
3-10
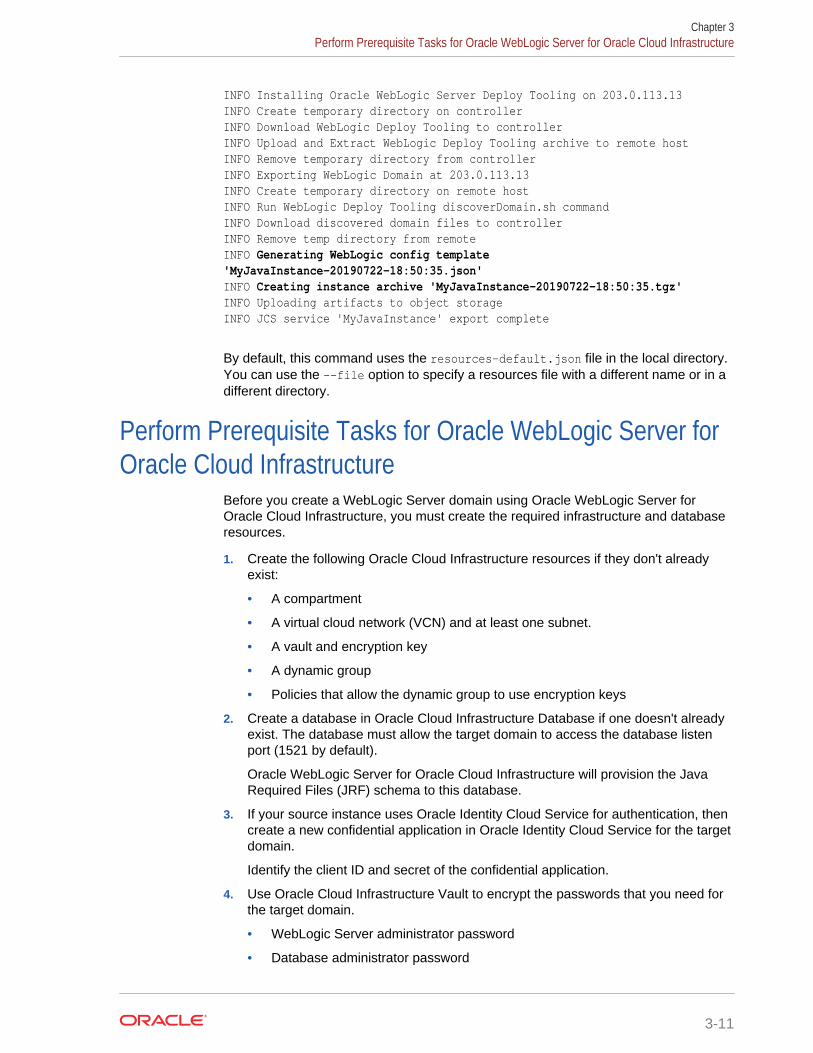
INFO Installing Oracle WebLogic Server Deploy Tooling on 203.0.113.13INFO Create temporary directory on controllerINFO Download WebLogic Deploy Tooling to controllerINFO Upload and Extract WebLogic Deploy Tooling archive to remote hostINFO Remove temporary directory from controllerINFO Exporting WebLogic Domain at 203.0.113.13INFO Create temporary directory on remote hostINFO Run WebLogic Deploy Tooling discoverDomain.sh commandINFO Download discovered domain files to controllerINFO Remove temp directory from remoteINFO Generating WebLogic config template 'MyJavaInstance-20190722-18:50:35.json'INFO Creating instance archive 'MyJavaInstance-20190722-18:50:35.tgz'INFO Uploading artifacts to object storageINFO JCS service 'MyJavaInstance' export complete
By default, this command uses the resources-default.json file in the local directory.You can use the --file option to specify a resources file with a different name or in adifferent directory.
Perform Prerequisite Tasks for Oracle WebLogic Server forOracle Cloud Infrastructure
Before you create a WebLogic Server domain using Oracle WebLogic Server forOracle Cloud Infrastructure, you must create the required infrastructure and databaseresources.
1. Create the following Oracle Cloud Infrastructure resources if they don't alreadyexist:
• A compartment
• A virtual cloud network (VCN) and at least one subnet.
• A vault and encryption key
• A dynamic group
• Policies that allow the dynamic group to use encryption keys
2. Create a database in Oracle Cloud Infrastructure Database if one doesn't alreadyexist. The database must allow the target domain to access the database listenport (1521 by default).
Oracle WebLogic Server for Oracle Cloud Infrastructure will provision the JavaRequired Files (JRF) schema to this database.
3. If your source instance uses Oracle Identity Cloud Service for authentication, thencreate a new confidential application in Oracle Identity Cloud Service for the targetdomain.
Identify the client ID and secret of the confidential application.
4. Use Oracle Cloud Infrastructure Vault to encrypt the passwords that you need forthe target domain.
• WebLogic Server administrator password
• Database administrator password
Chapter 3Perform Prerequisite Tasks for Oracle WebLogic Server for Oracle Cloud Infrastructure
3-11

• Client secret, if using Oracle Identity Cloud Service
See Before You Begin with Oracle WebLogic Server for Oracle Cloud Infrastructure inUsing Oracle WebLogic Server for Oracle Cloud Infrastructure.
Create the Target Domain Using Oracle WebLogic Serverfor Oracle Cloud Infrastructure
Launch the Oracle WebLogic Server for Oracle Cloud Infrastructure application in theOracle Cloud Infrastructure Marketplace to create a new domain. This domain musthave the same topology and configuration as the source Oracle Java Cloud Serviceinstance.
Note:
The migration import tooling uses the SSH keys specified for the sourceinstance in your ~/.opc/profiles/default file (or ~/.opc/profiles/<profile> file) on the Control-S instance. Be sure to use the same SSH keypair to create your target domain with Oracle WebLogic Server for OracleCloud Infrastructure.
1. Sign in to the Oracle Cloud Infrastructure Console.
2. Click the navigation menu, and then select Marketplace.
3. Select the same Oracle WebLogic Server edition as your source instance.
4. For Version, select the same major version (X.Y) as the source instance.
For example, 12.2.1.2 and 12.2.1.3 are the same major version of OracleWebLogic Server.
5. Select the compartment in which you want to create the stack.
6. Click Launch Stack.
7. Enter a name for your stack.
8. Click Next.
9. Enter a resource name prefix.
10. Select an Oracle Cloud Infrastructure shape that most closely matches the numberof Oracle Compute Units (OCPUs) and the amount of memory that are available inthe Oracle Cloud Infrastructure Classic shape in your source instance.
See Select Oracle Cloud Infrastructure Shapes.
11. Enter the SSH public key.
12. Select the availability domain where you want to create the domain.
13. Select the same number of managed servers as the source instance.
14. Enter the same Oracle WebLogic Server administrator credentials as your sourceinstance.
The password must be encrypted.
Chapter 3Create the Target Domain Using Oracle WebLogic Server for Oracle Cloud Infrastructure
3-12

15. For Network Compartment, select the same compartment you selected earlierupon launching the stack.
16. For Virtual Cloud Network Strategy, select Use Existing VCN and then selectthe virtual cloud network (VCN) where you want to create the domain.
17. For Subnet Strategy, select Use Existing Subnet or Create New Subnet.
• If you're using an existing subnet, make sure the database port (1521 bydefault) is opened for the subnet's CIDR.
• When you create a new subnet, Oracle WebLogic Server for Oracle CloudInfrastructure configures the security list that enables outbound access to thedatabase port on the database subnet.
18. If you're creating a new subnet, specify a CIDR for the new subnet.
The new subnet's CIDR should not overlap with any other subnet CIDRs in theexisting VCN.
19. If your source instance includes an Oracle Traffic Director load balancer, thenprovision a load balancer for the domain.
a. Select Provision Load Balancer.
b. Select an existing subnet where you want to create the load balancer.
20. If your source instance uses Oracle Identity Cloud Service for authentication, thenconfigure Oracle Identity Cloud Service for the target domain.
This configuration is supported only for WebLogic Server 12c, and also requires aload balancer.
a. Select Enable Authentication Using Identity Cloud Service.
b. Enter your Oracle Identity Cloud Service (IDCS) tenant name, which is alsoreferred to as the instance ID.
c. Enter the client ID and encrypted client secret of an existing confidentialapplication in this Oracle Identity Cloud Service instance.
The client secret must be encrypted.
21. For Database Strategy, select Database System.
22. Select the compartment and VCN in which you created the database.
23. Select your DB System, database home, database version, and database.
24. Enter the pluggable database (PDB) name if the selected database is runningOracle Database 12c or later.
25. Enter the name of a database user with database administrator (DBA) privileges,and the encrypted password for that database administrator.
The database password must be encrypted.
26. Enter the database listen port (1521 by default).
27. If your domain and database are on different VCNs, then you must configure localVCN peering.
Oracle WebLogic Server for Oracle Cloud Infrastructure creates a public subnet ineach VCN, and then creates a compute instance in each subnet. These computeinstances run software to forward DNS requests across the VCNs.
a. Specify a CIDR for the new subnet in the WebLogic VCN.
Chapter 3Create the Target Domain Using Oracle WebLogic Server for Oracle Cloud Infrastructure
3-13
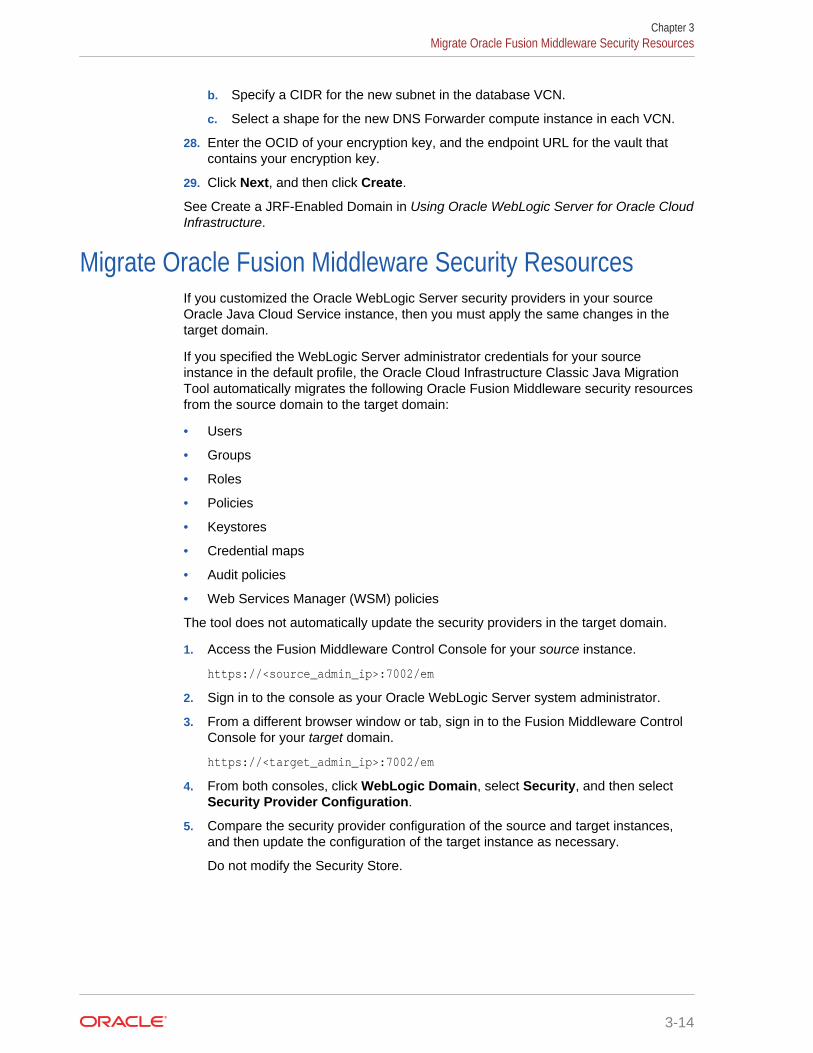
b. Specify a CIDR for the new subnet in the database VCN.
c. Select a shape for the new DNS Forwarder compute instance in each VCN.
28. Enter the OCID of your encryption key, and the endpoint URL for the vault thatcontains your encryption key.
29. Click Next, and then click Create.
See Create a JRF-Enabled Domain in Using Oracle WebLogic Server for Oracle CloudInfrastructure.
Migrate Oracle Fusion Middleware Security ResourcesIf you customized the Oracle WebLogic Server security providers in your sourceOracle Java Cloud Service instance, then you must apply the same changes in thetarget domain.
If you specified the WebLogic Server administrator credentials for your sourceinstance in the default profile, the Oracle Cloud Infrastructure Classic Java MigrationTool automatically migrates the following Oracle Fusion Middleware security resourcesfrom the source domain to the target domain:
• Users
• Groups
• Roles
• Policies
• Keystores
• Credential maps
• Audit policies
• Web Services Manager (WSM) policies
The tool does not automatically update the security providers in the target domain.
1. Access the Fusion Middleware Control Console for your source instance.
https://<source_admin_ip>:7002/em
2. Sign in to the console as your Oracle WebLogic Server system administrator.
3. From a different browser window or tab, sign in to the Fusion Middleware ControlConsole for your target domain.
https://<target_admin_ip>:7002/em
4. From both consoles, click WebLogic Domain, select Security, and then selectSecurity Provider Configuration.
5. Compare the security provider configuration of the source and target instances,and then update the configuration of the target instance as necessary.
Do not modify the Security Store.
Chapter 3Migrate Oracle Fusion Middleware Security Resources
3-14
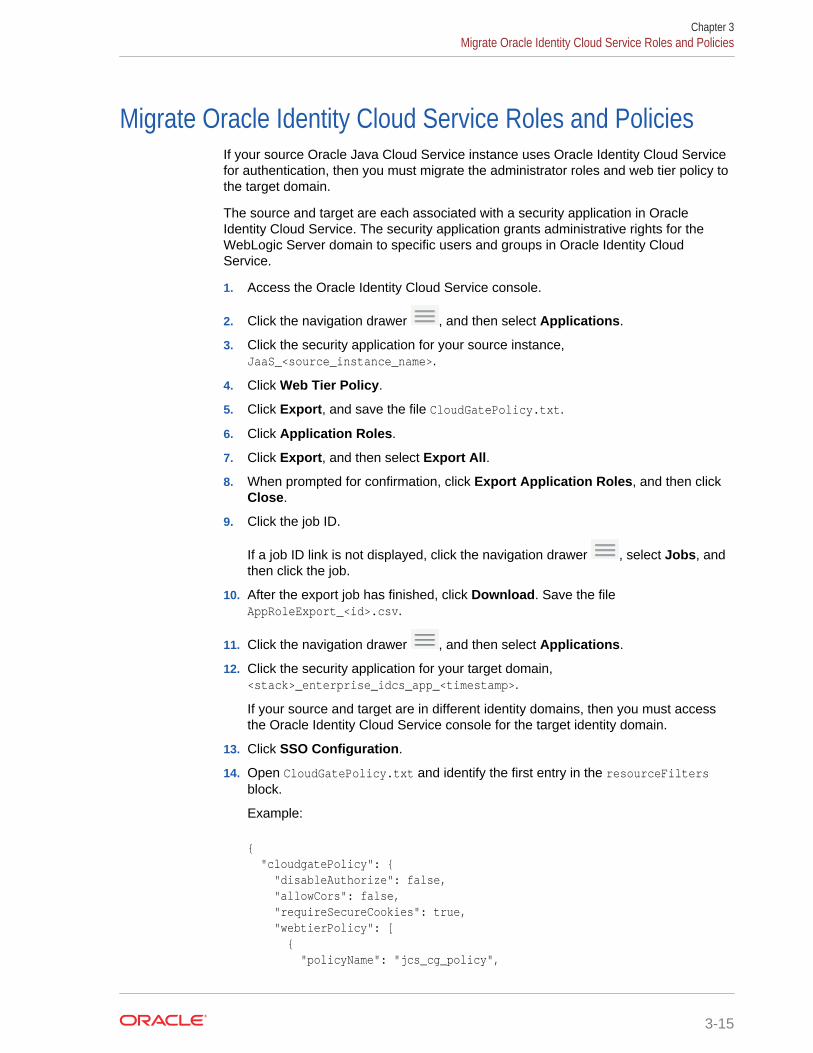
Migrate Oracle Identity Cloud Service Roles and PoliciesIf your source Oracle Java Cloud Service instance uses Oracle Identity Cloud Servicefor authentication, then you must migrate the administrator roles and web tier policy tothe target domain.
The source and target are each associated with a security application in OracleIdentity Cloud Service. The security application grants administrative rights for theWebLogic Server domain to specific users and groups in Oracle Identity CloudService.
1. Access the Oracle Identity Cloud Service console.
2. Click the navigation drawer , and then select Applications.
3. Click the security application for your source instance,JaaS_<source_instance_name>.
4. Click Web Tier Policy.
5. Click Export, and save the file CloudGatePolicy.txt.
6. Click Application Roles.
7. Click Export, and then select Export All.
8. When prompted for confirmation, click Export Application Roles, and then clickClose.
9. Click the job ID.
If a job ID link is not displayed, click the navigation drawer , select Jobs, andthen click the job.
10. After the export job has finished, click Download. Save the fileAppRoleExport_<id>.csv.
11. Click the navigation drawer , and then select Applications.
12. Click the security application for your target domain,<stack>_enterprise_idcs_app_<timestamp>.
If your source and target are in different identity domains, then you must accessthe Oracle Identity Cloud Service console for the target identity domain.
13. Click SSO Configuration.
14. Open CloudGatePolicy.txt and identify the first entry in the resourceFiltersblock.
Example:
{ "cloudgatePolicy": { "disableAuthorize": false, "allowCors": false, "requireSecureCookies": true, "webtierPolicy": [ { "policyName": "jcs_cg_policy",
Chapter 3Migrate Oracle Identity Cloud Service Roles and Policies
3-15
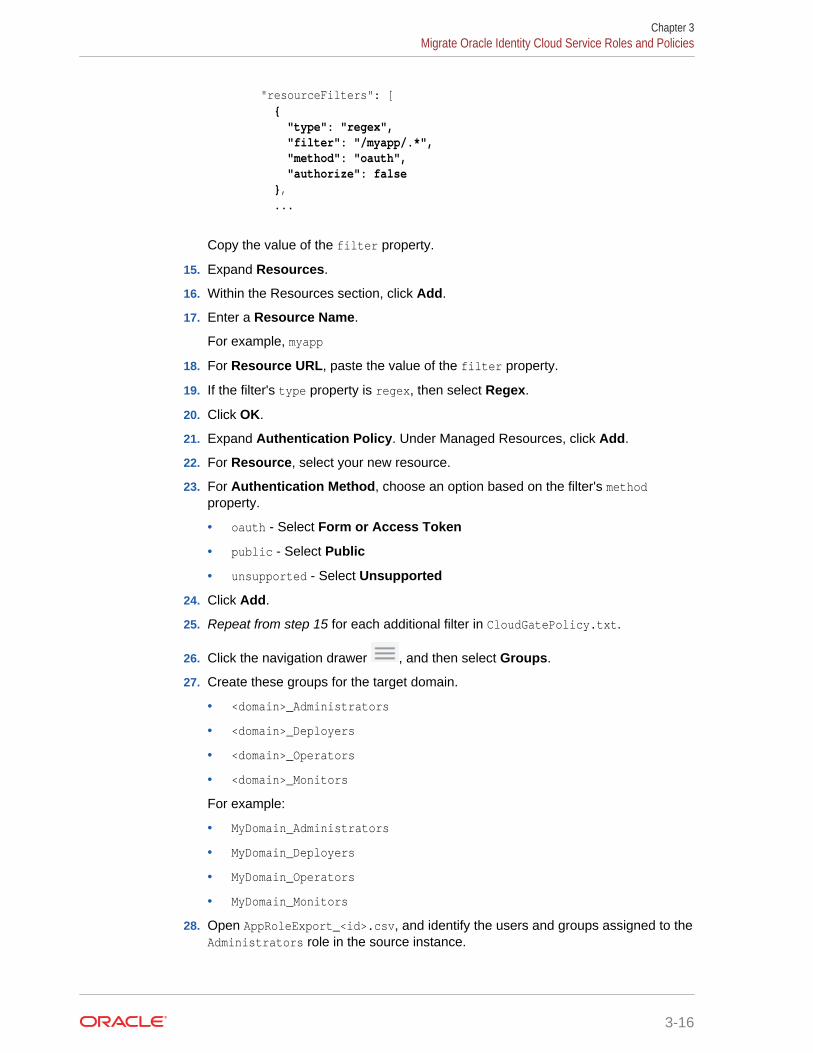
"resourceFilters": [ { "type": "regex", "filter": "/myapp/.*", "method": "oauth", "authorize": false }, ...
Copy the value of the filter property.
15. Expand Resources.
16. Within the Resources section, click Add.
17. Enter a Resource Name.
For example, myapp
18. For Resource URL, paste the value of the filter property.
19. If the filter's type property is regex, then select Regex.
20. Click OK.
21. Expand Authentication Policy. Under Managed Resources, click Add.
22. For Resource, select your new resource.
23. For Authentication Method, choose an option based on the filter's methodproperty.
• oauth - Select Form or Access Token
• public - Select Public
• unsupported - Select Unsupported
24. Click Add.
25. Repeat from step 15 for each additional filter in CloudGatePolicy.txt.
26. Click the navigation drawer , and then select Groups.
27. Create these groups for the target domain.
• <domain>_Administrators
• <domain>_Deployers
• <domain>_Operators
• <domain>_Monitors
For example:
• MyDomain_Administrators
• MyDomain_Deployers
• MyDomain_Operators
• MyDomain_Monitors
28. Open AppRoleExport_<id>.csv, and identify the users and groups assigned to theAdministrators role in the source instance.
Chapter 3Migrate Oracle Identity Cloud Service Roles and Policies
3-16
29. Edit the <domain>_Administrators group, and add the same users and groups asthe Administrators role in the source instance.
30. Repeat the previous step for the remaining roles in AppRoleExport_<id>.csv:
• Add the members of the Deployers role to the <domain>_Deployers group.
• Add the members of the Operators role to the <domain>_Operators group.
• Add the members of the Monitors role to the <domain>_Monitors group.
31. Sign in to the WebLogic Server Administration Console for the target domain.
https://<target_admin_ip>:7002/console
32. Click Security Realms.
33. Click the default realm.
34. Click the Roles and Policies tab.
35. From the Roles table, expand Global Roles, and then expand Roles.
36. Click View Role Conditions for the Admin role.
37. Click the group name assigned to this role. The default is Administrators.
38. Enter <domain>_Administrators.
39. Click OK, and then click Save.
40. From the breadcrumb links at the top of the page, click Realm Roles.
41. Repeat from step 35 for the remaining administrator roles:
• Map Deployer to <domain>_Deployers
• Map Operator to <domain>_Operators
• Map Monitor to <domain>_Monitors
Integrate Fusion Middleware Components with OracleIdentity Cloud Service
If your source Oracle Java Cloud Service instance uses Oracle Identity Cloud Servicefor authentication, then you can integrate certain Oracle Fusion Middlewarecomponents in the target domain with Oracle Identity Cloud Service.
If your source instance uses Oracle Web Services Manager to protect web serviceapplications and clients, then see Secure Web Services Using Identity Cloud Servicein Using Oracle WebLogic Server for Oracle Cloud Infrastructure.
If applications on your source instance use Oracle Platform Security Services APIs tolook up user and group information, then see Integrate OPSS User and Group APIswith Identity Cloud Service in Using Oracle WebLogic Server for Oracle CloudInfrastructure.
Chapter 3Integrate Fusion Middleware Components with Oracle Identity Cloud Service
3-17
Edit the Domain Configuration FileThe export command creates a file that contains parameters for updating the targetWebLogic Server domain. Specify JDBC URLs and passwords, SSL keystorepasswords, and other details for the target instance.
For security purposes, Oracle WebLogic Server Deploy Tooling excludes the values ofall passwords during domain discovery.
1. On the Control-S instance, edit the file <instance_name>-<date-time-stamp>.json.
Refer to the output from the export command to determine the specific file name.
2. Update the following attributes.
• JCSServiceName - The name of the target domain that you created with OracleWebLogic Server for Oracle Cloud Infrastructure (including the resource nameprefix you provided when you created the domain)
• JCSAdminIPAddress - The IP address of the first node in the target instance(running the Administration Server)
• WeblogicAdminUser - The user name for the WebLogic Server domainadministrator on the target instance
• WeblogicAdminPassword - The password for the WebLogic Server domainadministrator on the target instance
3. If your source instance includes a load balancer, then update the FrontendHostattribute for each cluster in the Cluster node.
Enter the public IP address of the load balancer in your target instance.
Example:
"topology": { "Cluster": { "cluster": { "FrontendHost": "<target_LB_IP>" } ...}
4. If you configured any custom startup arguments for a server in your sourceinstance, then update the AdditionalServerStartArguments attribute for eachserver in the Server node.
Set the value of AdditionalServerStartArguments to the custom arguments only.
Example:
"topology": { ... "Server": { ... "server_1": { ... "AdditionalServerStartArguments": "-Dmy.custom.arg=true"
Chapter 3Edit the Domain Configuration File
3-18
} ...}
5. If the servers in your source instance are configured to use custom identity andtrust keystore files, then update the file with the keystore passwords.
• CustomIdentityKeyStorePassPhrase
• CustomTrustKeyStorePassPhrase
• ServerPrivateKeyPassPhrase
Example:
"topology": { ... "Server": { "server_1": { ... "CustomIdentityKeyStorePassPhrase": "<your_password>", "CustomTrustKeyStorePassPhrase": "<your_password>", "ServerPrivateKeyPassPhrase": "<your_password>" } ...}
6. If your source instance includes custom Java Database Connectivity (JDBC) datasources, then provide the location and password of the new application databasesin Oracle Cloud Infrastructure.
a. For each data source in the JDBCSystemResource node, update the passwordattribute.
Example:
"resources": { "JDBCSystemResource": { "MyDataSource1": { ... "password": "<your_password>" } } ...
b. For each data source, find the url attribute and specify the URL to thecorresponding Oracle Cloud Infrastructure Database.
The following table shows the URL format to use, depending on the OracleDatabase version, and whether you created a Virtual Machine (VM) or BareMetal database type.
DatabaseVersion
DatabaseType
URL Format
12c VM jdbc:oracle:thin:@//<db_hostname>-scan.<db_domain>:<db_port>/<pdb_name>.<db_domain>
Chapter 3Edit the Domain Configuration File
3-19
DatabaseVersion
DatabaseType
URL Format
12c Bare Metal jdbc:oracle:thin:@//<db_hostname>.<db_domain>:<db_port>/<pdb_name>.<db_domain>
11g VM jdbc:oracle:thin:@//<db_hostname>-scan.<db_domain>:<db_port>/<db_unique_name>.<db_domain>
11g Bare Metal jdbc:oracle:thin:@//<db_hostname>.<db_domain>:<db_port>/<db_unique_name>.<db_domain>
The following example shows a Virtual Machine database named myappdb,that is running Oracle Database 12c, and contains a PDB named pdb1:
"resources": { "JDBCSystemResource": { "MyDataSource1": { "url": "jdbc:oracle:thin:@//myappdb-scan.mydbsubnet.myvcn.oraclevcn.com:1521/pdb1.mydbsubnet.myvcn.oraclevcn.com", ... } } ...
7. If your source instance includes any Foreign JNDI Providers, Foreign JMSServers, JMS Bridge Destinations, or Store-and-Forward (SAF) Contexts, thenprovide the locations and passwords for these external resources.
a. For each provider in the ForeignJNDIProvider node, update the passwordattribute.
Also update the url attribute if the location of this JNDI server is different thanthe JNDI server in the source environment.
Example:
"resources": { ... "ForeignJNDIProvider": { "MyJNDIProvider1": { "url": "t3://myjndiserver.example.com:9073", "password": "<your_password>" } } ...
b. For each foreign server in the ForeignJMSServer node, update the passwordattributes.
Also update the url attribute if the location of this JMS server is different thanthe JMS server in the source environment.
Chapter 3Edit the Domain Configuration File
3-20
Example:
"resources": { ... "ForeignJMSServer": { "MyForeignJMS1": { "url": "t3://myjms.example.com:9073", "ForeignConnectionFactory": { "MyForeignJMS1Factory": { "password": "<your_password>" } } } } ...
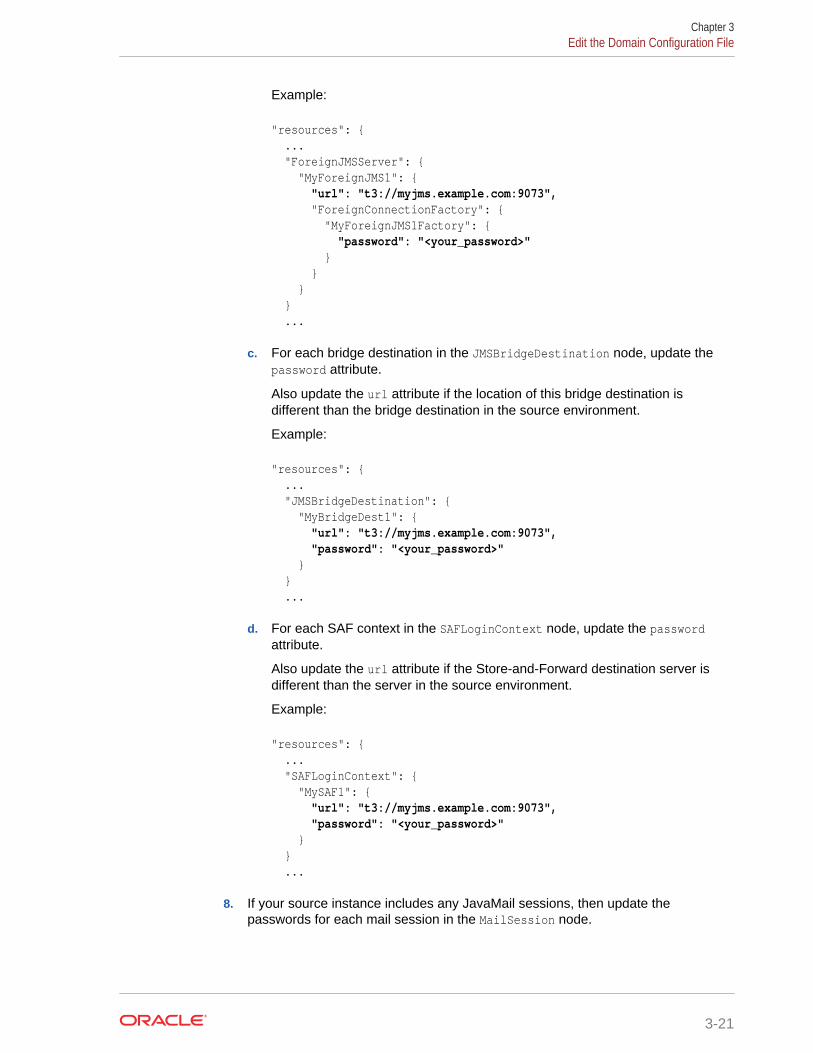
c. For each bridge destination in the JMSBridgeDestination node, update thepassword attribute.
Also update the url attribute if the location of this bridge destination isdifferent than the bridge destination in the source environment.
Example:
"resources": { ... "JMSBridgeDestination": { "MyBridgeDest1": { "url": "t3://myjms.example.com:9073", "password": "<your_password>" } } ...
d. For each SAF context in the SAFLoginContext node, update the passwordattribute.
Also update the url attribute if the Store-and-Forward destination server isdifferent than the server in the source environment.
Example:
"resources": { ... "SAFLoginContext": { "MySAF1": { "url": "t3://myjms.example.com:9073", "password": "<your_password>" } } ...
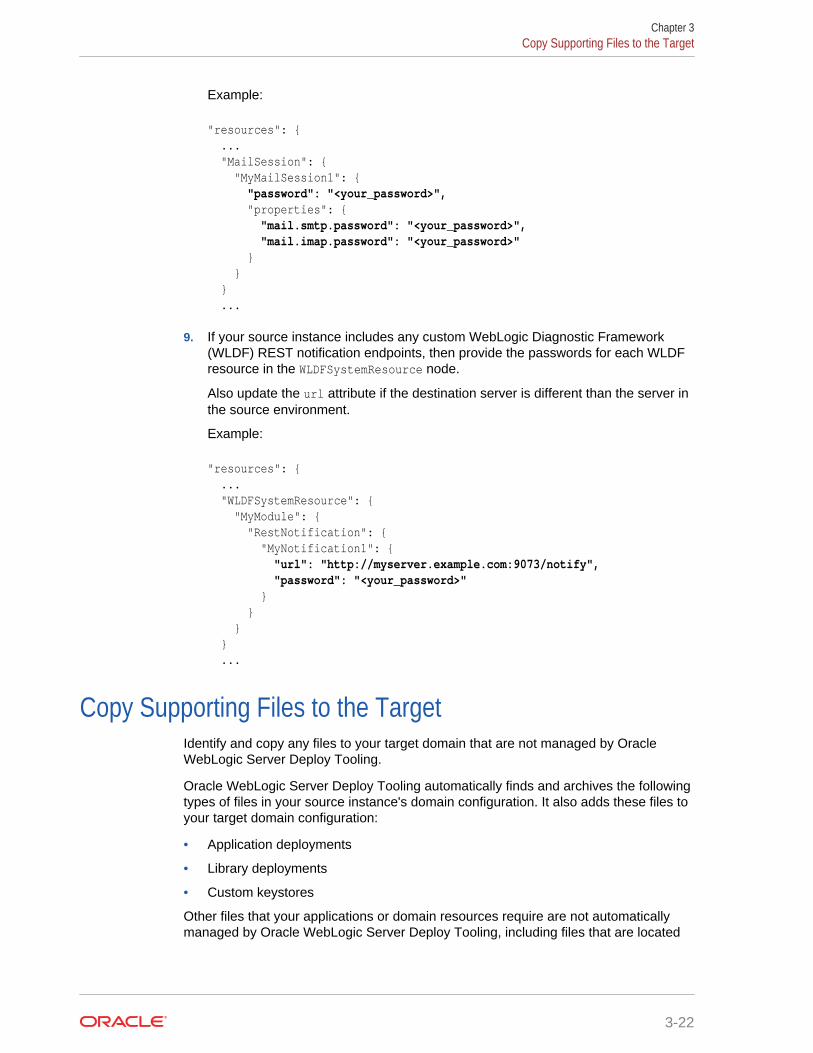
8. If your source instance includes any JavaMail sessions, then update thepasswords for each mail session in the MailSession node.
Chapter 3Edit the Domain Configuration File
3-21
Example:
"resources": { ... "MailSession": { "MyMailSession1": { "password": "<your_password>", "properties": { "mail.smtp.password": "<your_password>", "mail.imap.password": "<your_password>" } } } ...
9. If your source instance includes any custom WebLogic Diagnostic Framework(WLDF) REST notification endpoints, then provide the passwords for each WLDFresource in the WLDFSystemResource node.
Also update the url attribute if the destination server is different than the server inthe source environment.
Example:
"resources": { ... "WLDFSystemResource": { "MyModule": { "RestNotification": { "MyNotification1": { "url": "http://myserver.example.com:9073/notify", "password": "<your_password>" } } } } ...
Copy Supporting Files to the TargetIdentify and copy any files to your target domain that are not managed by OracleWebLogic Server Deploy Tooling.
Oracle WebLogic Server Deploy Tooling automatically finds and archives the followingtypes of files in your source instance's domain configuration. It also adds these files toyour target domain configuration:
• Application deployments
• Library deployments
• Custom keystores
Other files that your applications or domain resources require are not automaticallymanaged by Oracle WebLogic Server Deploy Tooling, including files that are located
Chapter 3Copy Supporting Files to the Target
3-22
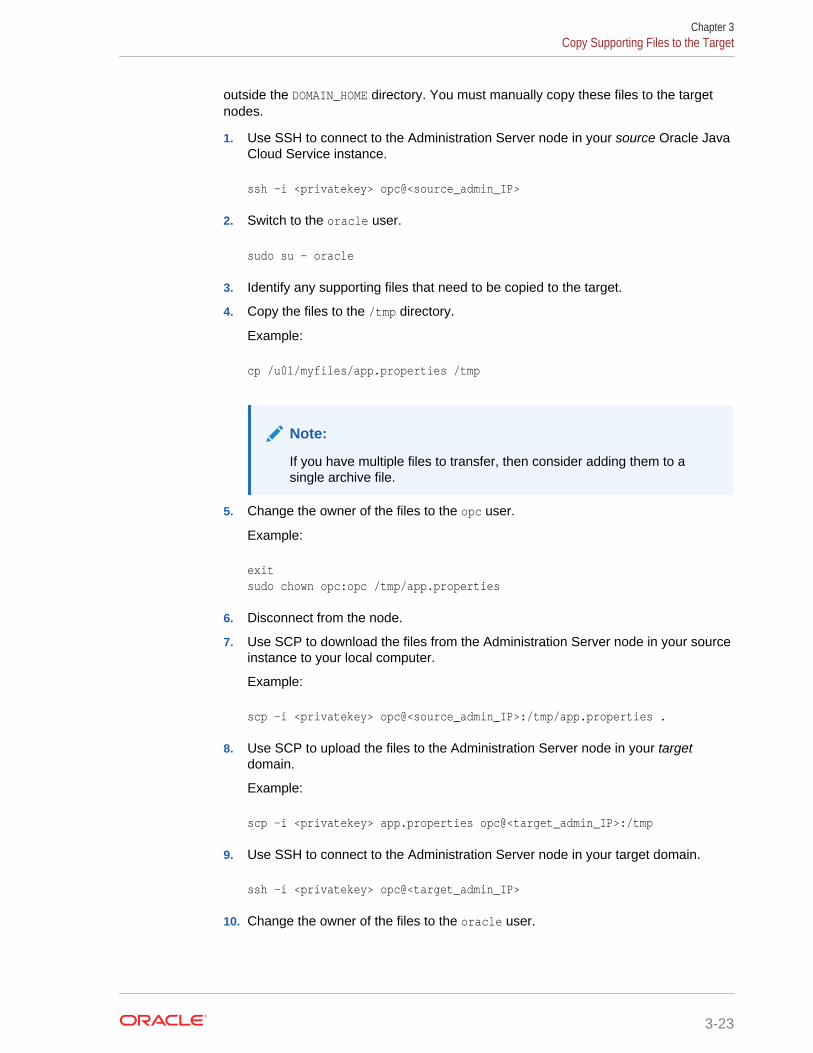
outside the DOMAIN_HOME directory. You must manually copy these files to the targetnodes.
1. Use SSH to connect to the Administration Server node in your source Oracle JavaCloud Service instance.
ssh -i <privatekey> opc@<source_admin_IP>
2. Switch to the oracle user.
sudo su - oracle
3. Identify any supporting files that need to be copied to the target.
4. Copy the files to the /tmp directory.
Example:
cp /u01/myfiles/app.properties /tmp
Note:
If you have multiple files to transfer, then consider adding them to asingle archive file.
5. Change the owner of the files to the opc user.
Example:
exitsudo chown opc:opc /tmp/app.properties
6. Disconnect from the node.
7. Use SCP to download the files from the Administration Server node in your sourceinstance to your local computer.
Example:
scp -i <privatekey> opc@<source_admin_IP>:/tmp/app.properties .
8. Use SCP to upload the files to the Administration Server node in your targetdomain.
Example:
scp -i <privatekey> app.properties opc@<target_admin_IP>:/tmp
9. Use SSH to connect to the Administration Server node in your target domain.
ssh -i <privatekey> opc@<target_admin_IP>
10. Change the owner of the files to the oracle user.
Chapter 3Copy Supporting Files to the Target
3-23
Example:
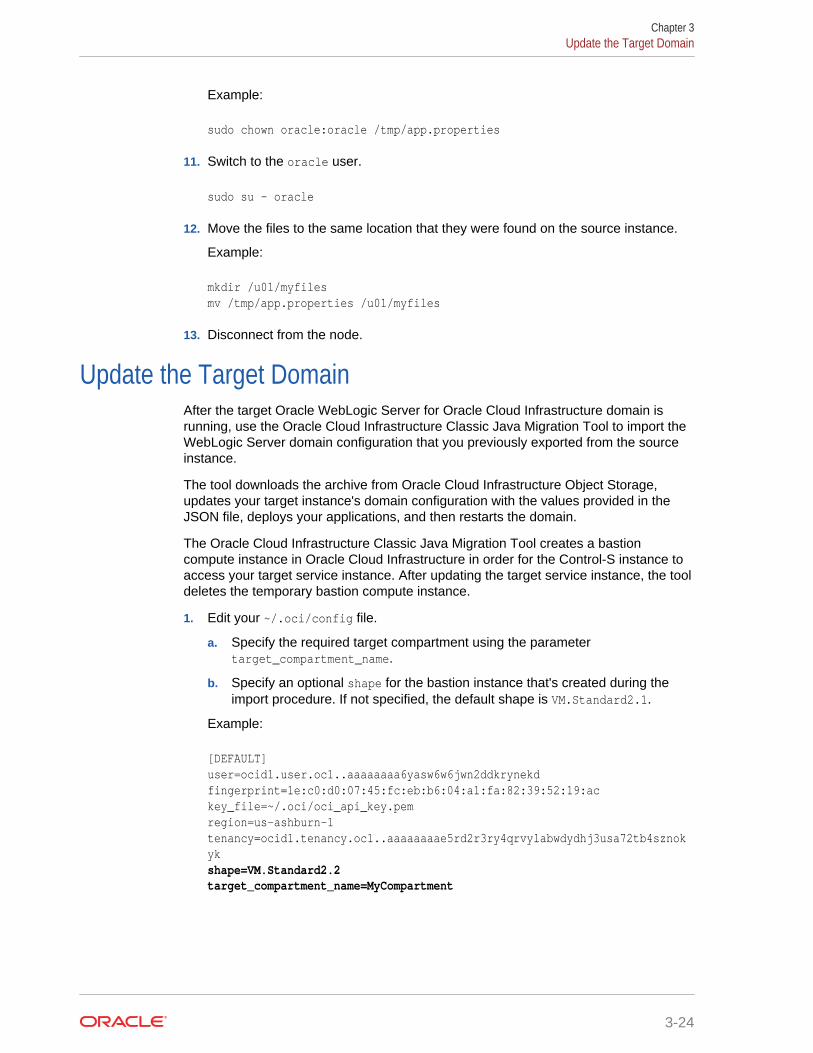
sudo chown oracle:oracle /tmp/app.properties
11. Switch to the oracle user.
sudo su - oracle
12. Move the files to the same location that they were found on the source instance.
Example:
mkdir /u01/myfilesmv /tmp/app.properties /u01/myfiles
13. Disconnect from the node.
Update the Target DomainAfter the target Oracle WebLogic Server for Oracle Cloud Infrastructure domain isrunning, use the Oracle Cloud Infrastructure Classic Java Migration Tool to import theWebLogic Server domain configuration that you previously exported from the sourceinstance.
The tool downloads the archive from Oracle Cloud Infrastructure Object Storage,updates your target instance's domain configuration with the values provided in theJSON file, deploys your applications, and then restarts the domain.
The Oracle Cloud Infrastructure Classic Java Migration Tool creates a bastioncompute instance in Oracle Cloud Infrastructure in order for the Control-S instance toaccess your target service instance. After updating the target service instance, the tooldeletes the temporary bastion compute instance.
1. Edit your ~/.oci/config file.
a. Specify the required target compartment using the parametertarget_compartment_name.
b. Specify an optional shape for the bastion instance that's created during theimport procedure. If not specified, the default shape is VM.Standard2.1.
Example:
[DEFAULT]user=ocid1.user.oc1..aaaaaaaa6yasw6w6jwn2ddkrynekdfingerprint=1e:c0:d0:07:45:fc:eb:b6:04:a1:fa:82:39:52:19:ackey_file=~/.oci/oci_api_key.pemregion=us-ashburn-1tenancy=ocid1.tenancy.oc1..aaaaaaaae5rd2r3ry4qrvylabwdydhj3usa72tb4sznokykshape=VM.Standard2.2target_compartment_name=MyCompartment
Chapter 3Update the Target Domain
3-24
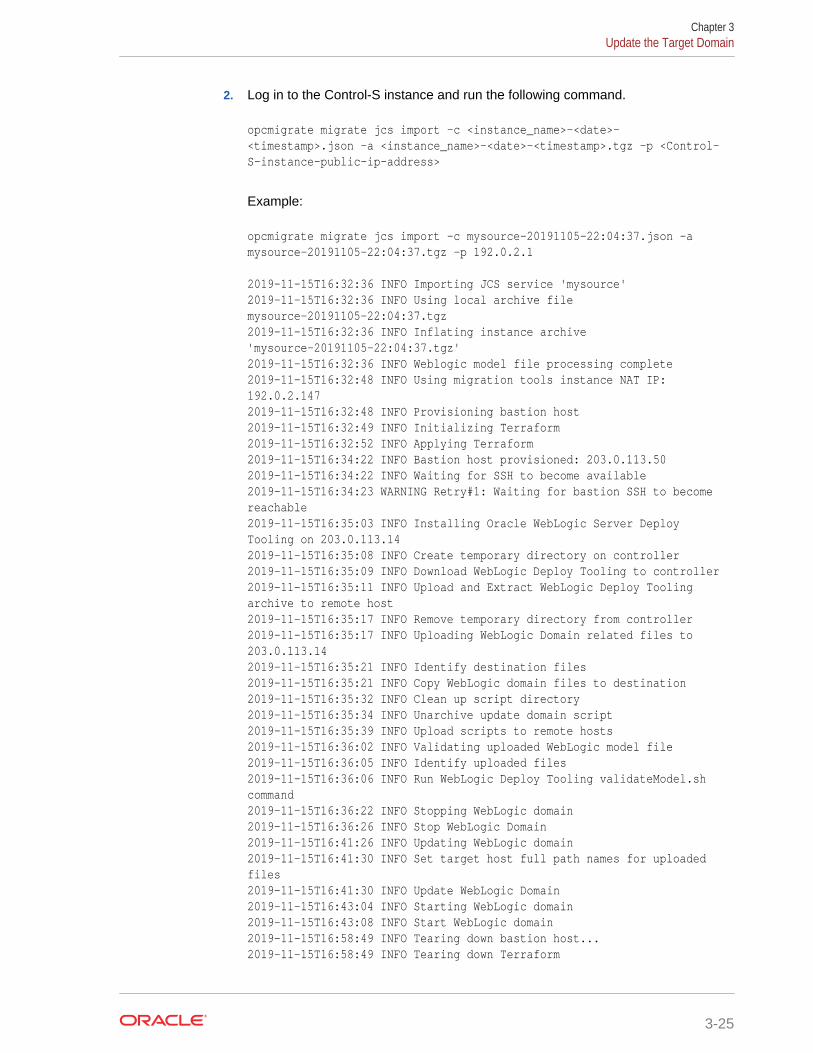
2. Log in to the Control-S instance and run the following command.
opcmigrate migrate jcs import -c <instance_name>-<date>-<timestamp>.json -a <instance_name>-<date>-<timestamp>.tgz -p <Control-S-instance-public-ip-address>
Example:
opcmigrate migrate jcs import -c mysource-20191105-22:04:37.json -a mysource-20191105-22:04:37.tgz -p 192.0.2.1
2019-11-15T16:32:36 INFO Importing JCS service 'mysource'2019-11-15T16:32:36 INFO Using local archive file mysource-20191105-22:04:37.tgz2019-11-15T16:32:36 INFO Inflating instance archive 'mysource-20191105-22:04:37.tgz'2019-11-15T16:32:36 INFO Weblogic model file processing complete2019-11-15T16:32:48 INFO Using migration tools instance NAT IP: 192.0.2.1472019-11-15T16:32:48 INFO Provisioning bastion host2019-11-15T16:32:49 INFO Initializing Terraform2019-11-15T16:32:52 INFO Applying Terraform2019-11-15T16:34:22 INFO Bastion host provisioned: 203.0.113.502019-11-15T16:34:22 INFO Waiting for SSH to become available2019-11-15T16:34:23 WARNING Retry#1: Waiting for bastion SSH to become reachable2019-11-15T16:35:03 INFO Installing Oracle WebLogic Server Deploy Tooling on 203.0.113.142019-11-15T16:35:08 INFO Create temporary directory on controller2019-11-15T16:35:09 INFO Download WebLogic Deploy Tooling to controller2019-11-15T16:35:11 INFO Upload and Extract WebLogic Deploy Tooling archive to remote host2019-11-15T16:35:17 INFO Remove temporary directory from controller2019-11-15T16:35:17 INFO Uploading WebLogic Domain related files to 203.0.113.142019-11-15T16:35:21 INFO Identify destination files2019-11-15T16:35:21 INFO Copy WebLogic domain files to destination2019-11-15T16:35:32 INFO Clean up script directory2019-11-15T16:35:34 INFO Unarchive update domain script2019-11-15T16:35:39 INFO Upload scripts to remote hosts2019-11-15T16:36:02 INFO Validating uploaded WebLogic model file2019-11-15T16:36:05 INFO Identify uploaded files2019-11-15T16:36:06 INFO Run WebLogic Deploy Tooling validateModel.sh command2019-11-15T16:36:22 INFO Stopping WebLogic domain2019-11-15T16:36:26 INFO Stop WebLogic Domain2019-11-15T16:41:26 INFO Updating WebLogic domain2019-11-15T16:41:30 INFO Set target host full path names for uploaded files2019-11-15T16:41:30 INFO Update WebLogic Domain2019-11-15T16:43:04 INFO Starting WebLogic domain2019-11-15T16:43:08 INFO Start WebLogic domain2019-11-15T16:58:49 INFO Tearing down bastion host...2019-11-15T16:58:49 INFO Tearing down Terraform
Chapter 3Update the Target Domain
3-25
4Migrate an Instance to Oracle Java CloudService Using Application MigrationService
Use Application Migration in Oracle Cloud Infrastructure to migrate your OracleWebLogic Server domain resources and applications from your existing Oracle JavaCloud Service instance in Oracle Cloud Infrastructure Classic to a new instance inOracle Cloud Infrastructure.
Application Migration is available only in specific Oracle Cloud Infrastructure regions.See Overview of Application Migration in the Oracle Cloud Infrastructuredocumentation.
Application Migration does not support the migration of WebLogic Server domains thatinclude these types of resources:
• Custom Identity or Trust Keystore
• Foreign JNDI Provider
• Foreign JMS Server
• JMS Bridge Destination
• Storage-and-Forward (SAF) Context
• JavaMail Session
• WebLogic Diagnostic Framework (WLDF) REST Notification Endpoint
If your source Oracle Java Cloud Service instance uses these resource types, thenOracle recommends using the Oracle Cloud Infrastructure Classic Java Migration Toolinstead of Application Migration. See Migrate an Instance to Oracle Java CloudService Using Classic Tools.
Before you begin the migration process, see Prepare to Migrate Oracle Java CloudService to Oracle Cloud Infrastructure.
When you migrate an Oracle Java Cloud Service instance, the following terms areused:
• Source: The connection to your Oracle Cloud Infrastructure Classic account inApplication Migration.
• Source Instance: The Oracle Java Cloud Service instance in Oracle CloudInfrastructure Classic.
• Target Instance: The Oracle Java Cloud Service instance in Oracle CloudInfrastructure.
Topics:
• Create a Source
• Create a Migration
4-1
• Configure and Run a Migration
• Copy Supporting Files to the Target Instance
• Recreate Oracle Fusion Middleware Security Resources
• Migrate Oracle Identity Cloud Service Roles and Policies
Perform Prerequisite Tasks for Oracle Java Cloud ServiceBefore you use Application Migration Service to create an Oracle Java Cloud Serviceinstance in an Oracle Cloud Infrastructure region, you must create the requiredinfrastructure resources.
Create the following Oracle Cloud Infrastructure resources if they don't already exist:
• A compartment
• A virtual cloud network (VCN) and at least one subnet
• A storage bucket and user authentication token for backups (optional)
• Policies that allow Oracle Java Cloud Service to access the resources in yourcompartment
See Prerequisites for Oracle Platform Services in the Oracle Cloud Infrastructuredocumentation.
Application Migration Service automatically creates an Oracle Cloud InfrastructureDatabase before it creates the target instance. Oracle Java Cloud Service provisionsthe required infrastructure schema to this database.
Create a SourceUse Application Migration to connect to your Oracle Cloud Infrastructure Classicaccount and region.
1. From the Oracle Cloud Infrastructure console, navigate to Application Migration.
2. Select the Compartment in which to create the source.
3. Click Sources.
4. Click Create Source.
5. Enter a Name and Description for the source.
6. For Source Type, select Oracle Cloud Infrastructure - Classic.
7. For Account, enter the name of your Oracle Cloud Infrastructure Classic account.
8. Select the Oracle Cloud Infrastructure Classic Region in which you created yoursource Oracle Java Cloud Service instance.
9. Enter credentials for this Oracle Cloud Infrastructure Classic account that haveaccess to Oracle Java Cloud Service.
10. Click Create.
For more information, see Manage Sources in the Oracle Cloud Infrastructuredocumentation.
Chapter 4Perform Prerequisite Tasks for Oracle Java Cloud Service
4-2
Create a MigrationUse Application Migration to connect to the WebLogic Server domain for the OracleJava Cloud Service instance within your source.
1. From the Oracle Cloud Infrastructure console, navigate to Application Migration.
2. Select the Compartment that contains your source.
3. Click Sources, and then select your source.
4. Click Actions for the Oracle Java Cloud Service instance that you want tomigrate, and then click Create Migration.
5. Enter a Name and Description for the migration.
6. Enter the WebLogic Server administrator credentials for the Oracle Java CloudService instance.
7. Click Create.
For more information, see Manage Migrations in the Oracle Cloud Infrastructuredocumentation.
Configure and Run a MigrationUse Application Migration to create the target Oracle Java Cloud Service instance inOracle Cloud Infrastructure. Specify a network, databases, and other details.
1. From the Oracle Cloud Infrastructure console, navigate to Application Migration.
2. Select the Compartment that contains your migration.
3. Click Migrations, and then select your migration.
4. Click Configure.
5. In the Configure Service section, click Configure.
6. Select the Availability Domain in which you want to create the target instance.
7. Select the Virtual Cloud Network and Subnet in which you want to create thetarget instance.
8. Enter the System Database Administrator Password for the new Oracle CloudInfrastructure Database.
9. Upload or paste the public SSH Key to use for the target instance and database.
10. Enter the WebLogic Server administrator credentials for the target instance.
11. Click Configure to return to the Configure Migration page.
12. If your source instance includes custom Java Database Connectivity (JDBC) datasources, then provide the location and password of the new application databasesin Oracle Cloud Infrastructure.
a. In the Configure Application section, click Configure.
b. For each data source, enter the Connection String to the correspondingOracle Cloud Infrastructure Database.
Chapter 4Create a Migration
4-3
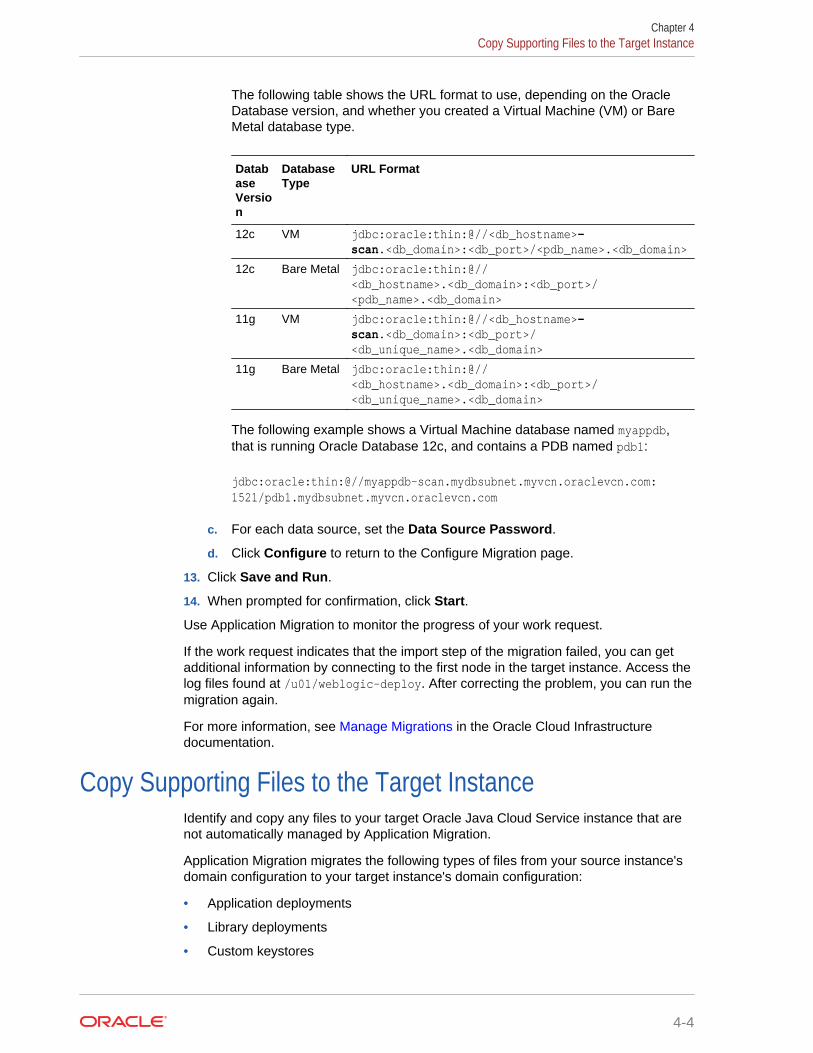
The following table shows the URL format to use, depending on the OracleDatabase version, and whether you created a Virtual Machine (VM) or BareMetal database type.
DatabaseVersion
DatabaseType
URL Format
12c VM jdbc:oracle:thin:@//<db_hostname>-scan.<db_domain>:<db_port>/<pdb_name>.<db_domain>
12c Bare Metal jdbc:oracle:thin:@//<db_hostname>.<db_domain>:<db_port>/<pdb_name>.<db_domain>
11g VM jdbc:oracle:thin:@//<db_hostname>-scan.<db_domain>:<db_port>/<db_unique_name>.<db_domain>
11g Bare Metal jdbc:oracle:thin:@//<db_hostname>.<db_domain>:<db_port>/<db_unique_name>.<db_domain>
The following example shows a Virtual Machine database named myappdb,that is running Oracle Database 12c, and contains a PDB named pdb1:
jdbc:oracle:thin:@//myappdb-scan.mydbsubnet.myvcn.oraclevcn.com:1521/pdb1.mydbsubnet.myvcn.oraclevcn.com
c. For each data source, set the Data Source Password.
d. Click Configure to return to the Configure Migration page.
13. Click Save and Run.
14. When prompted for confirmation, click Start.
Use Application Migration to monitor the progress of your work request.
If the work request indicates that the import step of the migration failed, you can getadditional information by connecting to the first node in the target instance. Access thelog files found at /u01/weblogic-deploy. After correcting the problem, you can run themigration again.
For more information, see Manage Migrations in the Oracle Cloud Infrastructuredocumentation.
Copy Supporting Files to the Target InstanceIdentify and copy any files to your target Oracle Java Cloud Service instance that arenot automatically managed by Application Migration.
Application Migration migrates the following types of files from your source instance'sdomain configuration to your target instance's domain configuration:
• Application deployments
• Library deployments
• Custom keystores
Chapter 4Copy Supporting Files to the Target Instance
4-4
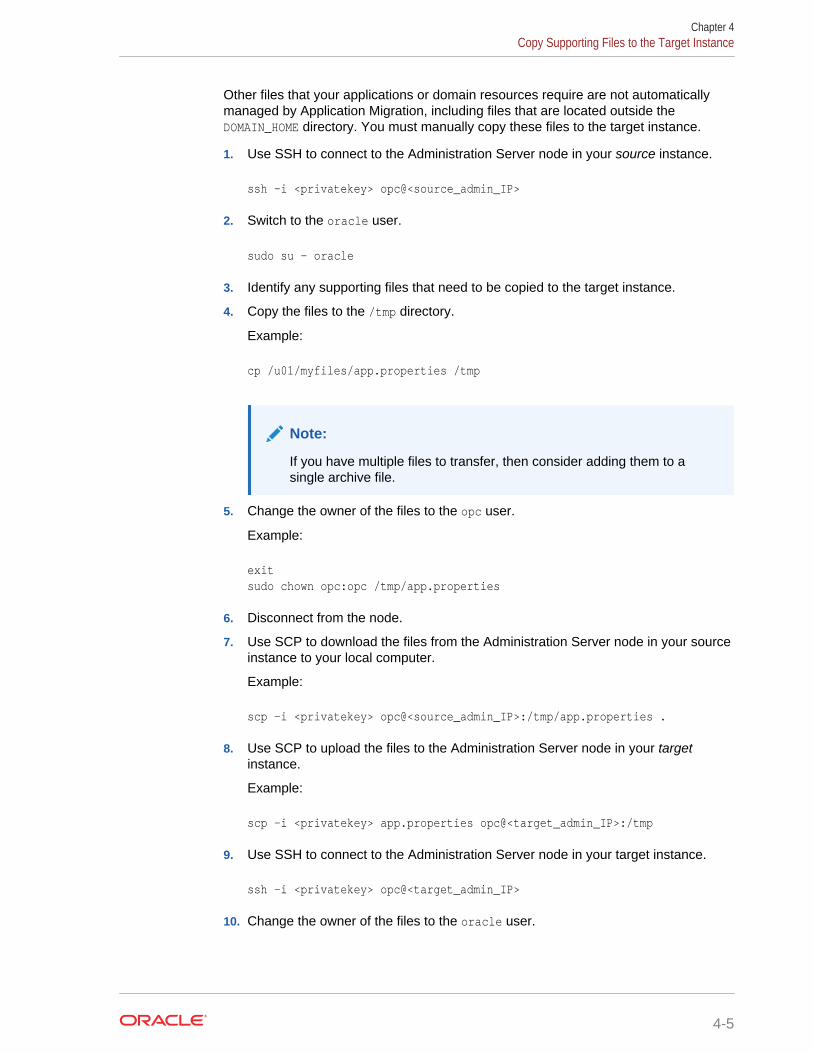
Other files that your applications or domain resources require are not automaticallymanaged by Application Migration, including files that are located outside theDOMAIN_HOME directory. You must manually copy these files to the target instance.
1. Use SSH to connect to the Administration Server node in your source instance.
ssh -i <privatekey> opc@<source_admin_IP>
2. Switch to the oracle user.
sudo su - oracle
3. Identify any supporting files that need to be copied to the target instance.
4. Copy the files to the /tmp directory.
Example:
cp /u01/myfiles/app.properties /tmp
Note:
If you have multiple files to transfer, then consider adding them to asingle archive file.
5. Change the owner of the files to the opc user.
Example:
exitsudo chown opc:opc /tmp/app.properties
6. Disconnect from the node.
7. Use SCP to download the files from the Administration Server node in your sourceinstance to your local computer.
Example:
scp -i <privatekey> opc@<source_admin_IP>:/tmp/app.properties .
8. Use SCP to upload the files to the Administration Server node in your targetinstance.
Example:
scp -i <privatekey> app.properties opc@<target_admin_IP>:/tmp
9. Use SSH to connect to the Administration Server node in your target instance.
ssh -i <privatekey> opc@<target_admin_IP>
10. Change the owner of the files to the oracle user.
Chapter 4Copy Supporting Files to the Target Instance
4-5
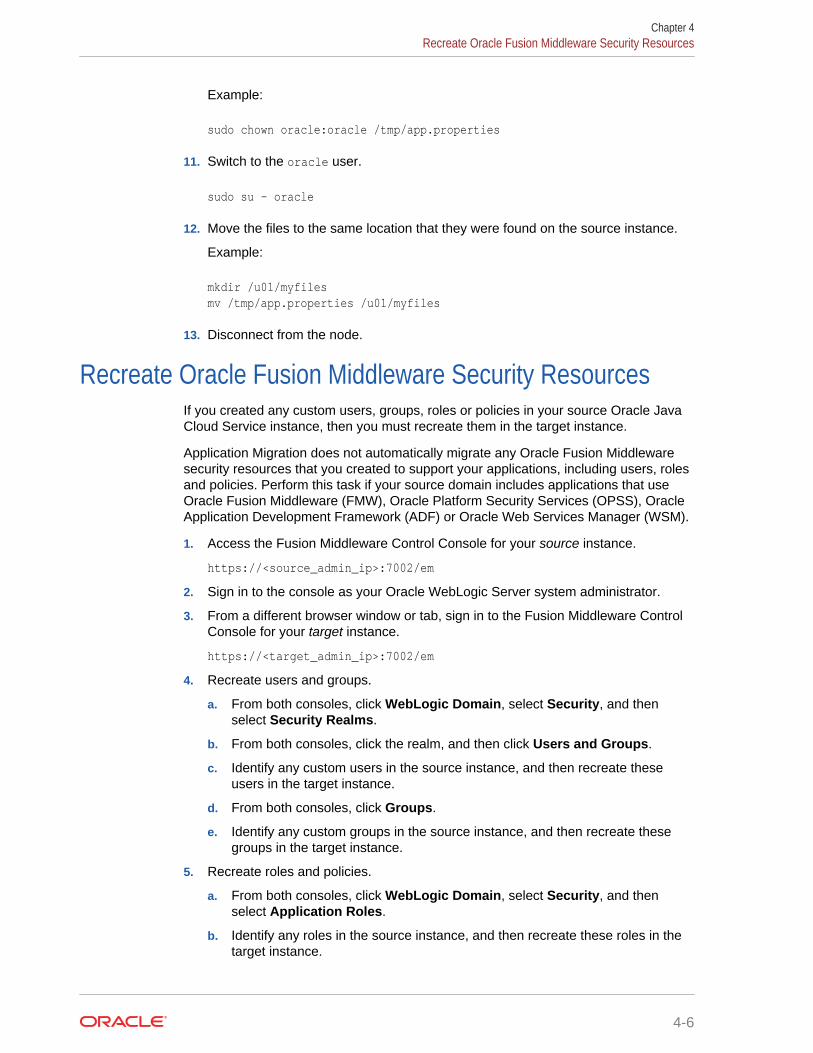
Example:
sudo chown oracle:oracle /tmp/app.properties
11. Switch to the oracle user.
sudo su - oracle
12. Move the files to the same location that they were found on the source instance.
Example:
mkdir /u01/myfilesmv /tmp/app.properties /u01/myfiles
13. Disconnect from the node.
Recreate Oracle Fusion Middleware Security ResourcesIf you created any custom users, groups, roles or policies in your source Oracle JavaCloud Service instance, then you must recreate them in the target instance.
Application Migration does not automatically migrate any Oracle Fusion Middlewaresecurity resources that you created to support your applications, including users, rolesand policies. Perform this task if your source domain includes applications that useOracle Fusion Middleware (FMW), Oracle Platform Security Services (OPSS), OracleApplication Development Framework (ADF) or Oracle Web Services Manager (WSM).
1. Access the Fusion Middleware Control Console for your source instance.
https://<source_admin_ip>:7002/em
2. Sign in to the console as your Oracle WebLogic Server system administrator.
3. From a different browser window or tab, sign in to the Fusion Middleware ControlConsole for your target instance.
https://<target_admin_ip>:7002/em
4. Recreate users and groups.
a. From both consoles, click WebLogic Domain, select Security, and thenselect Security Realms.
b. From both consoles, click the realm, and then click Users and Groups.
c. Identify any custom users in the source instance, and then recreate theseusers in the target instance.
d. From both consoles, click Groups.
e. Identify any custom groups in the source instance, and then recreate thesegroups in the target instance.
5. Recreate roles and policies.
a. From both consoles, click WebLogic Domain, select Security, and thenselect Application Roles.
b. Identify any roles in the source instance, and then recreate these roles in thetarget instance.
Chapter 4Recreate Oracle Fusion Middleware Security Resources
4-6
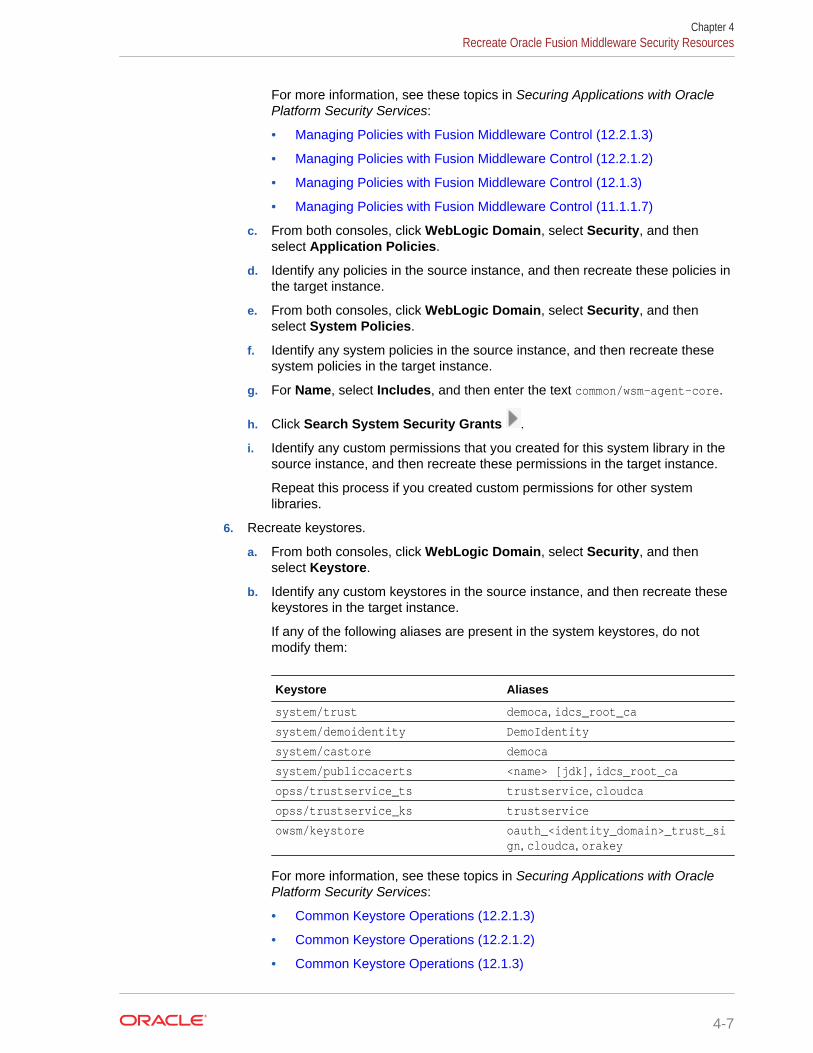
For more information, see these topics in Securing Applications with OraclePlatform Security Services:
• Managing Policies with Fusion Middleware Control (12.2.1.3)
• Managing Policies with Fusion Middleware Control (12.2.1.2)
• Managing Policies with Fusion Middleware Control (12.1.3)
• Managing Policies with Fusion Middleware Control (11.1.1.7)
c. From both consoles, click WebLogic Domain, select Security, and thenselect Application Policies.
d. Identify any policies in the source instance, and then recreate these policies inthe target instance.
e. From both consoles, click WebLogic Domain, select Security, and thenselect System Policies.
f. Identify any system policies in the source instance, and then recreate thesesystem policies in the target instance.
g. For Name, select Includes, and then enter the text common/wsm-agent-core.
h. Click Search System Security Grants .
i. Identify any custom permissions that you created for this system library in thesource instance, and then recreate these permissions in the target instance.
Repeat this process if you created custom permissions for other systemlibraries.
6. Recreate keystores.
a. From both consoles, click WebLogic Domain, select Security, and thenselect Keystore.
b. Identify any custom keystores in the source instance, and then recreate thesekeystores in the target instance.
If any of the following aliases are present in the system keystores, do notmodify them:
Keystore Aliases
system/trust democa, idcs_root_ca
system/demoidentity DemoIdentity
system/castore democa
system/publiccacerts <name> [jdk], idcs_root_ca
opss/trustservice_ts trustservice, cloudca
opss/trustservice_ks trustservice
owsm/keystore oauth_<identity_domain>_trust_sign, cloudca, orakey
For more information, see these topics in Securing Applications with OraclePlatform Security Services:
• Common Keystore Operations (12.2.1.3)
• Common Keystore Operations (12.2.1.2)
• Common Keystore Operations (12.1.3)
Chapter 4Recreate Oracle Fusion Middleware Security Resources
4-7
• Common Keystore Operations (11.1.1.7)
7. Recreate credential maps.
a. From both consoles, click WebLogic Domain, select Security, and thenselect Credentials.
b. Identify any custom credential maps in the source instance, and then recreatethese credential maps in the target instance.
Do not modify the default credential maps, including oracle.wsm.security.
For more information, see these topics in Securing Applications with OraclePlatform Security Services:
• Managing Credentials (12.2.1.3)
• Managing Credentials (12.2.1.2)
• Managing the Credential Store (12.1.3)
• Managing the Credential Store (11.1.1.7)
8. Reconfigure security providers.
a. From both consoles, click WebLogic Domain, select Security, and thenselect Security Provider Configuration.
b. Compare the security provider configuration of the source and targetinstances, and then update the configuration of the target instance asnecessary.
Do not modify the Security Store.
9. Reconfigure the audit service.
a. From both consoles, click WebLogic Domain, select Security, and thenselect Audit Registration and Policy.
b. Compare the audit policy settings of the source and target instances, and thenupdate the settings of the target instance as necessary.
For more information, see these topics in Securing Applications with OraclePlatform Security Services:
• Managing Audit Policies with Fusion Middleware Control (12.2.1.3)
• Managing Audit Policies with Fusion Middleware Control (12.2.1.2)
• Managing Audit Policies (12.1.3)
• Managing Audit Policies (11.1.1.7)
10. Recreate Web Services Manager (WSM) policies.
a. From both consoles, click WebLogic Domain, select Web Services, and thenselect WSM Policies.
b. Identify any custom policies in the source instance, and then recreate thesepolicies in the target instance.
The default policies are read-only and identified with a lock icon.For more information, see these topics in Securing Web Services andManaging Policies with Oracle Web Services Manager:
• Managing Web Service Policies with Fusion Middleware Control (12.2.1.3)
• Managing Web Service Policies with Fusion Middleware Control (12.2.1.2)
Chapter 4Recreate Oracle Fusion Middleware Security Resources
4-8
• Managing Web Service Policies with Fusion Middleware Control (12.1.3)
• Managing Web Services Policies (11.1.1.7)
c. From both consoles, click WebLogic Domain, select Web Services, and thenselect WSM Policy Sets.
d. Identify any policy sets in the source instance, and then recreate these policysets in the target instance.
Migrate Oracle Identity Cloud Service Roles and PoliciesIf your source Oracle Java Cloud Service instance uses Oracle Identity Cloud Servicefor authentication, then you must migrate the administrator roles and web tier policy tothe target instance.
The source and target instances are each associated with a security application inOracle Identity Cloud Service. The security application grants administrative rights forthe WebLogic Server domain to specific users and groups in Oracle Identity CloudService.
Your source and target instances must be in the same identity domain.
1. Access the Oracle Identity Cloud Service console.
2. Click the navigation drawer , and then select Applications.
3. Export the administrator roles for your source instance.
a. Click the security application for your source instance,JaaS_<source_instance_name>.
b. Click Application Roles.
c. Click Export, and then select Export All.
d. When prompted for confirmation, click Export Application Roles.
e. Click the job ID.
If a job ID link is not displayed, click the navigation drawer , select Jobs,and then click the job.
f. After the export job has finished, click Download. Save the fileAppRoleExport_<id>.csv to your computer.
g. Click the navigation drawer , and then select Applications.
4. Export the web tier policy for your source instance.
a. Click the security application for your source instance,JaaS_<source_instance_name>.
b. Click Web Tier Policy.
c. Click Export. Save the file CloudGatePolicy.txt to your computer.
d. From the navigation links at the top of the page, click Applications.
5. Import the administrator roles to your target instance.
a. Click the security application for your target instance,JaaS_<target_instance_name>.
Chapter 4Migrate Oracle Identity Cloud Service Roles and Policies
4-9

b. Click Application Roles.
c. Click Import.
d. Select the file AppRoleExport_<id>.csv on your computer, and then clickImport.
e. Click the job ID link.
If a job ID link is not displayed, click the navigation drawer , select Jobs,and then click the job.
f. Verify that the import job has finished.
You can ignore any error in the job with these messages:
• "Grant already exists" - the same user or group is already assigned to therole
• "Missing required attribute(s): Grantee" - no users or groups are assignedto the role
g. Click the navigation drawer , and then select Applications.
6. Import the web tier policy to your target instance.
a. Click the security application for your target instance,JaaS_<target_instance_name>.
b. Click Web Tier Policy.
c. Click Import. Select the file CloudGatePolicy.txt on your computer.
You might need to refresh your web browser in order to view the resourcesthat you imported from the policy file.
d. Click Validate.
e. Verify that the web tier policy validation was successful.
f. From the navigation links at the top of the page, click Applications.
7. Assign any custom applications to the roles for your target instance.
a. Click the security application for your source instance,JaaS_<source_instance_name>.
b. Click Application Roles.
c. If there is an Applications Assigned link for the first role, click this link, andthen record the application names for this role.
d. Repeat the previous step for all remaining roles in this application.
e. From the navigation links at the top of the page, click Applications.
f. Click the security application for your target instance,JaaS_<target_instance_name>.
g. Click Application Roles.
h. Click Menu for the first role, and then select Assign Applications.
i. Select the same applications that are assigned to this role in the sourceinstance, and then click OK.
j. Repeat the previous step for all remaining roles in this application.
Chapter 4Migrate Oracle Identity Cloud Service Roles and Policies
4-10
k. From the navigation links at the top of the page, click Applications.
8. Configure any custom security settings for your target instance.
a. Click the security application for your source instance,JaaS_<source_instance_name>.
The Details page is displayed.
b. From a different browser window or tab, view the security application for yourtarget instance, JaaS_<target_instance_name>.
c. Compare the Details page of the source and target applications, and thenupdate the target application as necessary. Click Save.
d. From both browser windows or tabs, click Configuration.
e. Expand Resources on the Configuration page.
f. Compare the Resources of the source and target applications, and thenupdate the target application as necessary. Click Save.
Ignore the resources named OCMSApp and LBAAS. You do not need to createthese resources in the target instance.
g. Expand Client Configuration on the Configuration page.
h. Compare the Client Configuration of the source and target applications, andthen update the target application as necessary.
Chapter 4Migrate Oracle Identity Cloud Service Roles and Policies
4-11
5Migrate an Instance to Oracle Java CloudService Using Classic Tools
Use the Oracle Cloud Infrastructure Classic Java Migration Tool to migrate yourOracle WebLogic Server domain resources and applications from your existing OracleJava Cloud Service instance in Oracle Cloud Infrastructure Classic to a new OracleJava Cloud Service instance in Oracle Cloud Infrastructure.
Before you begin the migration process, see Prepare to Migrate Oracle Java CloudService to Oracle Cloud Infrastructure.
When you migrate an Oracle Java Cloud Service instance, the following terms areused:
• Source: The Oracle Java Cloud Service instance in Oracle Cloud InfrastructureClassic.
• Target: The Oracle Java Cloud Service instance in Oracle Cloud Infrastructure.
Topics:
• Get Information About the Target Environment
• Launch the Migration Controller Instance in the Source Environment
• Update the Secret File
• Update the Default Profile File
• Discover Resources in Your Source Environment
• List Your Oracle Java Cloud Service Instances
• Export Your Source Instance Configuration
• Perform Prerequisite Tasks for Oracle Java Cloud Service
• Create the Target Instance on Oracle Cloud Infrastructure
• Migrate Oracle Fusion Middleware Security Resources
• Migrate Oracle Identity Cloud Service Roles and Policies
• Edit the Target Configuration File
• Copy Supporting Files to the Target Instance
• Import the Target Instance Configuration
Get Information About the Target EnvironmentCollect the information required for the migration tools to connect to the target OracleCloud Infrastructure environment.
1. Access the Oracle Cloud Infrastructure Console.
2. From the menu, choose Administration and then choose Tenancy Details.
5-1
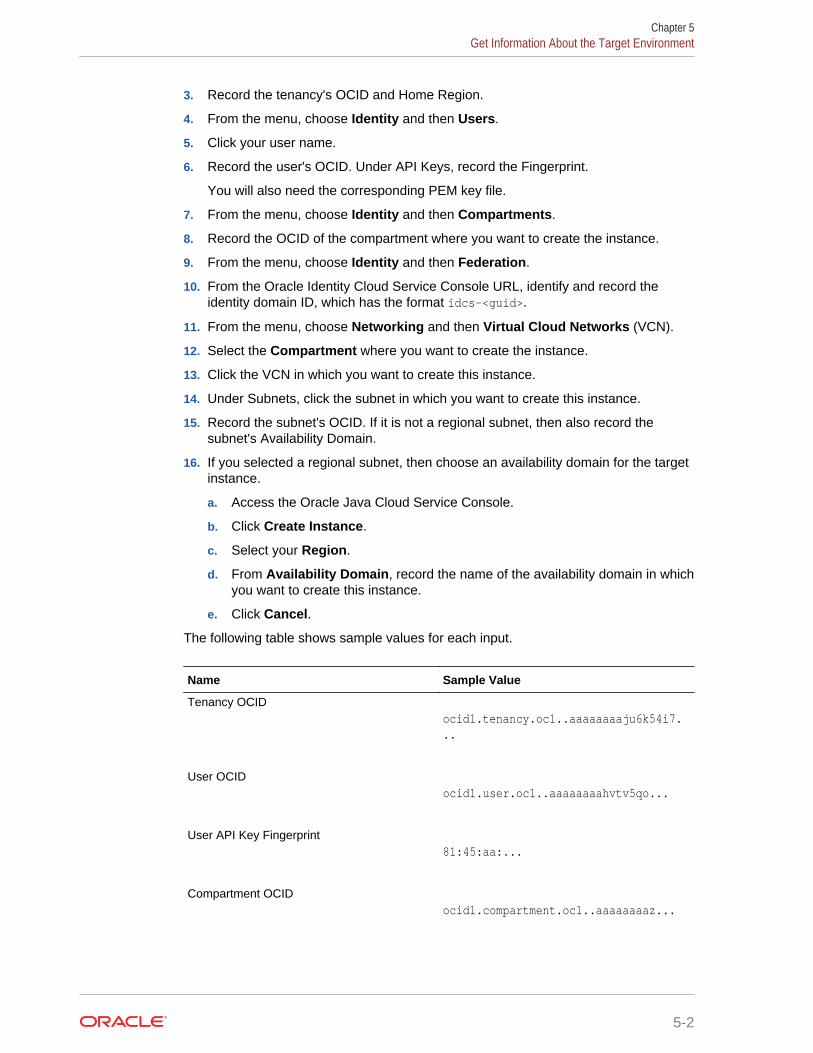
3. Record the tenancy's OCID and Home Region.
4. From the menu, choose Identity and then Users.
5. Click your user name.
6. Record the user's OCID. Under API Keys, record the Fingerprint.
You will also need the corresponding PEM key file.
7. From the menu, choose Identity and then Compartments.
8. Record the OCID of the compartment where you want to create the instance.
9. From the menu, choose Identity and then Federation.
10. From the Oracle Identity Cloud Service Console URL, identify and record theidentity domain ID, which has the format idcs-<guid>.
11. From the menu, choose Networking and then Virtual Cloud Networks (VCN).
12. Select the Compartment where you want to create the instance.
13. Click the VCN in which you want to create this instance.
14. Under Subnets, click the subnet in which you want to create this instance.
15. Record the subnet's OCID. If it is not a regional subnet, then also record thesubnet's Availability Domain.
16. If you selected a regional subnet, then choose an availability domain for the targetinstance.
a. Access the Oracle Java Cloud Service Console.
b. Click Create Instance.
c. Select your Region.
d. From Availability Domain, record the name of the availability domain in whichyou want to create this instance.
e. Click Cancel.
The following table shows sample values for each input.
Name Sample Value
Tenancy OCIDocid1.tenancy.oc1..aaaaaaaaju6k54i7...
User OCIDocid1.user.oc1..aaaaaaaahvtv5qo...
User API Key Fingerprint81:45:aa:...
Compartment OCIDocid1.compartment.oc1..aaaaaaaaz...
Chapter 5Get Information About the Target Environment
5-2
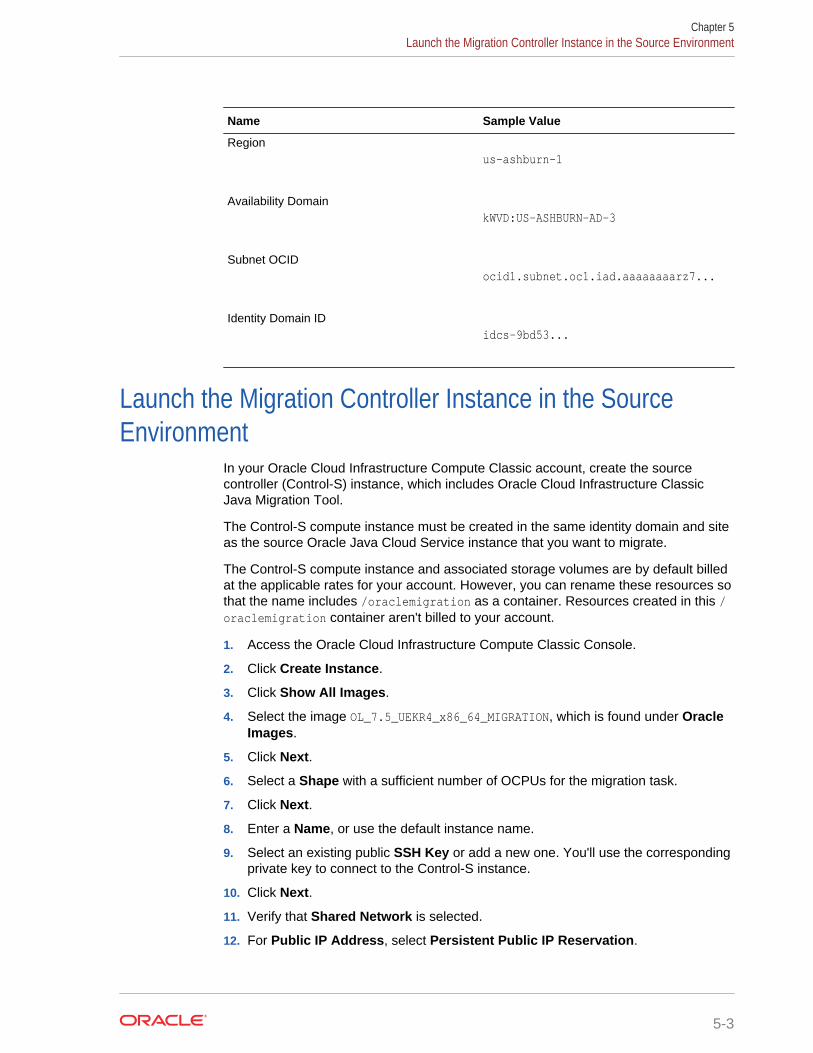
Name Sample Value
Regionus-ashburn-1
Availability DomainkWVD:US-ASHBURN-AD-3
Subnet OCIDocid1.subnet.oc1.iad.aaaaaaaarz7...
Identity Domain IDidcs-9bd53...
Launch the Migration Controller Instance in the SourceEnvironment
In your Oracle Cloud Infrastructure Compute Classic account, create the sourcecontroller (Control-S) instance, which includes Oracle Cloud Infrastructure ClassicJava Migration Tool.
The Control-S compute instance must be created in the same identity domain and siteas the source Oracle Java Cloud Service instance that you want to migrate.
The Control-S compute instance and associated storage volumes are by default billedat the applicable rates for your account. However, you can rename these resources sothat the name includes /oraclemigration as a container. Resources created in this /oraclemigration container aren't billed to your account.
1. Access the Oracle Cloud Infrastructure Compute Classic Console.
2. Click Create Instance.
3. Click Show All Images.
4. Select the image OL_7.5_UEKR4_x86_64_MIGRATION, which is found under OracleImages.
5. Click Next.
6. Select a Shape with a sufficient number of OCPUs for the migration task.
7. Click Next.
8. Enter a Name, or use the default instance name.
9. Select an existing public SSH Key or add a new one. You'll use the correspondingprivate key to connect to the Control-S instance.
10. Click Next.
11. Verify that Shared Network is selected.
12. For Public IP Address, select Persistent Public IP Reservation.
Chapter 5Launch the Migration Controller Instance in the Source Environment
5-3

13. For Security Lists, verify that the default security list is selected, which allowsSSH inbound traffic.
Also ensure that security rules are in place to allow SSH outbound, SMB inbound,and HTTPS outbound traffic.
14. If you want to migrate instances that have an interface on an IP network, thenconfigure the network interfaces of the Control-S instance on the relevant IPnetworks as well, so that the Control-S instance can access the source instancesthat you want to migrate.
15. Complete the creation of the compute instance.
Wait until its status is Running.
16. Optional: Move the Control-S instance and storage volumes into the /oraclemigration container.
Alternatively, if you create the Control-S instance using the API, CLI, or Terraform,you can specify /oraclemigration in the resource names as part of the instanceparameters.
a. Click the Orchestrations tab.
b. Locate the relevant orchestration for your compute instance, and from the menu, select Suspend.
c. After the orchestration status changes to Suspended, from the menu,select Update.
d. From the Instance section, click the menu and select Edit JSON.
e. In the Edit Orchestration Object JSON window, locate the instance name. Thisis usually displayed within the template section, after networking.
"name": "/Compute-Identity_Domain/User/Instance",
Modify the instance name to include the /oraclemigration container. Forexample:
"name": "/Compute-ExampleDomain/[email protected]/oraclemigration/MyControlS",
f. Click Update.
g. From the Orchestrations page, go to the relevant orchestration and from the
menu, select Terminate.
h. After the orchestration status changes to Stopped, from the menu, selectUpdate.
i. From the Storage Volume section, go to the relevant storage volume, click the
menu and select Edit JSON.
j. In the Edit Orchestration Object JSON window, locate the storage volumename in the template section:
"name": "/Identity_Domain/User/Volume",
Chapter 5Launch the Migration Controller Instance in the Source Environment
5-4
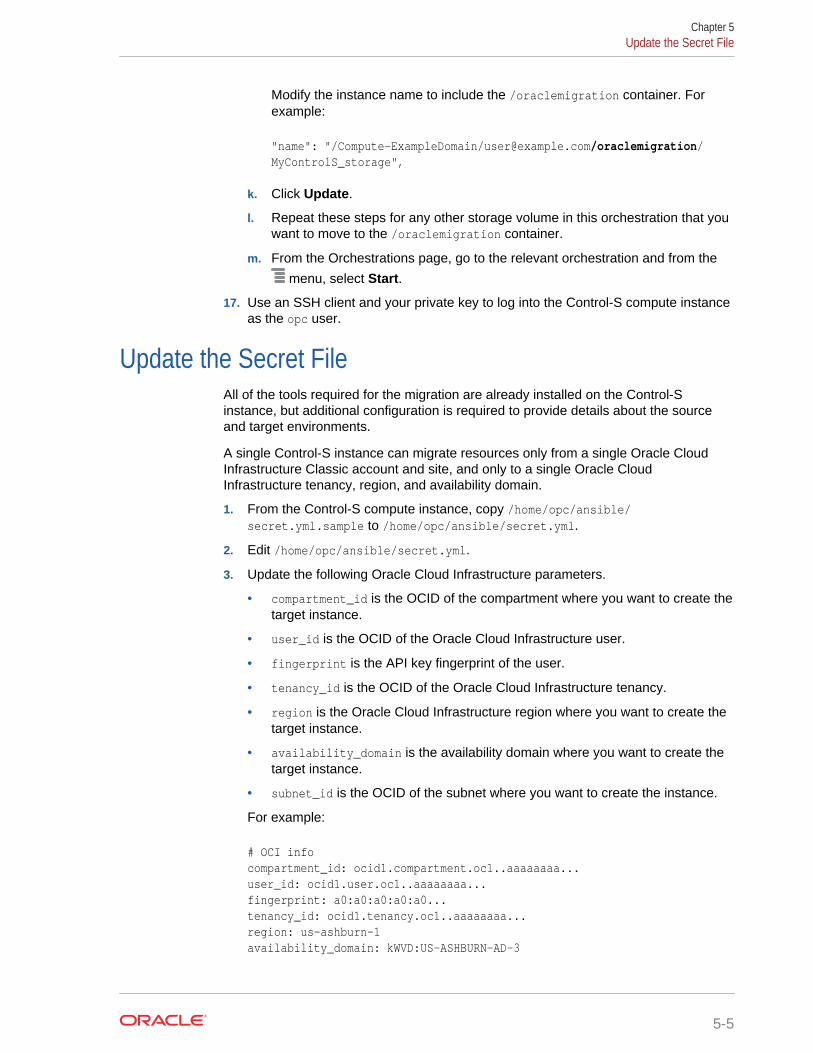
Modify the instance name to include the /oraclemigration container. Forexample:
"name": "/Compute-ExampleDomain/[email protected]/oraclemigration/MyControlS_storage",
k. Click Update.
l. Repeat these steps for any other storage volume in this orchestration that youwant to move to the /oraclemigration container.
m. From the Orchestrations page, go to the relevant orchestration and from the
menu, select Start.
17. Use an SSH client and your private key to log into the Control-S compute instanceas the opc user.
Update the Secret FileAll of the tools required for the migration are already installed on the Control-Sinstance, but additional configuration is required to provide details about the sourceand target environments.
A single Control-S instance can migrate resources only from a single Oracle CloudInfrastructure Classic account and site, and only to a single Oracle CloudInfrastructure tenancy, region, and availability domain.
1. From the Control-S compute instance, copy /home/opc/ansible/secret.yml.sample to /home/opc/ansible/secret.yml.
2. Edit /home/opc/ansible/secret.yml.
3. Update the following Oracle Cloud Infrastructure parameters.
• compartment_id is the OCID of the compartment where you want to create thetarget instance.
• user_id is the OCID of the Oracle Cloud Infrastructure user.
• fingerprint is the API key fingerprint of the user.
• tenancy_id is the OCID of the Oracle Cloud Infrastructure tenancy.
• region is the Oracle Cloud Infrastructure region where you want to create thetarget instance.
• availability_domain is the availability domain where you want to create thetarget instance.
• subnet_id is the OCID of the subnet where you want to create the instance.
For example:
# OCI infocompartment_id: ocid1.compartment.oc1..aaaaaaaa...user_id: ocid1.user.oc1..aaaaaaaa...fingerprint: a0:a0:a0:a0:a0...tenancy_id: ocid1.tenancy.oc1..aaaaaaaa...region: us-ashburn-1availability_domain: kWVD:US-ASHBURN-AD-3
Chapter 5Update the Secret File
5-5
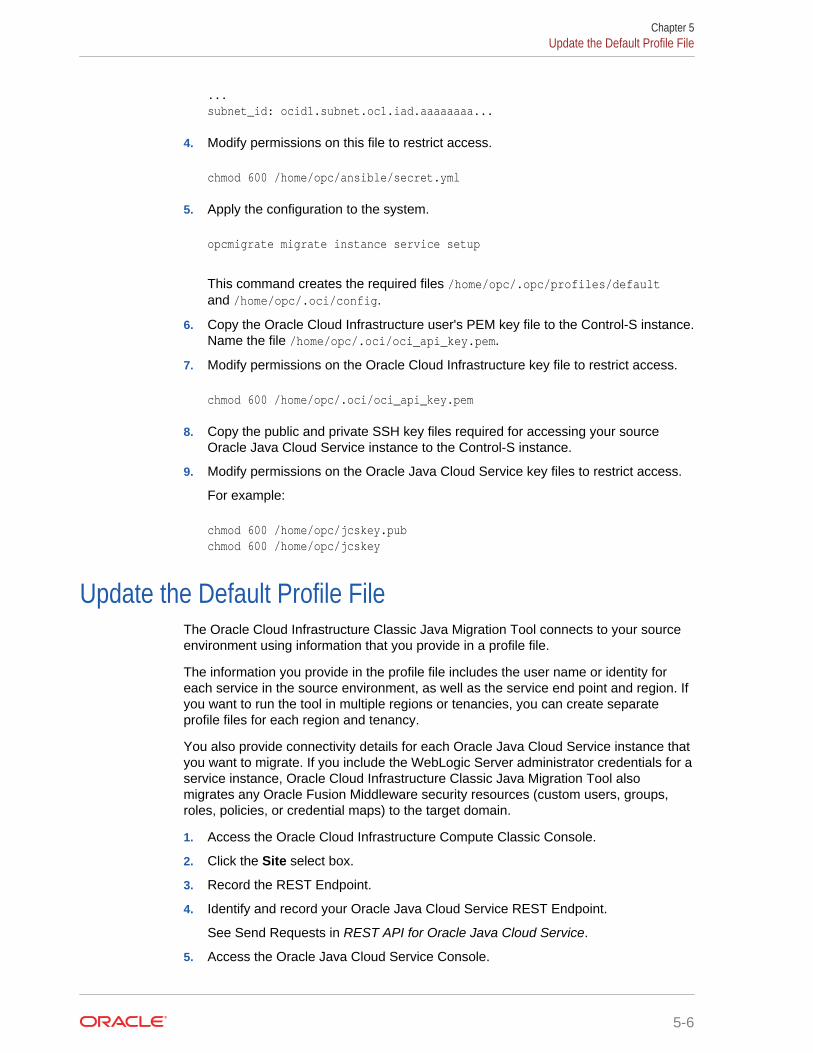
...subnet_id: ocid1.subnet.oc1.iad.aaaaaaaa...
4. Modify permissions on this file to restrict access.
chmod 600 /home/opc/ansible/secret.yml
5. Apply the configuration to the system.
opcmigrate migrate instance service setup
This command creates the required files /home/opc/.opc/profiles/defaultand /home/opc/.oci/config.
6. Copy the Oracle Cloud Infrastructure user's PEM key file to the Control-S instance.Name the file /home/opc/.oci/oci_api_key.pem.
7. Modify permissions on the Oracle Cloud Infrastructure key file to restrict access.
chmod 600 /home/opc/.oci/oci_api_key.pem
8. Copy the public and private SSH key files required for accessing your sourceOracle Java Cloud Service instance to the Control-S instance.
9. Modify permissions on the Oracle Java Cloud Service key files to restrict access.
For example:
chmod 600 /home/opc/jcskey.pubchmod 600 /home/opc/jcskey
Update the Default Profile FileThe Oracle Cloud Infrastructure Classic Java Migration Tool connects to your sourceenvironment using information that you provide in a profile file.
The information you provide in the profile file includes the user name or identity foreach service in the source environment, as well as the service end point and region. Ifyou want to run the tool in multiple regions or tenancies, you can create separateprofile files for each region and tenancy.
You also provide connectivity details for each Oracle Java Cloud Service instance thatyou want to migrate. If you include the WebLogic Server administrator credentials for aservice instance, Oracle Cloud Infrastructure Classic Java Migration Tool alsomigrates any Oracle Fusion Middleware security resources (custom users, groups,roles, policies, or credential maps) to the target domain.
1. Access the Oracle Cloud Infrastructure Compute Classic Console.
2. Click the Site select box.
3. Record the REST Endpoint.
4. Identify and record your Oracle Java Cloud Service REST Endpoint.
See Send Requests in REST API for Oracle Java Cloud Service.
5. Access the Oracle Java Cloud Service Console.
Chapter 5Update the Default Profile File
5-6
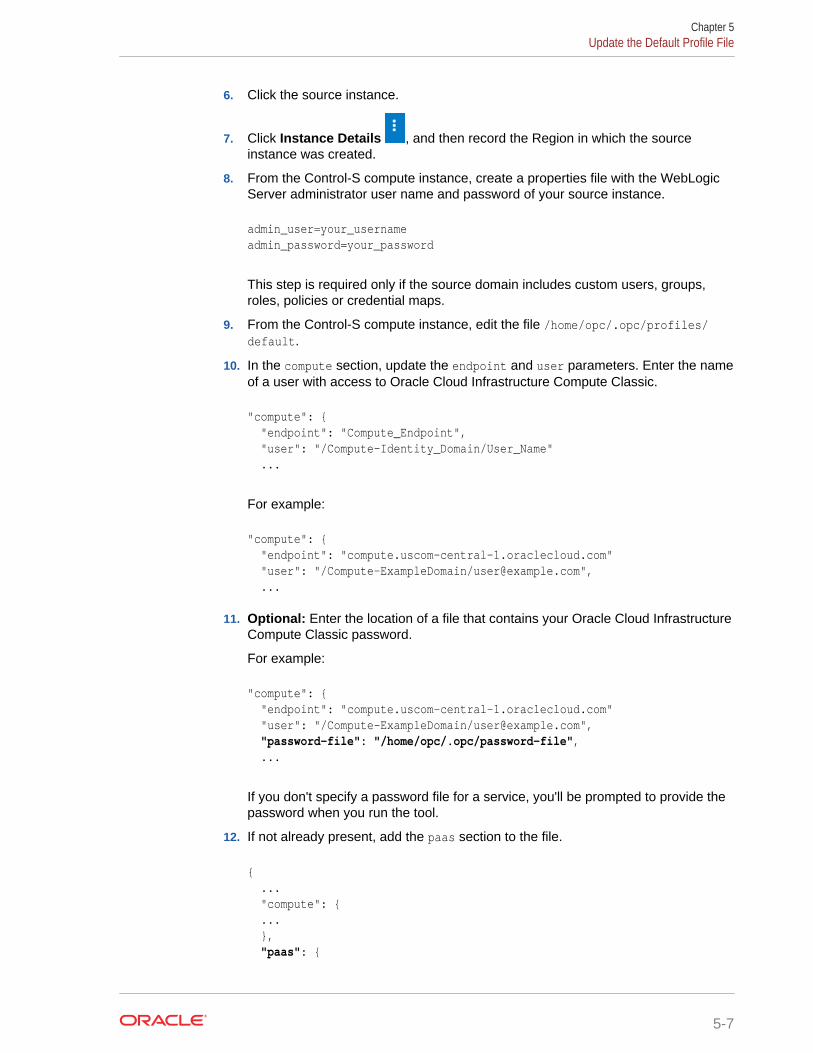
6. Click the source instance.
7. Click Instance Details , and then record the Region in which the sourceinstance was created.
8. From the Control-S compute instance, create a properties file with the WebLogicServer administrator user name and password of your source instance.
admin_user=your_usernameadmin_password=your_password
This step is required only if the source domain includes custom users, groups,roles, policies or credential maps.
9. From the Control-S compute instance, edit the file /home/opc/.opc/profiles/default.
10. In the compute section, update the endpoint and user parameters. Enter the nameof a user with access to Oracle Cloud Infrastructure Compute Classic.
"compute": { "endpoint": "Compute_Endpoint", "user": "/Compute-Identity_Domain/User_Name" ...
For example:
"compute": { "endpoint": "compute.uscom-central-1.oraclecloud.com" "user": "/Compute-ExampleDomain/[email protected]", ...
11. Optional: Enter the location of a file that contains your Oracle Cloud InfrastructureCompute Classic password.
For example:
"compute": { "endpoint": "compute.uscom-central-1.oraclecloud.com" "user": "/Compute-ExampleDomain/[email protected]", "password-file": "/home/opc/.opc/password-file", ...
If you don't specify a password file for a service, you'll be prompted to provide thepassword when you run the tool.
12. If not already present, add the paas section to the file.
{ ... "compute": { ... }, "paas": {
Chapter 5Update the Default Profile File
5-7
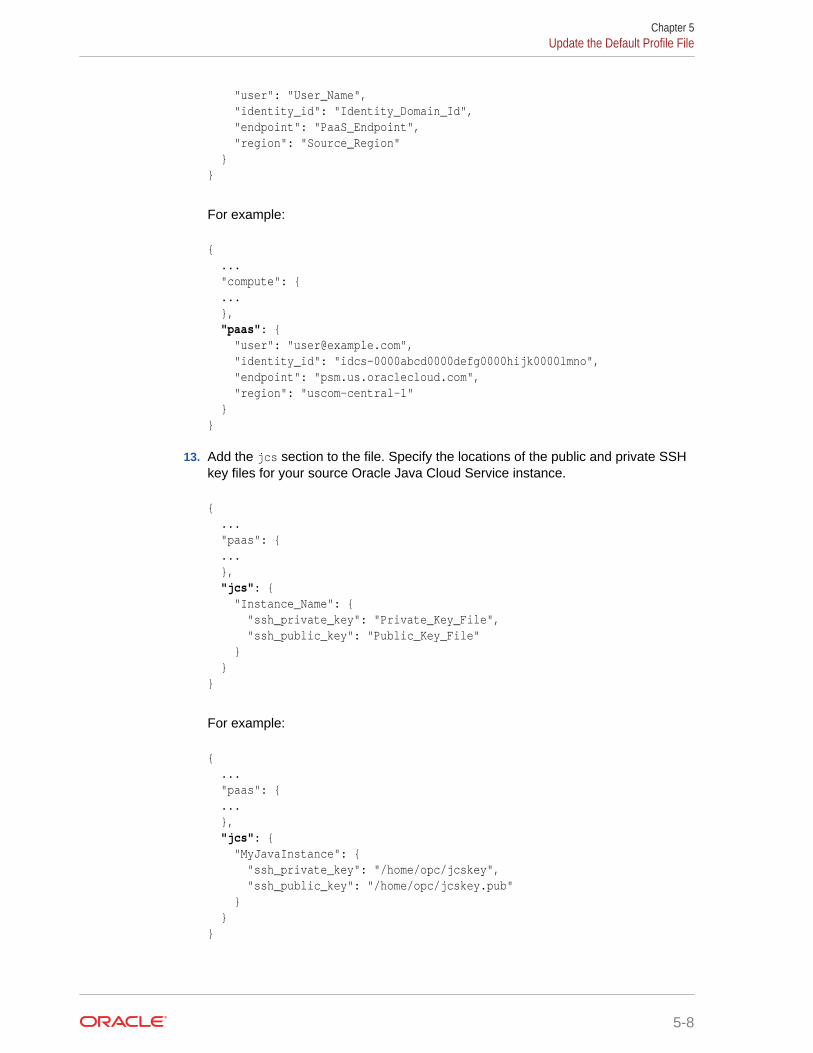
"user": "User_Name", "identity_id": "Identity_Domain_Id", "endpoint": "PaaS_Endpoint", "region": "Source_Region" }}
For example:
{ ... "compute": { ... }, "paas": { "user": "[email protected]", "identity_id": "idcs-0000abcd0000defg0000hijk0000lmno", "endpoint": "psm.us.oraclecloud.com", "region": "uscom-central-1" }}
13. Add the jcs section to the file. Specify the locations of the public and private SSHkey files for your source Oracle Java Cloud Service instance.
{ ... "paas": { ... }, "jcs": { "Instance_Name": { "ssh_private_key": "Private_Key_File", "ssh_public_key": "Public_Key_File" } }}
For example:
{ ... "paas": { ... }, "jcs": { "MyJavaInstance": { "ssh_private_key": "/home/opc/jcskey", "ssh_public_key": "/home/opc/jcskey.pub" } }}
Chapter 5Update the Default Profile File
5-8
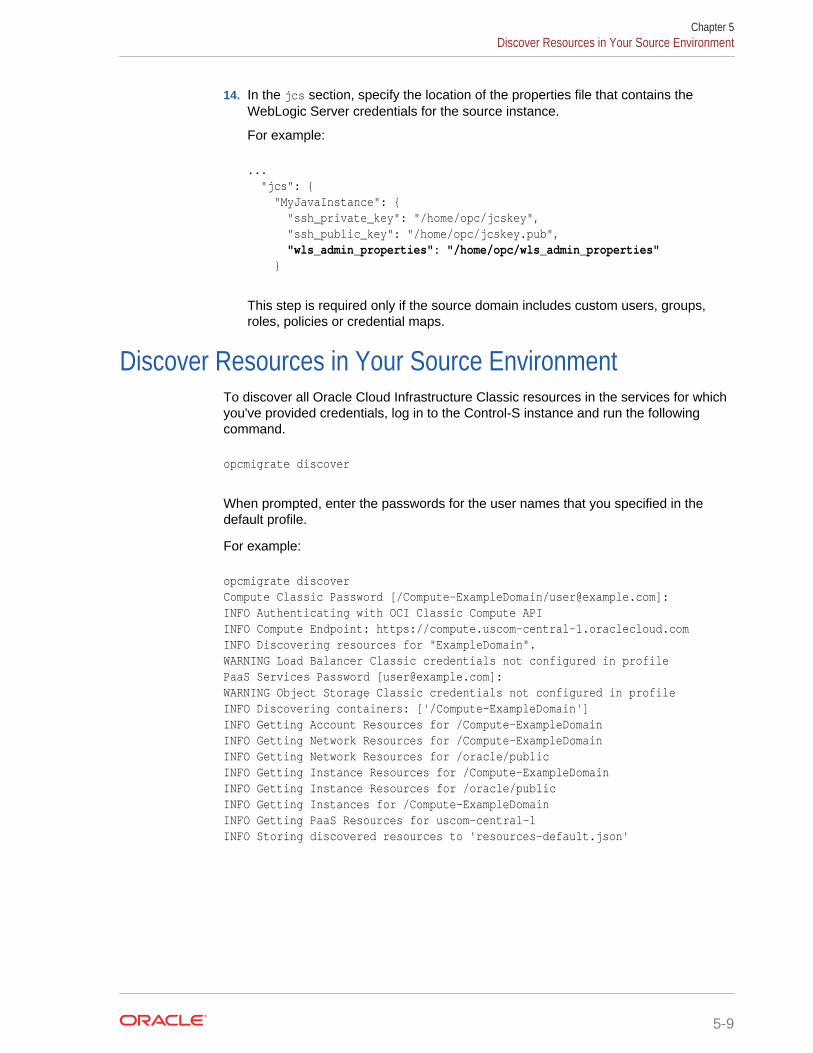
14. In the jcs section, specify the location of the properties file that contains theWebLogic Server credentials for the source instance.
For example:
... "jcs": { "MyJavaInstance": { "ssh_private_key": "/home/opc/jcskey", "ssh_public_key": "/home/opc/jcskey.pub", "wls_admin_properties": "/home/opc/wls_admin_properties" }
This step is required only if the source domain includes custom users, groups,roles, policies or credential maps.
Discover Resources in Your Source EnvironmentTo discover all Oracle Cloud Infrastructure Classic resources in the services for whichyou've provided credentials, log in to the Control-S instance and run the followingcommand.
opcmigrate discover
When prompted, enter the passwords for the user names that you specified in thedefault profile.
For example:
opcmigrate discoverCompute Classic Password [/Compute-ExampleDomain/[email protected]]:INFO Authenticating with OCI Classic Compute APIINFO Compute Endpoint: https://compute.uscom-central-1.oraclecloud.comINFO Discovering resources for "ExampleDomain".WARNING Load Balancer Classic credentials not configured in profilePaaS Services Password [[email protected]]:WARNING Object Storage Classic credentials not configured in profileINFO Discovering containers: ['/Compute-ExampleDomain']INFO Getting Account Resources for /Compute-ExampleDomainINFO Getting Network Resources for /Compute-ExampleDomainINFO Getting Network Resources for /oracle/publicINFO Getting Instance Resources for /Compute-ExampleDomainINFO Getting Instance Resources for /oracle/publicINFO Getting Instances for /Compute-ExampleDomainINFO Getting PaaS Resources for uscom-central-1INFO Storing discovered resources to 'resources-default.json'
Chapter 5Discover Resources in Your Source Environment
5-9
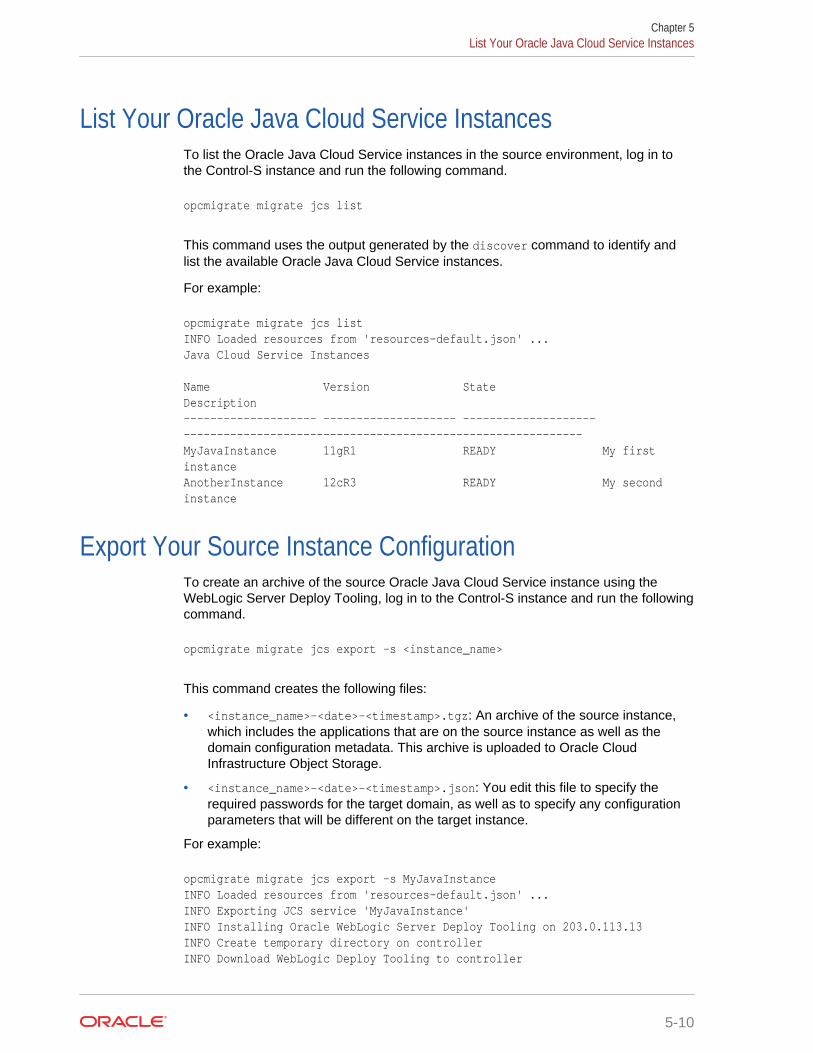
List Your Oracle Java Cloud Service InstancesTo list the Oracle Java Cloud Service instances in the source environment, log in tothe Control-S instance and run the following command.
opcmigrate migrate jcs list
This command uses the output generated by the discover command to identify andlist the available Oracle Java Cloud Service instances.
For example:
opcmigrate migrate jcs listINFO Loaded resources from 'resources-default.json' ...Java Cloud Service Instances
Name Version State Description -------------------- -------------------- -------------------- ------------------------------------------------------------MyJavaInstance 11gR1 READY My first instanceAnotherInstance 12cR3 READY My second instance
Export Your Source Instance ConfigurationTo create an archive of the source Oracle Java Cloud Service instance using theWebLogic Server Deploy Tooling, log in to the Control-S instance and run the followingcommand.
opcmigrate migrate jcs export -s <instance_name>
This command creates the following files:
• <instance_name>-<date>-<timestamp>.tgz: An archive of the source instance,which includes the applications that are on the source instance as well as thedomain configuration metadata. This archive is uploaded to Oracle CloudInfrastructure Object Storage.
• <instance_name>-<date>-<timestamp>.json: You edit this file to specify therequired passwords for the target domain, as well as to specify any configurationparameters that will be different on the target instance.
For example:
opcmigrate migrate jcs export -s MyJavaInstanceINFO Loaded resources from 'resources-default.json' ...INFO Exporting JCS service 'MyJavaInstance'INFO Installing Oracle WebLogic Server Deploy Tooling on 203.0.113.13INFO Create temporary directory on controllerINFO Download WebLogic Deploy Tooling to controller
Chapter 5List Your Oracle Java Cloud Service Instances
5-10
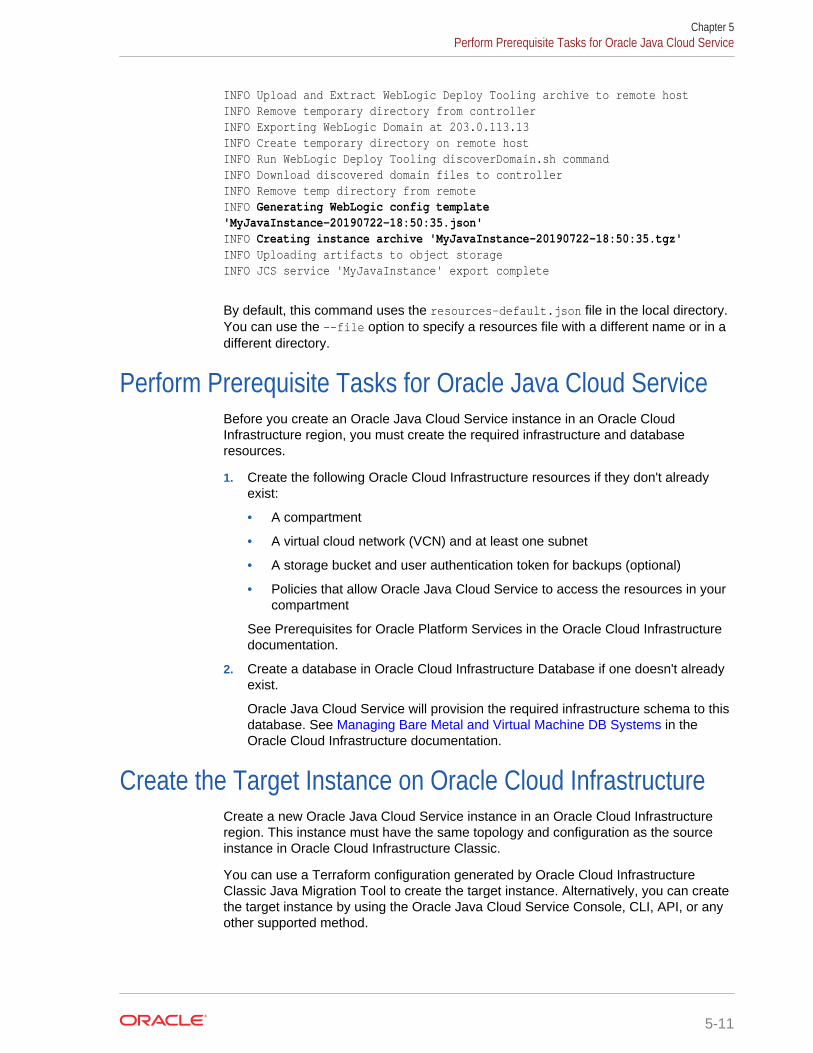
INFO Upload and Extract WebLogic Deploy Tooling archive to remote hostINFO Remove temporary directory from controllerINFO Exporting WebLogic Domain at 203.0.113.13INFO Create temporary directory on remote hostINFO Run WebLogic Deploy Tooling discoverDomain.sh commandINFO Download discovered domain files to controllerINFO Remove temp directory from remoteINFO Generating WebLogic config template 'MyJavaInstance-20190722-18:50:35.json'INFO Creating instance archive 'MyJavaInstance-20190722-18:50:35.tgz'INFO Uploading artifacts to object storageINFO JCS service 'MyJavaInstance' export complete
By default, this command uses the resources-default.json file in the local directory.You can use the --file option to specify a resources file with a different name or in adifferent directory.
Perform Prerequisite Tasks for Oracle Java Cloud ServiceBefore you create an Oracle Java Cloud Service instance in an Oracle CloudInfrastructure region, you must create the required infrastructure and databaseresources.
1. Create the following Oracle Cloud Infrastructure resources if they don't alreadyexist:
• A compartment
• A virtual cloud network (VCN) and at least one subnet
• A storage bucket and user authentication token for backups (optional)
• Policies that allow Oracle Java Cloud Service to access the resources in yourcompartment
See Prerequisites for Oracle Platform Services in the Oracle Cloud Infrastructuredocumentation.
2. Create a database in Oracle Cloud Infrastructure Database if one doesn't alreadyexist.
Oracle Java Cloud Service will provision the required infrastructure schema to thisdatabase. See Managing Bare Metal and Virtual Machine DB Systems in theOracle Cloud Infrastructure documentation.
Create the Target Instance on Oracle Cloud InfrastructureCreate a new Oracle Java Cloud Service instance in an Oracle Cloud Infrastructureregion. This instance must have the same topology and configuration as the sourceinstance in Oracle Cloud Infrastructure Classic.
You can use a Terraform configuration generated by Oracle Cloud InfrastructureClassic Java Migration Tool to create the target instance. Alternatively, you can createthe target instance by using the Oracle Java Cloud Service Console, CLI, API, or anyother supported method.
Chapter 5Perform Prerequisite Tasks for Oracle Java Cloud Service
5-11
Because your source and target instances are located in the same Oracle Cloudaccount (identity domain), they cannot have identical instance names.
The domain, server, and cluster names in a service instance are derived from the firsteight characters of the instance name. For example, the following instance names aredifferent, but result in identical domain, server, and cluster names in Oracle WebLogicServer:
• MyJCSInstance
• MyJCSInstanceOCI
Create the Target Instance Using the ConsoleYou can use the Oracle Java Cloud Service Console to create the service instance onOracle Cloud Infrastructure.
1. From the Oracle Java Cloud Service Console, click Create Instance.
2. Enter an Instance Name.
3. Select an Oracle Cloud Infrastructure Region, Availability Domain, and Subnet.
4. For Service Level and Software Edition, select the same values as the sourceinstance.
5. For Software Release, select the same major version (X.Y) as the sourceinstance.
For example, 12.2.1.2 and 12.2.1.3 are the same major version of OracleWebLogic Server.
6. Click Next.
7. Click Advanced.
8. For WebLogic Clusters, create the same number of clusters as the sourceinstance. Also set the cluster names and server counts to the same values as thesource instance.
For example, if the source instance has a single cluster named cluster1 with aserver count of 3, then the target instance must have the same configuration.
9. For the Compute Shape of your WebLogic Cluster, select an Oracle CloudInfrastructure shape that most closely matches the number of Oracle ComputeUnits (OCPUs) and the amount of memory that are available in the Oracle CloudInfrastructure Classic shape in your source instance.
See Select Oracle Cloud Infrastructure Shapes.
10. If your source instance uses Oracle Identity Cloud Service for authentication, thenselect Enable Authentication Using Identity Cloud Service.
11. For SSH Public Key, upload an existing key or generate a new one.
12. For Local Administrative User Name and Password, enter the same OracleWebLogic Server administrator credentials as your source instance.
13. If your source instance includes an Oracle Traffic Director load balancer, thenselect a Compute Shape for the load balancer that most closely matches theOracle Cloud Infrastructure Classic shape in the source instance.
14. If your source instance includes an Oracle Coherence data grid cluster, then selectthe same Cluster Size and Managed Servers Per Node as the data grid cluster
Chapter 5Create the Target Instance on Oracle Cloud Infrastructure
5-12
in the source instance. Also select a Compute Shape for the data grid cluster thatmost closely matches the Oracle Cloud Infrastructure Classic shape.
15. For Database Type, select Oracle Cloud Infrastructure Database.
16. Select the Compartment Name where your Oracle Cloud Infrastructure Databaseresides.
17. For Database Instance Name, select the Oracle Cloud Infrastructure Databasethat you created for the Oracle Java Cloud Service infrastructure schema.
Also enter a value for PDB Name if applicable.
18. Enter the Password for your database system administrator.
19. Complete the instance creation wizard.
For more information about using the console, see Create an Oracle Java CloudService Instance Attached to a Public Subnet on Oracle Cloud in Administering OracleJava Cloud Service.
Create the Target Instance Using TerraformYou can use Oracle Cloud Infrastructure Classic Java Migration Tool and Terraform tocreate the target instance.
1. Log in to the Control-S instance and run the following command:
opcmigrate migrate jcs create -s <instance_name> -o jcs_instance.tf
In the Terraform configuration generated by this command, the appropriatecompute shape is selected automatically. The tool also creates a unique name forthe target instance based on the name of the source instance.
2. Create a file named terraform.tfvars file. Add the following parameters:
• user_ocid is the OCID of the Oracle Cloud Infrastructure user.
• fingerprint is the API key fingerprint of the user.
• private_key_path is the path to the API PEM key file.
• region is the Oracle Cloud Infrastructure region where you want to create theinstance.
• tenancy_ocid is the OCID of the Oracle Cloud Infrastructure tenancy.
• compartment_id is the OCID of the compartment where you want to create theinstance.
• subnet_id is the OCID of the subnet where you want to create the instance.
• identity_domain is the Identity Service Id.
• identity_user is the name of the federated user that has the JavaAdministrator role.
• identity_password is the password of the federated user.
• weblogic_admin_username is the user name of the WebLogic Serveradministrator.
• weblogic_admin_password is the password of the WebLogic Serveradministrator.
Chapter 5Create the Target Instance on Oracle Cloud Infrastructure
5-13
• weblogic_database_username is the user name of the database administrator.
• weblogic_database_password is the password of the database administrator.
For example:
user_ocid="ocid1.user.oc1..aaa..."fingerprint="81:45..."private_key_path="/home/opc/oci_api_key.pem"region="us-ashburn-1"tenancy_ocid="ocid1.tenancy.oc1..aaa..."compartment_id="ocid1.compartment.oc1..aaa..."subnet_id="ocid1.subnet.oc1.iad.aaa..."identity_domain="idcs-9bd53..."identity_user="[email protected]"identity_password="Your_Password"weblogic_admin_username="weblogic"weblogic_admin_password="Your_Password"weblogic_database_username="sys"weblogic_database_password="Your_Password"
3. Add the weblogic_database_connect_string parameter to the file. Enter thedatabase connection string used by the instance to connect to the database and toprovision the infrastructure schema.
The following table shows the URL format to use, depending on the OracleDatabase version, and whether you created a Virtual Machine (VM) or Bare Metaldatabase type.
DatabaseVersion
DatabaseType
URL Format
12c VM //<db_hostname>-scan.<db_domain>:<db_port>/<pdb_name>.<db_domain>
12c Bare Metal //<db_hostname>.<db_domain>:<db_port>/<pdb_name>.<db_domain>
11g VM //<db_hostname>-scan.<db_domain>:<db_port>/<db_unique_name>.<db_domain>
11g Bare Metal //<db_hostname>.<db_domain>:<db_port>/<db_unique_name>.<db_domain>
If you did not specify a PDB name when you created an Oracle CloudInfrastructure Database that is running Oracle Database 12c, the default name is<db_name>_pdb1.
For example:
weblogic_database_connect_string="//myinfradb-scan.mydbsubnet.myvcn.oraclevcn.com:1521/pdb1.mydbsubnet.myvcn.oraclevcn.com"
4. By default, the Terraform configuration creates your instance in the first availabilitydomain in the specified region. If you want to change the availability domain wherethe instance is created, edit the Terraform configuration file.
Chapter 5Create the Target Instance on Oracle Cloud Infrastructure
5-14
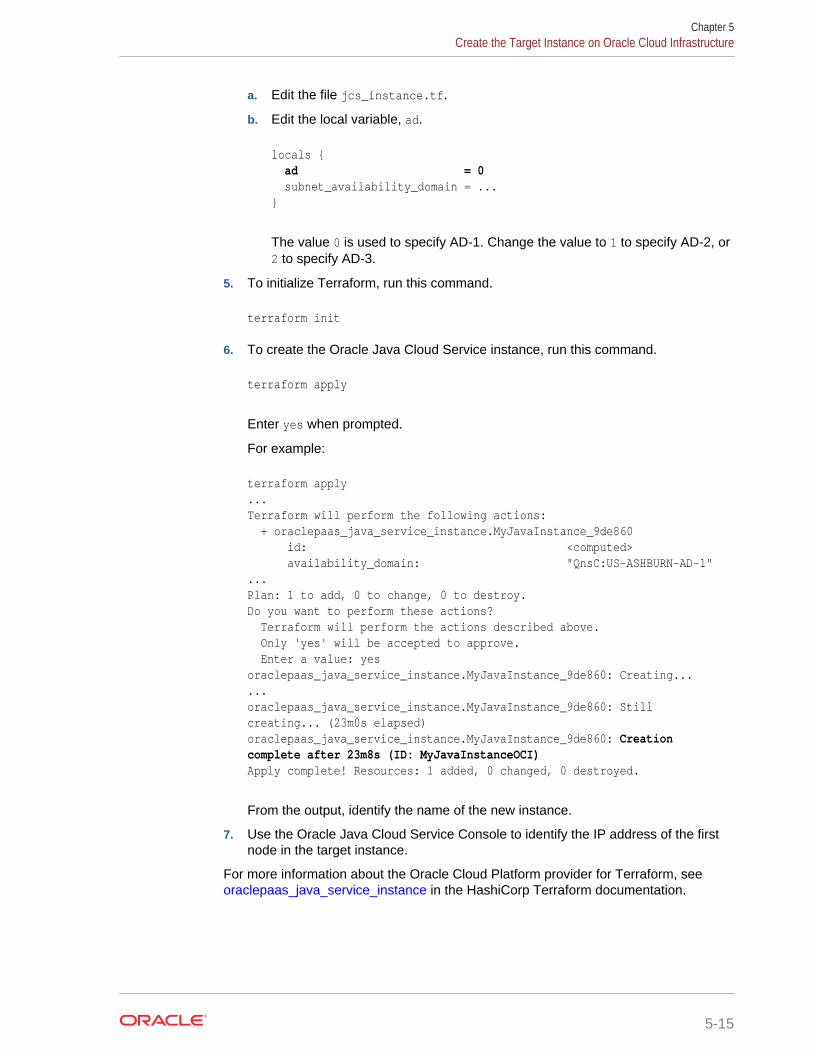
a. Edit the file jcs_instance.tf.
b. Edit the local variable, ad.
locals { ad = 0 subnet_availability_domain = ...}
The value 0 is used to specify AD-1. Change the value to 1 to specify AD-2, or2 to specify AD-3.
5. To initialize Terraform, run this command.
terraform init
6. To create the Oracle Java Cloud Service instance, run this command.
terraform apply
Enter yes when prompted.
For example:
terraform apply...Terraform will perform the following actions: + oraclepaas_java_service_instance.MyJavaInstance_9de860 id: <computed> availability_domain: "QnsC:US-ASHBURN-AD-1"...Plan: 1 to add, 0 to change, 0 to destroy.Do you want to perform these actions? Terraform will perform the actions described above. Only 'yes' will be accepted to approve. Enter a value: yesoraclepaas_java_service_instance.MyJavaInstance_9de860: Creating......oraclepaas_java_service_instance.MyJavaInstance_9de860: Still creating... (23m0s elapsed)oraclepaas_java_service_instance.MyJavaInstance_9de860: Creation complete after 23m8s (ID: MyJavaInstanceOCI)Apply complete! Resources: 1 added, 0 changed, 0 destroyed.
From the output, identify the name of the new instance.
7. Use the Oracle Java Cloud Service Console to identify the IP address of the firstnode in the target instance.
For more information about the Oracle Cloud Platform provider for Terraform, see oraclepaas_java_service_instance in the HashiCorp Terraform documentation.
Chapter 5Create the Target Instance on Oracle Cloud Infrastructure
5-15
Migrate Oracle Fusion Middleware Security ResourcesIf you customized the Oracle WebLogic Server security providers in your sourceOracle Java Cloud Service instance, then you must apply the same changes in thetarget service instance.
If you specified the WebLogic Server administrator credentials for your sourceinstance in the default profile, the Oracle Cloud Infrastructure Classic Java MigrationTool automatically migrates the following Oracle Fusion Middleware security resourcesfrom the source domain to the target domain:
• Users
• Groups
• Roles
• Policies
• Keystores
• Credential maps
• Audit policies
• Web Services Manager (WSM) policies
The tool does not automatically update the security providers in the target instance.
1. Access the Fusion Middleware Control Console for your source instance.
https://<source_admin_ip>:7002/em
2. Sign in to the console as your Oracle WebLogic Server system administrator.
3. From a different browser window or tab, sign in to the Fusion Middleware ControlConsole for your target instance.
https://<target_admin_ip>:7002/em
4. From both consoles, click WebLogic Domain, select Security, and then selectSecurity Provider Configuration.
5. Compare the security provider configuration of the source and target instances,and then update the configuration of the target instance as necessary.
Do not modify the Security Store.
Migrate Oracle Identity Cloud Service Roles and PoliciesIf your source Oracle Java Cloud Service instance uses Oracle Identity Cloud Servicefor authentication, then you must migrate the administrator roles and web tier policy tothe target instance.
The source and target instances are each associated with a security application inOracle Identity Cloud Service. The security application grants administrative rights forthe WebLogic Server domain to specific users and groups in Oracle Identity CloudService.
Your source and target instances must be in the same identity domain.
1. Access the Oracle Identity Cloud Service console.
Chapter 5Migrate Oracle Fusion Middleware Security Resources
5-16
2. Click the navigation drawer , and then select Applications.
3. Export the administrator roles for your source instance.
a. Click the security application for your source instance,JaaS_<source_instance_name>.
b. Click Application Roles.
c. Click Export, and then select Export All.
d. When prompted for confirmation, click Export Application Roles.
e. Click the job ID.
If a job ID link is not displayed, click the navigation drawer , select Jobs,and then click the job.
f. After the export job has finished, click Download. Save the fileAppRoleExport_<id>.csv to your computer.
g. Click the navigation drawer , and then select Applications.
4. Export the web tier policy for your source instance.
a. Click the security application for your source instance,JaaS_<source_instance_name>.
b. Click Web Tier Policy.
c. Click Export. Save the file CloudGatePolicy.txt to your computer.
d. From the navigation links at the top of the page, click Applications.
5. Import the administrator roles to your target instance.
a. Click the security application for your target instance,JaaS_<target_instance_name>.
b. Click Application Roles.
c. Click Import.
d. Select the file AppRoleExport_<id>.csv on your computer, and then clickImport.
e. Click the job ID link.
If a job ID link is not displayed, click the navigation drawer , select Jobs,and then click the job.
f. Verify that the import job has finished.
You can ignore any error in the job with these messages:
• "Grant already exists" - the same user or group is already assigned to therole
• "Missing required attribute(s): Grantee" - no users or groups are assignedto the role
g. Click the navigation drawer , and then select Applications.
6. Import the web tier policy to your target instance.
a. Click the security application for your target instance,JaaS_<target_instance_name>.
Chapter 5Migrate Oracle Identity Cloud Service Roles and Policies
5-17
b. Click Web Tier Policy.
c. Click Import. Select the file CloudGatePolicy.txt on your computer.
You might need to refresh your web browser in order to view the resourcesthat you imported from the policy file.
d. Click Validate.
e. Verify that the web tier policy validation was successful.
f. From the navigation links at the top of the page, click Applications.
7. Assign any custom applications to the roles for your target instance.
a. Click the security application for your source instance,JaaS_<source_instance_name>.
b. Click Application Roles.
c. If there is an Applications Assigned link for the first role, click this link, andthen record the application names for this role.
d. Repeat the previous step for all remaining roles in this application.
e. From the navigation links at the top of the page, click Applications.
f. Click the security application for your target instance,JaaS_<target_instance_name>.
g. Click Application Roles.
h. Click Menu for the first role, and then select Assign Applications.
i. Select the same applications that are assigned to this role in the sourceinstance, and then click OK.
j. Repeat the previous step for all remaining roles in this application.
k. From the navigation links at the top of the page, click Applications.
8. Configure any custom security settings for your target instance.
a. Click the security application for your source instance,JaaS_<source_instance_name>.
The Details page is displayed.
b. From a different browser window or tab, view the security application for yourtarget instance, JaaS_<target_instance_name>.
c. Compare the Details page of the source and target applications, and thenupdate the target application as necessary. Click Save.
d. From both browser windows or tabs, click Configuration.
e. Expand Resources on the Configuration page.
f. Compare the Resources of the source and target applications, and thenupdate the target application as necessary. Click Save.
Ignore the resources named OCMSApp and LBAAS. You do not need to createthese resources in the target instance.
g. Expand Client Configuration on the Configuration page.
h. Compare the Client Configuration of the source and target applications, andthen update the target application as necessary.
Chapter 5Migrate Oracle Identity Cloud Service Roles and Policies
5-18
Edit the Target Configuration FileThe export command creates a file that contains parameters for updating the targetWebLogic Server domain. Specify JDBC URLs and passwords, SSL keystorepasswords, and other details for the target instance.
For security purposes, Oracle WebLogic Server Deploy Tooling excludes the values ofall passwords during domain discovery.
1. On the Control-S instance, edit the file <instance_name>-<date-time-stamp>.json.
Refer to the output from the export command to determine the specific file name.
2. Update the following attributes.
• JCSServiceName - The name of the target Oracle Java Cloud Service instance
• JCSAdminIPAddress - The IP address of the first node in the target instance(running the Administration Server)
• WeblogicAdminUser - The user name for the WebLogic Server domainadministrator on the target instance
• WeblogicAdminPassword - The password for the WebLogic Server domainadministrator on the target instance
3. If your source instance includes a load balancer, then update the FrontendHostattribute for each cluster in the Cluster node. Enter the public IP address of theload balancer in your target instance.
Example:
"topology": { "Cluster": { "cluster": { "FrontendHost": "<target_LB_IP>" } ...}
4. If you configured any custom startup arguments for a server in your sourceinstance, then update the AdditionalServerStartArguments attribute for eachserver in the Server node.
Set the value of AdditionalServerStartArguments to the custom arguments only.Example:
"topology": { ... "Server": { ... "server_1": { ... "AdditionalServerStartArguments": "-Dmy.custom.arg=true" }
Chapter 5Edit the Target Configuration File
5-19
...}
5. If the servers in your source instance are configured to use custom identity andtrust keystore files, then update the file with the keystore passwords.
• CustomIdentityKeyStorePassPhrase
• CustomTrustKeyStorePassPhrase
• ServerPrivateKeyPassPhrase
Example:
"topology": { ... "Server": { "server_1": { ... "CustomIdentityKeyStorePassPhrase": "<your_password>", "CustomTrustKeyStorePassPhrase": "<your_password>", "ServerPrivateKeyPassPhrase": "<your_password>" } ...}
6. If your source instance includes custom Java Database Connectivity (JDBC) datasources, then provide the location and password of the new application databasesin Oracle Cloud Infrastructure.
a. For each data source in the JDBCSystemResource node, update the passwordattribute.
Example:
"resources": { "JDBCSystemResource": { "MyDataSource1": { ... "password": "<your_password>" } } ...
b. For each data source, find the url attribute and specify the URL to thecorresponding Oracle Cloud Infrastructure Database.
The following table shows the URL format to use, depending on the OracleDatabase version, and whether you created a Virtual Machine (VM) or BareMetal database type.
DatabaseVersion
DatabaseType
URL Format
12c VM jdbc:oracle:thin:@//<db_hostname>-scan.<db_domain>:<db_port>/<pdb_name>.<db_domain>
Chapter 5Edit the Target Configuration File
5-20
DatabaseVersion
DatabaseType
URL Format
12c Bare Metal jdbc:oracle:thin:@//<db_hostname>.<db_domain>:<db_port>/<pdb_name>.<db_domain>
11g VM jdbc:oracle:thin:@//<db_hostname>-scan.<db_domain>:<db_port>/<db_unique_name>.<db_domain>
11g Bare Metal jdbc:oracle:thin:@//<db_hostname>.<db_domain>:<db_port>/<db_unique_name>.<db_domain>
The following example shows a Virtual Machine database named myappdb,that is running Oracle Database 12c, and contains a PDB named pdb1:
"resources": { "JDBCSystemResource": { "MyDataSource1": { "url": "jdbc:oracle:thin:@//myappdb-scan.mydbsubnet.myvcn.oraclevcn.com:1521/pdb1.mydbsubnet.myvcn.oraclevcn.com", ... } } ...
7. If your source instance includes any Foreign JNDI Providers, Foreign JMSServers, JMS Bridge Destinations, or Store-and-Forward (SAF) Contexts, thenprovide the locations and passwords for these external resources.
a. For each provider in the ForeignJNDIProvider node, update the passwordattribute.
Also update the url attribute if the location of this JNDI server is different thanthe JNDI server in the source environment.Example:
"resources": { ... "ForeignJNDIProvider": { "MyJNDIProvider1": { "url": "t3://myjndiserver.example.com:9073", "password": "<your_password>" } } ...
b. For each foreign server in the ForeignJMSServer node, update the passwordattributes.
Also update the url attribute if the location of this JMS server is different thanthe JMS server in the source environment.
Chapter 5Edit the Target Configuration File
5-21
Example:
"resources": { ... "ForeignJMSServer": { "MyForeignJMS1": { "url": "t3://myjms.example.com:9073", "ForeignConnectionFactory": { "MyForeignJMS1Factory": { "password": "<your_password>" } } } } ...
c. For each bridge destination in the JMSBridgeDestination node, update thepassword attribute.
Also update the url attribute if the location of this bridge destination isdifferent than the bridge destination in the source environment.Example:
"resources": { ... "JMSBridgeDestination": { "MyBridgeDest1": { "url": "t3://myjms.example.com:9073", "password": "<your_password>" } } ...
d. For each SAF context in the SAFLoginContext node, update the passwordattribute.
Also update the url attribute if the Store-and-Forward destination server isdifferent than the server in the source environment.Example:
"resources": { ... "SAFLoginContext": { "MySAF1": { "url": "t3://myjms.example.com:9073", "password": "<your_password>" } } ...
8. If your source instance includes any JavaMail sessions, then update thepasswords for each mail session in the MailSession node.
Chapter 5Edit the Target Configuration File
5-22
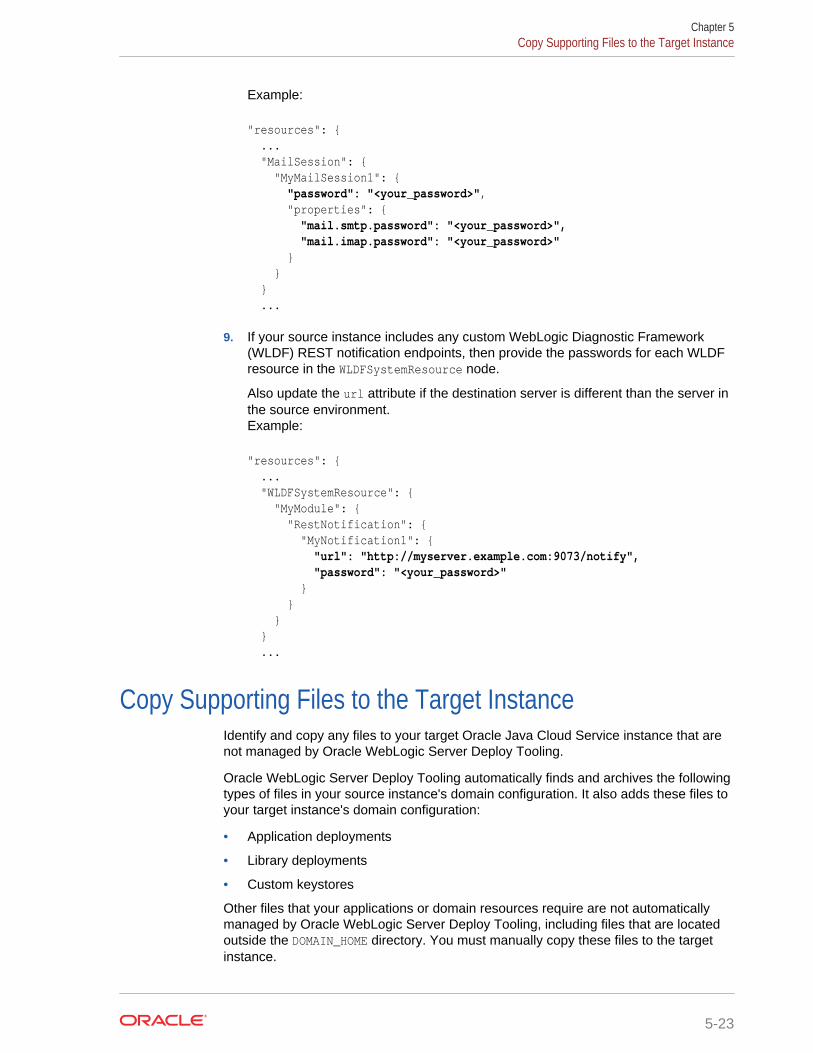
Example:
"resources": { ... "MailSession": { "MyMailSession1": { "password": "<your_password>", "properties": { "mail.smtp.password": "<your_password>", "mail.imap.password": "<your_password>" } } } ...
9. If your source instance includes any custom WebLogic Diagnostic Framework(WLDF) REST notification endpoints, then provide the passwords for each WLDFresource in the WLDFSystemResource node.
Also update the url attribute if the destination server is different than the server inthe source environment.Example:
"resources": { ... "WLDFSystemResource": { "MyModule": { "RestNotification": { "MyNotification1": { "url": "http://myserver.example.com:9073/notify", "password": "<your_password>" } } } } ...
Copy Supporting Files to the Target InstanceIdentify and copy any files to your target Oracle Java Cloud Service instance that arenot managed by Oracle WebLogic Server Deploy Tooling.
Oracle WebLogic Server Deploy Tooling automatically finds and archives the followingtypes of files in your source instance's domain configuration. It also adds these files toyour target instance's domain configuration:
• Application deployments
• Library deployments
• Custom keystores
Other files that your applications or domain resources require are not automaticallymanaged by Oracle WebLogic Server Deploy Tooling, including files that are locatedoutside the DOMAIN_HOME directory. You must manually copy these files to the targetinstance.
Chapter 5Copy Supporting Files to the Target Instance
5-23
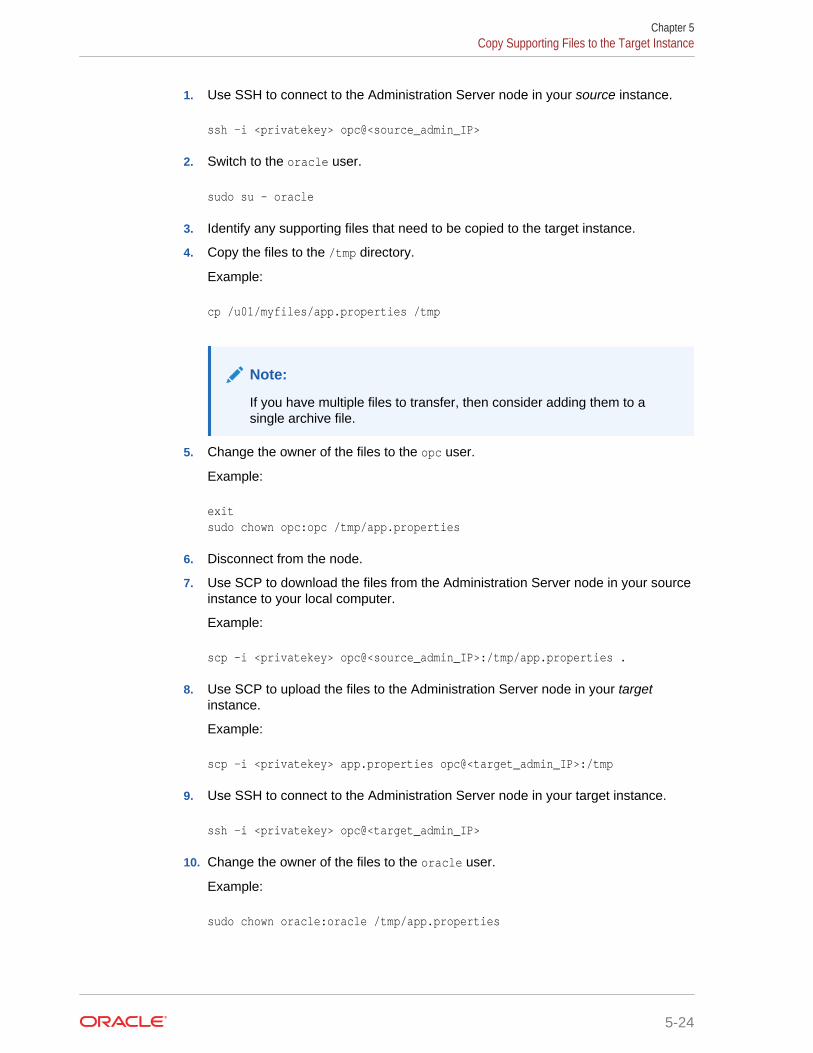
1. Use SSH to connect to the Administration Server node in your source instance.
ssh -i <privatekey> opc@<source_admin_IP>
2. Switch to the oracle user.
sudo su - oracle
3. Identify any supporting files that need to be copied to the target instance.
4. Copy the files to the /tmp directory.
Example:
cp /u01/myfiles/app.properties /tmp
Note:
If you have multiple files to transfer, then consider adding them to asingle archive file.
5. Change the owner of the files to the opc user.
Example:
exitsudo chown opc:opc /tmp/app.properties
6. Disconnect from the node.
7. Use SCP to download the files from the Administration Server node in your sourceinstance to your local computer.
Example:
scp -i <privatekey> opc@<source_admin_IP>:/tmp/app.properties .
8. Use SCP to upload the files to the Administration Server node in your targetinstance.
Example:
scp -i <privatekey> app.properties opc@<target_admin_IP>:/tmp
9. Use SSH to connect to the Administration Server node in your target instance.
ssh -i <privatekey> opc@<target_admin_IP>
10. Change the owner of the files to the oracle user.
Example:
sudo chown oracle:oracle /tmp/app.properties
Chapter 5Copy Supporting Files to the Target Instance
5-24
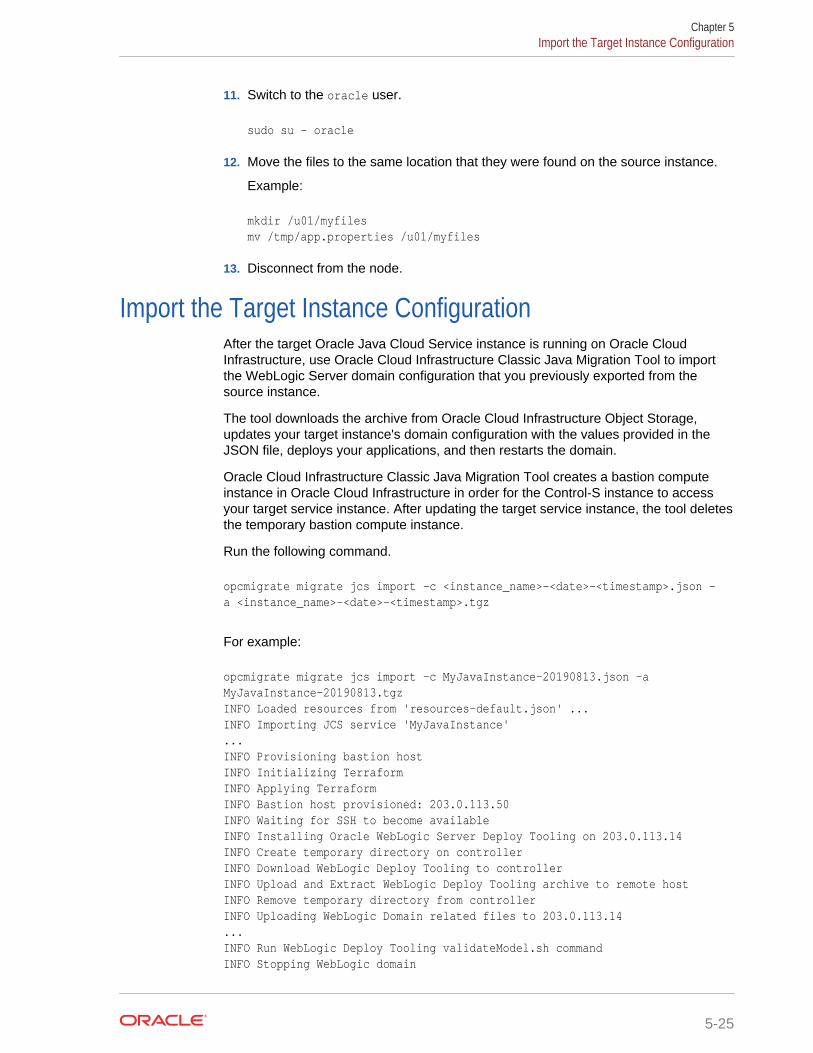
11. Switch to the oracle user.
sudo su - oracle
12. Move the files to the same location that they were found on the source instance.
Example:
mkdir /u01/myfilesmv /tmp/app.properties /u01/myfiles
13. Disconnect from the node.
Import the Target Instance ConfigurationAfter the target Oracle Java Cloud Service instance is running on Oracle CloudInfrastructure, use Oracle Cloud Infrastructure Classic Java Migration Tool to importthe WebLogic Server domain configuration that you previously exported from thesource instance.
The tool downloads the archive from Oracle Cloud Infrastructure Object Storage,updates your target instance's domain configuration with the values provided in theJSON file, deploys your applications, and then restarts the domain.
Oracle Cloud Infrastructure Classic Java Migration Tool creates a bastion computeinstance in Oracle Cloud Infrastructure in order for the Control-S instance to accessyour target service instance. After updating the target service instance, the tool deletesthe temporary bastion compute instance.
Run the following command.
opcmigrate migrate jcs import -c <instance_name>-<date>-<timestamp>.json -a <instance_name>-<date>-<timestamp>.tgz
For example:
opcmigrate migrate jcs import -c MyJavaInstance-20190813.json -a MyJavaInstance-20190813.tgzINFO Loaded resources from 'resources-default.json' ...INFO Importing JCS service 'MyJavaInstance'...INFO Provisioning bastion hostINFO Initializing TerraformINFO Applying TerraformINFO Bastion host provisioned: 203.0.113.50INFO Waiting for SSH to become availableINFO Installing Oracle WebLogic Server Deploy Tooling on 203.0.113.14INFO Create temporary directory on controllerINFO Download WebLogic Deploy Tooling to controllerINFO Upload and Extract WebLogic Deploy Tooling archive to remote hostINFO Remove temporary directory from controllerINFO Uploading WebLogic Domain related files to 203.0.113.14...INFO Run WebLogic Deploy Tooling validateModel.sh commandINFO Stopping WebLogic domain
Chapter 5Import the Target Instance Configuration
5-25
INFO Stop WebLogic DomainINFO Updating WebLogic domainINFO Set target host full path names for uploaded filesINFO Update WebLogic DomainINFO Starting WebLogic domainINFO Start WebLogic domainINFO Tearing down bastion host...INFO Tearing down TerraformINFO JCS service 'MyJavaInstance' import complete
Chapter 5Import the Target Instance Configuration
5-26
6Complete the Post-Migration Tasks
After successfully migrating your Oracle Java Cloud Service instances from OracleCloud Infrastructure Classic to Oracle Cloud Infrastructure, test your applicationsthoroughly, and then perform cleanup and other optional configuration tasks.
Topics:
• Test the Target
• Start the SMTP Service on the Target
• Migrate FastConnect and VPN Connections to Oracle Cloud Infrastructure
• Clean Up Resources in Oracle Cloud Infrastructure Classic
Test the TargetVerify that your Java applications and other Oracle WebLogic Server resources areaccessible and function correctly on the target Oracle WebLogic Server domain.
Be sure to thoroughly run all application test cases. Also verify that you can access theWebLogic Server Administration Console.
If your instance includes custom data sources that access your application databases,you can test database connectivity directly from the WebLogic Server AdministrationConsole. Select a data source, click the Monitoring tab, and then click the Testingtab.
Start the SMTP Service on the TargetIf your applications use JavaMail and require access to the local Simple Mail TransferProtocol (SMTP) server on the operating system, then you must start the SMTPserver.
Unlike Oracle Java Cloud Service nodes in Oracle Cloud Infrastructure Classic, theSMTP server is not configured to run by default for nodes in Oracle CloudInfrastructure.
Alternatively, you can configure your JavaMail sessions to use Oracle CloudInfrastructure Email Delivery. See Overview of the Email Delivery Service in the OracleCloud Infrastructure documentation.
1. Use a Secure Shell (SSH) client to connect to the Administration Server node onthe target instance as the opc user.
2. Configure and start the SMTP server on the node.
3. Connect to all Managed Server nodes in the target instance that require access tothe local SMTP server, and then repeat the previous step.
6-1
Migrate FastConnect and VPN Connections to Oracle CloudInfrastructure
Use Oracle Cloud Infrastructure to create a connection between your private, on-premises network and a network in Oracle Cloud.
A Virtual Private Network (VPN) uses a public network to create a secure connectionbetween two private networks. Oracle supports two connectivity solutions for a VirtualCloud Network (VCN) in Oracle Cloud Infrastructure:
• Oracle Cloud Infrastructure FastConnect - Create dedicated, high-speed, virtualcircuits for production systems that communicate with your on-premises networkusing the Border Gateway Protocol (BGP). This service is equivalent to OracleCloud Infrastructure FastConnect Classic.
• IPSec VPN - Create secure connections with your on-premises network using theIPSec protocol. This solution replaces VPN as a Service (VPNaaS) and Corente inOracle Cloud Infrastructure Classic.
When migrating from Oracle Cloud Infrastructure Classic, update the existing BGP orVPN configuration in your on-premises network to use either Oracle CloudInfrastructure FastConnect or IPSec VPN. Alternatively, if you require connectivity toinstances in both Oracle Cloud Infrastructure and Oracle Cloud Infrastructure Classicduring the migration process, create a separate BGP or VPN configuration in your on-premises network.
In Oracle Cloud Infrastructure, creating a connection to your on-premises networkincludes these tasks:
• Create a Dynamic Routing Gateway (DRG) in the VCN.
• Create a route table in the VCN that directs external traffic to the DRG.
• Assign the route table to a subnet in the VCN.
Refer to these topics in the Oracle Cloud Infrastructure documentation:
• FastConnect
• IPSec VPN
Clean Up Resources in Oracle Cloud Infrastructure ClassicAfter testing your target Oracle WebLogic Server domain in Oracle CloudInfrastructure, you can delete the source Oracle Java Cloud Service instance andsupporting cloud resources in Oracle Cloud Infrastructure Classic.
Delete these Oracle Cloud Infrastructure Classic resources to avoid costs for servicesthat you no longer use.
1. Access the Oracle Java Cloud Service console.
2. Delete the source Oracle Java Cloud Service instances that you created in OracleCloud Infrastructure Classic.
a. Click Manage this instance for the service instance, and then selectDelete.
Chapter 6Migrate FastConnect and VPN Connections to Oracle Cloud Infrastructure
6-2
b. Enter the Database Administrator User Name and Database AdministratorUser Password for the infrastructure schema database.
Alternatively, select Force Delete if you plan to delete this database as well.
c. Click Delete.
3. Click IP Reservations.
4. Delete any IP reservations that you created for your source Oracle Java CloudService instances.
a. Click Delete for the IP reservation.
b. When prompted for confirmation, click OK.
5. Access the Oracle Database Classic Cloud Service console (Database Classic).
6. Delete the Oracle Database Classic Cloud Service instances that you created inOracle Cloud Infrastructure Classic to support your source Oracle Java CloudService instances.
Do not delete a database if it is still in use by other services.
a. Click Manage this instance for the database instance, and then selectDelete.
b. When prompted for confirmation, click Delete.
7. Click IP Reservations.
8. Delete any IP reservations that you created for your Oracle Database ClassicCloud Service instances.
a. Click Delete for the IP reservation.
b. When prompted for confirmation, click OK.
9. Access the Oracle Cloud Infrastructure Object Storage Classic console (StorageClassic).
10. Delete the object storage containers that you created in Oracle CloudInfrastructure Classic to support your source Oracle Java Cloud Service instances.
Do not delete a container if it is still in use by other services.
a. Click the delete icon for the container.
b. When prompted for confirmation, click OK.
Chapter 6Clean Up Resources in Oracle Cloud Infrastructure Classic
6-3