Embed Size (px)
Citation preview

WPL_U101
T r a i n i n g G u i d e
2 – Working with presentations
Microsoft PowerPoint 2010
- Level 1
Microsoft PowerPoint 2010 - Level 1
© Learning and Development Service Page 2 Working with presentations
WORKING WITH PRESENTATIONS
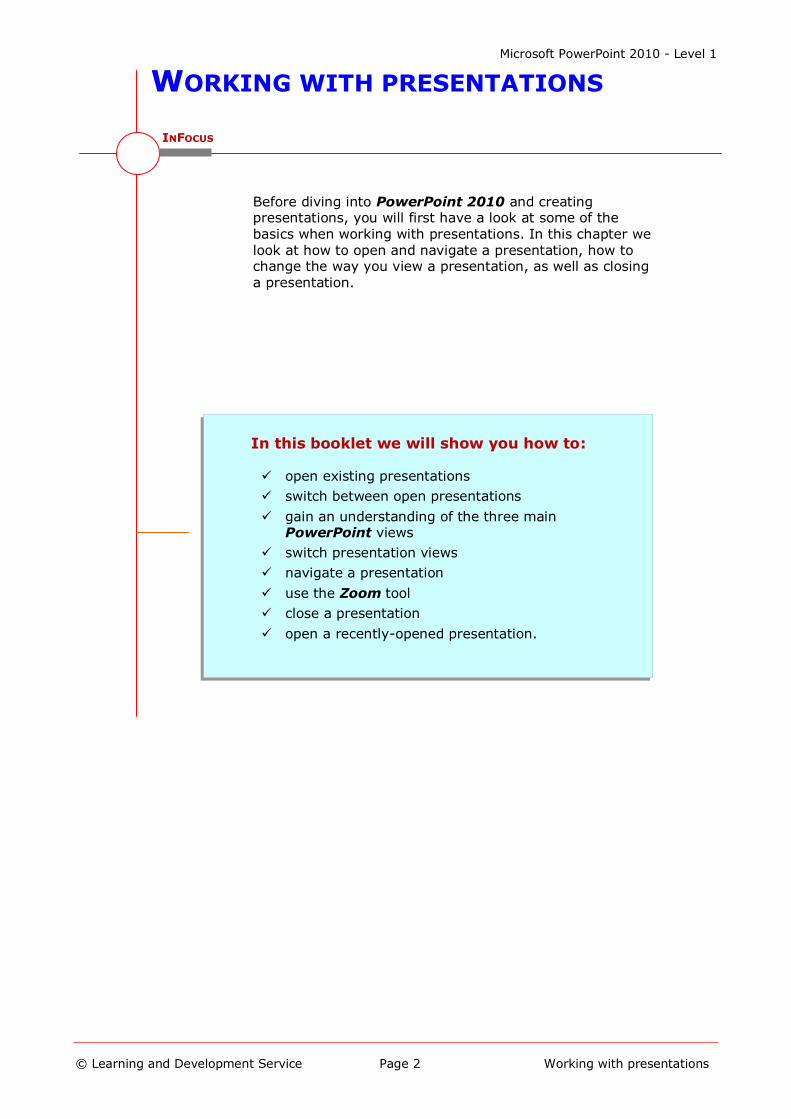
Before diving into PowerPoint 2010 and creating presentations, you will first have a look at some of the basics when working with presentations. In this chapter we look at how to open and navigate a presentation, how to change the way you view a presentation, as well as closing a presentation.
In this booklet we will show you how to:
open existing presentations
switch between open presentations
gain an understanding of the three main PowerPoint views
switch presentation views
navigate a presentation
use the Zoom tool
close a presentation
open a recently-opened presentation.
INFOCUS
Microsoft PowerPoint 2010 - Level 1
© Learning and Development Service Page 3 Working with presentations
OPENING A PRESENTATION
Try This Yourself:
Before starting this exercise ensure that PowerPoint is open...
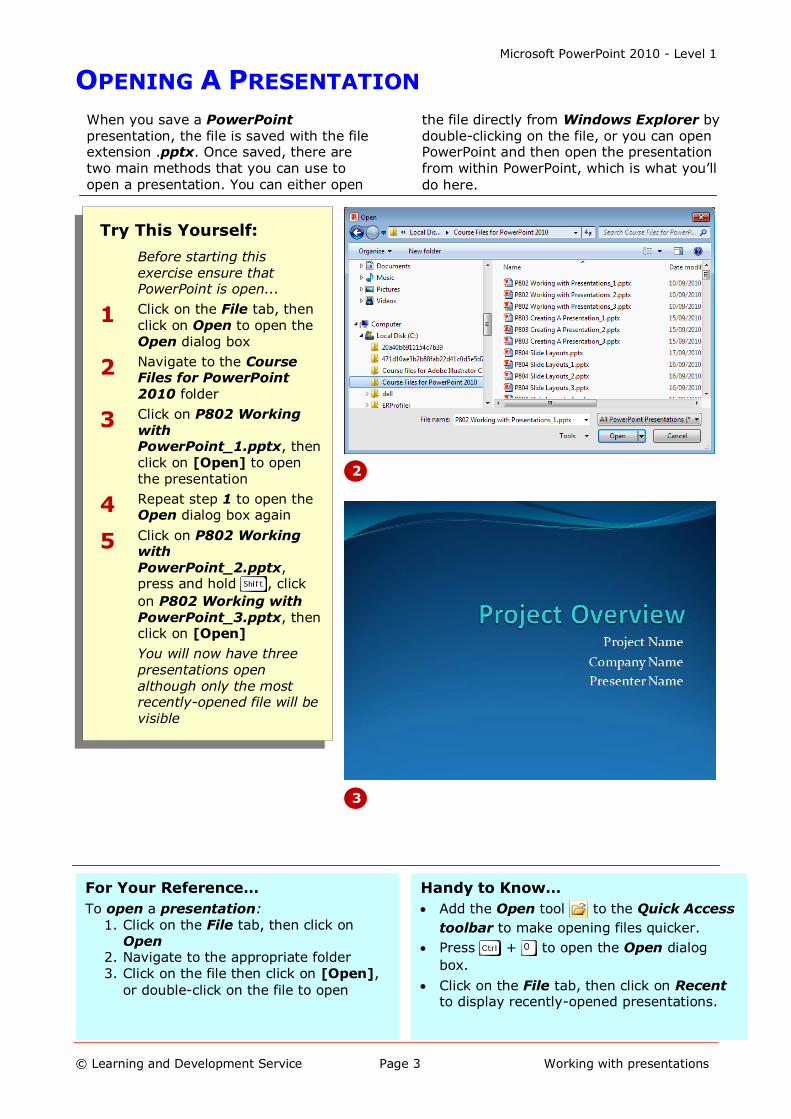
1 Click on the File tab, then click on Open to open the Open dialog box
2 Navigate to the Course Files for PowerPoint 2010 folder
3 Click on P802 Working with PowerPoint_1.pptx, then click on [Open] to open the presentation
4 Repeat step 1 to open the Open dialog box again
5 Click on P802 Working with PowerPoint_2.pptx, press and hold , click
on P802 Working with PowerPoint_3.pptx, then click on [Open]
You will now have three presentations open although only the most recently-opened file will be visible
For Your Reference…
To open a presentation: 1. Click on the File tab, then click on
Open 2. Navigate to the appropriate folder 3. Click on the file then click on [Open],
or double-click on the file to open
Handy to Know…
Add the Open tool to the Quick Access
toolbar to make opening files quicker.
Press + to open the Open dialog
box.
Click on the File tab, then click on Recent to display recently-opened presentations.
When you save a PowerPoint presentation, the file is saved with the file extension .pptx. Once saved, there are two main methods that you can use to
open a presentation. You can either open
the file directly from Windows Explorer by double-clicking on the file, or you can open PowerPoint and then open the presentation from within PowerPoint, which is what you’ll
do here.
2
3
Microsoft PowerPoint 2010 - Level 1
© Learning and Development Service Page 4 Working with presentations
SWITCHING BETWEEN OPEN PRESENTATIONS
Try This Yourself:
Sam
e
Fil
es
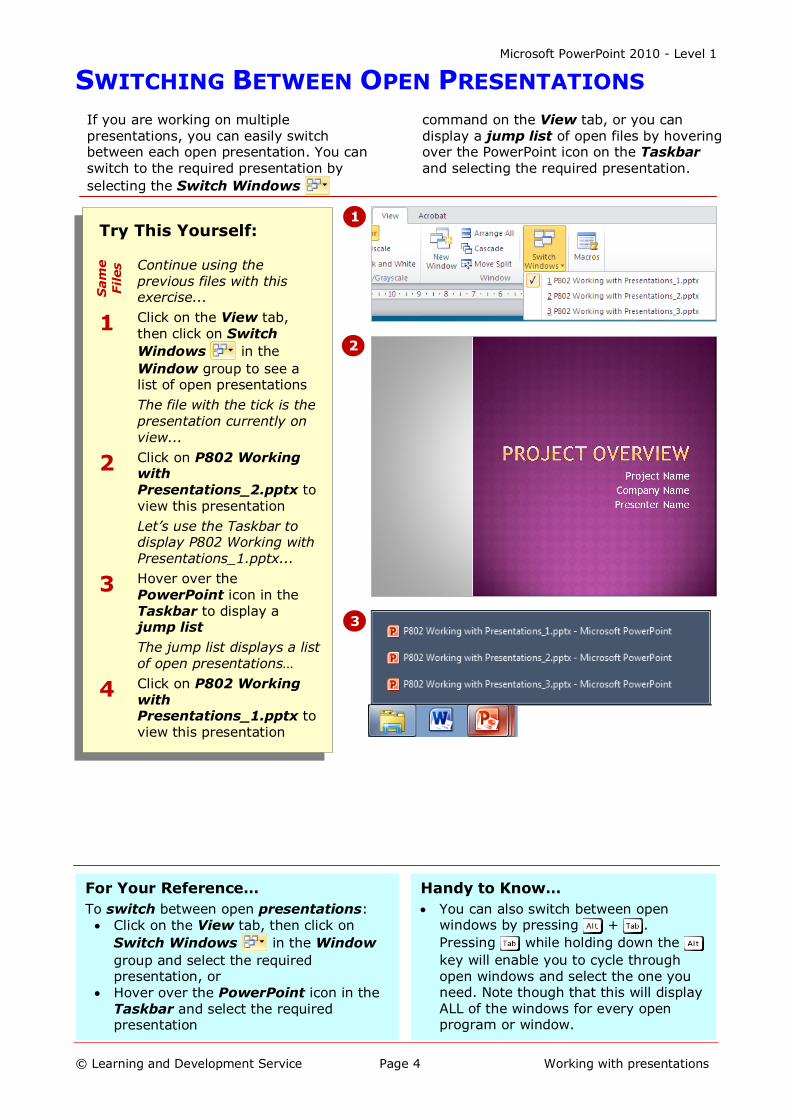
Continue using the previous files with this exercise...
1 Click on the View tab, then click on Switch
Windows in the
Window group to see a list of open presentations
The file with the tick is the presentation currently on view...
2 Click on P802 Working with Presentations_2.pptx to view this presentation
Let’s use the Taskbar to display P802 Working with Presentations_1.pptx...
3 Hover over the PowerPoint icon in the Taskbar to display a jump list
The jump list displays a list of open presentations…
4 Click on P802 Working with Presentations_1.pptx to view this presentation
For Your Reference…
To switch between open presentations: Click on the View tab, then click on
Switch Windows in the Window
group and select the required presentation, or
Hover over the PowerPoint icon in the Taskbar and select the required presentation
Handy to Know…
You can also switch between open windows by pressing + .
Pressing while holding down the
key will enable you to cycle through open windows and select the one you need. Note though that this will display ALL of the windows for every open program or window.
1
2
If you are working on multiple presentations, you can easily switch between each open presentation. You can switch to the required presentation by
selecting the Switch Windows
command on the View tab, or you can display a jump list of open files by hovering over the PowerPoint icon on the Taskbar and selecting the required presentation.
3
Microsoft PowerPoint 2010 - Level 1
© Learning and Development Service Page 5 Working with presentations
UNDERSTANDING POWERPOINT VIEWS
1
PowerPoint has four main views: Normal view, Slide Sorter view, Slide Show view and Reading view. Normal is the main editing view for designing and writing your
presentation. Slide Sorter displays your
slides as thumbnails. Slide Show is a full-screen slide show. Reading allows you to view your presentation as a slide show but with access to other open windows.
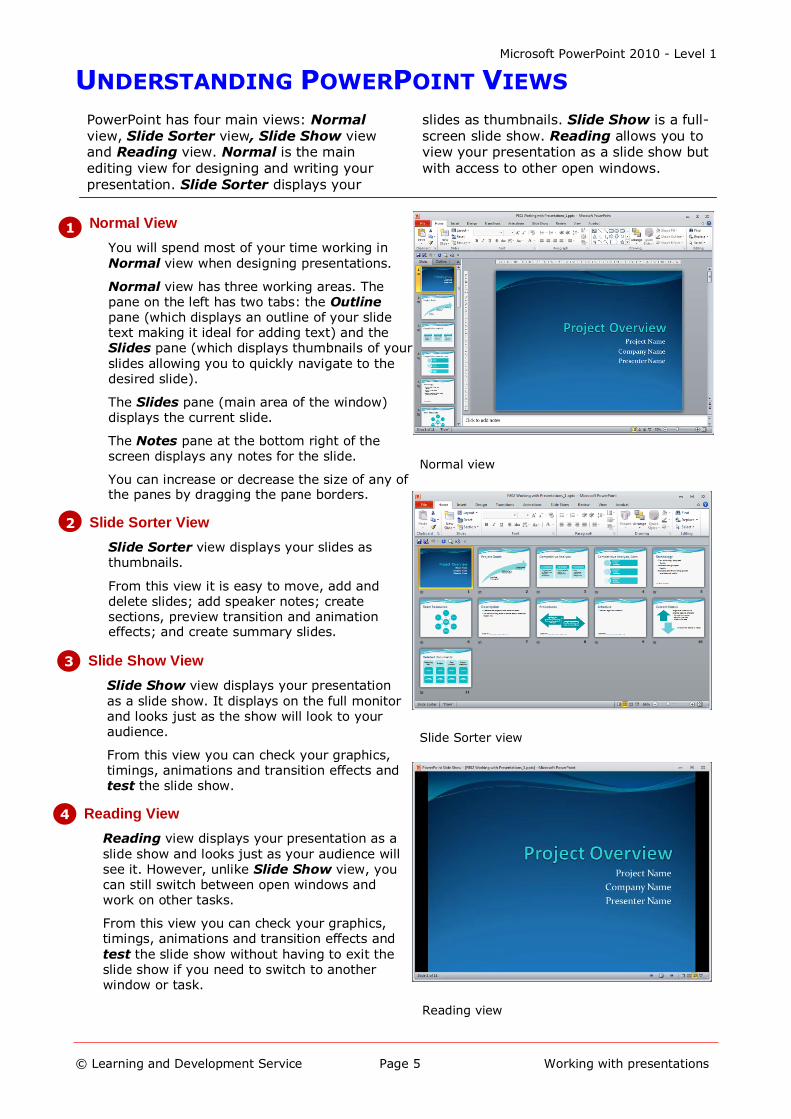
Normal View
You will spend most of your time working in
Normal view when designing presentations.
Normal view has three working areas. The pane on the left has two tabs: the Outline pane (which displays an outline of your slide text making it ideal for adding text) and the Slides pane (which displays thumbnails of your
slides allowing you to quickly navigate to the desired slide).
The Slides pane (main area of the window) displays the current slide.
The Notes pane at the bottom right of the screen displays any notes for the slide.
You can increase or decrease the size of any of the panes by dragging the pane borders.
2
Normal view
Slide Sorter view
Reading view
Slide Sorter View
Slide Sorter view displays your slides as thumbnails.
From this view it is easy to move, add and delete slides; add speaker notes; create sections, preview transition and animation effects; and create summary slides.
Slide Show View
Slide Show view displays your presentation
as a slide show. It displays on the full monitor and looks just as the show will look to your audience.
From this view you can check your graphics, timings, animations and transition effects and test the slide show.
Reading View
Reading view displays your presentation as a
slide show and looks just as your audience will see it. However, unlike Slide Show view, you can still switch between open windows and work on other tasks.
From this view you can check your graphics, timings, animations and transition effects and
test the slide show without having to exit the slide show if you need to switch to another window or task.
3
4
Microsoft PowerPoint 2010 - Level 1
© Learning and Development Service Page 6 Working with presentations
CHANGING PRESENTATION VIEWS
For Your Reference…
To change presentation views:
Click on a view tool on the Status bar, or
Click on a view tool on the Presentation Views group on the View tab, or
Click on the Outline or Slides tabs in the
left pane in Normal view to display Outline
or Slides view
Handy to Know…
Another view available in the Presentation Views group on the View tab is Notes Page. This displays a single
slide at the top of a page with room for notes on the lower half of the page. This
is ideal if you have lots of notes to include that would be difficult to add in the Notes pane of the Normal view.
PowerPoint provides several different ways to view your presentation, depending on the task at hand. The default view is Normal view, and you will spend most of
your time creating your presentations in
this view. However, sometimes you may find it easier to work in Slide Sorter view, or, when you’re ready to test or deliver your slide show, in either Reading or Slide
Show view.
1
2
Try This Yourself:
Sam
e
Fil
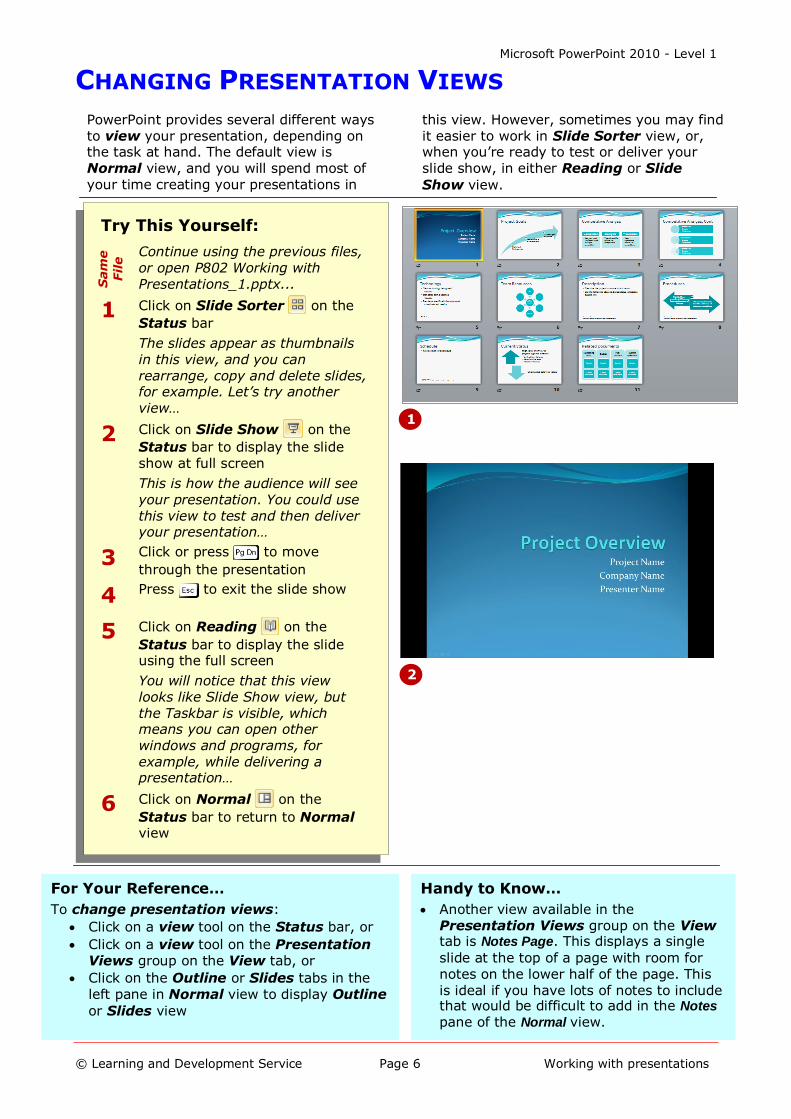
e Continue using the previous files,
or open P802 Working with Presentations_1.pptx...
1 Click on Slide Sorter on the
Status bar
The slides appear as thumbnails in this view, and you can rearrange, copy and delete slides, for example. Let’s try another
view…
2 Click on Slide Show on the
Status bar to display the slide show at full screen
This is how the audience will see your presentation. You could use this view to test and then deliver your presentation…
3 Click or press to move
through the presentation
4 Press to exit the slide show
5 Click on Reading on the
Status bar to display the slide using the full screen
You will notice that this view looks like Slide Show view, but the Taskbar is visible, which means you can open other windows and programs, for
example, while delivering a presentation…
6 Click on Normal on the
Status bar to return to Normal view
Microsoft PowerPoint 2010 - Level 1
© Learning and Development Service Page 7 Working with presentations
NAVIGATING A PRESENTATION
Try This Yourself:
Sam
e F
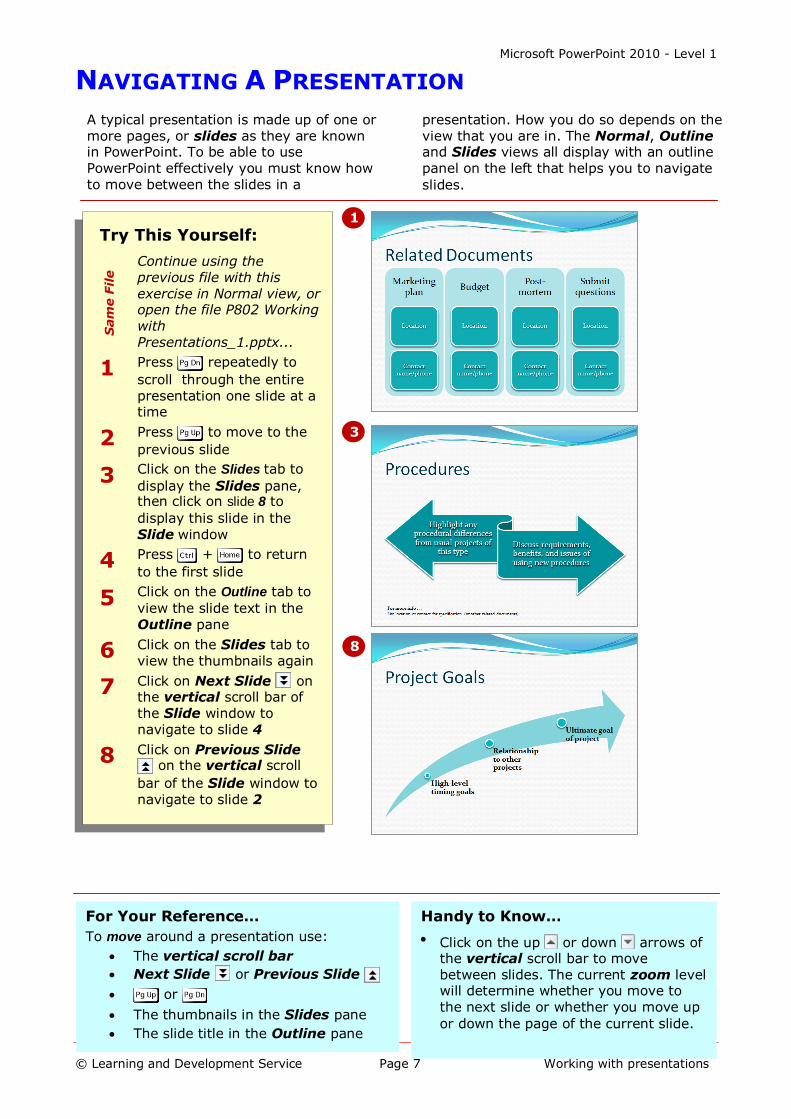
ile Continue using the
previous file with this
exercise in Normal view, or open the file P802 Working with Presentations_1.pptx...
1 Press repeatedly to
scroll through the entire presentation one slide at a time
2 Press to move to the
previous slide
3 Click on the Slides tab to
display the Slides pane, then click on slide 8 to
display this slide in the
Slide window
4 Press + to return
to the first slide
5 Click on the Outline tab to
view the slide text in the Outline pane
6 Click on the Slides tab to view the thumbnails again
7 Click on Next Slide on the vertical scroll bar of the Slide window to navigate to slide 4
8 Click on Previous Slide on the vertical scroll
bar of the Slide window to navigate to slide 2
For Your Reference…
To move around a presentation use:
The vertical scroll bar
Next Slide or Previous Slide
or
The thumbnails in the Slides pane
The slide title in the Outline pane
Handy to Know…
Click on the up or down arrows of the vertical scroll bar to move between slides. The current zoom level will determine whether you move to the next slide or whether you move up
or down the page of the current slide.
A typical presentation is made up of one or more pages, or slides as they are known in PowerPoint. To be able to use PowerPoint effectively you must know how
to move between the slides in a
presentation. How you do so depends on the view that you are in. The Normal, Outline and Slides views all display with an outline panel on the left that helps you to navigate
slides.
1
3
8
Microsoft PowerPoint 2010 - Level 1
© Learning and Development Service Page 8 Working with presentations
USING THE ZOOM TOOL
For Your Reference…
To use the Zoom tool: 1. Click on a slide 2. Click on the View tab, then click on
Zoom
3. Select the desired percentage
4. Click on [OK]
Handy to Know…
You can display the Slides or Outline panes at a maximum zoom level of
100%.
1
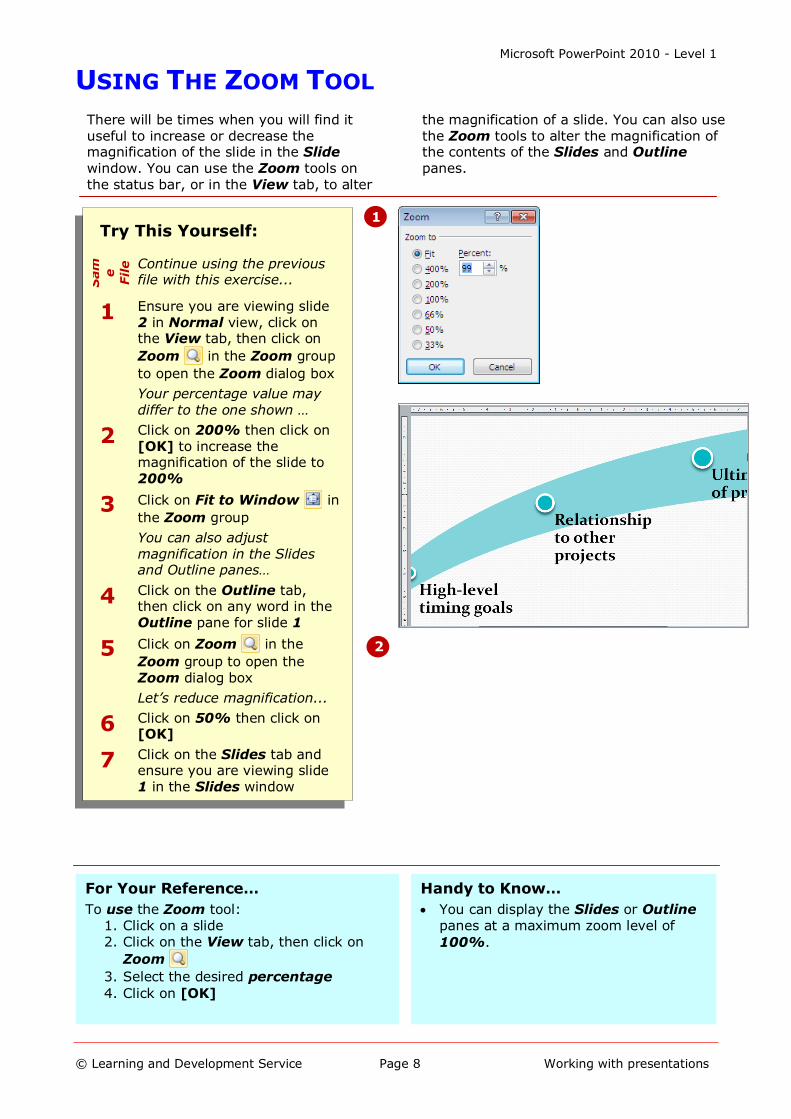
There will be times when you will find it useful to increase or decrease the magnification of the slide in the Slide window. You can use the Zoom tools on
the status bar, or in the View tab, to alter
the magnification of a slide. You can also use the Zoom tools to alter the magnification of the contents of the Slides and Outline panes.
2
Try This Yourself:
Sam
e
Fil
e
Continue using the previous file with this exercise...
1 Ensure you are viewing slide 2 in Normal view, click on the View tab, then click on
Zoom in the Zoom group
to open the Zoom dialog box
Your percentage value may
differ to the one shown …
2 Click on 200% then click on [OK] to increase the magnification of the slide to 200%
3 Click on Fit to Window in
the Zoom group
You can also adjust magnification in the Slides and Outline panes…
4 Click on the Outline tab, then click on any word in the Outline pane for slide 1
5 Click on Zoom in the
Zoom group to open the Zoom dialog box
Let’s reduce magnification...
6 Click on 50% then click on [OK]
7 Click on the Slides tab and ensure you are viewing slide 1 in the Slides window
Microsoft PowerPoint 2010 - Level 1
© Learning and Development Service Page 9 Working with presentations
CLOSING A PRESENTATION
Try This Yourself:
Sam
e
Fil
e Continue using the
previous files with this
exercise...
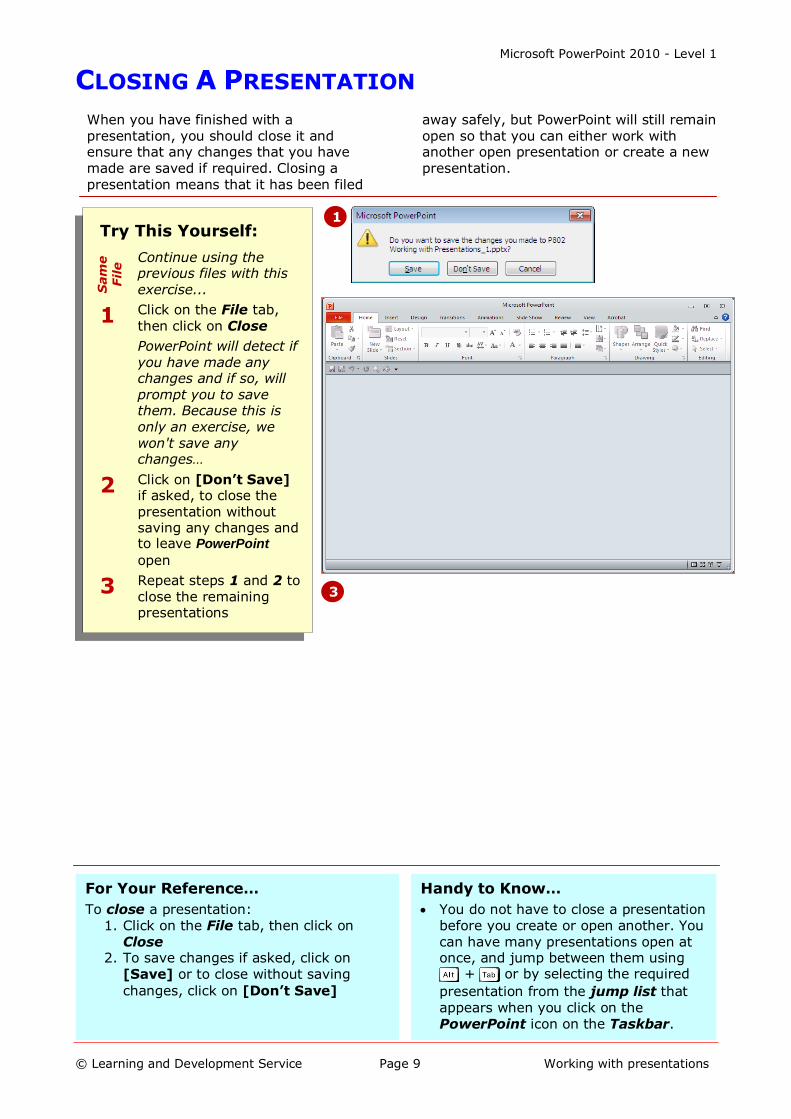
1 Click on the File tab, then click on Close
PowerPoint will detect if you have made any changes and if so, will prompt you to save them. Because this is only an exercise, we won't save any changes…
2 Click on [Don’t Save] if asked, to close the presentation without saving any changes and to leave PowerPoint
open
3 Repeat steps 1 and 2 to close the remaining presentations
For Your Reference…
To close a presentation: 1. Click on the File tab, then click on
Close 2. To save changes if asked, click on
[Save] or to close without saving
changes, click on [Don’t Save]
Handy to Know…
You do not have to close a presentation before you create or open another. You can have many presentations open at once, and jump between them using
+ or by selecting the required
presentation from the jump list that appears when you click on the PowerPoint icon on the Taskbar.
1
When you have finished with a presentation, you should close it and ensure that any changes that you have made are saved if required. Closing a
presentation means that it has been filed
away safely, but PowerPoint will still remain open so that you can either work with another open presentation or create a new presentation.
3

Microsoft PowerPoint 2010 - Level 1
© Learning and Development Service Page 10 Working with presentations
OPENING A RECENT PRESENTATION
Try This Yourself:
Before starting this exercise ensure that
PowerPoint has started and that you have completed the earlier topics in this chapter ...
1 Click on the File tab to display Backstage view
The most recently-opened presentations will be listed under Recent...
2 Click on Recent to display a list of recently-opened files
3 Click on P802 Working
with Presentations_2.pptx to open this presentation
4 Click on the File tab, then click on Close to close the presentation
For Your Reference…
To open a recent presentation: 1. Click on the File tab, then click on
Recent 2. Click on the required presentation in
the Recent pane
Handy to Know…
The Recent pane also displays a list of Recent Locations. This is a list of file locations, such as folders, that you have recently opened PowerPoint files from.
Press + to open Backstage
view.
One of the most time-consuming tasks you face when using your computer is navigating to and locating the files that you are currently working on. Microsoft
aims to save you time looking for files by
keeping a list of the files that you have recently worked on. In this exercise, you’ll re-open a recently-opened presentation without having to go hunting through the
folders.
2
3

Microsoft PowerPoint 2010 - Level 1
© Learning and Development Service Page 11 Working with presentations
CONCLUDING REMARKS
Congratulations!
You have now completed the Working with presentations booklet. This booklet was designed to get you to the point where you can competently perform a variety of operations as outlined in the task list on page 2.
We have tried to build up your skills and knowledge by having you work through specific tasks. The step by step approach will serve as a reference for you when you need to repeat a task.
Where To From Here…
The following is a little advice about what to do next:
Spend some time playing with what you have learnt. You should reinforce the skills that you have acquired and use some of the application's commands. This will test just how much of the concepts and features have stuck! Don't try a big task just yet if you can avoid it - small is a good way to start.
Some aspects of the course may now be a little vague. Go over some of the points that you may be unclear about. Use the examples and exercises in these notes and have another go - these step-by-step notes were designed to help you in the
classroom and in the work place!
Here are a few techniques and strategies that we've found handy for learning more about technology:
visit CLD’s e-learning zone on the Intranet
read computer magazines - there are often useful articles about specific techniques
if you have the skills and facilities, browse the Internet, specifically the technical
pages of the application that you have just learnt
take an interest in what your work colleagues have done and how they did it - we don't suggest that you plagiarise but you can certainly learn from the techniques of others
if your software came with a manual (which is rare nowadays) spend a bit of time each day reading a few pages. Then try the techniques out straight away - over a period of time you'll learn a lot this way
and of course, there are also more courses and booklets for you to work through
finally, don’t forget to contact CLD’s IT Training Helpdesk on 01243-752100