Embed Size (px)
Citation preview

That’s a good question. Keep reading to learn more …
Microsoft PowerPoint 2007 Tutorial
CIS*1000*DE
Introduction
• PowerPoint is a presentation tool in which the presentation is displayed as a slide show.
• Finished presentations can be shown as:• As slides in slide projector
• As overheads on an overhead projector
• As a web page
• From a screen projector linked to a computer
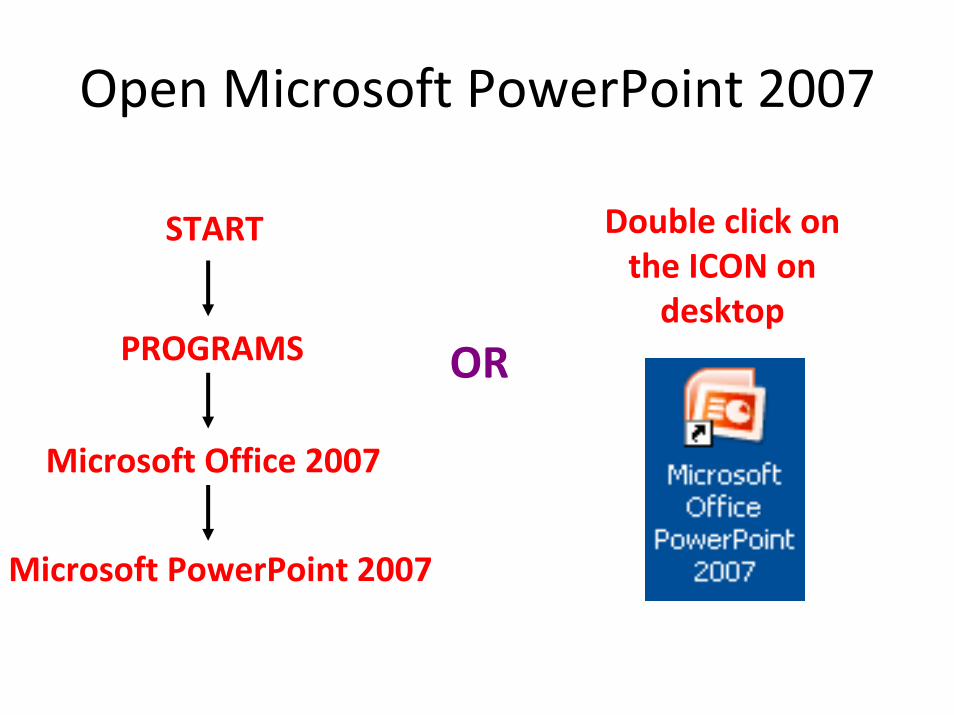
Open Microsoft PowerPoint 2007
START
PROGRAMS
Double click on the ICON on desktop
OR
Microsoft Office 2007
Microsoft PowerPoint 2007
Creating A New Presentation
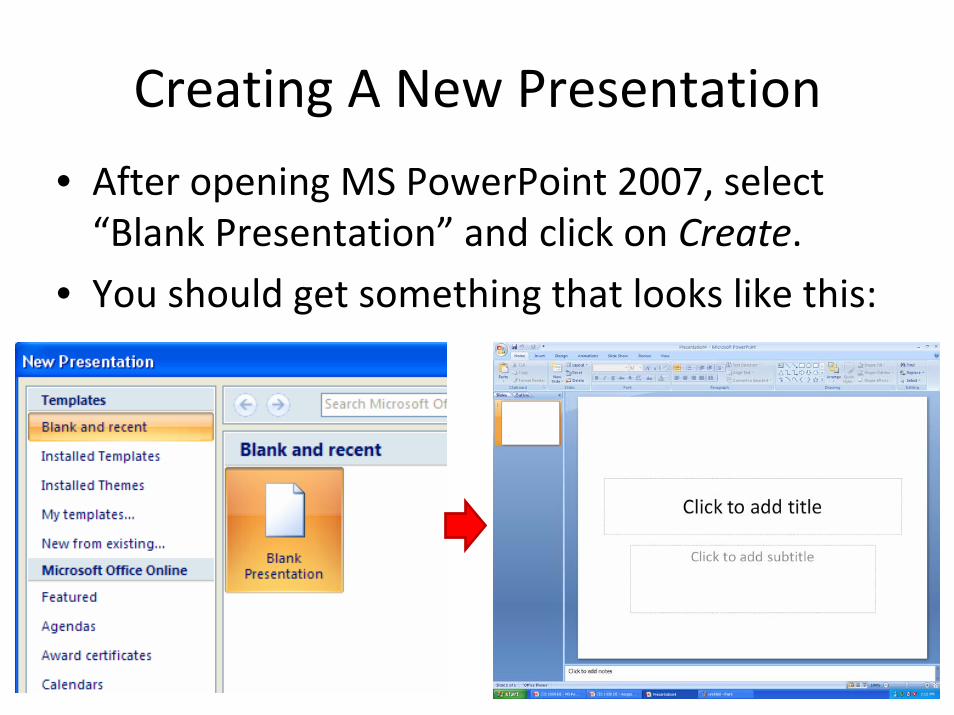
• After opening MS PowerPoint 2007, select “Blank Presentation” and click on Create.
• You should get something that looks like this:
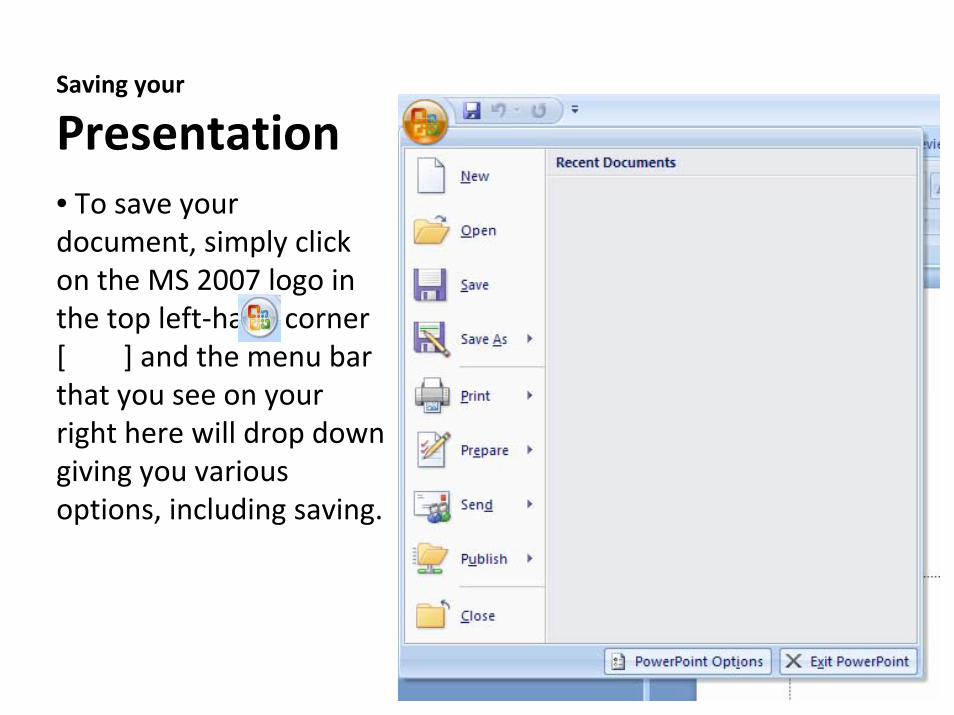
Saving your
Presentation• To save your document, simply click on the MS 2007 logo in the top left‐hand corner [ ] and the menu bar that you see on your right here will drop down giving you various options, including saving.
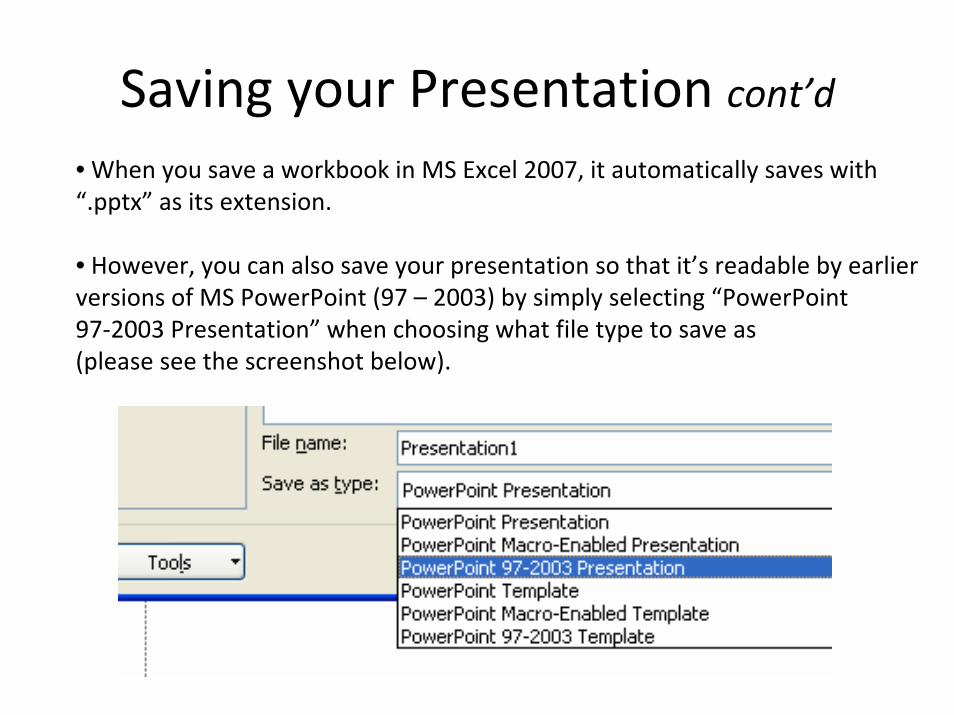
Saving your Presentation cont’d• When you save a workbook in MS Excel 2007, it automatically saves with “.pptx” as its extension.
• However, you can also save your presentation so that it’s readable by earlier versions of MS PowerPoint (97 – 2003) by simply selecting “PowerPoint 97‐2003 Presentation” when choosing what file type to save as (please see the screenshot below).
Getting Help in MS PowerPoint 2007
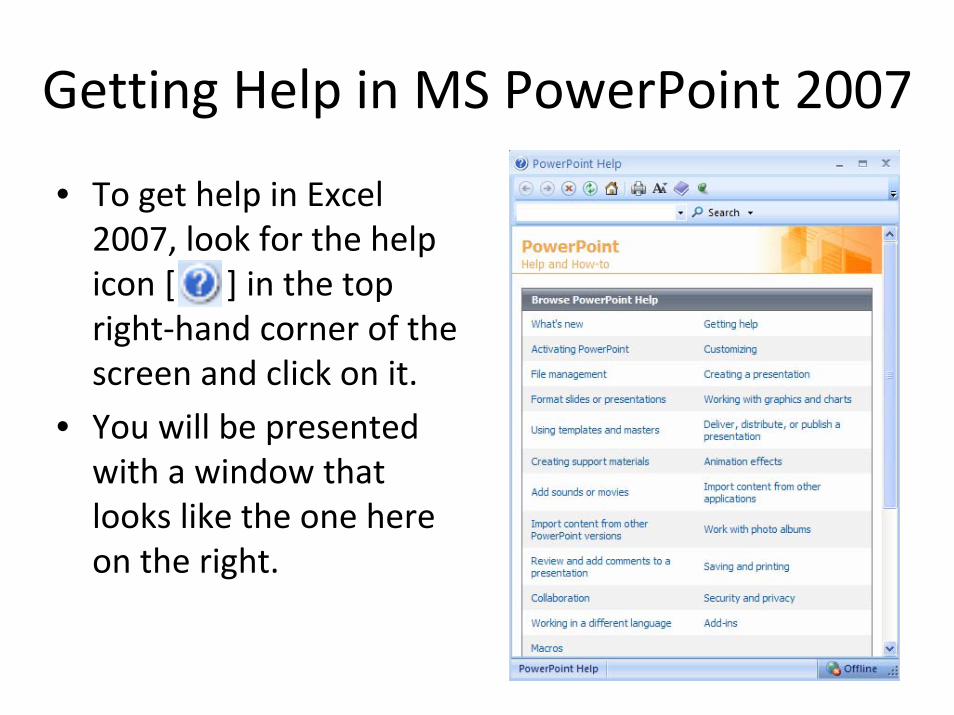
• To get help in Excel 2007, look for the help icon [ ] in the top right‐hand corner of the screen and click on it.
• You will be presented with a window that looks like the one here on the right.
The Slide Master
• On the master slide you can set the default “look” for each slide.– NOTE, the slide master is different than a theme in the sense that the
slide master is used to add default content (which can include background pictures) to your presentation and a theme is used to add a default art style to your presentation.
• All objects that you place on the master slide will be placed oneach slide.
• The master slide contains placeholders that can be formatted. • You can set the attributes for the text (Size, Weight, Font) and
you can also set the background images and background colour.
• You can also set the style of bullets to be used.
The Slide Master cont’d
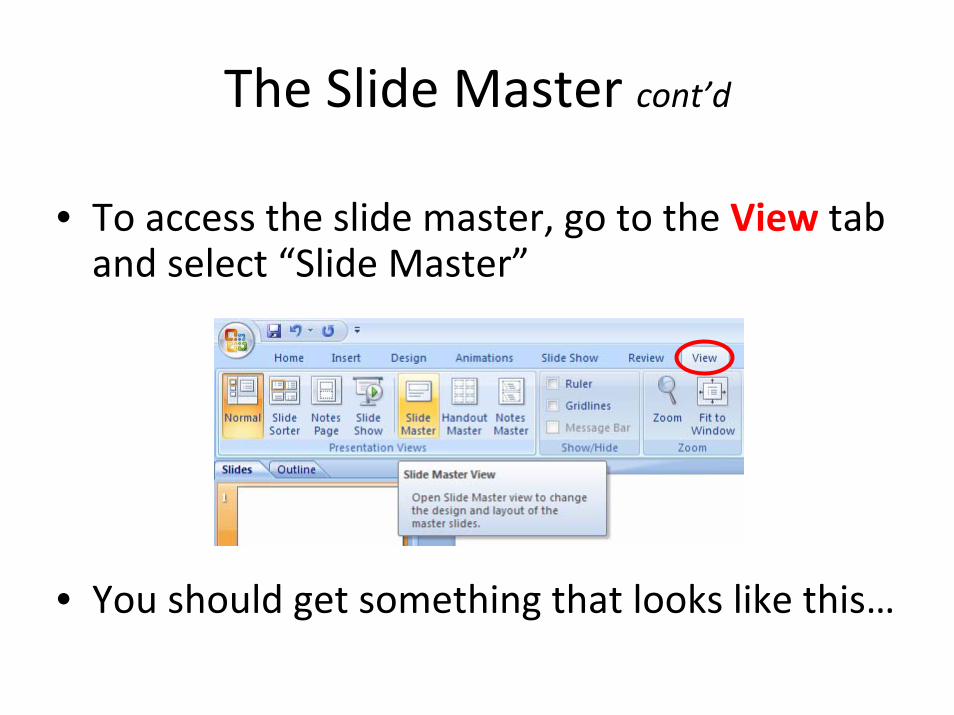
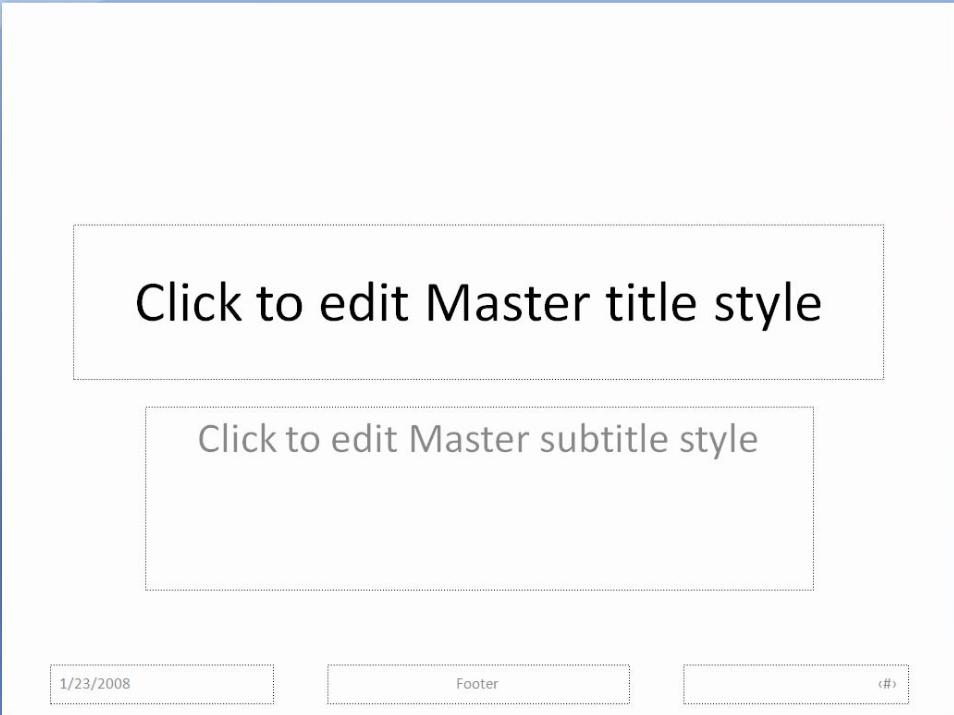
• To access the slide master, go to the View tab and select “Slide Master”
• You should get something that looks like this…
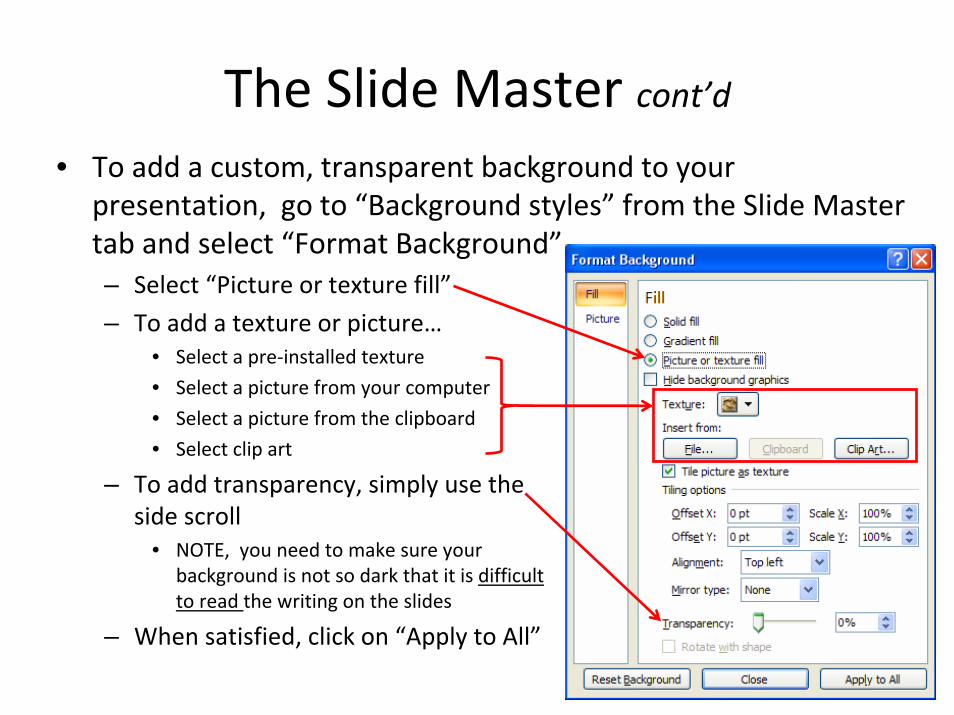
The Slide Master cont’d• To add a custom, transparent background to your
presentation, go to “Background styles” from the Slide Master tab and select “Format Background”– Select “Picture or texture fill”
– To add a texture or picture…• Select a pre‐installed texture
• Select a picture from your computer
• Select a picture from the clipboard
• Select clip art
– To add transparency, simply use the side scroll
• NOTE, you need to make sure your background is not so dark that it is difficult to read the writing on the slides
– When satisfied, click on “Apply to All”
Inserting a Slide
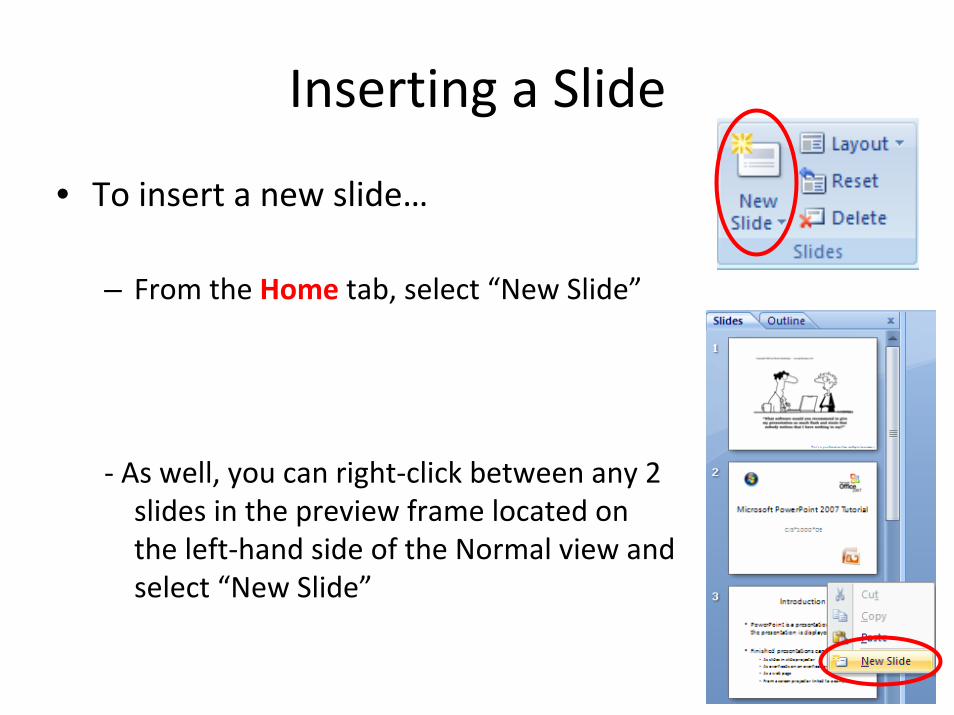
• To insert a new slide…
– From the Home tab, select “New Slide”
‐ As well, you can right‐click between any 2 slides in the preview frame located on the left‐hand side of the Normal view and select “New Slide”
Deleting a Slide
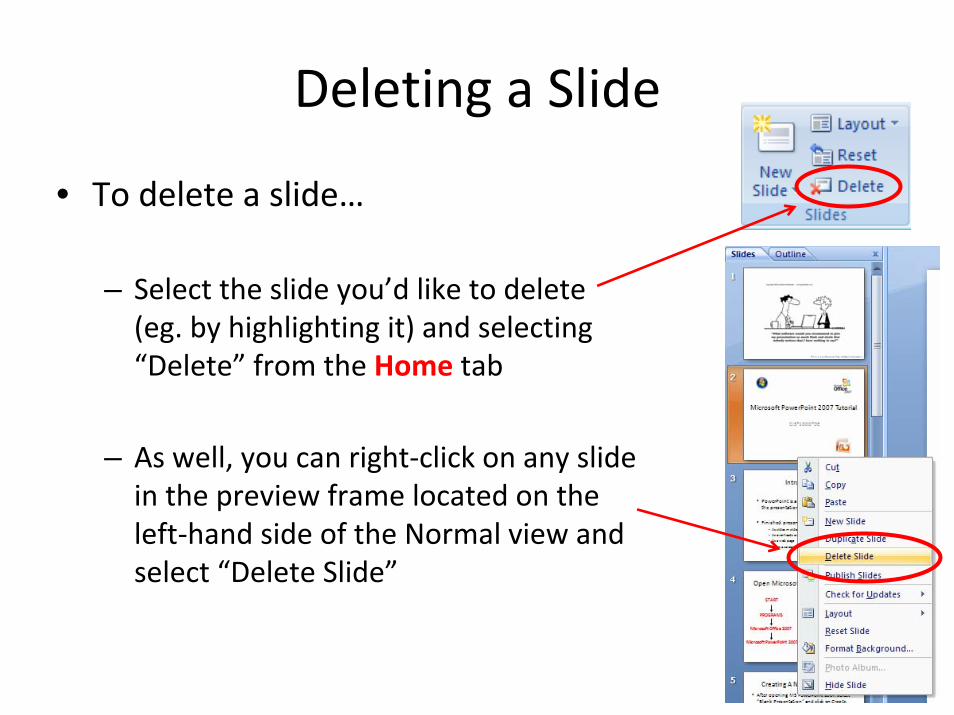
• To delete a slide…
– Select the slide you’d like to delete (eg. by highlighting it) and selecting “Delete” from the Home tab
– As well, you can right‐click on any slide in the preview frame located on the left‐hand side of the Normal view and select “Delete Slide”

Inserting Pictures
• To insert pictures…– From the Insert tab you can insert pictures from your computer, clip art, shapes, etc…
– Also, when you have a blank slide (or parts of a blank slide), you can also click on options within these blank compartments to insert pictures
Inserting Charts
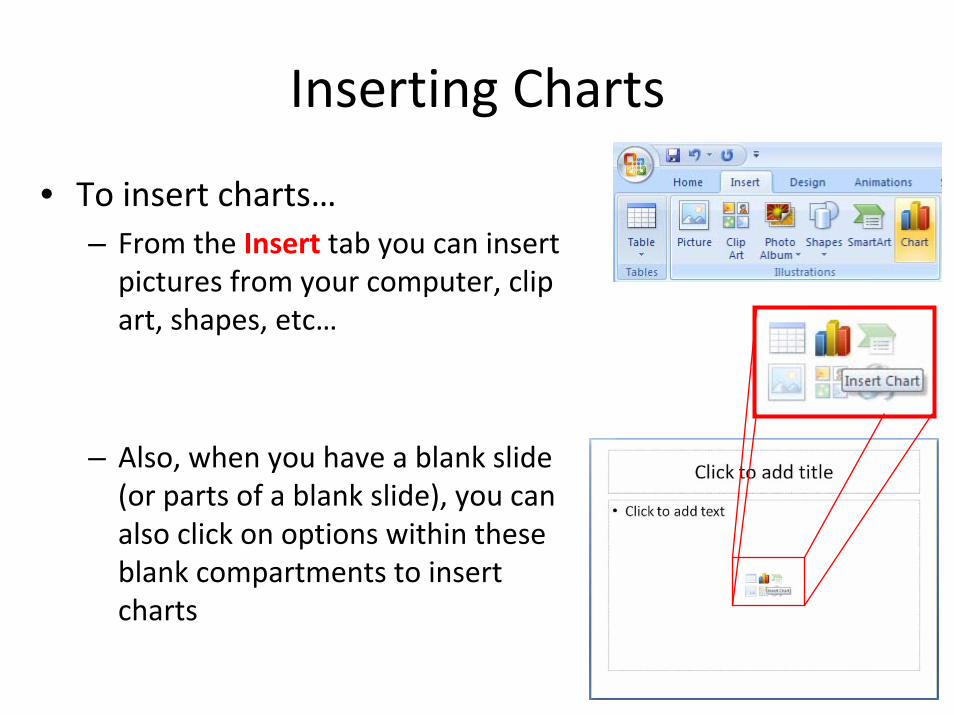
• To insert charts…– From the Insert tab you can insert pictures from your computer, clip art, shapes, etc…
– Also, when you have a blank slide (or parts of a blank slide), you can also click on options within these blank compartments to insert charts
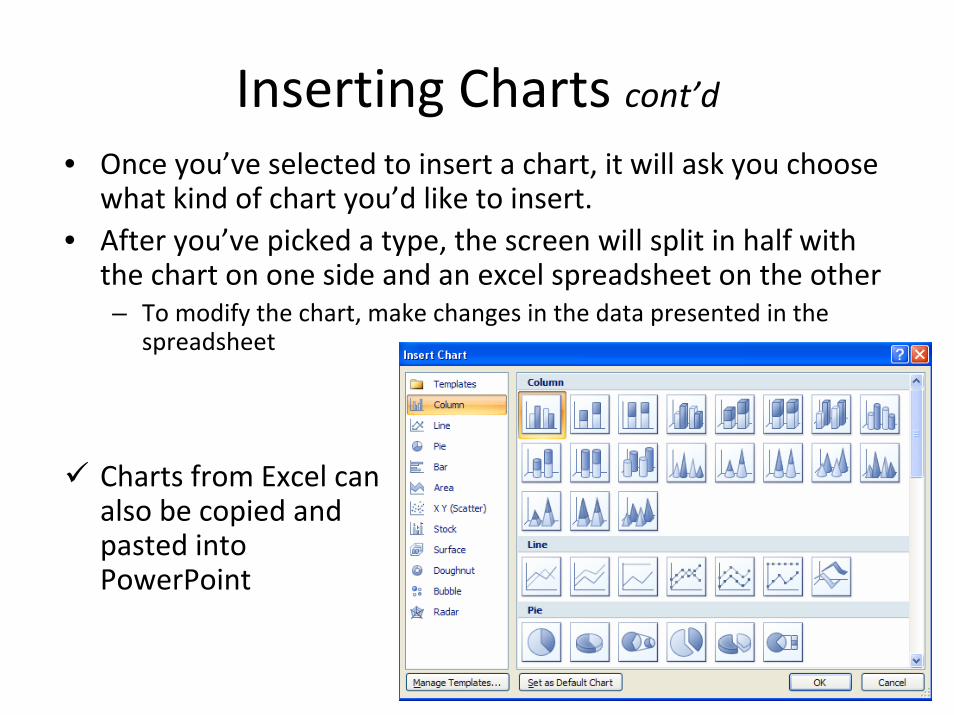
Inserting Charts cont’d• Once you’ve selected to insert a chart, it will ask you choose
what kind of chart you’d like to insert.• After you’ve picked a type, the screen will split in half with
the chart on one side and an excel spreadsheet on the other– To modify the chart, make changes in the data presented in the
spreadsheet
Charts from Excel can also be copied and pasted into PowerPoint

Inserting Tables• To insert a table…
– From the Insert tab, select “Table” and a box will drop down giving you more options for inserting a table.
– Also, when you have a blank slide (or parts of a blank slide), you can also click on options w/n these blank compartments to insert tables
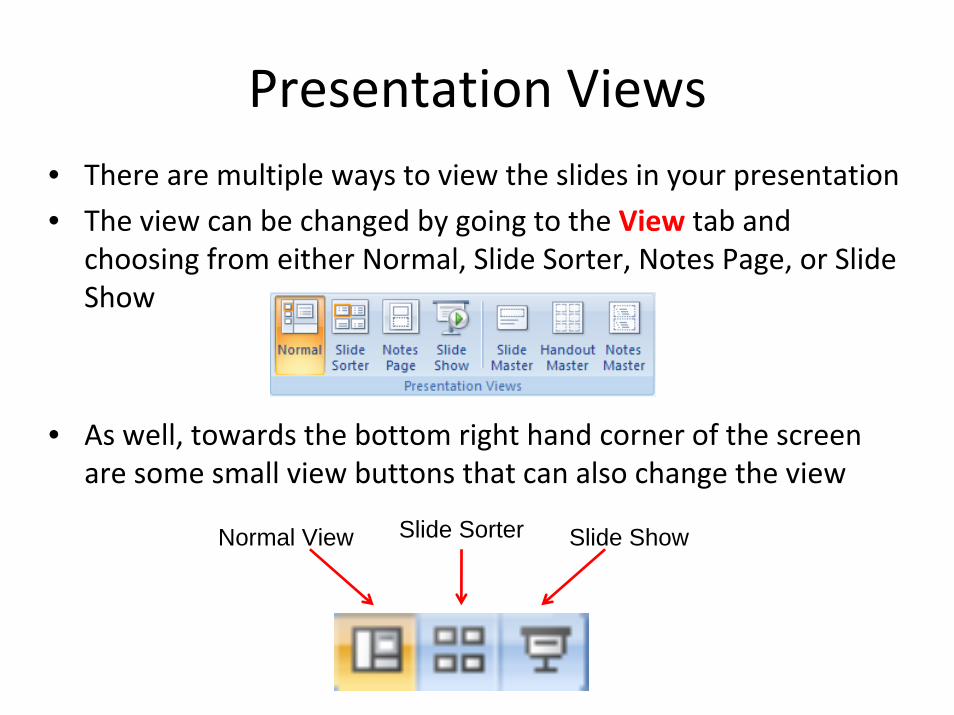
Presentation Views• There are multiple ways to view the slides in your presentation
• The view can be changed by going to the View tab and choosing from either Normal, Slide Sorter, Notes Page, or Slide Show
• As well, towards the bottom right hand corner of the screen are some small view buttons that can also change the view
Slide Sorter Slide ShowNormal View
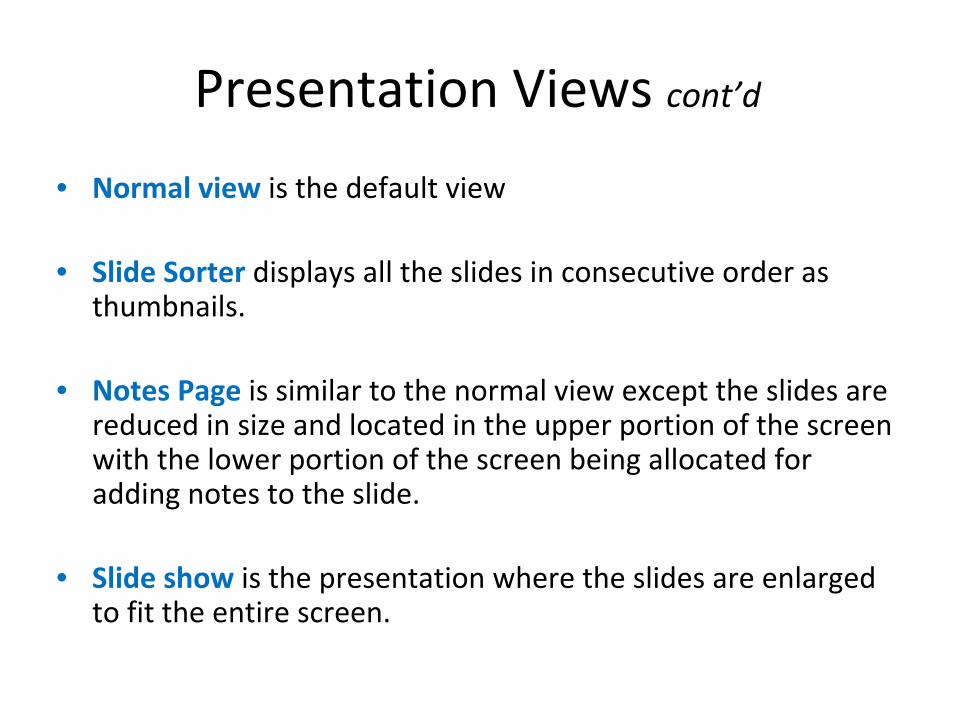
Presentation Views cont’d
• Normal view is the default view
• Slide Sorter displays all the slides in consecutive order as thumbnails.
• Notes Page is similar to the normal view except the slides are reduced in size and located in the upper portion of the screen with the lower portion of the screen being allocated for adding notes to the slide.
• Slide show is the presentation where the slides are enlarged to fit the entire screen.
Animations• All sorts Animation Effects can be added to your slides and the best way to find out what works best for your presentation is to play around and experiment with all the different options.
• But first, a cautionary note. Many bad presentations will overly rely on animations (and other stylistic effects) to keep the audience interested (probably because the presentation itself was less than riveting). The best presentations are the ones that effectively use animations as an aid in presenting information, rather than distracting from it. In short, a good rule of thumb to remember would be “Less is more.”
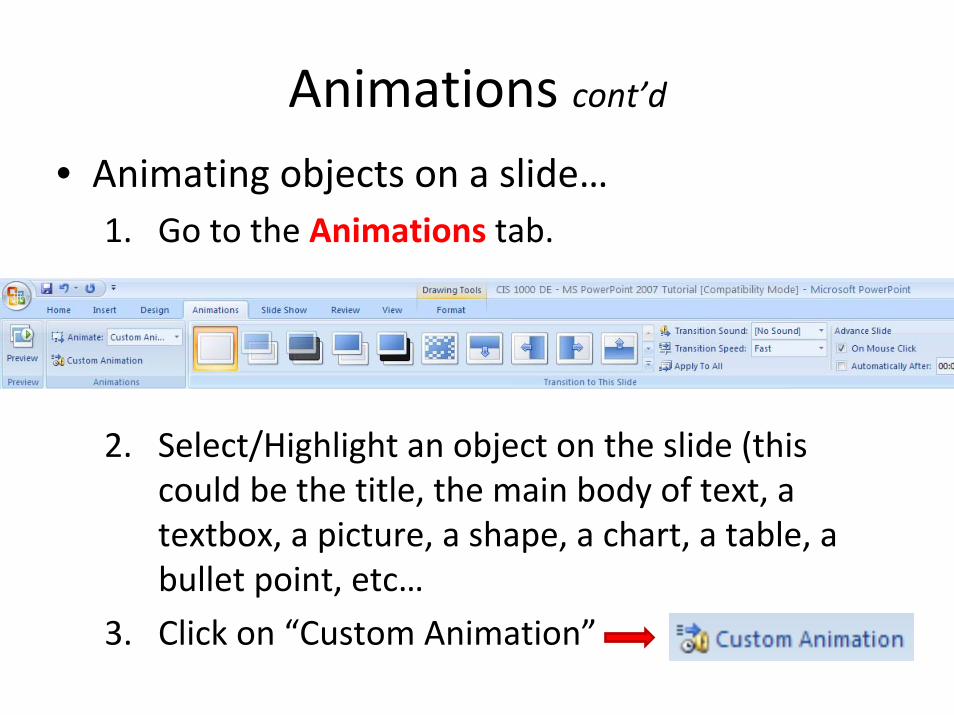
Animations cont’d• Animating objects on a slide…
1. Go to the Animations tab.
2. Select/Highlight an object on the slide (this could be the title, the main body of text, a textbox, a picture, a shape, a chart, a table, a bullet point, etc…
3. Click on “Custom Animation”
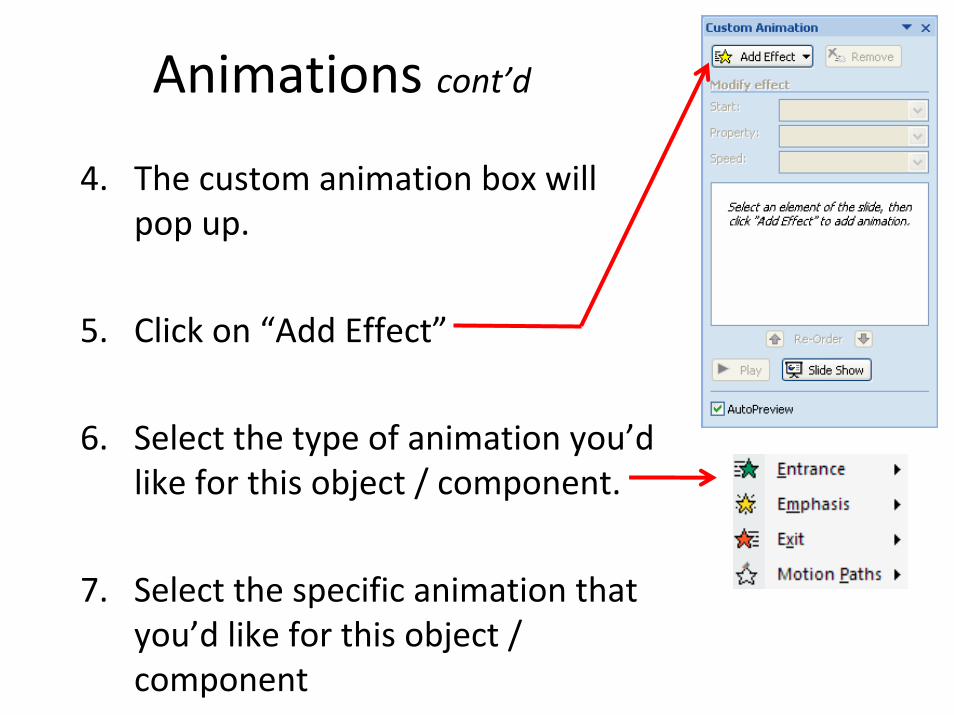
Animations cont’d
4. The custom animation box will pop up.
5. Click on “Add Effect”
6. Select the type of animation you’d like for this object / component.
7. Select the specific animation that you’d like for this object / component
+
=
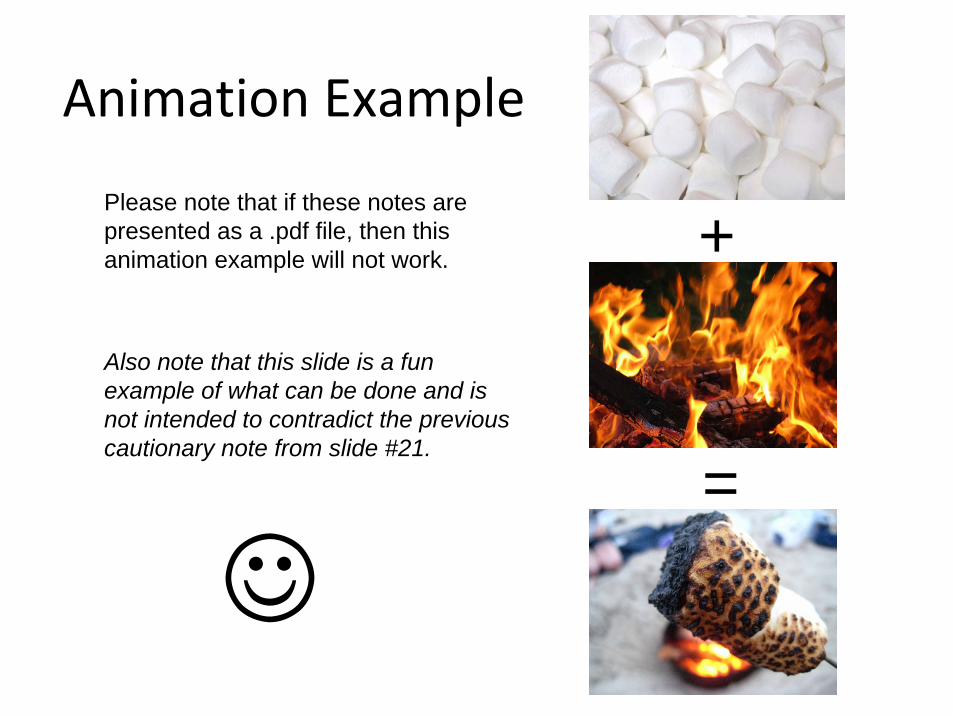
Please note that if these notes are presented as a .pdf file, then this animation example will not work.
Animation Example
☺
Also note that this slide is a fun example of what can be done and is not intended to contradict the previous cautionary note from slide #21.
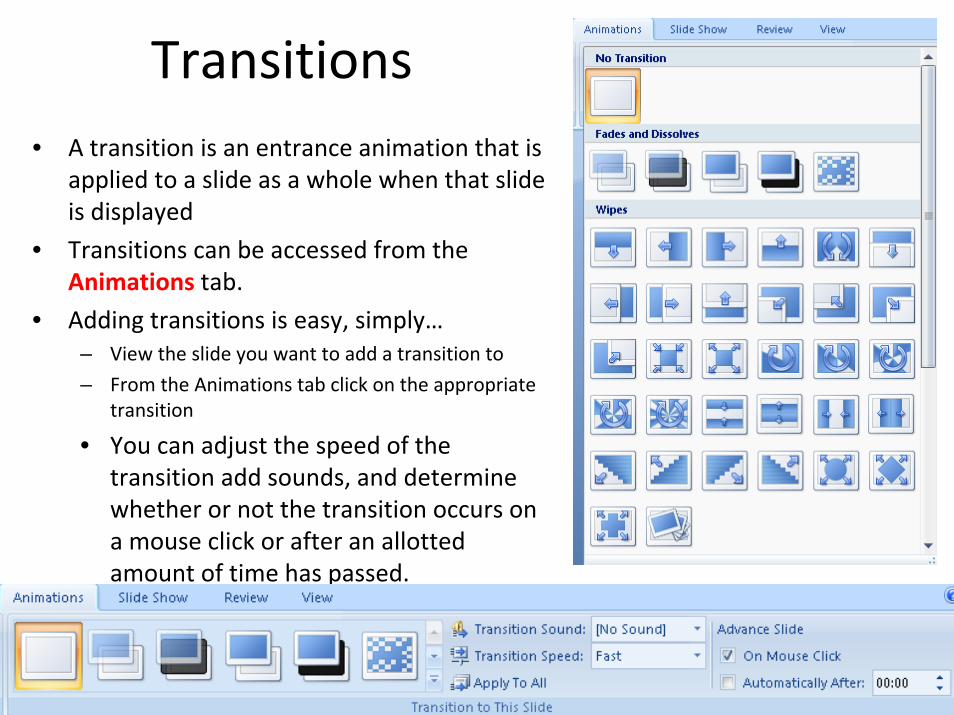
Transitions• A transition is an entrance animation that is
applied to a slide as a whole when that slide is displayed
• Transitions can be accessed from the Animations tab.
• Adding transitions is easy, simply…– View the slide you want to add a transition to
– From the Animations tab click on the appropriate transition
• You can adjust the speed of the transition add sounds, and determine whether or not the transition occurs on a mouse click or after an allotted amount of time has passed.
Final Notes
• Practise, Practise, Practise!!!
• If you have any problems post in the forum


![(5) C n & Excel Excel 7 v) Excel Excel 7 )Þ77 Excel Excel ... · (5) C n & Excel Excel 7 v) Excel Excel 7 )Þ77 Excel Excel Excel 3 97 l) 70 1900 r-kž 1937 (filllß)_] 136.8cm 136.8cm](https://img.pdfslide.us/doc/110x75/5f71a890b98d435cfa116d55/5-c-n-excel-excel-7-v-excel-excel-7-77-excel-excel-5-c-n-.jpg)