Embed Size (px)
Citation preview
5/13/2018 Mice and Trackballs - slidepdf.com
http://slidepdf.com/reader/full/mice-and-trackballs 1/18
2 S Y S T E M DAT A
AND
T R O UBL E
S H O OT I N G
25MICE AND
TRACKBALLS
As software packages evolved beyond simple menus and began to make use of the pow-
erful graphics systems coming into popular use during the mid-1980s (i.e., EGA and VGA
graphics), ever-larger amounts of information were presented in the display. Simple,
multi-layered text menus were aggressively replaced with striking graphic user interfaces(GUIs). System options and selections were soon represented with symbols (graphic “but-
tons” or “icons”), instead of plain text. Using a keyboard to maneuver through such visual
software soon became a cumbersome (if not impossible) chore.
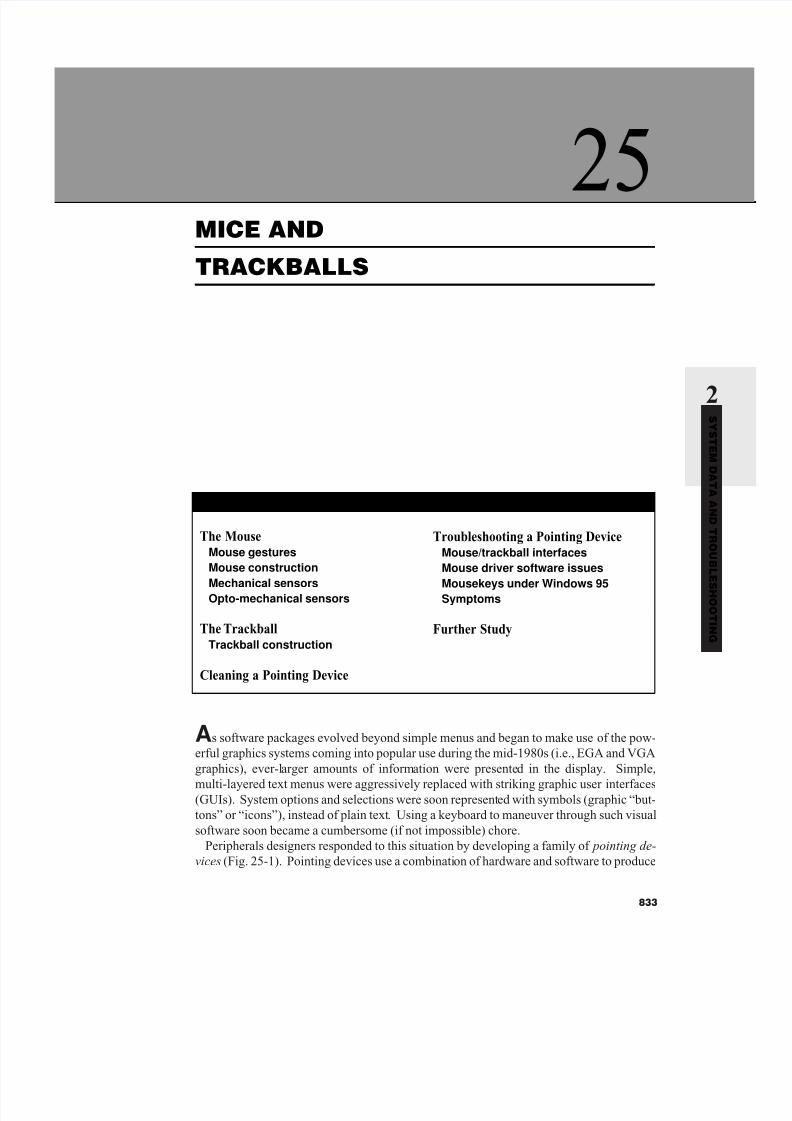
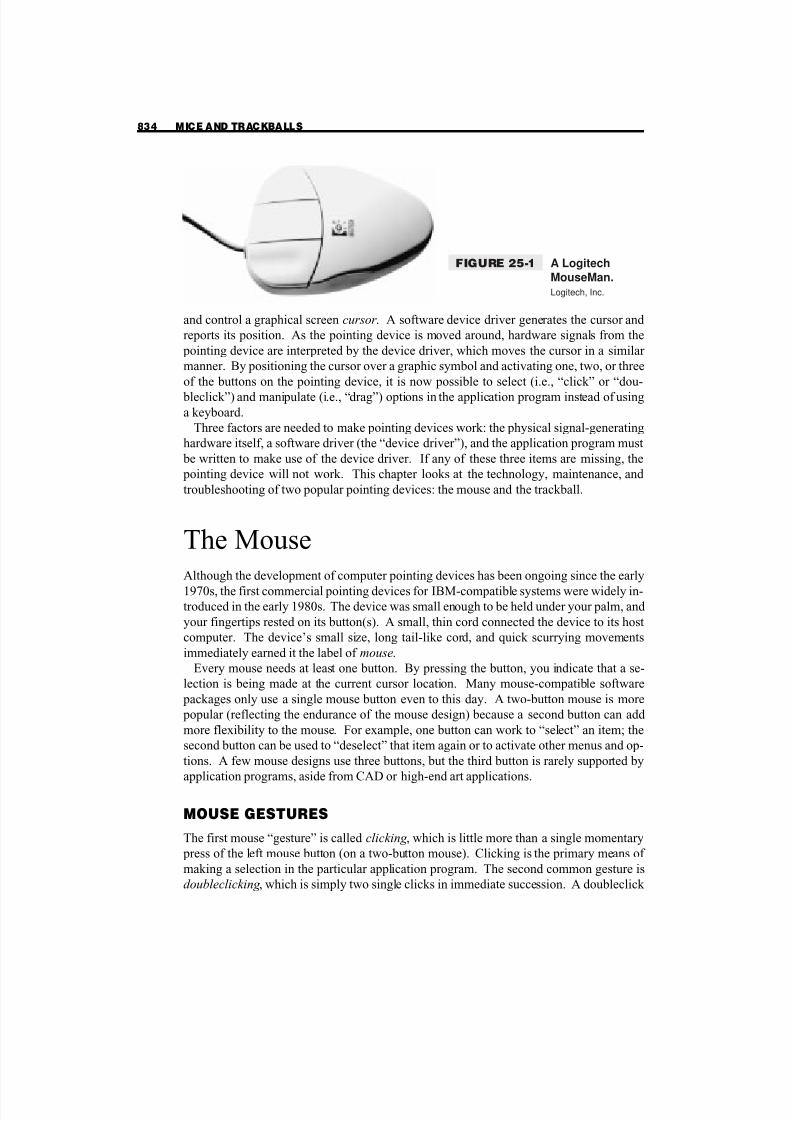
Peripherals designers responded to this situation by developing a family of pointing de-
vices (Fig. 25-1). Pointing devices use a combination of hardware and software to produce
833
CONTENTS AT A GLANCE
The MouseMouse gestures
Mouse construction
Mechanical sensorsOpto-mechanical sensors
The TrackballTrackball construction
Cleaning a Pointing Device
Troubleshooting a Pointing DeviceMouse/trackball interfaces
Mouse driver software issues
Mousekeys under Windows 95Symptoms
Further Study
5/13/2018 Mice and Trackballs - slidepdf.com
http://slidepdf.com/reader/full/mice-and-trackballs 2/18
and control a graphical screen cursor. A software device driver generates the cursor and
reports its position. As the pointing device is moved around, hardware signals from the
pointing device are interpreted by the device driver, which moves the cursor in a similar
manner. By positioning the cursor over a graphic symbol and activating one, two, or three
of the buttons on the pointing device, it is now possible to select (i.e., “click” or “dou-
bleclick”) and manipulate (i.e., “drag”) options in the application program instead of using
a keyboard.
Three factors are needed to make pointing devices work: the physical signal-generating
hardware itself, a software driver (the “device driver”), and the application program must
be written to make use of the device driver. If any of these three items are missing, the
pointing device will not work. This chapter looks at the technology, maintenance, and
troubleshooting of two popular pointing devices: the mouse and the trackball.
The MouseAlthough the development of computer pointing devices has been ongoing since the early
1970s, the first commercial pointing devices for IBM-compatible systems were widely in-troduced in the early 1980s. The device was small enough to be held under your palm, and
your fingertips rested on its button(s). A small, thin cord connected the device to its host
computer. The device’s small size, long tail-like cord, and quick scurrying movements
immediately earned it the label of mouse.
Every mouse needs at least one button. By pressing the button, you indicate that a se-
lection is being made at the current cursor location. Many mouse-compatible software
packages only use a single mouse button even to this day. A two-button mouse is more
popular (reflecting the endurance of the mouse design) because a second button can add
more flexibility to the mouse. For example, one button can work to “select” an item; the
second button can be used to “deselect” that item again or to activate other menus and op-
tions. A few mouse designs use three buttons, but the third button is rarely supported by
application programs, aside from CAD or high-end art applications.
MOUSE GESTURES
The first mouse “gesture” is called clicking , which is little more than a single momentary
press of the left mouse button (on a two-button mouse). Clicking is the primary means of
making a selection in the particular application program. The second common gesture is
doubleclicking , which is simply two single clicks in immediate succession. A doubleclick
834 MICE AND TRACKBALLS
FIGURE 25-1 A Logitech
MouseMan.
Logitech, Inc.
5/13/2018 Mice and Trackballs - slidepdf.com
http://slidepdf.com/reader/full/mice-and-trackballs 3/18
also represents selection, but its exact use depends upon the application program. The
third type of mouse gesture is the drag , where a graphical item can literally be moved around the display. Dragging is almost always accomplished by pressing the left mouse
button over the desired item, then (without releasing the button) moving the item to its new
location. When the item moved to its new position, releasing the left mouse button will
“drop” the item in that location.
It is interesting that pen gestures are interpreted by the computer’s operating system, but
mouse movements and button conditions are handled by the actual application program
(such as a word processor or game). Thus, the same mouse gestures can be made to rep-
resent different actions, depending on which program is executing.
MOUSE CONSTRUCTION
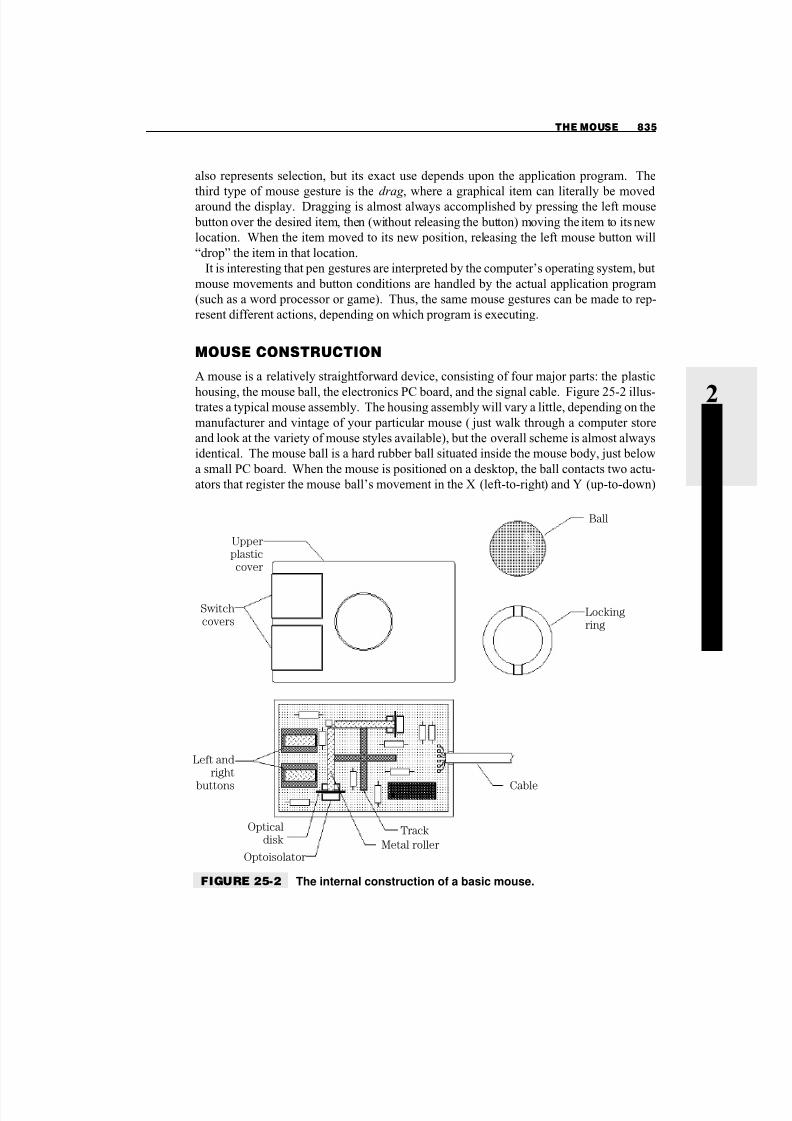
A mouse is a relatively straightforward device, consisting of four major parts: the plastic
housing, the mouse ball, the electronics PC board, and the signal cable. Figure 25-2 illus-trates a typical mouse assembly. The housing assembly will vary a little, depending on the
manufacturer and vintage of your particular mouse ( just walk through a computer store
and look at the variety of mouse styles available), but the overall scheme is almost always
identical. The mouse ball is a hard rubber ball situated inside the mouse body, just below
a small PC board. When the mouse is positioned on a desktop, the ball contacts two actu-
ators that register the mouse ball’s movement in the X (left-to-right) and Y (up-to-down)
THE MOUSE 835
2 S Y S T E M DAT A
AND
T R O UBL E
S H O OT I N G
Cable
Upperplastic
cover
Ball
Locking
ring
Switch
covers
Left and
right
buttons
Track
Metal roller
Optical
disk
Optoisolator
FIGURE 25-2 The internal construction of a basic mouse.
5/13/2018 Mice and Trackballs - slidepdf.com
http://slidepdf.com/reader/full/mice-and-trackballs 4/18
directions. Both sensors generate a series of pulses that represent movement in both axis.
Pulses equate to mouse movement—more pulses mean more movement. The pulses from
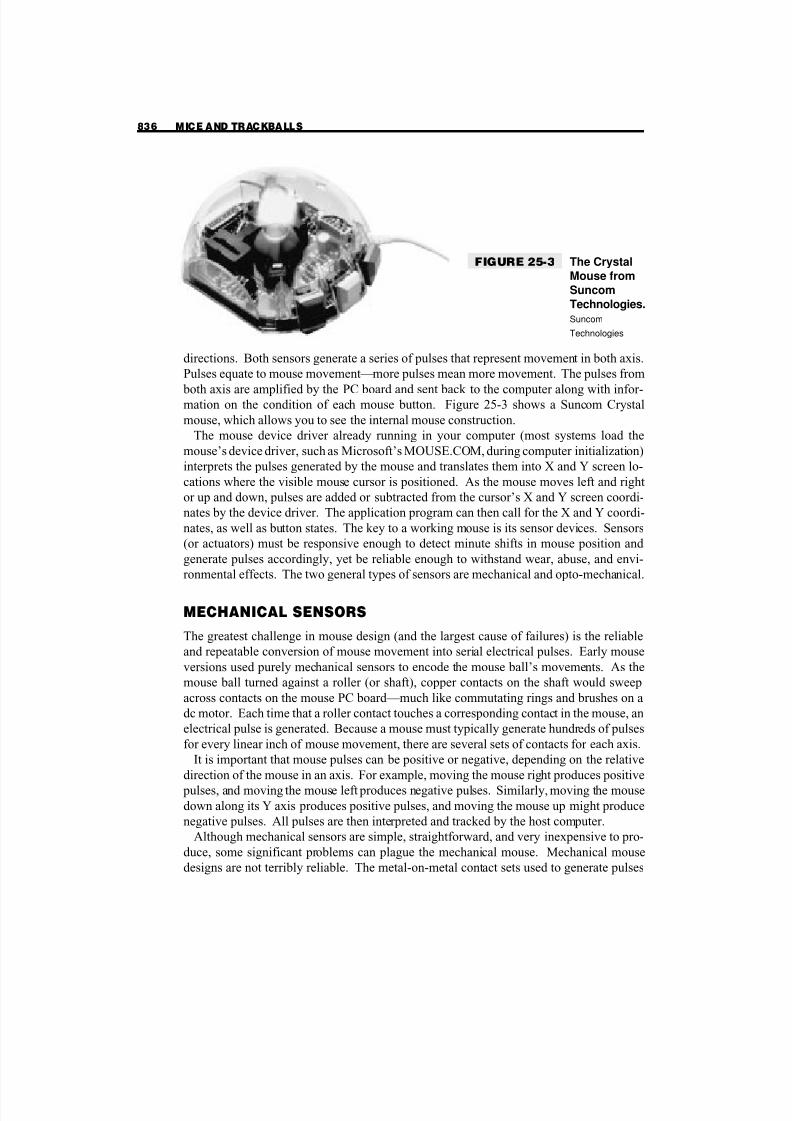
both axis are amplified by the PC board and sent back to the computer along with infor-mation on the condition of each mouse button. Figure 25-3 shows a Suncom Crystal
mouse, which allows you to see the internal mouse construction.
The mouse device driver already running in your computer (most systems load the
mouse’s device driver, such as Microsoft’s MOUSE.COM, during computer initialization)
interprets the pulses generated by the mouse and translates them into X and Y screen lo-
cations where the visible mouse cursor is positioned. As the mouse moves left and right
or up and down, pulses are added or subtracted from the cursor’s X and Y screen coordi-
nates by the device driver. The application program can then call for the X and Y coordi-
nates, as well as button states. The key to a working mouse is its sensor devices. Sensors
(or actuators) must be responsive enough to detect minute shifts in mouse position and
generate pulses accordingly, yet be reliable enough to withstand wear, abuse, and envi-
ronmental effects. The two general types of sensors are mechanical and opto-mechanical.
MECHANICAL SENSORS
The greatest challenge in mouse design (and the largest cause of failures) is the reliable
and repeatable conversion of mouse movement into serial electrical pulses. Early mouse
versions used purely mechanical sensors to encode the mouse ball’s movements. As the
mouse ball turned against a roller (or shaft), copper contacts on the shaft would sweep
across contacts on the mouse PC board—much like commutating rings and brushes on a
dc motor. Each time that a roller contact touches a corresponding contact in the mouse, an
electrical pulse is generated. Because a mouse must typically generate hundreds of pulses
for every linear inch of mouse movement, there are several sets of contacts for each axis.
It is important that mouse pulses can be positive or negative, depending on the relative
direction of the mouse in an axis. For example, moving the mouse right produces positive
pulses, and moving the mouse left produces negative pulses. Similarly, moving the mouse
down along its Y axis produces positive pulses, and moving the mouse up might produce
negative pulses. All pulses are then interpreted and tracked by the host computer.
Although mechanical sensors are simple, straightforward, and very inexpensive to pro-
duce, some significant problems can plague the mechanical mouse. Mechanical mouse
designs are not terribly reliable. The metal-on-metal contact sets used to generate pulses
836 MICE AND TRACKBALLS
FIGURE 25-3 The Crystal
Mouse from
Suncom
Technologies.
Suncom
Technologies
5/13/2018 Mice and Trackballs - slidepdf.com
http://slidepdf.com/reader/full/mice-and-trackballs 5/18
are prone to wear and breakage. Dust, dirt, hair, and any other foreign matter carried into
the mouse by the ball can also interfere with contacts. Any contact interference prevents pulses from being generated. This condition results in a frustratingly intermittent “skip”
or “stall” of the cursor while you move the mouse. Fortunately, it is often a simple matter
to disassemble and clean the contacts.
OPTO-MECHANICAL SENSORS
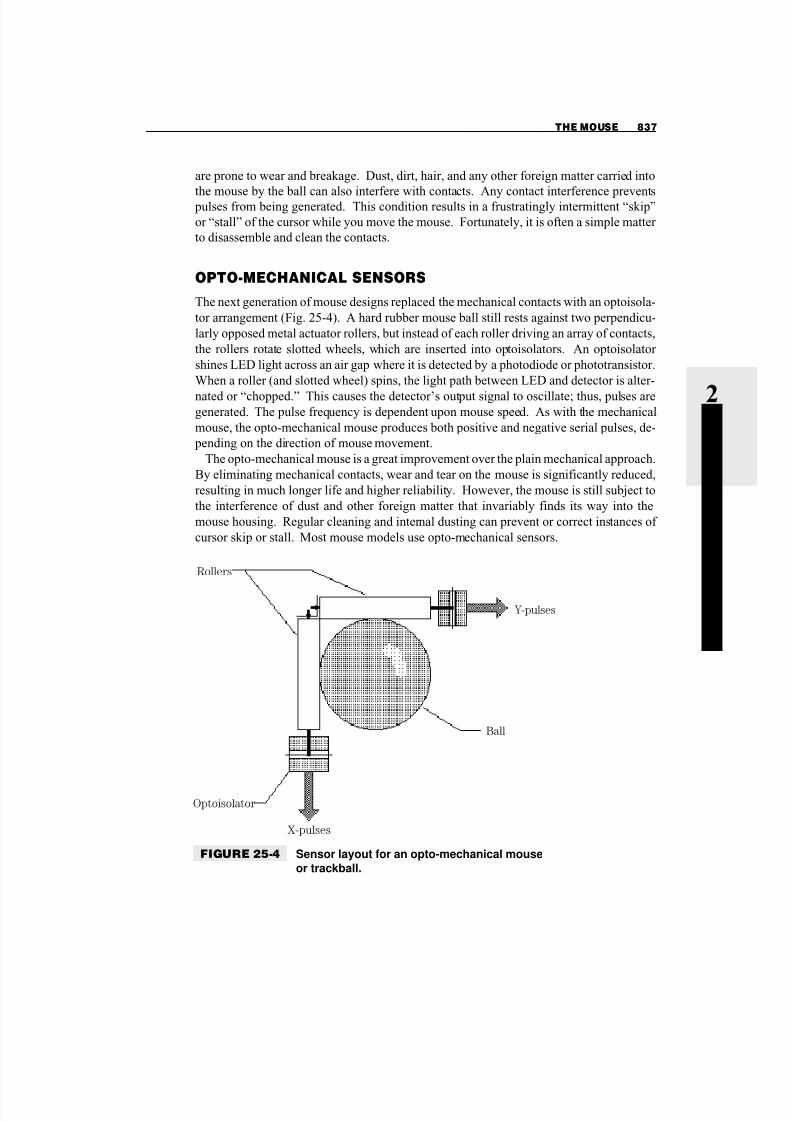
The next generation of mouse designs replaced the mechanical contacts with an optoisola-
tor arrangement (Fig. 25-4). A hard rubber mouse ball still rests against two perpendicu-
larly opposed metal actuator rollers, but instead of each roller driving an array of contacts,
the rollers rotate slotted wheels, which are inserted into optoisolators. An optoisolator
shines LED light across an air gap where it is detected by a photodiode or phototransistor.
When a roller (and slotted wheel) spins, the light path between LED and detector is alter-
nated or “chopped.” This causes the detector’s output signal to oscillate; thus, pulses are
generated. The pulse frequency is dependent upon mouse speed. As with the mechanical
mouse, the opto-mechanical mouse produces both positive and negative serial pulses, de-
pending on the direction of mouse movement.
The opto-mechanical mouse is a great improvement over the plain mechanical approach.
By eliminating mechanical contacts, wear and tear on the mouse is significantly reduced,
resulting in much longer life and higher reliability. However, the mouse is still subject to
the interference of dust and other foreign matter that invariably finds its way into the
mouse housing. Regular cleaning and internal dusting can prevent or correct instances of
cursor skip or stall. Most mouse models use opto-mechanical sensors.
THE MOUSE 837
2 S Y S T E M DAT A
AND
T R O UBL E
S H O OT I N G
Rollers
Y-pulses
Ball
Optoisolator
X-pulses
FIGURE 25-4 Sensor layout for an opto-mechanical mouse
or trackball.
5/13/2018 Mice and Trackballs - slidepdf.com
http://slidepdf.com/reader/full/mice-and-trackballs 6/18
The TrackballThe trackball is basically an inverted mouse. Instead of using your hand to move a mouse
body around on a desk surface, a trackball remains stationary. Your hand or fingertips
move the ball itself, which is mounted through the top of the device. The advantage to a
trackball is that it does not move. As a result, trackballs can be incorporated into desktop
keyboards, or added to your work area with a minimum of required space. Such charac-
teristics have made trackballs extremely popular with laptop and notebook computers.
Today, most notebook computers incorporate pointing devices directly.
In spite of their advantages, however, a trackball is not quite as easy to use as a mouse.
The successful use of a mouse is largely a matter of hand-eye coordination—a flick of the
wrist and a click or two can maneuver you through a program at an impressive rate. Be-
cause you can move the mouse and manipulate its buttons simultaneously, dragging is a
very intuitive gesture. Trackballs are usually turned with only your thumb. This positionsthe rest of your hand so that you can only reach one trackball button. That is a fine
arrangement as long as you are only clicking a single button, but you often have to move
your hand around completely to get to the second button (or you must at least let go of the
ball). Dragging is also typically a cumbersome effort. Even a clumsy trackball is better
than none at all, so you should be as familiar with trackballs as with a mouse.
TRACKBALL CONSTRUCTION
Virtually all trackballs use the same opto-mechanical sensor technology that is used with
mice. Instead of the mouse PC board resting over the ball, a trackball sits on top of a PC board.
The hard rubber ball sits at the intersection of a set of small plastic rails (or tracks)—thus, the
term “track-ball.” This positions the ball between two perpendicularly oriented metal rollers.
Each roller drives a slotted wheel, which, in turn, runs between the LED and detector of an op-toisolator. As the ball and rollers are made to turn, the slotted wheels cause the respective op-
toisolator’s light path to alternate and generate signal pulses. Pulse frequency is dependent on
the relative movements of each roller. Pulses are read and interpreted just like a mouse.
During initialization, your computer must load a device driver designed to read the
proper port, interpret any signals generated by the trackball, and make switch and roller in-
formation available to whatever program calls for it. Given the similarities of mice and
trackballs, many mouse-compatible applications are capable of accessing trackball data
and responding just like a mouse—even the trackball device driver is virtually identical to
a mouse driver (trackball drivers are usually “adopted” mouse drivers that simply com-
pensate for the inversion of the ball). Because the technologies and construction tech-
niques of mice and trackballs are essentially the same, the remainder of this chapter will
treat a mouse and trackball as interchangeable devices.
Cleaning a Pointing DevicePointing devices are perhaps the simplest peripheral available for your computer. Al-
though they are reasonably forgiving to wear and tear, trackballs and mice can easily be
fouled by dust, debris, and foreign matter introduced from the ball. Contamination of this
838 MICE AND TRACKBALLS
5/13/2018 Mice and Trackballs - slidepdf.com
http://slidepdf.com/reader/full/mice-and-trackballs 7/18
sort is almost never damaging, but it can cause some maddening problems when using the
pointing device. A regimen of routine cleaning will help to prevent contamination prob-
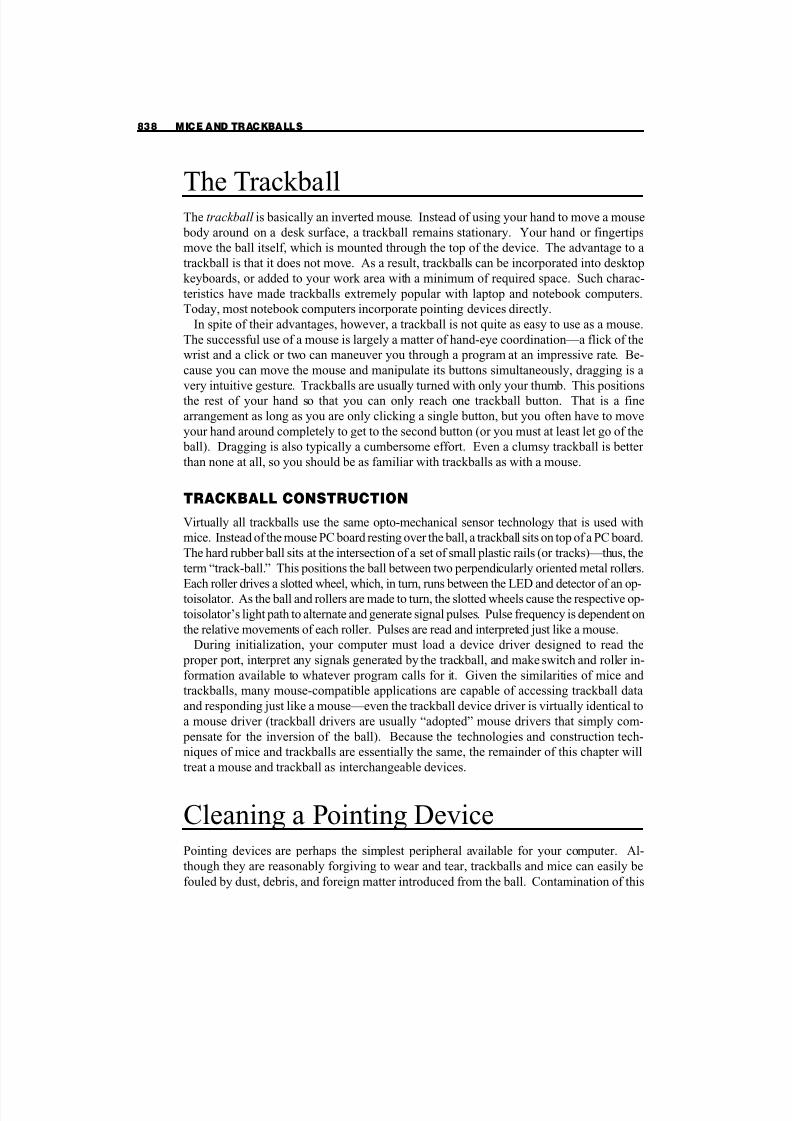
lems. You can use pre-fabricated mouse cleaning kits (Fig. 25-5) to speed the cleaning
process. Turn your small-computer off before performing any cleaning procedures:
s Remove the ball A ball is held in place by a retaining ring. For a mouse, the retaining
ring is on the bottom. For a trackball, the ring is in the top. Rotate the ring and remove
it gently—the ball will fall out. Place the retaining ring in a safe place.
s Clean the ball Wash the ball in warm, soapy water, then dry it thoroughly with a clean,
lint-free towel. Place the ball in a safe place.
s Blow out the dust Use a can of photography-grade compressed air to blow out any dust
or debris that has accumulated inside the pointing device. You might want to do this in
an open or outdoor area.
s Clean the rollers Notice that the mouse has three rollers: an X roller, a Y roller, and a
small pressure roller that keeps the ball pressed against the X and Y rollers. Use a cot-
ton swab dipped in isopropyl alcohol to clean off any layers of gunk that might have ac-
cumulated on the rollers.s Reassemble and test Allow everything to dry completely, then replace the ball and re-
taining ring. Then test the pointing device to be sure that it is performing as expected.
CREATING A POINTING DEVICE 839
2 S Y S T E M DAT A
AND
T R O UBL E
S H O OT I N G
FIGURE 25-5 A Curtis mouse-cleaning kit. Curtis, a divi-
sion of Rolodex, Secaucus, NJ 07094
Do not use harsh solvents, wood alcohol, or chemicals inside the pointing device or on
the ball. Chemicals can easily melt the plastic and result in permanent damage to the
pointing device.
5/13/2018 Mice and Trackballs - slidepdf.com
http://slidepdf.com/reader/full/mice-and-trackballs 8/18
Troubleshooting a Pointing DeviceThe weakest link in a pointing system is the peripheral pointing device itself. Few pe-
ripheral devices are subjected to the wear and general abuse seen by trackballs or mice.
They are dropped, yanked, and moved constantly from place to place. Damage to the de-
vice’s PC board, cabling, and connector is extremely common because of abuse. Accu-
mulations of dust and debris can easily work into the housing and create havoc with the
rubber ball, tracks, and rollers. Hardware conflicts and driver-configuration issues can
also result in limitless problems. This part of the chapter guides you through some simple
troubleshooting techniques for your trackball and mouse.
MOUSE/TRACKBALL INTERFACES
From time to time, you might need to check the physical interface on a mouse or trackball.At its core, the mouse uses a simple serial device—that is, it can pass serial data back and
forth with the host computer using communication protocols managed by the mouse driver.
Three types of mouse interfaces are common in the field: serial mice, bus mice, and PS/2
mice. This part of the chapter highlights the pinouts for each interface type.
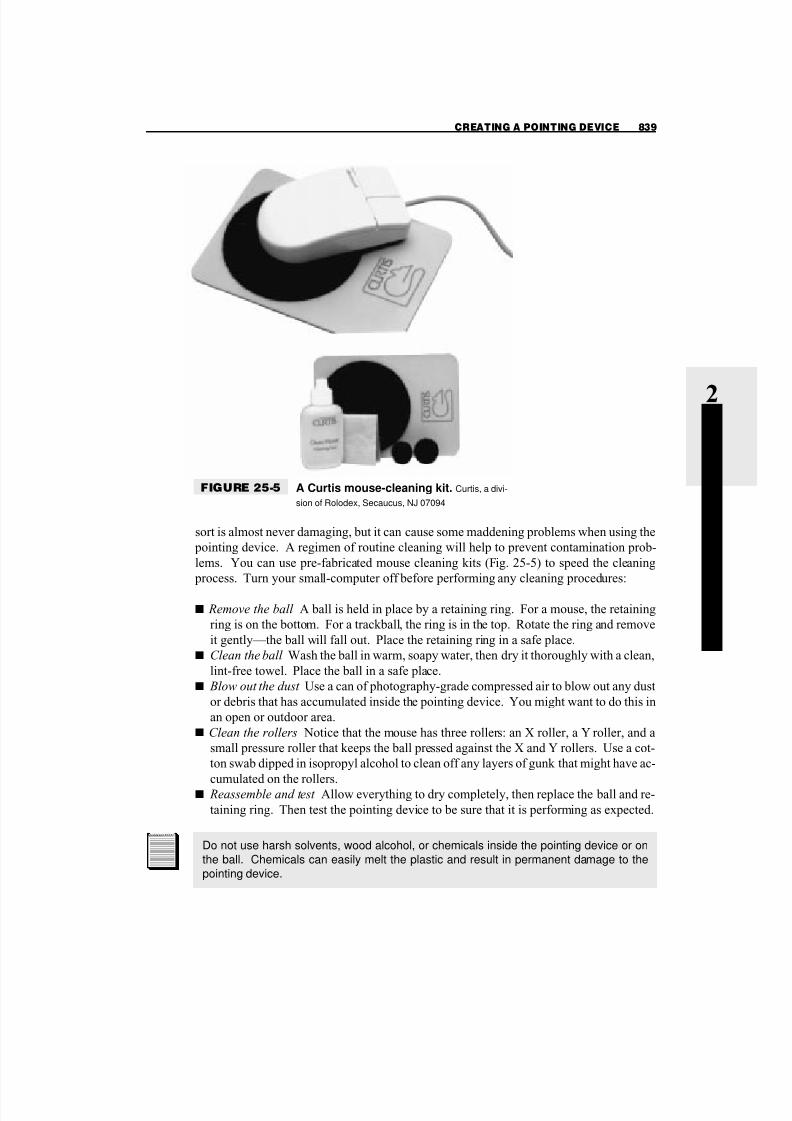
Serial mice A “serial” mouse connects to an existing RS232 serial port at the PC
(usually COM1 or COM2) using a standard DB-9F (9-pin female) or DB-25F (25-pin
female) connector. Table 25-1 lists the pinout for a Logitech Type M, V, or W serial
mouse connector.
Bus mice In many circumstances, it is not possible to use a serial mouse on an open
COM port, and the PC is not fitted with a PS/2 port. In this case, it might be necessary to
use a “bus mouse,” which basically involves using a stand-alone mouse-controller board (a bus mouse controller) and a mouse fitted with a bus mouse connector—usually a male
sub-miniature “D”-type connector or a miniature male DIN (circular) connector. Be care-
ful not to mistake the 9-pin DIN connector of a bus mouse for the 6-pin circular connector
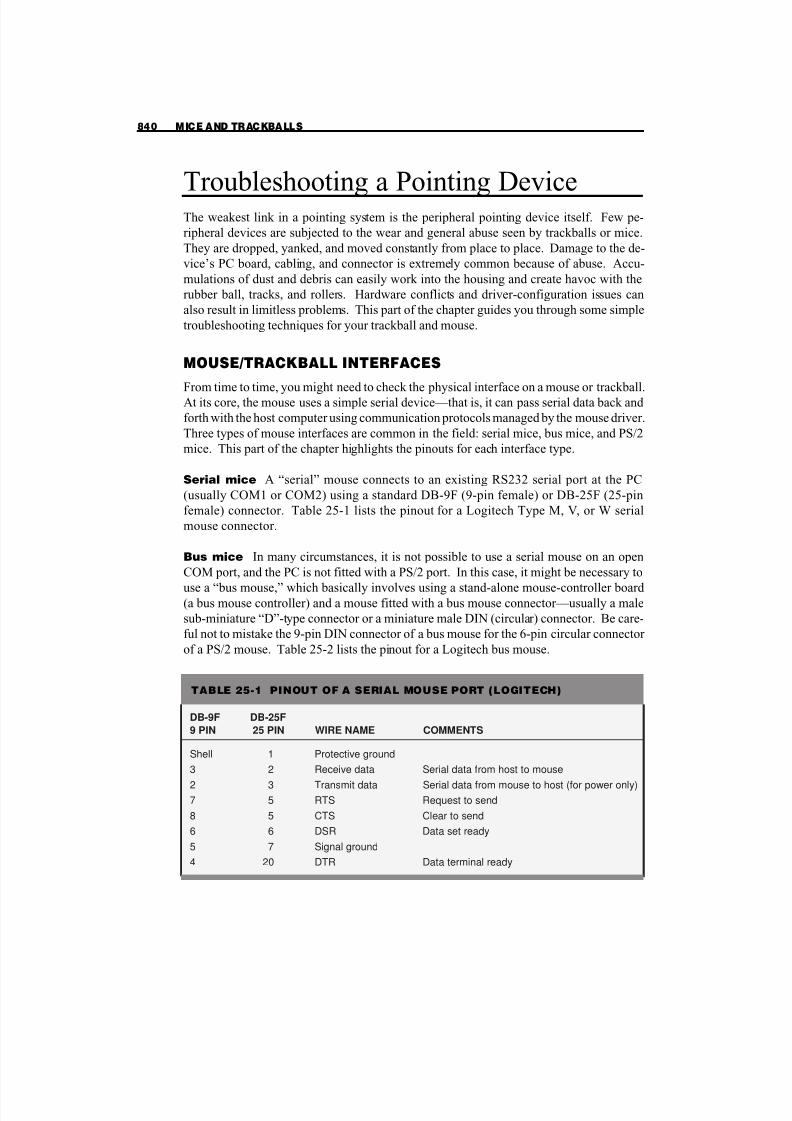
of a PS/2 mouse. Table 25-2 lists the pinout for a Logitech bus mouse.
840 MICE AND TRACKBALLS
TABLE 25-1 PINOUT OF A SERIAL MOUSE PORT (LOGITECH)
DB-9F DB-25F
9 PIN 25 PIN WIRE NAME COMMENTS
Shell 1 Protective ground
3 2 Receive data Serial data from host to mouse
2 3 Transmit data Serial data from mouse to host (for power only)
7 5 RTS Request to send
8 5 CTS Clear to send
6 6 DSR Data set ready
5 7 Signal ground
4 20 DTR Data terminal ready
5/13/2018 Mice and Trackballs - slidepdf.com
http://slidepdf.com/reader/full/mice-and-trackballs 9/18
PS/2 mice Most current computers are fitted with one or two PS/2 ports (these are of-
ten called PIX ports because the motherboard’s PIX controller(s) can manage the ports di-
rectly. PS/2 ports are basic serial interfaces that are ideal for keyboards and mice. PS/2
mice use a 6-pin DIN (barrel) connector (Table 25-3). Bi-directional data transmission is
controlled by the CLK and DATA lines—both are fed by an “open collector” device that
lets either the host or mouse control the lines. During non-transmission, CLK is at logic
“1” and DATA is at logic “0” or “1.” The PC can inhibit mouse transmission by forcing
CLK to logic “0.”
MOUSE DRIVER SOFTWARE ISSUES
Device drivers are often underrated when it comes to mouse/trackball troubleshooting.
The driver plays a vital role in mouse performance, and any driver bugs or incompatibili-
ties will have direct consequences on mouse operation. Mouse drivers are also surpris-
ingly versatile programs that can be extensively configured through the use of command
TROUBLESHOOTING A POINTING DEVICE 841
2 S Y S T E M DAT A
AND
T R O UBL E
S H O OT I N G
TABLE 25-2 PINOUT OF A BUS MOUSE PORT (LOGITECH)
WIRE LOGITECH MICROSOFT
COLOR MINI-DIN PIN P-SERIES SIGNAL INPORT SIGNAL
Black 1 +5 V +5 V
Brown 2 X2 XA
Red 3 X1 XB
Orange 4 Y1 YA
Yellow 5 Y2 YB
Green 6 Left SW1
Violet 7 Middle SW2
Gray 8 Right SW3
White 9 GND Logic GND
SHIELD shell Chassis Chassis
TABLE 25-3PINOUT OF APS/2 MOUSE PORT(LOGITECH)
PIN WIRE NAME
1 Data
2 Reserved
3 Ground
4 +5-V Supply
5 CLK
6 Reserved
Shield Chassis
5/13/2018 Mice and Trackballs - slidepdf.com
http://slidepdf.com/reader/full/mice-and-trackballs 10/18
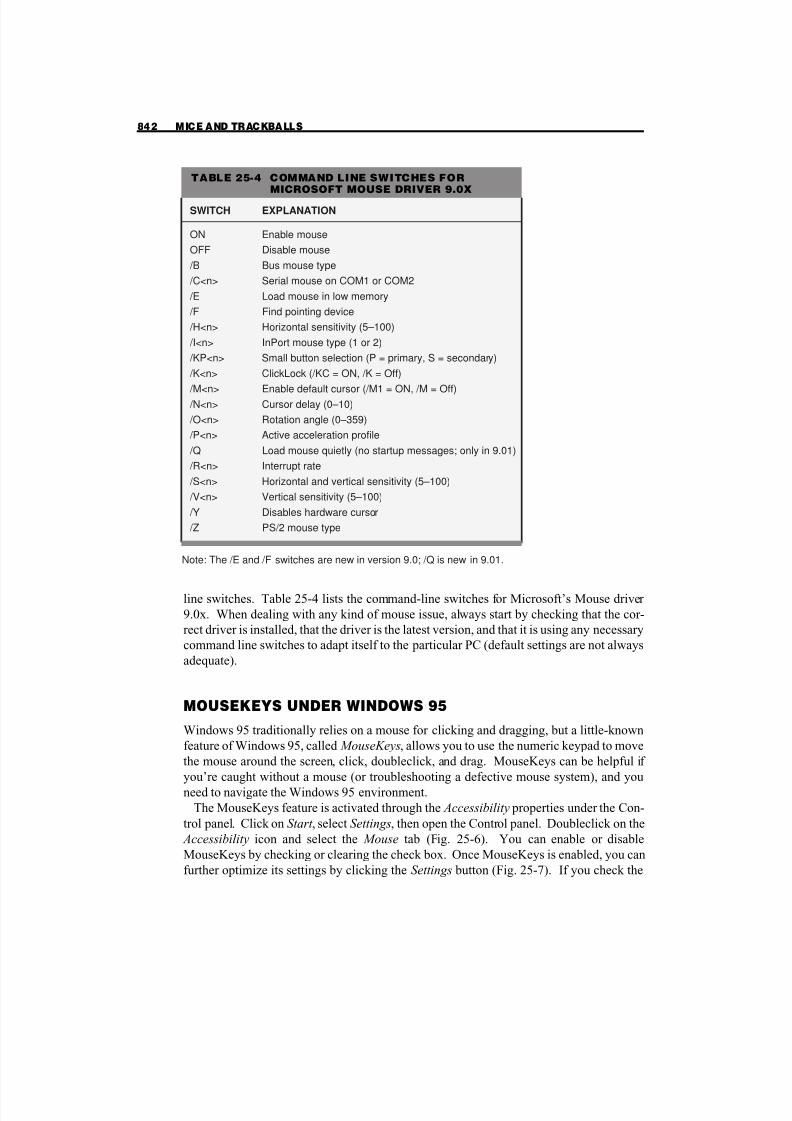
line switches. Table 25-4 lists the command-line switches for Microsoft’s Mouse driver
9.0x. When dealing with any kind of mouse issue, always start by checking that the cor-
rect driver is installed, that the driver is the latest version, and that it is using any necessary
command line switches to adapt itself to the particular PC (default settings are not always
adequate).
MOUSEKEYS UNDER WINDOWS 95
Windows 95 traditionally relies on a mouse for clicking and dragging, but a little-known
feature of Windows 95, called MouseKeys, allows you to use the numeric keypad to move
the mouse around the screen, click, doubleclick, and drag. MouseKeys can be helpful if
you’re caught without a mouse (or troubleshooting a defective mouse system), and youneed to navigate the Windows 95 environment.
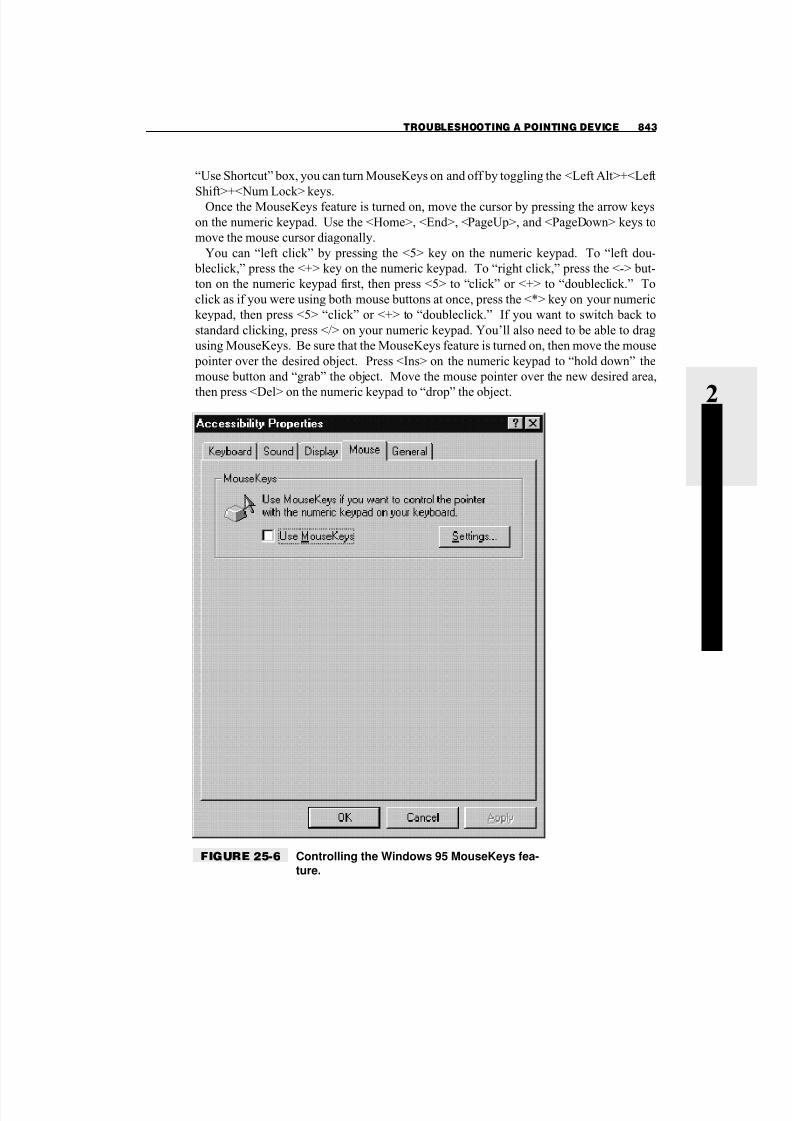
The MouseKeys feature is activated through the Accessibility properties under the Con-
trol panel. Click on Start , select Settings, then open the Control panel. Doubleclick on the
Accessibility icon and select the Mouse tab (Fig. 25-6). You can enable or disable
MouseKeys by checking or clearing the check box. Once MouseKeys is enabled, you can
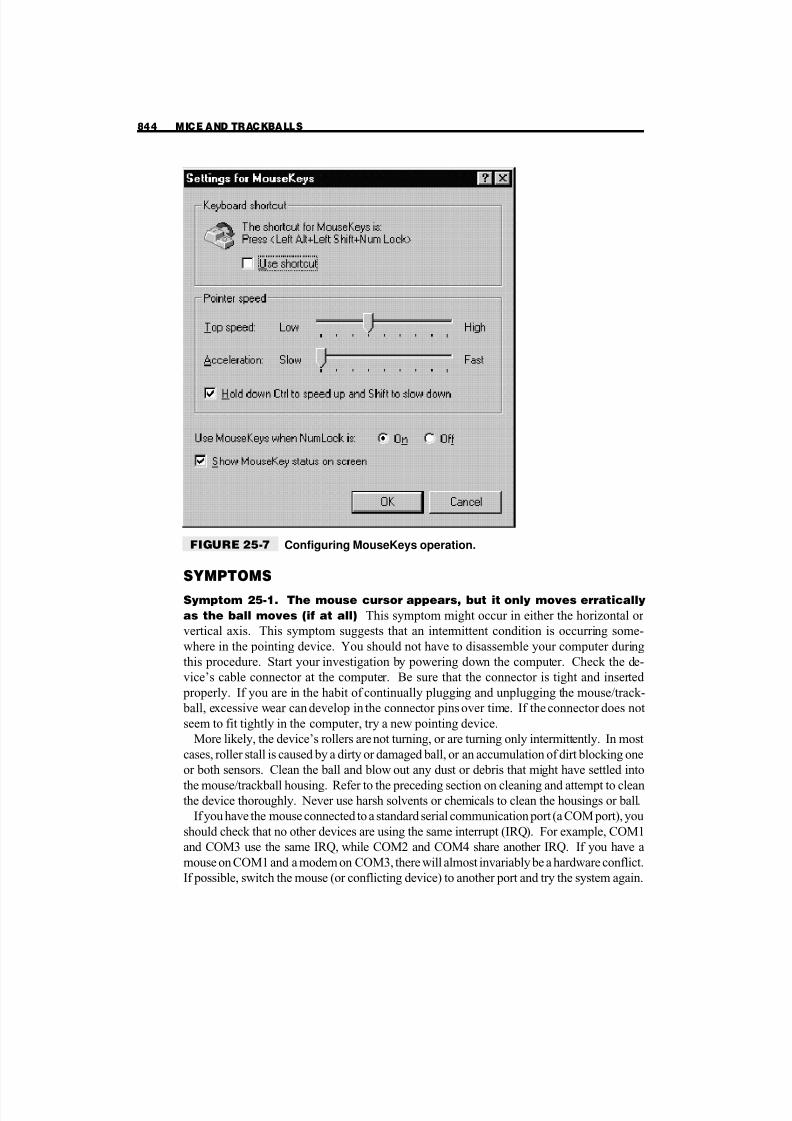
further optimize its settings by clicking the Settings button (Fig. 25-7). If you check the
842 MICE AND TRACKBALLS
TABLE 25-4 COMMAND LINE SWITCHES FORMICROSOFT MOUSE DRIVER 9.0X
SWITCH EXPLANATION
ON Enable mouse
OFF Disable mouse
/B Bus mouse type
/C<n> Serial mouse on COM1 or COM2
/E Load mouse in low memory
/F Find pointing device
/H<n> Horizontal sensitivity (5–100)
/I<n> InPort mouse type (1 or 2)
/KP<n> Small button selection (P = primary, S = secondary)
/K<n> ClickLock (/KC = ON, /K = Off)
/M<n> Enable default cursor (/M1 = ON, /M = Off) /N<n> Cursor delay (0–10)
/O<n> Rotation angle (0–359)
/P<n> Active acceleration profile
/Q Load mouse quietly (no startup messages; only in 9.01)
/R<n> Interrupt rate
/S<n> Horizontal and vertical sensitivity (5–100)
/V<n> Vertical sensitivity (5–100)
/Y Disables hardware cursor
/Z PS/2 mouse type
Note: The /E and /F switches are new in version 9.0; /Q is new in 9.01.
5/13/2018 Mice and Trackballs - slidepdf.com
http://slidepdf.com/reader/full/mice-and-trackballs 11/18
“Use Shortcut” box, you can turn MouseKeys on and off by toggling the <Left Alt>+<Left
Shift>+<Num Lock> keys.Once the MouseKeys feature is turned on, move the cursor by pressing the arrow keys
on the numeric keypad. Use the <Home>, <End>, <PageUp>, and <PageDown> keys to
move the mouse cursor diagonally.
You can “left click” by pressing the <5> key on the numeric keypad. To “left dou-
bleclick,” press the <+> key on the numeric keypad. To “right click,” press the <-> but-
ton on the numeric keypad first, then press <5> to “click” or <+> to “doubleclick.” To
click as if you were using both mouse buttons at once, press the <*> key on your numeric
keypad, then press <5> “click” or <+> to “doubleclick.” If you want to switch back to
standard clicking, press </> on your numeric keypad. You’ll also need to be able to drag
using MouseKeys. Be sure that the MouseKeys feature is turned on, then move the mouse
pointer over the desired object. Press <Ins> on the numeric keypad to “hold down” the
mouse button and “grab” the object. Move the mouse pointer over the new desired area,
then press <Del> on the numeric keypad to “drop” the object.
TROUBLESHOOTING A POINTING DEVICE 843
2 S Y S T E M DAT A
AND
T R O UBL E
S H O OT I N G
FIGURE 25-6 Controlling the Windows 95 MouseKeys fea-
ture.
5/13/2018 Mice and Trackballs - slidepdf.com
http://slidepdf.com/reader/full/mice-and-trackballs 12/18
SYMPTOMS
Symptom 25-1. The mouse cursor appears, but it only moves erratically
as the ball moves (if at all) This symptom might occur in either the horizontal or
vertical axis. This symptom suggests that an intermittent condition is occurring some-
where in the pointing device. You should not have to disassemble your computer during
this procedure. Start your investigation by powering down the computer. Check the de-
vice’s cable connector at the computer. Be sure that the connector is tight and inserted
properly. If you are in the habit of continually plugging and unplugging the mouse/track-
ball, excessive wear can develop in the connector pins over time. If the connector does not
seem to fit tightly in the computer, try a new pointing device.
More likely, the device’s rollers are not turning, or are turning only intermittently. In most
cases, roller stall is caused by a dirty or damaged ball, or an accumulation of dirt blocking one
or both sensors. Clean the ball and blow out any dust or debris that might have settled into
the mouse/trackball housing. Refer to the preceding section on cleaning and attempt to cleanthe device thoroughly. Never use harsh solvents or chemicals to clean the housings or ball.
If you have the mouse connected to a standard serial communication port (a COM port), you
should check that no other devices are using the same interrupt (IRQ). For example, COM1
and COM3 use the same IRQ, while COM2 and COM4 share another IRQ. If you have a
mouse on COM1 and a modem on COM3, there will almost invariably be a hardware conflict.
If possible, switch the mouse (or conflicting device) to another port and try the system again.
844 MICE AND TRACKBALLS
FIGURE 25-7 Configuring MouseKeys operation.
5/13/2018 Mice and Trackballs - slidepdf.com
http://slidepdf.com/reader/full/mice-and-trackballs 13/18
If no hardware conflict occurs, and cleaning does not correct an intermittent condition,
remove the device’s upper housing to expose the PC board, and use your multimeter tocheck continuity across each wire in the connecting cable. Because you probably will not
know which connector pins correspond to which wires at the sensor PC board, place one
meter probe on a device’s wire and “ring-out” each connector pin until you find continu-
ity. Make a wiring chart as you go. Each time you find a wire path, wiggle the cable to
stimulate any possible intermittent wiring. Repair any intermittent wiring, if possible. If
you cannot find continuity or repair faulty wiring, simply replace the pointing device.
Symptom 25-2. One or both buttons function erratically (if at all) Buttons
are prone to problems from dust accumulation and general contact corrosion. Your first step
should be power down your computer and disconnect the pointing device. Remove the ball
and upper housing to expose the PC board and switches. Spray a small amount of electron-
ics-grade contact cleaner into each switch, then work each switch to circulate the cleaner.
If cleaning does not improve intermittent switch contacts, you might wish to check con-tinuity across the connecting cable. With the ball and housing cover removed, use your
multimeter to check continuity across each wire in the connecting cable. Because you
probably do not know which connector pins correspond to which wires at the device, place
one meter lead on a device wire and “ring-out” each connector pin until you find continu-
ity. Once you find continuity, wiggle the cable to stimulate any possible intermittent
wiring. Repair any intermittent wiring if you can, or simply replace the pointing device.
Symptom 25-3. The screen cursor appears on the display, but it does not
move If the cursor appears, the device driver has loaded correctly and the application
program is communicating with the driver. Your first step should be to suspect the serial
connection. If there is no serial connection, however, no pulses will modify the cursor’s
position. If you find a bad connection, power down your computer before reattaching thedevice’s serial connector, then restore power and allow the system to reinitialize.
If the device is attached correctly to its proper serial port, the problem probably exists in the
pointing device’s wiring. Remove the ball and upper housing to expose the PC board, then use
your multimeter to check continuity across each wire in the connecting cable. Because you
probably do not know which connector pins correspond to which wires in the device, place
one meter lead on a device wire and “ring-out” each connector pin until you find continuity.
Once you find continuity, wiggle the cable to stimulate any possible intermittent wiring. Re-
pair any intermittent or open wiring if you can, or simply replace the pointing device.
Symptom 25-4. The mouse/trackball device driver fails to load The device
driver is a short program that allows an application program to access information from a
pointing device. Most computer users prefer to load their device drivers during system ini-
tialization by invoking the drivers in the CONFIG.SYS or AUTOEXEC.BAT files. Mostdrivers are written to check for the presence of their respective device first—if the ex-
pected device does not respond, the driver will not be loaded into memory. Other drivers
load blindly, regardless of whether the expected device is present or not.
If the device driver fails to load during initialization, your pointing device might not
have been detected. Power down your computer and check the connection of your point-
ing device. Ensure the device is securely plugged into the proper serial port (or other
TROUBLESHOOTING A POINTING DEVICE 845
2 S Y S T E M DAT A
AND
T R O UBL E
S H O OT I N G
5/13/2018 Mice and Trackballs - slidepdf.com
http://slidepdf.com/reader/full/mice-and-trackballs 14/18
mouse port). If the device is missing or incorrectly inserted, install or re-secure the point-
ing device and allow the system to re-initialize. If you see a “File not found” error mes-sage displayed at the point your device driver was supposed to load, the driver might have
been accidentally erased, might be corrupted, or might be located in a sub-directory where
the CONFIG.SYS or AUTOEXEC.BAT files are not looking. Try re-installing a valid
copy of your mouse device driver and ensure that the driver is located where your calling
batch file can access it. Reboot your system.
Most well-designed application programs check for the presence of a pointing device
through the device driver during initial program execution. If the application program
aborts or fails to execute because of a “No mouse found” or “No mouse driver” error, re-
turn to the preceding paragraphs and recheck the device and driver installation.
Symptom 25-5. You see a “General protection fault” after installing a new
mouse and driver under Windows First, this is probably not a hardware fault (although
it would be helpful to check any mouse driver command line switches in CONFIG.SYS or AUTOEXEC.BAT). It is more likely that the new mouse driver is conflicting with one or
more applications. Try several different applications—most will probably work just fine.
Check with the mouse manufacturer to see if there are any other reported problems, and
find if any patches are planned. If you have an older version of the mouse driver available,
try replacing that one. An older driver might not work as well as a newer one, but it might
not suffer from this kind of compatibility problem. If no patches or older drivers are avail-
able, you might be forced to change the mouse and mouse driver to something completely
different to eliminate the problem.
Symptom 25-6. You see an error: “This pointer device requires a newer ver-
sion” In virtually all cases, you have the wrong driver installed on the system for your dri-
ver. Check the driver and be sure that the driver you are using is appropriate for the particular
mouse. For example, a Logitech or Genius mouse selected in Windows setup can cause this
kind of problem if you have a Microsoft mouse on the system. Change the mouse type un-
der Windows. Under Windows 95, you’ll need to remove the old mouse reference from the
Device manager, then use the Add new hardware wizard to install the new mouse manually.
Symptom 25-7. You see an error: “Mouse port disabled or mouse not pre-
sent” This is almost always a connection or setup problem. Check the signal connector
first. Be sure the mouse cable is not cut or damaged anywhere, and see that it is attached
securely to the serial or PS/2 port. Many newer system BIOS versions now provide an op-
tion in the CMOS setup for a mouse port. Check the CMOS setup and see that any entries
for your mouse are enabled properly.
Symptom 25-8. The mouse works for a few minutes, then stops When thecomputer is rebooted, the mouse starts working again. This problem often plagues cut-
price mice, and is almost always caused by buildups of static in the mouse. The static
charges are interfering with the mouse circuitry, causing the mouse to stop responding
(though charges are not enough to actually damage the mouse). There are generally three
ways to resolve the problem: (1) spray the surrounding carpet and upholstery with a very
dilute fabric softener to dissipate static buildup, (2) hire an electrician to ensure that the
846 MICE AND TRACKBALLS
5/13/2018 Mice and Trackballs - slidepdf.com
http://slidepdf.com/reader/full/mice-and-trackballs 15/18
computer and house wiring are grounded properly, or (3) replace the mouse with a more
static-resistant model.
Symptom 25-9. You attempt a doubleclick but get quadrupleclick, or you
attempt a singleclick and get a doubleclick This is a phenomenon called “but-
ton bounce,” and is the result of a hardware defect (broken or poorly buffered mouse but-
tons). You might be able to clean the mouse buttons by spraying in some good-quality
electronic-grade contact cleaner. Otherwise, you’ll need to replace the mouse outright.
Symptom 25-10. A single mouse click works, but doubleclick doesn’t
When this problem occurs, it is almost always because the “doubleclick speed” is set too
high in the Windows 95 mouse control panel. Try setting it lower. Click Start , select Set-
tings, then open the Control panel . Doubleclick the Mouse icon and adjust the Dou-
bleclick speed slider under the Buttons tab.
Symptom 25-11. A PS/2 mouse is not detected by a notebook PC under
Windows 95 There is a known problem with PS/2 mouse detection on a Toshiba
portable computer under Windows 95. You can usually correct the problem by taking
the following steps:
1 Shut down the computer entirely and physically disconnect the PS/2 mouse from the
PS/2 port.
2 Restart the PC to the DOS mode and create backup copies of your CONFIG.SYS and
AUTOEXEC.BAT files.
3 Restart Windows 95 (reboot the PC, if necessary).
4 Click Start , select Settings, open the Control panel , and doubleclick on the System icon.
5 Select the Device manager tab and doubleclick the Mouse entry.
6 Select the mouse entry that is not being detected (i.e., “Toshiba AccuPoint”), and click
Remove.
7 Select and remove any other mouse entries.
8 Shut down the computer and reconnect the mouse, then turn the PC back on.
9 When the system reboots, it should detect the mouse and attempt to reinstall the appro-
priate drivers.
If this doesn’t fix the problem, a hardware issue could exist. Try a different PS/2 mouse
(preferably from a manufacturer different than the current one). If a different make and
model PS/2 mouse does not work, the PS/2 port might require service.
Symptom 25-12. Mouse pointer options are not saved This is a known prob-
lem when you use the “extra points” features in the Mouse Manager program included with the Microsoft Mouse driver. The pointer options are not saved or written to the
MOUSE.INI file when you are running a virus-protection program, such as Microsoft
Anti-Virus (MSAV) or Norton Anti-Virus (NAV). To correct this problem, remove the
CHKLIST.MS or CHKLIST.CPS file in the directory, which contains the mouse files. To
determine the location of that directory, type “set” at the MS-DOS command prompt—it
will return a list of locations of various files and memory strings. Look for the MOUSE=
TROUBLESHOOTING A POINTING DEVICE 847
2 S Y S T E M DAT A
AND
T R O UBL E
S H O OT I N G
5/13/2018 Mice and Trackballs - slidepdf.com
http://slidepdf.com/reader/full/mice-and-trackballs 16/18
line, then go to that directory and delete the CHKLIST.MS or CHKLIST.CPS file. Reboot
the system and try saving options again.
Symptom 25-13. Clicking the right mouse button doesn’t start the default
context menus of Windows 95 If the Mouse Manager software you’re running is
using an assignment set for the right button, this assignment will override the Windows 95
default setting of “context menus.” Open the Mouse Management software utility and
change the assignment for the right button to “Unassigned.” Save your changes. The right
mouse button will now access the default context menus.
Symptom 25-14. The modem won’t start after installing new mouse soft-
ware For example, this is a known problem when installing Logitech’s MouseWare 6.60 (or
later) under Windows 95. Sometimes the mouse drivers might detect the modem as a second
mouse and try to initialize it. This can cause the modem to go into a busy state. However, you
can prevent the mouse drivers from searching the serial port that the modem is using:
1 Download the current mouse driver for Windows 95.
2 Edit the Windows 95 registry by clicking on the Start menu and selecting Run.
3 Type “C:.EXE” on the Open line.
4 Click OK . The Registry Editor program will start.
5 Doubleclick on the HKEY_LOCAL_MACHINE folder.
6 Doubleclick on the Software folder.
7 Doubleclick on the manufacturer’s folder (i.e., Logitech).
8 Doubleclick on the manufacturer’s driver folder (i.e., MouseWare).
9 Doubleclick on the CurrentVersion folder.
10 Click on the Global folder.
11 Let’s assume the mouse is on COM1 and the modem is on COM2. On the right side
of the screen will be a list of value data strings. Doubleclick on the PortSearchOrder
string. An Edit string dialogue box will appear. The Value data line will read:
COM1, COM2
12 Remove the space, the comma, and “COM2,” so the line reads:
COM1
13 If you only plan to use one mouse on the system, change the MaximumDevices value
data line to “1” using the same steps. This will tell the driver to stop searching for ad-
ditional mice after the primary mouse has been found.
14 Now click OK , and the values under the data value section on the right side of the
screen should change. Exit the registry editor (saving is automatic). Shut down the
computer and reboot from a cold start so that your changes can take effect.
848 MICE AND TRACKBALLS
If you are not using a serial mouse, remove “Serial” from the “SearchOrder” valuedata line so that no serial devices are searched for at all. In general, remove any refer-
ence to the port that the modem is using.
5/13/2018 Mice and Trackballs - slidepdf.com
http://slidepdf.com/reader/full/mice-and-trackballs 17/18
Symptom 25-15. A two-button “First Mouse” refuses to work on a
Packard Bell system The pointer doesn’t move, but Windows 95 did not report any problem detecting the mouse. This is a known problem with some Packard Bell comput-
ers and the two-button “First Mouse” serial version (M/N: M34). It might be possible to
work around the problem by pressing <Ctrl>+<Esc> to open the Start menu. Using the ar-
row keys, highlight Settings, then Control panel , and press the <Enter> key. Select the
Mouse icon with the arrow keys, and press the <Enter> key. This will open the Mouse
properties dialog box. “Tab over” to the Quick setup tab. Then, (using the right arrow
key) open the Devices tab. Once on the Devices tab, “Tab over” to the Add mouse button
and press the <Enter> key. The mouse-control software should now detect the two-button
serial mouse, and the pointer should now move properly. Unfortunately, you’ll need to
perform this procedure each time you restart the system. Otherwise, you should try dis-
abling the built-in serial port and install a different serial card.
You might also exchange the serial version for a PS/2 version, if your system has a ded-
icated PS/2 style mouse port (be sure to uninstall the mouse software if you plan to ex-change the mouse). Go to the Windows 95 Control panel and launch the Add/remove
programs icon. Select the mouse product (i.e., “Logitech MouseWare”) and click on the
Add/remove button. When the message “Uninstall Completed” appears, reboot the system.
Symptom 25-16. A Logitech three-button mouse refuses to work on a
Packard Bell computer You install a Logitech three-button mouse on a Packard Bell
computer, and when you open the Enhanced mouse control center on the Devices tab, it
states: “Pointing device on unknown port.” It also shows only a two-button mouse. In vir-
tually all cases, you’ll need to tweak the Registry:
1 Click on the Start menu and select Run.
2 Type “C:.EXE” on the Open line.
3 Click OK . The Registry editor program will start.4 Open the Hkey_Local_Machinennnn> folder (where <nnnn> is an incremental four-
digit number starting at 0000).
5 Click on each folder under the Mouse folder and delete them until no 000X folders re-
main.
6 Exit the Registry (saving is automatic) and reboot the system from a cold start.
7 Open the Enhanced mouse control center to verify the correct detection of the pointing
device.
Symptom 25-17. The mouse pointer moves only vertically The mouse is con-
nected to a PS/2 port under Windows 95. If the mouse works along one axis but not the
other, it’s usually because of a hardware problem—either the mouse needs to be cleaned
or repaired. However, in some cases a software-configuration problem can occur when
the mouse driver (i.e., Mouse Power v9.5) is installed on a system with Plug-and-Play
BIOS running Windows 95, and the mouse is connected to the PS/2-style mouse port. As
soon as you touch the mouse, the pointer darts over the right edge of the screen, and then
will move only up and down.
1 To regain control over your computer, reboot in Safe mode.
2 Click Start , then Run, then type “REGEDIT” and press <Enter>.
TROUBLESHOOTING A POINTING DEVICE 849
2 S Y S T E M DAT A
AND
T R O UBL E
S H O OT I N G
5/13/2018 Mice and Trackballs - slidepdf.com
http://slidepdf.com/reader/full/mice-and-trackballs 18/18
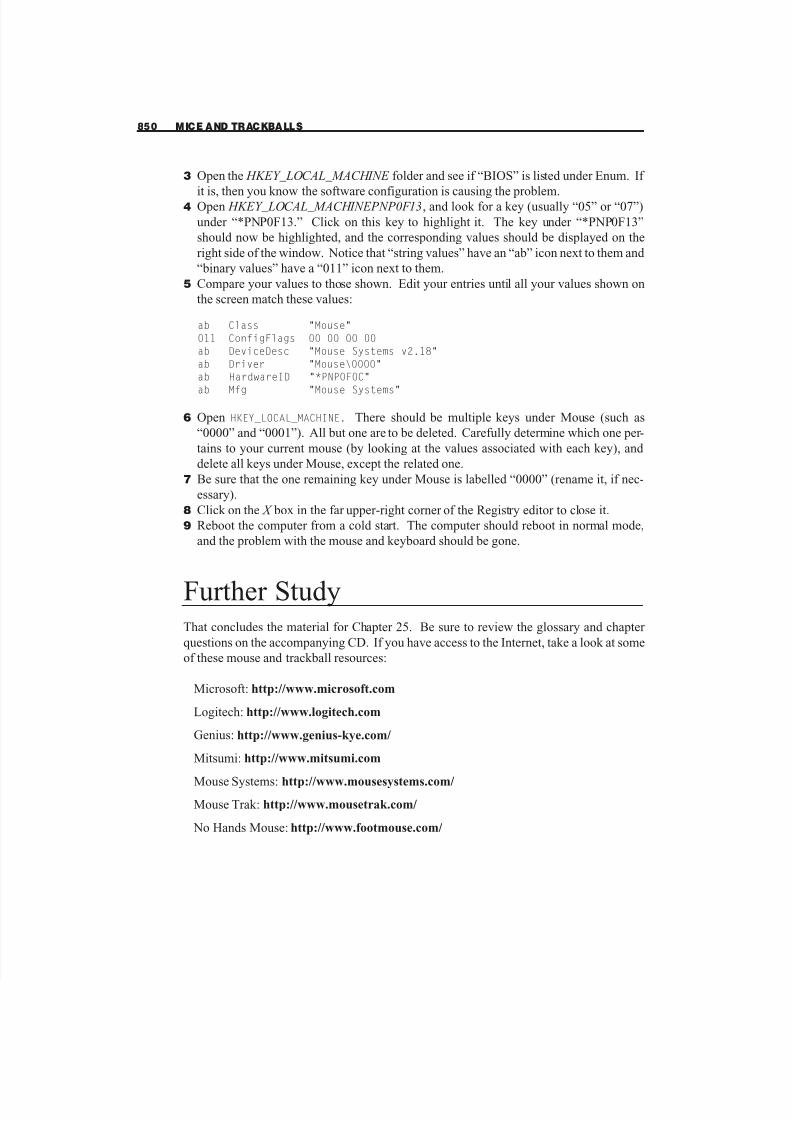
3 Open the HKEY_LOCAL_MACHINE folder and see if “BIOS” is listed under Enum. If
it is, then you know the software configuration is causing the problem.4 Open HKEY_LOCAL_MACHINEPNP0F13 , and look for a key (usually “05” or “07”)
under “*PNP0F13.” Click on this key to highlight it. The key under “*PNP0F13”
should now be highlighted, and the corresponding values should be displayed on the
right side of the window. Notice that “string values” have an “ab” icon next to them and
“binary values” have a “011” icon next to them.
5 Compare your values to those shown. Edit your entries until all your values shown on
the screen match these values:
ab Class "Mouse"
011 ConfigFlags 00 00 00 00
ab DeviceDesc "Mouse Systems v2.18"
ab Driver "Mouse\0000"
ab HardwareID "*PNP0F0C"
ab Mfg "Mouse Systems"
6 Open HKEY_LOCAL_MACHINE. There should be multiple keys under Mouse (such as
“0000” and “0001”). All but one are to be deleted. Carefully determine which one per-
tains to your current mouse (by looking at the values associated with each key), and
delete all keys under Mouse, except the related one.
7 Be sure that the one remaining key under Mouse is labelled “0000” (rename it, if nec-
essary).
8 Click on the X box in the far upper-right corner of the Registry editor to close it.
9 Reboot the computer from a cold start. The computer should reboot in normal mode,
and the problem with the mouse and keyboard should be gone.
Further StudyThat concludes the material for Chapter 25. Be sure to review the glossary and chapter
questions on the accompanying CD. If you have access to the Internet, take a look at some
of these mouse and trackball resources:
Microsoft: http://www.microsoft.com
Logitech: http://www.logitech.com
Genius: http://www.genius-kye.com/
Mitsumi: http://www.mitsumi.com
Mouse Systems: http://www.mousesystems.com/
Mouse Trak: http://www.mousetrak.com/
No Hands Mouse: http://www.footmouse.com/
850 MICE AND TRACKBALLS

![Natural exploration of 3d models - people.unica.it · interfaces[2]. Examples of the rst type include keyboards, stylus, joysticks, mice, touch screens and trackballs. Even a simple](https://img.pdfslide.us/doc/110x75/60081176ef3ae71fcd34fc5b/natural-exploration-of-3d-models-interfaces2-examples-of-the-rst-type-include.jpg)