Embed Size (px)
DESCRIPTION
Instructions for R107 SL hard and soft tops
Citation preview
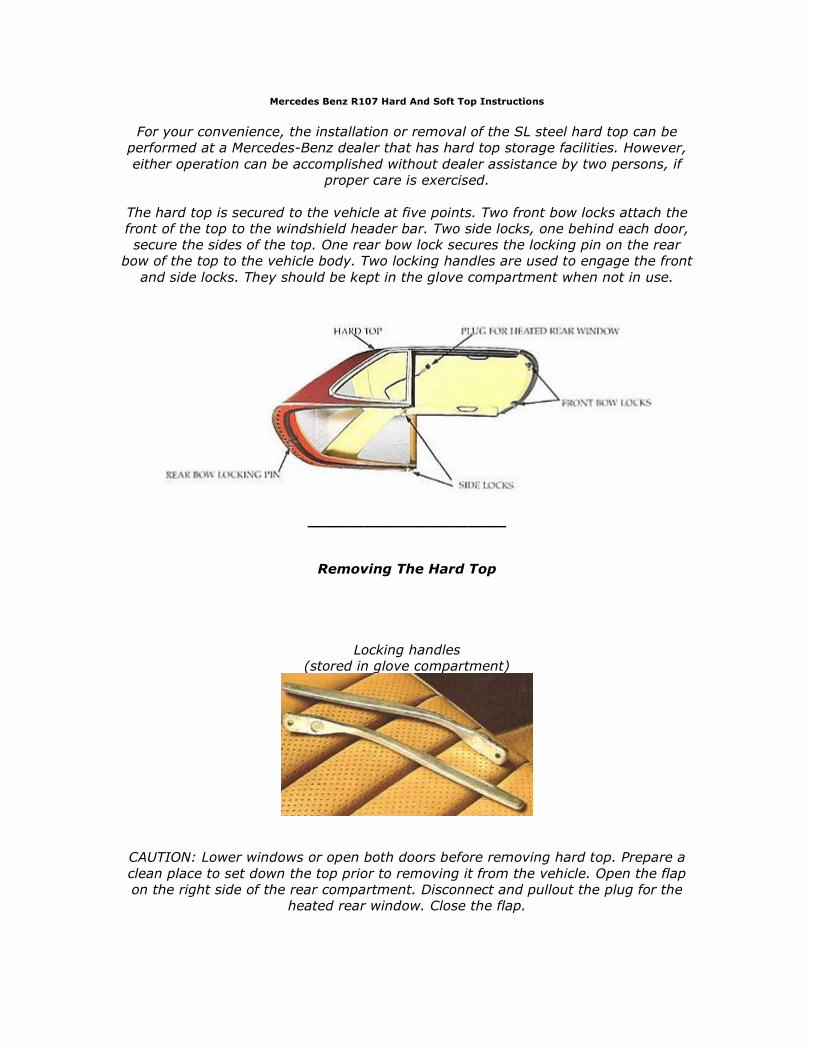
Mercedes Benz R107 Hard And Soft Top Instructions
For your convenience, the installation or removal of the SL steel hard top can be
performed at a Mercedes-Benz dealer that has hard top storage facilities. However,
either operation can be accomplished without dealer assistance by two persons, if
proper care is exercised.
The hard top is secured to the vehicle at five points. Two front bow locks attach the
front of the top to the windshield header bar. Two side locks, one behind each door,
secure the sides of the top. One rear bow lock secures the locking pin on the rear
bow of the top to the vehicle body. Two locking handles are used to engage the front
and side locks. They should be kept in the glove compartment when not in use.
_____________________
Removing The Hard Top
Locking handles
(stored in glove compartment)
CAUTION: Lower windows or open both doors before removing hard top. Prepare a
clean place to set down the top prior to removing it from the vehicle. Open the flap
on the right side of the rear compartment. Disconnect and pullout the plug for the
heated rear window. Close the flap.

Disengage the rear bow locking pin by turning the locking lever counter*clockwise to
position B. Turn the safety lever to position E.
To disengage the side locks, insert a locking handle into the slot from the front of
each lock. Rotate each handle to its rear stop. Remove the locking handles. If the
cap on a side lock pops off while the lock is being released, realign it and push down
until it snaps into place.
Lower the sun visors and disengage the front bow locks by inserting a locking handle
into the slot from the outer side of each lock. Rotate each handle to its inner
position. Remove the locking handles.
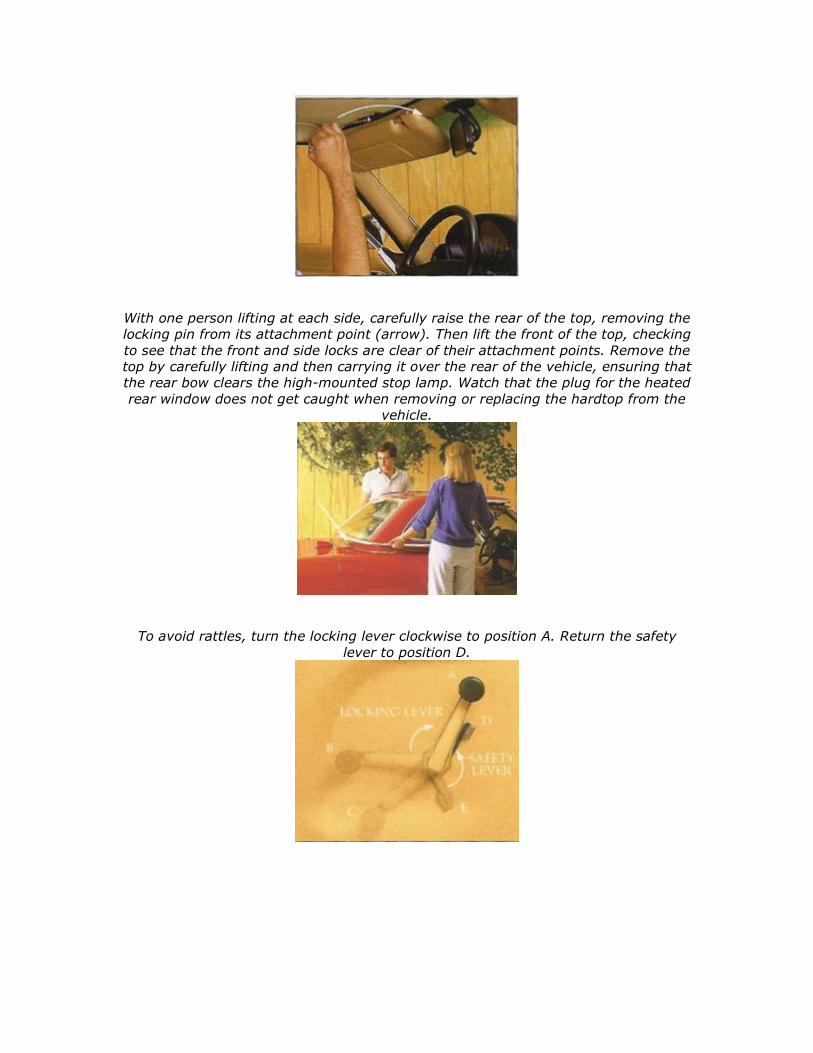
With one person lifting at each side, carefully raise the rear of the top, removing the
locking pin from its attachment point (arrow). Then lift the front of the top, checking
to see that the front and side locks are clear of their attachment points. Remove the
top by carefully lifting and then carrying it over the rear of the vehicle, ensuring that
the rear bow clears the high-mounted stop lamp. Watch that the plug for the heated
rear window does not get caught when removing or replacing the hardtop from the
vehicle.
To avoid rattles, turn the locking lever clockwise to position A. Return the safety
lever to position D.
Installing The Hard Top
CAUTION: Lower windows or open both doors before replacing hard top. Turn the
locking lever counter-clockwise to position B. Make sure that the safety lever is in
position D. Lower the sun visors
With one person supporting the top on each side, carefully lift the top into position
on the vehicle ensuring that the rear bow clears the high-mounted stop lamp. Insert
the rear bow locking pin of the top into the latch hole. When the rear bow lock has
engaged, align the front and side locks with their corresponding attachment points
and lower the top slowly, guiding the cable for the heated rear window into the rear
of the passenger compartment
Apply gentle downward pressure on the top to engage the front bow locks, insert a
locking handle into the slot on the inner side of each lock. Rotate each handle to its
outer position. Remove the locking handles.
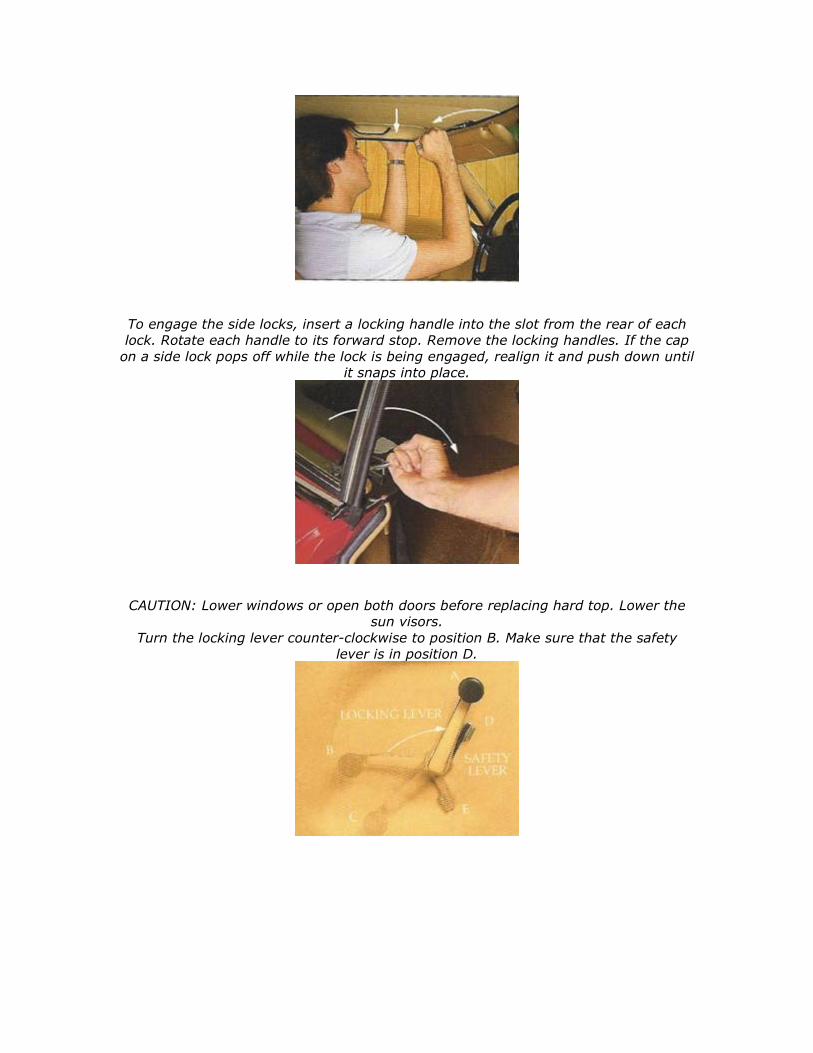
To engage the side locks, insert a locking handle into the slot from the rear of each
lock. Rotate each handle to its forward stop. Remove the locking handles. If the cap
on a side lock pops off while the lock is being engaged, realign it and push down until
it snaps into place.
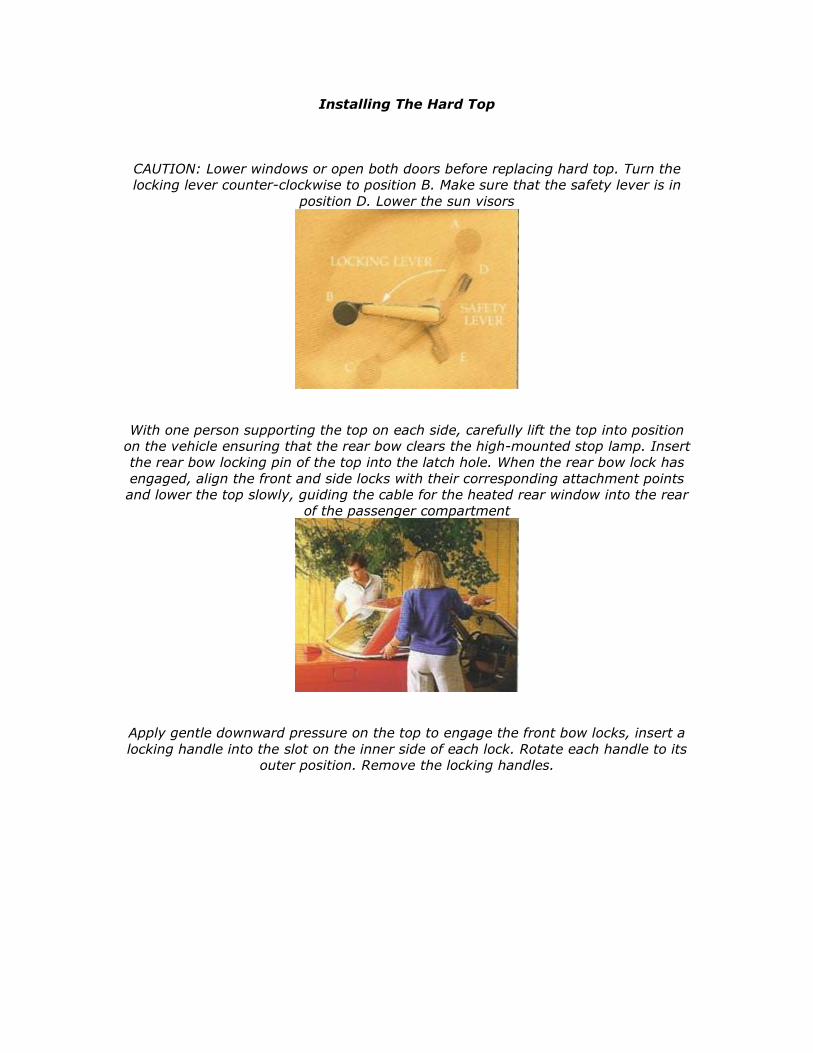
CAUTION: Lower windows or open both doors before replacing hard top. Lower the
sun visors.
Turn the locking lever counter-clockwise to position B. Make sure that the safety
lever is in position D.

Open the flap on the right side of the rear compartment. Connect the plug for the
heated rear window to its socket and tuck away the excess cable. Close the flap.
Raising The Soft Top
CAUTION: Lower windows or open both doors before raising the soft top. Lower the
sun visors. Turn the locking lever counterclockwise to position C. It will automatically
return to position B, and the storage compartment cover will open. Lift the cover to
its upright position.
Holding the top by the front bow, pull the top out of the storage compartment,
unfolding it forward to meet the windshield header bar.
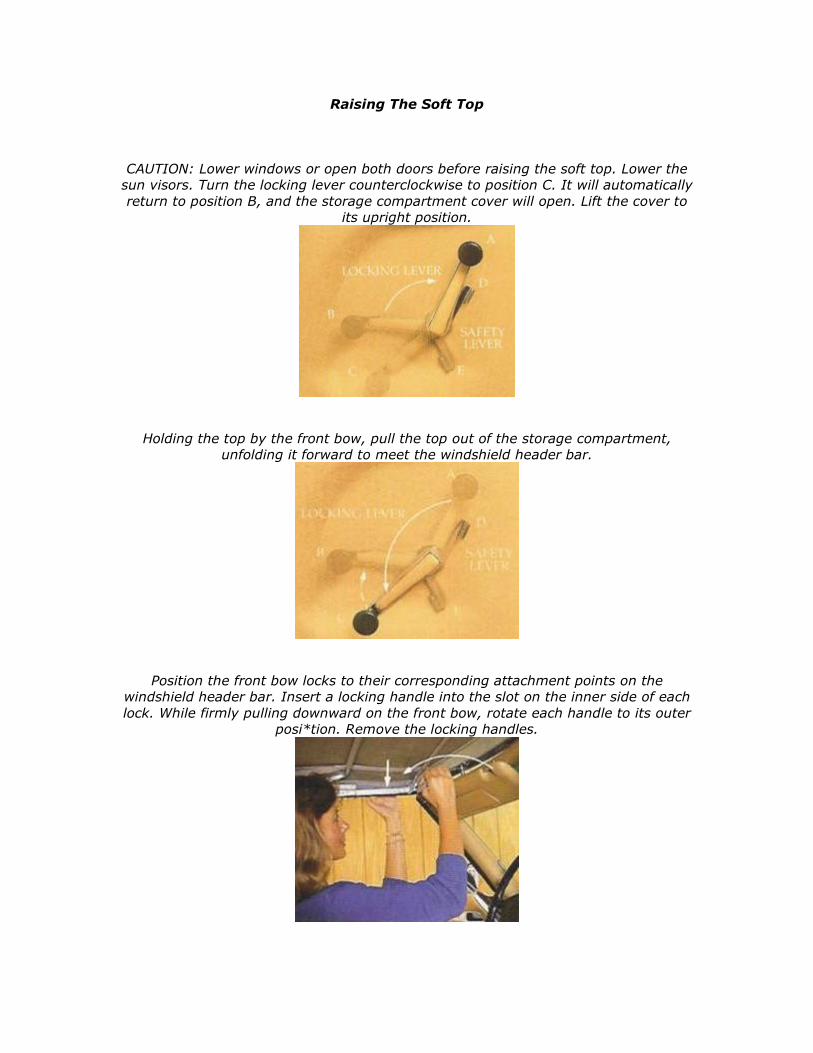
Position the front bow locks to their corresponding attachment points on the
windshield header bar. Insert a locking handle into the slot on the inner side of each
lock. While firmly pulling downward on the front bow, rotate each handle to its outer
posi*tion. Remove the locking handles.
Ensure that the safety lever is in position D. Lift the rear bow into an upright position
and close the storage compartment cover, being careful that it does not contact the
top. Make sure that the cover locks engage by pushing down firmly on each side of
the cover.
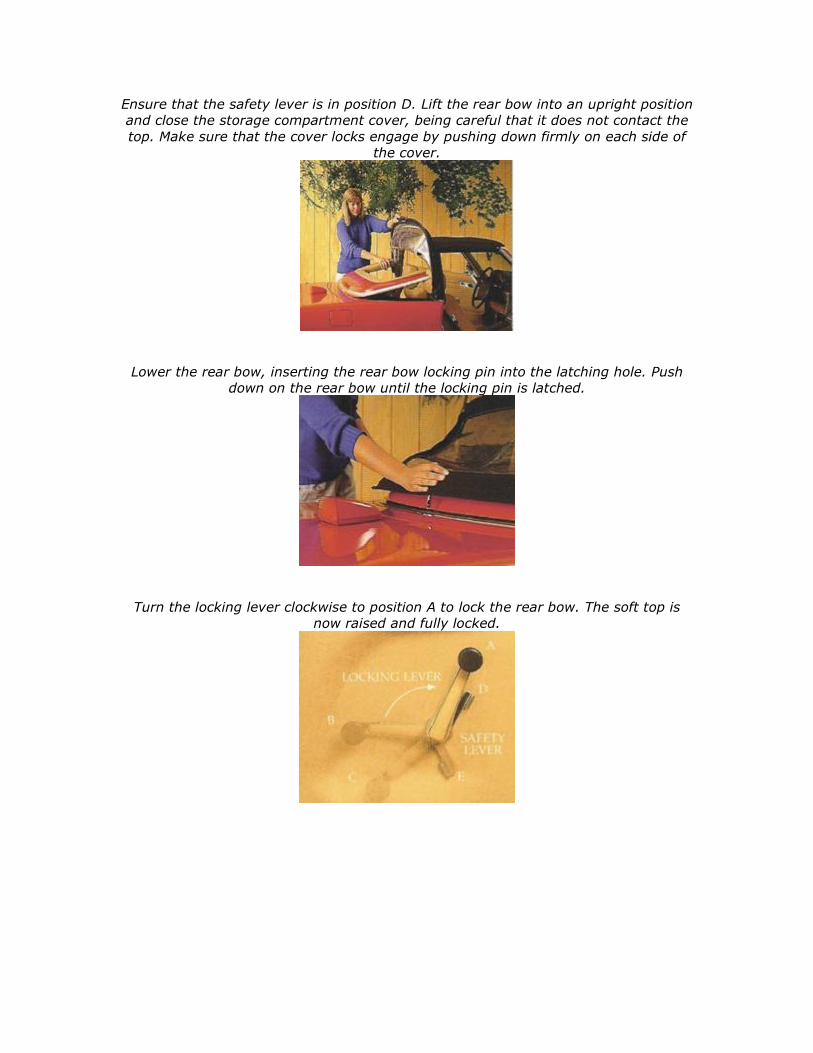
Lower the rear bow, inserting the rear bow locking pin into the latching hole. Push
down on the rear bow until the locking pin is latched.
Turn the locking lever clockwise to position A to lock the rear bow. The soft top is
now raised and fully locked.
Lowering The Soft Top
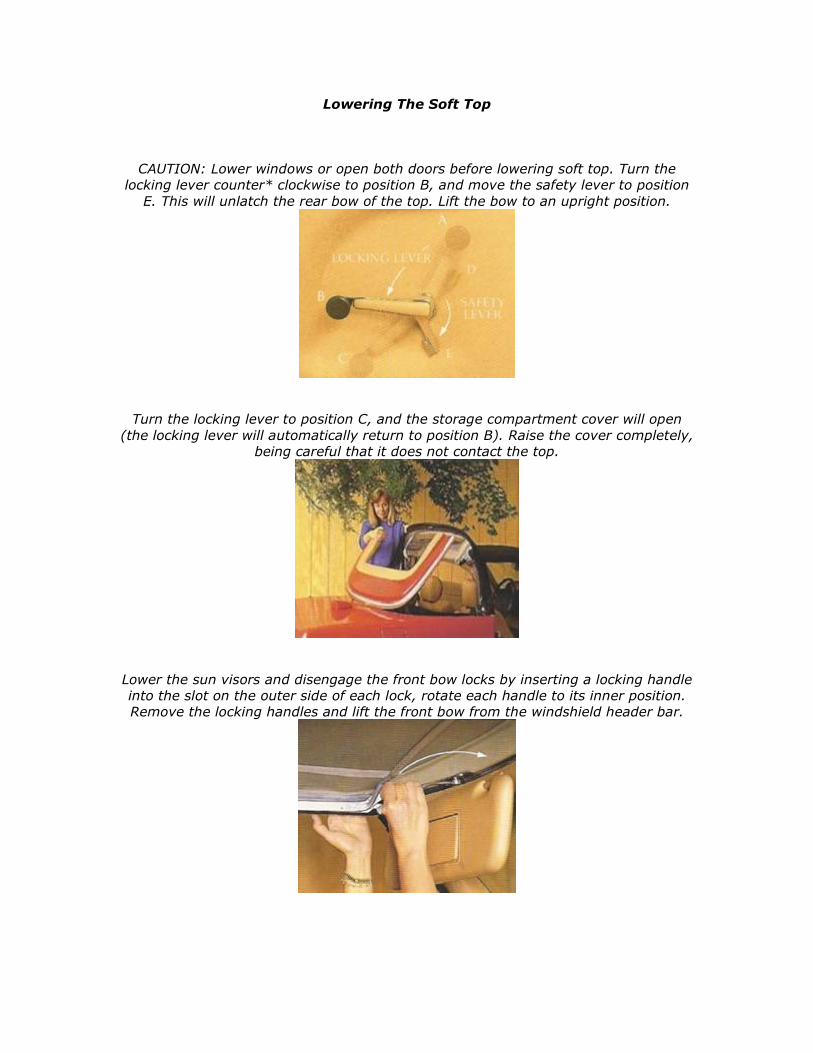
CAUTION: Lower windows or open both doors before lowering soft top. Turn the
locking lever counter* clockwise to position B, and move the safety lever to position
E. This will unlatch the rear bow of the top. Lift the bow to an upright position.
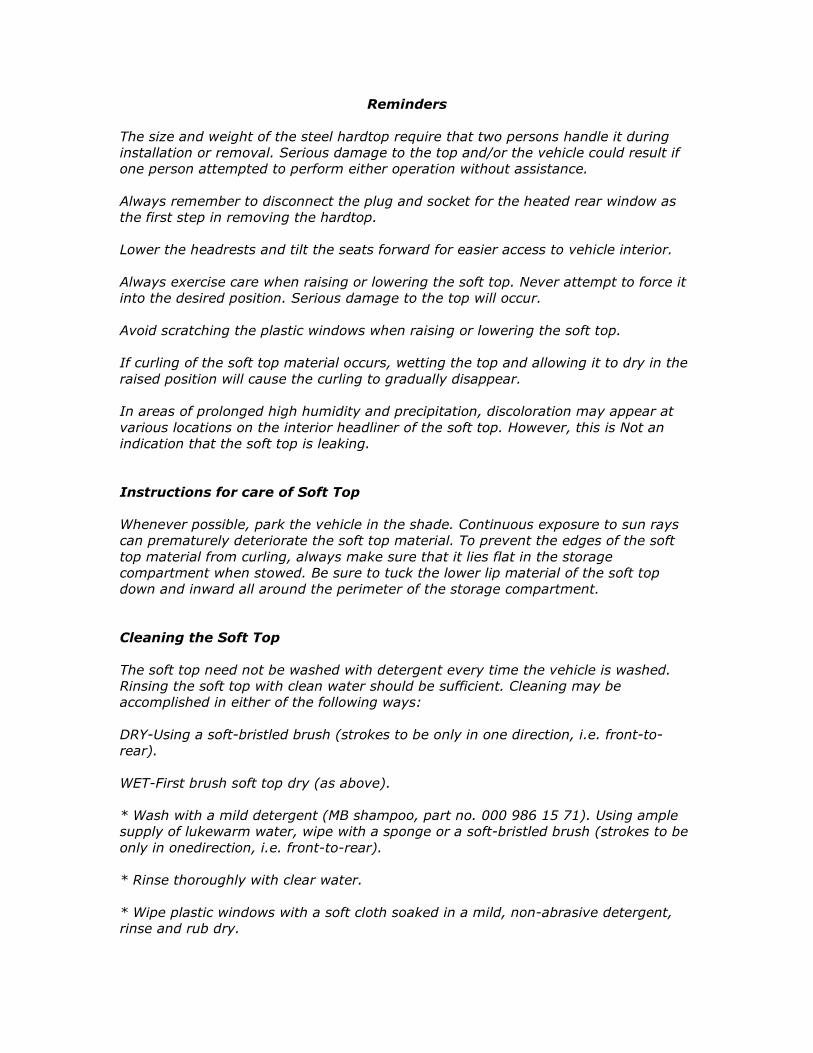
Turn the locking lever to position C, and the storage compartment cover will open
(the locking lever will automatically return to position B). Raise the cover completely,
being careful that it does not contact the top.
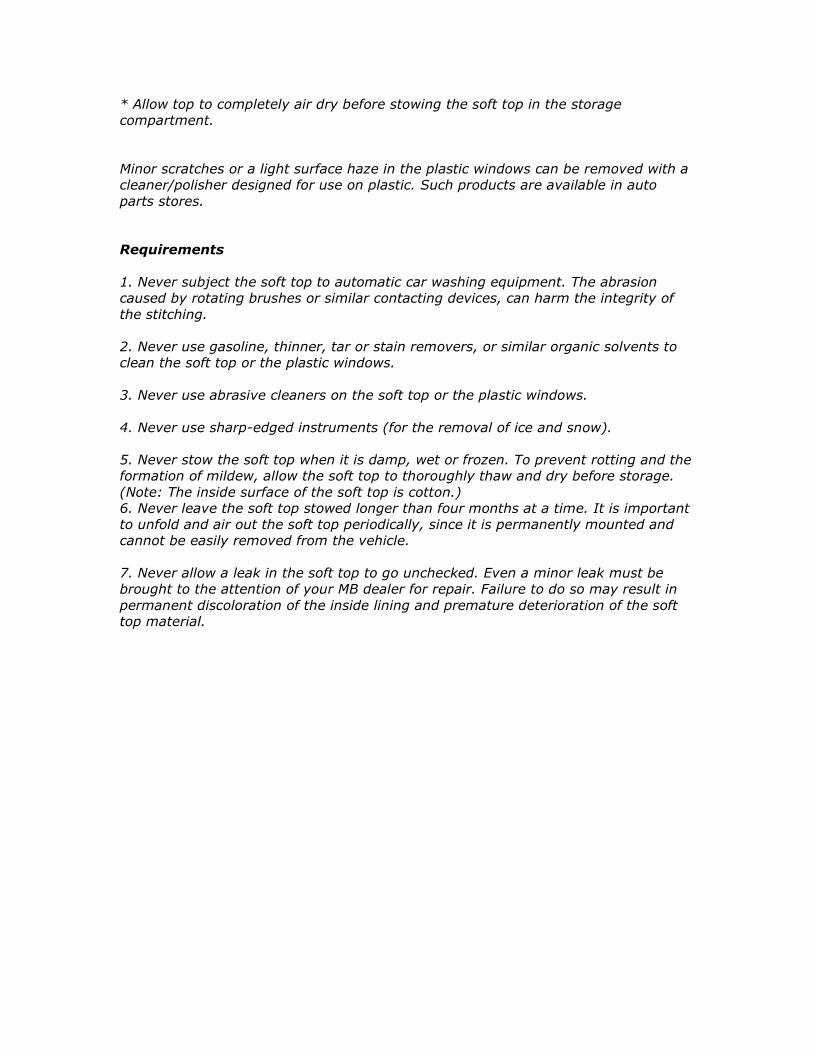
Lower the sun visors and disengage the front bow locks by inserting a locking handle
into the slot on the outer side of each lock, rotate each handle to its inner position.
Remove the locking handles and lift the front bow from the windshield header bar.

While holding the top by its front and rear bows, slowly guide the top into its storage
compartment. As the top is folded, make sure that the frame bow indicated
by the arrow pivots to its rearmost position. Ensure that the plastic windows
and the soft top material are folded smoothly with no wrinkles and that they are not
pinched by the frame.
Carefully tuck the lower lip material of the rear bow all around the perimeter of the
top into the storage compartment, and ensure that the lip material folds down and
inward. To prevent the lower lip from curling upward, make sure that the top
material lies flat in the storage compartment. Pay particular atten*tion to the
following areas: under rear center lock, under hinges for storage compartment cover,
left and right sides.
To flatten the top material, press down with the fingertips as shown.After the top
material has been flattened, return the safety lever to position D. Close the storage
compartment cover, engaging both locks by pushing down firmly on each side of the
cover. Return the locking lever to position A by turning it clockwise.
Reminders
The size and weight of the steel hardtop require that two persons handle it during
installation or removal. Serious damage to the top and/or the vehicle could result if
one person attempted to perform either operation without assistance.
Always remember to disconnect the plug and socket for the heated rear window as
the first step in removing the hardtop.
Lower the headrests and tilt the seats forward for easier access to vehicle interior.
Always exercise care when raising or lowering the soft top. Never attempt to force it
into the desired position. Serious damage to the top will occur.
Avoid scratching the plastic windows when raising or lowering the soft top.
If curling of the soft top material occurs, wetting the top and allowing it to dry in the
raised position will cause the curling to gradually disappear.
In areas of prolonged high humidity and precipitation, discoloration may appear at
various locations on the interior headliner of the soft top. However, this is Not an
indication that the soft top is leaking.
Instructions for care of Soft Top
Whenever possible, park the vehicle in the shade. Continuous exposure to sun rays
can prematurely deteriorate the soft top material. To prevent the edges of the soft
top material from curling, always make sure that it lies flat in the storage
compartment when stowed. Be sure to tuck the lower lip material of the soft top
down and inward all around the perimeter of the storage compartment.
Cleaning the Soft Top
The soft top need not be washed with detergent every time the vehicle is washed.
Rinsing the soft top with clean water should be sufficient. Cleaning may be
accomplished in either of the following ways:
DRY-Using a soft-bristled brush (strokes to be only in one direction, i.e. front-to-
rear).
WET-First brush soft top dry (as above).
* Wash with a mild detergent (MB shampoo, part no. 000 986 15 71). Using ample
supply of lukewarm water, wipe with a sponge or a soft-bristled brush (strokes to be
only in onedirection, i.e. front-to-rear).
* Rinse thoroughly with clear water.
* Wipe plastic windows with a soft cloth soaked in a mild, non-abrasive detergent,
rinse and rub dry.
* Allow top to completely air dry before stowing the soft top in the storage
compartment.
Minor scratches or a light surface haze in the plastic windows can be removed with a
cleaner/polisher designed for use on plastic. Such products are available in auto
parts stores.
Requirements
1. Never subject the soft top to automatic car washing equipment. The abrasion
caused by rotating brushes or similar contacting devices, can harm the integrity of
the stitching.
2. Never use gasoline, thinner, tar or stain removers, or similar organic solvents to
clean the soft top or the plastic windows.
3. Never use abrasive cleaners on the soft top or the plastic windows.
4. Never use sharp-edged instruments (for the removal of ice and snow).
5. Never stow the soft top when it is damp, wet or frozen. To prevent rotting and the
formation of mildew, allow the soft top to thoroughly thaw and dry before storage.
(Note: The inside surface of the soft top is cotton.)
6. Never leave the soft top stowed longer than four months at a time. It is important
to unfold and air out the soft top periodically, since it is permanently mounted and
cannot be easily removed from the vehicle.
7. Never allow a leak in the soft top to go unchecked. Even a minor leak must be
brought to the attention of your MB dealer for repair. Failure to do so may result in
permanent discoloration of the inside lining and premature deterioration of the soft
top material.