Embed Size (px)
Citation preview
StudioMember Magazine of the PMC Guild PMC
Summer 2007 • Volume 10, Number 2
Try This!page 6
Advanced Techniquesin Hollow Form Constructionpage 10
Perfect Pair:PMC and Plique-a-jourpage 16
Inspired by Historypage 18
22 · Studio PMC
Summer 2007 · Volume 10, Number 2
Editor Suzanne WadeP.O. Box 265 Mansfield, MA 02048Phone: 508-339-7366Fax: 928-563-8255
E-mail: [email protected] welcome your PMC photos, articles and ideas. You may submit by mail or electronically. Pleaseinclude your name, address, e-mail, phone, plus a full description of your PMC piece and a brief bio. E-mail articles in the body of the e-mail, or as attachments. E-mail photos as attachments. Werequire an image resolution of 300 dpi at an image size of 3" x 5". Files larger than 4MB should bemailed on CD, not e-mailed.
Deadlines:Spring Issue: Dec. 1Summer Issue: March 1Fall Issue: June 1Winter Issue: Sept. 1
How to Place Advertising in Studio PMCContact our Advertising Manager, Bill Spilman, for specifications, deadlines, and prices. Phone Toll-free: 877-878-3260. E-mail: [email protected]
How to get answers to technical questionsE-mail Tim McCreight at: [email protected]
Join, Renew, Update your PMC Guild MembershipTo join or renew your PMC Guild membership, to change your mailing or e-mail address, or torequest back issues or additional copies of Studio PMC, visit the PMC Guild Web site atwww.PMCGuild.com, call toll-free 866-315-6487 or write P.O. Box 3000, Denville, NJ 07834
PMC GuildJeanette Landenwitch, Executive Director1921 Cliffview Lane Florence, KY 41042 USAPhone: 859-586-0595Website: www.PMCguild.comE-mail: [email protected]
Copyright ©2006 PMC Guild. Printed four or more times a year. Reprints by permission only. All rights reserved.
Studio PMC, its staff and contributors, specifically disclaim any responsibility or liability for damagesor injury as a result of any construction, design, use, manufacture, or any other activity undertakenas a result of the use or application of information contained in any Studio PMC issue or article.
StudioMember Magazine of the PMC Guild PMC
features6 Try This!
PMC artists share the results of their experiments.
10 Advanced Techniques in Hollow Form ConstructionGwen Bernecker takes us beyond boxes and beads in the construction of hollow forms.
16 Perfect Pair: PMC and Plique-a-jourDebbi Clifford shares her method for using enamel and PMC to create pieces that let the light shine through.
18 Inspired by HistoryLori Catlin Garcia describes the design process that led her to create "Lancelot's Steed," a work commissioned by her local Chamber of Commerce.
departments4 As I PMC It
14 Gallery
21 Happenings
23 Marketplace
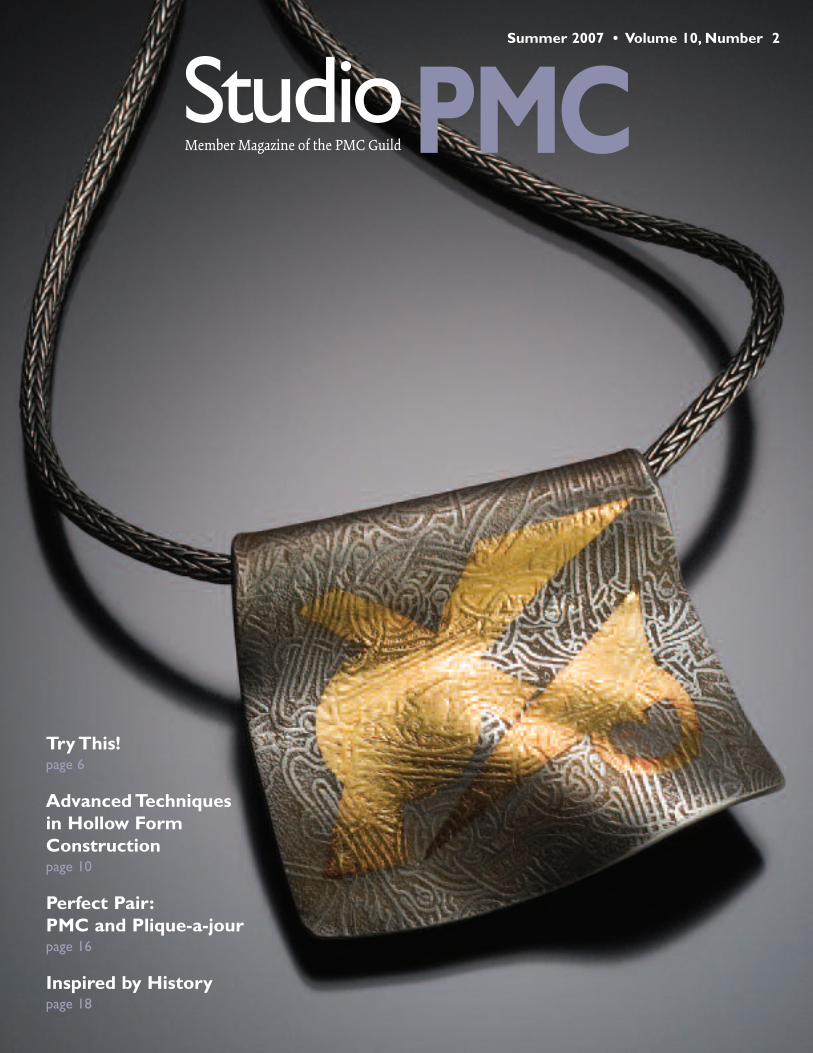
On the Cover: Hartland Abbey Pendant by Gwen Bernecker ofTwo Olives Studio. PMC textured with a low relief Celtic collage and decorated with 24k gold geometric shapes. Photo by Robert Diamante.
Studio PMCPMC GuildP.O. Box 265, Mansfield, MA 02048www.PMCguild.com
Volume 10, Number 2 • Summer 2007Editor—Suzanne WadeTechnical Editor—Tim McCreightArt Director—Jonah SpivakAdvertising Manager—Bill SpilmanStudio PMC is published by the PMC Guild Inc.
Contacting Studio PMC
Summer 2007 · 33
44 · Studio PMC
Guild Announces New Publication Plan
Here is a formula for failure: keepdoing things the way you've always
done them as if things don't change. Wesee it around us every day as major iconicinstitutions and companies shrink or goout of business. Companies, politicians,and organizations like the PMC Guild earntheir popularity by providing somethingtheir audience wants. As the audience andits needs change, it is important to adapt tokeep pace. I remember when McDonaldssold only burgers and fries: clearly part ofthe company's success is the ability toadapt to a changing market.
When the PMC Guild was created in1998 the jewelry community could bedivided into two parts. One group, a smallnumber, knew a little about metal clay andwas hungry for more information. Theother group, and this was most of the restof the world, had perhaps heard of a mate-rial with a three-letter name but didn'tknow much about it. The Guild’s first twoactions were to create a website and launcha newsletter. For the first two years, thenewsletter was available for free. It wasgiven out at conferences, distributed byteachers, and included in orders assembledby Rio Grande, then the exclusive distribu-tor of PMC.
Over the next 10 years, the newslettergrew into a full-color magazine. Majormagazines and book publishers recognizedthe size and vitality of the PMC communi-ty and offered dozens of articles and bookson the subject. Arguably, Studio PMC, thepublication that started it all, could be seenas a victim of its own success. By cultivat-ing the PMC audience, we demonstratedto others what an excited and committedgroup we are.
On this, our tenth anniversary, we haveonce again reviewed our future goals.Leaders within the Guild asked themselvestwo fundamental questions: What do ourmembers want, and what can we do or dobetter than others? The answers led us to anew publication program that we thinkpushes the Guild, once again, to the frontof the pack.
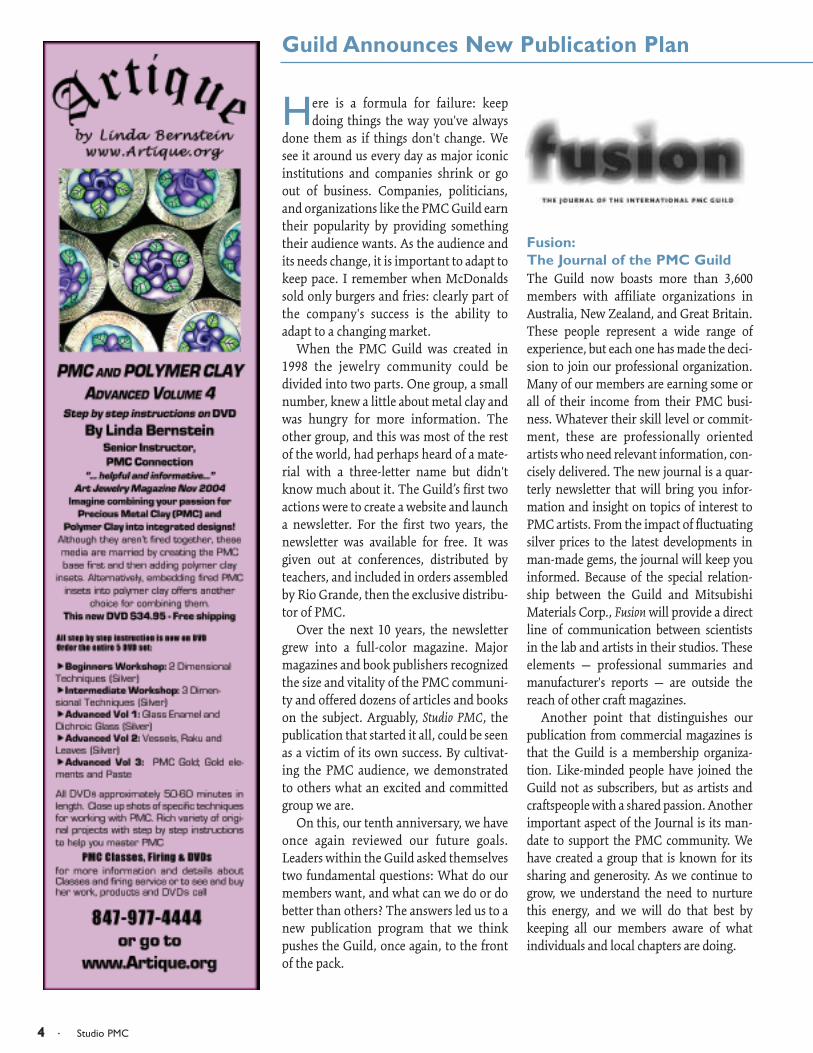
Fusion:The Journal of the PMC GuildThe Guild now boasts more than 3,600members with affiliate organizations inAustralia, New Zealand, and Great Britain.These people represent a wide range ofexperience, but each one has made the deci-sion to join our professional organization.Many of our members are earning some orall of their income from their PMC busi-ness. Whatever their skill level or commit-ment, these are professionally orientedartists who need relevant information, con-cisely delivered. The new journal is a quar-terly newsletter that will bring you infor-mation and insight on topics of interest toPMC artists. From the impact of fluctuatingsilver prices to the latest developments inman-made gems, the journal will keep youinformed. Because of the special relation-ship between the Guild and MitsubishiMaterials Corp., Fusion will provide a directline of communication between scientistsin the lab and artists in their studios. Theseelements — professional summaries andmanufacturer's reports — are outside thereach of other craft magazines.
Another point that distinguishes ourpublication from commercial magazines isthat the Guild is a membership organiza-tion. Like-minded people have joined theGuild not as subscribers, but as artists andcraftspeople with a shared passion. Anotherimportant aspect of the Journal is its man-date to support the PMC community. Wehave created a group that is known for itssharing and generosity. As we continue togrow, we understand the need to nurturethis energy, and we will do that best bykeeping all our members aware of whatindividuals and local chapters are doing.
Summer 2007 · 55
by Tim McCreight
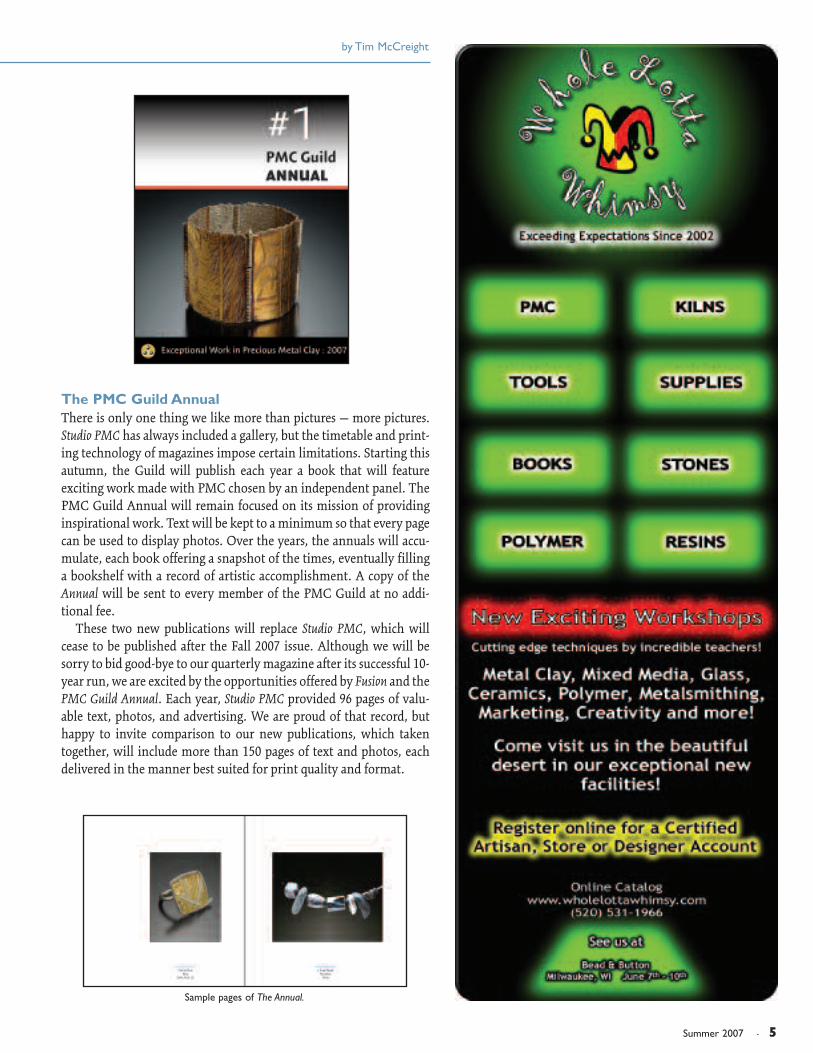
The PMC Guild AnnualThere is only one thing we like more than pictures — more pictures.Studio PMC has always included a gallery, but the timetable and print-ing technology of magazines impose certain limitations. Starting thisautumn, the Guild will publish each year a book that will featureexciting work made with PMC chosen by an independent panel. ThePMC Guild Annual will remain focused on its mission of providinginspirational work. Text will be kept to a minimum so that every pagecan be used to display photos. Over the years, the annuals will accu-mulate, each book offering a snapshot of the times, eventually fillinga bookshelf with a record of artistic accomplishment. A copy of theAnnual will be sent to every member of the PMC Guild at no addi-tional fee.
These two new publications will replace Studio PMC, which willcease to be published after the Fall 2007 issue. Although we will besorry to bid good-bye to our quarterly magazine after its successful 10-year run, we are excited by the opportunities offered by Fusion and thePMC Guild Annual. Each year, Studio PMC provided 96 pages of valu-able text, photos, and advertising. We are proud of that record, buthappy to invite comparison to our new publications, which takentogether, will include more than 150 pages of text and photos, eachdelivered in the manner best suited for print quality and format.
Sample pages of The Annual.
66 · Studio PMC
You can cut it, you can punch it, youcan fold it, but unlike other forms of
PMC, it doesn't take texture well. What isit? PMC Sheet — and I have been on aquest to find a way to do just that.
Two years ago, a friend took a PMC classat a national bead show, and at the end ofthe day, when I asked her how it went, shesaid that the class was great, but she couldnot texture her PMC Sheet the way shewanted. When I asked her how she tried todo it, she showed me a little tool that I rec-ognized as an embossing die, which shehad found in a scrap booking store.
I knew I had some of these, plus anembossing machine that might make itwork, and decided to try it when I gothome. Since then, I have tried a variety ofmethods with varying results.
The machine I use is a roller fromAccucut called “Zip’e Mate” that exerts aneven pressure as the platform passes under-neath. The embossing dies, called “GooseBumpz” by Qwikcutz, are two-sided with ahinge between them, with the positiveimage on one side and the negative on theother. They were designed to emboss paperdiecuts, and there are about 24 differentdesigns available. The main limitation ofthese is that the texture area is limited toabout 13⁄4 inch square.
Other things that have worked in theembossing machine are brass stencils, brasstexture plates, and clear plastic textureplates. The brass stencils are only margin-
ally satisfactory, as the resulting image is abit shallow and too much pressure can cutthrough the PMC Sheet.
The clear plastic plate gives a very softtexture, and the brass texture plates resultin a nice texture. Either of these can tex-ture the full square sheet if desired.
What has not worked for me, at least sofar, is a rubber stamp. The rubber is too softto hold up to the pressure. I tried bothmounted and unmounted stamps withoutmuch success. A paper crimper is not satis-factory either as it tends to shred the clay.All my tests were done with a single layerof unfired PMC Sheet. Unfired laminatedsheets might yield different results.
TryThis!
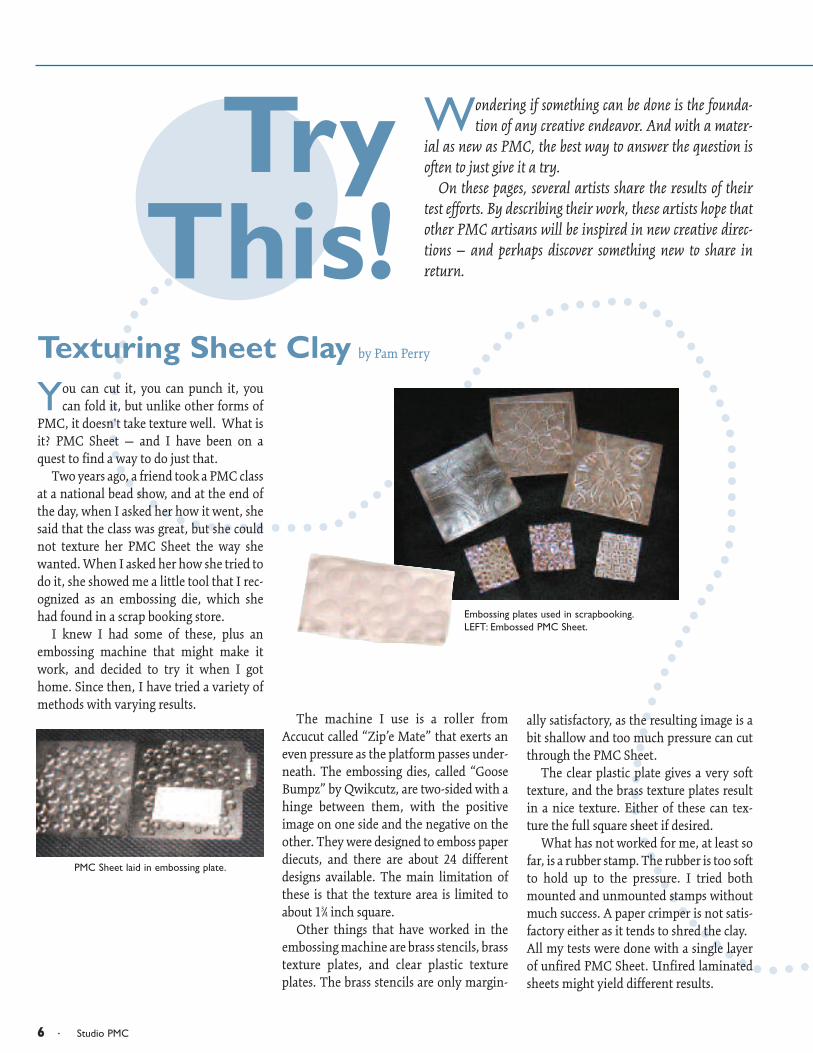
Embossing plates used in scrapbooking.LEFT: Embossed PMC Sheet.
PMC Sheet laid in embossing plate.
Texturing Sheet Clay by Pam Perry
Wondering if something can be done is the founda-tion of any creative endeavor. And with a mater-
ial as new as PMC, the best way to answer the question isoften to just give it a try.
On these pages, several artists share the results of theirtest efforts. By describing their work, these artists hope thatother PMC artisans will be inspired in new creative direc-tions — and perhaps discover something new to share inreturn.
Summer 2007 · 77
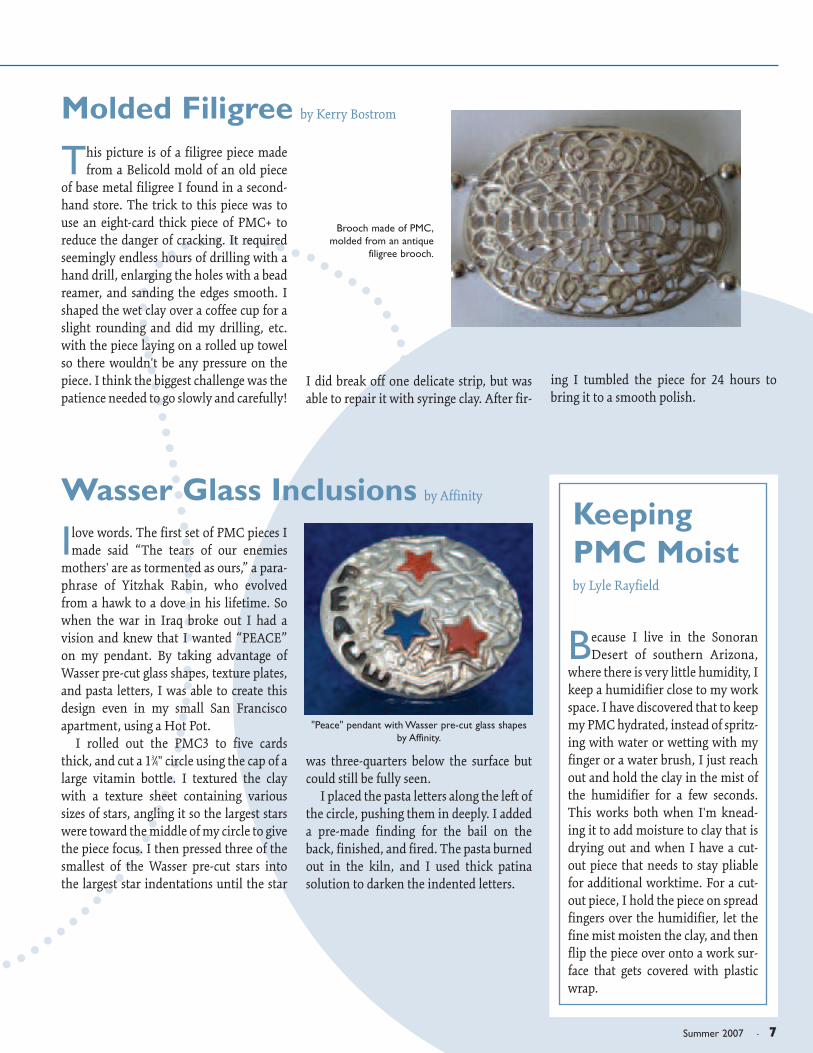
Brooch made of PMC,molded from an antique
filigree brooch.
"Peace" pendant with Wasser pre-cut glass shapesby Affinity.
Molded Filigree by Kerry Bostrom
Wasser Glass Inclusions by Affinity
This picture is of a filigree piece madefrom a Belicold mold of an old piece
of base metal filigree I found in a second-hand store. The trick to this piece was touse an eight-card thick piece of PMC+ toreduce the danger of cracking. It requiredseemingly endless hours of drilling with ahand drill, enlarging the holes with a beadreamer, and sanding the edges smooth. Ishaped the wet clay over a coffee cup for aslight rounding and did my drilling, etc.with the piece laying on a rolled up towelso there wouldn't be any pressure on thepiece. I think the biggest challenge was thepatience needed to go slowly and carefully!
I did break off one delicate strip, but wasable to repair it with syringe clay. After fir-
ing I tumbled the piece for 24 hours tobring it to a smooth polish.
Ilove words. The first set of PMC pieces Imade said “The tears of our enemies
mothers' are as tormented as ours,” a para-phrase of Yitzhak Rabin, who evolvedfrom a hawk to a dove in his lifetime. Sowhen the war in Iraq broke out I had avision and knew that I wanted “PEACE”on my pendant. By taking advantage ofWasser pre-cut glass shapes, texture plates,and pasta letters, I was able to create thisdesign even in my small San Franciscoapartment, using a Hot Pot.
I rolled out the PMC3 to five cardsthick, and cut a 13⁄4" circle using the cap of alarge vitamin bottle. I textured the claywith a texture sheet containing varioussizes of stars, angling it so the largest starswere toward the middle of my circle to givethe piece focus. I then pressed three of thesmallest of the Wasser pre-cut stars intothe largest star indentations until the star
was three-quarters below the surface butcould still be fully seen.
I placed the pasta letters along the left ofthe circle, pushing them in deeply. I addeda pre-made finding for the bail on theback, finished, and fired. The pasta burnedout in the kiln, and I used thick patinasolution to darken the indented letters.
Because I live in the SonoranDesert of southern Arizona,
where there is very little humidity, Ikeep a humidifier close to my workspace. I have discovered that to keepmy PMC hydrated, instead of spritz-ing with water or wetting with myfinger or a water brush, I just reachout and hold the clay in the mist ofthe humidifier for a few seconds.This works both when I'm knead-ing it to add moisture to clay that isdrying out and when I have a cut-out piece that needs to stay pliablefor additional worktime. For a cut-out piece, I hold the piece on spreadfingers over the humidifier, let thefine mist moisten the clay, and thenflip the piece over onto a work sur-face that gets covered with plasticwrap.
KeepingPMC Moistby Lyle Rayfield
88 · Studio PMC
Stone Setting Techniquesby Jennifer Smith-Righter
TryThis!
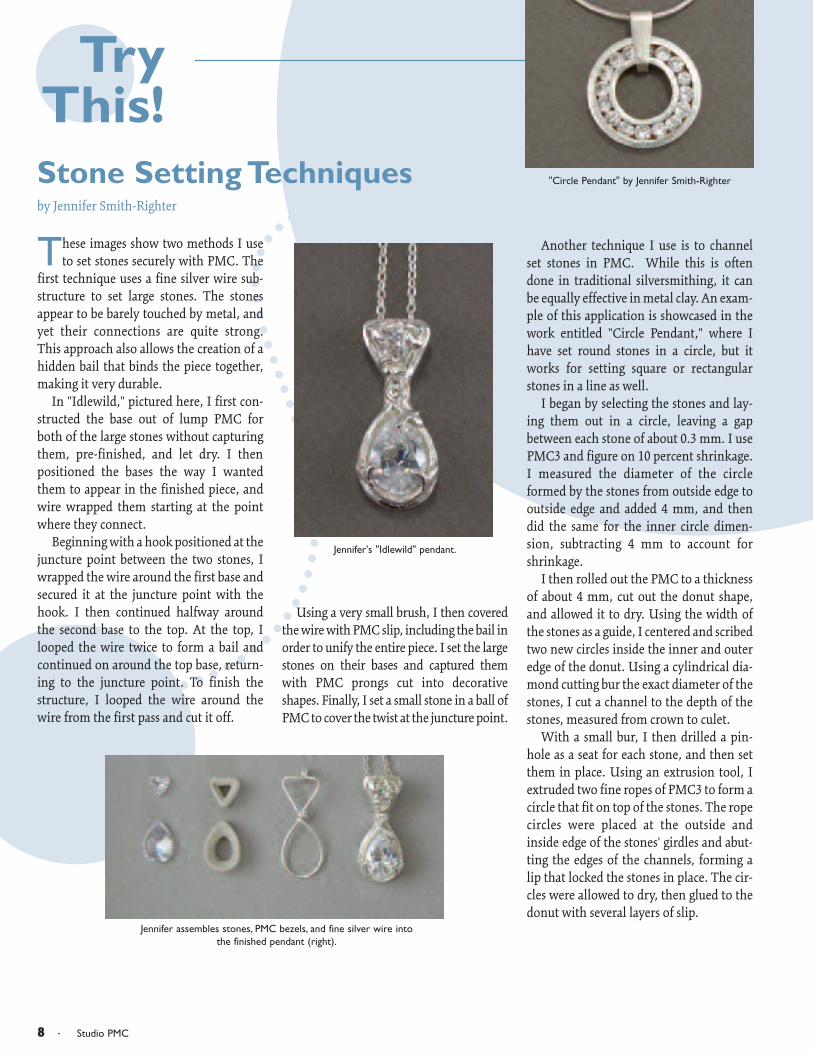
"Circle Pendant" by Jennifer Smith-Righter
Jennifer assembles stones, PMC bezels, and fine silver wire into the finished pendant (right).
Using a very small brush, I then coveredthe wire with PMC slip, including the bail inorder to unify the entire piece. I set the largestones on their bases and captured themwith PMC prongs cut into decorativeshapes. Finally, I set a small stone in a ball ofPMC to cover the twist at the juncture point.
Another technique I use is to channelset stones in PMC. While this is oftendone in traditional silversmithing, it canbe equally effective in metal clay. An exam-ple of this application is showcased in thework entitled "Circle Pendant," where Ihave set round stones in a circle, but itworks for setting square or rectangularstones in a line as well.
I began by selecting the stones and lay-ing them out in a circle, leaving a gapbetween each stone of about 0.3 mm. I usePMC3 and figure on 10 percent shrinkage.I measured the diameter of the circleformed by the stones from outside edge tooutside edge and added 4 mm, and thendid the same for the inner circle dimen-sion, subtracting 4 mm to account forshrinkage.
I then rolled out the PMC to a thicknessof about 4 mm, cut out the donut shape,and allowed it to dry. Using the width ofthe stones as a guide, I centered and scribedtwo new circles inside the inner and outeredge of the donut. Using a cylindrical dia-mond cutting bur the exact diameter of thestones, I cut a channel to the depth of thestones, measured from crown to culet.
With a small bur, I then drilled a pin-hole as a seat for each stone, and then setthem in place. Using an extrusion tool, Iextruded two fine ropes of PMC3 to form acircle that fit on top of the stones. The ropecircles were placed at the outside andinside edge of the stones' girdles and abut-ting the edges of the channels, forming alip that locked the stones in place. The cir-cles were allowed to dry, then glued to thedonut with several layers of slip.
These images show two methods I useto set stones securely with PMC. The
first technique uses a fine silver wire sub-structure to set large stones. The stonesappear to be barely touched by metal, andyet their connections are quite strong.This approach also allows the creation of ahidden bail that binds the piece together,making it very durable.
In "Idlewild," pictured here, I first con-structed the base out of lump PMC forboth of the large stones without capturingthem, pre-finished, and let dry. I thenpositioned the bases the way I wantedthem to appear in the finished piece, andwire wrapped them starting at the pointwhere they connect.
Beginning with a hook positioned at thejuncture point between the two stones, Iwrapped the wire around the first base andsecured it at the juncture point with thehook. I then continued halfway aroundthe second base to the top. At the top, Ilooped the wire twice to form a bail andcontinued on around the top base, return-ing to the juncture point. To finish thestructure, I looped the wire around thewire from the first pass and cut it off.
Jennifer's "Idlewild" pendant.
Summer 2007 · 99
3.375 X 4.875 1/4 page b/w ad
Thompson Unleaded Enamels, Soyer Leaded Enamels,
enameling books, tools and kilns
Get hooked – request a catalog 1-800-525-5959
Visit us on the web www.enameling.com
COLORM AYBE HABITFO RM ING!
SCHLAIFER’S Enameling Supplies, LLCPO Box 6776, Gardnerville, NV 89460
1100 · Studio PMC
Advanced Techniques in Hollow Form Construction
My work with hollow forms stemsfrom my architectural background. I
have a basic need to build things and tovisualize them in 3D. I remember spend-ing an entire spring break buried in a pileof balsa wood, striving to build a perfectmodel. Although balsa wood is no longermy modeling material, I am still driven bythe passion to build things.
When I began working in PMC, I startedout building basic boxes with flat sides. Itwasn’t long before the nagging voice struck:“There must be a way to make curved walls— boxes with undulating curves would benice.” But how would I do that? If PMC did-n’t shrink, it would be a slam dunk — justfire the pieces separately and then put themtogether. Variability in shrinkage preventedthat, though, so I just kept trying differentbuilding strategies and testing them until Ifound an approach that worked.
by Gwen A. Bernecker
Many people have asked me, “How didyou do that?” I think that’s one of the bestcompliments an artist can receive. The fol-lowing are some general guidelines andtechniques for building hollow forms thatare not limited to flat sides. Read throughthe steps and give it a try. This isn't an easyprocess, but I think it will expand yourPMC horizons.
Making PlansBegin by sketching your hollow form.Gradual slopes and angles are pleasing to theeye and easy to work with. You will need toincorporate an opening in your piece to ventthe cork clay when it burns out. These mightbe decorative holes or spaces for mounting apearl, bead, or gemstone. If you are usingsmall pinholes, be sure to make enough ofthem to vent the piece. Remember to takeshrinkage into consideration. Plan a bail
that will support the weight of your piece.Decide how you want to texture your
piece. Photopolymer plates, polymer etch-ings, rubber stamps, and organic textureswill all work. Prepare your texturing mate-rials ahead of time, making sure that sur-faces are oiled and ready to use.
Plan what type of form you will use toshape the top of the hollow form. Thiscould be anything: knitting needles, rolledpaper, chopsticks, children's woodenblocks, long thin cones of Teflon or waxedpaper — use your imagination. Prepareyour form for use and set aside.
Consider testing your design with poly-mer clay. Polymer clay is inexpensive, curesin your oven, and will help you visualizeyour design in 3D. Check the piece to makesure the resulting shape is visually pleasing.
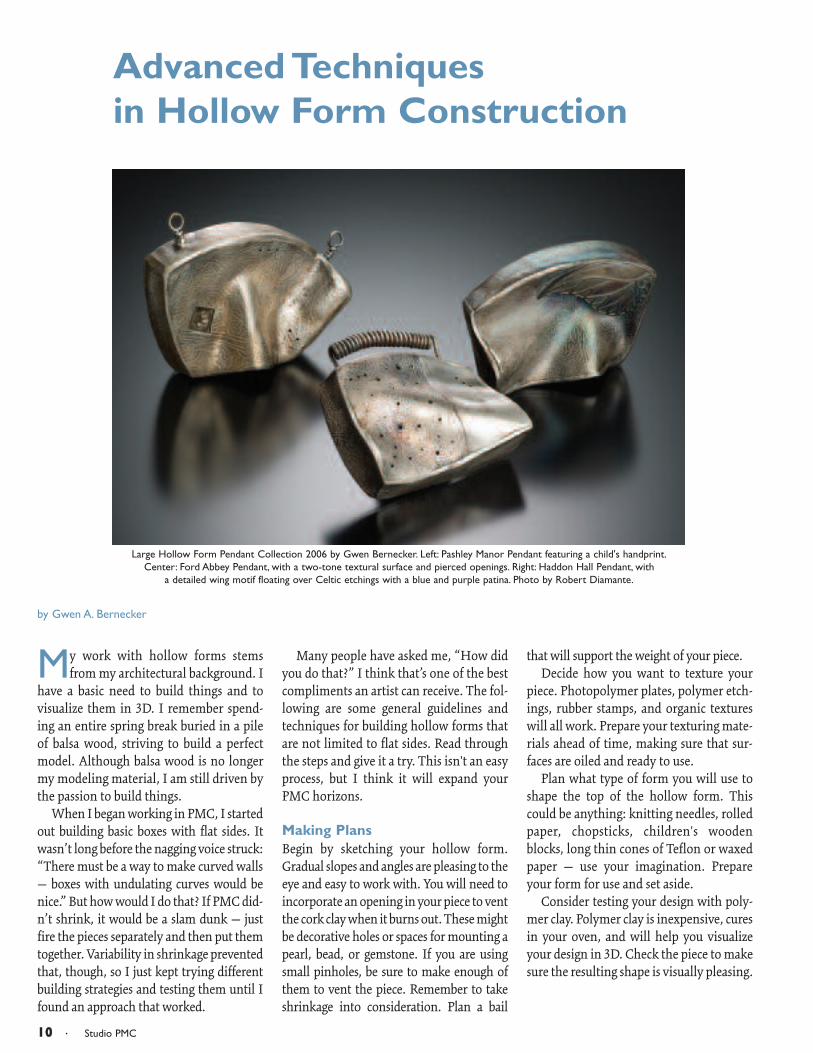
Large Hollow Form Pendant Collection 2006 by Gwen Bernecker. Left: Pashley Manor Pendant featuring a child's handprint.Center: Ford Abbey Pendant, with a two-tone textural surface and pierced openings. Right: Haddon Hall Pendant, with
a detailed wing motif floating over Celtic etchings with a blue and purple patina. Photo by Robert Diamante.
Summer 2007 · 1111
Take it from the TopStep 1. Make a template of the top piecefrom cardstock. Roll fresh clay sandwichedbetween a Teflon sheet on the bottom anda sheet protector on top to a thickness of1.5 mm. Check to make sure that the clay islarge enough for your template.
Step 2. Texture your clay. I usually reducethe thickness of the clay while texturing toabout 1.25 mm.
Step 3. Cut out the top of the hollow formusing your template. If your designincludes a large cut-out, remove that whilethe clay is wet. If you are drilling holes,wait until the clay is leather hard.
Step 4. Drape the clay gently over theform to shape it. Make any necessaryadjustments while the clay is workable.Lay a sheet protector over the clay andsmooth any ridges from cutting the claywith your fingers, using very light pres-sure. This will correct any distortion andsave you sanding time. Let dry. (It is bestnot to do this in the dehydrator because ofpotential warping: halogen lights willspeed drying without distortion.)
Step 5. When the piece is dry, sand theedges with a salon board at 90° to the topsurface. Take the time to properly refineyour edges – clay is much easier to workwith than metal, so doing this now is moreefficient.
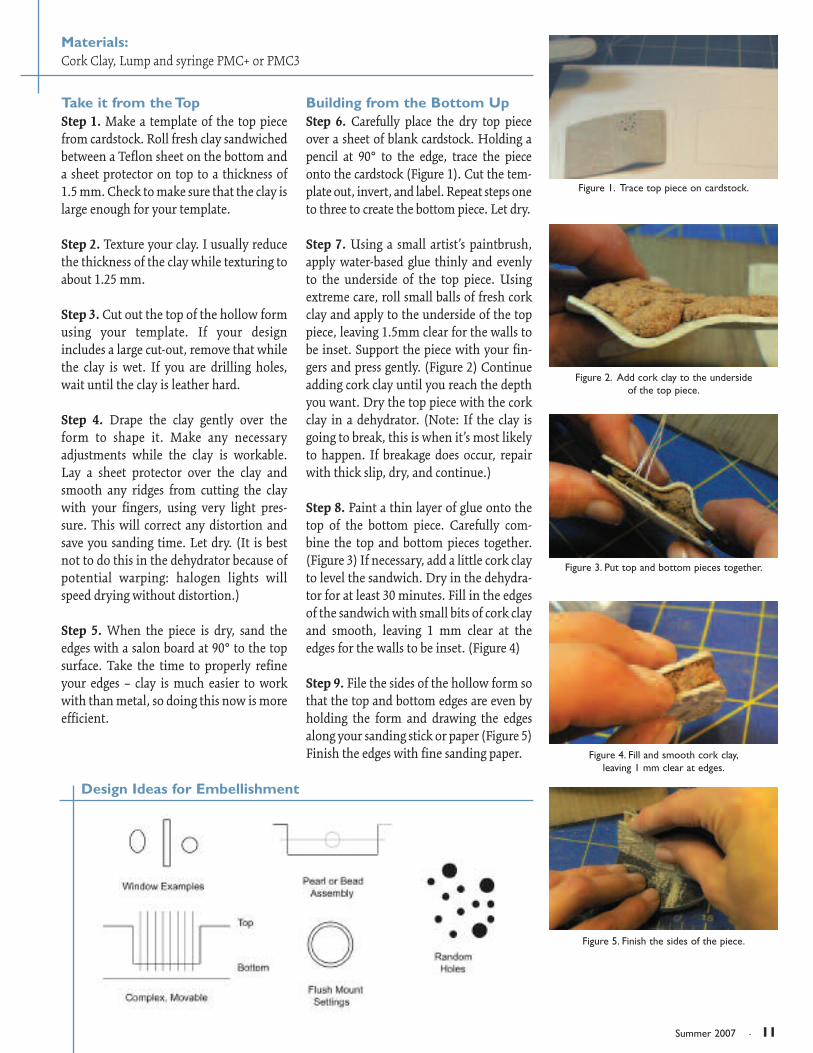
Building from the Bottom UpStep 6. Carefully place the dry top pieceover a sheet of blank cardstock. Holding apencil at 90° to the edge, trace the pieceonto the cardstock (Figure 1). Cut the tem-plate out, invert, and label. Repeat steps oneto three to create the bottom piece. Let dry.
Step 7. Using a small artist’s paintbrush,apply water-based glue thinly and evenlyto the underside of the top piece. Usingextreme care, roll small balls of fresh corkclay and apply to the underside of the toppiece, leaving 1.5mm clear for the walls tobe inset. Support the piece with your fin-gers and press gently. (Figure 2) Continueadding cork clay until you reach the depthyou want. Dry the top piece with the corkclay in a dehydrator. (Note: If the clay isgoing to break, this is when it’s most likelyto happen. If breakage does occur, repairwith thick slip, dry, and continue.)
Step 8. Paint a thin layer of glue onto thetop of the bottom piece. Carefully com-bine the top and bottom pieces together.(Figure 3) If necessary, add a little cork clayto level the sandwich. Dry in the dehydra-tor for at least 30 minutes. Fill in the edgesof the sandwich with small bits of cork clayand smooth, leaving 1 mm clear at theedges for the walls to be inset. (Figure 4)
Step 9. File the sides of the hollow form sothat the top and bottom edges are even byholding the form and drawing the edgesalong your sanding stick or paper (Figure 5)Finish the edges with fine sanding paper.
Materials:Cork Clay, Lump and syringe PMC+ or PMC3
Figure 1. Trace top piece on cardstock.
Figure 3. Put top and bottom pieces together.
Figure 4. Fill and smooth cork clay,leaving 1 mm clear at edges.
Figure 5. Finish the sides of the piece.
Figure 2. Add cork clay to the underside of the top piece.
Design Ideas for Embellishment

1122 · Studio PMC
Taking SidesStep 10. Trace each side of the piece oncardstock. For the curved areas, gently rollthe piece until it meets the paper for trac-ing. Draw a line 1 mm inside of the topand bottom border to account for thethickness of the top and bottom. For eachof the longer two sides, add 1 mm to eachend. (Figure 6) Cut out the templates andtest the sizing by overlaying the cardstockonto the box sides. Adjust as necessary.
Step 11. Following steps one to three,make the box sides using the templates cre-ated in Step 10. If the box sides will becurved, you will need to curve your sidepieces. This can be done using paper forms,or by actually draping the clay over the sideof the box (Figure 7). Dry side pieces.
Step 12. Working on one long side piece ata time, mark with a pencil any areas thatneed to be altered for proper fit. Refinecarefully using sanding pads and salonboard. This is an iterative process — checkfor fit, refine, check for fit again. The sidesneed to fit, but should not be tight. Oncethe fit and length are OK, miter the endsby making a 45˚ slice with a tissue blade.
Step 13. Apply thick slip with a syringe bypressing the tip gently against the insideedge of the top and bottom. Apply in acontinuous bead (like caulking) across thelength of the top and bottom. Very gentlypress one side piece into place so that it isflush with the top and bottom. (Figure 8)Repeat for the remaining sides. Dry.
Step 14. Support the hollow form in ver-miculite in an unglazed pottery saucer.Brush the vermiculite up to the sides of thepiece. Since there is cork clay in this piece,vent your kiln and program it for a slowramp of 800° per hour. Fire at 1650°F for10 minutes. Once the piece is cooled toroom temperature, invert it, and shakeand tap to remove the residual ash leftfrom the cork clay burnout. Brush thepiece using liquid soap and a brass brushunder running water.
Gwen Bernecker’s design studio, Two Olives, islocated in her home in Chester County,Pennsylvania. She left the building design pro-fession in 1999 after the birth of her youngestchild. She is a certified as both a PMC Artisanand Art Clay Instructor and teaches bothnationally and locally. Gwen is a member of thePMC Guild, the American Craft Council, theNational Polymer Clay Guild and thePhiladelphia Area Polymer Clay Guild. Gwen’sdegree is in architectural engineering from ThePennsylvania State University. Two Olives jew-elry is sold at juried galleries, shows and onlineat www.twoolivesstudio.com. Gwen would loveto receive photos of projects inspired by this arti-cle at [email protected].
Advanced Techniques in Hollow Form Construction
Figure 6. Make side templates.
Figure 7. Fit sides.
Figure 8.Attach sides with thick slip,using a syringe.
Snowshill Pendant. PMC with Celtic designs and Japanese glass beads onmovable silver wires. Photo by Robert Diamante.
Hidcote Pendant.PMC with Celtic etchings
framing a window of movableJapanese glass seed beads.
Photo by Robert Diamante.

Summer 2007 · 1133

1144 · Studio PMC
To submit your photos to our Gallery sendslides or prints to:
Studio PMC, P.O. Box 265,Mansfield, MA 02048.
Please include your name, address, countryif outside the US, phone, e-mail address, abrief bio, photo credit, plus the size andmaterials used in your piece.
Gallery
Everett Banister. Rainbow obsidian and PMC.Photo by Judd Bradley Studio.
Jo Ellen Vice. PMC and freshwater pearlnecklace on handmade sterling silver chain.Photo by Mark Minor.

Summer 2007 · 1155
"Forest Maze" by Gail Bass. PMC, fine silver wire, man-made sapphire. Photo by Alan L. Pearlman.
"Tree Frog Box" by Melinda Johnson. PMC, pewter,copper, enamel, and citrine cabochons.Photo by Brad Stanton Photography. Art Nouveau-style pendant by Cathy Klimes-Garcia.
PMC, enamel, and CZ.
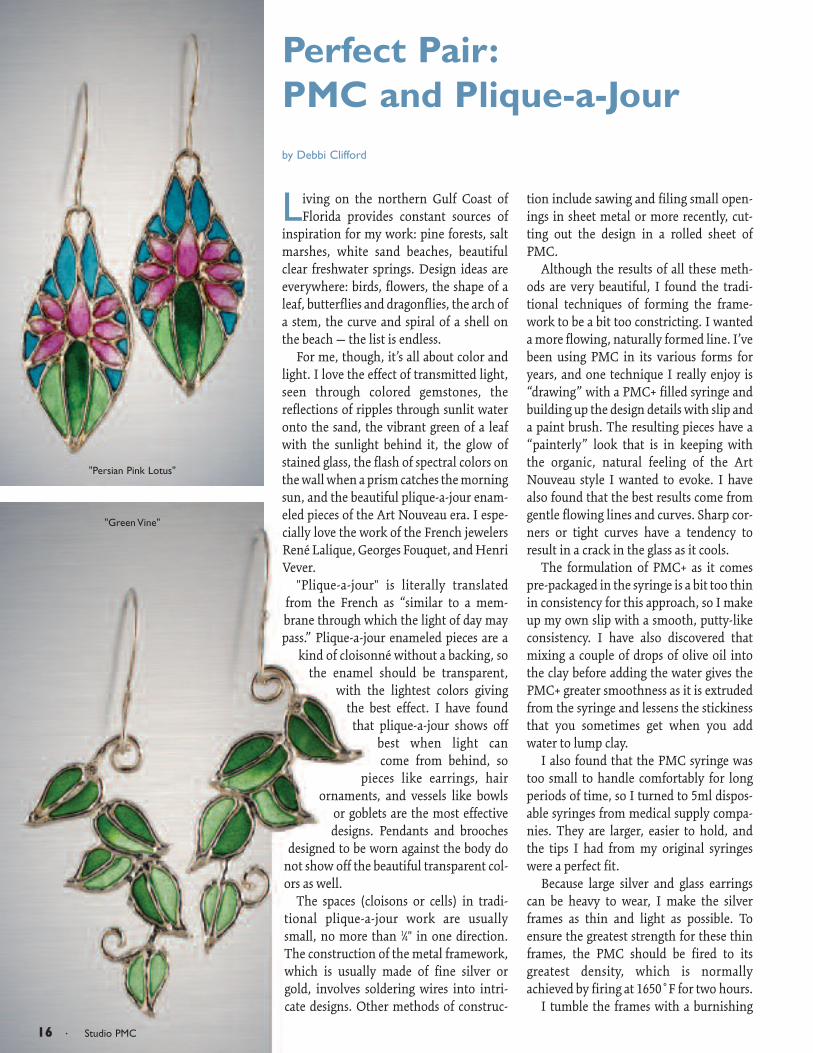
"Green Vine"
1166 · Studio PMC
Living on the northern Gulf Coast ofFlorida provides constant sources of
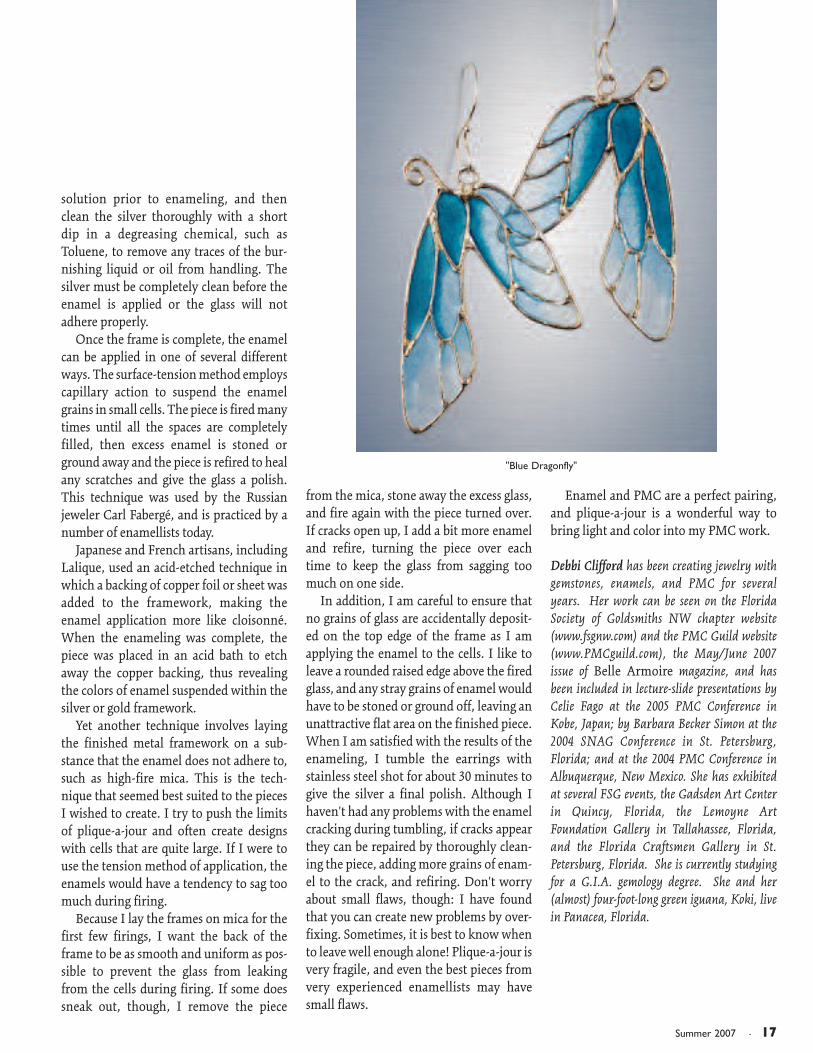
inspiration for my work: pine forests, saltmarshes, white sand beaches, beautifulclear freshwater springs. Design ideas areeverywhere: birds, flowers, the shape of aleaf, butterflies and dragonflies, the arch ofa stem, the curve and spiral of a shell onthe beach — the list is endless.
For me, though, it’s all about color andlight. I love the effect of transmitted light,seen through colored gemstones, thereflections of ripples through sunlit wateronto the sand, the vibrant green of a leafwith the sunlight behind it, the glow ofstained glass, the flash of spectral colors onthe wall when a prism catches the morningsun, and the beautiful plique-a-jour enam-eled pieces of the Art Nouveau era. I espe-cially love the work of the French jewelersRené Lalique, Georges Fouquet, and HenriVever.
"Plique-a-jour" is literally translatedfrom the French as “similar to a mem-brane through which the light of day maypass.” Plique-a-jour enameled pieces are a
kind of cloisonné without a backing, sothe enamel should be transparent,
with the lightest colors givingthe best effect. I have found
that plique-a-jour shows offbest when light cancome from behind, so
pieces like earrings, hairornaments, and vessels like bowls
or goblets are the most effectivedesigns. Pendants and brooches
designed to be worn against the body donot show off the beautiful transparent col-ors as well.
The spaces (cloisons or cells) in tradi-tional plique-a-jour work are usuallysmall, no more than 1⁄4" in one direction.The construction of the metal framework,which is usually made of fine silver orgold, involves soldering wires into intri-cate designs. Other methods of construc-
tion include sawing and filing small open-ings in sheet metal or more recently, cut-ting out the design in a rolled sheet ofPMC.
Although the results of all these meth-ods are very beautiful, I found the tradi-tional techniques of forming the frame-work to be a bit too constricting. I wanteda more flowing, naturally formed line. I’vebeen using PMC in its various forms foryears, and one technique I really enjoy is“drawing” with a PMC+ filled syringe andbuilding up the design details with slip anda paint brush. The resulting pieces have a“painterly” look that is in keeping withthe organic, natural feeling of the ArtNouveau style I wanted to evoke. I havealso found that the best results come fromgentle flowing lines and curves. Sharp cor-ners or tight curves have a tendency toresult in a crack in the glass as it cools.
The formulation of PMC+ as it comespre-packaged in the syringe is a bit too thinin consistency for this approach, so I makeup my own slip with a smooth, putty-likeconsistency. I have also discovered thatmixing a couple of drops of olive oil intothe clay before adding the water gives thePMC+ greater smoothness as it is extrudedfrom the syringe and lessens the stickinessthat you sometimes get when you addwater to lump clay.
I also found that the PMC syringe wastoo small to handle comfortably for longperiods of time, so I turned to 5ml dispos-able syringes from medical supply compa-nies. They are larger, easier to hold, andthe tips I had from my original syringeswere a perfect fit.
Because large silver and glass earringscan be heavy to wear, I make the silverframes as thin and light as possible. Toensure the greatest strength for these thinframes, the PMC should be fired to itsgreatest density, which is normallyachieved by firing at 1650˚F for two hours.
I tumble the frames with a burnishing
Perfect Pair:PMC and Plique-a-Jourby Debbi Clifford
"Persian Pink Lotus"
Summer 2007 · 1177
solution prior to enameling, and thenclean the silver thoroughly with a shortdip in a degreasing chemical, such asToluene, to remove any traces of the bur-nishing liquid or oil from handling. Thesilver must be completely clean before theenamel is applied or the glass will notadhere properly.
Once the frame is complete, the enamelcan be applied in one of several differentways. The surface-tension method employscapillary action to suspend the enamelgrains in small cells. The piece is fired manytimes until all the spaces are completelyfilled, then excess enamel is stoned orground away and the piece is refired to healany scratches and give the glass a polish.This technique was used by the Russianjeweler Carl Fabergé, and is practiced by anumber of enamellists today.
Japanese and French artisans, includingLalique, used an acid-etched technique inwhich a backing of copper foil or sheet wasadded to the framework, making theenamel application more like cloisonné.When the enameling was complete, thepiece was placed in an acid bath to etchaway the copper backing, thus revealingthe colors of enamel suspended within thesilver or gold framework.
Yet another technique involves layingthe finished metal framework on a sub-stance that the enamel does not adhere to,such as high-fire mica. This is the tech-nique that seemed best suited to the piecesI wished to create. I try to push the limitsof plique-a-jour and often create designswith cells that are quite large. If I were touse the tension method of application, theenamels would have a tendency to sag toomuch during firing.
Because I lay the frames on mica for thefirst few firings, I want the back of theframe to be as smooth and uniform as pos-sible to prevent the glass from leakingfrom the cells during firing. If some doessneak out, though, I remove the piece
from the mica, stone away the excess glass,and fire again with the piece turned over.If cracks open up, I add a bit more enameland refire, turning the piece over eachtime to keep the glass from sagging toomuch on one side.
In addition, I am careful to ensure thatno grains of glass are accidentally deposit-ed on the top edge of the frame as I amapplying the enamel to the cells. I like toleave a rounded raised edge above the firedglass, and any stray grains of enamel wouldhave to be stoned or ground off, leaving anunattractive flat area on the finished piece. When I am satisfied with the results of theenameling, I tumble the earrings withstainless steel shot for about 30 minutes togive the silver a final polish. Although Ihaven't had any problems with the enamelcracking during tumbling, if cracks appearthey can be repaired by thoroughly clean-ing the piece, adding more grains of enam-el to the crack, and refiring. Don't worryabout small flaws, though: I have foundthat you can create new problems by over-fixing. Sometimes, it is best to know whento leave well enough alone! Plique-a-jour isvery fragile, and even the best pieces fromvery experienced enamellists may havesmall flaws.
Enamel and PMC are a perfect pairing,and plique-a-jour is a wonderful way tobring light and color into my PMC work.
Debbi Clifford has been creating jewelry withgemstones, enamels, and PMC for severalyears. Her work can be seen on the FloridaSociety of Goldsmiths NW chapter website(www.fsgnw.com) and the PMC Guild website(www.PMCguild.com), the May/June 2007issue of Belle Armoire magazine, and hasbeen included in lecture-slide presentations byCelie Fago at the 2005 PMC Conference inKobe, Japan; by Barbara Becker Simon at the2004 SNAG Conference in St. Petersburg,Florida; and at the 2004 PMC Conference inAlbuquerque, New Mexico. She has exhibitedat several FSG events, the Gadsden Art Centerin Quincy, Florida, the Lemoyne ArtFoundation Gallery in Tallahassee, Florida,and the Florida Craftsmen Gallery in St.Petersburg, Florida. She is currently studyingfor a G.I.A. gemology degree. She and her(almost) four-foot-long green iguana, Koki, livein Panacea, Florida.
"Blue Dragonfly"
1188 · Studio PMC
Inspired by History by Lori Catlin Garcia
My life as a designer has always beeninspired by history. I am a self-pro-
claimed research junkie, and there is noth-ing I like more than spending endlesshours in museums with my sketchbook.However, faithful recreation of historicdetails has never interested me as much asthe use of history as a catalyst for a freshdesign. My career path before I turned tojewelry included theatre costume design,textile design, and many years as an artdirector for the LEGO® Toy Co. In each ofthose positions I had a chance to hone myresearch skills, whether I was investigatingAfrican fabric or drawing tourists at WaltDisney World who laterbecame models made oftiny LEGO® bricks.
A recent opportunityfor unusual inspirationcame from an unlikelysource. The town whereI live decided to sponsora painted animal event.The “Giddy up toGranby” horse paradewould pair artists withsponsors. The artistswere asked put in pro-posals to paint and/or decorate life-sizefiberglass horses. The finished horseswould be displayed to the public for sever-al months, then sold at auction to raisemoney for the Chamber of Commerce and
local charities. The minute I heard about the event, I
knew I wanted to participate. I lovemedieval history, and immediately thoughtof doing a horse in armor. However, Ialready had the experience of creating twolife-size cows for the CowParade® in WestHartford, Connecticut, three years before.While it was a great experience, I wanted todo something, uh, smaller this time.
The idea came to me to do a miniaturehorse. The stores in town were already sell-ing 6" resin horses and encouraging peopleto paint and display them as part of theevent. I wrote a proposal to dress one of
these tiny horses in metalarmor. At that scale, Iwould be able to showcasetechniques that couldpromote my jewelry busi-ness. The piece could be atrue collector’s item,made from silver, gold,and real gemstones. Also,I had been itching to do alarge scale piece in PMC,and this would be the per-fect opportunity. I sent insome sketches, and soon
got the good news that the Chamber ofCommerce would sponsor my horse, andthat the auction proceeds would go to sup-port the arts in the local school system.
Now the design process truly had to
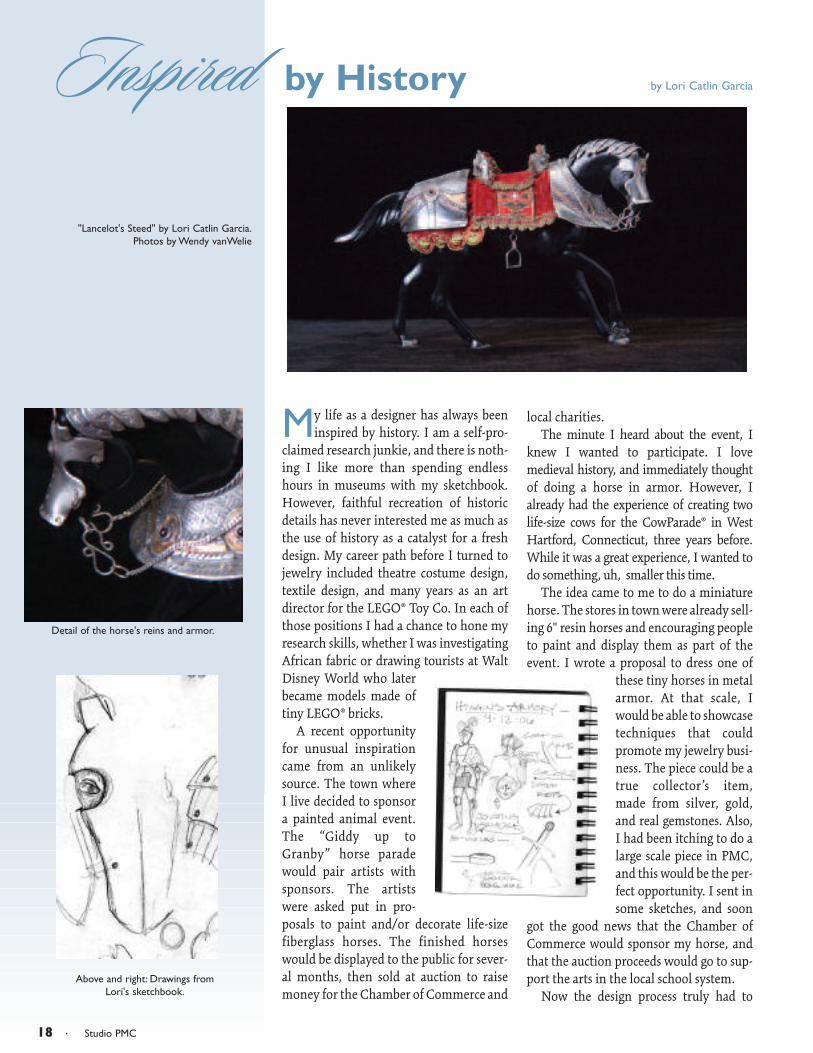
"Lancelot's Steed" by Lori Catlin Garcia.Photos by Wendy vanWelie
Detail of the horse's reins and armor.
Above and right: Drawings from Lori's sketchbook.
Summer 2007 · 1199
begin. As I said before, I love medieval his-tory, but I wanted this piece to go beyondhistory. Real medieval knights neededarmor on their horses to protect them.Later generations of wealthy men, howev-er, created armor that was purely for show.I wanted to create a fantasy based on histo-ry, so I chose to name my horse “Lancelot’sSteed.” Just like the legendary world ofKing Arthur’s Camelot, my little horsewould be a flight of fancy based on reality.
Fortunately, I had ready sources for thereality part. I live less than an hour fromthe Higgins Armory Museum inWorcester, Massachusetts, which has ondisplay more than 5,000 examples of armsand armaments. I never leave home with-out my sketchbook, so I was soon on theroad to the museum with drawing paper inhand. Once in the museum, I sketchedarmor from all styles and time periods,from ancient Greece to 17th century deco-rative armor. The details fascinated me,
particularly the construction of the mov-ing parts. I spent a long time in front ofeach case, imagining how I might recreatethose details in PMC.
My next stop was the MetropolitanMuseum of Art in New York City. They havean excellent armor collection that includesan entire gallery of armored horses. It washere that I studied the details of saddle blan-kets, reins, stirrups, etc. The collection at theMet includes superb examples of horsearmor made for wealthy rulers and noble-men. Elaborate patterns were often etchedinto the metal, and certain ceremonialpieces were studded with jewels. I sketched,and then sketched some more. I then turnedto the other medieval galleries and studiedthe paintings, sculpture and metalworkfrom the same time period. Finally, when Iwas done drawing, I visited the museumbookstore and purchased several volumesabout medieval artifacts, including a bookon the armored horse exhibit.
Lori’s Tips for Dazzling Design
• Never leave home without a sketch-book! Find one that is small enoughto fit in your purse, your briefcase, oryour pocket. Or, if you use a planner,try buying some plain white pages tofit in the back. You never know whenyou might see a detail that will fireyour imagination!
• Don’t worry if you think you “can’tdraw.” Do the best you can, and putlots of notes next to the pictures. Buypostcards and paste them in, or pickup free flyers and exhibit guideswherever you see them. The sketch-book is merely meant to jog yourmemory when you sit down to designa piece of jewelry or other artwork.
• Be motivated by others’ work, butdon’t try copy it! Try to analyze whatit is about the piece that captures you.Is it the interesting clasp? Or maybethe multi-layered texture? Writenotes in your sketchbook about theartists, styles, and time periods youadmire.
• Use historic details as a jumping-offpoint. Wouldn’t the knob on thatdresser make a great detail on that pinyou want to make? Could the peelfrom that grapefruit texture an ear-ring? I once watched another artistswoon over the peeling paint on theside of my garage!
Continued on page 20.
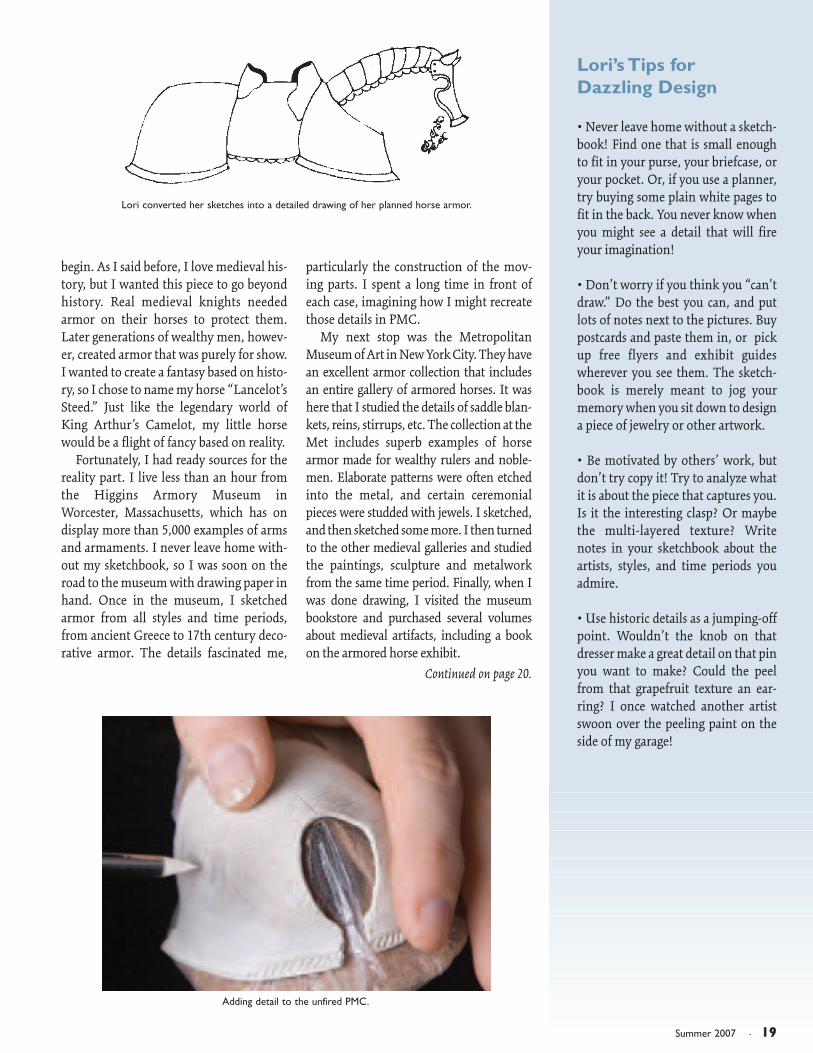
Adding detail to the unfired PMC.
Lori converted her sketches into a detailed drawing of her planned horse armor.
2200 · Studio PMC
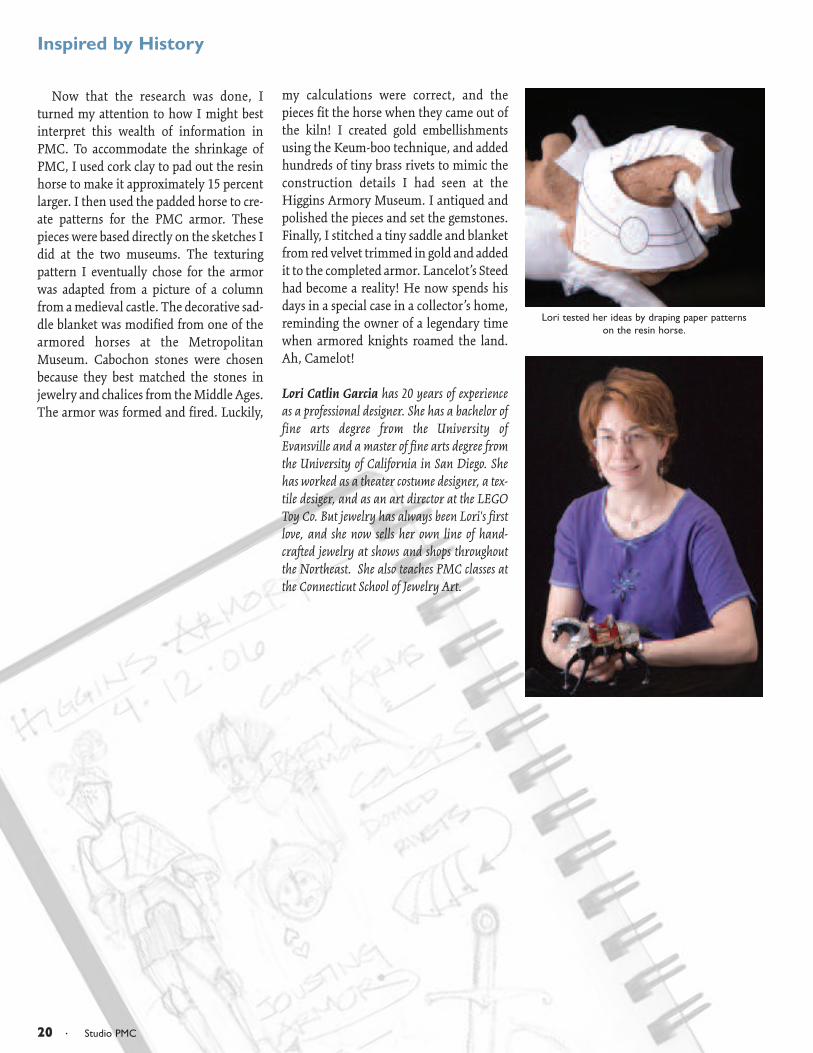
Now that the research was done, Iturned my attention to how I might bestinterpret this wealth of information inPMC. To accommodate the shrinkage ofPMC, I used cork clay to pad out the resinhorse to make it approximately 15 percentlarger. I then used the padded horse to cre-ate patterns for the PMC armor. Thesepieces were based directly on the sketches Idid at the two museums. The texturingpattern I eventually chose for the armorwas adapted from a picture of a columnfrom a medieval castle. The decorative sad-dle blanket was modified from one of thearmored horses at the MetropolitanMuseum. Cabochon stones were chosenbecause they best matched the stones injewelry and chalices from the Middle Ages.The armor was formed and fired. Luckily,
my calculations were correct, and thepieces fit the horse when they came out ofthe kiln! I created gold embellishmentsusing the Keum-boo technique, and addedhundreds of tiny brass rivets to mimic theconstruction details I had seen at theHiggins Armory Museum. I antiqued andpolished the pieces and set the gemstones.Finally, I stitched a tiny saddle and blanketfrom red velvet trimmed in gold and addedit to the completed armor. Lancelot’s Steedhad become a reality! He now spends hisdays in a special case in a collector’s home,reminding the owner of a legendary timewhen armored knights roamed the land.Ah, Camelot!
Lori Catlin Garcia has 20 years of experienceas a professional designer. She has a bachelor offine arts degree from the University ofEvansville and a master of fine arts degree fromthe University of California in San Diego. Shehas worked as a theater costume designer, a tex-tile desiger, and as an art director at the LEGOToy Co. But jewelry has always been Lori's firstlove, and she now sells her own line of hand-crafted jewelry at shows and shops throughoutthe Northeast. She also teaches PMC classes atthe Connecticut School of Jewelry Art.
Inspired by History
Lori tested her ideas by draping paper patterns on the resin horse.

Summer 2007 · 2211
Happenings
Member News
Anne Lingener-Reece was awardedJuror's Choice Award for her body of
work in silver at the Earth Fire & FibreXXVI Exhibit, which was first displayed atthe Anchorage Museum January throughMarch. The exhibit will travel through thestate of Alaska during 2007. The AnchorageMuseum also purchased Anne's work "JustDessert," a fine silver and PMC3 bowl andspoon, for its permanent collection.
The juror for the Earth Fire & Fibreexhibit was Michael W. Monroe, executivedirector and chief curator of the BellevueArt Museum in Bellevue, Washington.Prior to his current position he was execu-tive director for the American Craft Counciland associated with the SmithsonianNational Museum of American Art'sRenwick Gallery for 21 years.
Guild Member Denise Rieth's work isnow available at Everything But The
Girl, a Sarasota, Florida, boutique offeringan eclectic mix of art, home decor, gifts,jewelry, and clothing by local artists. Thestore's website is www.shopebtg.com.
Lora Hart has been selected as the onlymetal clay instructor to offer classes at
the Puget Sound Bead Festival in Tacoma,Washington, July 12-14. She will be one ofnearly 30 jewelry instructors from acrossthe country presenting classes at the festi-val, which is the largest bead show on theWest Coast.
PMC Guild member Donna Papazianwas profiled in a feature article in The
Landmark, a newspaper in Donna's home-town of Holden, Massachusetts, inNovember. The article focused on Donna'swork on behalf of the Molly Bish Centerfor the Protection of Children and theElderly at Anna Maria College. Donna hasbeen offering a bracelet of silver and beadsto support fundraising efforts for the cen-ter, founded in memory of a Rhode Islandgirl who disappeared from her lifeguardpost in 2000.
Donna was also featured in an article inthe Worcester Telegram and Gazette aboutHolden's open studio tour, called "ArtRide." The article described in detailDonna's use of PMC to capture geraniumsin silver.
Call for Entries
Entries for the 2008 Niche Awards arenow being accepted. The Niche
Awards, which are sponsored by Nichemagazine, celebrate excellence and inno-vation in American and Canadian craft.The competition's categories include jew-elry, metal, mixed media, handmadebeads, and polymer clay.
Finalists will be invited to display theirwork in the Niche Awards exhibit at theFebruary 2008 Philadelphia Buyers Marketof American Craft, where the winners willbe announced, and included in the Winter2008 issue of Niche.
Applications are currently available atwww.AmericanCraft.com. The entry dead-line for professionals is Aug. 31, and for stu-dents Sept. 28.
EventsThe Enamelist Society will hold their 2007conference and exhibition, “Fusion” Aug. 24-26 in Columbus, Ohio. Thekeynote speaker will be Harold B. Helwig,one of the three American enamellistsrecently featured in this year's exhibition,“Painting with Fire” at The Long BeachMuseum of Art in Long Beach, California.
The biennial event will include a juriedinternational exhibition open for publicviewing, an auction, and a variety of pre-and post-conference workshops. For infor-mation, visit the Enamelist Society websiteat www.enamelistsociety.org.
Publications
Rio Grande has introduced two new 32-page full-color magazines dedicated to
professional jewelers. The Artisan's Quarterly,for makers of jewelry, will include newproduct information and tips for usingfamiliar items in new ways, as well as featurearticles about jewelry making tools, sup-plies, and equipment. The Merchant'sQuarterly, for sellers of jewelry, will includehigh quality photography and in-depthinformation on products, processes and bestpractices that will help keep jewelry sellerswell-stocked and well-informed.
Guild members' work continues toappear in print. Holly Gage's feature
article "Free Formed Titanium" and com-panion step-by-step project "FocalTitanium Pendant" appeared in the April2007 issue of Lapidary Journal. "The ScreenBetween" by Hadar Jacobson with JillErickson appeared in the March 2007 issueof Art Jewelry, while Irina Miech's article“Calla Lily Suite” was published in the Mayissue. In addition, Catherine Davies Paetzand Debra Weld had work featured in theGallery section of Art Jewelry in March.
Correction
Due to a reporting error, Studio PMCincorrectly identified PMC artist
Carol Lynn Crow's home country in theWinter 2006 issue. Carol lives in theNetherlands.
"Just Desserts" by Anne Lingener-Reece.
2222 · Studio PMC
Local Chapters
In April, the Northeast Ohio Chapterinvited Robert Dancik come and play in
Cleveland. “Workshops in Faux BoneTM
and Adventures in the Material Worldwere enthusiastically attended by manymembers,” writes Catherine Davies-Paetz. “We had great fun exploring manynew materials, and are very excited to findways to incorporate them into our PMCdesigns.”
The chapter also continues to sponsor ashow of member's work at local libraries.“Our chapter's traveling library show con-tinues to ‘circulate monthly,’ and is receiv-ing rave reviews from patrons,” writesCathy. “We are ‘booked’ into a libraryevery month this year, and even have'return' engagements! We hope everyonewill 'check us out!’”
The Sonoran Desert Chapter inScottsdale, Arizona, is reorganizing.
Marilyn Ostrow has volunteered take thelead beginning this fall, and the chapter issoliciting interested artists to help with theplanning. Anyone interested in being partof the chapter's fresh start can e-mail DonnaLewis at [email protected].
Local Chapters
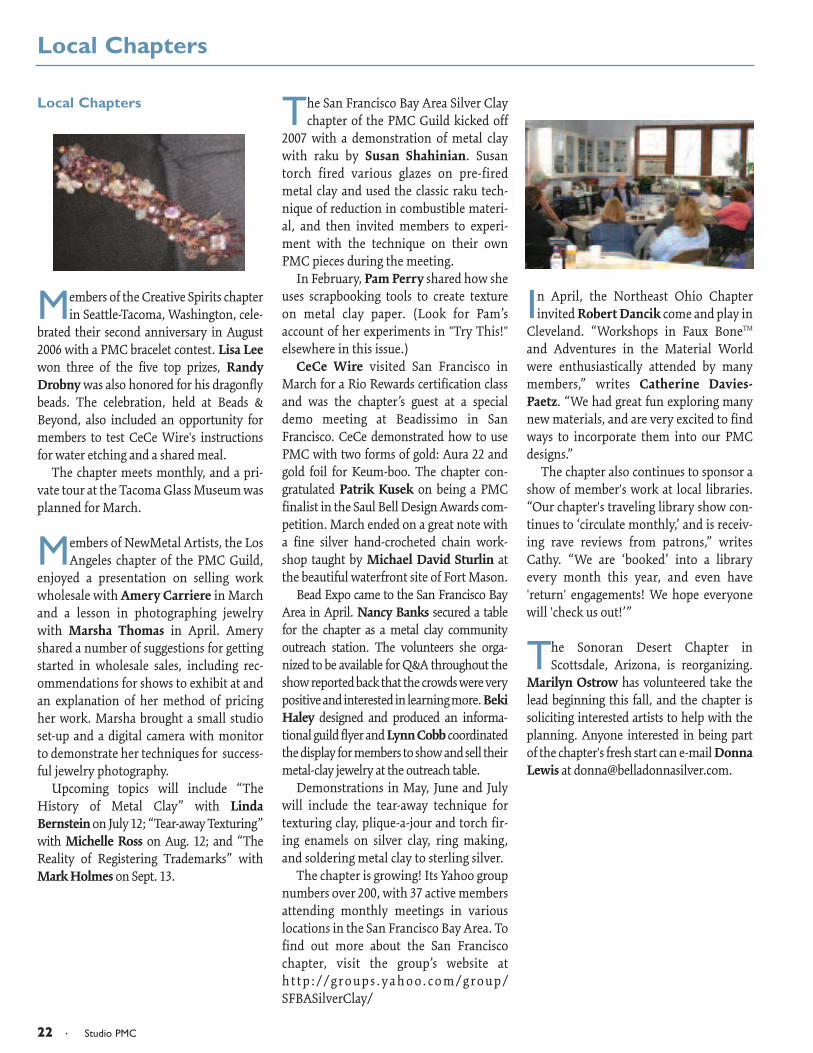
Members of the Creative Spirits chapterin Seattle-Tacoma, Washington, cele-
brated their second anniversary in August2006 with a PMC bracelet contest. Lisa Leewon three of the five top prizes, RandyDrobny was also honored for his dragonflybeads. The celebration, held at Beads &Beyond, also included an opportunity formembers to test CeCe Wire's instructionsfor water etching and a shared meal.
The chapter meets monthly, and a pri-vate tour at the Tacoma Glass Museum wasplanned for March.
Members of NewMetal Artists, the LosAngeles chapter of the PMC Guild,
enjoyed a presentation on selling workwholesale with Amery Carriere in Marchand a lesson in photographing jewelrywith Marsha Thomas in April. Ameryshared a number of suggestions for gettingstarted in wholesale sales, including rec-ommendations for shows to exhibit at andan explanation of her method of pricingher work. Marsha brought a small studioset-up and a digital camera with monitorto demonstrate her techniques for success-ful jewelry photography.
Upcoming topics will include “TheHistory of Metal Clay” with LindaBernstein on July 12; “Tear-away Texturing”with Michelle Ross on Aug. 12; and “TheReality of Registering Trademarks” withMark Holmes on Sept. 13.
The San Francisco Bay Area Silver Claychapter of the PMC Guild kicked off
2007 with a demonstration of metal claywith raku by Susan Shahinian. Susantorch fired various glazes on pre-firedmetal clay and used the classic raku tech-nique of reduction in combustible materi-al, and then invited members to experi-ment with the technique on their ownPMC pieces during the meeting.
In February, Pam Perry shared how sheuses scrapbooking tools to create textureon metal clay paper. (Look for Pam’saccount of her experiments in "Try This!"elsewhere in this issue.)
CeCe Wire visited San Francisco inMarch for a Rio Rewards certification classand was the chapter’s guest at a specialdemo meeting at Beadissimo in SanFrancisco. CeCe demonstrated how to usePMC with two forms of gold: Aura 22 andgold foil for Keum-boo. The chapter con-gratulated Patrik Kusek on being a PMCfinalist in the Saul Bell Design Awards com-petition. March ended on a great note witha fine silver hand-crocheted chain work-shop taught by Michael David Sturlin atthe beautiful waterfront site of Fort Mason.
Bead Expo came to the San Francisco BayArea in April. Nancy Banks secured a tablefor the chapter as a metal clay communityoutreach station. The volunteers she orga-nized to be available for Q&A throughout theshow reported back that the crowds were verypositive and interested in learning more. BekiHaley designed and produced an informa-tional guild flyer and Lynn Cobb coordinatedthe display for members to show and sell theirmetal-clay jewelry at the outreach table.
Demonstrations in May, June and Julywill include the tear-away technique fortexturing clay, plique-a-jour and torch fir-ing enamels on silver clay, ring making,and soldering metal clay to sterling silver.
The chapter is growing! Its Yahoo groupnumbers over 200, with 37 active membersattending monthly meetings in variouslocations in the San Francisco Bay Area. Tofind out more about the San Franciscochapter, visit the group’s website ath t t p : / / g r o u p s . y a h o o . c o m / g r o u p /SFBASilverClay/
Summer 2007 · 2233For Advertising information: Call Bill Spilman toll-free at 877-878-3260
THE SHOW for art glass, beads, flameworking, glass painting,polymer and metal clay, stained glass, classes, shopping and FUN!
November 16 – 17, 2007 • OCCC • Orlando, FLwww.BeadandArtGlassFest.comProduced by Offinger Management Co. – Offinger.com
Two days of clay ... endless creativity. Shop, learn, enjoy!
Linda’s Lid™Metal Clay Syringe Holder
Order online: www.naturescapesstudio.com
Tip proof!No more dried syringes!Holds 4 syringes!
$15+shippingwholesale inquiries welcome
Why not come to magical Cornwallfor a jewellery class? We offer thewidest range of jewellery relatedcourses available at any independentschool in the UK.
The purpose-built workshop is nestledin the valley at Treesmill in Mid Cornwallon the south coast. Situated within theg rounds of a water mill dating back over300 years, Treesmill is featured inDaphne Du Mauriers’ book,The Houseon the Strand.
We are only 5 minutes from lovelybeaches, ancient monuments and theworld famous Eden Project. MCSJ iseasily reached by train from either ofthe London airports. We can providedetails about ground transportation and lodging at a local B&B.
In 2007 we have masterclasses withquite a few names you will recogniseincluding Tim McCreight, Celie Fagoand Robert Dancik.Take a look at ourwebsite for further details.
We have also developed a ground-breaking new PMC trainingprogramme.
The Diploma in PMC Proficiencyis free from marketing discounts or particular suppliers and a quarter of the syllabus focuses on good PMC teaching skills.
If you want to teach classes or work seriously with PMC then this is currently the most thoroughtraining available. Come on over!
MCSJTreesmill Farm Tywardreath ParCornwall PL24 2TX United Kingdom
Telephone 01144-1726-817989E-mail [email protected]
THINKING OF VISITING ENGLAND?
• FAST• SECURE• GRATIFYING
www.PMCguild.com
Membership in the PMC Guild
Join or RenewONLINE!
PP.. OO
.. BBoo
xx 22 66 55MM
aa nnss ff ii ee ll dd
,, MMAA
00 22 00 44 88
ww ww ww .. PP MMCC gg uu ii ll dd .. cc oo mm
Nam
e & A
ddr ess incor r ect? Send corrections to P.O
. Box 3000 Denville, N
J 07834, or update your account on our W
eb site, ww
w.PM
Cguild.com
.
PRSRT STDU
.S. PO
STAG
EPA
ID
PON
TIAC
, ILPERM
IT No.721
StudioM
ember M
agazine of the PMC
GuildPM
C