Embed Size (px)
Citation preview

MECHANICSKILLS:Practice
BIKE WORKS 2015113FRAMEWORKS
Mechanic Skills: Practice
MECHANIC SKILLS: PRACTICE
QUICK NOTES
These lessons are not meant to be used alone. Always pair with “mechanic skills explanations.”
We broke the lessons into two parts so that teachers could make classes as long or as short as they needed. While we never do this, some schedules may call for doing an Explanation one day and a Practice another day. Other classes may be able to combine two Explanation units and two Practice units into one session. The important thing is that youth are receiving some explanation and safety information before being handed tools and bikes.
As with our Explanation units, when teaching Practice units we follow these guidelines at Bike Works: Ask twice as many questions as you answer. Emphasize a hands-on approach to learning. Focus on “problem solving” and “troubleshooting.” Safety is part of every lesson.
It is particularly important to stress safety during Practice units. There are countless ways youth can bump, bang, hit, chip, scrape or oth-erwise dent themselves, each other, and/ or the bikes. For this reason it is important to point out general safety guidelines such as, “Use tools for their intended use only,” as well as lesson-specific hints and tricks such as, “Be extremely careful of hitting your knuckles on the chain ring when you are removing crank arms.” We have done our best to include these reminders in “NOTES” boxes throughout the lessons.
Finally, be aware that some students may have never held a tool before. Start from the beginning and help students find a grip that is comfortable for them. Although it may seem like smaller people will have more trouble with loosening bolts or tightening a cable, most seasoned mechanics will tell you it’s all about leverage. Help students learn how to position themselves in order to put gravity on their side, and how to use the best tools (the longer combination wrench for example) to get the best leverage.
BIKE WORKS 2015114 FRAMEWORKS
Mechanic Skills: Practice
WHAT YOU WILL FIND IN THIS SECTIONBike Break Down 115Bike Part Bingo 116Fix a Flat Practice 118Front Hub Practice 120Threaded Headset Practice 1221–Piece Bottom Bracket Practice 124Brakes: BMX and MTB Practice 126Rear Derailleur Practice 128Front Derailleur Practice 130Threadless Headset Practice 1323–Piece Bottom Bracket Practice 134Advanced Brakes Practice 136Advanced Drivetrain Practice 138Rear Hub Practice 140Wheel Truing Practice 142
BIKE WORKS 2015115FRAMEWORKS
Mechanic Skills: Practice
T O O LK I T
STUDENT LEVEL
GOOD FOR GROUP
S T A F F LEVEL
STUDENT A G E
L E S S O NTIME
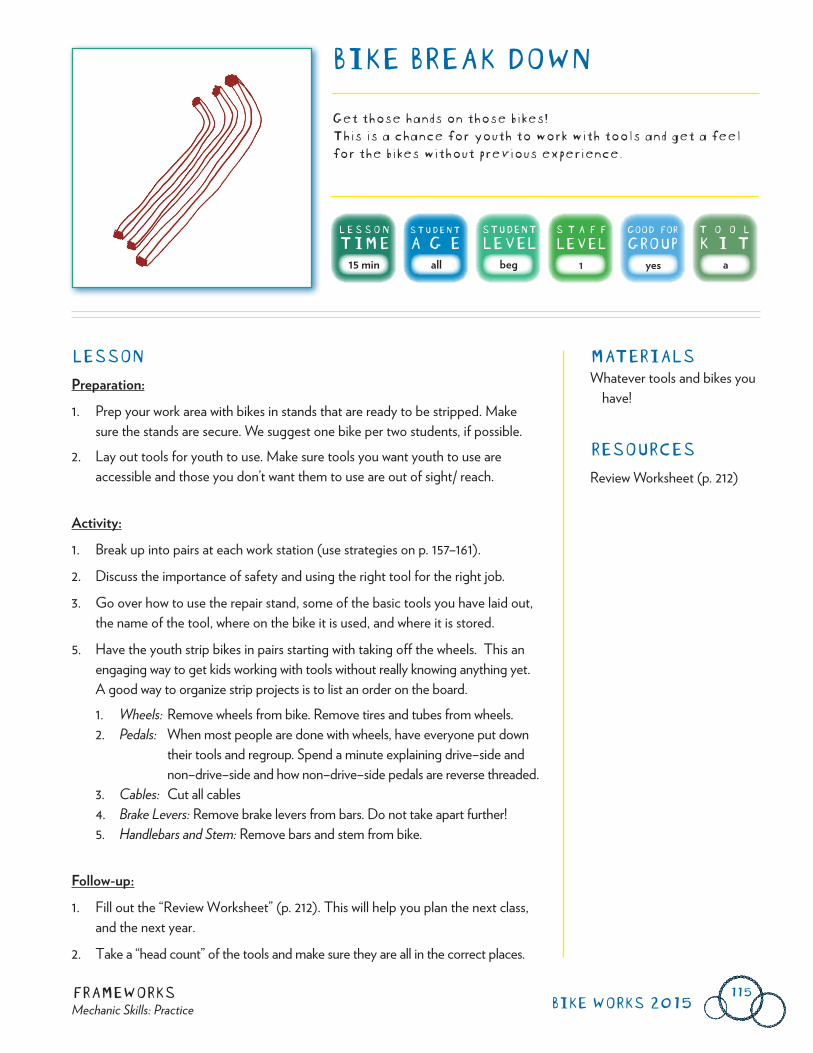
Get those hands on those bikes! This is a chance for youth to work with tools and get a feel for the bikes without previous experience.
BIKE BREAK DOWN
LESSONPreparation:1. Prep your work area with bikes in stands that are ready to be stripped. Make
sure the stands are secure. We suggest one bike per two students, if possible.2. Lay out tools for youth to use. Make sure tools you want youth to use are
accessible and those you don’t want them to use are out of sight/ reach.
Activity:1. Break up into pairs at each work station (use strategies on p. 157–161).
2. Discuss the importance of safety and using the right tool for the right job.
3. Go over how to use the repair stand, some of the basic tools you have laid out, the name of the tool, where on the bike it is used, and where it is stored.
5. Have the youth strip bikes in pairs starting with taking off the wheels. This an engaging way to get kids working with tools without really knowing anything yet.A good way to organize strip projects is to list an order on the board. 1. Wheels: Remove wheels from bike. Remove tires and tubes from wheels.2. Pedals: When most people are done with wheels, have everyone put down their tools and regroup. Spend a minute explaining drive–side and non–drive–side and how non–drive–side pedals are reverse threaded.3. Cables: Cut all cables4. Brake Levers: Remove brake levers from bars. Do not take apart further!5. Handlebars and Stem: Remove bars and stem from bike.
Follow-up:1. Fill out the “Review Worksheet” (p. 212). This will help you plan the next class, and the next year.
2. Take a “head count” of the tools and make sure they are all in the correct places.
MATERIALSWhatever tools and bikes you
have!
RESOURCES Review Worksheet (p. 212)
abegall yes15 min 1
FRAMEWORKSMechanic Skills: PracticeBIKE WORKS 2015
116
Help students learn the parts of the bike in a fun and easy way!
BIKE PART BINGO 1 OF 2
LESSONPreparation:1. Review your notes and “Review Worksheet” from the previous class.
2. Print out blank BINGO cards and BINGO images—one set for each student (p. 216 and 217).
3. Print out labeled image of the bicycle (p. 239).
4. Put a variety of bikes in the stands—one for each pair if possible.
5. Make a space for cutting, gluing and playing BINGO!
Activity:1. Pass out the labeled image of a bicycle.
2. Go over the parts of the bike using one of the bikes in the stand.
3. Explain the rules of BINGO and hint at some silly prizes.
4. Using the templates provided in the appendix, give everyone time to make their own BINGO card. There are several ways to do this:
• Allow people to cut and chose the parts they want to put on their card. • If you have enough bikes, assign pairs or groups to partially assembled
bikes. Tell them they can ONLY include parts on their card that are on their assigned bike.
• Have participants make a card and then trade with another participant before playing.
• Don’t forget to leave the “FREE” space open.
MATERIALSLabeled image of the parts of the bicycle
BINGO cards—you can prepare these ahead of time or have students make them
BINGO markers
Glue
Bikes in stands in various states of completion
Scissors
Silly prizes like bike pins, candy, tattoos, etc.
RESOURCESParts of the Bike—English/ Spanish (p. 239)
Blank BINGO Cards (p. 216)
BINGO Card Images (p. 217)
Review Worksheet (p. 212)
SOURCE WE Bike NYC
T O O LK I T
STUDENT LEVEL
STUDENT A G E
GOOD FOR GROUP
L E S S O NTIME
S T A F F LEVEL
CONTINUED ON P. 117
nonebegall yes30 min 1
LESSON (CONTINUED FROM P. 116)
5. Play BINGO! You can do four rounds of BINGO depending on time:
Round 1: Say the name of a part and point to it on the bicycle. Also point to the image that will be on the cards.
Round 2: Say the name of a part and point to it on the display bicycle.
Round 3: Say the name of a part and have a volunteer point to the part on the bicycle.
Round 4: Only point to a part on the bicycle and have the group come up with the name of the part.
6. When someone wins, you can have them come up and identify all 5 parts they covered on the display bicycle before claiming their prize.
Follow-up:1. Fill out the “Review Worksheet” (p. 212). This will help you plan the next class, and the next year.
2. Take a “head count” of the tools and make sure they are all in the correct places.
BIKE PART BINGO 2 OF 2
FRAMEWORKSMechanic Skills: Practice BIKE WORKS 2015
117
MATERIALS & RESOURCESSee p. 116
FRAMEWORKSMechanic Skills: PracticeBIKE WORKS 2015
118
Learn how to fix a flat tire!Gain a sense of accomplishment in a mechanic setting.
FIX A FLAT PRACTICE 1 OF 2
LESSONPreparation:1. Review your notes and “Review Worksheet” from the previous class.
2. Just before class take a tack and pop at least one tube on each bike.
3. Write the steps to fixing a flat on the board:
• Remove the Wheel • Remove the Tire • Patch the Tube
1. Find and mark the hole with an “X” 2. Sand area 3. Apply vulcanizing fluid and let DRY 4. Apply the patch
• Test for leaks • Reinstall tire and tube—NO TOOLS! • Reinstall wheel and inflate to proper pressure
MATERIALSRepair stands
13, 14, 15mm wrenches
Ballpoint pens
Sandpaper
Vulcanizing fluid
Bulk patches
Rags
Floor pumps
Holey tubes
BMX bikes with flats & worn out tires and/or wheels
Replacement tires and wheels as necessary
RESOURCESReview Worksheet (p. 212)
T O O LK I T
STUDENT LEVEL
STUDENT A G E
GOOD FOR GROUP
L E S S O NTIME
S T A F F LEVEL
CONTINUED ON P. 119
abegall yes30 min 1
LESSON (CONTINUED FROM P. 118)
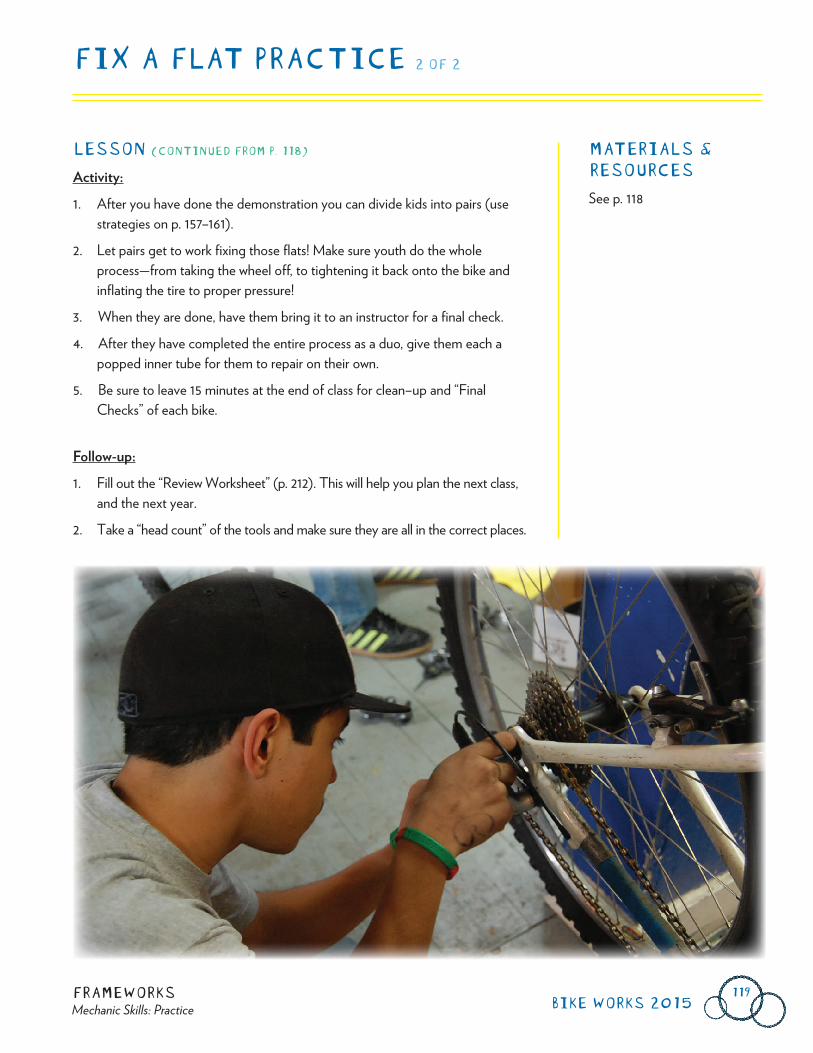
Activity:1. After you have done the demonstration you can divide kids into pairs (use strategies on p. 157–161).
2. Let pairs get to work fixing those flats! Make sure youth do the whole process—from taking the wheel off, to tightening it back onto the bike and inflating the tire to proper pressure!
3. When they are done, have them bring it to an instructor for a final check.
4. After they have completed the entire process as a duo, give them each a popped inner tube for them to repair on their own.
5. Be sure to leave 15 minutes at the end of class for clean–up and “Final Checks” of each bike.
Follow-up:1. Fill out the “Review Worksheet” (p. 212). This will help you plan the next class, and the next year.
2. Take a “head count” of the tools and make sure they are all in the correct places.
FIX A FLAT PRACTICE 2 OF 2
FRAMEWORKSMechanic Skills: Practice BIKE WORKS 2015
119
MATERIALS & RESOURCESSee p. 118
FRONT HUB PRACTICE 1 OF 2
FRAMEWORKSMechanic Skills: PracticeBIKE WORKS 2015
120
Practice overhauling front hubs.
LESSONPreparation:1. Review your notes and “Review Worksheet” from the previous class.
2. Make sure you have enough front wheels for one per pair of students.
3. Write the 5 1/2 steps of an overhaul on the board or wall.
1/2. Get a rag 1. Disassemble 2. Clean 3. Inspect 4. Grease and Reassemble 5. Adjust
Activity:1. Review the 5 1/2 steps of an overhaul with the students, having them explain
each step to each other.
2. Pair up students, two to a bike (use strategies on p. 157–161).
3. Have students work together to overhaul the front hub.
MATERIALSRepair stands
Cone wrenches
Combination wrenches
12” adj. wrench
Simple green
Rags
Grease
Bearings
Drop gauge tool
BMX bikes and/or wheels
RESOURCESReview Worksheet (p. 212)
Front Hub—Exploded (p. 246)
T O O LK I T
STUDENT LEVEL
STUDENT A G E
GOOD FOR GROUP
L E S S O NTIME
S T A F F LEVEL
CONTINUED ON P. 121
Remind students to use particular care with the dust caps (if they have them) and that this is the make or break portion of the repair if they approach it without caution.NO
TE
bbegall no30 min 2
LESSON (CONTINUED FROM P. 120)
4. When students are done, have them bring their wheel to an instructor for a “Final Check.”
5. Be sure to leave 15 minutes at the end of class for clean–up!
Follow-up:1. Fill out the “Review Worksheet” (p. 212). This will help you plan the next class, and the next year.
2. Take a “head count” of the tools and make sure they are all in the correct places.
FRONT HUB PRACTICE 2 OF 2
FRAMEWORKSMechanic Skills: Practice BIKE WORKS 2015
121
MATERIALS & RESOURCESSee p. 120
Make sure to monitor that a “stronger” student in the pair isn’t doing all the work. NO
TE
THREADED HEADSETPRACTICE 1 OF 2
FRAMEWORKSMechanic Skills: PracticeBIKE WORKS 2015
122
Practice overhauling threaded headsets.
LESSONPreparation:1. Review your notes and “Review Worksheet” from the previous class.
2. Prepare enough bikes in stands for students to work in groups of two
3. Write the agenda and the 5 1/2 steps of an overhaul on the board or wall.
1/2. Get a rag 1. Disassemble 2. Clean 3. Inspect 4. Grease and Reassemble 5. Adjust
Activity:1. Have students explain the 5 1/2 steps of an overhaul. You can have it already
written on the board, or have the students fill in the steps.
2. Pair up students, two to a bike (use strategies on p. 157–161).
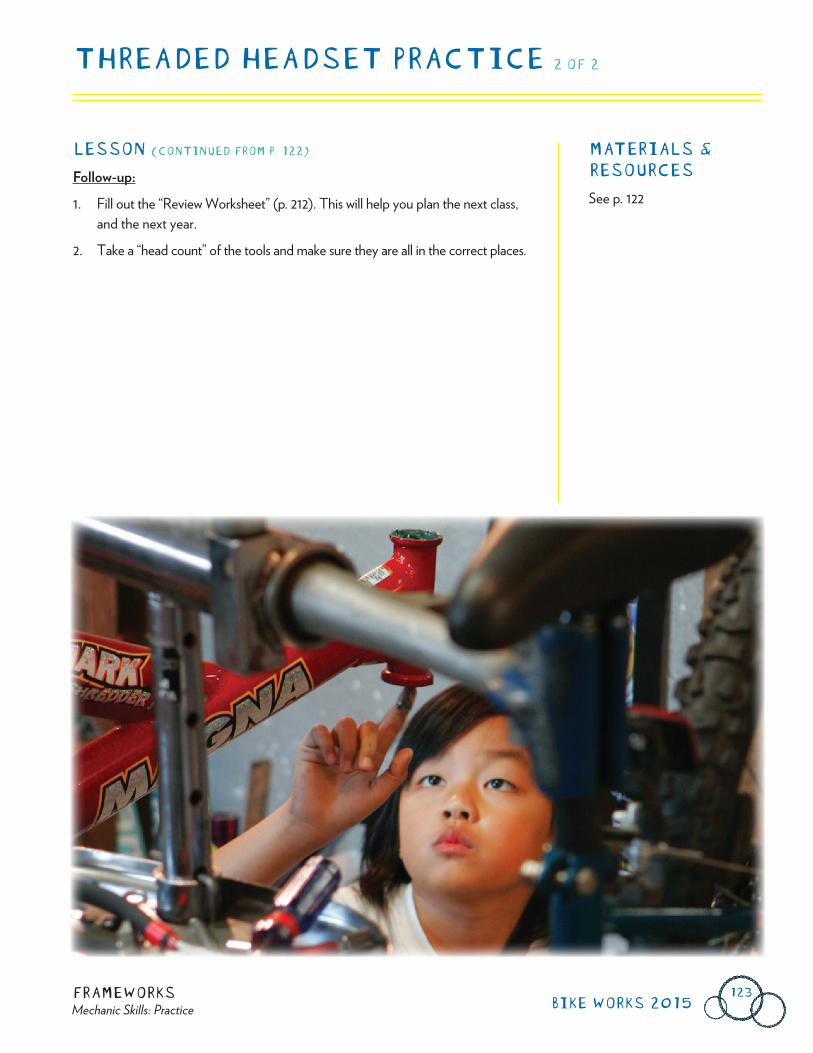
3. Work slowly showing everyone how to remove the handlebars from the bike. Make sure everyone has removed their handlebars before continuing with the overhaul.
4. Overhaul that headset! Follow the 5 1/2 steps and be sure to keep the pieces in order on your rag.
5. When students are done, have them bring their headset to an instructor for a “Final Check.”
6. Be sure to leave 15 minutes at the end of class for clean–up!
MATERIALSRepair stands
Allen keys
Combination wrenches
30, 32, 36, 40mm headsetwrenches
Channel locks
Large adjustable wrench
Simple green
Rags
Grease
Bearings
Drop gauges
BMX bikes
Threadless stem for demo
RESOURCESReview Worksheet (p. 212)
T O O LK I T
STUDENT LEVEL
STUDENT A G E
GOOD FOR GROUP
L E S S O NTIME
S T A F F LEVEL
CONTINUED ON P. 123
bbegall no30 min 2
LESSON (CONTINUED FROM P. 122)
Follow-up:1. Fill out the “Review Worksheet” (p. 212). This will help you plan the next class, and the next year.
2. Take a “head count” of the tools and make sure they are all in the correct places.
THREADED HEADSET PRACTICE 2 OF 2
FRAMEWORKSMechanic Skills: Practice BIKE WORKS 2015
123
MATERIALS & RESOURCESSee p. 122
1-PIECE BOTTOM BRACKETPRACTICE 1 OF 2
FRAMEWORKSMechanic Skills: PracticeBIKE WORKS 2015
124
Practice overhauling 1-piece bottom brackets.
LESSONPreparation:1. Review your notes and “Review Worksheet” from the previous class.
2. Prepare enough bikes in stands for students to work in groups of two. Try to choose bikes without chain guards.
3. Write the agenda and the 5 1/2 steps of an overhaul on the board or wall.
1/2. Get a rag 1. Disassemble 2. Clean 3. Inspect 4. Grease and Reassemble 5. Adjust
Activity:1. Have students explain the 5 1/2 steps of an overhaul in a creative way.
2. Pair up students, two to a bike (use strategies on p. 157–161).
3. Have students put their bikes in the stand non–drive–side facing the class.
4. Overhaul! Make sure to lay all the pieces out on the rag in order. Remind students about parts of the bottom bracket that are reverse threaded! The non–drive–side of the bike is “Backward Land” where everything is reverse threaded.
5. When students are done, have them bring their bottom bracket to an instructor for a “Final Check.”
MATERIALSRepair stands
Bottom bracket wrenches
Large and small adjustable wrench
Simple green
Rags
Grease
Spanner wrenches
Pedal wrench
Screwdriver
BMX bikes
RESOURCES Review Worksheet (p. 212)
T O O LK I T
STUDENT LEVEL
STUDENT A G E
GOOD FOR GROUP
L E S S O NTIME
S T A F F LEVEL
CONTINUED ON P. 125
bbegall no30 min 2
LESSON (CONTINUED FROM P. 124)
6. If students finish early, have them check all the other things on the bike that you have learned so far—headset, flat tires, front hubs. They can also lubricate the chain and clean the bike.
7. Be sure to leave 15 minutes at the end of class for clean-up and “Final Checks” of each bike.
Follow-up:1. Fill out the “Review Worksheet” (p. 212). This will help you plan the next class, and the next year.
2. Take a “head count” of the tools and make sure they are all in the correct places.
1-PIECE BOTTOM BRACKET PRACTICE 2 OF 2
FRAMEWORKSMechanic Skills: Practice BIKE WORKS 2015
125
MATERIALS & RESOURCESSee p. 124
BRAKES: BMX AND MTB PRACTICE 1 OF 2
FRAMEWORKSMechanic Skills: PracticeBIKE WORKS 2015
126
Understand the parts and adjustments associated with BMX and MTB brakes.Understand the concept of “troubleshooting” and problem solving.
LESSON
Preparation:
1. Review your notes and “Review Worksheet” from the previous class.
2. Prepare enough bikes in stands for students to work in groups of two on each bike. If supplies are limited, two groups can work on each bike given it has both a front and rear brake.
3. If possible, have an extra volunteer for this lesson. Brakes are tricky and can get frustrating fast!
4. Write the agenda and the steps to a brake adjustment on the board.
1. Wheels centered 2. “Troubleshooting”—Look at every part of the system and replace parts as necessary.
3. Pad alignments4. Cable tension—Remember your barrel adjuster!
MATERIALSRepair stands
Examples of housing and cables
Cable and housing cutters
Tri-flow or other chain lube
Spares for project
Cables
Offset brake tools
3rd & 4th hand tools (optional)
Housing
Cable ends
Ferrules
Brake pads
Y–socket (8,9,10)
Needle nose pliers
BMX bikes
RESOURCESReview Worksheet (p. 212)
Brake Types (p. 248)
T O O LK I T
STUDENT LEVEL
STUDENT A G E
GOOD FOR GROUP
L E S S O NTIME
S T A F F LEVEL
CONTINUED ON P. 127
Depending on what skill level you are teaching, youth can work on BMX (Beginner) or MTB (Intermediate) bikes.NO
TE
bbegall no30 min 2
LESSON (CONTINUED FROM P. 126)
Activity:1. Begin by talking about the difference between “troubleshooting” and an
“overhaul.” For this lesson we don’t need to take apart every part of the brake, like we would in an overhaul, we only need to look at each part of the system and fix the parts that aren’t working well. This is called “troubleshooting.”
2. Pair up students and assign bikes (use strategies on p. 157–161).
3. Give students enough time for everyone to replace, lube and adjust a cable. Remind students to follow this order:
1. Center wheel. 2. “Troubleshooting:” Inspect entire system—replace parts if necessary.
3. Adjust pad alignment.4. Adjust cable tension.
4. When students are done, have them bring their bike to an instructor for a “Final Check.”
5. If students finish early, have them check all the other things on the bike that you have learned so far—headset, flat tires, front hubs, bottom bracket. They can also lubricate the chain and clean the bike.
6. Be sure to leave 15 minutes at the end of class for clean–up and “Final Checks” of each bike.
Follow-up:1. Fill out the “Review Worksheet” (p. 212). This will help you plan the next class, and the next year.
2. Take a “head count” of the tools and make sure they are all in the correct places.
BRAKES: BMX AND MTB PRACTICE 2 OF 2
FRAMEWORKSMechanic Skills: Practice BIKE WORKS 2015
127
MATERIALS & RESOURCESSee p. 126
REAR DERAILLEUR PRACTICE 1 OF 2
FRAMEWORKSMechanic Skills: PracticeBIKE WORKS 2015
128
Understand components and adjustment of the rear derailleur.Understand the concept of “troubleshooting” and problem solving.
LESSON
Preparation:1. Review your notes and “Review Worksheet” from the previous class.
2. Prepare enough bikes in stands for students to work in groups of two.
3. You may want to go around and re-set some of the limit screws or change the cable tension on the bikes so that they are ready for repair.
4. Beware of grip shifts! Try not to replace the cable if you can!
5. This is another good lesson for an extra volunteer in the classroom!
6. Write the agenda and the steps to adjustment on the board.
1. “Troubleshoot;” Inspect entire system—replace parts if necessary. 2. Adjust alignment. 3. Adjust limit screws. 4. Adjust cable tension—Remember your barrel adjuster!
MATERIALSRepair stands
Examples of housing and
cables for all systems
Cable and housing cutters
Tri–flow or other chain lube
Screwdrivers
Spares for project
Cables
Housing
Cable ends
Ferrules
Y-socket (8, 9, 10)
Allen wrenches (4, 5, 6)
Mountain bikes
RESOURCES Review Worksheet (p. 212)
T O O LK I T
STUDENT LEVEL
STUDENT A G E
GOOD FOR GROUP
L E S S O NTIME
S T A F F LEVEL
CONTINUED ON P. 129
This lesson can be combined with “Front Derailleurs.”
NOT
E
abegall no30 min 2
LESSON (CONTINUED FROM P. 128)
Activity:1. Have students tell stories or imagine what might happen if the gears weren’t
working properly.
2. Pair up students, two to a bike (use strategies on p. 157–161).
3. Give students enough time for everyone to replace, lube and adjust a cable. Remind students to follow the adjustment steps on the board. Be sure to stress “TROUBLESHOOTING FIRST!” Many times youth will struggle with adjusting a rear derailleur for an hour only to realize they need to replace a rusty cable or their housing is frayed. Those are the things “troubleshooting” should find first!
4. When students are done, have them bring their bike to an instructor for a “Final Check.”
5. If students finish early, have them check all the other things on the bike that you have learned so far—headset, flat tires, front hubs, bottom bracket. They can also lubricate the chain and clean the bike.
6. Be sure to leave 15 minutes at the end of class for clean–up and “Final Checks” of each bike.
Follow-up:1. Fill out the “Review Worksheet” (p. 212). This will help you plan the next class, and the next year.
2. Take a “head count” of the tools and make sure they are all in the correct places.
REAR DERAILLEUR PRACTICE 2 OF 2
FRAMEWORKSMechanic Skills: Practice BIKE WORKS 2015
129
MATERIALS & RESOURCESSee p. 128
This lesson has the most potential for the glazed over student factor. Make sure you keep them engaged and talking. Be wary of overwhelming them with unnecessary information by keeping your lesson short and to the point.
NOT
E
FRONT DERAILLEUR PRACTICE 1 OF 2
FRAMEWORKSMechanic Skills: PracticeBIKE WORKS 2015
130
Understand components and adjustment of the front derailleur.Understand the concept of “troubleshooting” and problem solving.
LESSON
Preparation:1. Review your notes and “Review Worksheet” from the previous class.
2. Prepare enough bikes in stands for students to work in groups of two.
3. You may want to go around and re-set some of the limit screws or change the cable tension on the bikes so that they are ready for repair.
4. This is another good lesson for an extra volunteer in the classroom!
5. Beware of grip shifts! Try not to replace the cable if you can!
6. Write the agenda and the steps to adjustment on the board.
1. “Troubleshoot;” Inspect entire system—replace parts if necessary. 2. Adjust height. 3. Adjust alignment. 4. Adjust limit screws. 5. Adjust cable tension—remember your barrel adjuster!
MATERIALSRepair stands
Examples of housing and cables for all systems
Cable and housing cutters
Tri-flow or other chain lube
Screwdrivers
Spares for project
Cables
Housing
Cable ends
Ferrules
Y-socket (8, 9, 10)
Allen wrenches (4, 5, 6)
Mountain bikes
RESOURCESReview Worksheet (p. 212)
T O O LK I T
STUDENT LEVEL
STUDENT A G E
GOOD FOR GROUP
L E S S O NTIME
S T A F F LEVEL
CONTINUED ON P. 131
This lesson can be combined with “Rear Derailleurs.”
NOT
E
abegall no30 min 2
LESSON (CONTINUED FROM P. 130)
Activity:1. Have students tell stories or imagine what might happen if the gears weren’t
working properly.
2. Pair up students, two to a bike (use strategies on p. 157–161).
3. Give students enough time for everyone to replace, lube and adjust a cable. Follow the steps on the board. Remind students to “TROUBLESHOOT FIRST!” Cable tension won’t fix a problem if the housing is blown.
4. When students are done, have them bring their bike to an instructor for a “Final Check.”
5. If students finish early, have them walk around the shop and “tour” different kinds of shifting systems. Can they find a grip shift, downtube shifter, trigger shifter, bar end shifter, and an STI shifter?
6. If students still have time, have them check all the other things on the bike that you have learned so far—headset, flat tires, front hubs, bottom bracket, front derailleur and brakes. They can also lubricate the chain and clean the bike.
7. Be sure to leave 15 minutes at the end of class for clean–up and “Final Checks” of each bike.
Follow-up:1. Fill out the “Review Worksheet” (p. 212). This will help you plan the next class, and the next year.
2. Take a “head count” of the tools and make sure they are all in the correct places.
FRONT DERAILLEUR PRACTICE 2 OF 2
FRAMEWORKSMechanic Skills: Practice BIKE WORKS 2015
131
MATERIALS & RESOURCESSee p. 130
THREADLESS HEADSET PRACTICE 1 OF 2
FRAMEWORKSMechanic Skills: PracticeBIKE WORKS 2015
132
Review the 5 1/2 steps to an overhaul.Practice overhauling a threadless headset.
LESSONPreparation: 1. Review your notes and “Review Worksheet” from the previous class.
2. Prepare enough bikes in stands for students to work in groups of two. If you don’t have enough threadless headset bikes, have students work on what you have.
3. This is the portion of the class where students may be falling behind on their bike projects if they had harder bikes to work on or any unforeseen problems— make sure that they get ample time to do their work and catch up if they can.
4. Write the agenda and the 5 1/2 steps of an overhaul on the board or wall.
1/2. Get a rag 1. Disassemble 2. Clean 3. Inspect 4. Grease and Reassemble 5. Adjust
MATERIALSRepair stands
Allen keys
Combination wrenches
Simple green
Rags
Grease
Bearings
Drop gauges
Mountain bikes w threadless headsets
RESOURCESReview Worksheet (p. 212)
Threadless Headset—Exploded (p. 247)
T O O LK I T
STUDENT LEVEL
STUDENT A G E
GOOD FOR GROUP
L E S S O NTIME
S T A F F LEVEL
CONTINUED ON P. 133
aint11–17 no30 min 2
LESSON (CONTINUED FROM P. 132)
Activity:1. Review the 5 1/2 steps of an overhaul. Be creative! Have students do the
majority of the talking during the review.
2. Remind students that the cable routing of bikes with gears will be much more complex than the bikes they have worked on in the earlier classes, have them take a mental picture of the front of the bike before starting their work.
3. Pair up students, two to a bike (use strategies on p. 157–161).
4. Overhaul! Remind students to share the work.
5. When students are done, have them bring their headset to an instructor for a “Final Check.”
6. If students finish early, have them check all the other things on the bike that you have learned so far—headset, flat tires, front hubs. They can also lubricate the chain and clean the bike.
7. Make sure to leave 15 minutes for clean up! If a student pair is really struggling with an adjustment feel free to fix it for them at this point so that it gets back together.
Follow-up:1. Fill out the “Review Worksheet” (p. 212). This will help you plan the next class, and the next year.
2. Take a “head count” of the tools and make sure they are all in the correct places.
THREADLESS HEADSET PRACTICE 2 OF 2
FRAMEWORKSMechanic Skills: Practice BIKE WORKS 2015
133
MATERIALS & RESOURCESSee p. 132
3-PIECE BOTTOM BRACKET PRACTICE 1 OF 2
FRAMEWORKSMechanic Skills: PracticeBIKE WORKS 2015
134
Practice overhauling a 3–piece bottom bracket.
LESSONPreparation: 1. Review your notes and “Review Worksheet” from the previous class. If possible, remove crank arms and re–assemble before class to avoid a seized crank arm situation.
2. Prepare enough bikes in stands for students to work in groups of two.
3. Challenge the students’ sense of vocabulary by using bicycle language yourself and encouraging them to use precision in their speech.
4. This is a great lesson for extra volunteers!
5. Write the agenda and the 5 1/2 steps of an overhaul on the board or wall.
1/2. Get a rag 1. Disassemble 2. Clean 3. Inspect 4. Grease and Reassemble 5. Adjust
MATERIALSRepair stands
Bottom bracket sockets
Large and small adjustable wrench
Allen keys
Simple green
Lockring wrench
Spanner wrenches
Rags
Grease
Crank pullers
Screwdriver
Pedal wrench
Mountain bikes
Bottom Bracket chart
RESOURCES Review Worksheet (p. 212)
Bottom Brackets (p. 250)
T O O LK I T
STUDENT LEVEL
STUDENT A G E
GOOD FOR GROUP
L E S S O NTIME
S T A F F LEVEL
CONTINUED ON P. 135
It is very important during disassembly that you have all instructor hands on-deck to ensure that there is no cross-threading happening when removing crank arms.NO
TE
cint11–17 no30 min 2
LESSON (CONTINUED FROM P. 134)
Activity:1. Have students explain the 5 1/2 steps of an overhaul. Get creative! Assign
each person one step in the overhaul process. Have them act out their step without making any words. Have the rest of the students put the 6 actors in order without talking or making any noise!
2. There may be several different types of bottom brackets on the class bikes. Take some time to tour the classroom and look at the different systems. Display the Bottom Bracket chart (p. 250) to show students the various ways to take on and off a 3–piece bottom bracket based on the country of origin for the part/bike.
3. Remind students to look for washers when they remove the cranks/crank bolts!
4. Pair up students, two to a bike (use strategies on p. 157–161).
5. Overhaul! Make sure to remind students to tighten the crank puller in the crank with the adjustable wrench before extracting the cranks.
6. When students are done, have them bring their bike to an instructor for a “Final Check.”
7. If students finish early, have them check all the other things on the bike that you have learned so far, lubricate the chain and clean the bike.
8. Be sure to leave 15 minutes at the end of class for clean-up and “Final Checks” of additional work on each bike.
Follow-up:1. Fill out the “Review Worksheet” (p. 212). This will help you plan the next class, and the next year.
2. Take a “head count” of the tools and make sure they are all in the correct places.
3-PIECE BOTTOM BRACKET PRACTICE 2 OF 2
FRAMEWORKSMechanic Skills: Practice BIKE WORKS 2015
135
MATERIALS & RESOURCESSee p. 134
ADVANCED BRAKES PRACTICE 1 OF 2
FRAMEWORKSMechanic Skills: PracticeBIKE WORKS 2015
136
Understand the parts and adjustments associated with BMX and MTB brakes.Understand the concepts of “troubleshooting” and problem solving.
LESSONPreparation: 1. Review your notes and “Review Worksheet” from the previous class.
2. Prepare enough bikes in stands for students to work in groups of two. Try to get as many different kinds of brake systems in the stands as possible. Try to group similar types of systems together in the classroom so that students can help each other, and you don’t have to move around as much.
3. Prep the bikes by making subtle or not–so–subtle changes in the brakes that need to be fixed.
4. Write the agenda and the steps to brake adjustments on the board.
1. “Troubleshoot” 2. Cables and Housing 3. Canti–Hangers and Straddle Cables 4. Ferrules and End Caps 5. Cable Tension 6. Centering and Springs 7. Brake Pads
MATERIALSRepair standsBikesRagsSimple greenSandpaperTri–flow or other lubeCable cuttersOffset brake tools3rd & 4th hand toolsHousingCable endsFerrulesBrake padsY-socket (8/9/10) wrenchHex wrenches 9/11 & 8/10 brake wrenchesScrewdriversExamples of cablesExamples of brakes and pads
RESOURCESReview Worksheet (p. 212)Brake Types (p. 248)Brake Type Flow Chart (p. 249)
T O O LK I T
STUDENT LEVEL
STUDENT A G E
GOOD FOR GROUP
L E S S O NTIME
S T A F F LEVEL
CONTINUED ON P. 137
In the advanced classes, try to challenge the students’ sense of vocabulary by using bicycle language yourself and encouraging them to use precision in their speech.NO
TE
cint11–17 no30 min 2
LESSON (CONTINUED FROM P. 136)
Activity:1. Pair up students, two to a bike (use strategies on p. 157–161).
2. Review the steps on the board having youth explain each part.
3. Have at it! Remind students to “TROUBLESHOOT FIRST!”
4. Have all adjustment brought to an instructor for a “Final Check” before moving on.
5. If students finish early, have them check all the other things on the bike that they have learned so far, lubricate the chain and clean the bike.
6. Give students a chance to work on more than one type of brake. After they have adjusted their bike, have them “prep” it for the next group by making changes that need to be adjusted by the next mechanics.
7. Have a more in-depth discussion about disk brakes, hydraulic brakes and specific tips for “squealy brakes” if you have time.
8. Be sure to leave 15 minutes at the end of class for clean–up and “Final Checks” of each bike.
Follow-up:1. Fill out the “Review Worksheet” (p. 212). This will help you plan the next class, and the next year.
2. Take a “head count” of the tools and make sure they are all in the correct places.
ADVANCED BRAKES PRACTICE 2 OF 2
FRAMEWORKSMechanic Skills: Practice BIKE WORKS 2015
137
MATERIALS & RESOURCESSee p. 136
ADVANCED DRIVETRAIN PRACTICE 1 OF 2
FRAMEWORKSMechanic Skills: PracticeBIKE WORKS 2015
138
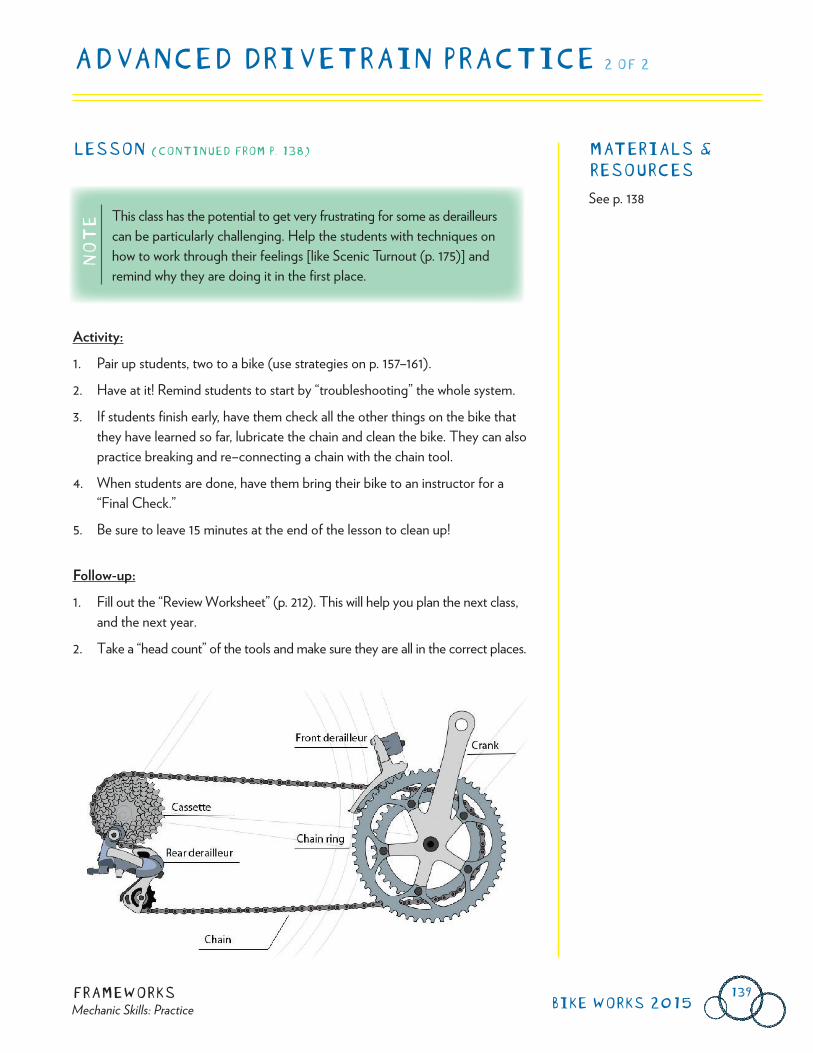
Practice looking at the drive train as a unit and adjusting all the parts together.
LESSONPreparation: 1. Review your notes and “Review Worksheet” from the previous class.
2. Prepare enough bikes in stands for students to work in groups of two.
3. Make sure to have a bike manual (or several) to use for reference if students start getting frustrated.
4. Prep the bikes by making subtle or not-so-subtle changes in the gears that need to be fixed.
5. Have some extra chain available for trying out the chain tool.
6. Write the agenda and steps to adjustment on the board.
Rear:1) “TROUBLESHOOT”2) Alignment3) Limit screws4) Cable Tension
Front:1) “TROUBLESHOOT”2) Height3) Alignment4) Limit screws5) Cable tension
MATERIALSRepair stands
Bikes
Examples of housing and cables for all systems
Cable and housing cutters
Tri-flow
Screwdrivers
Cables
Cable ends
Ferrules
Rags
Simple green
Chain checker
Chain removal tool
Allen keys
Y-socket wrench
9/11 & 8/10 wrenches
Freewheel example (off a bike)
Cassette example (off a bike)
RESOURCESReview Worksheet (p. 212)
T O O LK I T
STUDENT LEVEL
STUDENT A G E
GOOD FOR GROUP
L E S S O NTIME
S T A F F LEVEL
CONTINUED ON P. 139
cadv11–17 no30 min 2
LESSON (CONTINUED FROM P. 138)
Activity:1. Pair up students, two to a bike (use strategies on p. 157–161).
2. Have at it! Remind students to start by “troubleshooting” the whole system.
3. If students finish early, have them check all the other things on the bike that they have learned so far, lubricate the chain and clean the bike. They can also practice breaking and re–connecting a chain with the chain tool.
4. When students are done, have them bring their bike to an instructor for a “Final Check.”
5. Be sure to leave 15 minutes at the end of the lesson to clean up!
Follow-up:1. Fill out the “Review Worksheet” (p. 212). This will help you plan the next class, and the next year.
2. Take a “head count” of the tools and make sure they are all in the correct places.
ADVANCED DRIVETRAIN PRACTICE 2 OF 2
FRAMEWORKSMechanic Skills: Practice BIKE WORKS 2015
139
MATERIALS & RESOURCESSee p. 138
This class has the potential to get very frustrating for some as derailleurs can be particularly challenging. Help the students with techniques on how to work through their feelings [like Scenic Turnout (p. 175)] and remind why they are doing it in the first place.
NOT
E

REAR HUB PRACTICE 1 OF 2
FRAMEWORKSMechanic Skills: PracticeBIKE WORKS 2015
140
Practice overhauling a rear hub.
LESSONPreparation: 1. Review your notes and “Review Worksheet” from the previous class.
2. Prepare enough bikes in stands for students to work in groups of two.
3. Make sure to have a bike manual (or several) to use for reference if students start getting frustrated.
4. Challenge the students’ sense of vocabulary by using bicycle language yourself and encouraging them to use precision in their speech.
5. Write the agenda and the 5 1/2 steps of an overhaul on the board or wall.
1/2. Get a rag 1. Disassemble 2. Clean 3. Inspect 4. Grease and Reassemble 5. Adjust
MATERIALSRepair stands
Bikes
Cone wrenches
Combination wrenches
Bench vice
Axle vice
Freewheel remover
Chain whip
Giant adjustable wrench
Cassette lockring tools
Grease
Rags
Simple green
Cleaning brushes
Torque wrench (optional)
RESOURCESReview Worksheet (p. 212)
Rear Freewheel Hub— Exploded (p. 246)
T O O LK I T
STUDENT LEVEL
STUDENT A G E
GOOD FOR GROUP
L E S S O NTIME
S T A F F LEVEL
CONTINUED ON P. 141
cadv11–17 no30 min 2
LESSON (CONTINUED FROM P. 140)
Activity:1. Review the 5 1/2 steps of an overhaul. Get creative! If students are mature enough to stay positive and not get mean, have them explain the steps while imitating the teaching style of one of their teachers. Have students (and staff) guess which teacher it is!
2. Get to it! Remind students to take extra care when working with freewheels and cassettes.
3. Make sure the students know that they need to get their adjustment checked by an instructor EVERY TIME before fully reassembling their bike. They also need to sign off on each job as they finish—this is an important habit for working in a shop.
4. If students finish early, have them check all the other things on the bike that they have learned so far, lubricate the chain and clean the bike.
5. When students are done, have them bring their wheel to an instructor for a “Final Check” before putting it back in the bike.
6. Be sure to leave 15 minutes at the end of class for clean-up!
Follow-up:1. Fill out the “Review Worksheet” (p. 212). This will help you plan the next class, and the next year.
2. Take a “head count” of the tools and make sure they are all in the correct places.
REAR HUB PRACTICE 2 OF 2
FRAMEWORKSMechanic Skills: Practice BIKE WORKS 2015
141
MATERIALS & RESOURCESSee p. 140
Make sure students use caution when threading freewheels back onto the wheel as they could turn disastrous if improperly threaded.NO
TE

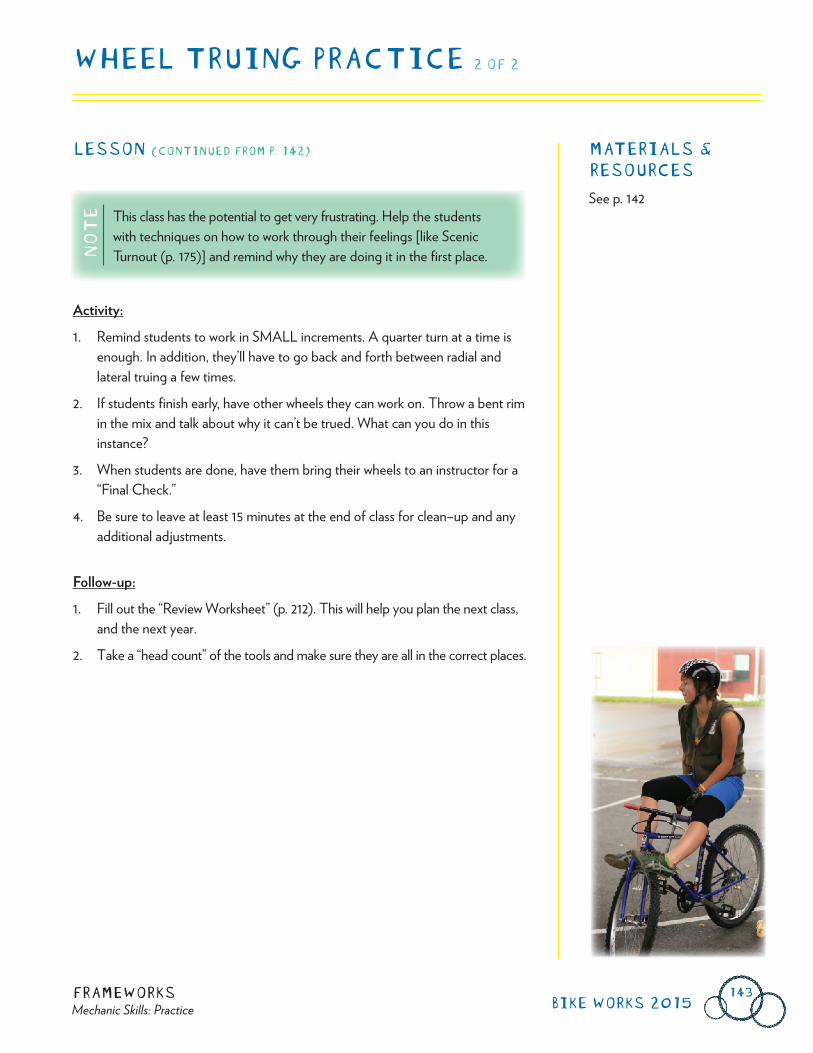
WHEEL TRUING PRACTICE 1 OF 2
FRAMEWORKSMechanic Skills: PracticeBIKE WORKS 2015
142
Practice concepts of wheel building and truing.
LESSONPreparation: 1. Review your notes and “Review Worksheet” from the previous class.
2. Prepare one bike for each student. They will true both the front and rear wheels.
3. This class requires special preparation to round up enough truing stands. Plan in advance!
4. Have additional practice wheels on hand for students who move fast or whose wheels don’t need much truing.
5. Have an example of a bent (versus out of true) rim.
6. Write the steps to truing a wheel on the board along with the agenda.
1. Remove the wheel2. Put the wheel in the stand3. True laterally with the tire on4. True radially with the tire off5. Check spoke tension with a tensiometer6. Check wheel dish with a dishing tool7. Clean the wheel
MATERIALSTruing stands
Spoke wrenches
Dishing tool
Tensiometer
Tri-Flow
Rags
Demo wheels, rims, hubs, spokes
RESOURCESReview Worksheet (p. 212)
Parts of the Wheel (p. 245)
T O O LK I T
STUDENT LEVEL
STUDENT A G E
GOOD FOR GROUP
L E S S O NTIME
S T A F F LEVEL
CONTINUED ON P. 143
cadv15–17 no30 min 3
LESSON (CONTINUED FROM P. 142)
Activity:1. Remind students to work in SMALL increments. A quarter turn at a time is
enough. In addition, they’ll have to go back and forth between radial and lateral truing a few times.
2. If students finish early, have other wheels they can work on. Throw a bent rim in the mix and talk about why it can’t be trued. What can you do in this instance?
3. When students are done, have them bring their wheels to an instructor for a “Final Check.”
4. Be sure to leave at least 15 minutes at the end of class for clean–up and any additional adjustments.
Follow-up:1. Fill out the “Review Worksheet” (p. 212). This will help you plan the next class, and the next year.
2. Take a “head count” of the tools and make sure they are all in the correct places.
WHEEL TRUING PRACTICE 2 OF 2
FRAMEWORKSMechanic Skills: Practice BIKE WORKS 2015
143
MATERIALS & RESOURCESSee p. 142
This class has the potential to get very frustrating. Help the students with techniques on how to work through their feelings [like Scenic Turnout (p. 175)] and remind why they are doing it in the first place.NO
TE