Embed Size (px)
Citation preview
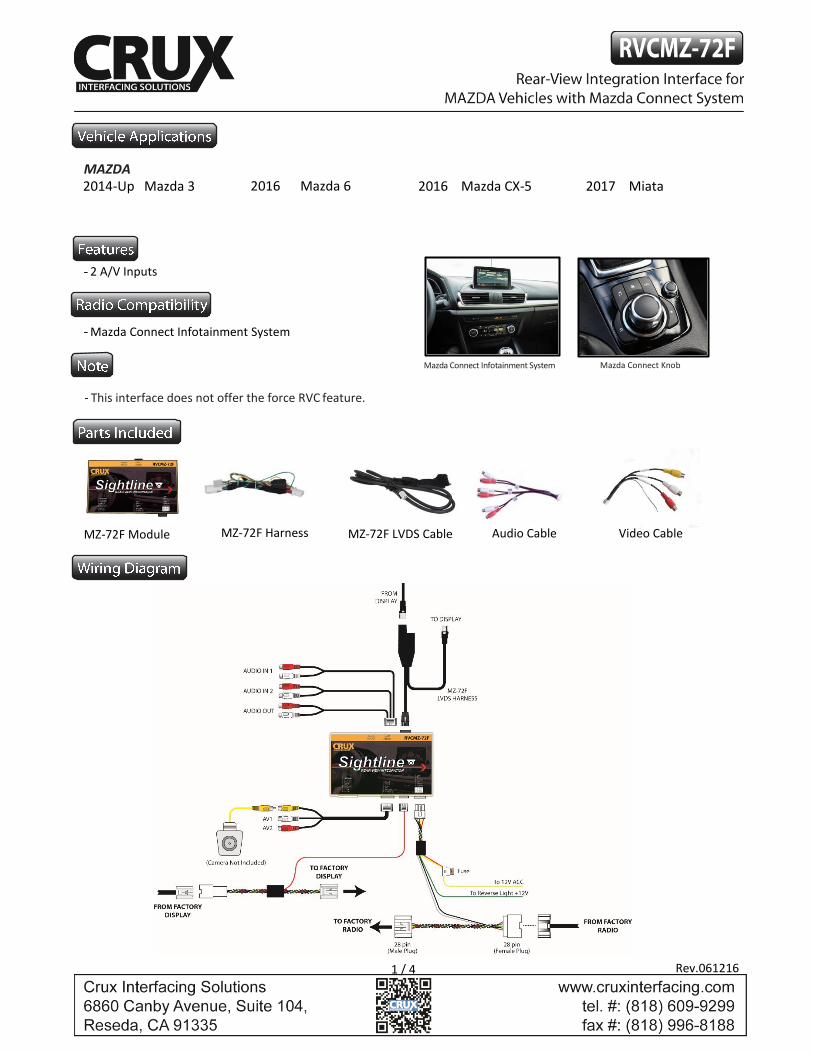
MAZDA 2014-Up Mazda 3 2016 Mazda 6 2016 Mazda CX-5 2017 Miata
2 A/V Inputs
Mazda Connect Infotainment System
This interface does not offer the force RVC feature.
MZ-72F Module MZ-72F LVDS Cable Audio Cable Video Cable
Mazda Connect Knob Mazda Connect Infotainment System
MZ-72F Harness
Rev.061216 1 / 4
Crux Interfacing Solutions
6860 Canby Avenue, Suite 116,
Reseda, CA 91335
www.cruxinterfacing.com
tel. #: (818) 609-9299
fax #: (818) 996-8188
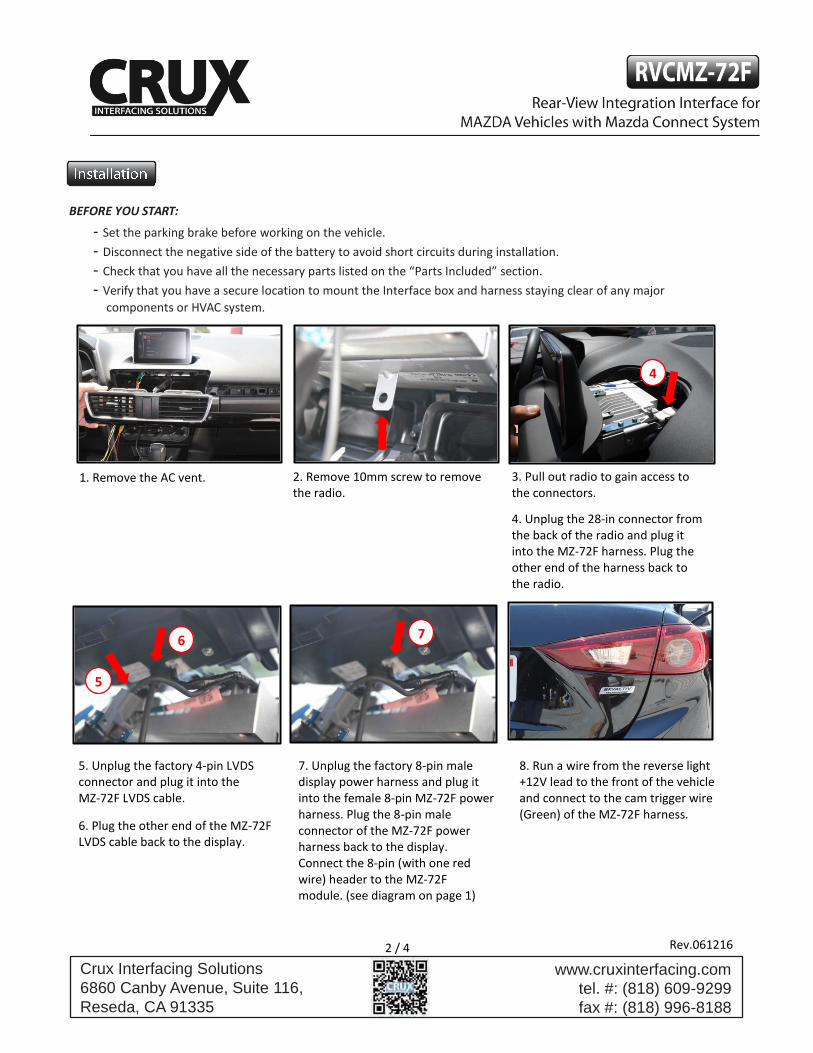
BEFORE YOU START:
- Set the parking brake before working on the vehicle.
- Disconnect the negative side of the battery to avoid short circuits during installation.
- Check that you have all the necessary parts listed on the “Parts Included” section.
- Verify that you have a secure location to mount the Interface box and harness staying clear of any major
components or HVAC system.
5
1
6
7
1
3. Pull out radio to gain access to the connectors.
4. Unplug the 28-in connector from the back of the radio and plug it into the MZ-72F harness. Plug the other end of the harness back to the radio.
4
1
5. Unplug the factory 4-pin LVDS connector and plug it into the MZ-72F LVDS cable.
6. Plug the other end of the MZ-72F LVDS cable back to the display.
8. Run a wire from the reverse light +12V lead to the front of the vehicle and connect to the cam trigger wire (Green) of the MZ-72F harness.
Rev.061216 2 / 4
1. Remove the AC vent.
2. Remove 10mm screw to remove the radio.
7. Unplug the factory 8-pin male display power harness and plug it into the female 8-pin MZ-72F power harness. Plug the 8-pin male connector of the MZ-72F power harness back to the display. Connect the 8-pin (with one red wire) header to the MZ-72F module. (see diagram on page 1)
7
1
Crux Interfacing Solutions
6860 Canby Avenue, Suite 116,
Reseda, CA 91335
www.cruxinterfacing.com
tel. #: (818) 609-9299
fax #: (818) 996-8188
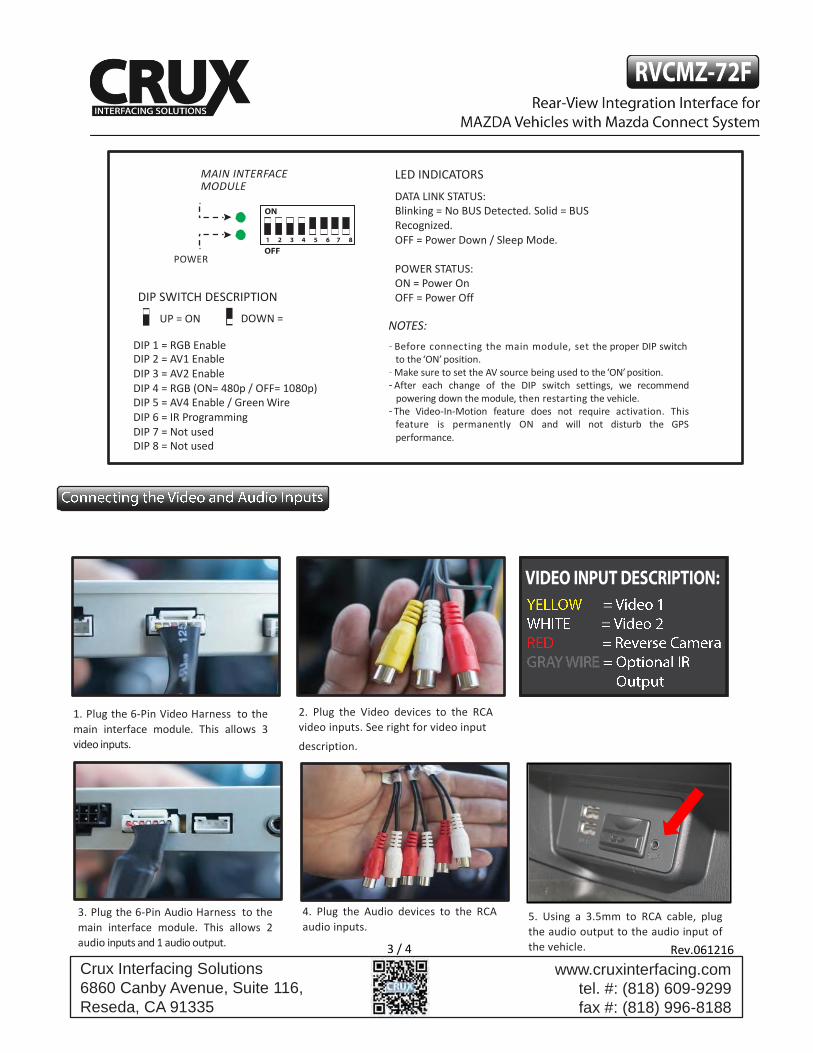
1. Plug the 6-Pin Video Harness to the
main interface module. This allows 3
video inputs.
2. Plug the Video devices to the RCA
video inputs. See right for video input
description.
MAIN INTERFACE MODULE
DATALINK Status
POWER Status
DIP SWITCH DESCRIPTION
UP = ON DOWN = OFF
DIP 1 = RGB Enable DIP 2 = AV1 Enable DIP 3 = AV2 Enable DIP 4 = RGB (ON= 480p / OFF= 1080p) DIP 5 = AV4 Enable / Green Wire DIP 6 = IR Programming DIP 7 = Not used DIP 8 = Not used
LED INDICATORS
DATA LINK STATUS: Blinking = No BUS Detected. Solid = BUS Recognized. OFF = Power Down / Sleep Mode.
POWER STATUS: ON = Power On OFF = Power O
NOTES:
Before connecting the main module, set the proper DIP switch to the ‘ON’ position. Make sure to set the AV source being used to the ‘ON’ position. After each change of the DIP switch settings, we recommend powering down the module, then restarting the vehicle. The Video-In-Motion feature does not require activation. This feature is permanently ON and will not disturb the GPS performance.
3. Plug the 6-Pin Audio Harness to the
main interface module. This allows 2
audio inputs and 1 audio output.
4. Plug the Audio devices to the RCA
audio inputs.
5. Using a 3.5mm to RCA cable, plug
the audio output to the audio input of
the vehicle.
3 / 4 Rev.061216
Crux Interfacing Solutions
6860 Canby Avenue, Suite 116,
Reseda, CA 91335
www.cruxinterfacing.com
tel. #: (818) 609-9299
fax #: (818) 996-8188
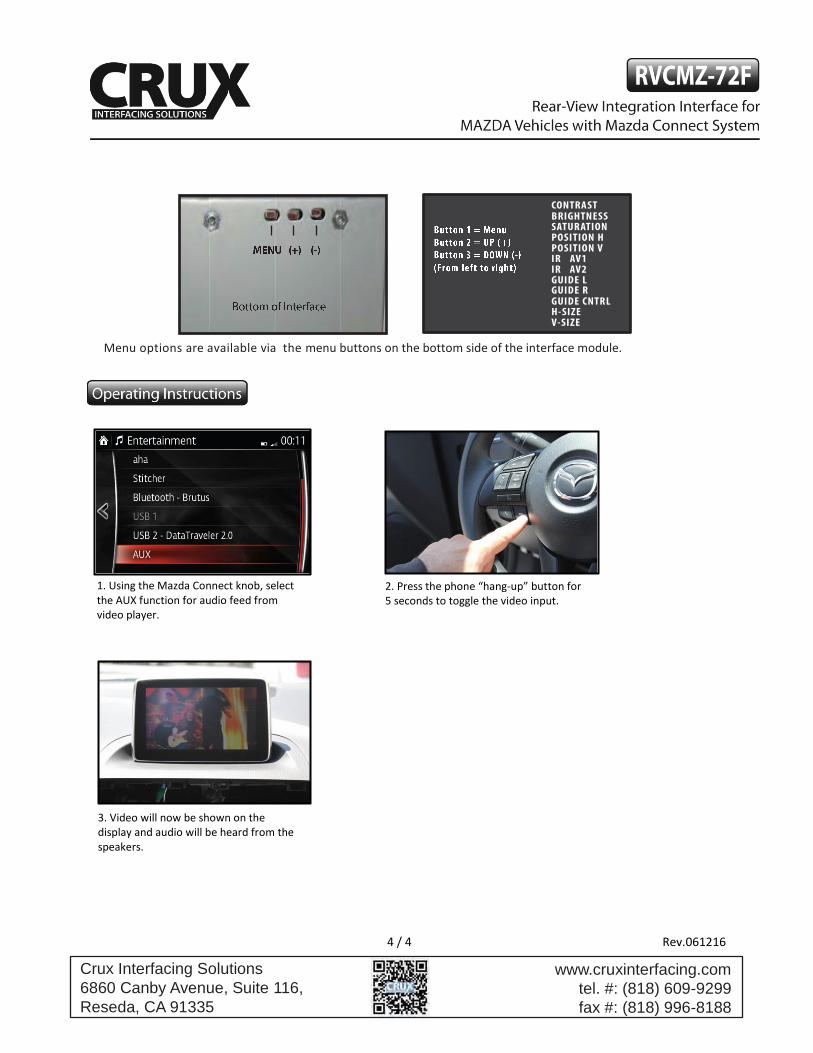
Menu options are available via the menu buttons on the bottom side of the interface module.
2. Press the phone “hang-up” button for 5 seconds to toggle the video input.
1. Using the Mazda Connect knob, select the AUX function for audio feed from video player.
3. Video will now be shown on the display and audio will be heard from the speakers.
Rev.061216 4 / 4