Embed Size (px)
Citation preview
Squishy
CircuitsDeveloped by: Dr. Michael H. Suckley
Squishy Circuits were developed as part of a project at the University of St. Thomas that created circuits and explored electronics. Squishy Circuits uses a “Play-Doh” like substance to enable hands-on learning about conductors and insulators as well as creating circuits.
Background The squishy circuits are made using homemade dough that resembles “Play-Doh”. We use squishy circuits because they are very easy to manipulate into many common circuit components.
If you had a microscope that was powerful enough to get a close look at the squishy dough, it would look like a big, messy tangle of spider's webs. Long strings of protein called gluten forms branches that knot together creating a springy sponge that can hold its shape in the flour. Water, in the squishy dough, can move about inside this sponge like material. If the dough dries out, the gluten locks together causing the dough to harden allowing it to go stale as its water evaporates. The water in your conductive dough contains dissolved salt. Dissolved salt molecule divide into two parts, or 'ions' – one with a positive charge (called a cation) and one with a negative charge (called an anion). To form a circuit, the electrons, inside the battery, flow from one terminal to the other. The ions in the water carry these electrons through the dough to the light bulb, making it glow, then returning to the battery.
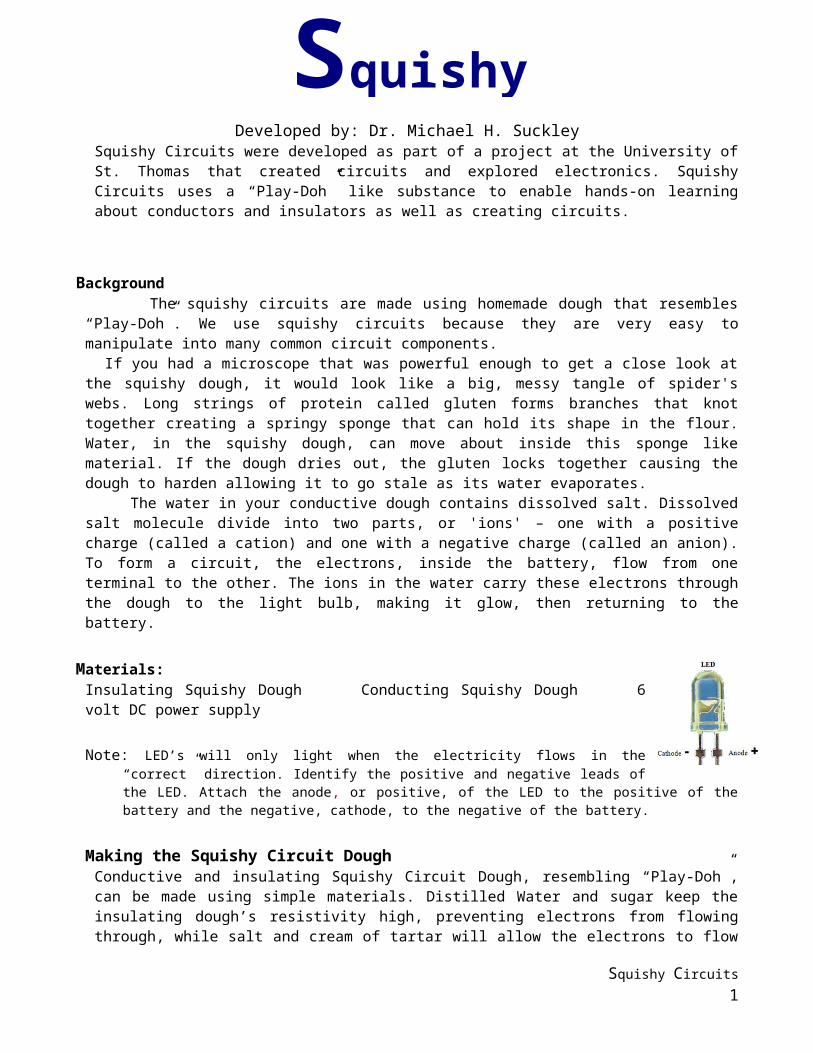
Materials:Insulating Squishy Dough Conducting Squishy Dough 6 volt DC power supply
Note: LED’s will only light when the electricity flows in the “correct” direction. Identify the positive and negative leads of the LED. Attach the anode, or positive, of the LED to the positive of the battery and the negative, cathode, to the negative of the battery.
Making the Squishy Circuit DoughConductive and insulating Squishy Circuit Dough, resembling “Play-Doh”, can be made using simple materials. Distilled Water and sugar keep the insulating dough’s resistivity high, preventing electrons from flowing through, while salt and cream of tartar will allow the electrons to flow in the conductive dough. Food coloring can be added to each batch to indicate the difference between them.
Conductive DoughMaterials:
2 cups of boiling Water3 1/2 cups Flour (A gluten free version of this dough can be made by replacing the flour with gluten-free flour.) 1 cup Salt4 Tbsp. Cream of Tartar or 9Tbsp. of Lemon Juice2 Tbsp. Vegetable OilFood Coloring (optional)
Procedure:1. Mix water, 1cup of flour, salt, cream of tartar, vegetable oil, and food coloring in a medium sized pot.
Stirring constantly as it cools it will become thicker, more like Play-Doh.2. Once a ball forms, place the ball on a lightly floured surface. 3. Slowly knead the remaining flour into the ball until you’ve reached a desired consistency. If it’s too dry,
add some water; if it’s too moist, add some flour until it’s just right.4. Store in an airtight container or plastic bag. While in the bag, water from the dough will create
condensation. This is normal. Just knead the dough after removing it from the bag, and it will be as good as new. I have kept refrigerated dough for several months.
Squishy Circuits 1

Insulating DoughMaterials:
1 1/2 cup Flour (A gluten free version of this dough can be made by replacing the flour with gluten-free flour.) 1/2 cup Sugar3 Tbsp. Vegetable Oil1/2 cup Deionized (or Distilled) Water (Regular tap water can be used, but the resistance of the dough will be lower.)Food coloring (Optional)
Procedure:1. Mix solid ingredients and oil in a pot or large bowl, setting aside ½ cup flour to be used later.2. Mix with this mixture a small amount of deionized water (about 1 Tbsp.) and stir.3. Stir it until it until it starts getting a doughy consistency, adding a little distilled water if your mixture is
too dry or extra flour if it’s too moist. Coat a flat surface with some flour and knead your dough into a ball.
4. Store in an airtight container or plastic bag. While in the bag, water from the dough will create condensation. This is normal. Just knead the dough after removing it from the bag, and it will be as good as new. I have kept refrigerated dough for several months.
Investigating Squishy CircuitsSquishy Conductors (Use Conductive Squishy Dough)
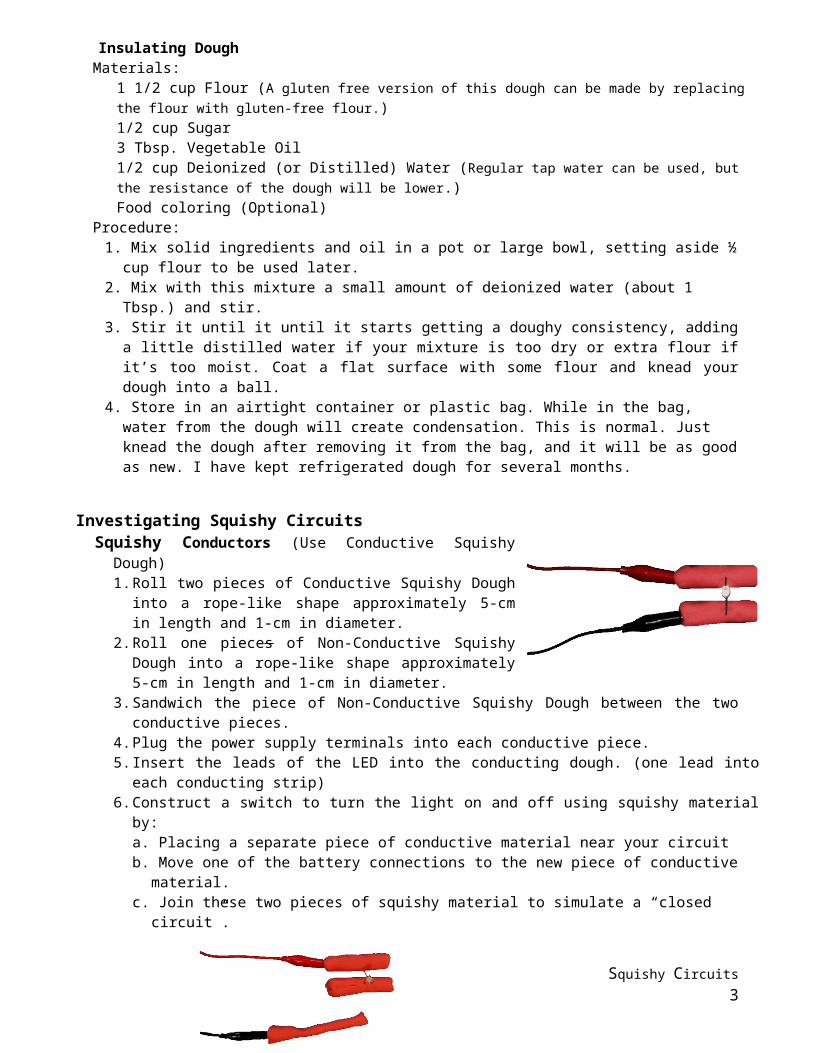
1. Roll two pieces of Conductive Squishy Dough into a rope-like shape approximately 5-cm in length and 1-cm in diameter.
2. Roll one pieces of Non-Conductive Squishy Dough into a rope-like shape approximately 5-cm in length and 1-cm in diameter.
3. Sandwich the piece of Non-Conductive Squishy Dough between the two conductive pieces.
4. Plug the power supply terminals into each conductive piece.5. Insert the leads of the LED into the conducting dough. (one lead into each conducting strip)6. Construct a switch to turn the light on and off using squishy material by:
a. Placing a separate piece of conductive material near your circuitb. Move one of the battery connections to the new piece of conductive material.c. Join these two pieces of squishy material to simulate a “closed circuit”.
7. Change the length of the squishy material (distance between switch connection and the light connection) and observe any differences between the original experiments.
8. Change the diameter of the squishy material (rolled into a thicker rope like shape) and observe any differences between the original experiments.
Squishy Circuits 2
Squishy CircuitsParallel Circuits - A parallel circuit is a closed circuit in which the current divides into two or more paths before
recombining to complete the circuit.
1. Obtain two conductive strips and place them slightly apart.2. Connect the battery pack to the two strips. (One wire to each strip)3. Place LEDs in the conductive dough as pictured.4. The LEDs should all light up. Please note that LED’s will only light when the electricity flows in the “correct”
direction. Identify the positive and negative leads of the LED. Attach the anode, or positive, of the LED to the positive of the battery and the negative, cathode, to the negative of the battery.
5. Observe the brightness of each bulb.6. Remove a bulb and describe what happens to the remaining bulbs.
Series Circuits - A series circuit is a closed circuit in which the current flows through each bulb/ appliance before completing the circuit.
1. Place two conductive pieces of Squishy Circuit Dough slightly apart. 2. Cut one side in the pattern pictured. 3. Place LEDs in the conductive dough as pictured.4. Connect the battery pack to the two strips (One wire to each strip). Please note that LED’s will only light when
the electricity flows in the “correct” direction. Identify the positive and negative leads of the LED. Attach the anode , or positive, of the LED to the positive of the battery and the negative, cathode, to the negative of the battery.
5. Observe the brightness of each bulb.6. Compare the brightness of the parallel and series circuits.7. Remove a bulb and describe what happens to the remaining bulbs.
Combined Circuit - This circuit combines the characteristics of both the series and parallel circuits. Building a Combined Circuit
1. Place two conductive pieces of Squishy Circuit Dough slightly apart. 2. Cut one side in the pattern pictured. 3. Place LEDs in the conductive dough as pictured.4. Connect the battery pack to the two strips. (One wire to each strip), Please note that LED’s will only lite when the
electricity flows in the “correct” direction. Identify the positive and negative leads of the LED. Attach the anode, or positive, of the LED to the positive of the battery and the negative, cathode, to the negative of the battery.
5. Observe the brightness of each bulb.6. Identify which bulb(s) are in series and which are in parallel. Remove a bulb and describe what happens to
the remaining bulbs.
Squishy Circuits 3

Squishy Battery When ions are dissolved in a substance such as water, the solution becomes an electrolyte. Chemical batteries such as those used in your television's remote produce electricity as a result of a reaction between two metals, where one passes its charge to the other. Different batteries use different metals. To transfer the charge, however, they need an electrolyte to carry it. The batteries in vehicles like cars and trucks contain a mix of water and sulfuric acid. The acid releases charged particles as it dissolves one of the metals in the battery. With the help of an alternator, the engine can be used to recharge the battery, reversing the reaction between the acid and the metal. Some batteries – such as the batteries used in your activity – are called dry cells. They contain a paste that works much like your electric dough, rather than a liquid such as in a car battery. This means they will work upside down and won't leak quite so easily if they're broken.
1. Make a “stack” of alternate conductive and insulating dough. Making the electrodes
a. This battery uses two dissimilar metals copper and zinc. Galvanized nails work well.b. Obtain #14 or 16 copper wire and cut into short lengths approx. 10 cm long. Create the electrodes
by wrapping the copper wire around the nail. 2. Insert the electrodes with a nail and copper wire in each piece of conductive dough with the copper
wire inserted into the next piece of conductive dough.. 3. The Squishy Battery cannot deliver much power; therefore the easiest way to prove that your Squishy
Battery is working is a voltmeter. Adding more “cells” in series can increase the voltage. Here a dimly lit red LED can be seen.
Applications
ExtensionsWhat type of circuit are the following?
Squishy Circuits 4
LED
Conductive
Conductive
Non-Conductive