Embed Size (px)
Citation preview
�
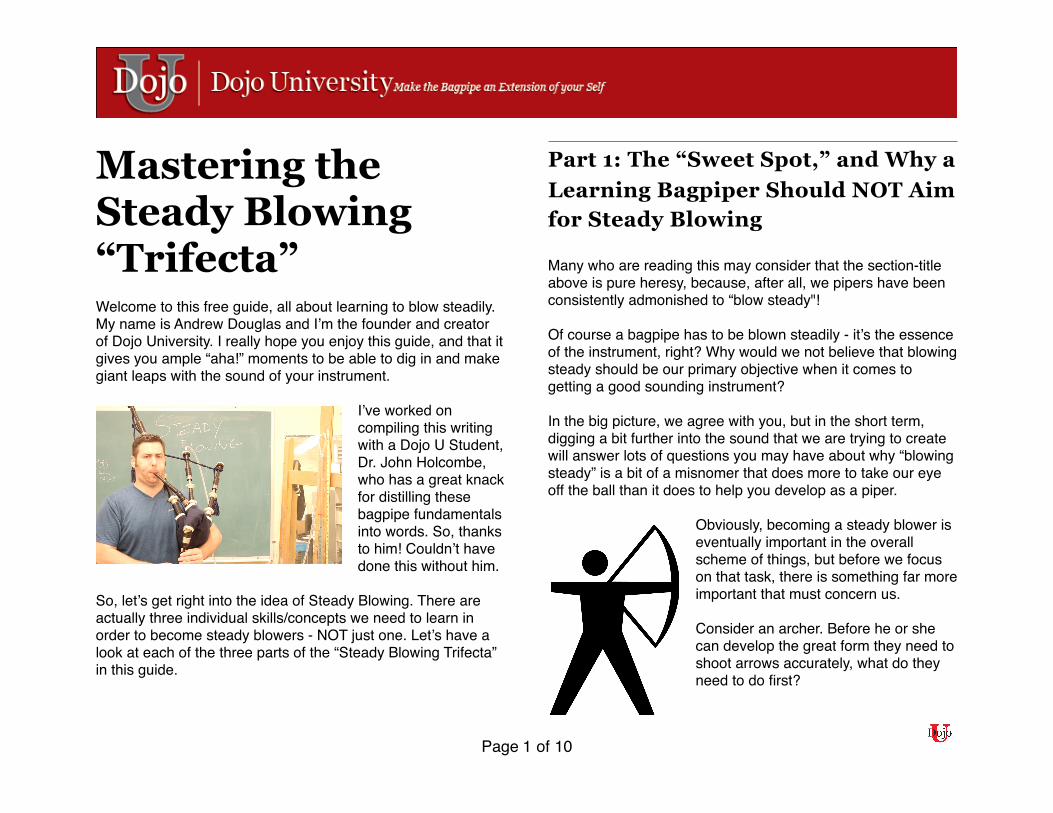
Mastering the Steady Blowing “Trifecta” Welcome to this free guide, all about learning to blow steadily. My name is Andrew Douglas and I’m the founder and creator of Dojo University. I really hope you enjoy this guide, and that it gives you ample “aha!” moments to be able to dig in and make giant leaps with the sound of your instrument.
I’ve worked on compiling this writing with a Dojo U Student, Dr. John Holcombe, who has a great knack for distilling these bagpipe fundamentals into words. So, thanks to him! Couldn’t have done this without him.
So, let’s get right into the idea of Steady Blowing. There are actually three individual skills/concepts we need to learn in order to become steady blowers - NOT just one. Let’s have a look at each of the three parts of the “Steady Blowing Trifecta” in this guide.
Part 1: The “Sweet Spot,” and Why a Learning Bagpiper Should NOT Aim for Steady Blowing
Many who are reading this may consider that the section-title above is pure heresy, because, after all, we pipers have been consistently admonished to “blow steady"!
Of course a bagpipe has to be blown steadily - it’s the essence of the instrument, right? Why would we not believe that blowing steady should be our primary objective when it comes to getting a good sounding instrument?
In the big picture, we agree with you, but in the short term, digging a bit further into the sound that we are trying to create will answer lots of questions you may have about why “blowing steady” is a bit of a misnomer that does more to take our eye off the ball than it does to help you develop as a piper.
Obviously, becoming a steady blower is eventually important in the overall scheme of things, but before we focus on that task, there is something far more important that must concern us.
Consider an archer. Before he or she can develop the great form they need to shoot arrows accurately, what do they need to do first?
Page � of �1 10 �
�
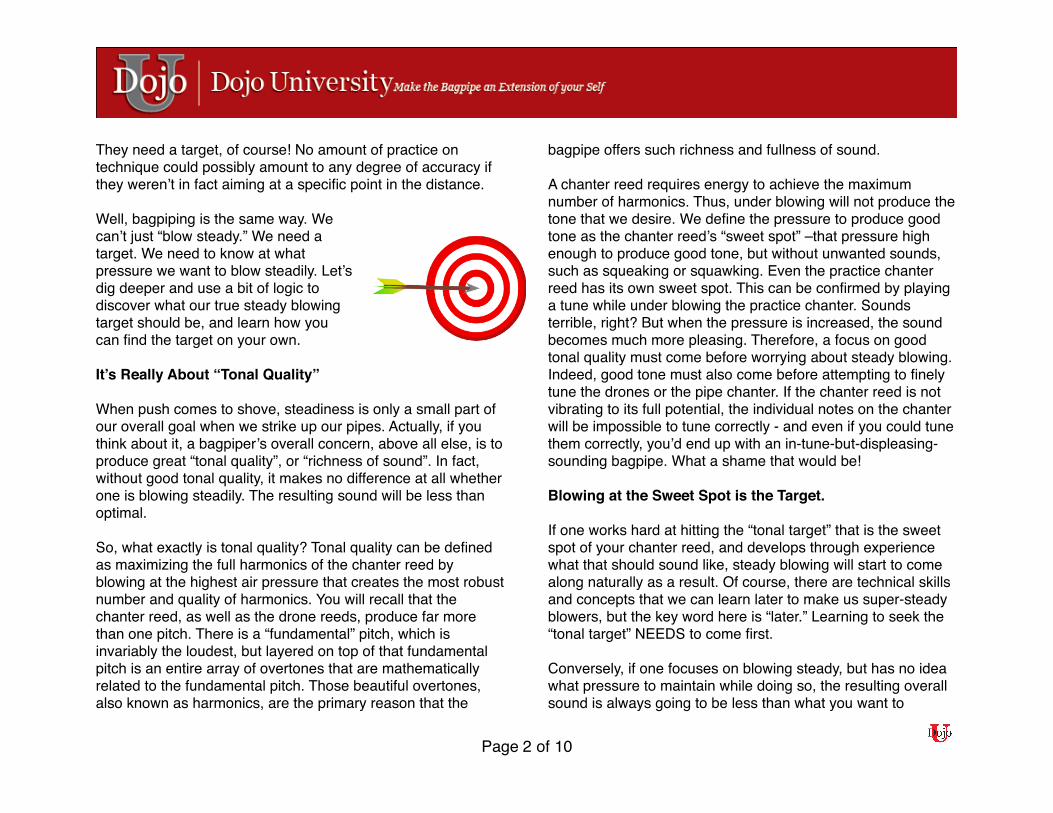
They need a target, of course! No amount of practice on technique could possibly amount to any degree of accuracy if they weren’t in fact aiming at a specific point in the distance.
Well, bagpiping is the same way. We can’t just “blow steady.” We need a target. We need to know at what pressure we want to blow steadily. Let’s dig deeper and use a bit of logic to discover what our true steady blowing target should be, and learn how you can find the target on your own.
It’s Really About “Tonal Quality”
When push comes to shove, steadiness is only a small part of our overall goal when we strike up our pipes. Actually, if you think about it, a bagpiper’s overall concern, above all else, is to produce great “tonal quality”, or “richness of sound”. In fact, without good tonal quality, it makes no difference at all whether one is blowing steadily. The resulting sound will be less than optimal.So, what exactly is tonal quality? Tonal quality can be defined as maximizing the full harmonics of the chanter reed by blowing at the highest air pressure that creates the most robust number and quality of harmonics. You will recall that the chanter reed, as well as the drone reeds, produce far more than one pitch. There is a “fundamental” pitch, which is invariably the loudest, but layered on top of that fundamental pitch is an entire array of overtones that are mathematically related to the fundamental pitch. Those beautiful overtones, also known as harmonics, are the primary reason that the
bagpipe offers such richness and fullness of sound.A chanter reed requires energy to achieve the maximum number of harmonics. Thus, under blowing will not produce the tone that we desire. We define the pressure to produce good tone as the chanter reed’s “sweet spot” –that pressure high enough to produce good tone, but without unwanted sounds, such as squeaking or squawking. Even the practice chanter reed has its own sweet spot. This can be confirmed by playing a tune while under blowing the practice chanter. Sounds terrible, right? But when the pressure is increased, the sound becomes much more pleasing. Therefore, a focus on good tonal quality must come before worrying about steady blowing. Indeed, good tone must also come before attempting to finely tune the drones or the pipe chanter. If the chanter reed is not vibrating to its full potential, the individual notes on the chanter will be impossible to tune correctly - and even if you could tune them correctly, you’d end up with an in-tune-but-displeasing-sounding bagpipe. What a shame that would be!
Blowing at the Sweet Spot is the Target.If one works hard at hitting the “tonal target” that is the sweet spot of your chanter reed, and develops through experience what that should sound like, steady blowing will start to come along naturally as a result. Of course, there are technical skills and concepts that we can learn later to make us super-steady blowers, but the key word here is “later.” Learning to seek the “tonal target” NEEDS to come first.
Conversely, if one focuses on blowing steady, but has no idea what pressure to maintain while doing so, the resulting overall sound is always going to be less than what you want to
Page � of �2 10 �
�
achieve. Stop falling into the trap! Just focus for now on hitting your “tonal target.”
Part 2: “Physical Blowing Technique,” and the Hidden Fact about Steady Blowing That is Holding You Back
How often have we pipers been told to “blow steady” or that our chanter notes or drones are “wavering” in and out of tune while we’re playing?
“Steady blowing” is a learned skill, and for most of us pipers it does not come naturally. As a matter of fact, most of the world’s population of pipers (young, old, beginner through advanced) STILL struggle to blow steadily even though it’s been in the back of our minds since the very first day we got the pipes out and started working on it.
The crazy thing is, it’s an amazingly EASY concept… right? Just keep the pressure in the bag the same at all times. It’s not rocket science. Sure, it’ll probably never be perfect, but it sure seems like anyone should be able to do this.
… So why can so few of us do it?
Well, one of the reasons is that we need a target, and we discussed the art of how and why finding the “tonal target” or “sweet spot” on your chanter reed is such an important aspect of getting a great bagpipe sound.
But there’s another important and largely hidden fact about steady blowing that holds back many pipers - and that is the fact steady blowing is not a “singular” issue - it actually has two distinct components. Blowing steadily requires two distinct skill sets to be mastered.
The first skill set we call “Physical Blowing Mechanics;” the ability to blow, squeeze, and transition between blowing and squeezing smoothly, with no detectable deviations in your bagpipe’s steadiness.
The second skillset is focused on eliminating “Mental Blowing Anomalies;” mistakes we make in our physical blowing mechanics as we navigate through the difficult fingerwork of the pipes.
In this section, let’s separate and focus on the first key skill set - “Physical Blowing Mechanics.”
Understanding Physical Blowing
Let’s begin by acknowledging the four phases of blowing and squeezing. For simplicity, let’s start with 1) blowing into the pipe bag, 2) transitioning to squeezing as one starts to breath in, 3) squeezing with increased arm pressure to allow a full inhalation, and 4) another transition to blowing. All four of these actions must not only be coordinated, they must also become completely second nature. A piper merely can’t be thinking
Page � of �3 10 �
�
about blowing and squeezing while playing a tune. Steady blowing needs to become as automatic as normal breathing, which will then allow one to concentrate on playing on the beat, with all the correct notes and embellishments.
The previous section described how to use a manometer to determine the chanter reeds’ sweet spot, and that point should already be marked on your manometer. To practice physical blowing technique, for the first few sessions the chanter can be removed and the stock corked off. Attach the water manometer to one of the tenor drones, and strike in the pipes. The bagpipe should be comfortable to play. The pipe bag should fit the piper well, allowing for relaxed but upright posture. The blowstick length should be appropriate and individualized. Make sure that the blowstick’s inner diameter doesn’t restrict too much airflow. Lift the bag up into the armpit as high as it will go, and move the bag as far back as it will fit comfortably. The drones should go over the shoulder at about a 45 degree angle. The pipes should be able to be balanced with the bass drone on the collar bone. The elbow and upper arm should be the only areas of the arm that apply pressure to the bag. Using the forearm to squeeze will likely interfere with top hand agility because of increased tension in those muscles.
Stand straight, keeping the shoulders of equal height. Face the manometer and watch the water level rise as the pressure in the bag increases. Since there is no chanter at this point, all the focus should be on keeping the water level even with the previously marked sweet spot. During the blowing phase, be sure that the arm is still maintaining some pressure on the bag. Never take the arm off the bag completely. In fact, some suggest that the upper arm be positioned down “into the bag itself”, not just riding on the surface of the bag. As the blowing
phase continues, watch the water level to see if the blowing is steady. At the end of the blowing phase, transition to squeezing. With coordinated effort, increase the arm pressure as the blowing stops. Watch the water level to see if it changes during the transition. As the arm increases its force to maintain pressure, take a deep breath in. Try to avoid rapid breathing cycles of huffing and puffing. Short cycles introduce a larger number of transitions, and steady blowing is harder to achieve.
At the end of inhalation, begin the transition to blowing once again. The arm must be relaxed just a bit as one begins to blow and “backfill” air into the bag, but the key is to maintain some arm pressure on the bag. But don’t try to blow against an arm that is vigorously squeezing, as doing so results in lack of coordination. Think of it as “blowing your arm away from your body, against a gentle arm force”. Try to make the blowing cycles as long as you can, but keep them of comfortable length. There is no magic “ratio” for how much time a piper should spend blowing or squeezing. But as a general rule, the longer the cycles, the better. As you blow through more and more cycles, continue to watch the water level in the manometer. Where in the blowing cycle does the water level suddenly rise? Does it abruptly fall at some point? Make a mental note to adjust what you’re doing wrong during the next cycle.
Surging pressure or drops in pressure can occur anywhere during the blowing/squeezing/transition phases. For example, as one begins to blow, lifting the arm too quickly away from the body will result in a sudden drop in pressure. Also, it is common during the squeezing cycle to apply too much arm pressure, resulting in surges. Pay special attention during transitions. Make the transitions as “fluid” as possible. By
Page � of �4 10 �
�
seeing the water move in the manometer, and linking those changes with what’s going on during the breathing cycle, the feedback for learning to correct the physical errors can be phenomenal.
Now that you’ve had a few sessions on the manometer without a chanter, practicing keeping the water level at the sweet spot, it is now time to practice steady blowing with the chanter back in place.
Roughly tune the pipes to a point they’re not a distraction, and hook back up to the manometer. Strike in and bring the pressure back up to the sweet spot while at the same time play only a single note, such as Low A. Stay on that one note for several complete breathing/squeezing cycles. It’s a bit more difficult, isn’t it, than with only the drones? Again, focus on where in the cycle that surges or dips occur. They tend to be in the same spots of the blowing cycle, so that’s an opportunity to adjust your blowing or squeezing.
The building blocks of learning physical blowing should really be practiced only while playing a single, static note on the chanter. Why? Because as soon as we introduce fingerwork to the equation, we can no longer be sure that fluctuations in pressure are due to physical errors. They may be caused by subconscious “Mental Blowing Anomalies” that we accidentally insert into our blowing process due to the changes in our fingers. As you’ll recall from the beginning of this section, “Mental Blowing Anomalies” are the second of the two key components that we need to understand and develop in order to truly become good, steady blowers.
Getting back on track: the ultimate goal, of course, is to achieve an optimal tone by always blowing at the chanter reed’s sweet spot. However, no piper can maintain an absolutely steady water level. As a result, how would we define excellent, good, or mediocre blowing? The top pipers in the world can blow steadily, within half an inch (one centimeter) of the sweet spot, regardless of the tune being played with their fingers. One can be considered to be a “good” steady blower if the water level never fluctuates more than one inch above or below the sweet spot. Clearly, anyone whose pressure changes wildly fluctuate outside of those parameters has a lot of work to do. But practice will pay off.
Practicing steady blowing with a manometer should not occupy entire practice sessions. When getting started along the path to steady blowing, use the manometer for 5-10 minutes during a practice. But use it for a little while during every practice session, especially at first. Avoid the temptation to quickly jump into tunes with your manometer, unless you are already an accomplished steady blower. Focus on the simple things first. Play one note, then another, making adjustments with your blowing.
Expect it to take at least 20 sessions with the manometer to see real improvement in steady blowing. However, some improvement will occur right away just by being aware of the shortcomings of our physical blowing and squeezing prowess. Be patient. Steady blowing will come to those who become self-aware, and then endeavor to improve.
Page � of �5 10 �
�
Part 3: “Mental Blowing Anomalies;" Uncovering the Dangerous Psychological Pitfall in Steady Blowing
Blowing steadily and consistently at the chanter reed’s sweet spot is a learned task. Involves mastering a “trifecta” of skills: Identifying the exact pressure we want to blow steadily at, well-coordinated physical blowing skills, and the ability to avoid mental blowing anomalies caused by our brains as we try to navigate the difficult fingerwork of the bagpipes.
In the previous section, we outlined the attributes of good physical blowing and reviewed some exercises using a water manometer that help to improve any piper’s physical blowing technique.
Besides physical blowing errors, however, there is another area of unsteady blowing that we call “mental blowing anomalies”, which can be just as detrimental to a good sound as physical blowing problems.
Mental blowing errors can be defined as any unsteady blowing brought about by something that the fingers are doing while you play. It is one thing to play a single note and be a rather steady blower, but it’s entirely different when slowly going up and down the scale causes big surges or dips in the blowing.
The difference here is that for some reason(s), moving the fingers affects physical blowing. As our brains shift focus away from the process of blowing steadily in order to tend to complex finger motions, we tend to experience unpredictable and unmusical lapses in the steadiness of our blowing.
This section will dive deeply into this phenomenon.
As with learning good physical blowing by using a manometer, mental blowing mistakes can be clearly brought out with this great tool. But before we get into details, let’s recall several facts pertinent to good tone.
First, the goal is to blow with a high enough pressure and to maintain that pressure at the chanter reed’s sweet spot. That pressure maximizes the vast number of harmonics of the chanter reed, producing a rich, full, and pleasing sound. [Link: “More on finding the sweet spot can be learned here.]
Second, tuning of the drones and chanter is difficult, if not impossible to achieve while blowing at a pressure anywhere below the sweet spot.
Third, and this is where mental blowing errors come in, the air pressure must remain constant, regardless of what note is played on the chanter!
It is an unfortunate myth that some chanter notes “take more air pressure” than other notes. Think about this logically. Would it really make any sense to blow harder or softer on any one or more of the nine notes on the bagpipe scale?
Page � of �6 10 �
�
If one were to over blow on High A, for example, what would happen to the next note that follows? It would be sharp because we’d be blowing “too hard” on that note. The opposite would be true of notes on either side of a note that was under-blown. The fact remains that the air pressure in the bag must be held constant, at the sweet spot, and the drones and chanter subsequently tuned at that same pressure.
To get an idea about how mental blowing anomalies may interfere with your own blowing, hook up the manometer to one of the tenor drones. Strike in and play only a Low A. Once the water level stabilizes, and while blowing as steadily as you can, simply drop the pinky finger and play Low G. Did the water level change at all? Did it drop, which is the most common change?
If the water level remained constant during the note change, congratulations! But if it changed at all, you have just witnessed a mental blowing anomaly, brought about by moving only one finger.
The purported reasons behind why finger movements may cause changes in our blowing are many, and those reasons are perhaps more academically interesting than they are of practical importance. But some of the more common blowing changes will be mentioned here, for completeness’ sake.
Blowing surges are common when playing top hand notes, particular High A and High G. Some suggest that the reason might be related to the relative “quietness” of those notes, and there’s an unwitting urge to “make them louder”, or to blow harder to make them sound “better”. Others have suggested that with those two notes, the chanter itself is less supported
by the top hand, and there’s a tendency to tense up, resulting in brief overblowing. Remember, all the notes ultimately need to take the same amount of air pressure.
What about bottom hand notes? It is common when playing Low A and Low G to let OFF on the blowing pressure. Some think that’s because of how loud those notes are, and there’s a subconscious tendency to make the “quieter”. But regardless of suspected “reasons” behind the mental blowing anomalies, it is critical to first recognize their existence, and to do something about it.
Now, back to the manometer, on our journey to obliterating mental blowing anomalies. Start on Low A, pausing for two or three blowing cycles, then go to B and pause again. Then to C, and up the scale. Spend two or three blowing cycles on each note, long enough for you to observe what the water level (air pressure) is doing during each note change. Did the pressure surge on High A? Playing the scale slowly is a great way to become self-aware of mental blowing anomalies.After several sessions with the manometer, and playing only scales, get a little more adventurous and play some arpeggios and other scale runs. While watching the manometer, increase the tempo very slightly and challenge yourself to maintain blowing steadiness with every note change.
With time and focused effort, your blowing steadiness will improve through enhanced physical blowing mechanics and through recognizing and dealing with mental blowing anomalies. At this point, you will be ready to take on simple tunes, such as a slow air that you can play well from memory. If you can maintain the water level fairly consistently around
Page � of �7 10 �
�
the sweet spot during an entire slow air, it’s time to get a bit more complicated with slightly advanced tune types.
Learning to become a truly steady blower may take a long time, but the effort put into the process will pay huge dividends, regardless of whether you’re part of a band, or simply enjoy solo piping.
Bonus: How to Use a Water Manometer to Find the Chanter Reed’s Sweet Spot
A water manometer is an extremely useful tool that can help us to achieve several fundamental goals in piping, including blowing at the correct pressure for our chanter reed with calibrated drone reeds, and with steady blowing. This section will focus only on the first goal, blowing at the correct pressure.
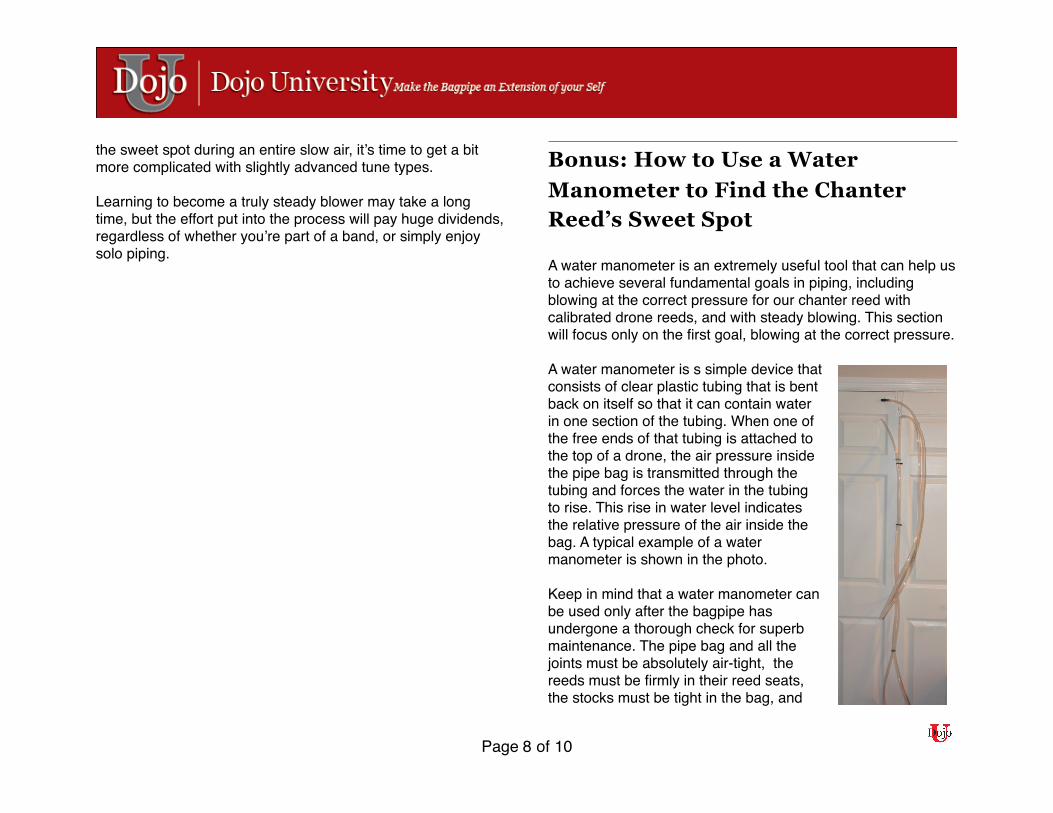
A water manometer is s simple device that consists of clear plastic tubing that is bent back on itself so that it can contain water in one section of the tubing. When one of the free ends of that tubing is attached to the top of a drone, the air pressure inside the pipe bag is transmitted through the tubing and forces the water in the tubing to rise. This rise in water level indicates the relative pressure of the air inside the bag. A typical example of a water manometer is shown in the photo.
Keep in mind that a water manometer can be used only after the bagpipe has undergone a thorough check for superb maintenance. The pipe bag and all the joints must be absolutely air-tight, the reeds must be firmly in their reed seats, the stocks must be tight in the bag, and
Page � of �8 10 �
�
the blow-stick flapper valve must be seated tightly and working properly.
Some pipers use an analog pressure gauge, but a water manometer is preferable because it lends itself more readily to “marking” different positions on the tubing, along with being very sensitive to pressure changes.
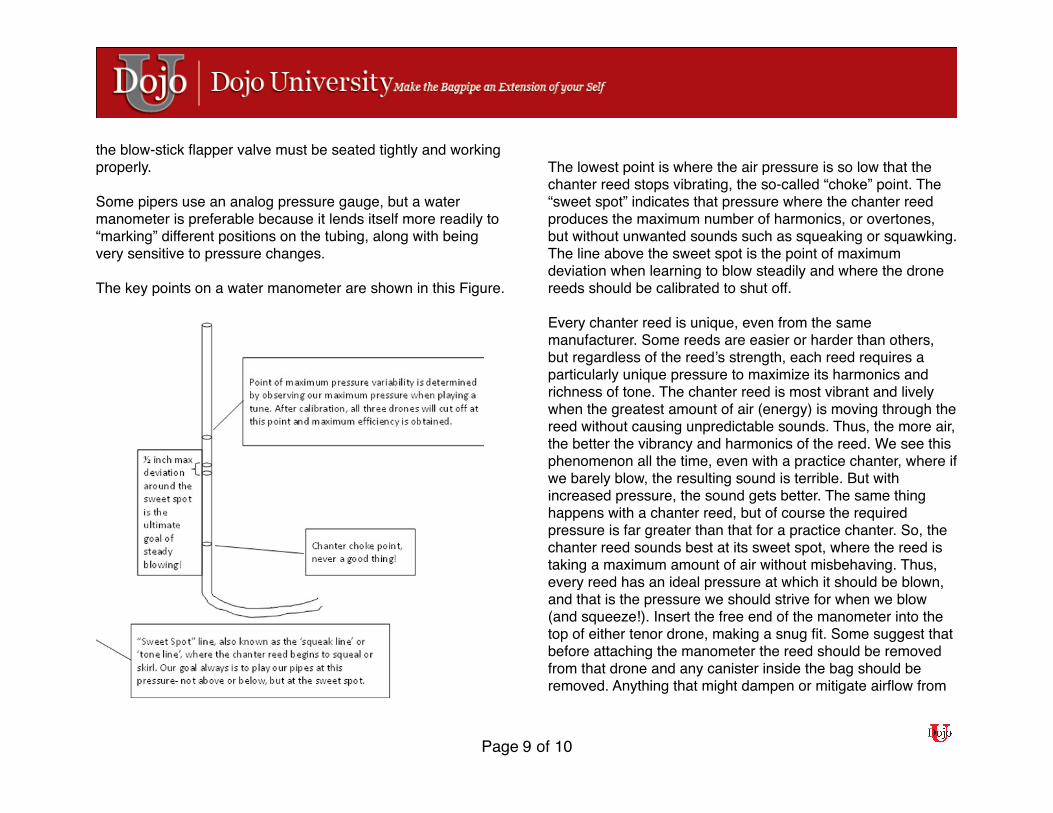
The key points on a water manometer are shown in this Figure.
The lowest point is where the air pressure is so low that the chanter reed stops vibrating, the so-called “choke” point. The “sweet spot” indicates that pressure where the chanter reed produces the maximum number of harmonics, or overtones, but without unwanted sounds such as squeaking or squawking. The line above the sweet spot is the point of maximum deviation when learning to blow steadily and where the drone reeds should be calibrated to shut off.
Every chanter reed is unique, even from the same manufacturer. Some reeds are easier or harder than others, but regardless of the reed’s strength, each reed requires a particularly unique pressure to maximize its harmonics and richness of tone. The chanter reed is most vibrant and lively when the greatest amount of air (energy) is moving through the reed without causing unpredictable sounds. Thus, the more air, the better the vibrancy and harmonics of the reed. We see this phenomenon all the time, even with a practice chanter, where if we barely blow, the resulting sound is terrible. But with increased pressure, the sound gets better. The same thing happens with a chanter reed, but of course the required pressure is far greater than that for a practice chanter. So, the chanter reed sounds best at its sweet spot, where the reed is taking a maximum amount of air without misbehaving. Thus, every reed has an ideal pressure at which it should be blown, and that is the pressure we should strive for when we blow (and squeeze!). Insert the free end of the manometer into the top of either tenor drone, making a snug fit. Some suggest that before attaching the manometer the reed should be removed from that drone and any canister inside the bag should be removed. Anything that might dampen or mitigate airflow from
Page � of �9 10 �
�
the inside of the bag out to the manometer has to potential to alter readings of the relative air pressure.
With the manometer attached to a drone top, strike in the pipes. Observe that the water level increases due to the increased pressure inside the bag. While playing a bottom hand note, such as Low G, begin to play a series of G gracenotes on Low G. Be sure that the gracenotes are crisp, small and percussive. An abrupt pressure change inside the pipe chanter brought about by playing a G gracenote on the Low G puts a lot of stress on the chanter reed. Now, while playing a G gracenote on Low G, gradually increase the pressure in the bag. Observe the water rise. The more controlled and gradual the water level rises, the easier it will be to observe a change in the sound. Ultimately, as the pressure continues to increase, the reed will become unstable to the point that it will squeak or give an unwanted sound when the gracenote is played. Carefully observe where the water level is when that phenomenon occurs. That point is the chanter reed’s “sweet spot”. Play around that point by varying the pressure above and below that point to confirm that the sound changes there when the G gracenote is played. At the sweet spot, put a rubber band or zip tie around the tubing.
The amount of pressure required to reach the chanter reed’s sweet spot often is a surprise to many pipers. But the fact is that one has now determined the optimal pressure for that particular chanter reed. But remember, the goal is to play at the same pressure, at the sweet spot, throughout the entire cycles of blowing and squeezing.
Now that the sweet spot has been closely identified, a huge question about our piping has been answered. That is, at what
pressure should I be playing all of the time? You now know. To be able to play at the sweet spot, producing great tone, is the first step in learning to become a steady blower. You will build up the necessary stamina to be able to play with what might be a significant increase in pressure, but as the stamina builds so does the ability to “hear” when the pressure falls away from the sweet spot. If, on the other hand, it is exceedingly difficult to get the pressure high enough to blow at the reed’s sweet spot, then consider a slightly easier reed.
In summary, a water manometer is a tool with several practical uses. In this section, its use in finding a chanter reed’s sweet spot has been highlighted. Blowing at the sweet spot is the first step along the way to achieve steady blowing and a great bagpipe sound.
That’s a wrap! Thanks so much again for requesting our free guide all about steady blowing on the bagpipes. I hope this in-depth guide will help you achieve a new level of steady blowing that great enhances your enjoyment of the instrument! From all of us here at the Dojo, happy piping!!!
Page � of �10 10 �