Embed Size (px)
Citation preview

© 2009 Alan Palmer Edition 1 Revision 1 Page 1
The reproduction of this document in any form without prior written permission from the publisher is strictly forbidden.
Portable Fire Extinguisher
Maintenance Procedures
Based on the requirements of BS5306 part 3:2009 covering all extinguishers manufactured to British Standards
Written by
ALAN PALMER
The step by step guide to commissioning,
servicing and recharging fire extinguishers

© 2009 Alan Palmer Edition 1 Revision 1 Page 2
The reproduction of this document in any form without prior written permission from the publisher is strictly forbidden.
INTRODUCTION
The aim of this guide is to provide the novice, student or improver technician with logical step by step instructions in the servicing of fire extinguishers. The procedures contained herein are based upon those recommended in BS5306 part 3:2009 Code of practice for the commissioning and maintenance of portable fire extinguishers. Extinguisher servicing must be conducted by a ‘competent person’. According to the Code this is a “person with the qualifications, training and experience, with access to the relevant tools, equipment and information, manuals and knowledge of any special procedures recommended by the manufacturer of an extinguisher, to carry out the relevant maintenance procedures”. The author trains extinguisher technicians to BAFE examination level. From this experience he has rearranged the order in carrying out many of the service procedures to rationalise the work process and in so doing improve productivity. This document should be used in conjunction with the Code along with the extinguisher manufacturers own maintenance instructions, all should be available for consultation by the servicing technician. Scheduled extinguisher service technician’s courses concluding with the BAFE examination are run regularly at strategic locations around the UK, go to www.firecontingency.co.uk/training/technicians.php for details. Extinguisher technicians are required to maintain their competency by attending a refresher course every 3 years, these are also regularly run nationally, visit http://www.uk-fa.org/courses.php for more information. If you have any comments or you need any further guidance or advice, contact the author directly at [email protected] or by telephone on 01932 222010. Alan Palmer Publisher Fire Industry Resources & Equipment Ltd t/a F.I.R.E LTD Unit 19 Enterprise House Walton on Thames Surrey KT12 2SD Telephone 01932 222010 Facsimile 01932 226201 Website www.firecontingency.com Email [email protected]
Photographs on the Service Procedures Index page were supplied courtesy of Gloria plc
All rights reserved No part of this publication may be reproduced, stored in a retrieval system, or transmitted, in any form or by any means, without the prior permission in writing of the publisher nor be otherwise circulated in any form of binding or cover other than that in which it is published and without a similar condition including this condition being imposed on the subsequent purchaser. Disclaimer The publisher has made every effort to ensure accuracy of the information contained in this book at the time of publishing, however it is not guaranteed and the author, publishers do not accept any responsibility for direct or indirect damages caused through its interpretation or use. E&OE.

© 2009 Alan Palmer Edition 1 Revision 1 Page 3
The reproduction of this document in any form without prior written permission from the publisher is strictly forbidden.
THE CHANGES IN BS5306 3:2009 The practices and methods described are those used day to day in running of the author’s fire extinguisher business.
BS5306 part 3:2009 is the ‘code of practice’ for the commissioning and maintenance of portable fire extinguishers - the title has changed to reflect the introduction of the ‘commissioning’ service. The updated Code has taken it’s time in coming but now in August 2009 it has at last arrived and we now have to interpret and apply the recommendations contained therein. My first impression was that it is a very well laid out document that is far easier to read and understand than its predecessor. So no excuses for not reading it!
So what exactly are the changes to the Code? Most are quite significant others are more subtle. I have detailed below the changes I have spotted and explain how they are being interpreted and used by the fire trade. The description of the customer’s responsible person has been specified in the Code as the person with effective control over fire provisions. It also states that the responsible person should record the results of visual inspections of fire equipment. It has now been made their responsibility to ensure that there is adequate extinguisher provision, whereas it was the duty of the service technician before to supply temporary cover if any were removed during servicing.
SERVICE INTERVALS
Commissioning The addition of the ‘commissioning’ specified in clause 4.1 is probably the most emotive new addition to the Code adding more work for the technician which the service company may not necessarily recoup payment for. One major servicing provider is known to be adding the cost of this service to the cost of new extinguishers they supply. Commissioning appears to have been introduced to try and thwart the threat to the fire trade from internet and catalogue sales. It must be undertaken by a ‘competent person’ and
Annex B of the new Code breaks down the service actions starting with the removal of the new or reconditioned extinguisher from it’s original packaging up until it is positioned in it’s designated place. It is almost a full basic service so helping to justify your prices over those of the internet and catalogue suppliers. I would recommend charging customers a fee for commissioning extinguishers that they have bought cheaply elsewhere. If used responsibly commissioning does help to justify to customers why buying an extinguisher from a bone fide servicing company with much higher operating costs has to charge more than one from a ‘box shifter’. For some ideas on how to guide your customers in the purchase of fire extinguishers visit www.firecontingency.co.uk/supply/exting_guide_buy.php.
© 2009 Alan Palmer Edition 1 Revision 1 Page 4
The reproduction of this document in any form without prior written permission from the publisher is strictly forbidden.
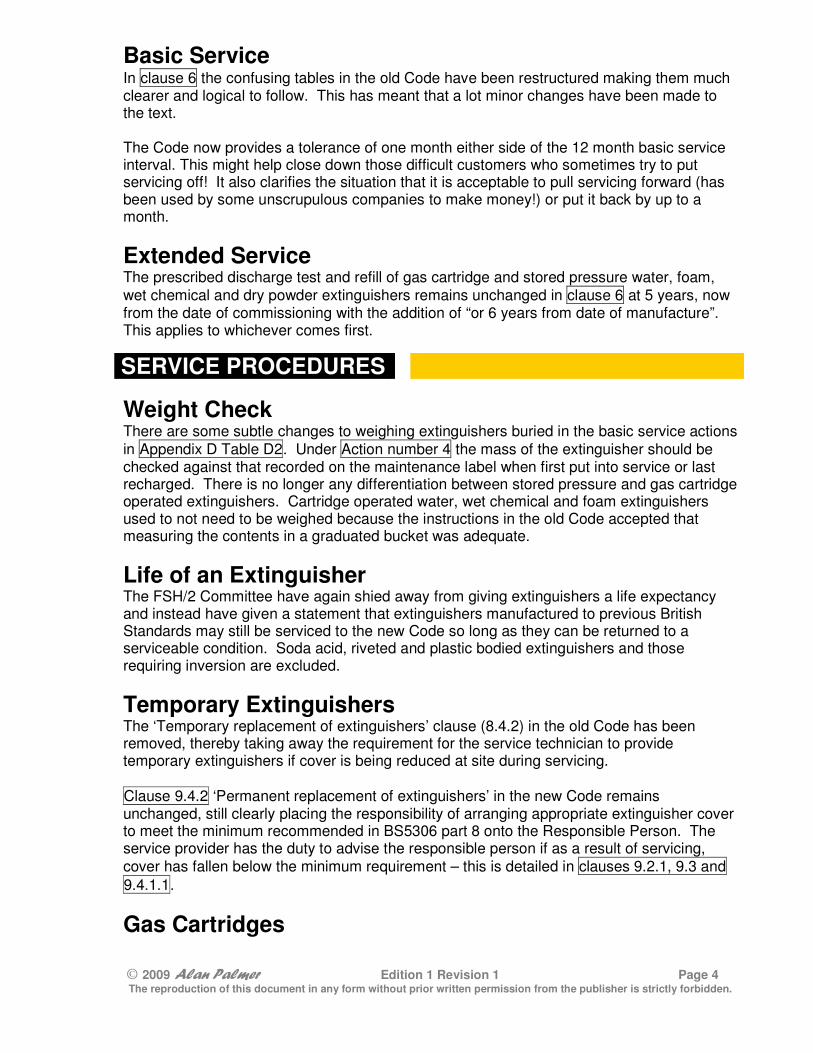
Basic Service In clause 6 the confusing tables in the old Code have been restructured making them much clearer and logical to follow. This has meant that a lot minor changes have been made to the text. The Code now provides a tolerance of one month either side of the 12 month basic service interval. This might help close down those difficult customers who sometimes try to put servicing off! It also clarifies the situation that it is acceptable to pull servicing forward (has been used by some unscrupulous companies to make money!) or put it back by up to a month.
Extended Service The prescribed discharge test and refill of gas cartridge and stored pressure water, foam,
wet chemical and dry powder extinguishers remains unchanged in clause 6 at 5 years, now from the date of commissioning with the addition of “or 6 years from date of manufacture”. This applies to whichever comes first.
SERVICE PROCEDURES
Weight Check There are some subtle changes to weighing extinguishers buried in the basic service actions
in Appendix D Table D2. Under Action number 4 the mass of the extinguisher should be checked against that recorded on the maintenance label when first put into service or last recharged. There is no longer any differentiation between stored pressure and gas cartridge operated extinguishers. Cartridge operated water, wet chemical and foam extinguishers used to not need to be weighed because the instructions in the old Code accepted that measuring the contents in a graduated bucket was adequate.
Life of an Extinguisher The FSH/2 Committee have again shied away from giving extinguishers a life expectancy and instead have given a statement that extinguishers manufactured to previous British Standards may still be serviced to the new Code so long as they can be returned to a serviceable condition. Soda acid, riveted and plastic bodied extinguishers and those requiring inversion are excluded.
Temporary Extinguishers The ‘Temporary replacement of extinguishers’ clause (8.4.2) in the old Code has been removed, thereby taking away the requirement for the service technician to provide temporary extinguishers if cover is being reduced at site during servicing.
Clause 9.4.2 ‘Permanent replacement of extinguishers’ in the new Code remains unchanged, still clearly placing the responsibility of arranging appropriate extinguisher cover to meet the minimum recommended in BS5306 part 8 onto the Responsible Person. The service provider has the duty to advise the responsible person if as a result of servicing,
cover has fallen below the minimum requirement – this is detailed in clauses 9.2.1, 9.3 and
9.4.1.1.
Gas Cartridges
© 2009 Alan Palmer Edition 1 Revision 1 Page 5
The reproduction of this document in any form without prior written permission from the publisher is strictly forbidden.
Clause 7.2 states that these should be replaced with the correct type and size (capacity and dimensions) and care should be taken to use an appropriate cartridge specified by the manufacturer. It goes on stating that cartridges should be removed from service 10 years from manufacture – after all it is no longer cost effective to hydraulically test them.
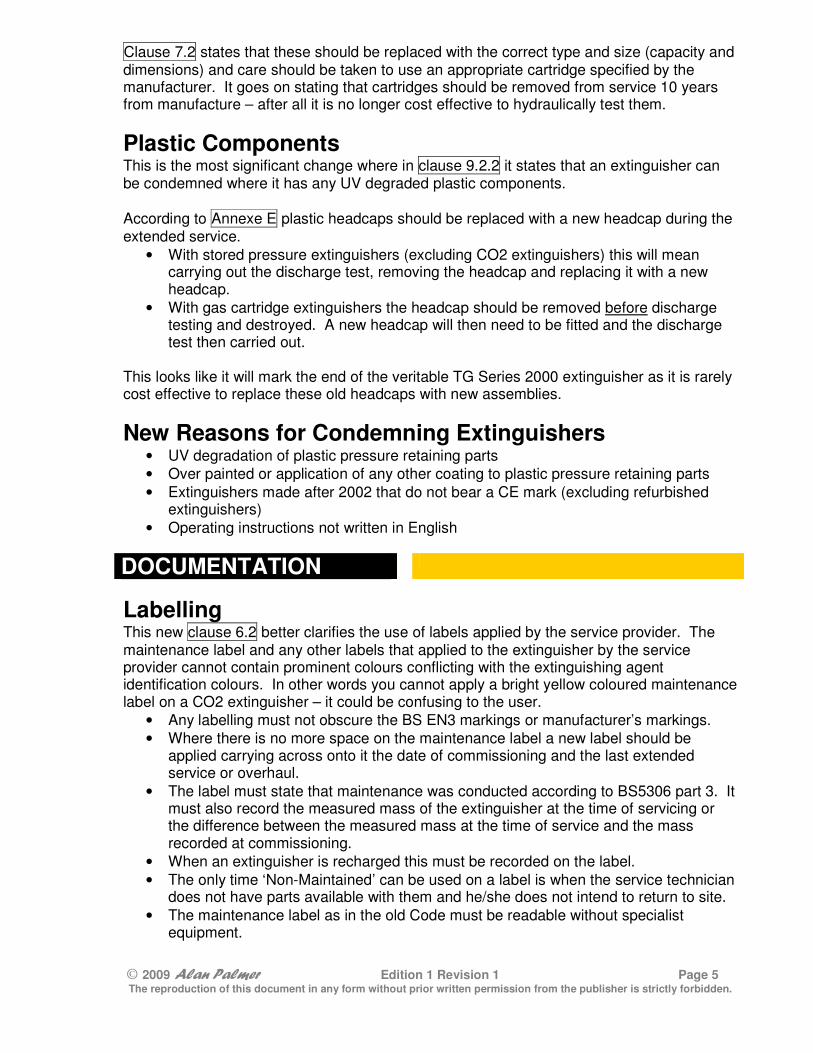
Plastic Components This is the most significant change where in clause 9.2.2 it states that an extinguisher can be condemned where it has any UV degraded plastic components.
According to Annexe E plastic headcaps should be replaced with a new headcap during the extended service.
• With stored pressure extinguishers (excluding CO2 extinguishers) this will mean carrying out the discharge test, removing the headcap and replacing it with a new headcap.
• With gas cartridge extinguishers the headcap should be removed before discharge testing and destroyed. A new headcap will then need to be fitted and the discharge test then carried out.
This looks like it will mark the end of the veritable TG Series 2000 extinguisher as it is rarely cost effective to replace these old headcaps with new assemblies.
New Reasons for Condemning Extinguishers • UV degradation of plastic pressure retaining parts
• Over painted or application of any other coating to plastic pressure retaining parts
• Extinguishers made after 2002 that do not bear a CE mark (excluding refurbished extinguishers)
• Operating instructions not written in English
DOCUMENTATION
Labelling This new clause 6.2 better clarifies the use of labels applied by the service provider. The maintenance label and any other labels that applied to the extinguisher by the service provider cannot contain prominent colours conflicting with the extinguishing agent identification colours. In other words you cannot apply a bright yellow coloured maintenance label on a CO2 extinguisher – it could be confusing to the user.
• Any labelling must not obscure the BS EN3 markings or manufacturer’s markings.
• Where there is no more space on the maintenance label a new label should be applied carrying across onto it the date of commissioning and the last extended service or overhaul.
• The label must state that maintenance was conducted according to BS5306 part 3. It must also record the measured mass of the extinguisher at the time of servicing or the difference between the measured mass at the time of service and the mass recorded at commissioning.
• When an extinguisher is recharged this must be recorded on the label.
• The only time ‘Non-Maintained’ can be used on a label is when the service technician does not have parts available with them and he/she does not intend to return to site.
• The maintenance label as in the old Code must be readable without specialist equipment.

© 2009 Alan Palmer Edition 1 Revision 1 Page 6
The reproduction of this document in any form without prior written permission from the publisher is strictly forbidden.
For reference the maintenance label should contain the following information:
1) type of work carried out (commissioning, basic service, extended service, recharge, overhaul, condemned, not maintained)
2) name and address of the service provider 3) identification of the service technician 4) date work carried out (month and year) 5) the measured mass of the extinguisher in kilogram’s or the difference between the
measured mass and that initially recorded at commissioning 6) date (month and year) of commissioning and the last extended service/overhaul 7) confirmation that servicing has been carried out in accordance with BS5306 part 3
Written Report I always felt that it was strange that the old Code gave no indication as to what the service
paperwork should convey to the customer. This is now better covered by clause 9.4.1.1 where it states that a written report should advise the responsible person;
1) of any extinguishers that have been condemned, not maintained and/or are missing 2) of any replacement extinguishers required 3) of any additional extinguishers needed to meet the minimum requirements of
BS5306 part 8 4) that any replacement or additional extinguishers are provided as soon as possible 5) it is their obligation to provide an adequate provision of fire fighting equipment at all
times The clause does not specify the information needed in the Written Report and I recommend using the same structure as that prescribed for the Certificate of Inspection but printed as a multipart (NCR) document for the technician to complete by hand:
• Your company name, postal address, telephone number of the service provider
• Date of maintenance
• Identification of the service technician
• A detailed list of all the extinguishers serviced including non conforming equipment
• The signature of the customers responsible person and their position in the organisation – or a reason given why this was not obtained e.g. an unmanned site
• Confirmation that servicing has been carried out in accordance with BS5306 part 3 Over and above this information I suggest that you also include:
• Your Terms of business (printed on the reverse of each sheet)
• Retention of title clause i.e. ‘The property in the equipment supplied shall remain the property of the company until the purchaser has paid the full price thereof as well as any other payments due to the company’
• A list of all the parts, signs and equipment supplied and services provided.
• Number and type of extinguishers responsibly disposed of
• A reminder for the Technician to complete the customers Fire Log Book
Certificate of Inspection Clause 9.4.1.2 states that a Certificate of Inspection should be issued “in all cases”. A printed Certificate of Inspection is usually provided by servicing providers (following receipt of payment!) and the clause states that the following information should be included:
1) Your company name, postal address, telephone number of the service provider

© 2009 Alan Palmer Edition 1 Revision 1 Page 7
The reproduction of this document in any form without prior written permission from the publisher is strictly forbidden.
2) Date of maintenance 3) Identification of the service technician 4) A list of all the extinguishers serviced including non conforming equipment and
recommendations for any corrective action required 5) The signature of the customer’s responsible person before leaving site – or a reason
given why this was not obtained e.g. it is an unmanned site 6) Confirmation that servicing has been carried out in accordance with BS5306 part 3
A note in Clause 9.4.1 allows the Certificate of Inspection to be amalgamated with the Written Report. I do not recommend doing this as technicians may make mistakes and a hand written certificate does not look very professional, especially when hung in the customer’s reception for the world to see!
TECHNICIAN TRAINING
Examination Board The current system of technicians being examined by three different boards BAFE, IFEDA & BFC is being overhauled and these will be amalgamated during 2009 into one which most likely will be run by BAFE. This does not restrict who provides the actual training but will mean that the examination will at last be consistent.
To be a ‘competent person’ Annex A puts more emphasis into “on the job” experience meaning that students need to acquire field skills working under supervision, as well as classroom learning. This will affect the facility management companies looking to train their general maintenance people in fire extinguisher maintenance. The practical servicing part of the examination will now include a test to establish the trainee’s skill in fault finding.
Refresher Training Continuity of technician competency remains in taking a three yearly refresher of one day duration concluding with a written examination. Alternatively this can now be through continuing professional development over a period with documented outlines and training material.
Conclusions The new Code tidies up several loose ends and is better laid out making it much easier to read. The commissioning service will be welcomed by some but loathed by others in the fire industry. The merging of the three extinguisher technician’s examinations will ensure even standards and reflect the way exams are managed in further education. It will be interesting to know who will invigilate and monitor the examination provider! Most responsible service technicians have been aware of the danger with UV degradation in plastic headcaps and taken appropriate action over last few years. We now have the long awaited for authority to protect our customers by what is otherwise a dubious sounding claim, especially as it usually requires replacement with a new extinguisher.

© 2009 Alan Palmer Edition 1 Revision 1 Page 8
The reproduction of this document in any form without prior written permission from the publisher is strictly forbidden.
SERVICE TECHNICIAN TOOLS This is a general guide for the basic tools that should be in every service technician’s toolbox or tool bag. Specific requirements will depend on the nature of the work undertaken and the technician’s preferences. o Battery drill complete with drill bits and
screwdrivers o Tool box or bag o 0–2kg (in 5 gram increments) spring/digital
scales o 0–20kg (in 20 gram increments)
spring/digital scales o Inspection torch o Rubber mallet o Slot and crosshead screwdrivers - small &
medium o Spanner - adjustable o Self grips and or slip joint pliers o Headcap ‘C’ spanners or strap wrench o Tape measure. o Allen keys - various sizes o Cutting knife o 9 litre bucket graduated in 0.5 litre
increments o Hose and a variety of tap connectors o Funnels - large & small o Silicone grease o Rags for cleaning o Pens o Gauge checking equipment o Stored pressure pressurising cylinder and
adapter kit o Head cap removal bar o Extinguisher clamp Tools and extinguisher parts are available from the following suppliers (shown in no particular order of preference);
SUPPLIER LOCATION TELEPHONE EMAIL
Cherry Parts Newcastle upon Tyne 0191 236 9505 [email protected]
Express Parts Manchester 0800 328 3078 [email protected]
Homesaver High Wycombe 01494 443388
Thomas Glover Manchester 0161 654 2222 [email protected]
Jewel Saffire Newstead, Notts 0845 330 5406 [email protected]

© 2009 Alan Palmer Edition 1 Revision 1 Page 9
The reproduction of this document in any form without prior written permission from the publisher is strictly forbidden.
SERVICE PROCEDURES INDEX
SECTION ONE SECTION FIVE
Water extinguisher – cartridge operated
Dry powder extinguisher - cartridge operated
Commissioning service 10 Commissioning service 29
Basic service 11 Basic service 30
Recharge 13 Recharge 32
SECTION TWO SECTION SIX
Water extinguisher – stored pressure
Dry powder extinguisher - stored pressure
Commissioning service 15 Commissioning service 34
Basic service 16 Basic service 35
Recharge 17 Recharge 36
SECTION THREE SECTION SEVEN
Foam, water additive & wet chemical – cartridge operated
Carbon dioxide extinguisher - cartridge operated
Commissioning service 19 Commissioning service 38
Basic service 20 Basic service 39
Recharge 22 Recharge 40
SECTION FOUR
Foam, water additive & wet chemical – stored pressure
Commissioning service 25
Basic service 26
Recharge 27

© 2009 Alan Palmer Edition 1 Revision 1 Page 10
The reproduction of this document in any form without prior written permission from the publisher is strictly forbidden.
SECTION ONE Water extinguisher Cartridge operated
COMMISSIONING Water extinguisher – cartridge operated
The extinguisher manufacturer’s service instructions must be read in conjunction with these procedures. If the there is any variance, the manufacturer’s instructions should take precedence.
1. Check the safety pin/clip and tamper indicating device to ensure that the extinguisher
has not been operated. 2. Examine the extinguisher body externally for corrosion or damage that could impair the
safe function of the extinguisher. 3. Ensure the operating labels are correct, in good condition, legible and printed in
English. 4. Check the condition of the discharge hose making sure that it meets the
manufacturer’s specifications. Fit to the extinguisher head cap if the discharge hose is supplied loose.
5. Unscrew the head cap assembly to not more than one third of extent necessary for full
disengagement - this allows any pressure still remaining to escape through the automatic means of venting. Then continue to open the extinguisher - slowly.
6. Examine the extinguisher body internally using a torch to check for corrosion and
damage to the lining. 7. Check that the extinguisher is correctly filled or if it was supplied empty fill with the
correct volume of water. The addition of low freeze* additive will be needed if the extinguisher is likely to be subject to freezing – adhere to manufacturers specifications.
8. Examine the head cap and operating mechanism for damage. 9. Examine the gas cartridge and if safe to do so, remove from the head cap. 10. Remove the safety pin/clip and tamper indicating device. Check for free movement of
the safety pin/clip and replace if necessary. Check that the operating lever freely operates and is not damaged.
11. Check the firing pin is in place and operates correctly. 12. Check that the discharge hose nozzle and siphon tube strainer are free from
obstruction and damage. Pass air through the discharge hose, valve and siphon tube checking for blockages and correct operation.
13. Examine the vent holes/slots in the head cap threads - clean as necessary. 14. Check that the head cap and discharge hose O rings are in place – replace if
damaged. 15. Refit the safety pin/clip to the head cap and seal with a tamper indicator. Replace the
pin/clip if it is designed to show that the extinguisher has been operated e.g. a plastic frangible pin.
16. Examine the gas cartridge for corrosion or damage - in either case replace the gas
cartridge in accordance with the manufacturer’s instructions. 17. Check that the gas cartridge matches the manufacturers specification i.e. it is the
correct size and capacity for the extinguisher.

© 2009 Alan Palmer Edition 1 Revision 1 Page 11
The reproduction of this document in any form without prior written permission from the publisher is strictly forbidden.
18. Check that the gas cartridge is less than 10 years old - otherwise replace it. 19. Check weigh the mass of the gas cartridge against that marked on the cartridge body.
Although a tolerance of -10% (-15% for cartridges with contents less than 30 grams) is allowed, it is good practice to replace it if it has lost weight.
20. Fit the gas cartridge or a replacement to the head cap. 21. Refit the head cap and tighten down firmly. 22. Weigh the extinguisher to check that the weight corresponds with the manufacturers
specifications. Recharge if there is a loss in content of 10% or more. 23. Affix the maintenance label to the extinguisher body avoiding covering instruction
labels with; • technicians name or identification mark • date (month & year) of service • mass of extinguisher in kg’s • type of work carried out i.e. commissioning service
24. Wipe extinguisher down with a cloth. 25. Install the extinguisher using a proprietary stand or wall bracket, according to the
customer’s wishes. If an existing wall hanging bracket is to be utilised check it is appropriate for use and is secure.
26. Fit an extinguisher ID sign and if one is already in place check that it is appropriate for
the extinguisher. 27. Fill in the inspection report advising the responsible person of your actions and any
recommendations. *To use any low freeze additive other than recommended by the manufacturer, may cause corrosion or affect
the fire fighting performance of the extinguisher.
BASIC SERVICE Water extinguisher – cartridge operated
The extinguisher manufacturer’s service instructions must be read in conjunction with these procedures. If the there is any variance, the manufacturer’s instructions should take precedence.
1. Check the maintenance label to be sure that the extinguisher is not due extended
service. 2. Check the safety pin/clip and tamper indicating device to ensure that the extinguisher
has not been operated. 3. Examine the extinguisher body externally for corrosion or damage that could impair the
safe function of the extinguisher, in particular scrutinising the plastic head cap (if fitted) for signs of UV degradation.
4. Ensure the operating labels are correct, in good condition, legible and printed in English.
5. Check the condition of the discharge hose and making sure that it meets the
manufacturer’s specifications. 6. Weigh the extinguisher to check that the weight corresponds with the manufacturers
specifications and the recorded weight when first commissioned or last recharged (discharge and recharge if there is a loss of content of10% or more).

© 2009 Alan Palmer Edition 1 Revision 1 Page 12
The reproduction of this document in any form without prior written permission from the publisher is strictly forbidden.
7. Unscrew the head cap assembly to not more than one third of extent necessary for full disengagement - this allows any pressure still remaining to escape through the automatic means of venting. Then continue to open the extinguisher - slowly.
8. Empty the contents of the extinguisher into a clean container and if appropriate rinse
out with clean water. Inspect the water for discolouration and bad smell – if it is contaminated dispose of it into a foul drain.
9. Examine the extinguisher body internally using a torch to check for corrosion and
damage to the lining. 10. Examine the head cap and operating mechanism for damage. 11. Examine the gas cartridge and if safe to do so, remove from the head cap. 12. Remove the safety pin/clip and tamper indicating device. Check for free movement of
the safety pin/clip and replace if necessary. Check that the operating lever freely operates and is not damaged.
13. Check the firing pin is in place and operates correctly. 14. Check that the discharge hose nozzle and siphon tube strainer are free from
obstruction and damage. Pass air through the discharge hose, valve and siphon tube checking for blockages and correct operation.
15. Examine the vent holes/slots in the head cap threads - clean as necessary. 16. Fit a new head cap O ring. The discharge hose O ring need only be renewed if the
hose has been removed during servicing. 17. Refit the safety pin/clip to the head cap and seal with a tamper indicator. Replace the
pin/clip if it is designed to show that the extinguisher has been operated e.g. a plastic frangible pin.
18. Examine the gas cartridge for corrosion or damage - in either case replace the gas
cartridge in accordance with the manufacturer’s instructions. 19. Check that the gas cartridge matches the manufacturers specification i.e. it is the
correct size and capacity for the extinguisher. 20. Check that the gas cartridge is less than 10 years old - otherwise replace it. 21. Check weigh the mass of the gas cartridge against that marked on the cartridge body.
Although a tolerance of -10% (-15% for cartridges with contents less than 30 grams) is allowed it is good practice to replace it if it has lost weight.
22. Fit the gas cartridge or a replacement to the head cap. 23. Return the original/fresh charge of water to the extinguisher, topping up if necessary.
The addition of low freeze* additive will be needed if the extinguisher is likely to be subject to freezing – adhere to manufacturers specifications.
24. Refit the head cap and tighten down firmly. 25. Fill in the maintenance label with;
• technicians name or identification mark • date (month & year) of service • mass of extinguisher in kg’s - or the difference in weight to that when first
commissioned • type of work carried out i.e. basic service

© 2009 Alan Palmer Edition 1 Revision 1 Page 13
The reproduction of this document in any form without prior written permission from the publisher is strictly forbidden.
• dates (month & year) originally commissioned and the last extended service/overhaul was conducted
26. Wipe extinguisher down with a cloth. 27. Examine the stand or the security of the wall hanging bracket and rectify any faults. 28. Check that the extinguisher ID sign is in place and appropriate for the extinguisher. 29. Fill in the inspection report advising the responsible person of your actions, the state of
maintenance and your recommendations (if any). *To use any low freeze additive other than recommended by the manufacturer, may cause corrosion or affect
the fire fighting performance of the extinguisher.
RECHARGE Water extinguisher – cartridge operated
The extinguisher manufacturer’s service instructions must be read in conjunction with these procedures. If the there is any variance, the manufacturer’s instructions should take precedence.
1. Fit a temporary safety pin/clip to avoid accidental discharge of any remaining contents
and pressure. 2. Examine the extinguisher body externally for corrosion or damage that could impair the
safe function of the extinguisher, in particular scrutinising the plastic head cap (if fitted) for signs of UV degradation.
3. Ensure the operating labels are correct, in good condition, legible and printed in
English. 4. Check the condition of the discharge hose making sure that it meets the
manufacturer’s specifications. 5. Remove the temporary safety pin/clip, invert the extinguisher and maintain a vertical
position while venting any residual pressure by depressing the operating lever. Hold the body of the extinguisher securely while carrying out this action and aim the discharge hose in a safe direction.
6. Unscrew the head cap assembly to not more than one third of extent necessary for full
disengagement - this allows any pressure still remaining to escape through the automatic means of venting. Then continue to open the extinguisher - slowly.
7. Empty the contents of the extinguisher completely into a clean container and rinse out
the body with clean water. 8. Examine the extinguisher body internally using a torch to check for corrosion and
damage to the lining. 9. Examine the head cap and operating mechanism for damage. 10. Check the firing pin is in place and operates correctly – if not replace. 11. Remove the gas cartridge from the head cap. 12. Check for free movement of the safety pin/clip and replace if necessary. Check that
the operating lever freely operates and is not damaged. 13. Check that discharge hose, nozzle, siphon tube and strainer are free from obstruction
and damage.

© 2009 Alan Palmer Edition 1 Revision 1 Page 14
The reproduction of this document in any form without prior written permission from the publisher is strictly forbidden.
14. Examine the vent holes/slots in the head cap threads - clean as necessary. 15. Fit a new head cap O ring. The discharge hose O ring need only be renewed if the
hose has been removed during recharging. 16. Refit the safety pin/clip to the head cap and seal with a tamper indicator. Replace the
pin/clip if it is designed to show that the extinguisher has been operated e.g. a plastic frangible pin.
17. Examine the replacement gas cartridge for corrosion or damage - in either case
replace the gas cartridge in accordance with the manufacturer’s instructions. 18. Check that the replacement gas cartridge matches the manufacturers specification i.e.
it is the correct size and capacity for the extinguisher. 19. Check that the gas cartridge is less than 10 years old - otherwise replace it. 20. Check weigh the mass of the gas cartridge against that marked on the cartridge body.
Although a tolerance of -10% (-15% for cartridges with contents less than 30 grams) is allowed it is good practice to replace it if it has lost weight.
21. Fit the replacement gas cartridge to the head cap. 22. Fill the extinguisher with the correct volume of water. The addition of low freeze*
additive will be needed if the extinguisher is likely to be subject to freezing – adhere to manufacturers specifications.
23. Refit the head cap and tighten down firmly. 24. Weigh the extinguisher to check that the weight corresponds with the manufacturer’s
specifications and the recorded weight when first commissioned or last recharged. 25. Fill in the maintenance label with;
• technicians name or identification mark • date (month & year) of recharge • mass of extinguisher in kg’s - or the difference in weight to that when first
commissioned • type of work carried out i.e. recharge • dates (month & year) originally commissioned and the last extended
service/overhaul was conducted 26. Wipe extinguisher down with a cloth. 27. Examine the stand or the security of the wall hanging bracket and rectify any faults. 28. Check that the extinguisher ID sign is in place and appropriate for the extinguisher. 29. Fill in the inspection report advising the responsible person of your actions, the state of
maintenance and your recommendations (if any). *To use any low freeze additive other than recommended by the manufacturer, may cause corrosion or affect
the fire fighting performance of the extinguisher.

© 2009 Alan Palmer Edition 1 Revision 1 Page 15
The reproduction of this document in any form without prior written permission from the publisher is strictly forbidden.
SECTION TWO Water extinguisher Stored pressure
COMMISSIONING Water extinguisher – stored pressure
The extinguisher manufacturer’s service instructions must be read in conjunction with these procedures. If the there is any variance, the manufacturer’s instructions should take precedence.
1. Check the safety pin/clip and tamper indicating device to ensure that the extinguisher
has not been operated. 2. Examine the extinguisher body externally for corrosion or damage that could impair the
safe function of the extinguisher. 3. Ensure the operating labels are correct, in good condition, legible and printed in
English. 4. Check the condition of the discharge hose making sure that it meets the
manufacturer’s specifications. Fit to the extinguisher head cap if the discharge hose is supplied loose, checking that if appropriate the O ring is in place.
5. Check the pressure indicating device – where fitted. If the needle is not moving freely
or the pressure is showing to be outside the normal operating range, return to the manufacturer for replacement. . Fit a dust cover on the lens ensuring that it does not obscure the needle.
6. Weigh the extinguisher to check that the weight corresponds with the manufacturers
specifications. Return to the manufacturer for replacement if there is a loss in content of 10% or more.
7. With an extinguisher that can have the head cap removed without the loss of pressure
and the contents being discharged, carefully remove the head cap and inspect the operating mechanism for free movement.
8. Remove the safety pin/clip and tamper indicating device. Check for free movement of
the safety pin/clip and replace if necessary. Check that the operating lever freely operates and is not damaged.
9. Refit the safety pin/clip to the head cap and seal with a tamper indicator. Replace the
pin/clip if it is designed to show that the extinguisher has been operated e.g. a plastic frangible pin.
10. Affix the maintenance label to the extinguisher body avoiding covering instruction
labels with; • technicians name or identification mark • date (month & year) of service • mass of extinguisher in kg’s • type of work carried out i.e. commissioning service
11. Wipe extinguisher down with a cloth. 12. Install the extinguisher using a proprietary stand or wall bracket, according to the
customer’s wishes. If an existing wall hanging bracket is to be utilised check it is appropriate for use and is secure.
13. Fit an extinguisher ID sign and if one is already in place check that it is appropriate for
the extinguisher.

© 2009 Alan Palmer Edition 1 Revision 1 Page 16
The reproduction of this document in any form without prior written permission from the publisher is strictly forbidden.
14. Fill in the inspection report advising the responsible person of your actions and any recommendations.
BASIC SERVICE Water extinguisher – stored pressure
The extinguisher manufacturer’s service instructions must be read in conjunction with these procedures. If the there is any variance, the manufacturer’s instructions should take precedence.
1. Check the maintenance label to be sure that the extinguisher is not due extended
service. 2. Check the safety pin/clip and tamper indicating device to ensure that the extinguisher
has not been operated. 3. Examine the extinguisher body externally for corrosion or damage that could impair the
safe function of the extinguisher, in particular scrutinising the plastic head cap (if fitted) for signs of UV degradation.
4. Ensure the operating labels are correct, in good condition, legible and printed in English.
5. Check the condition of the discharge hose and making sure that it meets the
manufacturer’s specifications. 6. Weigh the extinguisher to check that the weight corresponds with the manufacturers
specifications and the recorded weight when first commissioned or last recharged (discharge and recharge if there is a loss of content of10% or more).
7. With an extinguisher that can have the head cap removed without the loss of pressure
and the contents being discharged, carefully remove the head cap and inspect the operating mechanism for free movement.
8. Check the pressure indicating device – where fitted. If the needle is not moving freely
or the pressure is showing to be outside the normal operating range remove the extinguisher from service and refer to manufacturers instructions for guidance. Fit a dust cover on the lens ensuring that this does not obscure the needle.
9. Remove the discharge hose and check that it is free from obstruction, cracks and
damage. Pass air through the discharge hose checking for blockages. 10. Remove the safety pin/clip and tamper indicating device. Check for free movement of
the safety pin/clip and replace if necessary. Check that the operating lever freely operates and is not damaged.
11. Refit the safety pin/clip to the head cap and seal with a tamper indicator. Replace the
pin/clip if it is designed to show that the extinguisher has been operated e.g. a plastic frangible pin.
12. Fill in the maintenance label with;
• technicians name or identification mark • date (month & year) of service • mass of extinguisher in kg’s - or the difference in weight to that when first
commissioned • type of work carried out i.e. basic service • dates (month & year) originally commissioned and the last extended
service/overhaul was conducted 13. Wipe extinguisher down with a cloth.

© 2009 Alan Palmer Edition 1 Revision 1 Page 17
The reproduction of this document in any form without prior written permission from the publisher is strictly forbidden.
14. Examine the stand or the security of the wall hanging bracket and rectify any faults. 15. Check that the extinguisher ID sign is in place and appropriate for the extinguisher. 16. Fill in the inspection report advising the responsible person of your actions, the state of
maintenance and your recommendations (if any).
RECHARGE Water extinguisher – stored pressure
The extinguisher manufacturer’s service instructions must be read in conjunction with these procedures. If the there is any variance, the manufacturer’s instructions should take precedence.
1. Fit a temporary safety pin/clip to avoid accidental discharge of any remaining contents
and pressure. 2. Examine the extinguisher body externally for corrosion or damage that could impair the
safe function of the extinguisher, in particular scrutinising the plastic head cap (if fitted) for signs of UV degradation.
3. Ensure the operating labels are correct, in good condition, legible and printed in
English. 4. Check the condition of the discharge hose making sure that it meets the
manufacturer’s specifications. 5. Remove the temporary safety pin/clip, invert the extinguisher and maintain a vertical
position while venting any residual pressure by depressing the operating lever. Hold the body of the extinguisher securely while carrying out this action and aim the discharge hose in a safe direction.
6. Remove the discharge hose and check that it is free from obstruction, cracks and
damage. Pass air through the discharge hose checking for blockages. 7. Unscrew the head cap assembly to not more than one third of extent necessary for full
disengagement - this allows any pressure still remaining to escape through the automatic means of venting. Then continue to open the extinguisher - slowly.
8. Empty the contents of the extinguisher completely into a clean container and rinse out
the body with clean water. 9. Examine the extinguisher body internally using a torch to check for corrosion and
damage to the lining. 10. Examine the head cap and operating mechanism for damage. 11. Check that the siphon tube and strainer are free from obstruction and damage. 12. Examine the vent slots in the head cap threads - clean as necessary. 13. Fit a new head cap O ring. 14. Fill the extinguisher with the correct volume of water. The addition of low freeze*
additive will be needed if the extinguisher is likely to be subject to freezing – adhere to manufacturers specifications.
15. Refit the head cap and tighten down firmly checking for alignment with operating labels
and the hose holder.

© 2009 Alan Palmer Edition 1 Revision 1 Page 18
The reproduction of this document in any form without prior written permission from the publisher is strictly forbidden.
16. Refit the safety pin/clip to the head cap and seal with a tamper indicator. Replace the pin/clip if it is designed to show that the extinguisher has been operated e.g. a plastic frangible pin.
17. Weigh the extinguisher to check that the weight corresponds with the manufacturer’s
specifications and the recorded weight when first commissioned or last recharged. 18. Fill in the maintenance label with;
• technicians name or identification mark • date (month & year) of recharge • mass of extinguisher in kg’s - or the difference in weight to that when first
commissioned • type of work carried out i.e. recharge • dates (month & year) originally commissioned and the last extended
service/overhaul was conducted 19. Wipe extinguisher down with a cloth. 20. Examine the stand or the security of the wall hanging bracket and rectify any faults. 21. Check that the extinguisher ID sign is in place and appropriate for the extinguisher. 22. Fill in the inspection report advising the responsible person of your actions, the state of
maintenance and your recommendations (if any). *To use any low freeze additive other than recommended by the manufacturer, may cause corrosion or affect
the fire fighting performance of the extinguisher.

© 2009 Alan Palmer Edition 1 Revision 1 Page 19
The reproduction of this document in any form without prior written permission from the publisher is strictly forbidden.
SECTION THREE Foam, water additive & wet chemical extinguisher Cartridge operated
COMMISSIONING Foam, water additive & wet chemical extinguisher – cartridge operated
The extinguisher manufacturer’s service instructions must be read in conjunction with these procedures. If the there is any variance, the manufacturer’s instructions should take precedence.
1. Check the safety pin/clip and tamper indicating device to ensure that the extinguisher
has not been operated. 2. Examine the extinguisher body externally for corrosion or damage that could impair the
safe function of the extinguisher. 3. Ensure the operating labels are correct, in good condition, legible and printed in
English. 4. Check the condition of the discharge hose and nozzle making sure that it meets the
manufacturer’s specifications. Fit to the extinguisher head cap if the discharge hose is supplied loose.
5. Unscrew the head cap assembly to not more than one third of extent necessary for full
disengagement - this allows any pressure still remaining to escape through the automatic means of venting. Then continue to open the extinguisher - slowly.
6. Examine the extinguisher body internally using a torch to check for corrosion and
damage to the lining. 7. Check that the extinguisher is correctly filled or if it was supplied empty fill with the
correct volume of water including the manufacturers recommended foam/water additive concentrate or equivalent. The addition of low freeze* additive will be needed if the extinguisher is likely to be subject to freezing – adhere to manufacturers specifications. With pre-filled extinguishers that have the foam/water additive in a separate container inside the extinguisher, remove the container and check for leakage. If a leak has occurred empty and rinse out the extinguisher body before recharging.
8. Examine the head cap and operating mechanism for damage. 9. Examine the gas cartridge and if safe to do so, remove from the head cap. 10. Remove the safety pin/clip and tamper indicating device. Check for free movement of
the safety pin/clip and replace if necessary. Check that the operating lever freely operates and is not damaged.
11. Check the firing pin is in place and operates correctly. 12. Check that the discharge hose nozzle and siphon tube strainer are free from
obstruction and damage. Pass air through the discharge hose, valve and siphon tube checking for blockages and correct operation.
13. Examine the vent holes/slots in the head cap threads - clean as necessary. 14. Check that the head cap and discharge hose O rings are in place – replace if
damaged. 15. Refit the safety pin/clip to the head cap and seal with a tamper indicator. Replace the
pin/clip if it is designed to show that the extinguisher has been operated e.g. a plastic frangible pin.

© 2009 Alan Palmer Edition 1 Revision 1 Page 20
The reproduction of this document in any form without prior written permission from the publisher is strictly forbidden.
16. Examine the gas cartridge for corrosion or damage - in either case replace the gas cartridge in accordance with the manufacturer’s instructions.
17. Check that the gas cartridge matches the manufacturers specification i.e. it is the
correct size and capacity for the extinguisher. 18. Check that the gas cartridge is less than 10 years old - otherwise replace it. 19. Check weigh the mass of the gas cartridge against that marked on the cartridge body.
Although a tolerance of -10% (-15% for cartridges with contents less than 30 grams) is allowed, it is good practice to replace it if it has lost weight.
20. Fit the gas cartridge or a replacement to the head cap. 21. Refit the head cap and tighten down firmly. 22. Weigh the extinguisher to check that the weight corresponds with the manufacturers
specifications. Recharge if there is a loss in content of 10% or more. 23. Affix the maintenance label to the extinguisher body avoiding covering instruction
labels with; • technicians name or identification mark • date (month & year) of service • mass of extinguisher in kg’s • type of work carried out i.e. commissioning service
24. Wipe extinguisher down with a cloth. 25. Install the extinguisher using a proprietary stand or wall bracket, according to the
customer’s wishes. If an existing wall hanging bracket is to be utilised check it is appropriate for use and is secure.
26. Fit an extinguisher ID sign and if one is already in place check that it is appropriate for
the extinguisher. 27. Fill in the inspection report advising the responsible person of your actions and any
recommendations. *To use any low freeze additive other than recommended by the manufacturer, may cause corrosion or affect
the fire fighting performance of the extinguisher.
BASIC SERVICE Foam, water additive & wet chemical extinguisher – cartridge operated
The extinguisher manufacturer’s service instructions must be read in conjunction with these procedures. If the there is any variance, the manufacturer’s instructions should take precedence.
1. Check the maintenance label to be sure that the extinguisher is not due extended
service. 2. Check the safety pin/clip and tamper indicating device to ensure that the extinguisher
has not been operated. 3. Examine the extinguisher body externally for corrosion or damage that could impair the
safe function of the extinguisher, in particular scrutinising the plastic head cap (if fitted) for signs of UV degradation.
4. Ensure the operating labels are correct, in good condition, legible and printed in English.
© 2009 Alan Palmer Edition 1 Revision 1 Page 21
The reproduction of this document in any form without prior written permission from the publisher is strictly forbidden.
5. Check the condition of the discharge hose and making sure that it meets the manufacturer’s specifications.
6. Weigh the extinguisher to check that the weight corresponds with the manufacturers
specifications and the recorded weight when first commissioned or last recharged (discharge and recharge if there is a loss of content of10% or more).
7. Unscrew the head cap assembly to not more than one third of extent necessary for full
disengagement - this allows any pressure still remaining to escape through the automatic means of venting. Then continue to open the extinguisher - slowly.
8. Empty the contents of the extinguisher into a clean container and if appropriate rinse
out with clean water. Inspect for discolouration – if it is contaminated dispose of it responsibly. With pre-filled extinguishers that have the foam/water additive in a separate container inside the extinguisher, remove the container and check for leakage. If a leak has occurred empty and rinse out the extinguisher body before recharging.
9. Examine the extinguisher body internally using a torch to check for corrosion and
damage to the lining. 10. Examine the head cap and operating mechanism for damage. 11. Examine the gas cartridge and if safe to do so, remove from the head cap. 12. Remove the safety pin/clip and tamper indicating device. Check for free movement of
the safety pin/clip and replace if necessary. Check that the operating lever freely operates and is not damaged.
13. Check the firing pin is in place and operates correctly. 14. Check that the discharge hose nozzle and siphon tube strainer are free from
obstruction and damage. Pass air through the discharge hose, valve and siphon tube checking for blockages and correct operation.
15. Examine the vent holes/slots in the head cap threads - clean as necessary. 16. Fit a new head cap O ring. The discharge hose O ring need only be renewed if the
hose has been removed during servicing. 17. Refit the safety pin/clip to the head cap and seal with a tamper indicator. Replace the
pin/clip if it is designed to show that the extinguisher has been operated e.g. a plastic frangible pin.
18. Examine the gas cartridge for corrosion or damage - in either case replace the gas
cartridge in accordance with the manufacturer’s instructions. 19. Check that the gas cartridge matches the manufacturers specification i.e. it is the
correct size and capacity for the extinguisher. 20. Check that the gas cartridge is less than 10 years old - otherwise replace it. 21. Check weigh the mass of the gas cartridge against that marked on the cartridge body.
Although a tolerance of -10% (-15% for cartridges with contents less than 30 grams) is allowed it is good practice to replace it if it has lost weight.
22. Fit the gas cartridge or a replacement to the head cap.

© 2009 Alan Palmer Edition 1 Revision 1 Page 22
The reproduction of this document in any form without prior written permission from the publisher is strictly forbidden.
23. Return the original contents/fresh charge to the extinguisher using the manufacturers recommended foam/water additive concentrate or equivalent. The addition of low freeze* additive will be needed if the extinguisher is likely to be subject to freezing – adhere to manufacturers specifications.
24. Refit the head cap and tighten down firmly. 25. Fill in the maintenance label with;
• technicians name or identification mark • date (month & year) of service • mass of extinguisher in kg’s - or the difference in weight to that when first
commissioned • type of work carried out i.e. basic service • dates (month & year) originally commissioned and the last extended
service/overhaul was conducted 26. Wipe extinguisher down with a cloth. 27. Examine the stand or the security of the wall hanging bracket and rectify any faults. 28. Check that the extinguisher ID sign is in place and appropriate for the extinguisher. 29. Fill in the inspection report advising the responsible person of your actions, the state of
maintenance and your recommendations (if any). *To use any low freeze additive other than recommended by the manufacturer, may cause corrosion or affect
the fire fighting performance of the extinguisher.
RECHARGE Foam, water additive & wet chemical extinguisher – cartridge operated
The extinguisher manufacturer’s service instructions must be read in conjunction with these procedures. If the there is any variance, the manufacturer’s instructions should take precedence.
1. Fit a temporary safety pin/clip to avoid accidental discharge of any remaining contents
and pressure. 2. Examine the extinguisher body externally for corrosion or damage that could impair the
safe function of the extinguisher, in particular scrutinising the plastic head cap (if fitted) for signs of UV degradation.
3. Ensure the operating labels are correct, in good condition, legible and printed in
English. 4. Check the condition of the discharge hose and nozzle making sure that it meets the
manufacturer’s specifications. 5. Remove the temporary safety pin/clip, invert the extinguisher and maintain a vertical
position while venting any residual pressure by depressing the operating lever. Hold the body of the extinguisher securely while carrying out this action and aim the discharge hose in a safe direction.
6. Unscrew the head cap assembly to not more than one third of extent necessary for full
disengagement - this allows any pressure still remaining to escape through the automatic means of venting. Then continue to open the extinguisher - slowly.
7. Empty the contents of the extinguisher completely into a clean container and rinse out
the body with clean water.

© 2009 Alan Palmer Edition 1 Revision 1 Page 23
The reproduction of this document in any form without prior written permission from the publisher is strictly forbidden.
8. Examine the extinguisher body internally using a torch to check for corrosion and damage to the lining.
9. Examine the head cap and operating mechanism for damage. 10. Check the firing pin is in place and operates correctly – if not replace. 11. Remove the gas cartridge from the head cap. 12. Check for free movement of the safety pin/clip and replace if necessary. Check that
the operating lever freely operates and is not damaged. 13. Remove the siphon tube checking that it is free from obstruction and damage. 14. Remove the valve spindle and the retaining spring from within the head cap. Inspect
the internal bores of the head cap and the spindle for corrosion and extinguishing medium residue - clean and polish all surfaces. Inspect the spindle O ring(s) and replace if damaged.
15. Lubricate the valve spindle and O rings before reassembling with the spring and
siphon tube into the head cap. 16. Check that discharge hose, nozzle, siphon tube and strainer are free from obstruction
and damage. Pass air through the discharge hose, valve and siphon tube checking for blockages and correct operation.
17. Examine the vent holes/slots in the head cap threads - clean as necessary. 18. Fit a new head cap O ring. The discharge hose O ring need only be renewed if the
hose has been removed during recharging. 19. Refit the safety pin/clip to the head cap and seal with a tamper indicator. Replace the
pin/clip if it is designed to show that the extinguisher has been operated e.g. a plastic frangible pin.
20. Examine the replacement gas cartridge for corrosion or damage - in either case
replace the gas cartridge in accordance with the manufacturer’s instructions. 21. Check that the replacement gas cartridge matches the manufacturers specification i.e.
it is the correct size and capacity for the extinguisher. 22. Check that the gas cartridge is less than 10 years old - otherwise replace it. 23. Check weigh the mass of the gas cartridge against that marked on the cartridge body.
Although a tolerance of -10% (-15% for cartridges with contents less than 30 grams) is allowed it is good practice to replace it if it has lost weight.
24. Fit the replacement gas cartridge to the head cap. 25. Fill the extinguisher with the correct volume of manufacturers recommended (or
equivalent) wet chemical/water including the foam/water additive concentrate. The addition of low freeze* additive will be needed if the extinguisher is likely to be subject to freezing – adhere to manufacturers specifications. With pre-filled extinguishers that have the foam/water additive in a separate container inside the extinguisher, remove the container and check for leakage. If a leak has occurred empty and rinse out the extinguisher body before recharging.
26. Refit the head cap and tighten down firmly.

© 2009 Alan Palmer Edition 1 Revision 1 Page 24
The reproduction of this document in any form without prior written permission from the publisher is strictly forbidden.
27. Fill in the maintenance label with; • technicians name or identification mark • date (month & year) of recharge • mass of extinguisher in kg’s - or the difference in weight to that when first
commissioned • type of work carried out i.e. recharge • dates (month & year) originally commissioned and the last extended
service/overhaul was conducted 28. Wipe extinguisher down with a cloth. 29. Examine the stand or the security of the wall hanging bracket and rectify any faults. 30. Check that the extinguisher ID sign is in place and appropriate for the extinguisher. 31. Fill in the inspection report advising the responsible person of your actions, the state of
maintenance and your recommendations (if any). *To use any low freeze additive other than recommended by the manufacturer, may cause corrosion or affect
the fire fighting performance of the extinguisher.

© 2009 Alan Palmer Edition 1 Revision 1 Page 25
The reproduction of this document in any form without prior written permission from the publisher is strictly forbidden.
SECTION FOUR Foam, water additive & wet chemical extinguisher Stored pressure
COMMISSIONING Foam, water additive & wet chemical extinguisher – stored pressure
The extinguisher manufacturer’s service instructions must be read in conjunction with these procedures. If the there is any variance, the manufacturer’s instructions should take precedence.
1. Check the safety pin/clip and tamper indicating device to ensure that the extinguisher
has not been operated. 2. Examine the extinguisher body externally for corrosion or damage that could impair the
safe function of the extinguisher. 3. Ensure the operating labels are correct, in good condition, legible and printed in
English. 4. Check the condition of the discharge hose and nozzle making sure that it meets the
manufacturer’s specifications. Fit to the extinguisher head cap if the discharge hose is supplied loose, checking that if appropriate the O ring is in place.
5. Check the pressure indicating device – where fitted. If the needle is not moving freely
or the pressure is showing to be outside the normal operating range, return to the manufacturer for replacement. . Fit a dust cover on the lens ensuring that it does not obscure the needle.
6. Weigh the extinguisher to check that the weight corresponds with the manufacturers
specifications. Return to the manufacturer for replacement if there is a loss in content of 10% or more.
7. With an extinguisher that can have the head cap removed without the loss of pressure
and the contents being discharged, carefully remove the head cap and inspect the operating mechanism for free movement.
8. Remove the safety pin/clip and tamper indicating device. Check for free movement of
the safety pin/clip and replace if necessary. Check that the operating lever freely operates and is not damaged.
9. Refit the safety pin/clip to the head cap and seal with a tamper indicator. Replace the
pin/clip if it is designed to show that the extinguisher has been operated e.g. a plastic frangible pin.
10. Affix the maintenance label to the extinguisher body avoiding covering instruction
labels with; • technicians name or identification mark • date (month & year) of service • mass of extinguisher in kg’s • type of work carried out i.e. commissioning service
11. Wipe extinguisher down with a cloth. 12. Install the extinguisher using a proprietary stand or wall bracket, according to the
customer’s wishes. If an existing wall hanging bracket is to be utilised check it is appropriate for use and is secure.
13. Fit an extinguisher ID sign and if one is already in place check that it is appropriate for
the extinguisher.

© 2009 Alan Palmer Edition 1 Revision 1 Page 26
The reproduction of this document in any form without prior written permission from the publisher is strictly forbidden.
14. Fill in the inspection report advising the responsible person of your actions and any recommendations.
BASIC SERVICE Foam, water additive & wet chemical extinguisher – stored pressure
The extinguisher manufacturer’s service instructions must be read in conjunction with these procedures. If the there is any variance, the manufacturer’s instructions should take precedence.
1. Check the maintenance label to be sure that the extinguisher is not due extended
service. 2. Check the safety pin/clip and tamper indicating device to ensure that the extinguisher
has not been operated. 3. Examine the extinguisher body externally for corrosion or damage that could impair the
safe function of the extinguisher, in particular scrutinising the plastic head cap (if fitted) for signs of UV degradation.
4. Ensure the operating labels are correct, in good condition, legible and printed in English.
5. Check the condition of the discharge hose and nozzle making sure that it meets the
manufacturer’s specifications. 6. Weigh the extinguisher to check that the weight corresponds with the manufacturers
specifications and the recorded weight when first commissioned or last recharged (discharge and recharge if there is a loss of content of10% or more).
7. With an extinguisher that can have the head cap removed without the loss of pressure
and the contents being discharged, carefully remove the head cap and inspect the operating mechanism for free movement.
8. Check the pressure indicating device – where fitted. If the needle is not moving freely
or the pressure is showing to be outside the normal operating range remove the extinguisher from service and refer to manufacturers instructions for guidance. Fit a dust cover on the lens ensuring that this does not obscure the needle.
9. Remove the discharge hose and check that it is free from obstruction, cracks and
damage. Pass air through the discharge hose checking for blockages. 10. Remove the safety pin/clip and tamper indicating device. Check for free movement of
the safety pin/clip and replace if necessary. Check that the operating lever freely operates and is not damaged.
11. Refit the safety pin/clip to the head cap and seal with a tamper indicator. Replace the
pin/clip if it is designed to show that the extinguisher has been operated e.g. a plastic frangible pin.
12. Fill in the maintenance label with;
• technicians name or identification mark • date (month & year) of service • mass of extinguisher in kg’s - or the difference in weight to that when first
commissioned • type of work carried out i.e. basic service • dates (month & year) originally commissioned and the last extended
service/overhaul was conducted 13. Wipe extinguisher down with a cloth.

© 2009 Alan Palmer Edition 1 Revision 1 Page 27
The reproduction of this document in any form without prior written permission from the publisher is strictly forbidden.
14. Examine the stand or the security of the wall hanging bracket and rectify any faults. 15. Check that the extinguisher ID sign is in place and appropriate for the extinguisher. 16. Fill in the inspection report advising the responsible person of your actions, the state of
maintenance and your recommendations (if any).
RECHARGE Foam, water additive & wet chemical extinguisher – stored pressure
The extinguisher manufacturer’s service instructions must be read in conjunction with these procedures. If the there is any variance, the manufacturer’s instructions should take precedence.
1. Fit a temporary safety pin/clip to avoid accidental discharge of any remaining contents
and pressure. 2. Examine the extinguisher body externally for corrosion or damage that could impair the
safe function of the extinguisher, in particular scrutinising the plastic head cap (if fitted) for signs of UV degradation.
3. Ensure the operating labels are correct, in good condition, legible and printed in
English. 4. Check the condition of the discharge hose and nozzle making sure that it meets the
manufacturer’s specifications. 5. Remove the temporary safety pin/clip, invert the extinguisher and maintain a vertical
position while venting any residual pressure by depressing the operating lever. Hold the body of the extinguisher securely while carrying out this action and aim the discharge hose in a safe direction.
6. Remove the discharge hose and check that it is free from obstruction, cracks and
damage. Pass air through the discharge hose checking for blockages. 7. Unscrew the head cap assembly to not more than one third of extent necessary for full
disengagement - this allows any pressure still remaining to escape through the automatic means of venting. Then continue to open the extinguisher - slowly.
8. Empty the contents of the extinguisher completely into a clean container and rinse out
the body with clean water. 9. Examine the extinguisher body internally using a torch to check for corrosion and
damage to the lining. 10. Examine the head cap and operating mechanism for damage. 11. Remove the siphon tube checking that the bore and strainer are free from obstruction
and damage. 12. Remove the valve spindle and the retaining spring from within the head cap. Inspect
the internal bores of the head cap and the spindle for corrosion and extinguishing medium residue - clean and polish all surfaces. Inspect the spindle O ring(s) and replace if damaged.
13. Lubricate the valve spindle and O rings before reassembling with the spring and
siphon tube into the head cap. 14. Examine the vent slots in the head cap threads - clean as necessary. 15. Fit a new head cap O ring.

© 2009 Alan Palmer Edition 1 Revision 1 Page 28
The reproduction of this document in any form without prior written permission from the publisher is strictly forbidden.
16. Fill the extinguisher with the correct volume of manufacturers recommended (or equivalent) wet chemical/water including the foam/water additive concentrate. The addition of low freeze* additive will be needed if the extinguisher is likely to be subject to freezing – adhere to manufacturers specifications. With pre-filled extinguishers that have the foam/water additive in a separate container inside the extinguisher, remove the container and check for leakage. If a leak has occurred empty and rinse out the extinguisher body before recharging.
17. Refit the head cap and tighten down firmly checking for alignment with operating labels
and the hose holder. 18. Refit the safety pin/clip to the head cap and seal with a tamper indicator. Replace the
pin/clip if it is designed to show that the extinguisher has been operated e.g. a plastic frangible pin.
19. Fill in the maintenance label with;
• technicians name or identification mark • date (month & year) of recharge • mass of extinguisher in kg’s - or the difference in weight to that when first
commissioned • type of work carried out i.e. recharge • dates (month & year) originally commissioned and the last extended
service/overhaul was conducted 20. Wipe extinguisher down with a cloth. 21. Examine the stand or the security of the wall hanging bracket and rectify any faults. 22. Check that the extinguisher ID sign is in place and appropriate for the extinguisher. 23. Fill in the inspection report advising the responsible person of your actions, the state of
maintenance and your recommendations (if any). *To use any low freeze additive other than recommended by the manufacturer, may cause corrosion or affect
the fire fighting performance of the extinguisher.

© 2009 Alan Palmer Edition 1 Revision 1 Page 29
The reproduction of this document in any form without prior written permission from the publisher is strictly forbidden.
SECTION FIVE Dry powder extinguisher Cartridge operated
COMMISSIONING Dry powder extinguisher – cartridge operated
The extinguisher manufacturer’s service instructions must be read in conjunction with these procedures. If the there is any variance, the manufacturer’s instructions should take precedence.
1. Check the safety pin/clip and tamper indicating device to ensure that the extinguisher
has not been operated. 2. Examine the extinguisher body externally for corrosion or damage that could impair the
safe function of the extinguisher. 3. Ensure the operating labels are correct, in good condition, legible and printed in
English. 4. Check the condition of the discharge hose and nozzle making sure that it meets the
manufacturer’s specifications. Fit to the extinguisher head cap if the discharge hose is supplied loose.
5. Unscrew the head cap assembly to not more than one third of extent necessary for full
disengagement - this allows any pressure still remaining to escape through the automatic means of venting. Then continue to open the extinguisher - slowly.
6. Examine the extinguisher body internally using a torch to check for corrosion. 7. Check that the extinguisher is correctly filled. With pre-filled powder extinguishers
check the powder for caking, lumps and contamination. Return the extinguisher to the manufacturer or recharge with manufacturers recommended powder (or an equivalent) if there is any reason to doubt the condition of the powder.
8. Examine the head cap and operating mechanism for damage. 9. Examine the gas cartridge and if safe to do so, remove from the head cap. 10. Remove the safety pin/clip and tamper indicating device. Check for free movement of
the safety pin/clip and replace if necessary. Check that the operating lever freely operates and is not damaged.
11. Check the firing pin is in place and operates correctly. 12. Check that the discharge hose, nozzle and siphon tube are free from obstruction and
damage. Pass air through the discharge hose, valve and siphon tube checking for blockages and correct operation.
13. Examine the vent holes/slots in the head cap threads - clean as necessary. 14. Check that the head cap and discharge hose O rings are in place – replace if
damaged. 15. Refit the safety pin/clip to the head cap and seal with a tamper indicator. Replace the
pin/clip if it is designed to show that the extinguisher has been operated e.g. a plastic frangible pin.
16. Examine the gas cartridge for corrosion or damage - in either case replace the gas
cartridge in accordance with the manufacturer’s instructions.

© 2009 Alan Palmer Edition 1 Revision 1 Page 30
The reproduction of this document in any form without prior written permission from the publisher is strictly forbidden.
17. Check that the gas cartridge matches the manufacturers specification i.e. it is the correct size and capacity for the extinguisher.
18. Check that the gas cartridge is less than 10 years old - otherwise replace it. 19. Check weigh the mass of the gas cartridge against that marked on the cartridge body.
Although a tolerance of -10% (-15% for cartridges with contents less than 30 grams) is allowed, it is good practice to replace it if it has lost weight.
20. Fit the gas cartridge or a replacement to the head cap. 21. Refit the head cap and tighten down firmly. 22. Weigh the extinguisher to check that the weight corresponds with the manufacturers
specifications. Recharge if there is a loss in content of 10% or more. 23. Affix the maintenance label to the extinguisher body avoiding covering instruction
labels with; • technicians name or identification mark • date (month & year) of service • mass of extinguisher in kg’s • type of work carried out i.e. commissioning service
24. Wipe extinguisher down with a cloth. 25. Install the extinguisher using a proprietary stand or wall bracket, according to the
customer’s wishes. If an existing wall hanging bracket is to be utilised check it is appropriate for use and is secure.
26. Fit an extinguisher ID sign and if one is already in place check that it is appropriate for
the extinguisher. 27. Fill in the inspection report advising the responsible person of your actions and any
recommendations. *To use any low freeze additive other than recommended by the manufacturer, may cause corrosion or affect
the fire fighting performance of the extinguisher.
BASIC SERVICE Dry powder extinguisher – cartridge operated
The extinguisher manufacturer’s service instructions must be read in conjunction with these procedures. If the there is any variance, the manufacturer’s instructions should take precedence.
1. Check the maintenance label to be sure that the extinguisher is not due extended
service. 2. Check the safety pin/clip and tamper indicating device to ensure that the extinguisher
has not been operated. 3. Examine the extinguisher body externally for corrosion or damage that could impair the
safe function of the extinguisher, in particular scrutinising the plastic head cap (if fitted) for signs of UV degradation.
4. Ensure the operating labels are correct, in good condition, legible and printed in English.
5. Check the condition of the discharge hose and making sure that it meets the
manufacturer’s specifications.

© 2009 Alan Palmer Edition 1 Revision 1 Page 31
The reproduction of this document in any form without prior written permission from the publisher is strictly forbidden.
6. Weigh the extinguisher to check that the weight corresponds with the manufacturers specifications and the recorded weight when first commissioned or last recharged (discharge and recharge if there is a loss of content of10% or more).
7. Unscrew the head cap assembly to not more than one third of extent necessary for full
disengagement - this allows any pressure still remaining to escape through the automatic means of venting. Then continue to open the extinguisher - slowly.
8. Examine the extinguisher body internally using a torch to check for corrosion and
damage to the lining. 9. Check that the extinguisher is correctly filled. Examine the powder for caking, lumps
and contamination. Recharge with the manufacturers recommended powder (or an equivalent) if there is any reason to doubt the condition of the powder.
10. Examine the head cap and operating mechanism for damage. 11. Examine the gas cartridge and if safe to do so, remove from the head cap. 12. Remove the safety pin/clip and tamper indicating device. Check for free movement of
the safety pin/clip and replace if necessary. Check that the operating lever freely operates and is not damaged.
13. Check the firing pin is in place and operates correctly. 14. Check that the discharge hose, nozzle and siphon tube are free from obstruction and
damage. Pass air through the discharge hose, valve and siphon tube checking for blockages and correct operation.
15. Examine the vent holes/slots in the head cap threads - clean as necessary. 16. Fit a new head cap O ring. The discharge hose O ring need only be renewed if the
hose has been removed during servicing. 17. Refit the safety pin/clip to the head cap and seal with a tamper indicator. Replace the
pin/clip if it is designed to show that the extinguisher has been operated e.g. a plastic frangible pin.
18. Examine the gas cartridge for corrosion or damage - in either case replace the gas
cartridge in accordance with the manufacturer’s instructions. 19. Check that the gas cartridge matches the manufacturers specification i.e. it is the
correct size and capacity for the extinguisher. 20. Check that the gas cartridge is less than 10 years old - otherwise replace it. 21. Check weigh the mass of the gas cartridge against that marked on the cartridge body.
Although a tolerance of -10% (-15% for cartridges with contents less than 30 grams) is allowed it is good practice to replace it if it has lost weight.
22. Fit the gas cartridge or a replacement to the head cap. 23. Refit the head cap and tighten down firmly. 24. Fill in the maintenance label with;
• technicians name or identification mark • date (month & year) of service • mass of extinguisher in kg’s - or the difference in weight to that when first
commissioned

© 2009 Alan Palmer Edition 1 Revision 1 Page 32
The reproduction of this document in any form without prior written permission from the publisher is strictly forbidden.
• type of work carried out i.e. basic service • dates (month & year) originally commissioned and the last extended
service/overhaul was conducted 25. Wipe extinguisher down with a cloth. 26. Examine the stand or the security of the wall hanging bracket and rectify any faults. 27. Check that the extinguisher ID sign is in place and appropriate for the extinguisher. 28. Fill in the inspection report advising the responsible person of your actions, the state of
maintenance and your recommendations (if any). *To use any low freeze additive other than recommended by the manufacturer, may cause corrosion or affect
the fire fighting performance of the extinguisher.
RECHARGE Dry powder extinguisher – cartridge operated
The extinguisher manufacturer’s service instructions must be read in conjunction with these procedures. If the there is any variance, the manufacturer’s instructions should take precedence.
1. Fit a temporary safety pin/clip to avoid accidental discharge of any remaining contents
and pressure. 2. Examine the extinguisher body externally for corrosion or damage that could impair the
safe function of the extinguisher, in particular scrutinising the plastic head cap (if fitted) for signs of UV degradation.
3. Ensure the operating labels are correct, in good condition, legible and printed in
English. 4. Check the condition of the discharge hose and nozzle making sure that it meets the
manufacturer’s specifications. 5. Invert and agitate the extinguisher to loosen the powder then remove the temporary
safety pin/clip. Hold a canvas discharge sack securely over the discharge nozzle to contain any powder released while depressing the operating lever to vent any residual pressure.
6. Unscrew the head cap assembly to not more than one third of extent necessary for full
disengagement - this allows any pressure still remaining to escape through the automatic means of venting. Then continue to open the extinguisher - slowly.
7. Empty any powder remaining in the extinguisher body. 8. Examine the extinguisher body internally using a torch to check for corrosion. 9. Examine the head cap and operating mechanism for damage. 10. Check the firing pin is in place and operates correctly – if not replace. 11. Remove the gas cartridge from the head cap. 12. Check for free movement of the safety pin/clip and replace if necessary. Check that
the operating lever freely operates and is not damaged. 13. Check that the discharge hose, nozzle and siphon tube are free from obstruction and
damage. Pass air through the discharge hose, valve and siphon tube checking for blockages and correct operation.

© 2009 Alan Palmer Edition 1 Revision 1 Page 33
The reproduction of this document in any form without prior written permission from the publisher is strictly forbidden.
14. Examine the vent holes/slots in the head cap threads - clean as necessary 15. Remove the siphon tube checking that it is free from obstruction and damage. 16. Remove the valve spindle and the retaining spring from within the head cap. Inspect
the internal bores of the head cap and the spindle for corrosion and powder residue – thoroughly clean and polish all surfaces. Inspect the spindle O ring(s) and replace if damaged.
17. Lubricate the valve spindle and O rings before reassembling with the spring and
siphon tube into the head cap. 18. Fit a new head cap O ring. The discharge hose O ring need only be renewed if the
hose has been removed during recharging. 19. Refit the safety pin/clip to the head cap and seal with a tamper indicator. Replace the
pin/clip if it is designed to show that the extinguisher has been operated e.g. a plastic frangible pin.
20. Examine the replacement gas cartridge for corrosion or damage - in either case
replace the gas cartridge in accordance with the manufacturer’s instructions. 21. Check that the replacement gas cartridge matches the manufacturers specification i.e.
it is the correct size and capacity for the extinguisher. 22. Check that the gas cartridge is less than 10 years old - otherwise replace it. 23. Check weigh the mass of the gas cartridge against that marked on the cartridge body.
Although a tolerance of -10% (-15% for cartridges with contents less than 30 grams) is allowed it is good practice to replace it if it has lost weight.
24. Fit the replacement gas cartridge to the head cap. 25. Fill the extinguisher with the correct volume of manufacturer’s recommended (or
equivalent) powder. 26. Refit the head cap and tighten down firmly. 27. Fill in the maintenance label with;
• technicians name or identification mark • date (month & year) of recharge • mass of extinguisher in kg’s - or the difference in weight to that when first
commissioned • type of work carried out i.e. recharge • dates (month & year) originally commissioned and the last extended
service/overhaul was conducted 28. Wipe extinguisher down with a cloth. 29. Examine the stand or the security of the wall hanging bracket and rectify any faults. 30. Check that the extinguisher ID sign is in place and appropriate for the extinguisher. 31. Fill in the inspection report advising the responsible person of your actions, the state of
maintenance and your recommendations (if any). *To use any low freeze additive other than recommended by the manufacturer, may cause corrosion or affect
the fire fighting performance of the extinguisher.

© 2009 Alan Palmer Edition 1 Revision 1 Page 34
The reproduction of this document in any form without prior written permission from the publisher is strictly forbidden.
SECTION SIX Dry powder extinguisher Stored pressure
COMMISSIONING Dry powder extinguisher – stored pressure
The extinguisher manufacturer’s service instructions must be read in conjunction with these procedures. If the there is any variance, the manufacturer’s instructions should take precedence.
1. Check the safety pin/clip and tamper indicating device to ensure that the extinguisher
has not been operated. 2. Examine the extinguisher body externally for corrosion or damage that could impair the
safe function of the extinguisher. 3. Ensure the operating labels are correct, in good condition, legible and printed in
English. 4. Check the condition of the discharge hose and nozzle making sure that it meets the
manufacturer’s specifications. Fit to the extinguisher head cap if the discharge hose is supplied loose, checking that if appropriate the O ring is in place.
5. Check the pressure indicating device – where fitted. If the needle is not moving freely
or the pressure is showing to be outside the normal operating range, return to the manufacturer for replacement. . Fit a dust cover on the lens ensuring that it does not obscure the needle.
6. Weigh the extinguisher to check that the weight corresponds with the manufacturers
specifications. Return to the manufacturer for replacement if there is a loss in content of 10% or more.
7. With an extinguisher that can have the head cap removed without the loss of pressure
and the contents being discharged, carefully remove the head cap and inspect the operating mechanism for free movement.
8. Remove the safety pin/clip and tamper indicating device. Check for free movement of
the safety pin/clip and replace if necessary. Check that the operating lever freely operates and is not damaged.
9. Refit the safety pin/clip to the head cap and seal with a tamper indicator. Replace the
pin/clip if it is designed to show that the extinguisher has been operated e.g. a plastic frangible pin.
10. Affix the maintenance label to the extinguisher body avoiding covering instruction
labels with; • technicians name or identification mark • date (month & year) of service • mass of extinguisher in kg’s • type of work carried out i.e. commissioning service
11. Wipe extinguisher down with a cloth. 12. Install the extinguisher using a proprietary stand or wall bracket, according to the
customer’s wishes. If an existing wall hanging bracket is to be utilised check it is appropriate for use and is secure.
13. Fit an extinguisher ID sign and if one is already in place check that it is appropriate for
the extinguisher.

© 2009 Alan Palmer Edition 1 Revision 1 Page 35
The reproduction of this document in any form without prior written permission from the publisher is strictly forbidden.
14. Fill in the inspection report advising the responsible person of your actions and any recommendations.
BASIC SERVICE Dry powder extinguisher – stored pressure
The extinguisher manufacturer’s service instructions must be read in conjunction with these procedures. If the there is any variance, the manufacturer’s instructions should take precedence.
1. Check the maintenance label to be sure that the extinguisher is not due extended
service. 2. Check the safety pin/clip and tamper indicating device to ensure that the extinguisher
has not been operated. 3. Examine the extinguisher body externally for corrosion or damage that could impair the
safe function of the extinguisher, in particular scrutinising the plastic head cap (if fitted) for signs of UV degradation.
4. Ensure the operating labels are correct, in good condition, legible and printed in English.
5. Check the condition of the discharge hose and nozzle making sure that it meets the
manufacturer’s specifications. 6. Weigh the extinguisher to check that the weight corresponds with the manufacturers
specifications and the recorded weight when first commissioned or last recharged (discharge and recharge if there is a loss of content of10% or more).
7. With an extinguisher that can have the head cap removed without the loss of pressure
and the contents being discharged, carefully remove the head cap and inspect the operating mechanism for free movement.
8. Check the pressure indicating device – where fitted. If the needle is not moving freely
or the pressure is showing to be outside the normal operating range remove the extinguisher from service and refer to manufacturers instructions for guidance. Fit a dust cover on the lens ensuring that this does not obscure the needle.
9. Remove the discharge hose and check that it is free from obstruction, cracks and
damage. Pass air through the discharge hose checking for blockages. 10. Remove the safety pin/clip and tamper indicating device. Check for free movement of
the safety pin/clip and replace if necessary. Check that the operating lever freely operates and is not damaged.
11. Refit the safety pin/clip to the head cap and seal with a tamper indicator. Replace the
pin/clip if it is designed to show that the extinguisher has been operated e.g. a plastic frangible pin.
12. Fill in the maintenance label with;
• technicians name or identification mark • date (month & year) of service • mass of extinguisher in kg’s - or the difference in weight to that when first
commissioned • type of work carried out i.e. basic service • dates (month & year) originally commissioned and the last extended
service/overhaul was conducted 13. Wipe extinguisher down with a cloth. 14. Examine the stand or the security of the wall hanging bracket and rectify any faults.

© 2009 Alan Palmer Edition 1 Revision 1 Page 36
The reproduction of this document in any form without prior written permission from the publisher is strictly forbidden.
15. Check that the extinguisher ID sign is in place and appropriate for the extinguisher. 16. Fill in the inspection report advising the responsible person of your actions, the state of
maintenance and your recommendations (if any).
RECHARGE Dry powder extinguisher – stored pressure
The extinguisher manufacturer’s service instructions must be read in conjunction with these procedures. If the there is any variance, the manufacturer’s instructions should take precedence.
1. Fit a temporary safety pin/clip to avoid accidental discharge of any remaining contents
and pressure. 2. Examine the extinguisher body externally for corrosion or damage that could impair the
safe function of the extinguisher, in particular scrutinising the plastic head cap (if fitted) for signs of UV degradation.
3. Ensure the operating labels are correct, in good condition, legible and printed in
English. 4. Check the condition of the discharge hose and nozzle making sure that it meets the
manufacturer’s specifications. 5. Invert and agitate the extinguisher to loosen the powder then remove the temporary
safety pin/clip. Hold a canvas discharge sack securely over the discharge nozzle to contain any powder released while depressing the operating lever to vent any residual pressure.
6. Remove the discharge hose and check that it is free from obstruction, cracks and
damage. Pass air through the discharge hose checking for blockages. 7. Unscrew the head cap assembly to not more than one third of extent necessary for full
disengagement - this allows any pressure still remaining to escape through the automatic means of venting. Then continue to open the extinguisher - slowly.
8. Empty any powder remaining in the extinguisher body. 9. Examine the extinguisher body internally using a torch to check for corrosion and
damage to the lining. 10. Examine the head cap and operating mechanism for damage. 11. Remove the siphon tube from the headcap checking that it is free from obstruction and
damage. 12. Remove the valve spindle and the retaining spring from within the head cap. Inspect
the internal bores of the head cap and the spindle for corrosion and powder residue – thoroughly clean and polish all surfaces. Inspect the spindle O ring(s) and replace if damaged.
13. Lubricate the valve spindle and O rings before reassembling with the spring and
siphon tube into the head cap. 14. Examine the vent slots in the head cap threads - clean as necessary. 15. Fit a new head cap O ring. 16. Fill the extinguisher with the correct volume of manufacturer’s recommended (or
equivalent) powder.
© 2009 Alan Palmer Edition 1 Revision 1 Page 37
The reproduction of this document in any form without prior written permission from the publisher is strictly forbidden.
17. Refit the head cap and tighten down firmly checking for alignment with operating labels and the hose holder.
18. Refit the safety pin/clip to the head cap and seal with a tamper indicator. Replace the
pin/clip if it is designed to show that the extinguisher has been operated e.g. a plastic frangible pin.
19. Fill in the maintenance label with;
• technicians name or identification mark • date (month & year) of recharge • mass of extinguisher in kg’s - or the difference in weight to that when first
commissioned • type of work carried out i.e. recharge • dates (month & year) originally commissioned and the last extended
service/overhaul was conducted 20. Wipe extinguisher down with a cloth. 21. Examine the stand or the security of the wall hanging bracket and rectify any faults. 22. Check that the extinguisher ID sign is in place and appropriate for the extinguisher. 23. Fill in the inspection report advising the responsible person of your actions, the state of
maintenance and your recommendations (if any). *To use any low freeze additive other than recommended by the manufacturer, may cause corrosion or affect
the fire fighting performance of the extinguisher.

© 2009 Alan Palmer Edition 1 Revision 1 Page 38
The reproduction of this document in any form without prior written permission from the publisher is strictly forbidden.
SECTION SEVEN Carbon dioxide extinguisher Stored pressure
COMMISSIONING Carbon dioxide extinguisher
The extinguisher manufacturer’s service instructions must be read in conjunction with these procedures. If the there is any variance, the manufacturer’s instructions should take precedence.
1. Check the safety pin/clip and tamper indicating device to ensure that the extinguisher
has not been operated. 2. Examine the extinguisher body externally for corrosion or damage that could impair the
safe function of the extinguisher. 3. Ensure the operating labels are correct, in good condition, legible and printed in
English. 4. Weigh the extinguisher with the horn/hose and horn removed, to check that the weight
corresponds with the manufacturers specifications. Return to the manufacturer for replacement if there is a loss in content of 10% or more.
5. Check the condition of the discharge horn/hose and horn making sure that it meets the
manufacturer’s specifications. Fit to the extinguisher head cap if it is supplied loose by the manufacturer, checking that the O ring and/or washer is in place.
6. With an extinguisher that can have the head cap removed without the loss of pressure and the contents being discharged, carefully remove the head cap and inspect the operating mechanism for free movement.
7. Remove the safety pin/clip and tamper indicating device. Check for free movement of
the safety pin/clip and replace if necessary. Check that the operating lever freely operates and is not damaged.
8. Refit the safety pin/clip to the head cap and seal with a tamper indicator. Replace the
pin/clip if it is designed to show that the extinguisher has been operated e.g. a plastic frangible pin.
9. Affix the maintenance label to the extinguisher body avoiding covering instruction
labels with; • technicians name or identification mark • date (month & year) of service • mass of extinguisher in kg’s • type of work carried out i.e. commissioning service
10. Wipe extinguisher down with a cloth. 11. Install the extinguisher using a proprietary stand or wall bracket, according to the
customer’s wishes. If an existing wall hanging bracket is to be utilised check it is appropriate for use and is secure.
12. Fit an extinguisher ID sign and if one is already in place check that it is appropriate for
the extinguisher. 13. Fill in the inspection report advising the responsible person of your actions and any
recommendations.

© 2009 Alan Palmer Edition 1 Revision 1 Page 39
The reproduction of this document in any form without prior written permission from the publisher is strictly forbidden.
BASIC SERVICE Carbon dioxide extinguisher
The extinguisher manufacturer’s service instructions must be read in conjunction with these procedures. If the there is any variance, the manufacturer’s instructions should take precedence.
1. Check the maintenance label to be sure that the extinguisher is not due an overhaul. 2. Check the safety pin/clip and tamper indicating device to ensure that the extinguisher
has not been operated. 3. Examine the extinguisher body externally for corrosion or damage that could impair the
safe function of the extinguisher.
4. Ensure the operating labels are correct, in good condition, legible and printed in English.
5. Remove the discharge horn/hose and horn checking to make sure that it meets the
manufacturer’s specifications. 6. With the horn/hose and horn off, weigh the extinguisher to check that the weight
corresponds with the manufacturers specifications. Recharge if there is a loss in content of 10% or more.
7. With an extinguisher that can have the head cap removed without the loss of pressure
and the contents being discharged, carefully remove the head cap and inspect the operating mechanism for free movement.
8. Remove the safety pin/clip and tamper indicating device. Check for free movement of
the safety pin/clip and replace if necessary. Check that the operating lever freely operates and is not damaged.
9. Refit the safety pin/clip to the head cap and seal with a tamper indicator. Replace the
pin/clip if it is designed to show that the extinguisher has been operated e.g. a plastic frangible pin.
10. Fill in the maintenance label with;
• technicians name or identification mark • date (month & year) of service • mass of extinguisher in kg’s - or the difference in weight to that when first
commissioned • type of work carried out i.e. basic service • dates (month & year) originally commissioned and the last extended
service/overhaul was conducted 11. Wipe extinguisher down with a cloth. 12. Examine the stand or the security of the wall hanging bracket and rectify any faults. 13. Check that the extinguisher ID sign is in place and appropriate for the extinguisher. 14. Fill in the inspection report advising the responsible person of your actions, the state of
maintenance and your recommendations (if any).

© 2009 Alan Palmer Edition 1 Revision 1 Page 40
The reproduction of this document in any form without prior written permission from the publisher is strictly forbidden.
RECHARGE Carbon dioxide extinguisher
The extinguisher manufacturer’s service instructions must be read in conjunction with these procedures. If the there is any variance, the manufacturer’s instructions should take precedence.
Recharging of carbon dioxide extinguishers is not practical in the field without a high pressure cylinder and a decanting pump arrangement. Carbon dioxide extinguishers needing refilling or testing should be returned to a specialist re-filler.