Embed Size (px)
Citation preview
Self Massageand
StretchingA Series of Articles
fromHeadLines
by Shari AizenmanAtlanta, GA
HeadLines newsletter was st arted in 1996, using original articles, tips on health care, and sharing of everyday living experiences to aid the larynge omee. e articles ranged from physical care to emotional support and were written for and by patients and caregivers. In 1997 we added medical professionals and the current list of contributors contains a great mix of patients, caregivers, do ors, eech pathologist s and other professionals.
e mail-out edition is printed and dist ributed each month by the Mid-South Division of American Cancer Society and it is now dist ributed worldwide. It is published monthly on WebWhi ers, WWHealthHelp, and Larynx-C list servs and is featured on the following Internet sites.
Previous issues of HeadLines since 1996 may be found at the following sitehttp://www.webwhi ers.org/pages/Headlines/HLIndex.htm
is site in the UK has HeadLines since 1997http://www.larynge omees.inuk.com/headlines.htm
e IAL site also carries the previous two years.http://larynxlink.com/Main/newslett.htm
Pat Sanders, Editor, [email protected]
Layout by Leonard Librizzi
© 2003, 2004 Shari Aizenman, Atlanta, GAMay be reprinted for personal use.

1
table of contents
Introdu ion ..........................................................................2
e Right Touch ....................................................................3
e Right Touch II ................................................................5
e Right Touch III............................................................... e Right Touch III............................................................... e Right Touch III 7
e Right Touch IV............................................................. e Right Touch IV............................................................. e Right Touch IV 10
Refl exology...........................................................................13
e Right Stretch.................................................................16
e Right Stretch II ............................................................19

2
As a holist ic health care pra itioner for nearly eighteen years, I have a reputation for preaching, kind of. I have seen hundreds of clients with every variety of physical situations you can imagine. Each of them has left my offi ce with inst ru ions on self massage and st retching.
It has been a pleasure to write this series of articles that anyone can use, but is ecifi cally designed for larynge omees. ere are inherent diffi culties that are apparent when considering treatment and post -operative care for someone who has had a surgical procedure. ose who have had invasive pro-cedures on the front of their necks are indeed unique.
Not only are there the obvious scars involved, the underlying tissues and their changes, but the changes in lifest yle, use of the Servox and dominant new “ eaking hand” and the arm attached to it, but also the after eff e s of radiation, the change in diet, and a lifelong awareness of the physical, emo-tional and iritual being as a cancer survivor.
e Right Touch and e Right Stretch series ad-dress the need for self-care for those who are ready to take charge of their wellness and get in touch with a sense of feeling better and becoming more aware and honest with their bodies.
e series are user-friendly self-care guides that use handy tools and incorporate breath and yoga post ures to bring the body as a whole into a more fl exible and cared-for ace. When we address our core needs for touch, it aff e s the rest of our life
positively. We are more clear-headed when our body is not in discomfort.
A note on scar tissue and surgery is needed to un-derst and the need for continuous st retching. Scar tissue is not organized the same as normal tissue. You must underst and that the body has a cellular organization that allows for fl exibility and ease of motion. Scar tissue seeks to st abilize, and does not
consider fl exibility when form-ing. e use of massage and st retches can make scar tissue more fl exible. More fl exible equals more movement equals less binding equals more free-dom and so on.
A note on your general health care is necessary. Un-derst and that having a variety of partners in your wellness program will allow you new found freedom in your overall well-being. Your physician, maybe a physical therapist , massage therapist , yoga in-
st ru or or exercise teacher—all of us are available resources for improving the quality of your life.
Someone once shared with me a lovely poem that I remember always:
Do remember to forgetAnger, worry and regret.
Live while you have life to live.Love while you have love to give.
anks for allowing me to be a partner in your wellness program. If you have quest ions or com-ments regarding this series of articles, feel free to E-mail me at: [email protected]
introduction

3
Touch has always been paramount in the hist ory of being on earth. I am sure that the dinosaurs had a way of nurturing their young. Research shows that primates would rather live without food than without touch. Being a massage therapist , a primary and sec-ondary caregiver to hundreds of willing participants, I have done my own bit of “research”. e results: touch is just plain good for you. It is necessary to the growth and survival of the body, mind and irit.
Many of us have grown up in an environment where touch was not a part of nur-turing. How many times in your life have you comforted another in need by placing a hand on a shoulder, touch-ing another person’s hand? A simple hug, well-meant, can help a person in grief or fear. Providing touch to one’s self is the ultimate a of self-love. Showing yourself that you care enough to touch is nurturing to every cell in your being and you will learn how diff erent you can feel.
Having been a massage therapist for fi fteen years has been a gift for me. I have touched so many diff er-ent types of people with totally diff erent needs.
Eight years ago, a ecial person, Pat, was reintro-duced to me. I had met her originally at a time when she and my father dated, many years before, and now her son, a client of mine, recommended that his moth-er come in as she had been diagnosed with and treated for breast cancer. So we met again and our journey in healing began. During that fi rst year, we touched our way through a second cancer that resulted in her larynge omy. e next path was before us, and we
have walked together on this journey. Massage has been an important part of Pat’s healing, an education in self-care. I will share some of the basics of touch and st retching that have worked for Pat and hopefully will for you as well.
Recognize your tools, as they are many and varied. When we think of massage, we always think of the
hands as our tools, but as we age, sometimes arthritis and other maladies may hinder our ability to use our hands to massage. ere are many massage tools available on the market, as well as some you may have in your home. Do your research to fi nd the right tools for you. In this massage session, the hands are your tools.
Remember the basics of massage. Do not massage swollen, bruised, or open skin. You may want to ask your physician if there is any
reason why you should not be doing self-massage.
e right touch. Give your hands a little st retch. Stretching your hands in preparation is important. Lengthen your arm to lock your elbow and gently pull back on each of your fi ngers, including your thumb. en bend each fi nger, then hand toward the palm. Shake your hands, bend each at the wrist and read your fi ngers as wide as possible. Repeat this process. You are ready!! Remember to take breaks as often as needed so your hands don’t tire.
You will be sitting for the fi rst part of the session. Keep your ine as supported and ere as possible and your feet planted fi rmly on the fl oor. Remember
The right touchFirst in a Series on Stretching and Self-Massage

4
to breathe! Reach across your chest with your right arm, rest ing your arm on your chest and placing your right hand on your left shoulder. Cradle the right elbow with your left hand for support. Gently begin kneading the tissues of your left shoulder, as soft or fi rm as is in your comfort zone. You can make circles with your fi ngers or knuckles, squeeze with your fi n-gers and thumb, or just use pressure to compress the tissues. Work your way up the back of your neck, us-ing the cradling hand to assist in pushing the right arm up. Gra the back of the neck (sort of like you would a kitten) and squeeze. Hold this tension for ten seconds. Repeat. On the second squeeze, gently st retch the tissues behind the neck by taking your chin toward your chest . Hold for ten seconds. Repeat this process on the other side.
Still sitting, lengthen your ine by gently lifting up from the top of your head. When you do this your chin should drop a little toward your chest . Gently allow your left ear to drop to-ward your left shoulder, st retch-ing the tissues of the right side of your neck and shoulder. You can assist this st retch by reaching over the top of your head with your left hand and pulling the head in the same dire ion. Hold the st retch to the count of ten. Repeat on the right side. Next, st ay-ing tall through your ine, turn your head toward the left as far as it can comfortably go, and assist the st retch by taking your left hand and placing it on the right side of your face, pulling your cheek toward the st retch. Hold to the count of ten. Repeat on the
right side. Now, gently drop your chin to your chest . You can increase this st retch by lifting up the back of your head, lengthening your ine even more. Relax and gently allow your head to st retch back, support-ing your head by placing interlaced hands behind the neck and st retching over your hands, allowing your mouth to open and your jaw to relax. Lifting up tall from the top of your head once again, imagine you have a pencil coming out of the top of your head with the lead pointing toward the ceiling. Begin making small circles with your head, drawing imaginary
concentric circles on the ceiling with the pencil. After you have drawn fi ve circles, reverse the process, drawing large circles to small in the other dire ion.
Find a place to recline. Rub your hands briskly together and place them over your eyes. Hold your hands over your eyes to a count of ten. Take a couple of breaths. Gently move your hands toward your temples and rub in circles, fi rst in one dire ion, then the other, mov-ing out toward your hairline.
Rub your forehead and your scalp, softly or vigor-ously, whichever feels best to you. Give your ears a gentle tug down, and squeeze the perimeters of your ears. Stick your tongue out and make a funny face. Rub your cheeks and jaw, under your jaw, and gen-tly rub your throat. A little cream or lotion can help with fri ion. Rub your scars and let them know you care. Give your hands a little kiss and your soul will remember, until your next massage, how much love you have within.

5
In this session, we will deal with the shoulders, up-per back, rib cage and chest . Let’s get right to work.
In the fi rst of this series, I mentioned the need to recognize your tools, as they are many and varied. To-day, we will incorporate a tennis ball as a massage tool. You may not want to share your pet’s toy so it’s better to have one designated for your use only!
In the fi rst part of this ses-sion, you will be sitting in a chair with a st rong back. Plant your feet fi rmly on the ground and st retch tall from your ine, lengthen-ing your ine, vertebra by vertebra. Notice your breath. Keep your breathing easy and deep. We’ll begin this session with some warm-ing up movements. Stretch your right arm above your head, reaching really high, then let your left arm fol-low, reaching over your head toward the ceiling. Keep your head st raight and your eyes looking forward. Gently st retch your fi ngers, then your hands, up, one at a time, as if climbing a ladder. Allow your rib cage to release with these gentle st retches, and be aware of your breath. Feel your sitting bones remain in conta with the chair you are in as you reach your arms toward the sky. Climb ten rungs on the ladder, then allow your arms to come to your sides, bringing one down at a time. Check your ine for length, and then check in with your breathing. Are you relaxed? Is more breath coming in?
Next, with your arms to your side, gently reach your right fi ngers toward the fl oor. Allow your ribs to curve toward the side, and form a C-shape, fi nally allowing your head to follow to complete the curve. Don’t lean over so far as to lose your balance! Hold this st retch to
a count of ten, slowly come back to the st arting point and rest for a couple of seconds. Repeat on the left side.
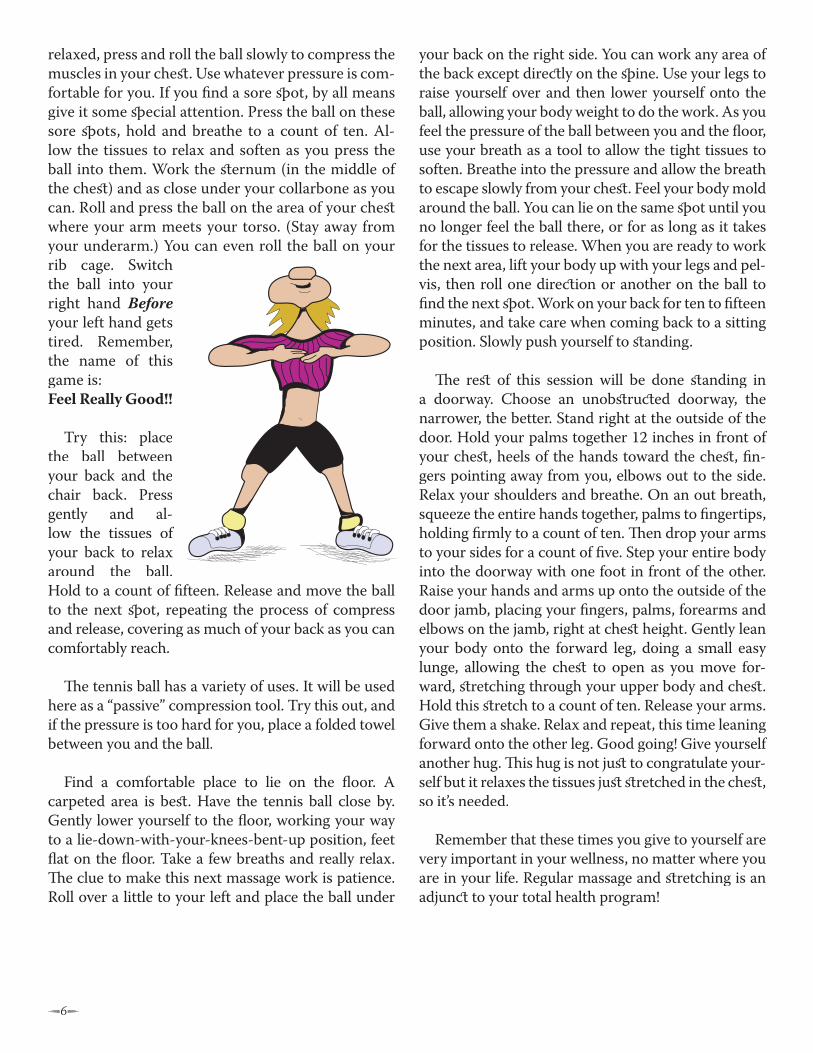
When is the last time you gave yourself a big hug? Reach your right arm across your chest , and then your left arm across your chest under the right one. Give yourself a big squeeze. en open your arms, st retch-ing them slowly out, then, with palms turned facing
behind you, st retch your arms as far back as you can, opening your chest as you breathe. Pull your shoul-der blades together to increase the st retch. Hold to a count of ten, and then release. Bring your left arm across your chest , following with the right arm under-neath, and hug yourself again. en, allow your arms to st retch back as you did before. Feel your breath as your chest opens. Hold to a count of ten and release. Give your fi ngers, then your hands, then your arms a good shake.
What happened to the tennis ball you have? If you left it on the fl oor, the cat probably batted it under the couch, so dig it out. It’s time to use it. It will be used here as an “a ive” compression tool. Holding the tennis ball in your left hand, press it against the tissues on your upper chest , your pe oral muscles. ( e pe oral muscles are two large fan shaped mus-cles covering the upper rib cage.) Keeping your hand
The right touch, IISecond in a Series on Stretching and Self-Massage
6
relaxed, press and roll the ball slowly to compress the muscles in your chest . Use whatever pressure is com-fortable for you. If you fi nd a sore ot, by all means give it some ecial attention. Press the ball on these sore ots, hold and breathe to a count of ten. Al-low the tissues to relax and soften as you press the ball into them. Work the st ernum (in the middle of the chest ) and as close under your collarbone as you can. Roll and press the ball on the area of your chest where your arm meets your torso. (Stay away from your underarm.) You can even roll the ball on your rib cage. Switch the ball into your right hand Before your left hand gets tired. Remember, the name of this game is:Feel Really Good!!
Try this: place the ball between your back and the chair back. Press gently and al-low the tissues of your back to relax around the ball. Hold to a count of fi fteen. Release and move the ball to the next ot, repeating the process of compress and release, covering as much of your back as you can comfortably reach.
e tennis ball has a variety of uses. It will be used here as a “passive” compression tool. Try this out, and if the pressure is too hard for you, place a folded towel between you and the ball.
Find a comfortable place to lie on the fl oor. A carpeted area is best . Have the tennis ball close by. Gently lower yourself to the fl oor, working your way to a lie-down-with-your-knees-bent-up position, feet fl at on the fl oor. Take a few breaths and really relax. e clue to make this next massage work is patience. Roll over a little to your left and place the ball under
your back on the right side. You can work any area of the back except dire ly on the ine. Use your legs to raise yourself over and then lower yourself onto the ball, allowing your body weight to do the work. As you feel the pressure of the ball between you and the fl oor, use your breath as a tool to allow the tight tissues to soften. Breathe into the pressure and allow the breath to escape slowly from your chest . Feel your body mold around the ball. You can lie on the same ot until you no longer feel the ball there, or for as long as it takes for the tissues to release. When you are ready to work the next area, lift your body up with your legs and pel-vis, then roll one dire ion or another on the ball to fi nd the next ot. Work on your back for ten to fi fteen minutes, and take care when coming back to a sitting position. Slowly push yourself to st anding.
e rest of this session will be done st anding in a doorway. Choose an unobst ru ed doorway, the narrower, the better. Stand right at the outside of the door. Hold your palms together 12 inches in front of your chest , heels of the hands toward the chest , fi n-gers pointing away from you, elbows out to the side. Relax your shoulders and breathe. On an out breath, squeeze the entire hands together, palms to fi ngertips, holding fi rmly to a count of ten. en drop your arms to your sides for a count of fi ve. Step your entire body into the doorway with one foot in front of the other. Raise your hands and arms up onto the outside of the door jamb, placing your fi ngers, palms, forearms and elbows on the jamb, right at chest height. Gently lean your body onto the forward leg, doing a small easy lunge, allowing the chest to open as you move for-ward, st retching through your upper body and chest . Hold this st retch to a count of ten. Release your arms. Give them a shake. Relax and repeat, this time leaning forward onto the other leg. Good going! Give yourself another hug. is hug is not just to congratulate your-self but it relaxes the tissues just st retched in the chest , so it’s needed.
Remember that these times you give to yourself are very important in your wellness, no matter where you are in your life. Regular massage and st retching is an adjun to your total health program!

777
How do you know when it’s time for a massage or time to st retch, or even if you need to do either? What are the benefi ts?
As I said in my fi rst article, touch is necessary for the health of the body, mind and irit. ere is a great deal of research that has been done on the benefi ts of massage and st retching. e two main physical ben-efi ts of both are increased circulation and increased mobility in the soft and bony st ru ures of the body. e psychological benefi ts are increased relaxation, a sense of vitality and heightened awareness. e iri-tual benefi ts are a better conne ion with your self and a sense of serenity.
Stretching. Isn’t that something we do naturally? When my clients ask, “when is the best time to st retch?” I refer them to a lesson I learned from my
cat. I notice whenever she gets up from a lying down position she always st retches out! How smart is that? I believe that there is not a wrong time to st retch. Any-time you are doing or expe to do any type of physi-cal labor or physical task is a good time to st retch. For how long should you st retch? Here’s a formula. Allow fi ve minutes st retching time for each forty-fi ve minutes of a ivity. e more arduous the a ivity, the more st retching time you need to add to the formula.
is includes working at a computer or at a desk job, or sitting in front of the TV.
Massage is another anytime a ivity. Make it an everyday, anytime routine. Get a friend or partner involved. Self-massage? Allow your self a little self-in-dulgence! Remember: if it feels good, do it!
In this session, we will incorporate the hips, ribs and lower back, as well as the diaphragm (your breathing muscle) into your massage and st retching routine. Re-member that these sessions are designed for you as a larynge omee, but anyone can benefi t from them.
You will need a bath towel, rolled up tightly length-wise, for the end of this session. You can roll two tow-els together if necessary. See how it feels with one, and then decide if you want the second.
is session will be done lying on a fi rm surface, preferably the fl oor or on your bed if necessary. If you have lower back problems, place a fi rm pillow under your knees. You may choose to put a very small pillow or folded hand towel under your head, but nothing much larger. Begin by warming up. Gently ease your self to the fl oor and relax. Breathe slowly and comfortably.
Reach one arm over your head and let it lie on the fl oor above you, then follow with the other. If you have trouble getting your arm fl at on the fl oor, use folded towels to prop them at a comfort-able level. Reach your right hand up, as if climbing a ladder. en release your ribs as you st retch and reach up for the ladder with the right hand. Breathe and allow your body to relax with the st retch. Reach up and release ten times on each side, alternating right and left. en slide your arms down to your sides,
The right touch, III ird in a Series on Stretching and Self-Massage

8
st retching out toward the sides all the while. When your hands are by your sides turn your palms facing down. Rest your arms at your sides for a moment. Reach your right hand down toward your right foot, sliding your palm by the side of your leg along the fl oor, allowing your head to gently roll to the right as your body gently curves to the right. Reach down as far as feels comfortable for you and hold to a count of ten. Breathe into the left side of your chest and rib cage, feel-ing the expansion on the left side as you inhale. Bring your right hand back to the st arting point and repeat on the left side. Allow yourself plenty of time and reach down ten times on each side, al-ternating right and left. Remem-ber to allow your head to roll and your neck to be soft and fl exible with your movements. Take a moment to notice any changes in your breathing and see if your chest is more relaxed.
Now it is time to incorporate your legs. Position your legs so your kneecaps are pointing to-ward the ceiling, and your toes are pointing st raight up. Gently st ep down with the heel of your right foot, sliding your heel on the fl oor away from your but-tocks, bringing your toes head-ward, st raightening and length-ening your leg, making it long, long, longer. Breathe as you st ep down toward the far wall. Hold for fi ve seconds. Release and st raighten your left leg, st epping down with your left heel as you gain length, allowing your lower back to release to allow you even more length in your leg. Hold to the count of ten. Once again, st ep down ten times with each leg, alter-nating right to left, rocking through your pelvis as one hip goes up and the other down, a natural movement that comes with the st retch.
Notice as you slowly move: is there a place that is hindering my movement? If so, you can locate that ot, and if it is within reach, st op your movement and gently massage the area for a few seconds with you
hands or fi ngers. You can massage those harder-to-reach places by placing a tennis ball between the ot and the fl oor and gently releasing the tissues as you lie on the ball. en continue with your movements.
Are you ready to put it all together? Once again, place your arms above your head, one at a time, rest ing them on the fl oor. Time for a little coordination. Give
your self time to pra ice this and be patient. Breathe. Reach up for the rung of the ladder with your right hand, lengthening your arm, and st ep down with your right heel, lengthening your leg at the same time. Feel your ribs open on the right side and your chest fi ll with healing breath as you st retch upward and down-ward. Allow your head to roll in the dire ion that feels natural for it. Release after fi ve seconds and as you release the right side, reach up and down with the left hand and heel. Breathe. Are your hips going up and down, your shoulders rocking on your ine? What in the world is going on here? You are rocking and rolling! Continue this healthy st retch for as long as it feels good to you.
Roll over on your side and push your self up to a sitting po-sition. Retrieve your towel and place it lengthwise next to you. You will need to get back to the fl oor, lowering your self onto the
towel, so the towel runs the length of your ine, on your ine, from the bottom of the curve in your neck to your tailbone. Allow your self time to adjust to the towels presence. Your breath is the tool you use to re-lax, allowing the tissues of your ine to relax over the towel with each exhale.
Gently draw one leg up at a time, coming to the lie-down-with-your-knees-bent-up position. With each of these st retches, you will repeat three times on each side. Slowly draw your left knee toward your chest , pressing your lower back and sacrum (the triangular-shaped bone at the base of your ine)

9
down onto the towel as the knee comes up. You may choose to wrap your interlaced fi ngers around your knee, gently increasing the st retch. Hold your knee up for ten seconds, release your lower back, and then lower your leg. Repeat on the other side. Squeezing your knees together, gently allow your knees to fall a little bit to the right side, st retching out the left lower back, maintaining your balance on the towel. Hold for ten seconds and repeat on the other side. Finally, raise your right leg and st raighten it at the knee, with the sole of your foot facing the ceiling. See if you can st ep up toward the ceiling. Bring your leg back to the
bent position and place your foot back on the fl oor and repeat on the left side. Roll to one side and come to a sitting position, then, when you are ready, to a st anding position.
Rub your hands together briskly for fi ve seconds. Clap fi ve times. Give your self a good pat on the right shoulder, and then the left. Congratulations! You have succeeded in letting your self know that you care enough to do something about it! Be well and at peace.

10
Hi there. We are here again in the series on st retch-ing and self-massage. In the previous three sessions, we covered the chest and back, ribs and breathing apparatus, shoulders and neck. We discussed that there are various tools to use in massage and even incorpo-rated a tennis ball and a towel in our sessions. You may want to consider reading, or having someone read, these sessions into a tape recorder and playing them back as you st retch or do self-massage. If you do so, then be sure to do it slowly, giving yourself time to do each of the movements or exercises.
In this session, we will fo-cus dire ly on healing on and around the larynge omy site. As you may know, there are dif-ferent types of larynge omy surgeries, and each has it’s own purpose and focus but these surgeries have in common the trauma on the tissues of the neck and surrounding areas. Lymph nodes and glands are often removed, dest royed, or aggravated. ere is scar tis-sue, and radiation may have taken its toll on the skin and underlying tissues. I have found that the amount of self-care information off ered to post -surgery pa-tients does not include self-massage. Remember that this is your body we are talking about here and it is your body we are talking about here and it is yourtime for you to realize that you are in charge of it! So, off we go! It is time to really explore and discover what your particular needs are around your surgery site.
To do this massage, you will need some cream or lotion. I prefer to use cocoa butter, which, in its pure form, is solid. Cocoa butter is very emollient and pen-etrates into the tissues as well, allowing for the perfe amount of fri ion necessary to do the massage. Pure cocoa butter is available at the beauty supply st ore and
at most pharmacies. If you cannot fi nd it, any cream is better than none.
In today’s massage, your hands will be your tools. You will sit in a very comfort-able chair (a recliner is great) for this session. You can also prop yourself in the bed or on the sofa with lots of cushions or pillows for support. First , while sitting or st anding, a little warm up exercise. Place the palms of your hands together about six inches in front of your chest , fi ngers matching, and point your fi ngers away from you. Your thumbs are point-ing up. Spread your hands out, fi ngers st ill matching. See how wide you can make the aces between your fi ngers. Use the
fi ngers on your right hand to gently st retch the fi ngers on your left hand by pushing them back, giving a good st retch through the wrist and then reverse the st retch. Hold to a count of ten on each side and repeat three times. Give your hands a good shake out. Gently pull each fi nger and each of your thumbs. Pinch all the way around the ends of your fi ngertips. Clap twice. Give your hands a brisk rub on both palm and backside. Now, on to the massage.
We will begin with a relaxation exercise. Reclining comfortably, close your eyes and watch your breath. Without changing your breath, you might notice that it gets slower and more regular by just watching it. Allow yourself a few breaths to let go of anything that is dist ra ing you. Allow thoughts and images to come into the forefront of your mind, and then allow them to escape your immediate thinking by breath-ing them out with a breath of relaxing air. You might want to imagine that your lungs are fi lled by a large
The right touch, IVForth in a Series on Stretching and Self-Massage

11
balloon, and that balloon fi lls from the top to the middle to the bottom as you breathe in, and that the balloon empties from bottom to middle to top as you breathe out. Filling top to middle to bottom and let-ting go from bottom to middle to top. Allow yourself a few breaths to get the sensation of letting go of any st ress as you breathe out, and fi lling up with a sense of calm, relaxing energy as you breathe in. Filling up and letting go. Give yourself a few moments to deal with the images that come into your mind, letting them go as you breathe, and getting in touch with a sense of inner calm.
When you feel that you have let go of as many dist ra ions as you can, turn your attention to your the area around your surgical site. Have you ever explored the soft tissues there? Reach up and feel the area from behind ears at your hair-line around to your jaw. Gently rub in small cir-cles, holding down the skin, rubbing the tissues just underneath the skin. Feel the bony st ru ures and get a sense of what your particular tissues feel like. Are there sore ots? Give your ears a tug in all dire ions (they won’t pull off !) and even st ick your fi nger-tips inside and give them a rub. Use your thumbs to rub underneath your jaw right on the bone until you reach the chin. Are there sore ots there? Now, explore the area on the front of your neck, paying particular attention to your scar, st ill gently rubbing in small circles. Massaging scar tissue is e ecially important because scar tis-sue can bind tissues together impeding free move-ment between st ru ures. After exploring your scar, work your way around the st oma site, feeling your collarbones, over and underneath. Do you feel as if you know your throat a little better already?
Time for the real massage. Into your reclining po-sition, please. If you are using cocoa butter, you will notice that in its pure form, it is solid. You will need
to rub it between your hands to warm it up, melting it enough to feel a little creamy. If you are using another cream or lotion, always rub it in your hands to warm it up fi rst . e st ages of this massage are palpate (check-ing the tissues as in the previous paragraph), warm the tissues, apply fri ion, then, cleanse the tissues with sweeping movements. Palpation, warming the tis-sues and fri ion can be done in any dire ion, while sweeping movements will always go top to bottom, fl ushing lymph and any by-produ s of the massage into the lymph syst em for cleansing. Isn’t the body amazing?
To warm the tissues prior to fri ion, use the pads and tips of your fi ngers. I suggest using both hands
for this part of the mas-sage. Use just enough lubricant to allow your hands to slide over the tissues, being aware that too much will not allow you to feel what is under the skin, the area we want to really massage. Not us-ing enough will cause too much fri ion. You can always add or subtra lu-bricant. We will begin by using the hands to read the lubricant over the en-tire area we are working, which is from the chin, down the front of the neck to underneath the collar bones (clavicles),
and out to the sides of the throat even with the ear-lobes. A note of caution: do not press deeply into any area on the front of the throat. You have major arter-ies and veins there and we want to avoid any pressure that might hamper blood movement. Rub the lubri-cant st arting under your ears, working your way to under your chin, gently pulling the tissues forward. Stroke this area fi ve times; ear to chin, and reading the cream evenly. en using the pads and tips of your fi ngers, warm the tissues from the sides of your neck into your scar by gently pulling the tissues toward the center line on your throat. Reach across your throat with your right hand, pulling the tissues from the left side toward the center, all the way from the outer edge of your collarbone to your st oma. Stroke each area fi ve

12
times, feeling each st roke a bit deeper as you go. en repeat with your left hand on the right side. Give your hands a rest and shake them out.
e next part of the massage may feel st range, but with pra ice it will become more comfort-able with time. Support your right elbow in your left palm, laying your right arm across your chest . Us-ing your right hand, gently pinch the tissues on your neck together, two fi ngers full and a thumb at a time, gently rolling the tissues together, lifting the skin away from the underlying tissues. Breathe. Notice that some areas are more tender than others are. ese areas need ecial at-tention. Rub them for a bit longer until the tenderness subsides. Work around to your scar and give it e-cial attention. Lifting, squeezing and fri ioning the scar tissue allows blood fl ow to the scar to increase and increases mobility of the scar itself. Switch hands as needed so your hands don’t tire. Spend several minutes working this area, and then turn your atten-tion to your collarbones. Use your fi ngertips, holding down the skin and rubbing the deeper tissues. One at a time and cradling your elbow in your opposite hand, rub the left bone with your right fi ngertips, then allow
your fi ngers to dip into the area above and beneath the bone. Sensitive? Rub in this area as deeply as is comfortable from the st oma to the shoulder, and then switch sides. Any area that is particularly sore can have some extra attention.
Remember to breathe and take breaks as needed to keep your hands from tiring.
OK. Cleanup time. e sweeping motions in this session are as important as any massage you will ever do. Begin by using your entire right hand, crossed over to the left side. e sweeping motion will cover from under the ear all the way over and under the clavicle to the fold at the armpit, where there are lymph du s galore. Sweep down only. Imagine that you are using a squeegee
to push any undesired water off a windshield. Ready? Ten st rokes down the left side of the neck, over the clavicle, toward the fold at the armpit. Shake that hand fi ve times when you are fi nished. Change hands and repeat with the left hand crossed over the right side. Shake that hand out when you have fi nished. Give the backs of your hands a brisk rub. Give yourself a pat on the back for a gift well given and received.

13
In previous self-massage and st retching sessions we utilized hands, fi ngers, a towel and a tennis ball as tools. In this session, foot and hand refl exology, also called refl ex zone therapy, we will use fi ngers, thumbs (shorter fi ngernails are a plus!), a pencil eraser, and the curved end of a tea oon as our tools. Did you ever imagine you had the recipe for a good massage right in your house?
Refl exology works on an ancient east ern theory that the body, divided into zones, can be treated to maintain balance in its organ, muscular and nervous syst ems by st imulating the coordinated areas on the feet and hands that refer to the diff erent syst ems. e hands and feet, as well as each of the large toes are di-vided into these particular zones. Each hand and foot is divided into fi ve zones, as is each of the large toes. I am not sure for our particular needs that it is neces-sary to know what organ syst ems or body parts are in each zone. We will do an overall treatment, with the hope that by st imulating the entire body through the zones, that your body will know how to di erse the energy from the treatment. Refl exology can be done any time, for any length of time, as long as the treat-ment feels good.
When treating the right hand or foot, the right side of the body is treated. e same goes for the left side. e zones in the feet run vertically, from toe tip to-ward the back of the heel, and eventually terminate at the ankle joint. e zones in the hand run from fi nger tips to the heel of the hand, with the line-up of the fi ngers dividing the hands into fi ve zones.
When doing these treatments, be sure to use pres-sure that is comfortable for you, noting ots that are tender. You may want to go back to them for ad-ditional treatment. If you are curious, you can look on the refl exology charts to see what the tender ots co-ordinate with in your body. ere are many web sites where you can fi nd more information.
You will be sitting somewhere comfortable for this session. You will need to be able to access the bottoms of your feet as much as possible, so sitting on a bed, sofa, or chair is okay, as is the fl oor. Make sure you have adequate support for your back. As always, it is important to warm up your hands before doing any type of massage. Here is a great exercise. Clap your hands three times. Rub your palms together briskly, noting the warmth from the fri ion. Use your left hand to briskly rub the back of your right hand, taking time and care to rub in between the fi ngers, giving the webbing a little extra attention. Roll each fi nger and thumb, squeezing each as it is rolled. Rub your wrist and forearm, around to the elbow. Shake out your left hand that just did all the work, allowing it time to re-lax, then repeat on the other side, with the right hand rubbing the left. When you are fi nished, give both of your hands a good shake, then your entire arms.
You can enhance your massage by varying the intensity of your grip, or increasing or decreasing the rhythm and/or pressure of your movements. Us-ing a delicate st rength will allow you to work longer with your hands. Do not rely simply on the muscular st rength of your hands. Rather see them as dexterous, fl exible and resourceful tools. When using the pencil eraser or oon, use a gentle grip that won’t tire your hands.
e fi rst sequence is the “get to know your foot “ part of the refl exology session. In your seated position, you need to gain access to the bottom of your foot. So, that may mean crossing the left leg over the right at the knee, or if you are on the bed or fl oor, simply turning your bent left leg outward to access the sole of the left foot. First , gra your left foot with both hands and give it a good one minute, all-over squeeze.
e next sequence is rhythm and pressure. Holding the top of your foot with your fi ngers, wrapping your thumbs around to the sole of your foot, press the sole
ReflexologyFifth in a Series on Stretching and Self-Massage

14
of your foot with your thumbs, using a mild pres-sure in the following sequence, dividing the foot into fi ve se ions toe to heel. Start at the big toe joint at the foot, under the big toe, pressing down, thumb width by thumb width, through the arch to the heel. Alternate thumbs as needed, making sure not to put too much pressure on the thumb joints. (You can a ually get a rhythm going when you become more experienced.) en go under the next toe and work your way to the back of the heel and repeat until the little toe and out-side edge of your foot has been treated. It is not neces-sary to cover every millimeter of your foot. Next is the pressure sequence. Treat each of your toes, beginning with the big toe, by pressing the underside of each toe, from the toenail, over the top, to the joint at the foot, covering the entire surface area of the bottom of the toe. When fi nished, give each toe a nice, fi rm squeeze. Turn your attention to your ankle joints, pressing around the ankle bones in a circle. Push your fi nger in the aces between your toes and st retch your toes to the sides, then gra each and st retch back and forth. Rub your left foot all over, clap your hands three times and give your hands a good shake out.
Rest if you need to, and then repeat the two se-quences on the other foot.
Remember that I mentioned a pencil eraser and a
oon? ese are alternate/additional tools for pres-sure. If you have trouble doing the treatment with your thumbs, try using the eraser end of a pencil, or the curved end of a oon. You can also do a light treatment with your thumbs, then an additional, deeper second treatment with your tools. Make sure that there is adequate support under your foot, and that you don’t press so hard as to cause damage.
e hand treatment is the same as the foot treat-ment, except it is all done with the hand against a fi rm surface. Since you can only utilize one hand to do a treatment on the other, this is a perfe time to try your tools. Give your entire left hand a fi rm squeeze
1. Brain2. Sinuses/outer ear3. Sinuses/inner ear/eye4. Temple5. Pineal/hypothalamus6. Pituitary7. Side of neck8. Cervical ine9. Shoulder/arm10. Neck/helper to eye, inner ear11. Neck/thyroid/tonsils12. Bronchial/thyroid helper13. Chest /lung14. Heart15. Esophagus16. oracic ine17. Diaphragm18. Solar plexus19. Liver20. Gallbladder21. Stomach
22. Spleen23. Adrenals24. Pancreas25. Kidney26. Waist line27. Ureter tube28. Bladder29. Duodenum30. Small intest ine31. Appendix32. Ileocecal valve33. Ascending colon34. Hepatic fl exure35. Transverse colon36. Splenic fl exure37. Descending colon38. Sigmoid colon39. Lumbar ine40. Sacral ine41. Coccyx42. Sciatic nerve

15
with your right hand. Support your hand on your lap. Press the area from the fi nger joint at the hand, thumb fi rst , all the way to the wrist , dividing the hand into fi ve se ions, just as you did your foot. When treating your fi ngers, only use your opposite hand and not the tools. Be sure to really rub and squeeze the webbed area between your fi ngers, which is so full of sensa-tion. Use your right hand to separate the fi ngers of the left, passively st retching and bending the fi ngers back and forth. Clap your hands three times, give them a shake, and repeat on the right hand.
Many experts in the fi eld of refl exology believe (through experience with treatments) that treatment
on the feet is much more eff e ive than on the hands. Perhaps that is because we are const antly bearing weight through our feet, and that our hands, used throughout the day in a non-weight bearing manner, tend to get treatments vicariously.
My belief is simple. Touch is touch. More is better. It is all essential.
Have a healthful and happy experience with touch and feel free to E-mail me with any quest ions about the sessions we have covered in this series so far, or about your ecial needs regarding touch therapy.
16
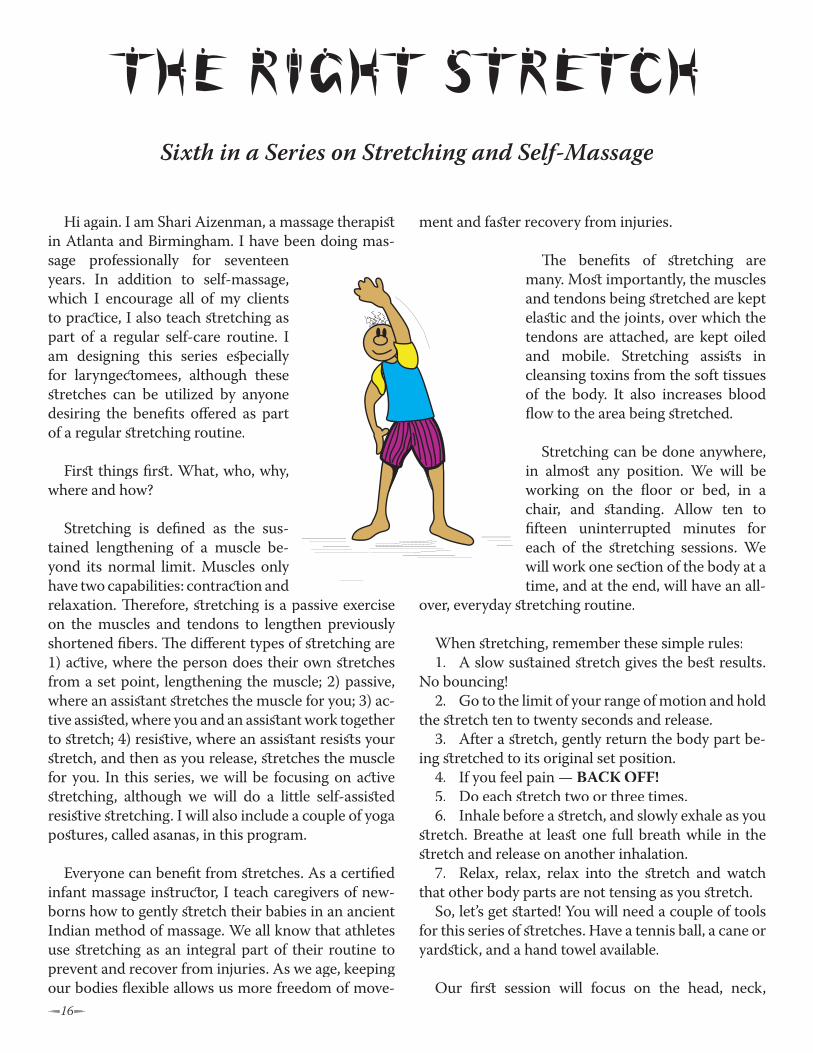
Hi again. I am Shari Aizenman, a massage therapist in Atlanta and Birmingham. I have been doing mas-sage professionally for seventeen years. In addition to self-massage, which I encourage all of my clients to pra ice, I also teach st retching as part of a regular self-care routine. I am designing this series e ecially for larynge omees, although these st retches can be utilized by anyone desiring the benefi ts off ered as part of a regular st retching routine.
First things fi rst . What, who, why, where and how?
Stretching is defi ned as the sus-tained lengthening of a muscle be-yond its normal limit. Muscles only have two capabilities: contra ion and relaxation. erefore, st retching is a passive exercise on the muscles and tendons to lengthen previously shortened fi bers. e diff erent types of st retching are 1) a ive, where the person does their own st retches from a set point, lengthening the muscle; 2) passive, where an assist ant st retches the muscle for you; 3) ac-tive assist ed, where you and an assist ant work together to st retch; 4) resist ive, where an assist ant resist s your st retch, and then as you release, st retches the muscle for you. In this series, we will be focusing on a ive st retching, although we will do a little self-assist ed resist ive st retching. I will also include a couple of yoga post ures, called asanas, in this program.
Everyone can benefi t from st retches. As a certifi ed infant massage inst ru or, I teach caregivers of new-borns how to gently st retch their babies in an ancient Indian method of massage. We all know that athletes use st retching as an integral part of their routine to prevent and recover from injuries. As we age, keeping our bodies fl exible allows us more freedom of move-
ment and fast er recovery from injuries.
e benefi ts of st retching are many. Most importantly, the muscles and tendons being st retched are kept elast ic and the joints, over which the tendons are attached, are kept oiled and mobile. Stretching assist s in cleansing toxins from the soft tissues of the body. It also increases blood fl ow to the area being st retched.
Stretching can be done anywhere, in almost any position. We will be working on the fl oor or bed, in a chair, and st anding. Allow ten to fi fteen uninterrupted minutes for each of the st retching sessions. We will work one se ion of the body at a time, and at the end, will have an all-
over, everyday st retching routine.
When st retching, remember these simple rules:1. A slow sust ained st retch gives the best results.
No bouncing!2. Go to the limit of your range of motion and hold
the st retch ten to twenty seconds and release.3. After a st retch, gently return the body part be-
ing st retched to its original set position.4. If you feel pain — BACK OFF!5. Do each st retch two or three times.6. Inhale before a st retch, and slowly exhale as you
st retch. Breathe at least one full breath while in the st retch and release on another inhalation.
7. Relax, relax, relax into the st retch and watch that other body parts are not tensing as you st retch.
So, let’s get st arted! You will need a couple of tools for this series of st retches. Have a tennis ball, a cane or yardst ick, and a hand towel available.
Our fi rst session will focus on the head, neck,
The Right StretchSixth in a Series on Stretching and Self-Massage

171717
shoulders and upper back. You can sit in a chair that has a back for the fi rst part of the session. Always take a moment before st retching to prepare your body, tools, and working ace, and to get rid of any dist rac-tions. Sit in a chair with your feet fl at on the fl oor and breathe deeply three times. Breathe in through your nose, and out of your mouth (I just put that in for non-larys because, for them, it makes a diff erence.)
Begin your routine by rotating the joints at the ends of your fi ngers. Use your left hand to move the joints of your right hand, working from your fi ngertips to your hands, then rotate both wrist s in either dire ion, bend your elbows to their full range, open and close at the elbow. en rotate your left arm at the shoulder, making small circles to large in one dire ion, then the other. Repeat with your right arm. en take a moment to focus on your head and neck. First , imagine that there is a pencil coming out of the top of your head. Slowly draw small circles on the ceiling with the pencil in a clock-wise dire ion. As you complete one circle, begin the next, larger circle, continuing until the circles can get no larger. Take time and be aware of any sore or tight areas while making your circles. Repeat the circle draw-ing in the other dire ion.
Now that you have warmed the area to be st retched, take a couple of relaxing breaths. Now it is time to st retch. Take a breath in and, as you exhale, allow your left ear to drop toward your left shoulder, taking care not to turn your chin downward. is st retch will imitate the sun, rising and falling over your shoulders. As you breathe out, reach your left arm over your head, placing the fi ngers of your left hand just above your right ear. On the next exhale, gently pull your left ear more toward your shoulder and feel the st retch on the right side of your neck. Hold this st retch for ten seconds or so and repeat on the right side. Repeat left and right.
Next, turn your head toward the left, imagining that it is like a pig on a it, not bending the chin up
or down, keeping your nose in a st raight line. When you reach your limit, breathe into the st retch, reach up with your left hand, taking your chin gently and on the next exhale, pull your head a little more to the left. Repeat on the right side. Repeat left and right.
Imagine that there is a st ring running through the top of your head, right on the ace where a line run-ning from the top of each ear would land. Pull this imaginary st ring st raight up, allowing your chin to gently drop and your ine to elongate. When it is as long as possible, gently roll forward, taking your chin toward your chest , one vertebra at a time, feel-
ing a good st retch through the upper part of your back. If you would like, you can assist this st retch by placing either hand on the back of your neck and pull gently forward. When you are ready to release this st retch, do so by coming up in the reverse order, bottom to top. en, gently st retch your neck backward, lifting your chin and taking care not to compress the back of your neck. See the dif-ference in sensation st retching with your mouth open and closed. If you want to increase this st retch, jut your jaw out. Check in; are you breathing through this st retch?
Next, st retch your left arm across your chest , placing your left hand on your right shoulder. With your right hand cradling your left elbow, on an exhale gently pull your left elbow across your chest and feel the st retch in your left shoulder and upper arm. Hold this st retch for ten seconds.
Drop your left arm and repeat on the same side. en do the same with your right arm, assist ing with your left.
If your range of motion allows, place your bent left arm behind your head, elbow in the air. Reach over the top of your head with your right hand and pull your left elbow behind your head, st retching the area around your left armpit. Repeat on the right side.
Now, imagine a ladder going upward from your shoulders. On an exhale, reach for the fi rst rung of
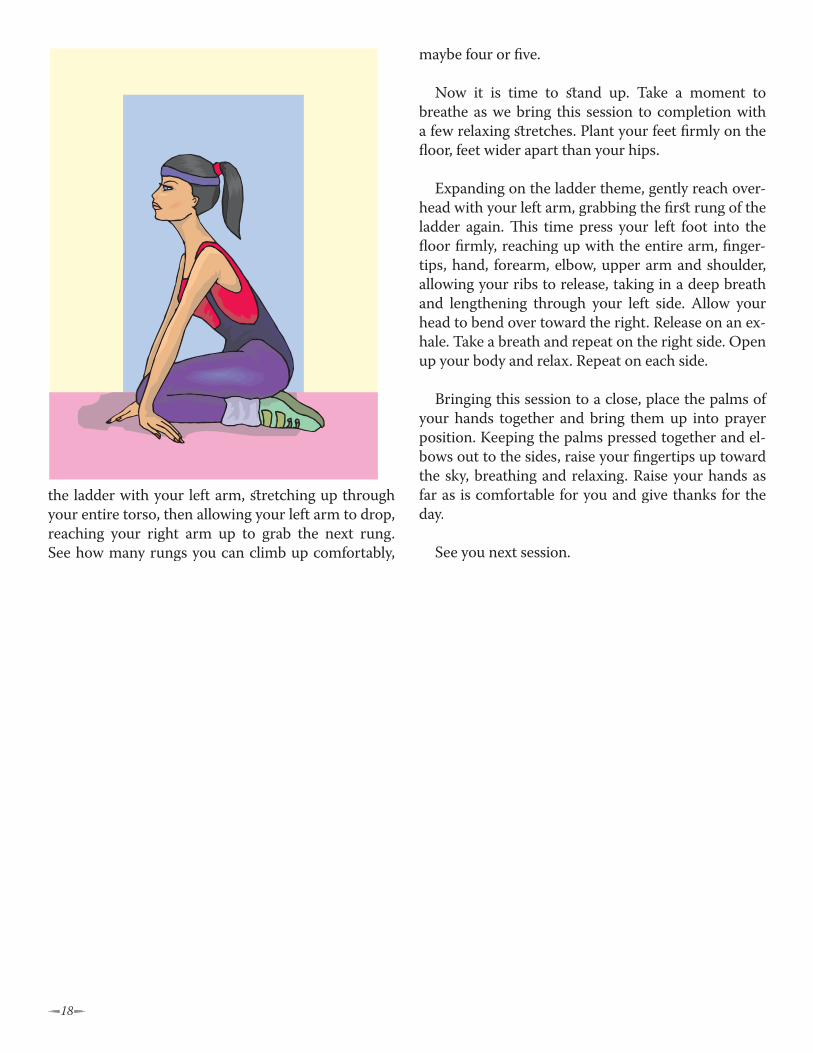
18
the ladder with your left arm, st retching up through your entire torso, then allowing your left arm to drop, reaching your right arm up to grab the next rung. See how many rungs you can climb up comfortably,
maybe four or fi ve.
Now it is time to st and up. Take a moment to breathe as we bring this session to completion with a few relaxing st retches. Plant your feet fi rmly on the fl oor, feet wider apart than your hips.
Expanding on the ladder theme, gently reach over-head with your left arm, grabbing the fi rst rung of the ladder again. is time press your left foot into the fl oor fi rmly, reaching up with the entire arm, fi nger-tips, hand, forearm, elbow, upper arm and shoulder, allowing your ribs to release, taking in a deep breath and lengthening through your left side. Allow your head to bend over toward the right. Release on an ex-hale. Take a breath and repeat on the right side. Open up your body and relax. Repeat on each side.
Bringing this session to a close, place the palms of your hands together and bring them up into prayer position. Keeping the palms pressed together and el-bows out to the sides, raise your fi ngertips up toward the sky, breathing and relaxing. Raise your hands as far as is comfortable for you and give thanks for the day.
See you next session.

19
Hello and welcome back to e Right Stretch, a se-ries of articles on st retching and self-care. In our last session, we focused on the upper body: head, neck, shoulders and upper back. In session two, we are go-ing to focus on everything that has to do dire ly with the lower back and legs.
In my seventeen years as a massage therapist , I have taken numerous seminars to increase my knowledge and ability to assist my clients to achieve and maintain better health. None of these seminars has paid off more than the ones in which I learned to work with lower back pain. How many of us, at one time in our life, has had a complaint about tightness or soreness in our lower back? In my pra ice, the count is well over seventy percent!
Whether you are a very mobile, highly energetic person, or a little bit more sed-entary, maintaining the health of your back is tantamount to your overall well being. Walking, jog-ging, cooking, shop-ping, even working at a desk job, we all are aware that our ability to remain comfortably upright is necessary to get our tasks fi nished.
It is my belief that a large number of lower back problems are a result of tightness in the gluteal (but-tocks) region of the lower back, as well as through the hips and upper legs. erefore, our session today will cover all of these areas. I will also include st retches for the sides of the torso to complete the session.
As always, remember to follow these simple-st retching guidelines:
1. Keep a slow, sust ained st retch. No bouncing!2. Go to the limit of your range of motion and hold
the st retch for 10-20 seconds and release.3. After a st retch, gently return the body part be-
ing st retched to its original set position.4. If you feel pain — BACK OFF!5. Do each st retch 2-3 times.6. Inhale before a st retch, and slowly exhale as you
st retch. Breathe a full breath while in the st retch, and release on another inhalation.
7. Relax into the st retch and be aware that other body parts are not tensing as you st retch.
Let’s st retch! is session will be done most ly on the fl oor. Choose an area to st retch that gives you plenty of room to full st retch your arms and legs out in every direc-tion. If you lack fl oor ace, you can choose to st retch on a bed. Have a bath towel, small pillow or rolled up hand towel avail-able, and one or two bed pillows as well. ese will be the tools
we will use in this session. Wear light, comfortable, clothing that allows lots of movement.
Gently ease yourself to the fl oor. If you have diffi -culty getting down to or back up from the fl oor, have a st urdy chair nearby to use as a balance or prop. You can use a table leg as well, if the table is st urdy. Sit comfortably and take three slow deep breaths. Take care to breathe slowly and with awareness, not forcing
The Right Stretch, IISeventh in a Series on Stretching and Self-Massage

20
the air in, but rather allowing ace in your body to ac-commodate more breath, then allowing the breath to escape inst ead of forcing it out. Very slowly roll your head in a full circle, fi rst taking your chin to your chest , then rolling your right ear toward the right shoulder and continuing around until your chin reaches your chest again. Notice any areas of discomfort and allow yourself a few seconds to breathe into and release any
tight areas. en reverse the move and take your left ear toward the left shoulder and continue until your chin reaches your chest again.
Ease yourself onto your back and place the small pillow or towel roll under your head if necessary to maintain comfort in your neck. With your legs st raight, drag your right foot toward your right but-tock, the sole of your foot on the fl oor, knee pointing toward the ceiling. I will call this “st anding your foot” for future reference. Now, st and your left foot. Lift your right knee toward your chin, and wrap your interlaced fi ngers around the top of your shin. If you need assis-tance getting your leg up, place the bath towel behind your knee and pull on the ends of it to lift your knee toward your chin. Pull your knee up toward your chin until you feel a st retch in your hamst rings, the muscle group on the back of your upper leg. Hold the st retch fi fteen seconds, and release, allowing your foot to re-turn to st anding. Repeat this st retch three times. Do the same st retch with your left leg three times.
Again, pull your right knee up toward your chin as far as is comfortable and interlace your fi ngers (or use a bath towel) behind your knee. Without moving your
upper leg, extend your lower leg at the knee, taking your foot up toward the ceiling. If you can get it all the way st raight, st ep up with your heel like you are trying to st ep on the ceiling. Hold ten seconds and bend at the knee, then lowering your foot to st anding. Do this st retch three times, then repeat with the left leg.
Keeping your feet st anding, pull them as close to-gether as possible. Gently allow your legs to move as a unit toward the left fl oor, twist ing through the lower ine, your upper body remaining on the fl oor, and your legs and lower back moving to the left. When your left leg touches the fl oor, take a couple of breaths and open the ace in the side of your torso as you breathe. Bring your legs as a unit back to st anding. Repeat on the same side. en do the same st retch on the other side.
Are you breathing? Don’t hold your breath. Be conscious of the role of breathing as you st retch, as st retching is a mild form of exercise. Oxygen is needed to nourish and cleanse all the tissues in your body!
Slide one of your legs down until it is st raight, and then the other. Lengthen your right leg by gently st ep-ping toward the wall with your heel, bringing your toes up toward your nose. Allow your leg to lengthen by freeing your hip, lower back, and even your rib cage. Can you feel the st retch all the way through the right side of your body?
If you want to increase this st retch, raise your right arm above your head on the fl oor and reach as if you are trying to climb a ladder. If you cannot rest your arm on the fl oor above your head comfortably, place a pillow or folded towel underneath it. Repeat on the left side, and then the right. Step down with your heel and climb the ladder with your right leg and hand, then st ep down and climb the ladder with your left leg and hand. Repeat this entire motion ten times. After a little pra ice, you can feel the rocking mechanism in your hips and shoulders as your ine frees itself with the motion.
Allow yourself a moment to rest and breathe while lying on the fl oor. en gently roll to one side and push yourself up to sitting position. Place one of the

21
bed pillows under your buttocks to lift your body just a little. You may fi nd that if you sit closer to the front edge of the pillow, your back is a bit more supported. If this is uncomfortable for you, add enough pillows or a folded towel so that you can sit comfortably.
Place your left leg st raight out, at an angle from your body, heel on the fl oor and toes toward the ceiling, and place the sole of your right foot on your left inner thigh. Sit as tall as you can, lengthening through your ine. Allow your hands to rest at your sides. Pivot at the waist so that your torso is in line with your left leg and gently bend forward at the hip, so that your upper body gently moves toward your left foot. Take the utmost care that you are not bend-ing through your upper back or waist . is is a small movement, and you should feel a st retch through the back of your left leg. Hold this st retch ten seconds and release for fi ve seconds. Breathe in and exhale as you st retch into your leg again.
Still working on your left leg, point your toes to-ward the ceiling. Pull your toes toward your nose until you feel a st retch behind your knee through your calf muscle. You can assist this st retch using the bath tow-el, placing it under the ball of your foot and pulling the ends toward your chest , bringing the ball of your foot and your toes toward your nose. Hold this st retch for twenty seconds. Release for fi ve seconds and repeat.
Now end a minute or two massaging the muscles on your left thigh. Use the heel of your hand to press the muscles, and using circular motions, fi rst clock-wise and then counter-clockwise, and be sure to switch hands before one tires. Rub as much of your left thigh as you can reach, working all the way down to your knee and as far up as the crease at your groin.
Switch legs, st retching your right one out at an
angle from your body, the left one on your right inner thigh and repeat the previous series of st retches and then massage.
Take a moment to breathe again before work-ing your way back up to a st anding position to complete this session. is is a simple st anding post ure (asana) taken from Hatha yoga. Stand with your feet wider apart than your hips, toes pointing forward. Relax and allow any tension to release out of your body. As you inhale, slowly raise your right arm, palm facing down, out from the side of your body. When your arm reaches shoulder height, turn your palm upward and continue to raise your arm toward your ear. As you exhale, slowly bend at the waist , leaning your body toward the left, allowing your left arm to slide down your left leg. Keep your head in line with your ine and your right arm next to your ear. Open your ribs on your right side and st ay in this st retch through one breath cycle. Inhale and slowly return to st anding post ure. Repeat on the other side.
is asana is called the abdominal lift. Standing with your legs wider apart than your hips, bend your knees slightly and lean forward from your waist only enough to place your hands on your thighs, right above your knees. Exhale completely. Suck your abdominal area in and up, pulling your navel toward your ine. Hold this position through a breath cycle and then release, inhaling slowly. Slowly return to st anding and breathe for a moment.
Sense the relaxation in your body and mind and take an internal pi ure of it. Imagine yourself doing your daily tasks from this place if you can. When you are ready, thank yourself for time well ent, make that imagination into a reality, and enjoy your fl exible, st rong body!

22
Notes