Embed Size (px)
Citation preview
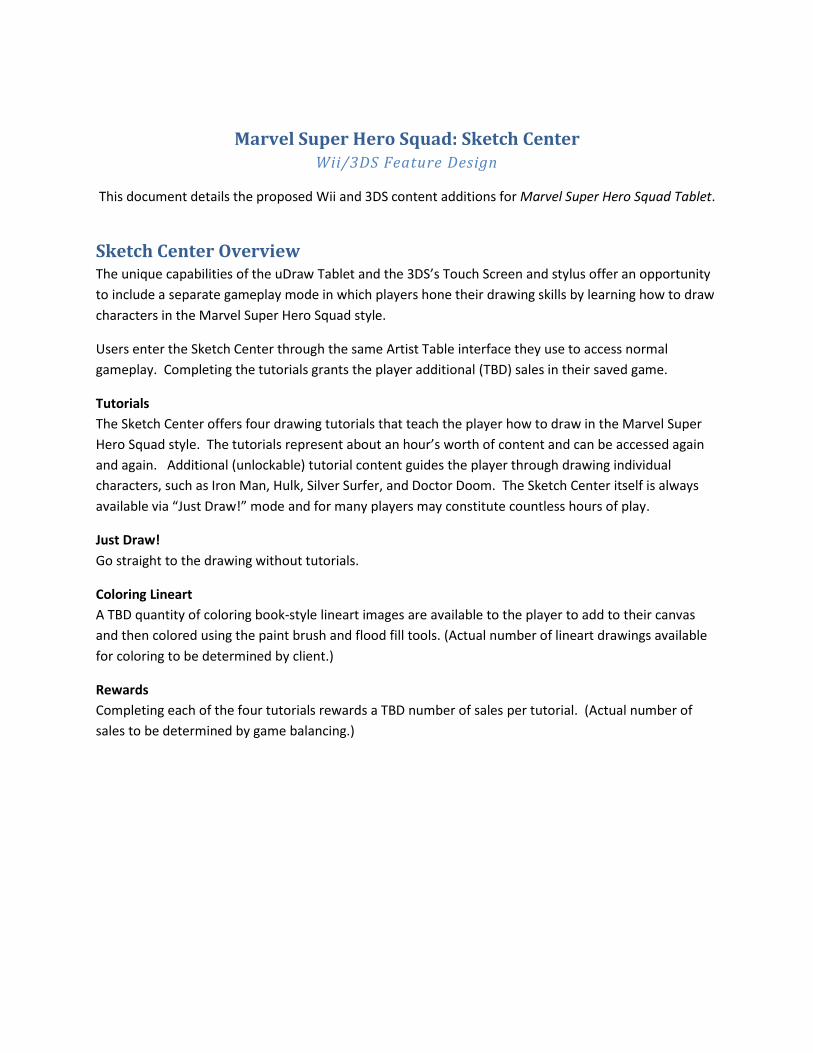
Marvel Super Hero Squad: Sketch Center Wii/3DS Feature Design
This document details the proposed Wii and 3DS content additions for Marvel Super Hero Squad Tablet.
Sketch Center Overview The unique capabilities of the uDraw Tablet and the 3DS’s Touch Screen and stylus offer an opportunity
to include a separate gameplay mode in which players hone their drawing skills by learning how to draw
characters in the Marvel Super Hero Squad style.
Users enter the Sketch Center through the same Artist Table interface they use to access normal
gameplay. Completing the tutorials grants the player additional (TBD) sales in their saved game.
Tutorials
The Sketch Center offers four drawing tutorials that teach the player how to draw in the Marvel Super
Hero Squad style. The tutorials represent about an hour’s worth of content and can be accessed again
and again. Additional (unlockable) tutorial content guides the player through drawing individual
characters, such as Iron Man, Hulk, Silver Surfer, and Doctor Doom. The Sketch Center itself is always
available via “Just Draw!” mode and for many players may constitute countless hours of play.
Just Draw!
Go straight to the drawing without tutorials.
Coloring Lineart
A TBD quantity of coloring book-style lineart images are available to the player to add to their canvas
and then colored using the paint brush and flood fill tools. (Actual number of lineart drawings available
for coloring to be determined by client.)
Rewards
Completing each of the four tutorials rewards a TBD number of sales per tutorial. (Actual number of
sales to be determined by game balancing.)
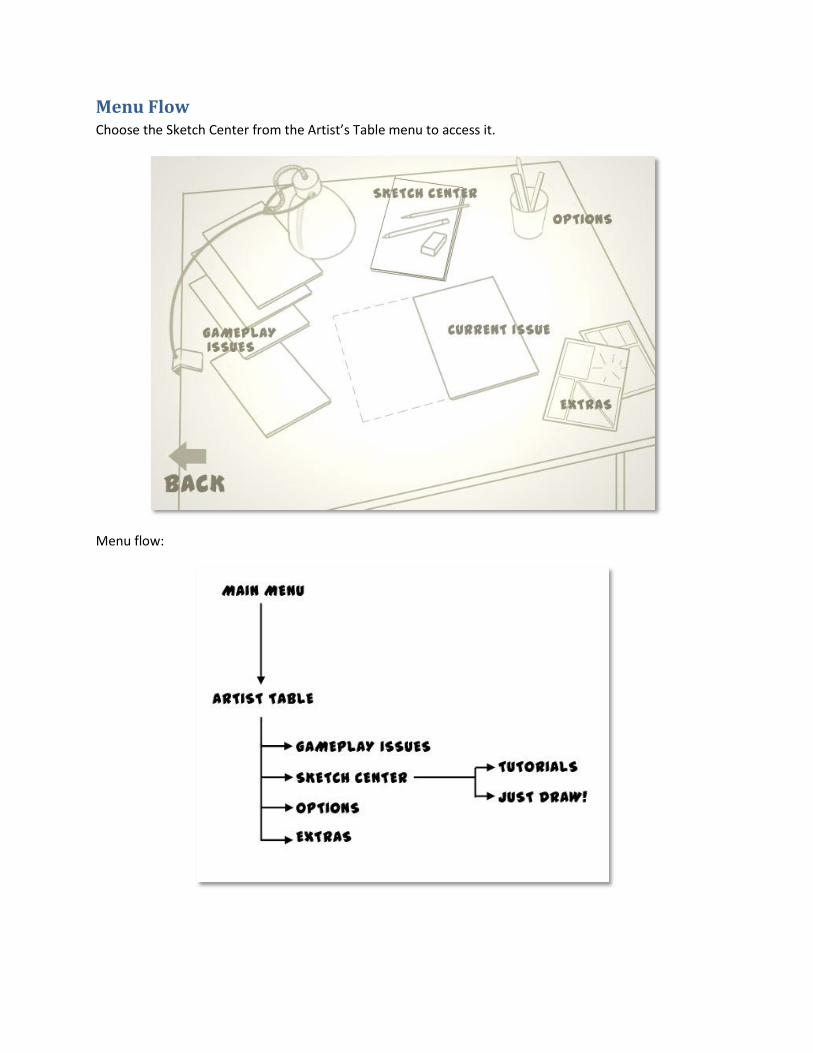
Menu Flow Choose the Sketch Center from the Artist’s Table menu to access it.
Menu flow:
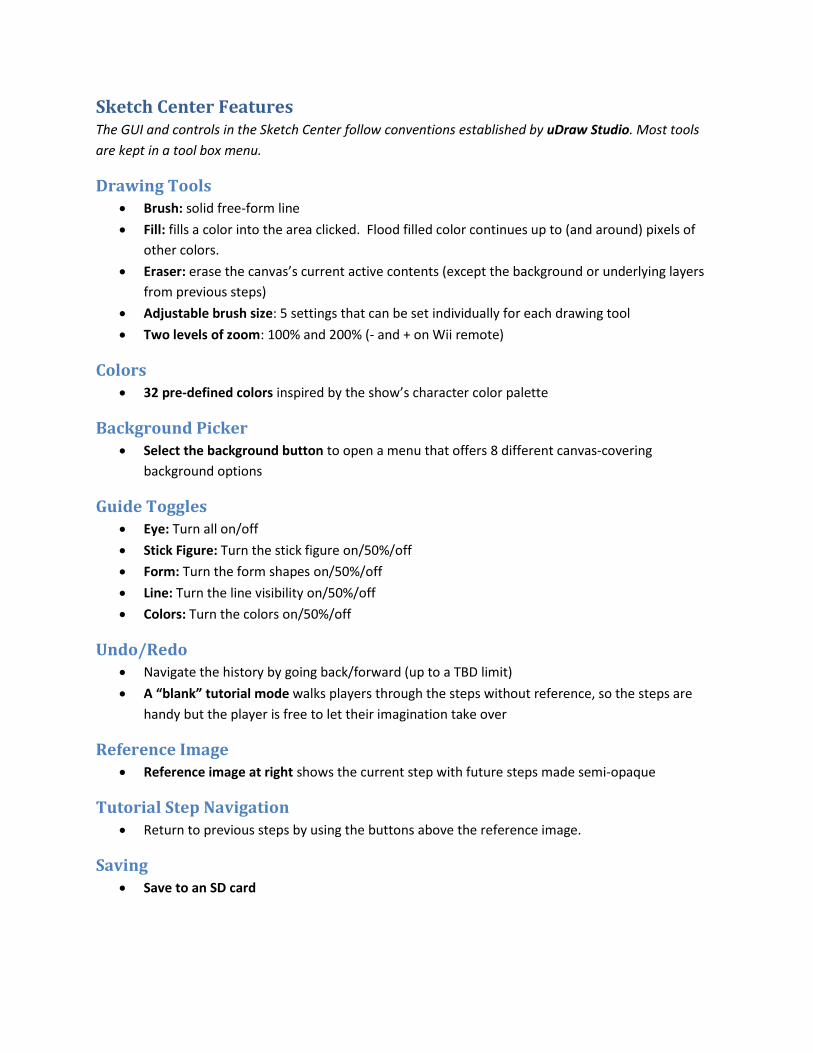
Sketch Center Features The GUI and controls in the Sketch Center follow conventions established by uDraw Studio. Most tools
are kept in a tool box menu.
Drawing Tools Brush: solid free-form line
Fill: fills a color into the area clicked. Flood filled color continues up to (and around) pixels of
other colors.
Eraser: erase the canvas’s current active contents (except the background or underlying layers
from previous steps)
Adjustable brush size: 5 settings that can be set individually for each drawing tool
Two levels of zoom: 100% and 200% (- and + on Wii remote)
Colors 32 pre-defined colors inspired by the show’s character color palette
Background Picker Select the background button to open a menu that offers 8 different canvas-covering
background options
Guide Toggles Eye: Turn all on/off
Stick Figure: Turn the stick figure on/50%/off
Form: Turn the form shapes on/50%/off
Line: Turn the line visibility on/50%/off
Colors: Turn the colors on/50%/off
Undo/Redo Navigate the history by going back/forward (up to a TBD limit)
A “blank” tutorial mode walks players through the steps without reference, so the steps are
handy but the player is free to let their imagination take over
Reference Image Reference image at right shows the current step with future steps made semi-opaque
Tutorial Step Navigation
Return to previous steps by using the buttons above the reference image.
Saving Save to an SD card
Tutorials Overview Tutorial 1: Terminology and controls tutorial gets players accustomed to the GUI and sets them
up for the drawing tutorials that follow
Tutorial 2: Figure drawing – start with basic forms in SHS proportion
Tutorial 3: Face drawing tutorial – draw a face SHS style onto the figure drawn in Tutorial 2
Tutorial 4: Details – add capes, boots, and other accessories to turn a plain figure into a super hero
Additional tutorials show players how to draw individual characters including Iron Man, Hulk, Silver Surfer, and Doctor Doom
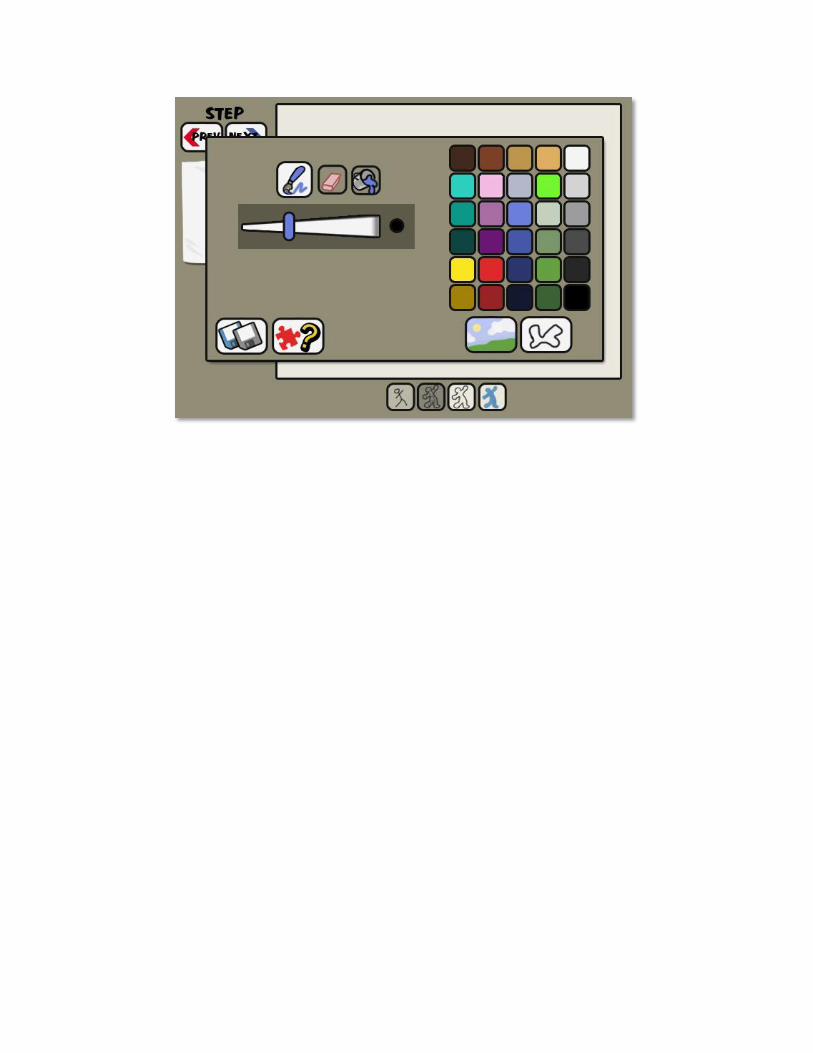
Tutorial Menu
Menu flow:
Tutorial Menu -> Tutorial Lesson Screen -> Sketch Center with step presentation
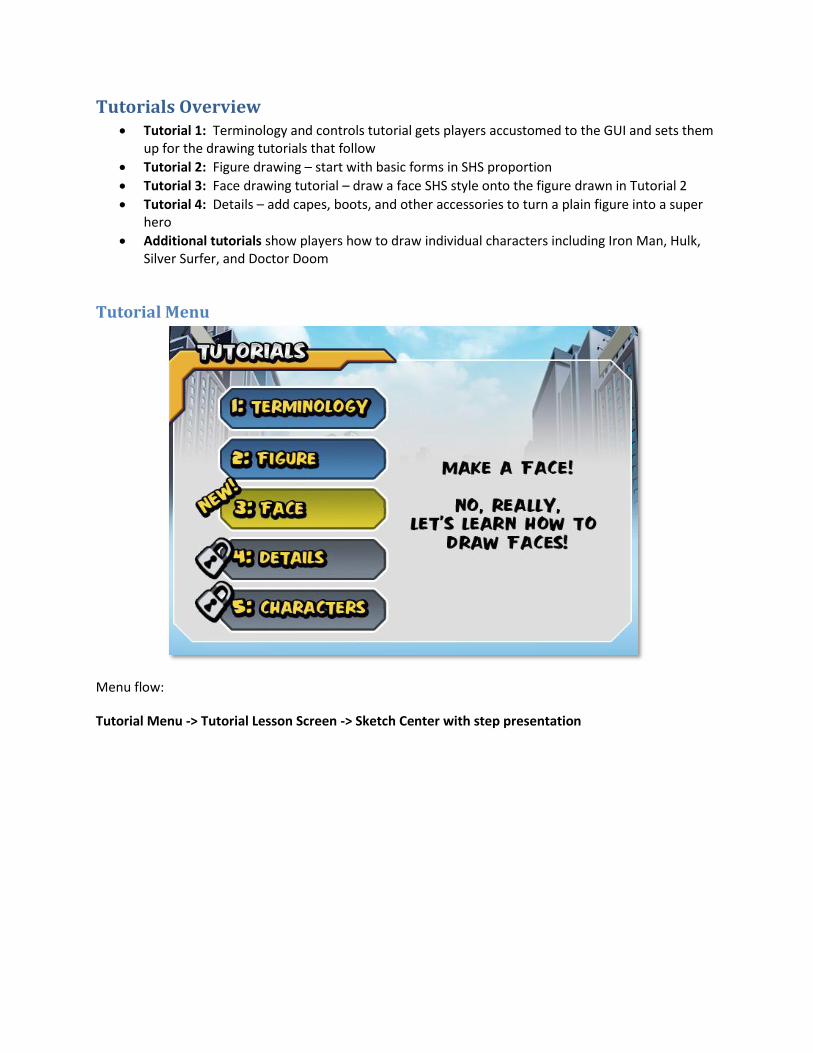
Tutorial Lesson Screen Each tutorial begins with a few Lesson Screens to illustrate the concept before bringing the player to the
Sketch Center. Text and VO briefly describe each step. This part of the lesson is short: one or two
screens, tops. The goal is simply to introduce the concept and demonstrate the scope of the lesson.
When this part of the lesson ends, the drawing GUI is brought up and the hands-on part of the lesson
begins.
Lesson Screen Example:
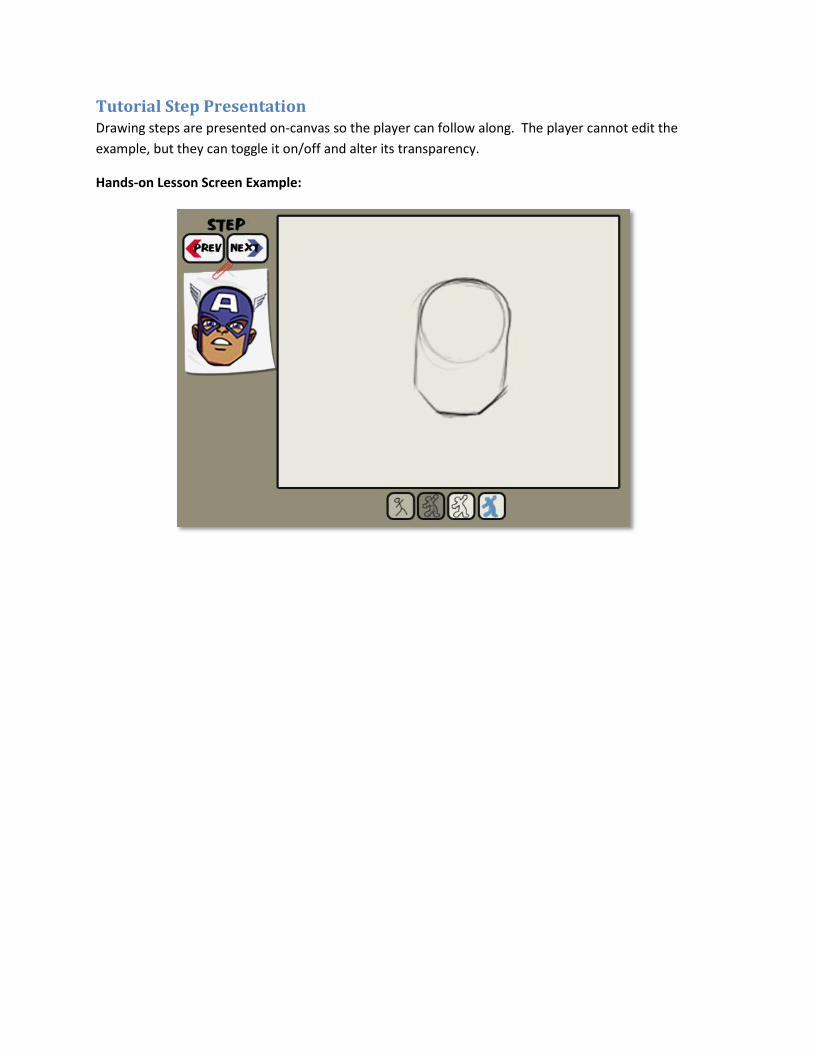
Tutorial Step Presentation Drawing steps are presented on-canvas so the player can follow along. The player cannot edit the
example, but they can toggle it on/off and alter its transparency.
Hands-on Lesson Screen Example:
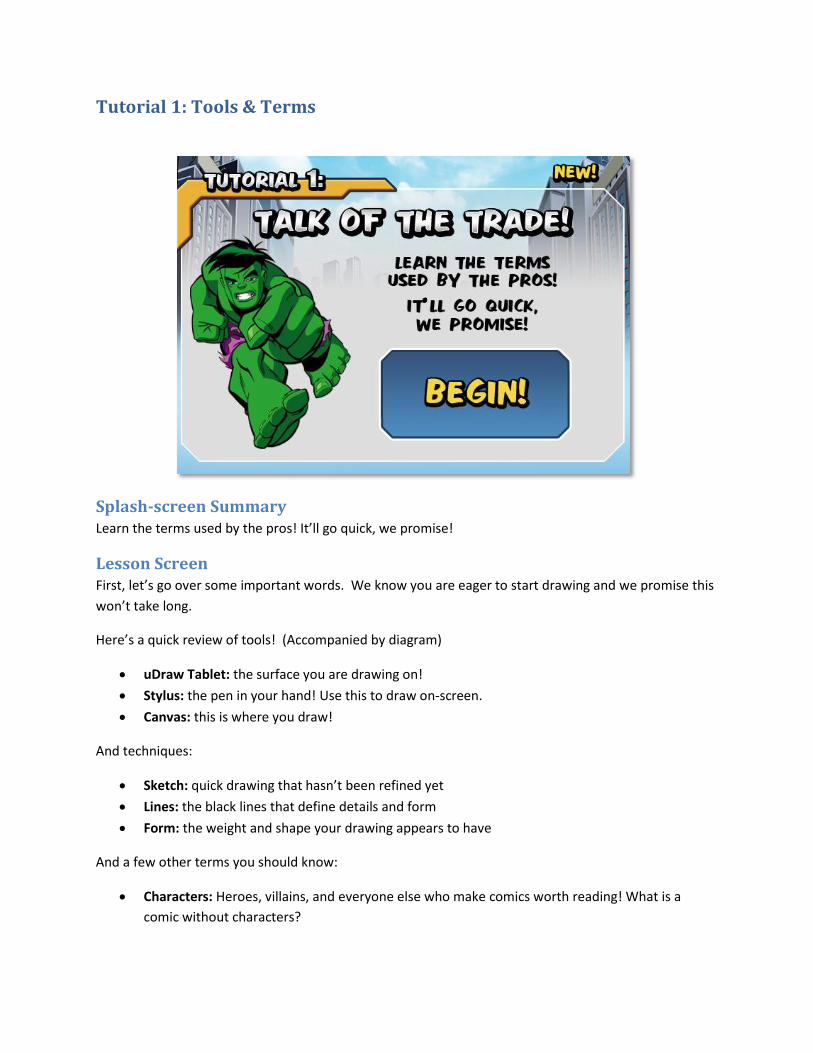
Tutorial 1: Tools & Terms
Splash-screen Summary Learn the terms used by the pros! It’ll go quick, we promise!
Lesson Screen First, let’s go over some important words. We know you are eager to start drawing and we promise this
won’t take long.
Here’s a quick review of tools! (Accompanied by diagram)
uDraw Tablet: the surface you are drawing on!
Stylus: the pen in your hand! Use this to draw on-screen.
Canvas: this is where you draw!
And techniques:
Sketch: quick drawing that hasn’t been refined yet
Lines: the black lines that define details and form
Form: the weight and shape your drawing appears to have
And a few other terms you should know:
Characters: Heroes, villains, and everyone else who make comics worth reading! What is a
comic without characters?
Background: The background is the environment or location the characters occupy.
Backgrounds can be everything from an ordinary school yard to an extraordinary alien planet!
Reference: Always look at an example of what you are trying to draw! If you are drawing
Captain America, look at a drawing of Captain America and study the shapes used in his face, the
design of his suit, and where accessories are placed. Very few artists draw entirely “from
memory” and a good reference will help you improve quickly! Ready to give it a try? Let’s do it!
Hands-on Lesson The player is taken to the Sketch Center. The tutorial guides the player through selecting the brush,
drawing on the canvas, erasing on the canvas, undoing the previous step, and exiting to the next
tutorial.
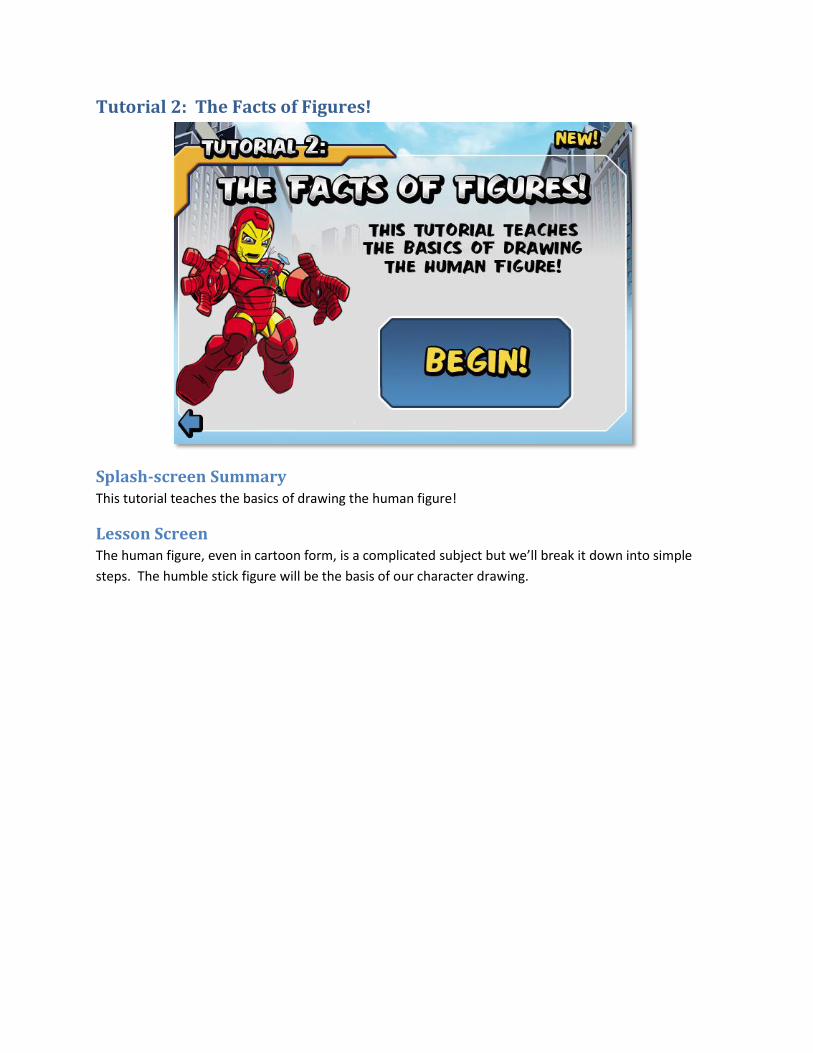
Tutorial 2: The Facts of Figures!
Splash-screen Summary This tutorial teaches the basics of drawing the human figure!
Lesson Screen The human figure, even in cartoon form, is a complicated subject but we’ll break it down into simple
steps. The humble stick figure will be the basis of our character drawing.
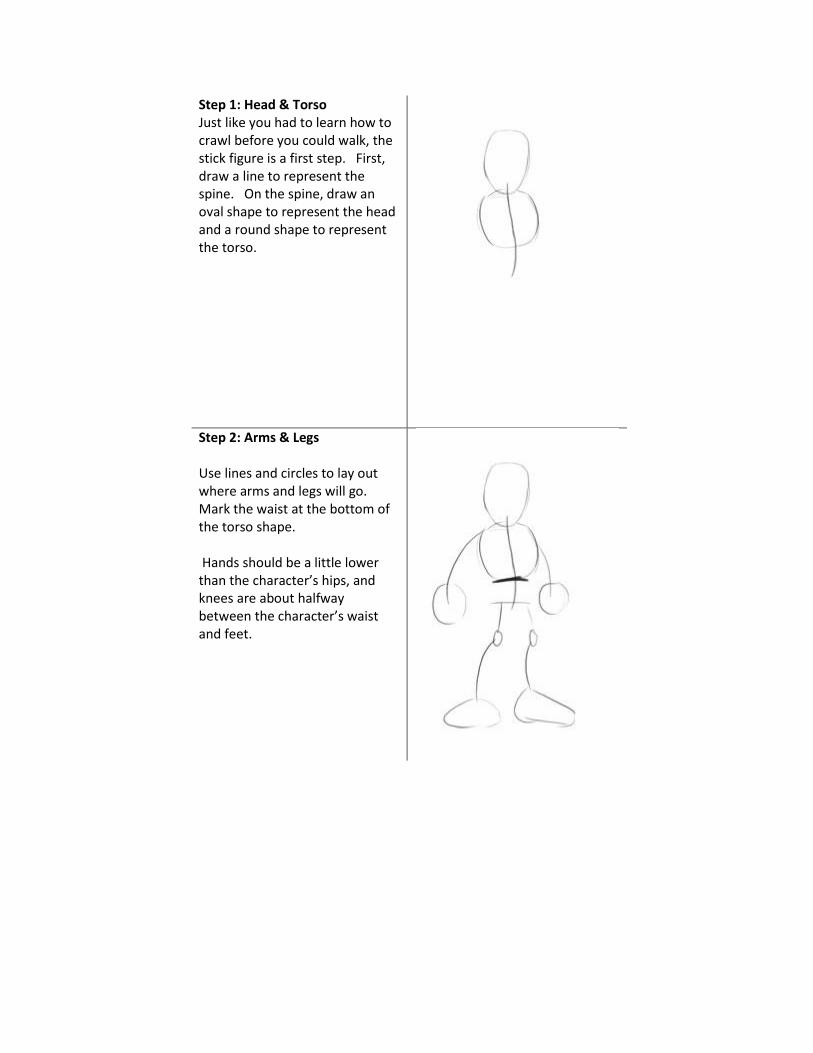
Step 1: Head & Torso Just like you had to learn how to crawl before you could walk, the stick figure is a first step. First, draw a line to represent the spine. On the spine, draw an oval shape to represent the head and a round shape to represent the torso.
Step 2: Arms & Legs Use lines and circles to lay out where arms and legs will go. Mark the waist at the bottom of the torso shape. Hands should be a little lower than the character’s hips, and knees are about halfway between the character’s waist and feet.
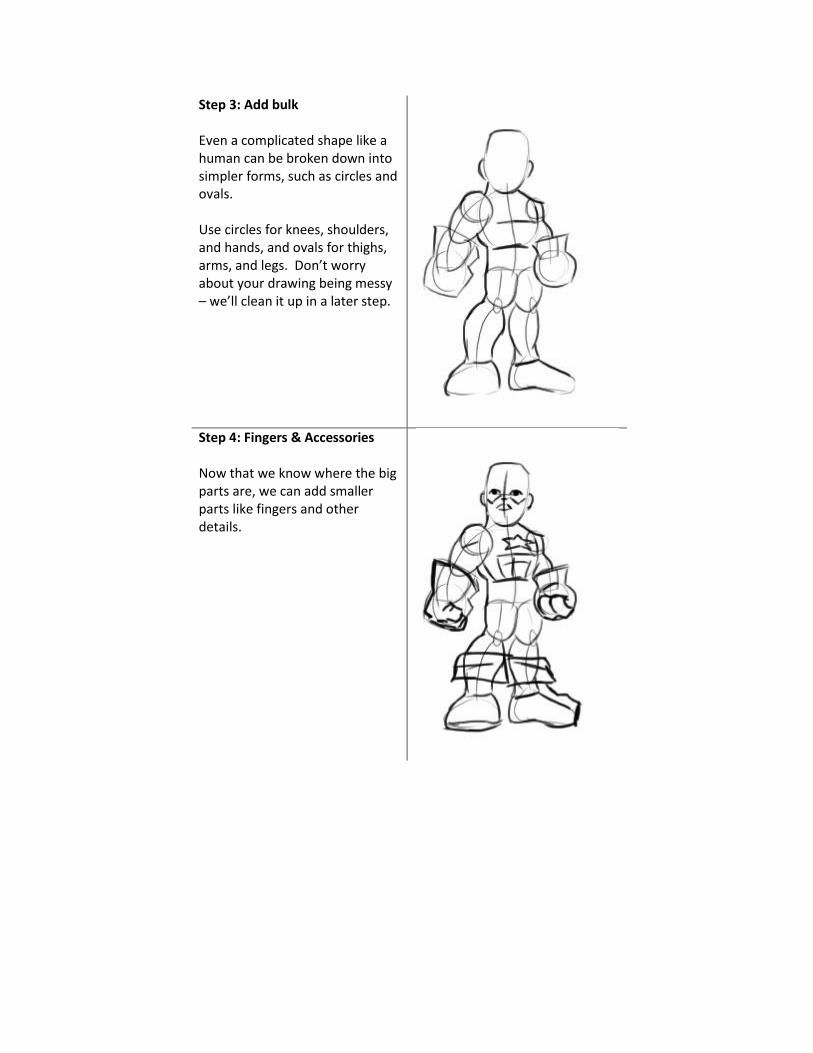
Step 3: Add bulk Even a complicated shape like a human can be broken down into simpler forms, such as circles and ovals. Use circles for knees, shoulders, and hands, and ovals for thighs, arms, and legs. Don’t worry about your drawing being messy – we’ll clean it up in a later step.
Step 4: Fingers & Accessories Now that we know where the big parts are, we can add smaller parts like fingers and other details.
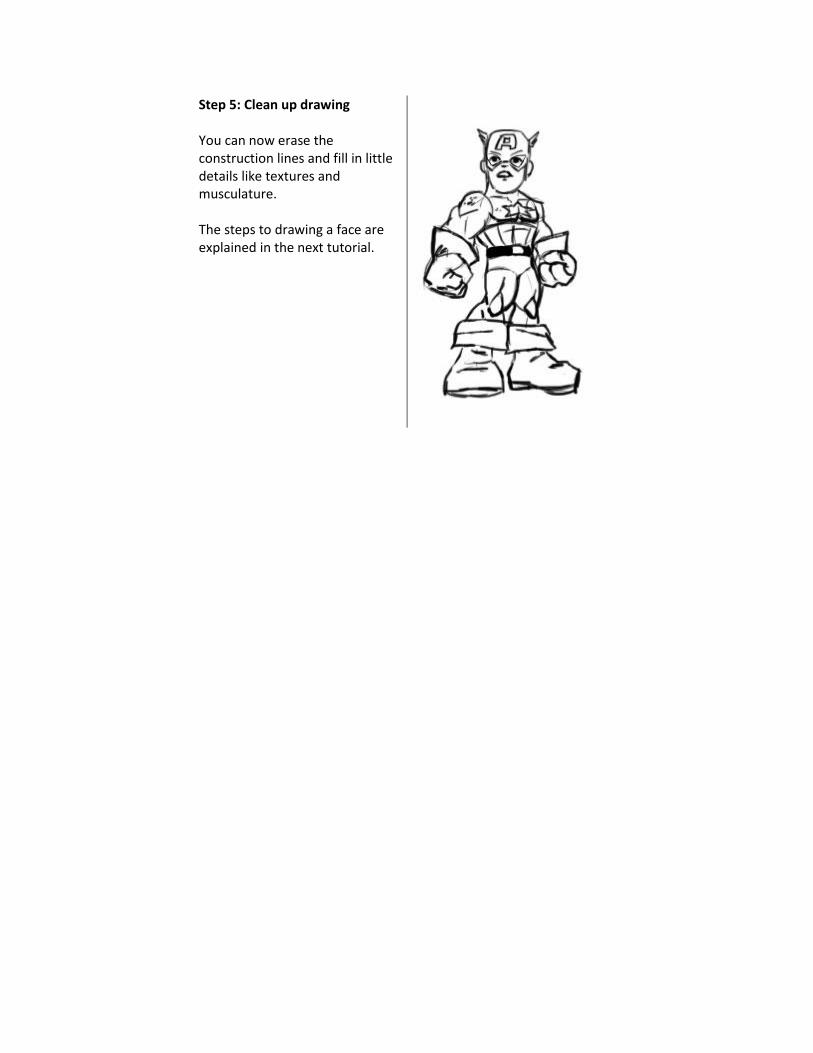
Step 5: Clean up drawing You can now erase the construction lines and fill in little details like textures and musculature. The steps to drawing a face are explained in the next tutorial.
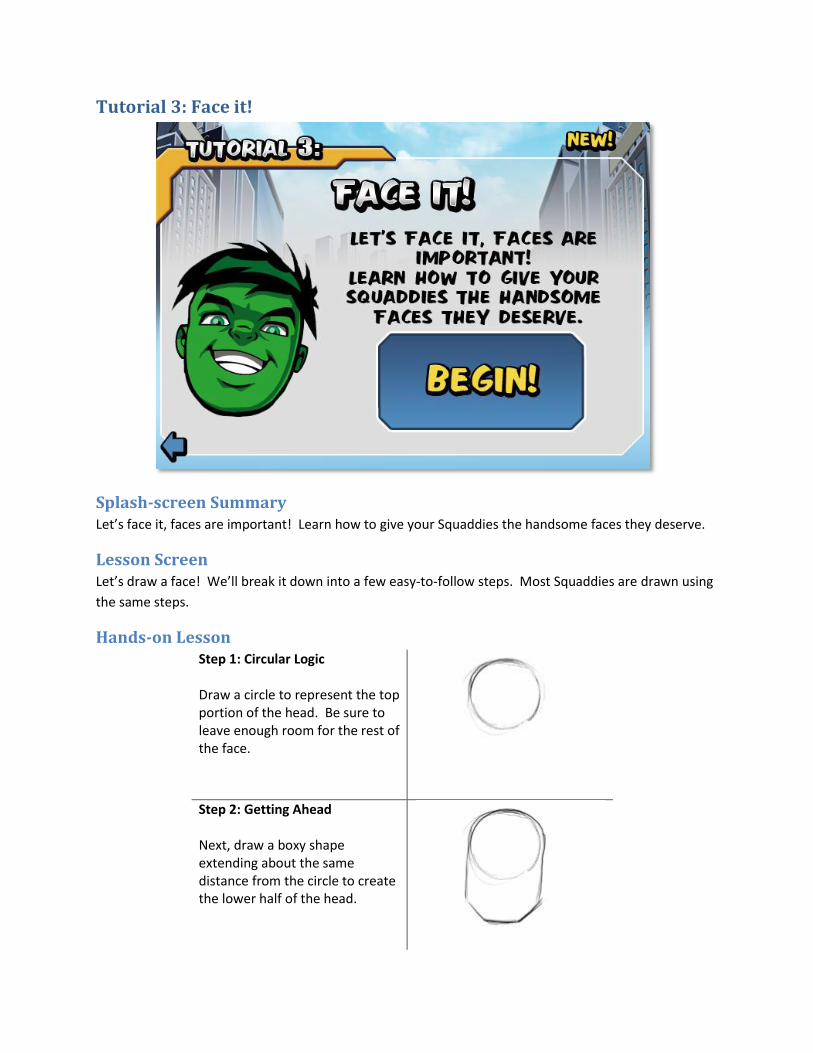
Tutorial 3: Face it!
Splash-screen Summary Let’s face it, faces are important! Learn how to give your Squaddies the handsome faces they deserve.
Lesson Screen Let’s draw a face! We’ll break it down into a few easy-to-follow steps. Most Squaddies are drawn using
the same steps.
Hands-on Lesson Step 1: Circular Logic Draw a circle to represent the top portion of the head. Be sure to leave enough room for the rest of the face.
Step 2: Getting Ahead Next, draw a boxy shape extending about the same distance from the circle to create the lower half of the head.
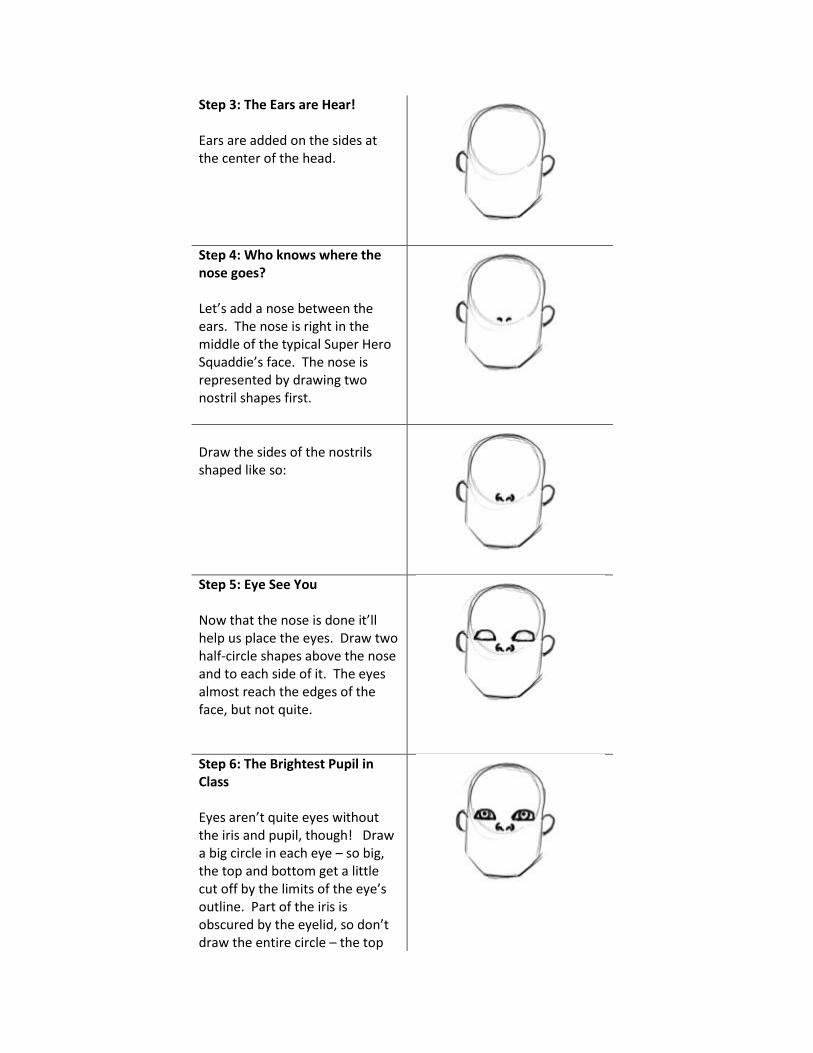
Step 3: The Ears are Hear! Ears are added on the sides at the center of the head.
Step 4: Who knows where the nose goes? Let’s add a nose between the ears. The nose is right in the middle of the typical Super Hero Squaddie’s face. The nose is represented by drawing two nostril shapes first.
Draw the sides of the nostrils shaped like so:
Step 5: Eye See You Now that the nose is done it’ll help us place the eyes. Draw two half-circle shapes above the nose and to each side of it. The eyes almost reach the edges of the face, but not quite.
Step 6: The Brightest Pupil in Class Eyes aren’t quite eyes without the iris and pupil, though! Draw a big circle in each eye – so big, the top and bottom get a little cut off by the limits of the eye’s outline. Part of the iris is obscured by the eyelid, so don’t draw the entire circle – the top
and bottom get cut off by the eyelids.
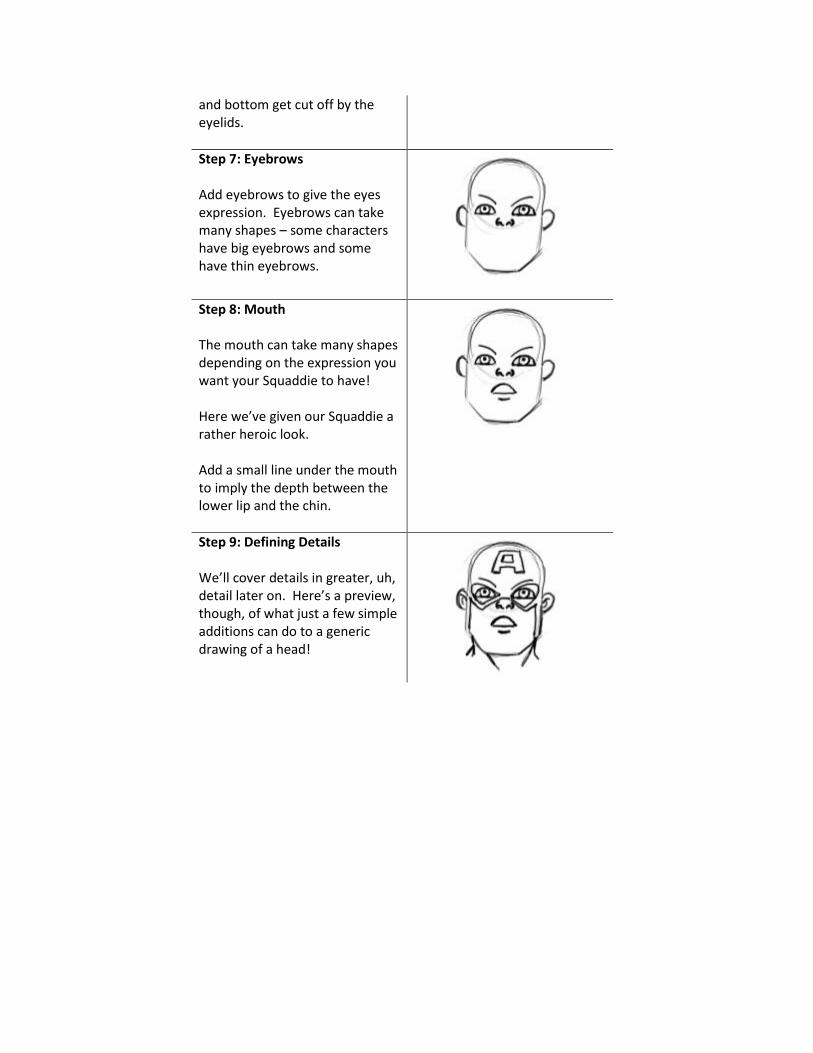
Step 7: Eyebrows Add eyebrows to give the eyes expression. Eyebrows can take many shapes – some characters have big eyebrows and some have thin eyebrows.
Step 8: Mouth The mouth can take many shapes depending on the expression you want your Squaddie to have! Here we’ve given our Squaddie a rather heroic look. Add a small line under the mouth to imply the depth between the lower lip and the chin.
Step 9: Defining Details We’ll cover details in greater, uh, detail later on. Here’s a preview, though, of what just a few simple additions can do to a generic drawing of a head!
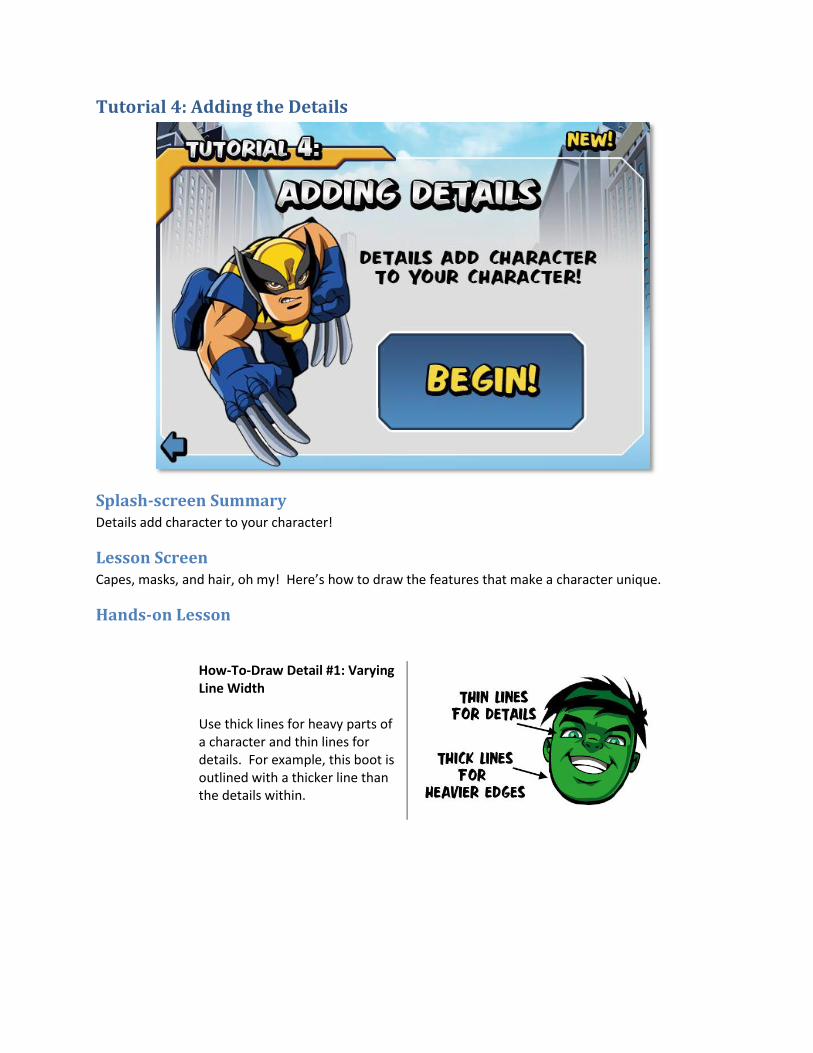
Tutorial 4: Adding the Details
Splash-screen Summary Details add character to your character!
Lesson Screen Capes, masks, and hair, oh my! Here’s how to draw the features that make a character unique.
Hands-on Lesson
How-To-Draw Detail #1: Varying Line Width Use thick lines for heavy parts of a character and thin lines for details. For example, this boot is outlined with a thicker line than the details within.
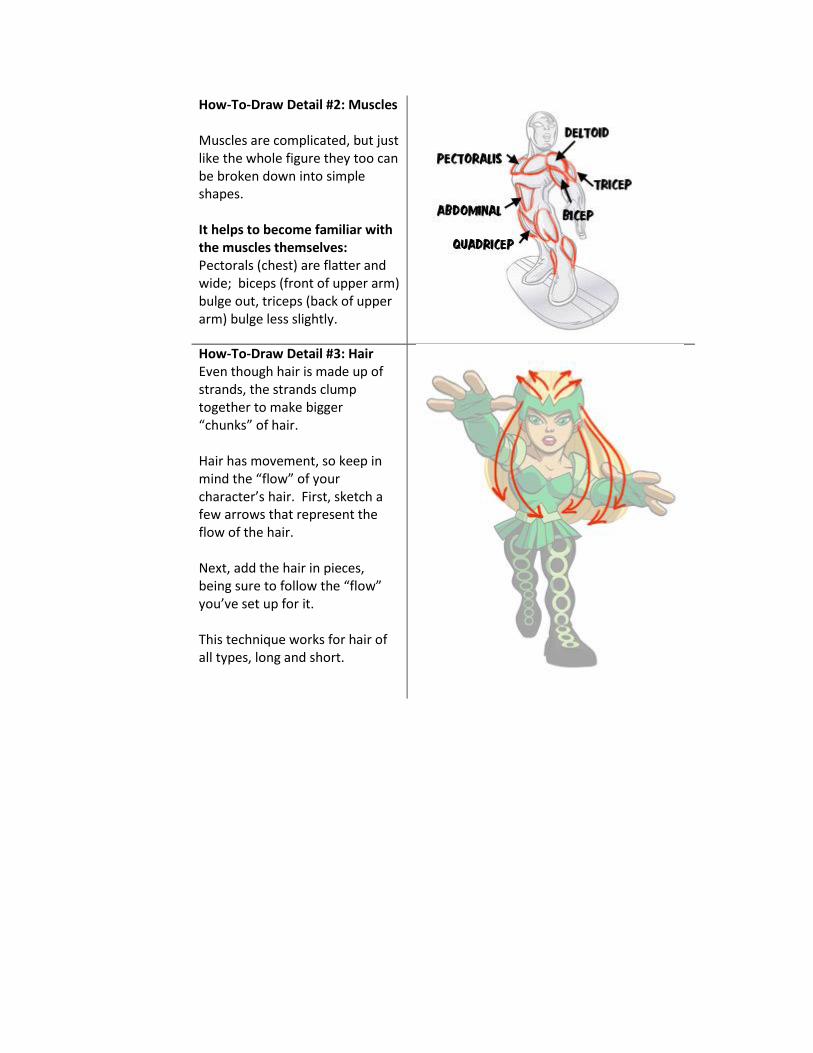
How-To-Draw Detail #2: Muscles Muscles are complicated, but just like the whole figure they too can be broken down into simple shapes. It helps to become familiar with the muscles themselves: Pectorals (chest) are flatter and wide; biceps (front of upper arm) bulge out, triceps (back of upper arm) bulge less slightly.
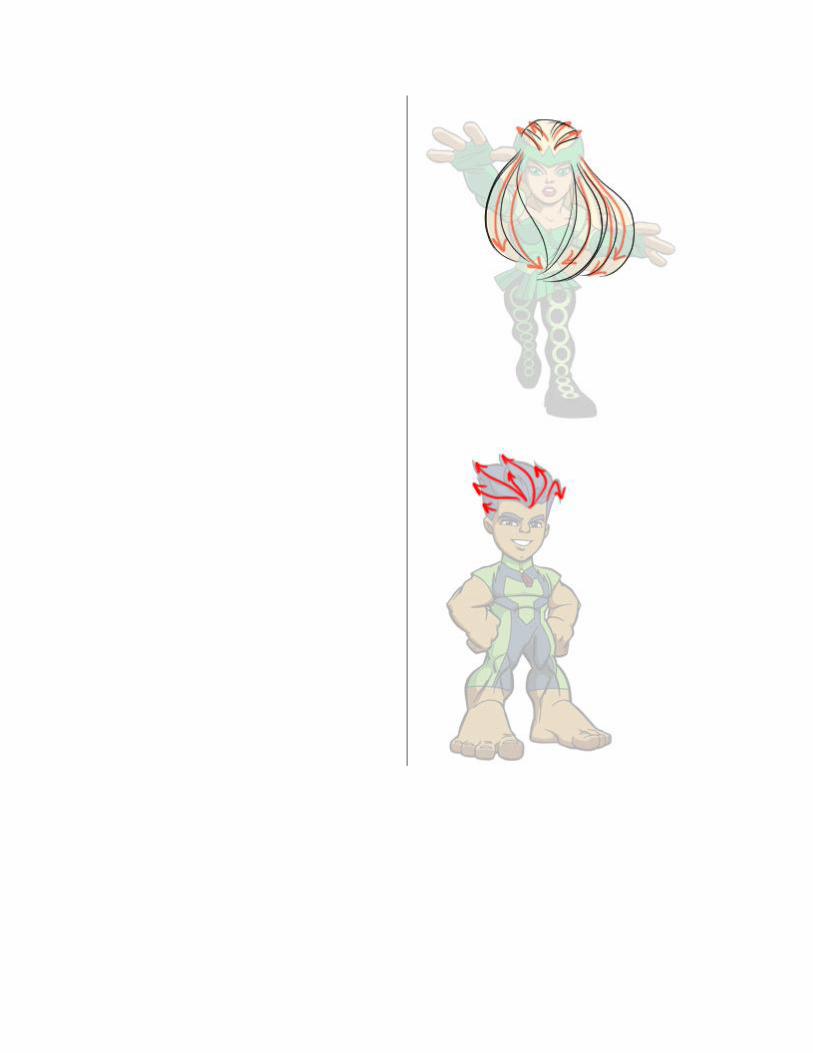
How-To-Draw Detail #3: Hair Even though hair is made up of strands, the strands clump together to make bigger “chunks” of hair. Hair has movement, so keep in mind the “flow” of your character’s hair. First, sketch a few arrows that represent the flow of the hair. Next, add the hair in pieces, being sure to follow the “flow” you’ve set up for it. This technique works for hair of all types, long and short.
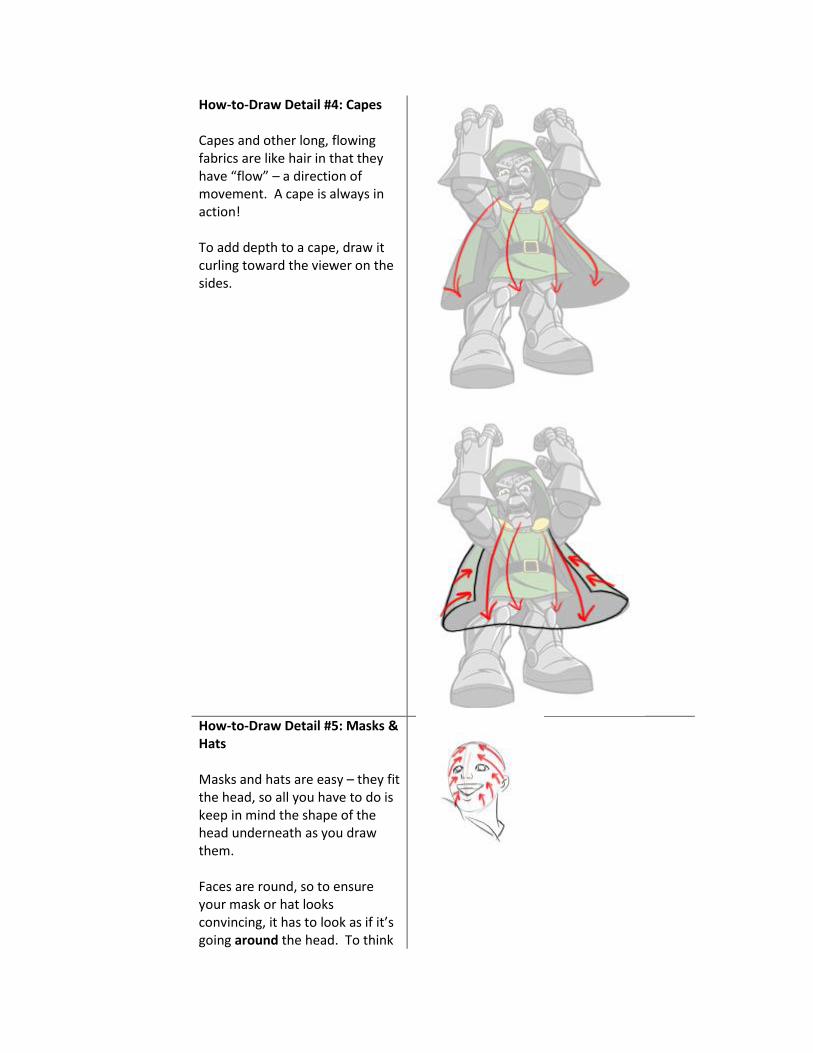
How-to-Draw Detail #4: Capes Capes and other long, flowing fabrics are like hair in that they have “flow” – a direction of movement. A cape is always in action! To add depth to a cape, draw it curling toward the viewer on the sides.
How-to-Draw Detail #5: Masks & Hats Masks and hats are easy – they fit the head, so all you have to do is keep in mind the shape of the head underneath as you draw them. Faces are round, so to ensure your mask or hat looks convincing, it has to look as if it’s going around the head. To think
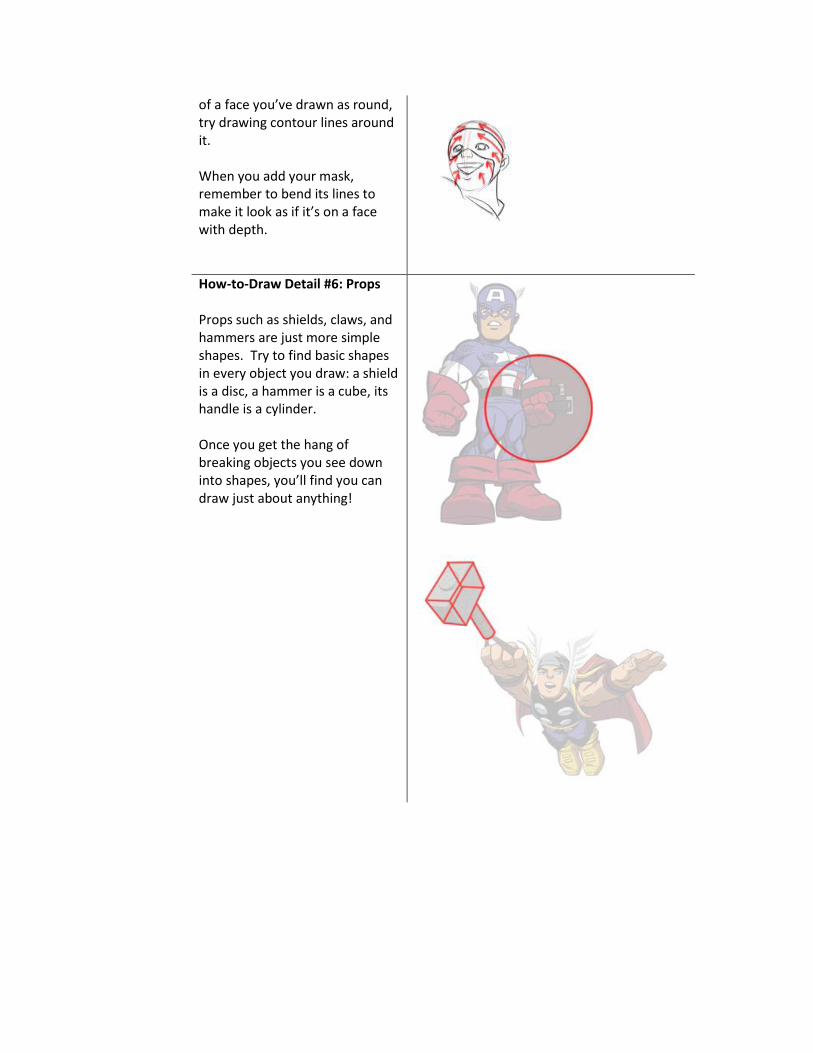
of a face you’ve drawn as round, try drawing contour lines around it. When you add your mask, remember to bend its lines to make it look as if it’s on a face with depth.
How-to-Draw Detail #6: Props Props such as shields, claws, and hammers are just more simple shapes. Try to find basic shapes in every object you draw: a shield is a disc, a hammer is a cube, its handle is a cylinder. Once you get the hang of breaking objects you see down into shapes, you’ll find you can draw just about anything!
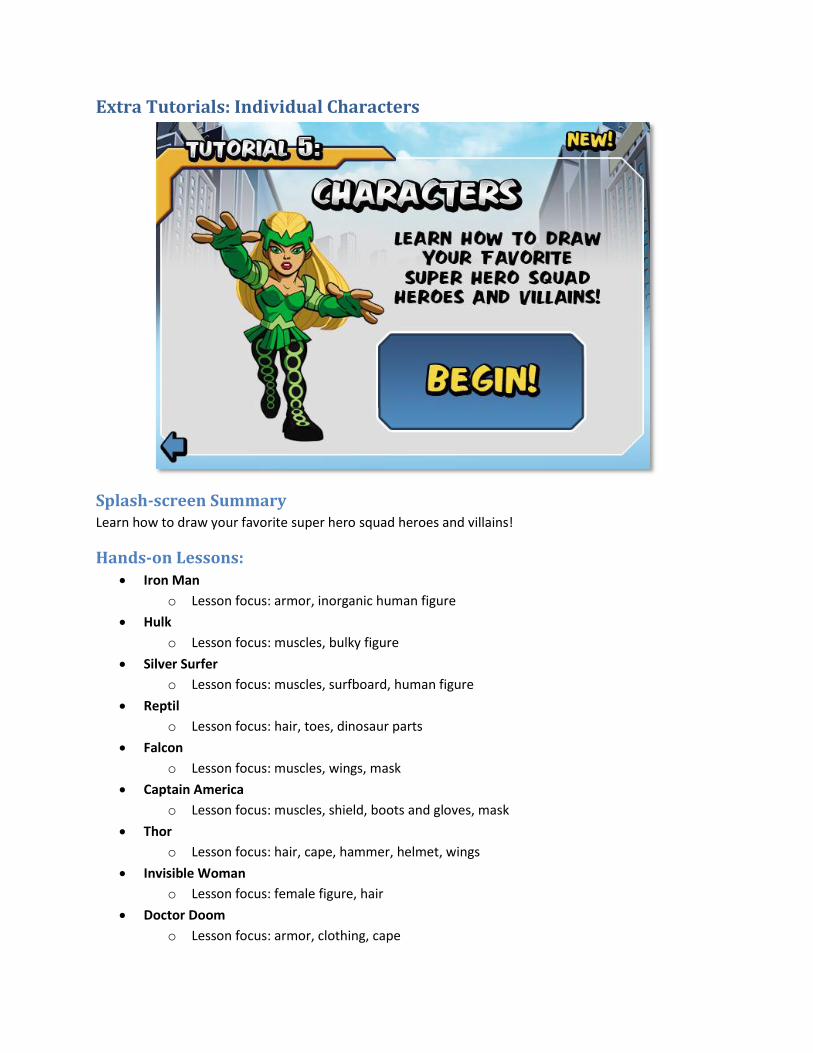
Extra Tutorials: Individual Characters
Splash-screen Summary Learn how to draw your favorite super hero squad heroes and villains!
Hands-on Lessons: Iron Man
o Lesson focus: armor, inorganic human figure
Hulk
o Lesson focus: muscles, bulky figure
Silver Surfer
o Lesson focus: muscles, surfboard, human figure
Reptil
o Lesson focus: hair, toes, dinosaur parts
Falcon
o Lesson focus: muscles, wings, mask
Captain America
o Lesson focus: muscles, shield, boots and gloves, mask
Thor
o Lesson focus: hair, cape, hammer, helmet, wings
Invisible Woman
o Lesson focus: female figure, hair
Doctor Doom
o Lesson focus: armor, clothing, cape
Abomination
o Lesson focus: muscles, bulky figure, details
Enchantress
o Lesson focus: female figure, hair, clothing
MODOC
o Lesson focus: chair, proportions
Each lesson starts with a basic humanoid form and adds the details that result in a unique, recognizable
character. TBD: quantity of characters, how many poses offered for each available character
Menu Flow Tutorial Menu -> Tutorial 5 -> Character Drawing Tutorial Selection Screen -> Character Drawing
Tutorial
The list of heroes could be presented as a scrolling list.
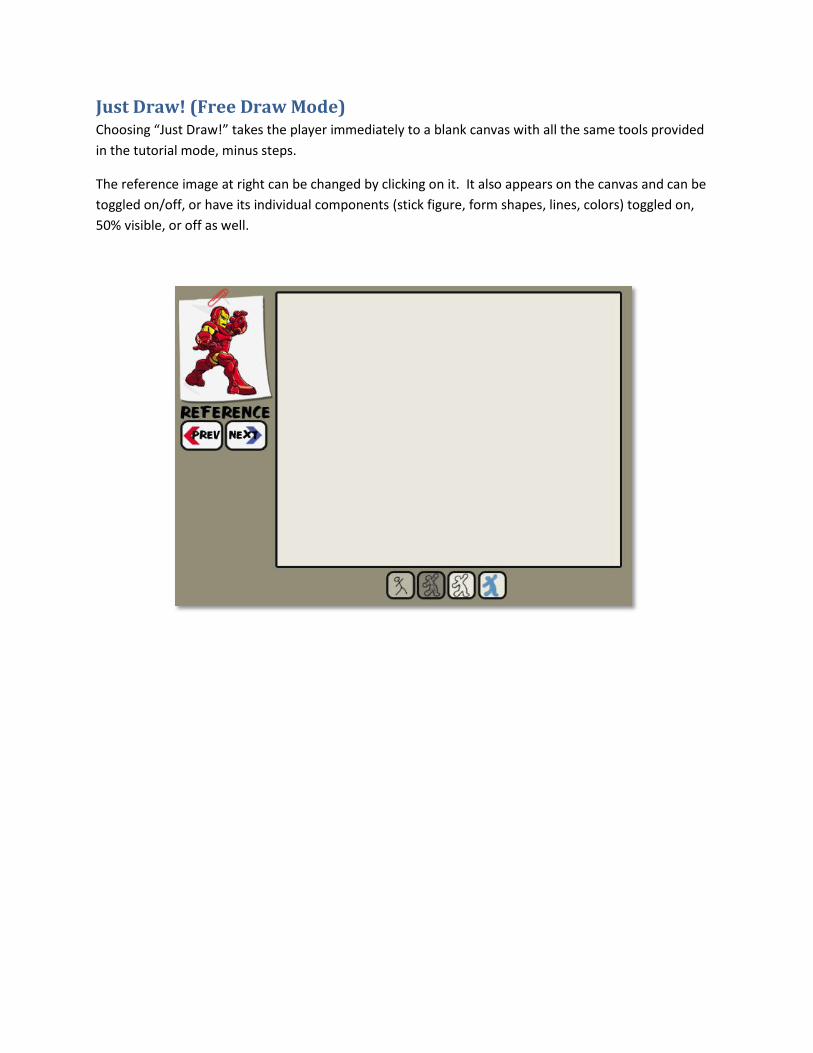
Just Draw! (Free Draw Mode) Choosing “Just Draw!” takes the player immediately to a blank canvas with all the same tools provided
in the tutorial mode, minus steps.
The reference image at right can be changed by clicking on it. It also appears on the canvas and can be
toggled on/off, or have its individual components (stick figure, form shapes, lines, colors) toggled on,
50% visible, or off as well.

GUI Notes This is feedback from THQ producers who have worked on other uDraw projects. The following wisdom
should be reflected in the Sketch Center’s GUI design:
Make sure the selection boxed for each feature are nice and large.
Make sure when any given feature is selected, it’s clear that it’s the selected option (popped out, thick black border, etc.)
For the eraser, make sure the point(s) of the eraser that will actually do the erasing are clear.

Document Change History 2/3/11 – swapped ruler for flood fill, updated GUI mockups, incorporated THQ’s feedback, added a few GUI notes for UI engineers, added rewards for completing tutorials