Embed Size (px)
Citation preview

8/9/2019 Manual | Setup | Jun2010
http://slidepdf.com/reader/full/manual-setup-jun2010 1/8
QUICK CHECK LIST
CHECKLIST : CAMERA1. tables behind one another, not side -by-side
2. camera cable looped at connection point
3. camera signal visible on Sony Anycast
4. camera is level (check spirit level)
5. barstool placed next to table
CHECKLIST : ANYCAST VISION MIXER1. audio house feed XLR connected
2. dvd player connected
3. dvd recorder output: video and audio connected
4. dvd recorder input (for preview) connected
5. 2 x vga outputs connected
6. 1 x vga input connected (from laptop)
7. earphones connected
8. comms connected and signal live
CHECKLIST : EXTRAS
1. tapes x 4 ready (am1, am2, pm1, pm2 & extra)
2. DVD pouch ready (blank dvds present)
SHORTAGES & BREAKAGES PROCEDURES: see page 7
SETUP GUIDELINES
8/9/2019 Manual | Setup | Jun2010
http://slidepdf.com/reader/full/manual-setup-jun2010 2/8
page 1
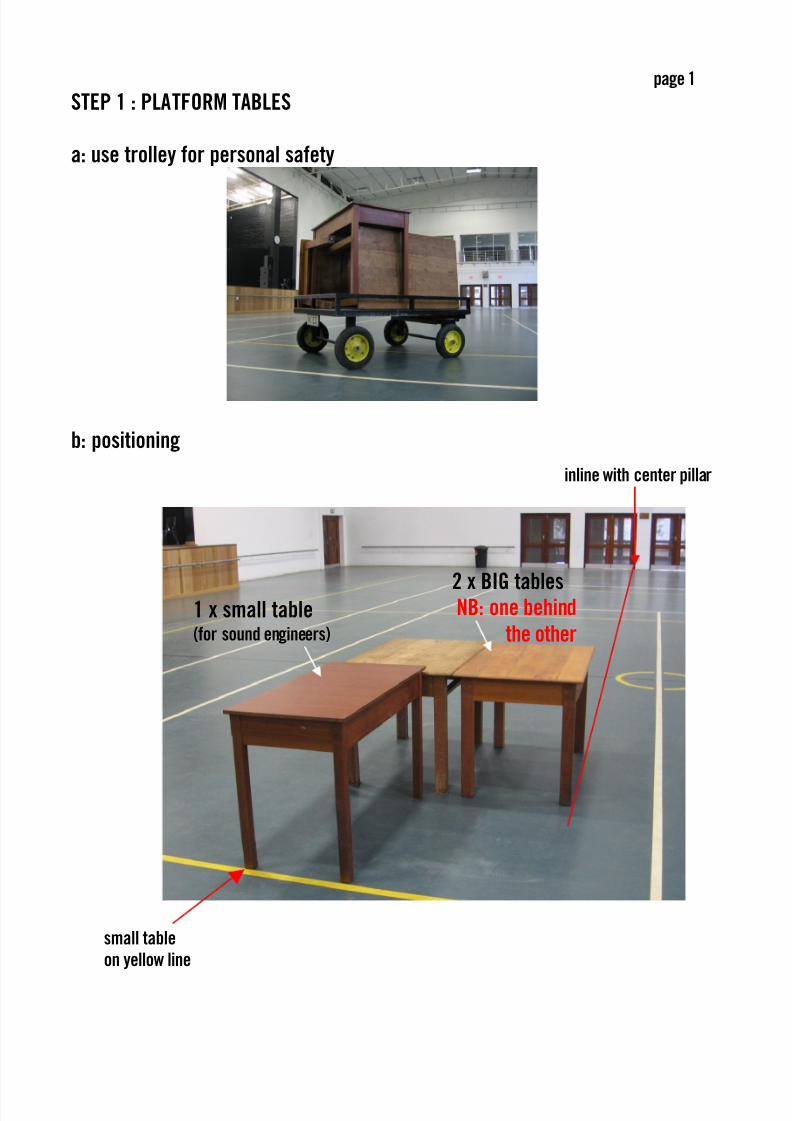
STEP 1 : PLATFORM TABLES
a: use trolley for personal safety
b: positioning
small table
on yellow line
inline with center pillar
1 x small table(for sound engineers)
2 x BIG tablesNB: one behind
the other
8/9/2019 Manual | Setup | Jun2010
http://slidepdf.com/reader/full/manual-setup-jun2010 3/8
page 2
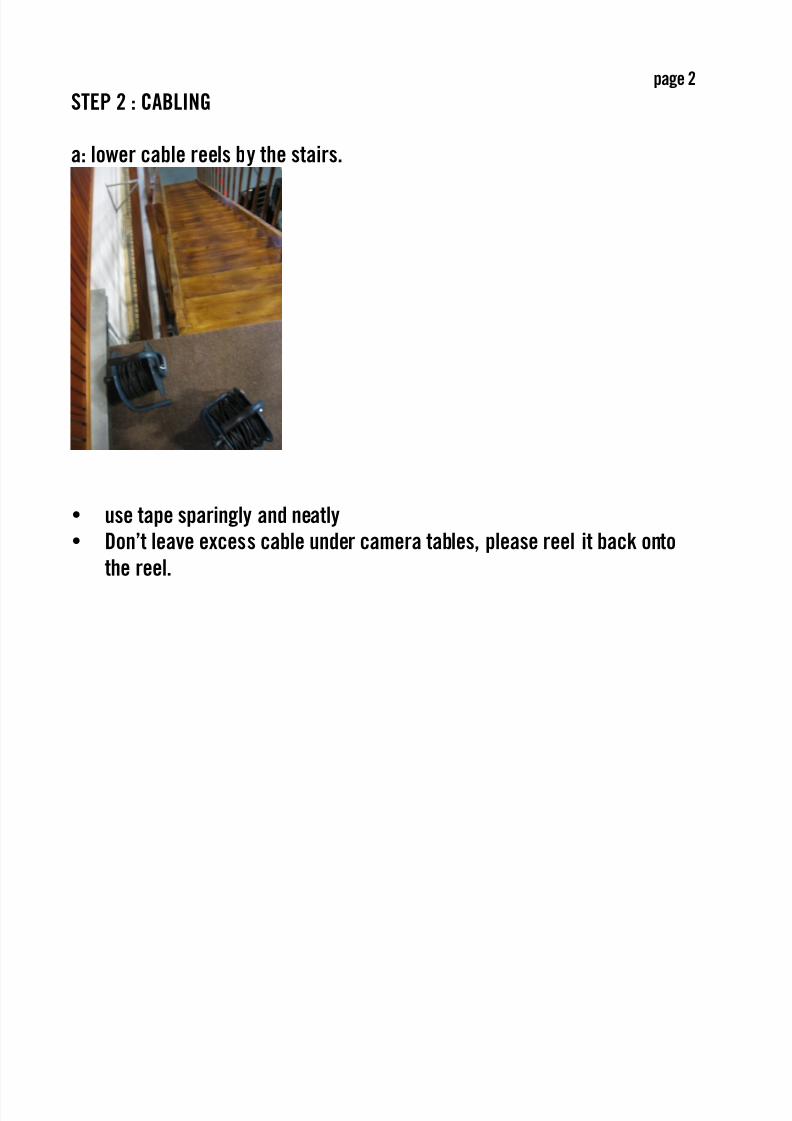
STEP 2 : CABLING
a: lower cable reels by the stairs.
• use tape sparingly and neatly
• Don’t leave excess cable under camera tables, please reel it back onto
the reel.
8/9/2019 Manual | Setup | Jun2010
http://slidepdf.com/reader/full/manual-setup-jun2010 4/8
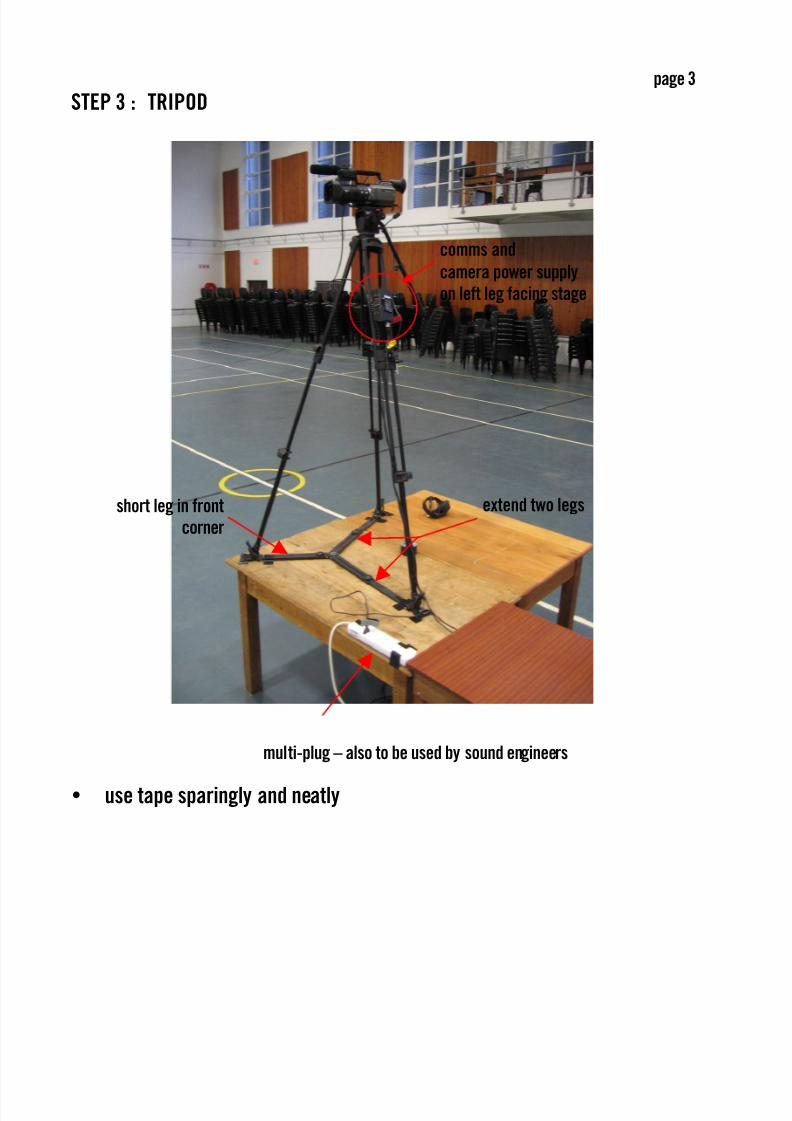
page 3
STEP 3 : TRIPOD
• use tape sparingly and neatly
short leg in front
corner
extend two legs
multi-plug – also to be used by sound engineers
comms and
camera power supply
on left leg facing stage

8/9/2019 Manual | Setup | Jun2010
http://slidepdf.com/reader/full/manual-setup-jun2010 5/8
page 4
STEP 4 : CAMERA
• ensure connector is tightened to cable
• loop cable on top of camera
• ensure camera is horizontal with spirit level on tripod
• ensure no strain on camera power cable
8/9/2019 Manual | Setup | Jun2010
http://slidepdf.com/reader/full/manual-setup-jun2010 6/8
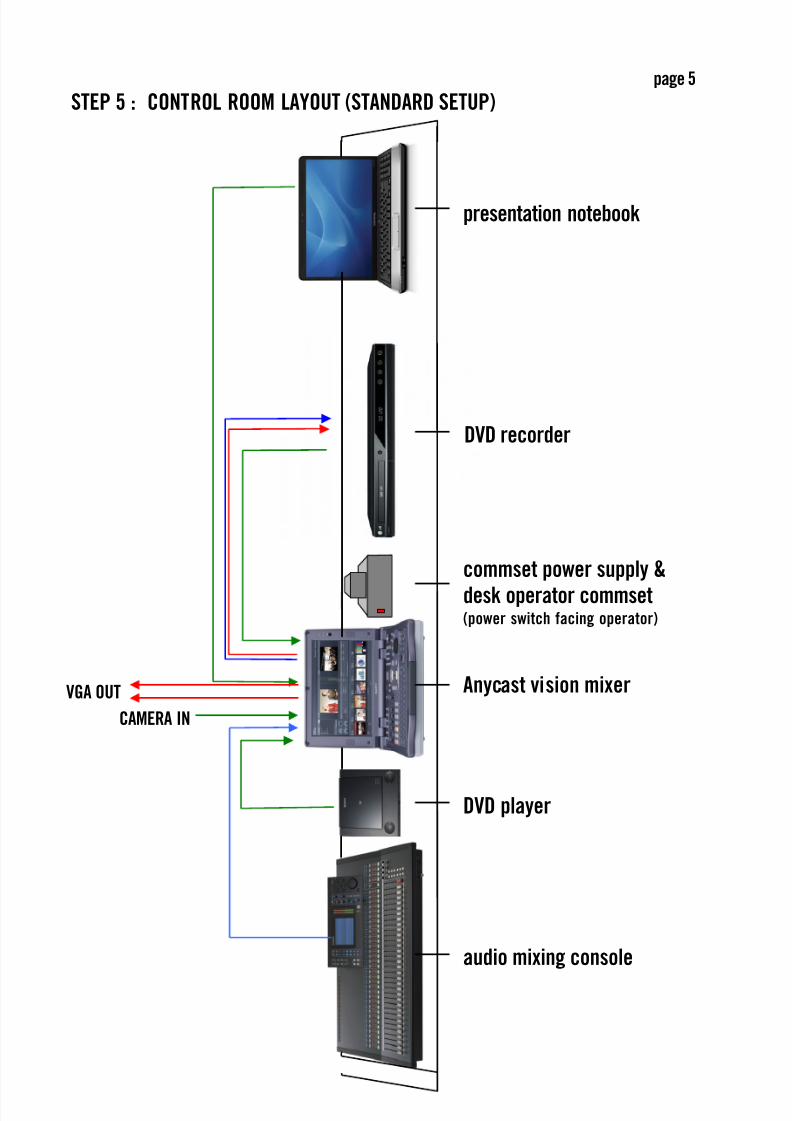
page 5
STEP 5 : CONTROL ROOM LAYOUT (STANDARD SETUP)
≠≠≠
DVD player
audio mixing console
Anycast vision mixer
commset power supply &
desk operator commset(power switch facing operator)
DVD recorder
presentation notebook
VGA OUT
CAMERA IN
8/9/2019 Manual | Setup | Jun2010
http://slidepdf.com/reader/full/manual-setup-jun2010 7/8
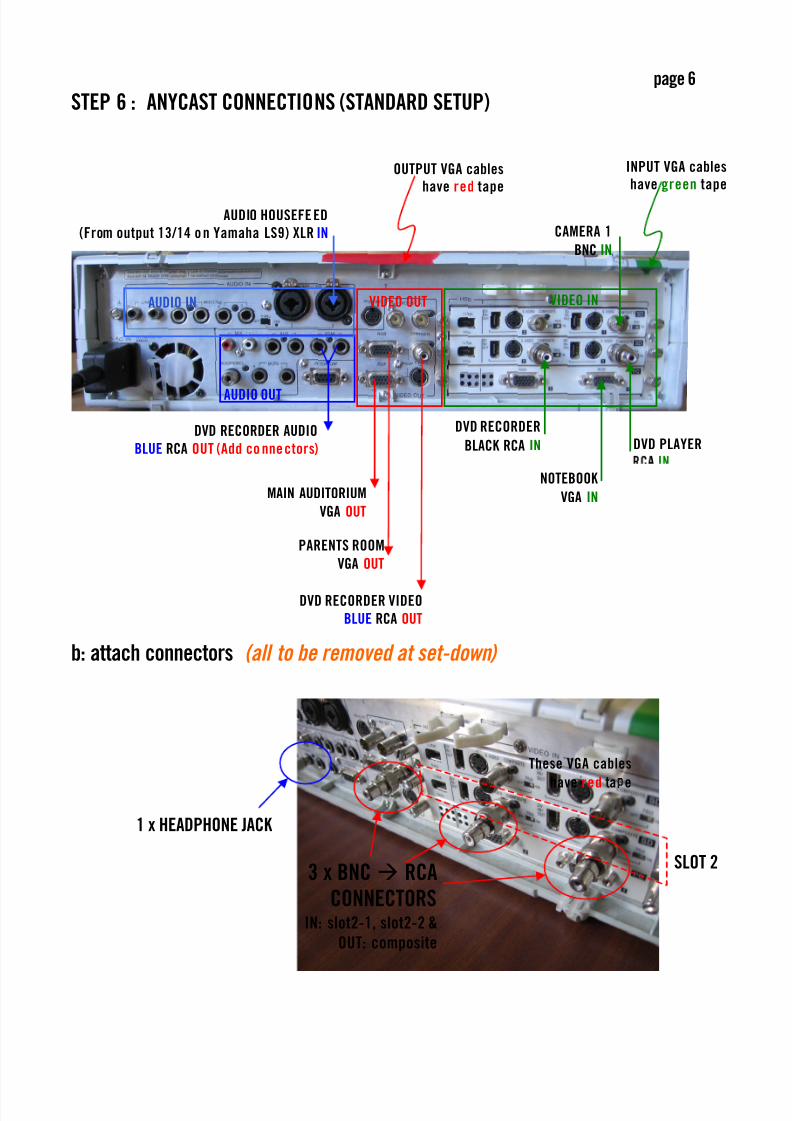
page 6
STEP 6 : ANYCAST CONNECTIONS (STANDARD SETUP)
b: attach connectors (all to be removed at set-down)
MAIN AUDITORIUM
VGA OUT
PARENTS ROOM
VGA OUT
NOTEBOOK
VGA IN
DVD PLAYER
DVD RECORDER
BLACK RCA IN
CAMERA 1
BNC IN
DVD RECORDER VIDEO
BLUE RCA OUT
DVD RECORDER AUDIO
BLUE RCA OUT (Add co nnectors)
AUDIO HOUSEFE ED
(From output 13/14 o n Yamaha LS9) XLR IN
AUDIO IN
AUDIO OUT
VIDEO OUT VIDEO IN
3 x BNC RCA
CONNECTORSIN: slot2-1, slot2-2 &
OUT: composite
SLOT 2
1 x HEADPHONE JACK
OUTPUT VGA cables
have red tape
These VGA cables
have red ta e
INPUT VGA cables
have green tape

8/9/2019 Manual | Setup | Jun2010
http://slidepdf.com/reader/full/manual-setup-jun2010 8/8
page 7
STEP 8 : CHECK STOCK LEVELS
Put out Tapes and DVD Pouch
1. Check DVD Pouch (min 6 blank DVDs per Sunday)
2. Check TAPES (1 for each service, plus extra tape. i.e. 4 in total)
STEP 9 : ATT: SETTER UPPERS
1. Replace Tapes every 2nd month to prevent recording errors
a. Labeled as follows:
top: am 1 only flat side: rewind & re-usetop: am 2 only flat side: rewind & re-use
top: pm 1 flat side: rewind & re-use
top: pm 2 flat side: rewind & re-use
top: extra 1 flat side: rewind & re-use
2. Check backup DVD spindle in cupboard (report shortages in stock
order form)
PLEASE COMMUNICATE
STOCK SHORTAGES & FAULTY EQUIPMENT
TO SETUP TECHNICAL HEAD: DEWALD ABRIE