Embed Size (px)
Citation preview

User Manual
CELLINK AB
Arvid Wallgrens Backe 20
Gothenburg, SE 413 46
SWEDEN

2
“You cannot create new science unless you realize where the old science leaves off and
new science begins, and science-fiction forces us to confront this.”
Michio Kaku
3
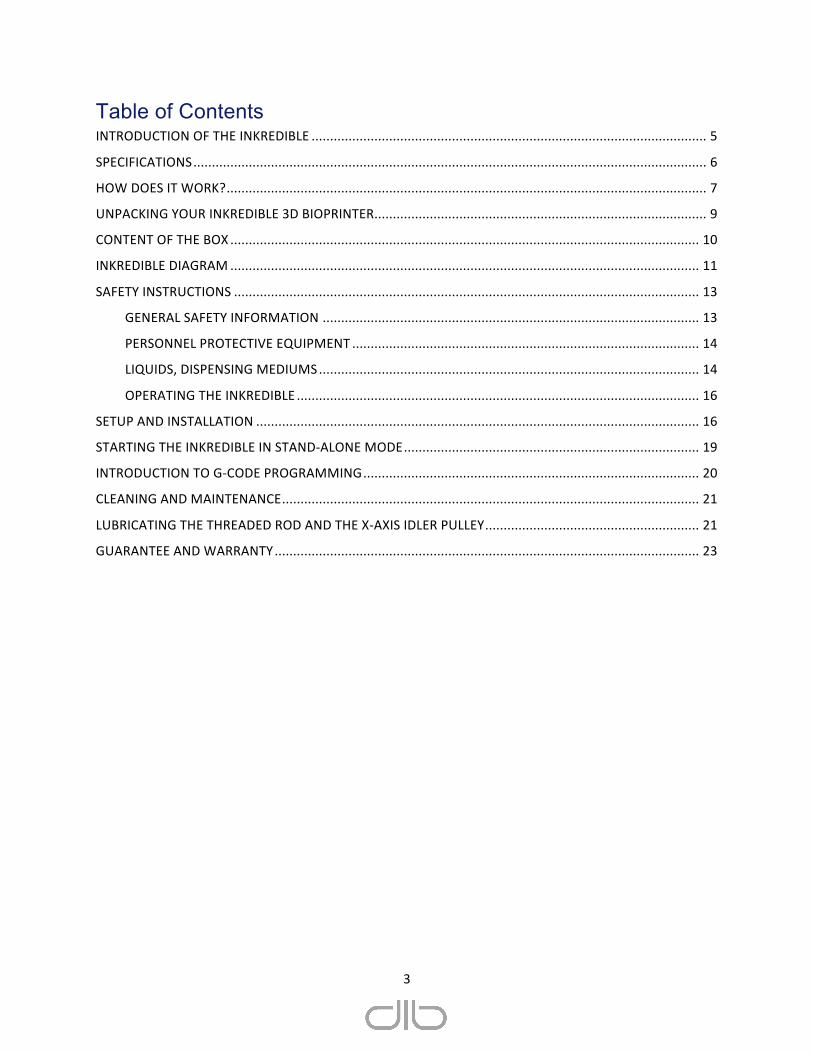
Table of Contents INTRODUCTION OF THE INKREDIBLE ........................................................................................................... 5
SPECIFICATIONS ........................................................................................................................................... 6
HOW DOES IT WORK? .................................................................................................................................. 7
UNPACKING YOUR INKREDIBLE 3D BIOPRINTER .......................................................................................... 9
CONTENT OF THE BOX ............................................................................................................................... 10
INKREDIBLE DIAGRAM ............................................................................................................................... 11
SAFETY INSTRUCTIONS .............................................................................................................................. 13
GENERAL SAFETY INFORMATION ...................................................................................................... 13
PERSONNEL PROTECTIVE EQUIPMENT .............................................................................................. 14
LIQUIDS, DISPENSING MEDIUMS ....................................................................................................... 14
OPERATING THE INKREDIBLE ............................................................................................................. 16
SETUP AND INSTALLATION ........................................................................................................................ 16
STARTING THE INKREDIBLE IN STAND-‐ALONE MODE ................................................................................ 19
INTRODUCTION TO G-‐CODE PROGRAMMING ........................................................................................... 20
CLEANING AND MAINTENANCE ................................................................................................................. 21
LUBRICATING THE THREADED ROD AND THE X-‐AXIS IDLER PULLEY .......................................................... 21
GUARANTEE AND WARRANTY ................................................................................................................... 23

4
1
INTRODUCTION OF YOUR INKREDIBLE 3D BIOPRINTER
5
INTRODUCTION OF THE INKREDIBLE
Hello and welcome to the exciting world of 3D Bioprinting, we are excited to have you here. The technology you have in front of you has the potential of creating real, living human life and it is only your imagination that limits what you can do. This manual will serve as your guide for setting up your INKREDIBLE bioprinter, maintaining it, and also notifying you about safety precautions to ensure a long-lasting product lifetime. Let`s begin this exciting journey!
WARNING: The INKREDIBLE includes moving parts that can cause injury. Never reach inside the INKREDIBLE while it is in operation. Always allow the INKREDIBLE to come to a complete stop prior to reaching inside. WARNING: Do not leave the INKREDIBLE unattended during operation.

6
SPECIFICATIONS
BIOPRINTING Bioprinting Technology: Pneumatic-based microextrusion system Printheads: 2 pneumatic-based extrusion printheads. 1 UV LED curing system (365 or 405 nm) Build Volume: 130 x 80 x 50 mm. Printbed has Insets for P100 petri dish and multi-well plates Positioning Precision: XY: 10 µm [0.0004 in]; Z: 2.5 µm [0.0001 in] Layer Resolution: 100 µm [0.0039 in] Hydrogel’s viscosity range: 0.001 to 250 Pa.S [1 to 250,000 cP] Pressure Supply: Portable, oil-free air compressors supplied Proof Pressure: 1200 kPa Max. Operating Pressure: 700 kPa Set Pressure Range: 5 to 400 kPa Sensitivity: Within 0.2% F.S. (0.8 kPa) Repeatability: Within ±1% F.S. (4 kPa) Minimum Unit Setting: 1 kPa Pressure Display Units: kPa, MPa, kgf/cm2, bar, psi, inHg and mmHg Printhead’s Response Time: 5 ms or less (ON), 4 ms or less (OFF) Needle Length: Auto-calibration, 6.35 mm [0.25 in] to 38.1 mm [1.5 in] Needle Diameter: User dependent, 100 to 1540 µm [33 to 14 needle gauge]
SOFTWARE Software Bundle: Slic3r, Repetier-Host File Types: STL/OBJ/AMF
Supports: Windows (XP 32 bit/7+), Mac OS X (10.6 64 bit/10.7+) and Ubuntu Linux (12.04+) Connectivity: USB, SD card ELECTRICAL Power Supply Adapter:
Input: 100-240VAC, 50/60Hz, 2.0A Output: 24VDC, 6.67A, 160W Max
Portable, Oil-free Air Compressor: USA: 110VAC, 60Hz EUROPE: 230VAC, 50Hz
PHYSICAL SPECIFICATIONS Frame: Chemically resistant, powder-coated high grade steel D x W x H: 330 x 370 x 380 mm [19.1 x 16.5 x 14.7 in] Shipping Box: 59 x 55 x 43 cm [23 x 21.5 x 17 in] Weight: 11.5 kg [25.4 lbs] Shipping Weight: 20 kg [44.5 lbs]

7
HOW DOES IT WORK? The INKREDIBLE 3D bioprinter is a pneumatic-based extrusion bioprinter with dual printheads and UV LED curing system for bioprinting of complex human tissue models and organs for tissue engineering research. It is a cost-effective unit for innovators to enter the 3D bioprinting field and start bioprinting living tissues at ease. It can be used as a standalone unit thanks to its LCD controller or it can be monitored through a computer with the use of the accompanied software. Your 3D CAD files are translated into coordinates and instructions for the INKREDIBLE to allow the bioprinter to move according to a defined path. The bioprinting process works through the extrusion of a bioink or hydrogel biomaterial combined with human cells in a bottom-up, layer-by-layer fashion until a 3D construct is built. Once the construct has been bioprinted, it is crosslinked using the UV LED curing system or ionic solutions, depending on your bioink’s crosslinking requirements.
8
2
UNPACKING YOUR INKREDIBLE 3D BIOPRINTER

9
UNPACKING YOUR INKREDIBLE 3D BIOPRINTER When unpacking your INKREDIBLE 3D Bioprinter, be careful not to grab onto any movable parts or lose components. We recommend you grab it by side window frames and pull it out from the box.
NOTE: Do not force or tear anything during the unpacking or setup process as this may irreversibly damage your INKREDIBLE 3D Bioprinter
CAUTION: When opening the box, do not force or tear anything while unpacking as this may damage the INKREDIBLE 3D Bioprinter.
10
CONTENT OF THE BOX
[1x] INKREDIBLE 3D Bioprinter
[1x] 24V Power supply
[1x] Power cord
[1x] SD card pre-loaded with ready-to-print models
[1x] USB Cable
[1x] Portable, oil-free air compressor with tubing
[1x] STARTINK-Kit (1 prefilled Syringe with 3mL of CELLINK + 1 CELLMIXER + 10mL of Crosslinking solution)
[3x] Empty cartridges
[1x] 24 well plate
[1x] Glass petri dish
Note: Unpacking should be done outside the cell laboratory environment.

11
INKREDIBLE DIAGRAM
12
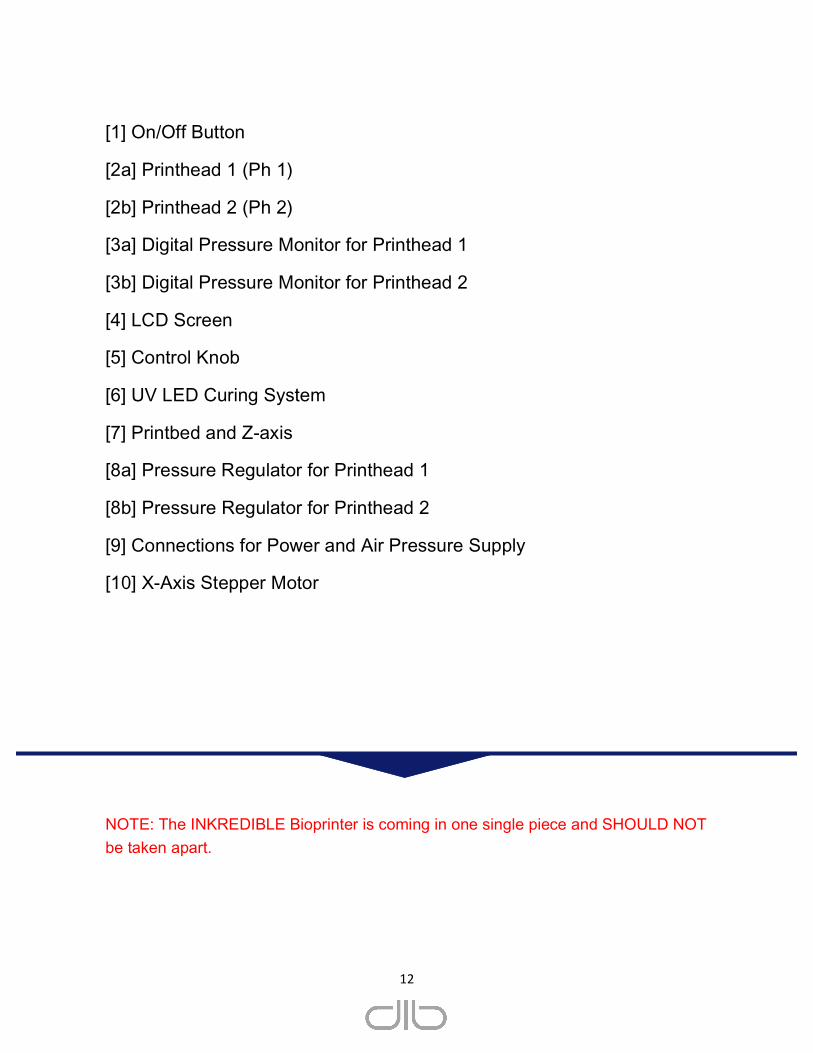
NOTE: The INKREDIBLE Bioprinter is coming in one single piece and SHOULD NOT be taken apart.
[1] On/Off Button
[2a] Printhead 1 (Ph 1)
[2b] Printhead 2 (Ph 2)
[3a] Digital Pressure Monitor for Printhead 1
[3b] Digital Pressure Monitor for Printhead 2
[4] LCD Screen
[5] Control Knob
[6] UV LED Curing System
[7] Printbed and Z-axis
[8a] Pressure Regulator for Printhead 1
[8b] Pressure Regulator for Printhead 2
[9] Connections for Power and Air Pressure Supply
[10] X-Axis Stepper Motor

13
SAFETY INSTRUCTIONS
MALOPERATION OF THE INKREDIBLE 3D BIOPRINTER INSTRUMENT CAN LEAD TO SEVERE AND IRREVERSIBLE INJURIES IF THE SECURITY INSTRUCTIONS ARE NOT FOLLOWED! NOTE: In order to respond to the INKREDIBLE 3D Bioprinter and its relevant accessories security requirements, the instrument has to be operated by trained personnel, which is aware of the risks and dangers that can be induced to themselves, as well as for the staff being in close relation with the INKREDIBLE 3D Bioprinter. The staff being involved in the installation, or the maintenance of the system or a part of the system, has to be qualified through an appropriate training. GENERAL SAFETY INFORMATION Use the instrument only for its intended purpose as described in the documentation. Do not modify the instrument, sub-components or accessories.
Never reach into the instrument until all components of the instrument have come to a complete stop. Moving parts can cause serious injuries.
Before cleaning, inspecting, adjusting, repairing or disassembling the instrument or the dispensing units, stop the instrument and turn off the main switch.
The INKREDIBLE Bioprinter is fitted with a 365 nm UV LED (405nm option). DO NOT LOOK DIRECTLY AT THE LIGHT. ALWAYS WEAR PROTECTIVE EQUIPMENT WHEN OPERATING THE SYSTEM. ALWAYS WEAR THE INCLUDED SAFETY GLASSES.
14
Improperly mounted pressurized air spouts, air tubes and cartridges can be dangerous. Make sure all connections and connectors are mounted according to instructions and all components are specified for use with the intended pressure.
NOTE: Make sure the supplied air pressure does not exceed the admissible range of 7 bars (700 kPa).
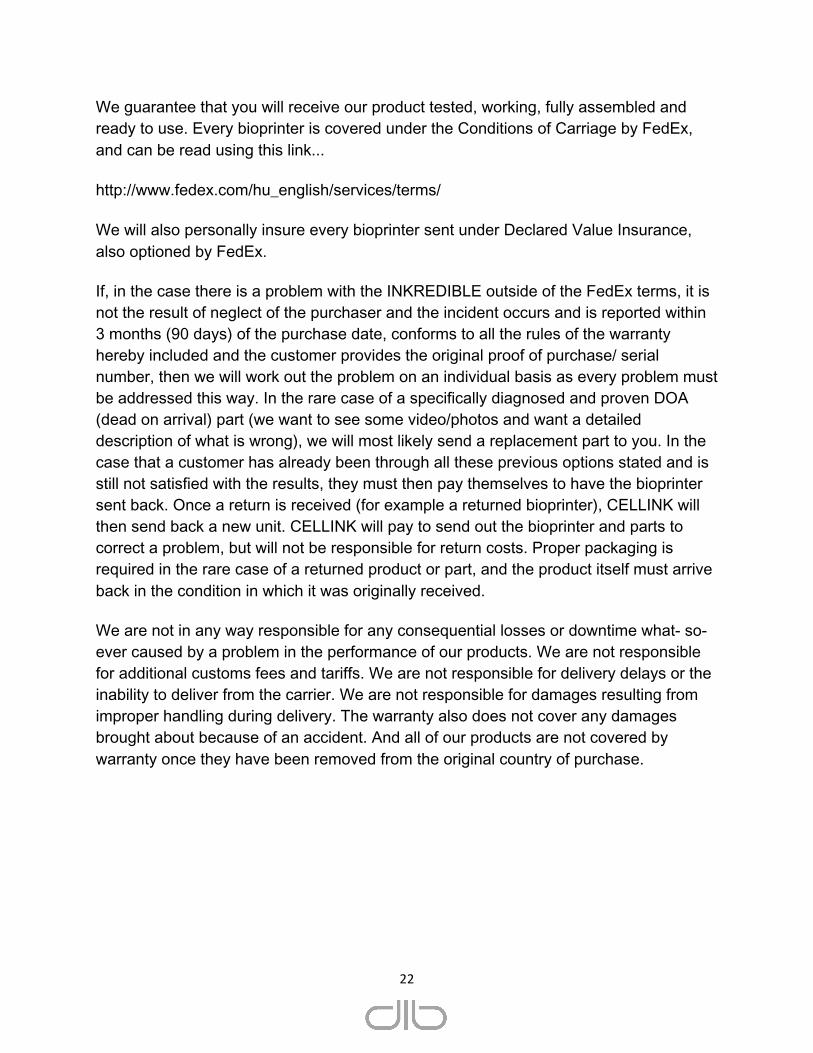
PERSONNEL PROTECTIVE EQUIPMENT
Always wear protective glasses and secure the environments of the instrument to other personnel while operating the INKREDIBLE. All laser safety equipment, including laser safety glasses, must be adapted to the installed UV curing kit. Always wear protective glasses and gloves while handling dangerous materials that can be absorbed by skin or which are toxic, strike-attractive, corrosive, causing allergies, carcinogen, reproduction-endangering or mutagenic to human being.
Always read the material safety data sheets, packing labels, manufacturer or dealer’s catalogue first to make sure to use adequate safety equipment.
LIQUIDS, DISPENSING MEDIUMS
Before starting to work with hazardous dispensing materials the operator has to inform himself about the characteristics of the material and its compatibility with the dispensing unit. The information can be drawn from the material safety data sheets, packaging labels, manufacturer or dealer catalogues.

15
3
SETUP & INSTALLATION

16
OPERATING THE INKREDIBLE
Only trained staff is allowed to operate the instrument being aware of the risks and potential injuries (non reversible damages can be caused).
NOTE: OPENING OF THE INSTRUMENTS ELECTRICAL PANEL WILL AUTOMATICALLY REVOKE THE WARRANTY.
The manufacturer certifies that the INKREDIBLE is conforming to requirements. The manufacturer gives an 8 months warranty on the moving parts in the INKREDIBLE bioprinter. The guarantee excludes deliberate damages.
SETUP AND INSTALLATION
1. Unpacking the 3D Bioprinter
Once the INKREDIBLE 3D Bioprinter has been carefully taken out of the box, all protective films and plastic parts preventing the axis to move during transportation can be removed. Once all protective materials have been removed, the INKREDIBLE can be placed inside a biological hood or laboratory bench. The INKREDIBLE should never be placed on wet/damp/moist/humid surfaces. Make sure to remove all ZIP TIES holding the X-carriage and Printbed in place during transportation.
2. Remove the Consumables, Electrical and Air Compressor boxes 3. Place the INKREDIBLE 3D bioprinter inside the biological hood (LAF bench) 4. Calibrating the printbed for the first time (every time you move the INKREDIBLE you
should follow this calibration procedure):
A standard leveler should be used for calibrating the printbed for the first time.
Place the leveler at the back of the printbed and adjust the back wingnuts until printbed is leveled.
Place the leveler on the middle of the printbed and perpendicular to the back screws. Adjust the front wingnut to level.
5. The power cord can be plugged in the back [9] of the of the INKREDIBLE 3D bioprinter and then in the outlet inside (or outside) of the biological hood. Note: Ensure to always connect the bioprinter’s power supply into a separate, individual power socket.
6. The INKREDIBLE 3D bioprinter can be switched on with the on/off button [1].

17
7. Connect the air tube provided to the air compressor and then to the back of the bioprinter. Connect the air compressor to a separate power socket. Note: The air compressor should be connected to a separate power socket (separate fuse) to avoid any electromagnetic interference with the INKREDIBLE Bioprinter.
8. Turn on the air compressor and increase the air pressure by pulling the knob of the pressure regulator and turning clockwise. Note: Ensure that the pressure supply is set at a higher pressure than needed to extrude your bioink material, e.g. 200 kPa. The air compressor has a maximum set pressure of 4 bars (400 kPa).
9. Connect the cartridges with needles to the air tube adapters for Printheads 1 and 2 by twisting the cartridge connectors clockwise.
10. Attach the cartridges (connected to the air tubes) inside the Printheads [2a] [2b]. 11. Start off by homing and calibrating the INKREDIBLE bioprinter. The bioprinter can be
calibrated using the “Home Axes” function in the menu, using the following sequence (Note: Ensure that the cartridges with needles are placed inside the printheads prior to initiating this sequence):
To Home Axes of the bioprinter:
-Remove all objects from the build plate [7] (such as well plates, petri dishes etc.)
-Lower the build plate [7] by simply pushing down at the back of the printbed with your hand
-Press the Control Knob [5] once to enter the “Main Menu”
-Turn the Control Knob Wheel [5] to select “Prepare Bioprint” and press the Control Knob to enter
-Turn Control Knob wheel and press “Home Axes”
The INKREDIBLE Bioprinter will now home all axes. The Ph 1 needle should be in the middle of the printbed once the sequence is completed
Defining the Print ing Surface:
This step will allow you to set the printing surface in order to bioprint in a petri dish or multiwell plate. This step should be performed right after the“Home Axes”sequence:
-Place a petridish onto the printbed [7] (there are insets in the center of the build plate where a petri dish and multiwall plate will fit tightly)
-In the“Prepare Bioprint”menu, turn the Control Knob Wheel [5] to select“Move Z”and press the Control Knob.
-On the LCD display you should see Z: +040.0 (position of Z axis: 40 mm)

18
-Turn the Control Knob Wheel [5] until the Ph 1 needle is right above the surface of the petri dish or well plate.
A little space of about 0.1mm should be visible between the printbed and the needle tip. You can use a piece of paper to slide between the needle and the petri dish. The paper should slide freely but there should not be more space than that.
-Once the correct distance has been selected, Press the Control Knob Wheel [5] once to exit the“Move Z”option.
-Scroll the Control Knob Wheel and select“Calibrate Z”
Your INKREDIBLE 3D Bioprinter is now calibrated and ready to print!

19
STARTING THE INKREDIBLE IN STAND-ALONE MODE
-Turn on the INKREDIBLE 3D Bioprinter, followed by the Air Compressor.
-Lock the air tube adapter onto the cartridge.
-Clip the cartridges onto Printhead 1 (Ph 1) and Printhead (Ph 2).
-Follow the step in the “Prepare Bioprint” Menu to “Home Axes” of the INKREDIBLE.
-Clip the petri dish or multiwell plate onto the printbed.
-Follow the step in the “Prepare Bioprint” Menu to “Move Z” and “Calibrate Z”.
- Adjust the air pressure using the pressure regulators for PH1 and PH2 located on the right side of the INKREDIBLE 3D Bioprinter. Note: the regulator closest to the user is for Printhead 1 and the one further away is for Printhead 2.
-In the LCD menu, select “Bioprint” menu and then select the file you wish to bioprint.
-The bioprinting process is now running! The pressure can be adjusted during bioprinting process in order to have a continuous flow, simply turn the pressure regulators.
-At the end of the bioprinting, the printbed will lower.
-Take out the petri dish or well plate.
-To Crosslink with the UV System, enter the “Utilities Menu” on the control panel by pressing the Control Knob Wheel [5].
-Scroll until you select “Turn On LED” and press the Control Knob. To turn off the UV LED curing, select “Turn Off LED” option and press the Control Knob.
You can try bioprinting any of your bioinks or hydrogels. Simply, load it in the cartridges and configure your bioprinting parameters (Printing pressure and printing speed). Configurations, pressure adjustments, and any development of printable biomaterial is upon the customer`s responsibility. CELLINK is not responsible for any clogging or damages caused by any user-dependent biomaterial bioprinted with the INKREDIBLE.

20
INTRODUCTION TO G-CODE PROGRAMMING The special M codes below are used to control the INKREDIBLE 3D Bioprinter: M codes M712 to M732 are used to set the offset between the printheads. Printheads 1 and 2 are for the cartridges and printhead 3 is for the UV LED. Note: That this will not place the chosen printhead in the active position. See M codes M751, M752 and M753. M712 Set offset from 1 to 2 M713 Set offset from 1 to 3 M721 Set offset from 2 to 1 M723 Set offset from 2 to 3 M731 Set offset from 3 to 1 M732 Set offset from 3 to 2 M codes M750 to M753 are used to place the chosen printhead in the active position. M750 homes the printheads. This is done at the beginning of the “Home Axes” and before any automatic switching of the printheads can occur. After this command Printhead 1 will be in the active position M751 Places Printhead 1 in the active position. This is faster than M750. M752 Places Printhead 2 in the active position M753 retracts both Printhead 1 and 2 making way for the UV LED to be used. M codes M712 to M732 are used to control the state of the Printheads. M760 Opens the valve for printhead 1 M761 Closes the valve for printhead 1 M762 Opens the valve for printhead 2 M763 Closes the valve for printhead 2 M764 Turns on the UV LED M765 Turns off the UV LED

21
CLEANING AND MAINTENANCE
The INKREDIBLE 3D Bioprinter is coated with a chemical resistant coating. It can be sprayed with chlorine or ethanol in order to sterilize the surface.
It is advised to lubricate the axis once in a month to ensure a good functioning of the 3D bioprinter.
LUBRICATING THE THREADED ROD AND THE X-AXIS IDLER PULLEY
After approximately 50 hours of build time, you should lubricate the threaded rod on your Z-axis and the X-axis idler pulley. To lubricate the threaded rod and the idler pulley:
1. PTFE-based grease can be used to lubricate the INKREDIBLE
2. Grasp both sides of the build printbed and push it gently to the bottom of the INKREDIBLE
3. Use a clean, lint-free rag [or your finger] to spread the grease onto the top section of the
threaded rod.
4. Make sure you get the grease inside of the threads themselves.
5. Grasp both sides of the build platform and move it to the top of the INKREDIBLE
6. Use a clean, lint-free rag [or your finger] to spread the grease onto the bottom section of the threaded rod. Make sure you get the grease inside of the threads themselves.
7. Locate the X-axis idler pulley. If you are facing the front of the INKREDIBLE, the idler
pulley is at the top left side. The idler pulley is one of the pulleys that allow the rubber belt to move the extruder from left to right, or along the X-axis. The pulley at the other side of the gantry is called the timing pulley and does not require lubrication.
8. Squeeze a small amount of the grease directly onto the exposed area of the dowel
inside the idler pulley and manually move the pulley back and forth to spread the grease.
22
We guarantee that you will receive our product tested, working, fully assembled and ready to use. Every bioprinter is covered under the Conditions of Carriage by FedEx, and can be read using this link...
http://www.fedex.com/hu_english/services/terms/
We will also personally insure every bioprinter sent under Declared Value Insurance, also optioned by FedEx.
If, in the case there is a problem with the INKREDIBLE outside of the FedEx terms, it is not the result of neglect of the purchaser and the incident occurs and is reported within 3 months (90 days) of the purchase date, conforms to all the rules of the warranty hereby included and the customer provides the original proof of purchase/ serial number, then we will work out the problem on an individual basis as every problem must be addressed this way. In the rare case of a specifically diagnosed and proven DOA (dead on arrival) part (we want to see some video/photos and want a detailed description of what is wrong), we will most likely send a replacement part to you. In the case that a customer has already been through all these previous options stated and is still not satisfied with the results, they must then pay themselves to have the bioprinter sent back. Once a return is received (for example a returned bioprinter), CELLINK will then send back a new unit. CELLINK will pay to send out the bioprinter and parts to correct a problem, but will not be responsible for return costs. Proper packaging is required in the rare case of a returned product or part, and the product itself must arrive back in the condition in which it was originally received.
We are not in any way responsible for any consequential losses or downtime what- so-ever caused by a problem in the performance of our products. We are not responsible for additional customs fees and tariffs. We are not responsible for delivery delays or the inability to deliver from the carrier. We are not responsible for damages resulting from improper handling during delivery. The warranty also does not cover any damages brought about because of an accident. And all of our products are not covered by warranty once they have been removed from the original country of purchase.
23
GUARANTEE AND WARRANTY
The guarantee and warranty does not cover any alterations or repairs made by a second or third party. We are always eager to work with you personally to fix any problem that may arise in the most efficient fashion meeting it’s specific case, but we do not suggest you to “rig” up something outside of the recommended guidelines in your user manual unless personally instructed by us to do so. We provide no guaranties on the safety or performance of modified INKREDIBLE 3D bioprinters. We are also not responsible for incorrect voltage being used, environmental conditions (moisture, fire, water, flood, lightning, ext.), or any other form of gross neglect on the customer’s part. If you are unsure about something, ask us about it first. We are also not responsible for damages caused by the use of old information, as we are a forward looking company and information/manuals/users guides and suggestions are continually being updated, as we plan to manufacture and to evolve our products into many future generations as the technology develops.
The guarantee and warranty covers critical components only. For example we will not replace a bioprinter because of a perceived blemish in the paintjob. The critical components/replacement parts do not carry a warranty themselves and are only covered in the initial 3 months warranty starting on the purchase date. Components not included in the warranty include: timing belts, linear ball bearings, rods, and the build platform. Moving parts, although of the highest manufactured quality, must be properly maintained, serviced and/or oiled, and the failure to do so will result in progressed wearing and tearing. The heated build platform itself will be subjected to unavoidable scratching and wear upon use. If you wish to order replacement parts, they are available in our online store, or by contacting us personally by telephone or email. There is no warranty issued when the INKREDIBLE is used with exotic printing material not personally recommended by us at CELLINK. Foreign materials can damage the system. The warranty also does not cover operating the bioprinter at not recommended speeds and settings.
In the case that a repair is determined to be “outside of the warranty” in which the buyer decides “must be looked at by the pros”, the buyer will pay the shipping both ways plus the repair costs.
Concerning “unauthorized returns”: returns not pre-authorized will not be eligible for repair, replacement or refund. Do not send it back to us unless you have contacted us first and we have pre-authorized you to do so.
24
Concerning “Refunds”: A refund is possible only with the INKREDIBLE 3D Bioprinter itself and will not be offered for any filaments, or spare parts what so ever. If within two weeks (14 days) after receiving your INKREDIBLE 3D Bioprinter you are not completely satisfied, we offer you a refund option. You will pay to have it shipped back, and after we receive it, we will deduct a 10% restocking fee from the total refund of the price of the INKREDIBLE 3D Bioprinter (excluding the tax and other fees). There will also be a thorough inspection of the bioprinter, and upon finding any damages deemed on the part of the buyer, other deductions from the refund would be made accordingly. Deductions will be made for any wear perceived to the bioprinter, including scratches. The 14 days period after receiving the bioprinter will be concretely determined in calculation with the FedEx tracking information.
Limitations
This guarantee and limited warranty are sole and final as they stand in reference to INKREDIBLE, CELLINK and it’s products where permitted by law. Any implied warranty or fitness is limited to this 3 months (90 day) warranty starting from the date of purchase. CELLINK waives all liability for any incidental, exemplary, punitive, collateral, indirect, consequential, or special damages. We will determine on sole discretion whether an issue is covered under our warranty or not.
Concerning any problems or enquiries, you can contact us at: [email protected]
Returned parts/products can be sent to:
CELLINK AB, Arvid Wallgrens Backe 20, Gothenburg SE-413 46, SWEDEN.


![æ ò Y - WKO.at9714]-NEKP... · ï d ] o í x x x x x x x x x x x x x x x x x x x x x x x x x x x x x x x x x x x x x x x x x x x x x x x x x x x x x x x x x x x x x x x x x x x](https://img.pdfslide.us/doc/110x75/5fbaf04dd150160874293c04/-y-wkoat-9714-nekp-d-o-x-x-x-x-x-x-x-x-x-x-x-x-x-x-x-x-x-x.jpg)


![t y r r s - RUN: Página principal · À ] ] 1e / 'z /d edk^ x x x x x x x x x x x x x x x x x x x x x x x x x x x x x x x x x x x x x x x x x x x x x x x x x x x x x x x x x x x](https://img.pdfslide.us/doc/110x75/5baf4cc109d3f2c70e8c393e/-t-y-r-r-s-run-pagina-principal-a-1e-z-d-edk-x-x-x-x-x-x-x-x.jpg)


![GEF report to UNCCD COP 14 - SPANISH version...1 v ] ^/'> ^ z z s/ dhz ^ x x x x x x x x x x x x x x x x x x x x x x x x x x x x x x x x x x x x x x x x x x x x x x x x x x x x x x](https://img.pdfslide.us/doc/110x75/5ff3ad7eea16862f7a672c4b/gef-report-to-unccd-cop-14-spanish-version-1-v-z-z-s-dhz-x.jpg)