Embed Size (px)
Citation preview

MAKING BEADED FELT CHRISMONS
Is. 9:6 For to us a child is born, to us a son is given…
By Alice B. ScottFaith Lutheran ChurchOak Ridge, Tennessee
January 2004
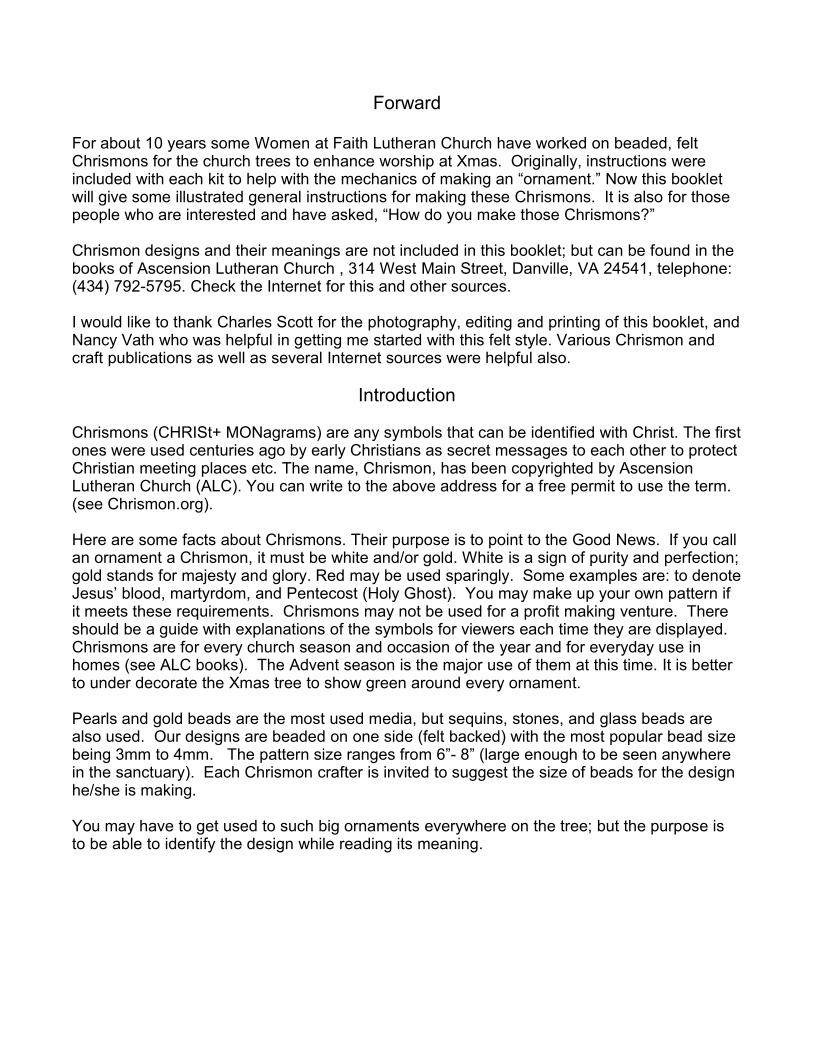
Forward
For about 10 years some Women at Faith Lutheran Church have worked on beaded, feltChrismons for the church trees to enhance worship at Xmas. Originally, instructions wereincluded with each kit to help with the mechanics of making an “ornament.” Now this bookletwill give some illustrated general instructions for making these Chrismons. It is also for thosepeople who are interested and have asked, “How do you make those Chrismons?”
Chrismon designs and their meanings are not included in this booklet; but can be found in thebooks of Ascension Lutheran Church , 314 West Main Street, Danville, VA 24541, telephone:(434) 792-5795. Check the Internet for this and other sources.
I would like to thank Charles Scott for the photography, editing and printing of this booklet, andNancy Vath who was helpful in getting me started with this felt style. Various Chrismon andcraft publications as well as several Internet sources were helpful also.
Introduction
Chrismons (CHRISt+ MONagrams) are any symbols that can be identified with Christ. The firstones were used centuries ago by early Christians as secret messages to each other to protectChristian meeting places etc. The name, Chrismon, has been copyrighted by AscensionLutheran Church (ALC). You can write to the above address for a free permit to use the term.(see Chrismon.org).
Here are some facts about Chrismons. Their purpose is to point to the Good News. If you callan ornament a Chrismon, it must be white and/or gold. White is a sign of purity and perfection;gold stands for majesty and glory. Red may be used sparingly. Some examples are: to denoteJesus’ blood, martyrdom, and Pentecost (Holy Ghost). You may make up your own pattern ifit meets these requirements. Chrismons may not be used for a profit making venture. Thereshould be a guide with explanations of the symbols for viewers each time they are displayed.Chrismons are for every church season and occasion of the year and for everyday use inhomes (see ALC books). The Advent season is the major use of them at this time. It is betterto under decorate the Xmas tree to show green around every ornament.
Pearls and gold beads are the most used media, but sequins, stones, and glass beads arealso used. Our designs are beaded on one side (felt backed) with the most popular bead sizebeing 3mm to 4mm. The pattern size ranges from 6”- 8” (large enough to be seen anywherein the sanctuary). Each Chrismon crafter is invited to suggest the size of beads for the designhe/she is making.
You may have to get used to such big ornaments everywhere on the tree; but the purpose isto be able to identify the design while reading its meaning.

FIGURE 1. Materials needed for a Chrismon.
Four squares of white craftsman’s felt ~ 11” x 11”
Chrismon pattern of choice (6“-8” in the major dimension).
Quilter’s marking pen for tracing
Beads (pearl & gold) Bead thread Sharp Scissors
Needles Pair of wire cutters
White covered 16 gauge wire (florists wire) for skeleton.
Fine fishing line for hanging.
Some Optional Materials
Embroidery Hoop Thimble Elmer’s Glue-All/Aileen’s Glue
28 gauge wire Bees Wax Clear sequins Interfacing
Gold material Rocaille beads Glass beads

FIGURE 2. Lay a piece of felt over the Chrismon design, hold it up to a window or place it on a light box, and trace it using a quilting pen.
FIGURE 3. Baste felt design to another piece of felt and/or pelon as backing for beadwork.

FIGURE 4. Organize beads. Keep them on their string when feasible and keep the sizes separated.
FIGURE 5. You may want to lay strings of beads on the felt for ideas for your design.
FIGURE 6. Some types of stitching used in beading.
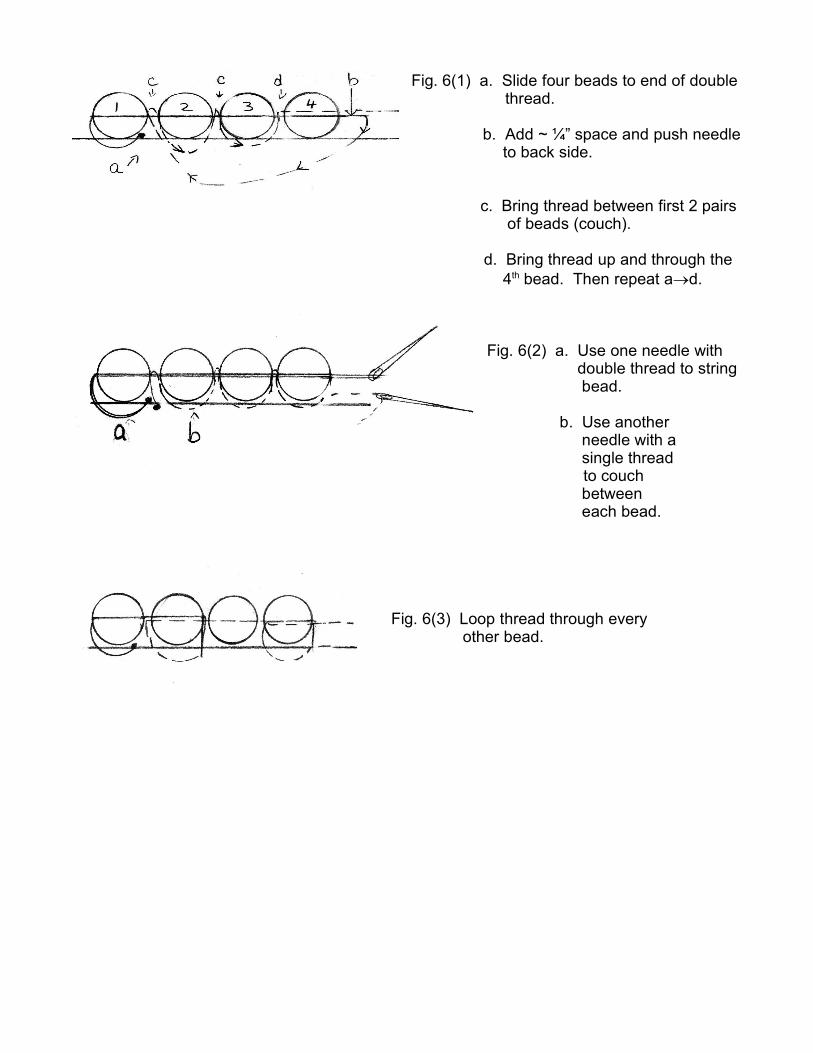
Fig. 6(1) a. Slide four beads to end of double thread. b. Add ~ ¼” space and push needle
to back side.
c. Bring thread between first 2 pairs of beads (couch).
d. Bring thread up and through the4th bead. Then repeat ad.
Fig. 6(2) a. Use one needle with double thread to string bead.
b. Use another needle with a single thread
to couch between each bead.
Fig. 6(3) Loop thread through every other bead.
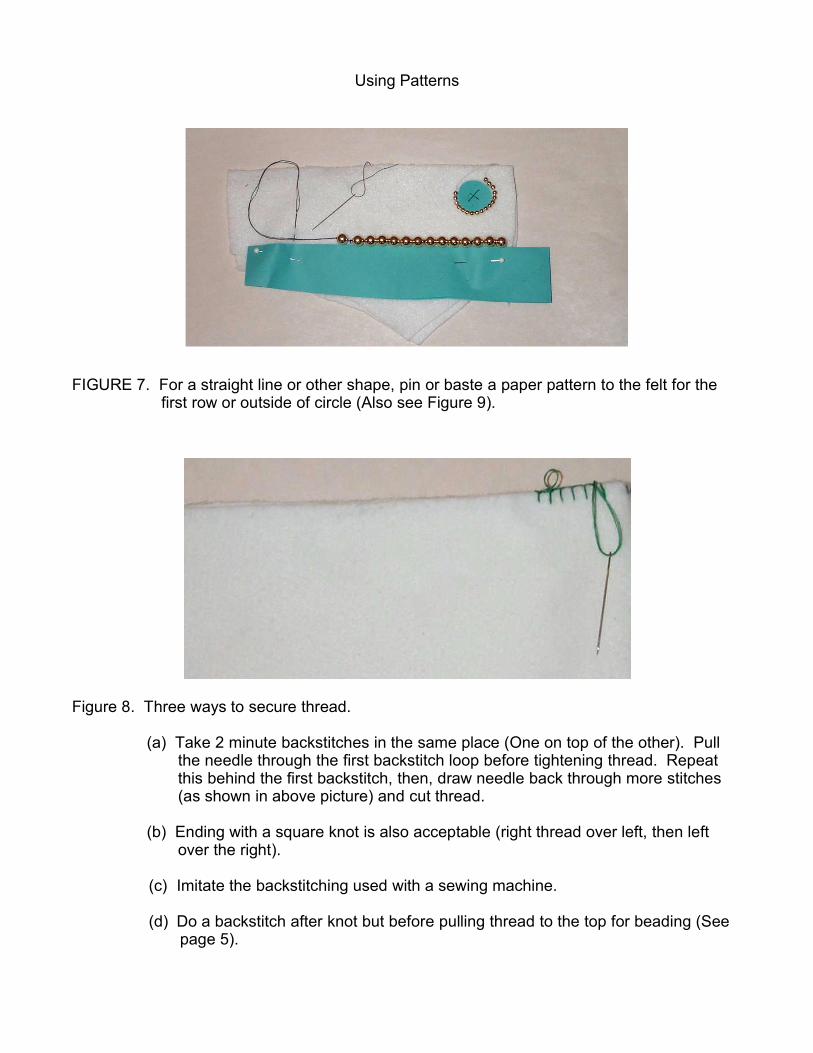
Using Patterns
FIGURE 7. For a straight line or other shape, pin or baste a paper pattern to the felt for the first row or outside of circle (Also see Figure 9).
Figure 8. Three ways to secure thread.
(a) Take 2 minute backstitches in the same place (One on top of the other). Pull the needle through the first backstitch loop before tightening thread. Repeat this behind the first backstitch, then, draw needle back through more stitches (as shown in above picture) and cut thread.
(b) Ending with a square knot is also acceptable (right thread over left, then left over the right).
(c) Imitate the backstitching used with a sewing machine.
(d) Do a backstitch after knot but before pulling thread to the top for beading (See page 5).

FIGURE 9. Beading is usually started at the center of the design. As an alternative to using a pattern (Fig. 7), a 28 gauge wire could be used temporarily for stability while couching.
FIGURE 10. If there is a design in the center part of the Chrismon, it might be easier to first outline that design and then fill it in. The outside border is optional. If any of the blue quilting pencil is visible (Fig.9) after beading the design, mist it with water and hang it indoors to dry. Note: there are beads on only one side of the Chrismon.
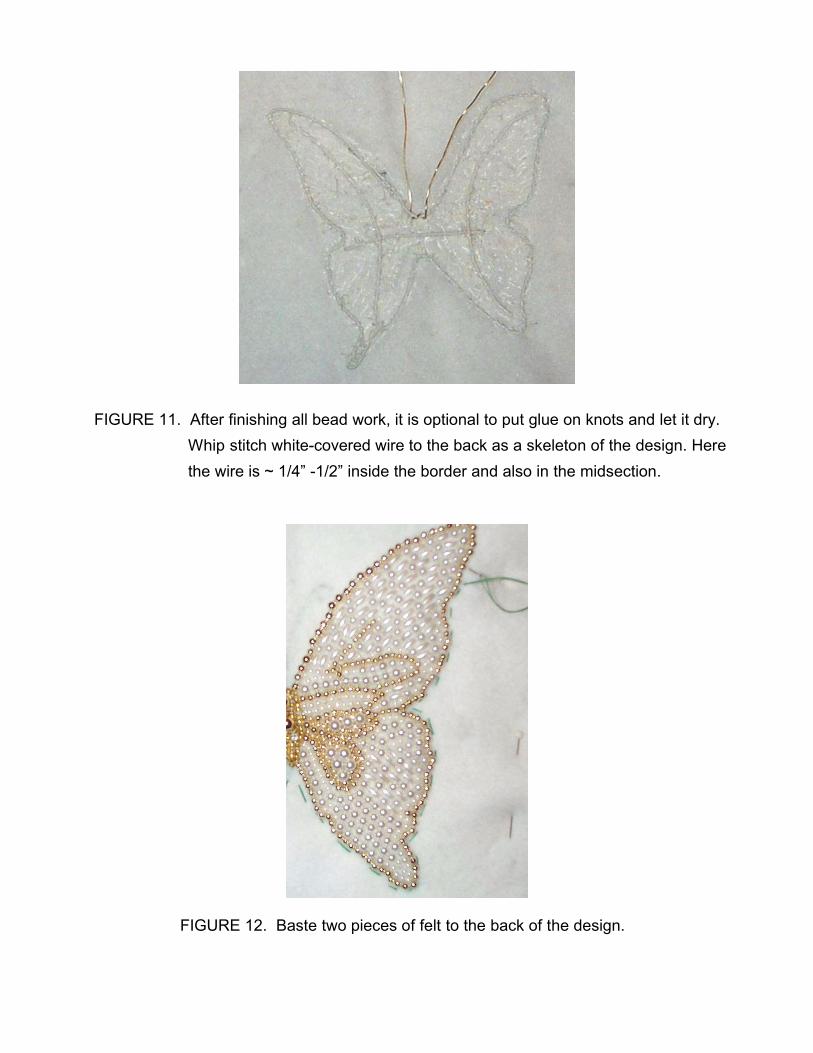
FIGURE 11. After finishing all bead work, it is optional to put glue on knots and let it dry. Whip stitch white-covered wire to the back as a skeleton of the design. Here the wire is ~ 1/4” -1/2” inside the border and also in the midsection.
FIGURE 12. Baste two pieces of felt to the back of the design.

Some Optional Border Stitches
FIGURE 13. One type of buttonhole stitch. Run needle up through the four layers of felt and repeat to form a loop. Take the thread all the way around this loop clockwise and then pull it through the first loop firmly and then repeat.
a b cFIGURE 14. (a) Pull the needle to the front making a loop. Take the needle over the loop and pull it through the loop behind the new stitch.
(b) Pull the needle to the front making a loop. Take the needle back through theloop and pull to tighten.
(c) Make a circular loop counterclockwise with thread. Bring needle up throughthe loop and tighten.
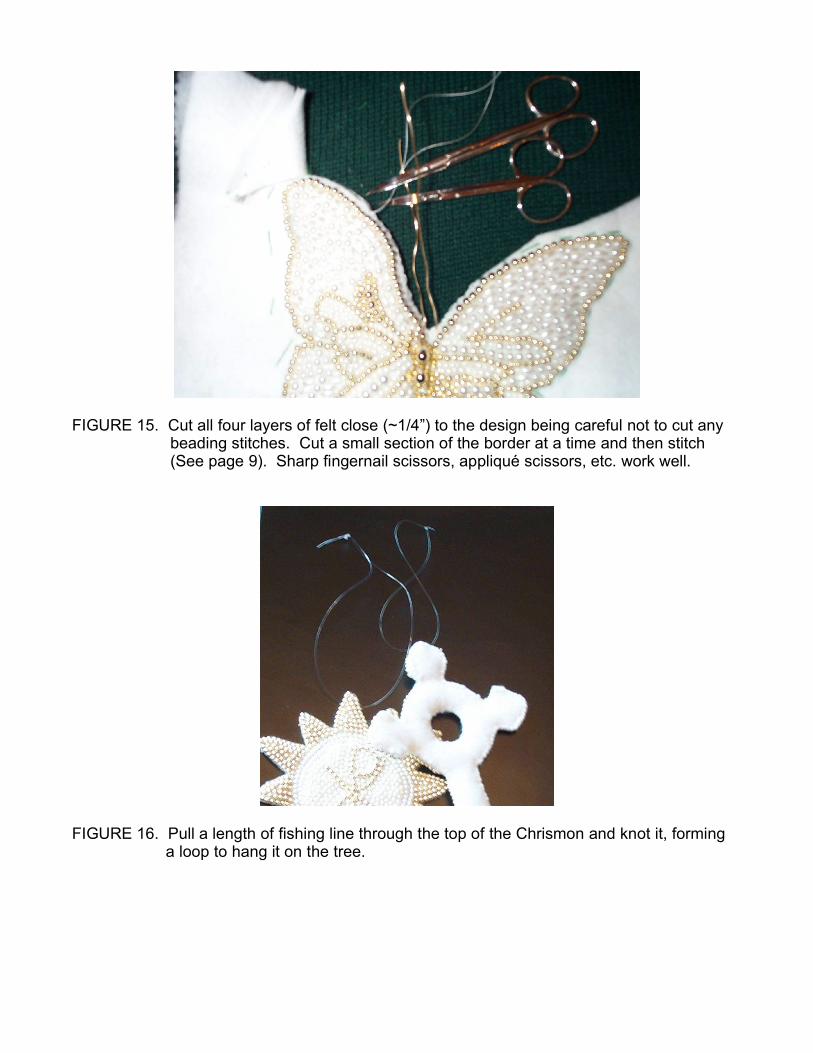
FIGURE 15. Cut all four layers of felt close (~1/4”) to the design being careful not to cut any beading stitches. Cut a small section of the border at a time and then stitch (See page 9). Sharp fingernail scissors, appliqué scissors, etc. work well.
FIGURE 16. Pull a length of fishing line through the top of the Chrismon and knot it, forming a loop to hang it on the tree.
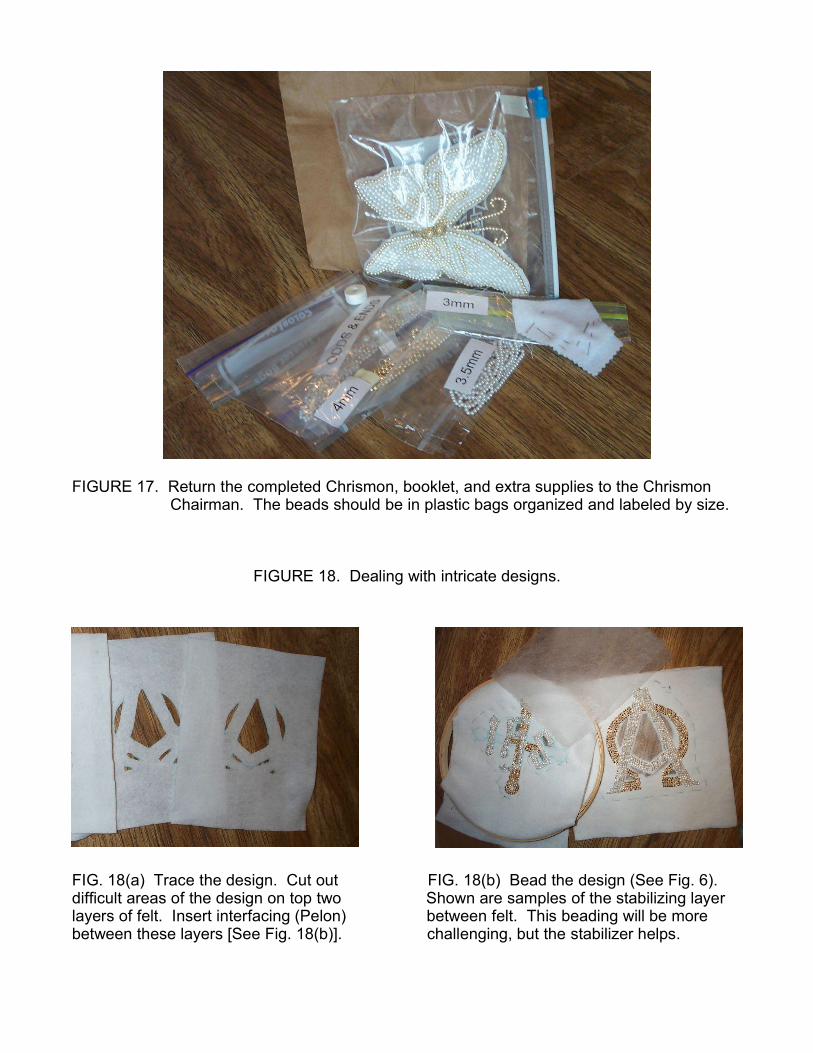
FIGURE 17. Return the completed Chrismon, booklet, and extra supplies to the Chrismon Chairman. The beads should be in plastic bags organized and labeled by size.
FIGURE 18. Dealing with intricate designs.
FIG. 18(a) Trace the design. Cut out FIG. 18(b) Bead the design (See Fig. 6).difficult areas of the design on top two Shown are samples of the stabilizing layerlayers of felt. Insert interfacing (Pelon) between felt. This beading will be more between these layers [See Fig. 18(b)]. challenging, but the stabilizer helps.
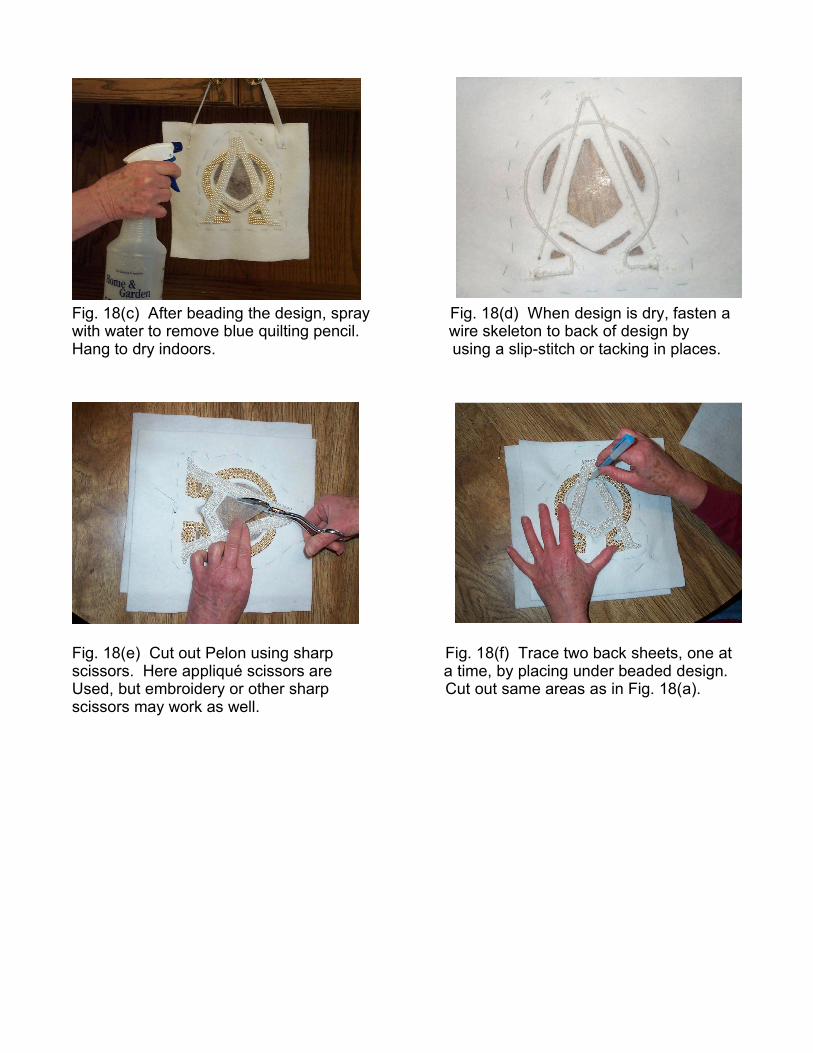
Fig. 18(c) After beading the design, spray Fig. 18(d) When design is dry, fasten awith water to remove blue quilting pencil. wire skeleton to back of design by Hang to dry indoors. using a slip-stitch or tacking in places.
Fig. 18(e) Cut out Pelon using sharp Fig. 18(f) Trace two back sheets, one atscissors. Here appliqué scissors are a time, by placing under beaded design.Used, but embroidery or other sharp Cut out same areas as in Fig. 18(a).scissors may work as well.
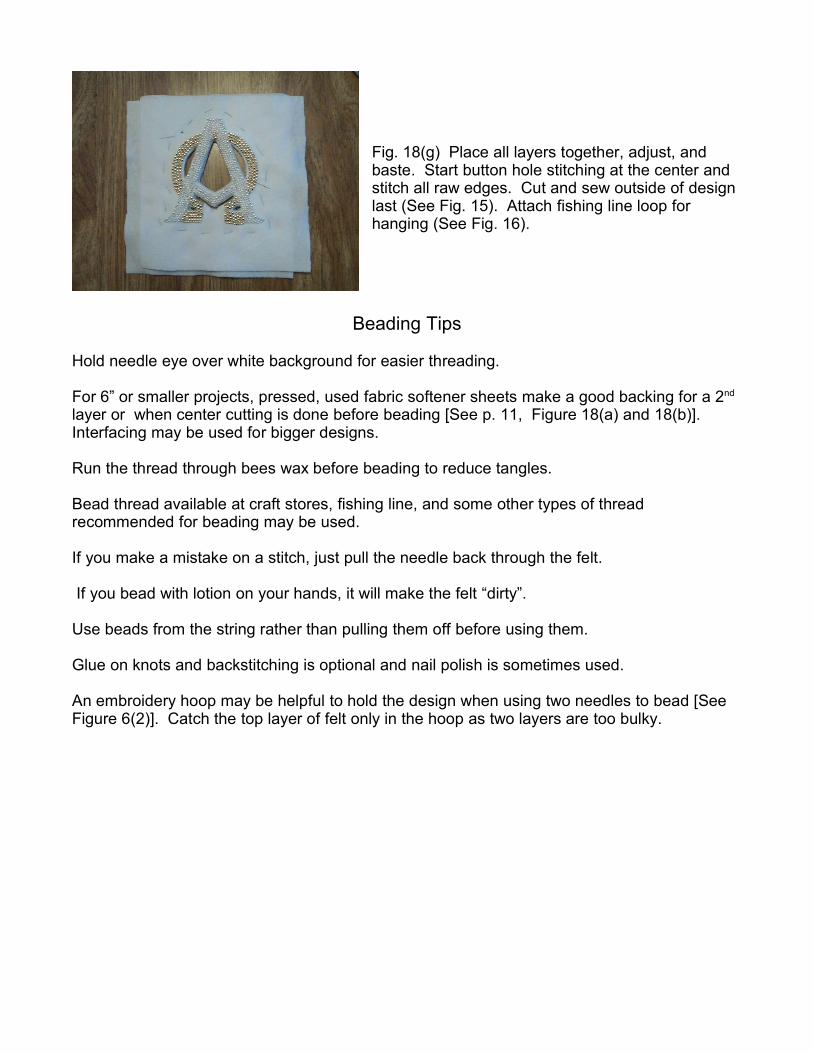
Fig. 18(g) Place all layers together, adjust, andbaste. Start button hole stitching at the center andstitch all raw edges. Cut and sew outside of designlast (See Fig. 15). Attach fishing line loop forhanging (See Fig. 16).
Beading Tips
Hold needle eye over white background for easier threading.
For 6” or smaller projects, pressed, used fabric softener sheets make a good backing for a 2nd
layer or when center cutting is done before beading [See p. 11, Figure 18(a) and 18(b)].Interfacing may be used for bigger designs.
Run the thread through bees wax before beading to reduce tangles.
Bead thread available at craft stores, fishing line, and some other types of threadrecommended for beading may be used.
If you make a mistake on a stitch, just pull the needle back through the felt.
If you bead with lotion on your hands, it will make the felt “dirty”.
Use beads from the string rather than pulling them off before using them.
Glue on knots and backstitching is optional and nail polish is sometimes used.
An embroidery hoop may be helpful to hold the design when using two needles to bead [SeeFigure 6(2)]. Catch the top layer of felt only in the hoop as two layers are too bulky.