Embed Size (px)
Citation preview
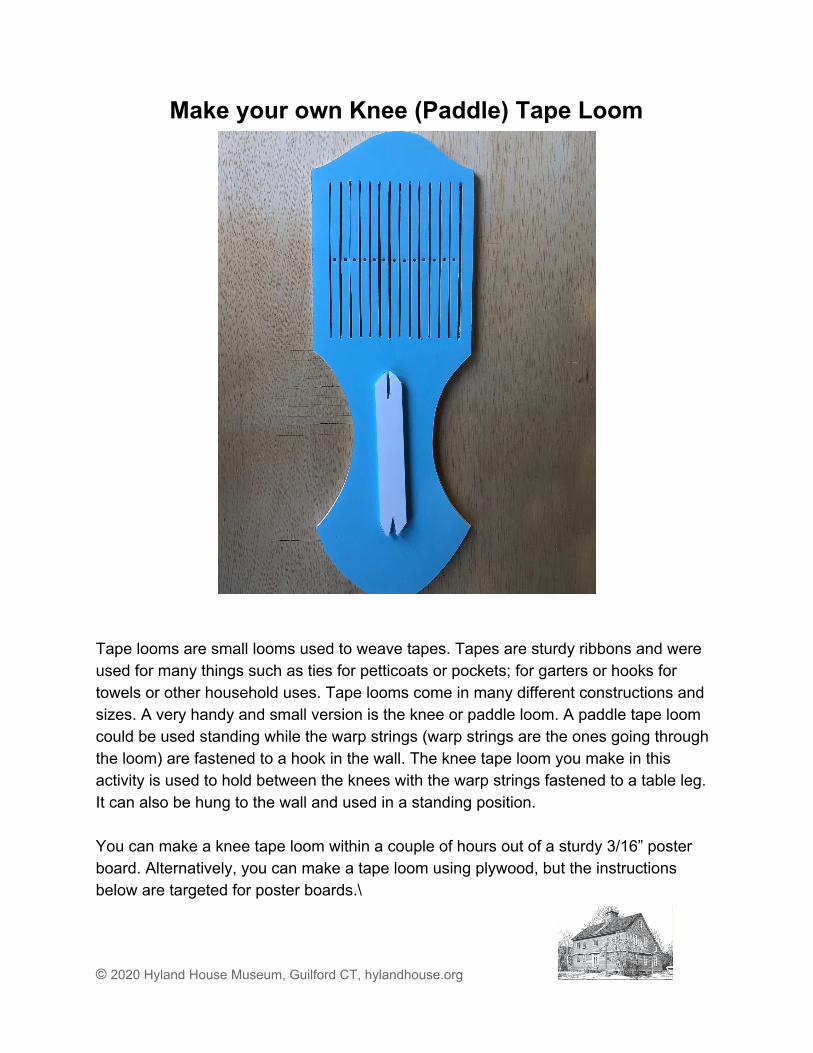
Make your own Knee (Paddle) Tape Loom
Tape looms are small looms used to weave tapes. Tapes are sturdy ribbons and were used for many things such as ties for petticoats or pockets; for garters or hooks for towels or other household uses. Tape looms come in many different constructions and sizes. A very handy and small version is the knee or paddle loom. A paddle tape loom could be used standing while the warp strings (warp strings are the ones going through the loom) are fastened to a hook in the wall. The knee tape loom you make in this activity is used to hold between the knees with the warp strings fastened to a table leg. It can also be hung to the wall and used in a standing position. You can make a knee tape loom within a couple of hours out of a sturdy 3/16” poster board. Alternatively, you can make a tape loom using plywood, but the instructions below are targeted for poster boards.\
© 2020 Hyland House Museum, Guilford CT, hylandhouse.org
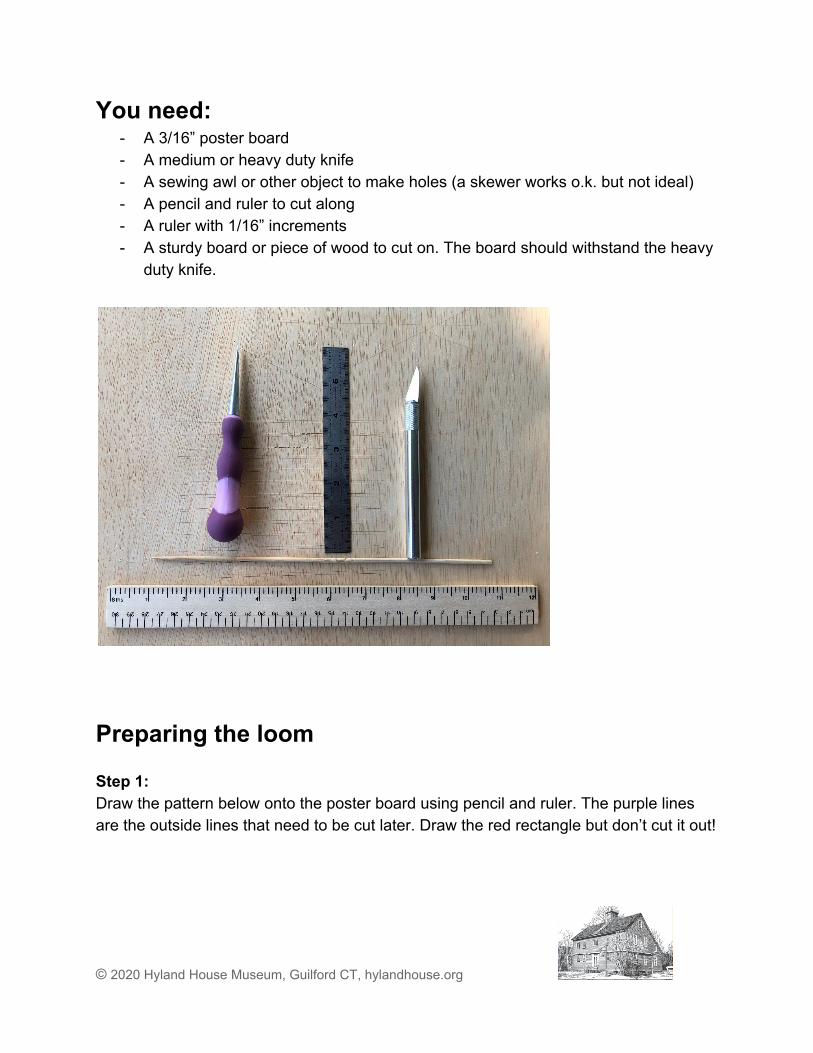
You need: - A 3/16” poster board - A medium or heavy duty knife - A sewing awl or other object to make holes (a skewer works o.k. but not ideal) - A pencil and ruler to cut along - A ruler with 1/16” increments - A sturdy board or piece of wood to cut on. The board should withstand the heavy
duty knife.
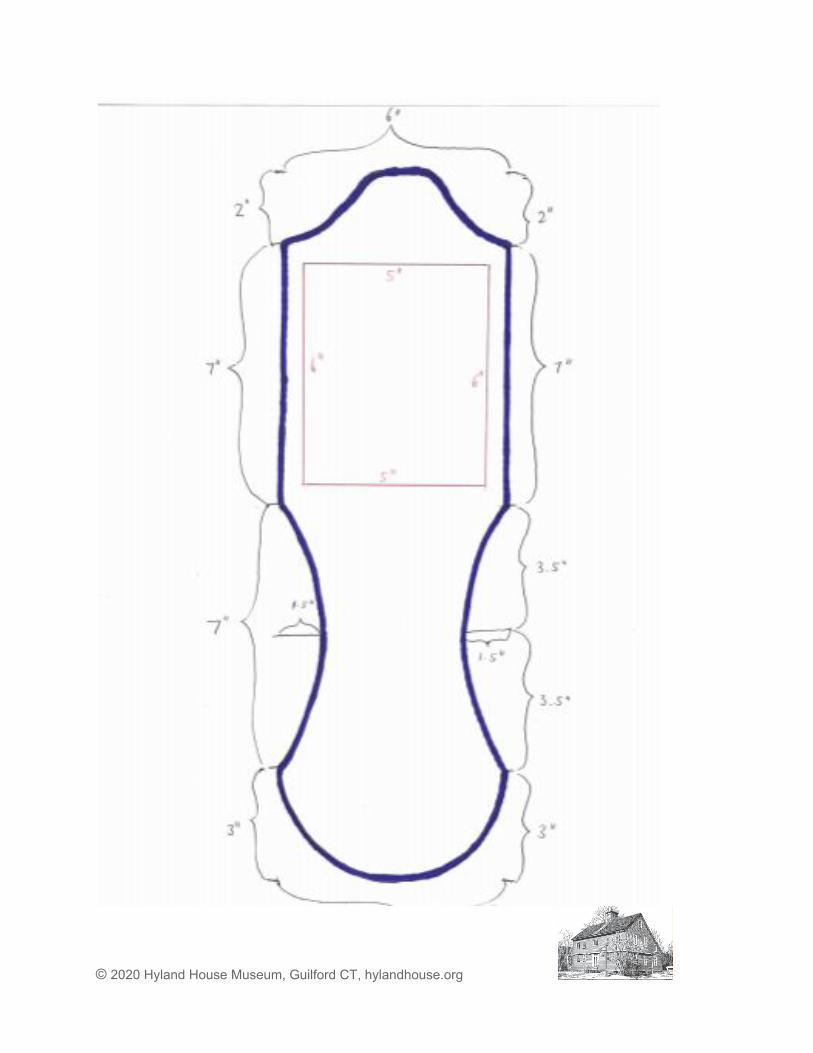
Preparing the loom Step 1: Draw the pattern below onto the poster board using pencil and ruler. The purple lines are the outside lines that need to be cut later. Draw the red rectangle but don’t cut it out!
© 2020 Hyland House Museum, Guilford CT, hylandhouse.org
© 2020 Hyland House Museum, Guilford CT, hylandhouse.org
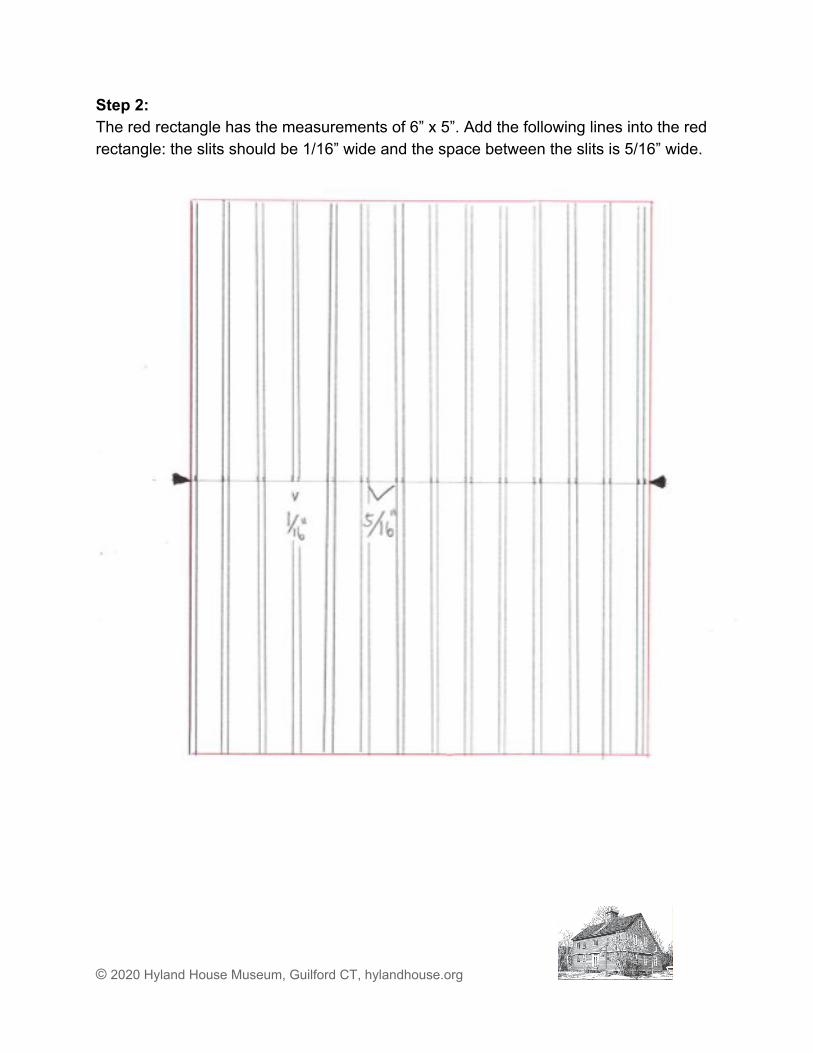
Step 2: The red rectangle has the measurements of 6” x 5”. Add the following lines into the red rectangle: the slits should be 1/16” wide and the space between the slits is 5/16” wide.
© 2020 Hyland House Museum, Guilford CT, hylandhouse.org
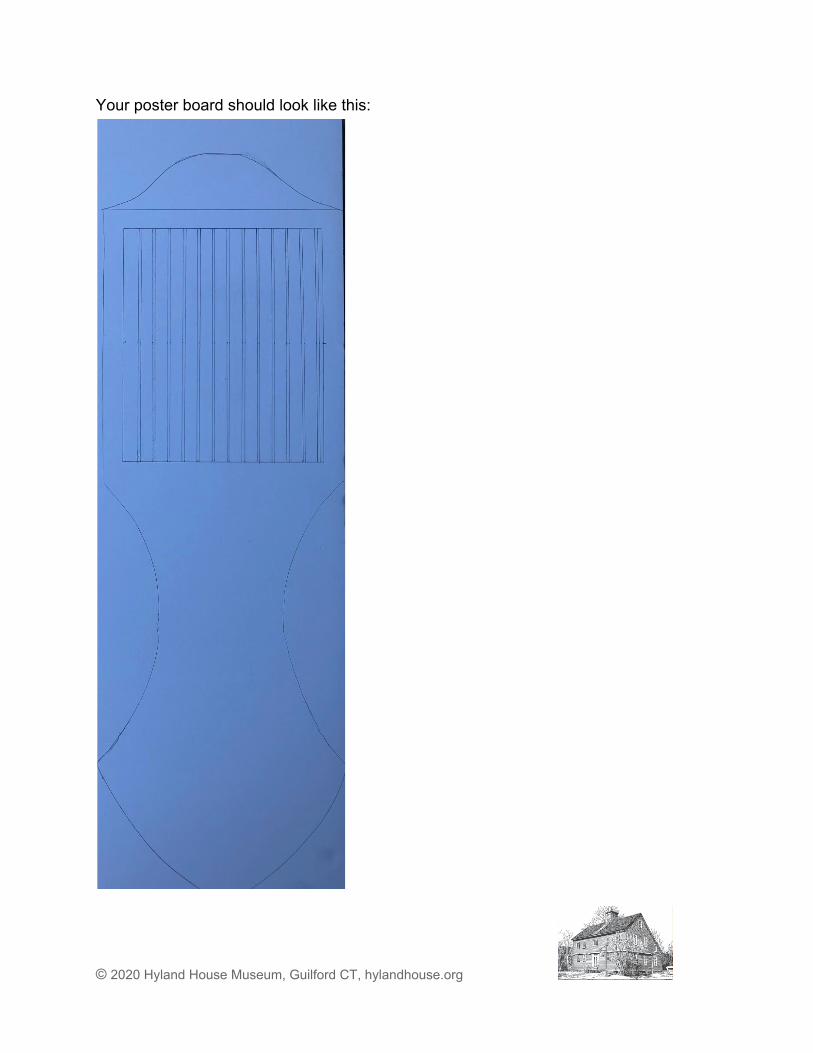
Your poster board should look like this:
© 2020 Hyland House Museum, Guilford CT, hylandhouse.org
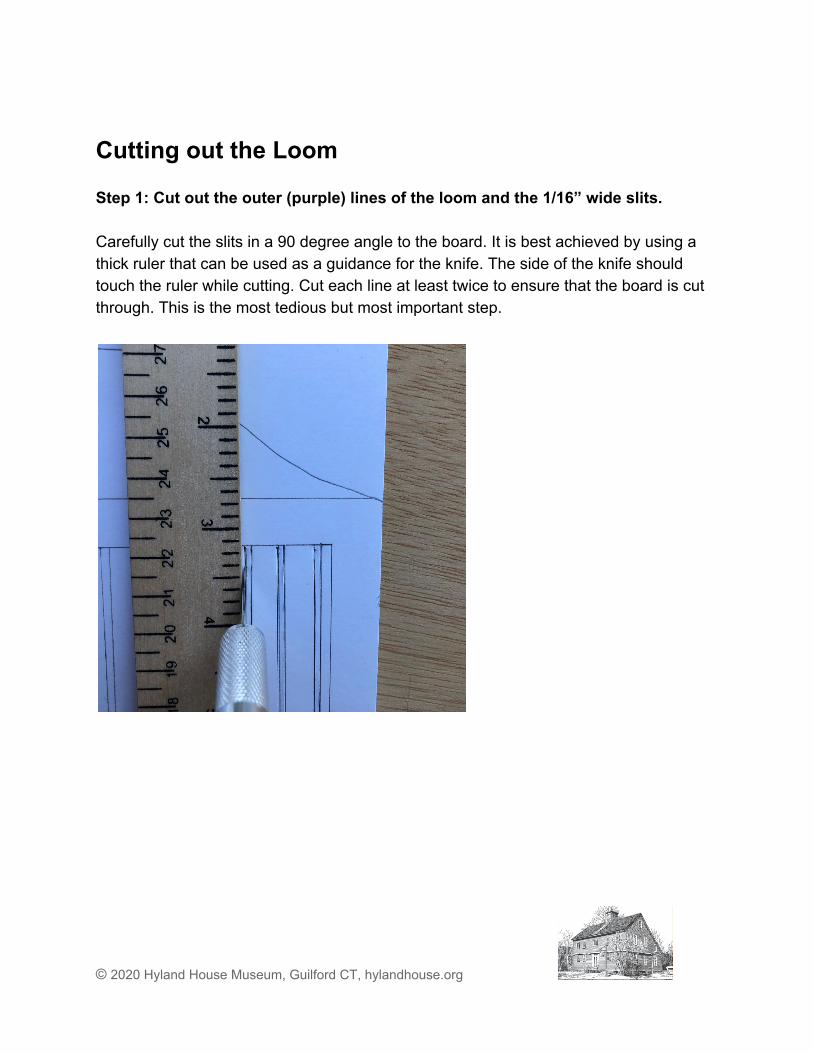
Cutting out the Loom Step 1: Cut out the outer (purple) lines of the loom and the 1/16” wide slits. Carefully cut the slits in a 90 degree angle to the board. It is best achieved by using a thick ruler that can be used as a guidance for the knife. The side of the knife should touch the ruler while cutting. Cut each line at least twice to ensure that the board is cut through. This is the most tedious but most important step.
© 2020 Hyland House Museum, Guilford CT, hylandhouse.org
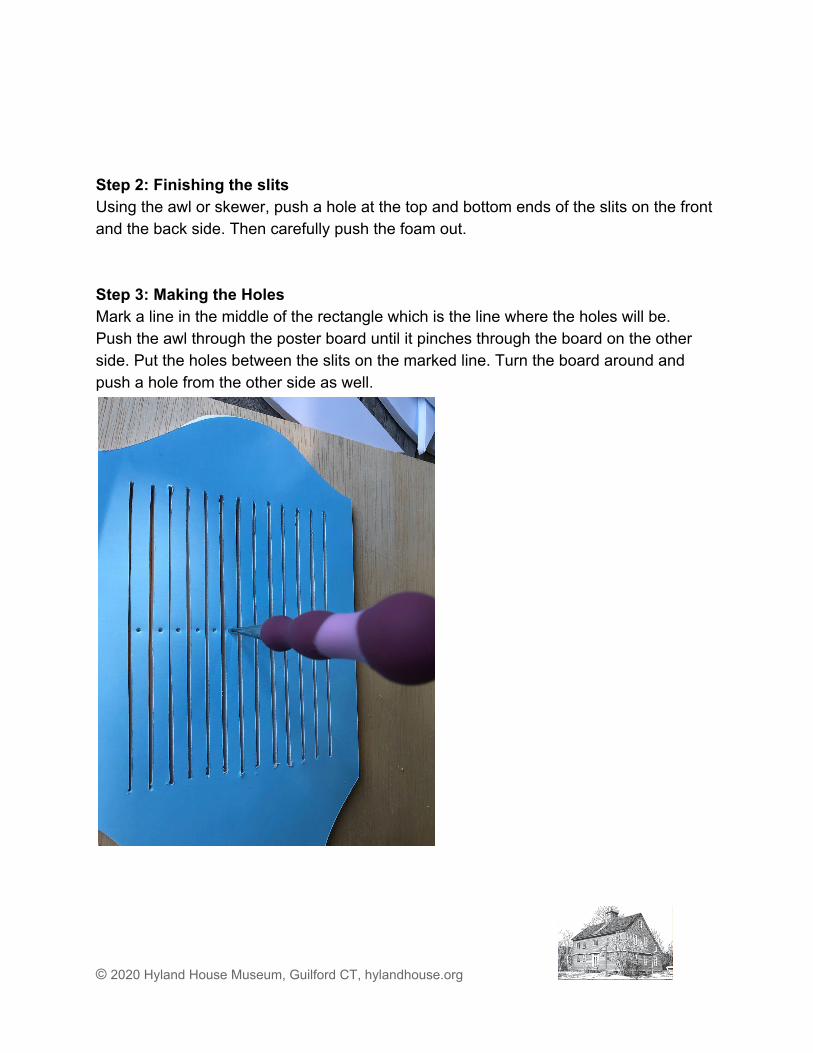
Step 2: Finishing the slits Using the awl or skewer, push a hole at the top and bottom ends of the slits on the front and the back side. Then carefully push the foam out. Step 3: Making the Holes Mark a line in the middle of the rectangle which is the line where the holes will be. Push the awl through the poster board until it pinches through the board on the other side. Put the holes between the slits on the marked line. Turn the board around and push a hole from the other side as well.
© 2020 Hyland House Museum, Guilford CT, hylandhouse.org

Then carefully push the awl through the loom until the hole is about ⅛” wide but not wider.
Step 4: Making the Weaving Shuttle To make the shuttle, draw a pattern on the poster board and cut out. The shuttle in the picture below is about 7” long and 1” wide.
© 2020 Hyland House Museum, Guilford CT, hylandhouse.org
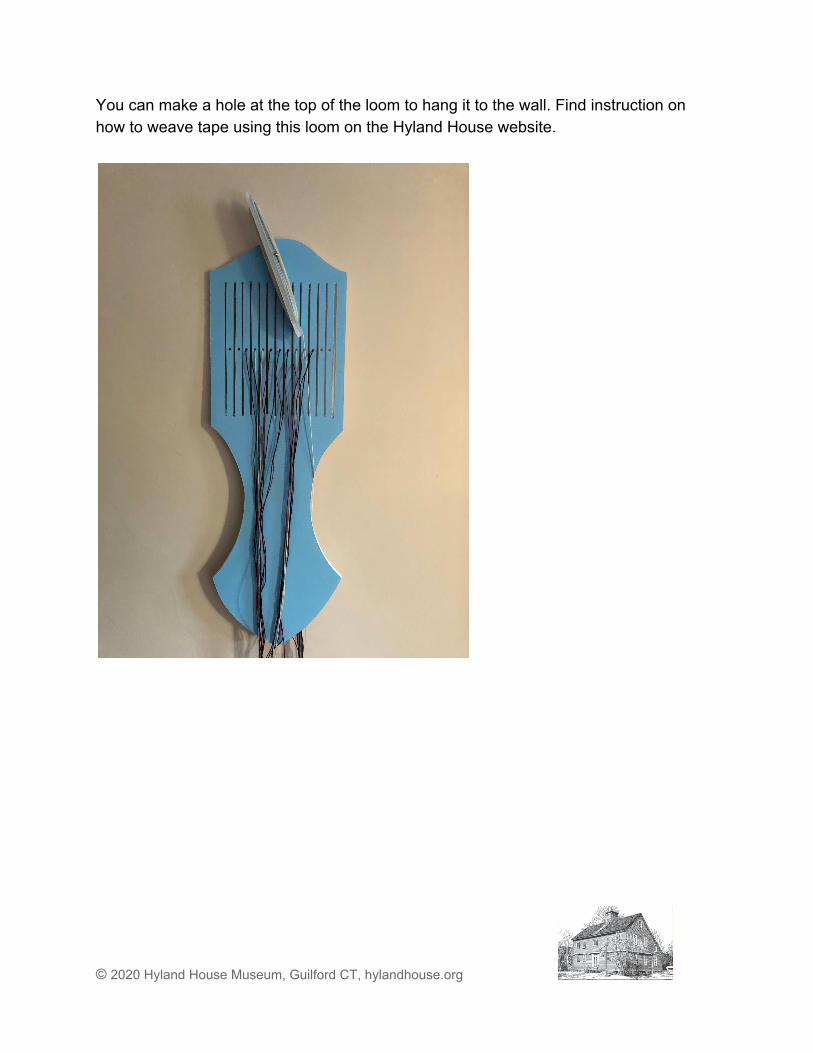
You can make a hole at the top of the loom to hang it to the wall. Find instruction on how to weave tape using this loom on the Hyland House website.
© 2020 Hyland House Museum, Guilford CT, hylandhouse.org