Embed Size (px)
Citation preview
MAKE AN IONISER.A negative ion generator is a device that emits a stream of negative ions into the air.
The result is a cleaner fresher air due to the electrostatic settling of dust and thesupposedly invigorating effect of breathing negative ions which are apparently found in
abundance in the vicinity of waterfalls and mountain tops. In addition an ioniser canreduce airborne odours due to trace quantities of ozone produced at the tip of the
ionisation needles.The principle of ion generation is fiendishly simple. The electrical charge on an object
is greatest at the sharpest point (that's why electrostatic generators favour big curvydomes for charge retention), so if a high negative voltage is applied to a sharp needlethen the charge at the tip is so high that ions are literally thrown off and then repelled
by the negative field on the needle. This results in a physical draught and a slighthissing noise. In a very dark room you will also see a faint purple corona glow on the
needle tips.Most technical wisdom suggests that while negative ions make you feel good, positiveions can cause headaches and nausea. This is why a negative ion generator can improvethe perceived atmosphere in an office that has an unaturally high positive ion balance.
But enough of the quackery... Here's the data.
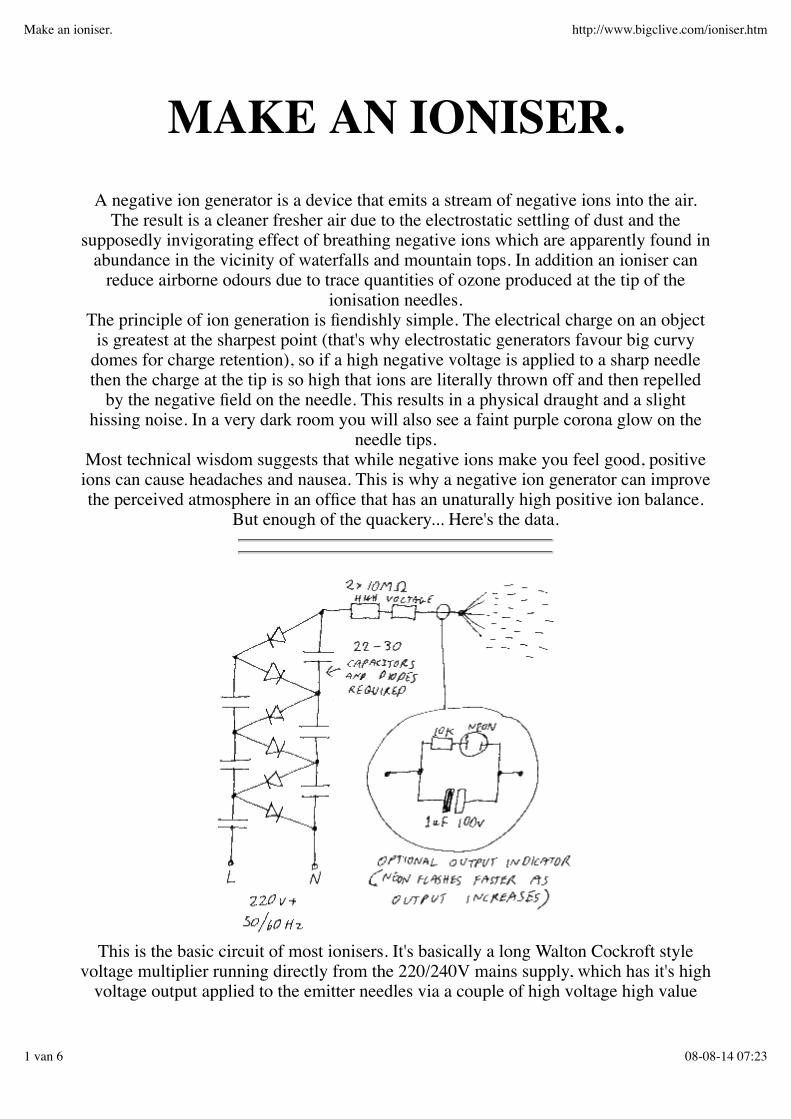
This is the basic circuit of most ionisers. It's basically a long Walton Cockroft stylevoltage multiplier running directly from the 220/240V mains supply, which has it's high
voltage output applied to the emitter needles via a couple of high voltage high value
Make an ioniser. http://www.bigclive.com/ioniser.htm
1 van 6 08-08-14 07:23
resistors (usually 10 Megohm). The resistors are there for safety to limit the current ifsomeone touches the needles.
The multiplier usually consists of 22 to 30 capacitors and diodes (the sketch above hasbeen simplified) and the capacitors are rated for about 630V DC, although most mains
suppression capacitors rated for 275V AC seem to work just fine. The diodes aregenerally IN4007's which are standard 1A diodes rated at 1000V. In most cheap
commercial ionisers the capacitors are rated at 10nF (0.01uF) but in my own designs Itend to use 100n and 220n capacitors for a much greater output.
The optional output indicator is a simple circuit that uses a capacitor, resistor and neonindicator lamp to monitor the amount of current flowing to the emitter needles. It relieson the fact that the potential difference across the circuit charges the capacitor until thestrike threshold of the neon lamp is achieved. The resistor limits the current through theneon lamp which then discharges the capacitor until the voltage is too low to keep the
lamp lit. The speed at which the lamp flashes is thus directly proportional to the currentflow.
The power consumption of an ioniser like this is so low that it can be virtuallyconsidered as being zero.
Remember that capacitors store charge and in this case it is at a high voltage. Thecircuit will hold a charge after being disconnected from the mains supply and can give
you a nip. If you are going to work on it then it's a good idea to remove most of theresidual charge by shorting the emitter needles to the other end of the ioniser with a bit
of wire.
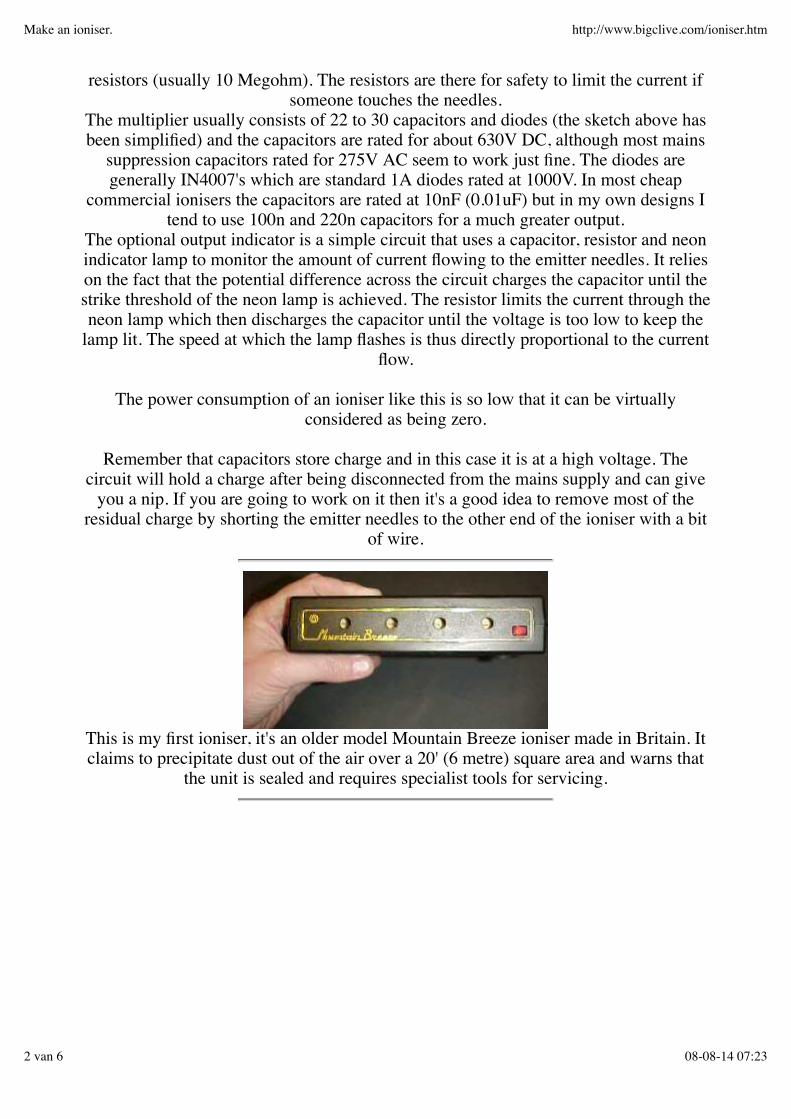
This is my first ioniser, it's an older model Mountain Breeze ioniser made in Britain. Itclaims to precipitate dust out of the air over a 20' (6 metre) square area and warns that
the unit is sealed and requires specialist tools for servicing.
Make an ioniser. http://www.bigclive.com/ioniser.htm
2 van 6 08-08-14 07:23
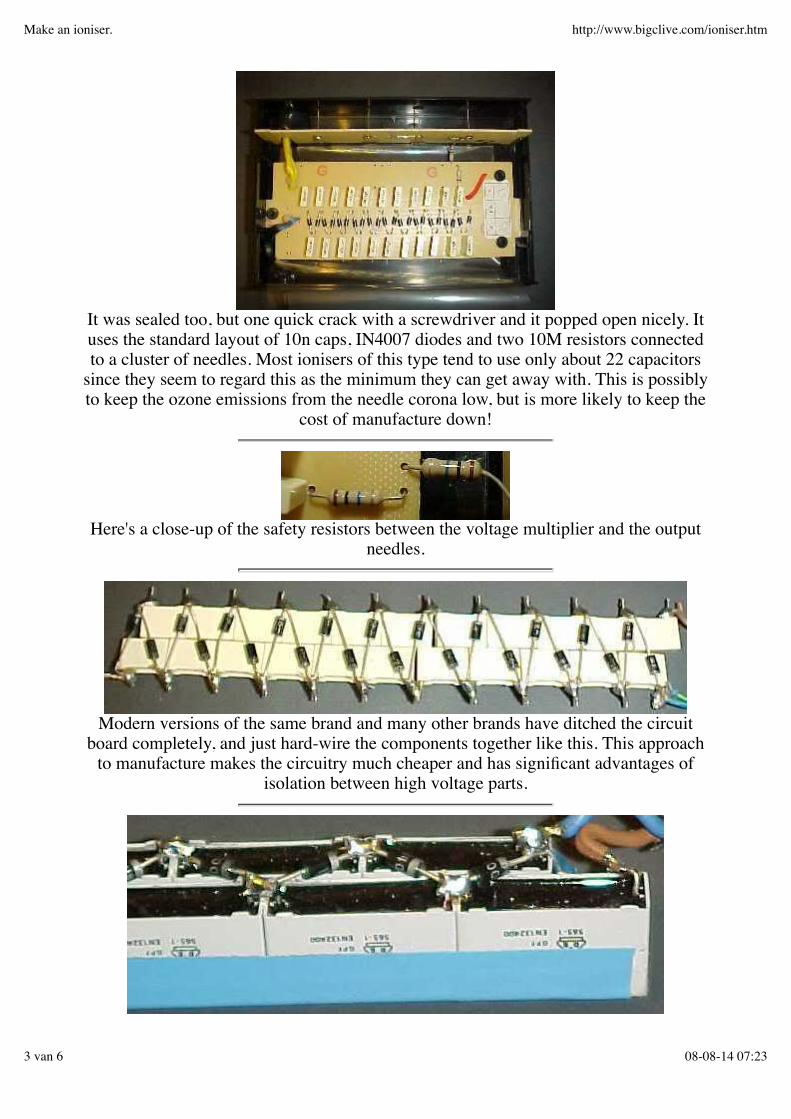
It was sealed too, but one quick crack with a screwdriver and it popped open nicely. Ituses the standard layout of 10n caps, IN4007 diodes and two 10M resistors connectedto a cluster of needles. Most ionisers of this type tend to use only about 22 capacitors
since they seem to regard this as the minimum they can get away with. This is possiblyto keep the ozone emissions from the needle corona low, but is more likely to keep the
cost of manufacture down!
Here's a close-up of the safety resistors between the voltage multiplier and the outputneedles.
Modern versions of the same brand and many other brands have ditched the circuitboard completely, and just hard-wire the components together like this. This approach
to manufacture makes the circuitry much cheaper and has significant advantages ofisolation between high voltage parts.
Make an ioniser. http://www.bigclive.com/ioniser.htm
3 van 6 08-08-14 07:23

This is the mains end of a multiplier that I hard wired together using 30 220ncapacitors. If you attempt to assemble your own multiplier in this manner, then be
careful to tin all the connections with solder before assembling them since solderingfour loose connections together can be quite awkward, even when the capacitors have
been stuck together rigidly.As a timely reminder, the diodes should all point with their marker band towards the
mains end of the multiplier to ensure that the high voltage end is at a negative potential.
This particular voltage multiplier was slid into the casing of a dead fluorescent lightbatton for use as a compact source of HT for an ozone generator.
This on the other hand is a PCB based voltage multiplier built with 30 100n capacitorssome time ago. It was fitted into a piece of drainage piping and used as a powerful
ioniser.
Commercial ionisers have to shield their emitter needles for safety and this can affecttheir output by restricting the airflow in the vicinity. But this home built ioniser doesn't
suffer from this restriction!You can get quite artistic and creative with your emitter designs.
Make an ioniser. http://www.bigclive.com/ioniser.htm
4 van 6 08-08-14 07:23

This rather interesting variant on a normal ioniser has two voltage multipliers. The redone generates the high negative ionisation voltage, while the blue one generates a much
lower positive voltage which is applied to a metal mesh on the base.
The mesh on the base is then covered with disposable paper mats, and the fact that it isat a lower potential than the natural ground means that the negatively charged dust
tends to gather on the paper instead of the surrounding furniture. (theoretically)
A kit ioniser from many moons ago. This neat design packs a lot of ioniser into a verysmall space, but compromises on electrical separation in doing so.
Make an ioniser. http://www.bigclive.com/ioniser.htm
5 van 6 08-08-14 07:23

Click here for more fun things to makeand do.
Make an ioniser. http://www.bigclive.com/ioniser.htm
6 van 6 08-08-14 07:23


![QBE at a glance UK · QBE Insurance Group Limited A– [negative] A– [negative] bbb [negative] QBE Insurance (Europe) Limited A– [negative] a [negative] QBE Re (Europe) Limited](https://img.pdfslide.us/doc/110x75/5fa8e28b58047158406a3b4f/qbe-at-a-glance-uk-qbe-insurance-group-limited-aa-negative-aa-negative-bbb.jpg)


![Disrupting Negative Thoughts PG [Read-Only] Negative Thought… · • Identify the symptoms and causes of negative thoughts • Apply strategies to disrupt negative thoughts •](https://img.pdfslide.us/doc/110x75/5f0277407e708231d4046607/disrupting-negative-thoughts-pg-read-only-negative-thought-a-identify-the.jpg)