Embed Size (px)
Citation preview

Nokia MetroSite EDGE Base Station
Maintenance
DN9913495 © Nokia Corporation Draft 1 (52)Issue 3-0 en Nokia Proprietary and Confidential

Maintenance
The information in this documentation is subject to change without notice and describes onlythe product defined in the introduction of this documentation. This documentation is intendedfor the use of Nokia's customers only for the purposes of the agreement under which thedocumentation is submitted, and no part of it may be reproduced or transmitted in any form ormeans without the prior written permission of Nokia. The documentation has been prepared tobe used by professional and properly trained personnel, and the customer assumes fullresponsibility when using it. Nokia welcomes customer comments as part of the process ofcontinuous development and improvement of the documentation.
The information or statements given in this documentation concerning the suitability, capacity,or performance of the mentioned hardware or software products cannot be considered bindingbut shall be defined in the agreement made between Nokia and the customer. However, Nokiahas made all reasonable efforts to ensure that the instructions contained in the documentationare adequate and free of material errors and omissions. Nokia will, if necessary, explain issueswhich may not be covered by the documentation.
Nokia's liability for any errors in the documentation is limited to the documentary correction oferrors. NOKIA WILL NOT BE RESPONSIBLE IN ANY EVENT FOR ERRORS IN THISDOCUMENTATION OR FOR ANY DAMAGES, INCIDENTAL OR CONSEQUENTIAL(INCLUDING MONETARY LOSSES), that might arise from the use of this documentation orthe information in it.
This documentation and the product it describes are considered protected by copyrightaccording to the applicable laws.
NOKIA logo is a registered trademark of Nokia Corporation.
Other product names mentioned in this documentation may be trademarks of their respectivecompanies, and they are mentioned for identification purposes only.
Copyright © Nokia Corporation 2002. All rights reserved.
2 (52) © Nokia Corporation Draft DN9913495Nokia Proprietary and Confidential Issue 3-0en

Hereby, Nokia Corporation, declares that this product is in compliance with theessential requirements and other relevant provisions of Directive: 1999/5/EC.
The product is marked with the CE marking and Notified Body number according to theDirective 1999/5/EC.
FCC FCC §15.21 - Information to user - This product is used as an intentional radiatedequipment and any changes or modifications on the equipment without any approvalby Nokia could void the user's authority to operate the equipment.
FCC §15.105 - Information to user - This equipment has been tested and found tocomply with the limits for a Class B digital device, pursuant to part 15 of the FCCRules. These limits are designed to provide reasonable protection against harmfulinterference in a residential installation. This equipment generates, uses and canradiate radio frequency energy and, if not installed and used in accordance with theinstructions, may cause harmful interference to radio communications. However, thereis no guarantee that interference will not occur in a particular installation. If thisequipment does cause harmful interference to radio or television reception, which canbe determined by turning the equipment off and on, the user is encouraged to try tocorrect the interference by one or more of the following measures:
• Reorient or relocate the receiving antenna.
• Increase the separation between the equipment and receiver.
• Connect the equipment into an outlet on a circuit different from that to which thereceiver is connected.
• Consult the dealer or an experienced radio/TV technician for help.
0523
DN9913495 © Nokia Corporation Draft 3 (52)Issue 3-0 en Nokia Proprietary and Confidential

Maintenance
4 (52) © Nokia Corporation Draft DN9913495Nokia Proprietary and Confidential Issue 3-0en

Contents
Contents 5
List of tables 7
List of figures 8
1 About this document 11
2 Preparations for maintenance 132.1 Site folder 132.1.1 Fault reporting 132.2 Maintenance equipment 132.2.1 Nokia BTS Manager 142.3 Environmental precautions 142.4 Power supply precautions 142.5 Removing the BTS cover 15
3 Periodic maintenance 173.1 Maintaining the cabinet 173.1.1 Fan unit and air circulation 173.1.2 Cover 173.1.3 Seals 183.1.4 Lock 183.2 Periodic testing of the BTS 18
4 Adjusting the 13 MHz clock 19
5 Troubleshooting 235.1 Testing the BTS 235.2 Troubleshooting checklist 24
6 Replacing units 276.1 ESD protection 276.2 Removing units 286.3 Recycling of units 306.4 Replacing TRXs 306.4.1 TRX slot identification 306.4.2 Replacing a slave TRX 316.4.3 Replacing the master TRX in BTS configurations with two or more
TRXs 336.4.4 Replacing the master TRX in a single TRX BTS 346.5 Replacing the transmission unit 356.6 Replacing the interface unit 386.7 Replacing the power supply unit 396.8 Replacing the cooling fan 406.8.1 Replacing the HVMF cooling fan, version 1 406.8.2 Replacing the HVMF cooling fan, version 2 44
DN9913495 © Nokia Corporation Draft 5 (52)Issue 3-0 en Nokia Proprietary and Confidential

Maintenance
7 LED indicator conditions 477.1 Transceiver unit LED 477.2 Transmission unit LED 487.3 Interface unit LED 487.4 Power supply unit LED 497.5 Fan unit LED 49
Index 51
6 (52) © Nokia Corporation Draft DN9913495Nokia Proprietary and Confidential Issue 3-0en

List of tables
Table 1. Power supply rules during maintenance procedures 15
Table 2. Troubleshooting checklist 24
Table 3. LED conditions for TRX units 47
Table 4. LED conditions for a transmission unit 48
Table 5. LED conditions for an RRI transmission unit’s Flexbus LED. 48
Table 6. LED conditions for an interface unit 49
Table 7. LED conditions of the power supply unit 49
Table 8. LED conditions for the fan unit 50
DN9913495 © Nokia Corporation Draft 7 (52)Issue 3-0 en Nokia Proprietary and Confidential

Maintenance
List of figures
Figure 1. Safety strap on the MetroSite EDGE BTS cover 16
Figure 2. 13 MHz clock adjustment 20
Figure 3. Clock control window - coarse adjustment 21
Figure 4. Fine adjustment of the DAC value 22
Figure 5. Electro-static sensitive device symbol 27
Figure 6. Connecting the antistatic wrist strap. 28
Figure 7. Removing the units 29
Figure 8. TRX slot numbering 31
Figure 9. Example Object Properties window in Nokia BTS Manager (can be usedfor blocking a TRX) 32
Figure 10. Displacing the sealing strip and releasing the cables 41
Figure 11. HVMF cooling fan assembly and mounting screws 42
Figure 12. HVMF fan assembly, version 1 43
Figure 13. HVMF fan assembly, version 2 45
8 (52) © Nokia Corporation Draft DN9913495Nokia Proprietary and Confidential Issue 3-0en

Summary of changes
Version 1, 12th November 1999.
Version 2, 22nd June 2000:
• Added GSM to title and body text
• Added high capacity fan assembly (Figure 5)
• Added 13 MHz clock adjustment procedure
Version 3, 30th June 2001:
• Updated for EDGE
• Added power supply rules, new fan controller module, BTS chaining
• Improved 13 MHz clock adjustment illustration
• Harmonised style
Version 3, July 2002:
• Note added to 13 MHz clock adjustment chapter that a high stabilityfrequency counter is required.
Version 3, October 2002:
• BTS Manager 3.0 commands added for replacing transmission unit.
DN9913495 © Nokia Corporation Draft 9 (52)Issue 3-0 en Nokia Proprietary and Confidential

Maintenance
10 (52) © Nokia Corporation Draft DN9913495Nokia Proprietary and Confidential Issue 3-0en

About this document
1 About this document
This document gives instructions on the maintenance of the Nokia MetroSiteTM
EDGE Base Station (BTS). Read carefully Nokia MetroSite EDGE Base Station:Warnings and Cautions before starting the maintenance work.
This document covers the following:
• preparations for maintenance
• periodic maintenance measures
• 13 MHz clock adjustment
• troubleshooting
• replacing units
• LED conditions of the MetroSite EDGE BTS units
Refer to the specific software release documentation for software updatinginstructions.
DN9913495 © Nokia Corporation Draft 11 (52)Issue 3-0 en Nokia Proprietary and Confidential

Maintenance
12 (52) © Nokia Corporation Draft DN9913495Nokia Proprietary and Confidential Issue 3-0en

Preparations for maintenance
Note
2 Preparations for maintenanceThis chapter describes the issues that must be considered in the maintenance ofthe Nokia MetroSite EDGE BTS.
2.1 Site folder
A site folder contains site-specific information required on the site. The sitefolders include installation, commissioning, and integration check lists. The exactcontents of the site folders are defined by the customer.
It is the responsibility of the customer to maintain and archive site-specificdocuments.
2.1.1 Fault reporting
Where possible, correct all damage, failures, and faults and report them to Nokiausing the Failure Report Form provided by Nokia Customer Services.
You can save the alarm information to a log file on your PC with Nokia BTSManager.
2.2 Maintenance equipment
Check which tools are needed for the type of maintenance being done. Forinformation on the tools required, refer to Nokia MetroSite EDGE Base Station:Requirements for Installation and Operation.
Always take the BTS key, antistatic wrist strap, and Nokia BTS Manager laptopPC and LMP cable with you for BTS maintenance operations.
DN9913495 © Nokia Corporation Draft 13 (52)Issue 3-0 en Nokia Proprietary and Confidential

Maintenance
WARNING
2.2.1 Nokia BTS Manager
When replacing or adding units, Nokia BTS Manager software is used for localmanagement of the BTS. Instructions for running specific maintenanceoperations with Nokia BTS Manager are included in the relevant sections of thisdocument.
For more general information on using Nokia BTS Manager, refer to NokiaMetroSite EDGE Base Station: Commissioning.
2.3 Environmental precautions
When the cover of the Nokia MetroSite EDGE Base Station is removed to allowfor maintenance work, the following conditions must be considered:
1. Rain or snow must not be allowed to fall on the internal surfaces of theequipment.
2. The cover must not be removed during conditions where dust can be blowninto the cabinet.
2.4 Power supply precautions
Potentially lethal voltages!
The BTS power must be switched OFF at the main disconnect device orcircuit breaker before starting maintenance work which involves the risk ofelectric shocks.
When working inside the BTS cabinet, prevent injury to personnel or damage tothe BTS equipment by following the requirements presented in Table .
14 (52) © Nokia Corporation Draft DN9913495Nokia Proprietary and Confidential Issue 3-0en

Preparations for maintenance
Note
2.5 Removing the BTS cover
Before removing the cover for internal maintenance of the BTS, refer to thepower supply precautions and environmental restrictions presented in thisdocument and to the safety precautions presented in Nokia MetroSite EDGE BaseStation: Warnings and Cautions.
Removing the cover issues an alarm to the BSC. Make sure that the BSC/NMSpersonnel is notified before removing the cover.
Removing the BTS cover
1. Unlock the cabinet lock at the bottom of the BTS.
Table 1. Power supply rules during maintenance procedures
Procedure Power supply rule
Replacing a power supply unit or PSUcable
Power OFF at main disconnect device
PSU switch to Stand-by
Replacing a grounding connection Power OFF at main disconnect device
PSU switch to Stand-by
Disconnecting or connecting antenna ordiversity cables on a TRX
PSU can be switched to ON but TRXmust be blocked
Replacing a TRX PSU can be switched to ON but TRXmust be blocked
Disconnecting or connectingtransmission cables
PSU can be switched to ON but TRXmust be blocked
Replacing a transmission unit PSU switch to Stand-by
Connecting or disconnecting cables tothe interface unit (VIFA)
PSU switch to Stand-by is advised
Replacing an interface unit PSU switch to Stand-by
Replacing a fan unit Power OFF at main disconnect device
PSU switch to Stand-by
DN9913495 © Nokia Corporation Draft 15 (52)Issue 3-0 en Nokia Proprietary and Confidential

Maintenance
2. Remove the cover by sliding it upwards to disengage the hooks at the sideof the cover from the locking guides on the BTS chassis.
3. When the cover is free, pull it away from the cabinet and hang it on thehook at the top left side of the chassis.
You can also remove the cover completely to place it on the floor. Removethe safety strap before pulling the cover away (see Figure 1).
Figure 1. Safety strap on the MetroSite EDGE BTS cover
Fixing pointfor safety strapunder thecover top
16 (52) © Nokia Corporation Draft DN9913495Nokia Proprietary and Confidential Issue 3-0en

Periodic maintenance
Caution
Caution
3 Periodic maintenanceThis chapter describes the periodic maintenance of the MetroSite EDGE BaseStation.
3.1 Maintaining the cabinet
This section describes the cabinet maintenance measures.
3.1.1 Fan unit and air circulation
The fan unit must be cleaned of leaves and debris whenever necessary. Tomaintain proper circulation of air through the cabinet, air inlets and outlets mustnot be obstructed.
3.1.2 Cover
Clean the BTS cover of stains and dust whenever necessary. Wipe the surface ofthe cover with a piece of cloth moistened with water and a washing agent.
Do not use any washing agents that contain alkalis, esters, ketones, or aromatic,chlorinated, or fluorinated hydrocarbons, since these may damage the cover.Washing agents containing these chemicals can only be used if approved by themanufacturer for cleaning polycarbonate objects.
Do not spill any water or chemicals inside the cover.
DN9913495 © Nokia Corporation Draft 17 (52)Issue 3-0 en Nokia Proprietary and Confidential

Maintenance
3.1.3 Seals
Wipe the BTS seals (seal on the lower edge of the BTS, under the cover)whenever they are dirty. The cleaning interval depends on the environment.
Check the visible seals during every site visit. If the seals are dirty, wipe themclean with a piece of cloth. Replace worn or broken seals.
3.1.4 Lock
Lubricate the lock during site visits with lubricating oil. If the cabinet is used intemperatures below 0ºC (32ºF), lubricate the lock with lubricating anti-freeze oilor use both anti-freeze oil and lubricating oil.
3.2 Periodic testing of the BTS
The condition of the hardware in the MetroSite EDGE BTS can be testedperiodically by running the Abis loop test and the TRX test remotely from theBSC/NMS. A TRX test can also be run locally with Nokia BTS Manager.
18 (52) © Nokia Corporation Draft DN9913495Nokia Proprietary and Confidential Issue 3-0en

Adjusting the 13 MHz clock
Note
4 Adjusting the 13 MHz clockThe 13 MHz clock is adjusted using the Nokia BTS Manager PC and a frequencycounter.
The 13 MHz clock should only need adjusting after a new installation or when theinterface unit (VIFA) is replaced.
Before commencing the adjustment procedure, switch ON the frequency counterand allow for a stabilising time of about 15 minutes, or as recommended by theinstrument’s manufacturer.
Use only a high stability frequency counter for this procedure.
Adjusting the 13 MHz clock
1. Remove the rubber dust shield from the side of the interface unit.
2. Connect the frequency counter to the X7 connector on the interface unit(first socket from the front). See Figure 2.
3. Connect the Nokia BTS Manager laptop PC to the LMP port of theinterface unit. See Figure 2.
DN9913495 © Nokia Corporation Draft 19 (52)Issue 3-0 en Nokia Proprietary and Confidential

Maintenance
Figure 2. 13 MHz clock adjustment
4. Open Nokia BTS Manager on your laptop PC.
5. Open the calibration menu by selecting OBJECTS on the BTS Managermain menu.
6. Select CLOCK CONTROL from the drop-down menu.
7. In the Clock Control window, enter a DAC (digital-to-analogue converter)value which will tune the clock to 13 MHz (±1 Hz).
VIFA Unit
Frequency counter
Laptop fittedwith Nokia BTSManager
X7 LMP
20 (52) © Nokia Corporation Draft DN9913495Nokia Proprietary and Confidential Issue 3-0en

Adjusting the 13 MHz clock
Note
Change the DAC value with the slider or by typing the DAC value directlyin the box (see Figure 3).
To increase the frequency, increase the DAC value. The range of DAC values isfrom 0 to 4095, providing an adjustment of ±25 Hz.
Figure 3. Clock control window - coarse adjustment
Fine adjustment of the DAC value slider is achieved by clicking the ‘UseFine Scale’ check box in the Clock Control window (see Figure 4).
DN9913495 © Nokia Corporation Draft 21 (52)Issue 3-0 en Nokia Proprietary and Confidential

Maintenance
Figure 4. Fine adjustment of the DAC value
8. Save the DAC value by clicking the SAVE CURRENT PERMANENTLYbutton in the Clock Control window. Click the CLOSE button or pressEnter on your keyboard.
Saving the DAC value permanently will ensure that it remains in the clockmemory after reset.
9. When asked if you want to continue, select YES in the dialogue box.
22 (52) © Nokia Corporation Draft DN9913495Nokia Proprietary and Confidential Issue 3-0en

Troubleshooting
Note
Note
5 TroubleshootingThis chapter gives advice on how to identify and rectify possible faults in theoperation of the Nokia MetroSite EDGE Base Station.
Troubleshooting instructions related to BTS commissioning are given in NokiaMetroSite EDGE Base Station: Commissioning.
Detailed descriptions of BTS alarms are presented in Nokia MetroSite EDGEBase Station: Alarm Descriptions. Descriptions of the LED unit status indicatorsare presented in Chapter 7 of this document.
Whenever problems occur in the operation of the BTS, connect the Nokia BTSManager PC to the interface unit. The LED conditions and the alarm windowusually indicate where and what the problem is. To obtain more information onthe BTS’s status, it is also advisable to be in contact with the BSC by mobilephone (MS).
5.1 Testing the BTS
If there is any reason to assume that the quality of calls in a cell is degraded, orthat the number of calls in a cell is reduced, the Abis loop test and the TRX testcan be run remotely from the BSC/NMS. A TRX test can also be run locally withNokia BTS Manager.
Further troubleshooting tests can also be done locally at the BTS. See theTroubleshooting checklist in Section 5.2 of this document and the LED indicatorconditions reference information in Chapter 7 of this document.
DN9913495 © Nokia Corporation Draft 23 (52)Issue 3-0 en Nokia Proprietary and Confidential

Maintenance
5.2 Troubleshooting checklist
Table 2. Troubleshooting checklist
Symptom Possible fault Action
BTS is powered ON butthe BTS Managerconnection cannot beestablished.
1. Master TRX broken. 1. Replace the masterTRX with one of the slaveTRXs and insert a newTRX into the slave TRX’sslot. Refer to Section6.4.3.
2. Interface unit broken. 2. Replace the interfaceunit.
3. Wrong BTS Managerport setting (COM 1, COM2).
3. Correct the COM portsettings.
4. LMP cable broken ornot properly connected.
4. Check the connectionbefore replacing the cable.
No power to the BTS. 1. Fault in the site mainspower supply.
1. Check the site’s mainspower source and fuses.Replace if necessary.
2. Broken power cable. 2. Replace the cable.
3. Power supply unitbroken.
3. Replace the powersupply unit.
4. Short circuit in one ofthe BTS units.
4. Pull the units out one byone until the power comesback on. Start from theTRXs and proceed to thetransmission unit, fan unitand finally to the interfaceunit. Return the units oneby one and replace thefaulty unit(s).
5. Power supply unitswitch in stand-byposition.
5. Turn the PSU’s switch tothe ON position.
6. Cold start active. 6. Wait until the units havewarmed up to theoperational temperaturerange and the powersupply unit LED turnsgreen.
24 (52) © Nokia Corporation Draft DN9913495Nokia Proprietary and Confidential Issue 3-0en

Troubleshooting
No transmissionconnection to the BSC(yellow or red LED ontransmission unit).
1. Abis cable notconnected or connectedincorrectly.
1. Check that the cable isconnected on thetransmission unit and atthe BSC. Check that theRX and TX cables areconnected to the correctconnectors.
2. Abis cable broken. 2. Replace the cable.
3. Line interface broken. 3. Connect a jumper cablefrom the TX connector ofeach transmissioninterface to its RXconnector. If the greenLED is lit the line interfaceis OK. Otherwise, changethe transmission unit.
4. Transmission unitbroken
4. Replace thetransmission unit.
Transmission connectionworks but there is a yellowLED lit on thetransmission unit.
No real time connectionfrom the network to thetransmission unit.
Establish the BSCconnection.
The device status reportin the BTS Managerindicates that the BCCHTRX and a slave TRX arein the ‘Supervisory’ state,but the yellow LED blinkson both TRXs.
Objects are locked fromthe BSC/NMS.
Request the state from theBSC/NMS. Request anunlock from the BSC/NMSif necessary.
Table 2. Troubleshooting checklist (Continued)
Symptom Possible fault Action
DN9913495 © Nokia Corporation Draft 25 (52)Issue 3-0 en Nokia Proprietary and Confidential
Maintenance
26 (52) © Nokia Corporation Draft DN9913495Nokia Proprietary and Confidential Issue 3-0en

Replacing units
Caution
Caution
6 Replacing unitsThis chapter describes how to replace plug-in units in the Nokia MetroSite EDGEBase Station.
BSC and/or NMS personnel must be notified before starting to replace or addunits to the Nokia MetroSite EDGE Base Station.
6.1 ESD protection
Some units in the MetroSite BTS contain electro-static sensitive devices. TheBTS is labelled with an electro-static sensitive device symbol as shown in Figure5.
Always use an anti-static wrist strap connected to the cabinet ESD stud, wheneverhandling electro-static sensitive units. The wrist strap and connection stud isshown in Figure 6.
Figure 5. Electro-static sensitive device symbol
DN9913495 © Nokia Corporation Draft 27 (52)Issue 3-0 en Nokia Proprietary and Confidential

Maintenance
Caution
Figure 6. Connecting the antistatic wrist strap.
6.2 Removing units
Figure 7 shows how the units are pulled out from the unit slots. Read the detailedstep instructions for each unit before pulling the units out.
If you are replacing BTS units, keep the units protected in their delivery packagesuntil they are needed. After installation, keep some of the packaging material forpacking the removed units when sending them for service. Recycle any remainingpackaging material.
Handle the units with care. Do not knock the units or place them with theirconnectors facing the ground. Prevent dirt, water, or snow from entering theconnectors.
ESD stud
to ESD studWrist strap
28 (52) © Nokia Corporation Draft DN9913495Nokia Proprietary and Confidential Issue 3-0en

Replacing units
Note
Figure 7. Removing the units
Examine the retaining screws when replacing units. If there are any traces ofaluminium burrs on the thread, replace the screw.
Spare counterparts for unit retaining screws can be found attached to theuppermost TRX guide beam on the top of the BTS (see Figure 7).
Power supply unit
Interface unit
Transmission unit
Transceiver units
Spare counterpartsfor unit retaining screws
DN9913495 © Nokia Corporation Draft 29 (52)Issue 3-0 en Nokia Proprietary and Confidential

Maintenance
Note
The shield unit fixing screws may only be tightened to 1.0 Nm (0.74 lb ft). Use atorque driver with a T10 Torx bit to tighten them.
6.3 Recycling of units
In case you need to dispose of the units or the whole BTS, contact NokiaProfessional Services for information on recycling. An environmental datapackage, including disassembly instructions and a material balance document isalso available via Nokia Professional Services.
6.4 Replacing TRXs
This section provides instructions on how to replace faulty TRXs. There are threedifferent scenarios for replacing TRXs, as follows:
• replacing a slave TRX
• replacing the master TRX
• replacing the master TRX in a single TRX BTS
6.4.1 TRX slot identification
The TRX in slot 1 is the master TRX of the Nokia MetroSite EDGE Base Station.Figure 8 shows the numbering order of the TRX slots.
30 (52) © Nokia Corporation Draft DN9913495Nokia Proprietary and Confidential Issue 3-0en

Replacing units
Caution
Figure 8. TRX slot numbering
6.4.2 Replacing a slave TRX
Make sure the TRX that you are replacing is a slave TRX (slots 2, 3, or 4).
Replacing a slave TRX
1. Connect your Nokia BTS Manager PC to the LMP connector on theinterface unit.
2. Block the TRX using Nokia BTS Manager (if the sector is not alreadylocked from the BSC). In the Supervision - Equipment View window, rightclick on the TRX image and select the BLOCK button in the ObjectProperties dialogue window (see Figure 9).
TRX3
TRX4
TRX1
TRX2
DN9913495 © Nokia Corporation Draft 31 (52)Issue 3-0 en Nokia Proprietary and Confidential

Maintenance
Figure 9. Example Object Properties window in Nokia BTS Manager (can beused for blocking a TRX)
3. Make a note of the TRX cabling.
4. Disconnect the TRX cabling.
5. Undo the retaining screws of the TRX unit with a T10 Torx driver. Loosenthe screws enough to remove the unit, but leave them engaged in the threadto allow easy refitting.
6. Remove the TRX.
7. Unpack the new TRX.
8. Insert the TRX into the free slot.
9. Tighten the TRX retaining screws to 1.5 Nm (11.1 lb ft) with a T10 Torxdriver.
10. Reconnect the TRX cabling.
11. Run the TRX test from Nokia BTS Manager (optional).
12. With Nokia BTS Manager, right-click the BCF object in the EquipmentView window and carry out a BCF Object Reset, or, if locked from theBSC/NMS, request an unlock from the BSC/NMS (the BCF reset isautomatic in this case).
If the green LED is lit on the TRX after the replacement procedure, the BTS is inservice. If the LED is yellow or red, check the alarms and run the TRX test fromthe BSC/NMS.
32 (52) © Nokia Corporation Draft DN9913495Nokia Proprietary and Confidential Issue 3-0en
Replacing units
Note
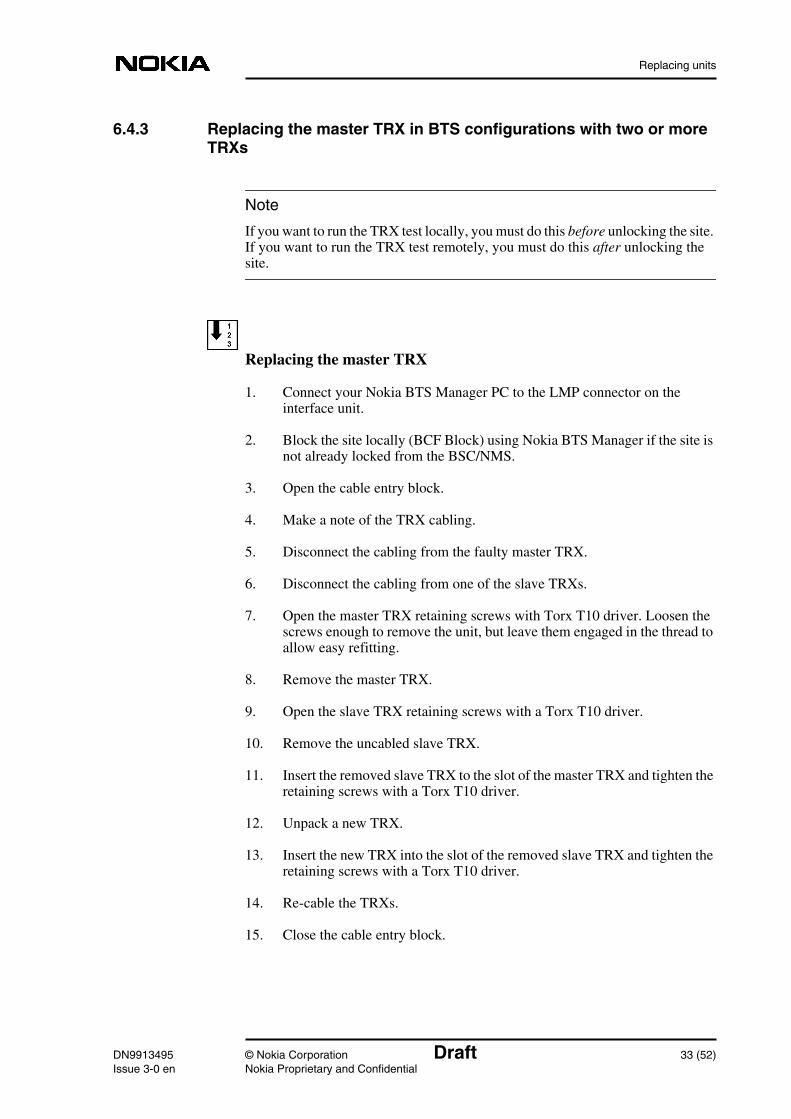
6.4.3 Replacing the master TRX in BTS configurations with two or moreTRXs
If you want to run the TRX test locally, you must do this before unlocking the site.If you want to run the TRX test remotely, you must do this after unlocking thesite.
Replacing the master TRX
1. Connect your Nokia BTS Manager PC to the LMP connector on theinterface unit.
2. Block the site locally (BCF Block) using Nokia BTS Manager if the site isnot already locked from the BSC/NMS.
3. Open the cable entry block.
4. Make a note of the TRX cabling.
5. Disconnect the cabling from the faulty master TRX.
6. Disconnect the cabling from one of the slave TRXs.
7. Open the master TRX retaining screws with Torx T10 driver. Loosen thescrews enough to remove the unit, but leave them engaged in the thread toallow easy refitting.
8. Remove the master TRX.
9. Open the slave TRX retaining screws with a Torx T10 driver.
10. Remove the uncabled slave TRX.
11. Insert the removed slave TRX to the slot of the master TRX and tighten theretaining screws with a Torx T10 driver.
12. Unpack a new TRX.
13. Insert the new TRX into the slot of the removed slave TRX and tighten theretaining screws with a Torx T10 driver.
14. Re-cable the TRXs.
15. Close the cable entry block.
DN9913495 © Nokia Corporation Draft 33 (52)Issue 3-0 en Nokia Proprietary and Confidential
Maintenance
16. With Nokia BTS Manager, right-click the BCF object in the EquipmentView window and carry out a BCF Object Reset, or, if locked from theBSC/NMS, request an unlock from the BSC/NMS (the BCF reset isautomatic in this case).
If the green LED is lit on the TRX after the replacement procedure, the BTS is inservice. If the LED is yellow or red, check the alarms and run the TRX test fromthe BSC/NMS.
6.4.4 Replacing the master TRX in a single TRX BTS
Replacing the master TRX in a single TRX BTS
1. Connect your Nokia BTS Manager PC to the LMP connector on theinterface unit.
2. Block the BCF locally with Nokia BTS Manager, or request a BCF lockfrom the BSC/NMS.
3. If the manager connection can still be established, open Traffic Managerfrom the Transmission menu and export the TS allocation information toyour PC’s hard disk.
4. Open the cable entry block.
5. Make a note of the TRX cabling.
6. Disconnect the TRX cabling.
7. Open the TRX retaining screws with a Torx T10 driver. Loosen the screwsenough to remove the unit, but leave them engaged in the threads to alloweasy refitting.
8. Remove the TRX.
9. Unpack a new TRX.
10. Insert the new uncommissioned TRX into the master TRX slot (slot 1).
11. Tighten the TRX retaining screws to 1.5 Nm (1.11 lb ft) with a Torx T10driver.
12. Re-cable the TRX.
13. Close the cable entry block.
34 (52) © Nokia Corporation Draft DN9913495Nokia Proprietary and Confidential Issue 3-0en

Replacing units
Caution
Note
14. Either import the TS allocation file from your PC hard disk or manuallyallocate the transmission capacity.
15. With Nokia BTS Manager, right-click the BCF object in the EquipmentView window and carry out a BCF Object Reset, or, if locked from theBSC/NMS, request an unlock from the BSC/NMS (the BCF reset isautomatic in this case).
If the green LED is lit on the TRX after the replacement procedure, the BTS is inservice. If the LED is yellow or red, check the alarms and run the TRX test fromthe BSC/NMS.
6.5 Replacing the transmission unit
This section provides instructions on how to replace a faulty transmission unitwith the same type of transmission unit.
If the transmission unit to be replaced is an FXC RRI type, the BTS power mustbe switched to the stand-by position from the switch on the BTS power supplyunit before disconnecting the Flexbus cable!
If the transmission unit to be replaced is an FXC E1 or FC E1/T1 type, the outerconductor of the 75 Ohm RX connector can either be grounded capacitively ordirectly. When the metal bridge connecting the TX and RX connector is removed,the grounding becomes capacitive.
Replacing the transmission unit
1. Connect your Nokia BTS Manager PC to the LMP connector on theinterface unit.
2. Verify the type of transmission unit.
If the transmission unit is an FXC E1 or FXC E1/T1 type, export the cross-connection information to a file before replacing the unit. You can importthe cross-connection information from the file to the new unit. Theseprocedures are detailed later in this section.
DN9913495 © Nokia Corporation Draft 35 (52)Issue 3-0 en Nokia Proprietary and Confidential
Maintenance
Note
3. Block the BCF locally from Nokia BTS Manager or request a BCF lockfrom the BSC.
4. Switch the BTS power supply unit to the stand-by position.
5. Disconnect the transmission unit cabling.
If the cables have not been labelled, make a note of which cable is TX and whichcable is RX before disconnecting them.
6. Open the upper and lower retaining screws of the unit with a T10 Torxdriver. Loosen the screw enough to remove the unit, but leave themengaged in the threads to allow easy refitting.
7. Remove the transmission unit. Pull the unit out from the front until the unitcomes to a stop, then pull the unit out from the side. See Figure 7.
8. Unpack the new transmission unit.
9. Insert the new transmission unit to the unit slot from the side of the cabinet.Push the unit towards the backplane. Do not use excessive force!
10. Tighten the upper and lower retaining screws to 1.5 Nm (1.11 lb ft) with aT10 Torx driver.
11. Reconnect the unit’s cabling.
12. Switch the BTS power supply unit to the ON position.
13. If the transmission unit is an FXC E1 or FXC E1/T1, refer to the procedurebelow for importing the saved cross-connection information.
14. With Nokia BTS Manager, right-click the BCF object in the EquipmentView window and carry out a BCF Object Reset, or, if locked from theBSC/NMS, request an unlock from the BSC/NMS (the BCF reset isautomatic in this case).
15. Request the BSC/NMS to run the Abis loop test.
36 (52) © Nokia Corporation Draft DN9913495Nokia Proprietary and Confidential Issue 3-0en

Replacing units
Exporting cross-connection information to a file before replacing anFXC E1 or FXC E1/T1 unit
1. Select TRANSMISSION | OPEN from the main menu in Nokia BTSManager. BTS Manager closes and the E1/T1 Manager (Transmission UnitManager) application starts and connects to the transmission unit.
2. Select CONFIGURATION | CROSS-CONNECTIONS from the mainmenu. The Cross-connections window opens.
3. Select the active bank.
4. Select FILE | EXPORT FILE and specify a name and location for the cross-connection file.
5. Exit the E1/T1 Manager (Transmission Unit Manager) application. NokiaBTS Manager restarts automatically.
Importing cross-connection information after replacing an FXC E1 orFXC E1/T1 unit
1. Select TRANSMISSION | OPEN from the main menu in Nokia BTSManager. BTS Manager closes and the E1/T1 Manager (Transmission UnitManager) application starts and connects to the transmission unit.
2. Select CONFIGURATION | CROSS-CONNECTIONS from the mainmenu. The Cross-connections window opens.
3. Select the inactive bank.
4. Select FILE | IMPORT FILE and select the cross-connections file youexported from the previous transmission unit.
5. Click the ‘Banks’ ACTIVATE button.
6. Click YES when Transmission Unit Manager asks if you want to activatethe inactive bank.
7. Exit the E1/T1 Manager (Transmission Unit Manager) application. NokiaBTS Manager restarts automatically.
DN9913495 © Nokia Corporation Draft 37 (52)Issue 3-0 en Nokia Proprietary and Confidential

Maintenance
6.6 Replacing the interface unit
Replacing the interface unit
1. Connect your Nokia BTS Manager PC to the LMP connector on theinterface unit.
2. Block the BCF locally with the Nokia BTS Manager or request a BCF lockfrom the BSC.
3. Switch the BTS power supply unit to the stand-by position.
4. Disconnect the interface unit’s cabling, including the BTS Managerconnection.
5. Open the upper and lower retaining screws of the unit with a T10 Torxdriver. Loosen the screw enough to remove the unit, but leave themengaged in the threads to allow easy refitting.
6. Remove the interface unit. Pull the unit out from the front until the unitcomes to stop, then pull the unit out from the side. See Figure 7.
7. Unpack the new interface unit.
8. Insert the new interface unit to the unit’s slot from the side of the cabinet.Push the unit towards the backplane. Do not use excessive force!
9. Tighten the interface unit retaining screws to 1.5 Nm (1.11 lb ft) with a T10Torx driver.
10. Reconnect the unit’s cabling, including the BTS Manager connection.
11. Switch the BTS power supply unit ON.
12. With BTS Manager, right-click the BCF object in the Equipment Viewwindow and carry out a BCF Object Reset, or, if locked from theBSC/NMS, request an unlock from the BSC/NMS (the BCF reset isautomatic in this case).
13. Re-set the 13 MHz clock according to the instructions given in Chapter 4.
38 (52) © Nokia Corporation Draft DN9913495Nokia Proprietary and Confidential Issue 3-0en
Replacing units
WARNING
6.7 Replacing the power supply unit
Lethal voltages!
Turn the site mains power OFF before disconnecting the power supplycable!
Replacing the power supply unit (PSU)
1. Turn the power feed to the BTS OFF at the main circuit breaker.
2. Open the power supply connector shield and the sealing pieces.
3. Disconnect the power cable from the connector on the PSU.
4. Open the upper and lower retaining screws of the unit with a T10 Torxdriver. Loosen the screw enough to remove the unit, but leave themengaged in the threads to allow easy refitting.
5. Remove the power supply unit. Pull the unit out from the front until the unitcomes to stop, then pull it out from the side. See Figure 7.
6. Unpack the new power supply unit.
7. Insert the new power supply unit to the unit’s slot from the side of thecabinet. Push the unit towards the backplane. Do not use excessive force!
8. Tighten the retaining screws to 1.5 Nm (1.11 lb ft) with a T10 Torx driver.
9. Reconnect the power supply cable.
10. Fit the sealing piece into the power supply connector shield, close theshield, and tighten the retaining screws.
11. Turn the site mains power ON from the main circuit breaker.
12. Turn the BTS power supply unit ON.
DN9913495 © Nokia Corporation Draft 39 (52)Issue 3-0 en Nokia Proprietary and Confidential

Maintenance
Note
WARNING
6.8 Replacing the cooling fan
The fan unit and its controller module are inside the fan mounting assembly onthe bottom of the BTS cabinet. For maintenance, the fan unit and controllermodule can be removed and replaced in the mounting assembly. The proceduresfor doing this are given here.
Alternatively, the complete fan assembly can be removed and replaced. Theprocedures for doing this are given in the document Nokia MetroSite EDGE BaseStation: Field Upgrade.
For Nokia MetroSite BTSs with 1W TRXs, refer to Nokia MetroSite EDGE BaseStation: Field Upgrade. This document gives instructions for replacing theVMFA type fan unit.
There are two versions of the HVMF fan unit. Version 1 has a controller modulewhich is fixed by tapper screws which are accessed from the top of the fanmounting (see Figure 12). Version 2 has a controller module which can beremoved by accessing the tapper screws from the bottom of the fan mounting (seeFigure 13).
The BTS power must be switched off before replacing the fan unit. Turn theswitch on the PSU to the stand-by position and turn off the power supply atthe main circuit breaker.
6.8.1 Replacing the HVMF cooling fan, version 1
In order to release version 1 of the fan unit’s controller module, the fan assemblymounting must be removed from the bottom of the cabinet. To do this, the cableentry block must first be removed.
Figure 11 shows the HVMF fan assembly. For an exploded view of the fanassembly, see Figure 12.
Releasing the cabling from the cable entry block
1. Make sure that the PSU is switched to the stand-by position and that thepower to the BTS is switched off at the main circuit breaker.
40 (52) © Nokia Corporation Draft DN9913495Nokia Proprietary and Confidential Issue 3-0en

Replacing units
Note
2. Unclip and slide the cable cover towards you.
3. Disengage and remove the cable cover support plate.
4. Remove all connecting cables to the units. If necessary, make a note of thecable connections before removing them.
All connecting cables must be removed in order to remove the fan mountingassembly.
5. Detach the outer sealing gasket at the point where it covers the cable entryblock, see (A) in Figure 10.
6. Remove the two 4 mm (0.157 in) Allen screws on the cable entry block.See (B) in Figure 10.
7. Open the cable entry block at the point where the cables are routed.
8. Disengage the cables from the cable entry block.
Figure 10. Displacing the sealing strip and releasing the cables
A
Sealing strip
Allen screwsM6Allen key 4 mm
DN9913495 © Nokia Corporation Draft 41 (52)Issue 3-0 en Nokia Proprietary and Confidential

Maintenance
Replacing the HVMF fan, version 1
1. Remove the fan mounting assembly from the cabinet, as follows:
1. Remove the three T10 Torx screws and one T25 Torx screw from theright hand side of the mounting assembly. See Figure 11.
2. Slide the mounting assembly sideways and disconnect the fan unit’sconnector from the backplane.
2. Remove the three M4 x 60 Torx screws from the fan unit (see Figure 12)to release the fan unit and the lower fan guard.
3. Remove the two 3 x 10 self tapper screws from the fan controller module(see Figure 12).
4. Remove the fan unit, the fan controller module, and the lower fan guard.
5. To replace the fan, reverse the procedure.
Figure 11. HVMF cooling fan assembly and mounting screws
T10T25
42 (52) © Nokia Corporation Draft DN9913495Nokia Proprietary and Confidential Issue 3-0en

Replacing units
Figure 12. HVMF fan assembly, version 1
DN9913495 © Nokia Corporation Draft 43 (52)Issue 3-0 en Nokia Proprietary and Confidential
Maintenance
Note
6.8.2 Replacing the HVMF cooling fan, version 2
BTS installations fitted with version 2 of the HVMF fan assembly can beremoved without removing the complete fan assembly mounting. The screwsretaining the fan unit and controller module can be reached from the underside ofthe BTS. Compare Figure 13 with Figure 12.
To replace a version 1 fan unit with a version 2 fan unit which can be replacedfrom the underside, the fan assembly mounting must also replaced with a version2 compatible fan assembly mounting.
Replacing the HVMF fan, version 2
1. Make sure that the PSU is switched to the stand-by position and that thepower to the BTS is switched off at the main circuit breaker.
2. Remove the three M4 x 60 Torx screws from the fan unit to release the fanunit and the lower fan guard. See Figure 12.
3. Remove the two 3 x 10 self tapper screws on the side of the fan controllermodule. See Figure 13.
4. Remove the fan controller module from the backplane and then remove thefan and lower fan guard.
5. To replace the fan, reverse the procedure.
44 (52) © Nokia Corporation Draft DN9913495Nokia Proprietary and Confidential Issue 3-0en

Replacing units
Legend:
1 Lower fan guard
2 Fan unit (HVMF)
3 Fan assembly mounting
4 Fan controller module
5 Tapper screws, 3x10, 2 pieces
6 Torx screws, M4x60, 3 pieces
Figure 13. HVMF fan assembly, version 2
1
2
3 4
6
DN0186406
5
DN9913495 © Nokia Corporation Draft 45 (52)Issue 3-0 en Nokia Proprietary and Confidential

Maintenance
46 (52) © Nokia Corporation Draft DN9913495Nokia Proprietary and Confidential Issue 3-0en

LED indicator conditions
7 LED indicator conditionsIn addition to the alarms a network element can produce, most functional unitsalso have three-colour LED indicators. These indicators display the current stateof the equipment for quick, on-site reference.
This chapter specifies the meaning of the LED conditions on the following units:
• transceiver unit
• transmission unit
• power supply unit
• interface unit
• fan unit
Inform your Operations Manager of any error situations detected on the units andenter the details in the site report.
7.1 Transceiver unit LED
The conditions on the transceiver unit’s LED indicators are specified in Table 3.
Table 3. LED conditions for TRX units
LED Colour Lit continuously Flashing
Green In service
Traffic going through
In service
No traffic going through
Yellow/Orange No LapD Configuring, not in service
Red Unit broken Unit operation degraded
DN9913495 © Nokia Corporation Draft 47 (52)Issue 3-0 en Nokia Proprietary and Confidential

Maintenance
7.2 Transmission unit LED
The conditions for the transmission unit’s LED indicators are specified in Table4.
The RRI transmission units incorporate an additional LED indicator for theFlexbus interface. The conditions for this LED are presented in Table 5.
7.3 Interface unit LED
The conditions for the interface unit’s LED indicators are specified in Table 6.
Table 4. LED conditions for a transmission unit
LED colour Lit continuously Flashing
Green Power is on and theoperation is continuous anderror-free
Unit is currently beingaccessed with atransmission managementdevice
Yellow/ Orange Control or test ongoing, orfault in incoming signal
Configuring, not in service
Red Serious fault, or an activetest interfering with normaltraffic
-
Table 5. LED conditions for an RRI transmission unit’s Flexbus LED.
LED Colour Lit continuously Flashing
Green DC power feed to theoutdoor unit and TX signalactive
DC power feed to outdoorunit active, TX signal notactive
No light No power feed or TX signal -
48 (52) © Nokia Corporation Draft DN9913495Nokia Proprietary and Confidential Issue 3-0en

LED indicator conditions
7.4 Power supply unit LED
The condition of the power supply unit’s LED indicators are specified in Table 7.
7.5 Fan unit LED
The conditions for the fan unit’s LED indicators are specified in Table 8.
Table 6. LED conditions for an interface unit
LED colour Indication
Green OCXO operating
Yellow OCXO warming up
Red OCXO broken
Table 7. LED conditions of the power supply unit
LED colour Condition
Green Unit operating
Yellow 1. Output voltage OK, switch on the power supplyunit is in the ON position, BTS in cold start mode
2. Power shut down signal sent from theBSC/NMS
3. Output voltage OFF because of a detectedovertemperature
Red Unit broken or short circuit in one of the BTS’sunits
Flashing yellow Input voltage OK, switch the power supply unit tothe stand-by position
DN9913495 © Nokia Corporation Draft 49 (52)Issue 3-0 en Nokia Proprietary and Confidential

Maintenance
Table 8. LED conditions for the fan unit
LED colour Conditions
Green Unit operating
Yellow Operation degraded
Red Unit broken
50 (52) © Nokia Corporation Draft DN9913495Nokia Proprietary and Confidential Issue 3-0en

IndexA
Abis loop test 18, 23adjusting the 13 MHz clock 19antistatic wrist strap 27
B
BTS Manager 14
C
cooling fanreplacing 40
D
disposal of units 30
E
environmental data package 30environmental precautions 14
F
Failure Report Form 13fan unit
LED 49maintenance 17
fault reporting 13
H
high capacity fan unit (HVMF)replacing 40, 44
I
interface unit LED 48replacing 38
L
LED indicator conditions 47LEDs
fan unit 49interface unit 48power supply unit 49transceiver unit 47
transmission unit 48lock lubrication 18
M
maintenance, periodic 17Manager software 14master TRX, replacing 33, 34
N
Nokia BTS Manager 14
P
power supply precautions 14power supply unit
LED 49replacing 39
R
recycling 28removing the cover 15replacing
cooling fan 40HVMF fan unit, version 1 40HVMF fan unit, version 2 44interface unit 38power supply unit 39transmission unit 35TRX units 30
replacing units 27
S
seal cleaning 18site folder 13slave TRX, replacing 31
T
transceiver unit (TRX) LED 47replacing 30replacing master TRX 33, 34replacing slave TRX 31
transmission unitLED 48replacing 35
troubleshooting 23
DN9913495 ©Nokia Corporation Draft 51 (52)Issue 3-0 en Nokia Proprietary and Confidential

Maintenance
TRX slots 30TRX test 18, 23
U
units, replacing 27
52 (52) © Nokia Corporation Draft DN9913495Nokia Proprietary and Confidential Issue 3-0en