Embed Size (px)
Citation preview
Magic + Mystery
Class description from the CJ website – what the girls signed up for!Drawing on the allure of the unexplained and whimsical, this class captures your daughter’s imagination through projects and experiments that delight and surprise! With a focus on fairies, forests, tricks and a dash of performance savvy, instructors work with girls to explore mysteries in nature and everyday life, as well as magic in many forms — the art of the magician, magic tricks, sleight of hand, props, witches and wizards and magical creatures. Projects may include: wand- and cape- and hat-making, designing a “fairy house” and simple magic tricks!
Intro
Instructors will work with girls to explore mysteries in nature and everyday life, as well as magic in all its forms -- the art of the magician, magic tricks, sleight of hand, props, shows and performances, witches and wizards and mythical magic creatures. Plus, we’ll discuss famous fictional females from the world of mystery + magic, from Ms. Granger in the Potter series, to Harriet the Spy, Nancy Drew, Buffy the Vampire Slayer, Morgan Le Fay, Daphne and Velma from Scooby Doo and other cool and clever girls.
Fun new projects may include: wand- and cape- and hat-making, finding clues to solve a who-dun-it murder mystery, building confidence when performing in front of others, how to make things disappear, levitation, card and rope tricks, casting spells and charms and more magical fun!
This class will be a real mix of experiment, performance, play and surprise!
TIps
It is possible to carve this week into theme days. For example it could be layed out day by day as categorized by Harry Potter’s classes:
Day 1 Transfiguration Wand making Cape making Daisy Chain crowns
Day 2 Potions Magic Potion Stew Magic Potion Drink Glow Beads Fairy Dust necklaces
Day 3 Care of Magical Creatures Clothespin fairy creatures Fairy castle creation
Day 4 Charms Levitation Disappearing Act Card Trick Rope Trick
Day 5 Defense Against The Dark Arts Whodunit mystery
These projects should be play and exploration based. Although you want to allow time to craft and create, make sure to leave space for free play and exploration- waltzing around in capes, putting spells on each other, practicing magic and cavorting in their fairy castles.
Resources for projects:“3 Beginner Magic Tricks for Kids: Easy Magic Tricks for Children | Suite101.” Accessed Decem-ber 18, 2012. http://suite101.com/article/3-beginner-magic-tricks-for-kids-easy-magic-tricks-for-children-a307114.“CJ_ToyDesign_Curriculum_Ages6to7_2012.pdf.” Accessed December 20, 2012. https://sum-mercamps.basecamphq.com/projects/5932084/file/122264415/CJ_ToyDesign_Curriculum_Ages6to7_2012.pdf.“Daisy Chain Crown Craft - Things to Make and Do, Crafts and Activities for Kids - The Crafty Crow.” Accessed December 18, 2012. http://www.thecraftycrow.net/2012/04/daisy-chain-crown-craft.html.“DIY Fairy Dust Necklaces | Chickabug.” Accessed December 20, 2012. http://www.chickabug.com/blog/2012/08/diy-fairy-dust-necklaces.html.“DIY Ribbon Wands | Intimate Weddings - Small Wedding Blog - DIY Wedding Ideas for Small and Intimate Weddings - Real Small Weddings.” Accessed December 18, 2012. http://www.intimateweddings.com/blog/diy-ribbon-wands/.“Harry Potter Wizard Magic Wands DIY!” Accessed December 18, 2012. http://www.instructa-bles.com/id/Harry-Potter-Wizard-Magic-Wands-DIY/.“Homemade Costumes | Make a Magician’s Cape | No Sew Cape | Magician Costume.” Accessed December 18, 2012. http://www.kidspot.com.au/kids-activities-and-games/Dress%20up%20costumes+25/magician-costume--make-a-no-sew-magicians-cape+11980.htm.“How to Make a Sponge Ball Disappear in Your Hand | eHow.com.” Accessed December 18, 2012. http://www.ehow.com/how_6364136_make-sponge-ball-disappear-hand.html.“Inspiring DIY Cardboard Castles | Family Style.” Accessed December 18, 2012. http://blogs.babble.com/family-style/2011/06/14/inspiring-diy-cardboard-castles/?pid=71#slideshow.“Levitating Ring Magic Trick Tutorial - YouTube.” Accessed December 18, 2012. http://www.you-tube.com/watch?v=kZ17X7DAVic.“List of Mythical Creatures.” Accessed December 18, 2012. http://www.lizaphoenix.com/ency-clopedia/types.shtml.“Magic Potion - Mrs Happy Homemaker.” Accessed December 18, 2012. http://www.mrshappy-homemaker.com/2011/10/magic-potion/.“Magician Costume: Make a No Sew Magician’s Cape - YouTube.” Accessed December 18, 2012. http://www.youtube.com/watch?v=9IA3sIudnqc.“Quick And Easy Magic Tricks To Learn.” Accessed December 18, 2012. http://www.goodtricks.net/quicktricks.html.“Sculpting Mythical Creatures Out of Polymer Clay | Crafts & Hobbies / Polymer Clay Crafts Book | Qbookshop.” Accessed December 18, 2012. http://www.qbookshop.com/prod-ucts/154270/9781592535149/Sculpting-Mythical-Creatures-out-of-Polymer-Clay.html.“The Chicken Chick: Magic Potion Activity for Kids. Good, Clean Fun.” Accessed December 18, 2012. http://www.the-chicken-chick.com/2012/10/magic-potion-activity-for-kids-good.html.“The Peasant Housewife: Tutorial- Flower Fairies.” Accessed December 20, 2012. http://the-peasanthousewife.blogspot.com/2011/04/tutorial-flower-fairies.html.“The Start.” Accessed December 18, 2012. http://www.instructables.com/id/Disappearing-Ball-trick/step2/The-start/.“Train Up a Child: Glow Water and Water Beads.” Accessed December 18, 2012. http://trainu-pachildlearnaswego.blogspot.com/2012/02/glow-in-dark-water-beads.html.“Velma Dinkley - Scoobypedia, the Scooby Doo Database.” Accessed December 18, 2012. http://scoobydoo.wikia.com/wiki/Velma_Dinkley.

Magic Wands
Intro: These can be anything the girls desire. The wand topper can take the form of a foam star or a puff ball or anything, really. Have lots of craft supplies available.
supplies:12 inch dowels
craft supplies: feathers, jewels, puff balls, colored foam sheets, beads, colored paper, sparkly
pipe cleaners, pipe cleaners, ribbon
Elmer’s glue
Glitter glue
prep: Make your own as an example,heat up the hot glue gun.
Time: 1 hour
project steps:
1. Show girls the materials and tell them you are going to make magic wands to use all week.
2. Show them how to wrap the handle with pipe cleaners
3. Let them work on their wands.
4. Help them hot glue the toppers.
Cape Making
Intro
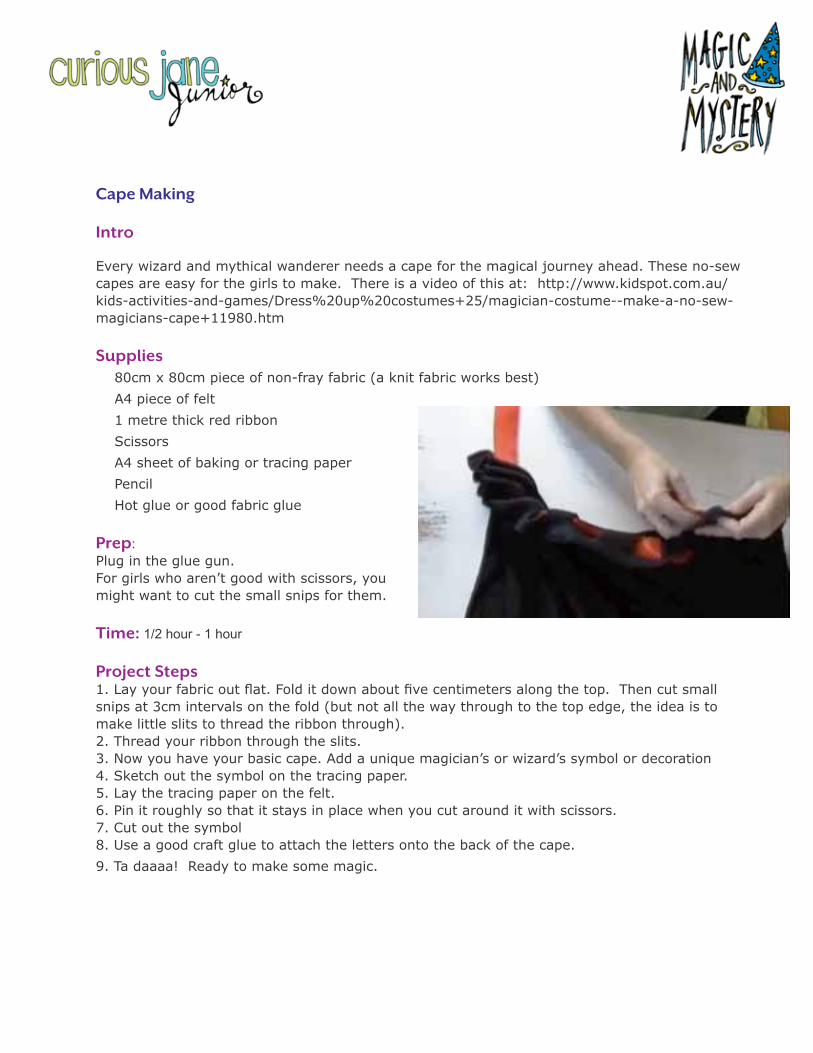
Every wizard and mythical wanderer needs a cape for the magical journey ahead. These no-sew capes are easy for the girls to make. There is a video of this at: http://www.kidspot.com.au/kids-activities-and-games/Dress%20up%20costumes+25/magician-costume--make-a-no-sew-magicians-cape+11980.htm
supplies 80cm x 80cm piece of non-fray fabric (a knit fabric works best)
A4 piece of felt
1 metre thick red ribbon
Scissors
A4 sheet of baking or tracing paper
Pencil
Hot glue or good fabric glue
prep: Plug in the glue gun. For girls who aren’t good with scissors, you might want to cut the small snips for them.
Time: 1/2 hour - 1 hour
project steps1. Lay your fabric out flat. Fold it down about five centimeters along the top. Then cut small snips at 3cm intervals on the fold (but not all the way through to the top edge, the idea is to make little slits to thread the ribbon through).2. Thread your ribbon through the slits.3. Now you have your basic cape. Add a unique magician’s or wizard’s symbol or decoration4. Sketch out the symbol on the tracing paper.5. Lay the tracing paper on the felt.6. Pin it roughly so that it stays in place when you cut around it with scissors.7. Cut out the symbol8. Use a good craft glue to attach the letters onto the back of the cape.
9. Ta daaaa! Ready to make some magic.
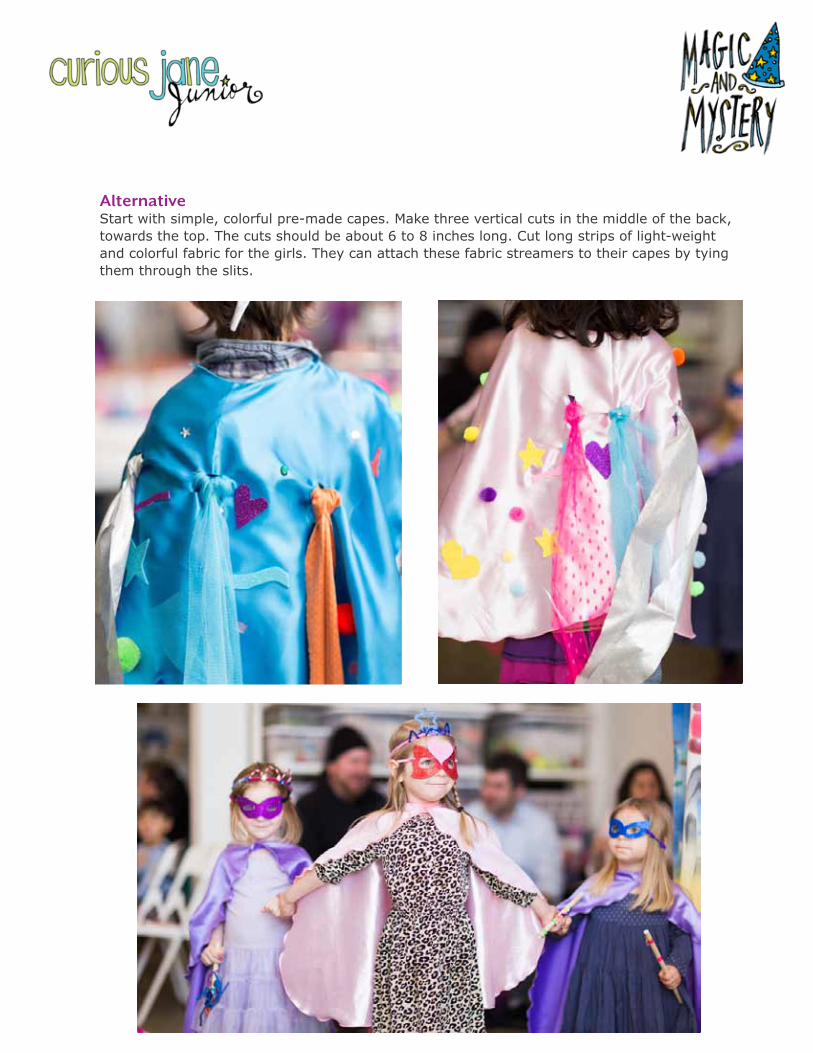
AlternativeStart with simple, colorful pre-made capes. Make three vertical cuts in the middle of the back, towards the top. The cuts should be about 6 to 8 inches long. Cut long strips of light-weight and colorful fabric for the girls. They can attach these fabric streamers to their capes by tying them through the slits.
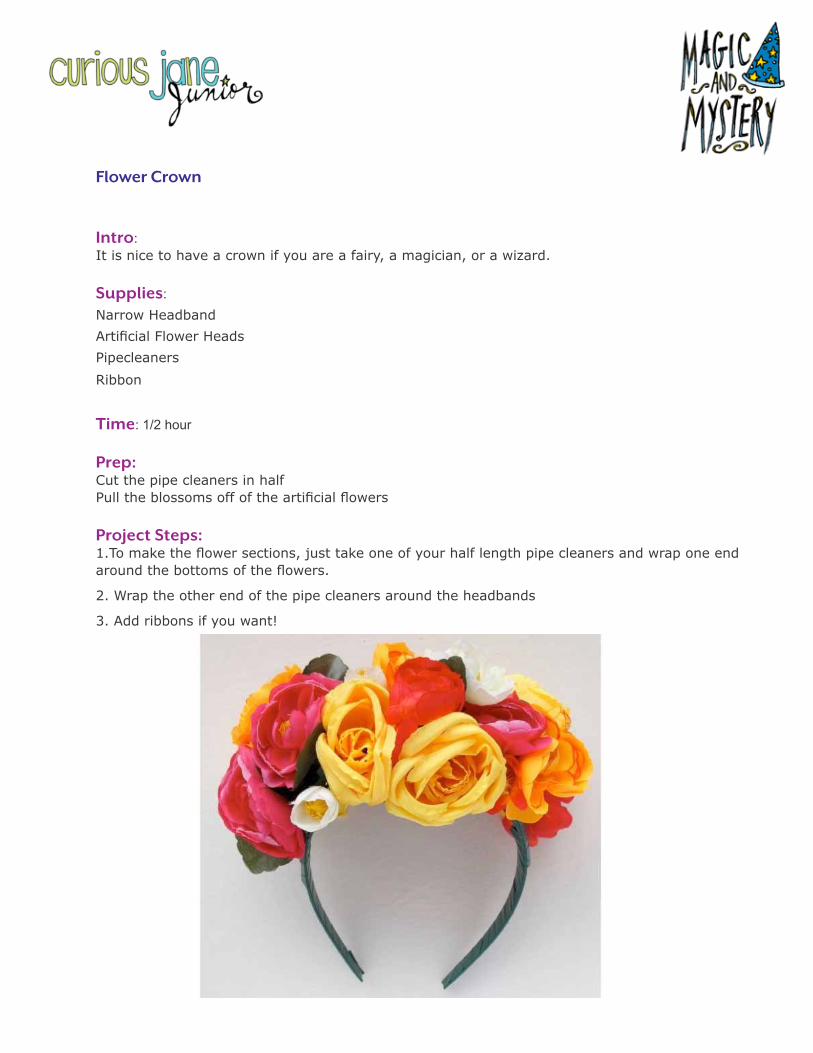
Flower Crown
Intro:It is nice to have a crown if you are a fairy, a magician, or a wizard.
supplies:Narrow Headband
Artificial Flower Heads
Pipecleaners
Ribbon
Time: 1/2 hour
prep: Cut the pipe cleaners in halfPull the blossoms off of the artificial flowers
project steps: 1.To make the flower sections, just take one of your half length pipe cleaners and wrap one end around the bottoms of the flowers.
2. Wrap the other end of the pipe cleaners around the headbands
3. Add ribbons if you want!
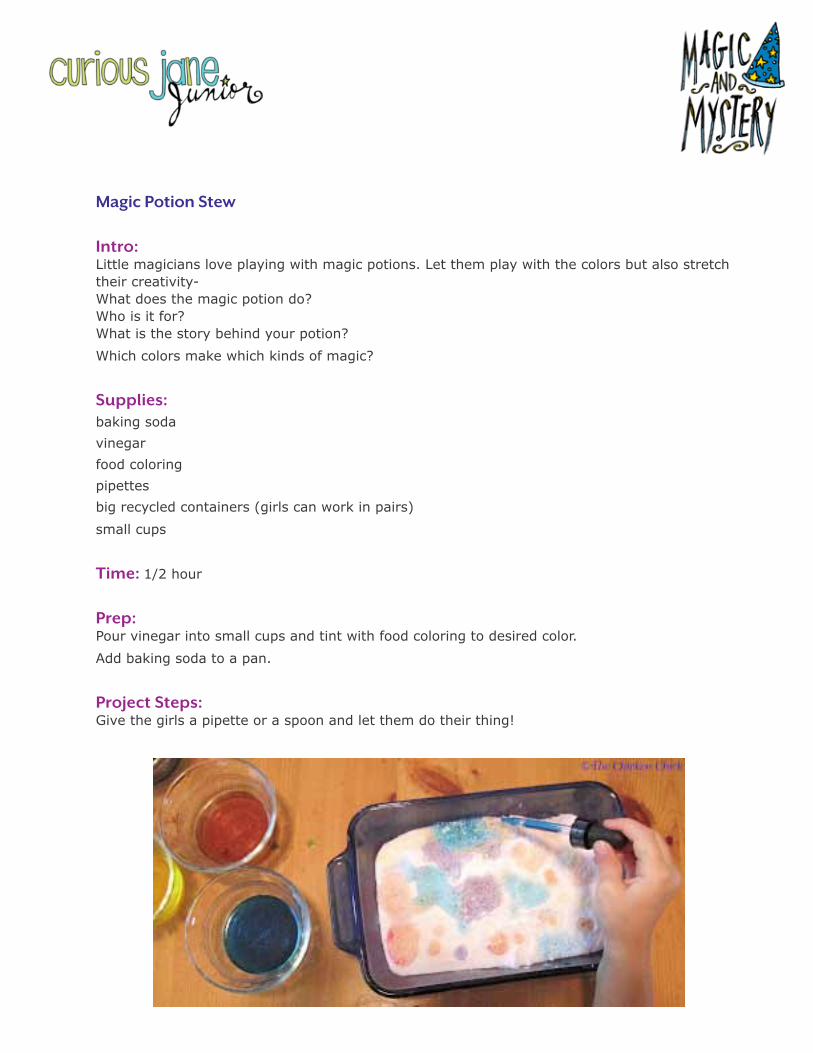
Magic potion stew
Intro: Little magicians love playing with magic potions. Let them play with the colors but also stretch their creativity- What does the magic potion do? Who is it for?What is the story behind your potion?
Which colors make which kinds of magic?
supplies: baking soda
vinegar
food coloring
pipettes
big recycled containers (girls can work in pairs)
small cups
Time: 1/2 hour
prep:Pour vinegar into small cups and tint with food coloring to desired color.
Add baking soda to a pan.
project steps:Give the girls a pipette or a spoon and let them do their thing!
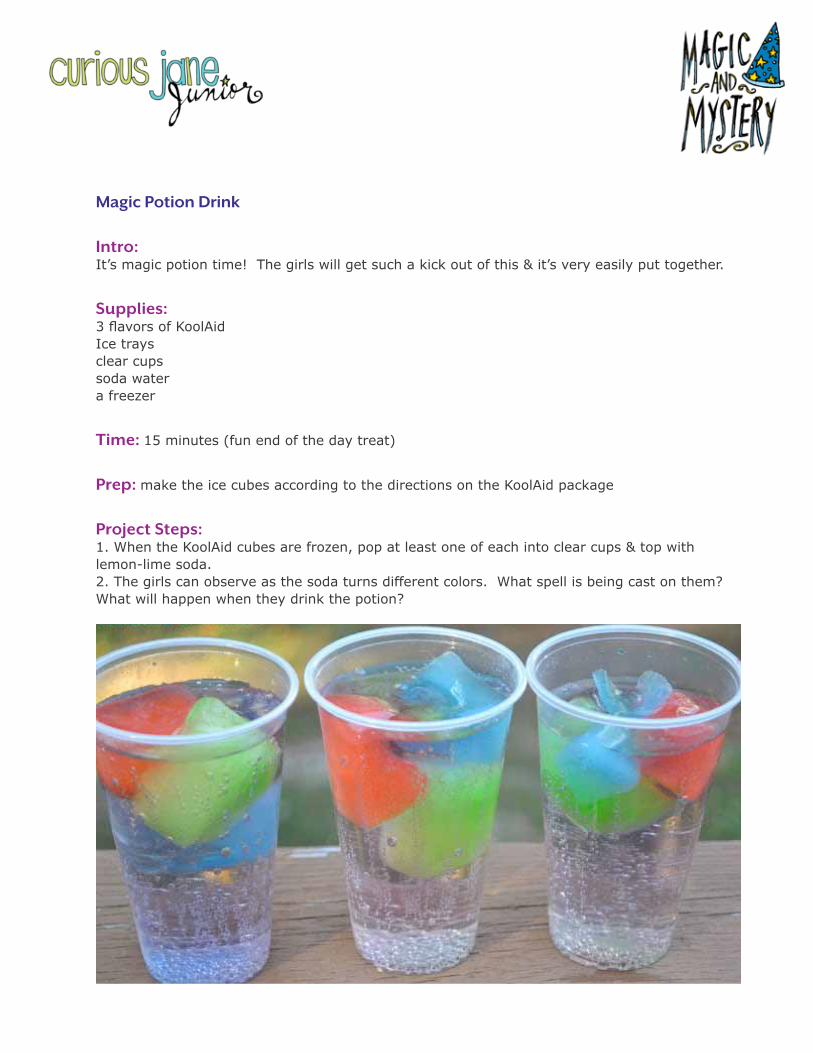
Magic potion Drink
Intro:It’s magic potion time! The girls will get such a kick out of this & it’s very easily put together.
supplies: 3 flavors of KoolAidIce traysclear cupssoda watera freezer
Time: 15 minutes (fun end of the day treat)
prep: make the ice cubes according to the directions on the KoolAid package
project steps:1. When the KoolAid cubes are frozen, pop at least one of each into clear cups & top with lemon-lime soda. 2. The girls can observe as the soda turns different colors. What spell is being cast on them? What will happen when they drink the potion?
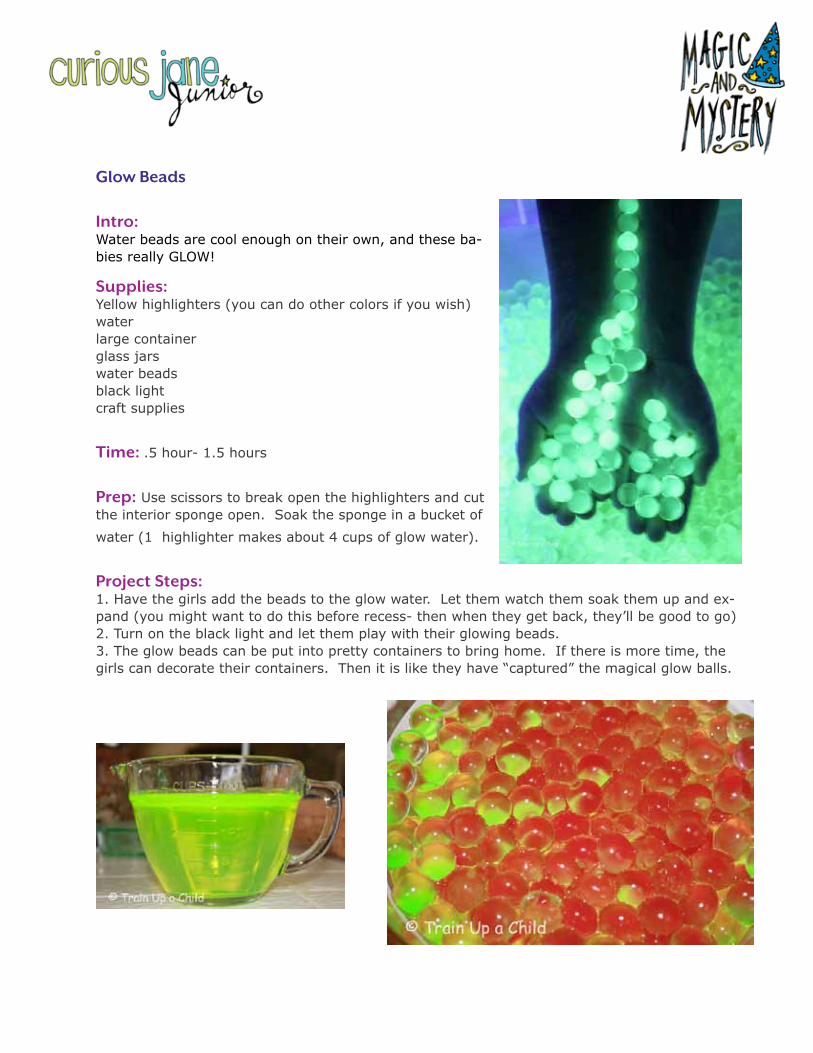
Glow Beads
Intro:Water beads are cool enough on their own, and these ba-bies really GLOW!
supplies:Yellow highlighters (you can do other colors if you wish)waterlarge container glass jarswater beadsblack lightcraft supplies
Time: .5 hour- 1.5 hours
prep: Use scissors to break open the highlighters and cut the interior sponge open. Soak the sponge in a bucket of
water (1 highlighter makes about 4 cups of glow water).
project steps:1. Have the girls add the beads to the glow water. Let them watch them soak them up and ex-pand (you might want to do this before recess- then when they get back, they’ll be good to go)2. Turn on the black light and let them play with their glowing beads. 3. The glow beads can be put into pretty containers to bring home. If there is more time, the girls can decorate their containers. Then it is like they have “captured” the magical glow balls.
Fairy Dust necklaces
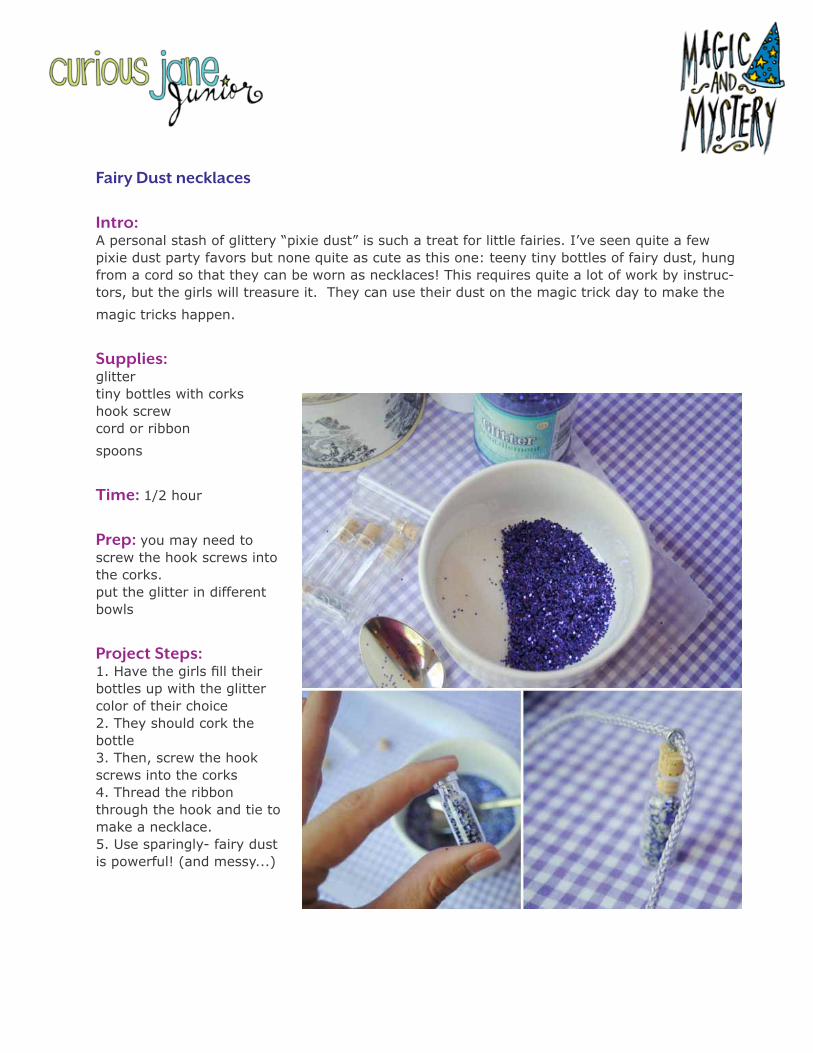
Intro: A personal stash of glittery “pixie dust” is such a treat for little fairies. I’ve seen quite a few pixie dust party favors but none quite as cute as this one: teeny tiny bottles of fairy dust, hung from a cord so that they can be worn as necklaces! This requires quite a lot of work by instruc-tors, but the girls will treasure it. They can use their dust on the magic trick day to make the
magic tricks happen.
supplies: glittertiny bottles with corkshook screwcord or ribbon
spoons
Time: 1/2 hour
prep: you may need to screw the hook screws into the corks. put the glitter in different bowls
project steps: 1. Have the girls fill their bottles up with the glitter color of their choice2. They should cork the bottle3. Then, screw the hook screws into the corks4. Thread the ribbon through the hook and tie to make a necklace. 5. Use sparingly- fairy dust is powerful! (and messy...)
Fairy Friends
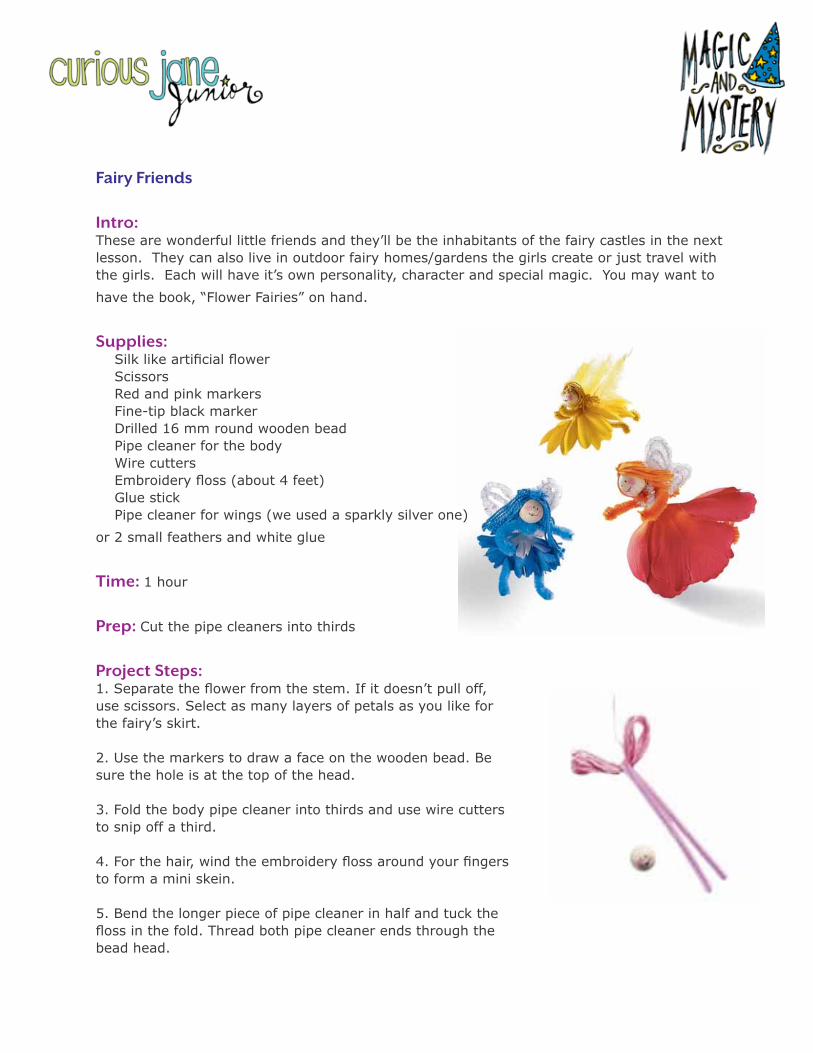
Intro:These are wonderful little friends and they’ll be the inhabitants of the fairy castles in the next lesson. They can also live in outdoor fairy homes/gardens the girls create or just travel with the girls. Each will have it’s own personality, character and special magic. You may want to
have the book, “Flower Fairies” on hand.
supplies: Silk like artificial flower Scissors Red and pink markers Fine-tip black marker Drilled 16 mm round wooden bead Pipe cleaner for the body Wire cutters Embroidery floss (about 4 feet) Glue stick Pipe cleaner for wings (we used a sparkly silver one)
or 2 small feathers and white glue
Time: 1 hour
prep: Cut the pipe cleaners into thirds
project steps:1. Separate the flower from the stem. If it doesn’t pull off, use scissors. Select as many layers of petals as you like for the fairy’s skirt.
2. Use the markers to draw a face on the wooden bead. Be sure the hole is at the top of the head.
3. Fold the body pipe cleaner into thirds and use wire cutters to snip off a third.
4. For the hair, wind the embroidery floss around your fingers to form a mini skein.
5. Bend the longer piece of pipe cleaner in half and tuck the floss in the fold. Thread both pipe cleaner ends through the bead head.
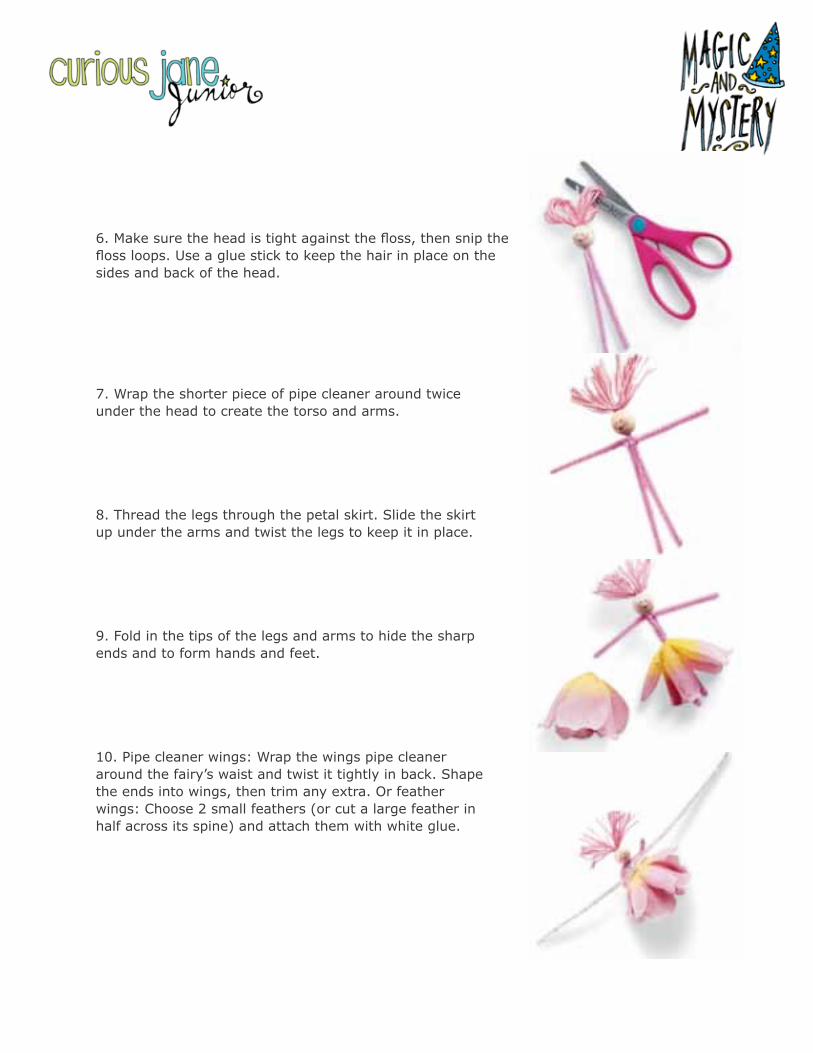
6. Make sure the head is tight against the floss, then snip the floss loops. Use a glue stick to keep the hair in place on the sides and back of the head.
7. Wrap the shorter piece of pipe cleaner around twice under the head to create the torso and arms.
8. Thread the legs through the petal skirt. Slide the skirt up under the arms and twist the legs to keep it in place.
9. Fold in the tips of the legs and arms to hide the sharp ends and to form hands and feet.
10. Pipe cleaner wings: Wrap the wings pipe cleaner around the fairy’s waist and twist it tightly in back. Shape the ends into wings, then trim any extra. Or feather wings: Choose 2 small feathers (or cut a large feather in half across its spine) and attach them with white glue.
Levitation Magic Trick
Intro:Here is an easy magic trick
supplies: Ring
Rubber band
Time: 15 minutes
prep: None
project steps:See trick at http://www.youtube.com/watch?v=kZ17X7DAVic
Disappearing Act
Intro:If you’re just starting out performing magic tricks, making a red sponge ball disappear in your hand is a simple trick to learn and fun to perform. One of the benefits of the disappearing small
ball trick is that you can practice it almost anywhere.
supplies: Red sponge ball (clown nose)
Time: 15 minutes
prep: None
project steps:1 Make a partial fist with your left hand, leaving space between your fingers and palm. It may help to imagine you are holding a hot dog in your fist that is pointing down toward the floor and upward to the ceiling.2 Hold your left hand in front of you and place the red sponge ball on the top of your fist.3 Use your right thumb to push the sponge ball into the cavity created by your partial fist. How-ever, instead of pushing in the ball entirely, use this motion to pinch the ball between your right thumb and index finger against the palm.4 Pull your right thumb away, which is now cradling the ball inside your right palm. Push your right index finger and middle finger into your partial fist to give the impression of stuffing the ball inside your left fist.5 Open your, now empty, left hand with a grand gesture to reveal that the ball has disappeared. After a suitable pause, reveal the sponge ball in your right hand.6 Practice hiding the red ball with the fingers of your right hand. Perform the trick in front of mirror to ensure that anyone standing in front of you will not be able to see the exchange from left palm to right hand take place.
Card Trick
Intro: This is a magic trick that shows the girls about how props make tricks happen.
supplies: MatchRing
Playing Cards
Time: 15 minutes
prep: None
project steps:Effect:
The magician places any number between 1 and 4 cards fanned out under his hand. He slowly lifts his hand and the cards float up with his hand. With his hand held high above the table, the magician now proceeds to pluck the cards of his hand and drops them on the table.
To perform this cool levitation trick you will need a ring, match and some playing cards.
Secret:
1. Put the ring on your middle finger. Then slide the matchstick under the ring so that both sides of the match stick out from the ring.
2. You now place your hand with your palm facing down on the table You now slide a card under your palm, carefully sliding one end of it between the ring and matchstick. This will grip the card and keep it in place when you lift your hand.. This move should look very natural and ca-sual to avoid the audience knowing that you have some kind of hidden gimmick, so practice in the mirror a few times beforehand so that you are able to carry out the move smoothly.
3. Now you can now raise your hand above the table. Pressing your fingers down a little on the back of the cards, will ensure that they stay in position.
Guess the Crayon Magic Trick
Intro: A fun pair magic trick
supplies: Different colors of crayons
Time: 15 minutes
prep: None
project steps:1. In this trick the girls will astound their friends with their psychic abilities. The magician holds her hands behind her back and a friend places a crayon in her hands. Discretely and quickly, the magician scratches the crayon so that a little bit of crayon remains under her fingernail. Then the magician dramatically holds a hand to her head as if using her psychic powers to determine the color while sneaking a peak at the color under her nail. When she reveals the color, her friends will be amazed and wonder how she knew.
Black Magic
Intro: First you should play this game with only you and your counselor or CIT knowing the secret. Then teach it to the girls, or let them guess how you did it.
supplies:Various objects in the room
Time: 15 minutes
prep: 2 people need to know the secret
project steps:1. Tell the girls that you and your CIT practice black magic, which allows you to have a psychic connection.2. Have your CIT leave the room and pick an object (which is not black) with the girls. Cindy’s lunchbox, eg. 3. Call the CIT back in. 4. Ask the CIT if it is a list of objects, then ask her if it is a black object. The object you ask her about after the black object will be the one you picked. For example:“is it the window?” No“is it Jane’s pink shoes?” No“is it the black trash can?” No“is it Cindy’s lunchbox?” Yes!The girls will have no idea what it going on. Repeat until they figure it out or you feel they are ready to know the trick.
Whodunit mystery/ Treasure hunt
Intro: This can be as involved or as simple as your imagination, prep time, and acting skills allow. The basic premise is that of a treasure hunt. This is a great time for the girls to put on their costumes and use the props they’ve made all week to solve the mystery. Or there doesn’t have to be a mystery, it can just be a regular treasure hunt.
supplies: Various
Time: All day, or one class period
prep: It’s up to you!
project steps:1. The day before the mystery, you could hand out character cards to the girls. The cards should include their name, profession, skills and personality traits. One girl’s card (or the CIT, depending on maturity of the girls) should say that she committed the crime. Tell the girls to keep the cards a secret. 2. When they come in that day you should say that a crime has been committed! It can be that something has been stolen, or whatever you want. It is probably a good idea to have a prize at the end of the hunt. 3. Set up a treasure hunt for the girls in which they have to find the stolen item and find out who stole it.
Ideas for treasure hunt:1. Take as many rolls of yarn as there are girls. Unravel the yarn in a web throughout the room. Have them start at one end and re-ravel the yarn until they reach the end, at which there will be a clue (have all the yarns end in the same secret place). 2. Make rhyming clues with hints in them which lead to a clue somewhere else in the building, maybe suspended from a balloon. 3. Have one of the cludes be a giant disassembled puzzle that the girls have to put together. 4. Make a bunch of “keys” and have the girls try to find which one will open a “chest” which has a clue in it. You can facilitate and the can be that the key color matches the lock color, e.g. 5. Make a map they have to follow6. Leave a trail for them to follow (jewels? feathers?)
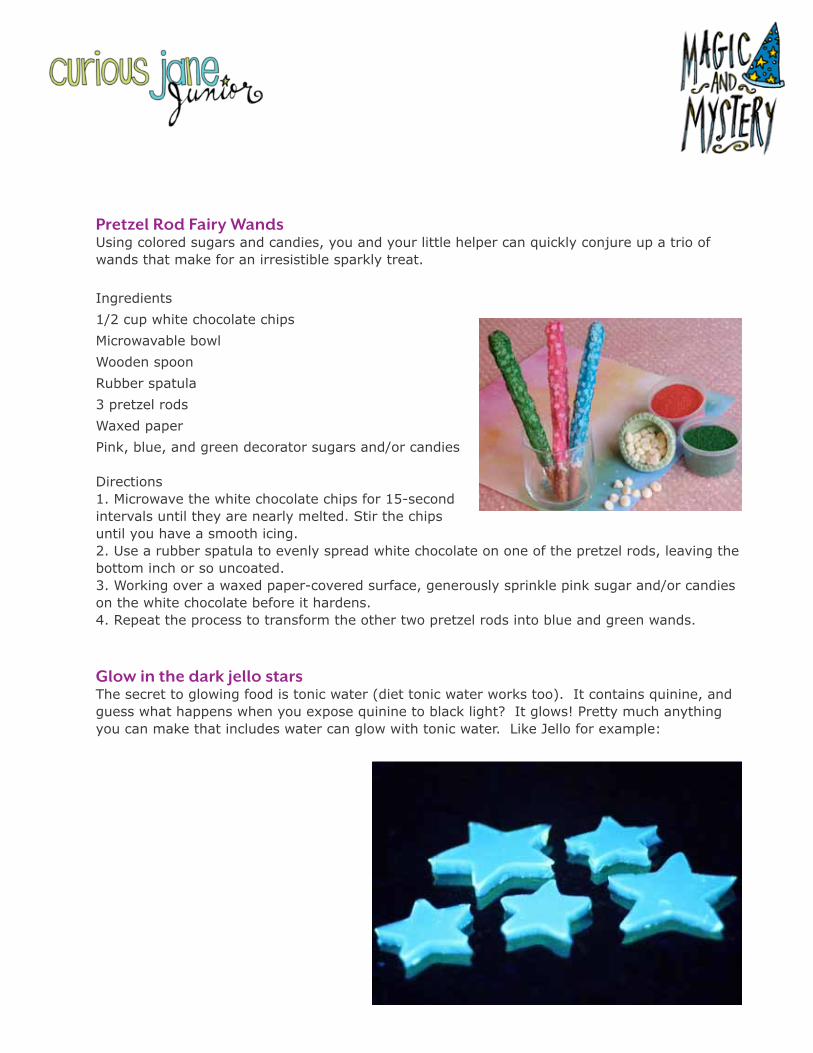
pretzel Rod Fairy WandsUsing colored sugars and candies, you and your little helper can quickly conjure up a trio of wands that make for an irresistible sparkly treat.
Ingredients
1/2 cup white chocolate chips
Microwavable bowl
Wooden spoon
Rubber spatula
3 pretzel rods
Waxed paper
Pink, blue, and green decorator sugars and/or candies
Directions1. Microwave the white chocolate chips for 15-second intervals until they are nearly melted. Stir the chips until you have a smooth icing.2. Use a rubber spatula to evenly spread white chocolate on one of the pretzel rods, leaving the bottom inch or so uncoated.3. Working over a waxed paper-covered surface, generously sprinkle pink sugar and/or candies on the white chocolate before it hardens.4. Repeat the process to transform the other two pretzel rods into blue and green wands.
Glow in the dark jello starsThe secret to glowing food is tonic water (diet tonic water works too). It contains quinine, and guess what happens when you expose quinine to black light? It glows! Pretty much anything you can make that includes water can glow with tonic water. Like Jello for example:
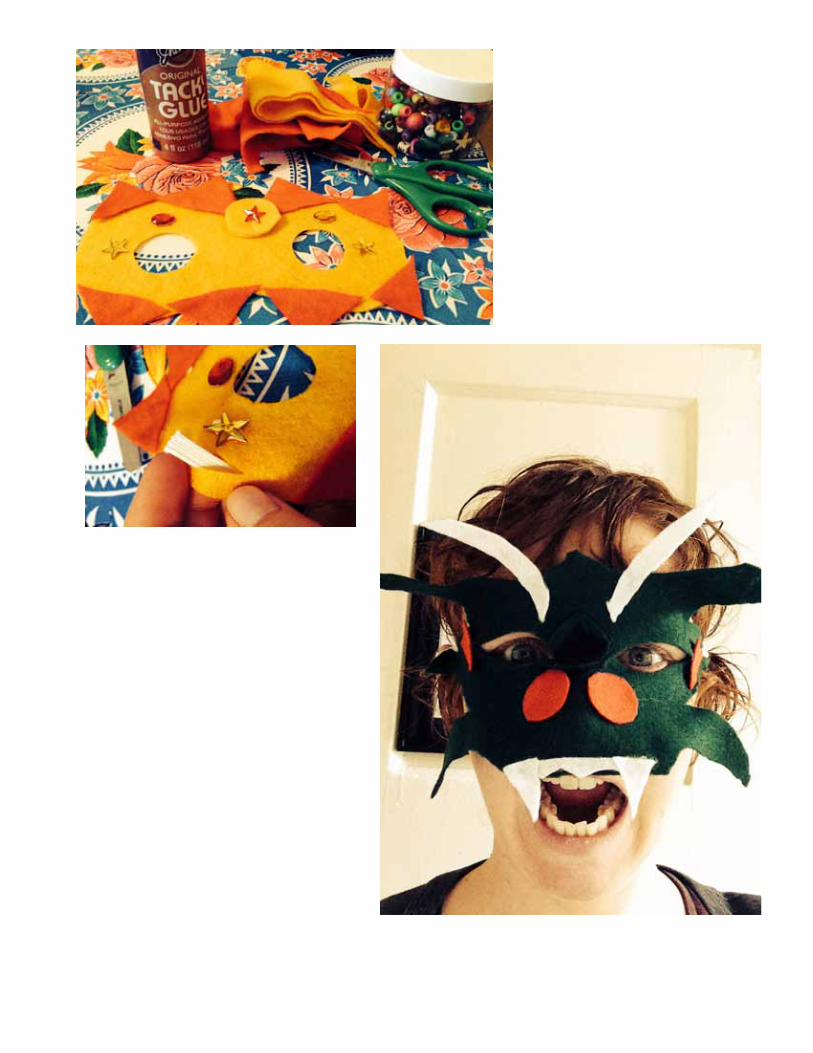
Mystery Masks
Intro: Creating a mysterious mask can help disguise and enchant! Animals, fairies, monsters, drag-ons, or any other unique disguise. The funkier, the better!
supplies: Colored felt and scraps of fabric
White cardstock--for mask base/outline and Thin elastic cord or yarn (to attach mask to face)
*OR* blank paper mache masks from Mardi Gras supply outlet
crafty bits
tacky glue
hot glue (just in case!)
scissors
Time: 1 hour
prep: Make a sample!
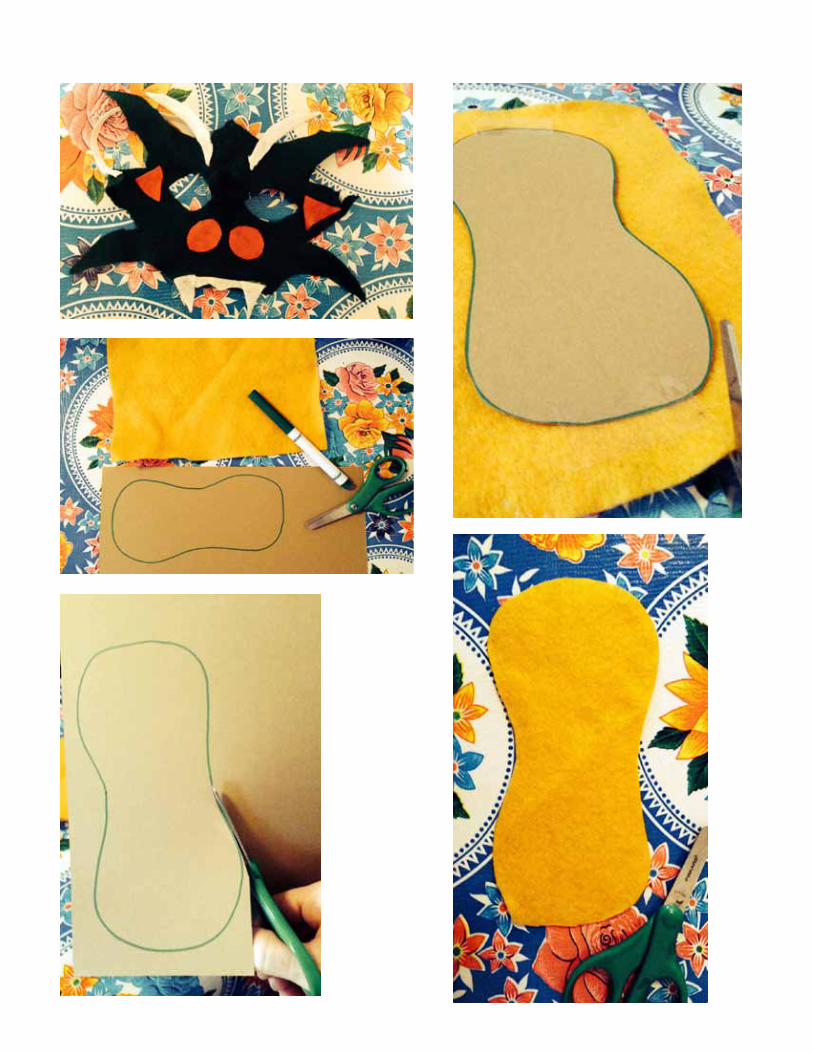
project steps:(Depending on the age/skill of the girls, you may want to have steps 1-3 prepared for them.)
1) Starting with a piece of cardstock, sketch the size and shape of your mask. This is the base of your mask and should be fairly simple. 2) Tape mask base unto a piece of thick felt and cut out design. (You can leave the piece of cardstock on the felt, if you want a sturdier mask, although it is harder to cut-out the eye-holes.)3) We can’t forget the eye-holes! Hold the mask up to the face and carefully (eyes closed!) mark where your eyes are. This can be done with a small dot, made with a marker. Alternative-ly, you can make a large hole that spread across both eyes, but that’s a bit less mysterious…Tip: Fold the mask in half, length-wise to help cut-out eye holes. Make sure to make them big enough to see through! 4) Once the foundation is made, you can move on to decorating/fully designing the mask. Add more scraps of materials, sparkly bits, or any other fun supplies you have! Depending on the material, it can be glued on with tacky glue, or hot glued by you or your assistant. 5) Using scissors, cut two small slits on either side of the mask and pull elastic cord through each hole, tying a knot on each side, securing the ends of the cord to the mask. (Be careful not to create large holes, especially when using elastic--the felt can rip! Although, this doesn’t seem to be the case with yarn.)6) Play time! Create stories for each “character” the girls come up with and have some imagi-native play. Enjoy the stories they come up with!
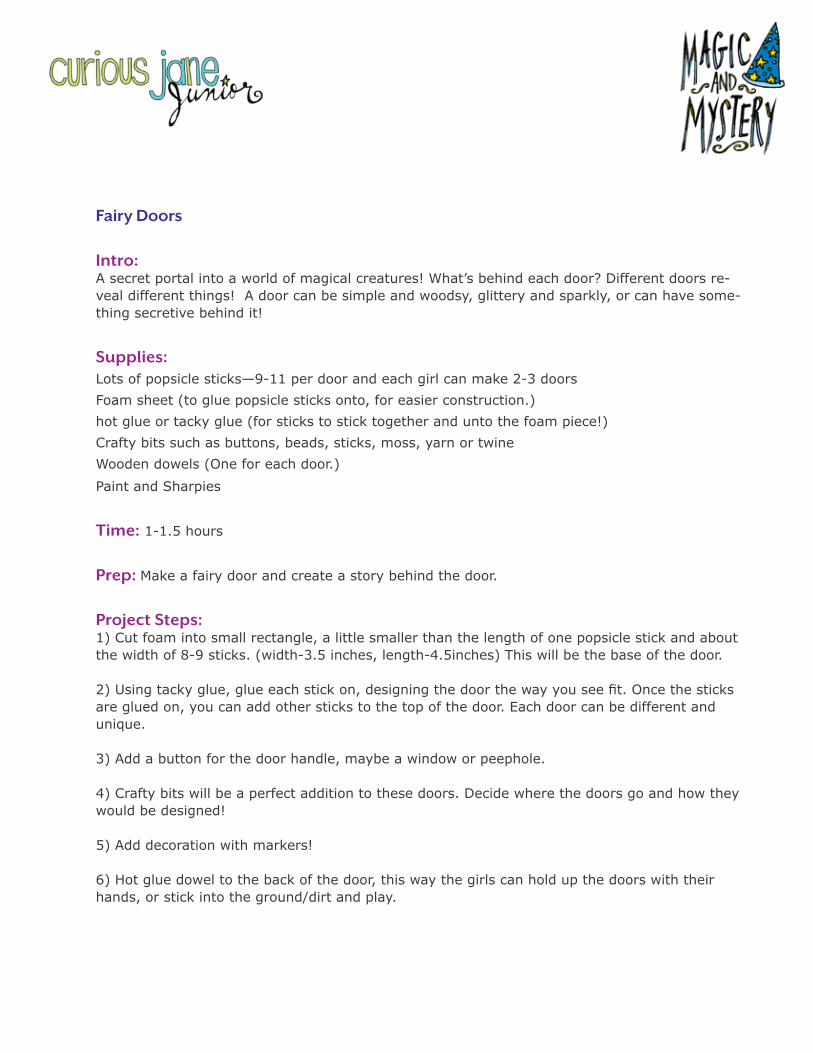
Fairy Doors
Intro: A secret portal into a world of magical creatures! What’s behind each door? Different doors re-veal different things! A door can be simple and woodsy, glittery and sparkly, or can have some-thing secretive behind it!
supplies: Lots of popsicle sticks—9-11 per door and each girl can make 2-3 doors
Foam sheet (to glue popsicle sticks onto, for easier construction.)
hot glue or tacky glue (for sticks to stick together and unto the foam piece!)
Crafty bits such as buttons, beads, sticks, moss, yarn or twine
Wooden dowels (One for each door.)
Paint and Sharpies
Time: 1-1.5 hours
prep: Make a fairy door and create a story behind the door.
project steps:1) Cut foam into small rectangle, a little smaller than the length of one popsicle stick and about the width of 8-9 sticks. (width-3.5 inches, length-4.5inches) This will be the base of the door.
2) Using tacky glue, glue each stick on, designing the door the way you see fit. Once the sticks are glued on, you can add other sticks to the top of the door. Each door can be different and unique.
3) Add a button for the door handle, maybe a window or peephole.
4) Crafty bits will be a perfect addition to these doors. Decide where the doors go and how they would be designed!
5) Add decoration with markers!
6) Hot glue dowel to the back of the door, this way the girls can hold up the doors with their hands, or stick into the ground/dirt and play.
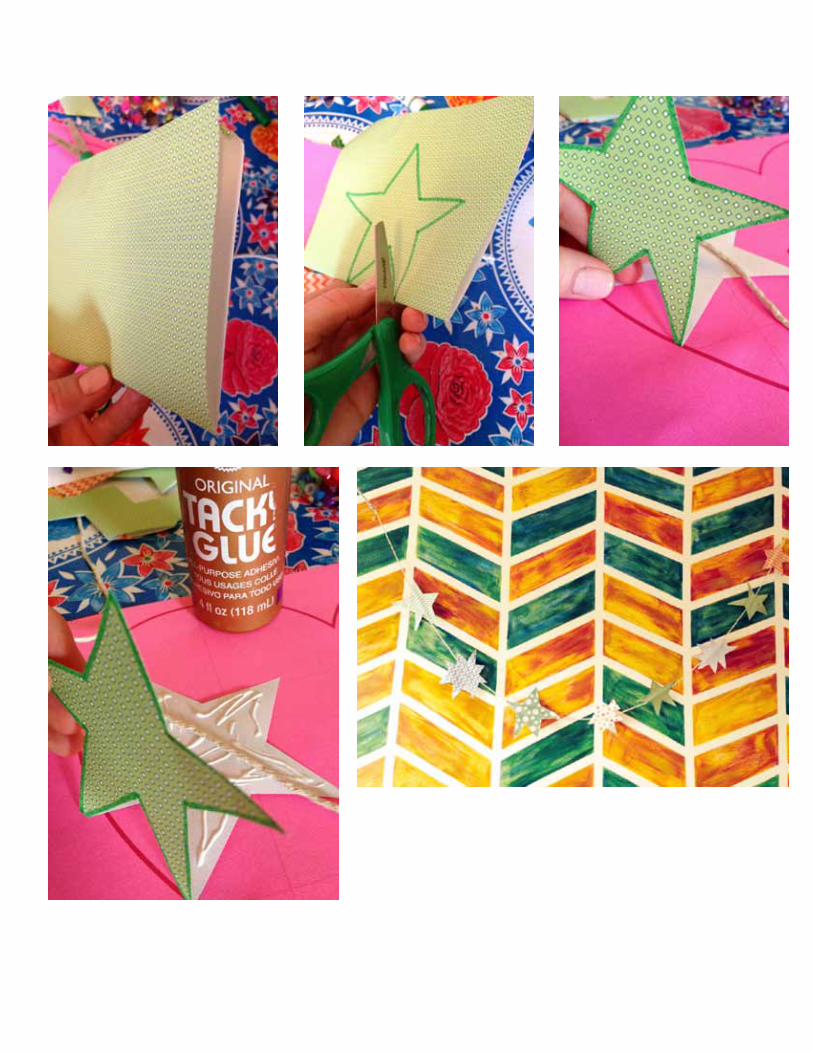
Magic star Garland
Intro: This garland will help to attract fairies to help with your magical tasks. Or, alternatively, it can fend-off creatures that are unkind!
supplies: Colored and pattered paperYarn, twine, or ribbonFun, colorful, patterned paperSparkly Pipe CleanersGlitterTacky glue
Time: 1-1.5 hours
prep: Make a sample.
project steps:1) Cut approx. a 54’ piece of yarn, hemp, twine, or ribbon (It can be larger or smaller, depend-ing on the time and interest.)
2) Have the girls decide what shapes they want on their garland. It doesn’t have to be just stars. It can be any fun shapes they deem necessary for whatever they need the garland to be.
3) Because the shapes need to be double sided, it is easier to fold the piece of paper in half and cut the shapes near the fold. That way, you can unfold the shape, glue one side, put the yarn between the two sides of paper and close it shut. This glues both sides together.
4) Continue adding shapes all along the yarn, leaving room at the ends.
5) Connect ends of yarn to pipe-cleaners by twisting the pipe-cleaners around the ends. This is a way to hang the garland without tape! You can hook it to shelves, windows, etc!
6) Hang the garland around the room and take in the enchanting power!
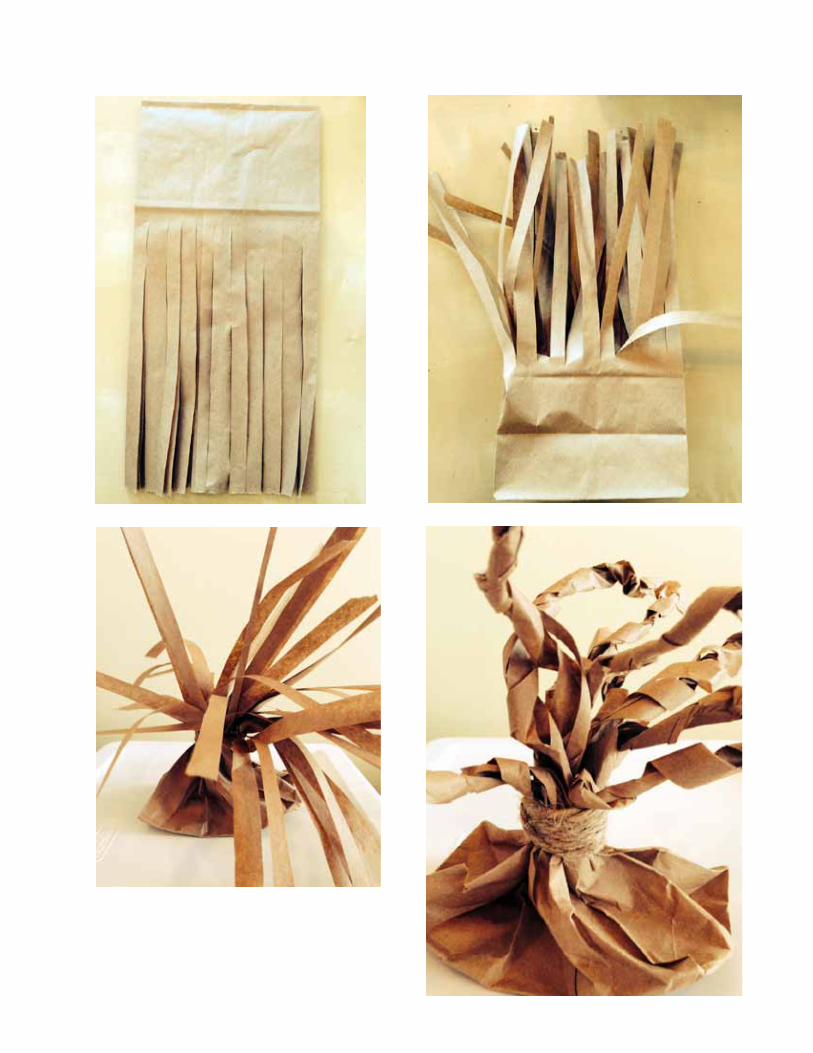
Fairy Trees
Intro: Using a paper lunch bag, each girl can create a fairy tree of her very own! It can also be used in your fairy’s castle or environment.
supplies: Paper lunch bag—At least 2 per girl
Scissors
Twine—For tree trunk
Paint and brushes—In case the trees need color!
Time: 45mins - 1 hour
prep: Make a sample.
project steps:1) With the bag flatten and closed, cut slits from the open end of the bag towards the bottom. Stop when you get to the line approx. 3 inches from the bottom of the bag.
2) Open bag and set bottom on table. The strips of paper should be opening up.
3) Twist the trunk of the tree, keep the bottom of the bag in its original form.
4) Twist 2-3 strips of paper together (from the top of the “trunk”), forming knobby branches.
5) Keep twisting until all strips become branches.
6) Cut some twine and wrap around the trunk of the tree. This will help to keep the tree togeth-er and give the tree a cool-looking trunk!
7) You can add color to tree using paint, or add any sparkly bits, if needed!
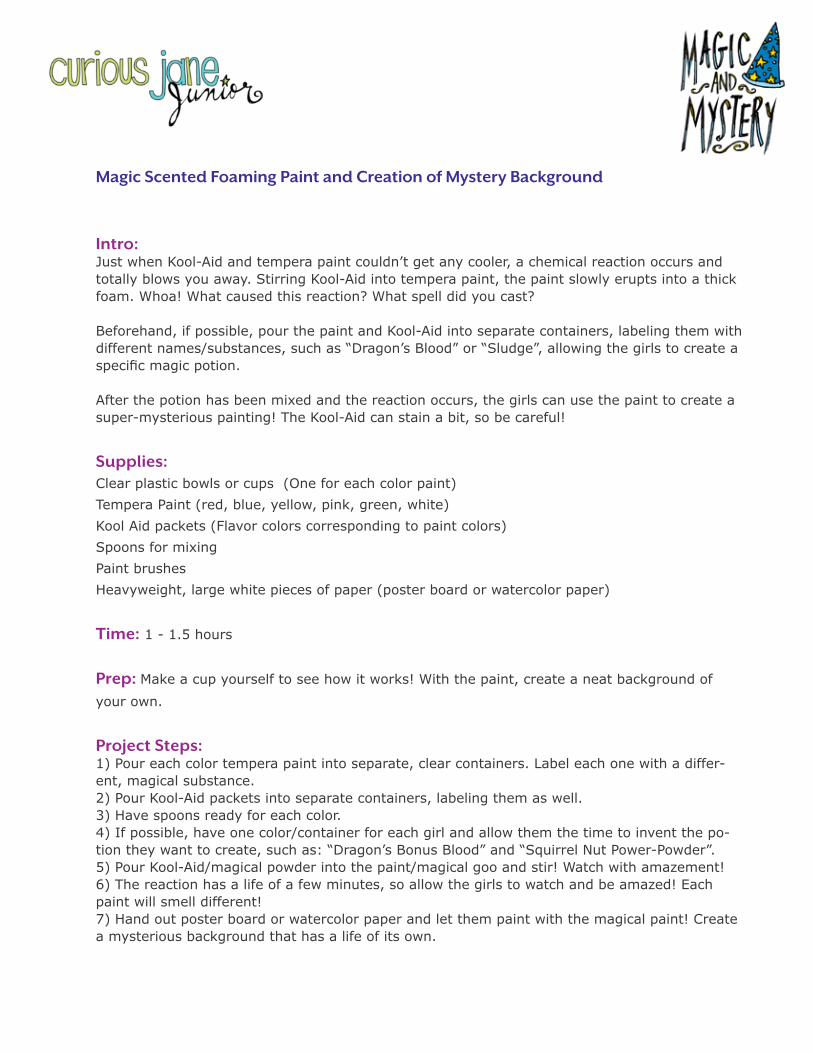
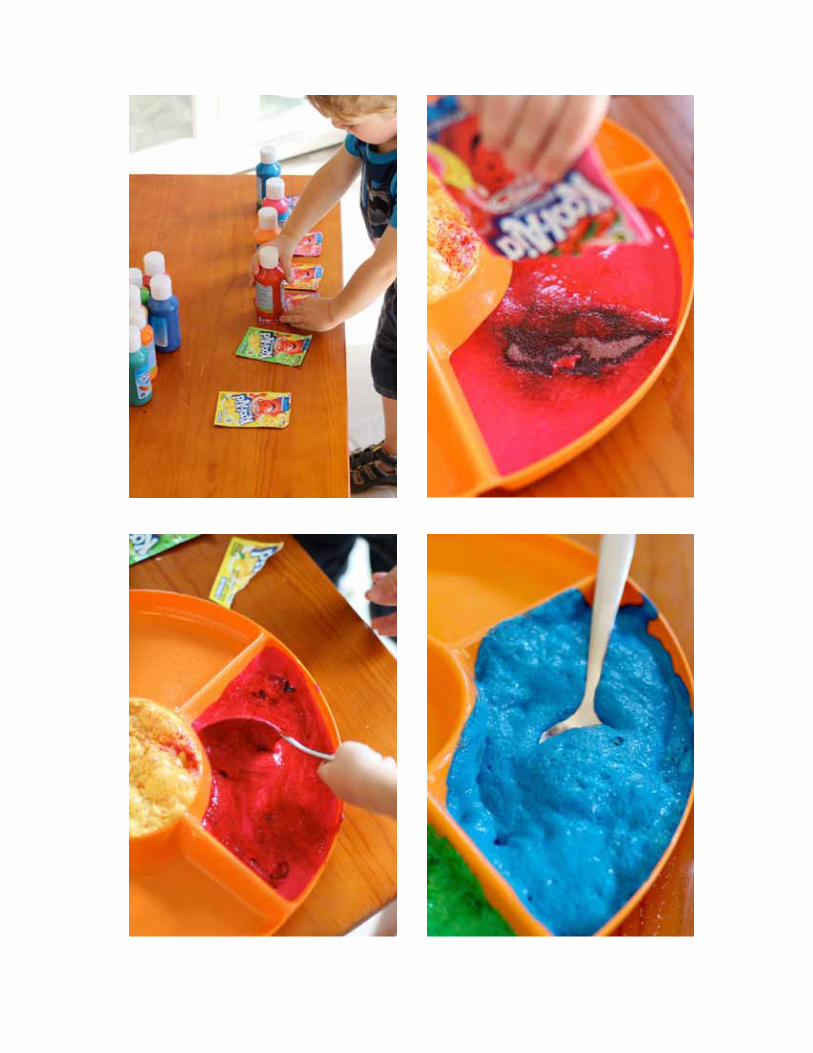
Magic scented Foaming paint and Creation of Mystery Background
Intro: Just when Kool-Aid and tempera paint couldn’t get any cooler, a chemical reaction occurs and totally blows you away. Stirring Kool-Aid into tempera paint, the paint slowly erupts into a thick foam. Whoa! What caused this reaction? What spell did you cast?
Beforehand, if possible, pour the paint and Kool-Aid into separate containers, labeling them with different names/substances, such as “Dragon’s Blood” or “Sludge”, allowing the girls to create a specific magic potion.
After the potion has been mixed and the reaction occurs, the girls can use the paint to create a super-mysterious painting! The Kool-Aid can stain a bit, so be careful!
supplies: Clear plastic bowls or cups (One for each color paint)
Tempera Paint (red, blue, yellow, pink, green, white)
Kool Aid packets (Flavor colors corresponding to paint colors)
Spoons for mixing
Paint brushes
Heavyweight, large white pieces of paper (poster board or watercolor paper)
Time: 1 - 1.5 hours
prep: Make a cup yourself to see how it works! With the paint, create a neat background of
your own.
project steps:1) Pour each color tempera paint into separate, clear containers. Label each one with a differ-ent, magical substance. 2) Pour Kool-Aid packets into separate containers, labeling them as well. 3) Have spoons ready for each color. 4) If possible, have one color/container for each girl and allow them the time to invent the po-tion they want to create, such as: “Dragon’s Bonus Blood” and “Squirrel Nut Power-Powder”. 5) Pour Kool-Aid/magical powder into the paint/magical goo and stir! Watch with amazement!6) The reaction has a life of a few minutes, so allow the girls to watch and be amazed! Each paint will smell different! 7) Hand out poster board or watercolor paper and let them paint with the magical paint! Create a mysterious background that has a life of its own.
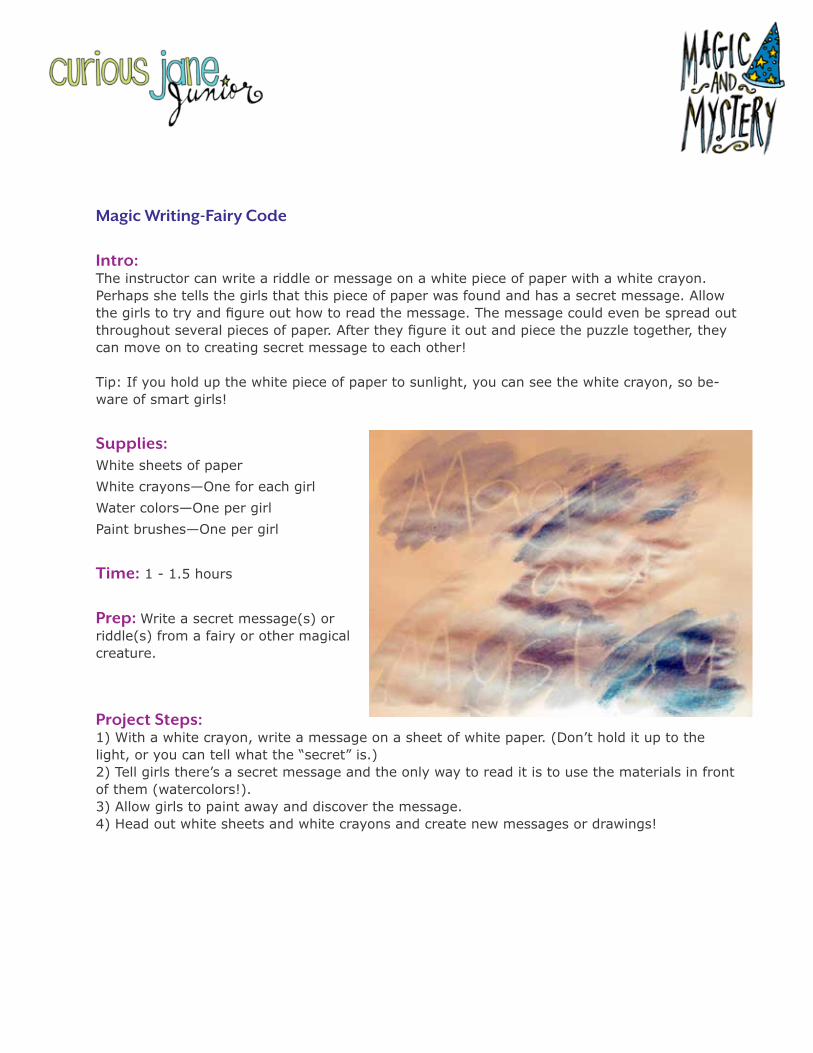
Magic Writing-Fairy Code
Intro: The instructor can write a riddle or message on a white piece of paper with a white crayon. Perhaps she tells the girls that this piece of paper was found and has a secret message. Allow the girls to try and figure out how to read the message. The message could even be spread out throughout several pieces of paper. After they figure it out and piece the puzzle together, they can move on to creating secret message to each other!
Tip: If you hold up the white piece of paper to sunlight, you can see the white crayon, so be-ware of smart girls!
supplies: White sheets of paper
White crayons—One for each girl
Water colors—One per girl
Paint brushes—One per girl
Time: 1 - 1.5 hours
prep: Write a secret message(s) or riddle(s) from a fairy or other magical creature.
project steps:1) With a white crayon, write a message on a sheet of white paper. (Don’t hold it up to the light, or you can tell what the “secret” is.)2) Tell girls there’s a secret message and the only way to read it is to use the materials in front of them (watercolors!).3) Allow girls to paint away and discover the message. 4) Head out white sheets and white crayons and create new messages or drawings!
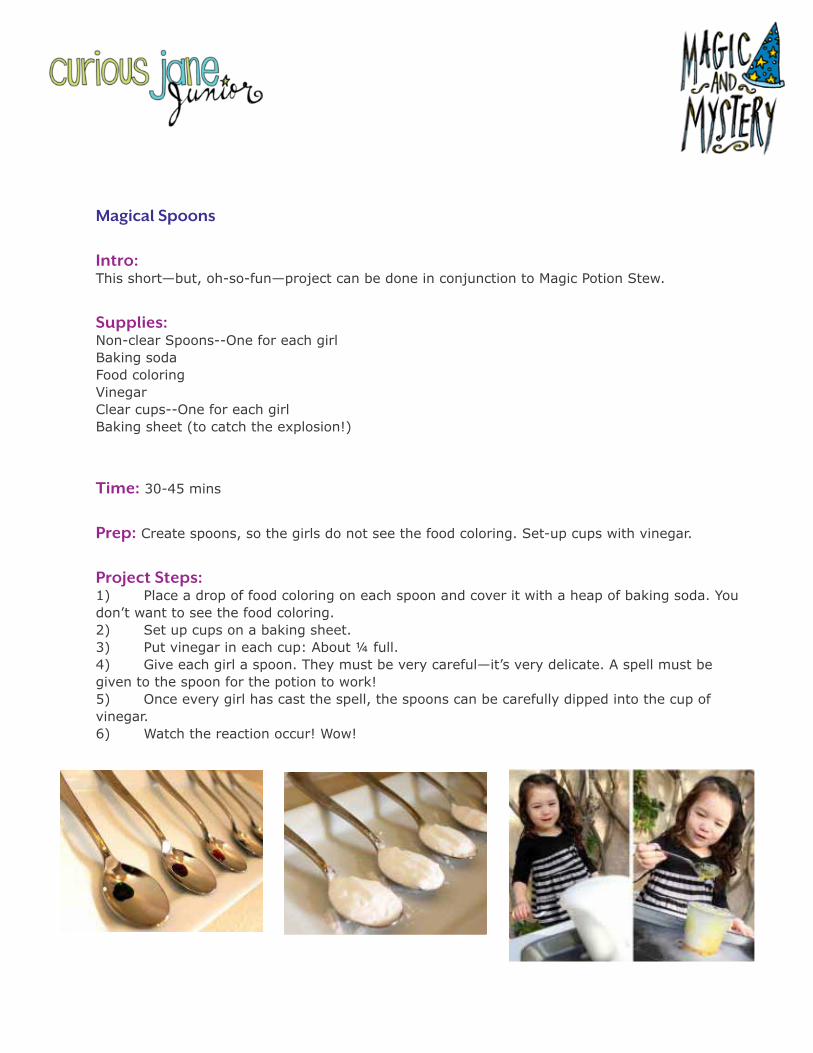
Magical spoons
Intro: This short—but, oh-so-fun—project can be done in conjunction to Magic Potion Stew.
supplies: Non-clear Spoons--One for each girlBaking sodaFood coloringVinegarClear cups--One for each girlBaking sheet (to catch the explosion!)
Time: 30-45 mins
prep: Create spoons, so the girls do not see the food coloring. Set-up cups with vinegar.
project steps:1) Place a drop of food coloring on each spoon and cover it with a heap of baking soda. You don’t want to see the food coloring.2) Set up cups on a baking sheet.3) Put vinegar in each cup: About ¼ full. 4) Give each girl a spoon. They must be very careful—it’s very delicate. A spell must be given to the spoon for the potion to work!5) Once every girl has cast the spell, the spoons can be carefully dipped into the cup of vinegar. 6) Watch the reaction occur! Wow!
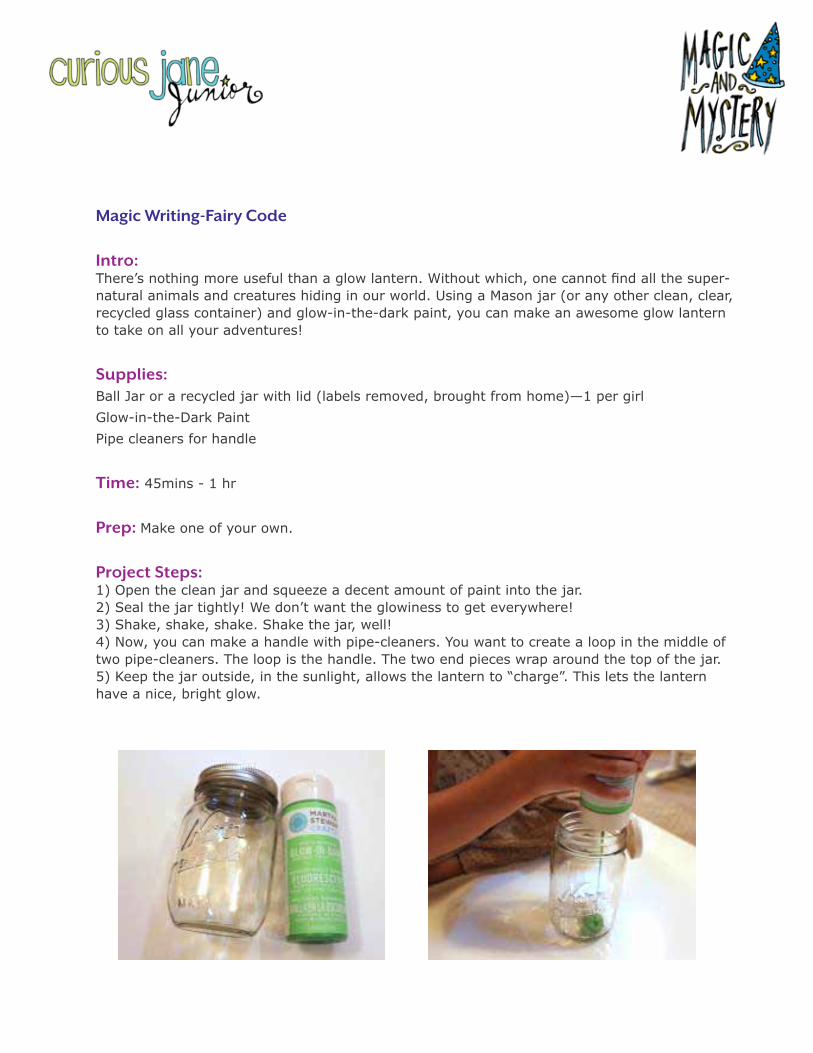
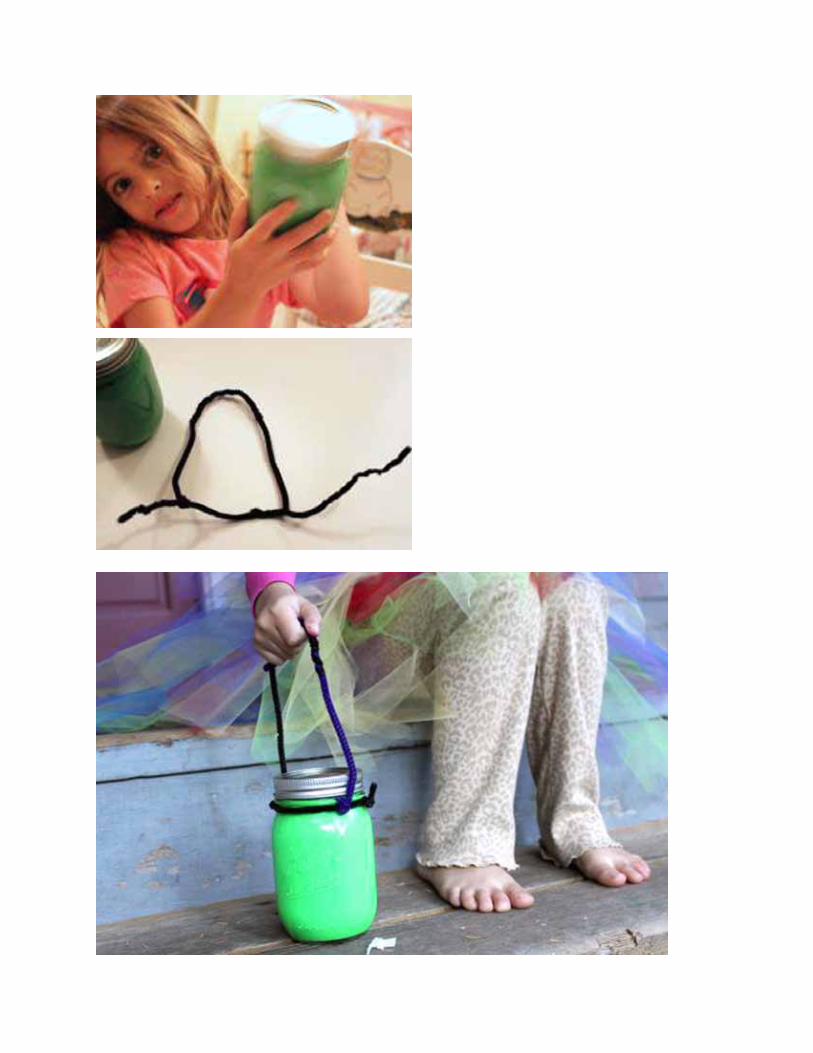
Magic Writing-Fairy Code
Intro: There’s nothing more useful than a glow lantern. Without which, one cannot find all the super-natural animals and creatures hiding in our world. Using a Mason jar (or any other clean, clear, recycled glass container) and glow-in-the-dark paint, you can make an awesome glow lantern to take on all your adventures!
supplies: Ball Jar or a recycled jar with lid (labels removed, brought from home)—1 per girl
Glow-in-the-Dark Paint
Pipe cleaners for handle
Time: 45mins - 1 hr
prep: Make one of your own.
project steps:1) Open the clean jar and squeeze a decent amount of paint into the jar.2) Seal the jar tightly! We don’t want the glowiness to get everywhere!3) Shake, shake, shake. Shake the jar, well!4) Now, you can make a handle with pipe-cleaners. You want to create a loop in the middle of two pipe-cleaners. The loop is the handle. The two end pieces wrap around the top of the jar.5) Keep the jar outside, in the sunlight, allows the lantern to “charge”. This lets the lantern have a nice, bright glow.


![₪[martin gardner]mathematics, magic and mystery](https://img.pdfslide.us/doc/110x75/568cacff1a28ab186da9d185/martin-gardnermathematics-magic-and-mystery.jpg)


![David a Adler - [Houdini Club Magic Mystery 02] - Wacky Jacks (Retail) (PDF)](https://img.pdfslide.us/doc/110x75/55cf94cd550346f57ba47b9d/david-a-adler-houdini-club-magic-mystery-02-wacky-jacks-retail-pdf.jpg)