Embed Size (px)
Citation preview
Mac Basics
OS X Mountain Lion Edition
SUPERGUIDE
Click here to buy the full 232-page “Macworld Mac Basics Superguide, Mountain Lion Edition” for only $12.99!
2
ContentsGet Started with OS XSet Up Your Mac 8Meet Your Mac 20Transfer Other Files 25
Get to Know Your DesktopGestures, Gestures, Gestures 29Welcome to the Finder 40The Dock, Launchpad, and Dashboard 59Mission Control 72Notification Center 74
Customize Your MacSystem Preferences Basics 79Change Your Personal Settings 81Change Your Hardware Settings 89Change Your Internet & Wireless Settings 97Change Your System Settings 102Add Third-Party Utilities 115
Work with AppsApplication Basics 119OS X’s Built-in Apps 129Explore the Mac App Store 157Venture beyond the Mac App Store 161
Connect Your MacPrint Documents 165Share Your Files (and Your Screen) 176Work with Accessories 182
Click here to buy the full 232-page “Macworld Mac Basics Superguide, Mountain Lion Edition” for only $12.99!
3
Secure Your MacLock Up Your Mac 190Protect Your Computer from Wayward Apps 198What Are Sandboxed Apps? 200Back Up Your Mac 202
Troubleshooting TipsYour Mac’s Troubleshooting Tools 214Recover from Crashes 216Treat Kernel Panic Attacks 222Cure Startup Woes 223How to Make OS X Less Like iOS 226Seek Outside Help 228
Click here to buy the full 232-page “Macworld Mac Basics Superguide, Mountain Lion Edition” for only $12.99!

4
ForewordIt’s a special moment, getting your first computer I’ve been using Macs since I was old enough to double-click, but I didn’t get one that was truly mine until 1998—a Bondi blue iMac with a silly-looking mouse and a carrying handle built into the case
Like buying your first house, getting your first Mac is both exciting and terrifying: For the first time, you have something that’s entirely yours to customize, tweak—and occasionally screw up. And as easy as Macs are to learn and set up, dealing with a new computer can be daunting if you’ve never done so before
That’s why we offer the Mac Basics Superguide, which is dedicated to helping you get started with all things Mac There are plenty of manu-
als and guides that explain every single system feature and setup detail; this book is instead designed to actively get you up and running on your Mac without making you feel like you’re studying a textbook
Our superguide has you covered from the first time you turn on your Mac: We walk you through the process of setting up your Mac and transferring any old files you might have, and we introduce you to the menus, windows, and places you need to know about to get going From there, we help you customize Multi-Touch gestures, organize your files, and tweak your preferences We’ll get your Mac suited up with third-party apps and accessories And we offer troubleshooting tips and security suggestions to keep your computer safe and sound
You won’t find everything you need to know about the Mac in this book (That’s what Macworld magazine and Macworld com are for ) But we hope we can give you the tools to begin, and get you excited to learn more
—Serenity Caldwell Boston, November 2012
Click here to buy the full 232-page “Macworld Mac Basics Superguide, Mountain Lion Edition” for only $12.99!
5
Mac Basics Superguide, Mountain LionEDITOR: SERENITY CALDWELL
SVP AND EDITORIAL DIRECTOR: Jason Snell
EDITOR: Dan Miller
EXECUTIVE EDITOR: Jonathan Seff
ART DIRECTOR: Rob Schultz
MANAGING EDITOR: Kimberly Brinson
ASSISTANT MANAGING EDITOR: Sally Zahner
ASSOCIATE EDITOR: Serenity Caldwell
ASSISTANT EDITOR: Mike Lata
COPY EDITOR: Gail Nelson-Bonebrake
DESIGNER: Liz Fiorentino
PRODUCTION: Tamara Gargus, Nancy Jonathans
Macworld is a publication of IDG Consumer & SMB, Inc , and International Data Group, Inc Macworld is an indepen-dent journal not affiliated with Apple. Copyright © 2012, IDG Consumer & SMB, Inc. All rights reserved. Macworld, the Macworld logo, Macworld Lab, the mouse-ratings logo, MacCentral.com, PriceGrabber, and Mac Developer Journal are registered trademarks of International Data Group, Inc , and used under license by IDG Consumer & SMB, Inc Apple, the Apple logo, Mac, and Macintosh are registered trademarks of Apple Printed in the United States of America
ISBN: 978-1-937821-12-8
Have comments or suggestions? Email us at ebooks@macworld com
Click here to buy the full 232-page “Macworld Mac Basics Superguide, Mountain Lion Edition” for only $12.99!
6
ContributorsSenior Editor Christopher Breen (@BodyofBreen) offers advice for new Mac users in Macworld’s Mac 101 blog and troubleshooting advice in Mac 911.
Associate Editor Serenity Caldwell (@settern) helps run the Superguide program She cut her teeth teaching Mac basics to workshop attendees at the Apple Store
Senior Contributor Glenn Fleishman (@GlennF) writes about Wi-Fi and networking, and is the author of Take Control of Your 802.11n AirPort Network, third edition (TidBits Publishing, 2012).
Senior Editor Dan Frakes (@danfrakes) covers the iPhone, iPad, iPod, and Mac—and everything that connects to, works with, or installs on them—for Macworld
Senior Writer Lex Friedman (@lexfri) has used and loved Apple products since Ronald Reagan was president He’s the author of several books, most recently the Dr Seuss parody The Kid in the Crib (Lyons Press, 2012).
Former Macworld and Mac OS X Hints editor Rob Griffiths (@rgriff) is now the Master of Ceremonies at Many Tricks, which makes many a helpful OS X app
Senior Contributor Joe Kissell is the senior editor of TidBits and the author of Take Control of Troubleshooting Your Mac, second edition (TidBits Publishing, 2012).
Senior Contributor Ted Landau (@tedlandau) writes for Macworld’s Mac 911 column, where he continually finds new ways to help you get out of trouble with your Mac
Former PCWorld Editor Harry McCracken (@harrymccracken) is a semi-switcher: He uses both a MacBook Pro and a Windows netbook every day He is an editor at large at Time, where he runs the Technologizer blog
Senior Editor Dan Moren (@dmoren) has been a Mac user since he was 12, before which he just spent a lot of time at his friends’ houses using their Macs
Editorial Director Jason Snell (@jsnell) is in charge of all editorial for IDG Consumer & SMB, the publishers of Macworld, PCWorld, and TechHive
Assistant Editor Leah Yamshon (@leahyamshon) covers iOS apps and cases for Macworld She used several of these Mac Basics tips herself when switching from a PC to a Mac seven years ago
Click here to buy the full 232-page “Macworld Mac Basics Superguide, Mountain Lion Edition” for only $12.99!

7
Get Started with OS X
Getting acquainted with any new operating system—even one as elegantly designed as Apple’s Mac OS X—can be a challenge Newcomers face strange terms, unfamiliar interface elements, and a host of seemingly inexplicable features
Wondering what Mac users mean when they refer to Notification Center or the Spotlight menu? Not sure what to call the list of applications at the bottom of your screen? We’ll walk you through setting up a brand-new Mac, as well as introduce you to some common OS X features—items we’ll refer to again and again in the pages of this book
We’ll also give you a primer for moving any files you might have left behind on an older Mac or PC
C H A P T E R 1
Click here to buy the full 232-page “Macworld Mac Basics Superguide, Mountain Lion Edition” for only $12.99!

8
C H A P T E R 1 Get Started with OS X
Set Up Your MacSo you’ve just pulled a freshly minted Mac out of the box Let’s fire it up and start the setup process
Press the Mac’s power button, and you see a gray screen that eventually displays a black Apple logo and a spin-ning gear icon This is a signal that your Mac is getting its house in order so that it can start up properly How long you’ll wait depends on the Mac you have If you have one with a flash-storage drive rather than a hard drive, it will start up very quickly A Mac that uses a hard drive to store its data will take a little longer
When a new Mac runs for the very first time, it launches something called the Startup Assistant This is a com-puter program that helps you with all the little settings your Mac needs so that it can get on the Internet, create a user account for you, properly set the time and date, connect your Mac to your Apple ID (or help you create one), and register your computer with Apple
Choose Your Location
The first thing you’ll be asked to tell your Mac is the country in which you live (or in which you’ll be using it) On Macs configured for the United States, this list will contain the options United States, Canada, United Kingdom, Australia, New Zealand, and Ireland
LOCATION, LOCATION, LOCATION Tell your Mac where you live.
Click here to buy the full 232-page “Macworld Mac Basics Superguide, Mountain Lion Edition” for only $12.99!
9
C H A P T E R 1 Get Started with OS X
If you don’t see your country in the list, simply enable the Show All option and that list will expand to include more countries than you can think of Choose the correct one and click the Continue button (a right-facing arrow)
Note that if you wait a while before leaving this screen, your Mac will start speaking to you This is for the ben-efit of people with visual impairments If you have difficulty seeing the screen, follow the spoken instructions You can hear those spoken instructions at any time while you’re on this screen by pressing the Escape key in the top left corner of your Mac’s keyboard
Choose Your Keyboard Layout
Keyboards around the world have different layouts Your Mac wants to know which layout you use In the United States, you see two options—U.S. and Canadian English. If you don’t see your preferred keyboard ar-rangement, click Show All and choose the most appropriate one Click Continue when you’re done
Choose Your Wi-Fi Network
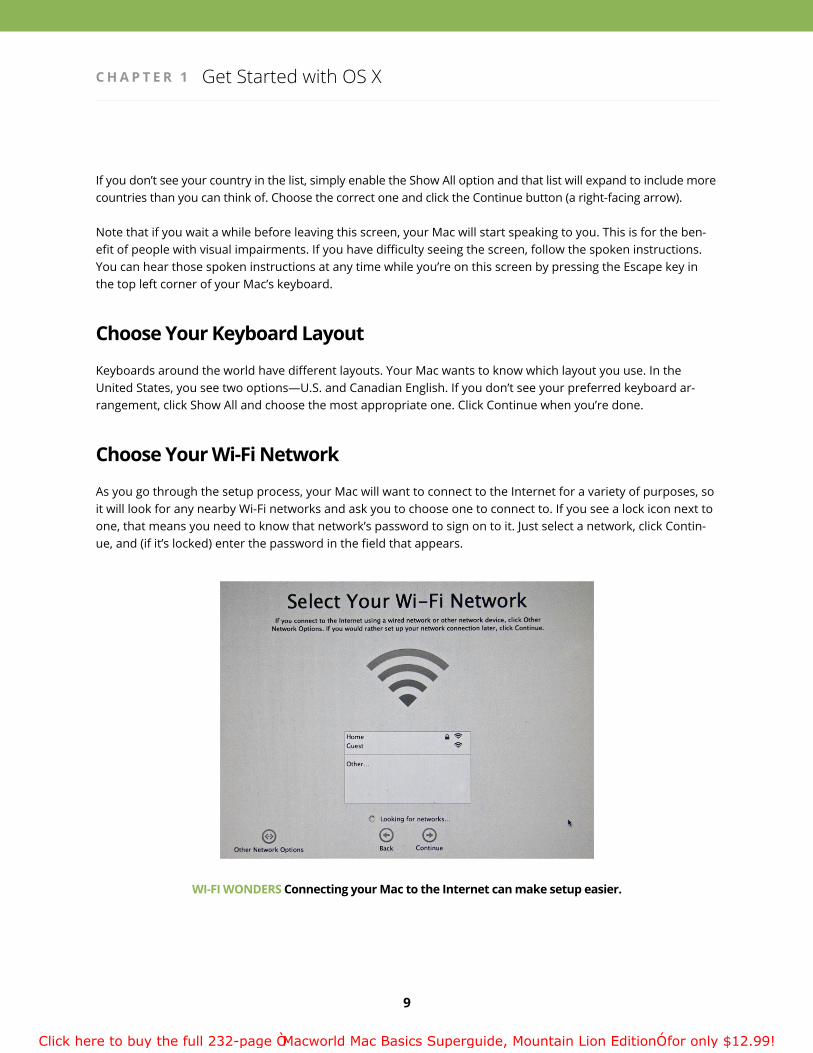
As you go through the setup process, your Mac will want to connect to the Internet for a variety of purposes, so it will look for any nearby Wi-Fi networks and ask you to choose one to connect to If you see a lock icon next to one, that means you need to know that network’s password to sign on to it Just select a network, click Contin-ue, and (if it’s locked) enter the password in the field that appears
WI-FI WONDERS Connecting your Mac to the Internet can make setup easier.
Click here to buy the full 232-page “Macworld Mac Basics Superguide, Mountain Lion Edition” for only $12.99!

10
C H A P T E R 1 Get Started with OS X
If you’ve connected your Mac to an Ethernet network via a networking cable, there’s a very good chance you won’t see this window at all—once the Mac understands that it can connect to your network via a wired connec-tion, it won’t bother asking you for a Wi-Fi alternative
In this window, you’ll also see an Other Network Options button in the bottom left corner Click it and you can tell your Mac specifically what kind of network you wish to connect to (or let it know that you don’t have access to a network at all) Your choices are Wi-Fi Network, Local Network (Ethernet), and My Computer Does Not Connect To The Internet You don’t have to have a network connection to complete setup, though it’s recom-mended Click Continue to move to the next step
Transfer Data to Your Mac
Your Mac has the ability to move all the data from your old computer to a new one, and that computer can be another Mac or a Windows PC A feature called Migration Assistant performs this bit of magic
TRANSFER TRAIN If you have data from an old Mac, PC, or Time Machine backup, you can restore it to your new Mac now; otherwise, you can transfer your data at another time.
Within this window you see four options—From Another Mac, From A Windows PC, From Time Machine Or Other Disk, and Don’t Transfer Now To move data from your old Mac to your new one, select From Another Mac and click the Continue button at the bottom of the screen (Select From A Windows PC to do the same thing from a Windows system )
Click here to buy the full 232-page “Macworld Mac Basics Superguide, Mountain Lion Edition” for only $12.99!

165
Connect Your Mac
CONNECT TO THE OUTSIDE You’ve had a chance to make a project or two; now share them with the outside world.
Your Mac can perform a bunch of neat tasks all on its own But when you want to share what you’ve created, you turn to the outside world to connect your Mac In this chapter, we go over the various ways to share your creations using printers and scanners, built-in OS X features, and screen sharing And if you want to pair their Mac with exter-nal accessories, we have a quick guide on the most common third-party devices and how they work with your Mac
Print DocumentsWe create and store a lot of digital files on our Macs—photos, text files, images, PDFs—but there are times when you may want a hard copy of those files That’s where printing comes in Printing digital images is easy nowadays: All you need is a printer and your Mac
Choose a Printer
If you had a computer before you purchased your Mac, you may already have a printer in your house Most modern printers are compatible with both Macs and PCs; if you’re unsure whether your printer will work with your Mac, you can check Apple’s website, which has a list of all compatible models
C H A P T E R 5
Click here to buy the full 232-page “Macworld Mac Basics Superguide, Mountain Lion Edition” for only $12.99!
33
C H A P T E R 2 Get to Know Your Desktop
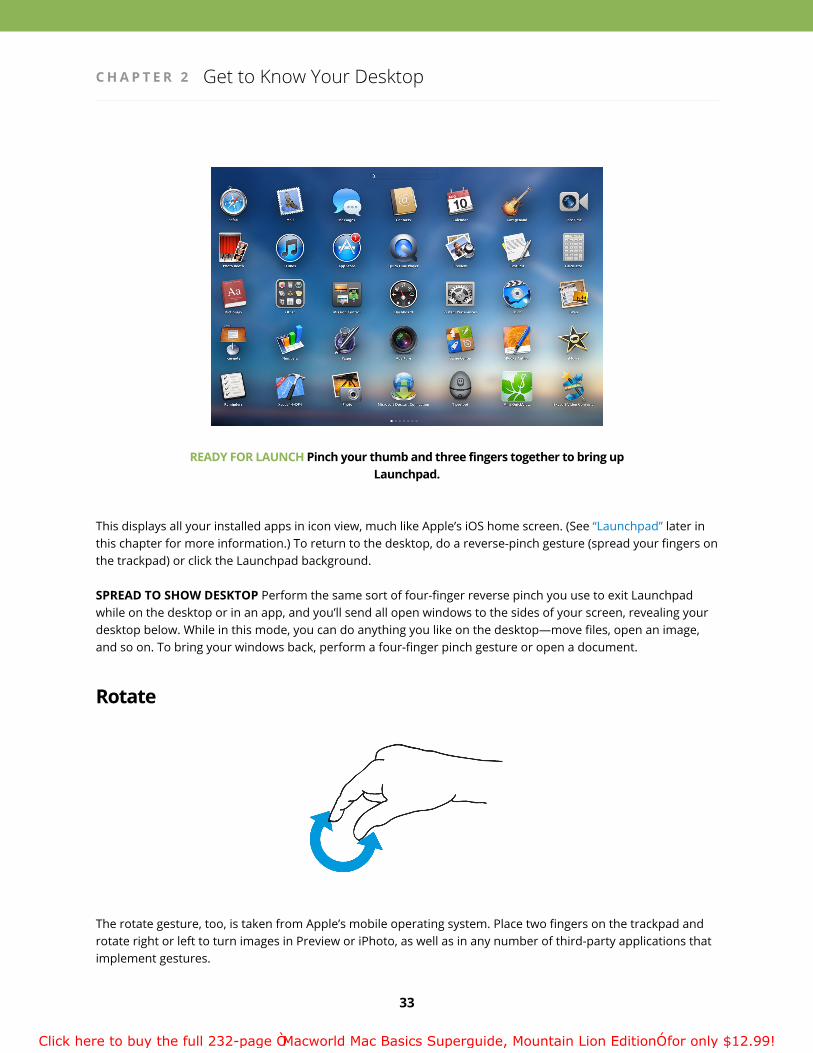
READY FOR LAUNCH Pinch your thumb and three fingers together to bring up Launchpad.
This displays all your installed apps in icon view, much like Apple’s iOS home screen (See “Launchpad” later in this chapter for more information ) To return to the desktop, do a reverse-pinch gesture (spread your fingers on the trackpad) or click the Launchpad background
SPREAD TO SHOW DESKTOP Perform the same sort of four-finger reverse pinch you use to exit Launchpad while on the desktop or in an app, and you’ll send all open windows to the sides of your screen, revealing your desktop below. While in this mode, you can do anything you like on the desktop—move files, open an image, and so on To bring your windows back, perform a four-finger pinch gesture or open a document
Rotate
The rotate gesture, too, is taken from Apple’s mobile operating system Place two fingers on the trackpad and rotate right or left to turn images in Preview or iPhoto, as well as in any number of third-party applications that implement gestures
Click here to buy the full 232-page “Macworld Mac Basics Superguide, Mountain Lion Edition” for only $12.99!
34
C H A P T E R 2 Get to Know Your Desktop
Two-Finger Side Swipe
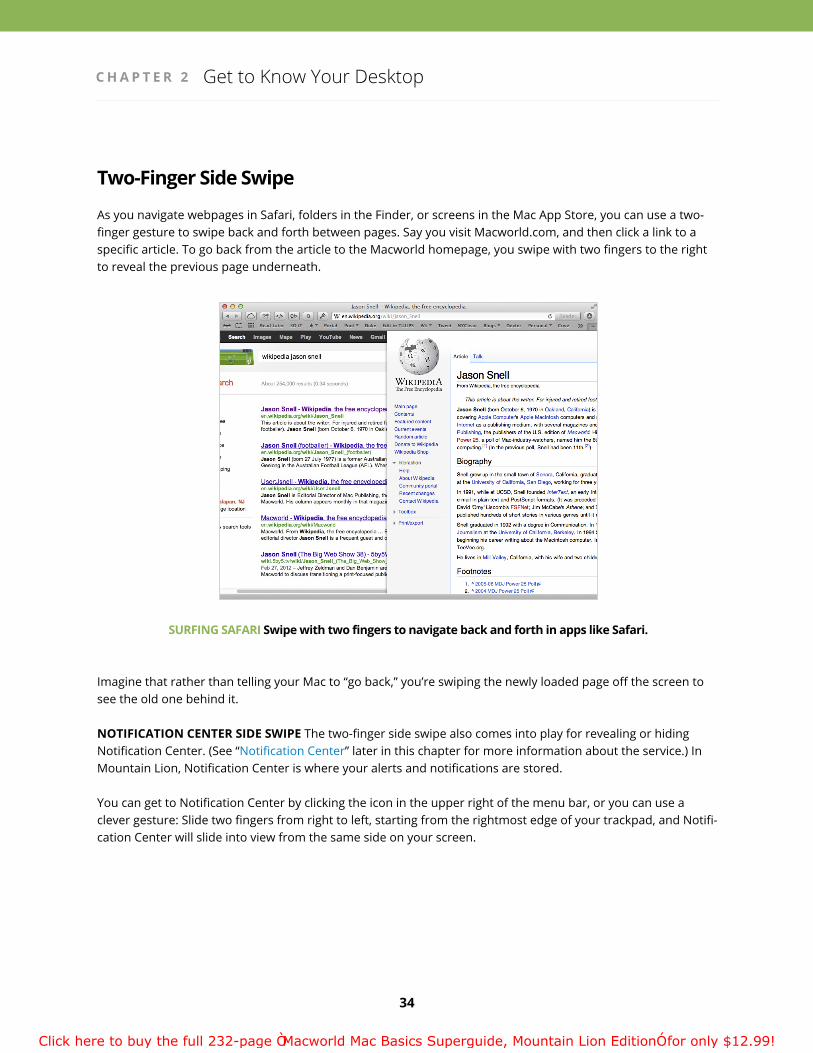
As you navigate webpages in Safari, folders in the Finder, or screens in the Mac App Store, you can use a two-finger gesture to swipe back and forth between pages Say you visit Macworld com, and then click a link to a specific article To go back from the article to the Macworld homepage, you swipe with two fingers to the right to reveal the previous page underneath
SURFING SAFARI Swipe with two fingers to navigate back and forth in apps like Safari.
Imagine that rather than telling your Mac to “go back,” you’re swiping the newly loaded page off the screen to see the old one behind it
NOTIFICATION CENTER SIDE SWIPE The two-finger side swipe also comes into play for revealing or hiding Notification Center (See “Notification Center” later in this chapter for more information about the service ) In Mountain Lion, Notification Center is where your alerts and notifications are stored
You can get to Notification Center by clicking the icon in the upper right of the menu bar, or you can use a clever gesture: Slide two fingers from right to left, starting from the rightmost edge of your trackpad, and Notifi-cation Center will slide into view from the same side on your screen
Click here to buy the full 232-page “Macworld Mac Basics Superguide, Mountain Lion Edition” for only $12.99!

35
C H A P T E R 2 Get to Know Your Desktop
Three- or Four-Finger Side Swipe
Three- or four-finger side swipes navigate between full-screen apps and multiple desktops (See “Full Screen Mode” in the “Work with Apps” chapter for more information on full-screen mode; see “Mission Control” later in this chapter for more information on multiple desktops ) You choose the number of fingers in the More Gestures tab of the Trackpad preference pane If you swipe your fingers to the right on your main desktop screen, your Dashboard will swoop in from the left Swiping your fingers left rotates between your full-screen apps and any virtual desktop spaces you’ve created
SCREEN PASS Swipe with three or four fingers to navigate between virtual desktops, full-screen apps, and the Dashboard.
Click here to buy the full 232-page “Macworld Mac Basics Superguide, Mountain Lion Edition” for only $12.99!
78
Customize Your Mac
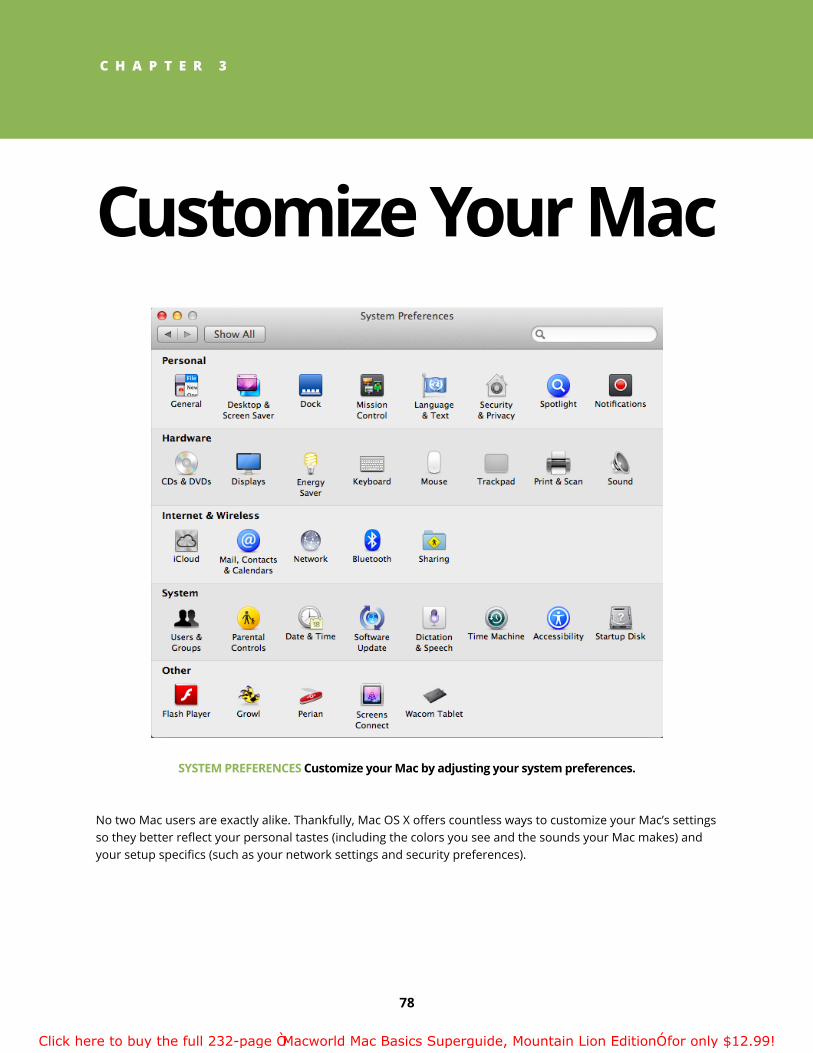
SYSTEM PREFERENCES Customize your Mac by adjusting your system preferences.
No two Mac users are exactly alike Thankfully, Mac OS X offers countless ways to customize your Mac’s settings so they better reflect your personal tastes (including the colors you see and the sounds your Mac makes) and your setup specifics (such as your network settings and security preferences)
C H A P T E R 3
Click here to buy the full 232-page “Macworld Mac Basics Superguide, Mountain Lion Edition” for only $12.99!
79
C H A P T E R 3 Customize Your Mac
System Preferences BasicsSystem Preferences technically resides in your Applications folder, though you can also launch System Preferences from the Apple menu or by clicking the System Preferences icon in the Dock (which resembles a group of gears)
For people familiar with Windows, System Preferences is like the Control Panel: It’s your one-stop shop for every-thing from selecting a screensaver to controlling outside access to your Mac’s files When you launch the applica-tion, you see rows of icons divided into five categories: Personal, Hardware, Internet & Wireless, System, and Other Within those categories are a series of panes: The Sound pane, for example, is located under the Hardware category
Unsurprisingly, System Preferences contains only those preferences used by the system If you’re instead look-ing for an application’s preferences, you can find those within the program’s own menu
There may be options we describe in this chapter that don’t appear on your Mac: This is because not all Macs have the same preferences; some options only appear for laptops, or only for computers with dual graphics cards We’ve tried to note those where they appear
Open a Preference Pane
Click a pane, and the System Preferences window morphs into that pane You can return to the main window by clicking the back button in the top left corner of the window, or by clicking Show All
If you’re having trouble locating a setting, you can type it into the search bar in the top right corner This brings you back to the main menu and highlights the icons that might contain the item you’re looking for You can also customize which preference panes show up on the main list by going to View > Customize, or you can organize your preferences alphabetically rather than by category
Unlock Secure Preferences
Only an administrator-level user on your Mac can modify certain preferences, such as those dealing with accounts, security, and system-level settings These panes, which Apple calls secure preferences, include the small padlock icon in the bottom left corner of the window
The original user account on your Mac is usually an administrator, so if you’ve only set up the one account, you should be able to click the lock and enter your username and password to change any secure preferences
Troubleshoot Misbehaving Preferences
System Preferences should rarely goof up That said, if for any reason your preference panes go missing, appear in duplicate, or crash your computer repeatedly, follow these steps: Quit System Preferences (if it’s open) and go to the Finder Hold down the Option key and click the Go menu, and then select Library Navigate to the /Caches folder and delete the com apple preferencepanes cache file The next time you launch System Preferences, it should work normally
Click here to buy the full 232-page “Macworld Mac Basics Superguide, Mountain Lion Edition” for only $12.99!

80
C H A P T E R 3 Customize Your Mac
Customize Your System
We’ve put together information on all the preference panes for each category later in this chapter, but here’s a quick chart to help you find the most popular settings
IF YOU NEED TO DO THIS . . . . . . USE THIS PANE
Change your desktop background Desktop & Screen Saver
Turn off the translucent menu bar Desktop & Screen Saver
Have your Mac go to sleep after a period of inac-tivity Energy Saver
Configure your keyboard modifier keys or set up keyboard shortcuts Keyboard
Turn off inverse scrolling Trackpad
Configure your network settings Network
Set up your printer Print & Scan
Set up an iCloud account iCloud
Add an email account Mail, Contacts & Calendars
Run apps that aren’t from the Mac App Store Security & Privacy
Share files with other computers Sharing
Change your user password Users & Groups
Add a new user Users & Groups
Set limits on certain accounts Parental Controls
Set the time and customize the menu-bar clock Date & Time
Use Dictation Dictation & Speech
Set up automatic backups Time Machine
Turn on accessibility features Accessibility
Click here to buy the full 232-page “Macworld Mac Basics Superguide, Mountain Lion Edition” for only $12.99!

81
C H A P T E R 3 Customize Your Mac
Change Your Personal SettingsThe Personal category is where you can tweak the way your Mac’s display looks Play around with its bar colors, desktop, screensaver, language, notifications, and more
General
This pane is where you can adjust the appearance color for buttons, menus, and windows, or change your highlight color
GENERAL This pane includes settings for appearance, color themes, and scrolling options.
You can also change the sidebar icon size; these are the icons inside the sidebar of the Finder window
You can additionally tweak your scrollbar settings: Determine whether scrollbars show automatically depend-ing on when your mouse or trackpad is in use, and whether clicking anywhere on the scrollbar jumps your view to the next page or to the specific page at the place you’ve clicked Choose whether to use LCD font smooth-ing, keep changes when closing documents, and close all windows when quitting an application You can play around with each of these options to figure out which settings best suit your style
Click here to buy the full 232-page “Macworld Mac Basics Superguide, Mountain Lion Edition” for only $12.99!

118
Work with Apps
MEET YOUR APPS Your Mac comes with a variety of preinstalled applications.
While the Finder and System Preferences give your Mac its underlying structure, its apps are what make it shine We explain how to open, save, and restore files from your apps, when to use Full Screen mode, and some iCloud basics We also provide an overview of all the applications that come preinstalled on your Mac, along with tips for buying third-party apps from the Mac App Store
C H A P T E R 4
Click here to buy the full 232-page “Macworld Mac Basics Superguide, Mountain Lion Edition” for only $12.99!
119
C H A P T E R 4 Work with Apps
Application BasicsAs mentioned in the “Get to Know Your Desktop” chapter, applications (sometimes called programs or apps) reside in the Applications folder of your computer (If you have multiple accounts, there’s also an Applications folder within your Home folder; this is for any apps you download from the Mac App Store, which we’ll talk about later in this chapter in “Explore the Mac App Store ”)
While you can store and launch your apps from other folders on your Mac, Apple recommends that you keep them in the Applications folder—storing them elsewhere may cause your apps to have problems with finding and storing your preferences
That said, you can make links—also called aliases—for your most-used apps. The easiest way to do so is to drag the application icon in question into the Dock; this gives you a way to quickly launch the program without having to go into the Applications folder If you want the application icon on the desktop, you can also make a traditional alias: Control-click (or right-click) the application’s icon and choose Make Alias This will create a copy of the application with a little arrow over the icon, indicating that it’s just a link to your program, rather than a duplicate of it Drag this icon to the desktop; now you can double-click it to open the program
You can also quickly launch apps by clicking the Spotlight icon in the menu bar (or using the Command-Space-bar shortcut) and typing the first few letters of an application’s name until it pops up under Top Hit, and then pressing the Return key
Menu Options
Once an application launches, it offers you a variety of menus and options to interact with it, depending on its type Like the Finder, all programs list their name in bold next to the Apple menu; clicking the name displays a menu with the program’s About information, preferences, system services, hiding options, and quit function If a keyboard command can also trigger a menu item, that command appears to the right of the item
All applications additionally show the File, Edit, View, Window, and Help menus in the menu bar, though their con-tents vary depending on the program (Apps may also insert custom menu items between View and Window )
TIP: CYCLE THROUGH MULTIPLE APPLICATIONSNeed to switch between several applications? Press Command-Tab on your keyboard to bring up the quick switch menu As long as you hold the Command key down, this menu will stay on screen; you can either use your cursor to select the app you want to go to, or tap the Tab key to cycle through apps until you find the one you like
You can also quit applications quickly this way: Press Command-Tab to bring up the menu, and, while holding down the Command key, highlight the app you want to quit (via your cursor or by tapping the Tab key) When the correct app is selected, press the Q key
Click here to buy the full 232-page “Macworld Mac Basics Superguide, Mountain Lion Edition” for only $12.99!
120
C H A P T E R 4 Work with Apps
FILE If you want to create a new file in your application, open a file, save a currently open file, or print it, open the File menu
EDIT The Edit menu often contains commands for Undo, Cut, Copy, Paste, and Select All
VIEW The actual items in the View menu vary greatly depending on the application, but it generally deals with various features you can enable (or hide) in a program The View menu may also offer ways to switch from one application view to another
WINDOW This menu deals with the commands for zooming and minimizing a window; it also lists all open win-dows in an application and may provide other options for arranging or moving your windows
HELP If you don’t know where to find a menu item, or you want to search the application’s manual, use the Help Search bar This menu may also have a listing for the application manual, if you want to look at it in its entirety, or tutorials
Work with Application Windows
When you open an application, it usually opens a window Depending on what program you’ve launched, that window may contain any manner of things: a webpage, an empty text document, your media library, your email, or a chat window
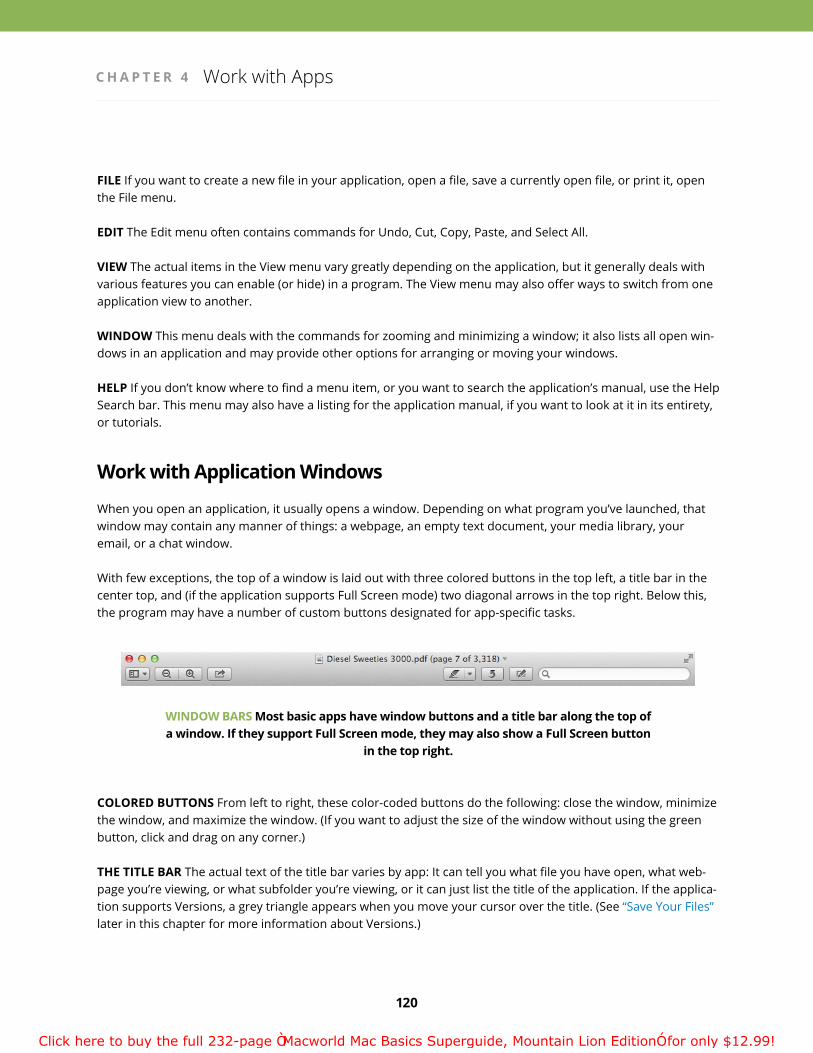
With few exceptions, the top of a window is laid out with three colored buttons in the top left, a title bar in the center top, and (if the application supports Full Screen mode) two diagonal arrows in the top right Below this, the program may have a number of custom buttons designated for app-specific tasks
WINDOW BARS Most basic apps have window buttons and a title bar along the top of a window. If they support Full Screen mode, they may also show a Full Screen button
in the top right.
COLORED BUTTONS From left to right, these color-coded buttons do the following: close the window, minimize the window, and maximize the window (If you want to adjust the size of the window without using the green button, click and drag on any corner )
THE TITLE BAR The actual text of the title bar varies by app: It can tell you what file you have open, what web-page you’re viewing, or what subfolder you’re viewing, or it can just list the title of the application If the applica-tion supports Versions, a grey triangle appears when you move your cursor over the title (See “Save Your Files” later in this chapter for more information about Versions )
Click here to buy the full 232-page “Macworld Mac Basics Superguide, Mountain Lion Edition” for only $12.99!
121
C H A P T E R 4 Work with Apps
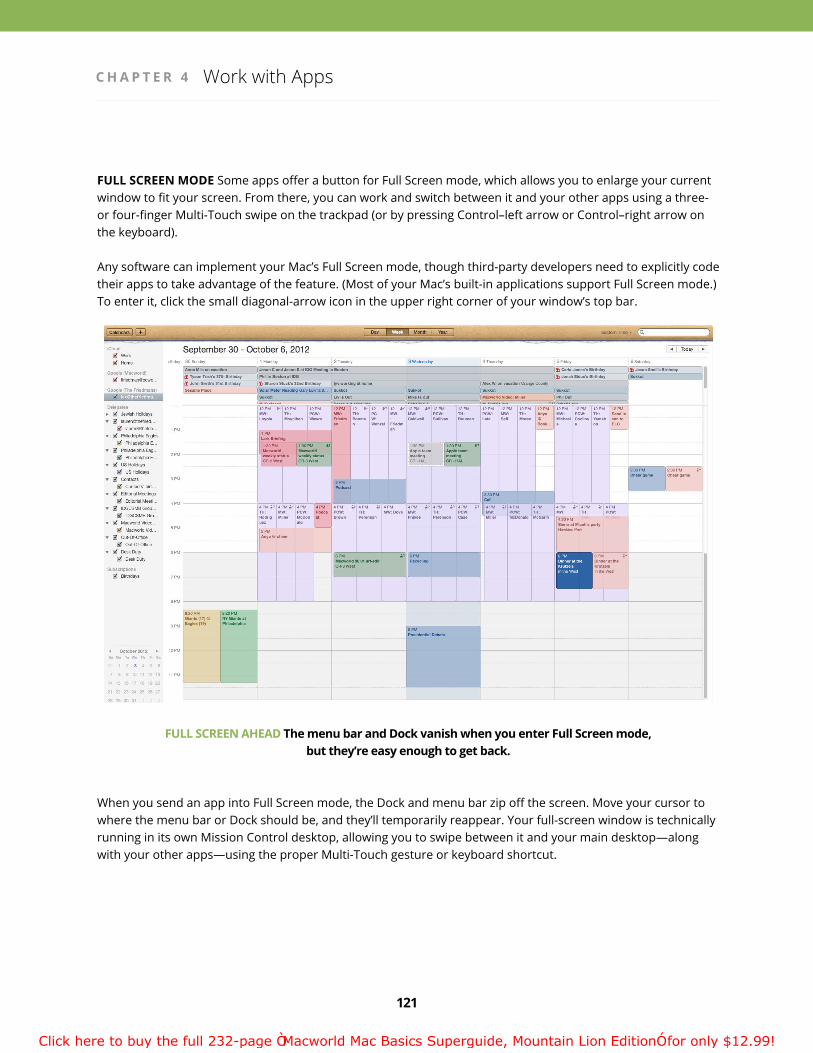
FULL SCREEN MODE Some apps offer a button for Full Screen mode, which allows you to enlarge your current window to fit your screen From there, you can work and switch between it and your other apps using a three- or four-finger Multi-Touch swipe on the trackpad (or by pressing Control–left arrow or Control–right arrow on the keyboard)
Any software can implement your Mac’s Full Screen mode, though third-party developers need to explicitly code their apps to take advantage of the feature (Most of your Mac’s built-in applications support Full Screen mode ) To enter it, click the small diagonal-arrow icon in the upper right corner of your window’s top bar
FULL SCREEN AHEAD The menu bar and Dock vanish when you enter Full Screen mode, but they’re easy enough to get back.
When you send an app into Full Screen mode, the Dock and menu bar zip off the screen Move your cursor to where the menu bar or Dock should be, and they’ll temporarily reappear Your full-screen window is technically running in its own Mission Control desktop, allowing you to swipe between it and your main desktop—along with your other apps—using the proper Multi-Touch gesture or keyboard shortcut.
Click here to buy the full 232-page “Macworld Mac Basics Superguide, Mountain Lion Edition” for only $12.99!

28
Get to Know Your Desktop
DESKTOP DUTY The desktop is the first aspect of the Mac you’ll get acquainted with.
Now that you’ve set your Mac up and familiarized yourself with the basics, it’s time to really get to know your desktop In this chapter, we cover OS X’s Multi-Touch gestures; introduce you to the Finder, the Dock, Launch-pad, Dashboard, and Mission Control; and help you set up your notifications in Notification Center
C H A P T E R 2
Click here to buy the full 232-page “Macworld Mac Basics Superguide, Mountain Lion Edition” for only $12.99!

29
C H A P T E R 2 Get to Know Your Desktop
Gestures, Gestures, GesturesOn the iPhone, you use Multi-Touch gestures—tapping and swiping fingers on a Multi-Touch trackpad—for almost everything And while your Mac laptop or desktop may not have a touch-sensitive screen, Apple com-pensates for this by offering users Multi-Touch gestures through their laptop’s built-in trackpad, external Magic Trackpad, or Magic Mouse
Apple began offering Multi-Touch gestures beyond the two-finger scroll in Lion; the company builds on this in Mountain Lion, letting you “touch” your Mac’s screen more than ever before via the easier-to-reach trackpad (One note: Most of these gestures won’t work with Apple’s Multi-Touch Magic Mouse, because that device is limited to two-finger gestures )
ON TRACK Review what particular gestures do, disable some of them if you prefer, and change how they work in the Trackpad pane of System Preferences.
The new gestures are configurable in the Trackpad pane of System Preferences (For more information, see the “Customize Your Mac” chapter ) They include tapping to click, dictionary definitions, swiping through webpages and images, and more
Click here to buy the full 232-page “Macworld Mac Basics Superguide, Mountain Lion Edition” for only $12.99!
30
C H A P T E R 2 Get to Know Your Desktop
Tap to Click and Control-Click (Right-Click)
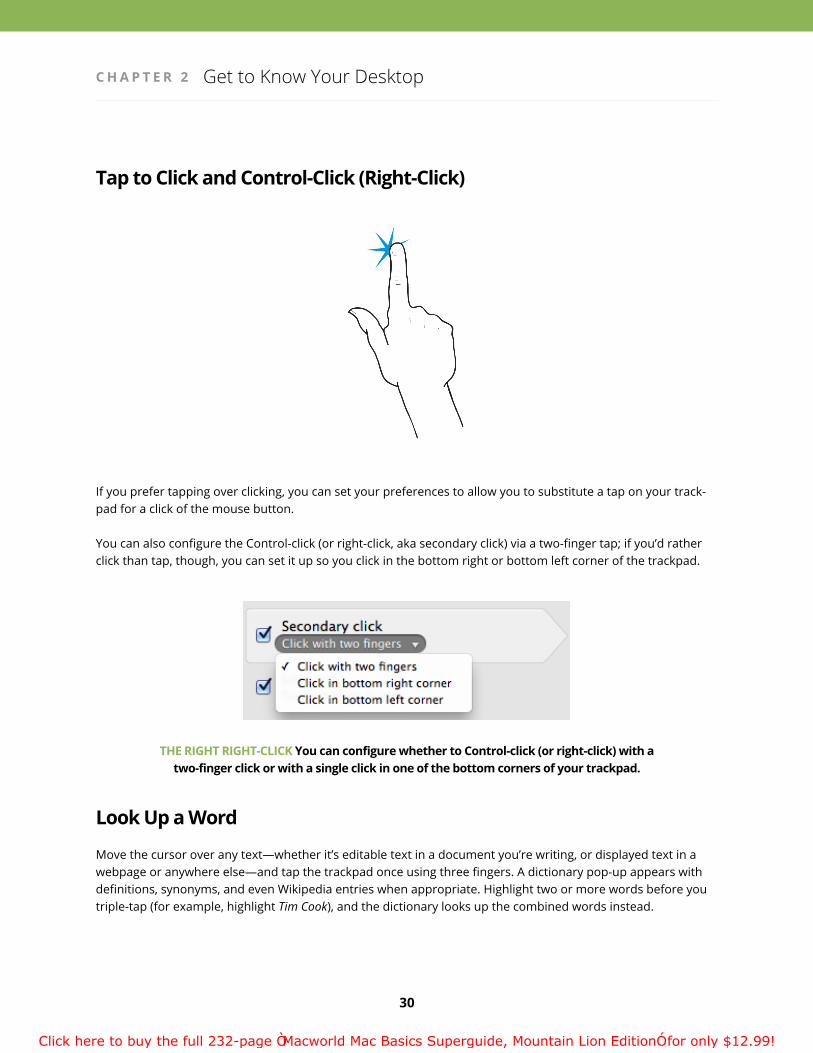
If you prefer tapping over clicking, you can set your preferences to allow you to substitute a tap on your track-pad for a click of the mouse button
You can also configure the Control-click (or right-click, aka secondary click) via a two-finger tap; if you’d rather click than tap, though, you can set it up so you click in the bottom right or bottom left corner of the trackpad
THE RIGHT RIGHT-CLICK You can configure whether to Control-click (or right-click) with a two-finger click or with a single click in one of the bottom corners of your trackpad.
Look Up a Word
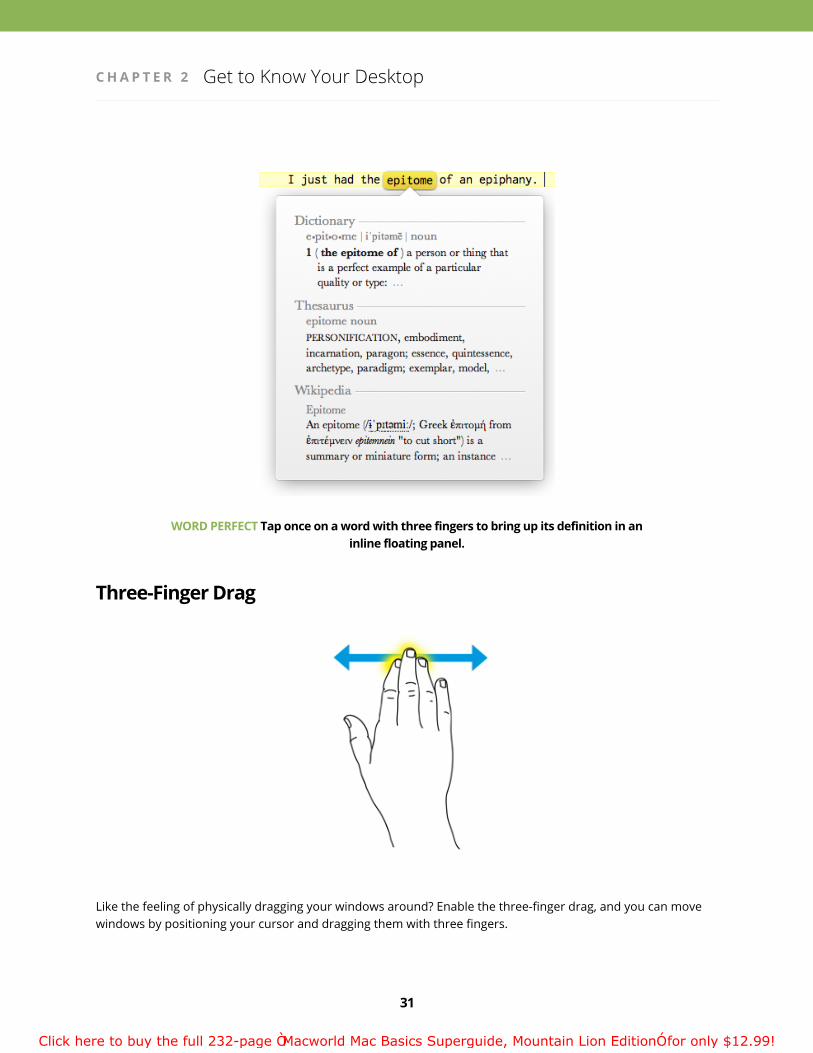
Move the cursor over any text—whether it’s editable text in a document you’re writing, or displayed text in a webpage or anywhere else—and tap the trackpad once using three fingers. A dictionary pop-up appears with definitions, synonyms, and even Wikipedia entries when appropriate Highlight two or more words before you triple-tap (for example, highlight Tim Cook), and the dictionary looks up the combined words instead
Click here to buy the full 232-page “Macworld Mac Basics Superguide, Mountain Lion Edition” for only $12.99!
31
C H A P T E R 2 Get to Know Your Desktop
WORD PERFECT Tap once on a word with three fingers to bring up its definition in an inline floating panel.
Three-Finger Drag
Like the feeling of physically dragging your windows around? Enable the three-finger drag, and you can move windows by positioning your cursor and dragging them with three fingers
Click here to buy the full 232-page “Macworld Mac Basics Superguide, Mountain Lion Edition” for only $12.99!

189
Secure Your Mac
SECURITY PARADE Keep your Mac safe and sound with OS X’s built-in tools.
Though Apple has long prided itself on the Mac’s safety record, recent exploits have proven that the company can’t take the security of its operating systems for granted And the security upgrades present in OS X make it clear that Apple isn’t
Apple keeps your data safe with several features: Gatekeeper makes sure you don’t download malicious soft-ware masquerading as a legitimate app; sandboxing protects your Mac App Store apps from similar exploita-tion; and FileVault allows you to encrypt your files, preventing the theft of important data from your Mac
The company also provides essential backup options for keeping your data safe at all times—even in the event of a hard drive crash or a liquid spill on the keyboard
C H A P T E R 6
Click here to buy the full 232-page “Macworld Mac Basics Superguide, Mountain Lion Edition” for only $12.99!
190
C H A P T E R 6 Secure Your Mac
Lock Up Your MacIf you purchased a laptop, chances are you’re often out and about with your Mac This makes it very important to keep your computer—and its data—safe from prying eyes, thieves, and other such dangers.
Set a Password and Lock Message
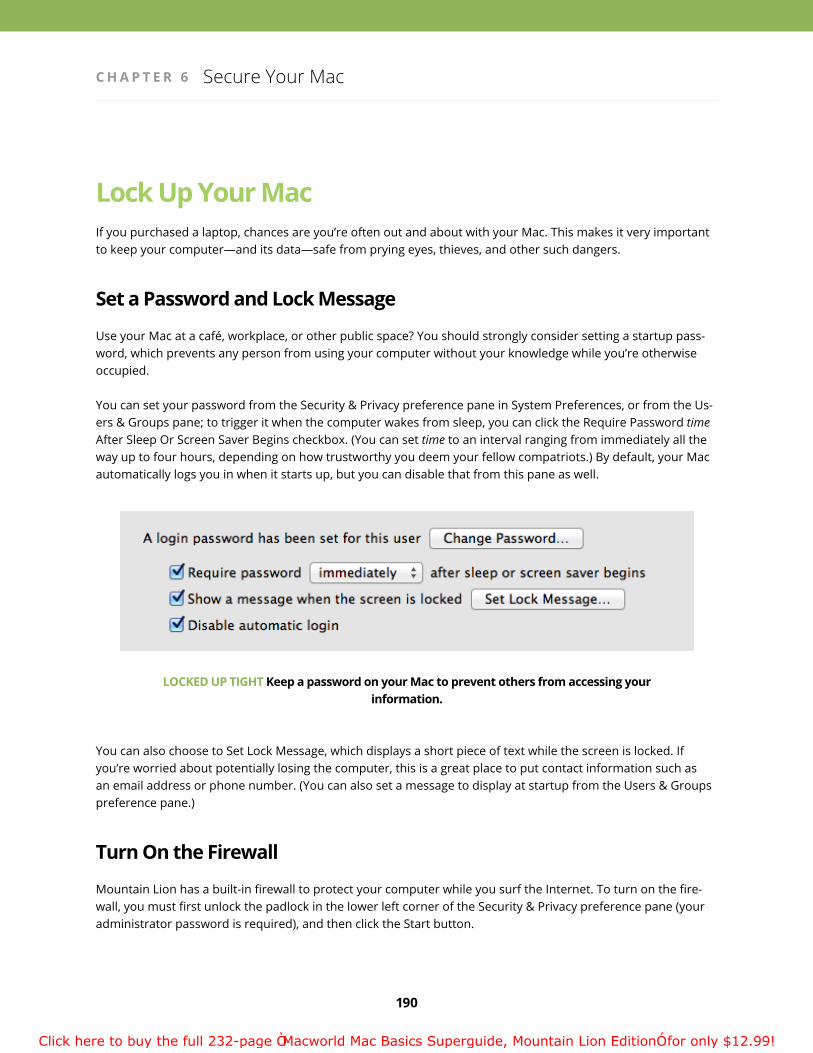
Use your Mac at a café, workplace, or other public space? You should strongly consider setting a startup pass-word, which prevents any person from using your computer without your knowledge while you’re otherwise occupied
You can set your password from the Security & Privacy preference pane in System Preferences, or from the Us-ers & Groups pane; to trigger it when the computer wakes from sleep, you can click the Require Password time After Sleep Or Screen Saver Begins checkbox (You can set time to an interval ranging from immediately all the way up to four hours, depending on how trustworthy you deem your fellow compatriots ) By default, your Mac automatically logs you in when it starts up, but you can disable that from this pane as well
LOCKED UP TIGHT Keep a password on your Mac to prevent others from accessing your information.
You can also choose to Set Lock Message, which displays a short piece of text while the screen is locked If you’re worried about potentially losing the computer, this is a great place to put contact information such as an email address or phone number (You can also set a message to display at startup from the Users & Groups preference pane )
Turn On the Firewall
Mountain Lion has a built-in firewall to protect your computer while you surf the Internet To turn on the fire-wall, you must first unlock the padlock in the lower left corner of the Security & Privacy preference pane (your administrator password is required), and then click the Start button
Click here to buy the full 232-page “Macworld Mac Basics Superguide, Mountain Lion Edition” for only $12.99!
191
C H A P T E R 6 Secure Your Mac
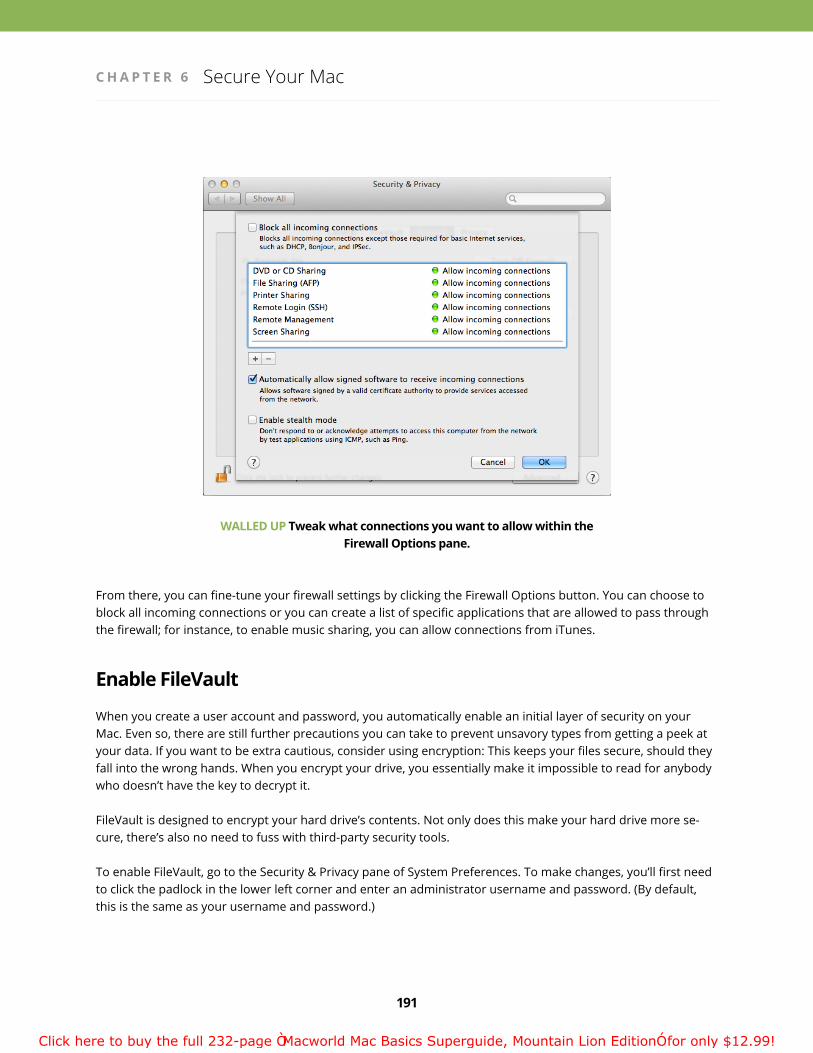
WALLED UP Tweak what connections you want to allow within the Firewall Options pane.
From there, you can fine-tune your firewall settings by clicking the Firewall Options button You can choose to block all incoming connections or you can create a list of specific applications that are allowed to pass through the firewall; for instance, to enable music sharing, you can allow connections from iTunes
Enable FileVault
When you create a user account and password, you automatically enable an initial layer of security on your Mac Even so, there are still further precautions you can take to prevent unsavory types from getting a peek at your data If you want to be extra cautious, consider using encryption: This keeps your files secure, should they fall into the wrong hands When you encrypt your drive, you essentially make it impossible to read for anybody who doesn’t have the key to decrypt it
FileVault is designed to encrypt your hard drive’s contents Not only does this make your hard drive more se-cure, there’s also no need to fuss with third-party security tools
To enable FileVault, go to the Security & Privacy pane of System Preferences To make changes, you’ll first need to click the padlock in the lower left corner and enter an administrator username and password (By default, this is the same as your username and password )
Click here to buy the full 232-page “Macworld Mac Basics Superguide, Mountain Lion Edition” for only $12.99!
192
C H A P T E R 6 Secure Your Mac
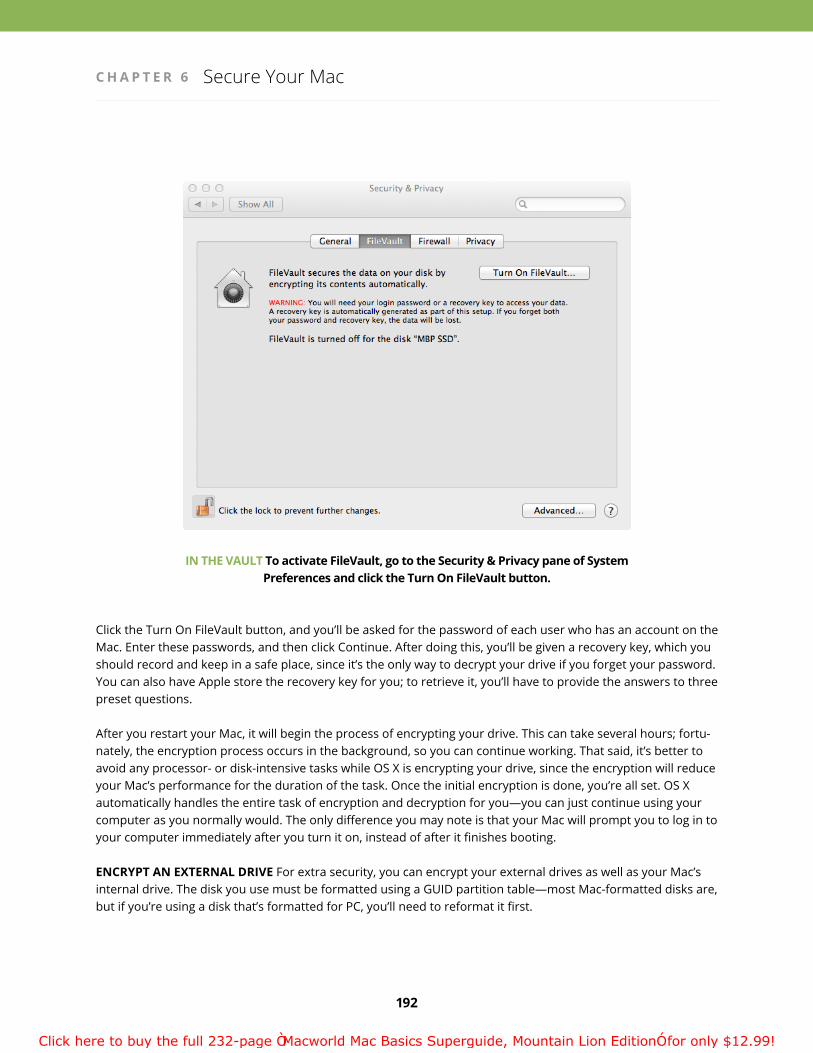
IN THE VAULT To activate FileVault, go to the Security & Privacy pane of System Preferences and click the Turn On FileVault button.
Click the Turn On FileVault button, and you’ll be asked for the password of each user who has an account on the Mac Enter these passwords, and then click Continue After doing this, you’ll be given a recovery key, which you should record and keep in a safe place, since it’s the only way to decrypt your drive if you forget your password You can also have Apple store the recovery key for you; to retrieve it, you’ll have to provide the answers to three preset questions
After you restart your Mac, it will begin the process of encrypting your drive This can take several hours; fortu-nately, the encryption process occurs in the background, so you can continue working That said, it’s better to avoid any processor- or disk-intensive tasks while OS X is encrypting your drive, since the encryption will reduce your Mac’s performance for the duration of the task Once the initial encryption is done, you’re all set OS X automatically handles the entire task of encryption and decryption for you—you can just continue using your computer as you normally would The only difference you may note is that your Mac will prompt you to log in to your computer immediately after you turn it on, instead of after it finishes booting
ENCRYPT AN EXTERNAL DRIVE For extra security, you can encrypt your external drives as well as your Mac’s internal drive. The disk you use must be formatted using a GUID partition table—most Mac-formatted disks are, but if you’re using a disk that’s formatted for PC, you’ll need to reformat it first
Click here to buy the full 232-page “Macworld Mac Basics Superguide, Mountain Lion Edition” for only $12.99!

213
Troubleshooting Tips
SAD MAC Even the best Macs can go bad.
Your Mac and its accompanying operating system are engineering marvels But even engineering marvels have their off days Unless you were born under the luckiest of stars, your Mac is going to act up And while a trip to your local Apple Genius Bar will likely result in a better-behaved computer, there are simple things you can try before calling in the experts In this chapter we’ll look at them
C H A P T E R 7
Click here to buy the full 232-page “Macworld Mac Basics Superguide, Mountain Lion Edition” for only $12.99!

214
C H A P T E R 7 Troubleshooting Tips
Your Mac’s Troubleshooting ToolsMountain Lion includes several useful diagnostic tools for tracking down persistent problems Here are some of the ones you might end up using
Network Preference Pane and Network Utility
If you’re having trouble with an Internet connection, your first stop should be the Network preference pane Click the Assist Me button From the sheet that appears, select Diagnostics If you need more help, and assum-ing you have sufficient technical skills, try Network Utility
Activity Monitor
When you’re wrestling with systemwide problems, such as slowdowns, Activity Monitor is the first place to turn This program lists all open processes, including running apps and behind-the-scenes activities you don’t see in the Finder
Start by checking Activity Monitor’s CPU column If one application is consistently showing an especially high percentage (anything over 30 percent would qualify), it may be the source of your problem If it’s an application you know you can safely quit, highlight it and click Quit Process If you don’t want to risk quitting something that looks unfamiliar, you can also restart your Mac
Click here to buy the full 232-page “Macworld Mac Basics Superguide, Mountain Lion Edition” for only $12.99!
215
C H A P T E R 7 Troubleshooting Tips
System Information
Accessed by holding down the Option key and choosing System Information from the Apple menu, this handy application provides you with your Mac’s intimate technical details Is your MacBook’s battery not holding a charge? Choose Power and check the Health Information entry A questionable reading could indicate a failing battery Are you receiving low-memory errors? Select Memory to see if the Mac recognizes all the memory you believe is installed While System Information can’t directly repair anything, it can give you a hint about what needs repairing
Recovery HD
When you can’t restart your Mac normally, you can hold down the Command-R keys on restart to boot into Recovery HD, an invisible, bootable, 650MB portion of your drive that OS X treats as a separate hard drive. It includes a few essential utilities for fixing problems, restoring files, browsing the Web, and even reinstalling the operating system
Click here to buy the full 232-page “Macworld Mac Basics Superguide, Mountain Lion Edition” for only $12.99!
216
C H A P T E R 7 Troubleshooting Tips
Recover from CrashesWhen trouble strikes, figuring out exactly what the problem is and where it’s coming from is half the challenge There are often several possible explanations for a single problem With that in mind, we’ll take a look at some of the most common Mac issues—application freezes and crashes—and walk you through the steps you should take to solve them
Deal with Frozen Applications
It happens to all Mac users sooner or later: You’re about to select a menu command when suddenly your cursor turns into a beach ball that just spins and spins You try everything from pounding on the keyboard to offering a sacrifice to the computer gods—all to no avail. Your application has frozen.
First, some good news: Usually only one application freezes at a time This means if you move your cursor away from the program’s window, the beach ball should disappear and your Mac’s behavior should return to normal But you’re still stuck with an application on ice
When you can’t access an application’s Quit command, how do you get it to quit? Don’t fret: OS X offers several alternative ways to force-quit a program You only need to use one, as they all do the same thing; however, you may find one method more convenient than another Also, sometimes one may work when another doesn’t
FORCE-QUIT FROM THE APPLE MENU Go to the Apple menu and select Force Quit (or press its keyboard equivalent: Command-Option-Escape) This brings up the Force Quit Applications window You’ll see a list of all your currently open applications Typically, the phrase “not responding” in parentheses will follow the name of the frozen app Select the program’s name and click Force Quit
Click here to buy the full 232-page “Macworld Mac Basics Superguide, Mountain Lion Edition” for only $12.99!
232
Thanks for Reading!We hope that this Superguide has helped you get started with your Mac, and that you’re on your way to Mac mastery For more Mac basics help and quick tips, check out our Mac 101 blog And for even more information on Apple’s products, OS X, and the latest tips, tricks, how-tos, and news, check out Macworld com and the rest of our Superguide program
Click here to buy the full 232-page “Macworld Mac Basics Superguide, Mountain Lion Edition” for only $12.99!