Embed Size (px)
Citation preview
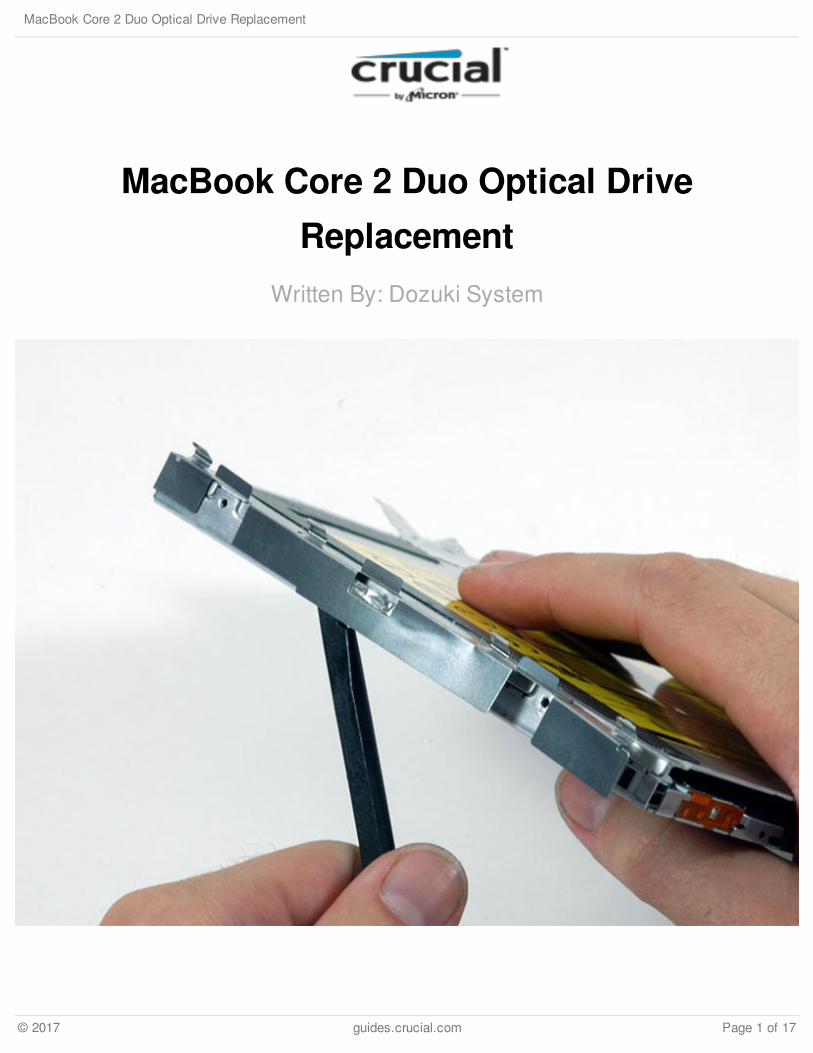
MacBook Core 2 Duo Optical DriveReplacement
Written By: Dozuki System
MacBook Core 2 Duo Optical Drive Replacement
© 2017 guides.crucial.com Page 1 of 17

INTRODUCTION
Upgrade or replace the combo or SuperDrive (requires a slim drive).
TOOLS:Coin (1)
Phillips #00 Screwdriver (1)
Spudger (1)
PARTS:MacBook/MacBook Pro 15" 8x
SuperDrive (1)MacBook 8x SuperDrive (Used) (1)
MacBook Core 2 Duo Optical Drive Replacement
© 2017 guides.crucial.com Page 2 of 17

Step 1 — Battery
Use a coin to rotate the battery-locking screw 90 degrees clockwise.
Step 2
Lift the battery out of the computer.
MacBook Core 2 Duo Optical Drive Replacement
© 2017 guides.crucial.com Page 3 of 17

Step 3 — Memory Cover
Unscrew the three evenly-spacedPhillips screws from along the rearwall of the battery compartment.
The screws are captive to the metalmemory cover so you cannot losethem.
Step 4
Rotate the L-shaped memory coverso it clears the battery compartmentopening and lift it up and out of thecomputer.
MacBook Core 2 Duo Optical Drive Replacement
© 2017 guides.crucial.com Page 4 of 17

Step 5 — Upper Case
Remove the following 3 screws:
One 11 mm Phillips#00 in themiddle of the case. (Head: 5mmdia. x .75mm thick)
Two 14.5 mm Phillips #00 (Head:5mm dia. x .75mm thick)
If the screws stick in the case, youcan use a magnetized screwdriver todraw them out.
The shorter of the three screws goesin the middle.
Step 6
Remove the following 3 screws fromthe rear wall of the batterycompartment:
One 3 mm Phillips #0. (Head:2.75 mm. dia.)
Two 4 mm Phillips #0 on theeither side. (Head: 2.75mm dia.)
MacBook Core 2 Duo Optical Drive Replacement
© 2017 guides.crucial.com Page 5 of 17
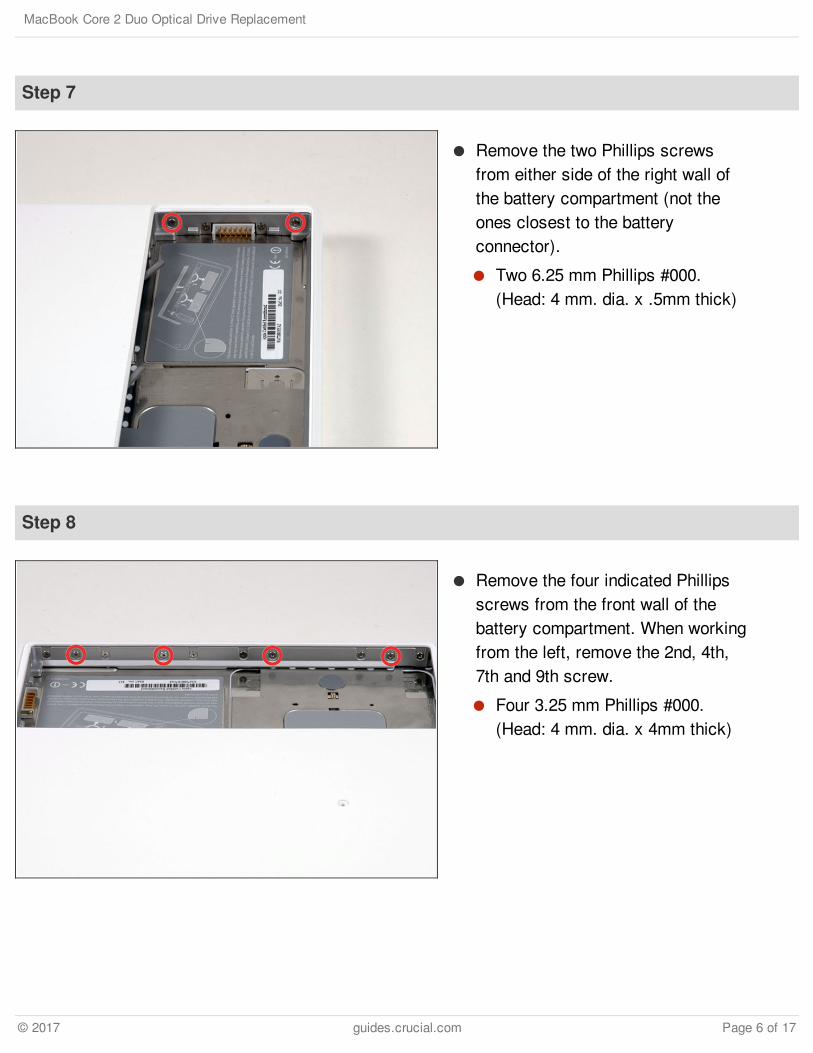
Step 7
Remove the two Phillips screwsfrom either side of the right wall ofthe battery compartment (not theones closest to the batteryconnector).
Two 6.25 mm Phillips #000.(Head: 4 mm. dia. x .5mm thick)
Step 8
Remove the four indicated Phillipsscrews from the front wall of thebattery compartment. When workingfrom the left, remove the 2nd, 4th,7th and 9th screw.
Four 3.25 mm Phillips #000.(Head: 4 mm. dia. x 4mm thick)
MacBook Core 2 Duo Optical Drive Replacement
© 2017 guides.crucial.com Page 6 of 17

Step 9
Remove the following 4 screws fromthe back of the computer:
The longer screws go on the inside,shorter screws on the outside.
Two 11 mm Phillips #00, withShank (2.2mm dia. x 2 mm len.)(Head: 3.2 mm. dia. x .5mm thick)
Two 7.25 mm Phillips #00, withShank (2mm dia. x 3.75 mm len.)(Head: 3.2 mm. dia. x .5mm thick)
Step 10
Remove the two Phillips screwsfrom the optical drive side of thecomputer.
Two 5.2 mm Phillips #00, withShank (2.3mm dia. x 3.5 mm len.)(Head: 3.2 mm. dia. x .5mm thick)
It is not necessary to remove thesimilar screws on the other side ofthe computer.
MacBook Core 2 Duo Optical Drive Replacement
© 2017 guides.crucial.com Page 7 of 17

Step 11
There's a trackpad and keyboardribbon connecting the upper case tothe logic board, so don't pull theupper case off entirely just yet.
Starting near the display andworking around to the front of thecomputer, pry up on the upper case.A or a medium hard guitar pick mayhelp you to do this.
The upper case is likely to stick atthe connection above the opticaldrive. If this is the case, first free allother sides, then proceed to pullupward on the upper case fromeither side of the optical driveopening.
MacBook Core 2 Duo Optical Drive Replacement
© 2017 guides.crucial.com Page 8 of 17

Step 12
While holding up the upper case, pullup the black tab of the silver cableaway from its connector.
If there is no black tab, you can alsouse a spudger to gently pry theconnector from its housing. Thisconnector is tall, so be sure to prystraight up.
If you happen to break your uppercase cable when removing the uppercase, we stock the individually andwe have a [invalid guide link] thatmakes replacing it easy.
Upon reassembly, there are 4 greyplastic clips on the optical drive sideof the keyboard. They must beinstalled in their slots for thekeyboard to snap in properly.
MacBook Core 2 Duo Optical Drive Replacement
© 2017 guides.crucial.com Page 9 of 17

Step 13 — Optical Drive
Grasp the white plastic tab attachedto the hard drive and pull it to theleft, removing the hard drive fromthe computer.
Step 14
Remove the two Phillips screwsfrom the front edge of the opticaldrive.
Two 3.25 mm Phillips #000,(Head: 4 mm. dia. x .3 mm thick)
MacBook Core 2 Duo Optical Drive Replacement
© 2017 guides.crucial.com Page 10 of 17

Step 15
Disconnect the orange optical driveribbon cable from the logic board.This cable can also be disconnectedby prying straight up using aspudger.
Step 16
Disconnect the newly revealeddisplay data cable. If there is no pull-tab on the top of the connector, itmay be helpful to use a spudger todisconnect this connector.
MacBook Core 2 Duo Optical Drive Replacement
© 2017 guides.crucial.com Page 11 of 17

Step 17
Disconnect the (once again) newly-revealed hard drive cable.
Step 18
Peel up the foil tape between the fanand the optical drive.
MacBook Core 2 Duo Optical Drive Replacement
© 2017 guides.crucial.com Page 12 of 17

Step 19
Pull up the display data cable fromalong the edge of the optical drive toreveal a silver Phillips screw.
Step 20
Remove the 2 mm Phillips screwsecuring the optical drive.
The Bluetooth cable may becovering the screw; carefully push itaside before removing the screw.
MacBook Core 2 Duo Optical Drive Replacement
© 2017 guides.crucial.com Page 13 of 17

Step 21
Lift the Bluetooth antenna board fromthe right side of the optical drive.
Step 22
Deroute the hard drive cable fromalong the front of the optical drive.
MacBook Core 2 Duo Optical Drive Replacement
© 2017 guides.crucial.com Page 14 of 17

Step 23
Lift the front edge of the optical driveand slide it up and out of thecomputer.
Step 24 — Optical Drive Replacement
Use a spudger to carefully pry thesilver metal bracket off the left sideof the optical drive. Be careful not tobend the bracket, as it is very thinand bends easily. If the bracketdoesn't come free easily, heating theadhesive may make prying thebracket off easier.
MacBook Core 2 Duo Optical Drive Replacement
© 2017 guides.crucial.com Page 15 of 17

Step 25
Peel up the L-shaped piece of blacktape from the top of the drive.
You'll want to reapply this tape in thesame position on your replacementdrive.
Step 26
Peel up the silver foil tape from theoptical drive.
You'll want to reapply this tape in thesame position on your replacementdrive.
MacBook Core 2 Duo Optical Drive Replacement
© 2017 guides.crucial.com Page 16 of 17
To reassemble your device, follow these instructions in reverse order.
This document was last generated on 2017-06-17 11:28:07 AM.
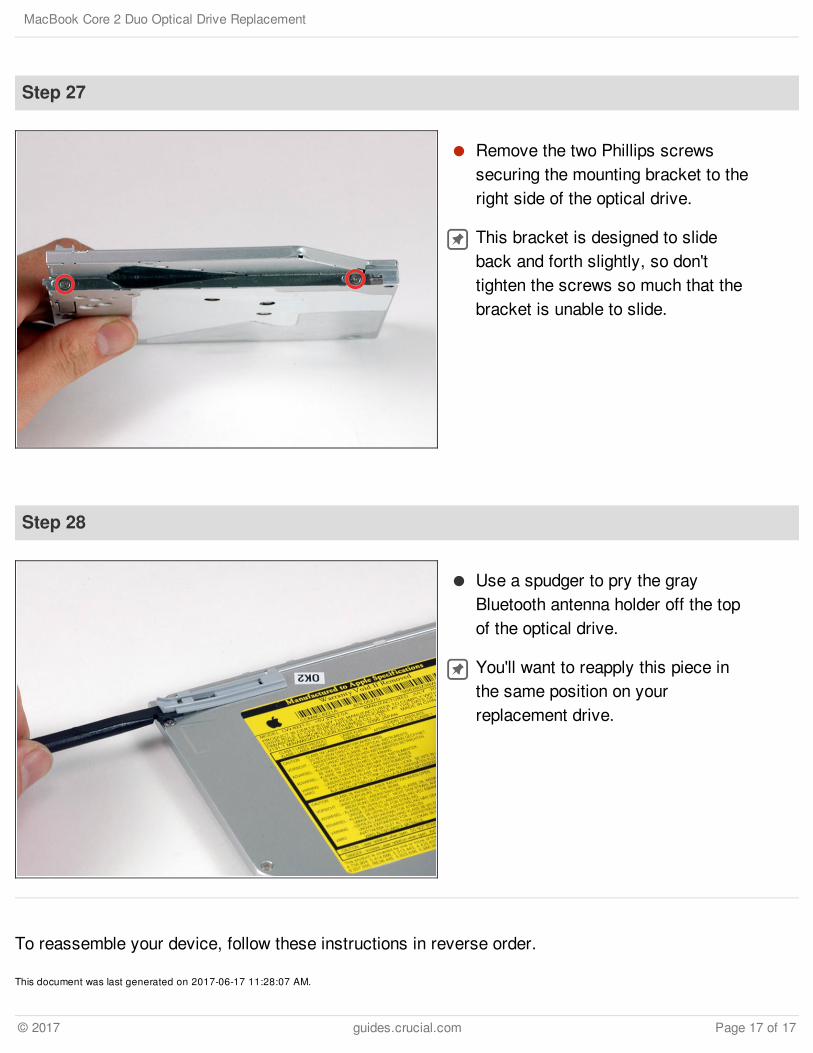
Step 27
Remove the two Phillips screwssecuring the mounting bracket to theright side of the optical drive.
This bracket is designed to slideback and forth slightly, so don'ttighten the screws so much that thebracket is unable to slide.
Step 28
Use a spudger to pry the grayBluetooth antenna holder off the topof the optical drive.
You'll want to reapply this piece inthe same position on yourreplacement drive.
MacBook Core 2 Duo Optical Drive Replacement
© 2017 guides.crucial.com Page 17 of 17


![Automatic Tool Changer - Roland DG · 2020. 4. 14. · (JBS4002 15T, 7/24 taper) Dia. 24 mm or less 18 mm or more (when gripped) Pull stud (JBS4002 15P [45˚], special) Dia.45 mm](https://img.pdfslide.us/doc/110x75/6122bc3d4f8f911c80324609/automatic-tool-changer-roland-dg-2020-4-14-jbs4002-15t-724-taper-dia.jpg)