Embed Size (px)
Citation preview
�
Special OperationsFrom the Editor:
Welcome to Special Operations, LPD Games’ games and game design ezine. Our staff and contributors are board wargamers & minia-tures grognards, gamers and wargames’ widows and, we hope, our readers, soon to be contributors.
Special Operations will come out between 3 and 4 times a year depending on what everyone has to say and how much quality mate-rial we can generate. You pioneer subscribers are an interesting mix of the hardest of the hard core gamers, people interested in board wargames, the curious, buffs, educators & historians. What you have in common is your self-selected interest in games and military history.
Special Operations isn’t for everyone, though anyone is welcome. LPD Games will be publishing all sorts of general inter-est material in the year to come, supporting our games with design, strategy articles, After Action Reports, and providing historical material for homeschoolers, teachers and others interested in history. At Special Operations, we’d like to engage the “serious” gamer - you know who we mean - in an ongoing conversation about history, simulation and the entertainment value of board war games.
This first issue naturally enough focuses on our own interests. In our second (due out in Jan, 2008) I’d like to feature some work from our fellow grognards, telling us about their interests and how they go about designing games, as well as experimen-tal artwork and other thought provoking material for those of us who design or modify our own games.
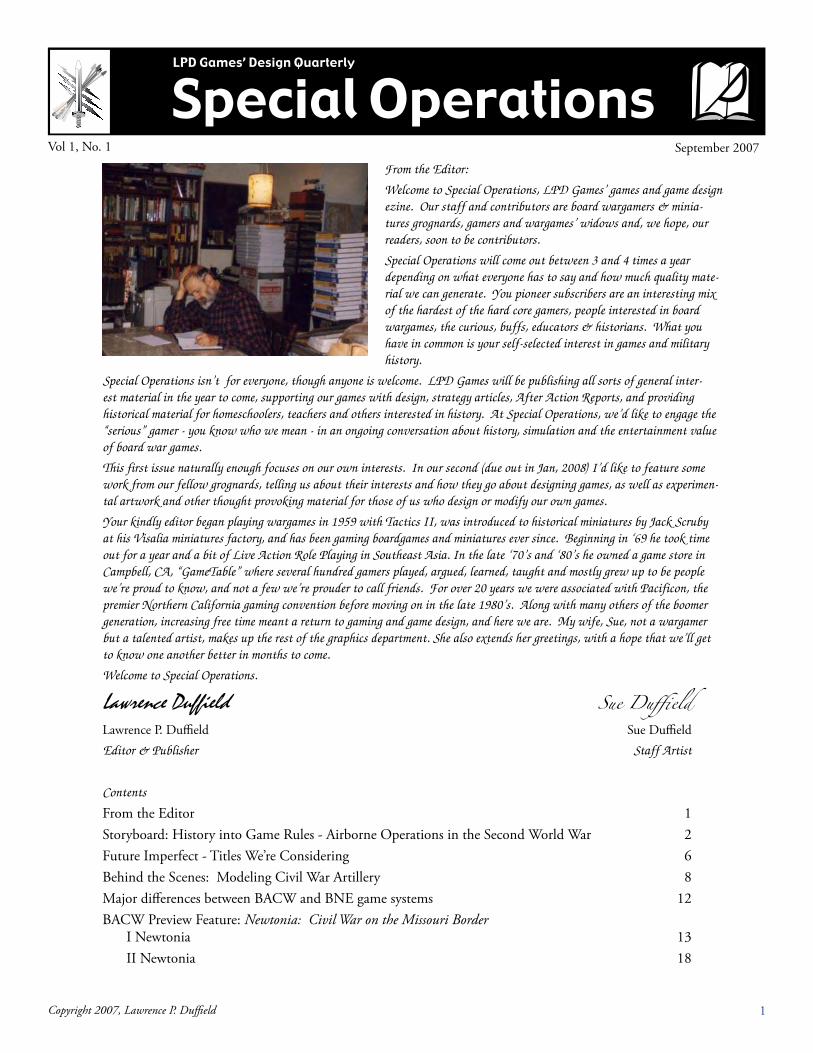
Your kindly editor began playing wargames in 1959 with Tactics II, was introduced to historical miniatures by Jack Scruby at his Visalia miniatures factory, and has been gaming boardgames and miniatures ever since. Beginning in ‘69 he took time out for a year and a bit of Live Action Role Playing in Southeast Asia. In the late ‘70’s and ‘80’s he owned a game store in Campbell, CA, “GameTable” where several hundred gamers played, argued, learned, taught and mostly grew up to be people we’re proud to know, and not a few we’re prouder to call friends. For over 20 years we were associated with Pacificon, the premier Northern California gaming convention before moving on in the late 1980’s. Along with many others of the boomer generation, increasing free time meant a return to gaming and game design, and here we are. My wife, Sue, not a wargamer but a talented artist, makes up the rest of the graphics department. She also extends her greetings, with a hope that we’ll get to know one another better in months to come.
Welcome to Special Operations.
Lawrence Duffield Sue DuffieldLawrence P. Duffield Sue DuffieldEditor & Publisher Staff Artist
Contents
From the Editor �Storyboard: History into Game Rules - Airborne Operations in the Second World War 2Future Imperfect - Titles We’re Considering 6Behind the Scenes: Modeling Civil War Artillery 8Major differences between BACW and BNE game systems �2BACW Preview Feature: Newtonia: Civil War on the Missouri Border I Newtonia �3 II Newtonia �8
September 2007Vol �, No. �
Copyright 2007, Lawrence P. Duffield
LPD Games’ Design Quarterly
2
Storyboard A “Storyboard” is a turn-by-turn outline of what takes place in a game, shown in game terms. The Storyboard is the prin-cipal mechanic for turning board games into historical games. In this column, I’ll share interesting findings and research and solicit comments, additions, critiques and ideas. This first topic is for the Campaigns of the Second World War series.
Airborne Combat in the Second World WarDelivery of large numbers of ground troops by aircraft is a mode of combat unique to the Second World War. Before that conflict, the technology was too primitive. Afterwards, although most military powers maintained troops trained in airborne operations, parachute and glider borne attacks were almost never used. The exceptions were emergency reinforcement of cut off bases in Indochina by the French Colonial Armies, and one episode during the Korean war which seems to have been staged largely to give point to the huge US airborne program. During the French wars in Algeria and the US entry into Viet Nam, helicopter air assaults, which could be performed with ordinary infantry with far more supporting arms, ammunition and equipment, gradually overtook the role of the airborne. Today, except for the High Altitude Low Opening insertion of special operations troops into the opera-tional theatre, airborne delivery of ground troops seems unlikely at best.
Airborne operations had some exceptional successes for the Axis in early WWII, delivered some fast reinforcements directly to the battlefield in Sicily and Italy and powerfully supported Allied invasions in Sicily, Normandy and across the Rhine in �945. German airborne assaults effectively ended with the pyrrhic victory on Crete, though another major operation in against Malta in combination with Italian amphibious and airborne forces was planned but never launched, and a last-gasp effort during the Ardennes Offensive delivered a few hundred miserable troop-ers behind enemy lines without adequate arms, supplies, air support or credible mission. Allied airborne operations in the later war either met with no opposition, as in Anvil/Dragoon, or too much, as in Operation Market-Garden. Montgomery’s Rhine Crossing was as a showcase drop by the US XVIII Airborne Corps, but safety features so abounded that it reached ground behind Allied lines, in spite of suffering a number of arguably unnessary casualties to the heavy AAA defenses known to ring the flyover path and drop zones.
How then, best to model this glamorous, but flawed, arm of service? Let’s start with the historical record.
Pre-WWII Development
Military airborne operations were first carried out by the Italian Army in �927, and from that time forward a bat-talion of parachutists graced the Italian OOB. The Red Army was the first to develop large scale air and glider borne forces in the inter-war period. Mass jumps in the late �920’s tested the concept of operational maneuver behind enemy lines. By �936 a brigade sized command of �500 men jumped in a mass exercise, causing a short lived flurry of interest in the concept on the part of knowledgable observers. However, most countries decided to concentrate scarce military resources on much needed improvements to conventional forces.
Decisions taken prior to German rearmament presented the �935 Luftwaffe with 250 transport aircraft suitable for use as troop carriers. There wasn’t any driving interest in the concept, but neither was the Wehrmacht inclined to neglect a source of strength. A training school was established in Bavaria in �936, where Italian style parachutes and Russian concepts of employment were tested. The whole project was put under a MajGen Oswalt Bassenge, and ev-eryone set out to find out what this new capability might be good for. The Wehrmacht formed an infantry battalion to experiment with rapid reinforcement of front line units. The Luftwaffe wanted a force of pioneers and sabateurs to take out targets and anti-aircraft positions too well defended for bombing attacks. After destroying their targets, the raiders would improvise landing strips on open fields or roadways for air extraction. Then there was the SS, who also wanted a piece of the action and provided their own platoon sized unit.
Bassenge carved out a place for his parachutists in the �937 East Prussian military exercises. The Luftwaffe-style raid went well, except the troops had no air droppable radios, so could not be extracted afterwards. A company-sized reinforcement drop went in under the eyes of most of the General Staff, and Hitler. Fallshirmjager were on the map. During this same period military gliders came on the horizon, as the first cargo gliders came into service. They couldn’t carry much, but were ideal training vehicles to develop vertical envelopment tactics and practices.

3
Czechoslovakia
During �938 the Wehrmacht was horriffied to learn it was tasked with conquering Czechoslovakia in a “Come-as-you-are” war. Nothing was ready. MajGen Bassenge was ordered to take existing Luftwaffe and Army battalions, the SS, and the SA Regiment “Feldherrenhalle”, form the latter into a parachute and an air landing battalion, and ready the whole conglomeration for action in Czechoslovakia in four months time. No one knew who would control the force - Luftwaffe, Army, SS and the SA were all contenders. Bassenge demanded clarity, and Luftwaffe MajGen Kurt Student was assigned to command the “Division” when it was formed. Czechoslovakia fell without fighting, but Student managed to drop one of his units, the army’s �6th Infantry, in an open area in Moravia as an exercise.
Afterwards, the Army took their regiment back, the SA theirs, and Student was left without a Division. However, he persuaded the Army to commit their 22nd Division as an Air Landing force, while he formed the 7th Fleiger Division from Luftwaffe personnel to serve as parachutists. By September �939 he had two 2 battalion regiments of paratroopers and some support units, and the 7th Fleiger Division was up and running. Both Divisions were given missions in Poland, but events rendered them superfluous, so foreign observers had no warning of what was in store.
By the outbreak of WWII, no one in any country had any idea what airborne forces were capable of, and many were skeptical of their value, but the Germans possessed a well developed force eager to prove its usefulness.
German Operations
September 1939. The 7th Fleiger had a Kampfgruppe ready in �939, expanding to Division strength by �940. The 22nd Air Landing Division was also available, along with @500 Transports to deliver them over the battlefield. Dur-ing the Campaigns in the West and the Balkans, the Germans launched several operations:
Weserubung One parachute battalion was made available to the planning staff for the invasion of both Norway and Denmark. One company secured a vital Danish airfield and captured a key causeway to Copenhagen. In Norway, a company drop secured Stavanger airfield, while the rmainder stormed Oslo’s airfield. Both took heavy losses.
Fall Gelb (Campaign in France, �940)
Holland. Profiting by the example of Norway, the Dutch defended their airfields. 22nd Air Landing, spear-headed by a parachute battalion, tried to take Rotterdam’s airfield, and failed with the destruction of all battlegroups. 7th Fleiger Division, tasked with holding the Maas bridges, used 3 battalions of paratroops and an Infantry regiment to sieze and hold 3 bridges and an airfield. They were successful.
Belgium. A battalion sized task force siezed Eben Emael, the key fortress complex of the Liege forts, and two of three bridges over the Albert Canal, and held them long enough to link up with advancing Panzer forces.
Balkans Operations, 1941
Marita. A battle group of 7 Fleiger Division dropped on a bridge over the Corinth canal. The bridge was blown, but more than 2000 Commonwealth troops were trapped and forced to surrender to advancing Panzers.
Merkur. 7 Fleiger Division dropped on Crete in two waves, the first totaling 4200 men, concentrating on the airfields. The Axis had total air superiority. Ultra provided the British with warning of the German/Italian invasion, and the Royal Navy was able to turn back or destroy the amphibious component. Two of the three drop zones were smashed, but the one at Maleme airfield was able to hold the field until Air Landing reinforcements could be com-mitted. The island was overrun, but 7500 men of the 20,000 man force were casualties, most dead.
Operation Hercules In �942, an air-amphibious assault on Malta was planned using a specially trained Italian amphibious Corps and the Folgore Parachute Division. Hitler contributed a reinforced kampfgruppe to the opera-tion, but it was cancelled when Germany refused to provide the Italian Navy with the fuel required to mount it, and Rommel’s success in Cyrenaica consumed the fuel and air support needed for the operation.
Tunis 1942-43 German airborne kampfgruppes were flown into the Tunisian bridgehead as ready reinforcements.
Sicily 1943 3rd & 4th Fallshirmjager Rgts & supporting units were committed to the front as reinforcements.
Wacht am Rhein During the Ardennes offensive a small battle group under Baron von der Heydte dropped in sup-port of the Sixth Army. It scattered and accomplished little beyond sowing confusion for a few days.
Soviet Operations
Stalin’s �937-39 Purges gutted the Red Army’s experienced cadre of Airborne commanders. Thereafter, the rush to build up the Army meant training and new equipment were unavailable. The Soviets maintained several Corps (of 3 to 5 brigades each)of Airborne, and regarded them as reliable troops, but they ended the war as elite infantry.
During the �94�-42 Winter Offensive, airborne drops behind enemy lines in support of penetrations by Cavalry Mechanized Groups were tried several times, but the Red Air Force proved unable to put organized units of any size

4
into a small enough area to present any threat.
Kanev A large winter drop in support of an offensive out of the Kanev bridgehead failed when the paratroopers were released into the path of a Panzer Korps moving to the front. The widely scattered troops operated indepen-dently for several days but the Soviets were unable to exploit their efforts.
Smaller efforts to reinforce Partisan offensives or operate behind German lines were similarly ineffectual.
Allied Operations
Torch Allied airborne available for Torch consisted of a British Brigade Group and a US battalion, 2/503. One battalion from each nation were committed in the initial invasion, and thereafter were used for “sieze and hold” op-erations on forward air strips, until friendlies could relieve them. On one such, at Boné, the C-47 Dakota transports left the Drop Zone as German paratroops from the Ramcke Brigade were flying in on the same mission!
Operation Husky: Sicily 1943 Initial airborne drops 1 Action Phase. The US 505 PIR drop in Biscaglia (1006) becomes badly Scattered, in part because of Allied AA fire from the invasion fleet. The drop hinders coastal forces at Scoglitti and Gela from freely retreating to Biscaglia. British 1 Air Landing Bde drops on Syracuse (1308) aids in capture of that port in spite of Scatter. Force contributes a combat shift but does not add strength to the invasion.
Sicily The US committed the 82nd Airborne, the British the �st Airborne. Each Division sent in a Battle Group (US 505 PIR, Br � Air Landing Brigade), reinforced on the 2nd night by another. Both initial drops were scattered over the Sicilian countryside, but achieved all objectives nevertheless. Follow up drops were used to reinforce Gela beachhead (US 504 PIR) and sieze the Primosole Bridge, which was being reinforced at the time by 3 Fallshirmjager supported by Italian infantry and some Flak guns (2 Airborne). These drops were equally ill fated due to Allied AA, but after some controversy, General Eisenhower vetoed a proposal to revert US Airborne Divisions to line infantry.
Normandy Three Airborne Divisions were committed to Normandy, US 82 & �0� Airborne and 6 British Air-borne. These were given key missions in the main battle plans. All dropped immediately preceeding the amphibious assault on D-Day. Although the US drops were scattered, excellent planning put enough of each Division on target to secure the approaches to the beaches. Linkup with US forces proceded smoothly. The British drops were far more accurate, and they, too, achieved their objectives with alacrity and not too many casualties.
Anvil-Dragoon The invasion of southern France went even more smoothly, more from lack of opposition than clean planning. the � Allied Airborne Task Force was a scratch force comprising 5 US parachute battalions, a 2 battalion glider regiment and a 3 battalion British Parachute Brigade. Some units were scattered in the morning fog, but half landed on the objective and secured it handily.
Market � Allied Airborne Army, of US XVIII Airborne (3 Divisions) and British I Airborne Corps (2 Divisions and 2 independent brigades), plus the British 52 (Lowland) Division as air landing reinforcements, was formed for use
Operation Husky: Sicily 1943 Follow on drops. 2nd Action Phase. The US Paratroops at Bisceglia (1006) Regroup. The 52nd Troop Carrier Wing regroups without loss. A second parachute drop reinforces the Gela Beachhead. This drop does not Scatter.British forces: 1 Airlanding Brigade and 51 Troop Carrier Wing Regroup losing 1 IR and 1 Air Replacement step respectively. 1 Airborne Brigade is immediately committed to a landing to secure the Primosole Bridge (1206). Not unexpectedly (heavy FLAK) the force Scatters, ending the Player Turn in that state. Supporting armor and 3 Commando landing by sea relieved them in time to hold the hex against Axis counterattack.

5
in the upcoming campaigns. British I Corps, under British General “Boy” Browning, received the mission of siezing and holding a string of bridges leading to the town of Arnhem, on the far bank of the Rhine. Each US Division put 3 battle groups in their first lift, reinforcing with the rest of the Division later. The British dropped one Airborne, one Glider Brigade and Division HQ from their smaller Division, intending to follow with their second Airborne Brigade. A chain of errors,bad weather and much heavier than expected German opposition led to � Airborne being isolated in Arnhem while XXX British Corps struggled mightily to link up. The two US Divisions achieved their objectives, and the Polish Parachute Brigade attempted to drop near Arnhem as reinforcements, but XXX Corps, the ground component, was unable to link with Br. � Airborne in time to prevent its surrender.
Varsity XVIII Airborne Corps, with 6 British Airborne and �7 US Airborne, dropped in support of 2� Army Group’s Rhine river crossing. Four battle groups dropped simultaneously on as many Drop Zones, each on its ob-jective. Fighter cover and artillery support was continuous. Everything went successfully, with linkup by �530 that same day, before all the troops were landed. Although it was a textbook landing, and regroupment, some questioned if it were even necessary given the short distance the troops landed in front of the crossing and the risk from FLAK.
OSS/Balkans Air Force British and OSS sponsored liason teams conducted aerial resupply and dropped small teams of observers, air controllers and so forth to help Tito’s Partisan Army. Similar efforts aided the French Resistance.
Modeling WWII Air Assault
WWII experience reinforces the salient points below, which are incorporated into the CSWW engine:
Airborne troops are expensive to produce, maintain, train, employ. They require “elite” troops, who must be regrouped after each drop. It is more cost effective to use such troops as cadre for other fighting units.
Airborne operations were mainly successful, though often accompanied by heavy loss. “Regroup” failure after a drop costs an Infantry step. The unit isn’t eliminated unless surrounded of no IR is available.
Pre-planning multiplies combat effect. A large drop requires planning and rehearsal time, preferably several weeks. Ad hoc operations increase the risk and decrease the chance of success. Up to 3 Game Turns planning modifies the Scatter DRM by � per Planning Turn.
Airborne units drop as Battle Groups, reorganizing into larger elements during the battle. Transport available determines the “combat strength” of the drop - other troops, including Air landed, are reinforcements landed as movement in one Action phase and beccme available in the NEXT.
Drops of less than Battle Group size may still be highly effective, but automatically “scatter”. They may be regrouped to Battle Group size if the drop captures an airstrip.
Scattered drops will act in the same manner as Air Interdiction: Enemy units traversing a hex occupied by Scat-tered paratroops lose a step on �D6 roll of 6. Expending an additional Movement Point modifies the DR by -�.
Scattered drops lose most of their combat effect, but are still highly useful for causing enemy confusion. Scat-tered airborne should not contribute to the combat directly, but provide combat shifts and block retreats.
Regrouping a scattered drop takes a unit’s entire Action Phase - i.e. it cannot move or fight after Regrouping.
Airborne forces, even when scattered, are difficult to destroy. Scattered paratroops alone in a hex may be at-tacked by enemy who have the hex. They defend at their Regrouped strength and may retreat to any adjacent hex occupied by a friendly unit. If a Scattered force begins a friendly Action Phase in an enemy occupied hex, it must Regroup immediately: a successful Regroup allows the force to continue to exist, still Scattered, for the Phase. (It still adds a shift to friendly attacks in the same Action Phase.) If it fails to Regroup, it is lost.
Air Transport must be Regrouped after each use. “Failure” costs an Air Replacement point but doesn’t prevent re-use in a later Action Phase.
Even small drops are potentially devastating in a surprise assault on a neutral nation. Conversely, the known existence of an enemy with airborne capability “hardens” airfields and special targets.
Airborne has limited combat value against armor. Air support, artillery, reinforcing AT guns and ground link ups are absolutely required. Divisions have AT value, but not Battle Groups.
Airborne & Air Transport capability is useful “below the grain” for reinforcing Resistance, Partisans, OSS & Commando missions. To gain that capability, a nation must develop their airborne arm.
•
•
•
•
•
•
•
•
•
•
•
•
•

6
The list of projects we’re interested in stretches far out into the future. Here are some of the games we’ve begun research on. You can help us prioritize the ones you’re most interested in by looking over the list at www.lpdgames.com and letting us know your interests. Emails to [email protected] will be eagerly read (and, as time permits, answered). You can also add new topic descriptions or suggestions to modify those on this list. For you designers out there, take a look at our Design Guidelines (soon to be) up on LPD Games.com. If you have some-thing you think we’d be interested in, we’ll be happy to take a look.
Battles of the American Civil War (BACW) topicsBattles for the Heartland - The Kentucky Campaign of �862. Includes Perryville, Stones’ River and Mill Springs/Logan’s Crossroads. These battles first brought Union General George Thomas to national prominence. They were “Soldiers’ battles” where the high command took little part in shaping the action except to initiate it.
Status: Draft maps for Perryville, Mill Springs/Logan’s Crossroads; Draft OOB’s for all three battles. Storyboarding Perryville and Mill Springs is underway. Rules engine additions will include Officer Personalities and Formation Or-ders, as well as special scenario specific rules for Acoustic Shadow at Perryville, a module for Grand Tactical decisions that shape the battle at Mill Springs/Logan’s Crossroads, and a Grand Tactical Fog of War module for Perryville that keeps both sides in the dark as to the size and intentions of the enemy army.
Battle Before Westport - The climactic battle of Price’s Missouri Expedition, the biggest battle west of the Mississippi. Little Blue, Independence, Byram’s Ford, Westport, Mine Creek. The Kansas State Militia, Army of the Frontier, XVI Corps and Pleasonton’s Provisional Cavalry Division converge on Kansas City to stop Price, who aims to wreck the Federal election by demonstrating Missouri was still an active battlefield (and, not incidentally, dispersing all those Kansas Militia voters). Lots of confusion, fog of war and highly colorful characters.
Status: Sketch map of the battle area, including all of the above battles except Mine Creek. Order of Battle research is nearly done. This mini-campaign will use Officer Personality and Formation Order rules.
Fustest With the Mostest - Parker’s Crossroads, Okolona, Brice’s Crossroads, Tupelo, Murphreesboro II, Selma. This is the western part of the cavalry story, centered on the man who may have been the finest cavalryman of the war: Bedford Forrest. Forrest managed to defeat or stymie infantry and cavalry alike well into the final year of the war.
Status: Research stage. This game set will include at least four of the above battles, with the final mix dependent on production issues and the size of the various maps. The other battles will either appear in Folio editions (like Honey Springs and Newtonia) or linked to other game sets by campaign. It isn’t clear yet whether this set needs Officer Personalities and Orders - the battles are small, and Forrest and his opponents generally had professional officers and efficient staffs. My bias is toward keeping the games as simple as possible while still allowing storyboarding.
No one but McClellan - The Peninsular Campaign of �862. Begins with the Ride around McClellan (solitaire) separate scenario, using the standard system, with AI for the Federal response. Then, on an extra large, interlocking map, the entire Peninsular Campaign from the landing and Siege of Yorktown, through the Seven Days Battles.
Status: Looking at the size and configuration of the map required to link everything. This quasi-monster will defi-nitely need McClellan rules and some method of reflecting the losses of one battle in the next, possibly unit replace-ment counters. Look for this one to have a long development and testing process.
March to Glory – Sherman’s Carolina Campaign – Griswoldville GA, Wyse Fork, Monroe’s Crossroads, Averasboro, Bentonville. The last, sad remnants of Confederate military power in the “west”, now defined as the Carolina coast. These small battles are excellent gamer contests, even though the final outcome of the war is no longer in doubt.
Status: Preliminary research on OOB and map sizes needed. Storyboarding will indicate what command rules are necessary, and whether the battles meet my basic game standards “at least two strategies for each side, at least a chance of an actual battlefield victory for each side”. A first pass through indicates the Orders of Battle and map sizes allow all five to combine in one game set, possibly with some units used in multiple scenarios.
Folio Battles These small battles offer sharp challenges or useful teaching points. Possible Special Operations treatment.
Olustee - Florida’s biggest battle. Good Tournament possibilities. This one is under research as a probable educa-tional module due to its small size, order of battle and usefulness to show a typical Civil War fight in miniature.
Future Imperfect

7
Pre-draft map (no hexgrid). Storyboarding. OOB complete, checking unit size references.
Fort Wagner – Charge to Glory Solitaire reenactment of the 54 MA assault that defines Civil War courage under fire. Again, an educational module, but also a look at how command and morale issues affect battle plans. It looks pretty hard to win as the Union, but that is the point of a solitaire, isn’t it?
Battles of the Napoleonic Era topicsThese are the core set used to develop the BNE game engine:
Maida - Maida is a tiny battle that gets over in an hour or so. French leadership is very aggressive, but they are handicapped by lack of ammo. British Light Infantry are some of the best troops Britain ever fielded. There is just enough cavalry (2 Squadrons) to test cavalry v. infantry interaction, and the game can be played in an hour or less.
Status: Map revision underway (new, better map uncovered). OOB complete. Cavalry v Infantry rules and Skir-misher rules in flux. Test bed status. This mini-scenario doesn’t really need the Officer Personality and Orders rules.
Borodino - Borodino is a straightforward slugfest, which will test the minor tactics of both sides. Grand Tactical de-cisions are few: whether to attempt Davout’s flanking movement is the big one. The Russians will be at the mercy of their command arrangements. This is more of a classic board wargame; Fog of War isn’t a critical feature here. The French will set the tempo. Boney needs to risk to win big, but the Guard is too valuable to lose. Includes the battle for the Schevardino Redoubt fought the previous evening.
Status: Map Draft finished. OOB finished. Storyboarding at final stage. This one is about ready for outside testers.
Tolentino - Tolentino is also a classic Napoleonic battle. King Murat is handicapped with a mixed lot of not particu-larly aggressive generals and men who, except the Royal Guard, are easily Fatigued and Demoralized (partly because they have already been retreating). But the Neapolitans fought well under good leadership. The Austrian command is more middling in every respect, under a commander (Bianci) who is tenacious and efficient. Austrian troops are very good. Options will include more Austrians (Murat didn’t know for sure what he was against) or more Italians (ditto Bianci). Murat needs an actual victory, Bianci needs not to lose.
Status: Map Draft finished. OOB finished. Storyboard under research. Cavalry v Infantry rules, Command Per-sonalities will both be critical to the model.
Salamanca A very tricky contest between Wellington and Marmont. The historical situation demonstrates why Wellington won in 40 minutes. The Battle Game starts earlier and has dual Victory Conditions in that the British would like to just march off the Southwestern edge of the map, while the smaller French army needs to cut them off and defeat part or all of Wellington’s army.
Status: Map Draft underway. OOB finished. Storyboard outline completed. This battle benefits from Rory Muir’s brilliant battle study. OTOH, if the game starts with the race for the Greater Arapiles, the British have a huge ad-vantage. If the battle is shaped by both sides’ missions, there is a good chance there won’t BE a “battle”. Interesting problem in game design.
Prince Eugene at War Sacile, Piave �809, Mincio �8�4. These battles feature a good Franco-Italian commander against mediocre Austrian leadership. Archduke John isn’t quite as bad as sometimes depicted. At Sacile, Eugene chooses to fight outnumbered, and lives to regret it. On the Piave, he gets his revenge. At the Mincio, the real chal-lenge is the odds - Eugene is outnumbered 2:�, and must maneuver to minimise odds at point of contact.
Status: Sacile and Piave map drafts complete; Mincio under research. These three may not quite fit together into one game set, so Mincio may float free. The battles are excellent Napoleonic contests without Napoleon, so have less pressure on the designer to favor the French.
Campaigns of the Second World War topicsCSWW is a Division level series with weekly through semi-monthly Turns and Quarterly strategic interphases. Ground scale is identical throughout the series (1 hex per 20 miles). Air & Ground combat is emphasized in some detail, with Naval affairs abstracted to focus on the land war. Some titles have extensive alt-history treatment.
Operation Husky - 1943 - This is the combined arms test bed for the Campaigns of the Second World War series. ��x�7 map, 7 Game Turns representing a week each. Features Amphibious invasion on the grand scale, Airborne assault, and a mobile campaign under very trying circumstances for each side. Designed to play in 2.5 hours.
Status: Map completed, OOB completed, Ground Combat Storyboard completed. Issues with naval/amphibious rules, logistics and air support. Air storyboard under revision.
Crimea 1941-42 - Covers the initial retreat to Sevastopol, the Soviet winter resurgence across the Kerch Straits and von Manstein’s brilliant �942 campaign. Highlights some of the difficulties of the early Russo-German war.
Continued on p.12

8
Behind the Scenes is about how we turn history into game mechanics. The Battles of the American Civil War series is designed to allow each game to storyboard the actual historical events, and present players with a realistic set of alternative actions and outcomes in their own battle replays. One of the more difficult issues is representing the effects of ACW artillery on battles. Here’s our take:
American Civil War ArtilleryThe Civil War occurred during a transitional phase in artillery development. The light bronze smoothbore pieces of the Napoleonic era had been pushed to their apogee by �860. The �2# light gun-howitzer sponsored by Napoleon III and named after him was beginning to replace the standard 6# bronze smoothbore issued to Regular Light Bat-teries since the Mexican American War. At the same time, rifled pieces, either made by boring out smoothbores (the James Rifle series) or cast in iron (Ordnance Rifles, Parrott Rifled Cannon and their Confederate equivalents, as well as foreign cannon like the Whitworth rifles) dramatically increased the range available to field artillerists on both sides. Field artillery practice was in flux. Should the armies retain lighter pieces, able to move quickly about the battlefield and support infantry from close range? Or accept the reduction in speed and decreased rate of fire of the heavier iron rifles, in order to gain the advantages of range?
Tactics, too were undergoing change. The “indian fighting Army” wanted small, handy accompanying pieces, 6# smoothbores and �2# howitzers, even light �2# pack howitzers, able to move easily over muddy prairie. Their cannon were deployed in sections and as individual pieces with mixed battalions of infantry or cavalry, providing a military punch completely unavailable to their indian adversaries.
During the War with Mexico, “Flying Artillery” batteries supported Taylor’s and Scott’s small armies, moving about the battlefield in response to the needs of the moment and maneuvering to overmaster the slower firing and pon-derous Mexican batteries. At the beginning of the Civil War the available batteries were distributed in much the same manner, as brigade batteries of 4 or 6 cannon, directed by the brigade commander for the benefit of his own command. The forested nature of most American battlefields was poorly suited to these tactics, while the growing size of Civil War armies brought a need for greater concentrations of cannon under control of Division, Corps and Army commanders. Beginning in the Southern armies, but spreading rapidly, Divisional batteries were grouped into battalions under the senior battery commander, who acted as Chief of Artillery to the Division commander. Armies, too, retained Reserve battalions to commit in support of army level maneuvers. By �863 the Army of Northern Vir-ginia was experimenting with a very modern system of control, with Corps Chiefs of Artillery supervising Divisional battalions and a Corps reserve of two battalions, under a senior Field Officer responsible for the whole.
Lee’s counterpart, Meade, had an Army Chief of Artillery, the great gunner Henry Hunt, who managed the Army of the Potomac’s artillery, divided into brigades for each Corps, and a Reserve Artillery of four brigades and a horse ar-tillery brigade permanently detached to the Cavalry Corps. Less effective overall than Lee’s system, the arrangement nevertheless allowed Hunt to deploy the Army’s artillery according to a single plan.
Western Federal armies retained their batteries at Division level, often with a substantial reserve. This was partly their response to a much more broken countryside where large artillery concentrations were not possible. When Grant took charge of the Eastern Armies he streamlined his artillery and fitted it for operations in the broken Wil-derness- reducing his 6 gun batteries to 4 tubes of a single cannon type and minimising the Artillery Reserve.
Modeling ArtilleryIn the attack
Batteries or Battalions assigned to Brigades or Divisions accompany and support their parent units, occupying a po-sition close to the front line and pouring fire into the target of the Brigade or Division assault. A battalion or battery assigned to Corps or Army reserve may also be assigned this task, firing at long range. Smaller units Disorder and pin units to the flanks or rear of the Division objective without risking the losses that an infantry formation would take to perform the same task. If there are enough supporting cannon, they can add their fire to the main attack.
Behind the Scenes - Modeling ACW Artillery

9
Bombardment
Civil War artillery batteries and battalions haven’t the strength to dominate an entire 400 yard hex with fire. They can only cause heavy losses on individual regiments and battalions. Larger forces can absorb artillery casualties without breaking or disappearing. What artillery CAN do is displace and disorder, deplete enemy reserves, and keep them from striking with full effect while the friendly forces are most vulnerable.
Reality Check
In the illustration at left, two Union artillery battalions, one vet-eran, one green, are faced with a variety of targets. In the broken countryside and fields of Shiloh, each battalion will probably be able to deploy a relatively small number of guns. Let us assume they can position 2/3 of their number, or approximately 8 can-non for the 6th Division and �2 for the 2nd.
Their targets will either be moving through the battery’s beaten zone, in which case they will be under fire for about 5 minutes, or they will be standing under fire. A typical battery mission lasted approximately 20 minutes at 2 shots per gun per minute. Since the 2 battalions shown don’t have the ability to blanket an entire hex with shellfire, and since
even an infantry regiment has a front large enough to give targets to 20 cannon, we can begin to asses artillery effectiveness in real and game terms.
The two battalions will fire 20x2x20 = 800 rounds against a standing target or 20x3x5 = 300 rounds against a mov-ing target, assuming maximum rate of fire is ordered. Because the target is only about 3 yards deep, more than 50% of the rounds will be misses, overhead explosions, etc.. Since a limber chest holds @60 rounds of which 40 are shell, this is an important part of the battery’s ammunition load (about �/5 of its shell).
With bursting radii of @5 yards, black powder shells, and uncertain fuzes, estimated lethality is less than � man killed or wounded per round which bursts on target. A shell will break into 4-6 pieces, which won’t injure all the men in the blast radius. Some men may be hit twice while others will be unharmed. The percent of casualties inside a burst radius is the shell’s “lethality index”. Let us assume and index of .33 casualties per shell fired, which may be generous. In our example, the 20 guns will cause @267 casualties against a stationary target and @�00 against a moving target.
The 47 TN regiment has about 400 men. Either outcome will cause it serious harm. What is likely to happen in the game? Let’s look at the CRT. At 2:� odds the Federals should eliminate the regiment 50% of the time, and force it to retreat another �6% of the time. That spread should cover a number of pos-sible eventualities: the artillery having fewer than normal guns on line, the regiment being hidden by in-hex terrain, etc. The 47 TN has an expected loss of � CV point, and a 2/3 chnce of retreating or being destroyed, which seems plausible.
Larger Targets
Trabue’s Brigade (7-4) is a more typical target in Shiloh. This command puts nearly 5 times as many men on line as the 47th TN. Such a force will be deployed in 2 or more lines, each �50 yards or more apart (so that small arms fire aimed at the first line doesn’t find the following line in its beaten zone.) The Union batteries won’t likely find this formation standing on defense in the open, but it is a possibility the game must consider.
Expected lethality is nearly the same, except that some overs & shorts will hit the second line, and a moving target will have someone vulnerable more of the time. We can predict a

�0
lethality index closer to .50. This works out to @�50 casualties against a moving brigade & @400 casualties against a standing target. Even though more total men are hit, each of Trabue’s 5 regiments takes from 30 to 80 casualties, far fewer than the �50 to 270 the 47th TN took above.
In game terms, artillery odds are 4:7 or �:2. One chance in 6 of a kill and one more of a D retreat. Trabue’s expected loss is �.�5 Strength Points, and a 2/3 chance of NOT retreating. That isn’t unreasonable - it is probable that his regiments will be able to absorb the caualties and remain combat effective.
Polk’s �st Division (below, white ID band) has 4000 or so men and a battalion of its own artillery. Against this assembly, lethality will increase again – overs and shorts might hit the sec-ond or third lines, some ball shot will hit multiple people, etc.. However, the Division is placed in one hex primarily as a mnemonic to indicate it is under unitary command. Actually it is spread out over its entire Zone of Control, with the center of mass in hex 07��. This doesn’t mean much in terms of Union artillery effectiveness as they are already firing at more targets than they can easily engage, but it is important nevertheless.
A more significant circumstance for our calculations is the artil-lery are now under counterbattery fire, which means EX results
will cause a loss to the Union. This is a much more lethal exchnge, and probably interferes with aim and accuracy.
Polk’s Division is almost certainly moving, not standing, because this deployment is inefficient in defense. Conse-quently exposure to fire is much lower. The lethality index is still around .50, but average casualties are likely far closer to �50 than 400. There are now also �� regiments and a battery to absorb the losses. Greater density means more hits, but the average loss per regiment goes down to �2-37 or so, with predictable lessened morale effect.
For BACW battles, the odds are �:3. Because the terrain is relatively open (Cultivated), there is a �/6 chance of a casualty and another of D retreat, exactly the same chances as with Trabue’s brigade. Expected lethality goes to .84 because a Loss only removes 5 CV. Polk’s brigades are a bit more spread out than Trabue’s bigade, though they cover roughly the same frontage. Frontage reflects how much a brigadier can easily control and how much separation a brigade needs to present minimum vulnerability to small arms fire. Trabue’s men are somewhat closer packed.
While the Union is inflicting these losses, they have a �/6 chance of EX, for an expected loss of 0.67 CV of their own.
Finally, let’s look at Bragg’s Corps level attack (p. ��). This concentration of units will only occur during a major attack. There are @8000 men in 4 brigades and 23–24 regiments.
The Union lethality index is probably up to .75 because even roundshot (used when the target’s range is changing too rapidly for black powder fuzes) can hit multiple targets massed in a small area. But time under fire is at a minimum. Assume 200 casualties inflicted, or an average of �2-�5 per regiment.
In BACW, Bragg’s attack will get through, and no units suffer losses that show up in a brigade level game. In fact, the cor-rect Federal response is to engage the assaulting group with one battalion supported by good infantry and deploy the other to be fresh for a counterattack in the next Player Turn.
The attack will be “resolved” by a combination of artillery fire (Disordering the units), the Confederate decision to advance anyway (or not), the CSA player’s die roll, and any US coun-terattack or retreat. No one die roll models the event.

��
Artillery on Defense
Artillery defense consists of “softening up” enemy troops while forming, adding to infantry support value in defense and supporting a counterattack in the friendly player turn. With good artillery sup-port, Bragg’s odds will be reduced by � shift before he goes in, and there will be a good artillery unit in the target hex adding its CV to the defenders. This tracks a number of historical outcomes (e.g. holding the guns into point blank range, withdraw-ing them at the last minute, or retiring by section - various things that will happen, or not, with no input from the Army commander, and are therefore best handled by the CRT.
Grand Batteries
Bombardment was rarely an effective tactic in the Civil War because artillery long range firepower is insufficient to inflict numbers of casualties. Massing batteries won’t stop a determined enemy or drive off one willing to reinforce his front line.
The big exception occurs when an artillery leader masses a large proportion of his army’s guns and at-tempts to shatter the enemy with a Grand Battery. The technique models firing a prolonged fire mis-
sion using far more ammunition than is readily carried at the unit level. This practice was infrequently (there is one example in each of the BACW games: Ruggles’ at Shiloh, Herron at Prairie Grove and Longstreet at Gettysburg.) It is even less frequently decisive. Ruggles’ battery had to be followed up by infantry attacks. Longstreet failed to prepare the way for Pickett’s Charge. Only Herron’s was an unqualified success, and its goals were more limited. Nevertheless, when circumstances are right, a Grand Battery can be just the right tool. Be advised: the game pen-alty for Low on Ammunition, which seems slight, isn’t.
Surveyed Artillery
Long range fire was in its infancy in the Civil War. Union battery commanders used a simplified theodolite similar to that used to determine a ship’s longitude to “Survey” their position. Confederate forces accomplished much the same thing by ranging shots and guesswork. A “surveyed” battery had more than twice the range of one which had not done so. In BACW, a careful gamer (imitating Lee or George Thomas, perhaps) can set up a surveyed artillery line to distribute fire across the front of the army, or unite many batteries to support a decisive attack. In the broken Civil War countryside this isn uncommon, but possible. More often a surveyed position dominates a clear field of fire and channel action elsewhere. Surveying consumes officers’ precious time, but richly rewards forethought.
Artillery in Works
Artillery can’t prepare their own hasty works, but once ensconced in them, they are extremely formidable. Fort Donelson provides an example. Later games will better show their role foreshadowing WWI trench warfare.
Range of variation
How can the whole range of historical results be represented in a simple game? The design goal is to craft rules to:
Encourage players to choose historical doctrines and tactics
Present plausible outcomes in approximate historical frequency
Account for as many as possible unusual historical events
Allow players to make the same mistakes as their command counterpart
Restrict player control to elements appropriate to his command level
Civil War artillery units are not the primary means of inflicting casualties on the enemy. Batteries support infantry and cavalry as accompanying guns or by long range fire. Smaller artillery units support individual formations while larger or rifled batteries fulfill the needs of the whole army. In rare instances massed artillery can prepare an attack or converge fire on an enemy surge. Well positioned, surveyed artillery can influence large areas of an open battlefield.
•
•
•
•
•

�2
Poland 1939 - A short depiction of Germany’s first campaign in the East. Poland is more than a walk-over but less than a fair contest. The Polish player must work hard just to avoid total defeat before the Soviets come in and take everything away. The Germans, however, are on a tight budget of fuel and ammunition and any failure to win a quick victory will be very costly. May possibly use a “Battle for Germany” solution where the Soviet player command the Poles in the Western sector, the German player maneuvers the Poles against the Soviets. Miscellaneous alt-his-tory changes to the Polish OOB. The Pole may be able to inspire the promised French offensive into the Rhineland.
Status: Map Draft, OOB completed. Storyboard under research. Air Storyboard under research. This is the primary test bed for the Blitzkrieg portion of the CSWW rules. Germany needs to be able to conquer Poland in 2 weeks with the historic deployment. Testing how the blitz integrates into the main engine is underway.
Desert Rats - 1940-43. The Western Desert from Alexandria to Tripoli, the first full campaign of the CSWW series. Many smaller scenarios, but the whole Campaign Game runs 76 Game Turns and, in spite of the small Orders of Battle and need for long pauses to build up supplies, ammo and fuel, will take �2-�4 hours to play. Good coverage of the Desert Air Force and the Luftwaffe. The Mediterranean naval campaign is abstracted to focus on the ground combat, but various possible outcomes of the contest of the RN vs. the Regia Marina are interpolated.
Status: Map Draft under revision. Ground OOB complete, Air OOB under revision. Early test stage.
Other TopicsThese topics represent individual game engines unrelated to the three main systems. Trolling for interest.
Invasion: Malta - George Cross Island - A moderately complex battalion level system with Turns representing 4-6 hours. Area movement, combat based on fire and counterfire, fog of war, command and logistics features reward the player who can best form an initial plan and improvise responses to the inevitable disruption. Simple to Moderate.
Wagons West - � to 6 players outfit a Conestoga Wagon and take their families west. Everyone is trying to arrive in Oregon or California with the best possible outfit, but sometimes survival is the most you can hope for. A “coopera-tive solitaire” where the players decide, individually or collectively, how to respond to contacts with Indians, outlaws, fire, flood, tornadoes and the U.S. Cavalry. Card influenced but player driven. Simple narrative based system.
Indian Fighting Army - Tactical combat in the Old West. Small unit �9th Century asymmetric warfare. Scenarios drawn from extensive research into the Old Regular Army from the Civil War to the Spanish American War. Me-dium complexity with some detailed tactical modeling. Outside Design proposal.
Battles of the War of the Triple Alliance , 1864 - Armstrong cannon, ironclad warships, Enfield rifles, amphibious assaults, commando operations. What’s not to like? Explore battles of the war between Paraguay and Brazil, Argen-tina and Uruguay for control of the Paraguay River Basin. Lots of local flavor from a locale outside our experience. Three battles using a system based on Battles of the American Civil War. Outside Design proposal.
Manassas to Bull Run - A look at two battles fought on nearly the same battlefields, using a system loosely based on We The People/Hannibal. Not a CDG, players alternate and resolve Offensive or Defensive Actions. 600 yds/hex. Unit strengths fluctuate during the battle and are tracked off map. Medium complexity. Outside Design proposal.
Major differences between Battles of the american civil War and Battles of the napoleonic era game systemsBattles of the Napoleonic Era is the next part of a continuing project to develop accurate models of tactical-level combat in the period roughly 1700 through 1939. The BNE series will primarily model the later armies of France and her enemies from 1799 to 1815, but may be extended forward until widespread use of rifled small arms dramatically change the interrelations of troops on a battlefield. Later sister systems will cover the transition to early musket-based armies epitomised by the War of the Spanish Succession, the rise of professional armies of the Seven Years War and popular armies of the American and French Revolutions.The test bed battles for BNE are Maida, Sacile, the Piave, Salamanca, Polotsk, Borodino, Hanau, Tolentino. After the main system is developed, the battles of the Hundred Days will be used as a test of concept and occasion for fine tuning. The battles in this test group are chosen because they are mostly small, representative of a particular problem or modeling challenge, do not depend on Napoleon’s generalship (except Borodino and Hanau, which are there precisely to test the game effect of Napoleon in command), and because there is enough information available to generate an ac-curate model. Also, several haven’t been done before.
Research into combat in the Napoleonic era and the American Civil War pointed to several major modeling issues and changes:
Armies are larger, and deploy in smaller areas. A given battlefield has more levels of command and more troops per square mile than an equivalent Civil War battlefield. Map scale is slightly larger at 500m/hex, to accomodate larger Regiments, Brigades and Divisions.
Command systems vary widely, as does doctrine and the ability of individual Generals to control and maneuver their armies. Officers have initiative, skill and personality ratings. Battles are decided as much by adeptly using a nation’s command system as by raw force of arms.
Future Imperfect (from p. 7)
Continued on p.20

�3
Newtonia is a game designed to test new rules concepts for the Battles of the American Civil War series. There were two battles outside this tiny Missouri town, one in 1862 as the Confederacy sought to tap the agricultural produce and mineral resources of the surrounding region, and another in late 1864 when Sterling Price’s Army of Missouri sought a brief rest during its retreat after the Battle of Westport. Each scenario exemplifies a different tactical situation. I Newtonia shows a Federal “demonstration” against the town. A “Demonstration”, in Civil War parlance, is a threatened attack on a stronger enemy which doesn’t actually intend to get heavily involved. Demonstrations are economy of force missions, occupying a larger enemy to support other operations. Here, a “Demonstration” simply reminds the Confederates that there was an active opponent in the areas.II Newtonia is a classic delaying action. Both armies are fatigued and at the limit of battle worthiness. In addition, Con-federate morale was low because of their defeat at Westport, lack of food and absence of any meaningful time to rest. The Federal army is bouyed up by their victory, but is equally tired and hungry.The primary new rules are those governing Formation Orders. They are intended to limit player omnipotence and provide realistic limits to army flexibility. Especially in Newtonia I, Formation Orders set the context for the scenario and limit each Army without a lot of Scenario Special Rules. LPD Games welcomes your comments on how the rules work, as many Civil War battles need similar limits on player responses.
Use core rules from any Battles of the American Civil War game:
I NewtoniaRules Notes:Army commanders have limited use in this battle. Cooper’s effects on this game are limited to changing Orders, coordinating artillery movement and allowing artillery survey. Salomon can, in addition also rally and coordinate his infantry. Since cavalry are difficult to kill, the Union has trouble getting a decisive advantage. This is a difficult battle for the Federals to win..
Line of Communications Federal LOC is traced to 070�
Confederate LOC traces to 08�6 or �0�6.
Terrain (both scenarios)Town (0909, Granby) � MV Defensive Terrain; Blocking Terrain.
Farmsteads � MV Defensive Terrain
Ritchey Farmstead (0809) � MV Defensive Terrain; Hasty Works
Bottomlands (trees) 2 MV Defensive Terrain; Blocking Terrain
Peach Orchard � MV Defensive Terrain; Blocking Terrain
Rise (hexes w/ hatchures) +� MV (entering from lower ground); May block LOF.
Run: +� MV (to cross)
Creek impassable to wagons and artillery. (i.e. wagons & artillery cannot enter or retreat off board except at 070�).
Roads: � MV (when entering from a road hex)
Fords � MV (when crossing via a road hex; all roads cross water at Fords)
Laden Wagons: +� MV (per hex, except on roads. May cross water only on roads)
Historical Losses: � Battalion (5-4) of 9 WI Vols., � Squadron, 9 KS Cavalry (3-5)
VictorySubtract the Federal points from the CSA total. Positive score is a CS win, a negative score is a US win; a zero-zero tie is a draw. Scores of �0+ or less than -�0 is a major victory.
Victory Conditions:
Hold Granby (� VP); Newtonia (3 VP). Casualties: 4 VP per unit (both sides). Officer Loss: 2 VP per officer (both sides). US or CS Demoralized: 6 VP. In Newtonia II CS Demoralization costs no new VP. Each excess Pursuing Cavalry 3 VP, Artillery/Infantry � VP.
Newtonia – Civil War on the Missouri Border

�4
Historical Result: Confederate Tactical Victory.
Scenario Special Rules: Newtonia IThe game begins with the Confederate 7am Player Turn and lasts till Dusk (�4 Game Turns).
Granby: Up to 4 units may occupy Granby. Granby can only be accessed or attacked from 0�05. Union and Confederate LOC’s lead through Granby. Forces which retreat out of Granby are not Losses, but do not return to player control unless Granby is empty or occupied by friendly forces. In this case, they reenter to Granby on the move after it becomes empty or friendly, and may subsequently reenter the board by 0�05.
Pack Howitzers (2-�-4 / �-0-5 or 4-2-4 / 2-0-5) cannot be Surveyed. Their range is limited to 3 hexes. Rifles (red artillery symbols) have a Surveyed Range of 9 hexes.
Orders (New Rules)In Newtonia, each Army is one Command, all subject to the same Orders.
Confederate opening Orders are Hold.
Colonel Lynde’s Orders are Attack.
General Cooper or the senior officer may change Confederate orders whenever he is available.
The senior US officer General Salomon or Col. Hall may change Federal orders whenever he is available.
Units enter in Route March and remain in March Column unless the Army Commander places in the Column to change Orders, or the Orders change according to the process described in Route March.
Attack
Subordinate units may not move farther from the enemy than the furthest subordinate unit of the same Command. Command must make one attack or bombardment during the Game Turn or else advance at least 25% of its subor-dinate units closer to the command’s Objective.
Advance
Subordinate units may not move farther from the enemy than the current furthest unit of that Command. A Com-mand may make one attack and any number of Long Range bombardments during the Game Turn. On the Game Turn after a unit of the Command occupies the Objective, Advance Orders automatically change to Screen.
Hold
Subordinates may move freely to any hex within 4 hexes of the Army objective. Subordinate units may move one hex nearer the enemy than the nearest subordinate unit (and into an enemy ZOC) in order to initiate attacks. Oth-erwise, subordinates may not move nearer to the enemy than the nearest subordinate unit or farther from the enemy than the furthest subordinate. Any number of attacks or bombardments are allowed.
Screen
Subordinate units may move one hex nearer the enemy than the nearest subordinate unit (and into an enemy ZOC) in order to initiate an attack. Otherwise, subordinates may not move nearer to the enemy than the nearest subor-dinate unit of the same Command. A Command may make one attack and any number of Long Range bombard-ments during the Game Turn.
Route March
Arriving units must move at least half speed in March Column toward the command objective on roadways, main-taining formation until one unit approaches within 4 hexes of the Command objective or an enemy with a LOF to the column. At this point the whole column’s orders instantly change to those of its parent Command. Bring remaining units up into Column with the unit in contact. Any remaining MV points may be used to deploy units out of the Column in that same Turn.
March Column
Up to 2 units per hex in a continuous chain of units stretched along a road. A Column larger than 6 units may assign one unit to “scout”. The scout may move anywhere on or off road while remaining within 2 hexes of at least one other unit in the Column.
•
•
•
•
•
•
•
•

�5
Confederate Seniority: Cooper (or his replacement) is the only Officer who can command the whole Army.
Walker commands only his own respective Formation.
Union Seniority: Salomon (or his replacement) or Col Hall, whoever is senior, can command the whole Army.
Lynde commands only his own Formation after Salomon arrives on the battlefield.
ObjectivesThe objective for both Armies is hex 0909, the town of Newtonia.
Order of Appearance
7am Confederates At Start: NEWTONIA
Bn., 3� TX Cav (Hawpe)(6-5) (Disordered, “gathering corn”) (0809).
Bryan’s � Cherokee Bn (3-5) ( (Disordered, “gathering corn”) (���0)
Bledsoe’s MO Battery (3-�-5) (Good Order) (�009)
(GRANBY: Stevens’ 22 TX Cav (6-5) (remains in Granby until released) )
7am Federal: At Start: Orders: Advance
(0802) Jacobi, 9 WI Vols (� Bn, 4 Co., ) (6-4)
(0802) Section, Handley’s Bty (3 guns) (3-�-4)
(0703) Cpt. Mefford’s Detachment (2 Co. 6 KS + � Co., 3 WI Cavalry) (3-5)
(0704) 3 IH Mounted Detachment (� Co.) (2-5)
7am Confederate CAMP COFFEE (08�6): Cooper, Alexander’s 34 TX Cav (6-5)
8am Confederate CAMP COFFEE (08�6): Tandy Walker, �st Choc n Chic Cav; (5-5, 5-5) Gordon’s 5 MO Cav. (6-5, 6-5)
8am Federal: (0802): Lynde (Orders: Attack)
9 KS Cav Bn (3 Companies) (3-5), 9 KS Mtn Howitzers (2 how) (2-�-4)
9am Confederate GRANBY: 22 TX Cav released
9am Federal (0802): 9 KS Cav Bn (3-5)
�0am Confederate CAMP COFFEE (08�6): Jean’s 4 MO Cav (6-5, 6-5); Howell’s TX Bty (4-3-5)
�0am: Federal (0802): 6 KS Cavalry Battalion (6-5); 6 KS Mtn How (2 how) (2-�-4)
�pm: Federal (0802): 3 Indian HG, Mtd. (-) (6-5), Allen’s � KS bty (4-3-4)
3pm Confederate SCOTT’S MILL (0��6): Folsom’s � Choctaw Rgt (4-5, 4-5)
3pm: Federal (0802): Salomon (0) (Can change Army Orders)
�0 KS (2 Bns), (6-4)(6-4)
Stockton’s Bty, Section (3 cannon) (3-2-4)
Bn 9 WI, (6-4)
3 WI Cav (-) (5-5)
2 OH Cav (4-5)
Blair’s 3 KS Bty (4) (3-2-4)
5pm Confederate PINEVILLE ROAD (�2�6): Buster’s � MO Bn
6pm: Federal Hall, (Hall is senior to Salomon’s replacement officer)
MSMC Bde.: �, 3, 8 MSMC (5-5, 4-5, 4-5), F, � MO Bty. (6-4-4)US Camp Guards (not in fight) US Camp Guards: 2 IHGCS Camp Guards (not in fight) Shelby, Coffee’s MO Cav. Rgt.

�6
Federal Order of Battle 30 counters
Provisional Union Division (74 CV) (Demoralize 30) BGen Frederich SalomonSalomon was under orders to avoid a battle unless he was sure he would win.
Salomon can change Orders whenever he is available.
1 Brigade - Frederich Salomon (1) 34 CV/9 units, 2 Leaders (Fatigue 13)
2 OH Cavalry, Battalion of 4 Companies (4-5)
Lynde (Minor Leader) interpreted his orders aggressively. (Attack)
9 KS Cav 4 Squadrons (pistols & sabres) (3-5)(3-5)
9 KS Howitzers (� Section) (2-�-4)/(�-0-5)
9 WI Infantry - A. Jacobbi (2 battalions) (6-4)(6-4)
25 OH Battery - Stockton & Handley (3 guns/section) (3-2-4)(3-�-4)
2 KS Battery - Blair (4-2-4)
2 Brigade – William Weer (0) 40 CV/9 units, 1 Leader (Fatigue 11)
6 KS Cav (at least 6 Coys) (Sharps Carbines)
Squadron – CPT Mefford (includes � Co, 3 WI Cav) 3-5
Squadron – LTC Jewell (5 Coys) 6-5
6 KS Howitzers - Benedict (2-�-4)/(�-0-5)
�0 KS Inf – (2 battalions) (6-4)(6-4)
3 WI Cav – 5 company battalion Sharps Carbines (5-5)
3 Indian Home Guards - W. Phillips (� Battalion) (6-5)
Scout Detachment (2-5)
� KS Battery – Allen (Rifles) (4-3-4)
4 Brigade – MSMC – George Hall 0 19 CV/4 units (Fatigue 6/Demoralize 8)Hall’s brigade arrives on or after 3pm on a 1D6 roll of 1.
� MSMC Cav. Bn (B, H, L, M) (5-5)
3 MSMC Cav (A, B, C) (4-5)
8 MSMC Cav (A, L, M) (4-5)
F, � MO Lt Arty – Murphey (3 Sections, Rifles) (6-4-4)
Confederate Order of Battle 24 counters
Provisional Confederate Division (75 CV) (Demoralize 29) BGen Douglas CooperThe Confederates outnumbered Salomon’s force, but were significantly worse armed.
Cooper’s Orders are Hold. He can change them whenever he is available.
Indian Brigade LTC Tandy Walker 1 (24 CV/6 Units, 2 Leaders) (Fatigue: 8 CV)
� Cherokee Battalion – Bryan (4-5)
� Choctaw Regiment – Folsom (4-5) (4-5)
Buster’s MO Bn – Buster (4-5)
� Choctaw & Chicasaw Regiment – Walker (5-5)(5-5)
25 Independent Battery, Ohio Volunteer Light ArtilleryOhio Historical Society
�7
Provisonal Texas Brigade D Cooper (0)(24 CV/7 units) (Fatigue 8 CV)
22 TX Cav – Stevens (6-5)
3� TX Cav – Hawpe (6-5)
Hawpe’s Orders are Defend.
34 TX Cav – Alexander (6-5)
Howell’s TX Lt Arty (Cannon) (4-3-5)
Shelby’s Missouri Brigade (27 CV/5 Units) Fatigue 9 CV)
Shelby’s �/5 MO Cav – Gordon (6-5)(6-5)
Hays’ 2/4 MO Cav – Jeans (6-5)(6-5)
Bledsoe’s MO Lt Arty (2 Guns) – J. Bledsoe (3-�-5)
References (Both):Britton, Wiley, “The Union Indian Brigade in the Civil War” (Ottowa KS: Kansas Heritage 1922) Rpr.W.S. Burke, ed. “Official Military History of the Kansas Regiments” (Leavenworth KS: Kansas Heritage n.d.) Rpr.Hinton, Richard, “Rebel Invasion of Missouri and Kansas and the Campaign of the Army of the Border” (Leavenworth KS: Kansas Heritage 1865) Rpr. w/ new material 1964 Sallee, Scott, “The Battle of Prairie Grove – War in the Ozarks, April ‘62 – January ‘63”, in “Blue & Gray” magazine, (Columbus OH: Blue & Gray Ent., 2004.OR - Newtonia I Report of Brigadier General James G. Blunt, Commanding Army of the Frontier, Sept 30, 1862 Report of Colonel Frederich Salomon, Commanding Army of Kansas, Report of Colonel George H. Hall, 4 MSMC, Commanding Brown’s Brigade, Oct 1, 1862 Report of Colonel Douglas H. Cooper, Commanding, CSA, October 2, 1862WEB RESOURCES (Dye): 25th Ohio Light ArtilleryTwenty-Fifth Ohio Independent Battery, Captain Julius L. Hadley, organized with men from the Second Ohio Cavalry, at Fort Scott, Southern Kansas, in August, 1862, as the Third Kansas Battery; served with the Army of the Frontier in Missouri the year out; orga-nized as Twenty-Fifth Ohio January 22, 1863; served in Arkansas and Missouri through the vear; mustered as veteran organization January 20, 1864; furloughed, and returned to duty at Little Rock, Arkansas, March 17, 1864, assigned to cavalry division, Seventh Army Corps - camped at Little Rock, fall and winter 1864-65; March 24, 1865, assigned to First Division, Seventh Army Corps; remained at Little Rock until ordered home; discharged at Columbus, Ohio, December 12, 1865, Captain Hadley still commanding; participated in thirteen battles and marched 6,351 miles.Buster’s Battalion: Jim Martin (webmaster) posted an outline history of the unit. http://history-sites.com/mb/cw/itcwmb/archive_index.cgi?read=340
General Douglas Cooper, CSA
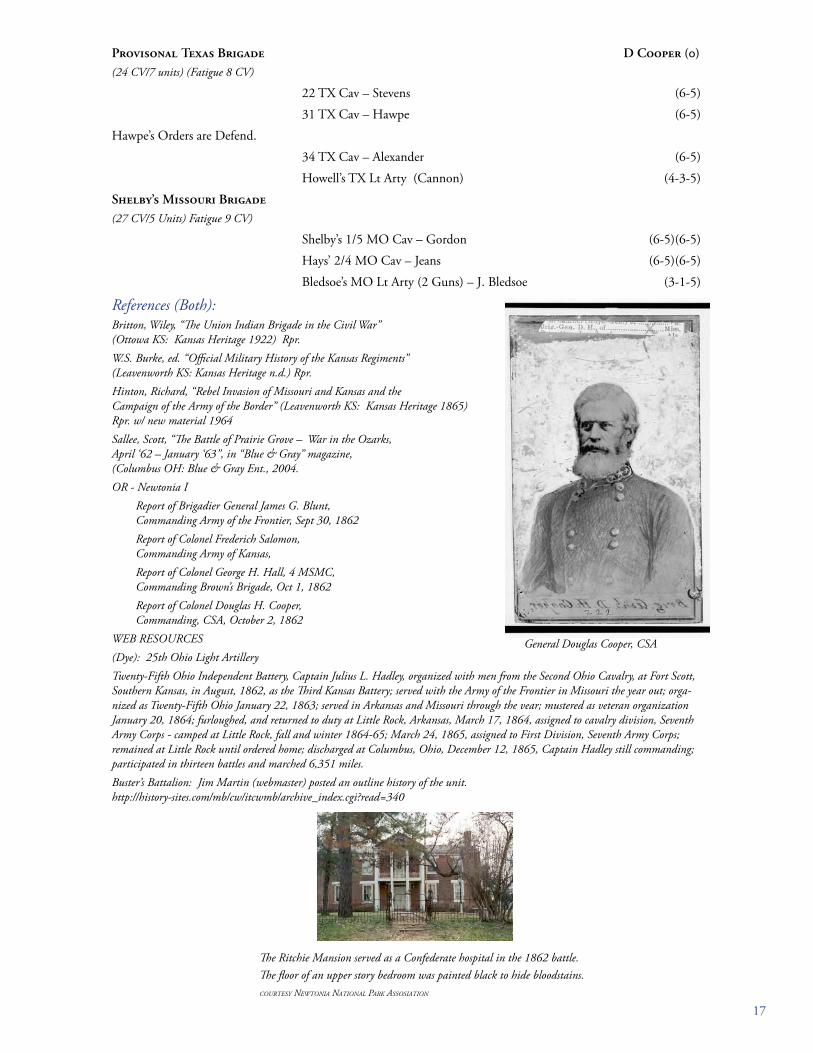
The Ritchie Mansion served as a Confederate hospital in the 1862 battle. The floor of an upper story bedroom was painted black to hide bloodstains. courtesy neWtonia national park assosiation

�8
Newtonia II The battle turns on holding a rear guard with a Demoralized Army. The Confederate edge in combat leadership (5 leaders, with 5 shifts vs. 4 leaders, 4 shifts) is important here, as is their numerical advantage and defensive mission. Federal artillery and Sharps carbines are equally important. There are no infantry in this scenario, so casualties will be lighter and surrounding important. Due to the restrictions of Orders, Fatigue and Demoralization, this battle should be sluggish.
Line of Communications Federal LOC is traced to Granby or 070�; Confederate to 08�6 or �0�6.
Terrain (see Newtonia I, above)VictorySubtract the Federal point total from the CSA total. Positive scores are CS wins, negative scores a US win, and a zero-zero tie is a draw. �0+ and -�0 or fewer is an important victory.
Victory Conditions: Grain: � VP per Grain counter controlled by either side. If a wagon bearing grain is lost, roll �D6: on a 4+, the Grain is destroyed and counts for neither side. Otherwise grain remains in the hex.
Casualties: 4 VP per unit (both sides); 2 VP per Officer (both sides)
US Demoralization: 6 VP; CS Control of Objective hex (08�6): 4 VP.
Each excess Pursuing Cavalry 3 VP, Artillery/Infantry � VP.
Historical Result: Confederate Tactical Victory.
Set UpGrain & Wagon counters on hexes: 06�2, 0809, 03�4, 09�2, ���0.
One Confederate unit is a “Grand Guard”, in good order in Newtonia (0909).
All other Confederate units deploy one to an unoccupied cultivated hex, in disorder.
Officers deploy with one of their units.
Blunt, his HQ, Ford & Hoyt’s Brigades enter on the road from Granby.
Sanborn enters in Route March on or after 3pm on a �D6 roll of � (roll each Turn until successful).
Scenario Special Rules: Newtonia IIThe game begins with the Confederate set up, then moves directly to the ��am Union Player Turn. There is no Confederate ��am Player Turn.
Wagons It takes two Game Turns to load Grain onto a wagon.
Laden Wagons: +� MV per hex, except on roads. Wagons may cross water only on roads)
Artillery: Pack Howitzers (2-�-4 / �-0-5 or 4-2-4 / 2-0-5) cannot be Surveyed. Their range is limited to 3 hexes.
Rifled Artillery (red artillery symbols) have a Surveyed Range of 9 hexes.
CSA HQ: HQ is in Camp Coffee.
Orbjectives Both side’s Objective is hex 08�6.
OrdersIn Newtonia, each Army is one Command, which obey the same Orders.
Confederate opening Orders are Screen.
Federal opening Orders are Advance.
General Shelby or the senior officer may change Confederate orders whenever he is available.
General Blunt or the senior officer may change Federal orders whenever he is available.
•
•
•
•
•
•
•
•
•
•
•
•
•
•
•
•
•
James Blunt’s General’s Sash
�9
Due to Fatigue, both sides’ “Orders” are limited to Screen and Advance.
Units enter in Route March and remain in March Column unless the Army Commander places in the Column to change Orders, or the Orders change according to the process described in Route March, below.
If either army becomes leaderless, Orders change to Screen.
SeniorityConfederate Officer Seniority: Shelby, Cabell, Jackman, Thompson
Union Officer Seniority: Blunt, Sanborn, Ford
Confederate Order of Battle:All CSA units are Fatigued; CSA is already Demoralized. All Officer Orders are Screen.
Shelby’s Division (-) Shelby (2) (34 CV/10 units)
M. Jeff Thompson (1) (21 CV/6 units)
5th MO Cavalry Regiment (5-5)
��th MO Cavalry Regiment (4-5)
�2th MO Cavalry Regiment (4-5)
Crisp’s MO Cavalry Battalion (3-5)
Elliot’s MO Cavalry Battalion (3-5)
Section of Collins’ Bty (2 guns) (2-�-4)
Jackman (1) (13 CV/4)
Hunter’s Missouri Cavalry (4-5)
Jackman’s Missouri Cavalry (4-5)
Williams Missouri Cavalry Bn (3-5)
Section of Collins’ Bty (2 guns) (2-�-4)
Fagan’s Division (-) (14CV/4)
Reefe (1) (not eligible to command the army)
Monroe’s Ark Cavalry Regiment (4-5)
Cabell (1) elements of Fagan’s Division.
Hill’s Ark Cavalry Regiment (4-5)
Witherspoon’s Ark Cav Bn (2-5)
Gordon’s Ark Cav Regiment (4-5)
Crawford’s Arkansas Cavalry (4-5)
Forage Train
5 Wagons; 5 Grain (Loot) Markers
United States Order of BattleAll US units are Fatigued; US Demoralizes on �� CV. All Officers Orders are Advance.
Blunt (1) (2 CV, 1 Unit, 1 Leader)
Escort & HQ (2-5)
Hoyt (1): (not eligible to command the army) (15 CV, 4 Units, 1 Leader)
�5 KS Bn (6 Companies) (4-5)(4-5)
�5 KS Pack Howitzers 4-2-4/2-0-5
Kansas mounted Militia Bn. (3-5)
Ford (1): (18 CV, 4 Units, 1 Leader)
2 CO Bn (5 Companies), 9 WI Cav (� Company) (4-5)(4-5)
�6 KS Bn (3 Companies) (4-5)
McLain’s Bty (Ordnance Rifles) (6-4-4)
•
•
•

20
Sanborn (1): (17 CV 4 units, 1 Leader)
2 AR Cavalry Bn (5-5)
6 MSMC Bn (4-5)
8 MSMC Bn (5-5)
Enrolled Militia Cav. (2-5)
Section H, � MO Lt (Montgomery) 3” Rodmans (3-2-4)
Strategic attrition influences the battle directly. Forced marching and pursuit generate additional losses before and after the battle.
Napoleonic armies had frequenlty to operate in theatres where the language and peoples were strange to them and hostile to their presence. Civil War armies of either side generally had at least some supporters among the populace to provide information and support. Fog of War and operational ignorance set the context of many battles. Formation level Orders, Grand Tactical Orders and hidden columns are standard.
Movement values are smaller and reflect state of Order: Infantry move 3 in Good Order, 4 in Disorder; Light Cavalry 5/6, Heavy Horse 4/5. Artillery & Wagons 3 in either state, Horse artillery 4.
Unit Morale in the Napoleonic Wars is tracked independently of training and experience. Morale ratings allow a geometric advance in ability to model nuances of troop performance. Veterans with poor morale and Conscripts with good morale become possible, as does modeling the “Gods” - Napoleon’s Imperial Guard Grenadiers.
CRT Loss is more frequent. Troops with poor morale lose more than elites. 25% losses per side are common. Attacker loss is high, even in successful attacks. Maintenance of a fresh reserve is even more critical to success, as is Artillery preparation of the enemy line.
Infantry are specialized. Skirmishers, Riflemen, Guards & Grenadiers, Militia all have different roles & capabilities. Larger formations can automatically react to Cavalry attack (“Form Square”) based on Morale.
Cavalry is split into heavy and light horse. These in turn are made up of Cuirassiers, Cavalry, Dragoons and Carabiniers on the one hand, and Hussars, Lancers, Light Dragoons, Chasseurs and Cossacks, along with various permutations of these varieties as well. True Dragoons are very rare - troopers stayed mounted in combat. Cavalry does not coordinate well with infantry or artillery, but cavalry shock can decide battles. Infantry defense against cavalry depends on Good Order and Morale.
Artillery is shorter ranged, but more important as musket range is even shorter. Large calibre artillery is capable of great destruction when massed against formed infantry or cavalry. As in the Civil War, lighter batteries provide support to infantry formations. Horse Artillery is an important asset to Corps and Army commanders and independent Cavalry forces.
Napoleonic battlefields are more open. Battlefield fortification is rare, and less important. Flanks are more important and easier to turn.
Sieges are more important, and more frequently waged.
Major differences between BacW and Bne game systems (from page 12)