Embed Size (px)
Citation preview

Lighting AnalysisInsight Lighting Analysis with Revit provides in-context daylighting and lighting analysis results, to help you document light levels throughout your design.
1. There few things to verify before performing your lighting analysis:a. First make sure to use a schematic or detailed model with Rooms specified in the
model. A conceptual mass model will not work. b. And be sure to login to your A360 account, as Revit will need to access your A360
account to complete the analysis.c. Note that it’s not necessary to generate an insight before performing Lighting
analysis, but you need to Set the location for your modeld. You can also Define surface reflectivity and glazing material properties for more
accurate results. You can find more information in the Insight Lighting Analysis help documentation. https://www.gitbook.com/@adskinsight
e. Finally, make sure you have purchased and are ready to spend cloud credits, as Lighting Analysis consumes cloud credits.
f. Click on the ‘Lighting’ icon, it opens a pop-up window with best practices for a lighting analysis workflow. It is recommended, but not necessary, that you review these links to ensure the best results. Click ‘Continue’.
2. In the “Lighting Analysis in the Cloud’ dialog box, you have the option to run a new analysis or recall previously saved results. Choose “Run new Analysis” and go.

3. The next dialogue box will allow you to control your study settings.
The analysis type setting lets you select different types of studies, such as LEED, or customized studies. Follow this link for the description of each study types.
a. For this demo we’ll use “Illuminance Analysis”.a. Select the level(s) for which you want this analysis to be done. To select multiple
levels, hold down SHIFT, select the levels, then click outside of the drop down menu. For this demo we will select only Level 1 Entry Level.
b. If you have selected Illuminance Analysis or Solar Access as a study type, you can control the Environment settings. For other types, the environment settings are set and include data you previously entered, such as location or time range. Additional settings include sky model, which you can read more about in the Insight Lighting Analysis Help documentation. You can specify the dates and times you wish to study, and you can either specify your own solar insolation data or use the weather data.
b. For the purposes of this exercise, leave the default settings in place.c. Below are the Illuminance Settings which are automatically populated based on
LEED criteria, but they can be manually controlled for Illuminance Analysis and Solar Access studies. And You can set different units.
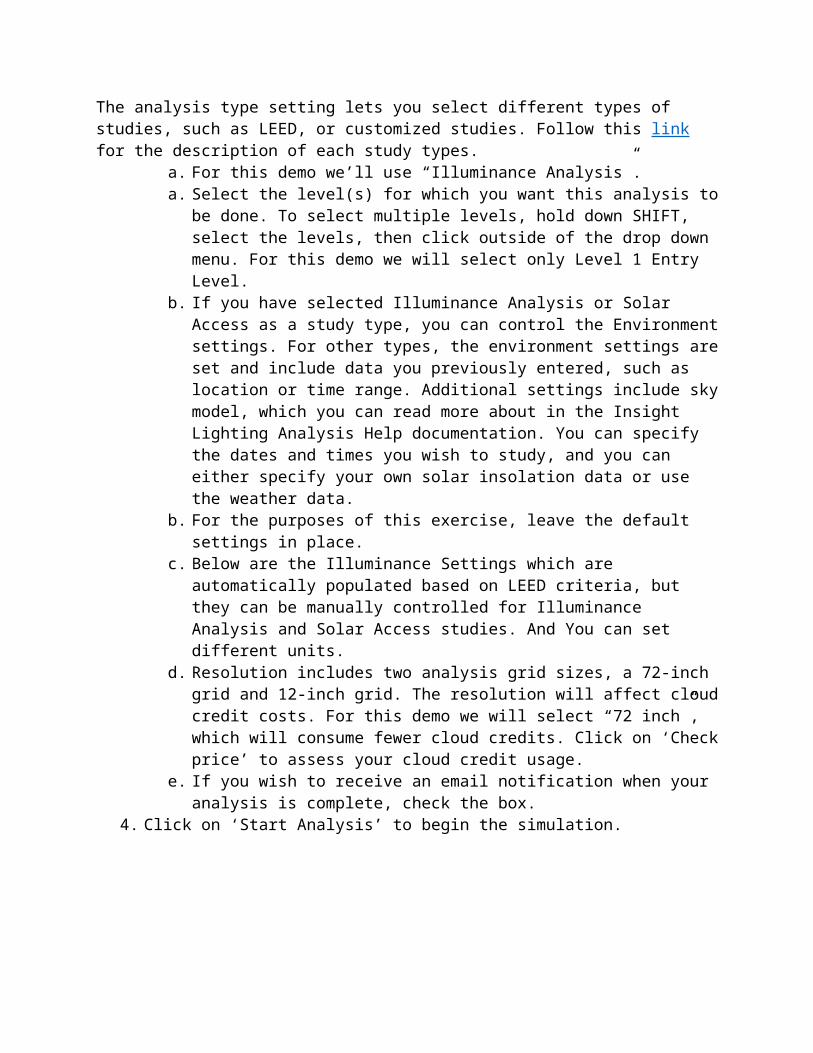
d. Resolution includes two analysis grid sizes, a 72-inch grid and 12-inch grid. The resolution will affect cloud credit costs. For this demo we will select “72 inch”, which will consume fewer cloud credits. Click on ‘Check price’ to assess your cloud credit usage.
e. If you wish to receive an email notification when your analysis is complete, check the box.
4. Click on ‘Start Analysis’ to begin the simulation.
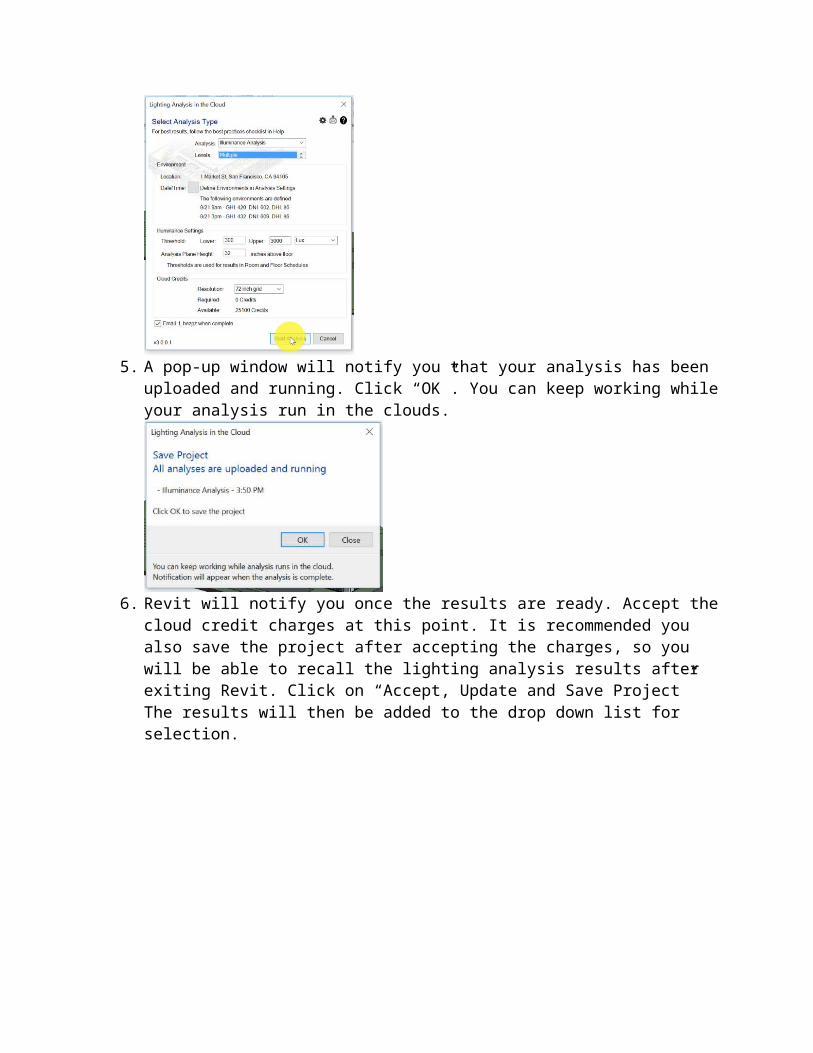
5. A pop-up window will notify you that your analysis has been uploaded and running. Click “OK”. You can keep working while your analysis run in the clouds.
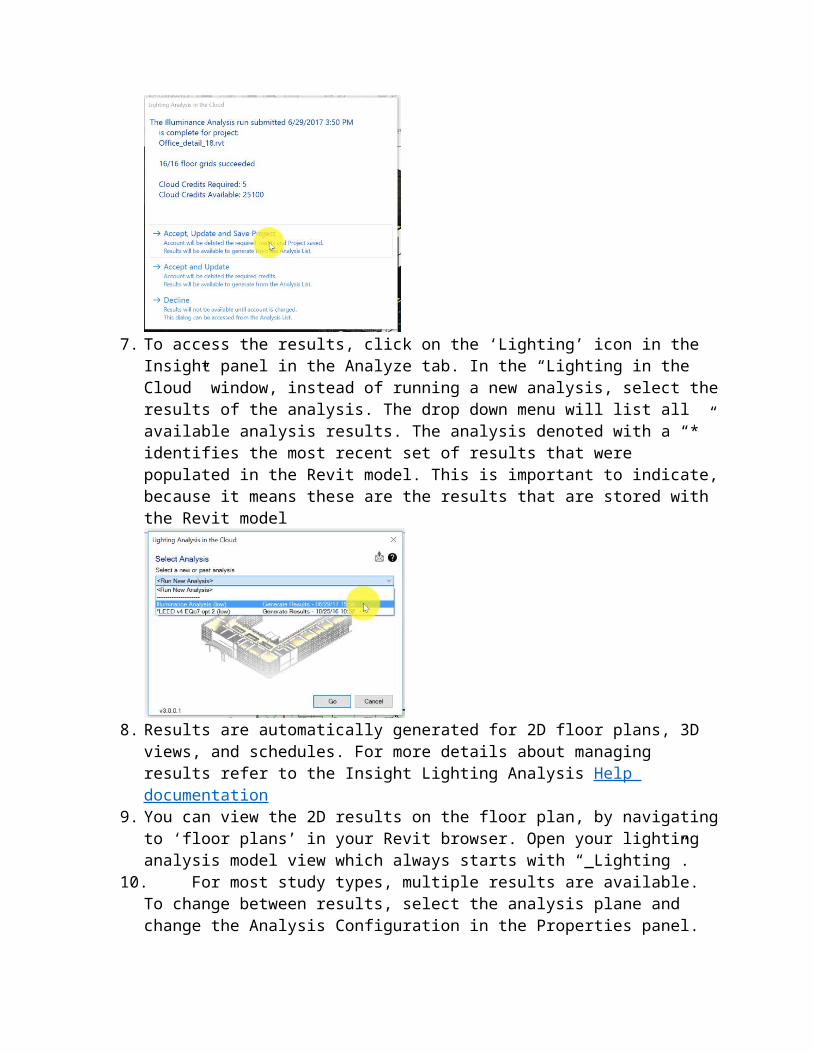
6. Revit will notify you once the results are ready. Accept the cloud credit charges at this point. It is recommended you also save the project after accepting the charges, so you will be able to recall the lighting analysis results after exiting Revit. Click on “Accept, Update and Save Project” The results will then be added to the drop down list for selection.
7. To access the results, click on the ‘Lighting’ icon in the Insight panel in the Analyze tab. In the “Lighting in the Cloud” window, instead of running a new analysis, select the results of the analysis. The drop down menu will list all available analysis results. The analysis denoted with a “*” identifies the most recent set of results that were populated in the Revit model. This is important to indicate, because it means these are the results that are stored with the Revit model
8. Results are automatically generated for 2D floor plans, 3D views, and schedules. For more details about managing results refer to the Insight Lighting Analysis Help documentation
9. You can view the 2D results on the floor plan, by navigating to ‘floor plans’ in your Revit browser. Open your lighting analysis model view which always starts with “_Lighting”.
10. For most study types, multiple results are available. To change between results, select the analysis plane and change the Analysis Configuration in the Properties panel.
11. You can change the Analysis Display styles by clicking on the Graphics section of the Properties browser and choose Default Analysis Display where you can choose another style, or customize your own. You can edit the Legend, and change the units on the Legend by navigating to the Graphics section of the Properties browser, and opening the Analysis Display Settings.
12. Analysis Display Styles can also be changed by clicking on the Legend and then opening the Edit Style in the ribbon.
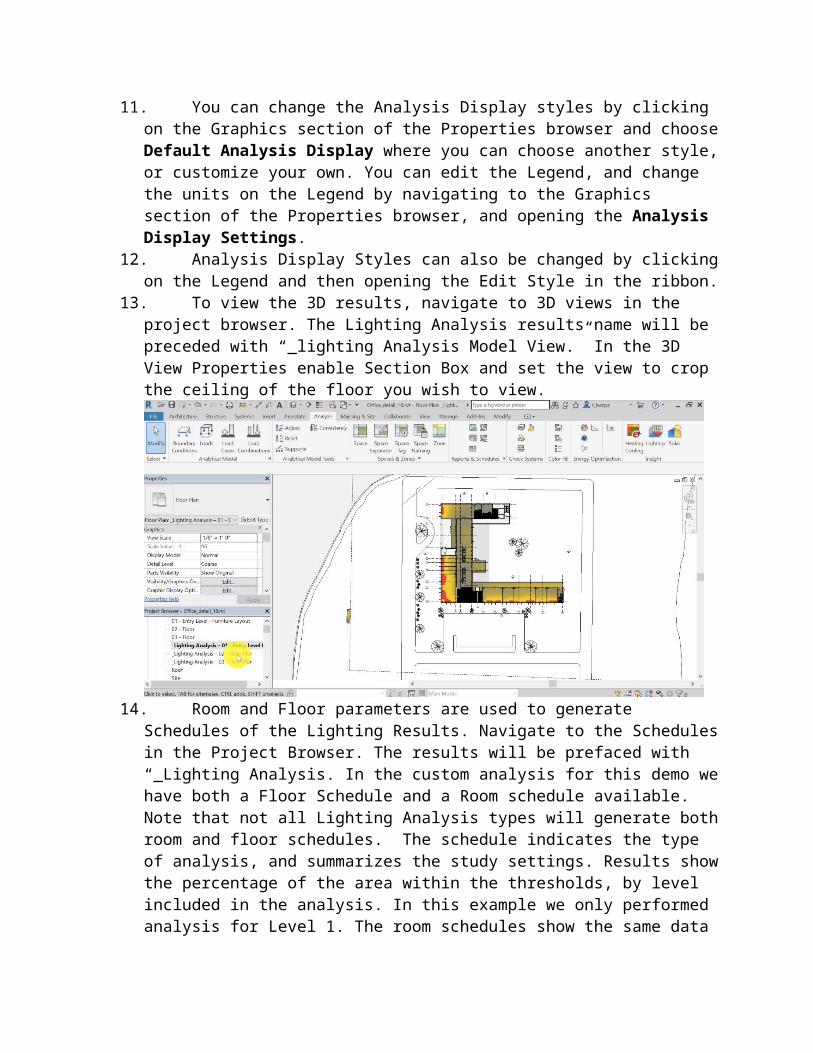
13. To view the 3D results, navigate to 3D views in the project browser. The Lighting Analysis results name will be preceded with “_lighting Analysis Model View.” In the 3D
View Properties enable Section Box and set the view to crop the ceiling of the floor you wish to view.
14. Room and Floor parameters are used to generate Schedules of the Lighting Results. Navigate to the Schedules in the Project Browser. The results will be prefaced with “_Lighting Analysis. In the custom analysis for this demo we have both a Floor Schedule and a Room schedule available. Note that not all Lighting Analysis types will generate both room and floor schedules. The schedule indicates the type of analysis, and summarizes the study settings. Results show the percentage of the area within the thresholds, by level included in the analysis. In this example we only performed analysis for Level 1. The room schedules show the same data on a room by room basis. You can choose which rooms to include in the study
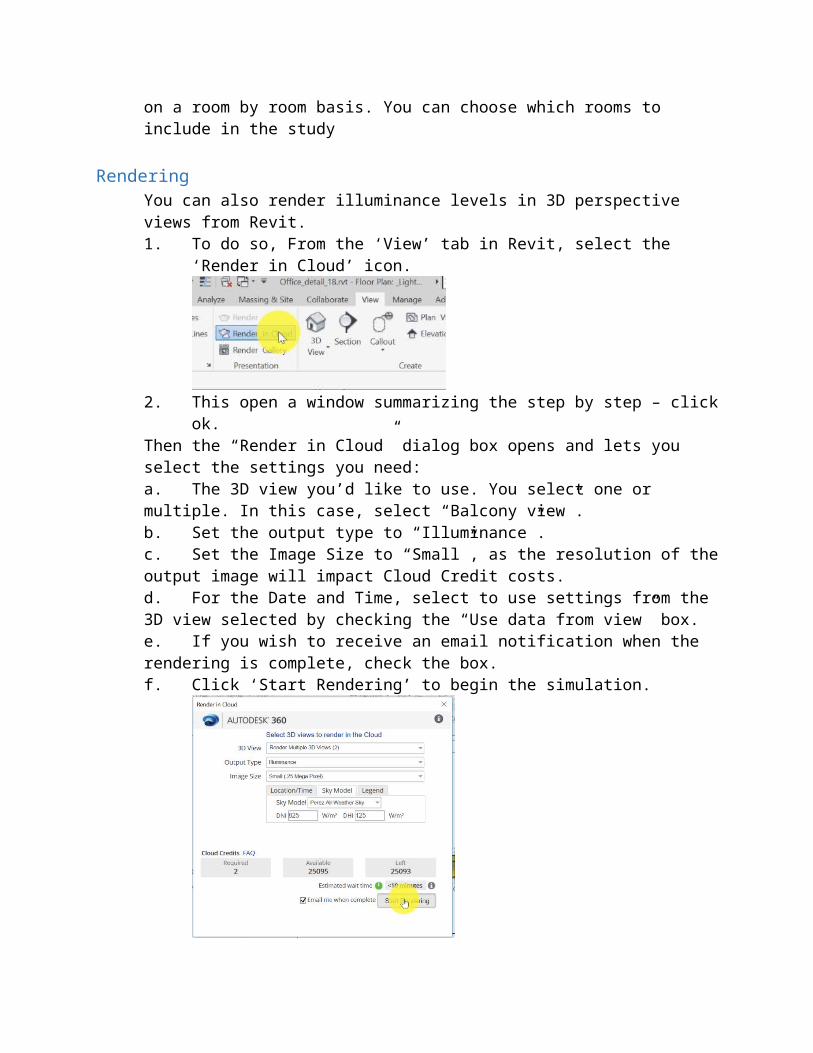
RenderingYou can also render illuminance levels in 3D perspective views from Revit. 1. To do so, From the ‘View’ tab in Revit, select the ‘Render in Cloud’ icon.
2. This open a window summarizing the step by step – click ok.Then the “Render in Cloud” dialog box opens and lets you select the settings you need:a. The 3D view you’d like to use. You select one or multiple. In this case, select “Balcony view”.b. Set the output type to “Illuminance”.c. Set the Image Size to “Small”, as the resolution of the output image will impact Cloud Credit costs.
d. For the Date and Time, select to use settings from the 3D view selected by checking the “Use data from view” box.e. If you wish to receive an email notification when the rendering is complete, check the box.f. Click ‘Start Rendering’ to begin the simulation.
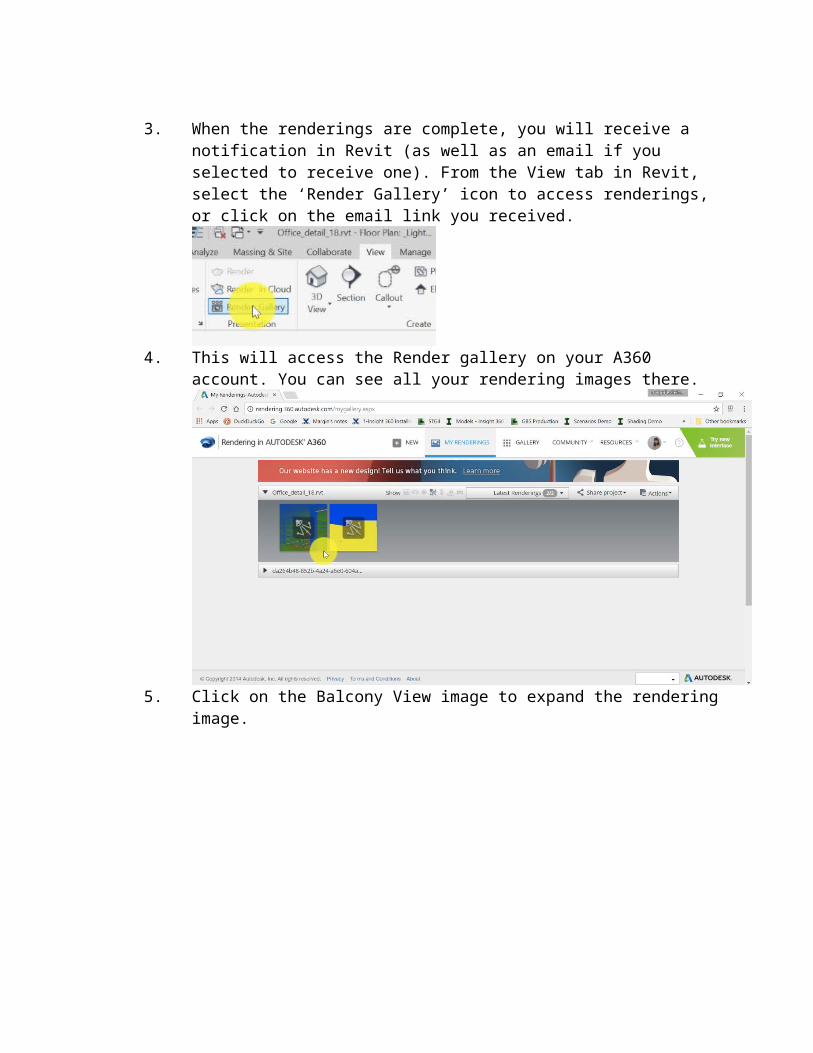
3. When the renderings are complete, you will receive a notification in Revit (as
well as an email if you selected to receive one). From the View tab in Revit, select the ‘Render Gallery’ icon to access renderings, or click on the email link you received.
4. This will access the Render gallery on your A360 account. You can see all your rendering images there.
5. Click on the Balcony View image to expand the rendering image.
6. From the drop-down button at the bottom right side of each image, you can choose to download the render in image file or pdf. You can also decide to re-render an image using new settings. This will open a window in the A360 interface for you to quickly change the settings, such as the dates and times settings of your render, and re-generate the rendering.
7. Close and go back to your model.
![[XLS]Lighting Products Disqualified from ENERGY STAR · Web viewLighting Products Disqualified from the ENERGY STAR® Program Canadian Tire 052-5314-0 135901 136343 137161 139779](https://img.pdfslide.us/doc/110x75/5ad1f7ee7f8b9abd6c8c2974/xlslighting-products-disqualified-from-energy-star-viewlighting-products-disqualified.jpg)