Embed Size (px)
DESCRIPTION
Realtime application with meteorjs
Citation preview
1
Table of Contents1. Introduction.................................................................................................................... 3
What is Meteor Streams.......................................................................................................... 3What's in this eBook................................................................................................................. 3Source Code................................................................................................................................. 3
2. Creating the App............................................................................................................ 5Adding Meteor Streams........................................................................................................... 5
With Atmosphere.................................................................................................................................... 5Using Git..................................................................................................................................................... 5
Adding Meteor Router............................................................................................................. 6Adding hammer.js..................................................................................................................... 6
3. Basic UI and Routes...................................................................................................... 7Let's add the UI........................................................................................................................... 7Adding Routes............................................................................................................................ 9
4. Let's build the Blackboard....................................................................................... 10
5. Designing the App for Meteor Streams................................................................ 12Blackboard app and Stream events.................................................................................. 12Permissions.............................................................................................................................. 13
6. Adding Meteor Streams Support........................................................................... 14Integrating Blackboard (Pad)............................................................................................. 14
7. Adding Fine-Grade Permissions............................................................................ 17Why we need permissions................................................................................................... 17Let's do the modifications.................................................................................................... 17
Thank You.......................................................................................................................... 19
2
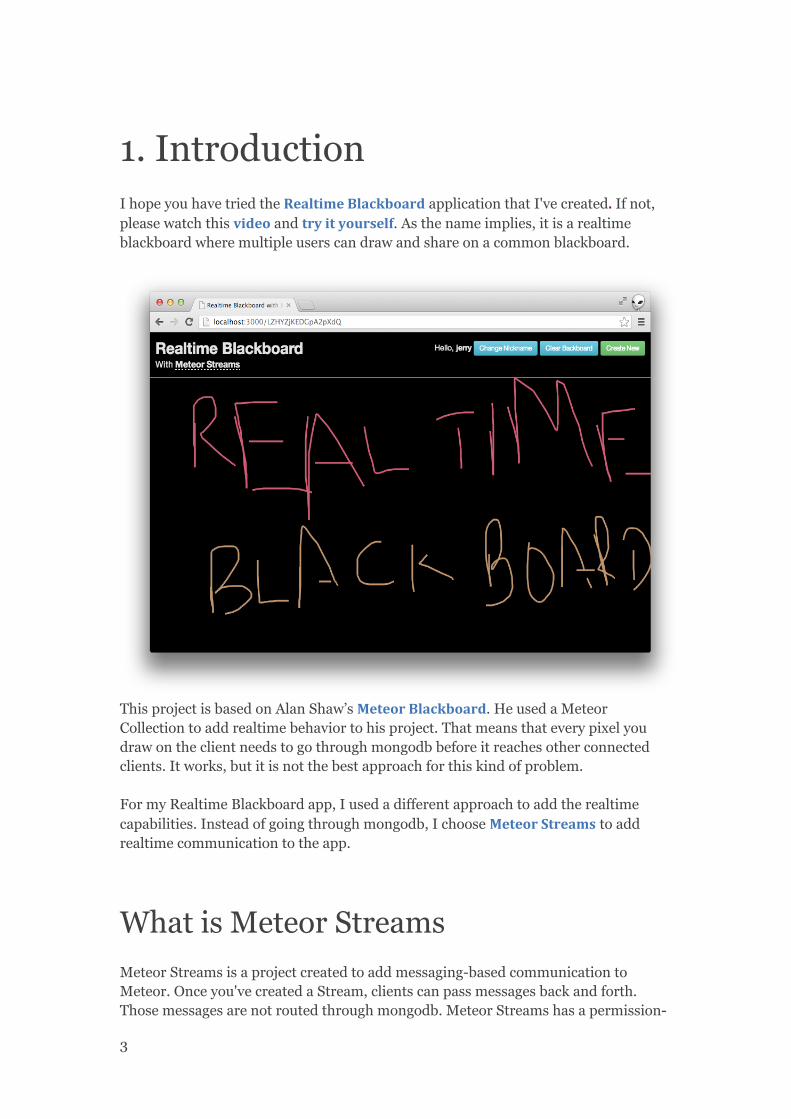
1. IntroductionI hope you have tried the Realtime Blackboard application that I've created. If not, please watch this video and try it yourself. As the name implies, it is a realtime blackboard where multiple users can draw and share on a common blackboard.
This project is based on Alan Shaw’s Meteor Blackboard. He used a Meteor Collection to add realtime behavior to his project. That means that every pixel you draw on the client needs to go through mongodb before it reaches other connected clients. It works, but it is not the best approach for this kind of problem.
For my Realtime Blackboard app, I used a different approach to add the realtime capabilities. Instead of going through mongodb, I choose Meteor Streams to add realtime communication to the app.
What is Meteor Streams
Meteor Streams is a project created to add messaging-based communication to Meteor. Once you've created a Stream, clients can pass messages back and forth. Those messages are not routed through mongodb. Meteor Streams has a permission-
3
based security model, and through filters, you can control what clients are communicating.
To follow this eBook, you don't need prior experience with Meteor Streams. But try having a look at Meteor Stream documentation before you proceed.
What's in this eBook
With this eBook, I will guide you in building the Realtime Blackboard app using Meteor Streams. I will assume you have some experience with Meteor already. If not, read the Discover Meteor book.
Source Code
Source code for the application we are creating is available on the Github. Click here to get it.
At the end of each chapter, you can view and download the source code with the changes made in that chapter and previous chapters.
So why wait? Let’s get started!
4

2. Creating the AppAs usual, you need to create a meteor app and remove default packages and unwanted files. You need to add the bootstrap package, too. Let’s name our project awesome-blackboard.
meteor create awesome-blackboardcd awesome-blackboardmeteor remove insecure autopublishmeteor add bootstraprm awesome-blackboard.* #remove files added by default
Adding Meteor Streams
Now it's time to incorporate Meteor Streams into our project. Meteor Streams distributes itself as a Smart Package, so you can very easily add it to the project. There are two possible ways to add it:
With Atmosphere
Atmosphere is a community-managed Smart Package repository. You can install atmosphere packages with meteorite. Once you've installed meteorite, installing Meteor Streams is just a single shell command.
mrt add streams
Using Git
If you are not a fan of meteorite and atmosphere, you can add Meteor Streams to your app as a git submodule.
mrt add streamsmkdir -p packages #make sure you created the packages folder git submodule add https://github.com/arunoda/meteor-streams.git
packages/streams
5
Now you've added Meteor Streams support for your app. Easy, wasn’t it?
Adding Meteor Router
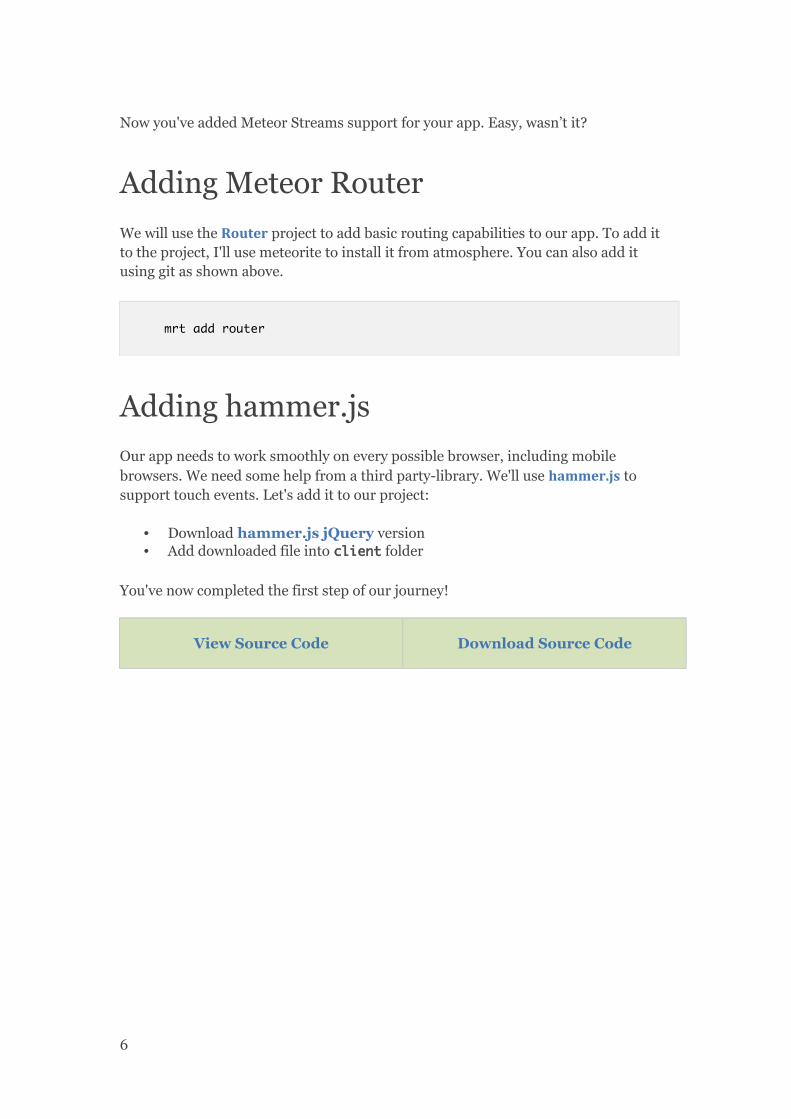
We will use the Router project to add basic routing capabilities to our app. To add it to the project, I'll use meteorite to install it from atmosphere. You can also add it using git as shown above.
mrt add router
Adding hammer.js
Our app needs to work smoothly on every possible browser, including mobile browsers. We need some help from a third party-library. We'll use hammer.js to support touch events. Let's add it to our project:
• Download hammer.js jQuery version• Add downloaded file into client folder
You've now completed the first step of our journey!
View Source Code Download Source Code
6
3. Basic UI and RoutesIn our blackboard app, users can create as many blackboards as they want. (We use the term pad internally to identify a blackboard.) Each blackboard has its own URL. Also, if someone visits the root of the website (/), he will be redirected to a new blackboard.
So, basically, we have 2 types of routes as shown below.
1. /2. /:padId
padId can be any value, since we have no restrictions on it. But it normally contains a random id generated with Random.id().
Let's add the UI
Since our focus here is on Streams, we don't need to discuss much about HTML and CSS. It is minimal and straightforward. So let's add it to the app.
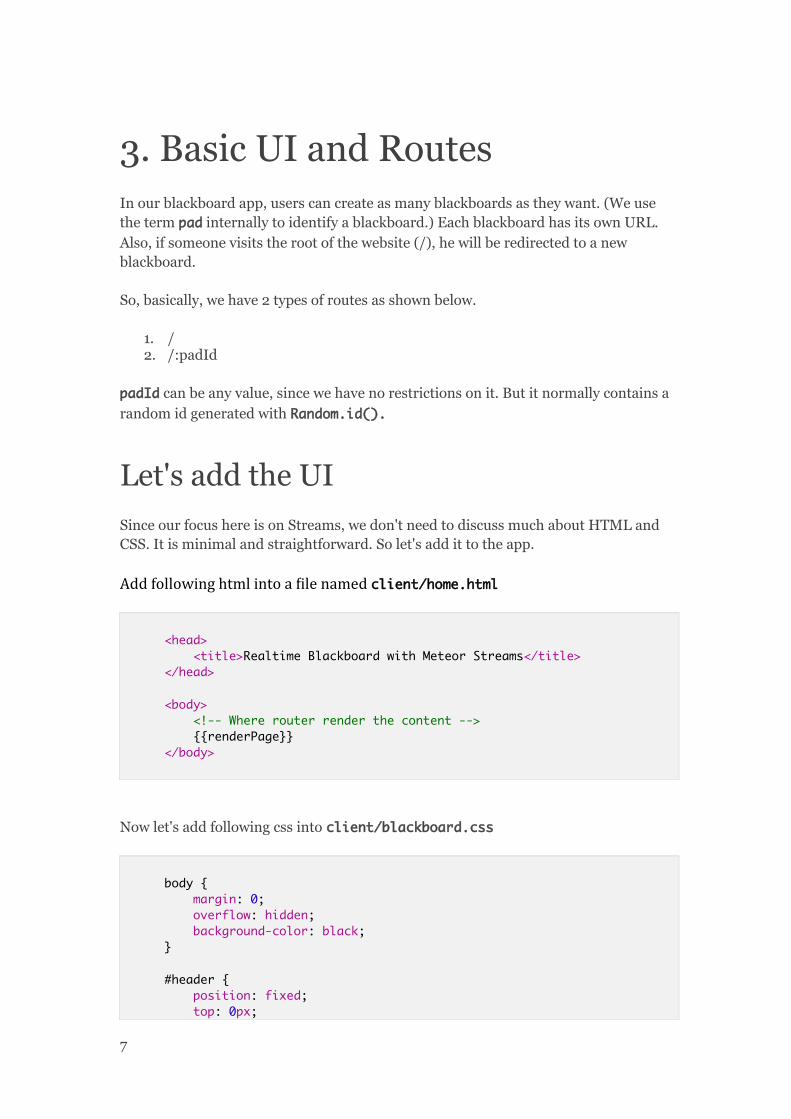
Add following html into a file named client/home.html
<head> <title>Realtime Blackboard with Meteor Streams</title></head>
<body> <!-- Where router render the content --> {{renderPage}}</body>
Now let's add following css into client/blackboard.css
body { margin: 0; overflow: hidden; background-color: black;}
#header { position: fixed; top: 0px;
7
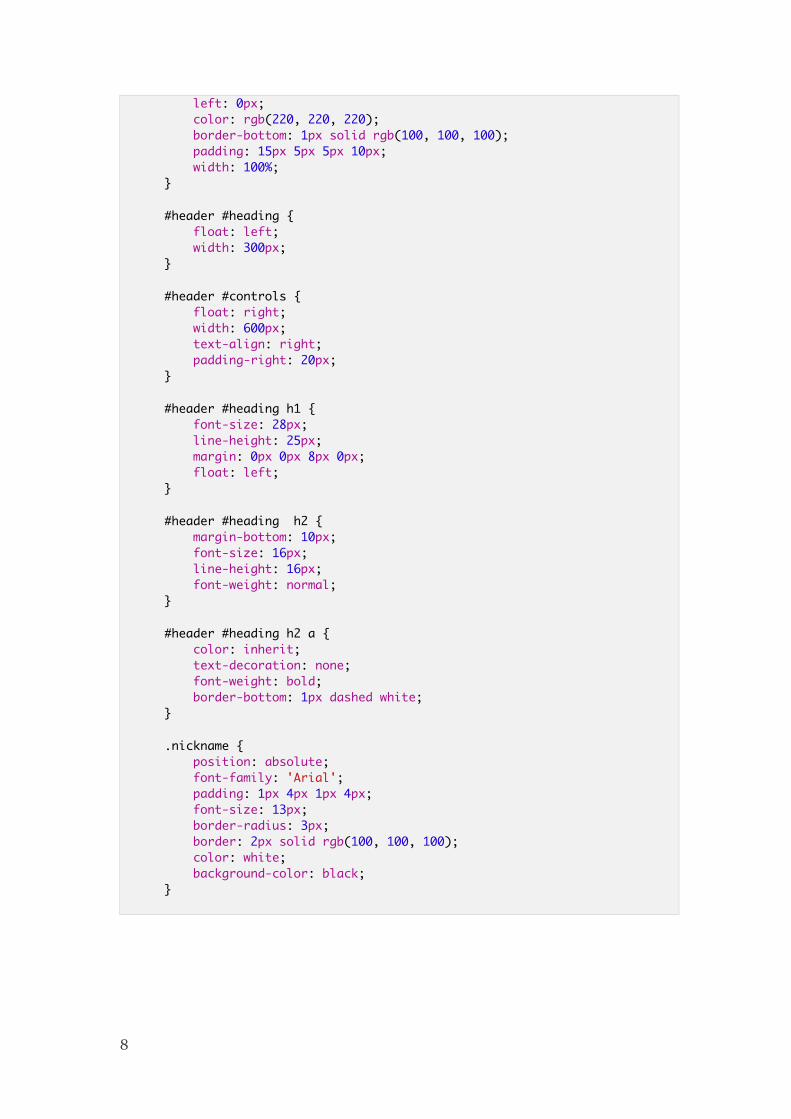
left: 0px; color: rgb(220, 220, 220); border-bottom: 1px solid rgb(100, 100, 100); padding: 15px 5px 5px 10px; width: 100%;}
#header #heading { float: left; width: 300px;}
#header #controls { float: right; width: 600px; text-align: right; padding-right: 20px;}
#header #heading h1 { font-size: 28px; line-height: 25px; margin: 0px 0px 8px 0px; float: left;}
#header #heading h2 { margin-bottom: 10px; font-size: 16px; line-height: 16px; font-weight: normal;}
#header #heading h2 a { color: inherit; text-decoration: none; font-weight: bold; border-bottom: 1px dashed white;}
.nickname { position: absolute; font-family: 'Arial'; padding: 1px 4px 1px 4px; font-size: 13px; border-radius: 3px; border: 2px solid rgb(100, 100, 100); color: white; background-color: black;}
8
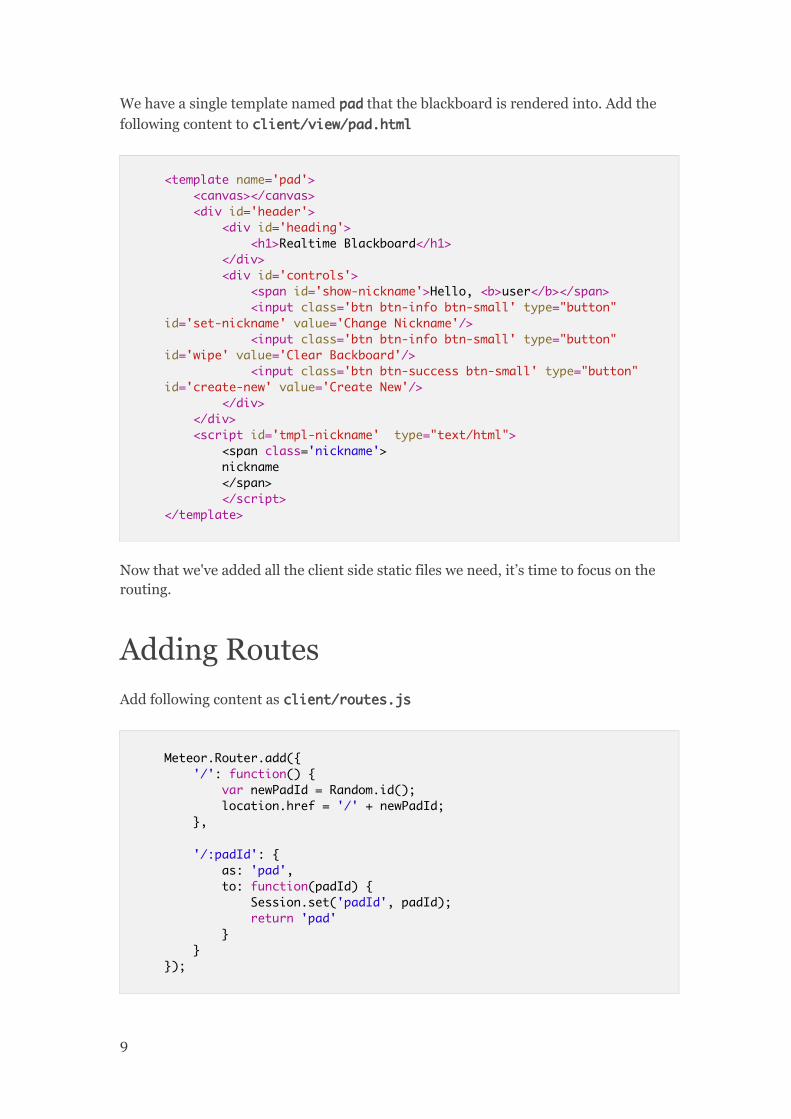
We have a single template named pad that the blackboard is rendered into. Add the following content to client/view/pad.html
<template name='pad'> <canvas></canvas> <div id='header'> <div id='heading'> <h1>Realtime Blackboard</h1> </div> <div id='controls'> <span id='show-nickname'>Hello, <b>user</b></span> <input class='btn btn-info btn-small' type="button" id='set-nickname' value='Change Nickname'/> <input class='btn btn-info btn-small' type="button" id='wipe' value='Clear Backboard'/> <input class='btn btn-success btn-small' type="button" id='create-new' value='Create New'/> </div> </div> <script id='tmpl-nickname' type="text/html"> <span class='nickname'> nickname </span> </script></template>
Now that we've added all the client side static files we need, it’s time to focus on the routing.
Adding Routes
Add following content as client/routes.js
Meteor.Router.add({ '/': function() { var newPadId = Random.id(); location.href = '/' + newPadId; }, '/:padId': { as: 'pad', to: function(padId) { Session.set('padId', padId); return 'pad' } }});
9
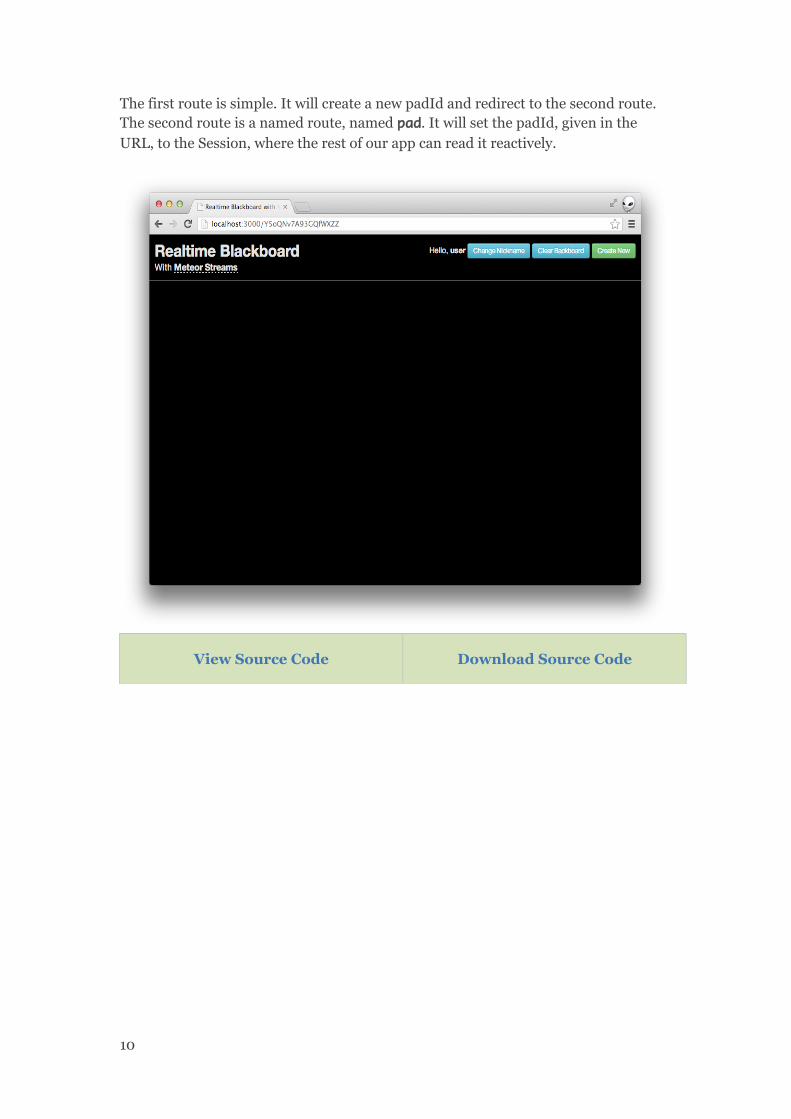
The first route is simple. It will create a new padId and redirect to the second route. The second route is a named route, named pad. It will set the padId, given in the URL, to the Session, where the rest of our app can read it reactively.
View Source Code Download Source Code
10
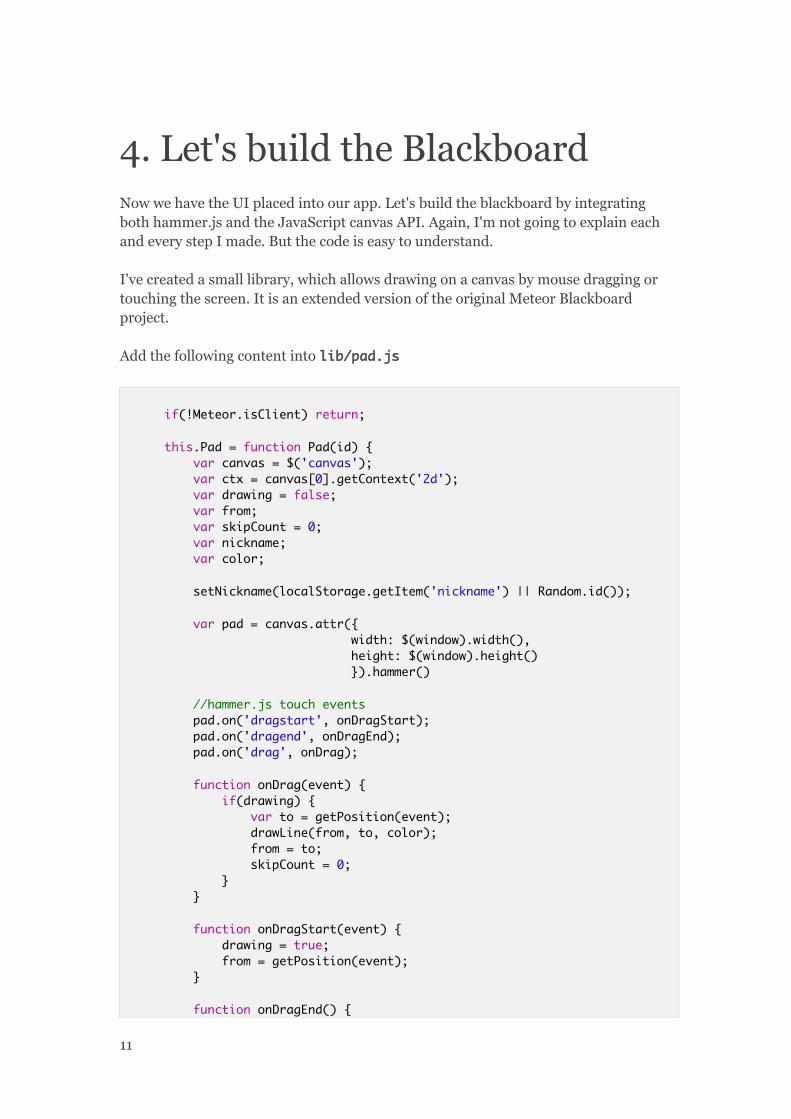
4. Let's build the BlackboardNow we have the UI placed into our app. Let's build the blackboard by integrating both hammer.js and the JavaScript canvas API. Again, I'm not going to explain each and every step I made. But the code is easy to understand.
I've created a small library, which allows drawing on a canvas by mouse dragging or touching the screen. It is an extended version of the original Meteor Blackboard project.
Add the following content into lib/pad.js
if(!Meteor.isClient) return;
this.Pad = function Pad(id) { var canvas = $('canvas'); var ctx = canvas[0].getContext('2d'); var drawing = false; var from; var skipCount = 0; var nickname; var color; setNickname(localStorage.getItem('nickname') || Random.id()); var pad = canvas.attr({ width: $(window).width(), height: $(window).height() }).hammer() //hammer.js touch events pad.on('dragstart', onDragStart); pad.on('dragend', onDragEnd); pad.on('drag', onDrag); function onDrag(event) { if(drawing) { var to = getPosition(event); drawLine(from, to, color); from = to; skipCount = 0; } } function onDragStart(event) { drawing = true; from = getPosition(event); } function onDragEnd() {
11
drawing = false; } function getPosition(event) { return { x: parseInt(event.gesture.center.pageX), y: parseInt(event.gesture.center.pageY) }; } function drawLine(from, to, color) { ctx.strokeStyle = color; ctx.beginPath(); ctx.moveTo(from.x, from.y); ctx.lineTo(to.x, to.y); ctx.closePath(); ctx.stroke(); } function setNickname(name) { nickname = name; $('#show-nickname b').text(nickname); localStorage.setItem('nickname', nickname); color = localStorage.getItem('color-' + nickname); if(!color) { color = getRandomColor(); localStorage.setItem('color-' + nickname, color); } } function wipe(emitAlso) { ctx.fillRect(0, 0, canvas.width(), canvas.height()); } ctx.strokeStyle = color; ctx.fillStyle = '#000000'; ctx.lineCap = 'round'; ctx.lineWidth = 3; ctx.fillRect(0, 0, canvas.width(), canvas.height()); // Stop iOS from doing the bounce thing with the screen document.ontouchmove = function(event){ event.preventDefault(); } //expose API this.drawLine = drawLine; this.wipe = wipe; this.setNickname = setNickname; this.close = function() { pad.off('dragstart', onDragStart); pad.off('dragend', onDragEnd); pad.off('drag', onDrag); };
12
}
function getRandomColor() { var letters = '0123456789ABCDEF'.split(''); var color = '#'; for (var i = 0; i < 6; i++ ) { color += letters[Math.round(Math.random() * 15)]; } return color;}
Now it is time to integrate the above Pad class with our routes. To do that, add following content into client/views/pad.js
var pad;
Meteor.startup(function() { Deps.autorun(function() { if(pad) { pad.close(); }
var padId = Session.get('padId'); pad = new Pad(padId); });});
Whenever the router sets a padId, the above code will take care of closing the existing pad and create a new one. Have you noticed the 3 buttons we have in the right top corner? Let's add their functionality.
Append the following content to client/views/pad.js.
$(function() { //Clear Blackboard $('body').on('click', '#wipe', function() { pad.wipe(true); });
//Change Nickname $('body').on('click', '#set-nickname', function() { var name = prompt('Enter your nickname'); if(name && name.trim() != '') { pad.setNickname(name); } });
13
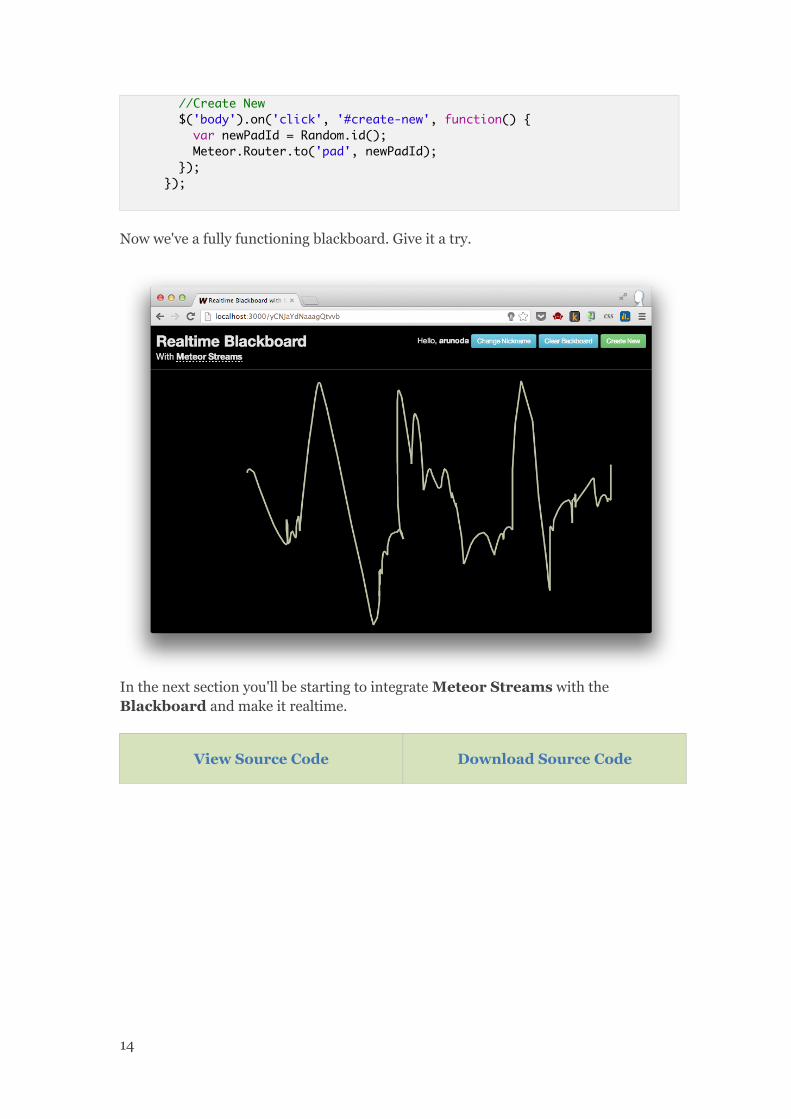
//Create New $('body').on('click', '#create-new', function() { var newPadId = Random.id(); Meteor.Router.to('pad', newPadId); });});
Now we've a fully functioning blackboard. Give it a try.
In the next section you'll be starting to integrate Meteor Streams with the Blackboard and make it realtime.
View Source Code Download Source Code
14
5. Designing the App for Meteor StreamsNow we have a fully functioning blackboard app. But it is not realtime and cannot be shared with anyone. In this section I'll show you how to design our app for Meteor Streams.
If you don't have a working blackboard app (maybe you've decided to directly jump into this chapter), download it from here.
Meteor.Stream is the class exposed by Meteor Streams, which allows you to create a Stream. It is a realtime EventEmitter and works across the Meteor. You can pass messages between clients. You can even send and listen to the messages on the Server.
Blackboard app and Stream events
In our blackboard app, when a user is drawing something on it, we need to send what he is drawing to all other connected users. So we need to send following information:
• Location where the mouse dragging (or touching on the screen) started• Locations the user is currently dragging• Location where the dragging has ended• Nickname and the color of the pencil
We'll use these three events to communication and listen to the above information.
• dragstart (also sends the nickname and the color)• drag• dragend
But we have multiple pads in a single app, so we need to namespace the above events with the padId as shown below. Let's assume our padId is L4nN7r8FpJ6xgpEiJ.
• L4nN7r8FpJ6xgpEiJ:dragstart• L4nN7r8FpJ6xgpEiJ:drag• L4nN7r8FpJ6xgpEiJ:dragend
15
Permissions
By default, clients don't have read or write access to the Stream. We need to explicitly enable permissions. We can use event name, userId and subscriptionId to make the decision to allow or deny conditionally.
Read more on Meteor Streams security and permissions
For simplicity, we'll enable clients to communicate without any restrictions at first. But in the later chapters, we'll discuss more on advanced permissions, which make the app more efficient.
Let's start integrating Meteor Streams!
16

6. Adding Meteor Streams SupportWe will be using a single Stream and it needs to be created on both client and server. When creating the stream, we need to use the same name for it in both places. It is not the variable name, but the name of the stream passed as the first parameter.
Let's add the following code in streams.js.
LineStream = new Meteor.Stream('lines');
if(Meteor.isServer) { LineStream.permissions.read(function() { return true; });
LineStream.permissions.write(function() { return true; });}
It will create a Stream in both client and server and add permissions. Here we simply add no restrictions to the stream. It’s not ideal, but we'll catch up with this later.
Integrating Blackboard (Pad)
Now we need to emit events when a user draws something so others can get those events and make them visible on their screens. See following diff of the lib/pad.js where you need to make changes.
if(drawing) { var to = getPosition(event); drawLine(from, to, color);+ LineStream.emit(id + ':drag', nickname, to); from = to; skipCount = 0; }@@ -33,10 +33,12 @@ this.Pad = function Pad(id) { function onDragStart(event) { drawing = true; from = getPosition(event);+ LineStream.emit(id + ':dragstart', nickname, from, color); }
17
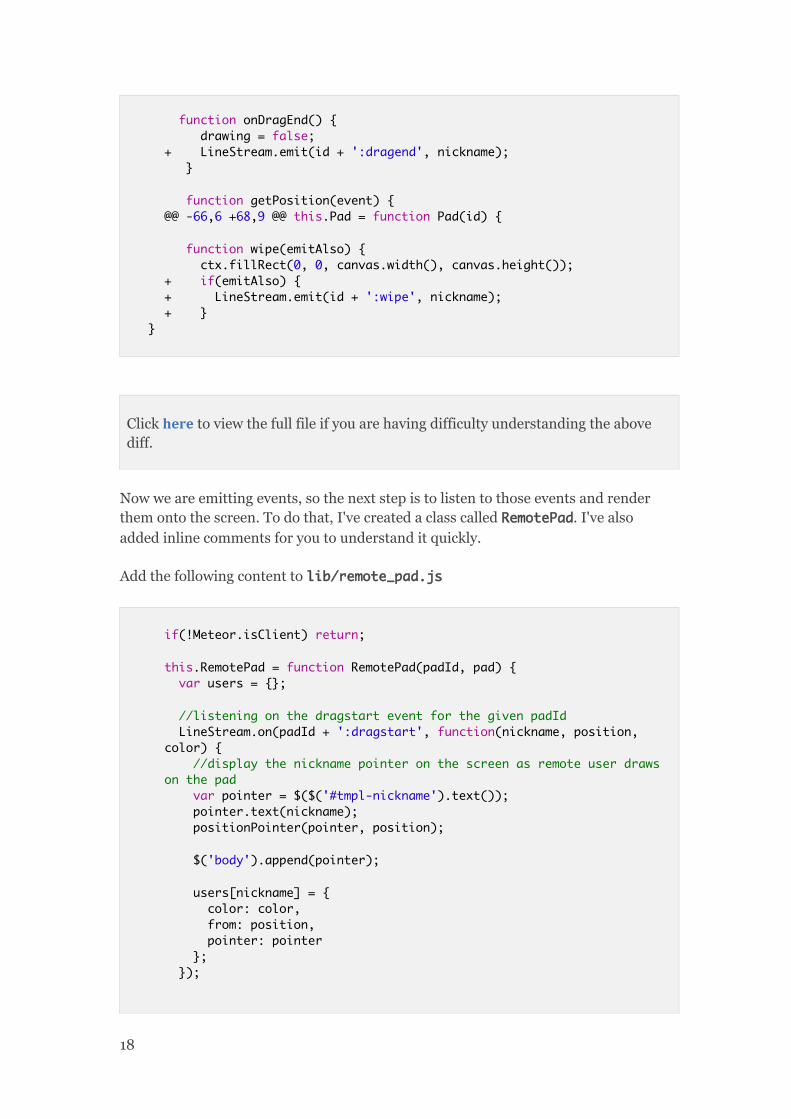
function onDragEnd() { drawing = false;+ LineStream.emit(id + ':dragend', nickname); }
function getPosition(event) {@@ -66,6 +68,9 @@ this.Pad = function Pad(id) {
function wipe(emitAlso) { ctx.fillRect(0, 0, canvas.width(), canvas.height());+ if(emitAlso) {+ LineStream.emit(id + ':wipe', nickname);+ }
}
Click here to view the full file if you are having difficulty understanding the above diff.
Now we are emitting events, so the next step is to listen to those events and render them onto the screen. To do that, I've created a class called RemotePad. I've also added inline comments for you to understand it quickly.
Add the following content to lib/remote_pad.js
if(!Meteor.isClient) return;
this.RemotePad = function RemotePad(padId, pad) { var users = {};
//listening on the dragstart event for the given padId LineStream.on(padId + ':dragstart', function(nickname, position, color) { //display the nickname pointer on the screen as remote user draws on the pad var pointer = $($('#tmpl-nickname').text()); pointer.text(nickname); positionPointer(pointer, position);
$('body').append(pointer);
users[nickname] = { color: color, from: position, pointer: pointer }; });
18
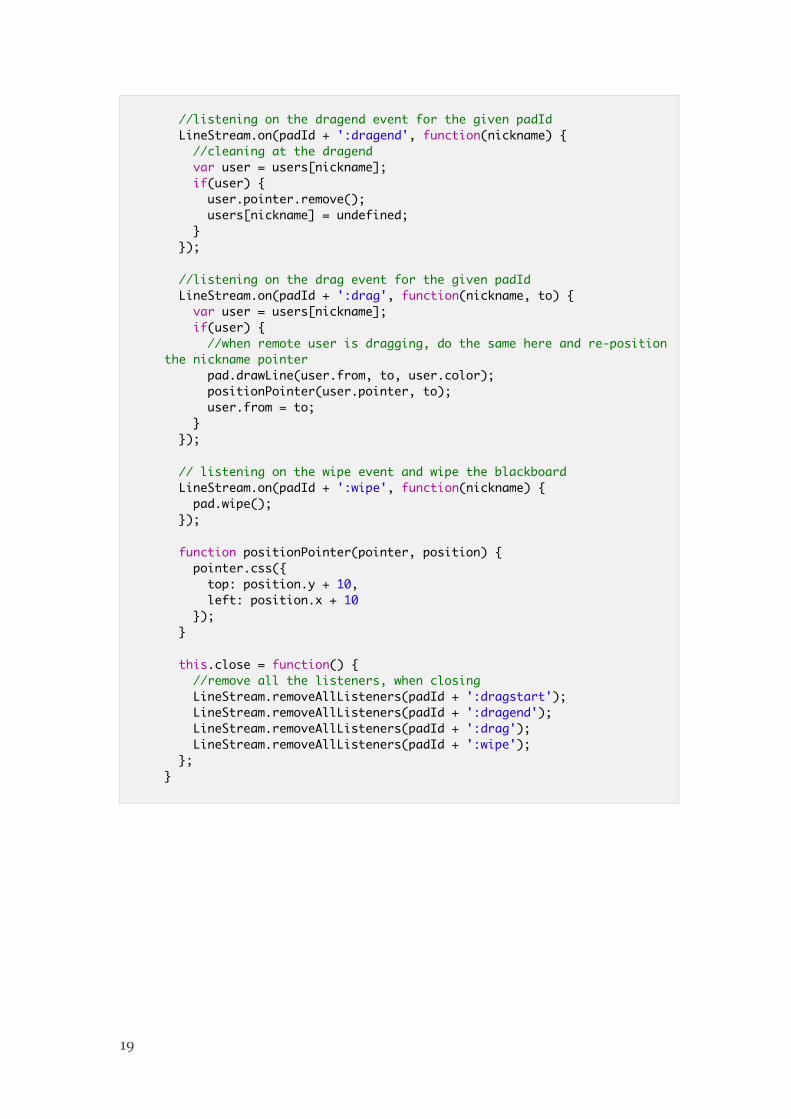
//listening on the dragend event for the given padId LineStream.on(padId + ':dragend', function(nickname) { //cleaning at the dragend var user = users[nickname]; if(user) { user.pointer.remove(); users[nickname] = undefined; } });
//listening on the drag event for the given padId LineStream.on(padId + ':drag', function(nickname, to) { var user = users[nickname]; if(user) { //when remote user is dragging, do the same here and re-position the nickname pointer pad.drawLine(user.from, to, user.color); positionPointer(user.pointer, to); user.from = to; } });
// listening on the wipe event and wipe the blackboard LineStream.on(padId + ':wipe', function(nickname) { pad.wipe(); });
function positionPointer(pointer, position) { pointer.css({ top: position.y + 10, left: position.x + 10 }); }
this.close = function() { //remove all the listeners, when closing LineStream.removeAllListeners(padId + ':dragstart'); LineStream.removeAllListeners(padId + ':dragend'); LineStream.removeAllListeners(padId + ':drag'); LineStream.removeAllListeners(padId + ':wipe'); };}
19
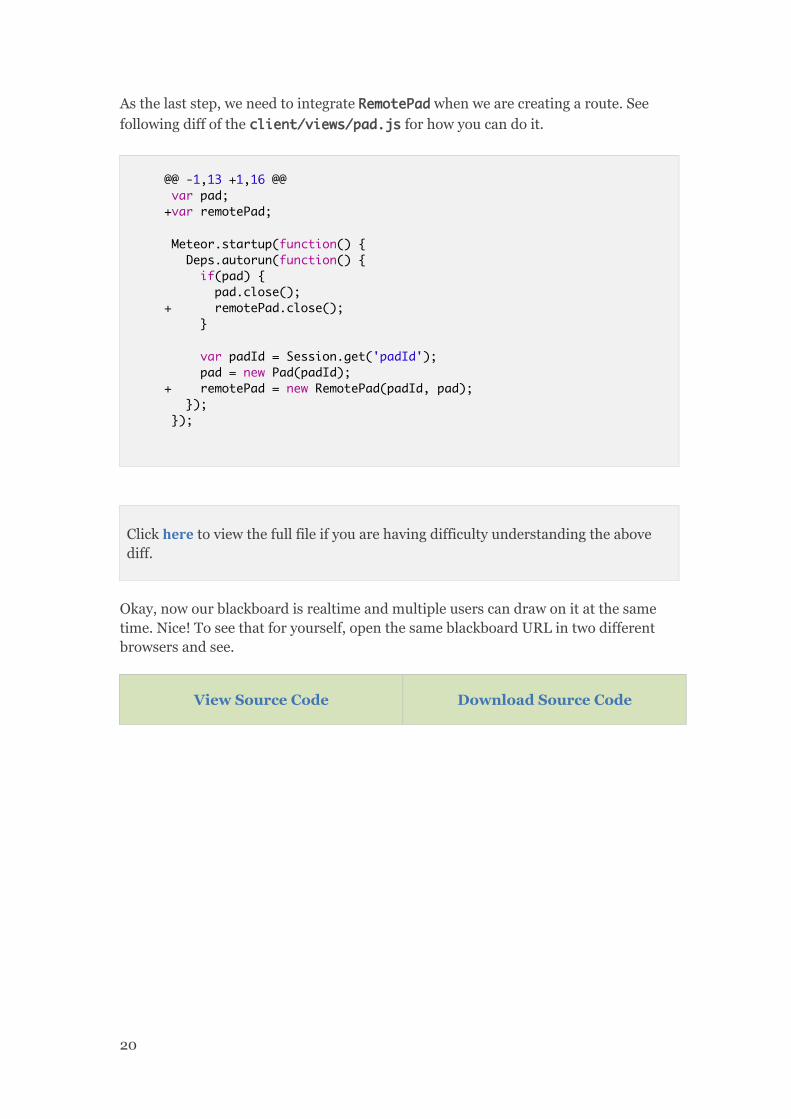
As the last step, we need to integrate RemotePad when we are creating a route. See following diff of the client/views/pad.js for how you can do it.
@@ -1,13 +1,16 @@ var pad;+var remotePad;
Meteor.startup(function() { Deps.autorun(function() { if(pad) { pad.close();+ remotePad.close(); }
var padId = Session.get('padId'); pad = new Pad(padId);+ remotePad = new RemotePad(padId, pad); }); });
Click here to view the full file if you are having difficulty understanding the above diff.
Okay, now our blackboard is realtime and multiple users can draw on it at the same time. Nice! To see that for yourself, open the same blackboard URL in two different browsers and see.
View Source Code Download Source Code
20
7. Adding Fine-Grade PermissionsOur blackboard app is now working, but it is not efficient. Because we have failed to add permissions, that makes sense.
Why we need permissions
Let's have a look at our app. It emits events and other listen to them. Have you noticed that although we are only listening to the events for the current padId, nothing prevents receiving events for other padIds as well.
This means that every event clients are emitting will be delivered to each and every client, regardless of the padId. So we need to fix that.
Ideally, clients should receive events belongs to the padId, which they are currently listening to. We can easily do it with permissions.
1. First, we need notify the server that client (client Y) is only interested in receiving events for padId X.
2. In the server for client Y, we must only send events related to padId X
In the next section, you'll see that I've discussed subscription and subscriptionId. A subscription is created when a client (browser tab) is connected to a stream. Meteor Streams creates a unique id for each subscription and it is the subscriptionId
Let's do the modifications
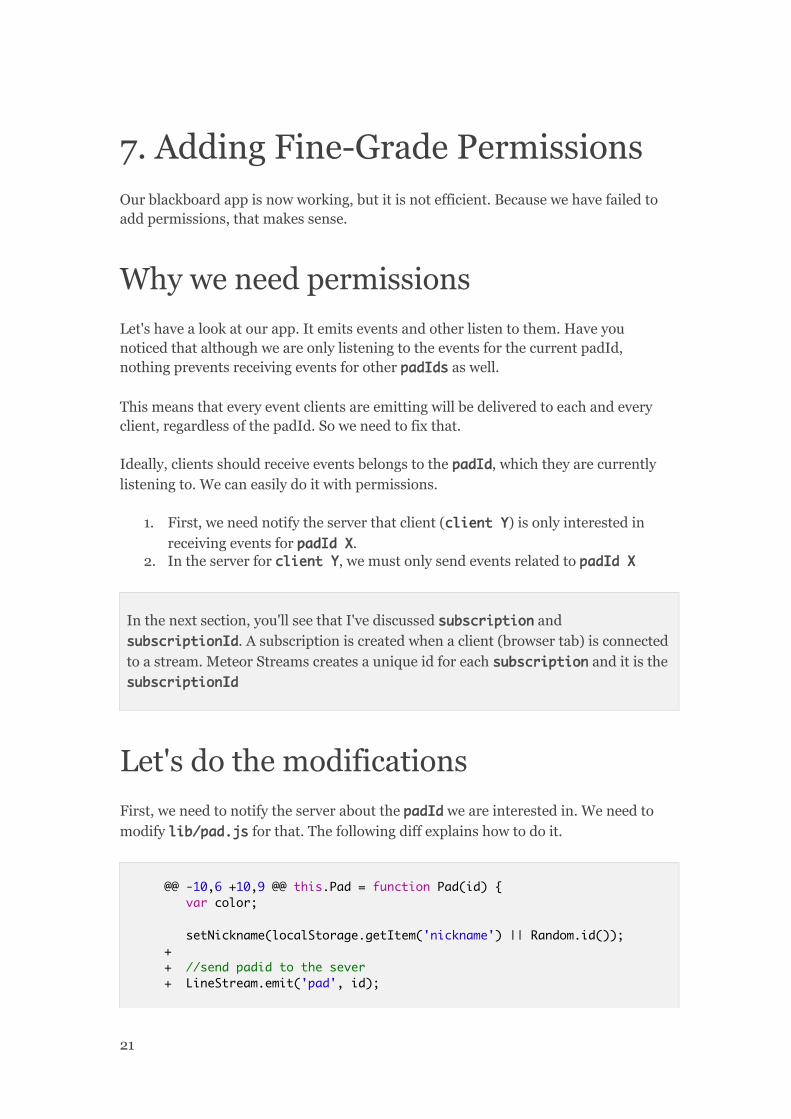
First, we need to notify the server about the padId we are interested in. We need to modify lib/pad.js for that. The following diff explains how to do it.
@@ -10,6 +10,9 @@ this.Pad = function Pad(id) { var color;
setNickname(localStorage.getItem('nickname') || Random.id());++ //send padid to the sever+ LineStream.emit('pad', id);
21
var pad = canvas.attr({ width: $(window).width(),
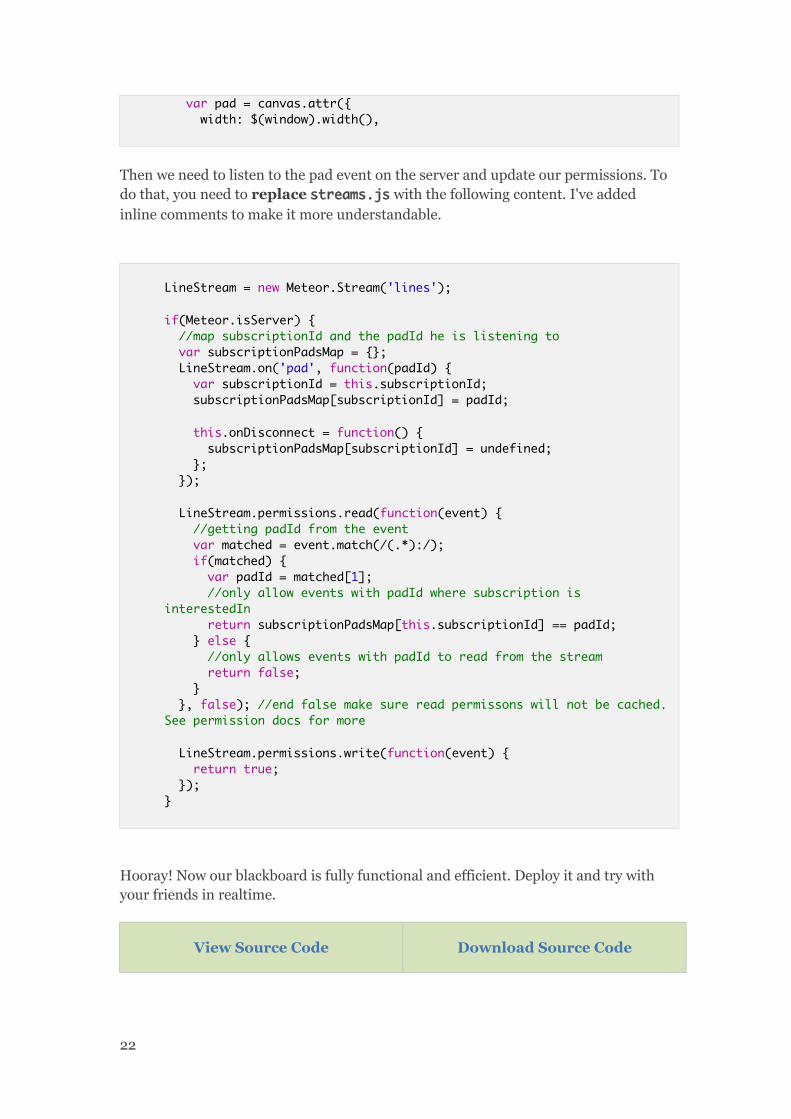
Then we need to listen to the pad event on the server and update our permissions. To do that, you need to replace streams.js with the following content. I've added inline comments to make it more understandable.
LineStream = new Meteor.Stream('lines');
if(Meteor.isServer) { //map subscriptionId and the padId he is listening to var subscriptionPadsMap = {}; LineStream.on('pad', function(padId) { var subscriptionId = this.subscriptionId; subscriptionPadsMap[subscriptionId] = padId;
this.onDisconnect = function() { subscriptionPadsMap[subscriptionId] = undefined; }; });
LineStream.permissions.read(function(event) { //getting padId from the event var matched = event.match(/(.*):/); if(matched) { var padId = matched[1]; //only allow events with padId where subscription is interestedIn return subscriptionPadsMap[this.subscriptionId] == padId; } else { //only allows events with padId to read from the stream return false; } }, false); //end false make sure read permissons will not be cached. See permission docs for more
LineStream.permissions.write(function(event) { return true; });}
Hooray! Now our blackboard is fully functional and efficient. Deploy it and try with your friends in realtime.
View Source Code Download Source Code
22
Thank YouThank you for taking the time to read this eBook. I’ve tried to make it simple and straight to the point. I hope you have enjoyed it.
Try to build something innovative using Meteor Streams. Try to use it with your next project. Meteor Streams is a new project, but I will continue to develop it -- there’s a lot to do.
If you encounter something weird with Meteor Streams, create an issue for it. And I would love to see your contributions. It could be a blog post, sample app, an issue or a pull request.
Have a Good Day!
Arunoda Susiripala@arunodahttp://meteorhacks.com
23