Embed Size (px)
DESCRIPTION
Tips of lesson planning
Citation preview
Tools for ESL Lesson Planning
A book of techniques, sample lesson plans, activities and resources for teaching ESL
(Second Edition)
ESL and Citizenship Programs Division of Adult and Career Education Los Angeles Unified School District
2004 (revised)
Acknowledgments Many thanks to the following people for their hours of work as members of the Lesson Planning committee. The sample lesson plans are the result of their knowledge and classroom experience: JAYME ADELSON-GOLDSTEIN, CRAIG CARTER, SUN HEE KIM, JENNIFER MORENO, FRANCISCO NARCISO, JULIE PASOS, MARILYNN SCHALIT, ROBERT SUCHER, AND SUSAN TARNE. Appreciation is also given to those teachers who field tested these lesson plans in their classrooms and gave feedback to the committee: ALEX ALEXANDER, SERGIO ARGUETA, JOHN FINLEY, PENNY GIACOLONE, DOUG GOULD, JIM HANH, MARILYN HOCH, DARLEEN HODGETTS, AMY LACY, LAUREL LOCKHART, MICHAEL NEAT, MICHAEL NOVICK, JANE PAHR, DONALD PHANG, EVELYN PUN, EVA QUEZADA, LINDA STAUFFER AND TIM WAHL. The team is very grateful to JEAN OWENSBY, whose diligent copy editing of this edition of Tools for ESL Lesson Planning provided the punctuation and clarity missing from the first edition. Special thanks to team leader JAYME ADELSON-GOLDSTEIN for her guidance, expertise and content editing of these materials. Thanks also to DOMINGO RODRIGUEZ, former Coordinator of Adult ESL and Citizenship Programs, who conceived of and launched the development of this project during his tenure. His guidance, leadership, and support were greatly appreciated by everyone who worked on Tools for ESL Lesson Planning. CATHERINE E. BELL Coordinator Adult ESL and Citizenship Programs
DOLORES DIAZ-CARREY Director Instructional Services APPROVED: JAMES A. FIGUEROA Assistant Superintendent Division of Adult and Career Education
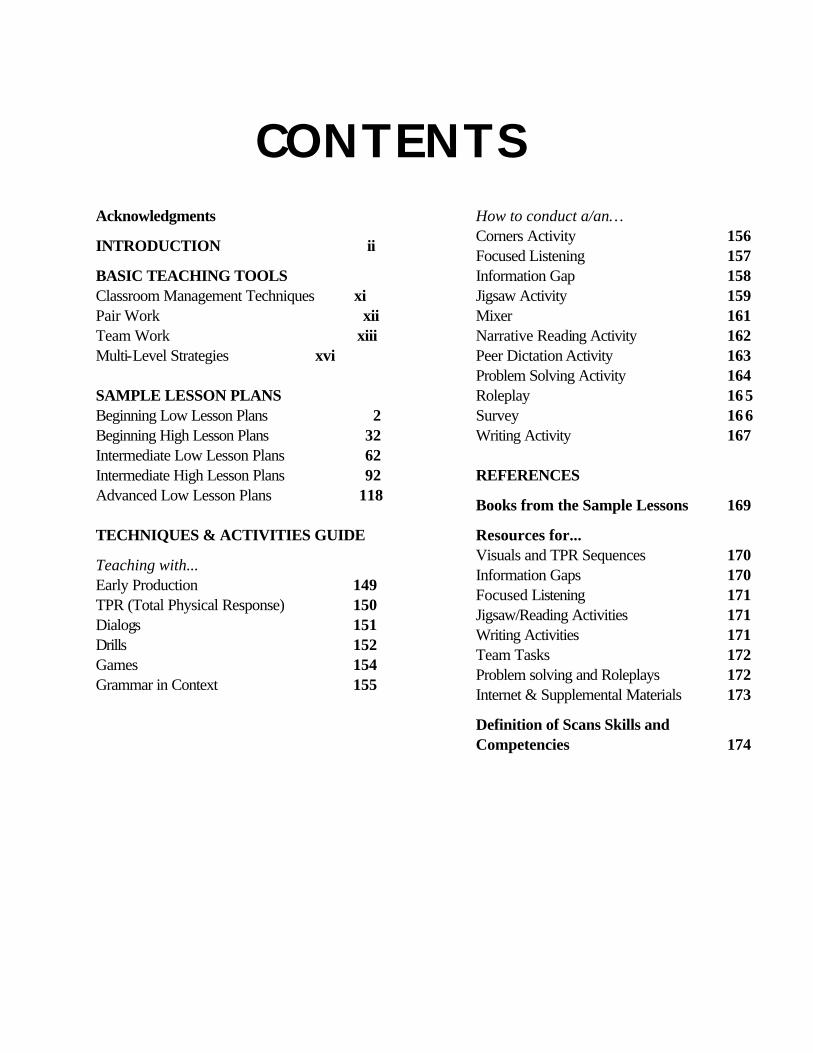
CONTENTS Acknowledgments
INTRODUCTION ii
BASIC TEACHING TOOLS Classroom Management Techniques xi Pair Work xii Team Work xiii Multi-Level Strategies xvi
SAMPLE LESSON PLANS Beginning Low Lesson Plans 2 Beginning High Lesson Plans 32 Intermediate Low Lesson Plans 62 Intermediate High Lesson Plans 92 Advanced Low Lesson Plans 118 TECHNIQUES & ACTIVITIES GUIDE
Teaching with... Early Production 149 TPR (Total Physical Response) 150 Dialogs 151 Drills 152 Games 154 Grammar in Context 155
How to conduct a/an… Corners Activity 156 Focused Listening 157 Information Gap 158 Jigsaw Activity 159 Mixer 161 Narrative Reading Activity 162 Peer Dictation Activity 163 Problem Solving Activity 164 Roleplay 16 5 Survey 16 6 Writing Activity 167 REFERENCES
Books from the Sample Lessons 169
Resources for... Visuals and TPR Sequences 170 Information Gaps 170 Focused Listening 171 Jigsaw/Reading Activities 171 Writing Activities 171 Team Tasks 172 Problem solving and Roleplays 172 Internet & Supplemental Materials 173
Definition of Scans Skills and Competencies 174
TOOLS FOR ESL LESSON PLANNING
Introduction
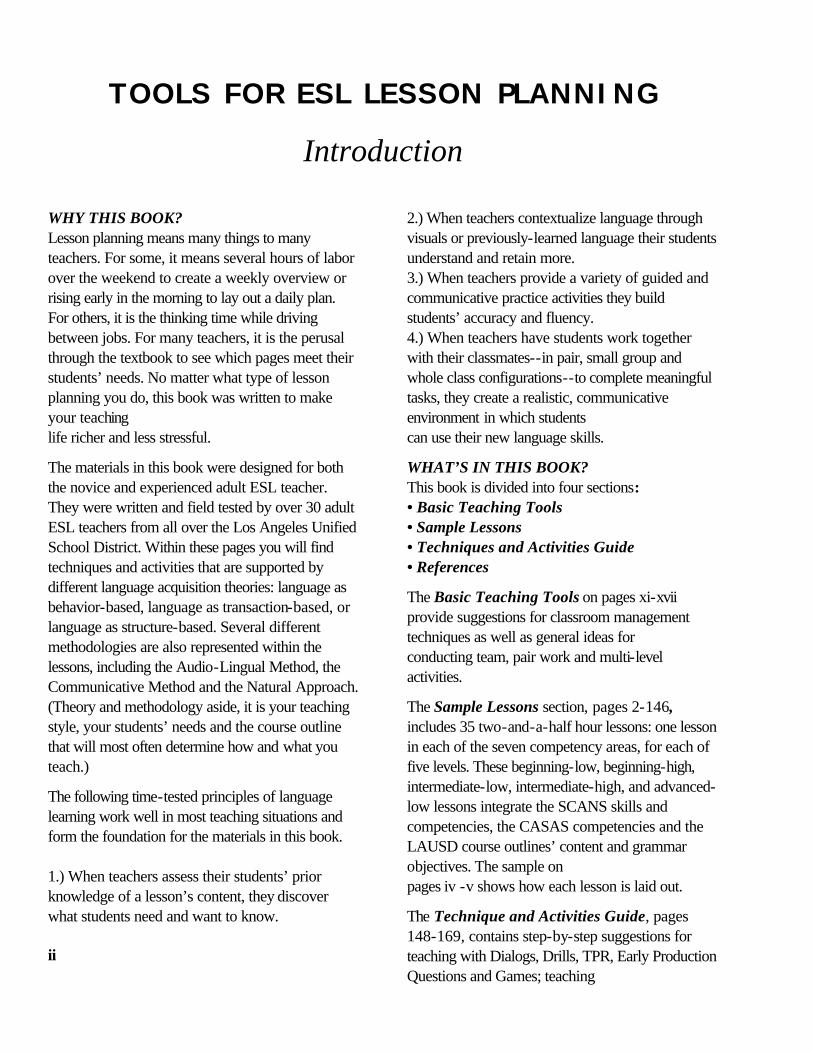
WHY THIS BOOK? Lesson planning means many things to many teachers. For some, it means several hours of labor over the weekend to create a weekly overview or rising early in the morning to lay out a daily plan. For others, it is the thinking time while driving between jobs. For many teachers, it is the perusal through the textbook to see which pages meet their students’ needs. No matter what type of lesson planning you do, this book was written to make your teaching life richer and less stressful.
The materials in this book were designed for both the novice and experienced adult ESL teacher. They were written and field tested by over 30 adult ESL teachers from all over the Los Angeles Unified School District. Within these pages you will find techniques and activities that are supported by different language acquisition theories: language as behavior-based, language as transaction-based, or language as structure-based. Several different methodologies are also represented within the lessons, including the Audio-Lingual Method, the Communicative Method and the Natural Approach. (Theory and methodology aside, it is your teaching style, your students’ needs and the course outline that will most often determine how and what you teach.)
The following time-tested principles of language learning work well in most teaching situations and form the foundation for the materials in this book. 1.) When teachers assess their students’ prior knowledge of a lesson’s content, they discover what students need and want to know.
2.) When teachers contextualize language through visuals or previously-learned language their students understand and retain more. 3.) When teachers provide a variety of guided and communicative practice activities they build students’ accuracy and fluency. 4.) When teachers have students work together with their classmates--in pair, small group and whole class configurations--to complete meaningful tasks, they create a realistic, communicative environment in which students can use their new language skills.
WHAT’S IN THIS BOOK? This book is divided into four sections: • Basic Teaching Tools • Sample Lessons • Techniques and Activities Guide • References
The Basic Teaching Tools on pages xi-xvii provide suggestions for classroom management techniques as well as general ideas for conducting team, pair work and multi-level activities.
The Sample Lessons section, pages 2-146, includes 35 two-and-a-half hour lessons: one lesson in each of the seven competency areas, for each of five levels. These beginning-low, beginning-high, intermediate-low, intermediate-high, and advanced-low lessons integrate the SCANS skills and competencies, the CASAS competencies and the LAUSD course outlines’ content and grammar objectives. The sample on pages iv -v shows how each lesson is laid out.
The Technique and Activities Guide, pages 148-169, contains step-by-step suggestions for teaching with Dialogs, Drills, TPR, Early Production Questions and Games; teaching
ii

Grammar, Narrative Reading, and the Writing Process; and conducting Survey, Mixer, Peer Dictation, Information Gap, Corners, Jigsaw, Problem Solving, Roleplay and Focused Listening activities. Each technique or activity lists the SCANS skills and/or competencies as well as the CASAS Learning to Learn competencies that are simultaneously being taught. The References section, pages 170-175, includes lists of visuals, tapes, textbooks, and supplementary books organized by level, as well as other informative materials you will want to consult for your lesson planning.
USING THIS BOOK Ideally, you will have all the time you need to peruse this entire book. Realistically, you may have to be a bit more focused. If you are a new teacher, begin by looking at the lessons for your level and then referring, if desired, to the pages featuring the techniques and activities from those lessons. If you are an experienced teacher, you may want to start by looking through the Techniques and Activities Guide section to find something you would like to add to your repertoire, noting the SCANS and CASAS correlations. HOW DO I TEACH FROM THE LESSONS? The lessons in this book are templates that are meant to be adapted in order to meet the particular needs of your students and your teaching situation. In many cases, the time frames will alter once you bring the lesson into your own class. A discussion will take longer because student interest is piqued, or a guided practice activity will move more quickly because students are familiar with the activity type. Do consider, however, that students need time, within the same class period, to practice the material that you present. If your warm up or review activities are taking more than a third of your class period, you may be reteaching rather than reviewing. Consider narrowing your
objectives so that they are achievable within a 2.5 hour time frame. (It is not at all uncommon to have to reteach lessons in open entry/open exit classes.) Sometimes you may want to begin a class with a practice activity from the previous lesson. Just remember to provide an evaluation activity to help you determine if students are ready to move on to a new lesson.
If you are at the beginning of the term, you will probably want to start with a lesson from the Personal, Social, Cultural competency area. Each level has a lesson in this area, and the page number for each of those lessons are: Beginning Low page 3 Beginning High page 33 Intermediate Low page 63 Intermediate High page 93 Advanced Low page 119
Once you’ve chosen a lesson to teach, look at the objective listed on the first page of the lesson plan. Is this an objective that matches your students' needs? Read through the structures and vocabulary that are part of the lesson. Are your students already familiar with this language? If they are, perhaps you can focus on different vocabulary or a different structure and still follow the lesson format. Look at the prerequisites. Will you need to teach or review any information before you teach the new lesson?
When you’ve answered the questions above, you are ready to move through the preparation guidelines and stages of the lesson, adapting and editing as you go along. Two reproducible pages accompany each lesson, providing visual support and/or practice activities for the lesson. The preparation guidelines, on the first page of each lesson, detail how many copies to duplicate of each reproducible and how to use them. The following pages show a sample lesson and outline the key features of the lesson design. While the sample is a beginning-low lesson, the key features are the same for all levels.
iii
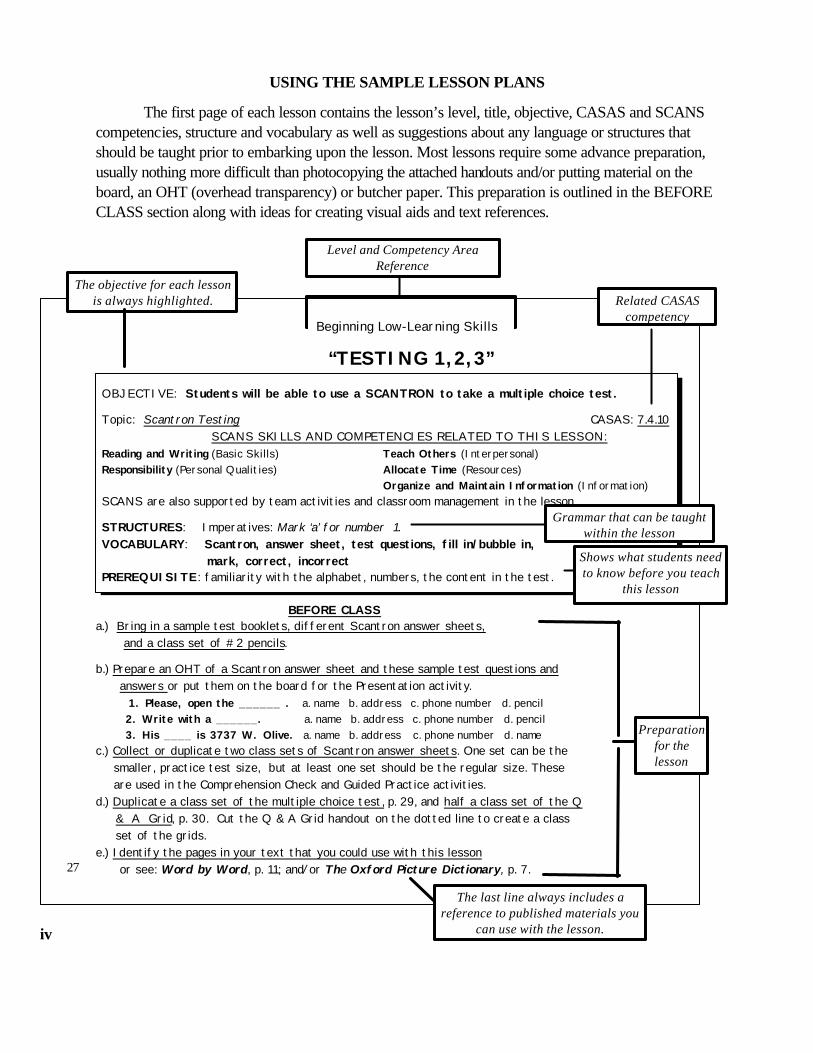
USING THE SAMPLE LESSON PLANS
The first page of each lesson contains the lesson’s level, title, objective, CASAS and SCANS competencies, structure and vocabulary as well as suggestions about any language or structures that should be taught prior to embarking upon the lesson. Most lessons require some advance preparation, usually nothing more difficult than photocopying the attached handouts and/or putting material on the board, an OHT (overhead transparency) or butcher paper. This preparation is outlined in the BEFORE CLASS section along with ideas for creating visual aids and text references.
Beginning Low-Learning Skills
“TESTING 1,2,3”
OBJECTIVE: Students will be able to use a SCANTRON to take a multiple choice test.
Topic: Scantron Testing CASAS: 7.4.10 SCANS SKILLS AND COMPETENCIES RELATED TO THIS LESSON:
Reading and Writing (Basic Skills) Teach Others (Interpersonal) Responsibility (Personal Qualities) Allocate Time (Resources) Organize and Maintain Information (Information) SCANS are also supported by team activities and classroom management in the lesson
STRUCTURES: Imperatives: Mark ‘a’ for number 1. VOCABULARY: Scantron, answer sheet, test questions, fill in/bubble in, mark, correct, incorrect PREREQUISITE : familiarity with the alphabet, numbers, the content in the test.
BEFORE CLASS
a.) Bring in a sample test booklets, different Scantron answer sheets, and a class set of #2 pencils.
b.) Prepare an OHT of a Scantron answer sheet and these sample test questions and answers or put them on the board for the Presentation activity. 1. Please, open the ______ . a. name b. address c. phone number d. pencil 2. Write with a ______. a. name b. address c. phone number d. pencil 3. His ____ is 3737 W. Olive. a. name b. address c. phone number d. name c.) Collect or duplicate two class sets of Scantron answer sheets. One set can be the
smaller, practice test size, but at least one set should be the regular size. These are used in the Comprehension Check and Guided Practice activities.
d.) Duplicate a class set of the multiple choice test, p. 29, and half a class set of the Q & A Grid, p. 30. Cut the Q & A Grid handout on the dotted line to create a class set of the grids. e.) Identify the pages in your text that you could use with this lesson or see: Word by Word, p. 11; and/or The Oxford Picture Dictionary, p. 7.
Preparation for the lesson
Level and Competency Area Reference
The objective for each lesson is always highlighted. Related CASAS
competency
Shows what students need to know before you teach
this lesson
Grammar that can be taught within the lesson
The last line always includes a reference to published materials you
can use with the lesson. iv
27
In the Evaluation stage you & your students assess their growth. v
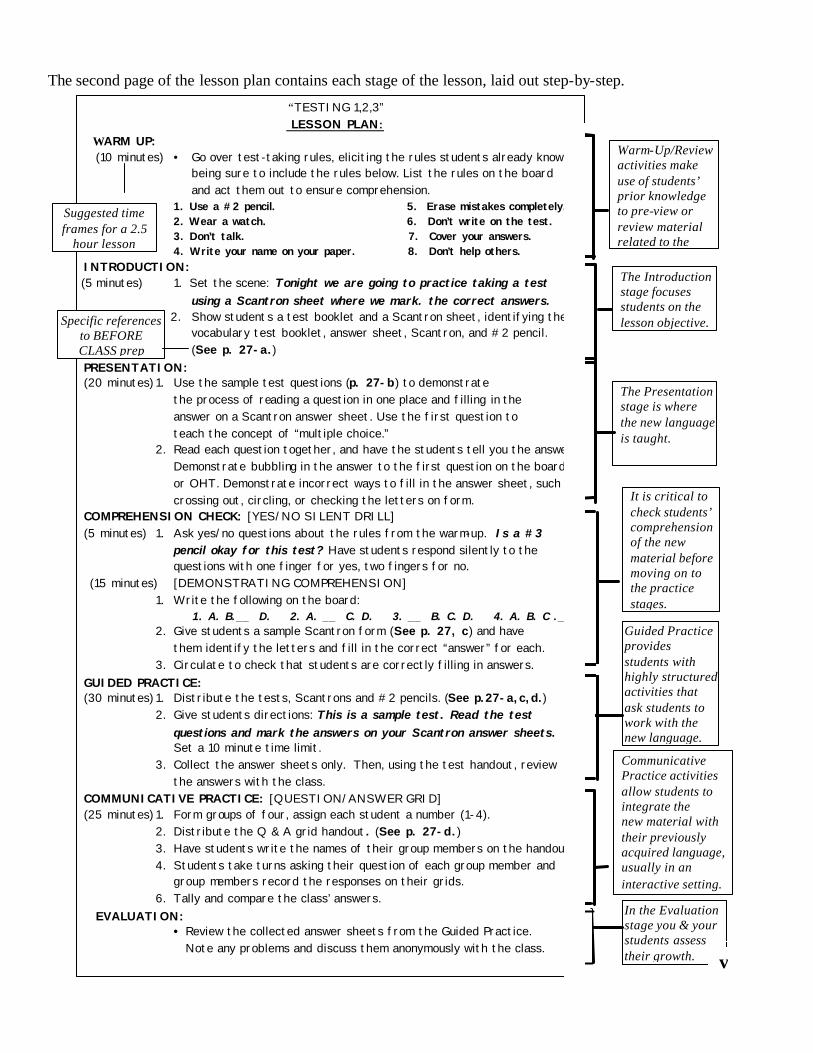
The second page of the lesson plan contains each stage of the lesson, laid out step-by-step.
“TESTING 1,2,3” LESSON PLAN:
WARM UP: (10 minutes) • Go over test-taking rules, eliciting the rules students already know,
being sure to include the rules below. List the rules on the board and act them out to ensure comprehension. 1. Use a #2 pencil. 5. Erase mistakes completely. 2. Wear a watch. 6. Don’t write on the test. 3. Don’t talk. 7. Cover your answers. 4. Write your name on your paper. 8. Don’t help others. INTRODUCTION:
(5 minutes) 1. Set the scene: Tonight we are going to practice taking a test using a Scantron sheet where we mark. the correct answers. 2. Show students a test booklet and a Scantron sheet, identifying the vocabulary test booklet, answer sheet, Scantron, and #2 pencil. (See p. 27-a.) PRESENTATION: (20 minutes) 1. Use the sample test questions (p. 27-b) to demonstrate the process of reading a question in one place and filling in the answer on a Scantron answer sheet. Use the first question to teach the concept of “multiple choice.” 2. Read each question together, and have the students tell you the answer.
Demonstrate bubbling in the answer to the first question on the board or OHT. Demonstrate incorrect ways to fill in the answer sheet, such as crossing out, circling, or checking the letters on form.
COMPREHENSION CHECK: [YES/NO SILENT DRILL] (5 minutes) 1. Ask yes/no questions about the rules from the warm-up. Is a #3 pencil okay for this test? Have students respond silently to the questions with one finger for yes, two fingers for no. (15 minutes) [DEMONSTRATING COMPREHENSION]
1. Write the following on the board: 1. A. B.__ D. 2. A. __ C. D. 3. __ B. C. D. 4. A. B. C .__ 2. Give students a sample Scantron form (See p. 27, c) and have them identify the letters and fill in the correct “answer” for each. 3. Circulate to check that students are correctly filling in answers. GUIDED PRACTICE: (30 minutes) 1. Distribute the tests, Scantrons and #2 pencils. (See p.27-a,c,d.) 2. Give students directions: This is a sample test. Read the test questions and mark the answers on your Scantron answer sheets. Set a 10 minute time limit. 3. Collect the answer sheets only. Then, using the test handout, review the answers with the class. COMMUNICATIVE PRACTICE: [QUESTION/ANSWER GRID] (25 minutes) 1. Form groups of four, assign each student a number (1-4). 2. Distribute the Q & A grid handout. (See p. 27-d.) 3. Have students write the names of their group members on the handout.
4. Students take turns asking their question of each group member and group members record the responses on their grids.
6. Tally and compare the class’ answers. EVALUATION:
• Review the collected answer sheets from the Guided Practice. Note any problems and discuss them anonymously with the class.
Specific references to BEFORE CLASS prep
Warm-Up/Review activities make use of students’ prior knowledge to pre-view or review material related to the
The Introduction stage focuses students on the lesson objective.
The Presentation stage is where the new language is taught.
It is critical to check students’ comprehension of the new material before moving on to the practice stages.
Guided Practice provides students with highly structured activities that ask students to work with the new language.
Communicative Practice activities allow students to integrate the new material with their previously acquired language, usually in an interactive setting.
Suggested time frames for a 2.5
hour lesson

There are two reproducible sheets for each lesson. Many of the reproducibles are designed for small group activities. • Duplicate half a class set of this page. Fold back these directions and cut the sheet in half. • Distribute one grid to each team member. TESTING 1,2,3 QUESTION AND ANSWER GRID • Write the names of your teammates on the grid. • Ask and answer the questions in your group. • Write your teammates' answers on the grid. (Follow the example.) TESTING 1,2,3 QUESTION AND ANSWER GRID
Name? Do you like tests?
Do you get nervous when you take a test?
Do you usually do well on tests?
Do you prefer ESL or math tests?
Julio yes no yes math
Examples clarify the process for teachers and students
Instructions to students build competency in following and clarifying directions.
" Paper is conserved whenever possible.
Removable directions to the teacher at the top of each reproducible
Julio yes no yes math
Name? Do you like tests?
Do you get nervous when you take a test?
Do you usually do well on tests?
Do you prefer ESL or math tests?
• Write the names of your teammates on the grid. • Ask and answer the questions in your group. • Write your teammates' answers on the grid. (Follow the example.)
vi
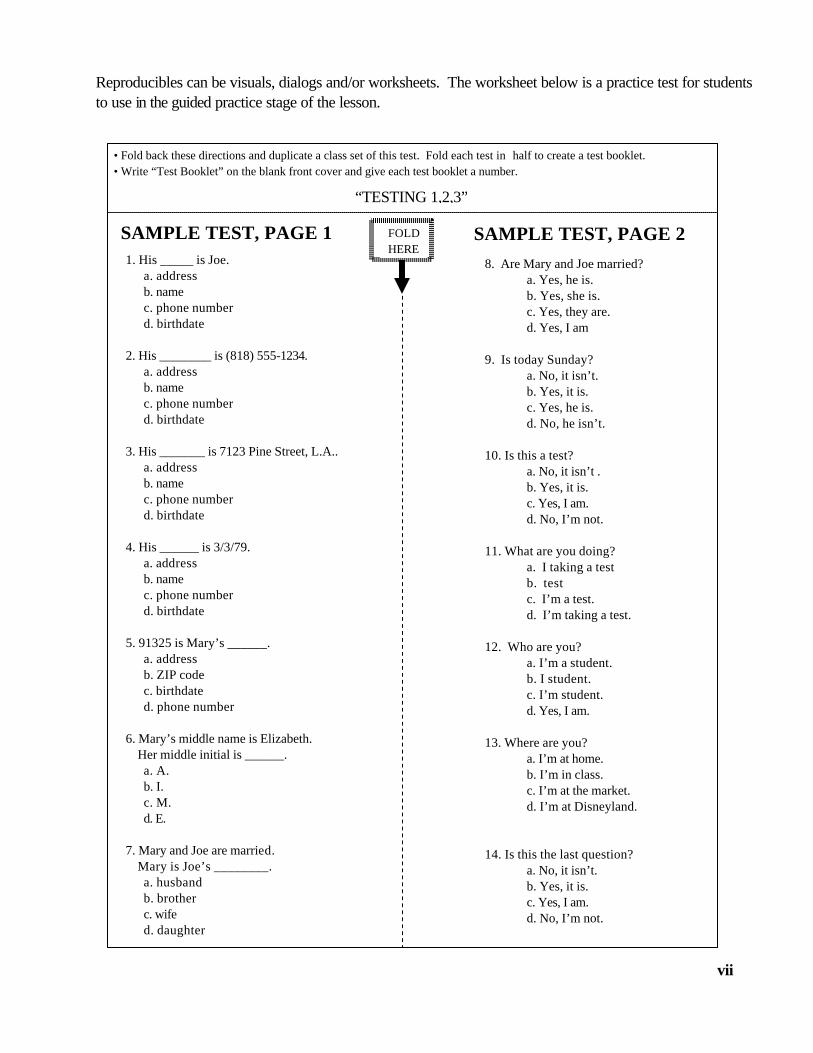
Reproducibles can be visuals, dialogs and/or worksheets. The worksheet below is a practice test for students to use in the guided practice stage of the lesson.
1. His _____ is Joe. a. address b. name c. phone number d. birthdate 2. His ________ is (818) 555-1234. a. address b. name c. phone number d. birthdate 3. His _______ is 7123 Pine Street, L.A.. a. address b. name c. phone number d. birthdate 4. His ______ is 3/3/79. a. address b. name c. phone number d. birthdate 5. 91325 is Mary’s ______. a. address b. ZIP code c. birthdate d. phone number 6. Mary’s middle name is Elizabeth. Her middle initial is ______. a. A. b. I. c. M. d. E. 7. Mary and Joe are married. Mary is Joe’s ________. a. husband b. brother c. wife d. daughter
8. Are Mary and Joe married? a. Yes, he is. b. Yes, she is. c. Yes, they are. d. Yes, I am 9. Is today Sunday? a. No, it isn’t. b. Yes, it is. c. Yes, he is. d. No, he isn’t. 10. Is this a test? a. No, it isn’t . b. Yes, it is. c. Yes, I am. d. No, I’m not. 11. What are you doing? a. I taking a test b. test c. I’m a test. d. I’m taking a test. 12. Who are you? a. I’m a student. b. I student. c. I’m student. d. Yes, I am. 13. Where are you? a. I’m at home. b. I’m in class. c. I’m at the market. d. I’m at Disneyland. 14. Is this the last question? a. No, it isn’t. b. Yes, it is. c. Yes, I am. d. No, I’m not.
vii
SAMPLE TEST, PAGE 2 SAMPLE TEST, PAGE 1
• Fold back these directions and duplicate a class set of this test. Fold each test in half to create a test booklet. • Write “Test Booklet” on the blank front cover and give each test booklet a number.
“TESTING 1,2,3”
FOLD HERE
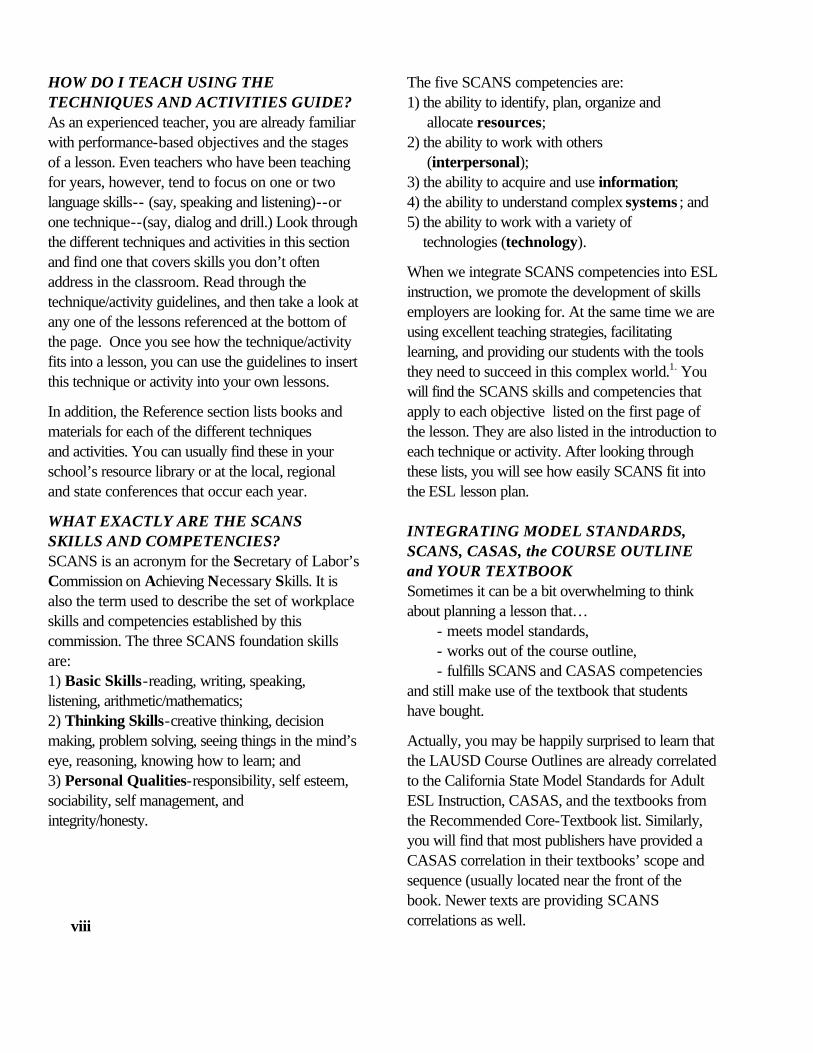
HOW DO I TEACH USING THE TECHNIQUES AND ACTIVITIES GUIDE? As an experienced teacher, you are already familiar with performance-based objectives and the stages of a lesson. Even teachers who have been teaching for years, however, tend to focus on one or two language skills-- (say, speaking and listening)--or one technique--(say, dialog and drill.) Look through the different techniques and activities in this section and find one that covers skills you don’t often address in the classroom. Read through the technique/activity guidelines, and then take a look at any one of the lessons referenced at the bottom of the page. Once you see how the technique/activity fits into a lesson, you can use the guidelines to insert this technique or activity into your own lessons.
In addition, the Reference section lists books and materials for each of the different techniques and activities. You can usually find these in your school’s resource library or at the local, regional and state conferences that occur each year.
WHAT EXACTLY ARE THE SCANS SKILLS AND COMPETENCIES? SCANS is an acronym for the Secretary of Labor’s Commission on Achieving Necessary Skills. It is also the term used to describe the set of workplace skills and competencies established by this commission. The three SCANS foundation skills are: 1) Basic Skills-reading, writing, speaking, listening, arithmetic/mathematics; 2) Thinking Skills-creative thinking, decision making, problem solving, seeing things in the mind’s eye, reasoning, knowing how to learn; and 3) Personal Qualities-responsibility, self esteem, sociability, self management, and integrity/honesty.
The five SCANS competencies are: 1) the ability to identify, plan, organize and allocate resources; 2) the ability to work with others (interpersonal); 3) the ability to acquire and use information; 4) the ability to understand complex systems ; and 5) the ability to work with a variety of technologies (technology).
When we integrate SCANS competencies into ESL instruction, we promote the development of skills employers are looking for. At the same time we are using excellent teaching strategies, facilitating learning, and providing our students with the tools they need to succeed in this complex world.1. You will find the SCANS skills and competencies that apply to each objective listed on the first page of the lesson. They are also listed in the introduction to each technique or activity. After looking through these lists, you will see how easily SCANS fit into the ESL lesson plan. INTEGRATING MODEL STANDARDS, SCANS, CASAS, the COURSE OUTLINE and YOUR TEXTBOOK Sometimes it can be a bit overwhelming to think about planning a lesson that… - meets model standards, - works out of the course outline, - fulfills SCANS and CASAS competencies and still make use of the textbook that students have bought.
Actually, you may be happily surprised to learn that the LAUSD Course Outlines are already correlated to the California State Model Standards for Adult ESL Instruction, CASAS, and the textbooks from the Recommended Core-Textbook list. Similarly, you will find that most publishers have provided a CASAS correlation in their textbooks’ scope and sequence (usually located near the front of the book. Newer texts are providing SCANS correlations as well.
viii
The sample lessons on pages 2-146 will provide you with a model for correlating these key elements to your lessons.
When you sit down to plan lessons, it’s a good idea to have your Course Outline, CASAS and SCANS references available. Each sample lesson suggests that you look at your core text to find pages that relate to that particular lesson and also references a particular text that has activities, grammar practice, or a dialog related to the lesson objective. Whenever possible, texts from the Recommended List are used; however, many of the referenced texts are recent publications and had not been available for review when the last List was developed. WHAT ABOUT TESTING? The District has been conducting standardized promotional tests for more than ten years. In 1998 a testing committee was formed to develop a new set of promotional tests that are correlated to Model Standards and CASAS. These tests as well as the CASAS pre- and post-assessment tests are now a part of our adult ESL curriculum. The materials in this book will help you plan lessons that, in turn, will help your students do well on the tests. Each of the sample lesson plans in this book contains an evaluation activity that assesses students’ understanding and use of the new information. One beginning- level lesson even teaches students how to take a multiple choice test using Scantron forms. Be sure to give students the opportunity to practice test-taking strategies within your lessons. This is not only an academic skill but an important job skill as well. (Many job promotion processes include testing.
Evaluation is an ongoing process. Therefore, informal assessment is as important as formal quizzes and tests. Throughout the Sample Lesson plans and the Techniques and Activities Guide, you will see references to comprehension checks and teacher monitoring.
Because so many communicative activities allow students to work in groups or pairs, teachers are released from their “front and center” position in order to move about the classroom.
While monitoring, it is best to be as unobtrusive as possible. This is the time for you to make mental or actual notes of where students are having difficulty, to listen for grammar and pronunciation problems, to see if and how students ask for clarification, etc. You can then address problems individually or in mini-lessons following the activity.2.
I TEACH A MULTI-LEVEL CLASS IN A BRANCH LOCATION WITHOUT THE USUAL CLASSROOM ACCOUTREMENTS. HOW CAN THIS MATERIAL HELP ME? Not every classroom comes with a chalkboard or an overhead projector. Not every classroom has moveable desks or tables. The lessons, techniques and activities in this book do not require a specially-equipped classroom. While suggestions are offered for different learning environments, you are the final arbiter of how well something can work in your classroom. Every lesson suggests various ways to present or post information. Often the direction line includes something such as Write the following questions on the board, an OHT, or butcher paper. (An OHT is an overhead transparency.) Whenever possible, original for the necessary visuals or handouts are provided with each lesson. Often the lessons can be “handout-free” and students can copy material from the board, the OHT or butcher paper into their notebooks.
The multi-level ESL class has characteristics that are similar to but not exactly the same as the standard ESL class. Although most ESL classes have a multi-level aspect, in a standard class there is usually a span of no more than three levels, with the majority of the students being at the main level. In a multi-level class there can be as many as six levels. Teachers of multi-level classes need lessons that address all levels’ needs. They also need activities that allow each level group to work independently so that the teacher can work with another level
ix
group when necessary. Often it is useful to prepare a lesson on a single topic with different objectives for each level. For example, within the Occupations Competency Area, a topic would be the job search. A teacher could decide on the following objectives for his or her different levels: Literacy level: Ss will be able to identify and write the names of five jobs Beg. Low: Ss will be able to identify five to ten jobs and their related tasks (paint, fix, file, etc.) Beg. High: Ss will be able to request assistance with a job task. The sample lessons on Earthquake safety on pp. 49-52, and pp. 135- 138 show how one competency area and topic can have objectives at different levels: Beginning High and Advanced Low. In these examples, the lessons for both these levels use similar information (although at a higher level for the advanced group), and both levels’ lessons include teamwork activities where students work cooperatively and independently from the teacher.
Once you and your students have become comfortable with the different types of teamwork activities, planning the multi-level lesson becomes much easier. See the guide to Multi-Level Instruction on page xvi for more information on teaching in a multi-level setting. ______________________________ 1. from SCANS in a Nutshell. Kit Bell. LAUSD- DACE, 1999 2. from The Oxford Picture Dictionary Teacher’s Book. Jayme Adelson-Goldstein, Norma Shapiro and Renee Weiss. Oxford. 1999 x
AND ONE MORE THING...
They know enough who know how to learn. -Henry Adams
You never know what is enough unless you
know what is more than enough. -William Blake
The lessons and suggestions in this book were designed to supplement your best thinking about ESL instruction and lesson planning. The materials on the following pages are flexible templates that you can expand upon and adapt. It is our hope that you will find lessons and/or activities that match your teaching style and maybe one or two that provide you with the opportunity to experiment.
To teach is to learn twice. -Joseph Joubert While this book represents one form of staff development, we’d like to suggest an even more powerful one: share your own successful activities and lessons with your colleagues. You can use the time before class or at the break, ask for time during staff development meetings, or give workshops at CATESOL and CCAE conferences. When we see how much we learn from each other, we become better advocates for student-to-student learning within our own classrooms.
Should you have questions or comments about this material, feel free to write to: Kit Bell, Supervisor of Adult ESL and Citizenship Programs, Division of Adult and Career Education, 333 South Beaudry Avenue, 18th Floor Los Angeles. CA 90017
xi
BASIC TEACHING TOOLS Classroom Management Techniques
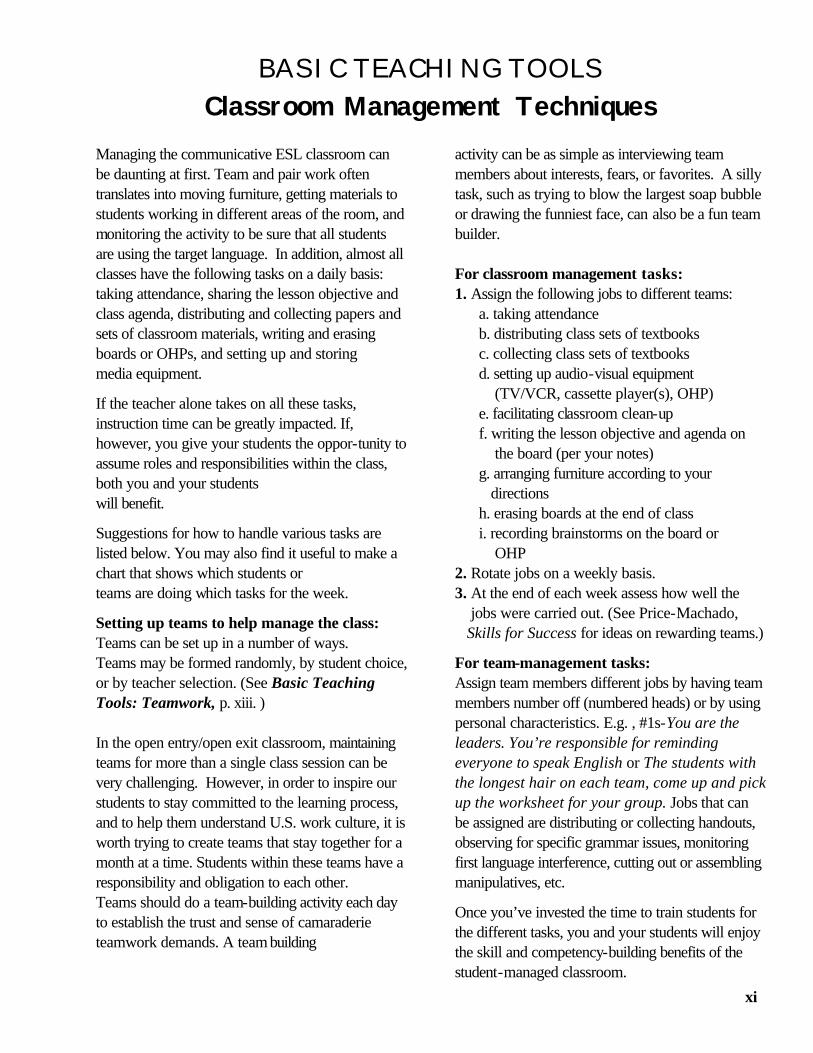
Managing the communicative ESL classroom can be daunting at first. Team and pair work often translates into moving furniture, getting materials to students working in different areas of the room, and monitoring the activity to be sure that all students are using the target language. In addition, almost all classes have the following tasks on a daily basis: taking attendance, sharing the lesson objective and class agenda, distributing and collecting papers and sets of classroom materials, writing and erasing boards or OHPs, and setting up and storing media equipment.
If the teacher alone takes on all these tasks, instruction time can be greatly impacted. If, however, you give your students the oppor-tunity to assume roles and responsibilities within the class, both you and your students will benefit.
Suggestions for how to handle various tasks are listed below. You may also find it useful to make a chart that shows which students or teams are doing which tasks for the week.
Setting up teams to help manage the class: Teams can be set up in a number of ways. Teams may be formed randomly, by student choice, or by teacher selection. (See Basic Teaching Tools: Teamwork, p. xiii. ) In the open entry/open exit classroom, maintaining teams for more than a single class session can be very challenging. However, in order to inspire our students to stay committed to the learning process, and to help them understand U.S. work culture, it is worth trying to create teams that stay together for a month at a time. Students within these teams have a responsibility and obligation to each other. Teams should do a team-building activity each day to establish the trust and sense of camaraderie teamwork demands. A team building
activity can be as simple as interviewing team members about interests, fears, or favorites. A silly task, such as trying to blow the largest soap bubble or drawing the funniest face, can also be a fun team builder. For classroom management tasks: 1. Assign the following jobs to different teams: a. taking attendance b. distributing class sets of textbooks c. collecting class sets of textbooks d. setting up audio-visual equipment (TV/VCR, cassette player(s), OHP) e. facilitating classroom clean-up f. writing the lesson objective and agenda on the board (per your notes) g. arranging furniture according to your directions h. erasing boards at the end of class i. recording brainstorms on the board or OHP 2. Rotate jobs on a weekly basis. 3. At the end of each week assess how well the jobs were carried out. (See Price-Machado, Skills for Success for ideas on rewarding teams.)
For team-management tasks: Assign team members different jobs by having team members number off (numbered heads) or by using personal characteristics. E.g. , #1s-You are the leaders. You’re responsible for reminding everyone to speak English or The students with the longest hair on each team, come up and pick up the worksheet for your group. Jobs that can be assigned are distributing or collecting handouts, observing for specific grammar issues, monitoring first language interference, cutting out or assembling manipulatives, etc.
Once you’ve invested the time to train students for the different tasks, you and your students will enjoy the skill and competency-building benefits of the student-managed classroom.
xi
xii xii
BASIC TEACHING TOOLS: Pair WorkPair work is written into the teaching practices of most methodologies. For example, in the Audiolingual Method, students work in pairs to practice dialogs and drills; the Natural Approach has students pair up to give and act out TPR commands; and the Communicative Method has pairs working together on tasks. Pair work is not unfamiliar to most teachers, but it can still feel strange to the student coming from a completely teacher-centered learning environment. Students need to know that they can learn from each other. While several SCANS foundation skills and competencies indicate that employers want workers who can work with cultural diversity, teach others, and know how to learn, students won’t know this unless we share it with them. A bonus for teachers who use a variety of grouping strategies, including pair work, is that they have the opportunity to circulate and observe how well students are working with the language and to assess the lesson’s success. There are a number of ways to pair students. Pairing students who are seated near each other (using front to back or side by side rows) is the easiest. Other ways to form pairs are: a. conduct a mixer where students with a color, number, letter, word, picture, etc., find their match. b. have students pair who have different characteristics (different first language, native country, gender, age, or Zipcode.) c. have half the class form a circle facing out and the other half form a circle around them, facing in. As you play music, have students in the outer circle move from partner to partner introducing themselves. When you stop the music, students pair up with the last partner they talked to. Note: If you have an odd number of students give a “wild card” to one student, so that s/he can join any pair.
You can bolster the success of pair work by giving partners a few minutes to get to know each other before you start an activity. Students who know each other’s names and a little something about each other are usually more comfortable communicating. Assigning roles and carefully checking comprehension before beginning an activity is another way to help pairs be more successful. In a Peer Dictation, for example, the student who is dictating becomes the teacher or supervisor and the student taking the dictation is the student or worker. By assigning roles, you create a clear context for the activity. When it’s time for students to switch roles, be sure to check students’ comprehension again, to be sure they know what’s expected of them. Using pair work to reinforce learning: 1. Find or create a task that helps students review, practice or apply the information presented in the lesson. (A Peer Dictation, Information Gap, TPR sequence, Dialog or Roleplay can all be pair activities.) 2. Review the language needed for the task by having students brainstorm necessary vocabulary or by eliciting what students already know about the topic and/or task. 3. Provide students with the task. Check students' comprehension of key vocabulary or concepts and clarify where necessary. Remind students of the goal(s). 4. Assign roles to each partner. 5. Set a time limit for each section of the task. Have pairs begin to work. 6. Stop the task periodically to check pairs’ progress. Monitor the activity and make notes of any issues that arise. 7. Have pairs report back on their progress or
product.
Pair work activities appear throughout the lessons in this book.
1
BASIC TEACHING TOOLS: Teamwork
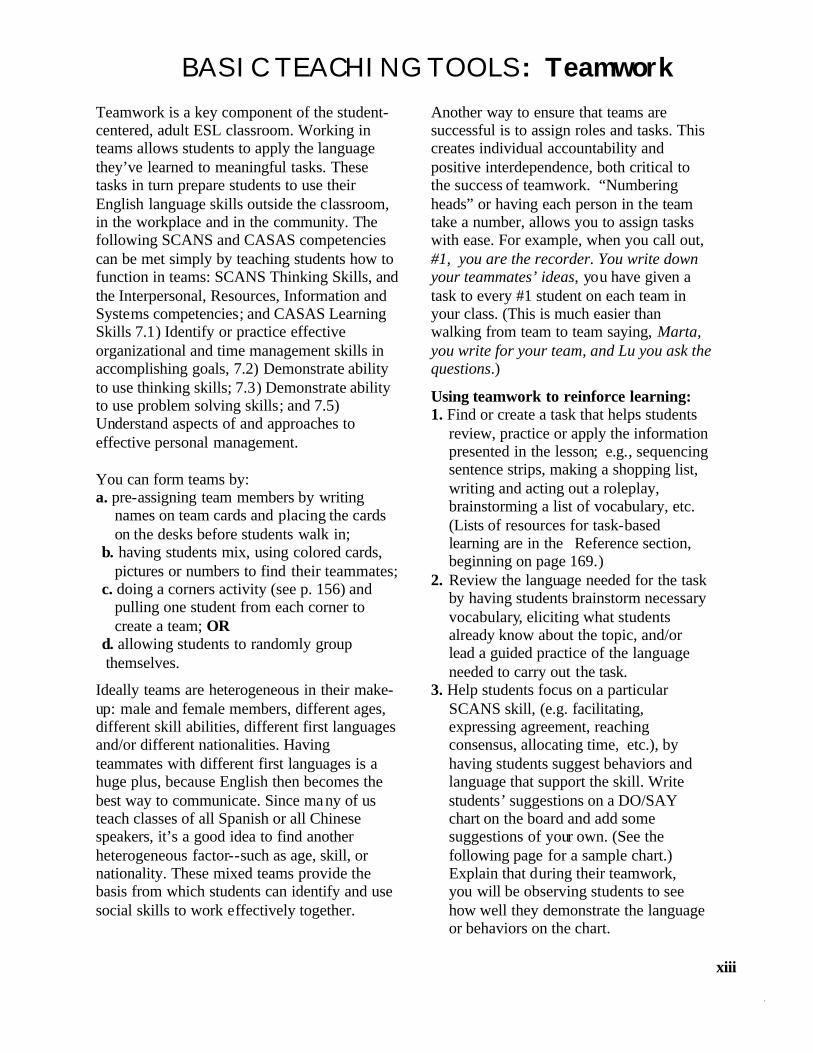
Teamwork is a key component of the student-centered, adult ESL classroom. Working in teams allows students to apply the language they’ve learned to meaningful tasks. These tasks in turn prepare students to use their English language skills outside the classroom, in the workplace and in the community. The following SCANS and CASAS competencies can be met simply by teaching students how to function in teams: SCANS Thinking Skills, and the Interpersonal, Resources, Information and Systems competencies; and CASAS Learning Skills 7.1) Identify or practice effective organizational and time management skills in accomplishing goals, 7.2) Demonstrate ability to use thinking skills; 7.3) Demonstrate ability to use problem solving skills; and 7.5) Understand aspects of and approaches to effective personal management. You can form teams by: a. pre-assigning team members by writing names on team cards and placing the cards on the desks before students walk in; b. having students mix, using colored cards, pictures or numbers to find their teammates; c. doing a corners activity (see p. 156) and
pulling one student from each corner to create a team; OR d. allowing students to randomly group themselves.
Ideally teams are heterogeneous in their make-up: male and female members, different ages, different skill abilities, different first languages and/or different nationalities. Having teammates with different first languages is a huge plus, because English then becomes the best way to communicate. Since many of us teach classes of all Spanish or all Chinese speakers, it’s a good idea to find another heterogeneous factor--such as age, skill, or nationality. These mixed teams provide the basis from which students can identify and use social skills to work effectively together.
Another way to ensure that teams are successful is to assign roles and tasks. This creates individual accountability and positive interdependence, both critical to the success of teamwork. “Numbering heads” or having each person in the team take a number, allows you to assign tasks with ease. For example, when you call out, #1, you are the recorder. You write down your teammates’ ideas, you have given a task to every #1 student on each team in your class. (This is much easier than walking from team to team saying, Marta, you write for your team, and Lu you ask the questions.)
Using teamwork to reinforce learning: 1. Find or create a task that helps students review, practice or apply the information presented in the lesson; e.g., sequencing sentence strips, making a shopping list, writing and acting out a roleplay, brainstorming a list of vocabulary, etc. (Lists of resources for task-based learning are in the Reference section, beginning on page 169.) 2. Review the language needed for the task
by having students brainstorm necessary vocabulary, eliciting what students already know about the topic, and/or lead a guided practice of the language needed to carry out the task.
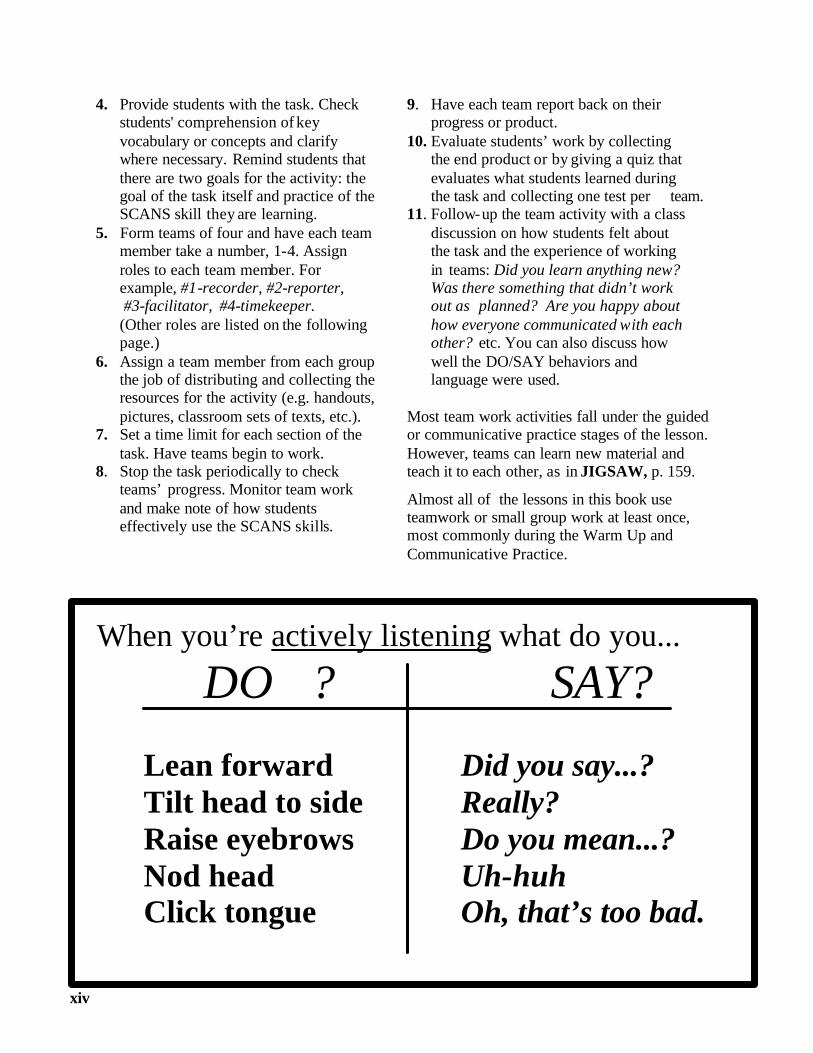
3. Help students focus on a particular SCANS skill, (e.g. facilitating, expressing agreement, reaching consensus, allocating time, etc.), by having students suggest behaviors and language that support the skill. Write students’ suggestions on a DO/SAY chart on the board and add some suggestions of your own. (See the following page for a sample chart.) Explain that during their teamwork, you will be observing students to see how well they demonstrate the language or behaviors on the chart.
xiii
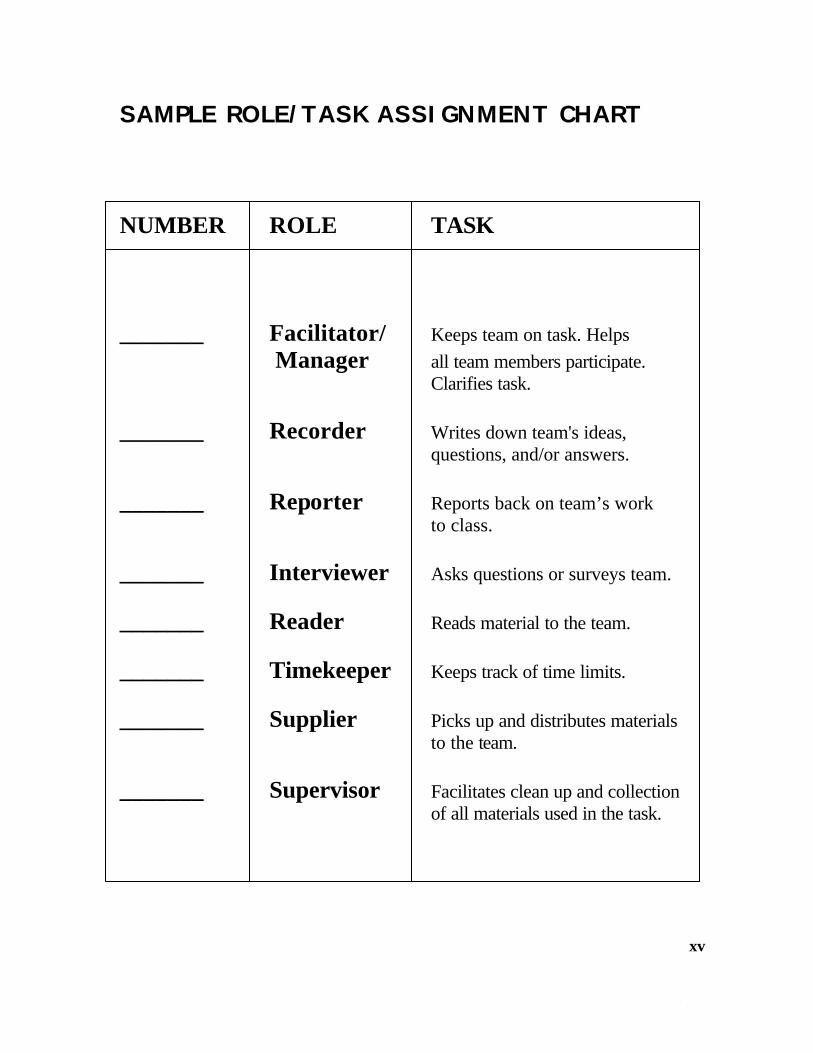
4. Provide students with the task. Check students' comprehension of key vocabulary or concepts and clarify where necessary. Remind students that there are two goals for the activity: the goal of the task itself and practice of the SCANS skill they are learning. 5. Form teams of four and have each team member take a number, 1-4. Assign roles to each team member. For example, #1-recorder, #2-reporter, #3-facilitator, #4-timekeeper. (Other roles are listed on the following page.) 6. Assign a team member from each group the job of distributing and collecting the resources for the activity (e.g. handouts, pictures, classroom sets of texts, etc.). 7. Set a time limit for each section of the task. Have teams begin to work. 8. Stop the task periodically to check teams’ progress. Monitor team work and make note of how students effectively use the SCANS skills.
9. Have each team report back on their progress or product.
10. Evaluate students’ work by collecting the end product or by giving a quiz that evaluates what students learned during the task and collecting one test per team. 11. Follow-up the team activity with a class discussion on how students felt about the task and the experience of working in teams: Did you learn anything new? Was there something that didn’t work out as planned? Are you happy about how everyone communicated with each other? etc. You can also discuss how well the DO/SAY behaviors and language were used. Most team work activities fall under the guided or communicative practice stages of the lesson. However, teams can learn new material and teach it to each other, as in JIGSAW, p. 159.
Almost all of the lessons in this book use teamwork or small group work at least once, most commonly during the Warm Up and Communicative Practice.
When you’re actively listening what do you...
DO ? SAY? Lean forward Did you say...? Tilt head to side Really? Raise eyebrows Do you mean...?
Nod head Uh-huh Click tongue Oh, that’s too bad.
xiv
xv
SAMPLE ROLE/TASK ASSIGNMENT CHART NUMBER ROLE TASK _______ Facilitator/ Keeps team on task. Helps Manager all team members participate. Clarifies task. _______ Recorder Writes down team's ideas, questions, and/or answers. _______ Reporter Reports back on team’s work to class. _______ Interviewer Asks questions or surveys team. _______ Reader Reads material to the team. _______ Timekeeper Keeps track of time limits. _______ Supplier Picks up and distributes materials to the team. _______ Supervisor Facilitates clean up and collection of all materials used in the task.
xv
xvi
BASIC TEACHING TOOLS:Multi-Level Strategies
All our classes reflect the multiple levels,learning styles and needs of our learners, evenwhen the designation of the class is within onelevel. Some classes, however, are specificallycreated for students of different levels. Mostoften these classes are offered at sites that couldnot support individual classes at different levels,e.g. a church basement, a community center, oran elementary school.
One of the most difficult aspects of teaching amulti-level class is planning lessons that meetthe disparate needs of the different levels in theclass. Some teachers group students accordingto their levels and teach a completely differentlesson to each group. This can be a veryexhausting process, as the teacher must makethree or more different presentations andprepare three or more different sets of materials.Current pedagogy suggests that students in amulti-level class should first identify themselvesas a class community, then learn or reviewinformation in a whole class presentation thataddresses level-specific objectives in the samecompetency area and general topic. For example,within the competency area of ConsumerEducation, and the topic of Dealing withHousehold Problems, level appropriateobjectives might be:
Literacy Level- Students will be able to match aseries of 10 pictures of household problems tothe appropriate vocabulary.Beg. Low- Students will be able to identify andcomplain about 10 common householdproblems; e.g. The faucet is dripping. Therefrigerator isn’t working.Beg. High-Students will be able to ask andanswer questions about common householdproblems in order to call a repair person orlandlord.. e.g. -There’s a problem in apartment#10- What’s going on?- The toilet is clogged.
Int. Low- Students will be able to call a repairperson, give details about the problem and get anestimate for repair services.E.g., I’m calling about our dishwasher. It isn’tworking. The door has a crack in it. How muchwould you charge to fix it?Int. High/Adv. Low- Students will be able tointerpret directions in order to tell others how tomake simple plumbing, plastering and electricalrepairs.
This kind of multi-level lesson usually includes aclass-building, warm-up activity. In the housinglesson above, students might do a classroomsurvey to discover where students live, if they liketheir landlord/manager, and if they ever call repairpeople. (Collecting and graphing the informationon the board gives students a profile of the class’housing situation.)
In the presentation for the lesson above, youcould show a number of visuals depictinghousehold problems, eliciting the vocabularyfrom the class. Then you could describe or enacta scene where a tenant is calling a landlord aboutvarious household problems. Finally, you wouldcheck for global understanding of the presenta-tion with a series of “yes/no” and “or”questions such as, Is the sink broken? Is thetenant angry or surprised? Is the landlord goingto call a repair person? (With these kinds ofquestions, students at all levels can demonstratetheir understanding. Asking Wh-questions tendsto shut out the beginners in the group.)
After the presentation, students can be groupedto practice the new language. There are twokinds of groupings used in multi-level: level-alike and cross-ability. A level-alike groupconsists of previously-assessed students whoare at the same general level. A cross-abilitygroup consists of two or more levels workingtogether, usually in pairs or teams of 3-4.
xvi
xvii
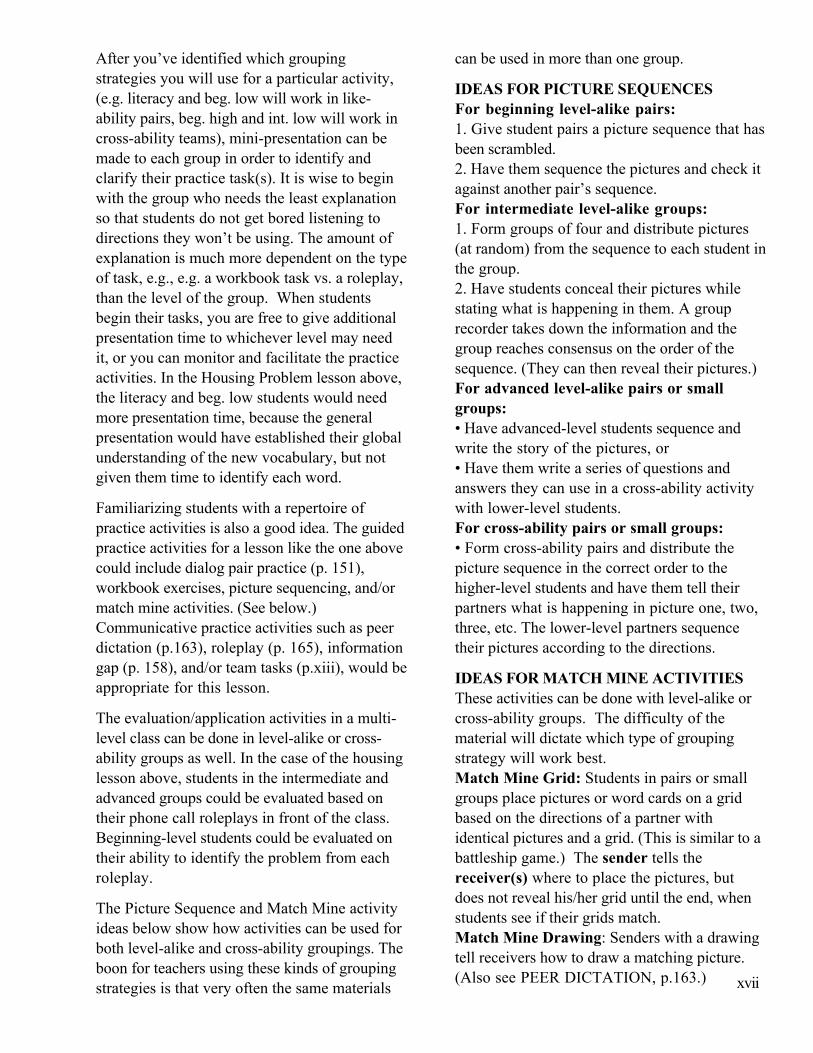
After you’ve identified which groupingstrategies you will use for a particular activity,(e.g. literacy and beg. low will work in like-ability pairs, beg. high and int. low will work incross-ability teams), mini-presentation can bemade to each group in order to identify andclarify their practice task(s). It is wise to beginwith the group who needs the least explanationso that students do not get bored listening todirections they won’t be using. The amount ofexplanation is much more dependent on the typeof task, e.g., e.g. a workbook task vs. a roleplay,than the level of the group. When studentsbegin their tasks, you are free to give additionalpresentation time to whichever level may needit, or you can monitor and facilitate the practiceactivities. In the Housing Problem lesson above,the literacy and beg. low students would needmore presentation time, because the generalpresentation would have established their globalunderstanding of the new vocabulary, but notgiven them time to identify each word.
Familiarizing students with a repertoire ofpractice activities is also a good idea. The guidedpractice activities for a lesson like the one abovecould include dialog pair practice (p. 151),workbook exercises, picture sequencing, and/ormatch mine activities. (See below.)Communicative practice activities such as peerdictation (p.163), roleplay (p. 165), informationgap (p. 158), and/or team tasks (p.xiii), would beappropriate for this lesson.
The evaluation/application activities in a multi-level class can be done in level-alike or cross-ability groups as well. In the case of the housinglesson above, students in the intermediate andadvanced groups could be evaluated based ontheir phone call roleplays in front of the class.Beginning-level students could be evaluated ontheir ability to identify the problem from eachroleplay.
The Picture Sequence and Match Mine activityideas below show how activities can be used forboth level-alike and cross-ability groupings. Theboon for teachers using these kinds of groupingstrategies is that very often the same materials
can be used in more than one group.
IDEAS FOR PICTURE SEQUENCESFor beginning level-alike pairs:1. Give student pairs a picture sequence that hasbeen scrambled.2. Have them sequence the pictures and check itagainst another pair’s sequence.For intermediate level-alike groups:1. Form groups of four and distribute pictures(at random) from the sequence to each student inthe group.2. Have students conceal their pictures whilestating what is happening in them. A grouprecorder takes down the information and thegroup reaches consensus on the order of thesequence. (They can then reveal their pictures.)For advanced level-alike pairs or smallgroups:• Have advanced-level students sequence andwrite the story of the pictures, or• Have them write a series of questions andanswers they can use in a cross-ability activitywith lower-level students.For cross-ability pairs or small groups:• Form cross-ability pairs and distribute thepicture sequence in the correct order to thehigher-level students and have them tell theirpartners what is happening in picture one, two,three, etc. The lower-level partners sequencetheir pictures according to the directions.
IDEAS FOR MATCH MINE ACTIVITIESThese activities can be done with level-alike orcross-ability groups. The difficulty of thematerial will dictate which type of groupingstrategy will work best.Match Mine Grid: Students in pairs or smallgroups place pictures or word cards on a gridbased on the directions of a partner withidentical pictures and a grid. (This is similar to abattleship game.) The sender tells thereceiver(s) where to place the pictures, butdoes not reveal his/her grid until the end, whenstudents see if their grids match.Match Mine Drawing: Senders with a drawingtell receivers how to draw a matching picture.(Also see PEER DICTATION, p.163.) xvii

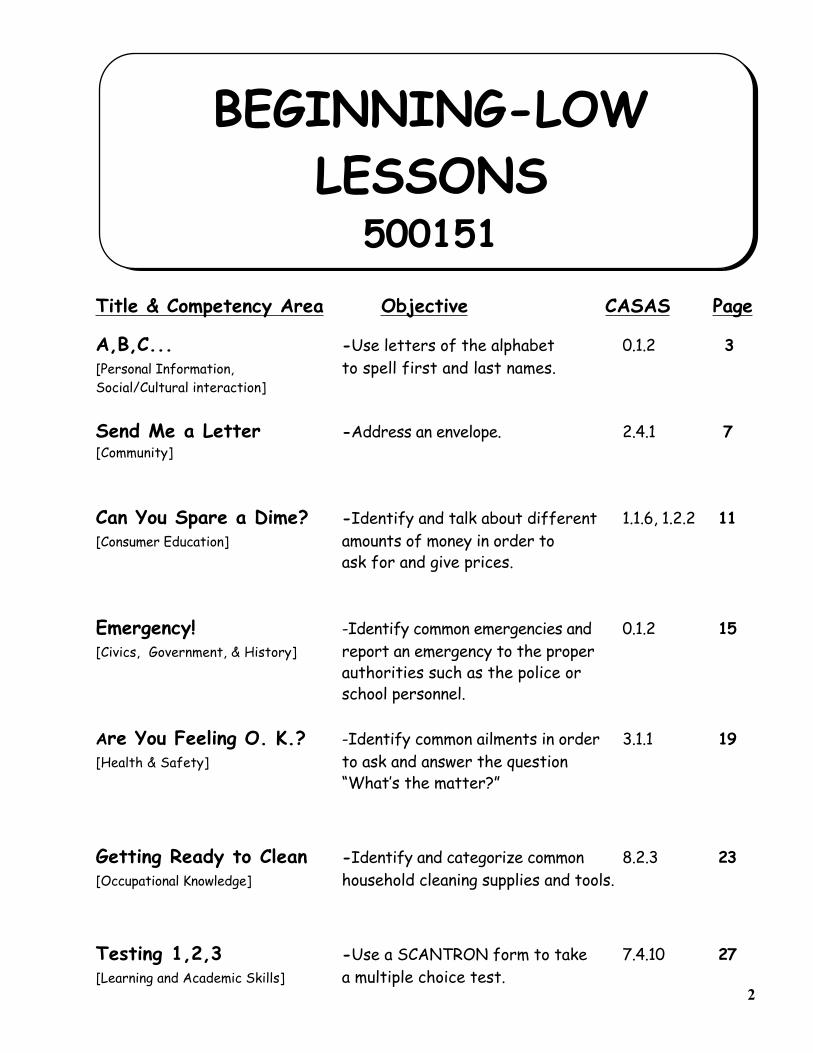
BEGINNING-LOWLESSONS
500151
Title & Competency Area Objective CASAS Page
A,B,C... -Use letters of the alphabet 0.1.2 3[Personal Information, to spell first and last names.Social/Cultural interaction]
Send Me a Letter -Address an envelope. 2.4.1 7[Community]
Can You Spare a Dime? -Identify and talk about different 1.1.6, 1.2.2 11[Consumer Education] amounts of money in order to
ask for and give prices.
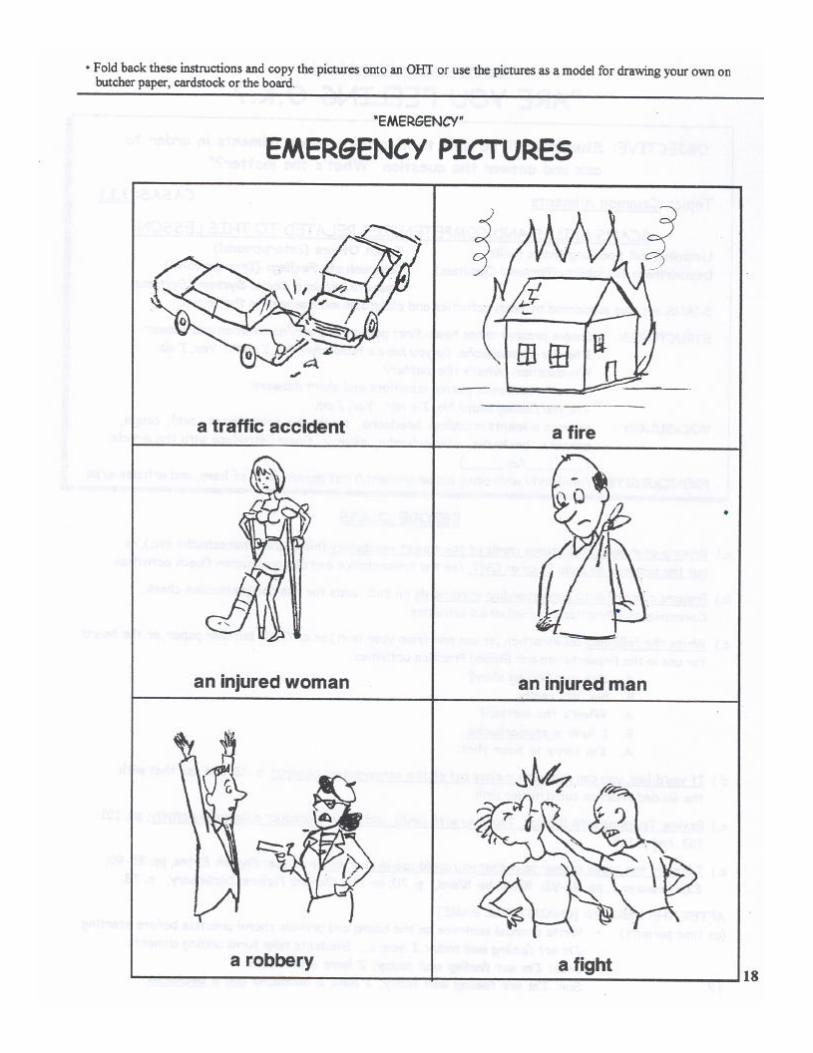
Emergency! -Identify common emergencies and 0.1.2 15[Civics, Government, & History] report an emergency to the proper
authorities such as the police orschool personnel.
Are You Feeling O. K.? -Identify common ailments in order 3.1.1 19[Health & Safety] to ask and answer the question
“What’s the matter?”
Getting Ready to Clean -Identify and categorize common 8.2.3 23[Occupational Knowledge] household cleaning supplies and tools.
Testing 1,2,3 -Use a SCANTRON form to take 7.4.10 27[Learning and Academic Skills] a multiple choice test.
2
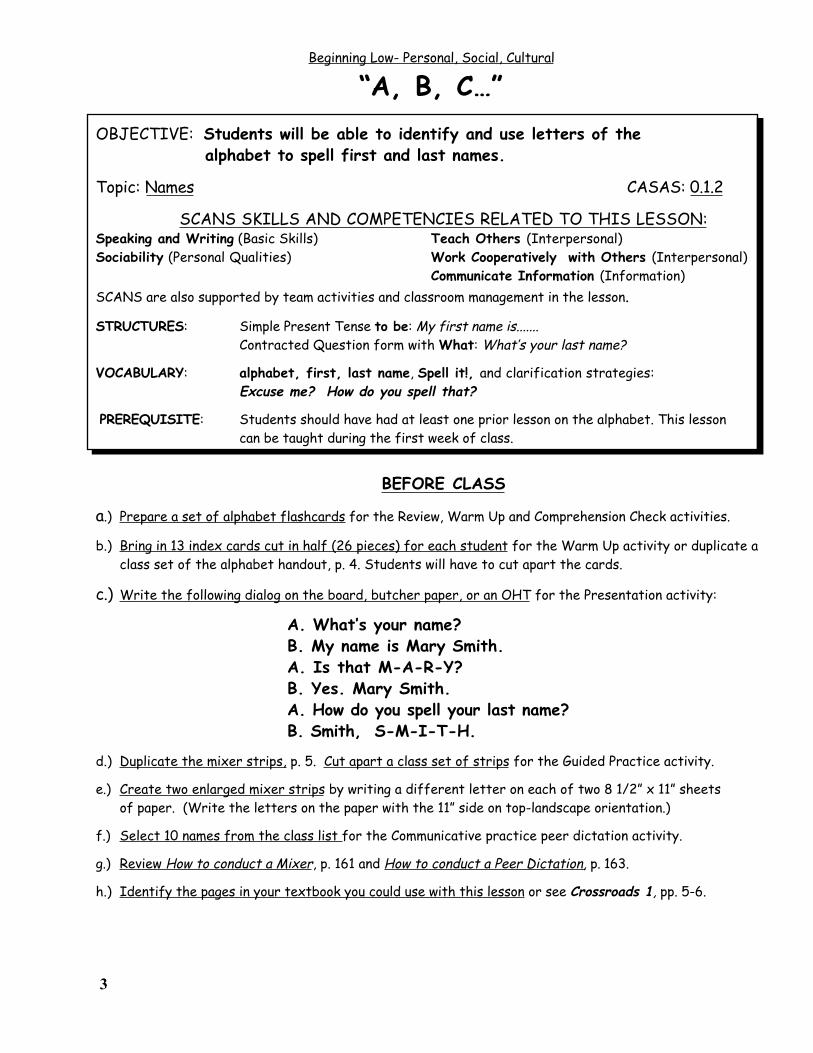
Beginning Low- Personal, Social, Cultural
“A, B, C…”OBJECTIVE: Students will be able to identify and use letters of the
alphabet to spell first and last names.
Topic: Names CASAS: 0.1.2
SCANS SKILLS AND COMPETENCIES RELATED TO THIS LESSON:Speaking and Writing (Basic Skills) Teach Others (Interpersonal)Sociability (Personal Qualities) Work Cooperatively with Others (Interpersonal)
Communicate Information (Information)SCANS are also supported by team activities and classroom management in the lesson.
STRUCTURES: Simple Present Tense to be: My first name is.......Contracted Question form with What: What’s your last name?
VOCABULARY: alphabet, first, last name, Spell it!, and clarification strategies:Excuse me? How do you spell that?
PREREQUISITE: Students should have had at least one prior lesson on the alphabet. This lessoncan be taught during the first week of class.
BEFORE CLASS
a.) Prepare a set of alphabet flashcards for the Review, Warm Up and Comprehension Check activities.
b.) Bring in 13 index cards cut in half (26 pieces) for each student for the Warm Up activity or duplicate aclass set of the alphabet handout, p. 4. Students will have to cut apart the cards.
c.) Write the following dialog on the board, butcher paper, or an OHT for the Presentation activity:
A. What’s your name?B. My name is Mary Smith.A. Is that M-A-R-Y?B. Yes. Mary Smith.A. How do you spell your last name?B. Smith, S-M-I-T-H.
d.) Duplicate the mixer strips, p. 5. Cut apart a class set of strips for the Guided Practice activity.
e.) Create two enlarged mixer strips by writing a different letter on each of two 8 1/2” x 11” sheetsof paper. (Write the letters on the paper with the 11” side on top-landscape orientation.)
f.) Select 10 names from the class list for the Communicative practice peer dictation activity.
g.) Review How to conduct a Mixer, p. 161 and How to conduct a Peer Dictation, p. 163.
h.) Identify the pages in your textbook you could use with this lesson or see Crossroads 1, pp. 5-6.
3
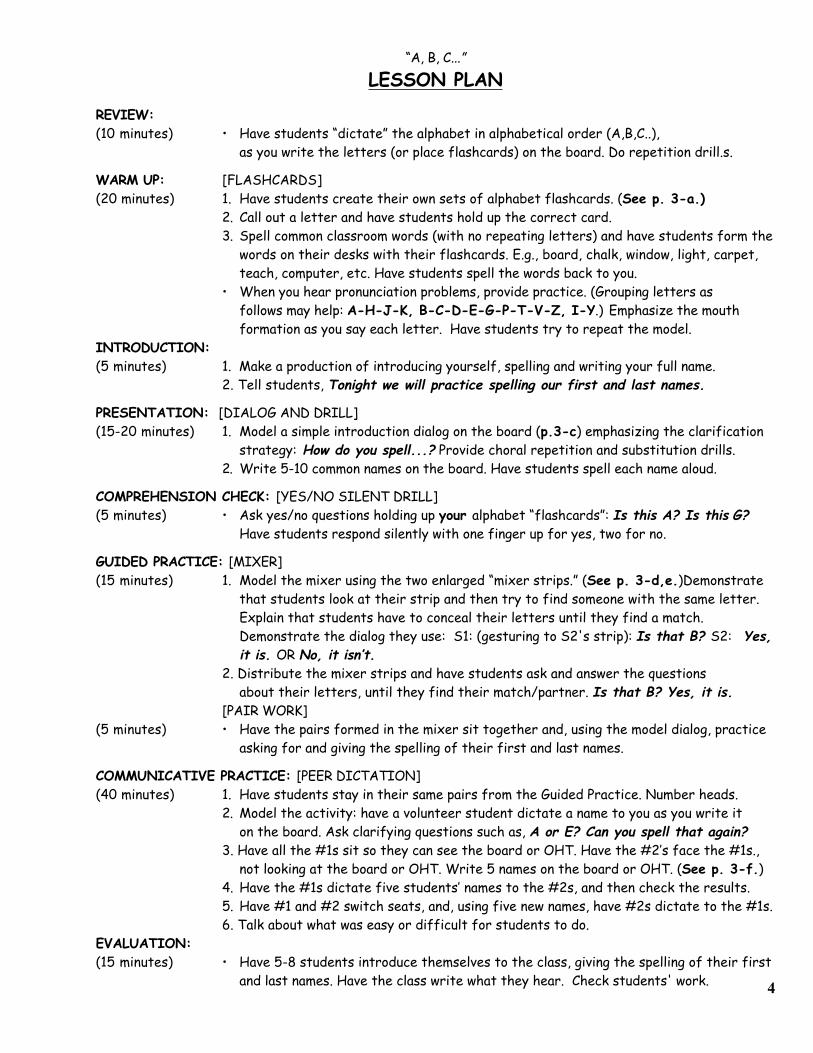
“A, B, C...”
LESSON PLAN
REVIEW:(10 minutes) • Have students “dictate” the alphabet in alphabetical order (A,B,C..),
as you write the letters (or place flashcards) on the board. Do repetition drill.s.
WARM UP: [FLASHCARDS](20 minutes) 1. Have students create their own sets of alphabet flashcards. (See p. 3-a.)
2. Call out a letter and have students hold up the correct card.3. Spell common classroom words (with no repeating letters) and have students form the
words on their desks with their flashcards. E.g., board, chalk, window, light, carpet,teach, computer, etc. Have students spell the words back to you.
• When you hear pronunciation problems, provide practice. (Grouping letters asfollows may help: A-H-J-K, B-C-D-E-G-P-T-V-Z, I-Y.) Emphasize the mouth
formation as you say each letter. Have students try to repeat the model.INTRODUCTION:(5 minutes) 1. Make a production of introducing yourself, spelling and writing your full name.
2. Tell students, Tonight we will practice spelling our first and last names.
PRESENTATION: [DIALOG AND DRILL](15-20 minutes) 1. Model a simple introduction dialog on the board (p.3-c) emphasizing the clarification
strategy: How do you spell...? Provide choral repetition and substitution drills.2. Write 5-10 common names on the board. Have students spell each name aloud.
COMPREHENSION CHECK: [YES/NO SILENT DRILL](5 minutes) • Ask yes/no questions holding up your alphabet “flashcards”: Is this A? Is this G?
Have students respond silently with one finger up for yes, two for no.
GUIDED PRACTICE: [MIXER](15 minutes) 1. Model the mixer using the two enlarged “mixer strips.” (See p. 3-d,e.)Demonstrate
that students look at their strip and then try to find someone with the same letter.Explain that students have to conceal their letters until they find a match.Demonstrate the dialog they use: S1: (gesturing to S2's strip): Is that B? S2: Yes,it is. OR No, it isn’t.
2. Distribute the mixer strips and have students ask and answer the questions about their letters, until they find their match/partner. Is that B? Yes, it is.
[PAIR WORK](5 minutes) • Have the pairs formed in the mixer sit together and, using the model dialog, practice asking for and giving the spelling of their first and last names.
COMMUNICATIVE PRACTICE: [PEER DICTATION](40 minutes) 1. Have students stay in their same pairs from the Guided Practice. Number heads.
2. Model the activity: have a volunteer student dictate a name to you as you write iton the board. Ask clarifying questions such as, A or E? Can you spell that again?
3. Have all the #1s sit so they can see the board or OHT. Have the #2’s face the #1s.,not looking at the board or OHT. Write 5 names on the board or OHT. (See p. 3-f.)
4. Have the #1s dictate five students’ names to the #2s, and then check the results.5. Have #1 and #2 switch seats, and, using five new names, have #2s dictate to the #1s.6. Talk about what was easy or difficult for students to do.
EVALUATION:(15 minutes) • Have 5-8 students introduce themselves to the class, giving the spelling of their first
and last names. Have the class write what they hear. Check students' work. 4
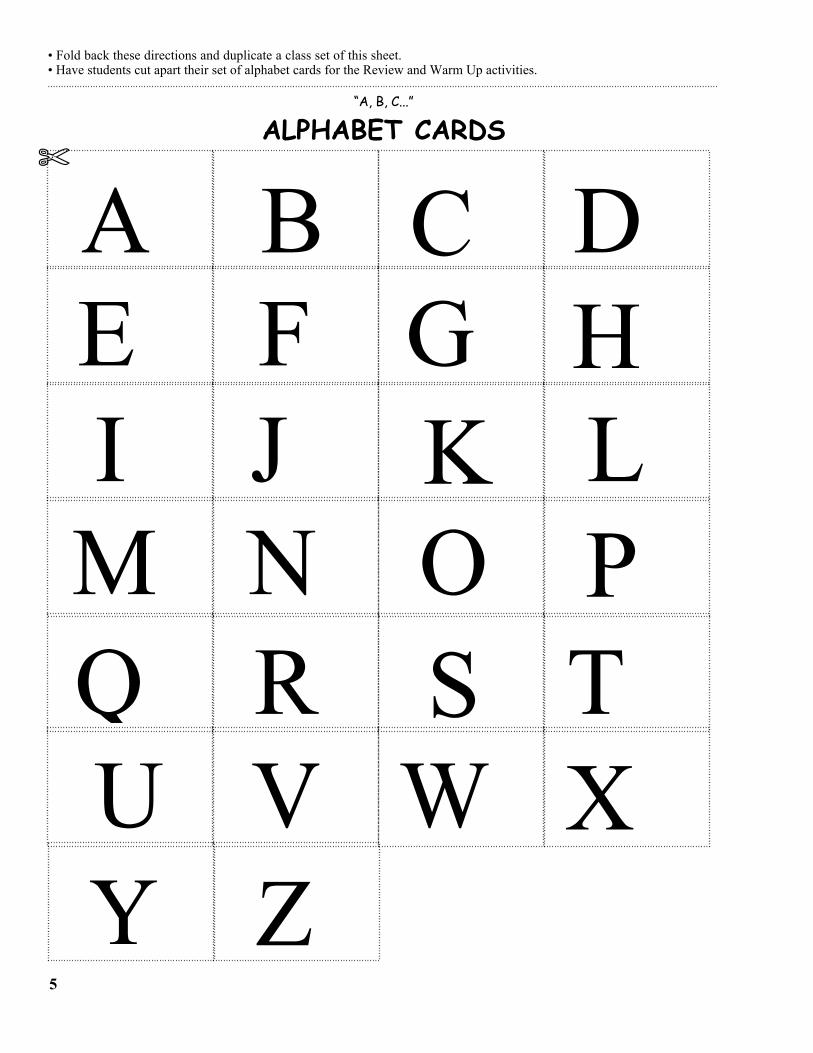
• Fold back these directions and duplicate a class set of this sheet.• Have students cut apart their set of alphabet cards for the Review and Warm Up activities.
“A, B, C...”
ALPHABET CARDS
A B CE F G
DH
I J KM N O
L P
Q R S U V W
TX
Y Z5
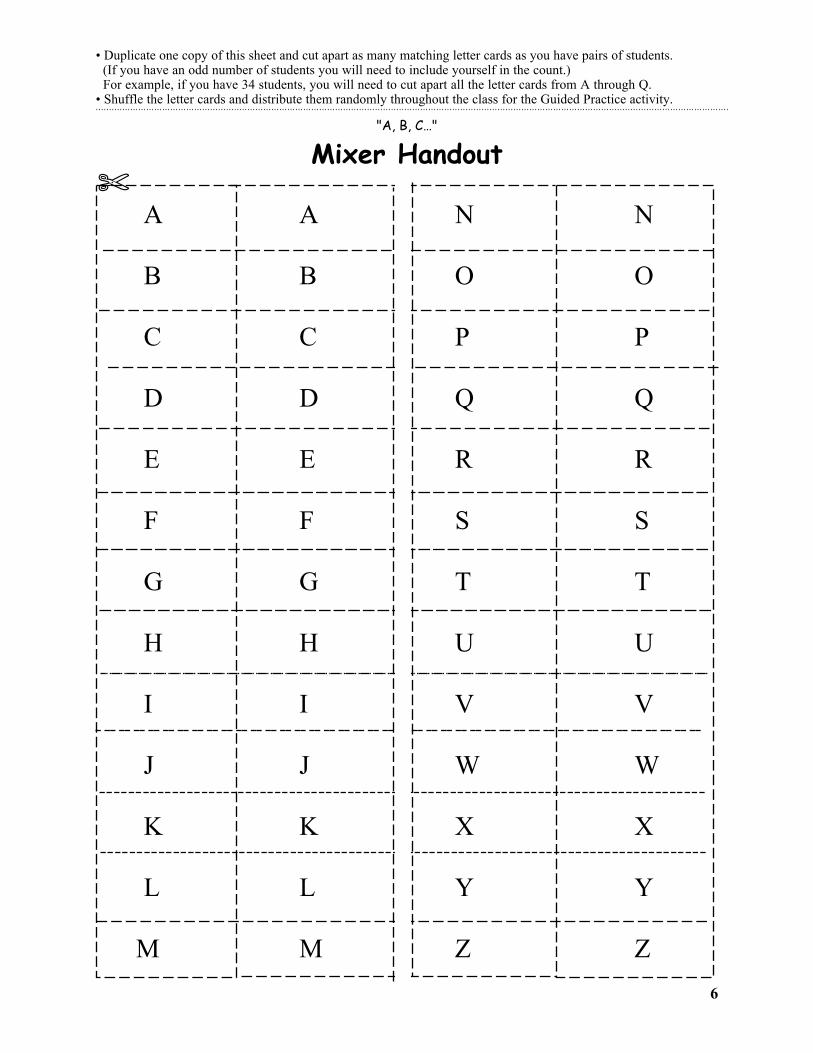
• Duplicate one copy of this sheet and cut apart as many matching letter cards as you have pairs of students. (If you have an odd number of students you will need to include yourself in the count.) For example, if you have 34 students, you will need to cut apart all the letter cards from A through Q.• Shuffle the letter cards and distribute them randomly throughout the class for the Guided Practice activity.
A
B
C
D
E
F
G
H
I
J
K
L
M
A
B
C
D
E
F
G
H
I
J
K
L
M
N
O
P
Q
R
S
T
U
V
W
X
Y
Z
N
O
P
Q
R
S
T
U
V
W
X
Y
Z
"A, B, C…"
Mixer Handout
6
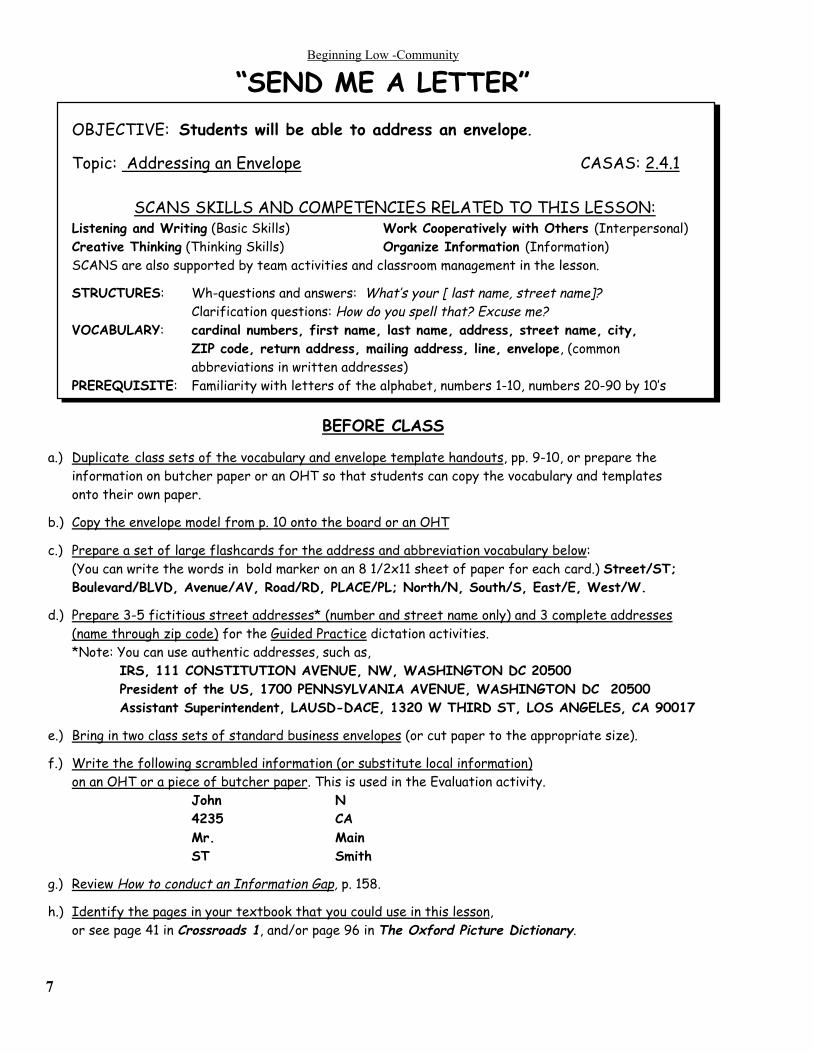
Beginning Low -Community
“SEND ME A LETTER”OBJECTIVE: Students will be able to address an envelope.
Topic: Addressing an Envelope CASAS: 2.4.1
SCANS SKILLS AND COMPETENCIES RELATED TO THIS LESSON:Listening and Writing (Basic Skills) Work Cooperatively with Others (Interpersonal)Creative Thinking (Thinking Skills) Organize Information (Information)SCANS are also supported by team activities and classroom management in the lesson.
STRUCTURES: Wh-questions and answers: What’s your [ last name, street name]?Clarification questions: How do you spell that? Excuse me?
VOCABULARY: cardinal numbers, first name, last name, address, street name, city,ZIP code, return address, mailing address, line, envelope, (commonabbreviations in written addresses)
PREREQUISITE: Familiarity with letters of the alphabet, numbers 1-10, numbers 20-90 by 10’s
BEFORE CLASS
a.) Duplicate class sets of the vocabulary and envelope template handouts, pp. 9-10, or prepare the information on butcher paper or an OHT so that students can copy the vocabulary and templatesonto their own paper.
b.) Copy the envelope model from p. 10 onto the board or an OHT
c.) Prepare a set of large flashcards for the address and abbreviation vocabulary below: (You can write the words in bold marker on an 8 1/2x11 sheet of paper for each card.) Street/ST;
Boulevard/BLVD, Avenue/AV, Road/RD, PLACE/PL; North/N, South/S, East/E, West/W.
d.) Prepare 3-5 fictitious street addresses* (number and street name only) and 3 complete addresses (name through zip code) for the Guided Practice dictation activities.
*Note: You can use authentic addresses, such as,IRS, 111 CONSTITUTION AVENUE, NW, WASHINGTON DC 20500
President of the US, 1700 PENNSYLVANIA AVENUE, WASHINGTON DC 20500Assistant Superintendent, LAUSD-DACE, 1320 W THIRD ST, LOS ANGELES, CA 90017
e.) Bring in two class sets of standard business envelopes (or cut paper to the appropriate size).
f.) Write the following scrambled information (or substitute local information) on an OHT or a piece of butcher paper. This is used in the Evaluation activity.
John N 4235 CAMr. MainST Smith
g.) Review How to conduct an Information Gap, p. 158.
h.) Identify the pages in your textbook that you could use in this lesson,or see page 41 in Crossroads 1, and/or page 96 in The Oxford Picture Dictionary.
7
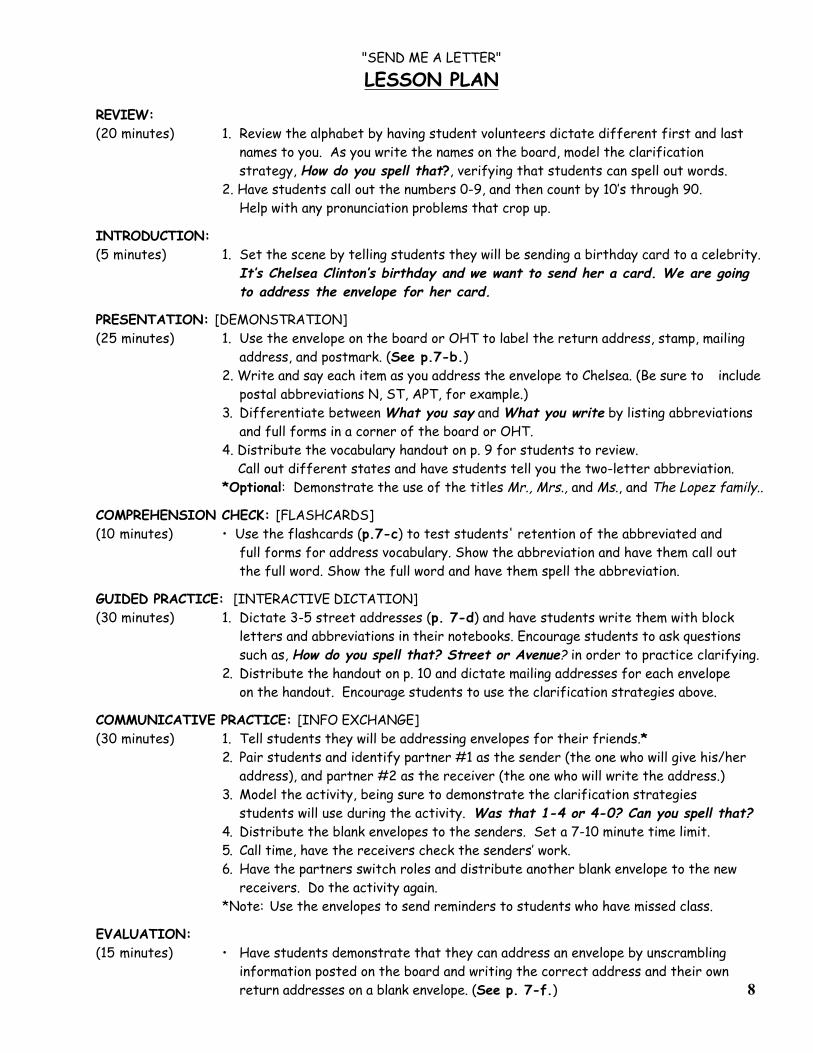
"SEND ME A LETTER"
LESSON PLAN
REVIEW:(20 minutes) 1. Review the alphabet by having student volunteers dictate different first and last
names to you. As you write the names on the board, model the clarification strategy, How do you spell that?, verifying that students can spell out words.
2. Have students call out the numbers 0-9, and then count by 10’s through 90.Help with any pronunciation problems that crop up.
INTRODUCTION:(5 minutes) 1. Set the scene by telling students they will be sending a birthday card to a celebrity.
It’s Chelsea Clinton’s birthday and we want to send her a card. We are going to address the envelope for her card.
PRESENTATION: [DEMONSTRATION](25 minutes) 1. Use the envelope on the board or OHT to label the return address, stamp, mailing
address, and postmark. (See p.7-b.)2. Write and say each item as you address the envelope to Chelsea. (Be sure to include
postal abbreviations N, ST, APT, for example.)3. Differentiate between What you say and What you write by listing abbreviations
and full forms in a corner of the board or OHT.4. Distribute the vocabulary handout on p. 9 for students to review. Call out different states and have students tell you the two-letter abbreviation.*Optional: Demonstrate the use of the titles Mr., Mrs., and Ms., and The Lopez family..
COMPREHENSION CHECK: [FLASHCARDS](10 minutes) • Use the flashcards (p.7-c) to test students' retention of the abbreviated and
full forms for address vocabulary. Show the abbreviation and have them call outthe full word. Show the full word and have them spell the abbreviation.
GUIDED PRACTICE: [INTERACTIVE DICTATION](30 minutes) 1. Dictate 3-5 street addresses (p. 7-d) and have students write them with block
letters and abbreviations in their notebooks. Encourage students to ask questionssuch as, How do you spell that? Street or Avenue? in order to practice clarifying.
2. Distribute the handout on p. 10 and dictate mailing addresses for each envelope on the handout. Encourage students to use the clarification strategies above.
COMMUNICATIVE PRACTICE: [INFO EXCHANGE](30 minutes) 1. Tell students they will be addressing envelopes for their friends.*
2. Pair students and identify partner #1 as the sender (the one who will give his/her address), and partner #2 as the receiver (the one who will write the address.)
3. Model the activity, being sure to demonstrate the clarification strategies students will use during the activity. Was that 1-4 or 4-0? Can you spell that?
4. Distribute the blank envelopes to the senders. Set a 7-10 minute time limit.5. Call time, have the receivers check the senders’ work.6. Have the partners switch roles and distribute another blank envelope to the new
receivers. Do the activity again.*Note: Use the envelopes to send reminders to students who have missed class.
EVALUATION:(15 minutes) • Have students demonstrate that they can address an envelope by unscrambling
information posted on the board and writing the correct address and their ownreturn addresses on a blank envelope. (See p. 7-f.) 8
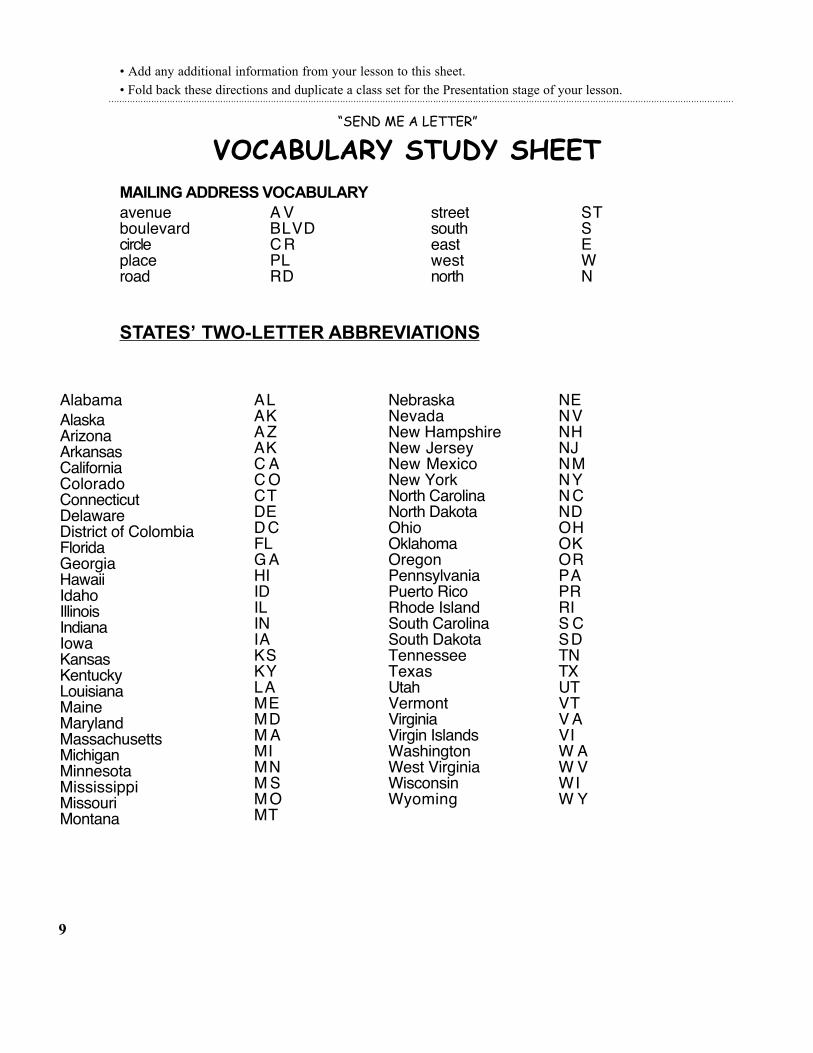
• Add any additional information from your lesson to this sheet.• Fold back these directions and duplicate a class set for the Presentation stage of your lesson.
“SEND ME A LETTER”
VOCABULARY STUDY SHEETMAILING ADDRESS VOCABULARYavenue A Vboulevard BLVDcircle CRplace PLroad RD
street STsouth Seast Ewest Wnorth N
STATES’ TWO-LETTER ABBREVIATIONS
AlabamaAlaskaArizonaArkansasCaliforniaColoradoConnecticutDelawareDistrict of ColombiaFloridaGeorgiaHawaiiIdahoIllinoisIndianaIowaKansasKentuckyLouisianaMaineMarylandMassachusettsMichiganMinnesotaMississippiMissouriMontana
ALAKAZAKC AC OCTDEDCFLGAHIIDILINIAKSKYLAMEMDM AMIMNM SM OMT
NebraskaNevadaNew HampshireNew JerseyNew MexicoNew YorkNorth CarolinaNorth DakotaOhioOklahomaOregonPennsylvaniaPuerto RicoRhode IslandSouth CarolinaSouth DakotaTennesseeTexasUtahVermontVirginiaVirgin IslandsWashingtonWest VirginiaWisconsinWyoming
NENVNHNJNMNYNCNDOHOKORPAPRRIS CSDTNTXUTVTV AVIW AW VWIW Y
9
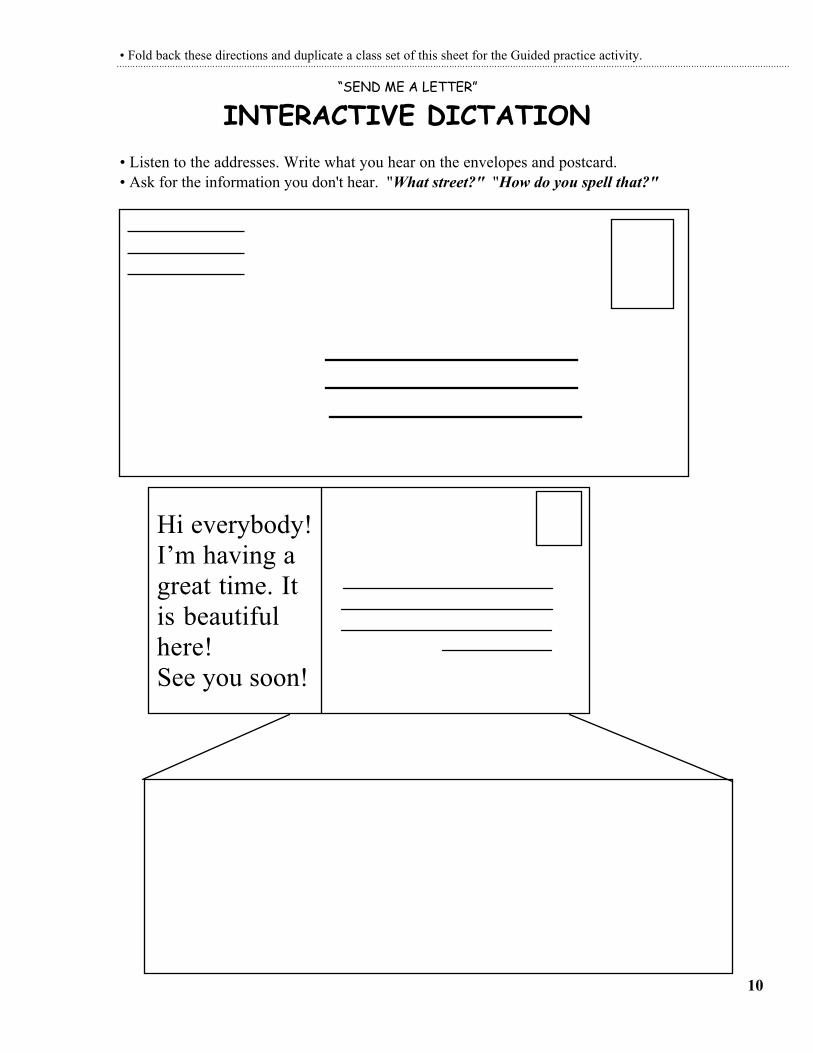
• Fold back these directions and duplicate a class set of this sheet for the Guided practice activity.
“SEND ME A LETTER”
INTERACTIVE DICTATION• Listen to the addresses. Write what you hear on the envelopes and postcard.• Ask for the information you don't hear. "What street?" "How do you spell that?"
Hi everybody!I’m having agreat time. Itis beautifulhere!See you soon!
10
Beginning Low-Consumer Economics
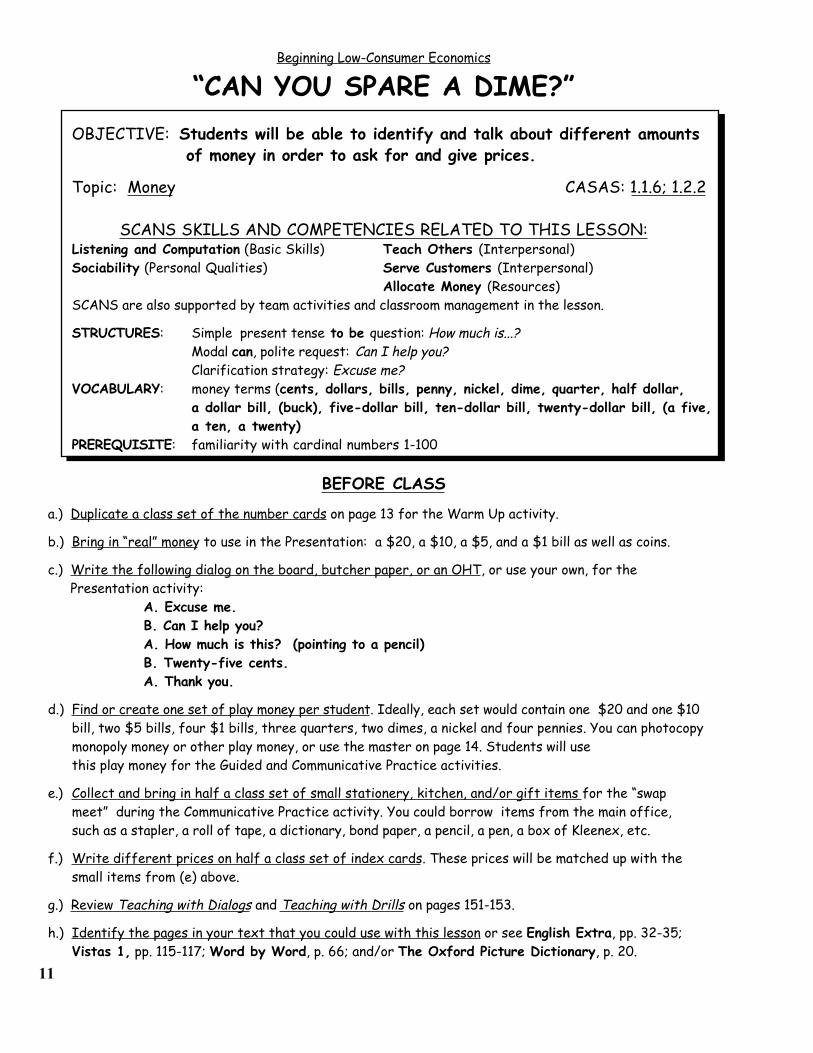
“CAN YOU SPARE A DIME?”OBJECTIVE: Students will be able to identify and talk about different amounts of money in order to ask for and give prices.
Topic: Money CASAS: 1.1.6; 1.2.2
SCANS SKILLS AND COMPETENCIES RELATED TO THIS LESSON:Listening and Computation (Basic Skills) Teach Others (Interpersonal)Sociability (Personal Qualities) Serve Customers (Interpersonal)
Allocate Money (Resources)SCANS are also supported by team activities and classroom management in the lesson.
STRUCTURES: Simple present tense to be question: How much is...?Modal can, polite request: Can I help you?Clarification strategy: Excuse me?
VOCABULARY: money terms (cents, dollars, bills, penny, nickel, dime, quarter, half dollar, a dollar bill, (buck), five-dollar bill, ten-dollar bill, twenty-dollar bill, (a five,a ten, a twenty)
PREREQUISITE: familiarity with cardinal numbers 1-100
BEFORE CLASS
a.) Duplicate a class set of the number cards on page 13 for the Warm Up activity.
b.) Bring in “real” money to use in the Presentation: a $20, a $10, a $5, and a $1 bill as well as coins.
c.) Write the following dialog on the board, butcher paper, or an OHT, or use your own, for the Presentation activity:
A. Excuse me.B. Can I help you?
A. How much is this? (pointing to a pencil)B. Twenty-five cents.
A. Thank you.
d.) Find or create one set of play money per student. Ideally, each set would contain one $20 and one $10bill, two $5 bills, four $1 bills, three quarters, two dimes, a nickel and four pennies. You can photocopymonopoly money or other play money, or use the master on page 14. Students will usethis play money for the Guided and Communicative Practice activities.
e.) Collect and bring in half a class set of small stationery, kitchen, and/or gift items for the “swap meet” during the Communicative Practice activity. You could borrow items from the main office,
such as a stapler, a roll of tape, a dictionary, bond paper, a pencil, a pen, a box of Kleenex, etc.
f.) Write different prices on half a class set of index cards. These prices will be matched up with thesmall items from (e) above.
g.) Review Teaching with Dialogs and Teaching with Drills on pages 151-153.
h.) Identify the pages in your text that you could use with this lesson or see English Extra, pp. 32-35; Vistas 1, pp. 115-117; Word by Word, p. 66; and/or The Oxford Picture Dictionary, p. 20.11
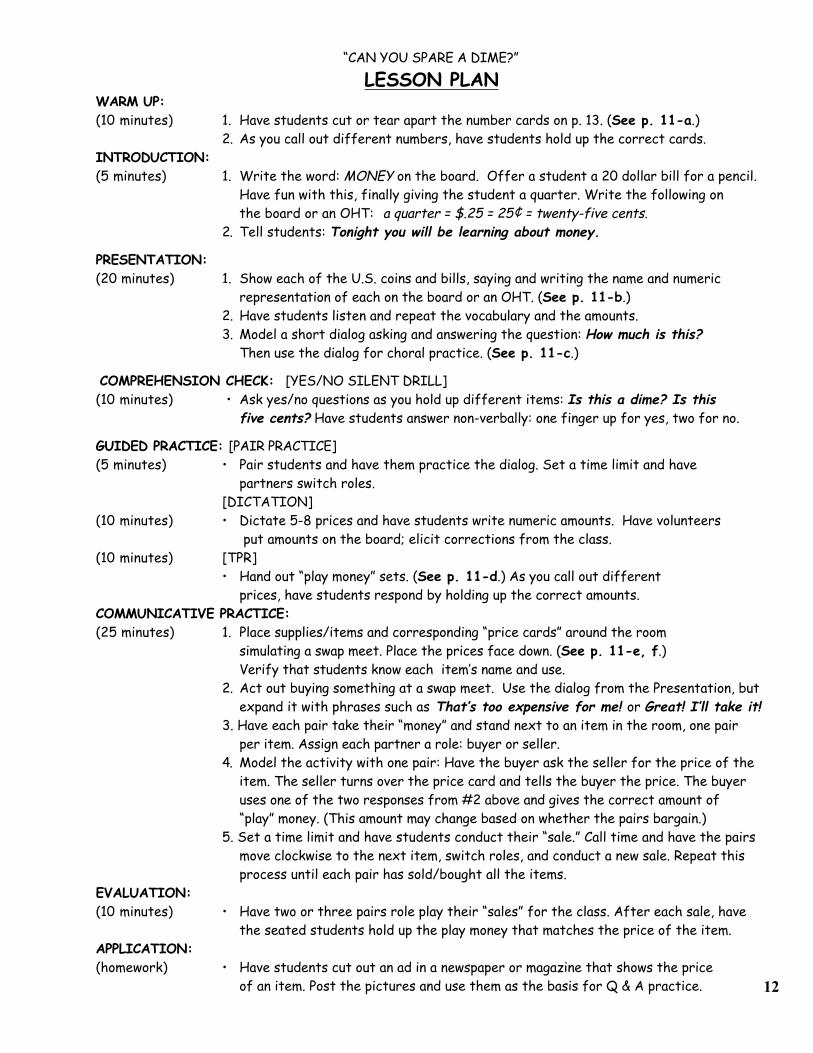
“CAN YOU SPARE A DIME?”
LESSON PLANWARM UP:(10 minutes) 1. Have students cut or tear apart the number cards on p. 13. (See p. 11-a.)
2. As you call out different numbers, have students hold up the correct cards.INTRODUCTION:(5 minutes) 1. Write the word: MONEY on the board. Offer a student a 20 dollar bill for a pencil.
Have fun with this, finally giving the student a quarter. Write the following onthe board or an OHT: a quarter = $.25 = 25¢ = twenty-five cents.
2. Tell students: Tonight you will be learning about money.
PRESENTATION:(20 minutes) 1. Show each of the U.S. coins and bills, saying and writing the name and numeric
representation of each on the board or an OHT. (See p. 11-b.)2. Have students listen and repeat the vocabulary and the amounts.3. Model a short dialog asking and answering the question: How much is this?
Then use the dialog for choral practice. (See p. 11-c.)
COMPREHENSION CHECK: [YES/NO SILENT DRILL](10 minutes) • Ask yes/no questions as you hold up different items: Is this a dime? Is this
five cents? Have students answer non-verbally: one finger up for yes, two for no.
GUIDED PRACTICE: [PAIR PRACTICE](5 minutes) • Pair students and have them practice the dialog. Set a time limit and have
partners switch roles.[DICTATION]
(10 minutes) • Dictate 5-8 prices and have students write numeric amounts. Have volunteers put amounts on the board; elicit corrections from the class.
(10 minutes) [TPR]• Hand out “play money” sets. (See p. 11-d.) As you call out different
prices, have students respond by holding up the correct amounts.COMMUNICATIVE PRACTICE:(25 minutes) 1. Place supplies/items and corresponding “price cards” around the room
simulating a swap meet. Place the prices face down. (See p. 11-e, f.)Verify that students know each item’s name and use.
2. Act out buying something at a swap meet. Use the dialog from the Presentation, butexpand it with phrases such as That’s too expensive for me! or Great! I’ll take it!
3. Have each pair take their “money” and stand next to an item in the room, one pair per item. Assign each partner a role: buyer or seller.
4. Model the activity with one pair: Have the buyer ask the seller for the price of the item. The seller turns over the price card and tells the buyer the price. The buyer uses one of the two responses from #2 above and gives the correct amount of “play” money. (This amount may change based on whether the pairs bargain.)
5. Set a time limit and have students conduct their “sale.” Call time and have the pairs move clockwise to the next item, switch roles, and conduct a new sale. Repeat thisprocess until each pair has sold/bought all the items.
EVALUATION:(10 minutes) • Have two or three pairs role play their “sales” for the class. After each sale, have
the seated students hold up the play money that matches the price of the item.APPLICATION:(homework) • Have students cut out an ad in a newspaper or magazine that shows the price
of an item. Post the pictures and use them as the basis for Q & A practice. 12
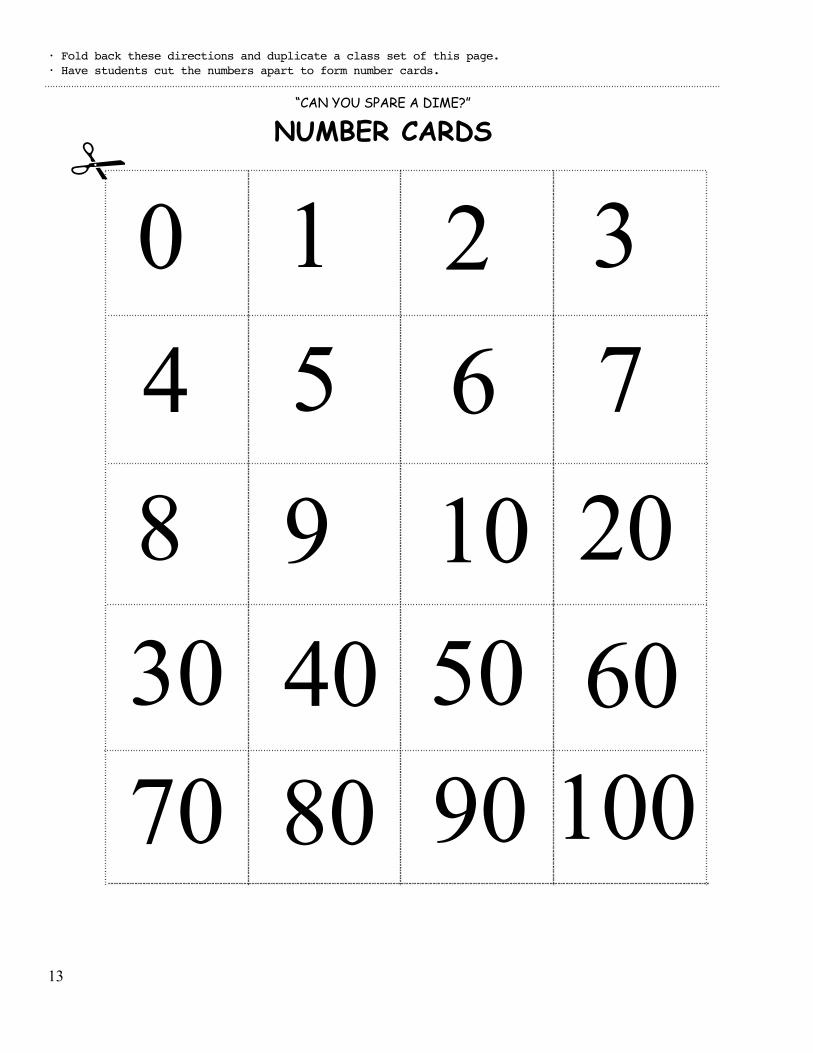
• Fold back these directions and duplicate a class set of this page.• Have students cut the numbers apart to form number cards.
“CAN YOU SPARE A DIME?”
NUMBER CARDS
13
0 1 2 3
4 5 6 7
8 9 10 20
30 40 50 60
70 100 80 90

15
Beginning Low-Civics, Government & History
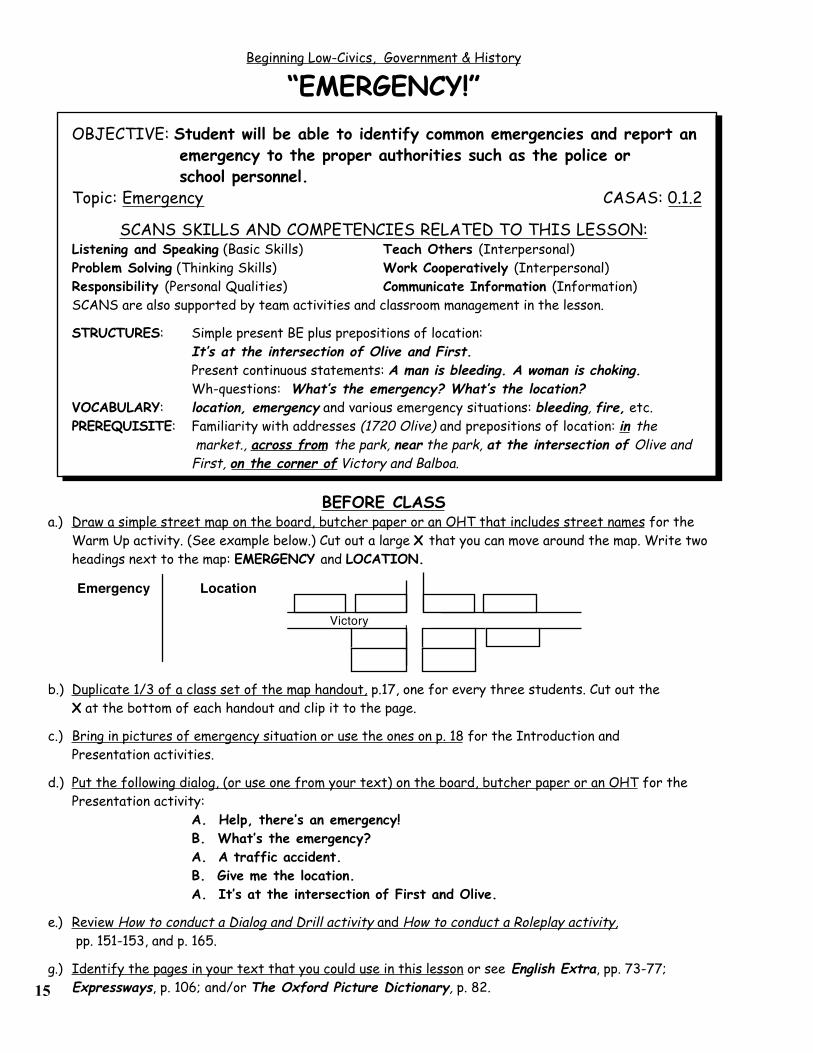
“EMERGENCY!”OBJECTIVE: Student will be able to identify common emergencies and report an
emergency to the proper authorities such as the police orschool personnel.
Topic: Emergency CASAS: 0.1.2
SCANS SKILLS AND COMPETENCIES RELATED TO THIS LESSON:Listening and Speaking (Basic Skills) Teach Others (Interpersonal)Problem Solving (Thinking Skills) Work Cooperatively (Interpersonal)Responsibility (Personal Qualities) Communicate Information (Information)SCANS are also supported by team activities and classroom management in the lesson.
STRUCTURES: Simple present BE plus prepositions of location:It’s at the intersection of Olive and First.Present continuous statements: A man is bleeding. A woman is choking.Wh-questions: What’s the emergency? What’s the location?
VOCABULARY: location, emergency and various emergency situations: bleeding, fire, etc.PREREQUISITE: Familiarity with addresses (1720 Olive) and prepositions of location: in the
market., across from the park, near the park, at the intersection of Olive andFirst, on the corner of Victory and Balboa.
BEFORE CLASSa.) Draw a simple street map on the board, butcher paper or an OHT that includes street names for the
Warm Up activity. (See example below.) Cut out a large X that you can move around the map. Write twoheadings next to the map: EMERGENCY and LOCATION.
b.) Duplicate 1/3 of a class set of the map handout, p.17, one for every three students. Cut out theX at the bottom of each handout and clip it to the page.
c.) Bring in pictures of emergency situation or use the ones on p. 18 for the Introduction andPresentation activities.
d.) Put the following dialog, (or use one from your text) on the board, butcher paper or an OHT for thePresentation activity:
A. Help, there’s an emergency!B. What’s the emergency?A. A traffic accident.B. Give me the location.A. It’s at the intersection of First and Olive.
e.) Review How to conduct a Dialog and Drill activity and How to conduct a Roleplay activity, pp. 151-153, and p. 165.
g.) Identify the pages in your text that you could use in this lesson or see English Extra, pp. 73-77;Expressways, p. 106; and/or The Oxford Picture Dictionary, p. 82.
Victory
Emergency Location
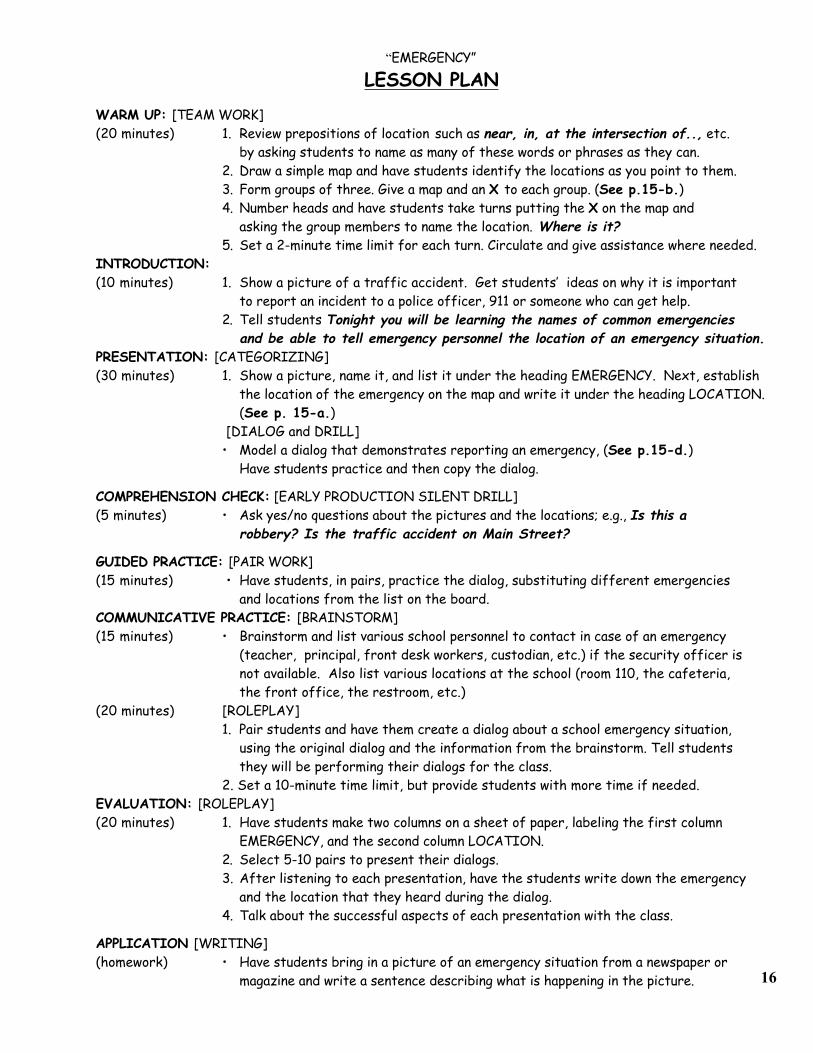
“EMERGENCY”
LESSON PLAN
WARM UP: [TEAM WORK](20 minutes) 1. Review prepositions of location such as near, in, at the intersection of.., etc.
by asking students to name as many of these words or phrases as they can. 2. Draw a simple map and have students identify the locations as you point to them.3. Form groups of three. Give a map and an X to each group. (See p.15-b.)4. Number heads and have students take turns putting the X on the map and
asking the group members to name the location. Where is it?5. Set a 2-minute time limit for each turn. Circulate and give assistance where needed.
INTRODUCTION:(10 minutes) 1. Show a picture of a traffic accident. Get students’ ideas on why it is important
to report an incident to a police officer, 911 or someone who can get help.2. Tell students Tonight you will be learning the names of common emergencies
and be able to tell emergency personnel the location of an emergency situation.PRESENTATION: [CATEGORIZING](30 minutes) 1. Show a picture, name it, and list it under the heading EMERGENCY. Next, establish
the location of the emergency on the map and write it under the heading LOCATION.(See p. 15-a.)
[DIALOG and DRILL]• Model a dialog that demonstrates reporting an emergency, (See p.15-d.) Have students practice and then copy the dialog.
COMPREHENSION CHECK: [EARLY PRODUCTION SILENT DRILL](5 minutes) • Ask yes/no questions about the pictures and the locations; e.g., Is this a
robbery? Is the traffic accident on Main Street?
GUIDED PRACTICE: [PAIR WORK](15 minutes) • Have students, in pairs, practice the dialog, substituting different emergencies and locations from the list on the board.COMMUNICATIVE PRACTICE: [BRAINSTORM](15 minutes) • Brainstorm and list various school personnel to contact in case of an emergency
(teacher, principal, front desk workers, custodian, etc.) if the security officer isnot available. Also list various locations at the school (room 110, the cafeteria, the front office, the restroom, etc.)
(20 minutes) [ROLEPLAY]1. Pair students and have them create a dialog about a school emergency situation,
using the original dialog and the information from the brainstorm. Tell students they will be performing their dialogs for the class.
2. Set a 10-minute time limit, but provide students with more time if needed.EVALUATION: [ROLEPLAY](20 minutes) 1. Have students make two columns on a sheet of paper, labeling the first column
EMERGENCY, and the second column LOCATION. 2. Select 5-10 pairs to present their dialogs.3. After listening to each presentation, have the students write down the emergency and the location that they heard during the dialog.4. Talk about the successful aspects of each presentation with the class.
APPLICATION [WRITING](homework) • Have students bring in a picture of an emergency situation from a newspaper or
magazine and write a sentence describing what is happening in the picture. 16
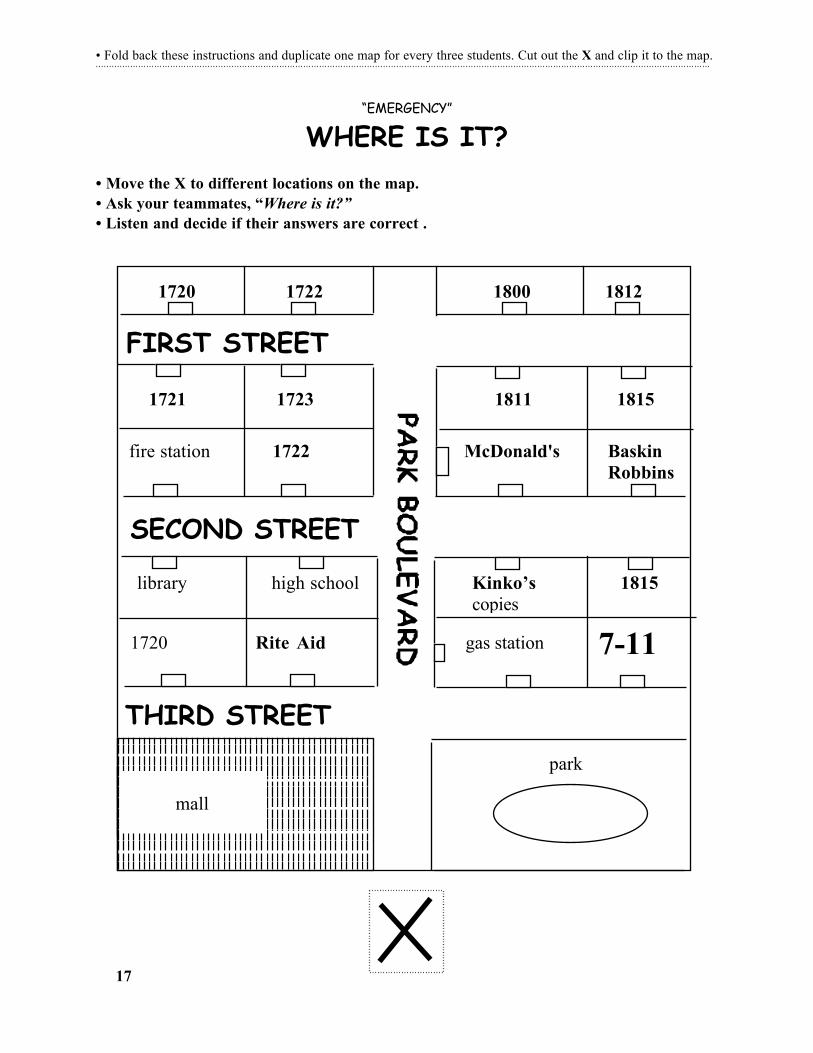
• Fold back these instructions and duplicate one map for every three students. Cut out the X and clip it to the map.
“EMERGENCY”
WHERE IS IT?• Move the X to different locations on the map.• Ask your teammates, “Where is it?”• Listen and decide if their answers are correct .
1720 1722 1800 1812
1721 1723 1811 1815
fire station 1722 McDonald's BaskinRobbins
FIRST STREET
SECOND STREET
library high school Kinko’s 1815copies
1720 Rite Aid gas station
pharmacy
mall
park
THIRD STREET
7-11
17
Beginning Low-Health and Safety
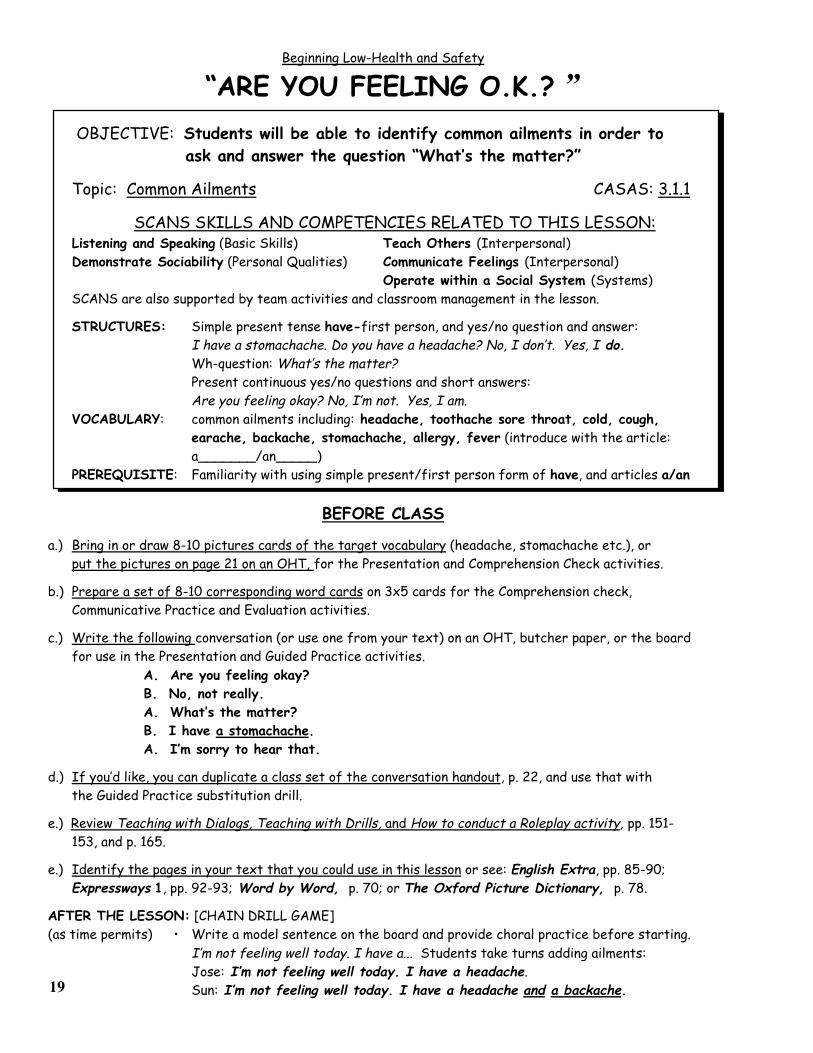
“ARE YOU FEELING O.K.? ” OBJECTIVE: Students will be able to identify common ailments in order to
ask and answer the question “What’s the matter?”
Topic: Common Ailments CASAS: 3.1.1
SCANS SKILLS AND COMPETENCIES RELATED TO THIS LESSON:Listening and Speaking (Basic Skills) Teach Others (Interpersonal)Demonstrate Sociability (Personal Qualities) Communicate Feelings (Interpersonal)
Operate within a Social System (Systems)SCANS are also supported by team activities and classroom management in the lesson.
STRUCTURES: Simple present tense have-first person, and yes/no question and answer:I have a stomachache. Do you have a headache? No, I don’t. Yes, I do.Wh-question: What’s the matter?Present continuous yes/no questions and short answers:Are you feeling okay? No, I’m not. Yes, I am.
VOCABULARY: common ailments including: headache, toothache sore throat, cold, cough, earache, backache, stomachache, allergy, fever (introduce with the article:a_______/an_____)
PREREQUISITE: Familiarity with using simple present/first person form of have, and articles a/an
BEFORE CLASS
a.) Bring in or draw 8-10 pictures cards of the target vocabulary (headache, stomachache etc.), orput the pictures on page 21 on an OHT, for the Presentation and Comprehension Check activities.
b.) Prepare a set of 8-10 corresponding word cards on 3x5 cards for the Comprehension check, Communicative Practice and Evaluation activities.
c.) Write the following conversation (or use one from your text) on an OHT, butcher paper, or the board for use in the Presentation and Guided Practice activities.
A. Are you feeling okay?B. No, not really.A. What’s the matter?B. I have a stomachache.A. I’m sorry to hear that.
d.) If you’d like, you can duplicate a class set of the conversation handout, p. 22, and use that withthe Guided Practice substitution drill.
e.) Review Teaching with Dialogs, Teaching with Drills, and How to conduct a Roleplay activity, pp. 151-153, and p. 165.
e.) Identify the pages in your text that you could use in this lesson or see: English Extra, pp. 85-90; Expressways 1, pp. 92-93; Word by Word, p. 70; or The Oxford Picture Dictionary, p. 78.
AFTER THE LESSON: [CHAIN DRILL GAME](as time permits) • Write a model sentence on the board and provide choral practice before starting.
I’m not feeling well today. I have a... Students take turns adding ailments: Jose: I’m not feeling well today. I have a headache.
Sun: I’m not feeling well today. I have a headache and a backache.19
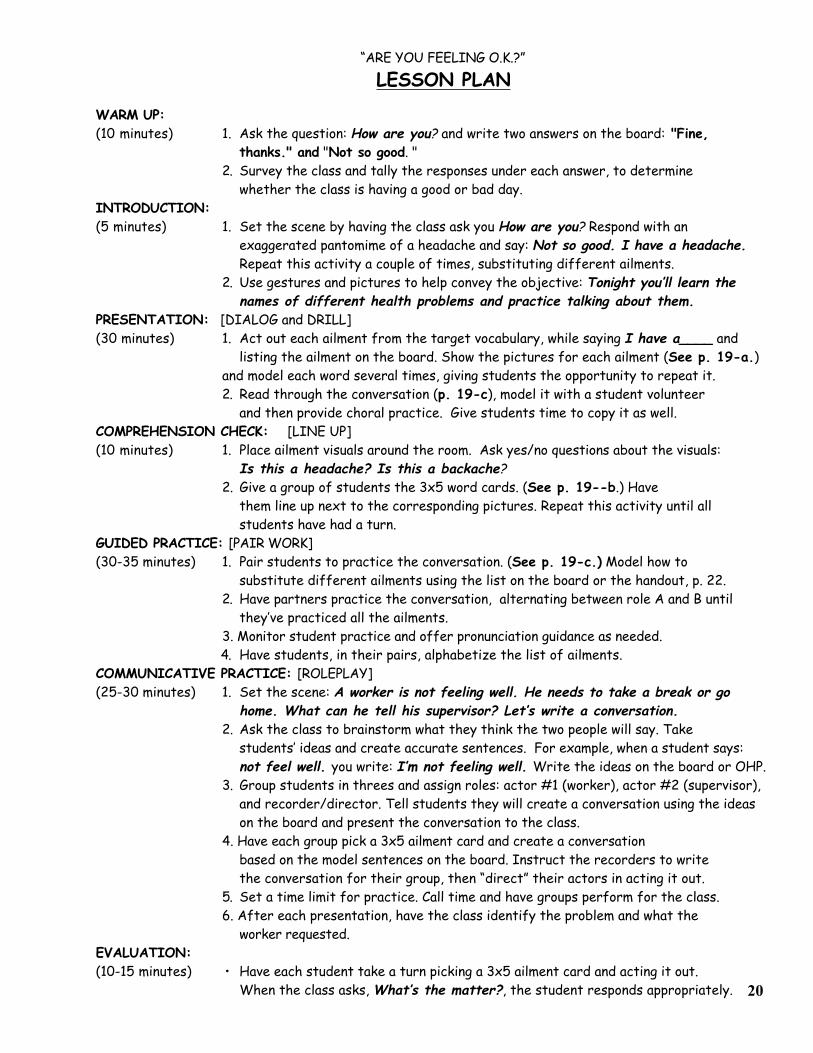
“ARE YOU FEELING O.K.?”
LESSON PLAN
WARM UP:(10 minutes) 1. Ask the question: How are you? and write two answers on the board: "Fine,
thanks." and "Not so good. "2. Survey the class and tally the responses under each answer, to determine
whether the class is having a good or bad day.INTRODUCTION:(5 minutes) 1. Set the scene by having the class ask you How are you? Respond with an
exaggerated pantomime of a headache and say: Not so good. I have a headache. Repeat this activity a couple of times, substituting different ailments.
2. Use gestures and pictures to help convey the objective: Tonight you’ll learn thenames of different health problems and practice talking about them.
PRESENTATION: [DIALOG and DRILL](30 minutes) 1. Act out each ailment from the target vocabulary, while saying I have a____ and
listing the ailment on the board. Show the pictures for each ailment (See p. 19-a.) and model each word several times, giving students the opportunity to repeat it.2. Read through the conversation (p. 19-c), model it with a student volunteer
and then provide choral practice. Give students time to copy it as well.COMPREHENSION CHECK: [LINE UP](10 minutes) 1. Place ailment visuals around the room. Ask yes/no questions about the visuals:
Is this a headache? Is this a backache?2. Give a group of students the 3x5 word cards. (See p. 19--b.) Have
them line up next to the corresponding pictures. Repeat this activity until all students have had a turn.
GUIDED PRACTICE: [PAIR WORK] (30-35 minutes) 1. Pair students to practice the conversation. (See p. 19-c.) Model how to
substitute different ailments using the list on the board or the handout, p. 22.2. Have partners practice the conversation, alternating between role A and B until
they’ve practiced all the ailments.3. Monitor student practice and offer pronunciation guidance as needed.4. Have students, in their pairs, alphabetize the list of ailments.
COMMUNICATIVE PRACTICE: [ROLEPLAY](25-30 minutes) 1. Set the scene: A worker is not feeling well. He needs to take a break or go
home. What can he tell his supervisor? Let’s write a conversation.2. Ask the class to brainstorm what they think the two people will say. Take
students’ ideas and create accurate sentences. For example, when a student says:not feel well. you write: I’m not feeling well. Write the ideas on the board or OHP.
3. Group students in threes and assign roles: actor #1 (worker), actor #2 (supervisor), and recorder/director. Tell students they will create a conversation using the ideason the board and present the conversation to the class.
4. Have each group pick a 3x5 ailment card and create a conversationbased on the model sentences on the board. Instruct the recorders to writethe conversation for their group, then “direct” their actors in acting it out.
5. Set a time limit for practice. Call time and have groups perform for the class.6. After each presentation, have the class identify the problem and what the
worker requested.EVALUATION:(10-15 minutes) • Have each student take a turn picking a 3x5 ailment card and acting it out.
When the class asks, What’s the matter?, the student responds appropriately. 20
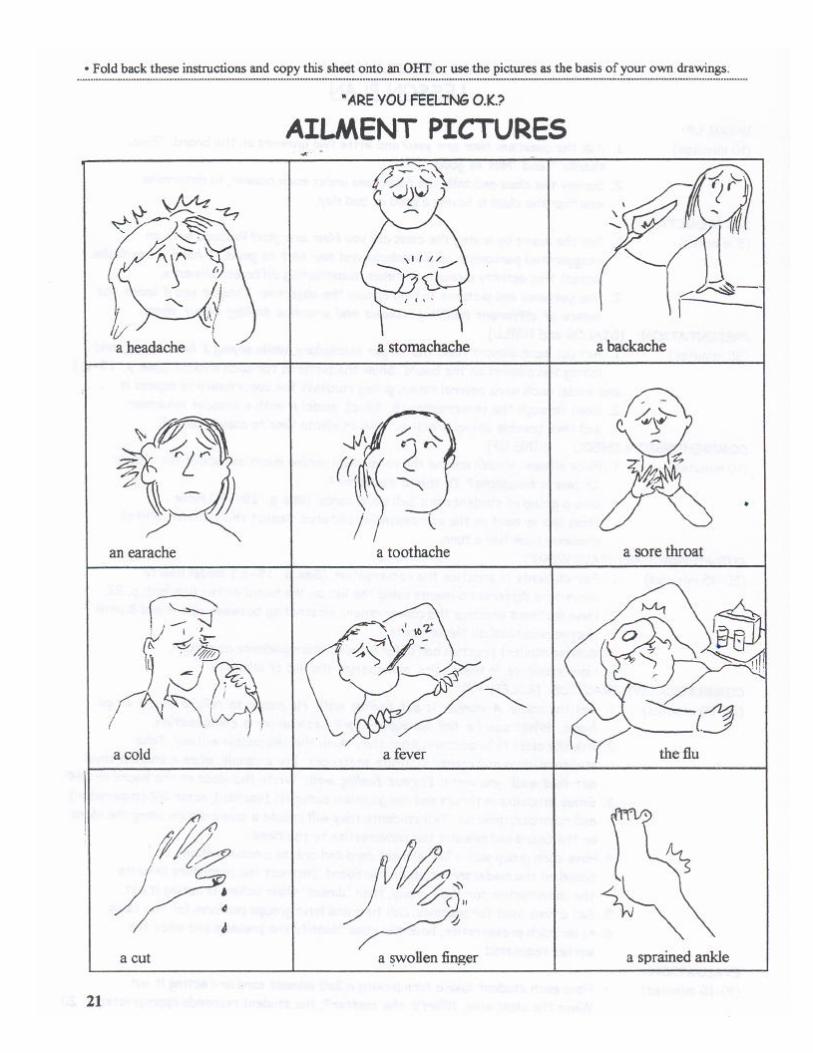
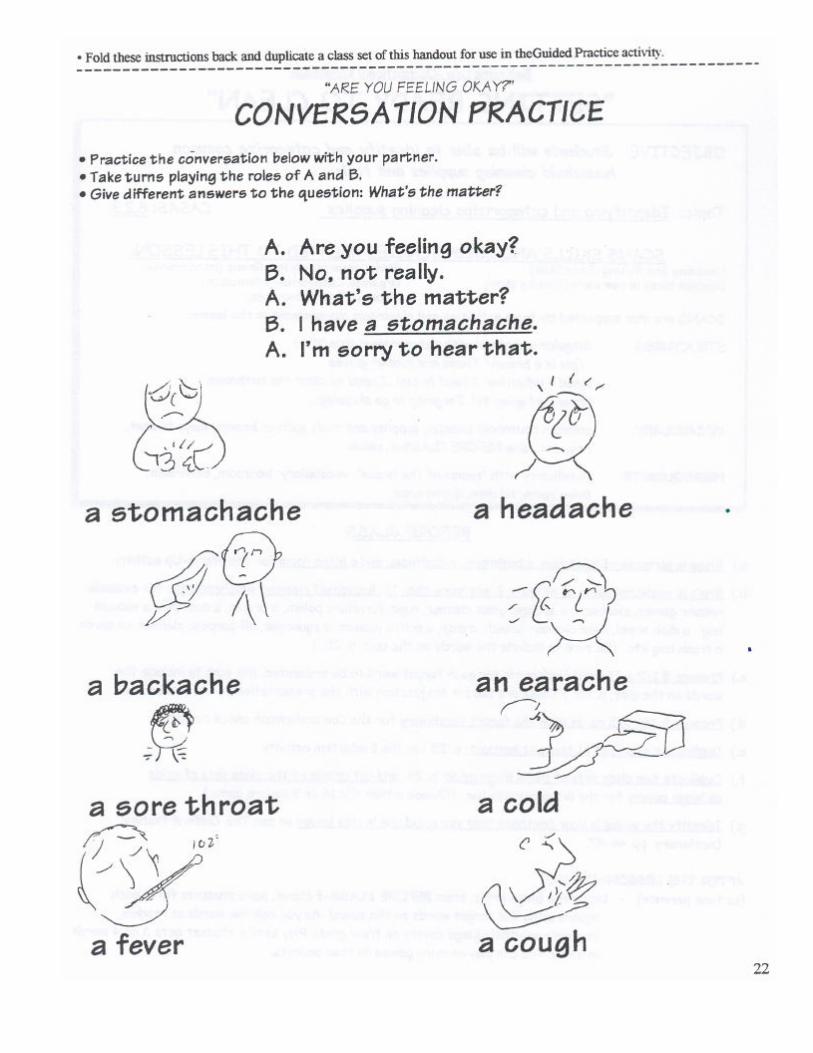
Beginning Low -Occupational Knowledge
“GETTING READY TO CLEAN”OBJECTIVE: Students will be able to identify and categorize common
household cleaning supplies and tools.
Topic: Identifying and categorizing cleaning supplies CASAS: 8.2.3
SCANS SKILLS AND COMPETENCIES RELATED TO THIS LESSON:Listening and Writing (Basic Skills) Work Cooperatively in a Group (Interpersonal)Combine ideas in new ways (Thinking Skills) Organize, Categorize (Information)
Allocate Time (Resources) SCANS are also supported by team activities and classroom management in the lesson.
STRUCTURES: Singular and plural with determiners: this/thatThis is a broom/ These are rubber gloves
Need + infinitive: I need to buy...I need to clean the bathroom.Future w/ going to: I’m going to go shopping....
VOCABULARY: common household cleaning supplies and tools such as broom, mop, bucket,rag, etc. See BEFORE CLASS-a, below.
PREREQUISITE: Familiarity with “rooms of the house” vocabulary: bedroom, bathroom,living room, kitchen, dining area
BEFORE CLASS
a.) Bring in pictures of a kitchen, a bathroom, a bedroom, and a living room for the Warm-Up activity.
b.) Bring in realia/pictures of at least 9, not more than 16, household cleaning supplies/tools: for example;rubber gloves, cleanser , a sponge, glass cleaner, rags, furniture polish, a broom, a dust pan, a vacuumbag, a dish towel, oven cleaner, bleach, a mop, a pail, a vacuum, a squeegee, all-purpose cleaner, an apron,a trash bag etc. (Be sure to include the words on the quiz, p. 25. )
c.) Prepare 8 1/2 x 11 word flashcards for each target word to be presented. (Be sure to include the words on the quiz, p. 25. ) These are used in conjunction with the presentation of the new words.
d.) Prepare 9-16, 3x5 cards with the target vocabulary for the Comprehension check activity.
e.) Duplicate a class set of the quiz handout, p. 25 for the Evaluation activity.
f.) Duplicate two class sets of blank Bingo grids, p. 26, and cut up one of the class sets of gridsas bingo covers for the Bingo game below. (Choose either the 16 or 9 square game.)
g.) Identify the pages in your textbook that you could use in this lesson or see The Oxford PictureDictionary, pp. 46-47.
AFTER THE LESSON: [BINGO](as time permits) • Using the Bingo grids, from BEFORE CLASS-f above, have students fill in each
square using the target words on the board. As you call the words at random,students use their bingo covers on their grids. Play until a student gets 3 or 4 wordsin a row. You can play as many games as time permits.
23
“GETTING READY TO CLEAN”
LESSON PLANWARM UP/REVIEW:(5-10 minutes) 1. Show/post pictures of the rooms of the house, eliciting the names of each from
the students. (BEFORE CLASS-a)2. Survey students to find out which cleaning supplies they have at home,
supplying names of items when students can’t.INTRODUCTION:(5 minutes) 1. Set the scene: It’s housecleaning day. We need cleaning supplies for every
room? What do we need for each room?2. Tell students they will be learning the names of different cleaning supplies.
PRESENTATION: [TEACHING VOCABULARY](20 minutes) 1. Name and show each cleaning supply item (either the actual item or the
flashcard.) This is a broom. Then act out the item’s different uses to providecontext for the vocabulary. I sweep the floor with a broom. (See p. 23-b,c.)
2. Categorize the cleaning supplies according to the four pictured categories on the board: Bedroom, Bathroom, Kitchen, Living Room. Use students’ input and elicitresponses to When I clean the ___, do I use __? Where do I use ___?
COMPREHENSION CHECK: [LINE UP]( 10 minutes) • Give a group of students the 3x5 word cards (p. 23-d) and have them line up
next to the corresponding item/picture. Scramble and repeat with new students.(Note: Items need not be at the front of the room, nor grouped together!)
GUIDED PRACTICE: [WHAT’S THE WORD GAME](20 minutes) 1. Have students number from 1-16 on their papers. (Adjust the number to match
the number of target vocabulary words in your lesson.)2. Provide clues for each vocabulary word without actually using the word. (E.g., act it
out, hold up the item, etc.) and have students write the word. Evaluate students’success by having them report back.
[CHAIN DRILL](10 minutes) • Write a model sentence on the board I’m going to clean the house. I need to buy
_____. Provide choral practice substituting different cleaning supplies. Then havestudents take turns adding items to the statement. Student 1: I need to buy amop. Student 2: I need to buy a mop and a sponge.
COMMUNICATIVE PRACTICE: [TEAM WORK](30 minutes) 1. Set the scene: Your friend has a new apartment. You’re going to help him
clean it. What cleaning supplies do you need? Make a list.2. Model the language needed for the activity: What do we need to buy to clean the
living room? -- We need to buy ___. --That’s a good idea.-- I don’t think so.3. Form teams of 4-5 students, assign roles (recorder, timekeeper, reporter,
facilitator) and a room to each group. Have each team’s recorder take down the team’s shopping list based on the cleaning jobs for that room. Set a time limit and monitor teams.
4. Call time and have each group share their lists, noting differences in the supplies for the same room(s).
EVALUATION: [QUIZ](15 minutes) • Distribute the quiz on p. 26 to evaluate students’ ability to identify the target
words. Have students exchange papers and compare answers.APPLICATION:(15 minutes) • Elicit students favorite cleaning tricks or tools. I like to use a toothbrush. 24
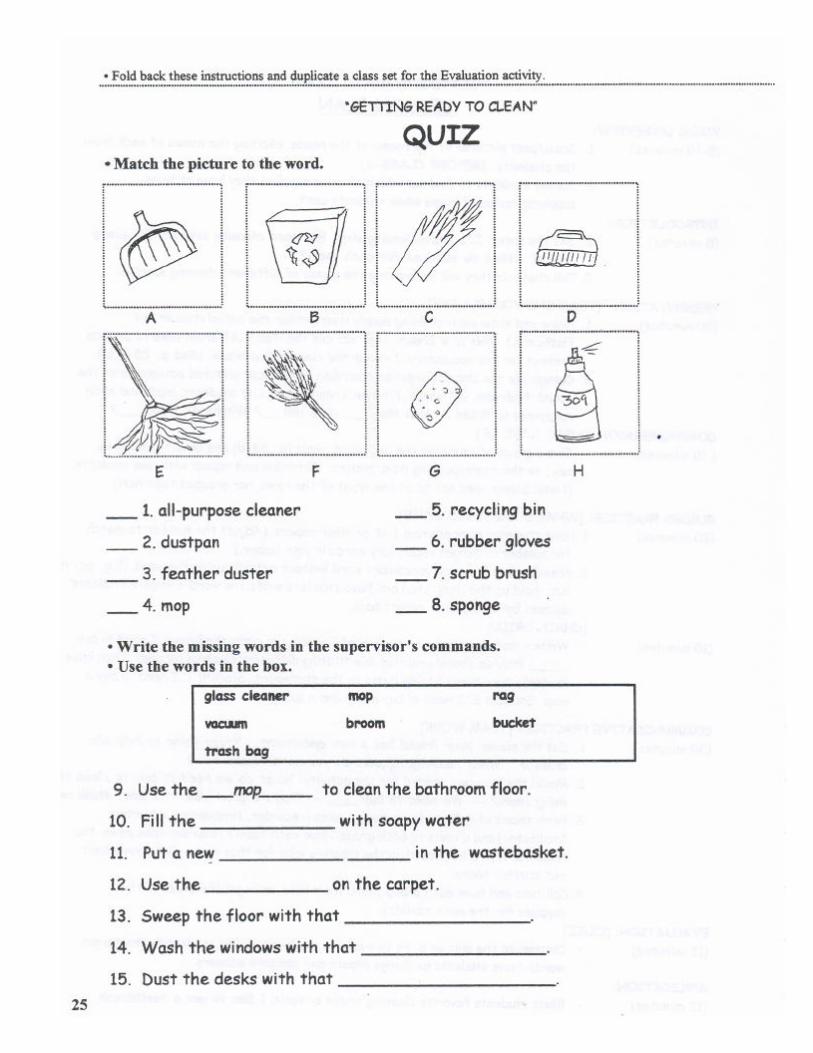
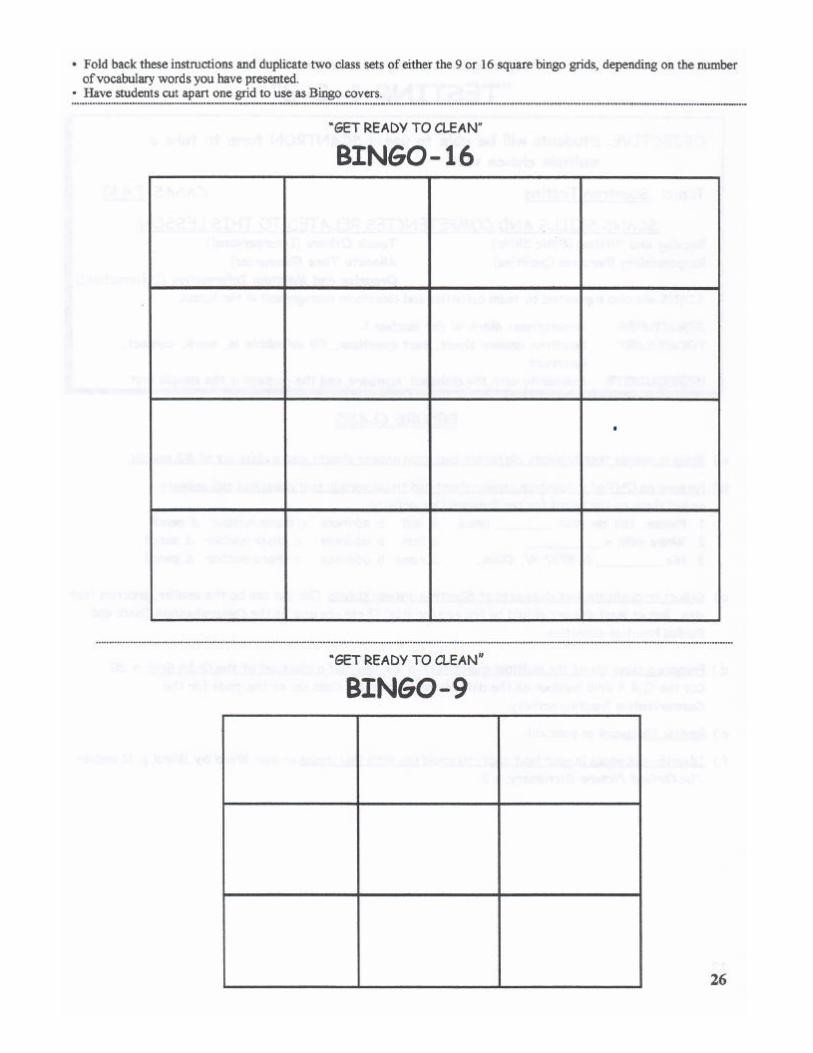
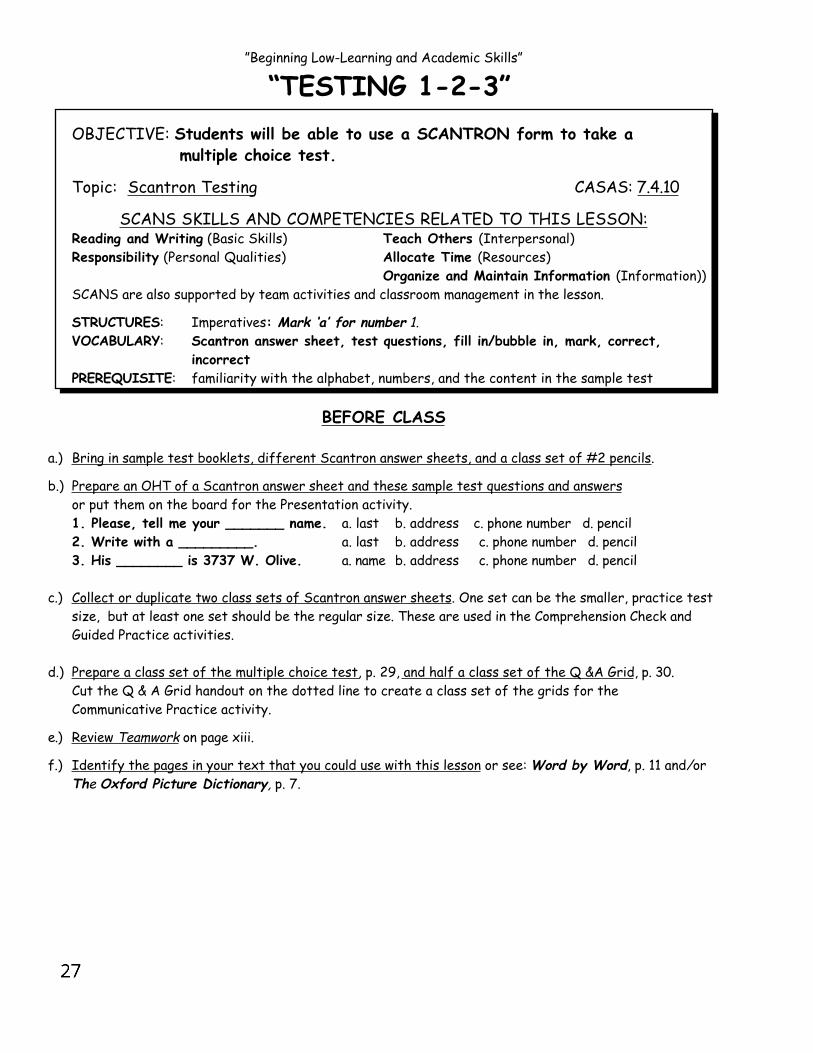
”Beginning Low-Learning and Academic Skills”
“TESTING 1-2-3”OBJECTIVE: Students will be able to use a SCANTRON form to take a
multiple choice test.
Topic: Scantron Testing CASAS: 7.4.10
SCANS SKILLS AND COMPETENCIES RELATED TO THIS LESSON:Reading and Writing (Basic Skills) Teach Others (Interpersonal)Responsibility (Personal Qualities) Allocate Time (Resources)
Organize and Maintain Information (Information))SCANS are also supported by team activities and classroom management in the lesson.
STRUCTURES: Imperatives: Mark ‘a’ for number 1.VOCABULARY: Scantron answer sheet, test questions, fill in/bubble in, mark, correct,
incorrectPREREQUISITE: familiarity with the alphabet, numbers, and the content in the sample test
BEFORE CLASS
a.) Bring in sample test booklets, different Scantron answer sheets, and a class set of #2 pencils.
b.) Prepare an OHT of a Scantron answer sheet and these sample test questions and answersor put them on the board for the Presentation activity.1. Please, tell me your _______ name. a. last b. address c. phone number d. pencil2. Write with a _________. a. last b. address c. phone number d. pencil3. His ________ is 3737 W. Olive. a. name b. address c. phone number d. pencil
c.) Collect or duplicate two class sets of Scantron answer sheets. One set can be the smaller, practice testsize, but at least one set should be the regular size. These are used in the Comprehension Check andGuided Practice activities.
d.) Prepare a class set of the multiple choice test, p. 29, and half a class set of the Q &A Grid, p. 30.Cut the Q & A Grid handout on the dotted line to create a class set of the grids for theCommunicative Practice activity.
e.) Review Teamwork on page xiii.
f.) Identify the pages in your text that you could use with this lesson or see: Word by Word, p. 11 and/orThe Oxford Picture Dictionary, p. 7.
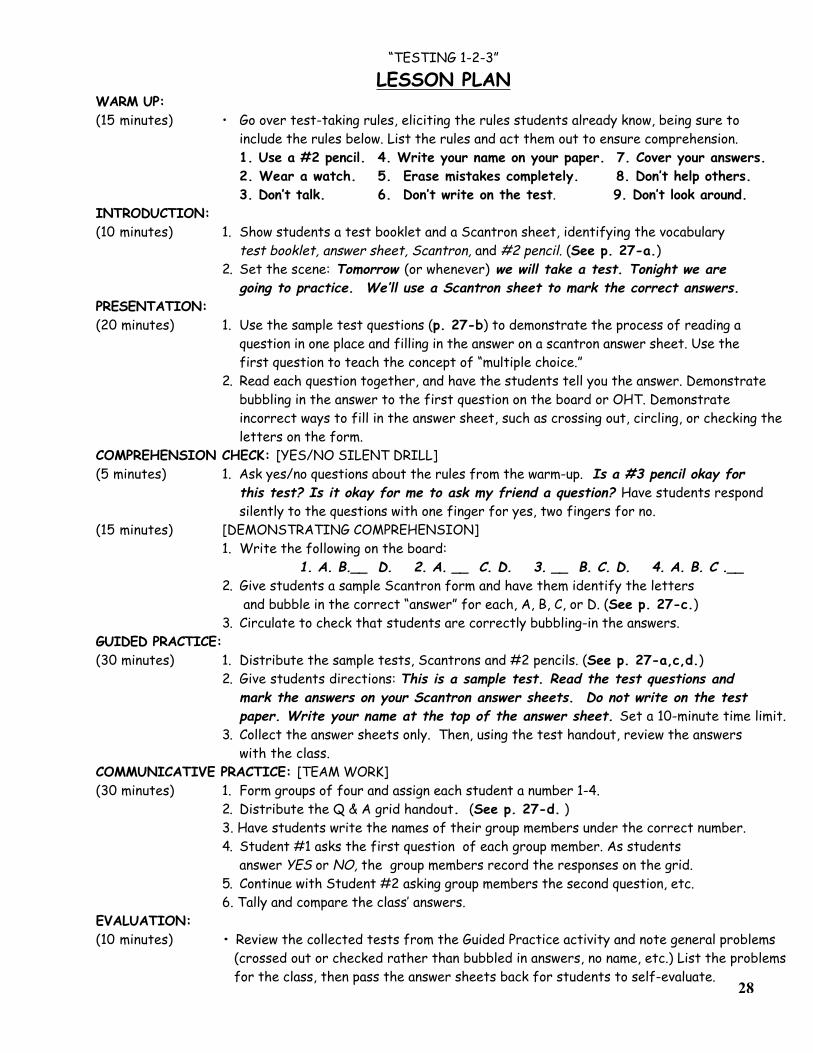
“TESTING 1-2-3”
LESSON PLANWARM UP:(15 minutes) • Go over test-taking rules, eliciting the rules students already know, being sure to
include the rules below. List the rules and act them out to ensure comprehension.1. Use a #2 pencil. 4. Write your name on your paper. 7. Cover your answers.2. Wear a watch. 5. Erase mistakes completely. 8. Don’t help others.3. Don’t talk. 6. Don’t write on the test. 9. Don’t look around.
INTRODUCTION:(10 minutes) 1. Show students a test booklet and a Scantron sheet, identifying the vocabulary
test booklet, answer sheet, Scantron, and #2 pencil. (See p. 27-a.)2. Set the scene: Tomorrow (or whenever) we will take a test. Tonight we are
going to practice. We’ll use a Scantron sheet to mark the correct answers. PRESENTATION:(20 minutes) 1. Use the sample test questions (p. 27-b) to demonstrate the process of reading a
question in one place and filling in the answer on a scantron answer sheet. Use thefirst question to teach the concept of “multiple choice.”
2. Read each question together, and have the students tell you the answer. Demonstratebubbling in the answer to the first question on the board or OHT. Demonstrateincorrect ways to fill in the answer sheet, such as crossing out, circling, or checking theletters on the form.
COMPREHENSION CHECK: [YES/NO SILENT DRILL](5 minutes) 1. Ask yes/no questions about the rules from the warm-up. Is a #3 pencil okay for
this test? Is it okay for me to ask my friend a question? Have students respondsilently to the questions with one finger for yes, two fingers for no.
(15 minutes) [DEMONSTRATING COMPREHENSION]1. Write the following on the board:
1. A. B.__ D. 2. A. __ C. D. 3. __ B. C. D. 4. A. B. C .__2. Give students a sample Scantron form and have them identify the letters
and bubble in the correct “answer” for each, A, B, C, or D. (See p. 27-c.)3. Circulate to check that students are correctly bubbling-in the answers.
GUIDED PRACTICE: (30 minutes) 1. Distribute the sample tests, Scantrons and #2 pencils. (See p. 27-a,c,d.)
2. Give students directions: This is a sample test. Read the test questions and mark the answers on your Scantron answer sheets. Do not write on the test paper. Write your name at the top of the answer sheet. Set a 10-minute time limit.
3. Collect the answer sheets only. Then, using the test handout, review the answerswith the class.
COMMUNICATIVE PRACTICE: [TEAM WORK](30 minutes) 1. Form groups of four and assign each student a number 1-4.
2. Distribute the Q & A grid handout. (See p. 27-d. )3. Have students write the names of their group members under the correct number.4. Student #1 asks the first question of each group member. As students
answer YES or NO, the group members record the responses on the grid.5. Continue with Student #2 asking group members the second question, etc.6. Tally and compare the class’ answers.
EVALUATION:(10 minutes) • Review the collected tests from the Guided Practice activity and note general problems
(crossed out or checked rather than bubbled in answers, no name, etc.) List the problemsfor the class, then pass the answer sheets back for students to self-evaluate.
28

• Fold back these directions and duplicate a class set of this sample test.• Fold each test in half to create a test booklet.• Write “Test Booklet” on the blank front cover and give each test booklet a number.
“TESTING 1-2-3”
1. His _____ is Joe.a. addressb. namec. phone numberd. birthdate
2. His ________ is (818) 555-1234.a. addressb. namec. phone numberd. birthdate
3. His _______ is 7123 Pine Street, L.A.a. addressb. namec. phone numberd. birthdate
4. His ______ is 3/3/79.a. addressb. namec. phone numberd. birthdate
5. 91325 is Mary’s ______.a. addressb. Zip codec. birthdated. phone number
6. Mary’s middle name is Elizabeth. Her middle initial is ______.
a. A.b. I.c. M.d. E.
7. Mary and Joe are married. Mary is Joe’s ________.
a. husbandb. brotherc. wifed. daughter
8. Are Mary and Joe married?a. Yes, he is.b. Yes, she is.c. Yes, they are.d. Yes, I am
9. Is today Sunday?a. No, it isn’t.b. Yes, it is.c. Yes, he is.d. No, he isn’t.
10. Is this a test?a. No, it isn’t.b. Yes, it is.c. Yes, I am.d. No, I’m not.
11. What are you doing?a. I taking a testb. testc. I’m a test.d. I’m taking a test.
12. Who are you?a. I’m a student.b. I student.c. I’m student.d. Yes, I am.
13. Where are you?a. I’m at home.b. I’m in class.c. I’m at the market.d. I’m at Disneyland.
14. Is this the last question?a. No, it isn’t.b. Yes, it is.c. Yes, I am.d. No, I’m not.
SAMPLE TEST, PAGE 1 SAMPLE TEST, PAGE 2
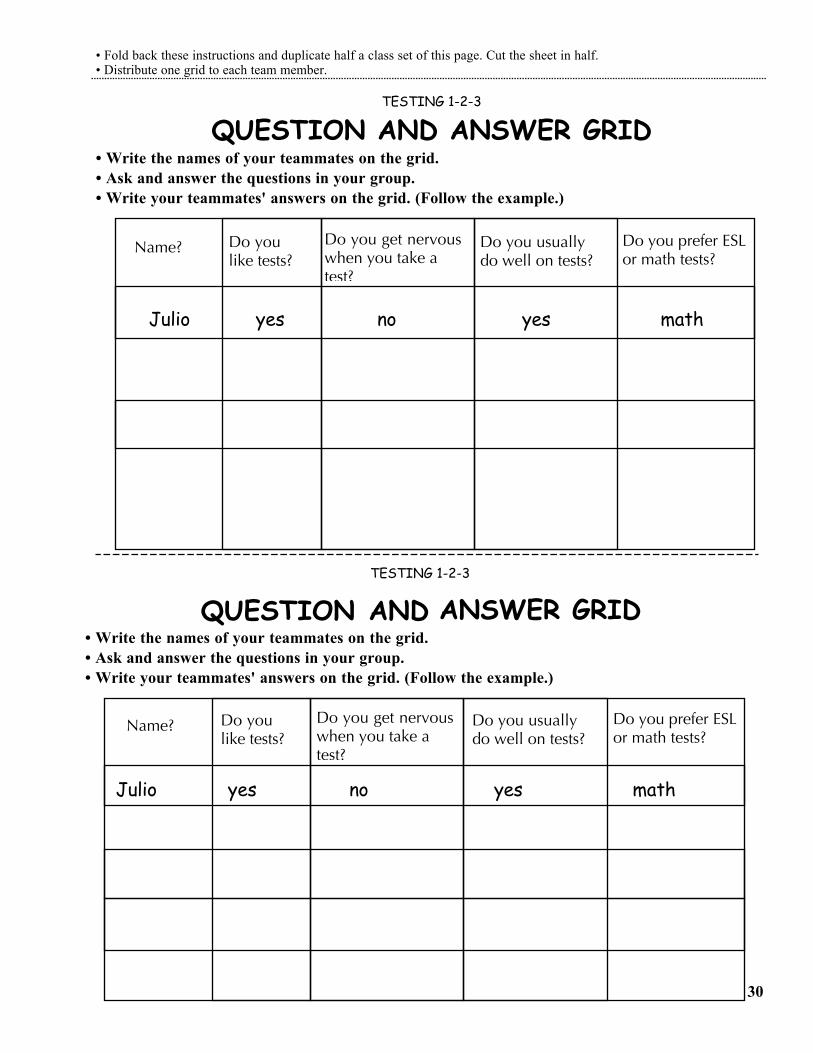
• Fold back these instructions and duplicate half a class set of this page. Cut the sheet in half.• Distribute one grid to each team member.
TESTING 1-2-3
QUESTION AND ANSWER GRID• Write the names of your teammates on the grid.• Ask and answer the questions in your group.• Write your teammates' answers on the grid. (Follow the example.)
Julio yes no yes math
Name? Do youlike tests?
Do you get nervouswhen you take atest?
Do you usuallydo well on tests?
Do you prefer ESLor math tests?
30


BEGINNING-HIGHLESSONS
500152
Title & Competency Area Objective CASAS PageWhat’s in a Name? -Use appropriate titles in addressing 0.1.2, 0.1.3 33[Social/Cultural Interaction] strangers or people in authority, in
order to ask for assistance on thejob or in the community.
911 Emergency -Identify emergency situations and 2.1.2 37[Community] make a 911 call.
What Do We Need -Write a shopping list for a dinner 1.3.8 41at the Store? using the vocabulary of containers,[Consumer Education] weights and measures.
Freeze! -Identify police and security personnel 0.1.1, 0.2.1 45[Civics, Government & History] and respond to their commands and 5.3.7
requests for information
What’s Shaking? -Identify proper safety precautions 3.4.2 49[Health & Safety] and procedures before, during, and
after an earthquake.
After the Tone... -Leave a voice mail message notifying 2.1.7 53[Occupational Knowledge] a supervisor of an illness-related
absence.
Tell Me What to Do -Read and perform steps to 4.5.4 57and How to Do It operate a cassette recorder.[Learning and Academic Skills]
32
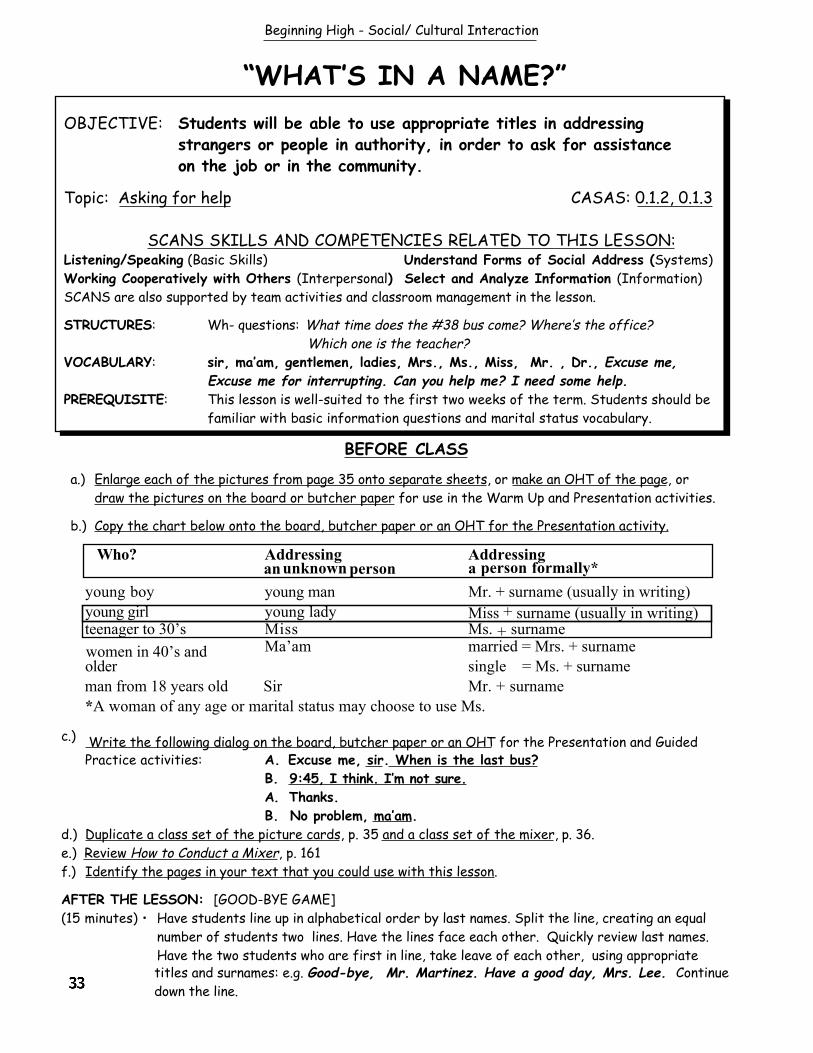
Beginning High - Social/ Cultural Interaction
“WHAT’S IN A NAME?”OBJECTIVE: Students will be able to use appropriate titles in addressing
strangers or people in authority, in order to ask for assistanceon the job or in the community.
Topic: Asking for help CASAS: 0.1.2, 0.1.3
SCANS SKILLS AND COMPETENCIES RELATED TO THIS LESSON:Listening/Speaking (Basic Skills) Understand Forms of Social Address (Systems)Working Cooperatively with Others (Interpersonal) Select and Analyze Information (Information)SCANS are also supported by team activities and classroom management in the lesson.
STRUCTURES: Wh- questions: What time does the #38 bus come? Where’s the office? Which one is the teacher?
VOCABULARY: sir, ma’am, gentlemen, ladies, Mrs., Ms., Miss, Mr. , Dr., Excuse me,Excuse me for interrupting. Can you help me? I need some help.
PREREQUISITE: This lesson is well-suited to the first two weeks of the term. Students should befamiliar with basic information questions and marital status vocabulary.
BEFORE CLASS
a.) Enlarge each of the pictures from page 35 onto separate sheets, or make an OHT of the page, ordraw the pictures on the board or butcher paper for use in the Warm Up and Presentation activities.
b.) Copy the chart below onto the board, butcher paper or an OHT for the Presentation activity.
Who? Addressing Addressing an unknown person a person formally*
young boy young man Mr. + surname (usually in writing)young girl young lady Miss + surname (usually in writing)
teenager to 30’s Miss Ms. + surname
women in 40’s and Ma’am married = Mrs. + surnameolder single = Ms. + surname
man from 18 years old Sir Mr. + surname*A woman of any age or marital status may choose to use Ms.
c.) Write the following dialog on the board, butcher paper or an OHT for the Presentation and GuidedPractice activities: A. Excuse me, sir. When is the last bus?
B. 9:45, I think. I’m not sure.A. Thanks.B. No problem, ma’am.
d.) Duplicate a class set of the picture cards, p. 35 and a class set of the mixer, p. 36.e.) Review How to Conduct a Mixer, p. 161f.) Identify the pages in your text that you could use with this lesson.
AFTER THE LESSON: [GOOD-BYE GAME](15 minutes) • Have students line up in alphabetical order by last names. Split the line, creating an equal
number of students two lines. Have the lines face each other. Quickly review last names.Have the two students who are first in line, take leave of each other, using appropriate
33
titles and surnames: e.g. Good-bye, Mr. Martinez. Have a good day, Mrs. Lee. Continuedown the line.
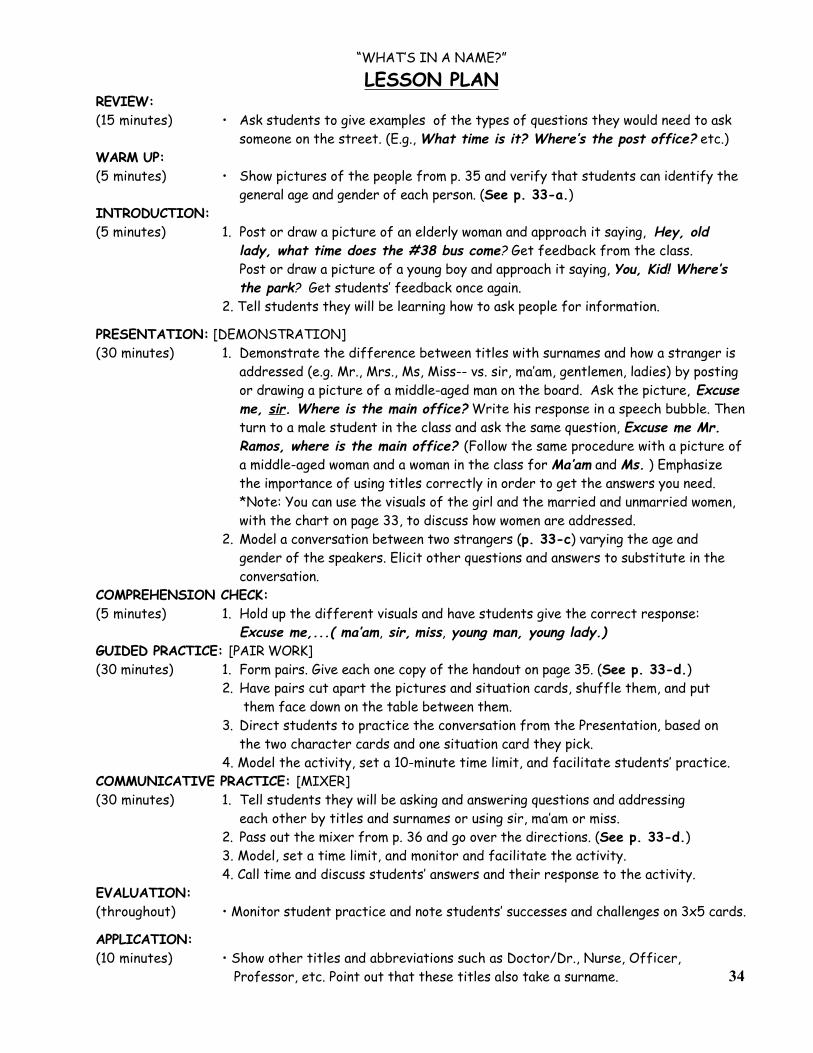
“WHAT’S IN A NAME?”
LESSON PLANREVIEW:(15 minutes) • Ask students to give examples of the types of questions they would need to ask
someone on the street. (E.g., What time is it? Where’s the post office? etc.)WARM UP:(5 minutes) • Show pictures of the people from p. 35 and verify that students can identify the
general age and gender of each person. (See p. 33-a.)INTRODUCTION:(5 minutes) 1. Post or draw a picture of an elderly woman and approach it saying, Hey, old
lady, what time does the #38 bus come? Get feedback from the class.Post or draw a picture of a young boy and approach it saying, You, Kid! Where’s the park? Get students’ feedback once again.
2. Tell students they will be learning how to ask people for information.
PRESENTATION: [DEMONSTRATION](30 minutes) 1. Demonstrate the difference between titles with surnames and how a stranger is
addressed (e.g. Mr., Mrs., Ms, Miss-- vs. sir, ma’am, gentlemen, ladies) by postingor drawing a picture of a middle-aged man on the board. Ask the picture, Excuse me, sir. Where is the main office? Write his response in a speech bubble. Thenturn to a male student in the class and ask the same question, Excuse me Mr. Ramos, where is the main office? (Follow the same procedure with a picture of a middle-aged woman and a woman in the class for Ma’am and Ms. ) Emphasizethe importance of using titles correctly in order to get the answers you need. *Note: You can use the visuals of the girl and the married and unmarried women, with the chart on page 33, to discuss how women are addressed.
2. Model a conversation between two strangers (p. 33-c) varying the age andgender of the speakers. Elicit other questions and answers to substitute in theconversation.
COMPREHENSION CHECK:(5 minutes) 1. Hold up the different visuals and have students give the correct response:
Excuse me,...( ma’am, sir, miss, young man, young lady.)GUIDED PRACTICE: [PAIR WORK](30 minutes) 1. Form pairs. Give each one copy of the handout on page 35. (See p. 33-d.)
2. Have pairs cut apart the pictures and situation cards, shuffle them, and put them face down on the table between them.
3. Direct students to practice the conversation from the Presentation, based on the two character cards and one situation card they pick.
4. Model the activity, set a 10-minute time limit, and facilitate students’ practice.COMMUNICATIVE PRACTICE: [MIXER](30 minutes) 1. Tell students they will be asking and answering questions and addressing
each other by titles and surnames or using sir, ma’am or miss.2. Pass out the mixer from p. 36 and go over the directions. (See p. 33-d.)3. Model, set a time limit, and monitor and facilitate the activity.4. Call time and discuss students’ answers and their response to the activity.
EVALUATION:(throughout) • Monitor student practice and note students’ successes and challenges on 3x5 cards.
APPLICATION: (10 minutes) • Show other titles and abbreviations such as Doctor/Dr., Nurse, Officer,
Professor, etc. Point out that these titles also take a surname. 34
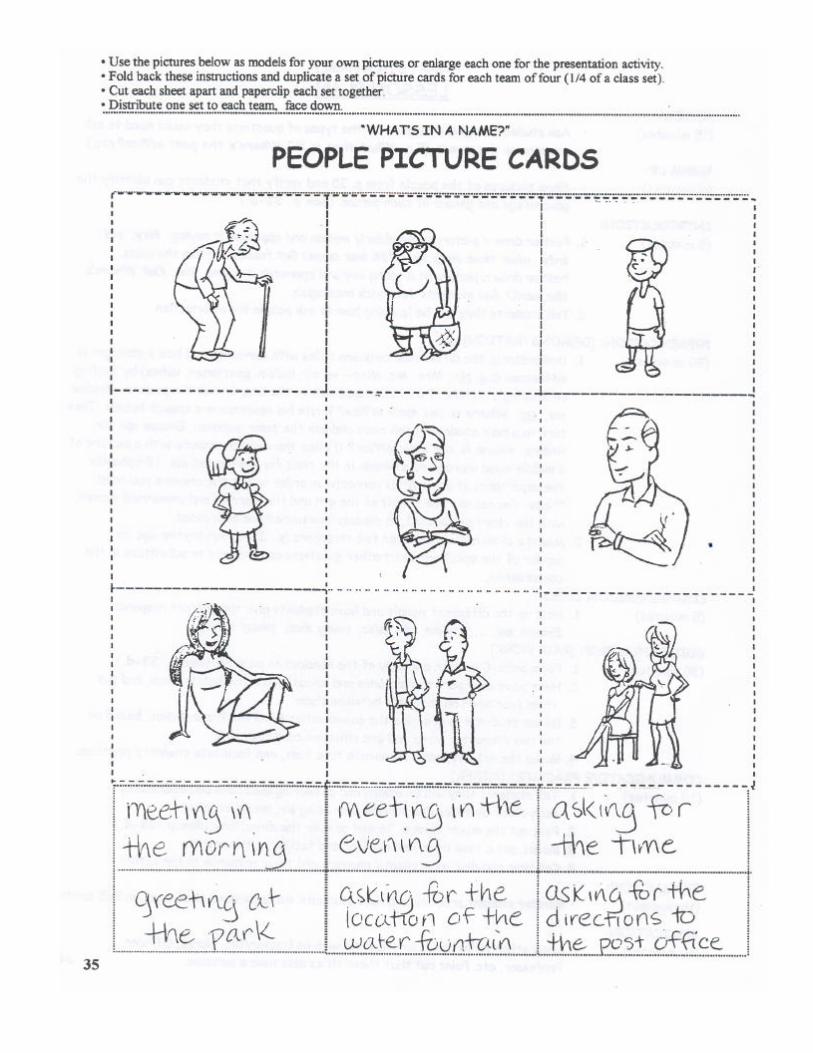
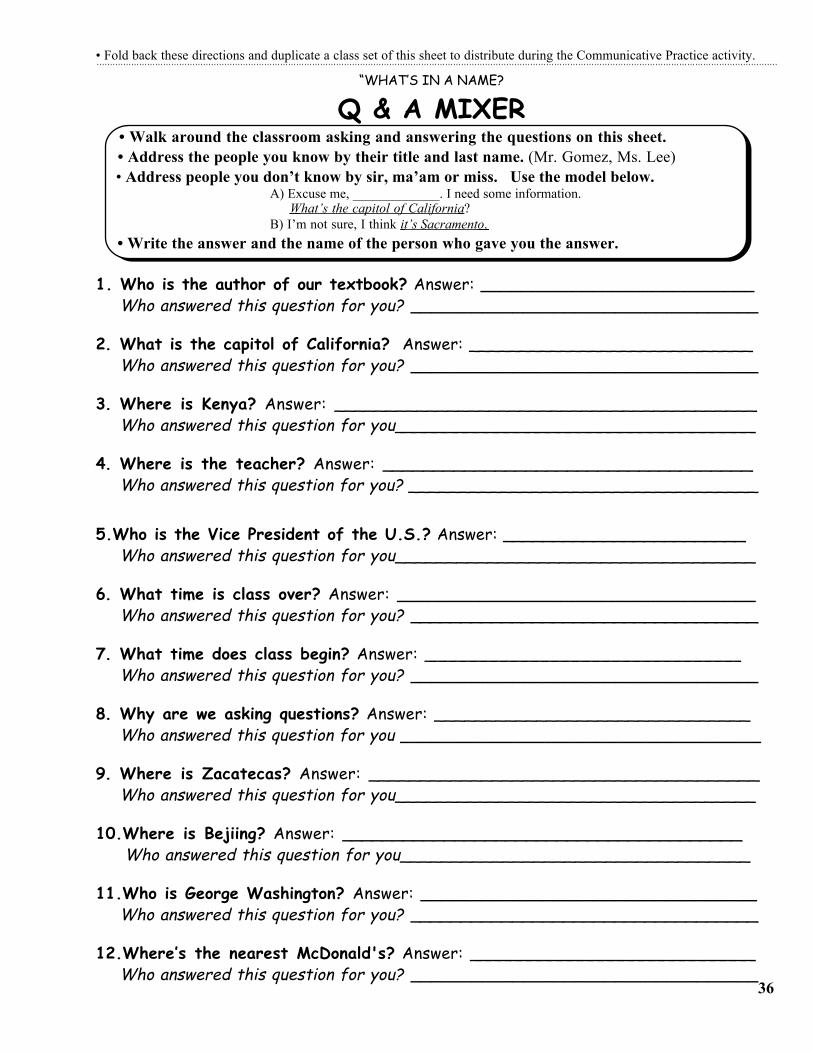
• Fold back these directions and duplicate a class set of this sheet to distribute during the Communicative Practice activity.
“WHAT’S IN A NAME?
Q & A MIXER • Walk around the classroom asking and answering the questions on this sheet. • Address the people you know by their title and last name. (Mr. Gomez, Ms. Lee) • Address people you don’t know by sir, ma’am or miss. Use the model below. A) Excuse me, _____________. I need some information. What’s the capitol of California ? B) I’m not sure, I think it’s Sacramento .
• Write the answer and the name of the person who gave you the answer.
1. Who is the author of our textbook? Answer: ___________________________Who answered this question for you? __________________________________
2. What is the capitol of California? Answer: ____________________________Who answered this question for you? __________________________________
3. Where is Kenya? Answer: _________________________________________Who answered this question for you___________________________________
4. Where is the teacher? Answer: ____________________________________Who answered this question for you? __________________________________
5.Who is the Vice President of the U.S.? Answer: ________________________ Who answered this question for you___________________________________
6. What time is class over? Answer: ___________________________________Who answered this question for you? __________________________________
7. What time does class begin? Answer: _______________________________Who answered this question for you? __________________________________
8. Why are we asking questions? Answer: _______________________________ Who answered this question for you ___________________________________
9. Where is Zacatecas? Answer: ______________________________________Who answered this question for you___________________________________
10.Where is Bejiing? Answer: _______________________________________ Who answered this question for you__________________________________
11.Who is George Washington? Answer: _________________________________Who answered this question for you? __________________________________
12.Where’s the nearest McDonald's? Answer: ____________________________ Who answered this question for you? __________________________________
36
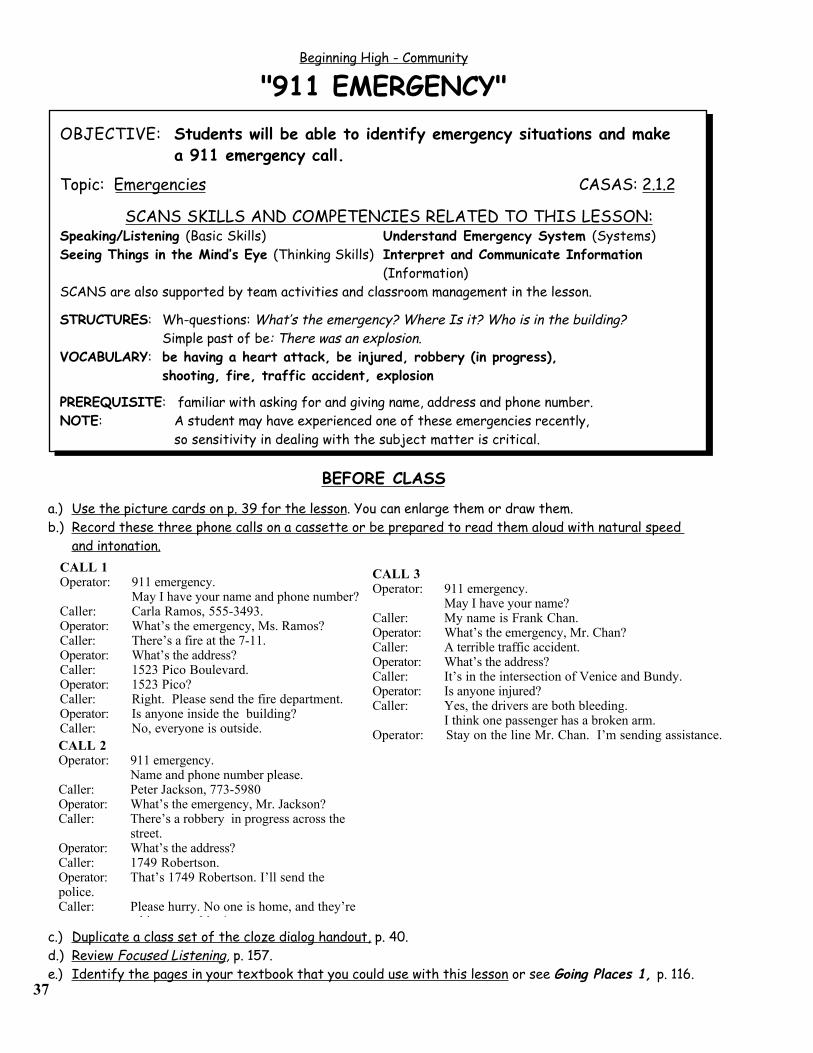
37
Beginning High - Community
"911 EMERGENCY"OBJECTIVE: Students will be able to identify emergency situations and make
a 911 emergency call.
Topic: Emergencies CASAS: 2.1.2
SCANS SKILLS AND COMPETENCIES RELATED TO THIS LESSON:Speaking/Listening (Basic Skills) Understand Emergency System (Systems)Seeing Things in the Mind’s Eye (Thinking Skills) Interpret and Communicate Information
(Information)SCANS are also supported by team activities and classroom management in the lesson.
STRUCTURES: Wh-questions: What’s the emergency? Where Is it? Who is in the building?Simple past of be: There was an explosion.
VOCABULARY: be having a heart attack, be injured, robbery (in progress), shooting, fire, traffic accident, explosion
PREREQUISITE: familiar with asking for and giving name, address and phone number.NOTE: A student may have experienced one of these emergencies recently,
so sensitivity in dealing with the subject matter is critical.
BEFORE CLASS
a.) Use the picture cards on p. 39 for the lesson. You can enlarge them or draw them.b.) Record these three phone calls on a cassette or be prepared to read them aloud with natural speed
and intonation.
c.) Duplicate a class set of the cloze dialog handout, p. 40.d.) Review Focused Listening, p. 157.e.) Identify the pages in your textbook that you could use with this lesson or see Going Places 1, p. 116.
CALL 1Operator: 911 emergency.
May I have your name and phone number?Caller: Carla Ramos, 555-3493.Operator: What’s the emergency, Ms. Ramos?Caller: There’s a fire at the 7-11.Operator: What’s the address?Caller: 1523 Pico Boulevard.Operator: 1523 Pico?Caller: Right. Please send the fire department.Operator: Is anyone inside the building?Caller: No, everyone is outside.CALL 2Operator: 911 emergency.
Name and phone number please.Caller: Peter Jackson, 773-5980Operator: What’s the emergency, Mr. Jackson?Caller: There’s a robbery in progress across the
street.Operator: What’s the address?Caller: 1749 Robertson.Operator: That’s 1749 Robertson. I’ll send thepolice.Caller: Please hurry. No one is home, and they’re
taking everything!
CALL 3Operator: 911 emergency.
May I have your name?Caller: My name is Frank Chan.Operator: What’s the emergency, Mr. Chan?Caller: A terrible traffic accident.Operator: What’s the address?Caller: It’s in the intersection of Venice and Bundy.Operator: Is anyone injured?Caller: Yes, the drivers are both bleeding.
I think one passenger has a broken arm.Operator: Stay on the line Mr. Chan. I’m sending assistance.
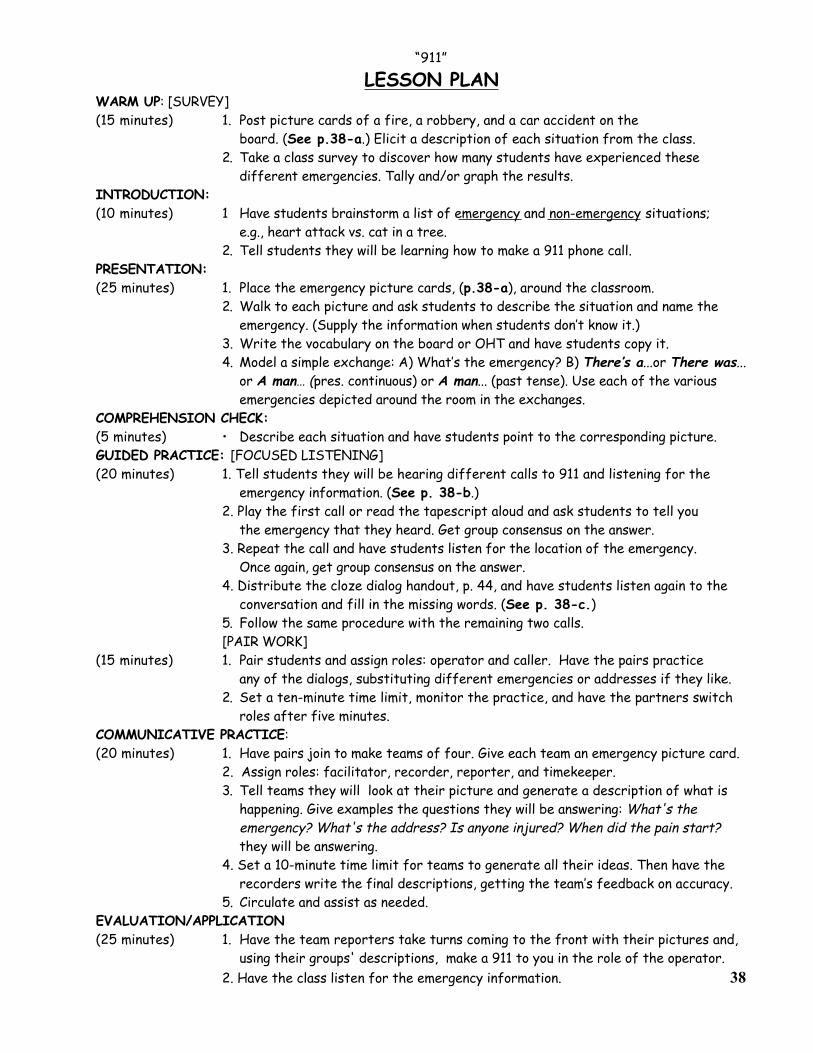
“911”
LESSON PLANWARM UP: [SURVEY](15 minutes) 1. Post picture cards of a fire, a robbery, and a car accident on the
board. (See p.38-a.) Elicit a description of each situation from the class.2. Take a class survey to discover how many students have experienced these
different emergencies. Tally and/or graph the results.INTRODUCTION:(10 minutes) 1 Have students brainstorm a list of emergency and non-emergency situations;
e.g., heart attack vs. cat in a tree.2. Tell students they will be learning how to make a 911 phone call.
PRESENTATION:(25 minutes) 1. Place the emergency picture cards, (p.38-a), around the classroom.
2. Walk to each picture and ask students to describe the situation and name the emergency. (Supply the information when students don’t know it.)
3. Write the vocabulary on the board or OHT and have students copy it.4. Model a simple exchange: A) What’s the emergency? B) There’s a...or There was...
or A man… (pres. continuous) or A man... (past tense). Use each of the variousemergencies depicted around the room in the exchanges.
COMPREHENSION CHECK:(5 minutes) • Describe each situation and have students point to the corresponding picture.GUIDED PRACTICE: [FOCUSED LISTENING](20 minutes) 1. Tell students they will be hearing different calls to 911 and listening for the
emergency information. (See p. 38-b.)2. Play the first call or read the tapescript aloud and ask students to tell you
the emergency that they heard. Get group consensus on the answer.3. Repeat the call and have students listen for the location of the emergency.
Once again, get group consensus on the answer.4. Distribute the cloze dialog handout, p. 44, and have students listen again to the
conversation and fill in the missing words. (See p. 38-c.)5. Follow the same procedure with the remaining two calls.[PAIR WORK]
(15 minutes) 1. Pair students and assign roles: operator and caller. Have the pairs practiceany of the dialogs, substituting different emergencies or addresses if they like.
2. Set a ten-minute time limit, monitor the practice, and have the partners switchroles after five minutes.
COMMUNICATIVE PRACTICE:(20 minutes) 1. Have pairs join to make teams of four. Give each team an emergency picture card.
2. Assign roles: facilitator, recorder, reporter, and timekeeper.3. Tell teams they will look at their picture and generate a description of what is
happening. Give examples the questions they will be answering: What's theemergency? What's the address? Is anyone injured? When did the pain start?
they will be answering.4. Set a 10-minute time limit for teams to generate all their ideas. Then have the
recorders write the final descriptions, getting the team’s feedback on accuracy.5. Circulate and assist as needed.
EVALUATION/APPLICATION(25 minutes) 1. Have the team reporters take turns coming to the front with their pictures and,
using their groups' descriptions, make a 911 to you in the role of the operator.2. Have the class listen for the emergency information. 38
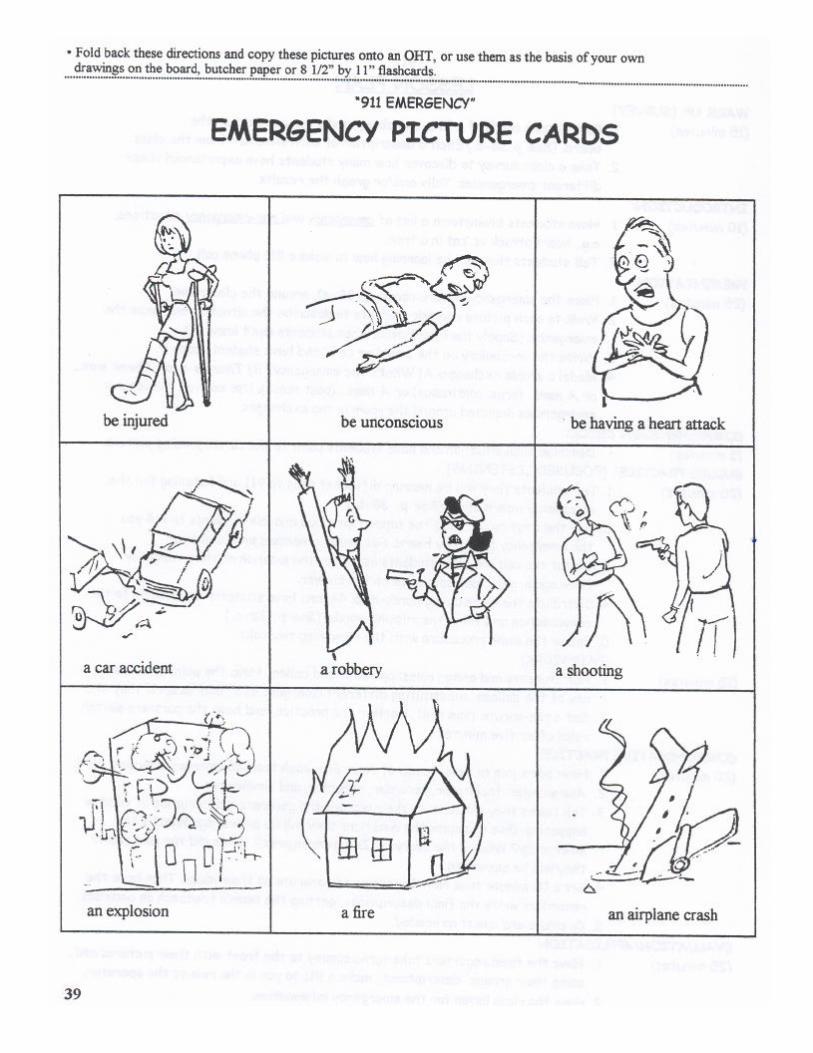
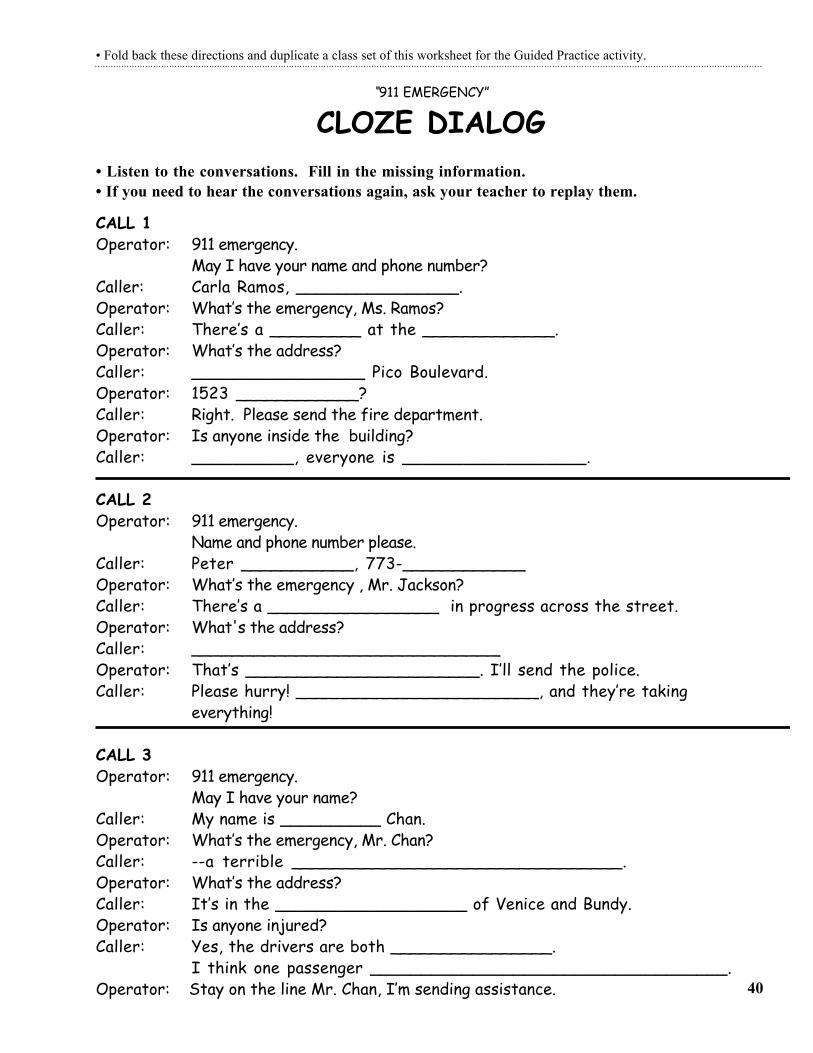
• Fold back these directions and duplicate a class set of this worksheet for the Guided Practice activity.
“911 EMERGENCY”
CLOZE DIALOG• Listen to the conversations. Fill in the missing information.• If you need to hear the conversations again, ask your teacher to replay them.
CALL 1Operator: 911 emergency.
May I have your name and phone number?Caller: Carla Ramos, ________________.Operator: What’s the emergency, Ms. Ramos?Caller: There’s a _________ at the _____________.Operator: What’s the address?Caller: _________________ Pico Boulevard.Operator: 1523 ____________?Caller: Right. Please send the fire department.Operator: Is anyone inside the building?Caller: __________, everyone is __________________.
CALL 2Operator: 911 emergency.
Name and phone number please.Caller: Peter ___________, 773-____________Operator: What’s the emergency , Mr. Jackson?Caller: There’s a _________________ in progress across the street.Operator: What's the address?Caller: _____________________________Operator: That’s _______________________. I’ll send the police.Caller: Please hurry! ________________________, and they’re taking
everything!
CALL 3Operator: 911 emergency.
May I have your name?Caller: My name is __________ Chan.Operator: What’s the emergency, Mr. Chan?Caller: --a terrible ________________________________.Operator: What’s the address?Caller: It’s in the ___________________ of Venice and Bundy.Operator: Is anyone injured?Caller: Yes, the drivers are both ________________.
I think one passenger ___________________________________.Operator: Stay on the line Mr. Chan, I’m sending assistance. 40
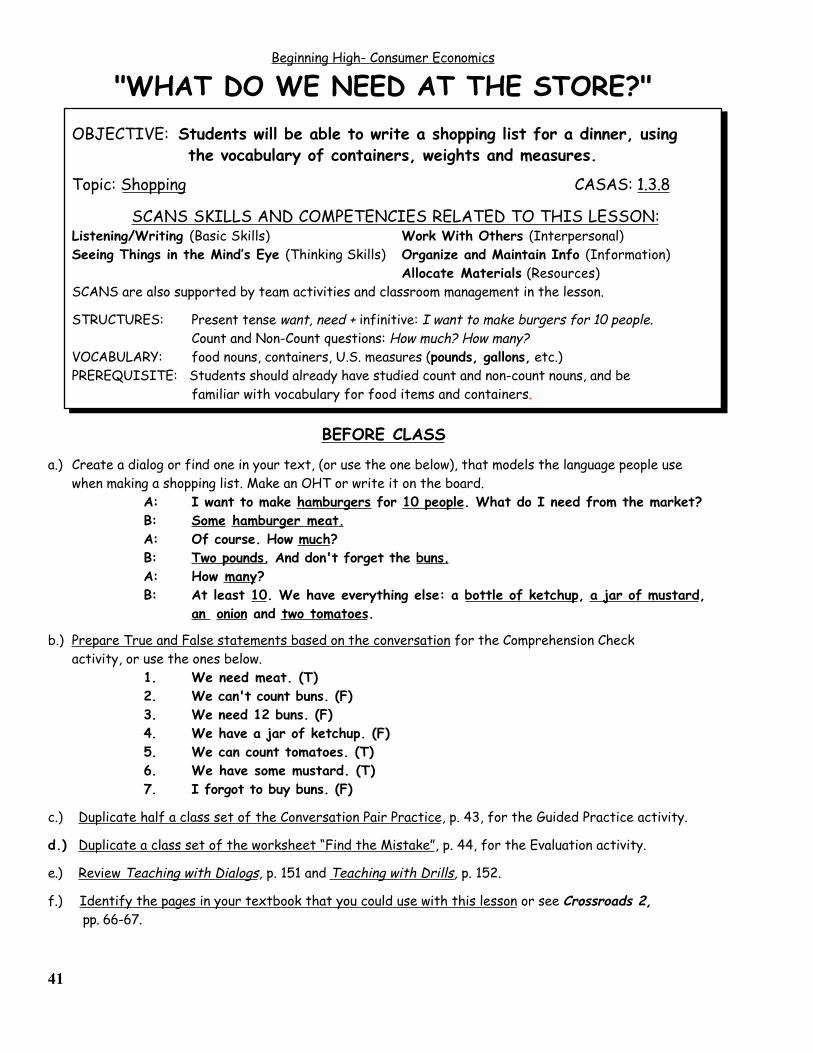
Beginning High- Consumer Economics
"WHAT DO WE NEED AT THE STORE?"OBJECTIVE: Students will be able to write a shopping list for a dinner, using
the vocabulary of containers, weights and measures.
Topic: Shopping CASAS: 1.3.8
SCANS SKILLS AND COMPETENCIES RELATED TO THIS LESSON:Listening/Writing (Basic Skills) Work With Others (Interpersonal)Seeing Things in the Mind’s Eye (Thinking Skills) Organize and Maintain Info (Information)
Allocate Materials (Resources)SCANS are also supported by team activities and classroom management in the lesson.
STRUCTURES: Present tense want, need + infinitive: I want to make burgers for 10 people. Count and Non-Count questions: How much? How many?
VOCABULARY: food nouns, containers, U.S. measures (pounds, gallons, etc.)PREREQUISITE: Students should already have studied count and non-count nouns, and be
familiar with vocabulary for food items and containers.
BEFORE CLASS
a.) Create a dialog or find one in your text, (or use the one below), that models the language people use when making a shopping list. Make an OHT or write it on the board.
A: I want to make hamburgers for 10 people. What do I need from the market?B: Some hamburger meat.A: Of course. How much?B: Two pounds. And don't forget the buns.A: How many?B: At least 10. We have everything else: a bottle of ketchup, a jar of mustard,
an onion and two tomatoes.
b.) Prepare True and False statements based on the conversation for the Comprehension Check activity, or use the ones below.
1. We need meat. (T)2. We can't count buns. (F)3. We need 12 buns. (F)4. We have a jar of ketchup. (F)5. We can count tomatoes. (T)6. We have some mustard. (T)7. I forgot to buy buns. (F)
c.) Duplicate half a class set of the Conversation Pair Practice, p. 43, for the Guided Practice activity.
d.) Duplicate a class set of the worksheet “Find the Mistake”, p. 44, for the Evaluation activity.
e.) Review Teaching with Dialogs, p. 151 and Teaching with Drills, p. 152.
f.) Identify the pages in your textbook that you could use with this lesson or see Crossroads 2, pp. 66-67.
41
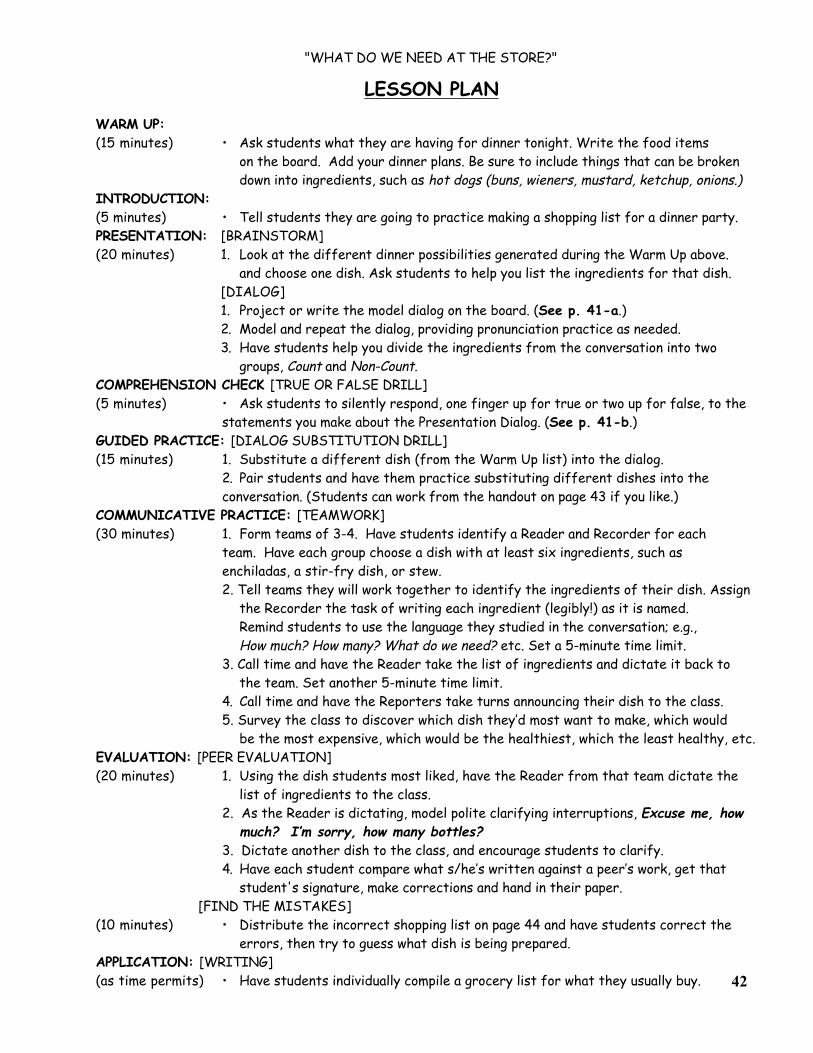
"WHAT DO WE NEED AT THE STORE?"
LESSON PLAN
WARM UP:(15 minutes) • Ask students what they are having for dinner tonight. Write the food items
on the board. Add your dinner plans. Be sure to include things that can be brokendown into ingredients, such as hot dogs (buns, wieners, mustard, ketchup, onions.)
INTRODUCTION:(5 minutes) • Tell students they are going to practice making a shopping list for a dinner party.PRESENTATION: [BRAINSTORM](20 minutes) 1. Look at the different dinner possibilities generated during the Warm Up above.
and choose one dish. Ask students to help you list the ingredients for that dish.[DIALOG]1. Project or write the model dialog on the board. (See p. 41-a.)2. Model and repeat the dialog, providing pronunciation practice as needed.3. Have students help you divide the ingredients from the conversation into two
groups, Count and Non-Count.COMPREHENSION CHECK [TRUE OR FALSE DRILL](5 minutes) • Ask students to silently respond, one finger up for true or two up for false, to the
statements you make about the Presentation Dialog. (See p. 41-b.)GUIDED PRACTICE: [DIALOG SUBSTITUTION DRILL](15 minutes) 1. Substitute a different dish (from the Warm Up list) into the dialog.
2. Pair students and have them practice substituting different dishes into the conversation. (Students can work from the handout on page 43 if you like.)
COMMUNICATIVE PRACTICE: [TEAMWORK](30 minutes) 1. Form teams of 3-4. Have students identify a Reader and Recorder for each
team. Have each group choose a dish with at least six ingredients, such as enchiladas, a stir-fry dish, or stew.2. Tell teams they will work together to identify the ingredients of their dish. Assign
the Recorder the task of writing each ingredient (legibly!) as it is named.Remind students to use the language they studied in the conversation; e.g.,How much? How many? What do we need? etc. Set a 5-minute time limit.
3. Call time and have the Reader take the list of ingredients and dictate it back to the team. Set another 5-minute time limit.
4. Call time and have the Reporters take turns announcing their dish to the class.5. Survey the class to discover which dish they’d most want to make, which would
be the most expensive, which would be the healthiest, which the least healthy, etc.EVALUATION: [PEER EVALUATION](20 minutes) 1. Using the dish students most liked, have the Reader from that team dictate the
list of ingredients to the class.2. As the Reader is dictating, model polite clarifying interruptions, Excuse me, how
much? I’m sorry, how many bottles?3. Dictate another dish to the class, and encourage students to clarify.4. Have each student compare what s/he’s written against a peer’s work, get that
student's signature, make corrections and hand in their paper.[FIND THE MISTAKES]
(10 minutes) • Distribute the incorrect shopping list on page 44 and have students correct the errors, then try to guess what dish is being prepared.
APPLICATION: [WRITING](as time permits) • Have students individually compile a grocery list for what they usually buy. 42
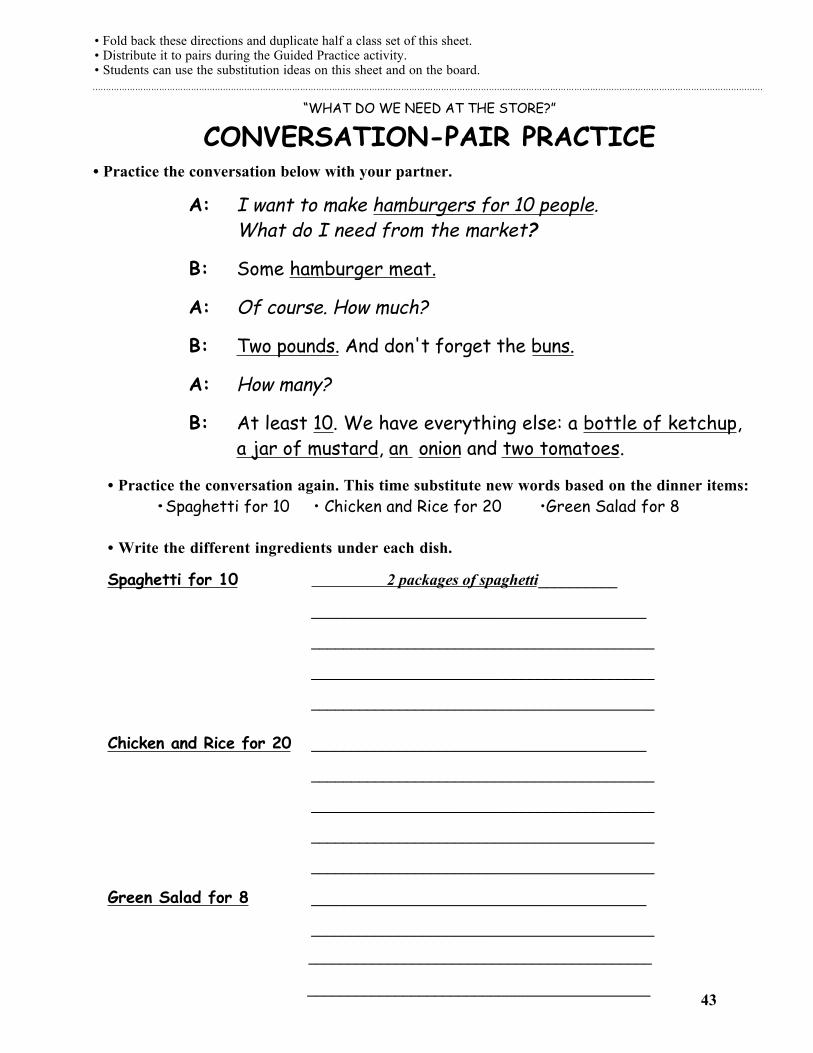
• Fold back these directions and duplicate half a class set of this sheet.• Distribute it to pairs during the Guided Practice activity.• Students can use the substitution ideas on this sheet and on the board.
“WHAT DO WE NEED AT THE STORE?”
CONVERSATION-PAIR PRACTICE• Practice the conversation below with your partner.
A: I want to make hamburgers for 10 people.What do I need from the market?
B: Some hamburger meat.
A: Of course. How much?
B: Two pounds. And don't forget the buns.
A: How many?
B: At least 10. We have everything else: a bottle of ketchup,a jar of mustard, an onion and two tomatoes.
• Practice the conversation again. This time substitute new words based on the dinner items:•Spaghetti for 10 • Chicken and Rice for 20 •Green Salad for 8
• Write the different ingredients under each dish.
Spaghetti for 10 2 packages of spaghetti__________
__________________________________________
___________________________________________
___________________________________________
___________________________________________
Chicken and Rice for 20 __________________________________________
___________________________________________
___________________________________________
___________________________________________
___________________________________________
Green Salad for 8 __________________________________________
___________________________________________
___________________________________________
43___________________________________________
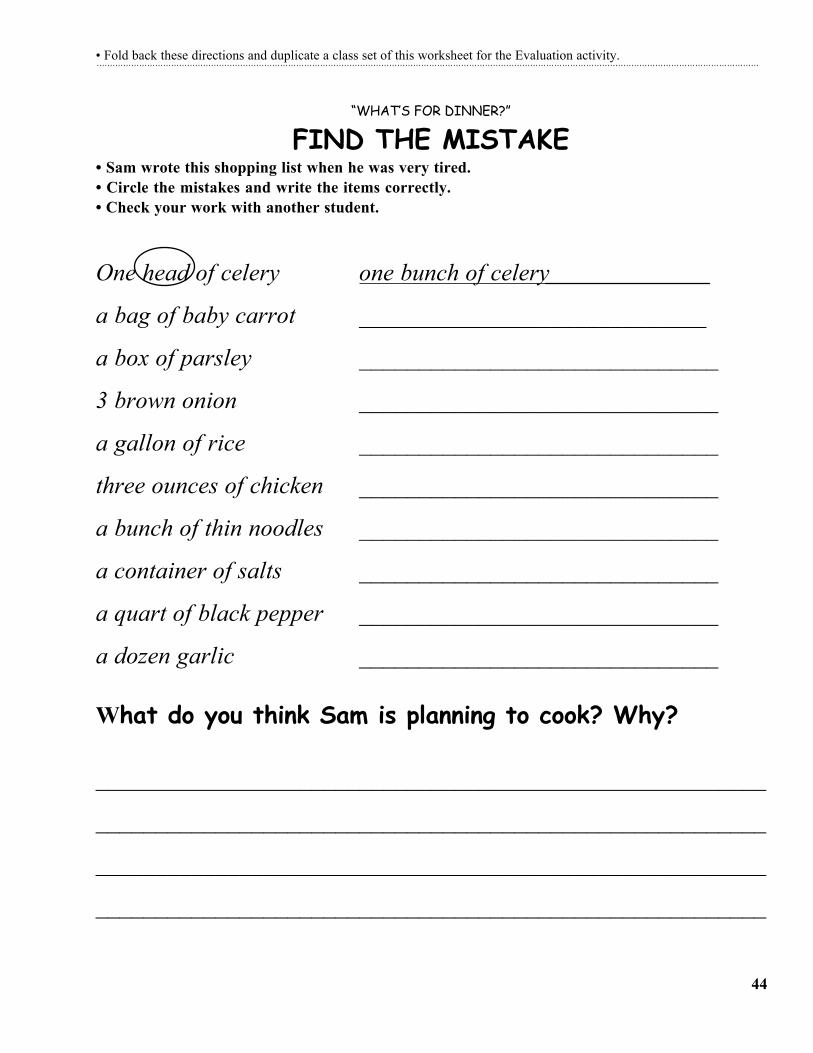
• Fold back these directions and duplicate a class set of this worksheet for the Evaluation activity.
“WHAT’S FOR DINNER?”
FIND THE MISTAKE• Sam wrote this shopping list when he was very tired.• Circle the mistakes and write the items correctly.• Check your work with another student.
One head of celery one bunch of celery
a bag of baby carrot _____________________________
a box of parsley ______________________________
3 brown onion ______________________________
a gallon of rice ______________________________
three ounces of chicken ______________________________
a bunch of thin noodles ______________________________
a container of salts ______________________________
a quart of black pepper ______________________________
a dozen garlic ______________________________
What do you think Sam is planning to cook? Why?
________________________________________________________
________________________________________________________
________________________________________________________
________________________________________________________
44
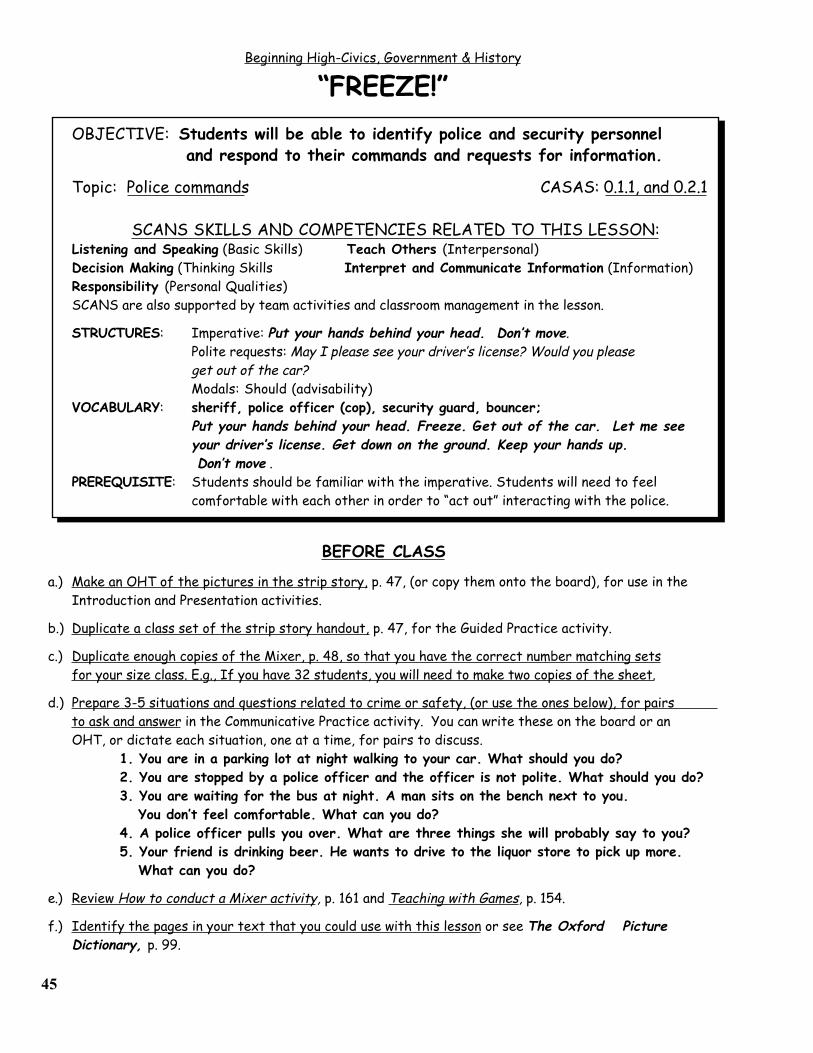
45
Beginning High-Civics, Government & History
“FREEZE!”OBJECTIVE: Students will be able to identify police and security personnel
and respond to their commands and requests for information.
Topic: Police commands CASAS: 0.1.1, and 0.2.1
SCANS SKILLS AND COMPETENCIES RELATED TO THIS LESSON:Listening and Speaking (Basic Skills) Teach Others (Interpersonal)Decision Making (Thinking Skills Interpret and Communicate Information (Information)Responsibility (Personal Qualities)SCANS are also supported by team activities and classroom management in the lesson.
STRUCTURES: Imperative: Put your hands behind your head. Don’t move.Polite requests: May I please see your driver’s license? Would you pleaseget out of the car?Modals: Should (advisability)
VOCABULARY: sheriff, police officer (cop), security guard, bouncer;Put your hands behind your head. Freeze. Get out of the car. Let me see your driver’s license. Get down on the ground. Keep your hands up. Don’t move .
PREREQUISITE: Students should be familiar with the imperative. Students will need to feel comfortable with each other in order to “act out” interacting with the police.
BEFORE CLASS
a.) Make an OHT of the pictures in the strip story, p. 47, (or copy them onto the board), for use in theIntroduction and Presentation activities.
b.) Duplicate a class set of the strip story handout, p. 47, for the Guided Practice activity.
c.) Duplicate enough copies of the Mixer, p. 48, so that you have the correct number matching setsfor your size class. E.g., If you have 32 students, you will need to make two copies of the sheet.
d.) Prepare 3-5 situations and questions related to crime or safety, (or use the ones below), for pairs to ask and answer in the Communicative Practice activity. You can write these on the board or anOHT, or dictate each situation, one at a time, for pairs to discuss.
1. You are in a parking lot at night walking to your car. What should you do?2. You are stopped by a police officer and the officer is not polite. What should you do?3. You are waiting for the bus at night. A man sits on the bench next to you.
You don’t feel comfortable. What can you do?4. A police officer pulls you over. What are three things she will probably say to you?5. Your friend is drinking beer. He wants to drive to the liquor store to pick up more. What can you do?
e.) Review How to conduct a Mixer activity, p. 161 and Teaching with Games, p. 154.
f.) Identify the pages in your text that you could use with this lesson or see The Oxford Picture Dictionary, p. 99.
46
“FREEZE” LESSON PLAN
WARM UP: [ROUNDTABLE BRAINSTORM](10 minutes) • Have students brainstorm the different occupations that protect private
citizens, e.g. police officer, sheriff, detective, security officer, soldier, etc. [SURVEY](15 minutes) • Survey the class to find out: a) how many know a law enforcement officer,
b) how many have been stopped by an officer, and c) how many would like tohave that kind of job. Chart the results on the board for students to see.
INTRODUCTION:(5-10 minutes) • Ask students to tell you why it’s important to understand what a police officer
says or asks for.PRESENTATION: [TPR](20 minutes) 1. Show the class the strip story on p. 47. (See p.45-a.) Talk about each
picture. Elicit from students what they think the police officer is saying and doing.2. Use TPR to teach the police commands such as Freeze! Don’t move! Put your
hands up on the wall, etc. (See Vocabulary on p. 45.)COMPREHENSION CHECK: [LISTEN AND POINT](5-10 minutes) 1. Distribute the strip story on page 47. (See p. 45-b.)
2. Have students listen while you describe a picture. Have the students point to the picture that matches your description. e.g. In this picture, he’s saying, FREEZE!
3. Describe each picture (out of order) as you circulate to check comprehension.
GUIDED PRACTICE: [DICTATION](20 minutes) 1. Dictate the commands for students to write in on their strip story handouts
( p.47)2. Write the commands on the board or OHT, being sure to make mistakes and
eliciting correction from the students.[PAIR WORK]
(10 minutes) 1. Pair students and assign roles, police officer and pedestrian.2. Have the police officers use the handouts as scripts to practice giving the
commands. Have the drivers act out (“obey”) each command. Set a time limit.3. Monitor the practice, call time and have the pairs switch roles.
COMMUNICATIVE PRACTICE: [MIXER](10 minutes) 1. Tell students they will try to find their match by asking and answering the kinds of
questions a police officer might ask.2. Distribute the information mixer cards, p.48, and model how students will ask
a question, (Where are you going?) or give information (I’m going to school.)Point out that student 1 (the police officer) must always start the conversationwith his or her question.
3. Demonstrate how two non-matches can communicate: Student 1: (reading from card) Where are you going? Student 2: (not reading from card) --to the market. (reading from card), Here’s my car registration.Student 1: (not reading) Well, that’s good. Have a good day.
(15 minutes) [PAIR WORK]1. Once students have matched up, have them sit in their pairs and discuss 3-5
different crime or safety-related situations and questions. (See p. 45-d.)2. Elicit different pairs’ answers to the questions.
EVALUATION: (15 minutes) • Give groups of students commands from the lesson and note their responses.
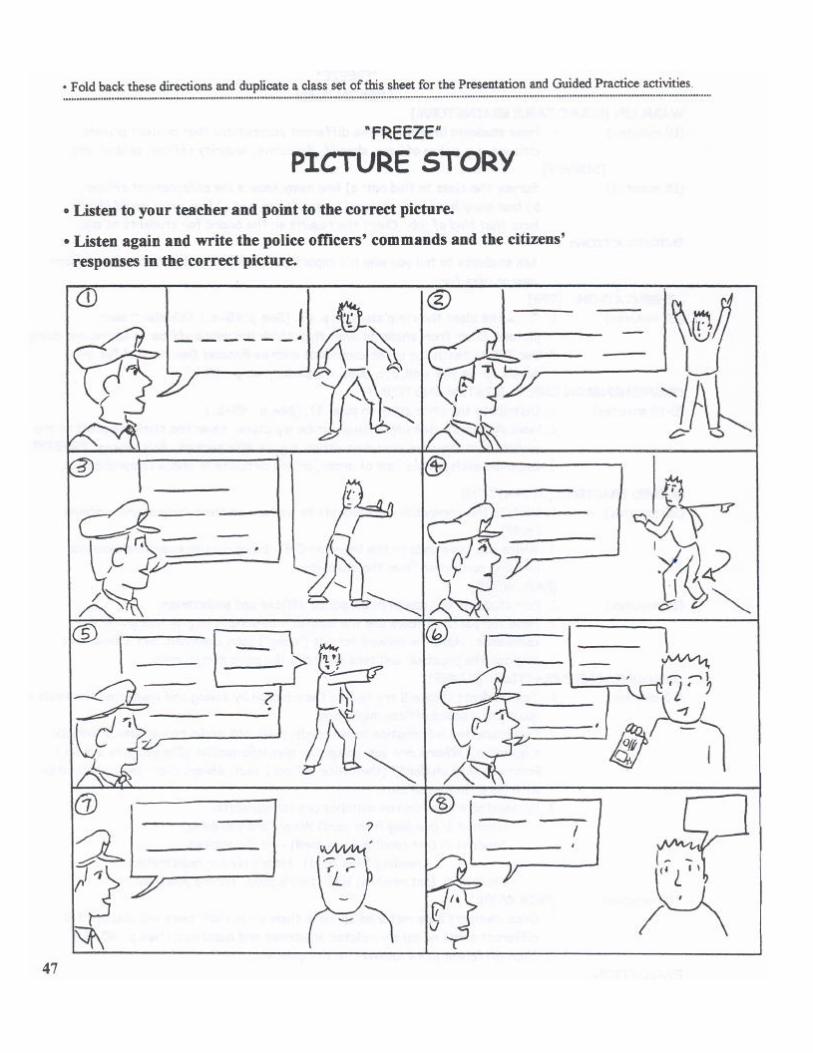
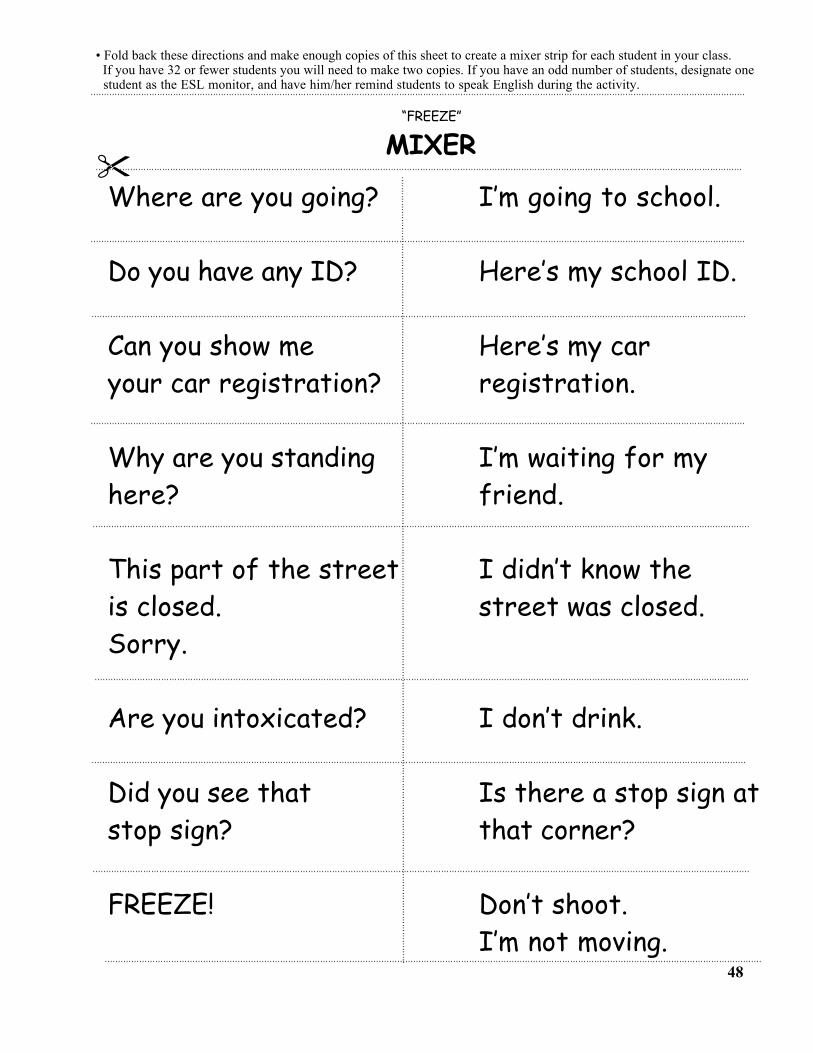
• Fold back these directions and make enough copies of this sheet to create a mixer strip for each student in your class. If you have 32 or fewer students you will need to make two copies. If you have an odd number of students, designate one student as the ESL monitor, and have him/her remind students to speak English during the activity.
“FREEZE”
MIXER
Where are you going? I’m going to school.
Do you have any ID? Here’s my school ID.
Can you show me Here’s my caryour car registration? registration.
Why are you standing I’m waiting for myhere? friend.
This part of the street I didn’t know theis closed. street was closed.Sorry.
Are you intoxicated? I don’t drink.
Did you see that Is there a stop sign atstop sign? that corner?
FREEZE! Don’t shoot.I’m not moving.
48
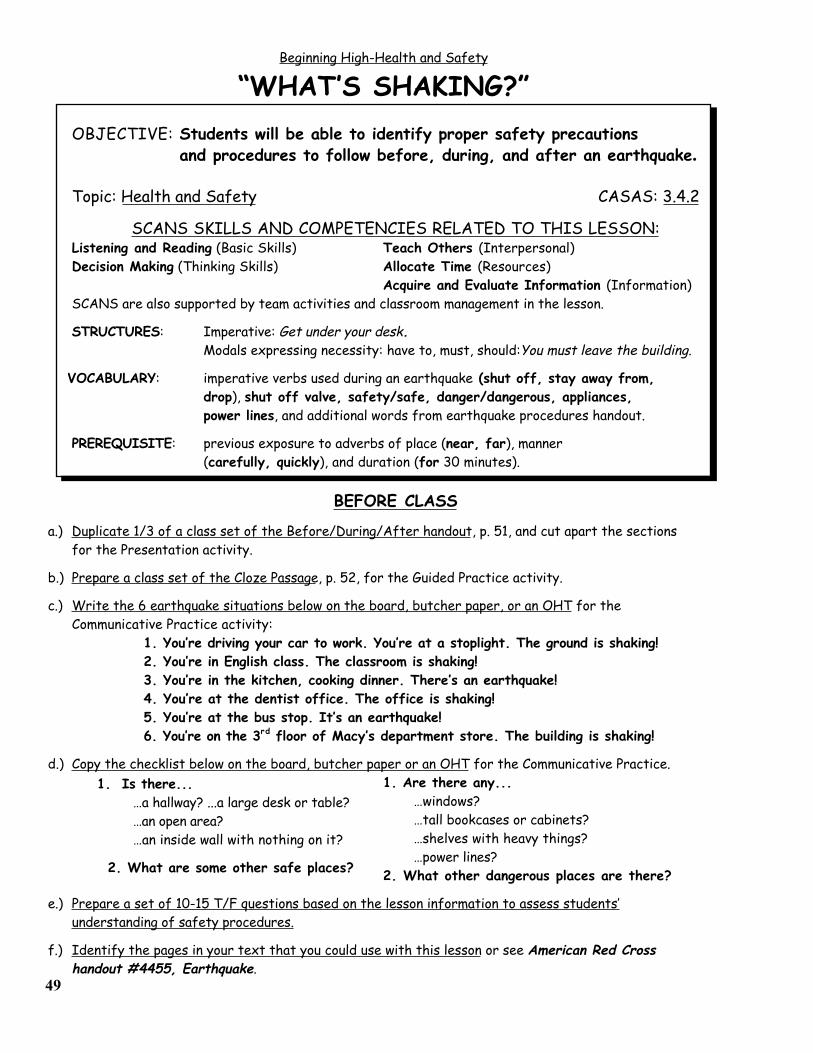
Beginning High-Health and Safety
“WHAT’S SHAKING?”OBJECTIVE: Students will be able to identify proper safety precautions
and procedures to follow before, during, and after an earthquake.
Topic: Health and Safety CASAS: 3.4.2
SCANS SKILLS AND COMPETENCIES RELATED TO THIS LESSON:Listening and Reading (Basic Skills) Teach Others (Interpersonal)Decision Making (Thinking Skills) Allocate Time (Resources)
Acquire and Evaluate Information (Information)SCANS are also supported by team activities and classroom management in the lesson.
STRUCTURES: Imperative: Get under your desk.Modals expressing necessity: have to, must, should:You must leave the building.
VOCABULARY: imperative verbs used during an earthquake (shut off, stay away from,drop), shut off valve, safety/safe, danger/dangerous, appliances, power lines, and additional words from earthquake procedures handout.
PREREQUISITE: previous exposure to adverbs of place (near, far), manner(carefully, quickly), and duration (for 30 minutes).
BEFORE CLASS
a.) Duplicate 1/3 of a class set of the Before/During/After handout, p. 51, and cut apart the sectionsfor the Presentation activity.
b.) Prepare a class set of the Cloze Passage, p. 52, for the Guided Practice activity.
c.) Write the 6 earthquake situations below on the board, butcher paper, or an OHT for theCommunicative Practice activity:
1. You’re driving your car to work. You’re at a stoplight. The ground is shaking!2. You’re in English class. The classroom is shaking!3. You’re in the kitchen, cooking dinner. There’s an earthquake!4. You’re at the dentist office. The office is shaking!5. You’re at the bus stop. It’s an earthquake!6. You’re on the 3rd floor of Macy’s department store. The building is shaking!
d.) Copy the checklist below on the board, butcher paper or an OHT for the Communicative Practice.1. Are there any...
…windows? …tall bookcases or cabinets?
…shelves with heavy things? …power lines? 2. What other dangerous places are there?
e.) Prepare a set of 10-15 T/F questions based on the lesson information to assess students’understanding of safety procedures.
f.) Identify the pages in your text that you could use with this lesson or see American Red Crosshandout #4455, Earthquake.
1. Is there... …a hallway? ...a large desk or table? …an open area? …an inside wall with nothing on it?
2. What are some other safe places?
49
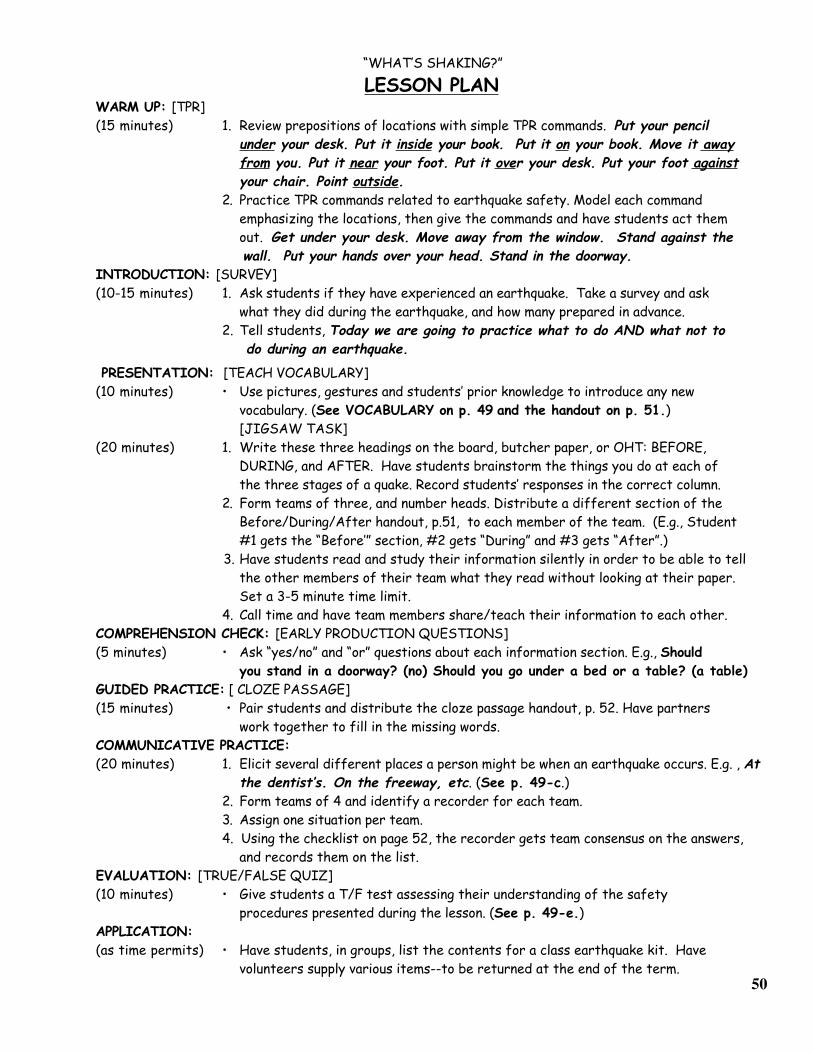
“WHAT’S SHAKING?”
LESSON PLANWARM UP: [TPR](15 minutes) 1. Review prepositions of locations with simple TPR commands. Put your pencil
under your desk. Put it inside your book. Put it on your book. Move it away from you. Put it near your foot. Put it over your desk. Put your foot against
your chair. Point outside. 2. Practice TPR commands related to earthquake safety. Model each command
emphasizing the locations, then give the commands and have students act them out. Get under your desk. Move away from the window. Stand against the
wall. Put your hands over your head. Stand in the doorway.INTRODUCTION: [SURVEY](10-15 minutes) 1. Ask students if they have experienced an earthquake. Take a survey and ask
what they did during the earthquake, and how many prepared in advance.2. Tell students, Today we are going to practice what to do AND what not to
do during an earthquake.
PRESENTATION: [TEACH VOCABULARY](10 minutes) • Use pictures, gestures and students’ prior knowledge to introduce any new
vocabulary. (See VOCABULARY on p. 49 and the handout on p. 51.)[JIGSAW TASK]
(20 minutes) 1. Write these three headings on the board, butcher paper, or OHT: BEFORE, DURING, and AFTER. Have students brainstorm the things you do at each of the three stages of a quake. Record students’ responses in the correct column.
2. Form teams of three, and number heads. Distribute a different section of the Before/During/After handout, p.51, to each member of the team. (E.g., Student #1 gets the “Before’” section, #2 gets “During” and #3 gets “After”.)
3. Have students read and study their information silently in order to be able to tellthe other members of their team what they read without looking at their paper.Set a 3-5 minute time limit.
4. Call time and have team members share/teach their information to each other.COMPREHENSION CHECK: [EARLY PRODUCTION QUESTIONS](5 minutes) • Ask “yes/no” and “or” questions about each information section. E.g., Should
you stand in a doorway? (no) Should you go under a bed or a table? (a table)GUIDED PRACTICE: [ CLOZE PASSAGE](15 minutes) • Pair students and distribute the cloze passage handout, p. 52. Have partners
work together to fill in the missing words.COMMUNICATIVE PRACTICE:(20 minutes) 1. Elicit several different places a person might be when an earthquake occurs. E.g. , At
the dentist’s. On the freeway, etc. (See p. 49-c.)2. Form teams of 4 and identify a recorder for each team.3. Assign one situation per team.4. Using the checklist on page 52, the recorder gets team consensus on the answers,
and records them on the list.EVALUATION: [TRUE/FALSE QUIZ](10 minutes) • Give students a T/F test assessing their understanding of the safety
procedures presented during the lesson. (See p. 49-e.)APPLICATION:(as time permits) • Have students, in groups, list the contents for a class earthquake kit. Have
volunteers supply various items--to be returned at the end of the term.50
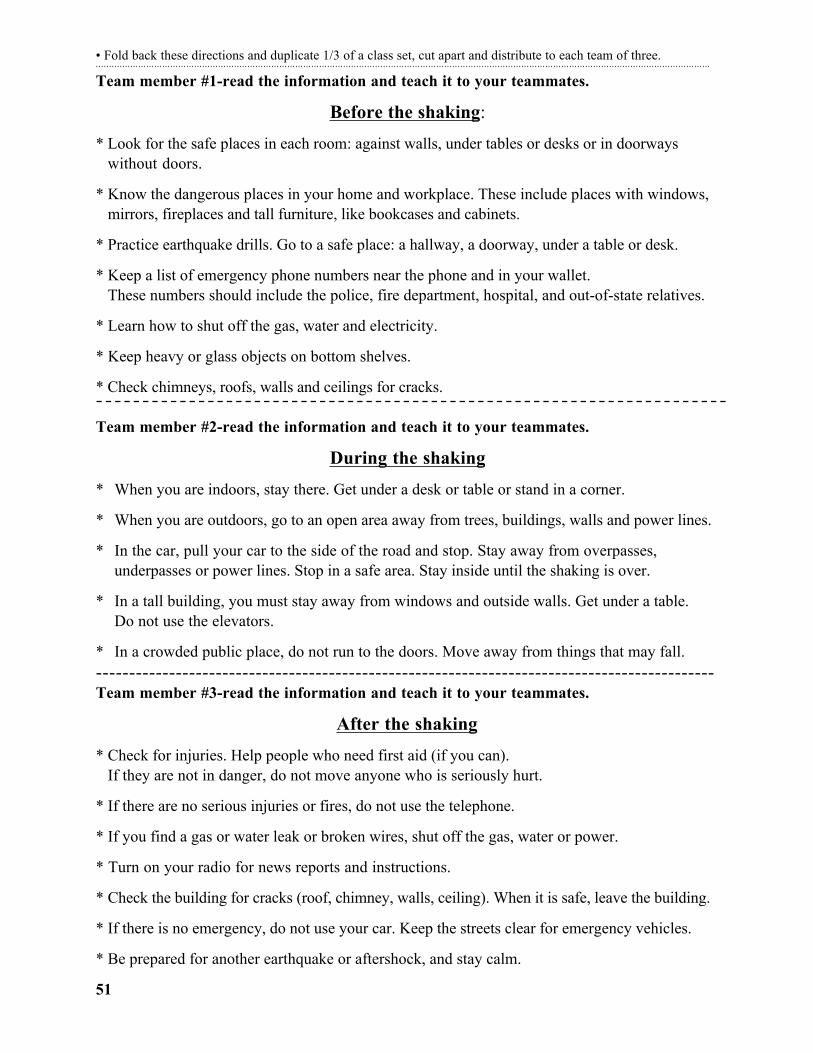
• Fold back these directions and duplicate 1/3 of a class set, cut apart and distribute to each team of three.
Team member #1-read the information and teach it to your teammates.
Before the shaking:
* Look for the safe places in each room: against walls, under tables or desks or in doorwayswithout doors.
* Know the dangerous places in your home and workplace. These include places with windows,mirrors, fireplaces and tall furniture, like bookcases and cabinets.
* Practice earthquake drills. Go to a safe place: a hallway, a doorway, under a table or desk.
* Keep a list of emergency phone numbers near the phone and in your wallet.These numbers should include the police, fire department, hospital, and out-of-state relatives.
* Learn how to shut off the gas, water and electricity.
* Keep heavy or glass objects on bottom shelves.
* Check chimneys, roofs, walls and ceilings for cracks.
Team member #2-read the information and teach it to your teammates.
During the shaking
* When you are indoors, stay there. Get under a desk or table or stand in a corner.
* When you are outdoors, go to an open area away from trees, buildings, walls and power lines.
* In the car, pull your car to the side of the road and stop. Stay away from overpasses,underpasses or power lines. Stop in a safe area. Stay inside until the shaking is over.
* In a tall building, you must stay away from windows and outside walls. Get under a table.Do not use the elevators.
* In a crowded public place, do not run to the doors. Move away from things that may fall.---------------------------------------------------------------------------------------------Team member #3-read the information and teach it to your teammates.
After the shaking
* Check for injuries. Help people who need first aid (if you can).If they are not in danger, do not move anyone who is seriously hurt.
* If there are no serious injuries or fires, do not use the telephone.
* If you find a gas or water leak or broken wires, shut off the gas, water or power.
* Turn on your radio for news reports and instructions.
* Check the building for cracks (roof, chimney, walls, ceiling). When it is safe, leave the building.
* If there is no emergency, do not use your car. Keep the streets clear for emergency vehicles.
* Be prepared for another earthquake or aftershock, and stay calm.
51
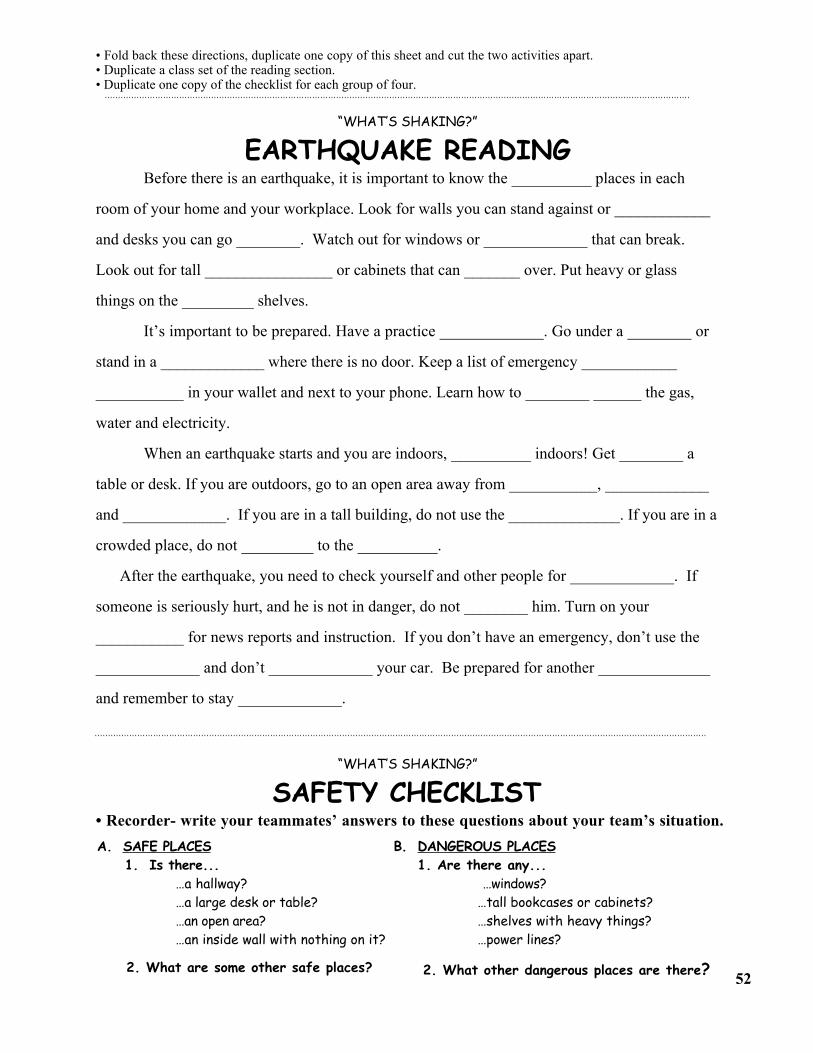
• Fold back these directions, duplicate one copy of this sheet and cut the two activities apart.• Duplicate a class set of the reading section.• Duplicate one copy of the checklist for each group of four.
“WHAT’S SHAKING?”
EARTHQUAKE READINGBefore there is an earthquake, it is important to know the __________ places in each
room of your home and your workplace. Look for walls you can stand against or ____________
and desks you can go ________. Watch out for windows or _____________ that can break.
Look out for tall ________________ or cabinets that can _______ over. Put heavy or glass
things on the _________ shelves.
It’s important to be prepared. Have a practice _____________. Go under a ________ or
stand in a _____________ where there is no door. Keep a list of emergency ____________
___________ in your wallet and next to your phone. Learn how to ________ ______ the gas,
water and electricity.
When an earthquake starts and you are indoors, __________ indoors! Get ________ a
table or desk. If you are outdoors, go to an open area away from ___________, _____________
and _____________. If you are in a tall building, do not use the ______________. If you are in a
crowded place, do not _________ to the __________.
After the earthquake, you need to check yourself and other people for _____________. If
someone is seriously hurt, and he is not in danger, do not ________ him. Turn on your
___________ for news reports and instruction. If you don’t have an emergency, don’t use the
_____________ and don’t _____________ your car. Be prepared for another ______________
and remember to stay _____________.
“WHAT’S SHAKING?”
SAFETY CHECKLIST• Recorder- write your teammates’ answers to these questions about your team’s situation.
A. SAFE PLACES 1. Is there... …a hallway? …a large desk or table? …an open area? …an inside wall with nothing on it?
2. What are some other safe places?
B. DANGEROUS PLACES1. Are there any... …windows?
…tall bookcases or cabinets? …shelves with heavy things?
…power lines?
2. What other dangerous places are there?52
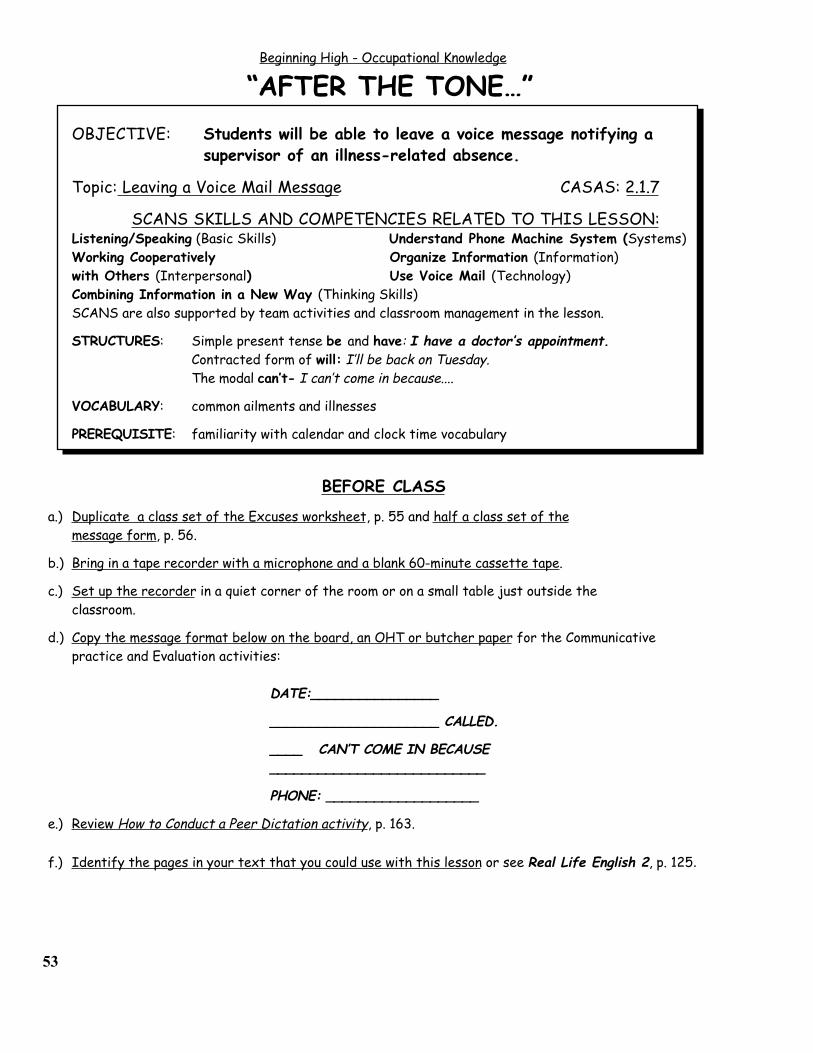
Beginning High - Occupational Knowledge
“AFTER THE TONE…”OBJECTIVE: Students will be able to leave a voice message notifying a
supervisor of an illness-related absence.
Topic: Leaving a Voice Mail Message CASAS: 2.1.7
SCANS SKILLS AND COMPETENCIES RELATED TO THIS LESSON:Listening/Speaking (Basic Skills) Understand Phone Machine System (Systems)Working Cooperatively Organize Information (Information)with Others (Interpersonal) Use Voice Mail (Technology)Combining Information in a New Way (Thinking Skills)
SCANS are also supported by team activities and classroom management in the lesson.
STRUCTURES: Simple present tense be and have: I have a doctor’s appointment.Contracted form of will: I’ll be back on Tuesday.The modal can’t- I can’t come in because....
VOCABULARY: common ailments and illnesses
PREREQUISITE: familiarity with calendar and clock time vocabulary
BEFORE CLASS
a.) Duplicate a class set of the Excuses worksheet, p. 55 and half a class set of the message form, p. 56.
b.) Bring in a tape recorder with a microphone and a blank 60-minute cassette tape.
c.) Set up the recorder in a quiet corner of the room or on a small table just outside the classroom.
d.) Copy the message format below on the board, an OHT or butcher paper for the Communicative practice and Evaluation activities:
DATE:________________
_____________________ CALLED.
____ CAN’T COME IN BECAUSE___________________________
PHONE: ___________________
e.) Review How to Conduct a Peer Dictation activity, p. 163.
f.) Identify the pages in your text that you could use with this lesson or see Real Life English 2, p. 125.
53
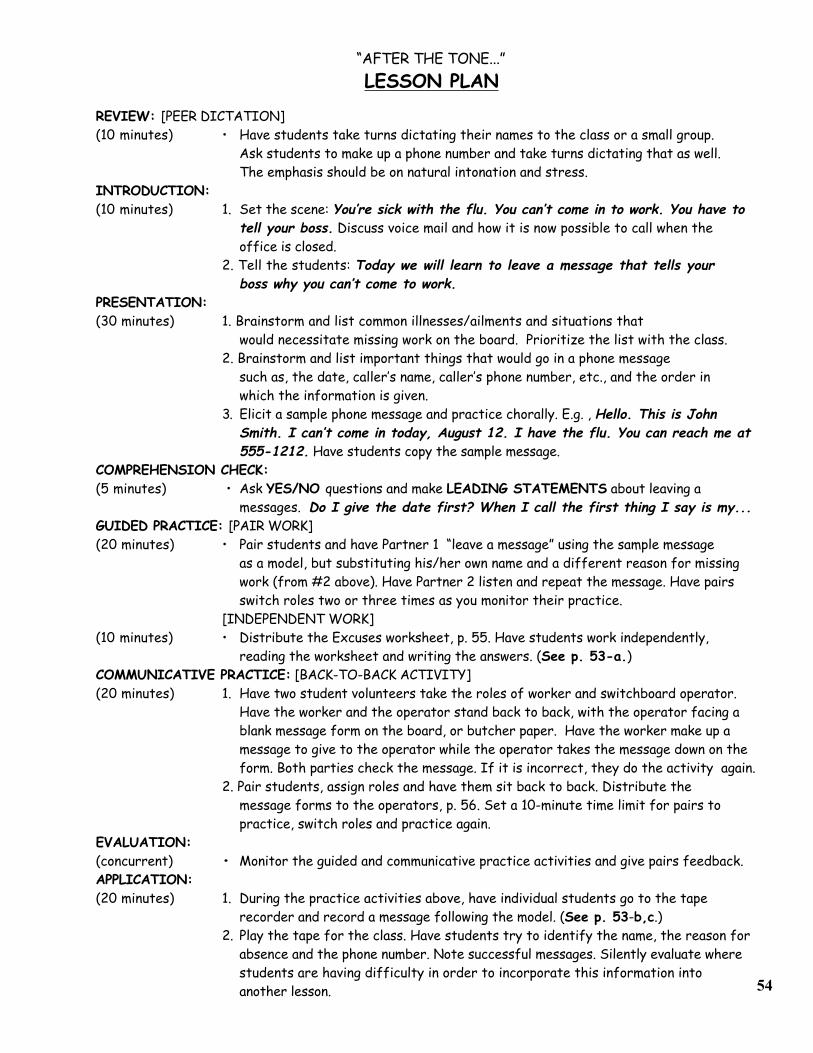
“AFTER THE TONE...”LESSON PLAN
REVIEW: [PEER DICTATION](10 minutes) • Have students take turns dictating their names to the class or a small group.
Ask students to make up a phone number and take turns dictating that as well. The emphasis should be on natural intonation and stress.INTRODUCTION:(10 minutes) 1. Set the scene: You’re sick with the flu. You can’t come in to work. You have to
tell your boss. Discuss voice mail and how it is now possible to call when the office is closed.
2. Tell the students: Today we will learn to leave a message that tells yourboss why you can’t come to work.
PRESENTATION:(30 minutes) 1. Brainstorm and list common illnesses/ailments and situations that
would necessitate missing work on the board. Prioritize the list with the class.2. Brainstorm and list important things that would go in a phone message
such as, the date, caller’s name, caller’s phone number, etc., and the order in which the information is given.
3. Elicit a sample phone message and practice chorally. E.g. , Hello. This is John Smith. I can’t come in today, August 12. I have the flu. You can reach me at555-1212. Have students copy the sample message.
COMPREHENSION CHECK:(5 minutes) • Ask YES/NO questions and make LEADING STATEMENTS about leaving a
messages. Do I give the date first? When I call the first thing I say is my...GUIDED PRACTICE: [PAIR WORK] (20 minutes) • Pair students and have Partner 1 “leave a message” using the sample message
as a model, but substituting his/her own name and a different reason for missing work (from #2 above). Have Partner 2 listen and repeat the message. Have pairs switch roles two or three times as you monitor their practice.
[INDEPENDENT WORK](10 minutes) • Distribute the Excuses worksheet, p. 55. Have students work independently,
reading the worksheet and writing the answers. (See p. 53-a.)COMMUNICATIVE PRACTICE: [BACK-TO-BACK ACTIVITY](20 minutes) 1. Have two student volunteers take the roles of worker and switchboard operator.
Have the worker and the operator stand back to back, with the operator facing a blank message form on the board, or butcher paper. Have the worker make up amessage to give to the operator while the operator takes the message down on theform. Both parties check the message. If it is incorrect, they do the activity again.
2. Pair students, assign roles and have them sit back to back. Distribute the message forms to the operators, p. 56. Set a 10-minute time limit for pairs topractice, switch roles and practice again.
EVALUATION:(concurrent) • Monitor the guided and communicative practice activities and give pairs feedback.APPLICATION:(20 minutes) 1. During the practice activities above, have individual students go to the tape
recorder and record a message following the model. (See p. 53-b,c.)2. Play the tape for the class. Have students try to identify the name, the reason for
absence and the phone number. Note successful messages. Silently evaluate wherestudents are having difficulty in order to incorporate this information intoanother lesson. 54
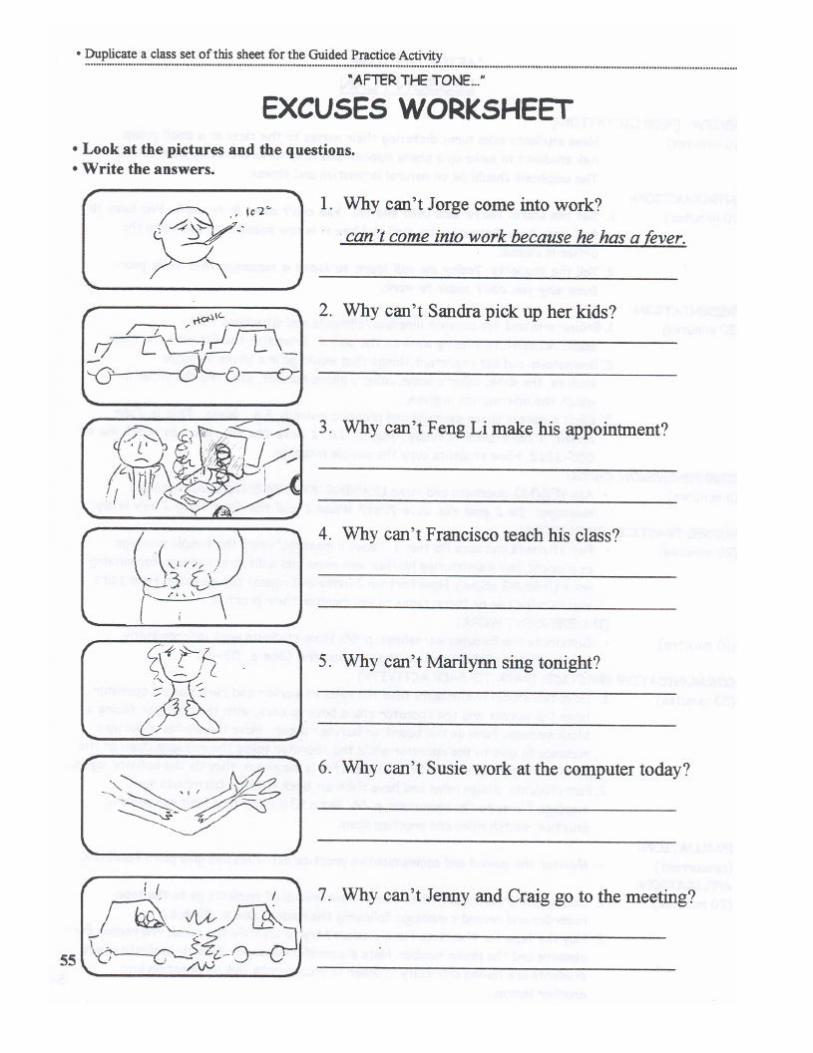
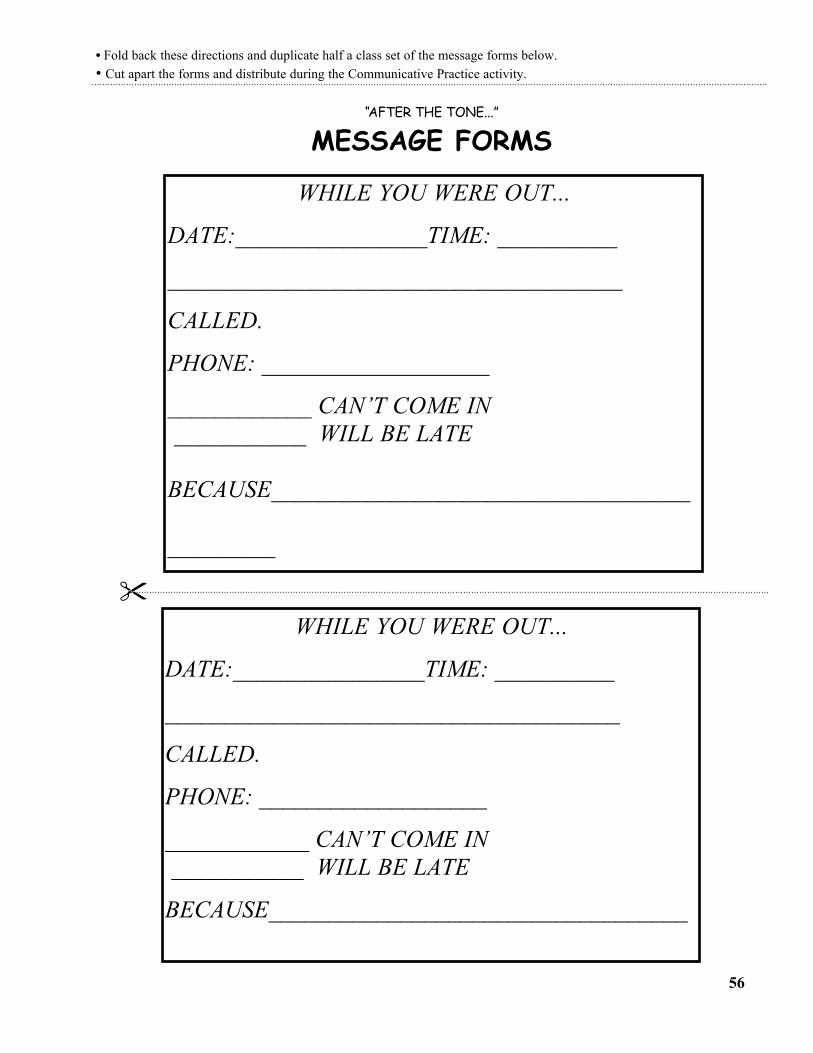
• Fold back these directions and duplicate half a class set of the message forms below.• Cut apart the forms and distribute during the Communicative Practice activity.
“AFTER THE TONE...”
MESSAGE FORMS
WHILE YOU WERE OUT...
DATE:________________TIME: __________
______________________________________
CALLED.
PHONE: ___________________
____________ CAN’T COME IN ___________ WILL BE LATE
BECAUSE___________________________________
_________
____________________________________________
____________WHILE YOU WERE OUT...
DATE:________________TIME: __________
______________________________________
CALLED.
PHONE: ___________________
____________ CAN’T COME IN ___________ WILL BE LATE
BECAUSE___________________________________
_________
____________________________________________
____________
56
57
Beginning High- Learning and Academic Skills
"TELL ME WHAT TO DO AND HOW TO DO IT"OBJECTIVE: Students will be able to read, follow, and teach the steps to
operate a cassette recorder.
Topic: Learning Skills CASAS: 4.5.4
SCANS SKILLS AND COMPETENCIES RELATED TO THIS LESSON:Speaking/Reading (Basic Skills) Teach Others (Interpersonal)Sociability (Personal Qualities) Interpret and Communicate (Information)Seeing Things in the Mind's Eye (Thinking Skills) Monitor and Correct Performance (Systems)SCANS are also supported by team activities and classroom management in the lesson.
STRUCTURES: Imperative Mode: Turn up the volume.Want + Infinitive: I want to hear the song again.
VOCABULARY: overhead projector, cassette player, tape recorder, VCR, play button, rewind button, cue/fast forward, focus knob, switch (n.), plug in, open, turn on, turn off
PREREQUISITE: Students should be familiar with the above structures.
BEFORE CLASS
a.) Bring in a cassette player and a cassette tape. Be sure you can identify the following parts on the player:cord, plug, cassette deck, rewind button, cue/fast forward button, eject button, stop button, volume,counter (if there is one).
b) Prepare a set of TPR commands (or use the ones below) for the Presentation, Comprehension Check and Guided Practice activities.
1. Plug in the cord.2. Press the eject button.3. Put the cassette into the deck.4. Close the cassette deck.5. Press the play button and listen.6. Turn up the volume.7. Press rewind to hear the song again.8. Press fast forward to the hear the end of the song.
c.) Look over the picture on page 59, to see if it matches your cassette player.Change items if needed and/or redraw the picture.
d.) Duplicate a class set of the cassette player picture, p.59, for the Presentation and Guided Practice activities.
e.) Duplicate one set of Sentence Strips, page 60, for every eight students.Cut apart and scramble each set of strips for the Communicative Practice activity.
f.) Make an oversized sentence strip of “ I don’t want to hear that song.” to use in demonstrating theCommunicative Practice activity.
g.) Review Teaching with Total Physical Response, p. 150.
h.) Identify the pages in your textbook that you could use with this lesson or see English ASAP, pp. 34-35.
" TELL ME WHAT TO DO AND HOW TO DO IT "
LESSON PLANWARM UP:(15 minutes) • Bring in a cassette player and name each of the parts. (e.g. This button makes
the tape go backward. It’s the rewind button.) Have student volunteerscome to the front and demonstrate how each part works. Ask other studentvolunteers to write the name of each part on the board. (See p. 57-a.)
INTRODUCTION: [PROBLEM POSING](10 minutes) 1. “Forget” to put a cassette in the player and say, Today we are going to listen to
a popular song. Press the play button and when nothing happens, say, Something’s wrong here. It's not working. Can anyone help? Elicit the problem.
2. Talk about the importance of following a sequence of steps on the job.PRESENTATION: [TPR](25 minutes) 1. Present the TPR sequence from page 57-b. Perform the commands as you say them.
2. Distribute the paper “cassette players” (See p. 57-c,d.) Have students mime the actions in the sequence in response to your commands.
3. Have students give you the commands. Make intentional mistakes so that studentshave to clarify. No, no--push the rewind button. After you’ve gone through thesequence several times, write the commands and have students copy them.
COMPREHENSION CHECK [QUESTIONING STRATEGIES](5 minutes) 1. Repeat the sequence , making mistakes and asking comprehension questions; e.g.
Did I miss a step? Which step comes first? Next?GUIDED PRACTICE: [TPR](15 minutes) 1. Pair students and assign roles: supervisor and worker.
2. Demonstrate how the supervisor will give the TPR commands to the worker.3. Give pairs a 3-minute time limit to run through the sequence. Call time and have
them switch roles for another 3 minutes. (15 minutes) [CHARADES]
1. Tell students they will practice describing their teammates’ actions.2. Ask a student volunteer to act out one of the TPR steps; e.g. plug in the cord.
Write the sentence on the board, He’s plugging in the cord. Show yoursentence to the class and say it. Check with the actor to see if you’re correct.
3. Form teams of four and number heads. Set a 3-minute time limit and have #1 begin by acting out a step in the sequence. #2, 3 and 4 independently write the sentence that describes #1’s action, then say and show what they wrote. Call time and rotate the role of actor. Circulate and monitor the practice.
COMMUNICATIVE PRACTICE: [TEAM WORK](15 minutes) 1. Have groups of four combine to make a team of eight. Distribute the
sentence strips to each group. (See p. 57-e.) 2. Hold up the enlarged strip that says I don't want to hear that song.. Ask
students to find the matching step in the TPR sequence: Press the eject button. Tell students they will be doing that for each of the eight strips.
3. Distribute the strips to each team and have teammates work together to match their strips to a TPR step.
EVALUATION: [MONITORING](throughout) • Monitor students' Guided and Communicative practice activities.EXPANSION ACTIVITY: [WRITING](as time permits • Have students choose a machine they use at work or home and write the or as homework) operational steps. Collect students’ work, evaluate and hand back. 58
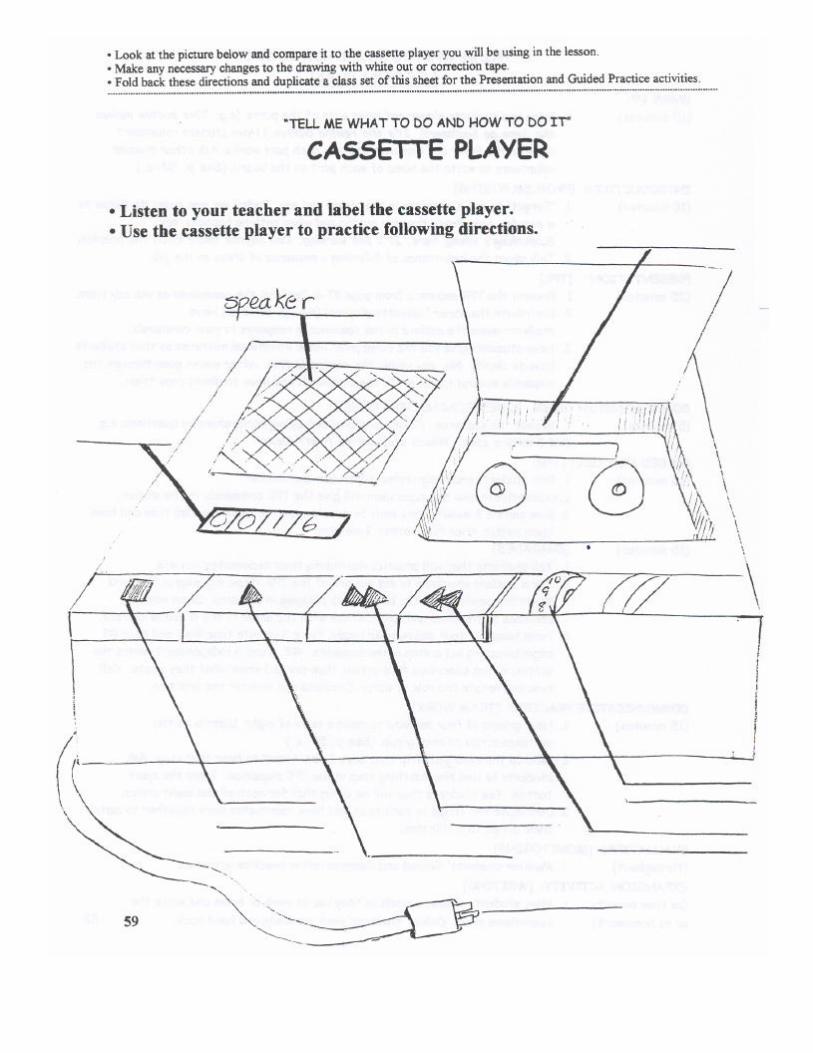
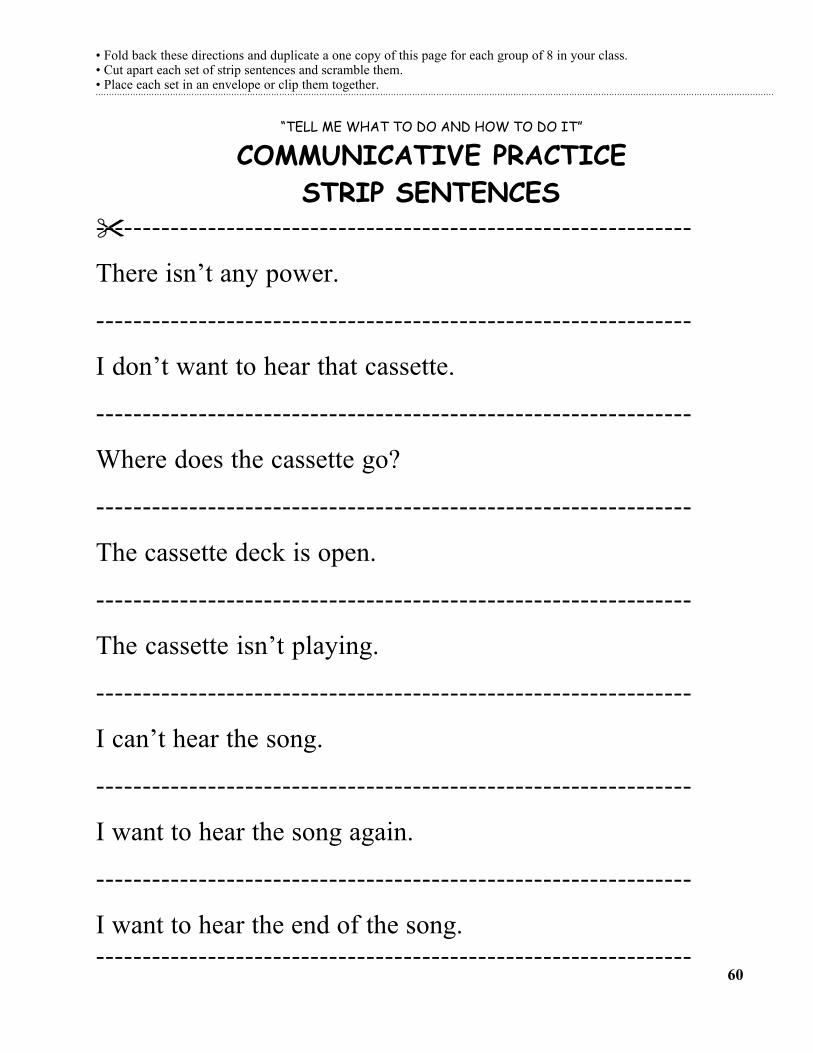
• Fold back these directions and duplicate a one copy of this page for each group of 8 in your class.• Cut apart each set of strip sentences and scramble them.• Place each set in an envelope or clip them together.
“TELL ME WHAT TO DO AND HOW TO DO IT”
COMMUNICATIVE PRACTICESTRIP SENTENCES
----------------------------------------------------------------
There isn’t any power.
----------------------------------------------------------------
I don’t want to hear that cassette.
----------------------------------------------------------------
Where does the cassette go?
----------------------------------------------------------------
The cassette deck is open.
----------------------------------------------------------------
The cassette isn’t playing.
----------------------------------------------------------------
I can’t hear the song.
----------------------------------------------------------------
I want to hear the song again.
----------------------------------------------------------------
I want to hear the end of the song.----------------------------------------------------------------
60

INTERMEDIATE-LOWLESSONS
500153
Title & Competency Area Objective CASAS PageWhat’s He Really Like? -Write and evaluate descriptive 0.1.2 63[Personal Information, paragraphs that create a physical,Social/Cultural interaction] behavioral, and emotional profile.
No One’s Available to -Leave a message on an answering 2.17 67Take Your Call machine.[Community]
I Want to Return -Interpret and use appropriate 1.3.3 71this Lemon! language to return a defective or[Consumer Education] unwanted product.
I Need to Report a Crime! -Fill out a crime report. 5.3.8 75[Civics, Government & History]
She Can’t Breathe! -Identify common symptoms of 3.1.1 79[Health & Safety] a medical emergency and relate them
to medical personnel.
First, Insert the Originals -Delineate the steps in a simple 7.2.2 83[Occupational Knowledge] workplace task, using appropriate
sequencing vocabulary, in order toteach the task to others.
Computer Friendly -Identify the parts of a computer, 4.5.1, 7.2.4 87 [Learning Skills] read a short article about computers,
and use reasoning to identify valid and62 invalid conclusions.
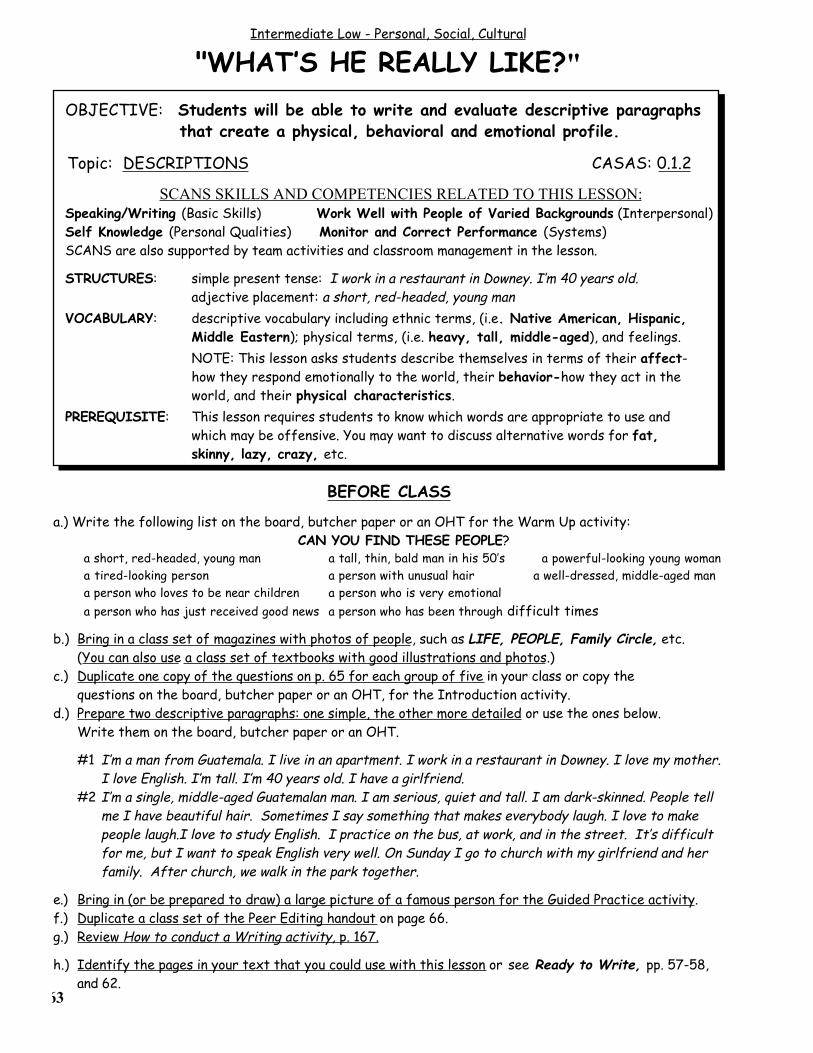
Intermediate Low - Personal, Social, Cultural
"WHAT’S HE REALLY LIKE?"OBJECTIVE: Students will be able to write and evaluate descriptive paragraphs
that create a physical, behavioral and emotional profile.
Topic: DESCRIPTIONS CASAS: 0.1.2
SCANS SKILLS AND COMPETENCIES RELATED TO THIS LESSON:Speaking/Writing (Basic Skills) Work Well with People of Varied Backgrounds (Interpersonal)Self Knowledge (Personal Qualities) Monitor and Correct Performance (Systems)SCANS are also supported by team activities and classroom management in the lesson.
STRUCTURES: simple present tense: I work in a restaurant in Downey. I’m 40 years old.adjective placement: a short, red-headed, young man
VOCABULARY: descriptive vocabulary including ethnic terms, (i.e. Native American, Hispanic,Middle Eastern); physical terms, (i.e. heavy, tall, middle-aged), and feelings.NOTE: This lesson asks students describe themselves in terms of their affect- how they respond emotionally to the world, their behavior-how they act in the world, and their physical characteristics.
PREREQUISITE: This lesson requires students to know which words are appropriate to use andwhich may be offensive. You may want to discuss alternative words for fat,skinny, lazy, crazy, etc.
BEFORE CLASS
a.) Write the following list on the board, butcher paper or an OHT for the Warm Up activity:CAN YOU FIND THESE PEOPLE?
a short, red-headed, young man a tall, thin, bald man in his 50’s a powerful-looking young womana tired-looking person a person with unusual hair a well-dressed, middle-aged mana person who loves to be near children a person who is very emotionala person who has just received good news a person who has been through difficult times
b.) Bring in a class set of magazines with photos of people, such as LIFE, PEOPLE, Family Circle, etc.(You can also use a class set of textbooks with good illustrations and photos.)
c.) Duplicate one copy of the questions on p. 65 for each group of five in your class or copy thequestions on the board, butcher paper or an OHT, for the Introduction activity.
d.) Prepare two descriptive paragraphs: one simple, the other more detailed or use the ones below.Write them on the board, butcher paper or an OHT.
#1 I’m a man from Guatemala. I live in an apartment. I work in a restaurant in Downey. I love my mother.I love English. I’m tall. I’m 40 years old. I have a girlfriend.
#2 I’m a single, middle-aged Guatemalan man. I am serious, quiet and tall. I am dark-skinned. People tellme I have beautiful hair. Sometimes I say something that makes everybody laugh. I love to makepeople laugh.I love to study English. I practice on the bus, at work, and in the street. It’s difficultfor me, but I want to speak English very well. On Sunday I go to church with my girlfriend and herfamily. After church, we walk in the park together.
e.) Bring in (or be prepared to draw) a large picture of a famous person for the Guided Practice activity.f.) Duplicate a class set of the Peer Editing handout on page 66.g.) Review How to conduct a Writing activity, p. 167.
h.) Identify the pages in your text that you could use with this lesson or see Ready to Write, pp. 57-58,and 62.
63
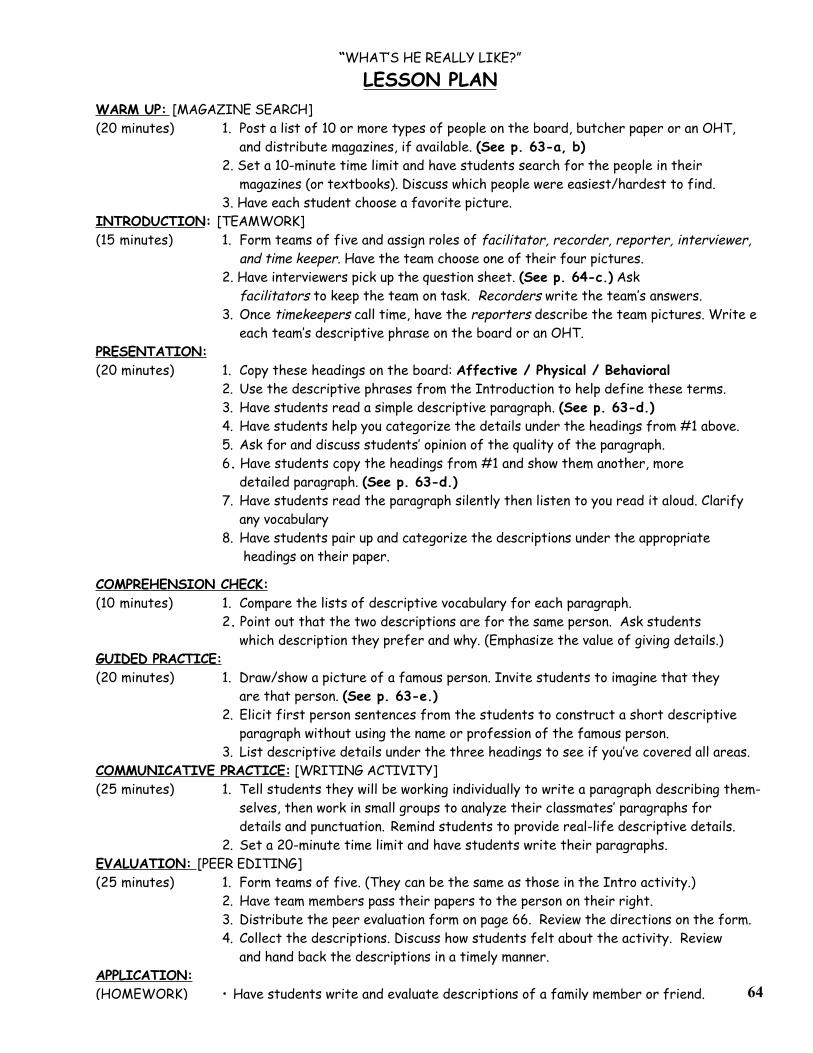
“WHAT’S HE REALLY LIKE?”
LESSON PLANWARM UP: [MAGAZINE SEARCH](20 minutes) 1. Post a list of 10 or more types of people on the board, butcher paper or an OHT,
and distribute magazines, if available. (See p. 63-a, b)2. Set a 10-minute time limit and have students search for the people in their
magazines (or textbooks). Discuss which people were easiest/hardest to find.3. Have each student choose a favorite picture.
INTRODUCTION: [TEAMWORK](15 minutes) 1. Form teams of five and assign roles of facilitator, recorder, reporter, interviewer,
and time keeper. Have the team choose one of their four pictures.2. Have interviewers pick up the question sheet. (See p. 64-c.) Ask
facilitators to keep the team on task. Recorders write the team’s answers.3. Once timekeepers call time, have the reporters describe the team pictures. Write e
each team’s descriptive phrase on the board or an OHT.PRESENTATION:(20 minutes) 1. Copy these headings on the board: Affective / Physical / Behavioral
2. Use the descriptive phrases from the Introduction to help define these terms.3. Have students read a simple descriptive paragraph. (See p. 63-d.)4. Have students help you categorize the details under the headings from #1 above.5. Ask for and discuss students’ opinion of the quality of the paragraph.6. Have students copy the headings from #1 and show them another, more
detailed paragraph. (See p. 63-d.)7. Have students read the paragraph silently then listen to you read it aloud. Clarify
any vocabulary8. Have students pair up and categorize the descriptions under the appropriate
headings on their paper.
COMPREHENSION CHECK:(10 minutes) 1. Compare the lists of descriptive vocabulary for each paragraph.
2. Point out that the two descriptions are for the same person. Ask students which description they prefer and why. (Emphasize the value of giving details.)
GUIDED PRACTICE:(20 minutes) 1. Draw/show a picture of a famous person. Invite students to imagine that they
are that person. (See p. 63-e.)2. Elicit first person sentences from the students to construct a short descriptive
paragraph without using the name or profession of the famous person.3. List descriptive details under the three headings to see if you’ve covered all areas.
COMMUNICATIVE PRACTICE: [WRITING ACTIVITY](25 minutes) 1. Tell students they will be working individually to write a paragraph describing them-
selves, then work in small groups to analyze their classmates’ paragraphs for details and punctuation. Remind students to provide real-life descriptive details.
2. Set a 20-minute time limit and have students write their paragraphs.EVALUATION: [PEER EDITING](25 minutes) 1. Form teams of five. (They can be the same as those in the Intro activity.)
2. Have team members pass their papers to the person on their right.3. Distribute the peer evaluation form on page 66. Review the directions on the form.4. Collect the descriptions. Discuss how students felt about the activity. Review
and hand back the descriptions in a timely manner.APPLICATION:(HOMEWORK) • Have students write and evaluate descriptions of a family member or friend. 64
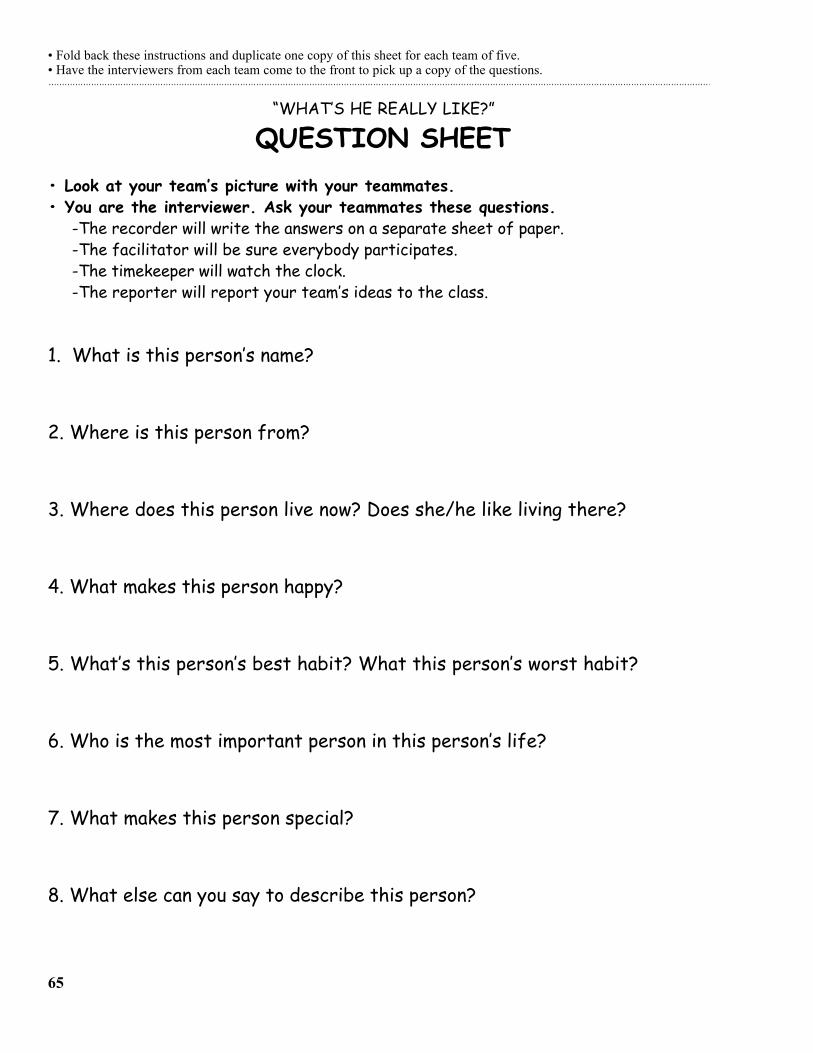
• Fold back these instructions and duplicate one copy of this sheet for each team of five.• Have the interviewers from each team come to the front to pick up a copy of the questions.
“WHAT’S HE REALLY LIKE?”
QUESTION SHEET• Look at your team’s picture with your teammates.• You are the interviewer. Ask your teammates these questions. -The recorder will write the answers on a separate sheet of paper.
-The facilitator will be sure everybody participates.-The timekeeper will watch the clock.-The reporter will report your team’s ideas to the class.
1. What is this person’s name?
2. Where is this person from?
3. Where does this person live now? Does she/he like living there?
4. What makes this person happy?
5. What’s this person’s best habit? What this person’s worst habit?
6. Who is the most important person in this person’s life?
7. What makes this person special?
8. What else can you say to describe this person?
65
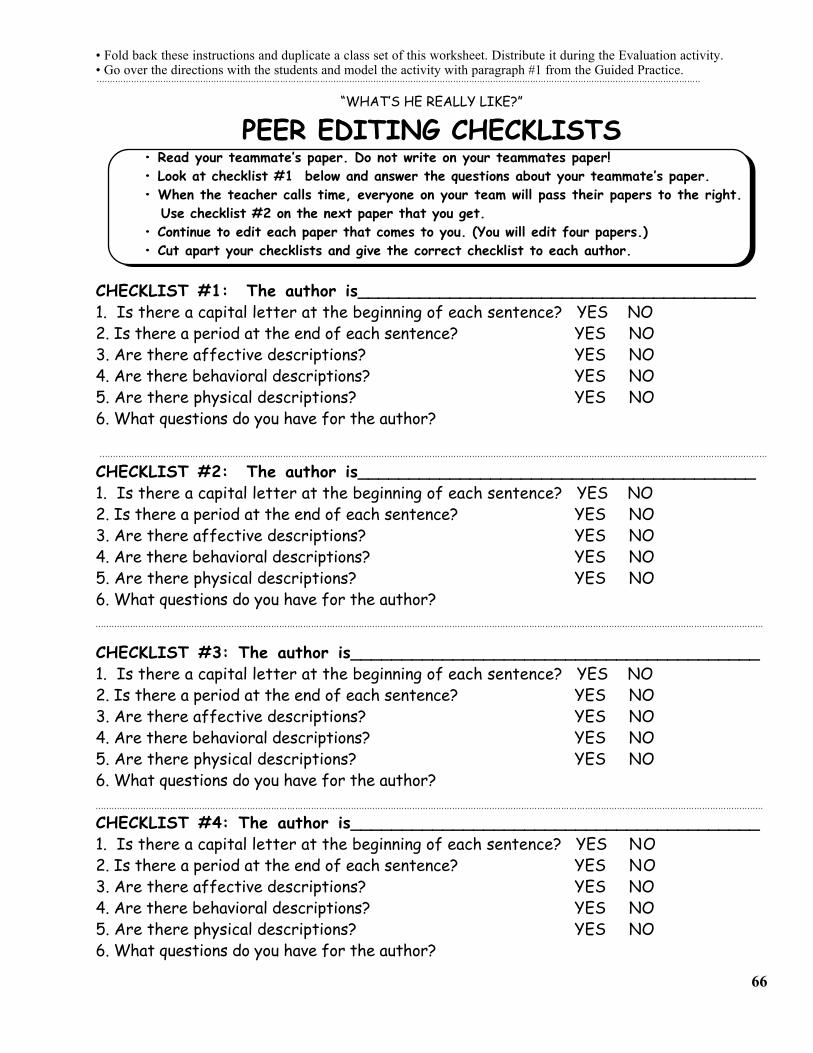
• Fold back these instructions and duplicate a class set of this worksheet. Distribute it during the Evaluation activity.• Go over the directions with the students and model the activity with paragraph #1 from the Guided Practice.
“WHAT’S HE REALLY LIKE?”
PEER EDITING CHECKLISTS• Read your teammate’s paper. Do not write on your teammates paper!• Look at checklist #1 below and answer the questions about your teammate’s paper.• When the teacher calls time, everyone on your team will pass their papers to the right.
Use checklist #2 on the next paper that you get.• Continue to edit each paper that comes to you. (You will edit four papers.)• Cut apart your checklists and give the correct checklist to each author.
CHECKLIST #1: The author is_______________________________________1. Is there a capital letter at the beginning of each sentence? YES NO2. Is there a period at the end of each sentence? YES NO3. Are there affective descriptions? YES NO4. Are there behavioral descriptions? YES NO5. Are there physical descriptions? YES NO6. What questions do you have for the author?
CHECKLIST #2: The author is_______________________________________1. Is there a capital letter at the beginning of each sentence? YES NO2. Is there a period at the end of each sentence? YES NO3. Are there affective descriptions? YES NO4. Are there behavioral descriptions? YES NO5. Are there physical descriptions? YES NO6. What questions do you have for the author?
CHECKLIST #3: The author is________________________________________1. Is there a capital letter at the beginning of each sentence? YES NO2. Is there a period at the end of each sentence? YES NO3. Are there affective descriptions? YES NO4. Are there behavioral descriptions? YES NO5. Are there physical descriptions? YES NO6. What questions do you have for the author?
CHECKLIST #4: The author is________________________________________1. Is there a capital letter at the beginning of each sentence? YES NO2. Is there a period at the end of each sentence? YES NO3. Are there affective descriptions? YES NO4. Are there behavioral descriptions? YES NO5. Are there physical descriptions? YES NO6. What questions do you have for the author?
66
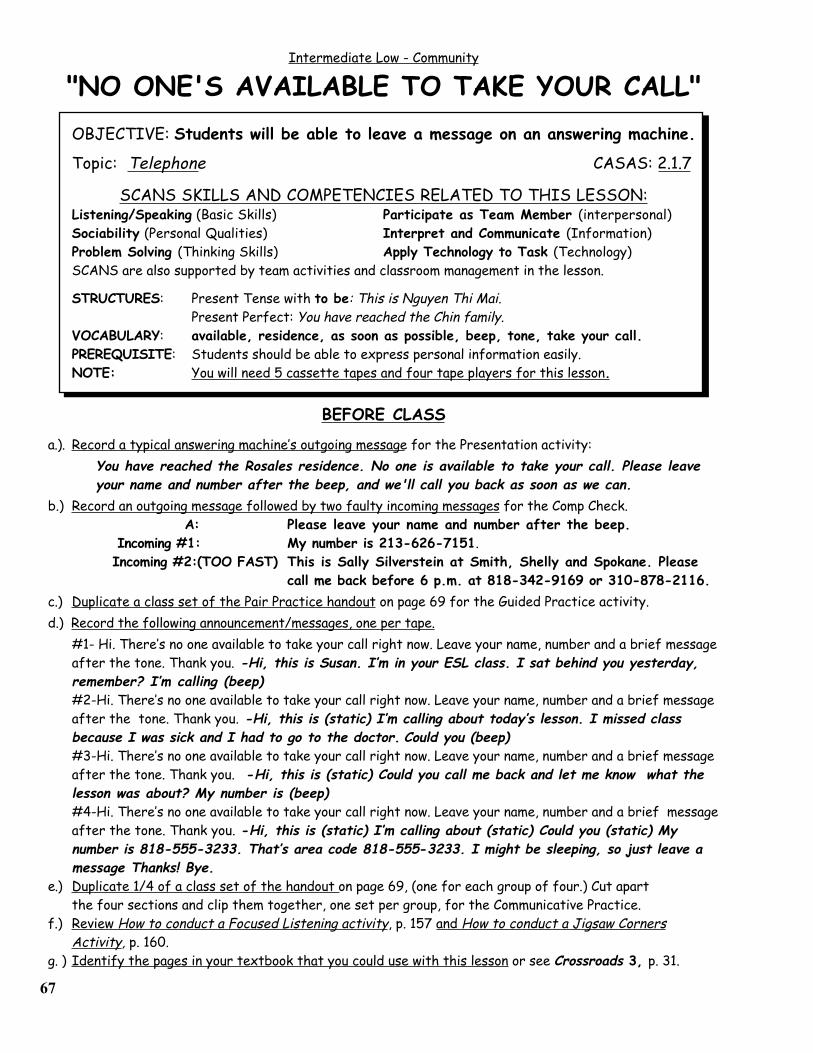
Intermediate Low - Community
"NO ONE'S AVAILABLE TO TAKE YOUR CALL"OBJECTIVE: Students will be able to leave a message on an answering machine.
Topic: Telephone CASAS: 2.1.7
SCANS SKILLS AND COMPETENCIES RELATED TO THIS LESSON:Listening/Speaking (Basic Skills) Participate as Team Member (interpersonal)Sociability (Personal Qualities) Interpret and Communicate (Information)Problem Solving (Thinking Skills) Apply Technology to Task (Technology)SCANS are also supported by team activities and classroom management in the lesson.
STRUCTURES: Present Tense with to be: This is Nguyen Thi Mai.Present Perfect: You have reached the Chin family.
VOCABULARY: available, residence, as soon as possible, beep, tone, take your call.PREREQUISITE: Students should be able to express personal information easily.NOTE: You will need 5 cassette tapes and four tape players for this lesson.
BEFORE CLASS
a.). Record a typical answering machine’s outgoing message for the Presentation activity:You have reached the Rosales residence. No one is available to take your call. Please leave your name and number after the beep, and we'll call you back as soon as we can.
b.) Record an outgoing message followed by two faulty incoming messages for the Comp Check. A: Please leave your name and number after the beep.
Incoming #1: My number is 213-626-7151. Incoming #2:(TOO FAST) This is Sally Silverstein at Smith, Shelly and Spokane. Please
call me back before 6 p.m. at 818-342-9169 or 310-878-2116.c.) Duplicate a class set of the Pair Practice handout on page 69 for the Guided Practice activity.d.) Record the following announcement/messages, one per tape.
#1- Hi. There’s no one available to take your call right now. Leave your name, number and a brief messageafter the tone. Thank you. -Hi, this is Susan. I’m in your ESL class. I sat behind you yesterday,remember? I’m calling (beep)#2-Hi. There’s no one available to take your call right now. Leave your name, number and a brief messageafter the tone. Thank you. -Hi, this is (static) I’m calling about today’s lesson. I missed classbecause I was sick and I had to go to the doctor. Could you (beep)#3-Hi. There’s no one available to take your call right now. Leave your name, number and a brief messageafter the tone. Thank you. -Hi, this is (static) Could you call me back and let me know what thelesson was about? My number is (beep)#4-Hi. There’s no one available to take your call right now. Leave your name, number and a brief messageafter the tone. Thank you. -Hi, this is (static) I’m calling about (static) Could you (static) Mynumber is 818-555-3233. That’s area code 818-555-3233. I might be sleeping, so just leave amessage Thanks! Bye.
e.) Duplicate 1/4 of a class set of the handout on page 69, (one for each group of four.) Cut apartthe four sections and clip them together, one set per group, for the Communicative Practice.
f.) Review How to conduct a Focused Listening activity, p. 157 and How to conduct a Jigsaw CornersActivity, p. 160.
g. ) Identify the pages in your textbook that you could use with this lesson or see Crossroads 3, p. 31.
67
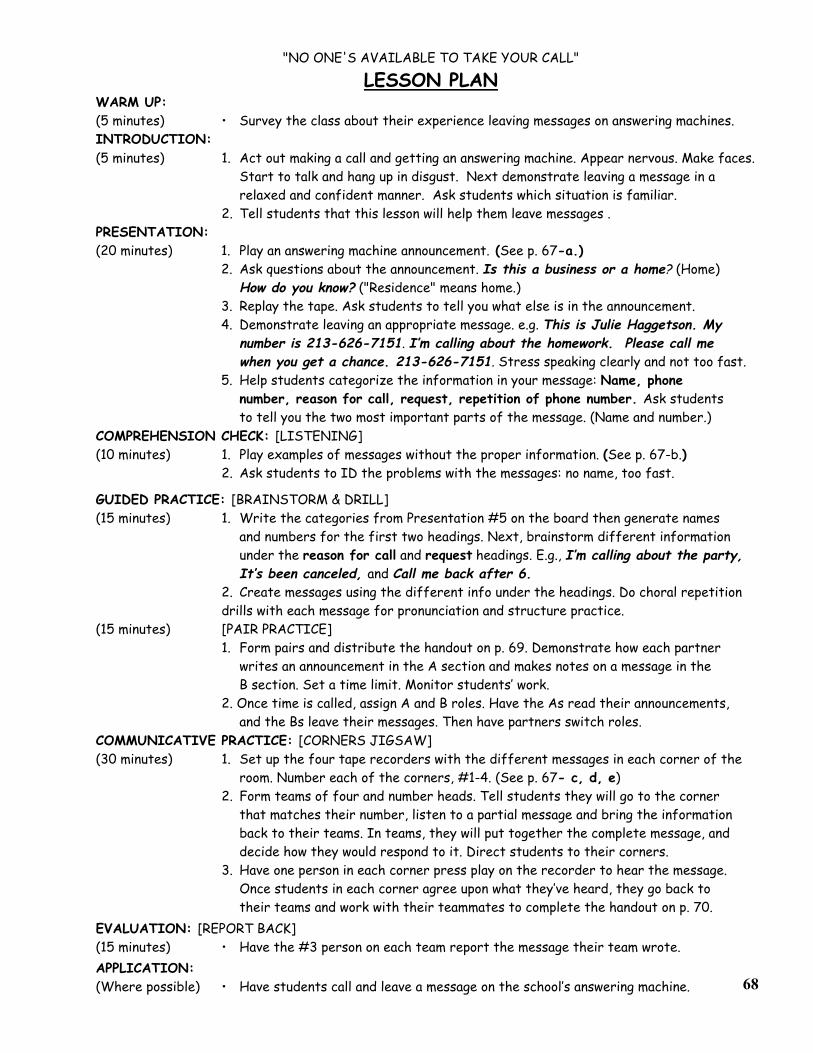
"NO ONE'S AVAILABLE TO TAKE YOUR CALL"
LESSON PLANWARM UP:(5 minutes) • Survey the class about their experience leaving messages on answering machines.INTRODUCTION: (5 minutes) 1. Act out making a call and getting an answering machine. Appear nervous. Make faces.
Start to talk and hang up in disgust. Next demonstrate leaving a message in a relaxed and confident manner. Ask students which situation is familiar.
2. Tell students that this lesson will help them leave messages .PRESENTATION:(20 minutes) 1. Play an answering machine announcement. (See p. 67-a.)
2. Ask questions about the announcement. Is this a business or a home? (Home)How do you know? ("Residence" means home.)
3. Replay the tape. Ask students to tell you what else is in the announcement.4. Demonstrate leaving an appropriate message. e.g. This is Julie Haggetson. My
number is 213-626-7151. I’m calling about the homework. Please call me when you get a chance. 213-626-7151. Stress speaking clearly and not too fast.
5. Help students categorize the information in your message: Name, phone number, reason for call, request, repetition of phone number. Ask students to tell you the two most important parts of the message. (Name and number.)
COMPREHENSION CHECK: [LISTENING](10 minutes) 1. Play examples of messages without the proper information. (See p. 67-b.)
2. Ask students to ID the problems with the messages: no name, too fast.
GUIDED PRACTICE: [BRAINSTORM & DRILL](15 minutes) 1. Write the categories from Presentation #5 on the board then generate names
and numbers for the first two headings. Next, brainstorm different information under the reason for call and request headings. E.g., I’m calling about the party, It’s been canceled, and Call me back after 6.
2. Create messages using the different info under the headings. Do choral repetition drills with each message for pronunciation and structure practice.
(15 minutes) [PAIR PRACTICE]1. Form pairs and distribute the handout on p. 69. Demonstrate how each partner
writes an announcement in the A section and makes notes on a message in the B section. Set a time limit. Monitor students’ work.
2. Once time is called, assign A and B roles. Have the As read their announcements,and the Bs leave their messages. Then have partners switch roles.
COMMUNICATIVE PRACTICE: [CORNERS JIGSAW](30 minutes) 1. Set up the four tape recorders with the different messages in each corner of the
room. Number each of the corners, #1-4. (See p. 67- c, d, e) 2. Form teams of four and number heads. Tell students they will go to the corner
that matches their number, listen to a partial message and bring the information back to their teams. In teams, they will put together the complete message, and decide how they would respond to it. Direct students to their corners.
3. Have one person in each corner press play on the recorder to hear the message. Once students in each corner agree upon what they’ve heard, they go back to their teams and work with their teammates to complete the handout on p. 70.
EVALUATION: [REPORT BACK](15 minutes) • Have the #3 person on each team report the message their team wrote.APPLICATION:(Where possible) • Have students call and leave a message on the school’s answering machine. 68
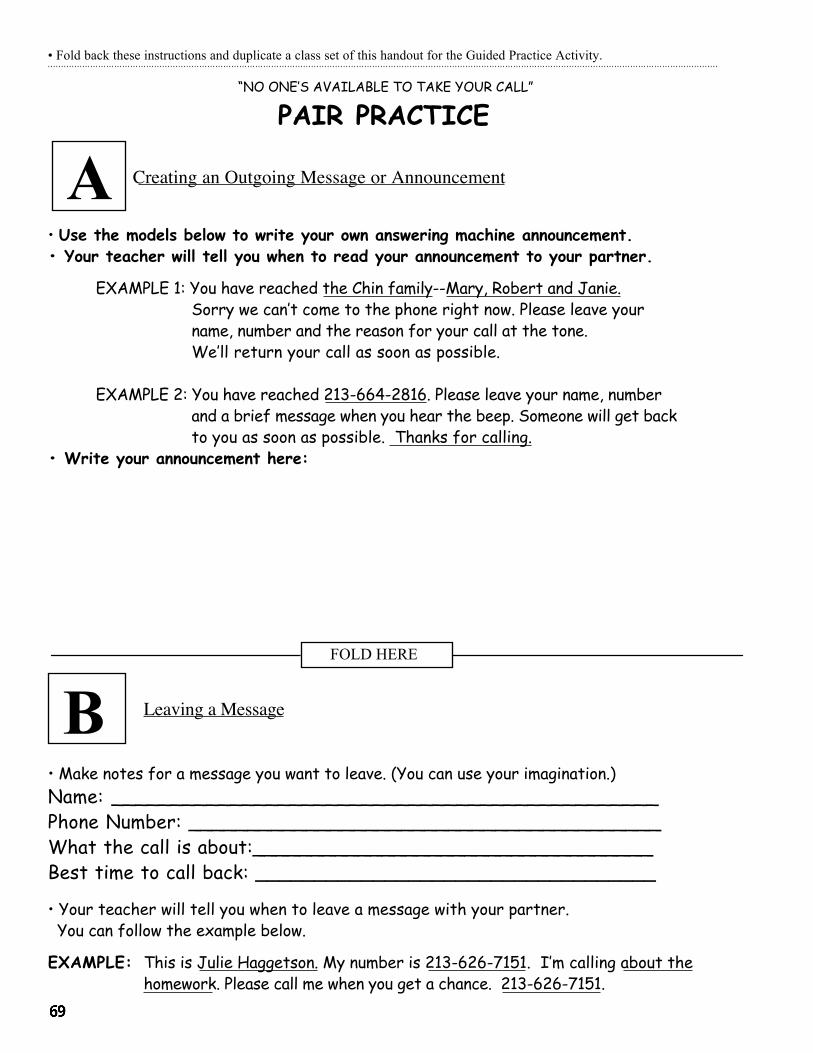
• Fold back these instructions and duplicate a class set of this handout for the Guided Practice Activity.
“NO ONE’S AVAILABLE TO TAKE YOUR CALL”
PAIR PRACTICE
Creating an Outgoing Message or Announcement
• Use the models below to write your own answering machine announcement.• Your teacher will tell you when to read your announcement to your partner.
EXAMPLE 1: You have reached the Chin family--Mary, Robert and Janie. Sorry we can’t come to the phone right now. Please leave your
name, number and the reason for your call at the tone.We’ll return your call as soon as possible.
EXAMPLE 2: You have reached 213-664-2816. Please leave your name, number and a brief message when you hear the beep. Someone will get backto you as soon as possible. Thanks for calling.
• Write your announcement here:
Leaving a Message
• Make notes for a message you want to leave. (You can use your imagination.)Name: ______________________________________________Phone Number: ________________________________________What the call is about:__________________________________Best time to call back: __________________________________
• Your teacher will tell you when to leave a message with your partner. You can follow the example below.
EXAMPLE: This is Julie Haggetson. My number is 213-626-7151. I’m calling about thehomework. Please call me when you get a chance. 213-626-7151.
A
B FOLD HERE
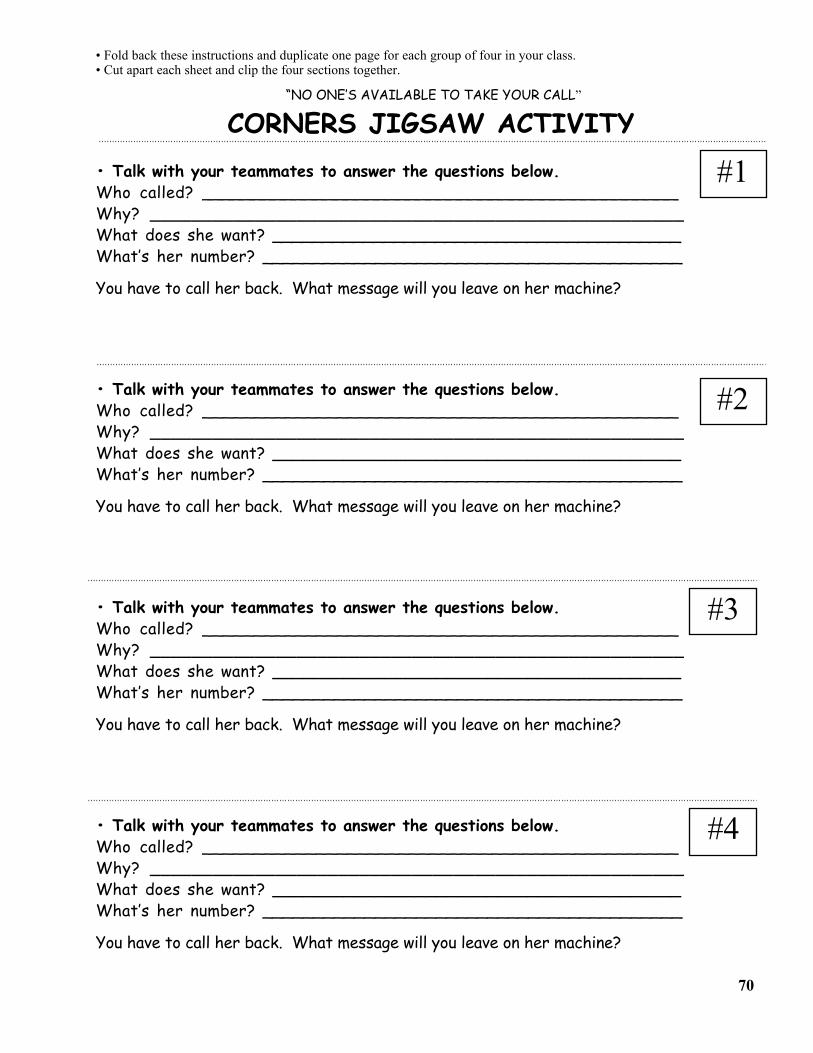
• Fold back these instructions and duplicate one page for each group of four in your class.• Cut apart each sheet and clip the four sections together.
“NO ONE’S AVAILABLE TO TAKE YOUR CALL”
CORNERS JIGSAW ACTIVITY• Talk with your teammates to answer the questions below.Who called? ______________________________________________Why? ___________________________________________________What does she want? ________________________________________What’s her number? _________________________________________
You have to call her back. What message will you leave on her machine?
• Talk with your teammates to answer the questions below.Who called? ______________________________________________Why? ___________________________________________________What does she want? ________________________________________What’s her number? _________________________________________
You have to call her back. What message will you leave on her machine?
#1
#2
#3
#4
70
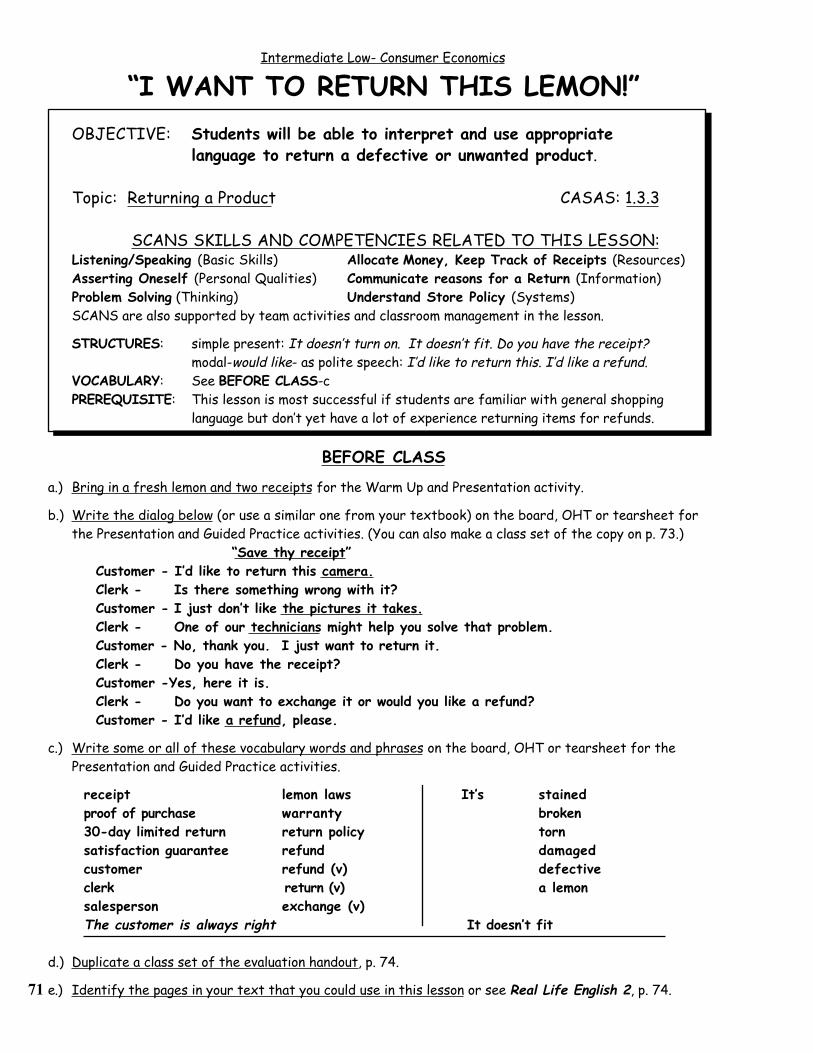
Intermediate Low- Consumer Economics
“I WANT TO RETURN THIS LEMON!”OBJECTIVE: Students will be able to interpret and use appropriate
language to return a defective or unwanted product.
Topic: Returning a Product CASAS: 1.3.3
SCANS SKILLS AND COMPETENCIES RELATED TO THIS LESSON:Listening/Speaking (Basic Skills) Allocate Money, Keep Track of Receipts (Resources)Asserting Oneself (Personal Qualities) Communicate reasons for a Return (Information)Problem Solving (Thinking) Understand Store Policy (Systems)SCANS are also supported by team activities and classroom management in the lesson.
STRUCTURES: simple present: It doesn’t turn on. It doesn’t fit. Do you have the receipt?modal-would like- as polite speech: I’d like to return this. I’d like a refund.
VOCABULARY: See BEFORE CLASS-cPREREQUISITE: This lesson is most successful if students are familiar with general shopping language but don’t yet have a lot of experience returning items for refunds.
BEFORE CLASS
a.) Bring in a fresh lemon and two receipts for the Warm Up and Presentation activity.
b.) Write the dialog below (or use a similar one from your textbook) on the board, OHT or tearsheet for the Presentation and Guided Practice activities. (You can also make a class set of the copy on p. 73.)
“Save thy receipt”Customer - I’d like to return this camera.Clerk - Is there something wrong with it?Customer - I just don’t like the pictures it takes.Clerk - One of our technicians might help you solve that problem.Customer - No, thank you. I just want to return it.Clerk - Do you have the receipt?Customer -Yes, here it is.Clerk - Do you want to exchange it or would you like a refund?Customer - I’d like a refund, please.
c.) Write some or all of these vocabulary words and phrases on the board, OHT or tearsheet for the Presentation and Guided Practice activities.
receipt lemon laws It’s stainedproof of purchase warranty broken30-day limited return return policy tornsatisfaction guarantee refund damagedcustomer refund (v) defectiveclerk return (v) a lemonsalesperson exchange (v)The customer is always right It doesn’t fit
d.) Duplicate a class set of the evaluation handout, p. 74.
e.) Identify the pages in your text that you could use in this lesson or see Real Life English 2, p. 74.71
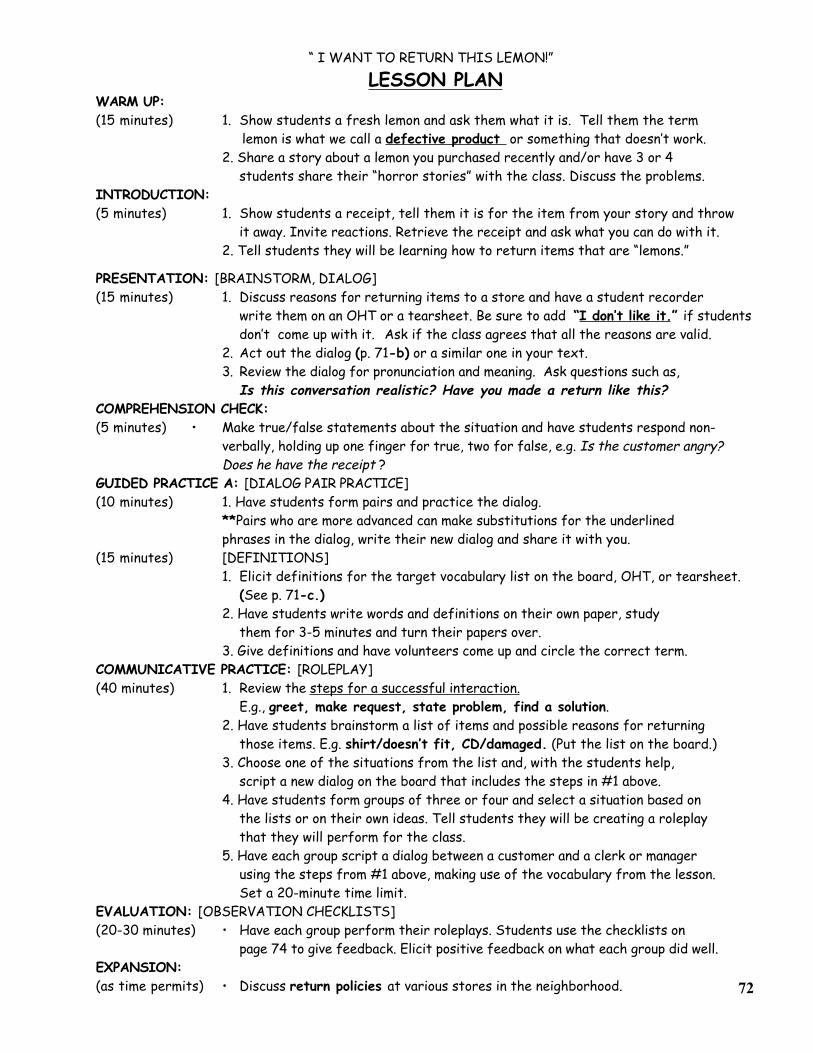
“ I WANT TO RETURN THIS LEMON!”
LESSON PLANWARM UP:(15 minutes) 1. Show students a fresh lemon and ask them what it is. Tell them the term
lemon is what we call a defective product or something that doesn’t work.2. Share a story about a lemon you purchased recently and/or have 3 or 4
students share their “horror stories” with the class. Discuss the problems.INTRODUCTION:(5 minutes) 1. Show students a receipt, tell them it is for the item from your story and throw
it away. Invite reactions. Retrieve the receipt and ask what you can do with it.2. Tell students they will be learning how to return items that are “lemons.”
PRESENTATION: [BRAINSTORM, DIALOG](15 minutes) 1. Discuss reasons for returning items to a store and have a student recorder
write them on an OHT or a tearsheet. Be sure to add “I don’t like it.” if studentsdon’t come up with it. Ask if the class agrees that all the reasons are valid.
2. Act out the dialog (p. 71-b) or a similar one in your text.3. Review the dialog for pronunciation and meaning. Ask questions such as,
Is this conversation realistic? Have you made a return like this?COMPREHENSION CHECK:(5 minutes) • Make true/false statements about the situation and have students respond non-
verbally, holding up one finger for true, two for false, e.g. Is the customer angry?Does he have the receipt ?
GUIDED PRACTICE A: [DIALOG PAIR PRACTICE](10 minutes) 1. Have students form pairs and practice the dialog.
**Pairs who are more advanced can make substitutions for the underlinedphrases in the dialog, write their new dialog and share it with you.
(15 minutes) [DEFINITIONS]1. Elicit definitions for the target vocabulary list on the board, OHT, or tearsheet. (See p. 71-c.)2. Have students write words and definitions on their own paper, study
them for 3-5 minutes and turn their papers over.3. Give definitions and have volunteers come up and circle the correct term.
COMMUNICATIVE PRACTICE: [ROLEPLAY](40 minutes) 1. Review the steps for a successful interaction.
E.g., greet, make request, state problem, find a solution.2. Have students brainstorm a list of items and possible reasons for returning
those items. E.g. shirt/doesn’t fit, CD/damaged. (Put the list on the board.)3. Choose one of the situations from the list and, with the students help,
script a new dialog on the board that includes the steps in #1 above.4. Have students form groups of three or four and select a situation based on
the lists or on their own ideas. Tell students they will be creating a roleplay that they will perform for the class.
5. Have each group script a dialog between a customer and a clerk or manager using the steps from #1 above, making use of the vocabulary from the lesson.
Set a 20-minute time limit.EVALUATION: [OBSERVATION CHECKLISTS](20-30 minutes) • Have each group perform their roleplays. Students use the checklists on
page 74 to give feedback. Elicit positive feedback on what each group did well. EXPANSION: (as time permits) • Discuss return policies at various stores in the neighborhood. 72
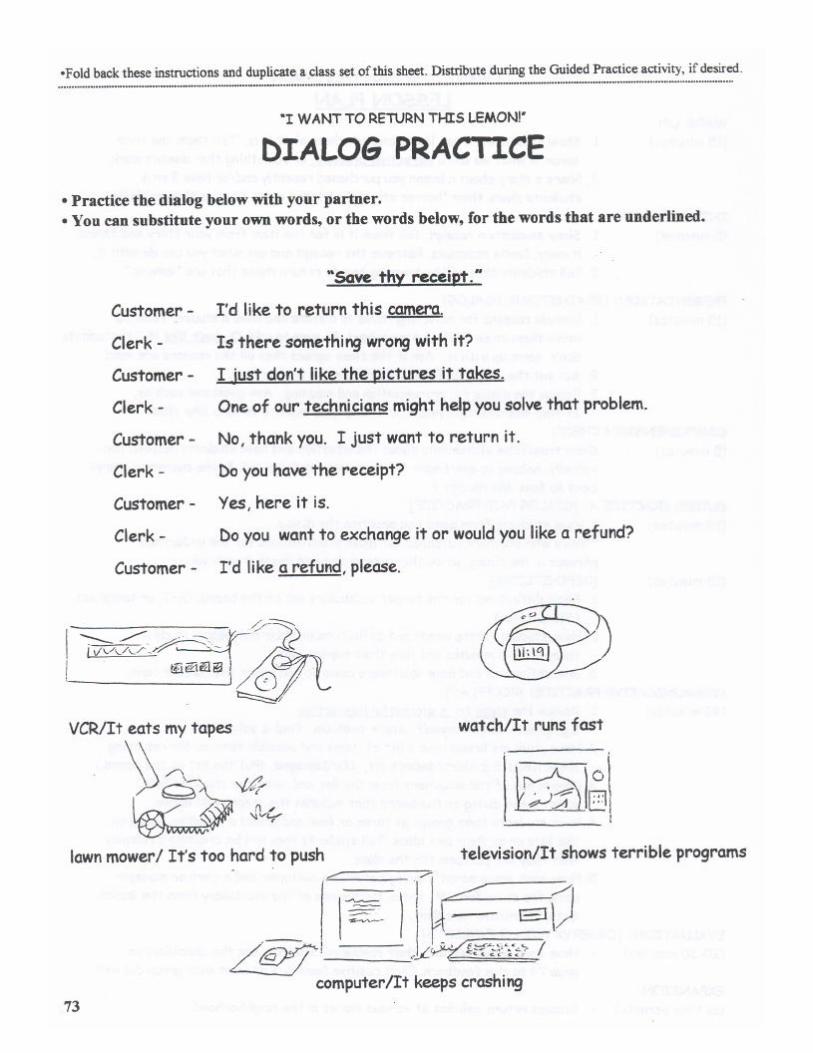
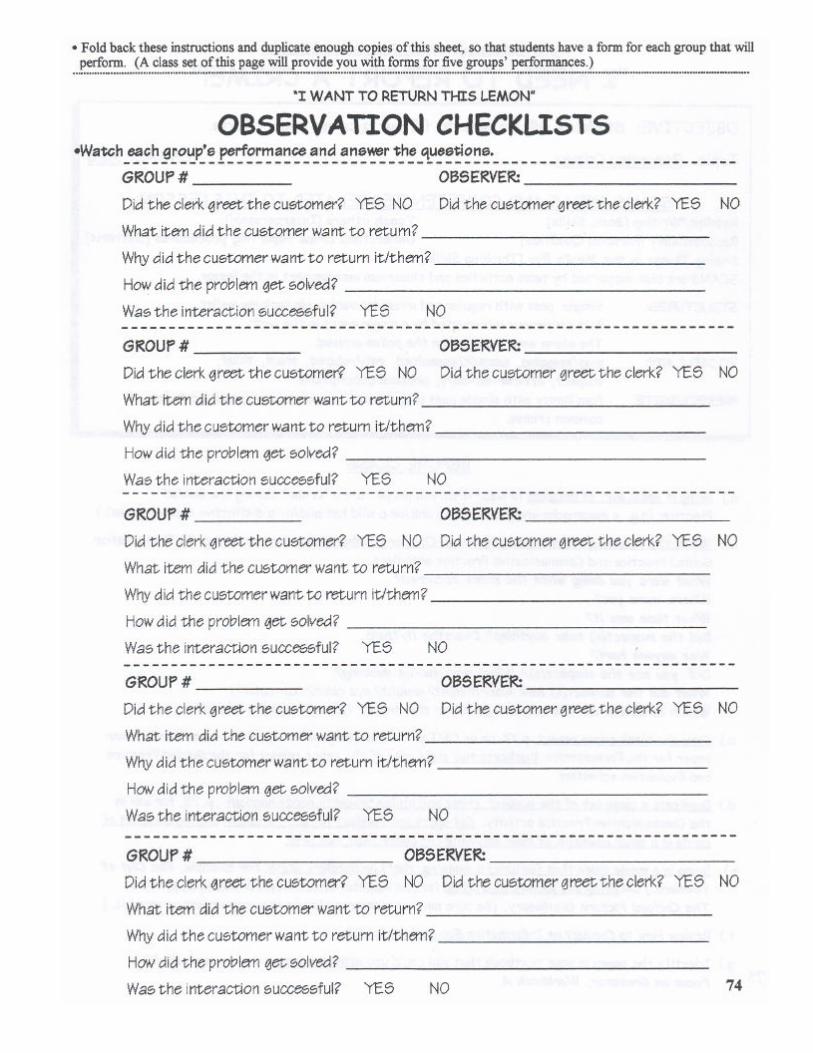
I ntermediate Low-Civics, Government & History
“I NEED TO REPORT A CRIME!”OBJECTIVE: Students will be able to fill out a crime report form.
Topic: Reporting Crimes CASAS: 5.3.8
SCANS SKILLS AND COMPETENCIES RELATED TO THIS LESSON:Reading/Writing [Basic Skills] Teach others [Interpersonal]Responsibility [Personal Qualities] Understand crime reporting procedures [Systems]Seeing Things in the Mind’s Eye [Thinking Skills] SCANS are also supported by team activities and classroom management in the lesson.
STRUCTURES: Simple past with regular and irregular verbs: He took my wallet.Past continuous interrupted by a single event in the past:The alarm was ringing when the police arrived.
VOCABULARY: mug/mugging, assault/assaulted, rob/robbed, steal, thief,suspect, officer-on-duty, physical descriptions
PREREQUISITE: Familiarity with simple past (regular and irregular forms) and vocabulary ofcommon crimes.
BEFORE CLASS
a.) Bring in some sort of disguise to wear when you perpetrate a “crime” during the Guided Practice, (e.g., a moustache and glasses prop and/or a wild hat and/or a distinctive coat or jacket.)
b.) Write the following questions on the board, OHT or butcher paper for use during the Presentation,Guided Practice and Communicative Practice activities.What were you doing when the crime occurred?Where were you?What time was it?Did the suspect(s) take anything? Describe it/them.Was anyone hurt?Did you see the suspect(s)? What was she/he wearing?What did the suspect(s) look like? (height? weight? eye color? hair color?)Which direction did the suspect go after the crime? How did she/he travel?
c.) Copy the blank crime report, p.77, on an OHT or create a large mock-up of the report on butcher paper for the Presentation. Duplicate two class sets of the crime report for the Guided Practice and Evaluation activities.
d.) Duplicate a class set of the suspect, crime and stolen property cards handout , p. 78, for use in the Communicative Practice activity. Cut apart one handout for each student, placing each set ofcards in a small envelope, or have students cut apart their own sets.
e.) Bring in a movie video that features a mugging, theft or burglary scene. For example, The Out ofTowners.) OR Bring in a picture of a crime for the Application activity. For example, p. 100 inThe Oxford Picture Dictionary. (Be sure neither video nor picture is overly violent or graphic. )
f.) Review How to Conduct an Information Gap activity, p. 160
g.) Identify the pages in your textbook that you could use with this lesson or see pages 29-30 in Focus on Grammar, Workbook A.75
“I NEED TO REPORT A CRIME!’
LESSON PLANREVIEW/WARM-UP:(15 minutes) 1. Act out (or have students act out) a series of actions. Have students tell you what
you did. You wrote on the board, looked at the clock and ran to the door.2. Act out two or three things simultaneously and see if students can name what
you are doing. You are singing and writing at the same time. See if anyone can identify what you were doing. You were singing and writing at the same.
3. Act out doing one thing and getting interrupted. See if students can say whathappened. You were writing when you sneezed.
INTRODUCTION:(5 minutes) 1. Poll students to discover how many have been victims of a crime.
2. Tell students they will be learning how to fill out a crime report.
PRESENTATION: [DEMONSTRATION](15 minutes) 1. Have a student volunteer run to the front of the room, grab your books while
shouting "Give me those!", and then run out of the room. 2. Ask students what happened, then use the questions on the board to guide the
students’ responses. (See p. 75-b.)3. Show students the OHT or copy of the police report. (See p. 75-c.) Go over
any new vocabulary, and fill in the report with the class’ help.COMPREHENSION CHECK: [SILENT DRILL](5 minutes) • Ask YES/NO questions about the report that students can answer non-verbally.
E.g., Was the suspect tall?GUIDED PRACTICE: [PAIR WORK](15 minutes) 1. Act out another simple crime in which you are the suspect.
2. Have students work in pairs to fill out the report (p. 77) for the new crime.3. Walk around to each pair and check their work.
COMMUNICATIVE PRACTICE: [INFORMATION GAP](40 minutes) 1. Give each pair a set of the crime/suspect/stolen property cards on page 78.
(See p. 75-d.)2. Have one student be the officer-on-duty and the other be the victim. Tell the
officers they will be listening to the victims describe the crime, the suspect and thestolen property so that the officers can pick out the correct cards from their decks.
3. Tell the victims: Choose one suspect, one crime and one or more stolen property cards but don’t show the cards to your partner.
4. Have the officers ask the victims the questions from the board and write down the victim’s answers. Once an officer thinks she knows which cards are being
described, she pulls the cards from her own deck, shows the victim and asks Is this the man/woman who __________? Is this your stolen _____?Give students a 15-minute time limit. (If they finish early, they can do it again.)
5. Call time, get feedback on the students' success. Have pairs switch roles and dothe activity again.
EVALUATION: (20-30 minutes) • Distribute another set of crime report forms and have students fill them out
based on one of the suspects and crimes from the card game.APPLICATION: (As time permits) • Show a clip from the video or show students a picture of a crime. (See p. 75-e.)
After viewing the clip, have students write several sentences describing the crime,suspect, and situation they “witnessed.” 76
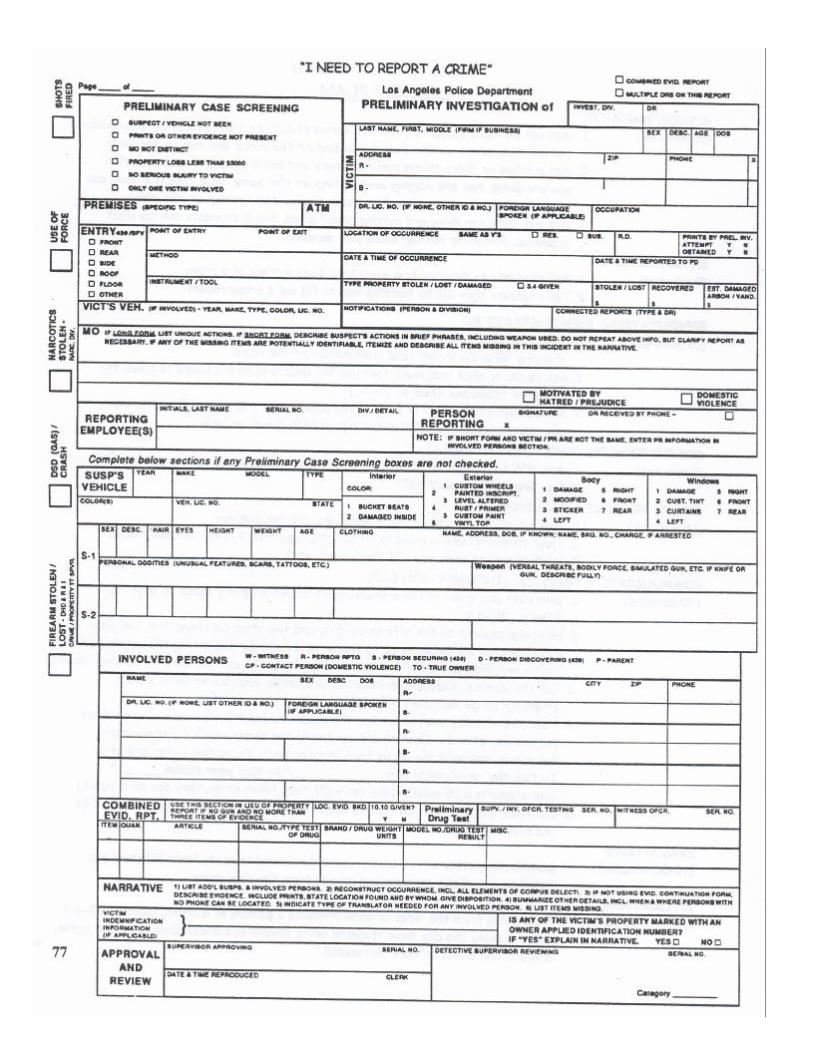
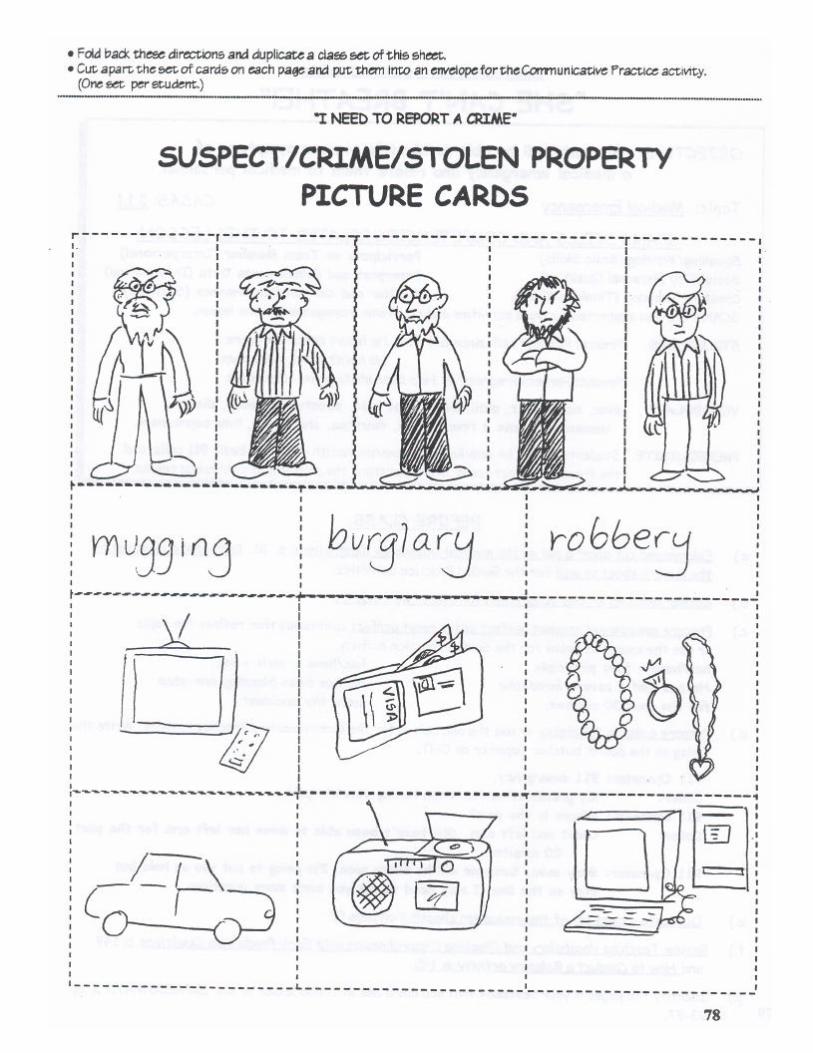
Intermediate Low- Health and Safety
“SHE CAN’T BREATHE!”OBJECTIVE: Students will be able to identify common symptoms of
a medical emergency and relate them to medical personnel.
Topic: Medical Emergency CASAS: 3.1.1
SCANS SKILLS AND COMPETENCIES RELATED TO THIS LESSON:Speaking/Writing (Basic Skills) Participate as Team Member (Interpersonal)Sociability (Personal Qualities) Interpret and Communicate Data (Information)Creative Thinking (Thinking Skills) Monitor and Correct Performance (Systems)SCANS are also supported by team activities and classroom management in the lesson.
STRUCTURES: Present Perfect with since and for: He hasn’t eaten for hours. He hasn’t eaten since noon.
Present Perfect Progressive: He’s been shaking for 20 minutes.
VOCABULARY: ever, never, yet, until, before, be pale, sweaty, nauseous, dizzy, unconscious, have a fever, chills, diarrhea, shake, etc., time expressions.
PREREQUISITE: Students should be familiar with common health ailments, basic 911 calls, andthe Present Perfect tense, and understand the principle of continuous tenses.
BEFORE CLASS
a.) Enlarge and cut apart a set of the medical emergency illustrations, p. 81. Duplicate a class set ofthe picture sheet as well for the Guided Practice activities.
b.) Gather five 3x5 or 4x6 index cards for every two students.
c.) Prepare examples of present perfect and present perfect continuous that reflect the topic or use the examples below for the Guided Practice activity.
has/have + past participle has/have + verb + ingHe has had a severe headache He has been bleeding non-stopfor the past 30 minutes. since the accident.
d.) Prepare a simple 911 dialog, or use the one below, for the Communicative Practice activity. Write thedialog on the board, butcher paper or an OHT.
911 Operator: 911 emergency.Caller: My grandmother has been having terrible pain.911 Operator: Where is the pain?Caller: Chest and left arm. She hasn't been able to move her left arm for the past
20 minutes.911 Operator: Stay calm. Someone will be there soon. I’m going to put you on hold but
stay on the line. I may need to ask you some more questions.
e.) Duplicate a class set of the evaluation checklist on page 82.
f.) Review Teaching Vocabulary and Checking Comprehension with Early Production Questions, p. 149 and How to Conduct a Roleplay activity, p. 165.
g.) Identify the pages in your textbook that you could use with this lesson or see EXPRESSWAYS 3, pp.93-97.79
"SHE CAN’T BREATHE!"
LESSON PLANWARM UP: [INTERVIEW](10 minutes) • Define medical emergency. Have student pairs ask each other, Can you name five
medical emergencies? Have you ever experienced a medical emergency? What happened?
INTRODUCTION:(5 minutes) • Tell students they will learn how to describe symptoms to a paramedic, doctor or
emergency operator.
PRESENTATION: [TEACH VOCABULARY](25 minutes) 1. Act out the symptoms of a heart attack (left arm pain, difficulty breathing,
depression), choking (hands at throat) and shock (glazed expression, chilled)2. Ask students to tell you what's wrong.3. Have a student write the symptoms on the board.4. Show pictures (p. 79-a), or mime other emergencies to prompt more
vocabulary. List the emergency situations and their symptoms on the board.
COMPREHENSION CHECK: [EARLY PRODUCTION NON-VERBAL DRILL](5 minutes) 1. Ask nine students to come to the front. Hand each one of the pictures
from page 79. Have the students line up facing the class with their pictures.2. Describe a set of symptoms. Have the student holding the pictured symptoms
step forward. E.g., He has a pain in his left arm and difficulty breathing. /Heartattack steps forward.
GUIDED PRACTICE: [PAIR WORK](15 minutes) 1. Distribute five index cards to each student pair. (See p. 79-a.)
2. Have students write one symptom per card using the basic verb form (e.g. be nauseous, have a glazed expression, shake, etc.)
3. Demonstrate the structures for the present perfect and present perfect continuous using sample sentences that relate to the topic. (See p. 79-c.)
4. Have pairs use the symptoms on their flash card and the tense structuresfrom #3 above to write original sentences they might say to emergency personnel. On a piece of paper, and practice saying them. Set a time limit.
5. Once time is called, have pairs exchange cards and repeat step #4.
COMMUNICATIVE PRACTICE: [ROLEPLAY](40 minutes) 1. Show students a 911 dialog model, such as the one on page 79,d.
2. Form groups of three. Have groups assign the roles of caller, victim, and 911 operator.3. Tell students to create and act out a conversation, based on the model.
(The victim mimes symptoms, while the caller and 911 operator talk.)
EVALUATION: [ROLEPLAY](20-30 minutes) • Have groups present their dramas while the class notes what they observe on
the evaluation checklist from page 82.
EXPANSION: [BRAINSTORM](as time permits) • Assign each group a different emergency and have them brainstorm ways to
prevent it.
80
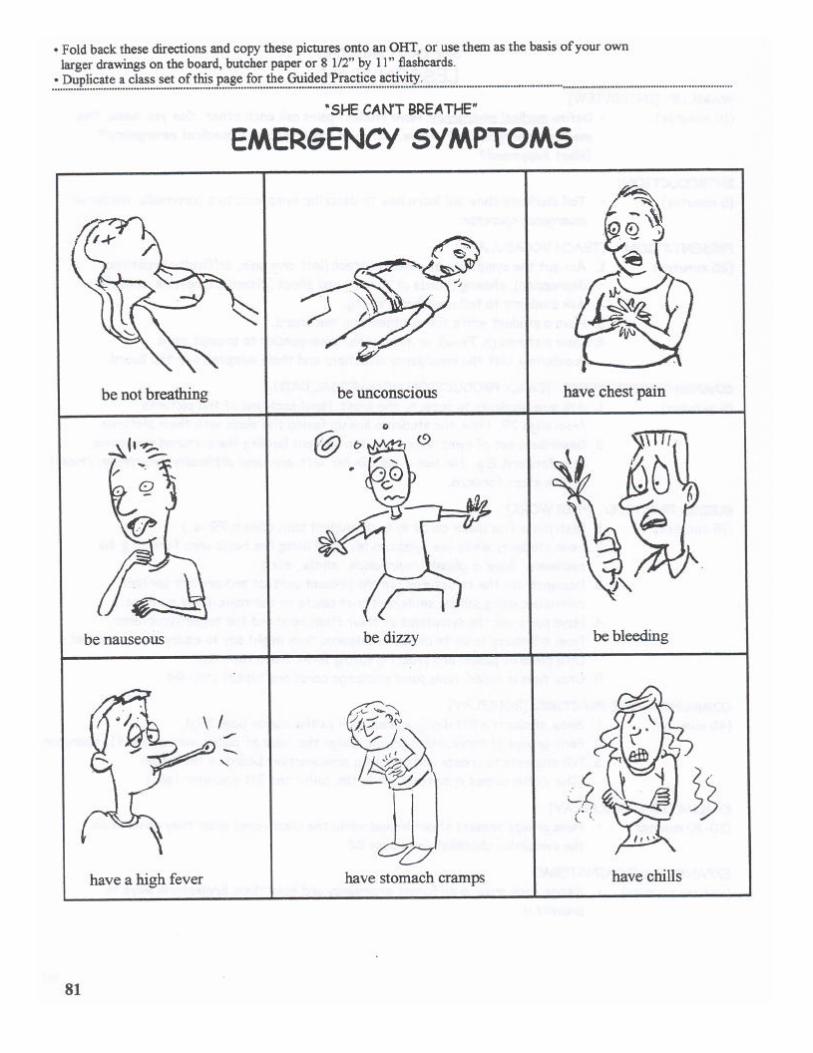
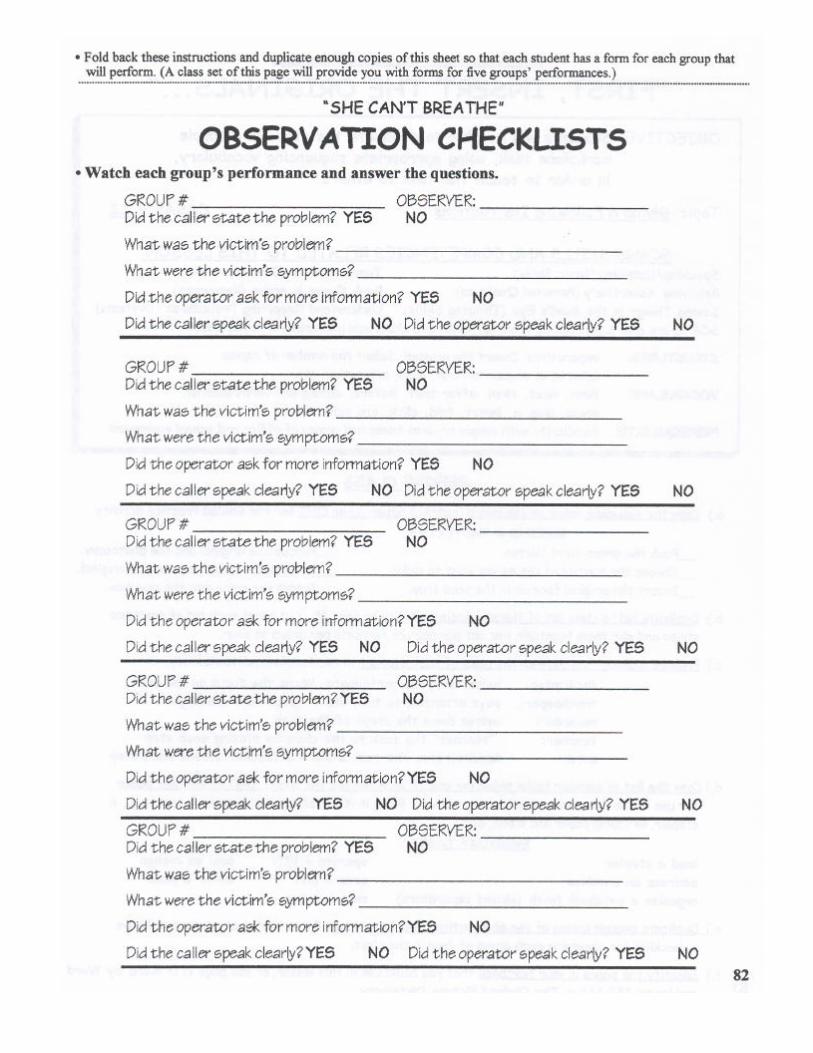
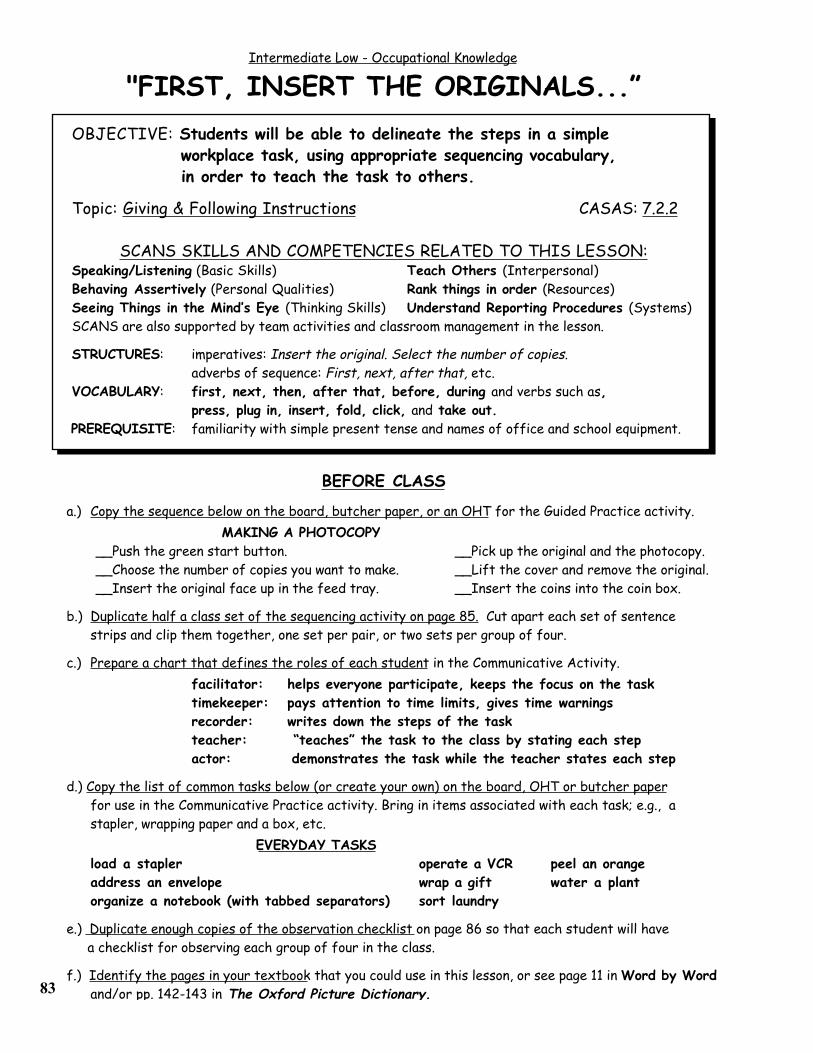
Intermediate Low - Occupational Knowledge
"FIRST, INSERT THE ORIGINALS...”OBJECTIVE: Students will be able to delineate the steps in a simple
workplace task, using appropriate sequencing vocabulary, in order to teach the task to others.
Topic: Giving & Following Instructions CASAS: 7.2.2
SCANS SKILLS AND COMPETENCIES RELATED TO THIS LESSON:Speaking/Listening (Basic Skills) Teach Others (Interpersonal)Behaving Assertively (Personal Qualities) Rank things in order (Resources)Seeing Things in the Mind’s Eye (Thinking Skills) Understand Reporting Procedures (Systems)SCANS are also supported by team activities and classroom management in the lesson.
STRUCTURES: imperatives: Insert the original. Select the number of copies.adverbs of sequence: First, next, after that, etc.
VOCABULARY: first, next, then, after that, before, during and verbs such as,press, plug in, insert, fold, click, and take out.
PREREQUISITE: familiarity with simple present tense and names of office and school equipment.
BEFORE CLASS
a.) Copy the sequence below on the board, butcher paper, or an OHT for the Guided Practice activity. MAKING A PHOTOCOPY
__Push the green start button. __Pick up the original and the photocopy.__Choose the number of copies you want to make. __Lift the cover and remove the original.__Insert the original face up in the feed tray. __Insert the coins into the coin box.
b.) Duplicate half a class set of the sequencing activity on page 85. Cut apart each set of sentence strips and clip them together, one set per pair, or two sets per group of four.
c.) Prepare a chart that defines the roles of each student in the Communicative Activity.facilitator: helps everyone participate, keeps the focus on the tasktimekeeper: pays attention to time limits, gives time warningsrecorder: writes down the steps of the taskteacher: “teaches” the task to the class by stating each stepactor: demonstrates the task while the teacher states each step
d.) Copy the list of common tasks below (or create your own) on the board, OHT or butcher paperfor use in the Communicative Practice activity. Bring in items associated with each task; e.g., a
stapler, wrapping paper and a box, etc. EVERYDAY TASKS
load a stapler operate a VCR peel an orangeaddress an envelope wrap a gift water a plantorganize a notebook (with tabbed separators) sort laundry
e.) Duplicate enough copies of the observation checklist on page 86 so that each student will have a checklist for observing each group of four in the class.
f.) Identify the pages in your textbook that you could use in this lesson, or see page 11 in Word by Wordand/or pp. 142-143 in The Oxford Picture Dictionary.83
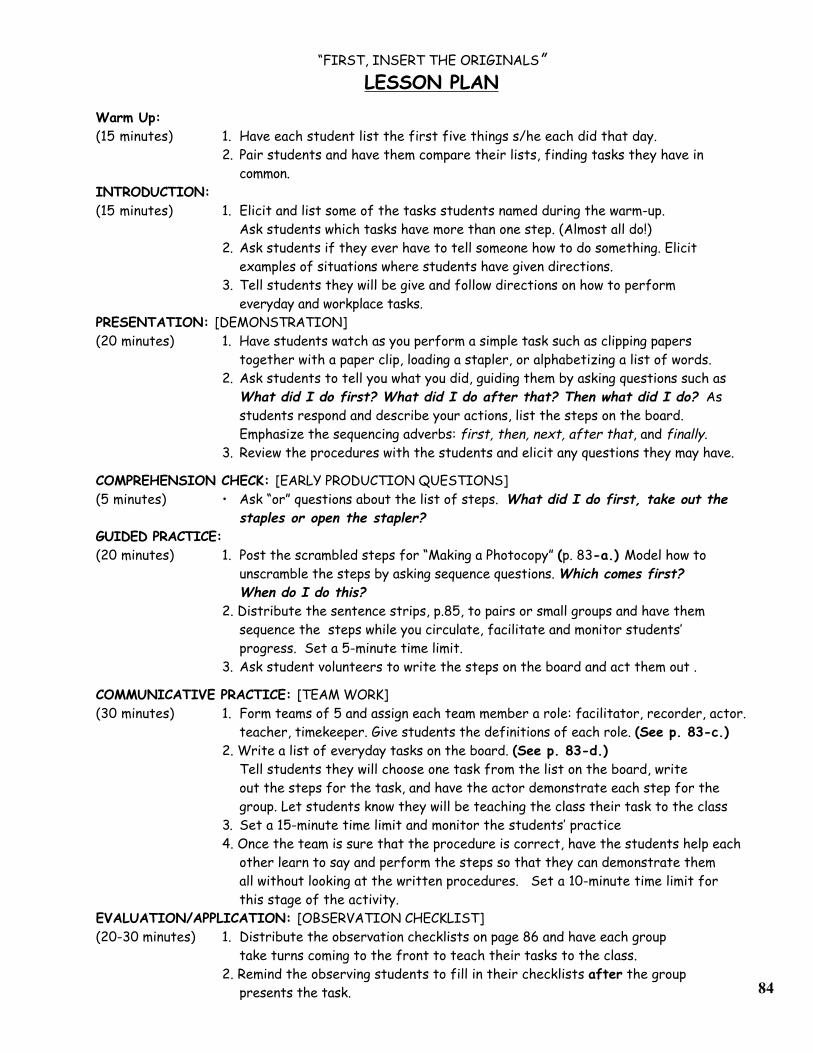
“FIRST, INSERT THE ORIGINALS”LESSON PLAN
Warm Up:(15 minutes) 1. Have each student list the first five things s/he each did that day.
2. Pair students and have them compare their lists, finding tasks they have in common.
INTRODUCTION:(15 minutes) 1. Elicit and list some of the tasks students named during the warm-up.
Ask students which tasks have more than one step. (Almost all do!)2. Ask students if they ever have to tell someone how to do something. Elicit
examples of situations where students have given directions.3. Tell students they will be give and follow directions on how to perform
everyday and workplace tasks.PRESENTATION: [DEMONSTRATION](20 minutes) 1. Have students watch as you perform a simple task such as clipping papers
together with a paper clip, loading a stapler, or alphabetizing a list of words.2. Ask students to tell you what you did, guiding them by asking questions such as
What did I do first? What did I do after that? Then what did I do? As students respond and describe your actions, list the steps on the board. Emphasize the sequencing adverbs: first, then, next, after that, and finally.
3. Review the procedures with the students and elicit any questions they may have.
COMPREHENSION CHECK: [EARLY PRODUCTION QUESTIONS](5 minutes) • Ask “or” questions about the list of steps. What did I do first, take out the staples or open the stapler?GUIDED PRACTICE: (20 minutes) 1. Post the scrambled steps for “Making a Photocopy” (p. 83-a.) Model how to
unscramble the steps by asking sequence questions. Which comes first?When do I do this?
2. Distribute the sentence strips, p.85, to pairs or small groups and have them sequence the steps while you circulate, facilitate and monitor students’ progress. Set a 5-minute time limit.
3. Ask student volunteers to write the steps on the board and act them out .
COMMUNICATIVE PRACTICE: [TEAM WORK](30 minutes) 1. Form teams of 5 and assign each team member a role: facilitator, recorder, actor.
teacher, timekeeper. Give students the definitions of each role. (See p. 83-c.)2. Write a list of everyday tasks on the board. (See p. 83-d.)
Tell students they will choose one task from the list on the board, writeout the steps for the task, and have the actor demonstrate each step for thegroup. Let students know they will be teaching the class their task to the class
3. Set a 15-minute time limit and monitor the students’ practice4. Once the team is sure that the procedure is correct, have the students help each
other learn to say and perform the steps so that they can demonstrate them all without looking at the written procedures. Set a 10-minute time limit for
this stage of the activity.EVALUATION/APPLICATION: [OBSERVATION CHECKLIST](20-30 minutes) 1. Distribute the observation checklists on page 86 and have each group
take turns coming to the front to teach their tasks to the class.2. Remind the observing students to fill in their checklists after the group
presents the task. 84
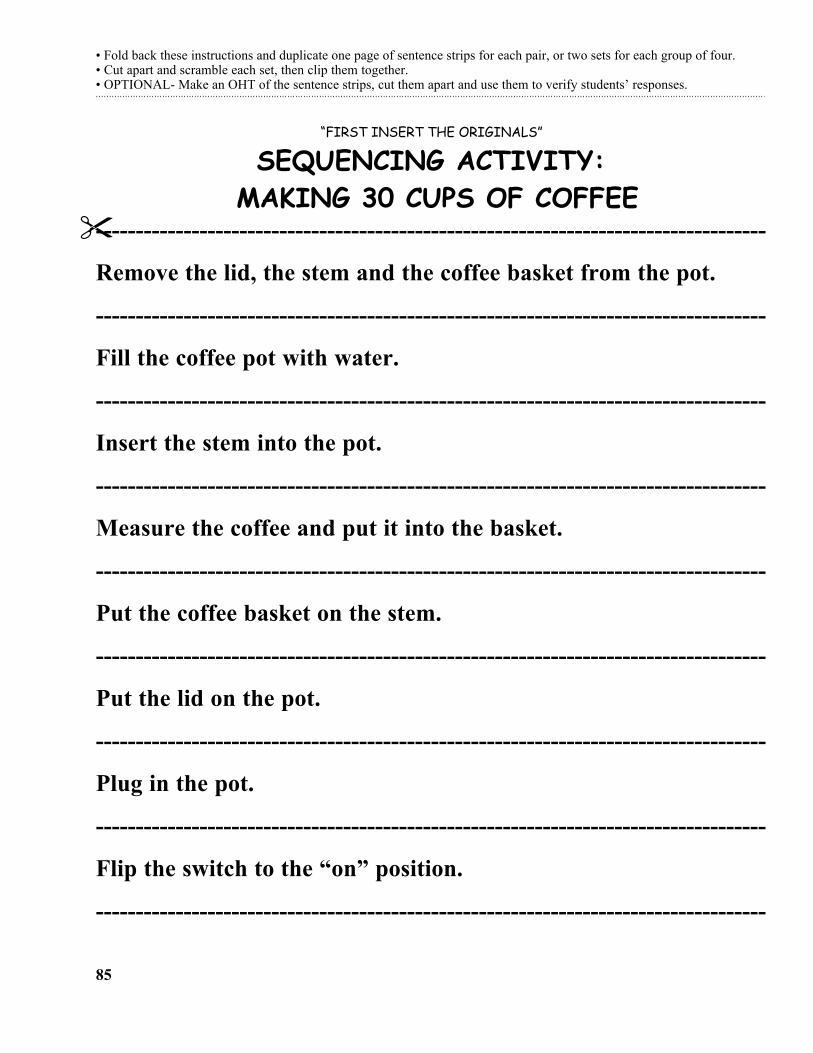
• Fold back these instructions and duplicate one page of sentence strips for each pair, or two sets for each group of four.• Cut apart and scramble each set, then clip them together.• OPTIONAL- Make an OHT of the sentence strips, cut them apart and use them to verify students’ responses.
“FIRST INSERT THE ORIGINALS”
SEQUENCING ACTIVITY: MAKING 30 CUPS OF COFFEE
------------------------------------------------------------------------------------
Remove the lid, the stem and the coffee basket from the pot.
------------------------------------------------------------------------------------
Fill the coffee pot with water.
------------------------------------------------------------------------------------
Insert the stem into the pot.
------------------------------------------------------------------------------------
Measure the coffee and put it into the basket.
------------------------------------------------------------------------------------
Put the coffee basket on the stem.
------------------------------------------------------------------------------------
Put the lid on the pot.
------------------------------------------------------------------------------------
Plug in the pot.
------------------------------------------------------------------------------------
Flip the switch to the “on” position.
------------------------------------------------------------------------------------
85
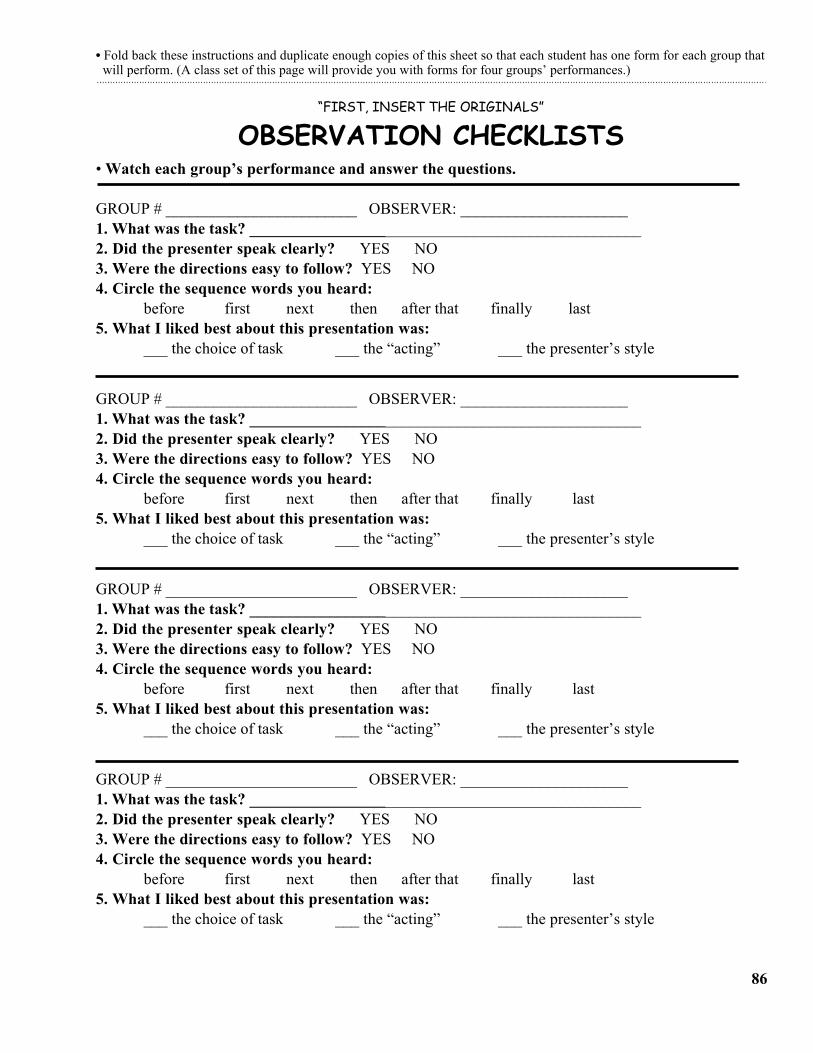
• Fold back these instructions and duplicate enough copies of this sheet so that each student has one form for each group that will perform. (A class set of this page will provide you with forms for four groups’ performances.)
“FIRST, INSERT THE ORIGINALS”
OBSERVATION CHECKLISTS• Watch each group’s performance and answer the questions.
GROUP # ________________________ OBSERVER: _____________________1. What was the task? _________________________________________________2. Did the presenter speak clearly? YES NO3. Were the directions easy to follow? YES NO4. Circle the sequence words you heard:
before first next then after that finally last5. What I liked best about this presentation was:
___ the choice of task ___ the “acting” ___ the presenter’s style
86
87
Intermediate Low - Learning Skills
"COMPUTER FRIENDLY"OBJECTIVE: Students will be able to identify the parts of a computer,
read a short article about computers, and use reasoning skillsto identify valid and invalid conclusions based on the article.
Topic: Computers CASAS: 4.5.1, 7.2.4
SCANS SKILLS AND COMPETENCIES RELATED TO THIS LESSON:Speaking/Reading (Basic Skills) Interpret and Communicate Information (Information)Reasoning (Thinking Skills) Select Technology (Technology)SCANS are also supported by team activities and classroom management in the lesson.
STRUCTURES: simple present and past tensesVOCABULARY: mouse, keyboard, cable, motherboard, hard drive, software, floppy disk,
byte, memory, monitor, printer, scanner, selected words from the readingPREREQUISITE: none
BEFORE CLASS
a.) Bring in realia or pictures to represent at least 10 of the following vocabulary items: computer,CPU, monitor, motherboard, mouse, keyboard, cable, scanner, printer, modem, laptop,trackball, slot, port, hard disk drive, surge protector, CD-ROM, CD-ROM drive
b.) Duplicate a class set of the computer diagram on page 89 for the Presentation activity.
c.) Prepare “or” questions (or use the ones below) to help check how well students understand the purposeof each component. These are used in the Comprehension Check activity.
1. Does the final product come out of the printer or the scanner?2. Does the modem attach to the telephone line or the printer?3. Are the components connected by the mouse or the cable?4. Do cables fit into slots or ports?5. Is the most important component the CPU or the CD ROM?6. Does the monitor look like a T.V. or a typewriter?7. Does the floppy disk go in the hard drive or the disk drive?8. Do you type on the keyboard or the motherboard?
d.) Duplicate a class set of the article on page 90 for the Guided Practice and Communicative Practice activities.e.) Prepare a set of conclusions based on the article or use the ones below in the Communicative Practiceactivity:
1. It’s very expensive to put computers into every classroom.2. There aren’t enough computers in the world.3. BASIC programs were used in jobs in the 1980’s.4. Many teachers are not familiar with the internet.5. There are many job opportunities for computer repair people.6. The government wants teachers to teach students to use computers.7. Bill Clinton learned how to use a computer at Jordan Locke Community Adult School.
f.) Review How to Conduct a Narrative Reading activity, p. 162.
g.) Identify the pages in your textbook that you could use with this lesson or see Working It Out, pp. 30-31.w
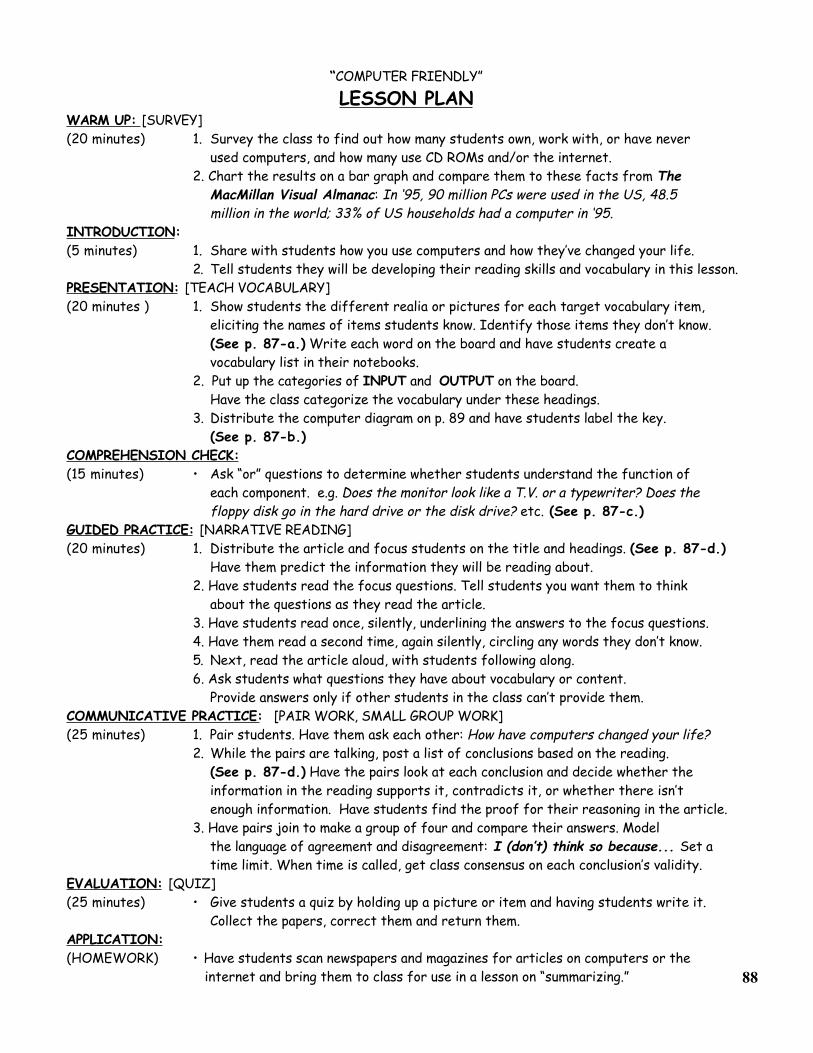
“COMPUTER FRIENDLY”
LESSON PLANWARM UP: [SURVEY](20 minutes) 1. Survey the class to find out how many students own, work with, or have never
used computers, and how many use CD ROMs and/or the internet.2. Chart the results on a bar graph and compare them to these facts from The
MacMillan Visual Almanac: In ‘95, 90 million PCs were used in the US, 48.5 million in the world; 33% of US households had a computer in ‘95.
INTRODUCTION:(5 minutes) 1. Share with students how you use computers and how they’ve changed your life.
2. Tell students they will be developing their reading skills and vocabulary in this lesson.PRESENTATION: [TEACH VOCABULARY](20 minutes ) 1. Show students the different realia or pictures for each target vocabulary item,
eliciting the names of items students know. Identify those items they don’t know.(See p. 87-a.) Write each word on the board and have students create a vocabulary list in their notebooks.
2. Put up the categories of INPUT and OUTPUT on the board.Have the class categorize the vocabulary under these headings.
3. Distribute the computer diagram on p. 89 and have students label the key.(See p. 87-b.)
COMPREHENSION CHECK:(15 minutes) • Ask “or” questions to determine whether students understand the function of
each component. e.g. Does the monitor look like a T.V. or a typewriter? Does thefloppy disk go in the hard drive or the disk drive? etc. (See p. 87-c.)
GUIDED PRACTICE: [NARRATIVE READING](20 minutes) 1. Distribute the article and focus students on the title and headings. (See p. 87-d.)
Have them predict the information they will be reading about.2. Have students read the focus questions. Tell students you want them to think
about the questions as they read the article.3. Have students read once, silently, underlining the answers to the focus questions.4. Have them read a second time, again silently, circling any words they don’t know.5. Next, read the article aloud, with students following along.6. Ask students what questions they have about vocabulary or content.
Provide answers only if other students in the class can’t provide them.COMMUNICATIVE PRACTICE: [PAIR WORK, SMALL GROUP WORK](25 minutes) 1. Pair students. Have them ask each other: How have computers changed your life?
2. While the pairs are talking, post a list of conclusions based on the reading. (See p. 87-d.) Have the pairs look at each conclusion and decide whether the information in the reading supports it, contradicts it, or whether there isn’t enough information. Have students find the proof for their reasoning in the article.
3. Have pairs join to make a group of four and compare their answers. Modelthe language of agreement and disagreement: I (don’t) think so because... Set atime limit. When time is called, get class consensus on each conclusion’s validity.
EVALUATION: [QUIZ](25 minutes) • Give students a quiz by holding up a picture or item and having students write it.
Collect the papers, correct them and return them.APPLICATION:(HOMEWORK) • Have students scan newspapers and magazines for articles on computers or the
internet and bring them to class for use in a lesson on “summarizing.” 88
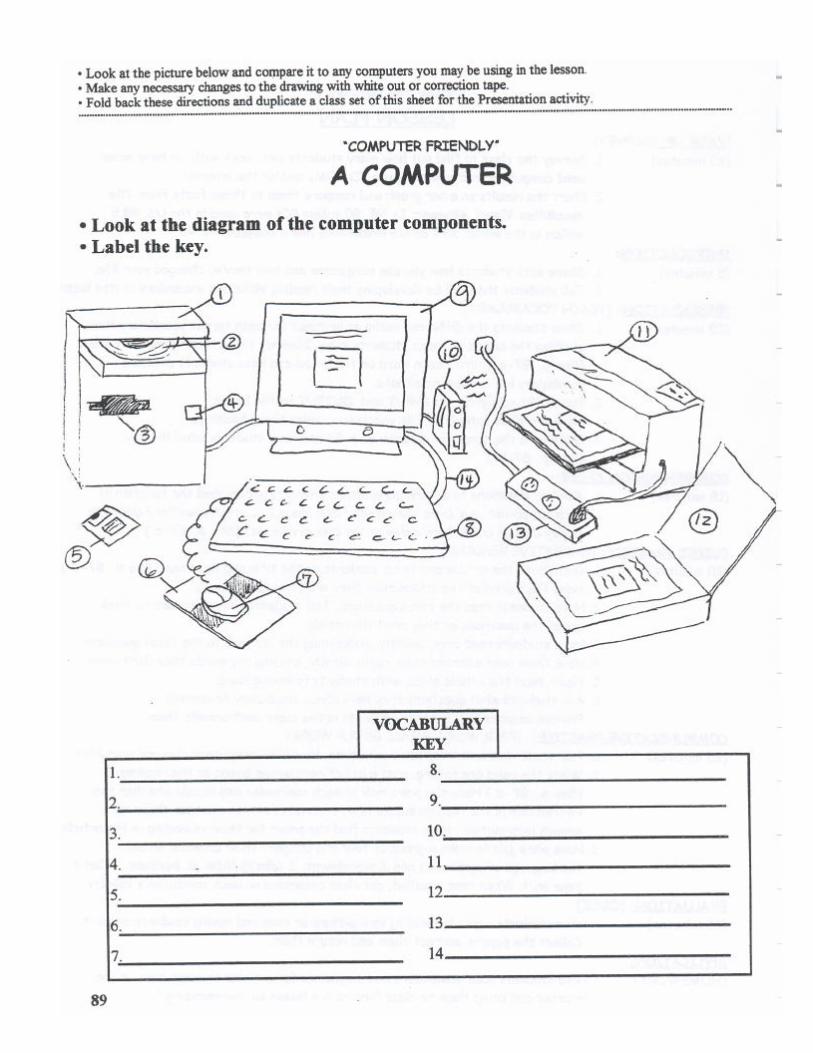
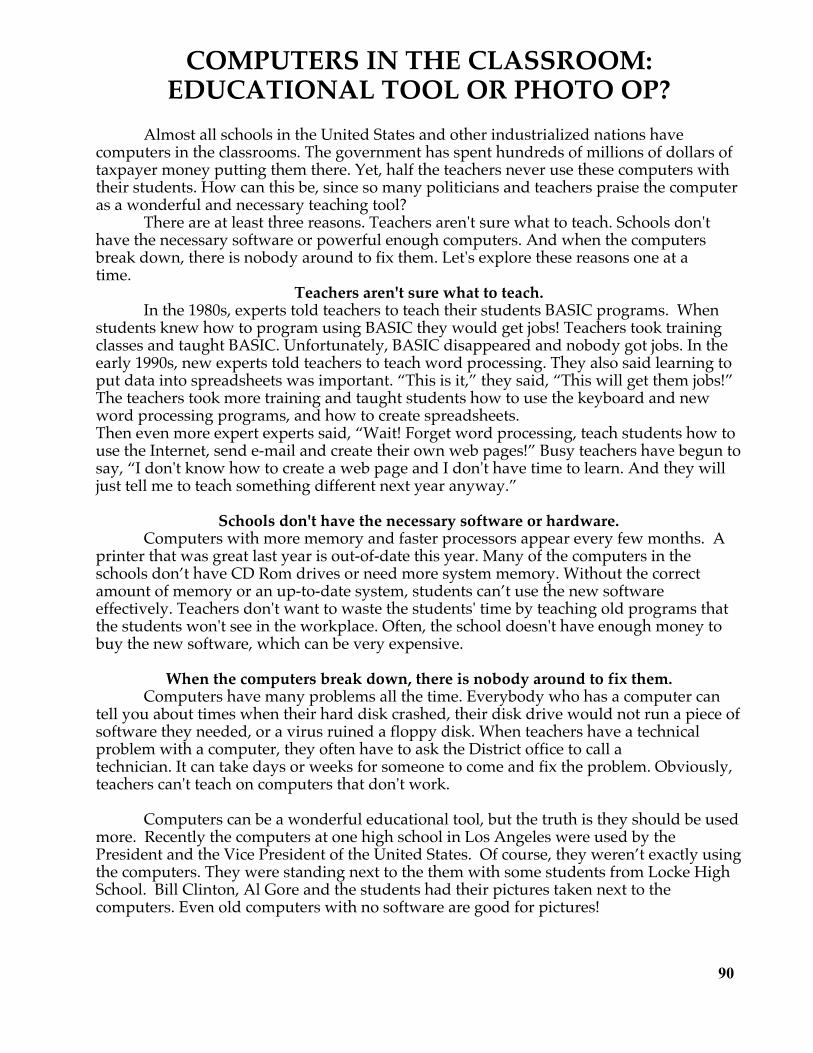
90
COMPUTERS IN THE CLASSROOM:EDUCATIONAL TOOL OR PHOTO OP?
Almost all schools in the United States and other industrialized nations havecomputers in the classrooms. The government has spent hundreds of millions of dollars oftaxpayer money putting them there. Yet, half the teachers never use these computers withtheir students. How can this be, since so many politicians and teachers praise the computeras a wonderful and necessary teaching tool?
There are at least three reasons. Teachers aren't sure what to teach. Schools don'thave the necessary software or powerful enough computers. And when the computersbreak down, there is nobody around to fix them. Let's explore these reasons one at atime.
Teachers aren't sure what to teach.In the 1980s, experts told teachers to teach their students BASIC programs. When
students knew how to program using BASIC they would get jobs! Teachers took trainingclasses and taught BASIC. Unfortunately, BASIC disappeared and nobody got jobs. In theearly 1990s, new experts told teachers to teach word processing. They also said learning toput data into spreadsheets was important. “This is it,” they said, “This will get them jobs!”The teachers took more training and taught students how to use the keyboard and newword processing programs, and how to create spreadsheets.Then even more expert experts said, “Wait! Forget word processing, teach students how touse the Internet, send e-mail and create their own web pages!” Busy teachers have begun tosay, “I don't know how to create a web page and I don't have time to learn. And they willjust tell me to teach something different next year anyway.”
Schools don't have the necessary software or hardware.Computers with more memory and faster processors appear every few months. A
printer that was great last year is out-of-date this year. Many of the computers in theschools don’t have CD Rom drives or need more system memory. Without the correctamount of memory or an up-to-date system, students can’t use the new softwareeffectively. Teachers don't want to waste the students' time by teaching old programs thatthe students won't see in the workplace. Often, the school doesn't have enough money tobuy the new software, which can be very expensive.
When the computers break down, there is nobody around to fix them.Computers have many problems all the time. Everybody who has a computer can
tell you about times when their hard disk crashed, their disk drive would not run a piece ofsoftware they needed, or a virus ruined a floppy disk. When teachers have a technicalproblem with a computer, they often have to ask the District office to call atechnician. It can take days or weeks for someone to come and fix the problem. Obviously,teachers can't teach on computers that don't work.
Computers can be a wonderful educational tool, but the truth is they should be usedmore. Recently the computers at one high school in Los Angeles were used by thePresident and the Vice President of the United States. Of course, they weren’t exactly usingthe computers. They were standing next to the them with some students from Locke HighSchool. Bill Clinton, Al Gore and the students had their pictures taken next to thecomputers. Even old computers with no software are good for pictures!

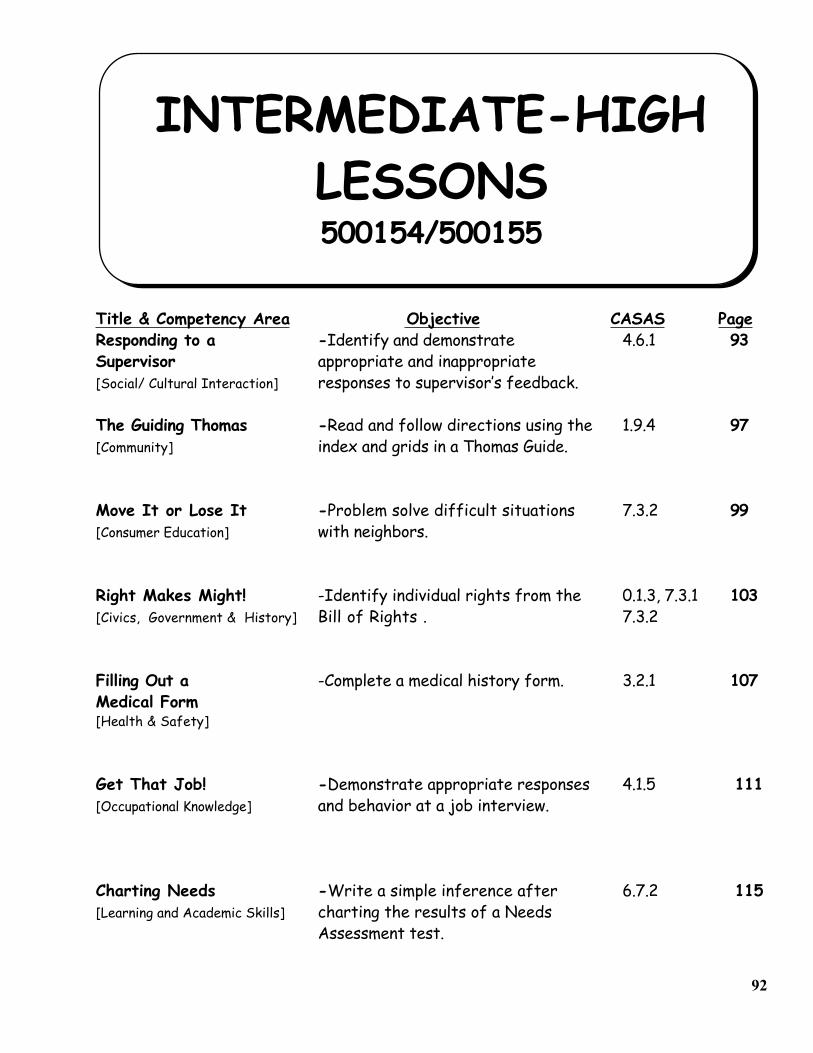
INTERMEDIATE-HIGHLESSONS500154/500155
Title & Competency Area Objective CASAS PageResponding to a -Identify and demonstrate 4.6.1 93Supervisor appropriate and inappropriate[Social/ Cultural Interaction] responses to supervisor’s feedback.
The Guiding Thomas -Read and follow directions using the 1.9.4 97[Community] index and grids in a Thomas Guide.
Move It or Lose It -Problem solve difficult situations 7.3.2 99[Consumer Education] with neighbors.
Right Makes Might! -Identify individual rights from the 0.1.3, 7.3.1 103[Civics, Government & History] Bill of Rights . 7.3.2
Filling Out a -Complete a medical history form. 3.2.1 107Medical Form[Health & Safety]
Get That Job! -Demonstrate appropriate responses 4.1.5 111[Occupational Knowledge] and behavior at a job interview.
Charting Needs -Write a simple inference after 6.7.2 115[Learning and Academic Skills] charting the results of a Needs
Assessment test.
92
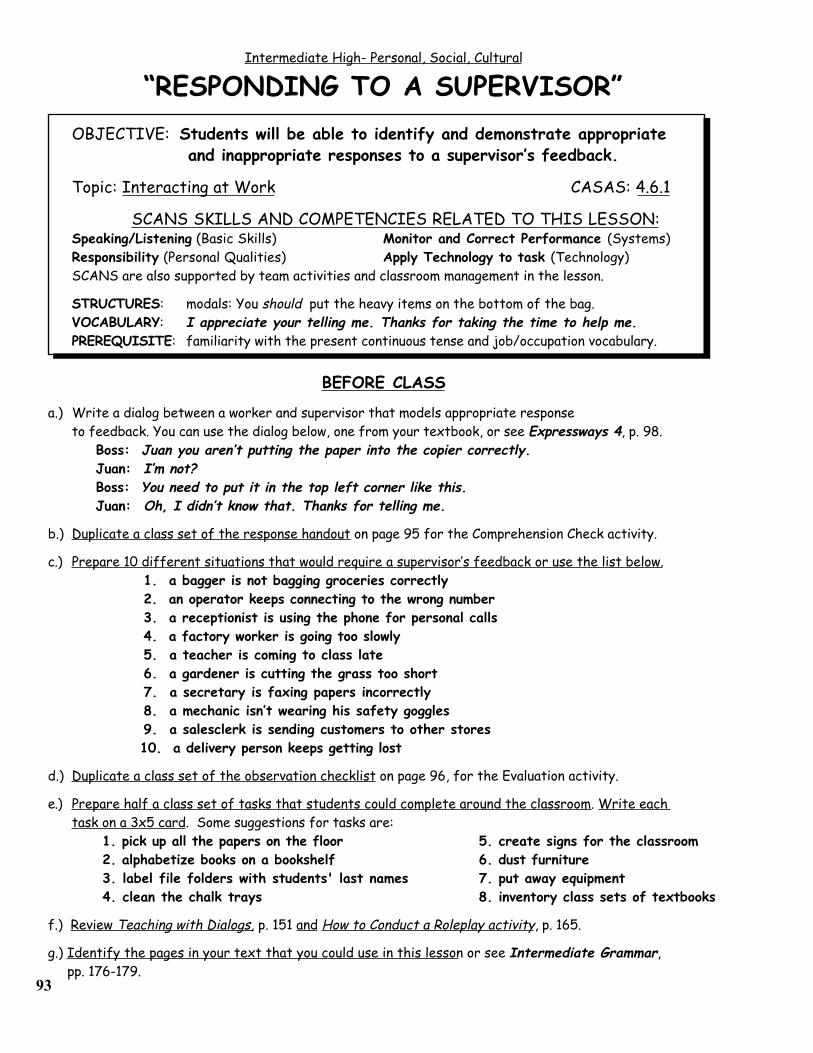
93
Intermediate High- Personal, Social, Cultural
“RESPONDING TO A SUPERVISOR”OBJECTIVE: Students will be able to identify and demonstrate appropriate
and inappropriate responses to a supervisor’s feedback.
Topic: Interacting at Work CASAS: 4.6.1
SCANS SKILLS AND COMPETENCIES RELATED TO THIS LESSON:Speaking/Listening (Basic Skills) Monitor and Correct Performance (Systems)Responsibility (Personal Qualities) Apply Technology to task (Technology)SCANS are also supported by team activities and classroom management in the lesson.
STRUCTURES: modals: You should put the heavy items on the bottom of the bag.VOCABULARY: I appreciate your telling me. Thanks for taking the time to help me.PREREQUISITE: familiarity with the present continuous tense and job/occupation vocabulary.
BEFORE CLASS
a.) Write a dialog between a worker and supervisor that models appropriate response to feedback. You can use the dialog below, one from your textbook, or see Expressways 4, p. 98.
Boss: Juan you aren’t putting the paper into the copier correctly.Juan: I’m not?Boss: You need to put it in the top left corner like this.
Juan: Oh, I didn’t know that. Thanks for telling me.
b.) Duplicate a class set of the response handout on page 95 for the Comprehension Check activity.
c.) Prepare 10 different situations that would require a supervisor’s feedback or use the list below.1. a bagger is not bagging groceries correctly2. an operator keeps connecting to the wrong number3. a receptionist is using the phone for personal calls4. a factory worker is going too slowly5. a teacher is coming to class late6. a gardener is cutting the grass too short7. a secretary is faxing papers incorrectly8. a mechanic isn’t wearing his safety goggles9. a salesclerk is sending customers to other stores
10. a delivery person keeps getting lost
d.) Duplicate a class set of the observation checklist on page 96, for the Evaluation activity.
e.) Prepare half a class set of tasks that students could complete around the classroom. Write each task on a 3x5 card. Some suggestions for tasks are:
1. pick up all the papers on the floor 5. create signs for the classroom2. alphabetize books on a bookshelf 6. dust furniture3. label file folders with students' last names 7. put away equipment4. clean the chalk trays 8. inventory class sets of textbooks
f.) Review Teaching with Dialogs, p. 151 and How to Conduct a Roleplay activity, p. 165.
g.) Identify the pages in your text that you could use in this lesson or see Intermediate Grammar, pp. 176-179.
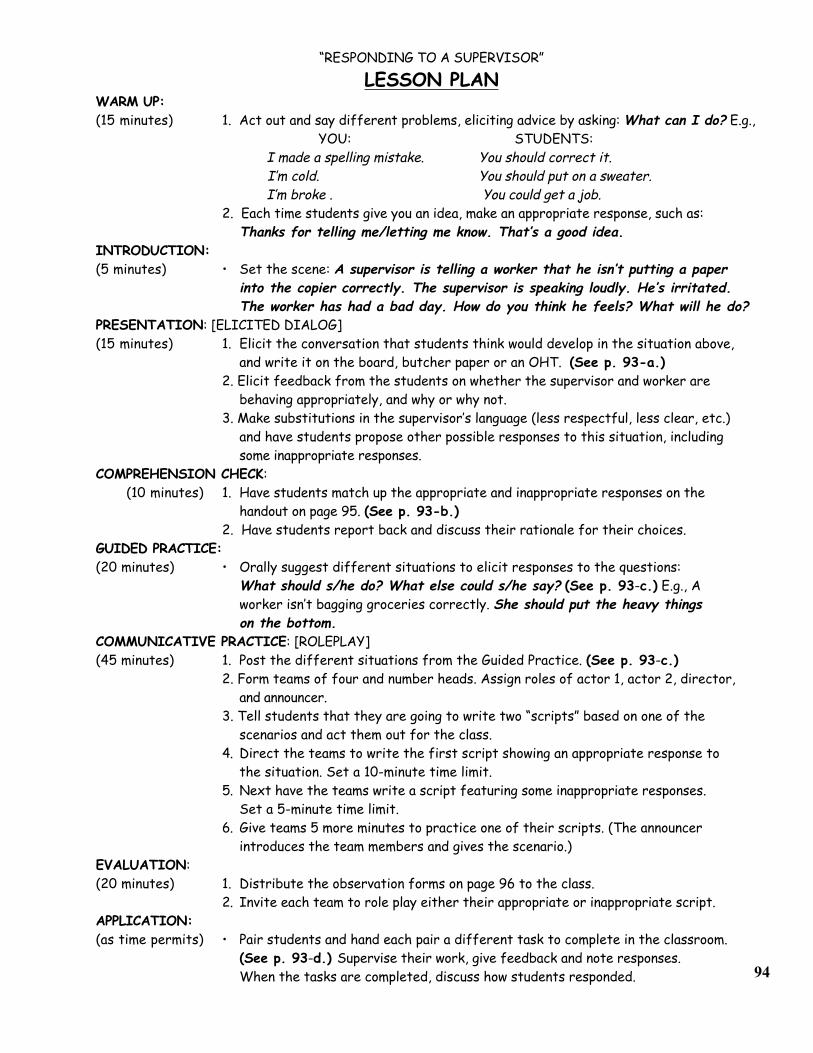
“RESPONDING TO A SUPERVISOR”
LESSON PLANWARM UP:(15 minutes) 1. Act out and say different problems, eliciting advice by asking: What can I do? E.g.,
YOU: STUDENTS: I made a spelling mistake. You should correct it.
I’m cold. You should put on a sweater. I’m broke . You could get a job.
2. Each time students give you an idea, make an appropriate response, such as:Thanks for telling me/letting me know. That’s a good idea.
INTRODUCTION:(5 minutes) • Set the scene: A supervisor is telling a worker that he isn’t putting a paper
into the copier correctly. The supervisor is speaking loudly. He’s irritated.The worker has had a bad day. How do you think he feels? What will he do?
PRESENTATION: [ELICITED DIALOG](15 minutes) 1. Elicit the conversation that students think would develop in the situation above,
and write it on the board, butcher paper or an OHT. (See p. 93-a.)2. Elicit feedback from the students on whether the supervisor and worker are
behaving appropriately, and why or why not.3. Make substitutions in the supervisor’s language (less respectful, less clear, etc.)
and have students propose other possible responses to this situation, including some inappropriate responses.COMPREHENSION CHECK:
(10 minutes) 1. Have students match up the appropriate and inappropriate responses on the handout on page 95. (See p. 93-b.)2. Have students report back and discuss their rationale for their choices.
GUIDED PRACTICE:(20 minutes) • Orally suggest different situations to elicit responses to the questions:
What should s/he do? What else could s/he say? (See p. 93-c.) E.g., A worker isn’t bagging groceries correctly. She should put the heavy things
on the bottom.COMMUNICATIVE PRACTICE: [ROLEPLAY](45 minutes) 1. Post the different situations from the Guided Practice. (See p. 93-c.)
2. Form teams of four and number heads. Assign roles of actor 1, actor 2, director,and announcer.
3. Tell students that they are going to write two “scripts” based on one of the scenarios and act them out for the class.
4. Direct the teams to write the first script showing an appropriate response tothe situation. Set a 10-minute time limit.
5. Next have the teams write a script featuring some inappropriate responses.Set a 5-minute time limit.
6. Give teams 5 more minutes to practice one of their scripts. (The announcer introduces the team members and gives the scenario.)
EVALUATION:(20 minutes) 1. Distribute the observation forms on page 96 to the class.
2. Invite each team to role play either their appropriate or inappropriate script.APPLICATION:(as time permits) • Pair students and hand each pair a different task to complete in the classroom.
(See p. 93-d.) Supervise their work, give feedback and note responses.When the tasks are completed, discuss how students responded. 94
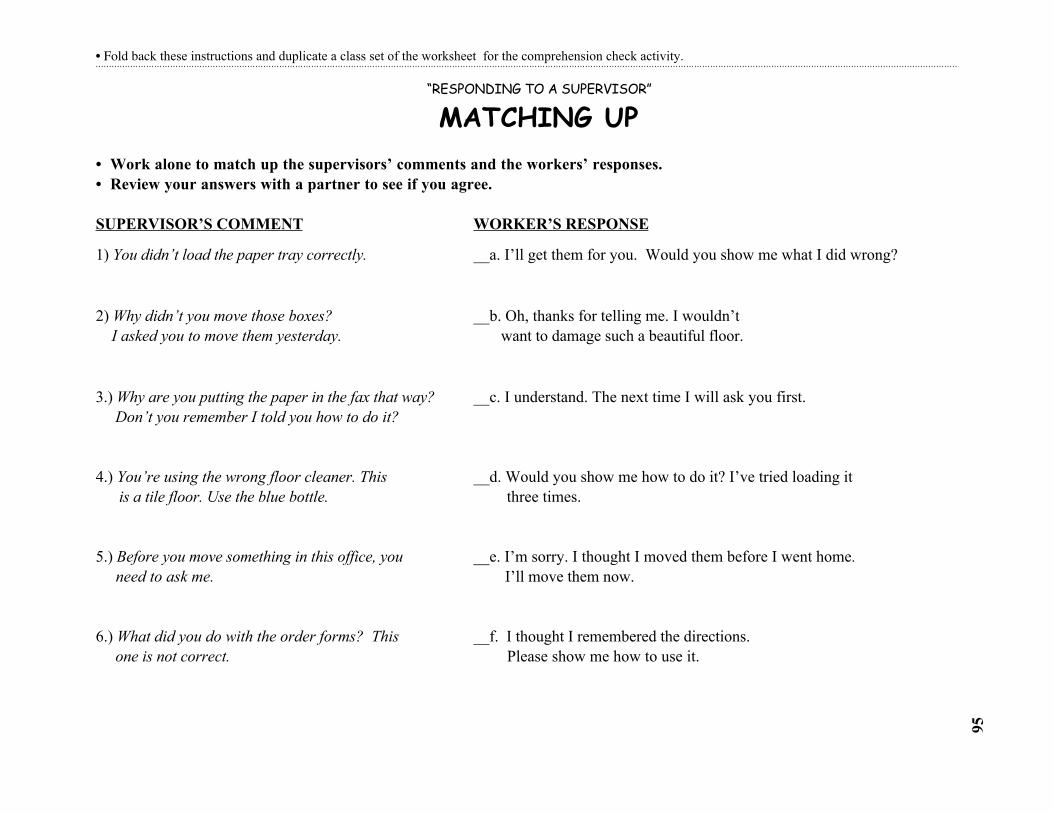
• Fold back these instructions and duplicate a class set of the worksheet for the comprehension check activity.
“RESPONDING TO A SUPERVISOR”
MATCHING UP• Work alone to match up the supervisors’ comments and the workers’ responses.• Review your answers with a partner to see if you agree.
SUPERVISOR’S COMMENT WORKER’S RESPONSE
1) You didn’t load the paper tray correctly. __a. I’ll get them for you. Would you show me what I did wrong?
2) Why didn’t you move those boxes? __b. Oh, thanks for telling me. I wouldn’t I asked you to move them yesterday. want to damage such a beautiful floor.
3.) Why are you putting the paper in the fax that way? __c. I understand. The next time I will ask you first. Don’t you remember I told you how to do it?
4.) You’re using the wrong floor cleaner. This __d. Would you show me how to do it? I’ve tried loading it is a tile floor. Use the blue bottle. three times.
5.) Before you move something in this office, you __e. I’m sorry. I thought I moved them before I went home. need to ask me. I’ll move them now.
6.) What did you do with the order forms? This __f. I thought I remembered the directions. one is not correct. Please show me how to use it.
95
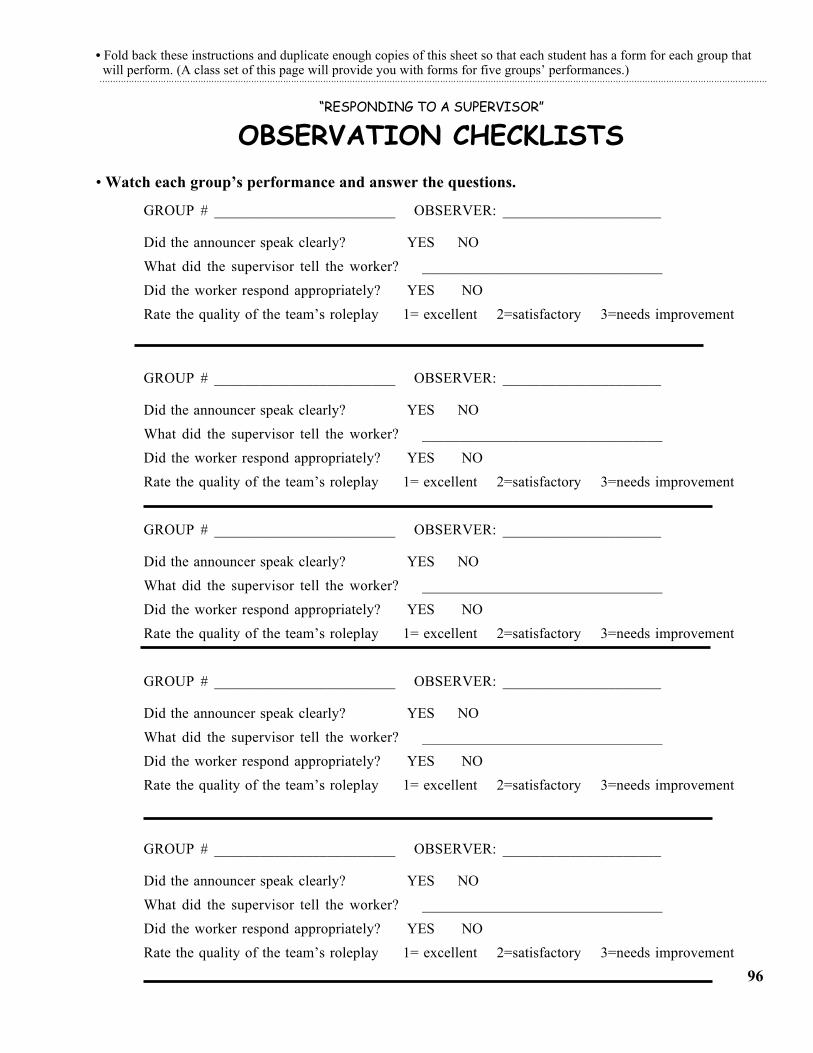
• Fold back these instructions and duplicate enough copies of this sheet so that each student has a form for each group that will perform. (A class set of this page will provide you with forms for five groups’ performances.)
“RESPONDING TO A SUPERVISOR”
OBSERVATION CHECKLISTS• Watch each group’s performance and answer the questions.
GROUP # ________________________ OBSERVER: _____________________
Did the announcer speak clearly? YES NO
What did the supervisor tell the worker? ________________________________
Did the worker respond appropriately? YES NO
Rate the quality of the team’s roleplay 1= excellent 2=satisfactory 3=needs improvement
96
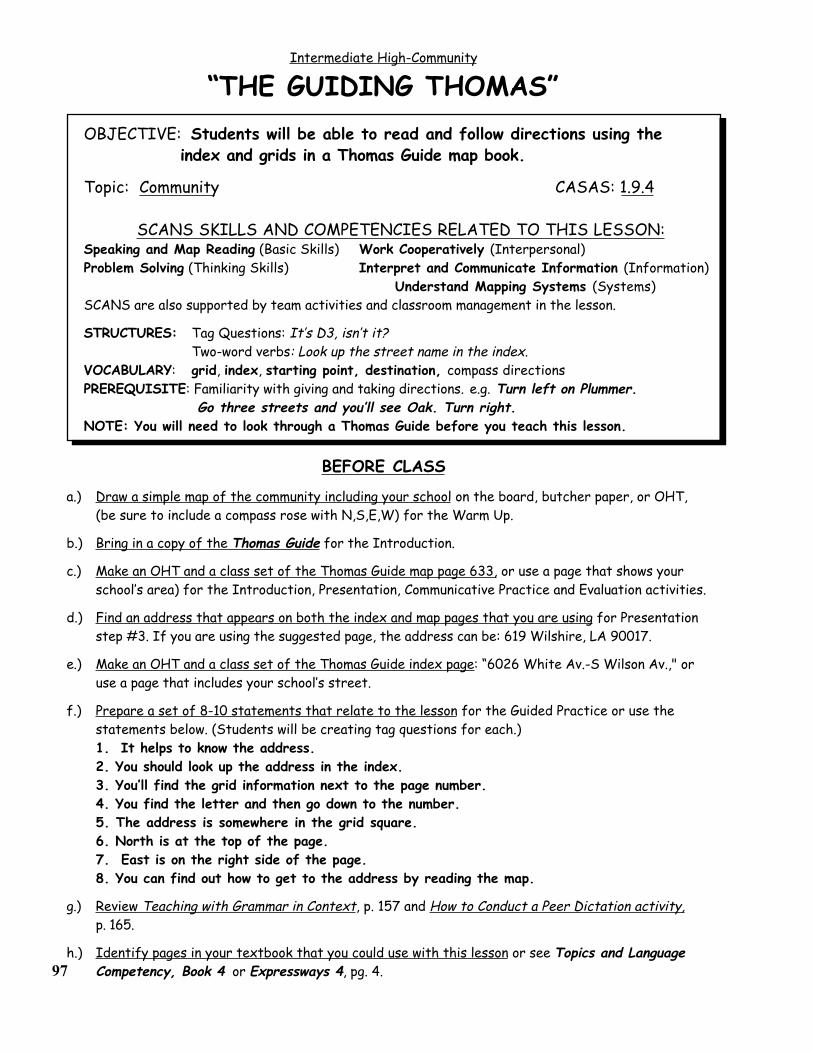
97
Intermediate High-Community
“THE GUIDING THOMAS”OBJECTIVE: Students will be able to read and follow directions using the
index and grids in a Thomas Guide map book.
Topic: Community CASAS: 1.9.4
SCANS SKILLS AND COMPETENCIES RELATED TO THIS LESSON:Speaking and Map Reading (Basic Skills) Work Cooperatively (Interpersonal)Problem Solving (Thinking Skills) Interpret and Communicate Information (Information)
Understand Mapping Systems (Systems)SCANS are also supported by team activities and classroom management in the lesson.
STRUCTURES: Tag Questions: It’s D3, isn’t it?Two-word verbs: Look up the street name in the index.
VOCABULARY: grid, index, starting point, destination, compass directionsPREREQUISITE: Familiarity with giving and taking directions. e.g. Turn left on Plummer.
Go three streets and you’ll see Oak. Turn right.NOTE: You will need to look through a Thomas Guide before you teach this lesson.
BEFORE CLASS
a.) Draw a simple map of the community including your school on the board, butcher paper, or OHT, (be sure to include a compass rose with N,S,E,W) for the Warm Up.
b.) Bring in a copy of the Thomas Guide for the Introduction.
c.) Make an OHT and a class set of the Thomas Guide map page 633, or use a page that shows yourschool’s area) for the Introduction, Presentation, Communicative Practice and Evaluation activities.
d.) Find an address that appears on both the index and map pages that you are using for Presentation step #3. If you are using the suggested page, the address can be: 619 Wilshire, LA 90017.
e.) Make an OHT and a class set of the Thomas Guide index page: “6026 White Av.-S Wilson Av.," oruse a page that includes your school’s street.
f.) Prepare a set of 8-10 statements that relate to the lesson for the Guided Practice or use thestatements below. (Students will be creating tag questions for each.)1. It helps to know the address.2. You should look up the address in the index.3. You’ll find the grid information next to the page number.4. You find the letter and then go down to the number.5. The address is somewhere in the grid square.6. North is at the top of the page.7. East is on the right side of the page.8. You can find out how to get to the address by reading the map.
g.) Review Teaching with Grammar in Context, p. 157 and How to Conduct a Peer Dictation activity, p. 165.
h.) Identify pages in your textbook that you could use with this lesson or see Topics and Language Competency, Book 4 or Expressways 4, pg. 4.
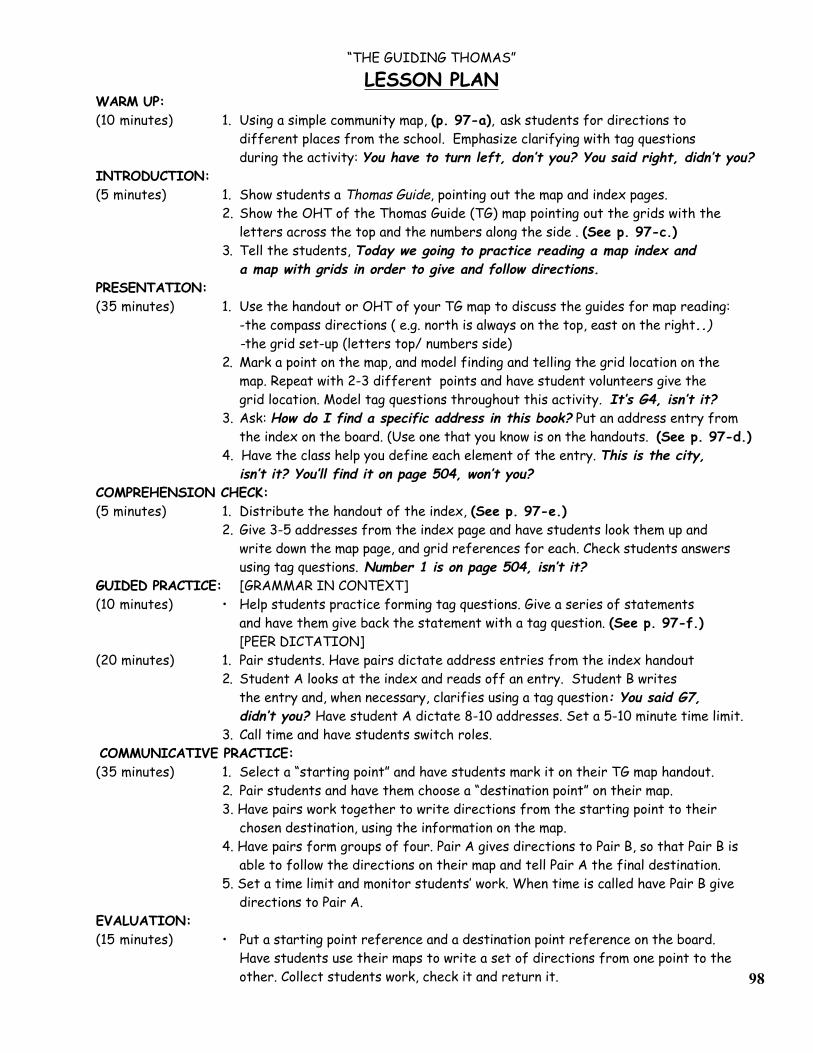
“THE GUIDING THOMAS”
LESSON PLANWARM UP:(10 minutes) 1. Using a simple community map, (p. 97-a), ask students for directions to
different places from the school. Emphasize clarifying with tag questionsduring the activity: You have to turn left, don’t you? You said right, didn’t you?
INTRODUCTION:(5 minutes) 1. Show students a Thomas Guide, pointing out the map and index pages.
2. Show the OHT of the Thomas Guide (TG) map pointing out the grids with theletters across the top and the numbers along the side . (See p. 97-c.)
3. Tell the students, Today we going to practice reading a map index anda map with grids in order to give and follow directions.
PRESENTATION:(35 minutes) 1. Use the handout or OHT of your TG map to discuss the guides for map reading:
-the compass directions ( e.g. north is always on the top, east on the right..)-the grid set-up (letters top/ numbers side)
2. Mark a point on the map, and model finding and telling the grid location on the map. Repeat with 2-3 different points and have student volunteers give the grid location. Model tag questions throughout this activity. It’s G4, isn’t it?
3. Ask: How do I find a specific address in this book? Put an address entry fromthe index on the board. (Use one that you know is on the handouts. (See p. 97-d.)
4. Have the class help you define each element of the entry. This is the city,isn’t it? You’ll find it on page 504, won’t you?
COMPREHENSION CHECK:(5 minutes) 1. Distribute the handout of the index, (See p. 97-e.)
2. Give 3-5 addresses from the index page and have students look them up and write down the map page, and grid references for each. Check students answers using tag questions. Number 1 is on page 504, isn’t it?
GUIDED PRACTICE: [GRAMMAR IN CONTEXT](10 minutes) • Help students practice forming tag questions. Give a series of statements and have them give back the statement with a tag question. (See p. 97-f.) [PEER DICTATION](20 minutes) 1. Pair students. Have pairs dictate address entries from the index handout 2. Student A looks at the index and reads off an entry. Student B writes
the entry and, when necessary, clarifies using a tag question: You said G7, didn’t you? Have student A dictate 8-10 addresses. Set a 5-10 minute time limit.
3. Call time and have students switch roles. COMMUNICATIVE PRACTICE:(35 minutes) 1. Select a “starting point” and have students mark it on their TG map handout.
2. Pair students and have them choose a “destination point” on their map.3. Have pairs work together to write directions from the starting point to their
chosen destination, using the information on the map.4. Have pairs form groups of four. Pair A gives directions to Pair B, so that Pair B is
able to follow the directions on their map and tell Pair A the final destination.5. Set a time limit and monitor students’ work. When time is called have Pair B give
directions to Pair A.EVALUATION:(15 minutes) • Put a starting point reference and a destination point reference on the board.
Have students use their maps to write a set of directions from one point to the other. Collect students work, check it and return it. 98
Intermediate High- Consumer Economics
“MOVE IT OR LOSE IT”OBJECTIVE: Students will be able to problem solve difficult situations
with neighbors.
Topic: Housing CASAS: 7.3.2
SCANS SKILLS AND COMPETENCIES RELATED TO THIS LESSON:
Speaking (Basic Skills) Negotiate (Interpersonal)Integrity/Honesty (Personal Qualities) Obtain & Communicate Data (Information)Problem Solving (Thinking Skills) Monitor and Correct Performance (Systems)SCANS are also supported by team activities and classroom management in the lesson.
STRUCTURES: Short Answers w/question intonation:A: You're blocking my driveway. B: I am?Indirect Questions: Could you please move your car?
VOCABULARY: bark, block, cable, complain, loud music, neighbors, steal, trash, water. I’m sorry. Please take care of it right away.PREREQUISITE: This lesson should be taught after the mid-point of the term.
BEFORE CLASS
a.) Duplicate and enlarge a class set of the pictured problems , p. 101, or use them as a model fordrawing the same items on the board.
b.) Write the dialog below on the board, an OHT or butcher paper for use in the Presentation activity.A: Could you please move your car? You're blocking my driveway.B: I am? I'm sorry. I didn't realize.A: I don't like to complain, but I need to go to work.B: I'll move it right away.A: Thanks.
c.) Write the dialog below on the board, an OHT or butcher paper for use in the Communicative Practice activity.
Marco: Could you please turn down your stereo? I can't sleep.Luz: You can't? It's my birthday party.Marco: If you don't turn down the music, I'm going to call the police.Luz: They'll never come.Marco: I guess we'll find out.Luz: All right. I'll turn it down.
d.) Duplicate a class set of the observation forms, p. 102 for the Evaluation activity.
e.) Review Teaching with Dialogs, p. 151 and How to Conduct a Roleplay activity, 165 and How toConduct a Survey, p. 166.
f.) Identify the pages in your textbook that you could use in this lesson or see Expressways 4, pp. 116-117.
99
"MOVE IT OR LOSE IT"
LESSON PLAN
WARM UP: [SURVEY](15 minutes) 1. Have students write two questions at the top of a sheet of paper.
Are you a good neighbor? Why or why not?2. Have students survey their classmates and note the answers they hear.
INTRODUCTION: (5 minutes) Tell students they are going to practice solving problems with neighbors .
PRESENTATION: [TEACHING VOCABULARY](15 minutes) 1. Using the picture of neighborhood problems from page 101 (or your own pictures)
ask: What's this? What do you see? (See p. 99-a.)2. Elicit the vocabulary of the problems from the students, write it on the board.
E.g., piles of trash, barking dogs, loud music, pirated cable, blocking the driveway.3. Model and repeat the vocabulary.[DIALOG]
(20 minutes) 1. Tell students: Your neighbor has parked her car in front of your driveway. You have to go to work now. Act out the dialog . (See p. 99-b.)
2. Write the dialog on the board, asking for student input along the way.3. Read through the dialog with the class; then do choral drilling until students are
comfortable with the new language.
COMPREHENSION CHECK: [PROBLEM SOLVING](5 minutes) • Ask questions about the dialog to check students’ understanding of the
situation. Is the neighbor angry? How do you know he will move the car? Etc.
GUIDED PRACTICE: [PAIR WORK](15 minutes) 1. Pair students and tell them to practice the dialog, taking turns playing the A and B
roles. Set a 5-minute time limit.2. Have pairs continue to practice, substituting the problems depicted on the board.
COMMUNICATIVE PRACTICE: [PROBLEM SOLVING](40 minutes) 1. Ask students: What do you do if the neighbor doesn't cooperate so easily?
Discuss their answers.2. Work with the class to create a dialog based on a situation with an uncooperative
neighbor on the board. You can use the dialog from page 99-c as an example.3. Form new pairs and have them invent a new dialog with an uncooperative
neighbor. Give students 5 minutes to think of the dialog and 10 minutes to write it.Tell students they will present their dialogs in front of the class, but they will not
have their scripts. Give students 15 minutes to practice their dialogs.EVALUATION:(20-30 minutes) 1. Collect the pairs' written dialogs to evaluate and return.
2. Give each student an observation sheet, p. 102. Refer to the example at the top of the sheet to show students how to fill in their sheets.
3. Call on pairs to present their dialogs to the class. Stress communication, not perfection.
4. Collect the observation sheets. Ask: Which problem was the most serious?Which was the least serious? Why? Discuss the answers.
APPLICATION: [PROBLEM SOLVING](as time permits) • Have students write a paragraph about a problem that they (or people they
know) have had with a neighbor. 100
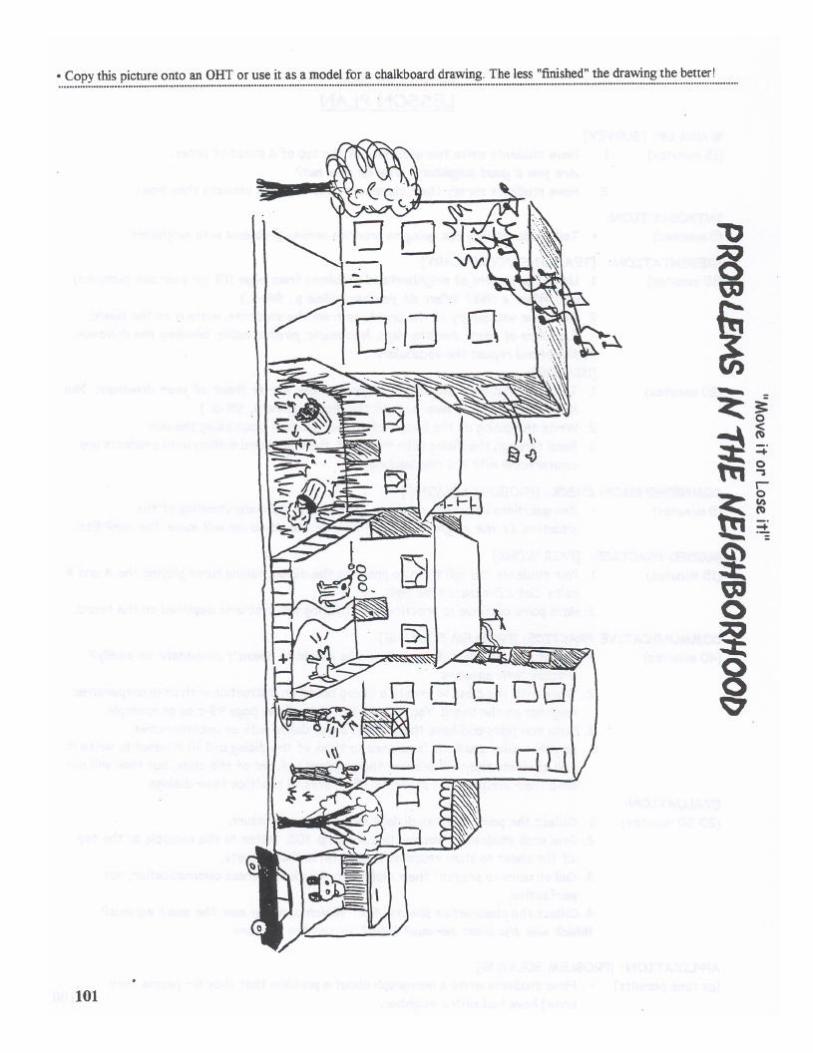
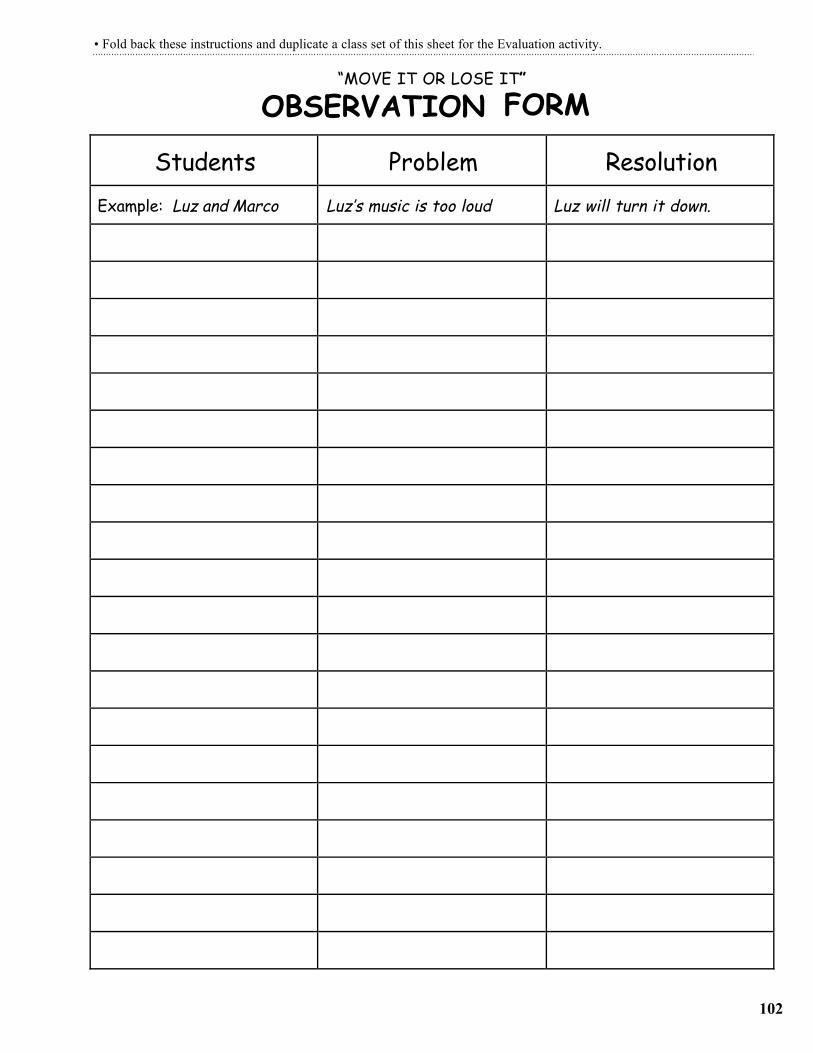
• Fold back these instructions and duplicate a class set of this sheet for the Evaluation activity.
“MOVE IT OR LOSE IT”
OBSERVATION FORM
Students Problem ResolutionExample: Luz and Marco Luz’s music is too loud Luz will turn it down.
102
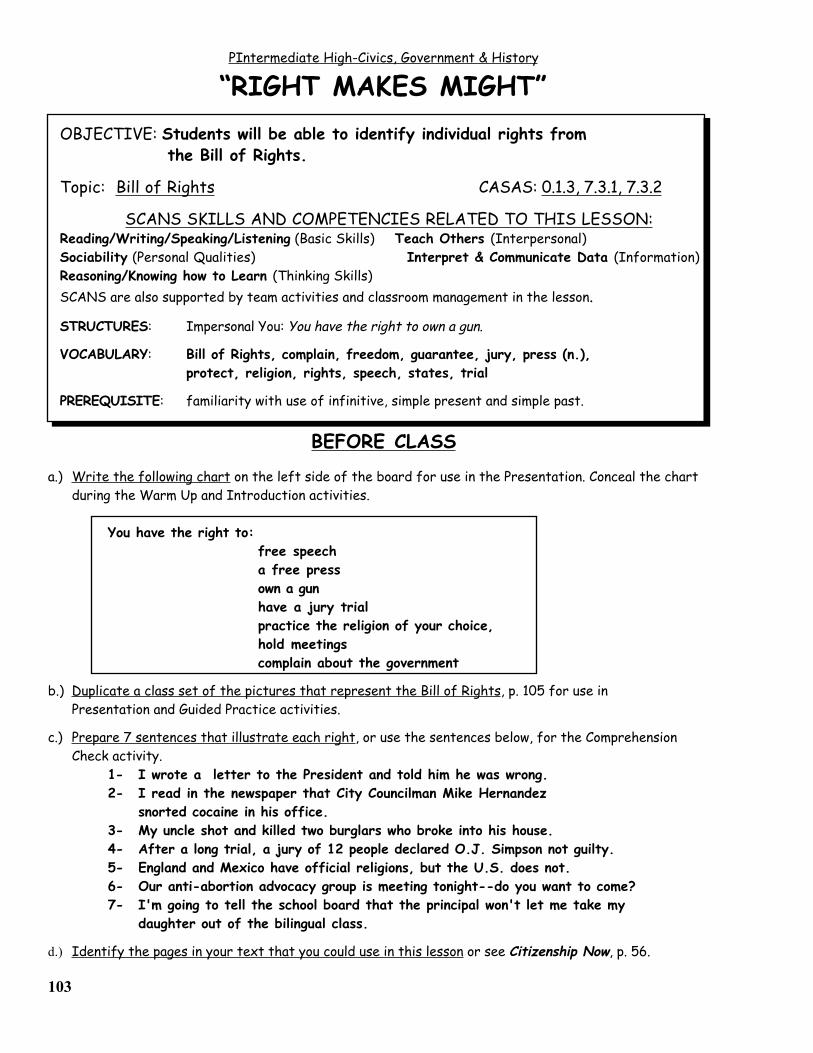
PIntermediate High-Civics, Government & History
“RIGHT MAKES MIGHT”OBJECTIVE: Students will be able to identify individual rights from
the Bill of Rights.
Topic: Bill of Rights CASAS: 0.1.3, 7.3.1, 7.3.2
SCANS SKILLS AND COMPETENCIES RELATED TO THIS LESSON:Reading/Writing/Speaking/Listening (Basic Skills) Teach Others (Interpersonal)Sociability (Personal Qualities) Interpret & Communicate Data (Information)Reasoning/Knowing how to Learn (Thinking Skills) SCANS are also supported by team activities and classroom management in the lesson.
STRUCTURES: Impersonal You: You have the right to own a gun.
VOCABULARY: Bill of Rights, complain, freedom, guarantee, jury, press (n.),protect, religion, rights, speech, states, trial
PREREQUISITE: familiarity with use of infinitive, simple present and simple past.
BEFORE CLASS
a.) Write the following chart on the left side of the board for use in the Presentation. Conceal the chart during the Warm Up and Introduction activities.
You have the right to:free speecha free pressown a gunhave a jury trialpractice the religion of your choice,hold meetingscomplain about the government
b.) Duplicate a class set of the pictures that represent the Bill of Rights, p. 105 for use inPresentation and Guided Practice activities.
c.) Prepare 7 sentences that illustrate each right, or use the sentences below, for the Comprehension Check activity.
1- I wrote a letter to the President and told him he was wrong.2- I read in the newspaper that City Councilman Mike Hernandez
snorted cocaine in his office.3- My uncle shot and killed two burglars who broke into his house.4- After a long trial, a jury of 12 people declared O.J. Simpson not guilty.5- England and Mexico have official religions, but the U.S. does not.6- Our anti-abortion advocacy group is meeting tonight--do you want to come?
7- I'm going to tell the school board that the principal won't let me take mydaughter out of the bilingual class.
d.) Identify the pages in your text that you could use in this lesson or see Citizenship Now, p. 56.
103
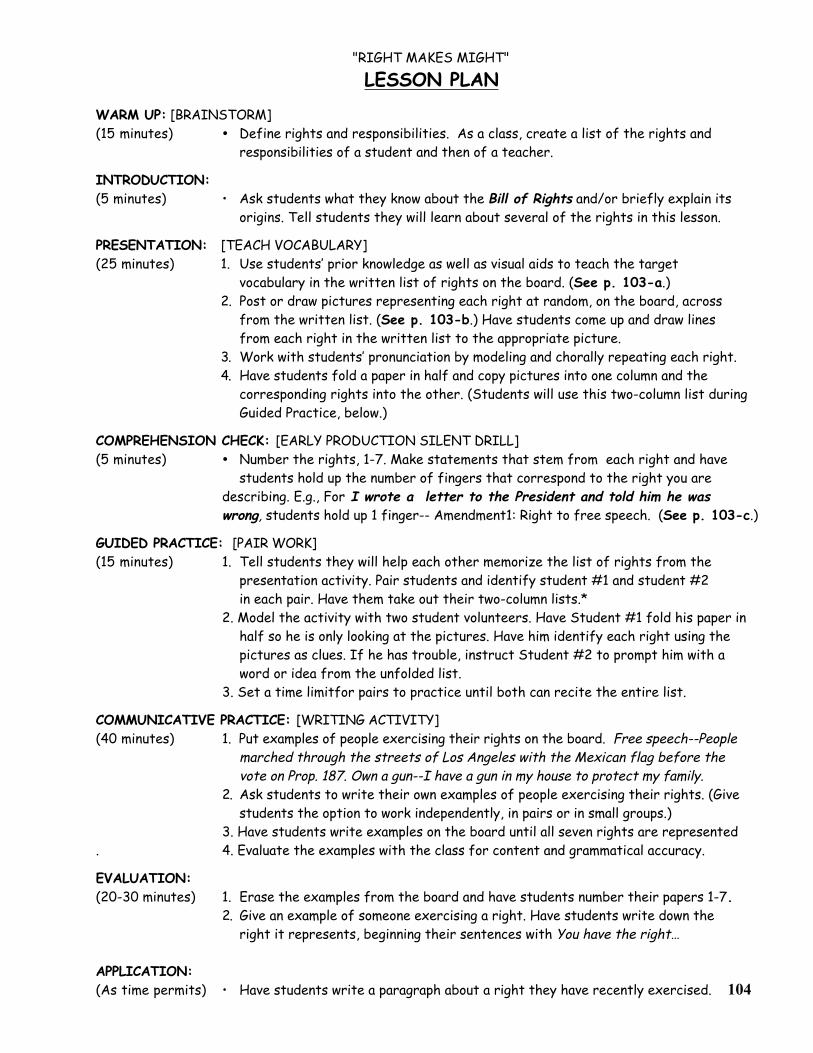
"RIGHT MAKES MIGHT"
LESSON PLAN
WARM UP: [BRAINSTORM](15 minutes) Define rights and responsibilities. As a class, create a list of the rights and responsibilities of a student and then of a teacher.
INTRODUCTION:(5 minutes) • Ask students what they know about the Bill of Rights and/or briefly explain its origins. Tell students they will learn about several of the rights in this lesson.
PRESENTATION: [TEACH VOCABULARY](25 minutes) 1. Use students’ prior knowledge as well as visual aids to teach the target
vocabulary in the written list of rights on the board. (See p. 103-a.)2. Post or draw pictures representing each right at random, on the board, across
from the written list. (See p. 103-b.) Have students come up and draw lines from each right in the written list to the appropriate picture.
3. Work with students’ pronunciation by modeling and chorally repeating each right.4. Have students fold a paper in half and copy pictures into one column and the
corresponding rights into the other. (Students will use this two-column list during Guided Practice, below.)
COMPREHENSION CHECK: [EARLY PRODUCTION SILENT DRILL](5 minutes) Number the rights, 1-7. Make statements that stem from each right and have
students hold up the number of fingers that correspond to the right you are describing. E.g., For I wrote a letter to the President and told him he was
wrong, students hold up 1 finger-- Amendment1: Right to free speech. (See p. 103-c.)
GUIDED PRACTICE: [PAIR WORK](15 minutes) 1. Tell students they will help each other memorize the list of rights from the
presentation activity. Pair students and identify student #1 and student #2 in each pair. Have them take out their two-column lists.*
2. Model the activity with two student volunteers. Have Student #1 fold his paper in half so he is only looking at the pictures. Have him identify each right using the pictures as clues. If he has trouble, instruct Student #2 to prompt him with aword or idea from the unfolded list.
3. Set a time limitfor pairs to practice until both can recite the entire list.
COMMUNICATIVE PRACTICE: [WRITING ACTIVITY](40 minutes) 1. Put examples of people exercising their rights on the board. Free speech--People
marched through the streets of Los Angeles with the Mexican flag before the vote on Prop. 187. Own a gun--I have a gun in my house to protect my family.
2. Ask students to write their own examples of people exercising their rights. (Give students the option to work independently, in pairs or in small groups.)
3. Have students write examples on the board until all seven rights are represented. 4. Evaluate the examples with the class for content and grammatical accuracy.
EVALUATION:(20-30 minutes) 1. Erase the examples from the board and have students number their papers 1-7.
2. Give an example of someone exercising a right. Have students write down the right it represents, beginning their sentences with You have the right…
APPLICATION:(As time permits) • Have students write a paragraph about a right they have recently exercised. 104
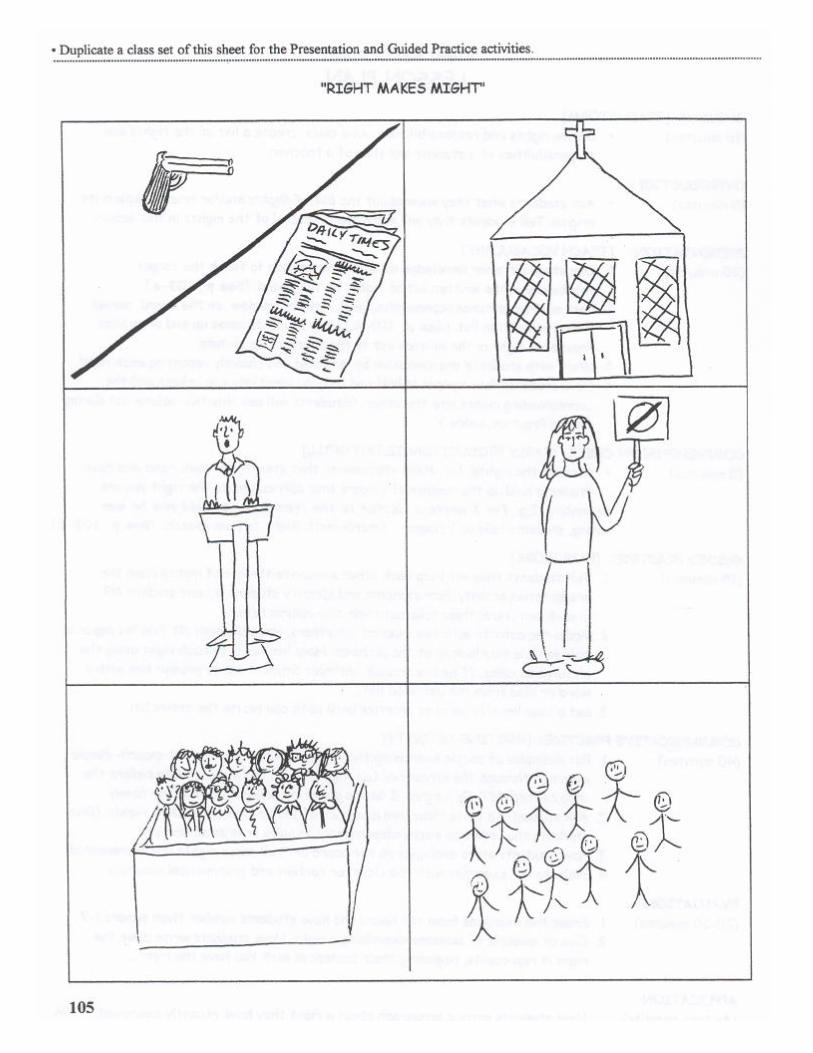
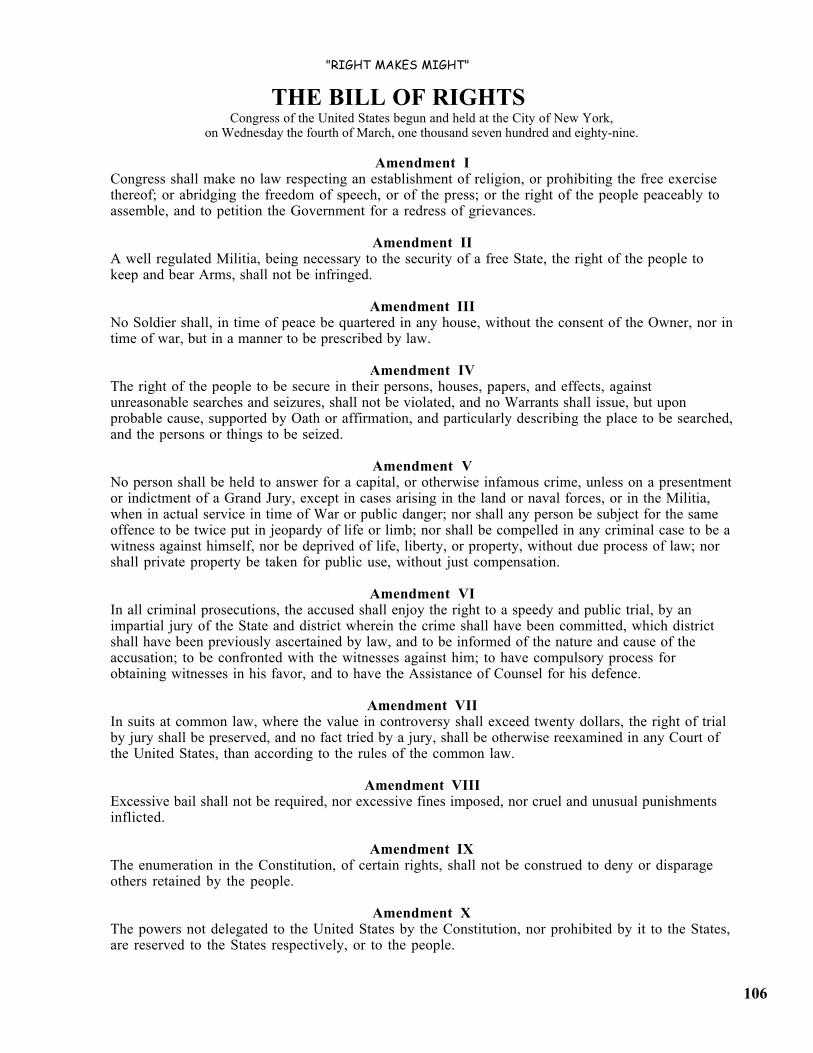
"RIGHT MAKES MIGHT"
THE BILL OF RIGHTSCongress of the United States begun and held at the City of New York,
on Wednesday the fourth of March, one thousand seven hundred and eighty-nine.
Amendment ICongress shall make no law respecting an establishment of religion, or prohibiting the free exercisethereof; or abridging the freedom of speech, or of the press; or the right of the people peaceably toassemble, and to petition the Government for a redress of grievances.
Amendment IIA well regulated Militia, being necessary to the security of a free State, the right of the people tokeep and bear Arms, shall not be infringed.
Amendment IIINo Soldier shall, in time of peace be quartered in any house, without the consent of the Owner, nor intime of war, but in a manner to be prescribed by law.
Amendment IVThe right of the people to be secure in their persons, houses, papers, and effects, againstunreasonable searches and seizures, shall not be violated, and no Warrants shall issue, but uponprobable cause, supported by Oath or affirmation, and particularly describing the place to be searched,and the persons or things to be seized.
Amendment VNo person shall be held to answer for a capital, or otherwise infamous crime, unless on a presentmentor indictment of a Grand Jury, except in cases arising in the land or naval forces, or in the Militia,when in actual service in time of War or public danger; nor shall any person be subject for the sameoffence to be twice put in jeopardy of life or limb; nor shall be compelled in any criminal case to be awitness against himself, nor be deprived of life, liberty, or property, without due process of law; norshall private property be taken for public use, without just compensation.
Amendment VIIn all criminal prosecutions, the accused shall enjoy the right to a speedy and public trial, by animpartial jury of the State and district wherein the crime shall have been committed, which districtshall have been previously ascertained by law, and to be informed of the nature and cause of theaccusation; to be confronted with the witnesses against him; to have compulsory process forobtaining witnesses in his favor, and to have the Assistance of Counsel for his defence.
Amendment VIIIn suits at common law, where the value in controversy shall exceed twenty dollars, the right of trialby jury shall be preserved, and no fact tried by a jury, shall be otherwise reexamined in any Court ofthe United States, than according to the rules of the common law.
Amendment VIIIExcessive bail shall not be required, nor excessive fines imposed, nor cruel and unusual punishmentsinflicted.
Amendment IXThe enumeration in the Constitution, of certain rights, shall not be construed to deny or disparageothers retained by the people.
Amendment XThe powers not delegated to the United States by the Constitution, nor prohibited by it to the States,are reserved to the States respectively, or to the people.
106
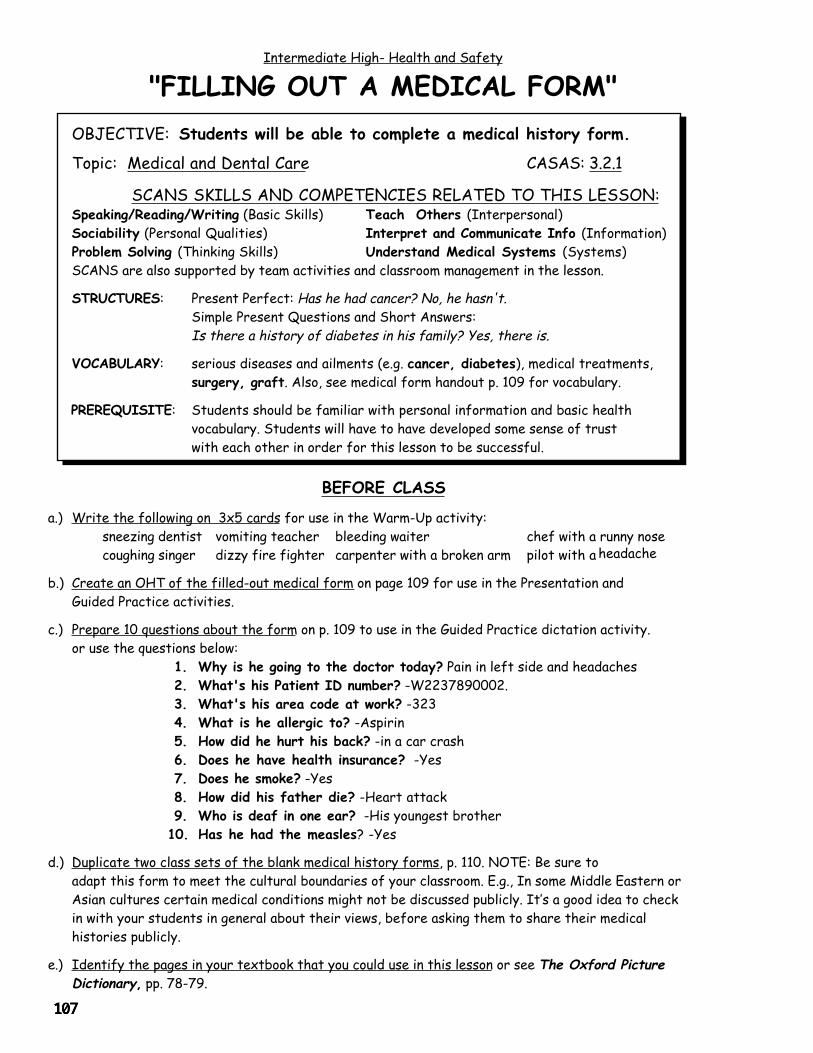
Intermediate High- Health and Safety
"FILLING OUT A MEDICAL FORM"OBJECTIVE: Students will be able to complete a medical history form.
Topic: Medical and Dental Care CASAS: 3.2.1
SCANS SKILLS AND COMPETENCIES RELATED TO THIS LESSON:Speaking/Reading/Writing (Basic Skills) Teach Others (Interpersonal)Sociability (Personal Qualities) Interpret and Communicate Info (Information)Problem Solving (Thinking Skills) Understand Medical Systems (Systems)SCANS are also supported by team activities and classroom management in the lesson.
STRUCTURES: Present Perfect: Has he had cancer? No, he hasn't.Simple Present Questions and Short Answers:
Is there a history of diabetes in his family? Yes, there is.
VOCABULARY: serious diseases and ailments (e.g. cancer, diabetes), medical treatments,surgery, graft. Also, see medical form handout p. 109 for vocabulary.
PREREQUISITE: Students should be familiar with personal information and basic healthvocabulary. Students will have to have developed some sense of trustwith each other in order for this lesson to be successful.
BEFORE CLASS
a.) Write the following on 3x5 cards for use in the Warm-Up activity:sneezing dentist vomiting teacher bleeding waiter chef with a runny nose
coughing singer dizzy fire fighter carpenter with a broken arm pilot with a headache
b.) Create an OHT of the filled-out medical form on page 109 for use in the Presentation andGuided Practice activities.
c.) Prepare 10 questions about the form on p. 109 to use in the Guided Practice dictation activity.or use the questions below:
1. Why is he going to the doctor today? Pain in left side and headaches2. What's his Patient ID number? -W2237890002.3. What's his area code at work? -3234. What is he allergic to? -Aspirin5. How did he hurt his back? -in a car crash6. Does he have health insurance? -Yes7. Does he smoke? -Yes8. How did his father die? -Heart attack9. Who is deaf in one ear? -His youngest brother
10. Has he had the measles? -Yes
d.) Duplicate two class sets of the blank medical history forms, p. 110. NOTE: Be sure toadapt this form to meet the cultural boundaries of your classroom. E.g., In some Middle Eastern or Asian cultures certain medical conditions might not be discussed publicly. It’s a good idea to checkin with your students in general about their views, before asking them to share their medicalhistories publicly.
e.) Identify the pages in your textbook that you could use in this lesson or see The Oxford Picture Dictionary, pp. 78-79.
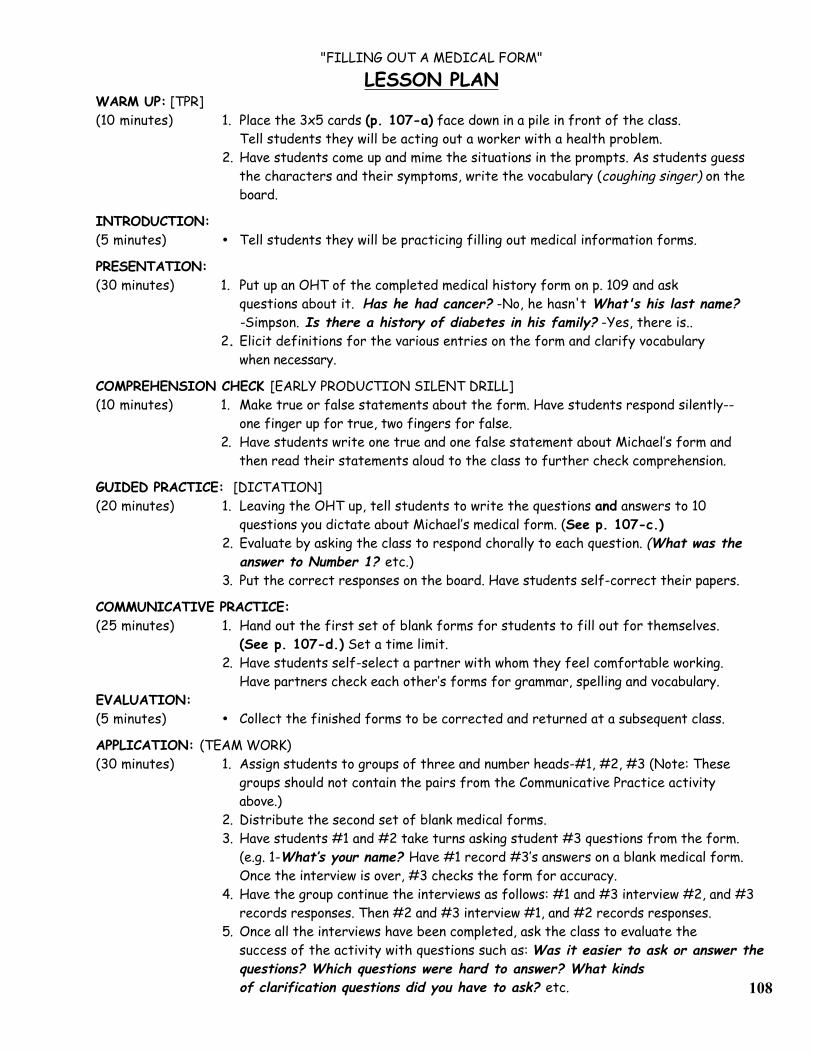
"FILLING OUT A MEDICAL FORM"
LESSON PLANWARM UP: [TPR](10 minutes) 1. Place the 3x5 cards (p. 107-a) face down in a pile in front of the class.
Tell students they will be acting out a worker with a health problem.2. Have students come up and mime the situations in the prompts. As students guess
the characters and their symptoms, write the vocabulary (coughing singer) on theboard.
INTRODUCTION:(5 minutes) Tell students they will be practicing filling out medical information forms.
PRESENTATION: (30 minutes) 1. Put up an OHT of the completed medical history form on p. 109 and ask
questions about it. Has he had cancer? -No, he hasn't What's his last name?-Simpson. Is there a history of diabetes in his family? -Yes, there is..
2. Elicit definitions for the various entries on the form and clarify vocabularywhen necessary.
COMPREHENSION CHECK [EARLY PRODUCTION SILENT DRILL](10 minutes) 1. Make true or false statements about the form. Have students respond silently--
one finger up for true, two fingers for false. 2. Have students write one true and one false statement about Michael’s form and
then read their statements aloud to the class to further check comprehension.
GUIDED PRACTICE: [DICTATION](20 minutes) 1. Leaving the OHT up, tell students to write the questions and answers to 10
questions you dictate about Michael’s medical form. (See p. 107-c.)2. Evaluate by asking the class to respond chorally to each question. (What was the
answer to Number 1? etc.)3. Put the correct responses on the board. Have students self-correct their papers.
COMMUNICATIVE PRACTICE: (25 minutes) 1. Hand out the first set of blank forms for students to fill out for themselves.
(See p. 107-d.) Set a time limit.2. Have students self-select a partner with whom they feel comfortable working.
Have partners check each other’s forms for grammar, spelling and vocabulary.EVALUATION:(5 minutes) Collect the finished forms to be corrected and returned at a subsequent class.
APPLICATION: (TEAM WORK)(30 minutes) 1. Assign students to groups of three and number heads-#1, #2, #3 (Note: These
groups should not contain the pairs from the Communicative Practice activity above.)
2. Distribute the second set of blank medical forms.3. Have students #1 and #2 take turns asking student #3 questions from the form.
(e.g. 1-What’s your name? Have #1 record #3’s answers on a blank medical form. Once the interview is over, #3 checks the form for accuracy.
4. Have the group continue the interviews as follows: #1 and #3 interview #2, and #3 records responses. Then #2 and #3 interview #1, and #2 records responses.
5. Once all the interviews have been completed, ask the class to evaluate thesuccess of the activity with questions such as: Was it easier to ask or answer thequestions? Which questions were hard to answer? What kindsof clarification questions did you have to ask? etc. 108
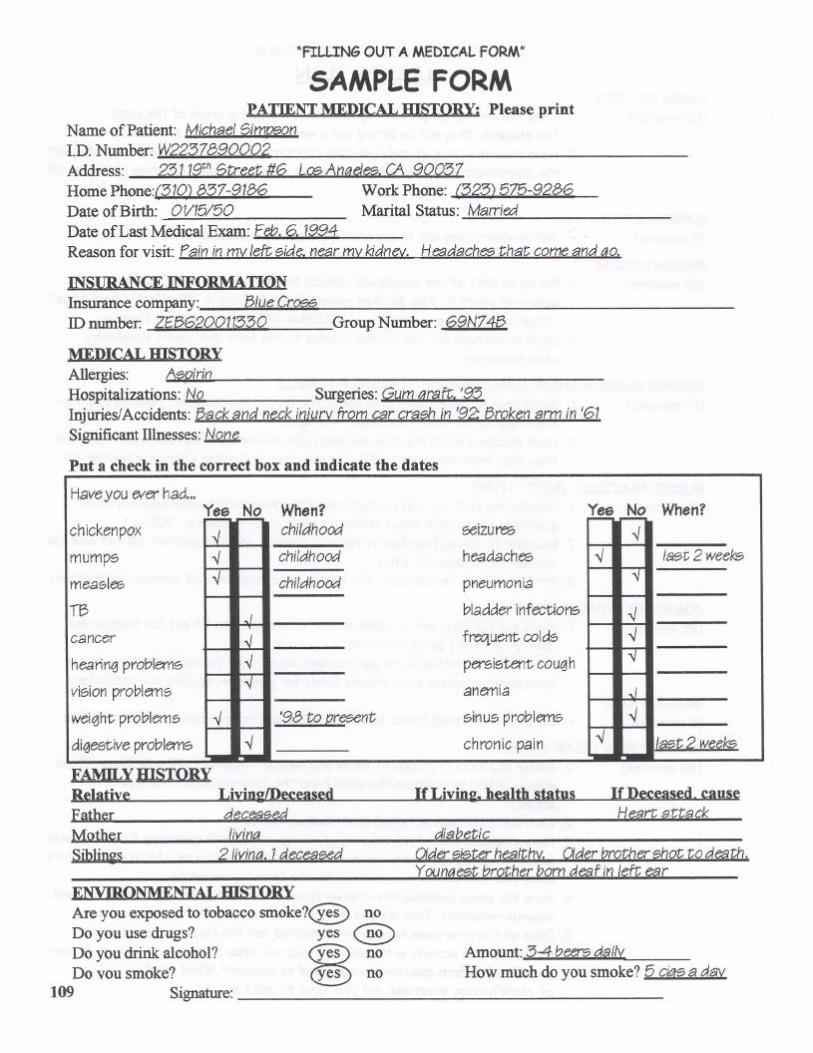
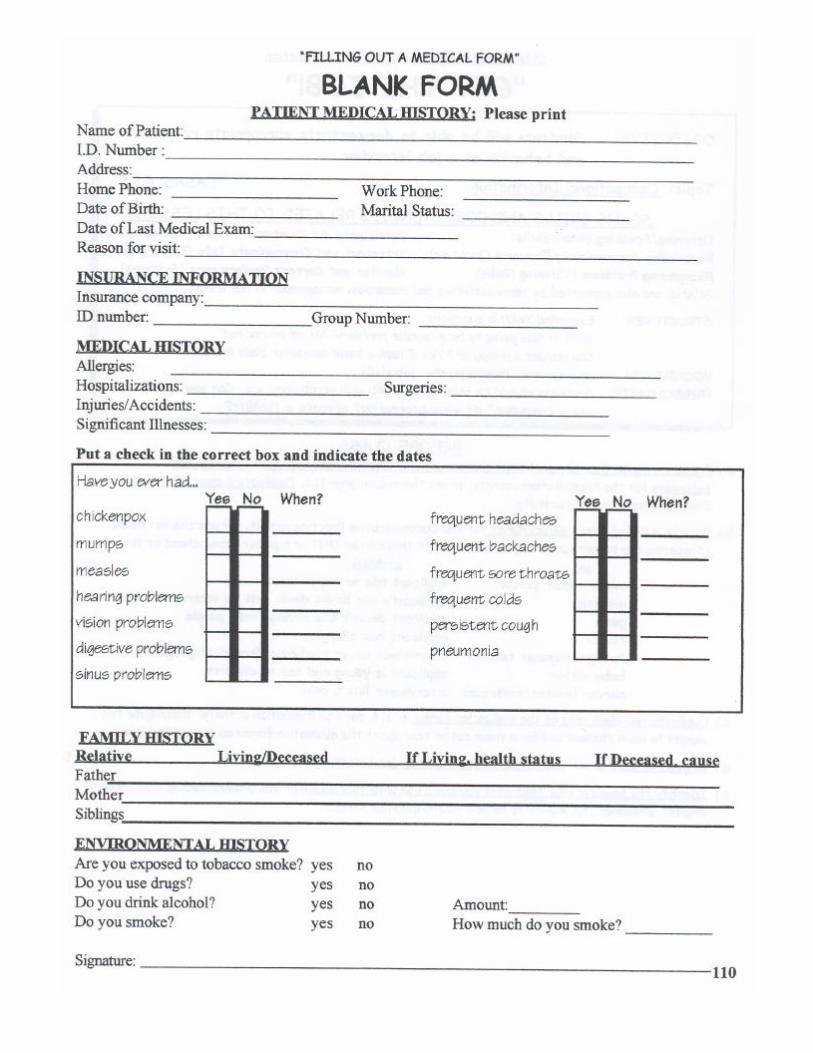
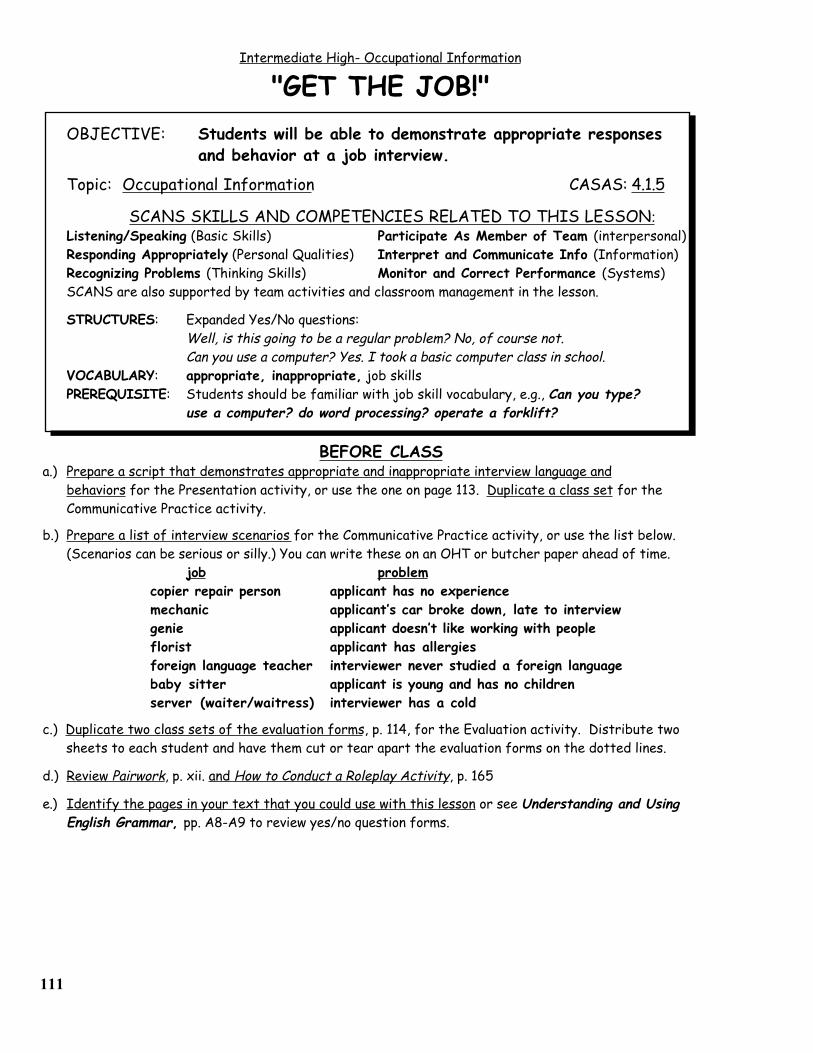
Intermediate High- Occupational Information
"GET THE JOB!"OBJECTIVE: Students will be able to demonstrate appropriate responses
and behavior at a job interview.
Topic: Occupational Information CASAS: 4.1.5
SCANS SKILLS AND COMPETENCIES RELATED TO THIS LESSON:Listening/Speaking (Basic Skills) Participate As Member of Team (interpersonal)Responding Appropriately (Personal Qualities) Interpret and Communicate Info (Information)Recognizing Problems (Thinking Skills) Monitor and Correct Performance (Systems)SCANS are also supported by team activities and classroom management in the lesson.
STRUCTURES: Expanded Yes/No questions:Well, is this going to be a regular problem? No, of course not.Can you use a computer? Yes. I took a basic computer class in school.
VOCABULARY: appropriate, inappropriate, job skillsPREREQUISITE: Students should be familiar with job skill vocabulary, e.g., Can you type?
use a computer? do word processing? operate a forklift?
BEFORE CLASSa.) Prepare a script that demonstrates appropriate and inappropriate interview language and
behaviors for the Presentation activity, or use the one on page 113. Duplicate a class set for the Communicative Practice activity.
b.) Prepare a list of interview scenarios for the Communicative Practice activity, or use the list below. (Scenarios can be serious or silly.) You can write these on an OHT or butcher paper ahead of time.
job problemcopier repair person applicant has no experiencemechanic applicant’s car broke down, late to interviewgenie applicant doesn’t like working with peopleflorist applicant has allergiesforeign language teacher interviewer never studied a foreign languagebaby sitter applicant is young and has no childrenserver (waiter/waitress) interviewer has a cold
c.) Duplicate two class sets of the evaluation forms, p. 114, for the Evaluation activity. Distribute two sheets to each student and have them cut or tear apart the evaluation forms on the dotted lines.
d.) Review Pairwork, p. xii. and How to Conduct a Roleplay Activity, p. 165
e.) Identify the pages in your text that you could use with this lesson or see Understanding and Using English Grammar, pp. A8-A9 to review yes/no question forms.
111
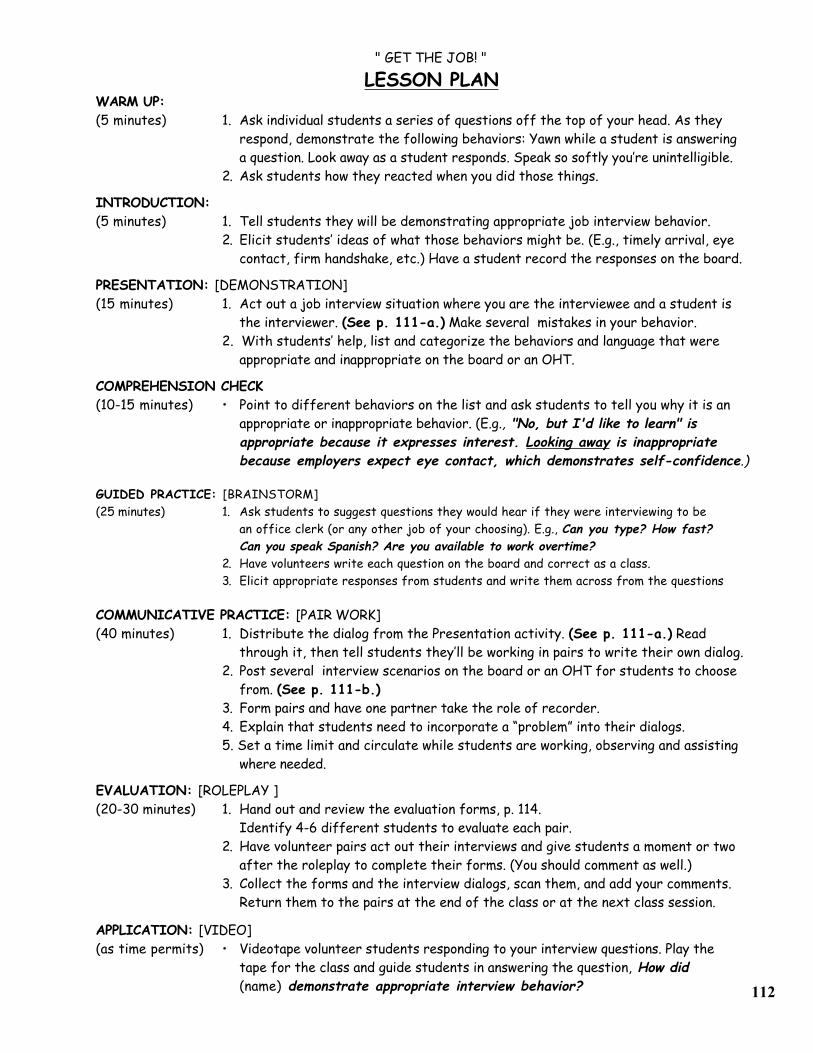
" GET THE JOB! "
LESSON PLANWARM UP:(5 minutes) 1. Ask individual students a series of questions off the top of your head. As they
respond, demonstrate the following behaviors: Yawn while a student is answering a question. Look away as a student responds. Speak so softly you’re unintelligible.
2. Ask students how they reacted when you did those things.
INTRODUCTION:(5 minutes) 1. Tell students they will be demonstrating appropriate job interview behavior.
2. Elicit students’ ideas of what those behaviors might be. (E.g., timely arrival, eye contact, firm handshake, etc.) Have a student record the responses on the board.
PRESENTATION: [DEMONSTRATION](15 minutes) 1. Act out a job interview situation where you are the interviewee and a student is
the interviewer. (See p. 111-a.) Make several mistakes in your behavior.2. With students’ help, list and categorize the behaviors and language that were
appropriate and inappropriate on the board or an OHT.
COMPREHENSION CHECK(10-15 minutes) • Point to different behaviors on the list and ask students to tell you why it is an
appropriate or inappropriate behavior. (E.g., "No, but I'd like to learn" is appropriate because it expresses interest. Looking away is inappropriatebecause employers expect eye contact, which demonstrates self-confidence.)
GUIDED PRACTICE: [BRAINSTORM](25 minutes) 1. Ask students to suggest questions they would hear if they were interviewing to be
an office clerk (or any other job of your choosing). E.g., Can you type? How fast? Can you speak Spanish? Are you available to work overtime?
2. Have volunteers write each question on the board and correct as a class. 3. Elicit appropriate responses from students and write them across from the questions
COMMUNICATIVE PRACTICE: [PAIR WORK](40 minutes) 1. Distribute the dialog from the Presentation activity. (See p. 111-a.) Read
through it, then tell students they’ll be working in pairs to write their own dialog. 2. Post several interview scenarios on the board or an OHT for students to choose
from. (See p. 111-b.) 3. Form pairs and have one partner take the role of recorder.
4. Explain that students need to incorporate a “problem” into their dialogs.5. Set a time limit and circulate while students are working, observing and assisting
where needed.
EVALUATION: [ROLEPLAY ](20-30 minutes) 1. Hand out and review the evaluation forms, p. 114.
Identify 4-6 different students to evaluate each pair.2. Have volunteer pairs act out their interviews and give students a moment or two
after the roleplay to complete their forms. (You should comment as well.) 3. Collect the forms and the interview dialogs, scan them, and add your comments.
Return them to the pairs at the end of the class or at the next class session.
APPLICATION: [VIDEO](as time permits) • Videotape volunteer students responding to your interview questions. Play the
tape for the class and guide students in answering the question, How did (name) demonstrate appropriate interview behavior? 112

• Fold back these directions and duplicate a class set of this conversation for students to use as a model.
“GET THE JOB”
JOB INTERVIEW ROLEPLAY
MANAGER: Hello I'm Mr. Smith, the manager. [shakes hands]
JOB APPLICANT: Hello, I’m __________. [crosses legs and leans back.]I'm sorry to be late. I had to pick up my daughterfrom school and give my family their lunch.
MANAGER: Well, [crossing arms] is this going to be aregular problem?
JOB APPLICANT: No, of course not. [looking away]It's not my fault if the bus is late.
MANAGER: Can you use a computer, ________?
JOB APPLICANT: [yawning] Yes. I took a basic computer class in school.
MANAGER: Do you know how to use a fax machine?
JOB APPLICANT: No, but I'd like to learn.
MANAGER: Well, let me think about it and call you.
JOB APPLICANT: Okay. Thanks Mr. Smith. [reaches over and shakes hands vigorously]
113
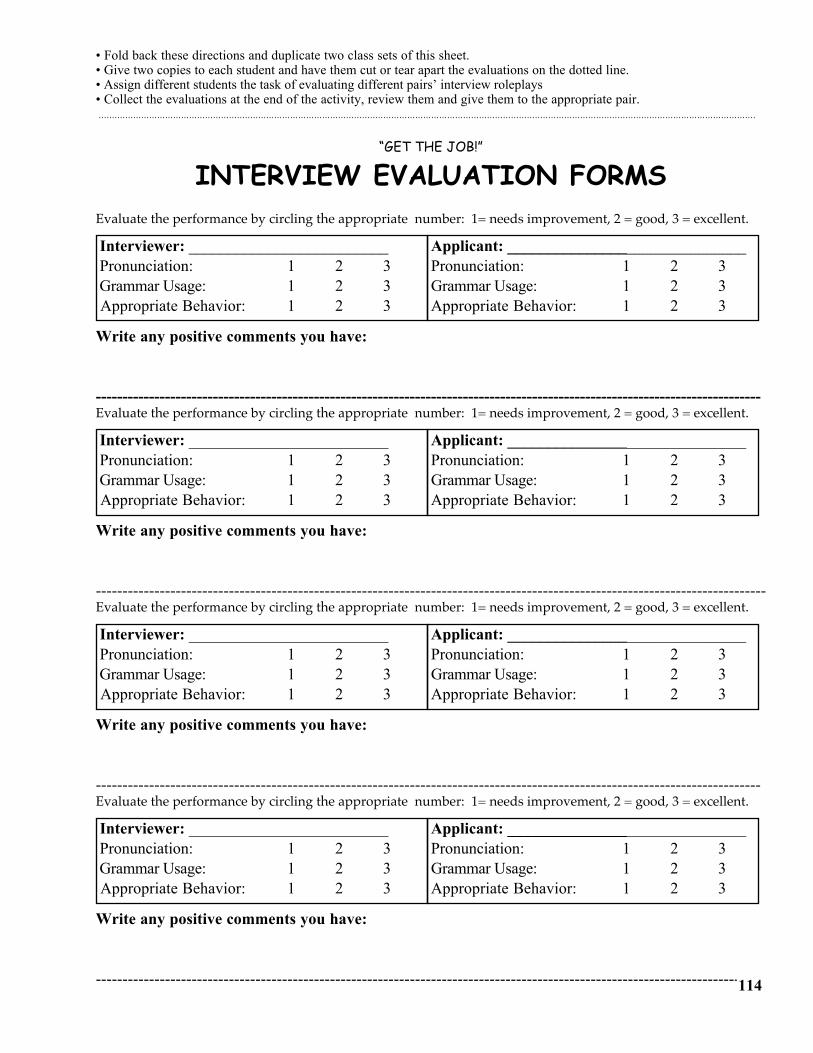
• Fold back these directions and duplicate two class sets of this sheet.• Give two copies to each student and have them cut or tear apart the evaluations on the dotted line.• Assign different students the task of evaluating different pairs’ interview roleplays• Collect the evaluations at the end of the activity, review them and give them to the appropriate pair.
“GET THE JOB!”
INTERVIEW EVALUATION FORMSEvaluate the performance by circling the appropriate number: 1= needs improvement, 2 = good, 3 = excellent.
Interviewer: _________________________ Applicant: ______________________________ Pronunciation: 1 2 3 Pronunciation: 1 2 3 Grammar Usage: 1 2 3 Grammar Usage: 1 2 3 Appropriate Behavior: 1 2 3 Appropriate Behavior: 1 2 3
Write any positive comments you have:
-----------------------------------------------------------------------------------------------------------------------------Evaluate the performance by circling the appropriate number: 1= needs improvement, 2 = good, 3 = excellent.
Interviewer: _________________________ Applicant: ______________________________ Pronunciation: 1 2 3 Pronunciation: 1 2 3 Grammar Usage: 1 2 3 Grammar Usage: 1 2 3 Appropriate Behavior: 1 2 3 Appropriate Behavior: 1 2 3
Write any positive comments you have:
------------------------------------------------------------------------------------------------------------------------------Evaluate the performance by circling the appropriate number: 1= needs improvement, 2 = good, 3 = excellent.
Interviewer: _________________________ Applicant: ______________________________ Pronunciation: 1 2 3 Pronunciation: 1 2 3 Grammar Usage: 1 2 3 Grammar Usage: 1 2 3 Appropriate Behavior: 1 2 3 Appropriate Behavior: 1 2 3
Write any positive comments you have:
-----------------------------------------------------------------------------------------------------------------------------Evaluate the performance by circling the appropriate number: 1= needs improvement, 2 = good, 3 = excellent.
Interviewer: _________________________ Applicant: ______________________________ Pronunciation: 1 2 3 Pronunciation: 1 2 3 Grammar Usage: 1 2 3 Grammar Usage: 1 2 3 Appropriate Behavior: 1 2 3 Appropriate Behavior: 1 2 3
Write any positive comments you have:
-----------------------------------------------------------------------------------------------------------------------------114
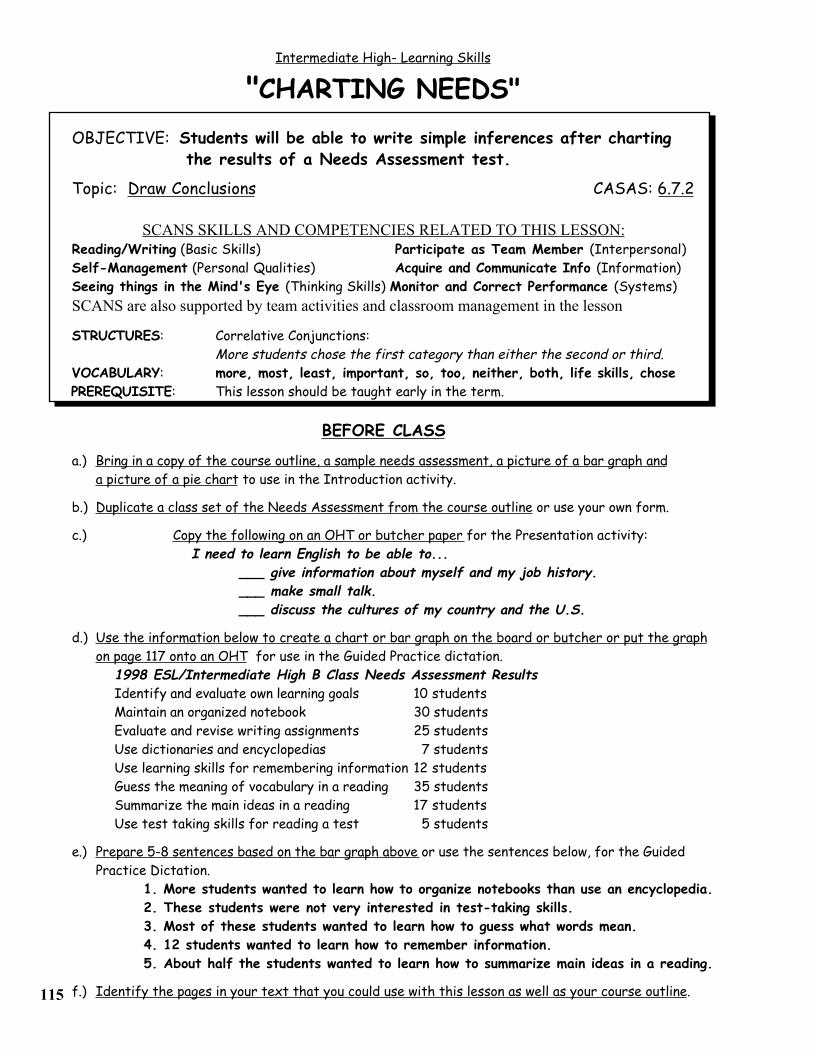
115
Intermediate High- Learning Skills
"CHARTING NEEDS"OBJECTIVE: Students will be able to write simple inferences after charting
the results of a Needs Assessment test.
Topic: Draw Conclusions CASAS: 6.7.2
SCANS SKILLS AND COMPETENCIES RELATED TO THIS LESSON:Reading/Writing (Basic Skills) Participate as Team Member (Interpersonal)Self-Management (Personal Qualities) Acquire and Communicate Info (Information)Seeing things in the Mind's Eye (Thinking Skills) Monitor and Correct Performance (Systems)SCANS are also supported by team activities and classroom management in the lesson
STRUCTURES: Correlative Conjunctions: More students chose the first category than either the second or third.
VOCABULARY: more, most, least, important, so, too, neither, both, life skills, chose PREREQUISITE: This lesson should be taught early in the term.
BEFORE CLASS
a.) Bring in a copy of the course outline, a sample needs assessment, a picture of a bar graph and a picture of a pie chart to use in the Introduction activity.
b.) Duplicate a class set of the Needs Assessment from the course outline or use your own form.
c.) Copy the following on an OHT or butcher paper for the Presentation activity:I need to learn English to be able to...
___ give information about myself and my job history.___ make small talk.___ discuss the cultures of my country and the U.S.
d.) Use the information below to create a chart or bar graph on the board or butcher or put the graphon page 117 onto an OHT for use in the Guided Practice dictation.
1998 ESL/Intermediate High B Class Needs Assessment ResultsIdentify and evaluate own learning goals 10 studentsMaintain an organized notebook 30 studentsEvaluate and revise writing assignments 25 studentsUse dictionaries and encyclopedias 7 studentsUse learning skills for remembering information 12 studentsGuess the meaning of vocabulary in a reading 35 studentsSummarize the main ideas in a reading 17 studentsUse test taking skills for reading a test 5 students
e.) Prepare 5-8 sentences based on the bar graph above or use the sentences below, for the Guided Practice Dictation.
1. More students wanted to learn how to organize notebooks than use an encyclopedia.2. These students were not very interested in test-taking skills.3. Most of these students wanted to learn how to guess what words mean.4. 12 students wanted to learn how to remember information.5. About half the students wanted to learn how to summarize main ideas in a reading.
f.) Identify the pages in your text that you could use with this lesson as well as your course outline.
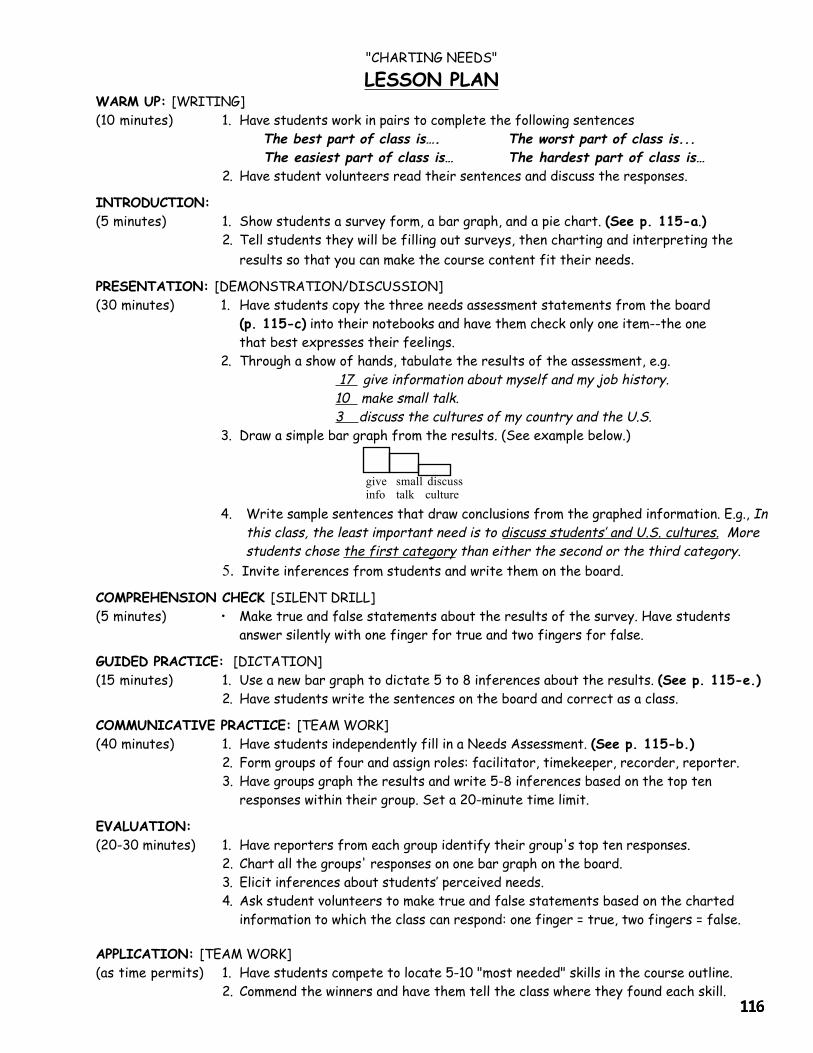
"CHARTING NEEDS"
LESSON PLANWARM UP: [WRITING](10 minutes) 1. Have students work in pairs to complete the following sentences
The best part of class is…. The worst part of class is... The easiest part of class is… The hardest part of class is…
2. Have student volunteers read their sentences and discuss the responses.
INTRODUCTION:(5 minutes) 1. Show students a survey form, a bar graph, and a pie chart. (See p. 115-a.)
2. Tell students they will be filling out surveys, then charting and interpreting the results so that you can make the course content fit their needs.
PRESENTATION: [DEMONSTRATION/DISCUSSION](30 minutes) 1. Have students copy the three needs assessment statements from the board
(p. 115-c) into their notebooks and have them check only one item--the onethat best expresses their feelings.
2. Through a show of hands, tabulate the results of the assessment, e.g. 17 give information about myself and my job history.
10 make small talk.3 discuss the cultures of my country and the U.S.
3. Draw a simple bar graph from the results. (See example below.)
4. Write sample sentences that draw conclusions from the graphed information. E.g., In this class, the least important need is to discuss students’ and U.S. cultures. More
students chose the first category than either the second or the third category.5. Invite inferences from students and write them on the board.
COMPREHENSION CHECK [SILENT DRILL](5 minutes) • Make true and false statements about the results of the survey. Have students
answer silently with one finger for true and two fingers for false.
GUIDED PRACTICE: [DICTATION](15 minutes) 1. Use a new bar graph to dictate 5 to 8 inferences about the results. (See p. 115-e.)
2. Have students write the sentences on the board and correct as a class.
COMMUNICATIVE PRACTICE: [TEAM WORK](40 minutes) 1. Have students independently fill in a Needs Assessment. (See p. 115-b.)
2. Form groups of four and assign roles: facilitator, timekeeper, recorder, reporter.3. Have groups graph the results and write 5-8 inferences based on the top ten
responses within their group. Set a 20-minute time limit.
EVALUATION: (20-30 minutes) 1. Have reporters from each group identify their group's top ten responses.
2. Chart all the groups' responses on one bar graph on the board.3. Elicit inferences about students’ perceived needs.4. Ask student volunteers to make true and false statements based on the charted
information to which the class can respond: one finger = true, two fingers = false.
APPLICATION: [TEAM WORK](as time permits) 1. Have students compete to locate 5-10 "most needed" skills in the course outline.
2. Commend the winners and have them tell the class where they found each skill.
give small discussinfo talk culture
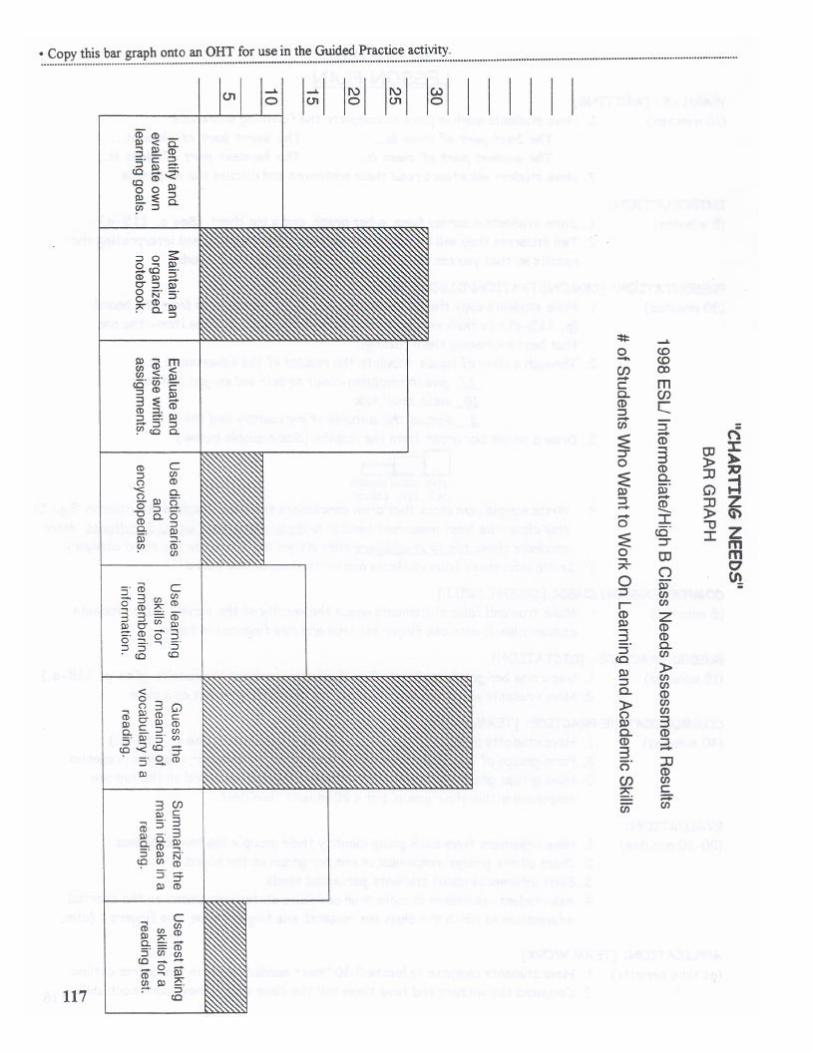
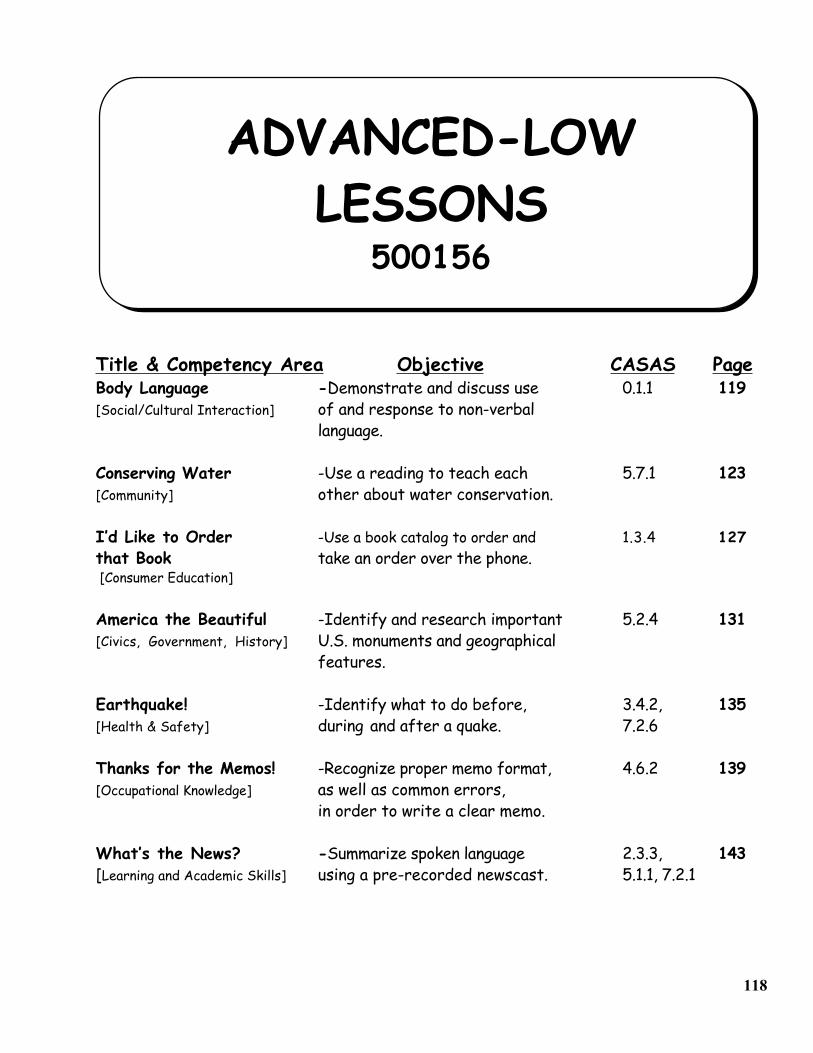
ADVANCED-LOWLESSONS
500156
Title & Competency Area Objective CASAS PageBody Language -Demonstrate and discuss use 0.1.1 119[Social/Cultural Interaction] of and response to non-verbal
language.
Conserving Water -Use a reading to teach each 5.7.1 123[Community] other about water conservation.
I’d Like to Order -Use a book catalog to order and 1.3.4 127that Book take an order over the phone. [Consumer Education]
America the Beautiful -Identify and research important 5.2.4 131[Civics, Government, History] U.S. monuments and geographical
features.
Earthquake! -Identify what to do before, 3.4.2, 135[Health & Safety] during and after a quake. 7.2.6
Thanks for the Memos! -Recognize proper memo format, 4.6.2 139[Occupational Knowledge] as well as common errors,
in order to write a clear memo.
What’s the News? -Summarize spoken language 2.3.3, 143[Learning and Academic Skills] using a pre-recorded newscast. 5.1.1, 7.2.1
118
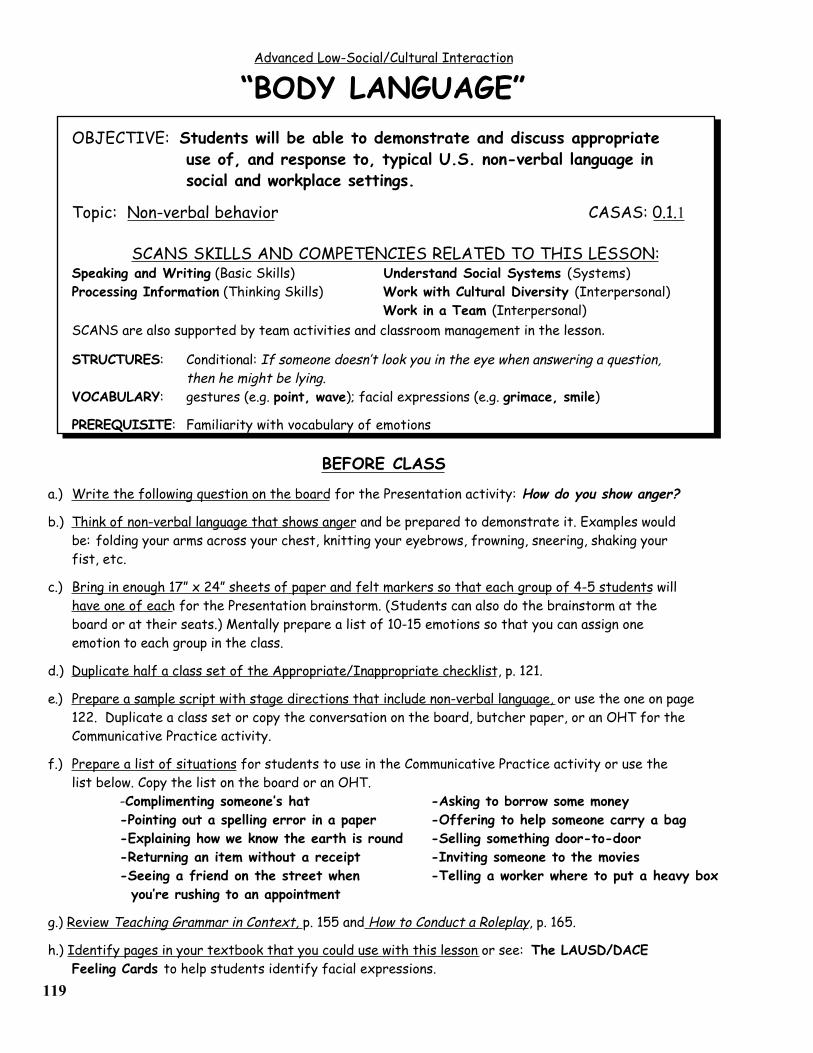
119
Advanced Low-Social/Cultural Interaction
“BODY LANGUAGE”OBJECTIVE: Students will be able to demonstrate and discuss appropriate
use of, and response to, typical U.S. non-verbal language insocial and workplace settings.
Topic: Non-verbal behavior CASAS: 0.1.1
SCANS SKILLS AND COMPETENCIES RELATED TO THIS LESSON:Speaking and Writing (Basic Skills) Understand Social Systems (Systems)Processing Information (Thinking Skills) Work with Cultural Diversity (Interpersonal)
Work in a Team (Interpersonal)SCANS are also supported by team activities and classroom management in the lesson.
STRUCTURES: Conditional: If someone doesn’t look you in the eye when answering a question, then he might be lying.VOCABULARY: gestures (e.g. point, wave); facial expressions (e.g. grimace, smile)
PREREQUISITE: Familiarity with vocabulary of emotions
BEFORE CLASS
a.) Write the following question on the board for the Presentation activity: How do you show anger?
b.) Think of non-verbal language that shows anger and be prepared to demonstrate it. Examples would be: folding your arms across your chest, knitting your eyebrows, frowning, sneering, shaking yourfist, etc.
c.) Bring in enough 17” x 24” sheets of paper and felt markers so that each group of 4-5 students willhave one of each for the Presentation brainstorm. (Students can also do the brainstorm at theboard or at their seats.) Mentally prepare a list of 10-15 emotions so that you can assign oneemotion to each group in the class.
d.) Duplicate half a class set of the Appropriate/Inappropriate checklist, p. 121.
e.) Prepare a sample script with stage directions that include non-verbal language, or use the one on page122. Duplicate a class set or copy the conversation on the board, butcher paper, or an OHT for theCommunicative Practice activity.
f.) Prepare a list of situations for students to use in the Communicative Practice activity or use the list below. Copy the list on the board or an OHT.
-Complimenting someone’s hat -Asking to borrow some money-Pointing out a spelling error in a paper -Offering to help someone carry a bag-Explaining how we know the earth is round -Selling something door-to-door-Returning an item without a receipt -Inviting someone to the movies-Seeing a friend on the street when -Telling a worker where to put a heavy box you’re rushing to an appointment
g.) Review Teaching Grammar in Context, p. 155 and How to Conduct a Roleplay, p. 165.
h.) Identify pages in your textbook that you could use with this lesson or see: The LAUSD/DACE Feeling Cards to help students identify facial expressions.
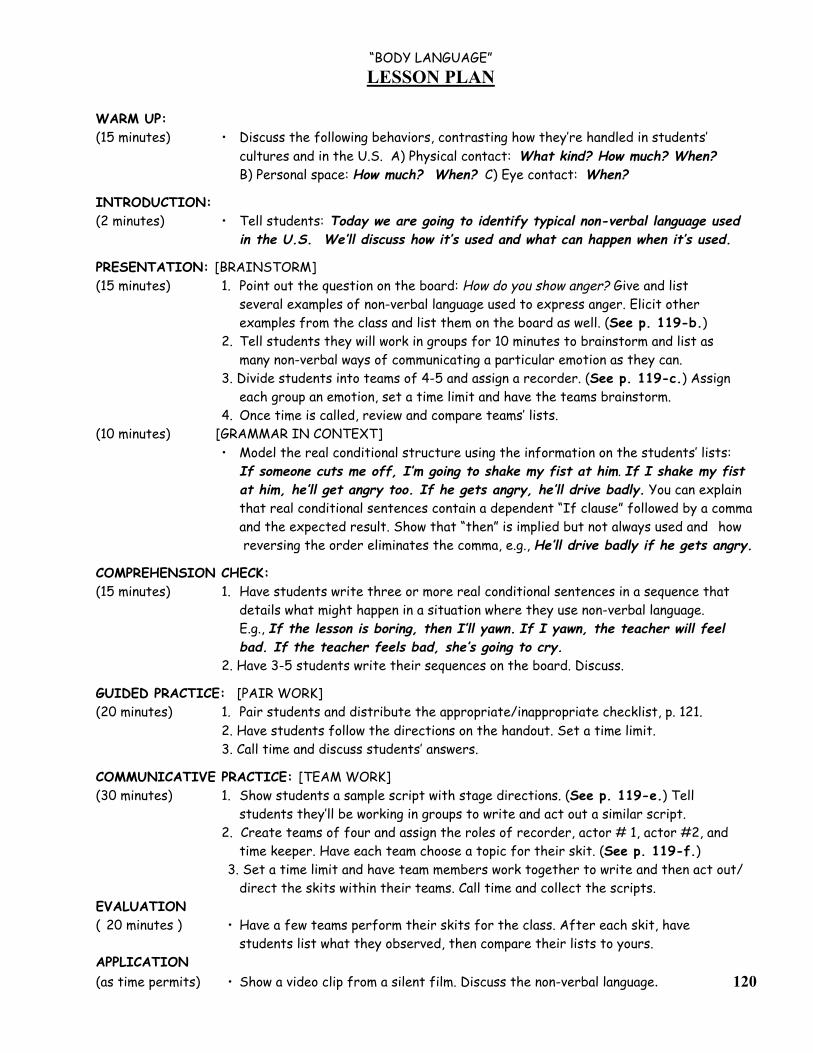
“BODY LANGUAGE”LESSON PLAN
WARM UP:(15 minutes) • Discuss the following behaviors, contrasting how they’re handled in students’
cultures and in the U.S. A) Physical contact: What kind? How much? When? B) Personal space: How much? When? C) Eye contact: When?
INTRODUCTION:(2 minutes) • Tell students: Today we are going to identify typical non-verbal language used in the U.S. We’ll discuss how it’s used and what can happen when it’s used.
PRESENTATION: [BRAINSTORM](15 minutes) 1. Point out the question on the board: How do you show anger? Give and list
several examples of non-verbal language used to express anger. Elicit other examples from the class and list them on the board as well. (See p. 119-b.)
2. Tell students they will work in groups for 10 minutes to brainstorm and list as many non-verbal ways of communicating a particular emotion as they can.
3. Divide students into teams of 4-5 and assign a recorder. (See p. 119-c.) Assign each group an emotion, set a time limit and have the teams brainstorm.4. Once time is called, review and compare teams’ lists.
(10 minutes) [GRAMMAR IN CONTEXT]• Model the real conditional structure using the information on the students’ lists:
If someone cuts me off, I’m going to shake my fist at him. If I shake my fistat him, he’ll get angry too. If he gets angry, he’ll drive badly. You can explainthat real conditional sentences contain a dependent “If clause” followed by a commaand the expected result. Show that “then” is implied but not always used and how reversing the order eliminates the comma, e.g., He’ll drive badly if he gets angry.
COMPREHENSION CHECK:(15 minutes) 1. Have students write three or more real conditional sentences in a sequence that
details what might happen in a situation where they use non-verbal language.E.g., If the lesson is boring, then I’ll yawn. If I yawn, the teacher will feelbad. If the teacher feels bad, she’s going to cry.
2. Have 3-5 students write their sequences on the board. Discuss.
GUIDED PRACTICE: [PAIR WORK](20 minutes) 1. Pair students and distribute the appropriate/inappropriate checklist, p. 121.
2. Have students follow the directions on the handout. Set a time limit.3. Call time and discuss students’ answers.
COMMUNICATIVE PRACTICE: [TEAM WORK](30 minutes) 1. Show students a sample script with stage directions. (See p. 119-e.) Tell
students they’ll be working in groups to write and act out a similar script.2. Create teams of four and assign the roles of recorder, actor # 1, actor #2, and
time keeper. Have each team choose a topic for their skit. (See p. 119-f.)3. Set a time limit and have team members work together to write and then act out/
direct the skits within their teams. Call time and collect the scripts. EVALUATION( 20 minutes ) • Have a few teams perform their skits for the class. After each skit, have
students list what they observed, then compare their lists to yours.APPLICATION(as time permits) • Show a video clip from a silent film. Discuss the non-verbal language. 120
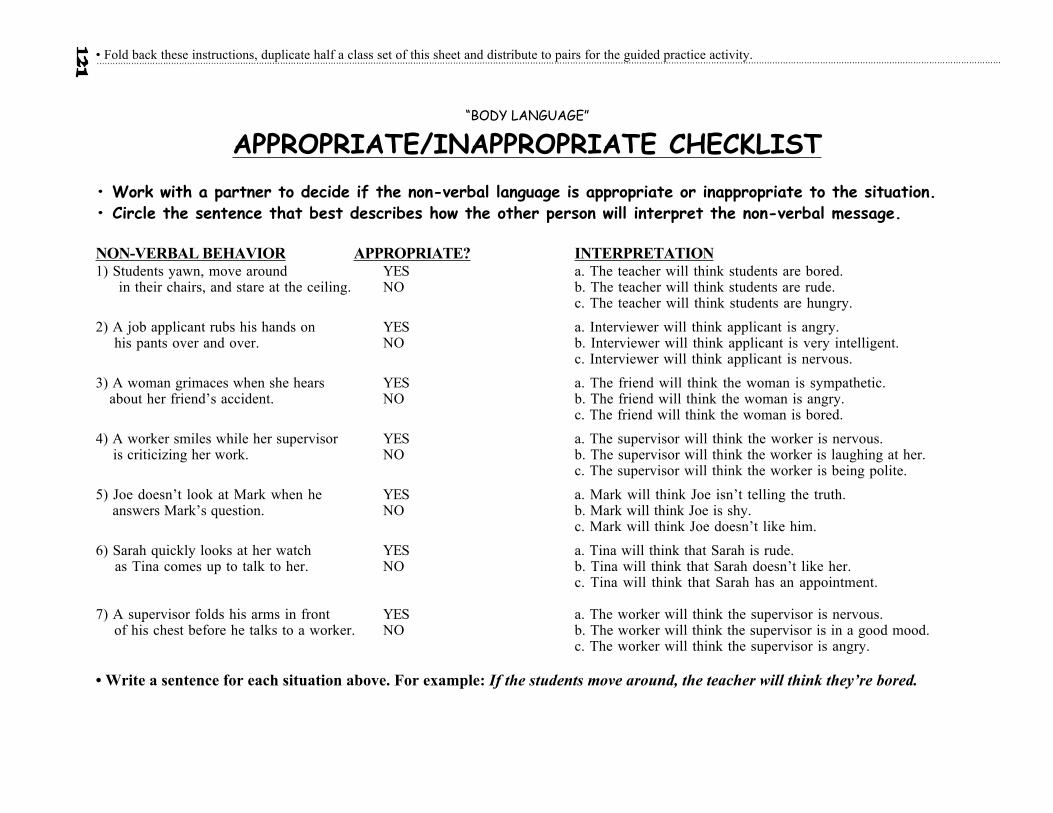
• Fold back these instructions, duplicate half a class set of this sheet and distribute to pairs for the guided practice activity.
“BODY LANGUAGE”
APPROPRIATE/INAPPROPRIATE CHECKLIST• Work with a partner to decide if the non-verbal language is appropriate or inappropriate to the situation.• Circle the sentence that best describes how the other person will interpret the non-verbal message.
NON-VERBAL BEHAVIOR APPROPRIATE? INTERPRETATION1) Students yawn, move around YES a. The teacher will think students are bored. in their chairs, and stare at the ceiling. NO b. The teacher will think students are rude.
c. The teacher will think students are hungry.
2) A job applicant rubs his hands on YES a. Interviewer will think applicant is angry. his pants over and over. NO b. Interviewer will think applicant is very intelligent.
c. Interviewer will think applicant is nervous.
3) A woman grimaces when she hears YES a. The friend will think the woman is sympathetic. about her friend’s accident. NO b. The friend will think the woman is angry.
c. The friend will think the woman is bored.
4) A worker smiles while her supervisor YES a. The supervisor will think the worker is nervous. is criticizing her work. NO b. The supervisor will think the worker is laughing at her.
c. The supervisor will think the worker is being polite.
5) Joe doesn’t look at Mark when he YES a. Mark will think Joe isn’t telling the truth. answers Mark’s question. NO b. Mark will think Joe is shy.
c. Mark will think Joe doesn’t like him.
6) Sarah quickly looks at her watch YES a. Tina will think that Sarah is rude. as Tina comes up to talk to her. NO b. Tina will think that Sarah doesn’t like her.
c. Tina will think that Sarah has an appointment.
7) A supervisor folds his arms in front YES a. The worker will think the supervisor is nervous. of his chest before he talks to a worker. NO b. The worker will think the supervisor is in a good mood.
c. The worker will think the supervisor is angry.
• Write a sentence for each situation above. For example: If the students move around, the teacher will think they’re bored.
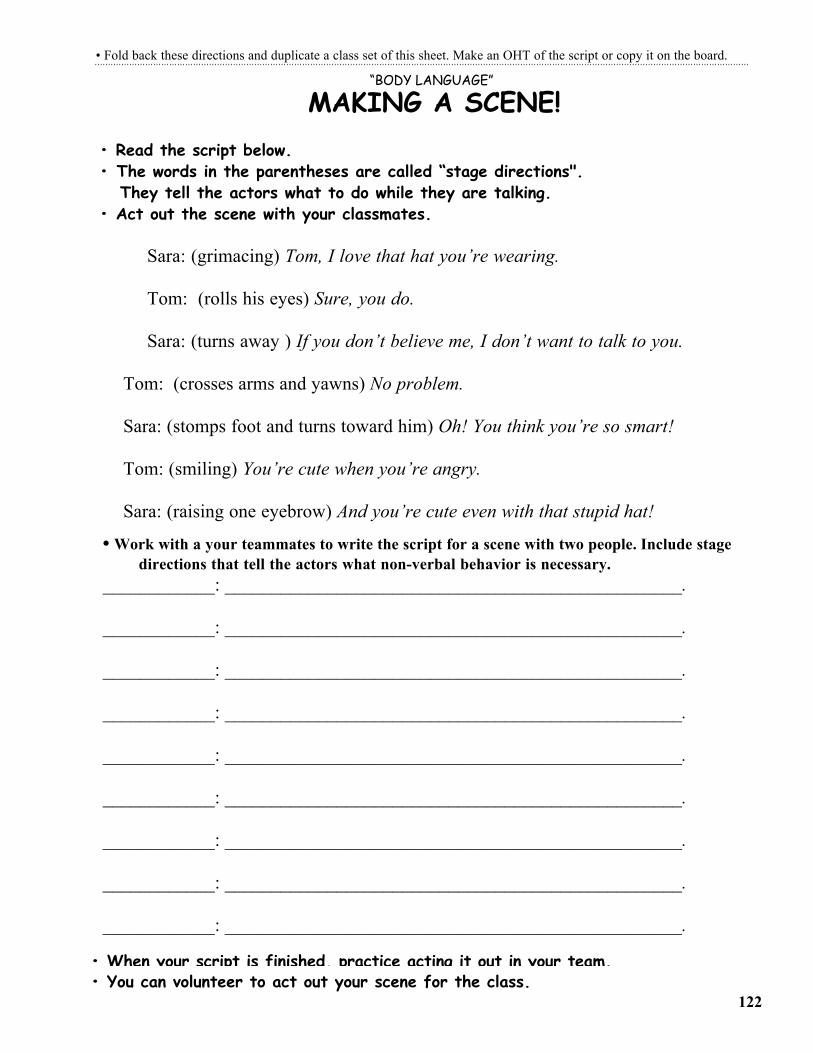
• Fold back these directions and duplicate a class set of this sheet. Make an OHT of the script or copy it on the board.
“BODY LANGUAGE”
MAKING A SCENE!• Read the script below.• The words in the parentheses are called “stage directions". They tell the actors what to do while they are talking.• Act out the scene with your classmates.
Sara: (grimacing) Tom, I love that hat you’re wearing.
Tom: (rolls his eyes) Sure, you do.
Sara: (turns away ) If you don’t believe me, I don’t want to talk to you.
Tom: (crosses arms and yawns) No problem.
Sara: (stomps foot and turns toward him) Oh! You think you’re so smart!
Tom: (smiling) You’re cute when you’re angry.
Sara: (raising one eyebrow) And you’re cute even with that stupid hat!
• Work with a your teammates to write the script for a scene with two people. Include stage directions that tell the actors what non-verbal behavior is necessary.
____________: _________________________________________________.
____________: _________________________________________________.
____________: _________________________________________________.
____________: _________________________________________________.
____________: _________________________________________________.
____________: _________________________________________________.
____________: _________________________________________________.
____________: _________________________________________________.
____________: _________________________________________________.
• When your script is finished, practice acting it out in your team. • You can volunteer to act out your scene for the class.
122
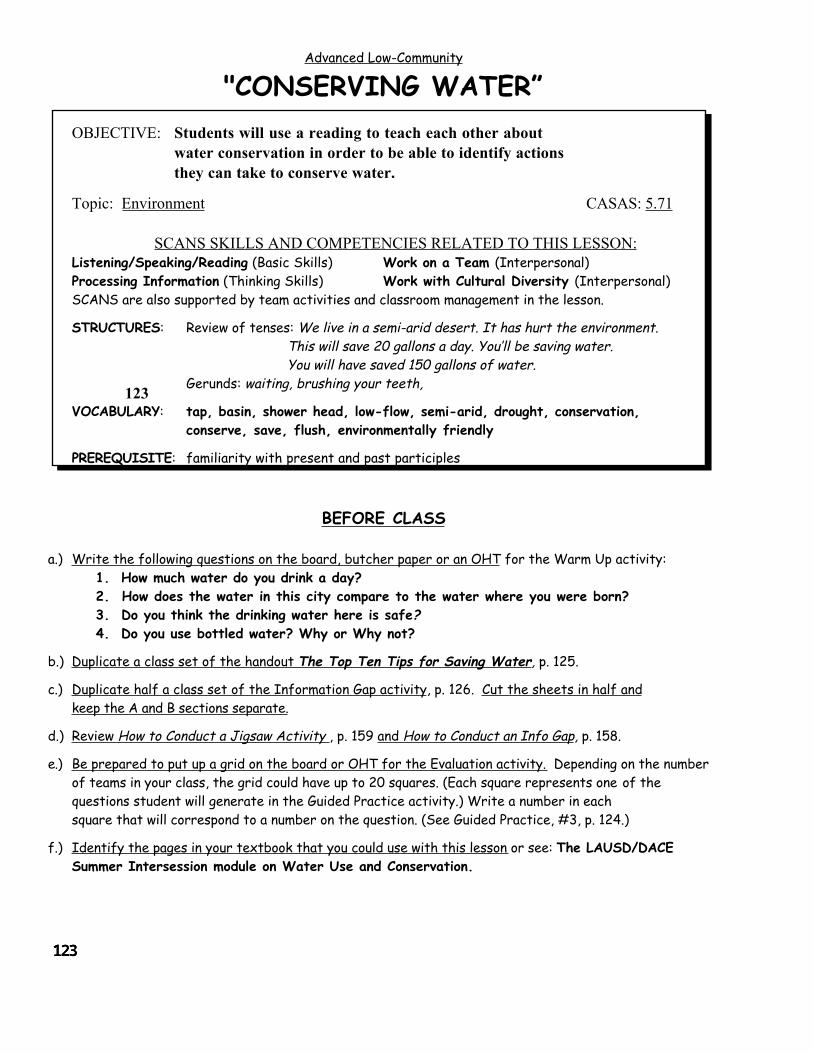
Advanced Low-Community
"CONSERVING WATER”OBJECTIVE: Students will use a reading to teach each other about
water conservation in order to be able to identify actionsthey can take to conserve water.
Topic: Environment CASAS: 5.71
SCANS SKILLS AND COMPETENCIES RELATED TO THIS LESSON:Listening/Speaking/Reading (Basic Skills) Work on a Team (Interpersonal)Processing Information (Thinking Skills) Work with Cultural Diversity (Interpersonal)SCANS are also supported by team activities and classroom management in the lesson.
STRUCTURES: Review of tenses: We live in a semi-arid desert. It has hurt the environment. This will save 20 gallons a day. You’ll be saving water.You will have saved 150 gallons of water.
Gerunds: waiting, brushing your teeth,
VOCABULARY: tap, basin, shower head, low-flow, semi-arid, drought, conservation,conserve, save, flush, environmentally friendly
PREREQUISITE: familiarity with present and past participles
BEFORE CLASS
a.) Write the following questions on the board, butcher paper or an OHT for the Warm Up activity:1. How much water do you drink a day?2. How does the water in this city compare to the water where you were born?3. Do you think the drinking water here is safe?4. Do you use bottled water? Why or Why not?
b.) Duplicate a class set of the handout The Top Ten Tips for Saving Water, p. 125.
c.) Duplicate half a class set of the Information Gap activity, p. 126. Cut the sheets in half and keep the A and B sections separate.
d.) Review How to Conduct a Jigsaw Activity , p. 159 and How to Conduct an Info Gap, p. 158.
e.) Be prepared to put up a grid on the board or OHT for the Evaluation activity. Depending on the numberof teams in your class, the grid could have up to 20 squares. (Each square represents one of thequestions student will generate in the Guided Practice activity.) Write a number in eachsquare that will correspond to a number on the question. (See Guided Practice, #3, p. 124.)
f.) Identify the pages in your textbook that you could use with this lesson or see: The LAUSD/DACE Summer Intersession module on Water Use and Conservation.
123
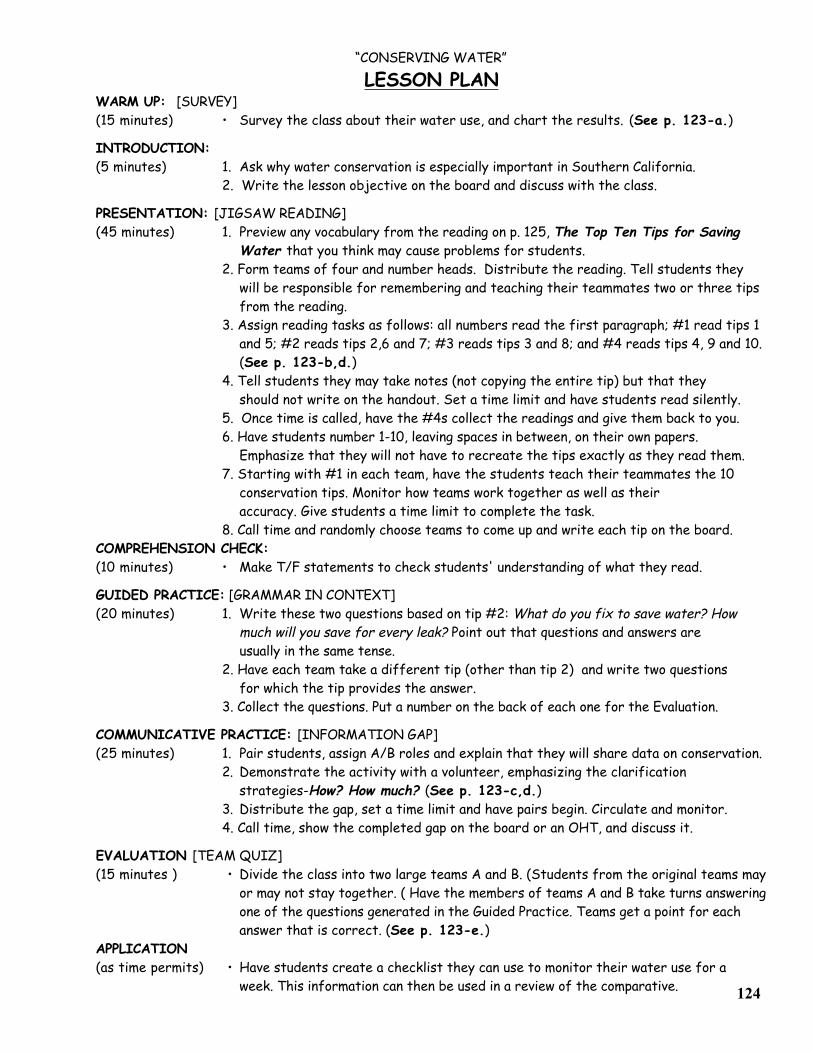
“CONSERVING WATER”
LESSON PLANWARM UP: [SURVEY](15 minutes) • Survey the class about their water use, and chart the results. (See p. 123-a.)
INTRODUCTION:(5 minutes) 1. Ask why water conservation is especially important in Southern California.
2. Write the lesson objective on the board and discuss with the class.
PRESENTATION: [JIGSAW READING](45 minutes) 1. Preview any vocabulary from the reading on p. 125, The Top Ten Tips for Saving
Water that you think may cause problems for students.2. Form teams of four and number heads. Distribute the reading. Tell students they
will be responsible for remembering and teaching their teammates two or three tipsfrom the reading.
3. Assign reading tasks as follows: all numbers read the first paragraph; #1 read tips 1and 5; #2 reads tips 2,6 and 7; #3 reads tips 3 and 8; and #4 reads tips 4, 9 and 10.(See p. 123-b,d.)
4. Tell students they may take notes (not copying the entire tip) but that they should not write on the handout. Set a time limit and have students read silently.
5. Once time is called, have the #4s collect the readings and give them back to you.6. Have students number 1-10, leaving spaces in between, on their own papers.
Emphasize that they will not have to recreate the tips exactly as they read them.7. Starting with #1 in each team, have the students teach their teammates the 10
conservation tips. Monitor how teams work together as well as their accuracy. Give students a time limit to complete the task.
8. Call time and randomly choose teams to come up and write each tip on the board.COMPREHENSION CHECK:(10 minutes) • Make T/F statements to check students' understanding of what they read.
GUIDED PRACTICE: [GRAMMAR IN CONTEXT](20 minutes) 1. Write these two questions based on tip #2: What do you fix to save water? How
much will you save for every leak? Point out that questions and answers are usually in the same tense.
2. Have each team take a different tip (other than tip 2) and write two questionsfor which the tip provides the answer.
3. Collect the questions. Put a number on the back of each one for the Evaluation.
COMMUNICATIVE PRACTICE: [INFORMATION GAP](25 minutes) 1. Pair students, assign A/B roles and explain that they will share data on conservation.
2. Demonstrate the activity with a volunteer, emphasizing the clarification strategies-How? How much? (See p. 123-c,d.)
3. Distribute the gap, set a time limit and have pairs begin. Circulate and monitor.4. Call time, show the completed gap on the board or an OHT, and discuss it.
EVALUATION [TEAM QUIZ](15 minutes ) • Divide the class into two large teams A and B. (Students from the original teams may
or may not stay together. ( Have the members of teams A and B take turns answeringone of the questions generated in the Guided Practice. Teams get a point for eachanswer that is correct. (See p. 123-e.)
APPLICATION(as time permits) • Have students create a checklist they can use to monitor their water use for a
week. This information can then be used in a review of the comparative. 124
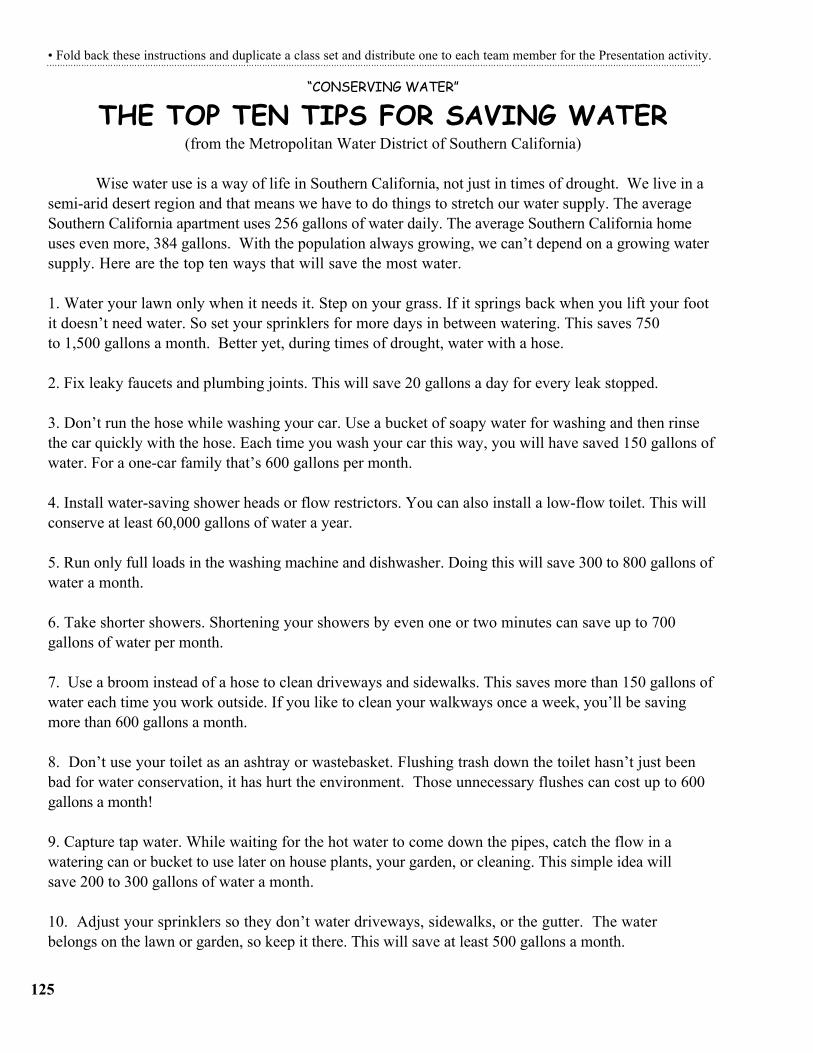
• Fold back these instructions and duplicate a class set and distribute one to each team member for the Presentation activity.
“CONSERVING WATER”
THE TOP TEN TIPS FOR SAVING WATER(from the Metropolitan Water District of Southern California)
Wise water use is a way of life in Southern California, not just in times of drought. We live in asemi-arid desert region and that means we have to do things to stretch our water supply. The averageSouthern California apartment uses 256 gallons of water daily. The average Southern California homeuses even more, 384 gallons. With the population always growing, we can’t depend on a growing watersupply. Here are the top ten ways that will save the most water.
1. Water your lawn only when it needs it. Step on your grass. If it springs back when you lift your footit doesn’t need water. So set your sprinklers for more days in between watering. This saves 750to 1,500 gallons a month. Better yet, during times of drought, water with a hose.
2. Fix leaky faucets and plumbing joints. This will save 20 gallons a day for every leak stopped.
3. Don’t run the hose while washing your car. Use a bucket of soapy water for washing and then rinsethe car quickly with the hose. Each time you wash your car this way, you will have saved 150 gallons ofwater. For a one-car family that’s 600 gallons per month.
4. Install water-saving shower heads or flow restrictors. You can also install a low-flow toilet. This willconserve at least 60,000 gallons of water a year.
5. Run only full loads in the washing machine and dishwasher. Doing this will save 300 to 800 gallons ofwater a month.
6. Take shorter showers. Shortening your showers by even one or two minutes can save up to 700gallons of water per month.
7. Use a broom instead of a hose to clean driveways and sidewalks. This saves more than 150 gallons ofwater each time you work outside. If you like to clean your walkways once a week, you’ll be savingmore than 600 gallons a month.
8. Don’t use your toilet as an ashtray or wastebasket. Flushing trash down the toilet hasn’t just beenbad for water conservation, it has hurt the environment. Those unnecessary flushes can cost up to 600gallons a month!
9. Capture tap water. While waiting for the hot water to come down the pipes, catch the flow in awatering can or bucket to use later on house plants, your garden, or cleaning. This simple idea willsave 200 to 300 gallons of water a month.
10. Adjust your sprinklers so they don’t water driveways, sidewalks, or the gutter. The waterbelongs on the lawn or garden, so keep it there. This will save at least 500 gallons a month.
125
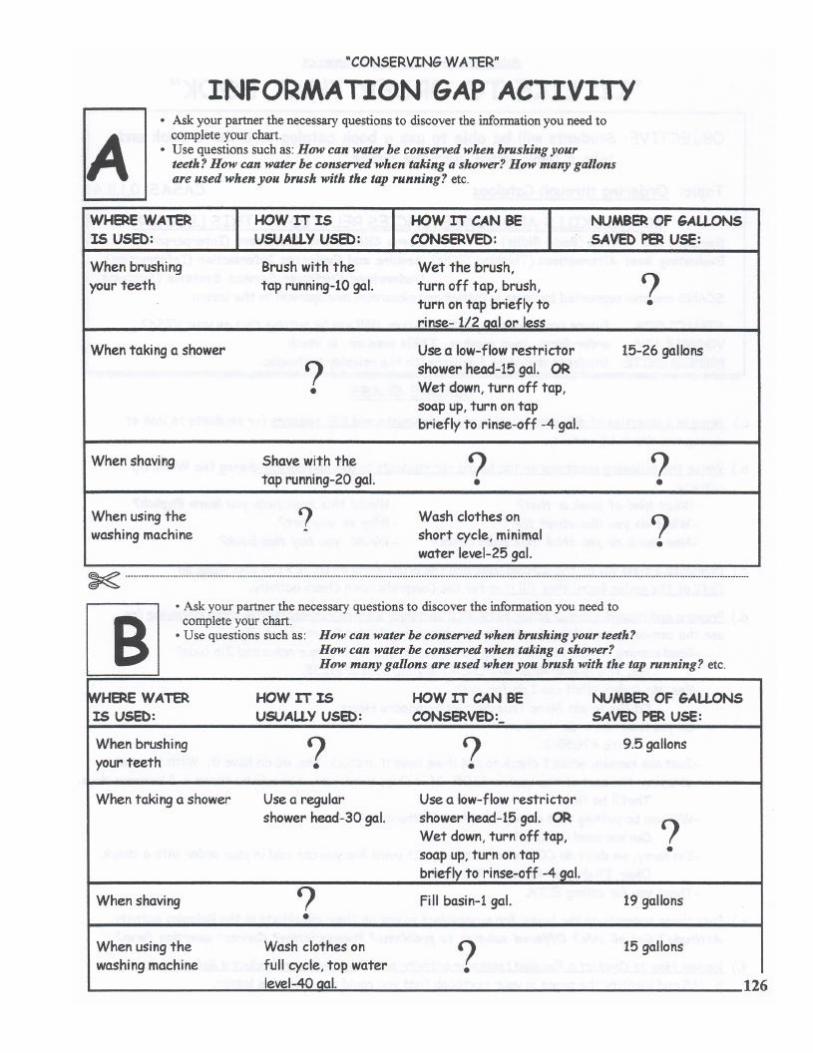
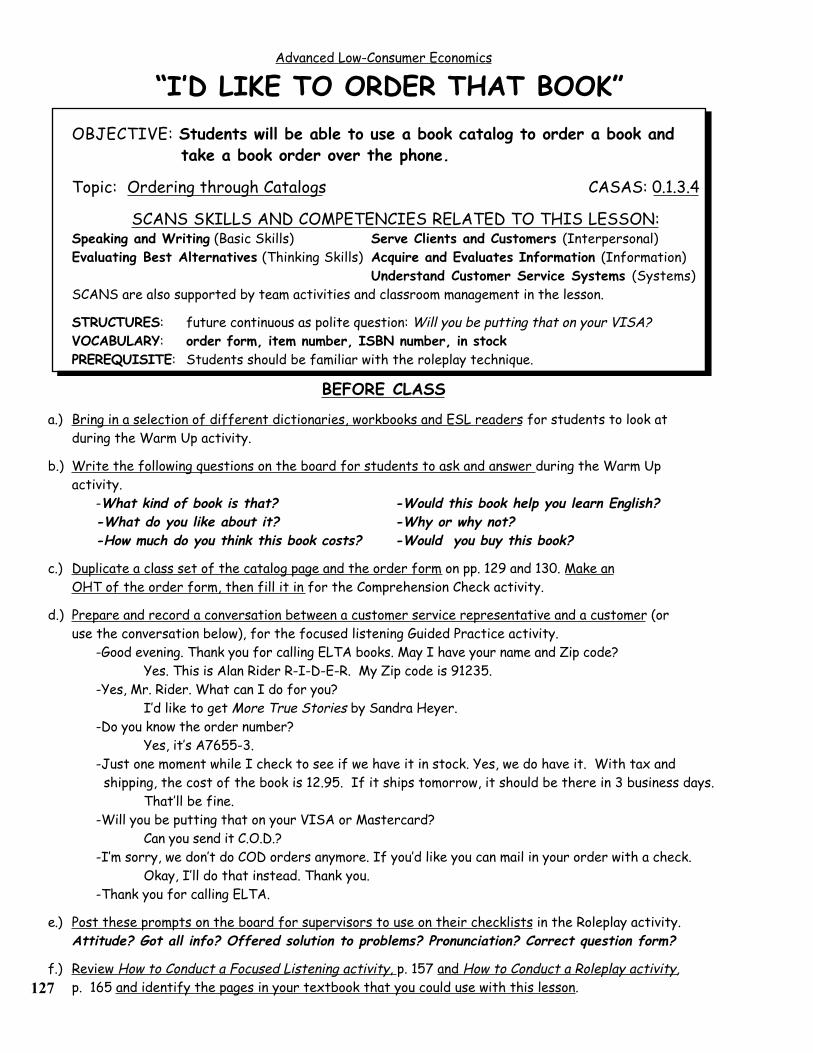
Advanced Low-Consumer Economics
“I’D LIKE TO ORDER THAT BOOK”OBJECTIVE: Students will be able to use a book catalog to order a book and
take a book order over the phone.
Topic: Ordering through Catalogs CASAS: 0.1.3.4
SCANS SKILLS AND COMPETENCIES RELATED TO THIS LESSON:Speaking and Writing (Basic Skills) Serve Clients and Customers (Interpersonal)Evaluating Best Alternatives (Thinking Skills) Acquire and Evaluates Information (Information)
Understand Customer Service Systems (Systems)SCANS are also supported by team activities and classroom management in the lesson.
STRUCTURES: future continuous as polite question: Will you be putting that on your VISA?VOCABULARY: order form, item number, ISBN number, in stockPREREQUISITE: Students should be familiar with the roleplay technique.
BEFORE CLASS
a.) Bring in a selection of different dictionaries, workbooks and ESL readers for students to look atduring the Warm Up activity.
b.) Write the following questions on the board for students to ask and answer during the Warm Up activity.
-What kind of book is that? -Would this book help you learn English?-What do you like about it? -Why or why not?-How much do you think this book costs? -Would you buy this book?
c.) Duplicate a class set of the catalog page and the order form on pp. 129 and 130. Make anOHT of the order form, then fill it in for the Comprehension Check activity.
d.) Prepare and record a conversation between a customer service representative and a customer (or use the conversation below), for the focused listening Guided Practice activity.
-Good evening. Thank you for calling ELTA books. May I have your name and Zip code?Yes. This is Alan Rider R-I-D-E-R. My Zip code is 91235.
-Yes, Mr. Rider. What can I do for you?I’d like to get More True Stories by Sandra Heyer.
-Do you know the order number?Yes, it’s A7655-3.
-Just one moment while I check to see if we have it in stock. Yes, we do have it. With tax and shipping, the cost of the book is 12.95. If it ships tomorrow, it should be there in 3 business days.
That’ll be fine.-Will you be putting that on your VISA or Mastercard?
Can you send it C.O.D.?-I’m sorry, we don’t do COD orders anymore. If you’d like you can mail in your order with a check.
Okay, I’ll do that instead. Thank you.-Thank you for calling ELTA.
e.) Post these prompts on the board for supervisors to use on their checklists in the Roleplay activity.Attitude? Got all info? Offered solution to problems? Pronunciation? Correct question form?
f.) Review How to Conduct a Focused Listening activity, p. 157 and How to Conduct a Roleplay activity,p. 165 and identify the pages in your textbook that you could use with this lesson.127
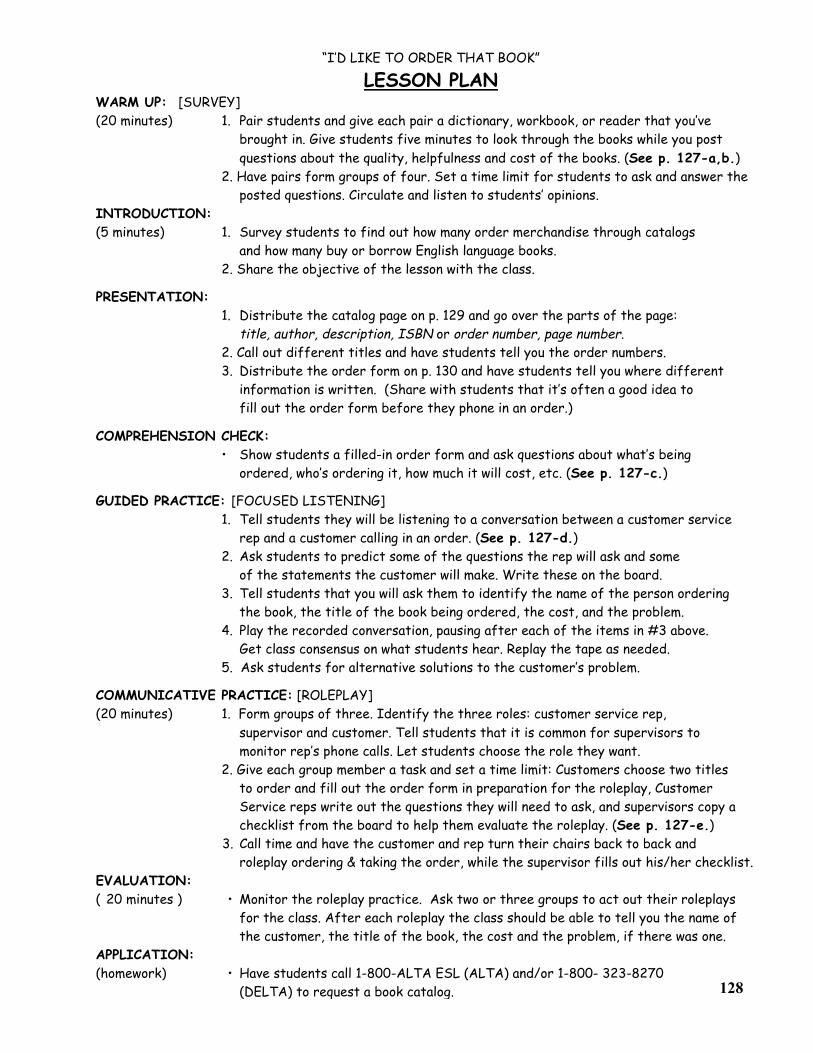
“I’D LIKE TO ORDER THAT BOOK”
LESSON PLANWARM UP: [SURVEY](20 minutes) 1. Pair students and give each pair a dictionary, workbook, or reader that you’ve
brought in. Give students five minutes to look through the books while you postquestions about the quality, helpfulness and cost of the books. (See p. 127-a,b.)
2. Have pairs form groups of four. Set a time limit for students to ask and answer theposted questions. Circulate and listen to students’ opinions.
INTRODUCTION:(5 minutes) 1. Survey students to find out how many order merchandise through catalogs
and how many buy or borrow English language books.2. Share the objective of the lesson with the class.
PRESENTATION:1. Distribute the catalog page on p. 129 and go over the parts of the page:
title, author, description, ISBN or order number, page number.2. Call out different titles and have students tell you the order numbers.3. Distribute the order form on p. 130 and have students tell you where different
information is written. (Share with students that it’s often a good idea tofill out the order form before they phone in an order.)
COMPREHENSION CHECK:• Show students a filled-in order form and ask questions about what’s being
ordered, who’s ordering it, how much it will cost, etc. (See p. 127-c.)
GUIDED PRACTICE: [FOCUSED LISTENING]1. Tell students they will be listening to a conversation between a customer service
rep and a customer calling in an order. (See p. 127-d.)2. Ask students to predict some of the questions the rep will ask and some
of the statements the customer will make. Write these on the board.3. Tell students that you will ask them to identify the name of the person ordering
the book, the title of the book being ordered, the cost, and the problem.4. Play the recorded conversation, pausing after each of the items in #3 above.
Get class consensus on what students hear. Replay the tape as needed.5. Ask students for alternative solutions to the customer’s problem.
COMMUNICATIVE PRACTICE: [ROLEPLAY](20 minutes) 1. Form groups of three. Identify the three roles: customer service rep,
supervisor and customer. Tell students that it is common for supervisors to monitor rep’s phone calls. Let students choose the role they want.
2. Give each group member a task and set a time limit: Customers choose two titles to order and fill out the order form in preparation for the roleplay, Customer Service reps write out the questions they will need to ask, and supervisors copy a checklist from the board to help them evaluate the roleplay. (See p. 127-e.)
3. Call time and have the customer and rep turn their chairs back to back androleplay ordering & taking the order, while the supervisor fills out his/her checklist.
EVALUATION:( 20 minutes ) • Monitor the roleplay practice. Ask two or three groups to act out their roleplays
for the class. After each roleplay the class should be able to tell you the name of the customer, the title of the book, the cost and the problem, if there was one.
APPLICATION:(homework) • Have students call 1-800-ALTA ESL (ALTA) and/or 1-800- 323-8270
(DELTA) to request a book catalog. 128
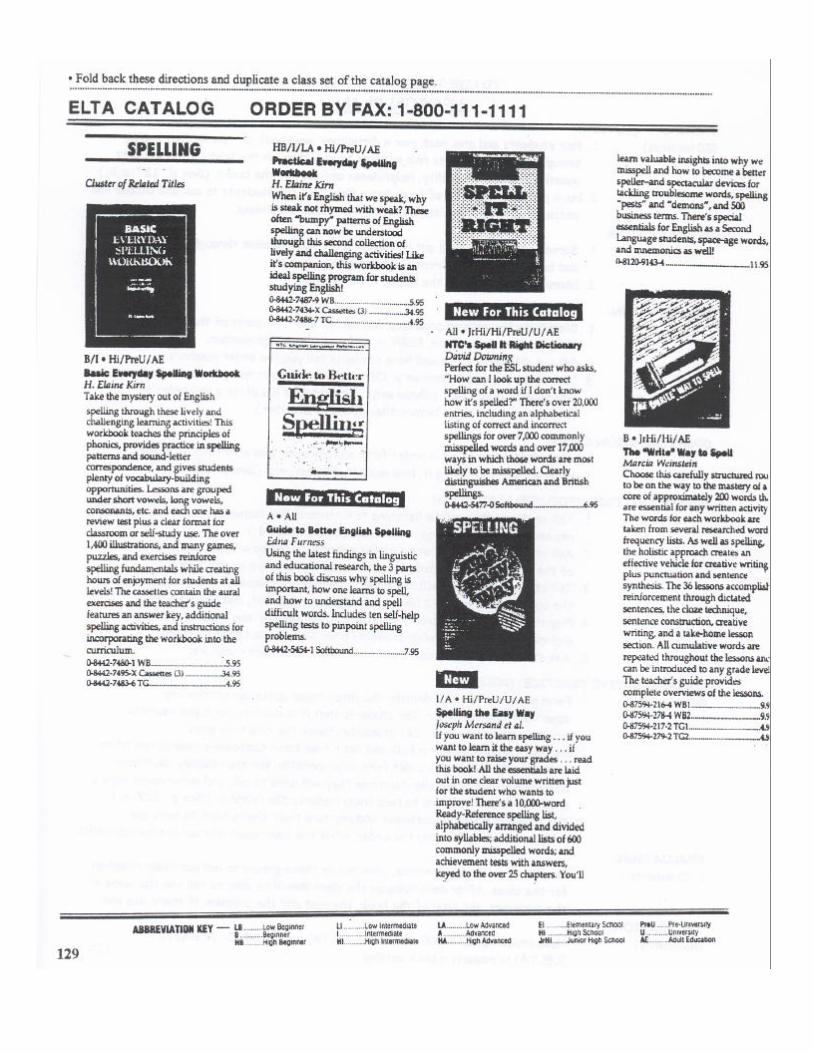
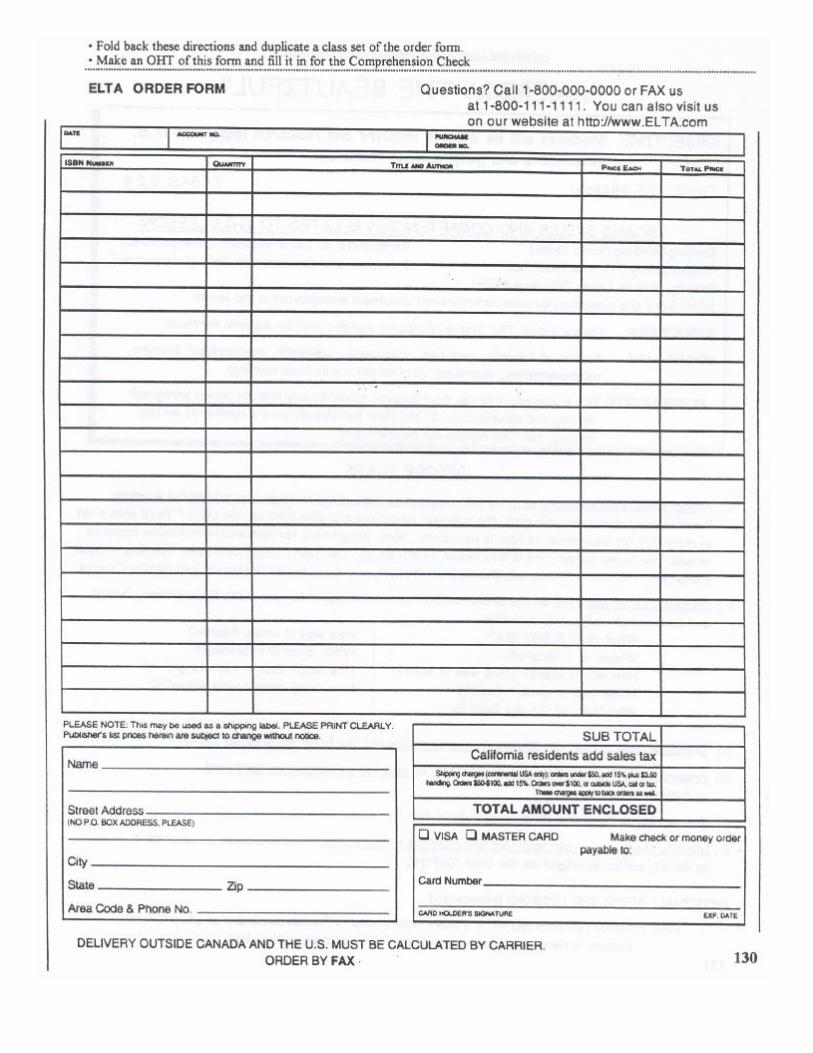
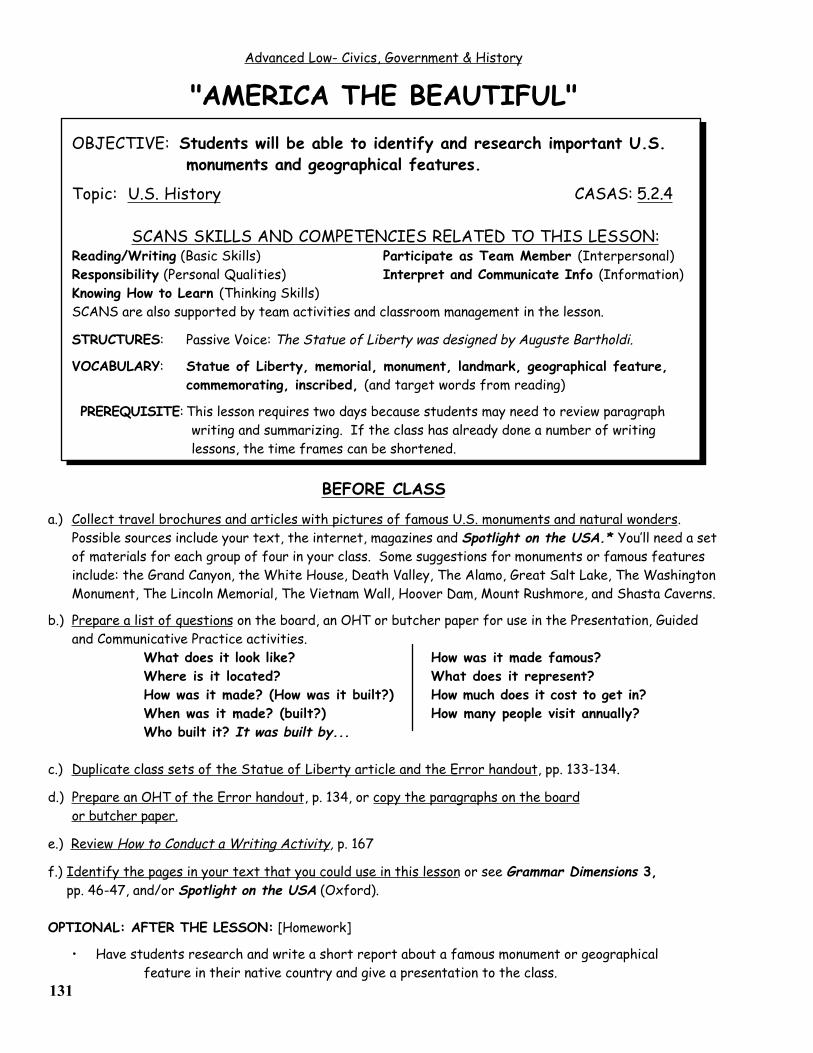
Advanced Low- Civics, Government & History
"AMERICA THE BEAUTIFUL"OBJECTIVE: Students will be able to identify and research important U.S.
monuments and geographical features.
Topic: U.S. History CASAS: 5.2.4
SCANS SKILLS AND COMPETENCIES RELATED TO THIS LESSON:Reading/Writing (Basic Skills) Participate as Team Member (Interpersonal)Responsibility (Personal Qualities) Interpret and Communicate Info (Information)Knowing How to Learn (Thinking Skills)SCANS are also supported by team activities and classroom management in the lesson.
STRUCTURES: Passive Voice: The Statue of Liberty was designed by Auguste Bartholdi.
VOCABULARY: Statue of Liberty, memorial, monument, landmark, geographical feature,commemorating, inscribed, (and target words from reading)
PREREQUISITE: This lesson requires two days because students may need to review paragraph writing and summarizing. If the class has already done a number of writinglessons, the time frames can be shortened.
BEFORE CLASS
a.) Collect travel brochures and articles with pictures of famous U.S. monuments and natural wonders.Possible sources include your text, the internet, magazines and Spotlight on the USA.* You’ll need a setof materials for each group of four in your class. Some suggestions for monuments or famous featuresinclude: the Grand Canyon, the White House, Death Valley, The Alamo, Great Salt Lake, The WashingtonMonument, The Lincoln Memorial, The Vietnam Wall, Hoover Dam, Mount Rushmore, and Shasta Caverns.
b.) Prepare a list of questions on the board, an OHT or butcher paper for use in the Presentation, Guidedand Communicative Practice activities.
What does it look like? How was it made famous?Where is it located? What does it represent?How was it made? (How was it built?) How much does it cost to get in?When was it made? (built?) How many people visit annually?Who built it? It was built by...
c.) Duplicate class sets of the Statue of Liberty article and the Error handout, pp. 133-134.
d.) Prepare an OHT of the Error handout, p. 134, or copy the paragraphs on the boardor butcher paper.
e.) Review How to Conduct a Writing Activity, p. 167
f.) Identify the pages in your text that you could use in this lesson or see Grammar Dimensions 3,pp. 46-47, and/or Spotlight on the USA (Oxford).
OPTIONAL: AFTER THE LESSON: [Homework]
• Have students research and write a short report about a famous monument or geographical feature in their native country and give a presentation to the class.
131
"AMERICA THE BEAUTIFUL”
LESSON PLANWARM UP: [CATEGORIZING](15 minutes) • Ask students, What famous places in the United States have you visited or
heard about? Write their answers under one of these categories on the board or OHT: Man-Made or Geographical Features.
INTRODUCTION:(5 minutes) 1. Tell the class they will be researching some of these important U.S. landmarks.
2. Elicit student definitions of “research,” and where they would go to getinformation on a topic. (e.g. encyclopedia, internet, newspaper, etc.)
PRESENTATION:(40 minutes) 1. Identify and discuss pictures or travel brochures of famous places in the U.S.
(See p. 131-a.) 2. Focus on the picture of the Statue of Liberty on p. 133. Ask, What do you know
about her? and What would you like to know? Briefly discuss students’ answers.3. Review a list of information questions about the Statue; e.g., What does it look like?
When was it built? etc. (See p. 131-b.) Elicit additional questions students have.4. Distribute the Statue of Liberty article from p. 135, and have students read it
silently looking for the answers to the questions from #3 above.5. Have student volunteers come to the front and write their answers, using
complete sentences, next to the questions. Check for accuracy with the class. 6. Demonstrate how to put the sentences into paragraph form, eliciting the
appropriate pronouns, conjunctions, and transitions: however, therefore, etc.
COMPREHENSION CHECK [SILENT DRILL](10 minutes) • Make true and false statements about the information on the board, asking
students to respond with one finger up for True and two fingers up for False.
GUIDED PRACTICE:(20 minutes) 1. Distribute the error-filled handout on p. 134. Have students, in pairs, first
find the errors, then rewrite the paragraphs correctly.2. Go over the handout on the board, OHT or butcher paper. (See p. 131-d.)
COMMUNICATIVE PRACTICE: [TEAM WORK](75 minutes) 1. Have pairs form groups of four and choose their roles: Leader, Timekeeper,
Recorder, or Reader.2. Tell students that each group will research a different landmark in order to
write a short report. Explain that first they will scan their materials for the information that answers the questions on the board. Next, they’ll work together to write their report, with the recorder writing the finished paragraphs.
3. Have the leaders come up and chose a set of materials for their groups.(See p. 131-a.)
4. Set a time limit, circulate and assist the groups.5. After time is called, have the reporters turn in their group's work.
EVALUATION: [PEER EDITING](30 minutes) • Collect the reports and redistribute them so that each group has a report they
didn’t write. After each team’s Reader reads the report to their teammates, the Recorders write down the team members responses and questions.
• Collect the reports and the peer feedback sheets in order to provide your own feedback at a subsequent lesson. Display the reports or "publish" them, two or three
at a time in a weekly class newsletter. 132
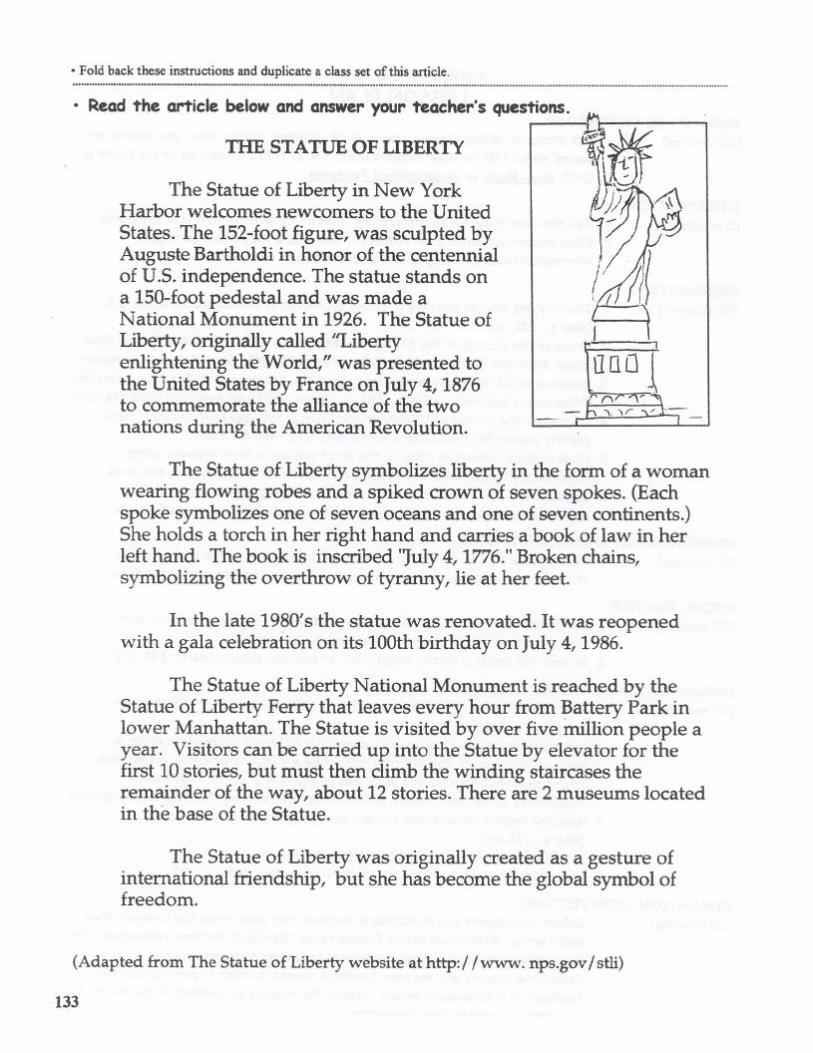
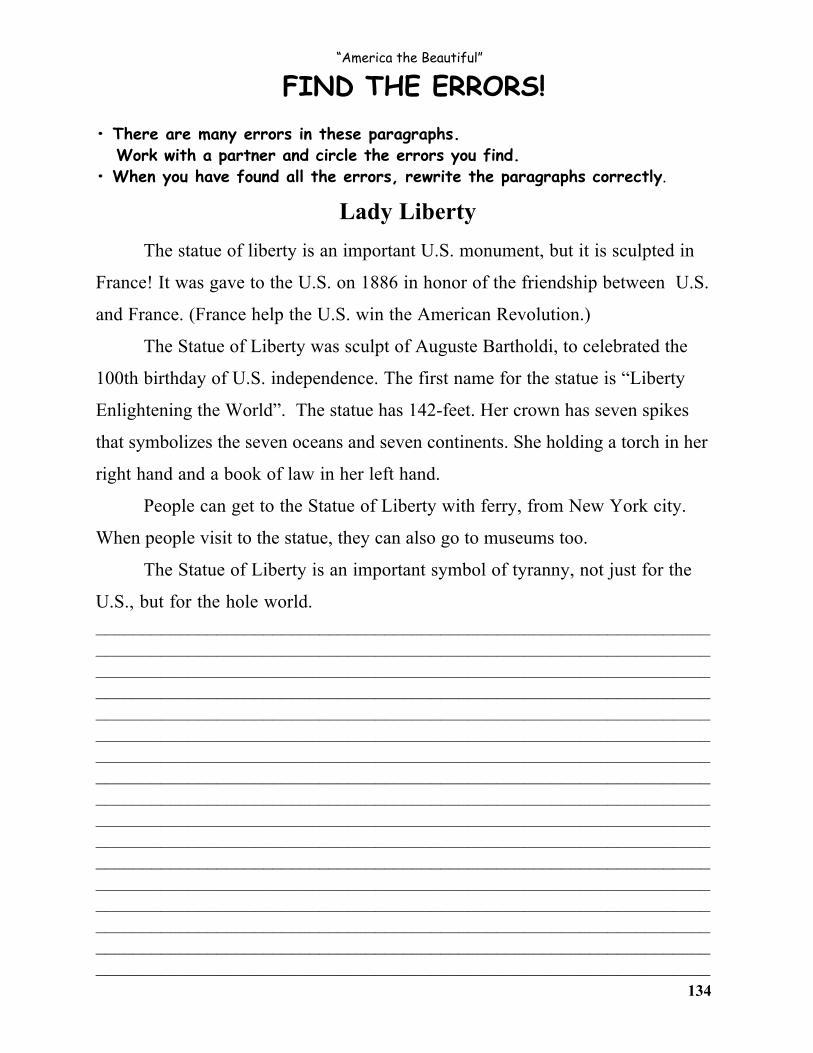
“America the Beautiful”
FIND THE ERRORS!• There are many errors in these paragraphs. Work with a partner and circle the errors you find.• When you have found all the errors, rewrite the paragraphs correctly.
Lady Liberty
The statue of liberty is an important U.S. monument, but it is sculpted in
France! It was gave to the U.S. on 1886 in honor of the friendship between U.S.
and France. (France help the U.S. win the American Revolution.)
The Statue of Liberty was sculpt of Auguste Bartholdi, to celebrated the
100th birthday of U.S. independence. The first name for the statue is “Liberty
Enlightening the World”. The statue has 142-feet. Her crown has seven spikes
that symbolizes the seven oceans and seven continents. She holding a torch in her
right hand and a book of law in her left hand.
People can get to the Statue of Liberty with ferry, from New York city.
When people visit to the statue, they can also go to museums too.
The Statue of Liberty is an important symbol of tyranny, not just for the
U.S., but for the hole world.
––––––––––––––––––––––––––––––––––––––––––––––––––––––––––––––––––––––––––––––––––––––––––––––––––––––––––––––––––––––––––––––––––––––––––––––––––––––––––––––––––––––––––––––––––––––––––––––––––––––––––––––––––––––––––––––––––––––––––––––––––––––––––––––––––––––––––––––––––––––––––––––––––––––––––––––––––––––––––––––––––––––––––––––––––––––––––––––––––––––––––––––––––––––––––––––––––––––––––––––––––––––––––––––––––––––––––––––––––––––––––––––––––––––––––––––––––––––––––––––––––––––––––––––––––––––––––––––––––––––––––––––––––––––––––––––––––––––––––––––––––––––––––––––––––––––––––––––––––––––––––––––––––––––––––––––––––––––––––––––––––––––––––––––––––––––––––––––––––––––––––––––––––––––––––––––––––––––––––––––––––––––––––––––––––––––––––––––––––––––––––––––––––––––––––––––––––––––––––––––––––––––––––––––––––––––––––––––––––––––––––––––––––––––––––––––––––––––––––––––––––––––––––––––––––––––––––––––––––––––––––––––––––––––––––––––––––––––––––––––––––––––––––––––––––––––––––––––––––––––––––––––––––––––––––––––––––––––––––––––––––––––––––––––––––––––––––––––––––––––––––––––––––––––––––––––––––––––––––––––––––
134
Advanced Low-Health & Safety
“EARTHQUAKE!” OBJECTIVE: Students will be able to identify what they should do before,
during and after an earthquake.
Topic: Health & Safety CASAS: 0.1.3, 3.4.2, 7.2.6
SCANS SKILLS AND COMPETENCIES RELATED TO THIS LESSON:Listening and Reading (Basic Skills) Work in a Team (Interpersonal)Problem Solving (Thinking Skills) Organize and Communicate Info (Information)SCANS are also supported by team activities and classroom management in the lesson.
STRUCTURES: Modals (advisory)-should, ought to; imperative- Stay calm. Be alert.
VOCABULARY: disaster, after shocks, damage, sufficient, fire extinguisher, on hand,first aid kit items
PREREQUISITE: none
BEFORE CLASS:
a.) Copy the Red Cross list of 10 survival items below onto an OHT or piece of butcher paper to use in thePresentation activity. (Students should not see this list until they have completed their own brainstorm.)
1. First aid kit and essential medications2. Canned food .3. Can opener4. At least three gallons of water per person5. Protective clothing, rainwear6. Bedding or sleeping bags7. Battery-powered radio8. Flashlight, and extra batteries9. Special items for infants, elderly or people with special needs
10. Written instructions for how to turn off gas, electricity, and water(You'll need a professional to turn natural gas service back on.)
b.) Copy “What to do when the shaking starts," p. 137, onto an OHT or piece of butcherpaper for the first Guided Practice peer dictation.
c.) Copy “What to do after the shaking stops.”, p. 137, onto an OHT or piece of butcher paperfor the second Guided Practice peer dictation.
d.) Review How to Conduct a Peer Dictation activity, p. 163.
e.) Duplicate two class sets of the Earthquake Plan handout, p. 138, for use in the CommunicativePractice and Application activities.
f.) Prepare a list of 10-20 T/F statements (based on the earthquake information students havelearned) for the true/false Evaluation activity.
g.) Identify the pages in your text that you could use with this lesson or see the LAUSD handout“Before the Shaking Starts.”
135
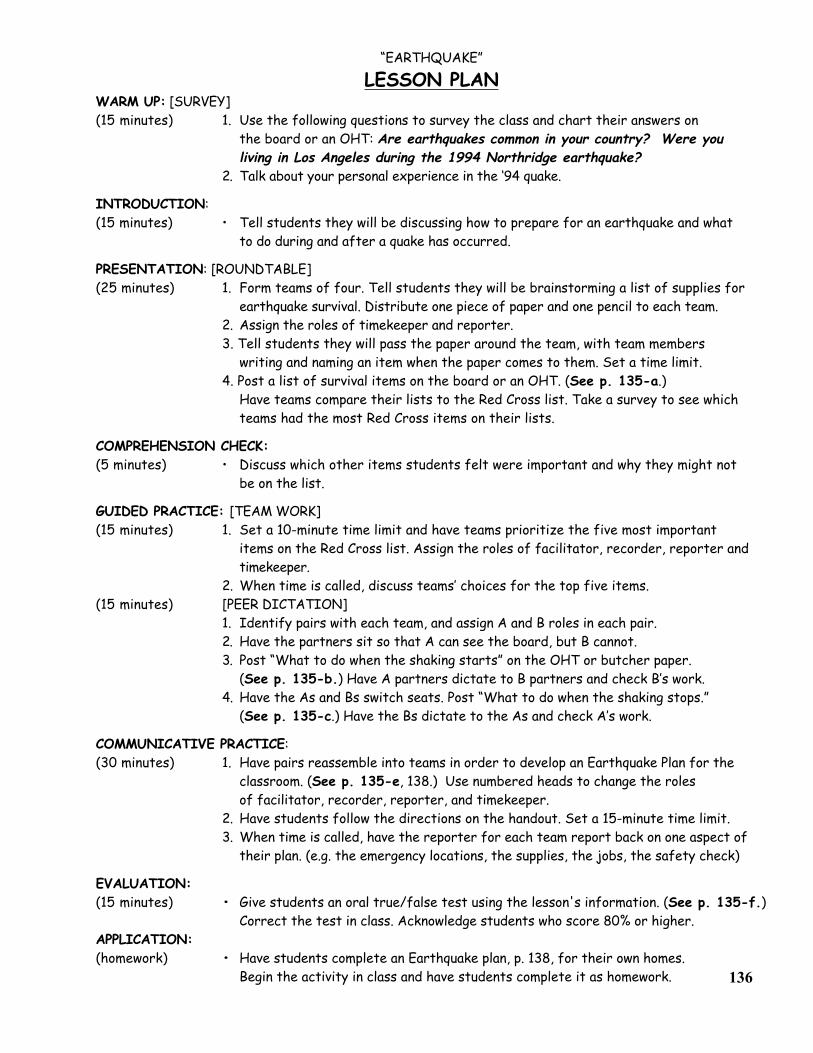
“EARTHQUAKE”
LESSON PLANWARM UP: [SURVEY](15 minutes) 1. Use the following questions to survey the class and chart their answers on
the board or an OHT: Are earthquakes common in your country? Were you living in Los Angeles during the 1994 Northridge earthquake?
2. Talk about your personal experience in the ‘94 quake.
INTRODUCTION:(15 minutes) • Tell students they will be discussing how to prepare for an earthquake and what
to do during and after a quake has occurred.
PRESENTATION: [ROUNDTABLE](25 minutes) 1. Form teams of four. Tell students they will be brainstorming a list of supplies for
earthquake survival. Distribute one piece of paper and one pencil to each team.2. Assign the roles of timekeeper and reporter.3. Tell students they will pass the paper around the team, with team members
writing and naming an item when the paper comes to them. Set a time limit.4. Post a list of survival items on the board or an OHT. (See p. 135-a.)
Have teams compare their lists to the Red Cross list. Take a survey to see which teams had the most Red Cross items on their lists.
COMPREHENSION CHECK:(5 minutes) • Discuss which other items students felt were important and why they might not
be on the list.
GUIDED PRACTICE: [TEAM WORK](15 minutes) 1. Set a 10-minute time limit and have teams prioritize the five most important
items on the Red Cross list. Assign the roles of facilitator, recorder, reporter and timekeeper.
2. When time is called, discuss teams’ choices for the top five items.(15 minutes) [PEER DICTATION]
1. Identify pairs with each team, and assign A and B roles in each pair.2. Have the partners sit so that A can see the board, but B cannot.3. Post “What to do when the shaking starts” on the OHT or butcher paper.
(See p. 135-b.) Have A partners dictate to B partners and check B’s work.4. Have the As and Bs switch seats. Post “What to do when the shaking stops.”
(See p. 135-c.) Have the Bs dictate to the As and check A’s work.
COMMUNICATIVE PRACTICE:(30 minutes) 1. Have pairs reassemble into teams in order to develop an Earthquake Plan for the
classroom. (See p. 135-e, 138.) Use numbered heads to change the roles of facilitator, recorder, reporter, and timekeeper.
2. Have students follow the directions on the handout. Set a 15-minute time limit.3. When time is called, have the reporter for each team report back on one aspect of
their plan. (e.g. the emergency locations, the supplies, the jobs, the safety check)
EVALUATION:(15 minutes) • Give students an oral true/false test using the lesson's information. (See p. 135-f.)
Correct the test in class. Acknowledge students who score 80% or higher.APPLICATION:(homework) • Have students complete an Earthquake plan, p. 138, for their own homes.
Begin the activity in class and have students complete it as homework. 136
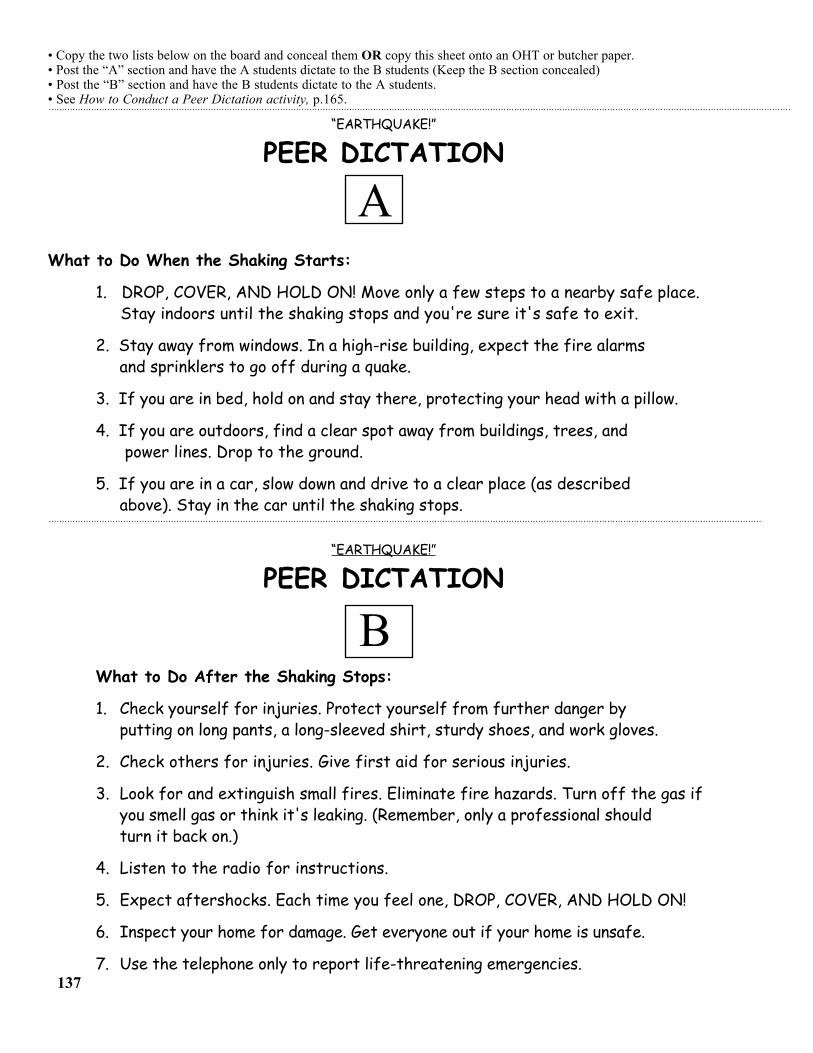
• Copy the two lists below on the board and conceal them OR copy this sheet onto an OHT or butcher paper.• Post the “A” section and have the A students dictate to the B students (Keep the B section concealed)• Post the “B” section and have the B students dictate to the A students.• See How to Conduct a Peer Dictation activity, p.165.
“EARTHQUAKE!”
PEER DICTATION
What to Do When the Shaking Starts:
1. DROP, COVER, AND HOLD ON! Move only a few steps to a nearby safe place. Stay indoors until the shaking stops and you're sure it's safe to exit.
2. Stay away from windows. In a high-rise building, expect the fire alarms and sprinklers to go off during a quake.
3. If you are in bed, hold on and stay there, protecting your head with a pillow.
4. If you are outdoors, find a clear spot away from buildings, trees, and power lines. Drop to the ground.
5. If you are in a car, slow down and drive to a clear place (as described above). Stay in the car until the shaking stops.
“EARTHQUAKE!”
PEER DICTATION
What to Do After the Shaking Stops:
1. Check yourself for injuries. Protect yourself from further danger byputting on long pants, a long-sleeved shirt, sturdy shoes, and work gloves.
2. Check others for injuries. Give first aid for serious injuries.
3. Look for and extinguish small fires. Eliminate fire hazards. Turn off the gas if you smell gas or think it's leaking. (Remember, only a professional shouldturn it back on.)
4. Listen to the radio for instructions.
5. Expect aftershocks. Each time you feel one, DROP, COVER, AND HOLD ON!
6. Inspect your home for damage. Get everyone out if your home is unsafe.
7. Use the telephone only to report life-threatening emergencies.
A
B
137
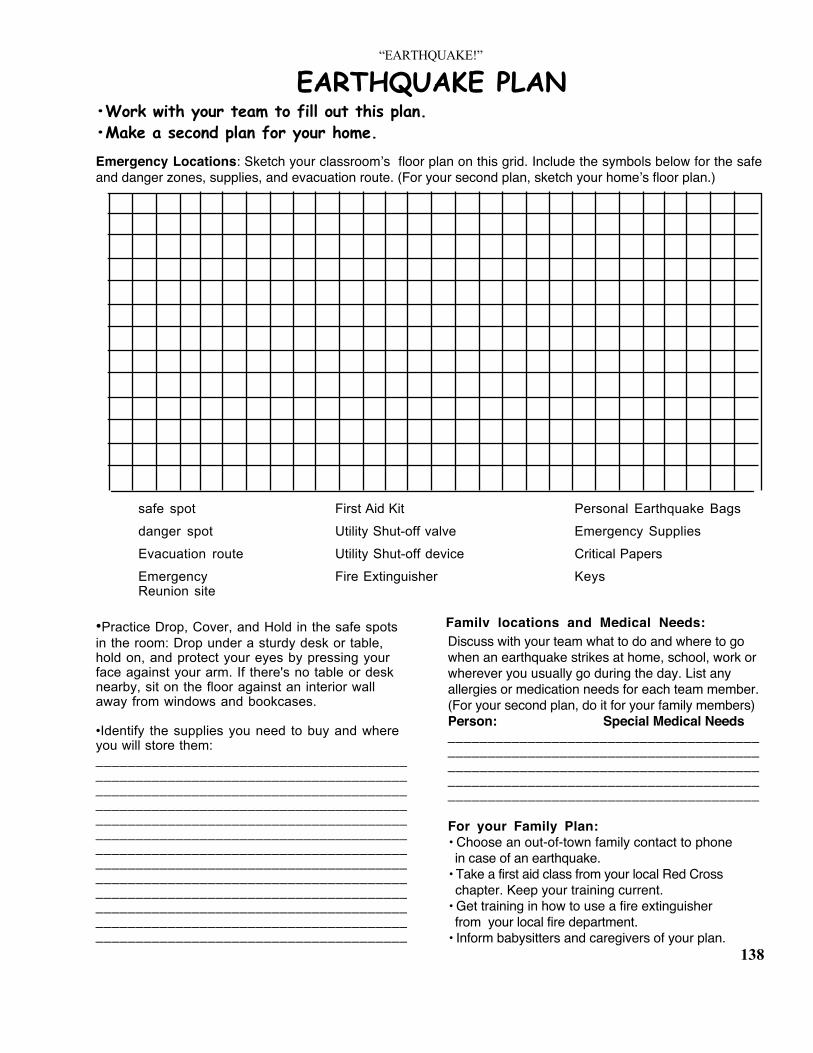
138
“EARTHQUAKE!”
EARTHQUAKE PLAN•Work with your team to fill out this plan.•Make a second plan for your home.
Emergency Locations: Sketch your classroom’s floor plan on this grid. Include the symbols below for the safeand danger zones, supplies, and evacuation route. (For your second plan, sketch your home’s floor plan.)
safe spot First Aid Kit Personal Earthquake Bags
danger spot Utility Shut-off valve Emergency Supplies
Evacuation route Utility Shut-off device Critical Papers
Emergency Fire Extinguisher KeysReunion site
•Practice Drop, Cover, and Hold in the safe spotsin the room: Drop under a sturdy desk or table,hold on, and protect your eyes by pressing yourface against your arm. If there's no table or desknearby, sit on the floor against an interior wallaway from windows and bookcases.
•Identify the supplies you need to buy and whereyou will store them:___________________________________________________________________________________________________________________________________________________________________________________________________________________________________________________________________________________________________________________________________________________________________________________________________________________________________________________________________________________________________________________________
Family locations and Medical Needs:Discuss with your team what to do and where to gowhen an earthquake strikes at home, school, work orwherever you usually go during the day. List anyallergies or medication needs for each team member.(For your second plan, do it for your family members)Person: Special Medical Needs___________________________________________________________________________________________________________________________________________________________________________________________________
For your Family Plan:• Choose an out-of-town family contact to phone in case of an earthquake.• Take a first aid class from your local Red Cross chapter. Keep your training current.• Get training in how to use a fire extinguisher from your local fire department.• Inform babysitters and caregivers of your plan.
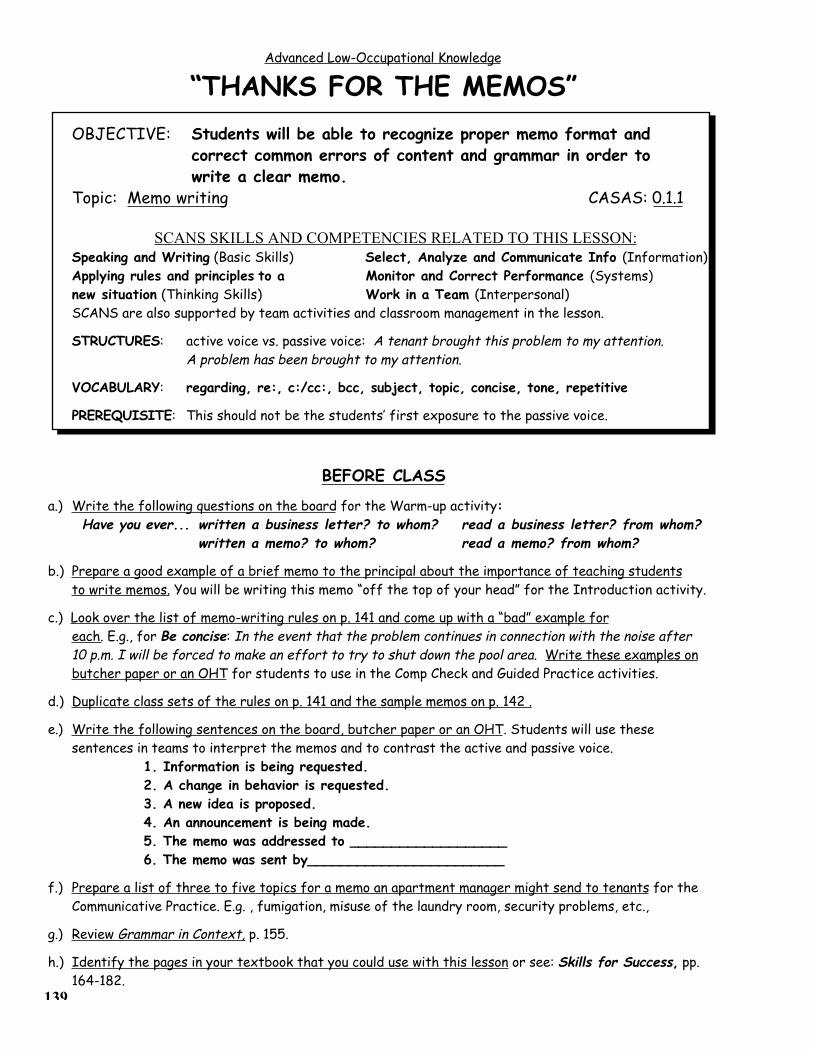
139
Advanced Low-Occupational Knowledge
“THANKS FOR THE MEMOS”OBJECTIVE: Students will be able to recognize proper memo format and
correct common errors of content and grammar in order towrite a clear memo.
Topic: Memo writing CASAS: 0.1.1
SCANS SKILLS AND COMPETENCIES RELATED TO THIS LESSON:Speaking and Writing (Basic Skills) Select, Analyze and Communicate Info (Information)Applying rules and principles to a Monitor and Correct Performance (Systems)new situation (Thinking Skills) Work in a Team (Interpersonal)SCANS are also supported by team activities and classroom management in the lesson.
STRUCTURES: active voice vs. passive voice: A tenant brought this problem to my attention.A problem has been brought to my attention.
VOCABULARY: regarding, re:, c:/cc:, bcc, subject, topic, concise, tone, repetitive
PREREQUISITE: This should not be the students’ first exposure to the passive voice.
BEFORE CLASS
a.) Write the following questions on the board for the Warm-up activity: Have you ever... written a business letter? to whom? read a business letter? from whom?
written a memo? to whom? read a memo? from whom?
b.) Prepare a good example of a brief memo to the principal about the importance of teaching studentsto write memos. You will be writing this memo “off the top of your head” for the Introduction activity.
c.) Look over the list of memo-writing rules on p. 141 and come up with a “bad” example foreach. E.g., for Be concise: In the event that the problem continues in connection with the noise after
10 p.m. I will be forced to make an effort to try to shut down the pool area. Write these examples onbutcher paper or an OHT for students to use in the Comp Check and Guided Practice activities.
d.) Duplicate class sets of the rules on p. 141 and the sample memos on p. 142 .
e.) Write the following sentences on the board, butcher paper or an OHT. Students will use thesesentences in teams to interpret the memos and to contrast the active and passive voice.
1. Information is being requested.2. A change in behavior is requested.3. A new idea is proposed.4. An announcement is being made.5. The memo was addressed to ___________________
6. The memo was sent by________________________
f.) Prepare a list of three to five topics for a memo an apartment manager might send to tenants for the Communicative Practice. E.g. , fumigation, misuse of the laundry room, security problems, etc.,
g.) Review Grammar in Context, p. 155.
h.) Identify the pages in your textbook that you could use with this lesson or see: Skills for Success, pp.164-182.
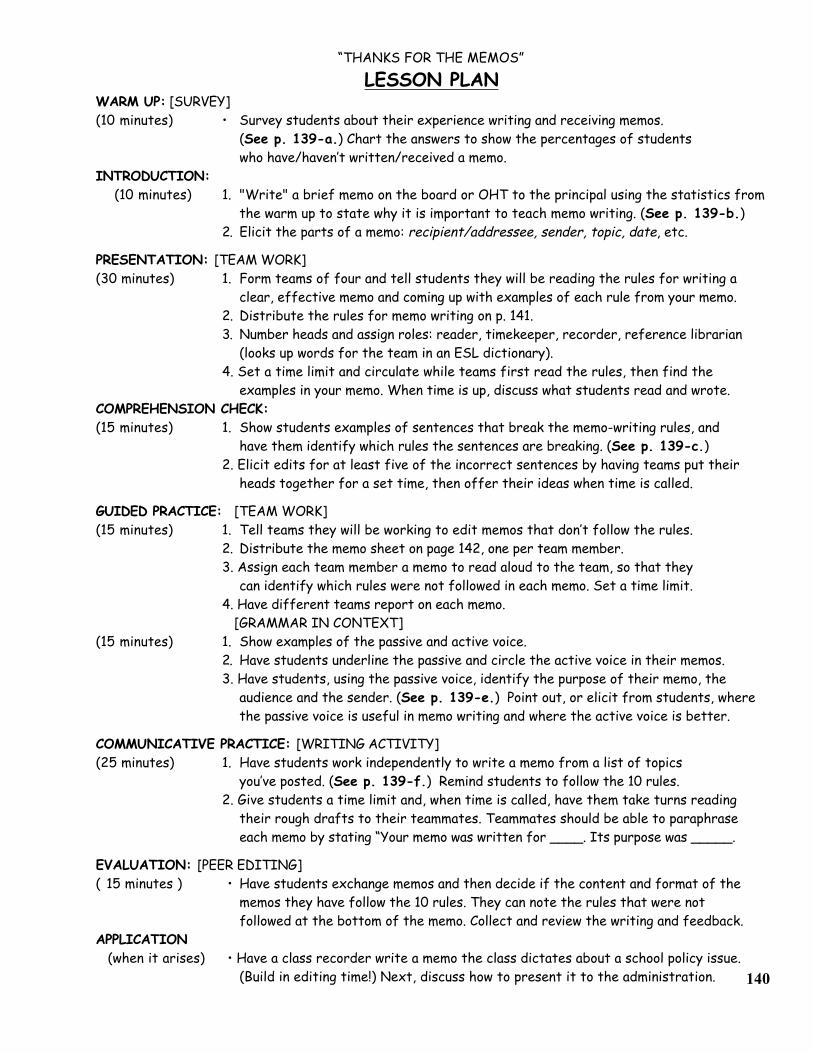
“THANKS FOR THE MEMOS”
LESSON PLANWARM UP: [SURVEY](10 minutes) • Survey students about their experience writing and receiving memos.
(See p. 139-a.) Chart the answers to show the percentages of students who have/haven’t written/received a memo.
INTRODUCTION:(10 minutes) 1. "Write" a brief memo on the board or OHT to the principal using the statistics from
the warm up to state why it is important to teach memo writing. (See p. 139-b.)2. Elicit the parts of a memo: recipient/addressee, sender, topic, date, etc.
PRESENTATION: [TEAM WORK](30 minutes) 1. Form teams of four and tell students they will be reading the rules for writing a
clear, effective memo and coming up with examples of each rule from your memo.2. Distribute the rules for memo writing on p. 141.3. Number heads and assign roles: reader, timekeeper, recorder, reference librarian
(looks up words for the team in an ESL dictionary).4. Set a time limit and circulate while teams first read the rules, then find the
examples in your memo. When time is up, discuss what students read and wrote.COMPREHENSION CHECK:(15 minutes) 1. Show students examples of sentences that break the memo-writing rules, and
have them identify which rules the sentences are breaking. (See p. 139-c.)2. Elicit edits for at least five of the incorrect sentences by having teams put their
heads together for a set time, then offer their ideas when time is called.
GUIDED PRACTICE: [TEAM WORK](15 minutes) 1. Tell teams they will be working to edit memos that don’t follow the rules.
2. Distribute the memo sheet on page 142, one per team member.3. Assign each team member a memo to read aloud to the team, so that they
can identify which rules were not followed in each memo. Set a time limit.4. Have different teams report on each memo.
[GRAMMAR IN CONTEXT](15 minutes) 1. Show examples of the passive and active voice.
2. Have students underline the passive and circle the active voice in their memos.3. Have students, using the passive voice, identify the purpose of their memo, the
audience and the sender. (See p. 139-e.) Point out, or elicit from students, wherethe passive voice is useful in memo writing and where the active voice is better.
COMMUNICATIVE PRACTICE: [WRITING ACTIVITY](25 minutes) 1. Have students work independently to write a memo from a list of topics
you’ve posted. (See p. 139-f.) Remind students to follow the 10 rules.2. Give students a time limit and, when time is called, have them take turns reading
their rough drafts to their teammates. Teammates should be able to paraphrase each memo by stating “Your memo was written for ____. Its purpose was _____.
EVALUATION: [PEER EDITING]( 15 minutes ) • Have students exchange memos and then decide if the content and format of the
memos they have follow the 10 rules. They can note the rules that were not followed at the bottom of the memo. Collect and review the writing and feedback.
APPLICATION(when it arises) • Have a class recorder write a memo the class dictates about a school policy issue.
(Build in editing time!) Next, discuss how to present it to the administration. 140
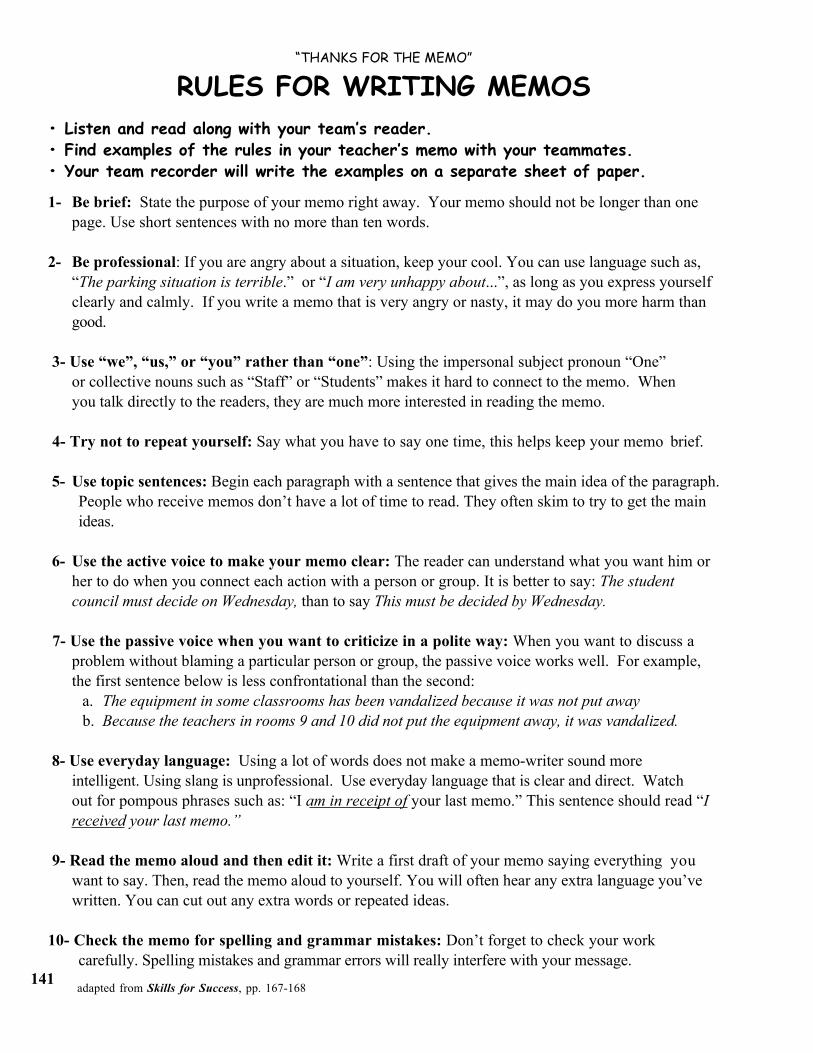
“THANKS FOR THE MEMO”
RULES FOR WRITING MEMOS• Listen and read along with your team’s reader.• Find examples of the rules in your teacher’s memo with your teammates.• Your team recorder will write the examples on a separate sheet of paper.
1- Be brief: State the purpose of your memo right away. Your memo should not be longer than one page. Use short sentences with no more than ten words.
2- Be professional: If you are angry about a situation, keep your cool. You can use language such as,“The parking situation is terrible.” or “I am very unhappy about...”, as long as you express yourselfclearly and calmly. If you write a memo that is very angry or nasty, it may do you more harm thangood.
3- Use “we”, “us,” or “you” rather than “one”: Using the impersonal subject pronoun “One” or collective nouns such as “Staff” or “Students” makes it hard to connect to the memo. When you talk directly to the readers, they are much more interested in reading the memo.
4- Try not to repeat yourself: Say what you have to say one time, this helps keep your memo brief.
5- Use topic sentences: Begin each paragraph with a sentence that gives the main idea of the paragraph.People who receive memos don’t have a lot of time to read. They often skim to try to get the mainideas.
6- Use the active voice to make your memo clear: The reader can understand what you want him orher to do when you connect each action with a person or group. It is better to say: The studentcouncil must decide on Wednesday, than to say This must be decided by Wednesday.
7- Use the passive voice when you want to criticize in a polite way: When you want to discuss aproblem without blaming a particular person or group, the passive voice works well. For example,the first sentence below is less confrontational than the second: a. The equipment in some classrooms has been vandalized because it was not put away b. Because the teachers in rooms 9 and 10 did not put the equipment away, it was vandalized.
8- Use everyday language: Using a lot of words does not make a memo-writer sound more intelligent. Using slang is unprofessional. Use everyday language that is clear and direct. Watch out for pompous phrases such as: “I am in receipt of your last memo.” This sentence should read “I received your last memo.”
9- Read the memo aloud and then edit it: Write a first draft of your memo saying everything youwant to say. Then, read the memo aloud to yourself. You will often hear any extra language you’vewritten. You can cut out any extra words or repeated ideas.
10- Check the memo for spelling and grammar mistakes: Don’t forget to check your work carefully. Spelling mistakes and grammar errors will really interfere with your message.
141adapted from Skills for Success, pp. 167-168
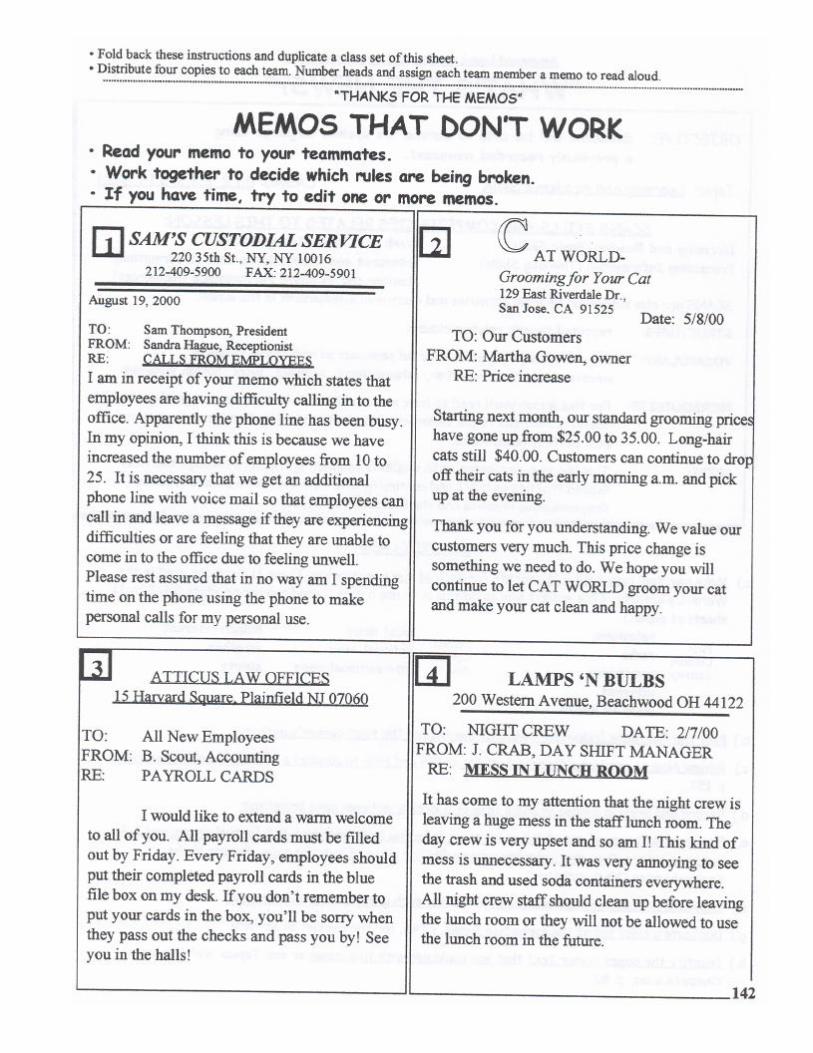
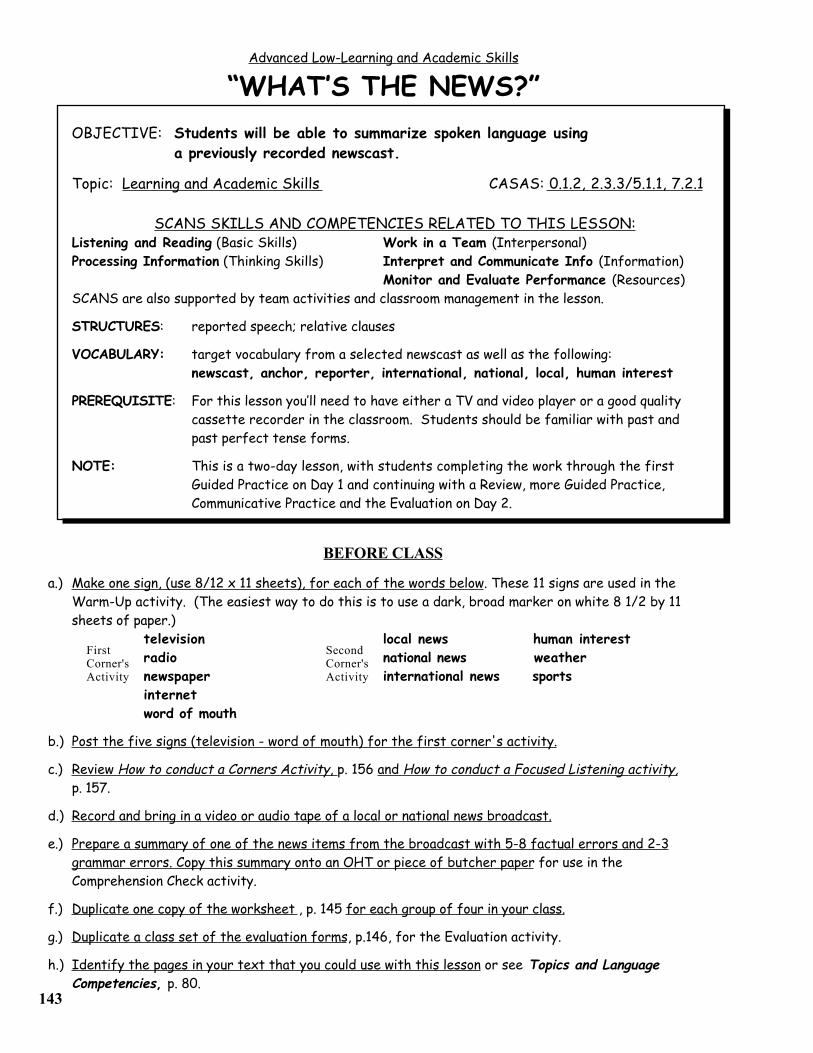
143
FirstCorner'sActivity
Advanced Low-Learning and Academic Skills
“WHAT’S THE NEWS?” OBJECTIVE: Students will be able to summarize spoken language using
a previously recorded newscast.
Topic: Learning and Academic Skills CASAS: 0.1.2, 2.3.3/5.1.1, 7.2.1
SCANS SKILLS AND COMPETENCIES RELATED TO THIS LESSON:Listening and Reading (Basic Skills) Work in a Team (Interpersonal)Processing Information (Thinking Skills) Interpret and Communicate Info (Information)
Monitor and Evaluate Performance (Resources)SCANS are also supported by team activities and classroom management in the lesson.
STRUCTURES: reported speech; relative clauses
VOCABULARY: target vocabulary from a selected newscast as well as the following:newscast, anchor, reporter, international, national, local, human interest
PREREQUISITE: For this lesson you’ll need to have either a TV and video player or a good quality cassette recorder in the classroom. Students should be familiar with past andpast perfect tense forms.
NOTE: This is a two-day lesson, with students completing the work through the firstGuided Practice on Day 1 and continuing with a Review, more Guided Practice,Communicative Practice and the Evaluation on Day 2.
BEFORE CLASS
a.) Make one sign, (use 8/12 x 11 sheets), for each of the words below. These 11 signs are used in theWarm-Up activity. (The easiest way to do this is to use a dark, broad marker on white 8 1/2 by 11sheets of paper.)
television local news human interestradio national news weathernewspaper international news sportsinternetword of mouth
b.) Post the five signs (television - word of mouth) for the first corner's activity.
c.) Review How to conduct a Corners Activity, p. 156 and How to conduct a Focused Listening activity,p. 157.
d.) Record and bring in a video or audio tape of a local or national news broadcast.
e.) Prepare a summary of one of the news items from the broadcast with 5-8 factual errors and 2-3grammar errors. Copy this summary onto an OHT or piece of butcher paper for use in theComprehension Check activity.
f.) Duplicate one copy of the worksheet , p. 145 for each group of four in your class.
g.) Duplicate a class set of the evaluation forms, p.146, for the Evaluation activity.
h.) Identify the pages in your text that you could use with this lesson or see Topics and Language Competencies, p. 80.
SecondCorner'sActivity
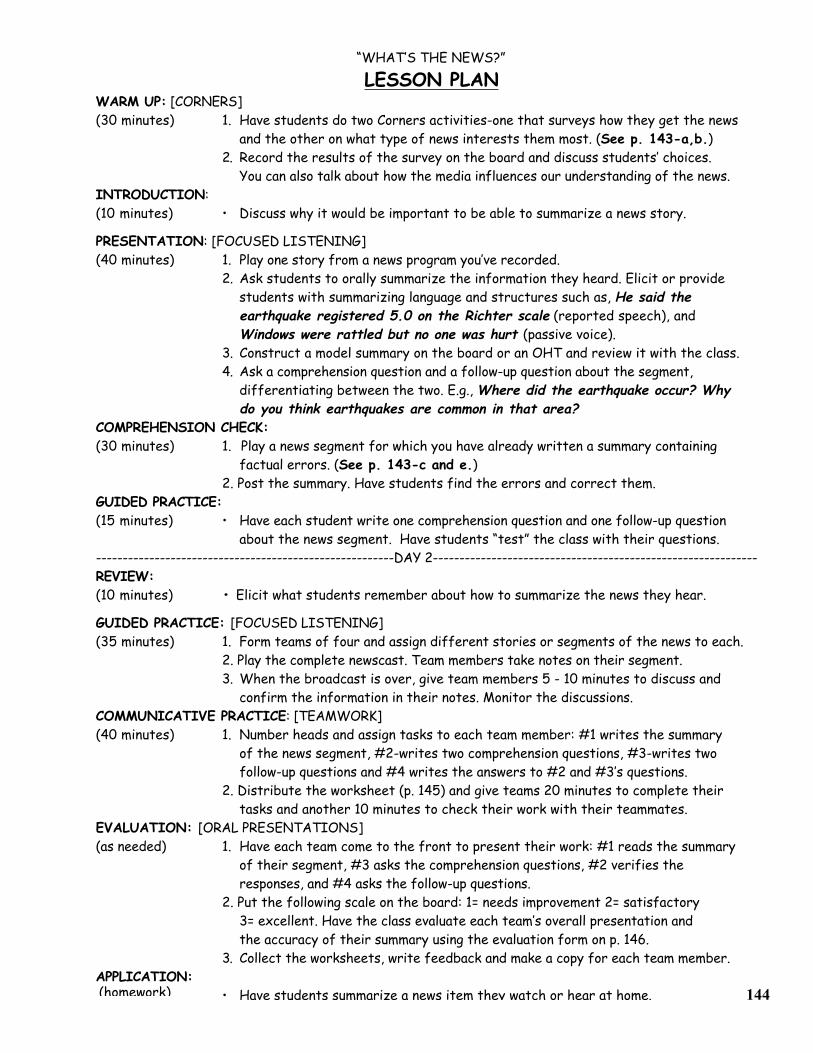
“WHAT’S THE NEWS?”
LESSON PLANWARM UP: [CORNERS](30 minutes) 1. Have students do two Corners activities-one that surveys how they get the news
and the other on what type of news interests them most. (See p. 143-a,b.)2. Record the results of the survey on the board and discuss students’ choices.
You can also talk about how the media influences our understanding of the news.INTRODUCTION:(10 minutes) • Discuss why it would be important to be able to summarize a news story.
PRESENTATION: [FOCUSED LISTENING](40 minutes) 1. Play one story from a news program you’ve recorded.
2. Ask students to orally summarize the information they heard. Elicit or provide students with summarizing language and structures such as, He said the earthquake registered 5.0 on the Richter scale (reported speech), andWindows were rattled but no one was hurt (passive voice).
3. Construct a model summary on the board or an OHT and review it with the class.4. Ask a comprehension question and a follow-up question about the segment,
differentiating between the two. E.g., Where did the earthquake occur? Whydo you think earthquakes are common in that area?
COMPREHENSION CHECK:(30 minutes) 1. Play a news segment for which you have already written a summary containing
factual errors. (See p. 143-c and e.)2. Post the summary. Have students find the errors and correct them.
GUIDED PRACTICE:(15 minutes) • Have each student write one comprehension question and one follow-up question
about the news segment. Have students “test” the class with their questions.--------------------------------------------------------DAY 2-------------------------------------------------------------REVIEW: (10 minutes) • Elicit what students remember about how to summarize the news they hear.
GUIDED PRACTICE: [FOCUSED LISTENING](35 minutes) 1. Form teams of four and assign different stories or segments of the news to each.
2. Play the complete newscast. Team members take notes on their segment. 3. When the broadcast is over, give team members 5 - 10 minutes to discuss and
confirm the information in their notes. Monitor the discussions.COMMUNICATIVE PRACTICE: [TEAMWORK](40 minutes) 1. Number heads and assign tasks to each team member: #1 writes the summary
of the news segment, #2-writes two comprehension questions, #3-writes two follow-up questions and #4 writes the answers to #2 and #3’s questions.
2. Distribute the worksheet (p. 145) and give teams 20 minutes to complete theirtasks and another 10 minutes to check their work with their teammates.
EVALUATION: [ORAL PRESENTATIONS](as needed) 1. Have each team come to the front to present their work: #1 reads the summary
of their segment, #3 asks the comprehension questions, #2 verifies theresponses, and #4 asks the follow-up questions.
2. Put the following scale on the board: 1= needs improvement 2= satisfactory3= excellent. Have the class evaluate each team’s overall presentation andthe accuracy of their summary using the evaluation form on p. 146.
3. Collect the worksheets, write feedback and make a copy for each team member.APPLICATION:(homework) • Have students summarize a news item they watch or hear at home. 144
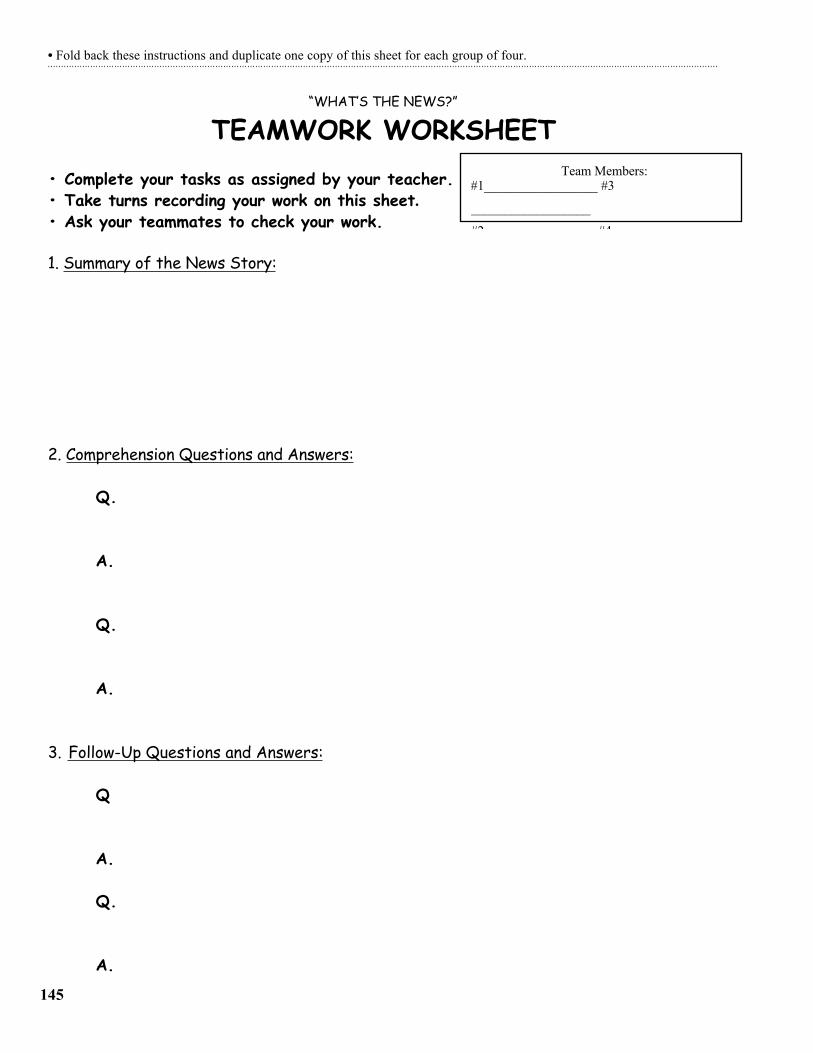
• Fold back these instructions and duplicate one copy of this sheet for each group of four.
“WHAT’S THE NEWS?”
TEAMWORK WORKSHEET• Complete your tasks as assigned by your teacher.• Take turns recording your work on this sheet.• Ask your teammates to check your work.
1. Summary of the News Story:
2. Comprehension Questions and Answers:
Q.
A.
Q.
A.
3. Follow-Up Questions and Answers:
Q
A.
Q.
A.
145
Team Members:#1_________________ #3
__________________
#2 ________________ #4 __________________
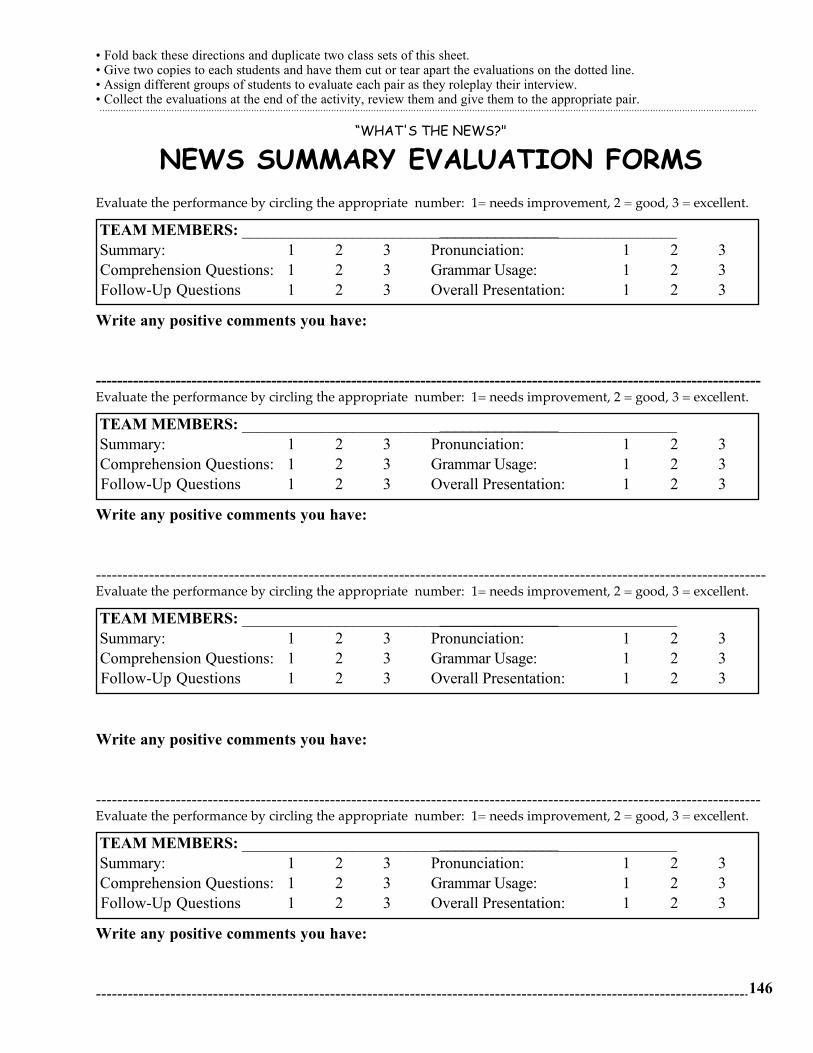
• Fold back these directions and duplicate two class sets of this sheet.• Give two copies to each students and have them cut or tear apart the evaluations on the dotted line.• Assign different groups of students to evaluate each pair as they roleplay their interview.• Collect the evaluations at the end of the activity, review them and give them to the appropriate pair.
“WHAT'S THE NEWS?"
NEWS SUMMARY EVALUATION FORMSEvaluate the performance by circling the appropriate number: 1= needs improvement, 2 = good, 3 = excellent.
TEAM MEMBERS: _______________________________________________________ Summary: 1 2 3 Pronunciation: 1 2 3 Comprehension Questions: 1 2 3 Grammar Usage: 1 2 3 Follow-Up Questions 1 2 3 Overall Presentation: 1 2 3
Write any positive comments you have:
-----------------------------------------------------------------------------------------------------------------------------Evaluate the performance by circling the appropriate number: 1= needs improvement, 2 = good, 3 = excellent.
TEAM MEMBERS: _______________________________________________________ Summary: 1 2 3 Pronunciation: 1 2 3 Comprehension Questions: 1 2 3 Grammar Usage: 1 2 3 Follow-Up Questions 1 2 3 Overall Presentation: 1 2 3
Write any positive comments you have:
------------------------------------------------------------------------------------------------------------------------------Evaluate the performance by circling the appropriate number: 1= needs improvement, 2 = good, 3 = excellent.
TEAM MEMBERS: _______________________________________________________ Summary: 1 2 3 Pronunciation: 1 2 3 Comprehension Questions: 1 2 3 Grammar Usage: 1 2 3 Follow-Up Questions 1 2 3 Overall Presentation: 1 2 3
Write any positive comments you have:
-----------------------------------------------------------------------------------------------------------------------------Evaluate the performance by circling the appropriate number: 1= needs improvement, 2 = good, 3 = excellent.
TEAM MEMBERS: _______________________________________________________ Summary: 1 2 3 Pronunciation: 1 2 3 Comprehension Questions: 1 2 3 Grammar Usage: 1 2 3 Follow-Up Questions 1 2 3 Overall Presentation: 1 2 3
Write any positive comments you have:
-----------------------------------------------------------------------------------------------------------------------------146

Teaching Vocabulary and Checking Comprehension with...
EARLY PRODUCTION QUESTIONSEarly Production is a term used in NaturalApproach methodology, referring to a languagelearner’s second stage of language acquisition.(The three stages are Pre-production, EarlyProduction and Speech Emergent). Once newmaterial is presented in context, the teacher usesa sequence of questions to help students use thelanguage. The sequence is based on the difficultyof the response. Therefore a non-verbalcommand, or a Yes/No question to whichstudents can respond by holding up a “yes” or“no” card, is the first step in the sequence, and aleading statement which students must completewith at least a one or two-word answer is at theend of the sequence.There are five types of Early Productionquestions:1.) Non-verbal strategies: Point to the pencil.2.) Yes/No questions: Is this a pencil?3.) “Or” questions: Is this a pencil or a pen?4.) Wh-questions: What’s yellow with an eraser on the end?5.) Open-ended/leading statements: I write with a...
Early production questioning strategies are notfound only in beginning-level classes. They area valuable vocabulary teaching tool at all levels,although high intermediate and advanced levelteachers will not spend much, if any time on thenon-verbal strategies. The “Or” question’s valuecannot be overstated. It not only checksstudents' comprehension, it provides apronunciation model for students touse in responding.
Early production questions are also very usefulin conducting comprehension checks. Give eachstudent a white and a blue (or other color) indexcard. Have them label the white card “Yes” andthe blue card “No." Ask Yes/No questions about
the lesson content or activity directions andhave students hold up the appropriate card.(Students may change their answers once theylook around at their classmates’ responses, butyou will have already determined that there issome confusion.)
“Or” questions provide a quick check onstudents’ comprehension of concepts: Do youput your address on the top or in the center ofthe envelope? or their understanding of thedirections for an activity: Does #1 write or ask the questions?
To teach vocabulary with EP questions:1. Limit the number of new vocabulary words
you will present at one time to 8-10. Preparevisuals or bring in realia to represent each ofthe new words.
2. Present the new vocabulary items in context, talking about how they’re used, where students would see them, relating them to previously learned language, etc.
3. At the beginning levels, command studentsto point to the items or name the people whoare holding or near the items.
4. Use two or three items in each series ofquestions. E.g. For a high-beginning or low-intermediate class: Is this a capsule Is this alozenge? Is this a tablet? Is this a capsule ora tablet? Is this a lozenge or a capsule? Whatdo I take for a sore throat?What kind of pill can be chewable? An aspirin can be a... I’m coughing so I’m goingto take a...
As a follow-up, students at beginning high andintermediate levels can write out questions totest their classmates.
All the lessons in this book includecomprehension check activities. See pages12, 24, 28, 46 and 50 for examples.
149
Teaching with...
T. P. R.(TOTAL PHYSICAL RESPONSE)
TPR (Total Physical Response) is a techniquethat can be used to great advantage at thebeginning levels, but is also a surefire way toengage intermediate students’ attention. Toteach with TPR, you need to prepare a set ofcommands that use the new language you areintroducing. Students respond to thesecommands (without speaking) and, aftersufficient practice, give the commands to eachother. One of the most exciting moments in aTPR lesson is when students are able to respondto a command that is novel: a command thatrecombines language they’ve learned into acommand they’ve never heard before. Forexample, if you’ve said--and students havepracticed: Stand up, Touch the floor, Sit on thechair, and Touch the desk, when you say,Sit on the floor, and students respond (by doingit or laughing) they are demonstrating how wellthey’ve understood and retained the newlanguage.
TPR can help students develop the SCANSskills of listening and speaking, and achieve thecompetencies of teaching others, monitoring andcorrecting performance and understanding howsystems work. The latter is achieved when theTPR sequence deals with a particular process,such as “registering for school” or “sending afax.” TPR and CASAS cross paths at variouscompetencies, depending upon the language inthe TPR sequence. For example, if students aredoing a TPR sequence that relates to operating acopier, then CASAS 4.5.4 Demonstrate use ofcommon business machines, is being addressed.
Using TPR to teach new language:1. Create a sequence of commands that you
can use to teach the content of the lesson.(See the Reference section for a list of bookswith ready-made TPR sequences.)
2. Ask students questions to elicit what they already know about the sequence you are
going to demonstrate. For example, show a prop and see if students can name it.
3. Say each command as you demonstrate it.4. Give each command, demonstrate it, and
encourage the class to respond to the command as well. Remind students that they don’t need to speak, just do the actions. (Youmay have to work for quite a while with some beginning-low students before this concept is clear.)
5. Give the commands in sequence, without demonstrating, and see if the class can respond. Quickly demonstrate the command if they start floundering.
6. Give the commands out of sequence, again without demonstrating. If the whole group is responding well, give commands to rows, small groups, even individuals--much like in a drill activity. Create new commands by combining previously learned language with the new language from the sequence. E.g.,from a sequence on sending a fax the command Insert the paper face down, might lead to Put your book face down on your desk.
7. Ask for student volunteers to give you the commands. Make errors in following their commands so that the class has to correct you.
8. Write the sequence on the board and have students copy it, or distribute a handout withthe sequence or picture cues.
9. Pair students and have the partners take turns giving the commands to each other.
You can follow up the TPR lesson by havingstudents give a demonstration in front of theclass, or by having students create newsequences based on a related but differentsituation. Lessons that emphasize TPR are onpages 12, 46, 50 and 58.
150
Teaching with…
DIALOGS
Model dialogs are important teaching tools thatpresent vocabulary, grammar, and languagefunctions in context. Traditionally, dialogs havebeen used as the basis for the presentation ofnew information and to practice, with the use ofvarious drills, language structures and lexicon. Inthe past, students were drilled on the dialogs tosuch a degree that they memorized them. It ismuch more meaningful, however, if students“own” the elements of the dialog and can applythese elements in their own conversations. Oneway to check students’ ownership is to havestudents paraphrase a conversation once they’veheard it. Another way to ensure ownership, isto elicit a dialog from the class on a particularsubject and insert structure and vocabulary as itis needed.
Dialog practice can develop SCANS Basic Skillsof listening, speaking, reading and writing as wellas providing the language necessary for achievingthe various Interpersonal competencies.Whetheryou use a ready-made textbook dialog, or astudent-generated dialog, the language practicethat ensues is rich with opportunities forstudents to develop their accuracy and fluency.
To present and practice a textbook orteacher-generated model dialog:1. Briefly set the scene: two people are talking
in the market, a man is making a phone callto 911, a customer is talking to a clerk in a department store, etc.
2. Post or draw pictures of the speakers on the board, and present the dialog, standing near each speaker’s picture as you say his/her lines.
3. Ask students to restate what’s happeningin the conversation. Who are the people in the market? Why is the man calling 911? What isthe customer asking the clerk?
4. Write or post the conversation and model it again with a student volunteer.
5. If desired, give students an opportunity tochorally repeat each line of the dialog, so that they can practice accurate pronunciation.
6. Give students time to copy the conversationinto their notebooks.
7. Pair students, assign speaker roles and set a 1-2 minute time limit for pairs to practice. Call time and have students switch roles for another 1-2 minute period. Monitor the practice.
8. Based on your observations during the practice session above, clarify pronun- ciation, grammar or vocabulary issues students may have.
9. Ask students to brainstorm a list of words or phrases that could be substituted in the dialog or provide a list.
10. Ask student volunteers to demonstratemaking substitutions in the dialog.
11. Have students practice in pairs (see #7).Circulate and monitor students’ progress.
To elicit a dialog from the class:1. Set the scene and establish the purpose of
the dialog.2. Ask students to provide the language
for each speaker as you write down what they say. During this process, in order to have a dialog that will serve as an accurate model, ask students to edit their language. You can use prompts such as “If I want to get the clerk’s attention, what should I say first?”or “ If I don’t have a reason for the return what should I say?” You, in turn, can add to or edit students’ language, discussing why you are making changes.
3. To practice the elicited dialog, follow steps#5-11 above.
You may want to follow up the dialog practicewith presentations in front of the class or afocused listening activity (see p. 157).Lessons that emphasize dialogs are on pages4, 16, 20, 38, 42, 72, 94 and 100.151
Teaching with…
DRILLS
Drilling can help students hear and reproducethe natural intonation, rhythm and stress ofEnglish. It also provides guided practice in usingnew vocabulary and structures in a fairlyanonymous choral response. Drills buildSCANS Basic Skills in listening and speakingand, depending on the content being drilled, helpstudents achieve CASAS competencies. Fordrills to be used effectively, however, theyshould vary in technique and the responsesshould move back and forth between choralwhole class, choral small group, and individualresponse. The most common drillsare illustrated below.
REPETITION: Model a statement and thestudents chorally repeat the utterance.
Teacher: I have a pencil.Students: I have a pencil.
SUBSTITUTION: Model a statement and givethe substitution or show a picture thatrepresents the substitution. The students repeatthe statement substituting the new language.Then you model the new statement and providea new substitution.Teacher: I have a book. (notebook)Teacher: I have a notebook (pen)Students: I have a pen.
Multiple substitutions can also be made.Teacher: I have a pen. (pencil, eraser)Students: I have a pencil and an eraser.
EXTENSION: Model the statement andprovide a new element. Students then add it tothe sentence.Teacher: I have a pencil. (yellow)Students: I have a yellow pencil.
It’s also possible for you to ask individualstudents to respond.
BACKWARDS BUILD-UP: Model thestatement and then conduct a repetition drillstarting from the last words in the statement.This is especially effective when the statementis cumbersome.Teacher: There’s a pencil on the floor next
to the chair leg. chair leg.Students: chair legTeacher: next to the chair legStudents: next to the chair legTeacher: on the floor next to the chair legStudents: on the floor next to the chair legTeacher: There’s a pencil on the floor next
to the chair leg.Students: There’s a pencil on the floor next
to the chair leg.It may be necessary to provide smaller chunksof the statement for some students.
TRANSFORMATIONAL: After modeling thestatement, provide a substitution or cue thatforces the students to transform another part ofthe statement. This is effective for practicinggrammar changes that occur with tense change orhelping students practice forming yes/noquestions.Teacher: I work in an office. (Robert)Students: Robert works in an office.Teacher: He works on Saturday. (last
Satuday)Students: He worked last Saturday.Teacher: He worked last Saturday.
(question cue)Students: Did he work last Saturday?
QUESTION AND ANSWER DRILL:There are various ways of conducting a Q&Adrill. The easiest is for the teacher to ask thequestion and get a choral response.Teacher: Does a plumber repair pipes?Students: Yes, he does.
152
Another type of question and answer drill hasthe teacher ask one student a question, who thenturns and asks a person nearby.Teacher: Do you like fish?Student #1: Yes, I do. Do you like fish?Student #2: No, I don’t. Do you like fish?Student #3: Yes, I do. etc.
When answering yes/no questions, students willnaturally respond “yes” or “no.” If it isimportant to practice the short answer with theauxilliary, i.e. Yes, he does. Yes, he will. etc., thenbe sure to model the response you want.
In practicing information questions, be sure tospecify whether or not you want the responsesto be in complete sentences.Teacher: Where does he live?Student: --in Santa Monica. ORTeacher: Where does he liveStudent: He lives in Santa Monica.
SENTENCE COMBINING: Model twostatements and have students combine them intoone sentence. This is great for practicingconjunctions and adjective clauses.Teacher: I have a dog. I have a cat.Students: I have a dog and a cat.Teacher: I saw a car. The car was very
expensive.Students: The car I saw was very expensive.
CHAIN DRILL: This drill can be used withquestions and answer drills (see above) or withextension drills. In the latter situation, youprovide the model statement and the nextstudent adds an item to the statement, thestudent after that adds something else, and soon. This is often a very successful closingactivity using the new vocabulary from thelesson.For example in a lesson on containers andpartitives the chain drill would be:Teacher: I went to the store to buy a
dozen eggs.Student #1: I went to the store to buy a
dozen eggs and a quart of milk.Student #2: I went to the store to buy a
dozen eggs, a quart of milk, and abox of rice.
Student #3: I went to the store to buy a dozen eggs, a quart of milk, a box of rice and an apple.
REDUCTION DRILL: Model the statementand have students provide the subject or objectpronoun, possessive adjective, contracted formor other shortened form.Teacher: I have a pen.Students: I have it.Teacher: Mary is a student.Students: She is a student.Teacher: I have a pen and a pencil.Students: I have them.Teacher: Those are George and Mary’s
books.Students: Those are their books.
Lessons that emphasize choral drills are onpages 4, 16, 20, 42, 68, and 104.
153
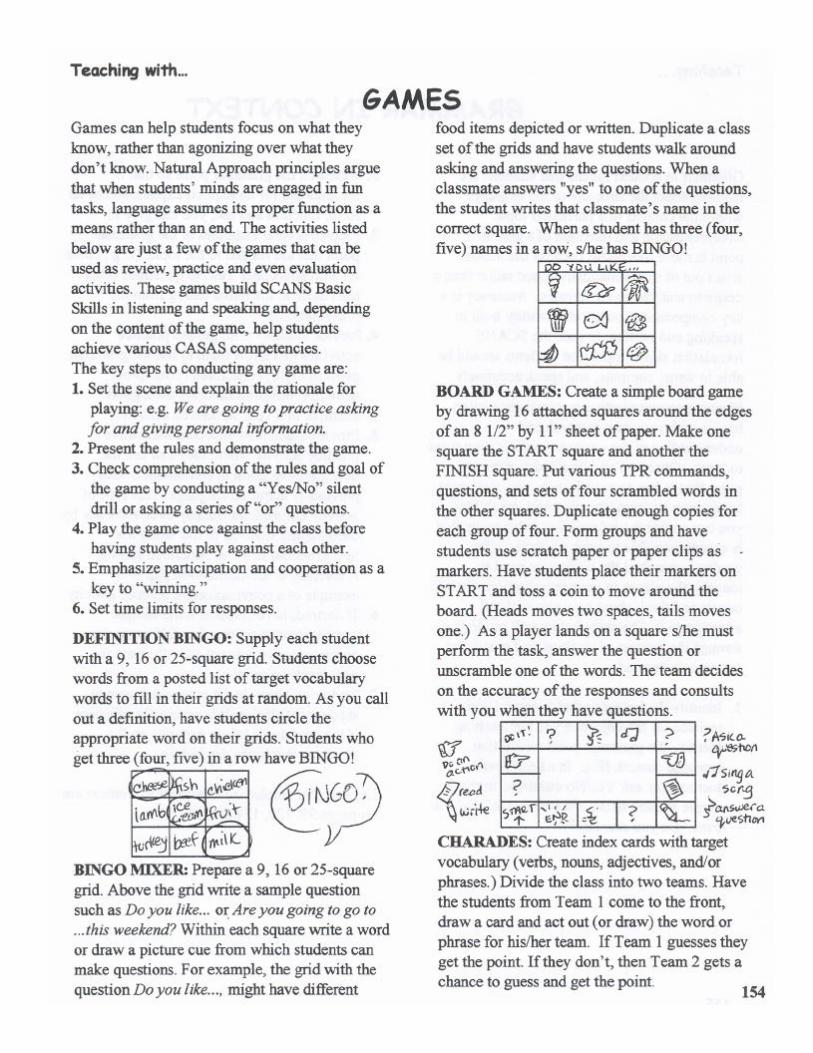
Teaching...
GRAMMAR IN CONTEXT
Grammar in context means that students arelearning about the structure of the languagewithin the context of a particular topic.Comprehension and retention of a grammarpoint is more successful because the lessonarises out of a communicative need rather than adesire to analyze and memorize. Accuracy is akey component in comprehensibility both inspeaking and writing. In fact, the SCANSfoundation skills imply that students should beable to write, compute, and speak accurately.
Planning communicative grammar instructionbegins with your own research andunderstanding of the grammar point(s) you wantto teach. Once you’ve identified a grammarpoint that is key to your lesson, you may needto research its form, function and use so thatyou can restate the information in language thatis comprehensible to your students. Afteryou’ve researched the point, you need toidentify the places in your presentation where itoccurs and think about how you will callattention to it. The steps below will guide youthrough the process of teaching and practicinggrammar in context.
1. Identify the language that is natural and realistic for the objective you are teaching. Identify the grammar point within that language context. (E.g. In a health exam-
doctors may ask Yes/No questions in the simple present tense: Do you smoke? Do you drink? Do you exercise?)
2. Research the grammar point so that if students ask for an explicit explanation of its form, function and use, you can give it.
3. Prepare several examples of the grammar point that are related to the topic. (E.g., come up with additional Yes/No questions other than those in the initial dialog from the presentation.)
4. Provide students with guided practice activities that allow them to use the grammar point in highly-structured (error-proof) activities. Substitution drills are a good example of a very structured activity.
5. Provide students with a communicativepractice activity where they can use the new grammar point in combination withpreviously acquired language. This type ofactivity emphasizes fluency over accuracy byencouraging students to risk using thenew grammar in a less structured setting.A roleplay or an information gap is an example of a communicative practice activity.
6. If desired, have students write sample sentences or questions that follow up the communicative activity and illustrate the new grammar point.
7. Review and recycle the grammar lesson in subsequent classes. It is especially effectiveif the next day’s lesson expands on the grammar taught the day before.
Lessons that emphasize Grammar in Context areon pages 98, 120, 124 and 140.
155
How to conduct a...
CORNERS ACTIVITYCorners activities provide students with anopportunity to stand up and “mingle” withstudents of similar interests. Signs postedaround the room represent students’ differentinterests, age groups, responses to questions, ortopics they’d like to learn more about. Thegroups that form around these signs can thendiscuss a follow-up question based on the signor pair off and perform a particular task.
For a Corners activity based on interests:1.Think of the topic and then come up with four or more related items. e.g.
Topic: Corner SignsFoods- Vegetables, Bread & Grains,
Fruits, Meat & Poultry
Places- Movies, Park, Mall, Library
Cars- Rolls Royce, Volkswagon Bug, Corvette, Toyta Minivan
2. Create the signs for the corners. You can use plain white 8 1/2 by 11” paper and a broad dark marker for the signs, but sometimes using different colors of construction paper or at least a different color marker for each “corner” helps beginning level students focuson where to go. You can also use calendar or
large magazine pictures.3. Post the signs around the room. (If you
post these signs as students walk in, it allowsthem to predict what they will be asked to doand start processing the language even before you start the activity.)
4. Walk around the room pointing out each sign and clarifying its meaning OR have students look at the signs and decode them for themselves.
5. Tell students they will have 30 seconds to choose the sign that has the word or picture they like the most and stand next to that sign.
6. Once students have grouped themselves,have them introduce themselves to a partneror, if the groups are small, to the entire group.
7. Set a time limit for the partners or group members to ask and answer a question that pertains to the corner they’re in. For example,
using the topic of Foods, students in the vegetable corner could ask and answer,
“What’s your favorite vegetable?” or “What’s one vegetable you can’t find here that you ate in your country?”
8. Once the students in each corner have had a chance to talk to at least two other people, they can...a. thank their last partner and return to their chairs, ORb. sit down with their last partner and
complete a worksheet or other task, ORc. form a team with a student from each of
the other three corners, sit down and begin a new task.
To develop a Corners activity based on personalstatistics or on responses to questions, simplyfollow the directions above, altering only thecontent on the signs. Be conscious that Cornersis a very public activity, so the choices you givestudents should not put them on the spot. Forexample, if you wanted to do a lesson on worldreligions, the corners could name the variousreligions, but instead of having students stand intheir religion’s corner, you’d direct them tostand next to a religion they’d like to learn moreabout. See also, JIGSAW CORNERS, p. 160
For examples of Corners activities, see pages68 and 144.
156

How to conduct a
FOCUSED LISTENING ACTIVITYWhile we work hard in our classrooms to teachstudents the most accurate model of English, ourstudents work, socialize and study with nativeand non-native speakers who speak quickly, usecolloquial speech and idiomatic expressions, andwho have a variety of accents and educationlevels. Additionally, students are often unawareof the listener’s responsibility toclarify what s/he has heard.
Focused listening activities help studentsdevelop SCANS and CASAS basic listeningskills. These skills enable them to comprehendand, if necessary, clarify the English that theyhear spoken outside the classroom. During thefocused listening activity students listen forinformation they need, embedded withinlanguage with which they may not be totallyfamiliar. The focused listening activity usuallyfollows the natural listening cycle of setting uppredictions and expectations, actively listening,and giving feedback.
These types of activities can make use ofaudio cassettes, video tapes, and teacher-read orstudent-read scripts. Often, students listen tosections of a passage rather than the wholepassage at once. When students listen forinformation, they confer in order to reachconsensus on what it is they heard. It is notuncommon to repeat a listening section two ormore times before students reach consensus.The number of repetitions varies from level tolevel, with beginning-level learners usuallyneeding the most. The procedures below workfor both commercially-prepared and teacher-generated materials.
To conduct a Focused Listening Activity:1. Preview the listening passage and exercises
before class, identifying what students will be listening for, what difficulties they might have, where you might have to divide up the material, and what you might have to pre-
teach. Prepare an OHT of any worksheets so you can refer to them during the activity.
2. Provide a review activity that reinforces the topic of the passage and the language for which students will be listening. For example,
if students will listen to a news broadcast, have them first do a survey activity that
determines how they get the news and what types of news interests them most. Please note that focused listening activities do not usually teach new material, but rather give students an opportunity to practice listeningfor previously taught language.
3. Use pictures, questions, personal experiences,or the worksheet (or anything else that will start students processing and predicting) to introduce the context of the focused listening task. Here’s a picture of a police officer. What do you think he’s saying?
4. Explain and check students’ comprehension of the task with “yes/no” and “or” questions:Will you write what you hear or act it out?
5. Provide an example. You can play the first item on the tape or say the first exercise from the tapescript. Get a class consensus on the correct answer. If necessary, replay or repeat the passage.
6. Distribute the materials students will need for the activity. (E.g., Some listening exercisesrequire a picture for the student to point to
different items as they are described.)7. Play the tape or read the tapescript for each
section. Have a student call out the “answer” and get class consensus on the response. If the class agrees (and the response is correct), continue to the next section. If the class does not agree or the answer is incorrect, repeat the section until students are able to catchwhat they missed.
For a follow-up activity you can use a PeerDictation, p. 163 or an Information Gap, p. 158.Focused Listening is emphasized on pages 37,127, and 143.157
How to conduct an...
INFORMATION GAPDuring an Information Gap activity studentpairs use the target language to ask for andexchange information. Each partner has theinformation the other needs to complete agrid, map, chart, or other worksheet. By askingfor and giving the necessary information,students use the language they’ve learned in ameaningful, realistic exchange. Students mustlisten carefully and speak accurately in order forthe information gap to be “filled.” Other thanthe obvious SCANS basic skills, the Info Gapdevelops students’ thinking skills and helpsthem achieve the competencies in theInformation and Interpersonal areas includingteaching others, negotiating and acquiringinformation.
Happily, most current course books includeinformation gap activities in their core texts orworkbooks. (See the Reference section on page168 for Information Gap resources.) However,you can create an information gap from almostany schedule, chart, graph, set of pictures, orlist. Simply duplicate two copies of the material,labeling one copy A and the other B. “White-out” different, complementary information oneach copy. Then make half a class set of each.
To prepare students for an information gap youshould check to be sure students have thelanguage they’ll need for the task. Next, modelthe procedure or, for higher levels, set up thesituation, the rationale for exchanging theinformation, and the roles of the studentsexchanging the information. Finally, monitor theactivity, providing feedback as needed.
For a beginning-level information gap:1. Chose information that is limited, such as an
inventory of household items, a price list,a directory in a market or mall, etc.
2. Prepare or find A/B worksheets that have complimentary information missing.
3. Duplicate one and a half class sets of the B worksheet and half a class set of the A worksheet.
4. Make an OHT of worksheet A or copy itonto the board.
5. Distribute the class set of B worksheets, andusing your “paper” on the board or OHP,model how you ask for the missinginformation on your A worksheet. Next,conceal your “paper” from the class and havevolunteer students ask you questions to getthe information that is missing from their Bworksheets. (Collect the B worksheets fromthe class before moving onto step 8. )
6. Pair students and identify A and B partners.Have a volunteer pair come to the front and demonstrate the information gap for the class.
7. Check students’ comprehension of the process by asking Yes/No questions. Have students respond with one finger for yes, two for no. e.g. Do you show your partner your paper? Do you ask questions? Do you write on your paper?
8. Distribute the A worksheets to the A partners and the B worksheets to the Bs.
9. Set a time limit and have students begin the activity. Circulate and monitor the pairs at work.
10. Call time and have students report back onthe information in the completed gap.
For a higher-level information gap:Follow the directions above, but create a gapthat has more information missing and is morelinguistically challenging. For example, StudentA has a map of one area and Student B has onlya starting point and destination. B asks fordirections and A uses the map to give directionsthat B writes down. Both partners check theirwork on A's map. B would then get a differentmap and A would ask B for directions from adifferent starting point and destination.A lesson that emphasizes an Information Gapactivity is on page 123. 158
How to conduct a...
JIGSAW ACTIVITYJigsaw activities turn students into teachers.Members of a team are assigned different piecesof a lesson’s information to first learn and thenteach their teammates. Jigsaw activities arehighly structured, so that even beginning levelstudents can use them. Jigsaws help studentsdevelop SCANS Thinking Skills and achieveSCANS Information, Resource, andInterpersonal competencies. They also helpstudents achieve CASAS Learning to Learncompetencies.
The procedures for Classic Jigsaw (where eachmember of a team learns and teaches a part ofthe lesson), Corners Jigsaw (where teammatesgo off to an assigned corner to get theirinformation), and Partners Jigsaw (wheremembers of a team pair up to learn theinformation) are outlined below.
To conduct a Classic Jigsaw:1. Identify the information you want students
to learn. This can be a reading, a list of vocabulary, a set of rules, a timeline, a set of facts, or even a grammar point. Divide theinformation into four parts 1, 2, 3, and 4.Duplicate a quarter of a class set of each.
2. Prepare a set of comprehension questions for each part of the information. It’s a good idea to put these questions on butcher paper so that you can post them in the area where eachEXPERT GROUP will be sitting. (See # 4 below.) Also, if desired, you can prepare a worksheet that teams can use to test their retention of the information they learned from their teammates. (See #11 below.)
3. Form HOME teams of four and numberheads. Assign all the #1's to EXPERTGROUP 1, #2's to EXPERT GROUP 2, etc.
4. Designate a location in the room where eachexpert group will gather to learn theirportion of the new information.
5. Present or discuss the goal of the jigsaw activity with the whole class. E.g., Today we will be learning about earthquake safetyPoint out the other skill(s) they will be working on. (E.g. ,active listening, clarifying,summarizing, asking questions, etc.)
6. Go over vocabulary you think may be problematic for students in the material, eliciting definitions from the class and supplying information as needed.
NOTE: Set time limits for each of the stepsbelow:7. Distribute the materials to each group and
have them read the material silently.8. Post the questions (from #2 above) and have
students within each group work together to find the answers in the material
9. Once students have answered the questions, they should test each other, still within theirEXPERT groups, to see how well they remember what they’ve learned and how wellthey can explain the material.
10. Have students return to their HOME teams and take turns teaching the new information they have learned to each other. They can usethe posted questions as a guide, but they should be speaking, not reading.
11. Once all the information has been taught, students in each team should take a test, write a paragraph, or complete a task that shows their retention of the information they were taught.
12. Follow up the activity with a short processing discussion, so that students can identify what skills they developed in addition to learning the content. Share your observations at this time.
159
To conduct a Partners’ Jigsaw:Follow the steps for the Classic jigsaw abovewith these variations:1. Divide the material to be taught into two
sections.2. Within the HOME teams, number heads and
assign partners; e.g., #1 and #2, #3 and #4. Give partners a “warm-up” activity (such as talking about their likes and dislikes)to help them connect.
3. Have partners go to their EXPERT groupstogether, where they can join other pairs inthat group to check their understanding of thematerial.
NOTE: The Partner’s Jigsaw is very useful inmulti-level classes because it is possible tocreate partnerships between stronger and weakerstudents.
To conduct a Jigsaw Corners activity:1. Create signs for four areas you want students
to review or learn. Number each sign #1-4.E.g.,Topic Corners SignsJob Search #1-Jobs A-F, #2-Jobs G-L,
#3-Jobs M-R, #4-Jobs S-Z2. Assemble material for each corner that
students can use to review or learn information. Examples would be a set of pictures defining vocabulary, a short reading,or a series of questions and answers. Postthe material at the appropriate corner and conceal it by covering it with a piece of paperor turning it to face the wall.
3. Form HOME teams of four and number heads. Tell students they will be going to a corner, learning the information in that corner,bringing it back and teaching it to their teammates.
4. Set a time limit and have students go to their assigned corners. (E.g. #1 goes to corner #1.)
5. Once in their corners, have students study the information you’ve posted there. (Depending on the goals of the lesson, students can pair up and memorize the information, fill out a worksheet, or simply take notes and bring them back to the team.)
6. Call time and have students rejoin theirHOME teams. Have them take turns using their worksheet, notes, or memory to relay
the information to their teammates.7. Once students have learned all the
information from their teammates, it’s important to have them demonstrate their learning through a quiz or other assessment tool. The quiz can be as simple asholding up a picture and having students write the correct word.
8. Follow up the activity with a short processing discussion, so that students can identify what skills they developed in addition to learning the content; e.g.,managing time, note-taking, teaching others, etc.
Lessons that emphasize Jigsaw activities are onpages 49 and 123.
160
How to conduct a...
MIXER
Mixers are highly interactive but also highlystructured activities, making them perfect forwarm up and guided practice at all levels. Oftenstudents ask and answer questions based on asingle grammatical structure; e.g., Do you liketo...? or Have you ever...? or Did you...over theweekend? Some mixers provide a samplequestion format and then give picture or wordcues for the students to use in creating thequestions. Other mixers are often titled "FindSomeone Who…" This type of mixer givesstudents statements from which they must formquestions; e.g., based on the statement: Findsomeone who likes to go fishing, the studentasks his/her classmates: Do you like to gofishing? Accountability is built in by havingstudents get the names of the respondents.(Some worksheets ask students to get the namesof students whether they answer “yes” or “no”to the question.) Based on their interactivenature, time limits, and built-in accountability,mixers are well suited for teaching the SCANSskills and competencies.For a question/answer mixer:1. Determine the type of questions (yes/no or
Wh-questions) and the grammaticalstructure(s), (present perfect, simple present,passive, etc.) students will be practicing
2. Prepare a set of 8-16 questions, depending on the class level, put them on a worksheet and duplicate a class set. You can also post them on the board, butcher paper, or an OHT, but if you do, you will need to build in time for students to copy the questions onto their own paper.)
3. Set up the activity by establishing the purpose of asking the mixer questions. (E.g.,for a mixer about activities over the weekend,discuss how small talk frequently revolves around weekend events or future plans.)
4. Model the process of “mixing” by walking around the room asking sample questions ofdifferent students. Show how to ask for and
write down students names on theworksheet.For intermediate levels, demonstrate how students can expand the interaction by askingadditional questions based on their classmate’s first response.
5. Have student volunteers come to the front and demonstrate the activity using the worksheets.
6. Check students’ comprehension by asking“or” questions about the mixer process; e.g.,Do you write the answers or circle them?Do you write students’ first names or last names? Do you sit or stand for this activity?Do you ask or answer questions? (trick question!)
7. Distribute the worksheets (or have students copy the questions.) Set a time limit andhave students begin the activity.
8. Circulate and participate in the mixer, facilitating when necessary. (It is usually bestto make mental notes of pronunciation and grammar issues that arise, so that you canteach to those issues at a later time. )
9. Call time and have students go back to their seats.
10. Check students’ results by asking themto name the different people who responded to their questions; e.g., T: Who likes to go
fishing? S: Juan does.
For a “Find Someone Who..” mixer:Follow the directions above, but instead ofquestions, prepare statements from whichstudents will create questions. For example, ifyou want to practice asking and answering aboutjob skills using the present perfect structure,you might write the following statement andcues: Find someone who has...
-typed a letter.-used a computer.-translated from English to Spanish.,
etc.
Mixers can be found on pages 3, 33, and 45.161
How to conduct a…
NARRATIVE READING ACTIVITY
Reading is a critical component of communi-cative competence and one of the best ways tocreate a truly relevant ESL lesson. Readings canprovide the basis of grammar-in-context lessons(see the Reference section on page 168) as wellas opportunities for cross-cultural discussions.Using readings, students can work in teams tolearn new information and teach it toothers. (See Jigsaw, p. 159.)
Students who have basic literacy skills and canproduce basic sentences can participate innarrative reading activities. High-interest readingpassages are used to develop students’ globalunderstanding as well as specific readingstrategies, such as skimming, scanning,distinguishing main ideas from supportingdetails, and making inferences and predictions.
Five different reading competencies are listedunder the SCANS’ Basic Skills. They are: locate,understand and interpret written information inorder to perform a task; learn from text bydetermining the main idea; identify relevantdetails, facts and specifications; infer or locatethe meaning of unknown vocabulary; and judgeother writer’s work. When working with anarrative reading activity all these competenciesare being practiced and strengthened.
These guidelines will help you develop aa Narrative Reading activity.1. Select (or create) a high-interest reading
passage that relates to the lesson topic.(See the Reference section on page 171.)
2. Conduct a pre-reading activity that helpsstudents predict the content and main ideas inthe passage by:a. asking questions about a visual related to the reading topic,b. talking about the title of the reading,
c. eliciting or providing vocabulary on the reading topic, ord. discussing students’ experiences around the reading topic.
3. Present four or five comprehension questionsand have students read the passage silently tofind the answers to the questions. Get students’ responses to the questions, thenread the passage aloud for students. Offer students the opportunity to change the answers to the questions.
4. Have the students read the passage silently again, circling any words that they would like defined. List these words on the boardand have students in the class offer the definitions they know, then provide theremaining definitions.
5. Provide students with factual questions that require them to get details from the passage and/or questions that ask them to make inferences based on what they have read.
6. For beginning-level students, create an activity that requires them to sequencesentences from the reading. For higher-levelstudents, create an activity that has themwork with the new vocabulary or theorganization of the passage.
Follow-up activities can include small groupdiscussions on the reading topic, having studentswrite questions for the author, or havingstudents write a summary of the reading’s mainpoints.
A sample narrative reading activity can be foundon page 87.
162
How to conduct a…
PEER DICTATION ACTIVITYPeer Dictations can be done in pairs or withsmall groups. In this type of activity, studentstake the roles of teacher and student orsupervisor and worker. The dictating student(the teacher/supervisor), is responsible foraccurately relaying information to her peer(s),and the student taking the dictation isresponsible for asking the correct clarificationquestions to be sure she gets the correctinformation. Not only listening and speakingskills but several of the SCANS Information andInterpersonal competencies are developed inpeer dictations. The content of the dictation candirectly relate to various CASAS competencies.
Peer dictation activities are most successfulwhen students have had a mini-lesson on theclarification strategies that are appropriate to thetopic. (E.g., for a peer dictation on prices ofitems, the clarification questions wouldprobably be How much? or 1-5 or 5-0?)Content for a peer dictation could be numbers,addresses, prices, personal information about animaginary third party, interview questions, newsheadlines, or even new vocabulary items.In order to include a peer dictation in yourlesson, you will need to prepare a list of theinformation or questions that students will usefor the dictation. Divide the list in half and labelthe halves A and B. Put each half on an OHT orhandout. (See p. 139 as an example.) You canalso print the lists on the board, if they can beconcealed from the class until the practice.
To conduct a Peer Dictation:1. Set the scene for the students and identify
the roles they will be taking: teacher/student,supervisor/worker, etc. Describe the list of information that students will be dictating.
2. Write a list of 3-5 sample items on the boardthat reflect the activity’s focus (e.g., 3-5numbers, prices, descriptions rules, etc.). Aska student to dictate the first item in the list toyou as you write it on another part of theboard. Model clarification language as you
take the dictation. (What was that? Did yousay---? Would you spell that? etc.). Continueto have volunteers dictate the remainingitems, emphasizing different clarificationstrategies you want students to use.
3. Demonstrate the peer dictation by asking twovolunteers to come to the front. Seat the volunteers face to face, with one partner facing the board or screen. Write one more sample item on the board and have the student facing the board dictate it to her/his partner. Encourage the student taking the dictation to clarify or check what s/he hears.
4. Check students’ comprehension of the activity by asking questions such as, “Do you work in pairs or groups?” “Do both people write?” etc.
5. Pair students and identify partner A andpartner B. Have the As face the board orOHP screen, and assign the dictating role tothem. Have the Bs face their partners. (If youare using separate A and B handouts,students can sit face-to-face anywhere.)
6. Remind the As that they should not show the Bs their list. Set a time limit. Reveal (or distribute) the A list and have them begin dictating to the Bs. When the time is up, have the students switch seats. Set a new time limit, reveal (or distribute) the B list, and have the Bs begin dictating.
7. Evaluate students’ use of clarification strategies during the activity by monitoring the pair work. Make note of students who doespecially well and note any problems you observe. Process this information with
the class when the activity is completed.You can follow up by having students:
a. use their lists to generate a conversation,b. ask & answer any dictated questions,c. write answers to dictated questions, ORd. add two more items to their lists.
Lessons that use Peer Dictations are on pages3, 53, 97 and 135.
163
How to conduct a…
PROBLEM SOLVING ACTIVITY
Problem solving is not only a great way toapply language skills, but is one of the keyelements in the list of SCANS Thinking Skillsand the CASAS Learning to Learn competency.When students examine a difficult situation inorder to identify both the problem and ameaningful solution, they are learning skills thatwill serve them well in the workplace, at homewith their families, and in their daily lives.
Before you can conduct a problem solvingactivity, your students need to have thevocabulary and social skills to enable them toagree and disagree successfully. E.g., I don’tthink that’s correct. I agree, but I also thinkthat... You might be right, but in my opinion, etc.You can teach a mini lesson, modeling thislanguage and helping students practice it withcontent that is already familiar. For example, inan intermediate high class, you could pose aquestion such as: Is it better to live in a house oran apartment?, propose different answers, andhave students take turns expressing theiropinions about each answer.
To conduct a Problem Solving activity:1. Present a problematic situation to the class
by either:a. writing it on the board for students to read
and restate,b. reading the problem to the class and asking
comprehension questions, OR c. acting out the situation and asking students to tell you what happened.2. Clarify and check students’ comprehension of
key vocabulary and concepts.3. Ask students to identify the main problem in
the situation. (If students disagree, list their different ideas and then ask them to prioritizeto find the most pressing problem.)
4. Have students brainstorm solutions to the problem, within a set time limit, in any of these ways:
a. Form teams of four and have teammembers take turns suggesting solutions, asthe team recorder writes down their differentideas, ORb. Form pairs and have each pair generate alist of solutions that they then share withanother pair, ORc. Have individual students write theirsolutions and share them with a partner, ORd. Conduct a whole class brainstorm to
determine possible solutions.5. Once students have generated a list of
solutions, have them report back to the class.List their solutions on the board.
6. Take one of the proposed solutions on the board and discuss its consequences. Presentthe language students will need to agree and disagree with each other, and demonstratesupporting a statement with an example. E.g.,I agree that unions are important because they fight for benefits for their members.
7. Set a time limit of at least 10 minutes and have students in groups or pairs list the consequences of their solutions and then decide which one is the best.
8. Evaluate students’ work by collecting each group’s list and having each group reportback on their decision.
Follow up a problem solving activity by havingstudents: a. write a letter, giving advice to someone
experiencing a similar problem. b. write a conversation that illustrates the way a person could solve the problem. c. survey their relatives and friends to discover their solutions to the problems.
A lesson that includes problem solving activitiesis on page 99.
164
How to conduct a…
ROLEPLAY
Roleplays give students the opportunity tocombine their own language resources with thenew language they’ve learned in the lesson. Inmany cases, the roleplay is the only way thatstudents can apply the language they havestudied. Roleplays help students develop theSCANS Listening and Speaking Basic Skills aswell as the Thinking Skills of decision making,problem solving and creative thinking.Depending on the content of the roleplay,several CASAS competencies may be achievedincluding evaluating a situation, statement, orprocess and providing evidence, makingjudgements etc.
Setting up a roleplay involves preparinga model dialog and a few alternative situations,as well as an observation checklist of itemsyou and the class will use to evaluate thesuccess of the roleplay. (See page 74 for asample checklist.)
To conduct a Roleplay activity:1. Preview the language students will use in
the roleplay by practicing a model dialog based on a situation related to the lesson. E.g., A customer wants to return a camera because it doesn’t take good pictures.
2. Suggest a slightly different situation and elicit a new dialog from the class, writing each line of the dialog on the board as students dictate it to you. Elicit other ways to say lines in the dialog and list them on the board as well.
3. Identify the key elements that should occurin this type of interaction. For example:greet, make a request or state a problem,find a solution, and express thanks. You canalso identify the grammar point that goesalong with each element, if appropriate forthe level of the class.
4. Have the class compare the list of key elements to the elicited dialog and identify where each element appears.
5. Take one of the roles in the dialog and ask different students to roleplay the dialog with you. Use this time to demonstraterealistic and varied responses to what each volunteer says.
6. Tell students they will practicing a roleplay in order to present it to the class.
7. Form small groups and have each group roleplaythe situation, taking turns assuming the roles ofactors, who will perform the roleplay, and observers,who will evaluate the key elements of the roleplay.
8. Monitor the group practice, clarifying any pronunciation or grammar issues, and encouraging students to “play” with the situation.
9. As groups present their roleplays to the class, have their classmates complete an observation checklist for each group.
10. Collect the checklists and ask the class todiscuss the success of the activity.
You can provide further skill development byhaving students:
a. write a conversation, based on the roleplay,
b. write a series of questions about the roleplay and then answer them, OR
c. write a letter to a friend describing the situation from the roleplay.
Lessons that include roleplay are on pages 15,19, 71, 79, 93, 111, and 127.
165
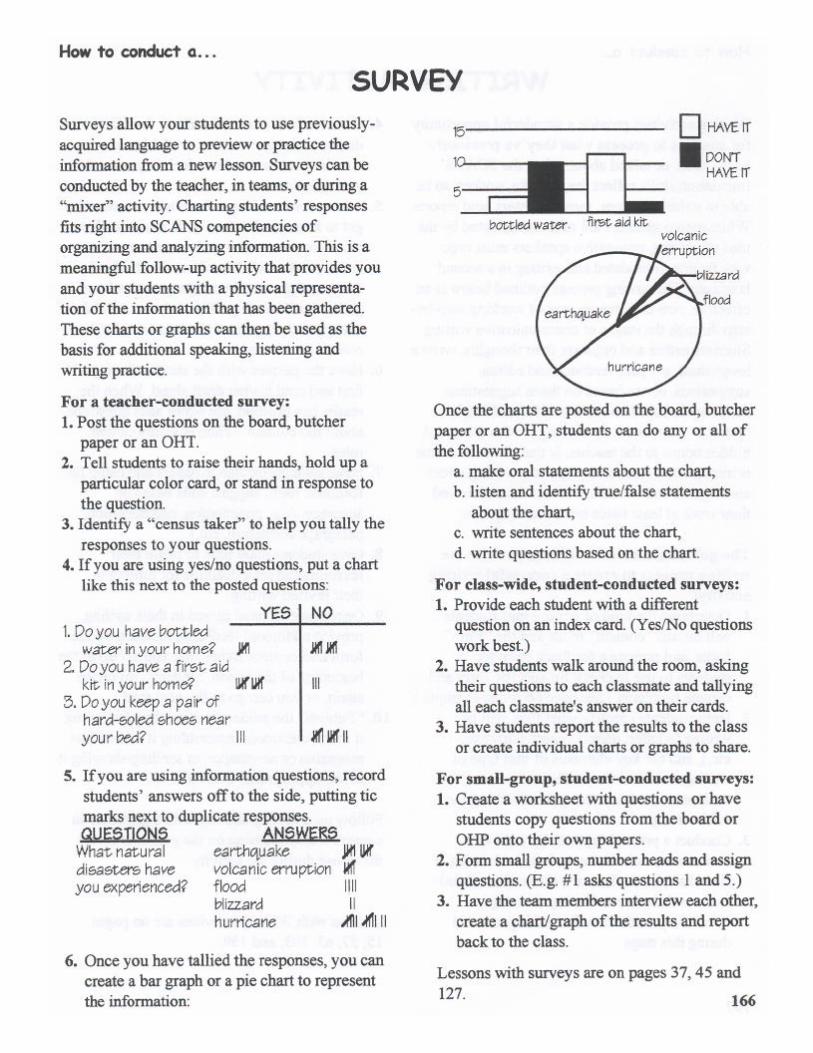

How to conduct a…
WRITING ACTIVITYWriting activities provide a wonderful opportunityfor students to process what they’ve previouslyheard, read, or talked about. Also, the SCANS’foundation skills reflect the need for workers to beable to write messages, memos, letters, and reports.While native speakers are often intimidated by theidea of writing, non-native speakers must copewith feeling intimidated and writing in a secondlanguage! The writing process outlined below is aneffective, non-threatening way of working step-by-step through the stages of communicative writing.Students gather and organize their thoughts, write arough draft, get peer feedback and editingsuggestions, revise based on those suggestions,revise again based on teacher edits, and finally“publish” their work by sharing it with others. Ahidden bonus to the teacher, is that correction timeis minimized because only specific writing errorsare targeted and because students have reviewedtheir work at least twice before turning it in.
The guidelines below will help you use thewriting process to create a successful writingactivity:1. Determine the kind of writing that students
will do, the “content” focus and the “form” focus, and prepare a feedback form forstudents to use to check for specific form andcontent problems. (See page 66 for an example.)
2. Help students identify what they will be writing (a letter, memo, report, narrative, etc.), and the key elements of that type of writing. It can be very effective to show students a model of the type of writing they
will be doing.3. Conduct a pre-writing activity such as a
brainstorm, a clustering activity, a drawing, a flowchart, an outline, or a discussion related to the writing topic. During this stage,vocabulary students will need is generatedduring this stage.
4. Give students time to work on their first drafts. Make dictionaries available and circulate so that students feel they can ask you questions.
5. Pair students and have them take a moment toget to know each other. (It’s easier to sharewhat you’ve written with someone whose name you know!) Distribute the feedback forms and go over the language and rules of giving feedback. (e.g. Why did you...? I didn’t understand this part. I think you need a comma here., etc.)
6. Have the partner with the shortest hair go first and read his/her draft aloud. When thereader has finished, the editor asks questions about the content. Then students switch roles.
7. Have students exchange papers and using the feedback form, suggest edits based on accuracy. (e.g. punctuation, capitalization, paragraph formation, etc.)
8. Give students class time to begin their revisions and set a deadline for turning intheir revised writing.
9. Once students have turned in their writing, provide additional feedback, focusing on theform and content issues that you set up at thebeginning of the lesson. Students can reviseagain, or you can go to the next step.
10. “Publish” the student writing, by displayingit in the classroom, assembling it into a classmagazine or newspaper, or sending/showing itto the appropriate audience.
Follow up a writing activity with a grammar-incontext-lesson focusing on the grammar issuesthat arose during the activity.
Lessons with Writing activities are on pages15, 57, 63, 103, and 139.
167
169
REFERENCESThe following books are cited, with page references, in the sample lessons.
*Series:
Crossroads. Frankel, Irene, et. al. Oxford University Press
English ASAP. Steck Vaughn Company.
Expressways. Bliss, Bill and Molinsky, Steven. Pearson Publishing.
Real Life English. Steck Vaughn Company.
Vistas. Brown, Douglas H.. Pearson Publishing.
Topics and Language Competency. Kerwin, Michael. Prentice Hall Regents.
*Beginning Low/High Texts:
The Oxford Picture Dictionary. Shapiro, Norma and Adelson-Goldstein, Jayme.Oxford University Press.
Word by Word. Bliss, Bill and Molinsky, Steven. Prentice Hall Regents.
English Extra. Tanaka, Grace. Prentice Hall Regents.
*Intermediate Low/High Texts:
Ready to Write. Blanchard, Karen and Root, Christine. Addison-Wesley-Longman.
Focus on Grammar Workbook A. Fuchs, Marjorie, et. al. Addison-Wesley Longman.
Working it Out. Magy, Ronna. Heinle and Heinle.
Intermediate Grammar. Bland, Linda. Oxford University Press.
Citizenship Now. Becker, Aliza and Edwards, Lori. Contemporary Books.
Understanding and Using English Grammar. Azar, Betty. Prentice Hall Regents.
*Advanced Low Texts:
Grammar Dimensions 3. Thewlis, Stephen. Heinle and Heinle.
Skills for Success. Price-Machado, Donna. Cambridge.
* Please note: This list is meant to inform rather than recommend, as are the lists that follow.
170
RESOURCES FOR VISUALS AND TPR SEQUENCES
Both of the picture dictionaries mentioned on the previous page, The Oxford Picture Dictionary andWord by Word are excellent visual resources. Overhead transparencies of the Oxford Picture Dictionarypages are also very useful.
Action English Pictures. Takahashi, Noriko and Frauman-Prickel, Maxine. Prentice Hall Regents.[Classic TPR sequences illustrated in a light-hearted style.]
The Card Book. Tom, Abigail, and McKay, Heather. Prentice Hall Regents.
Chalk Talks. Shapiro, Norma and Genser, Carol. Command Performance Language Institute.[Includes numerous visual lessons and a pictionary.]
Comics and Conversation. Ashkenas, Joan. JAG Publications.More Comics and Conversation. --------------------------------.[Authentic cartoon art.]
English for Technology: Language Skills for Using Everyday Technology. Owensby, Jean, et al.Dominie Press. [Vocabulary and instruction sequences for ATM machines, copy machines, etc.]
Live Action English. Romjin, Elizabeth and Seely, Contee. Command Performance Institute.[Classic TPR sequences]
Picture Stories for Beginning Communication. Heyer, Sandra. Prentice Hall Regents..[Jokes and Humorous anecdotes depicted in a series of picture stories.]
Picture Stories: Language and Literacy Activities for Beginners. Ligon, Fred andTannenbaum, Elizabeth. Addison-Wesley Longman. [Real-life picture story sequences with ahumorous twist.]
Shortcuts. Mentel, Jim. McGraw Hill. [A myriad of TPR activities in a book that comes with its ownmanipulatives.]
RESOURCES FOR INFORMATION GAP ACTIVITIES
Back and Forth: Pair Activities for Language Development. Palmer, Adrian, et. al. Prentice HallRegents.
Basic Oxford Picture Dictionary Resource Book. Shapiro, Norma, et. al. . Oxford University Press.[Beginning-low information gap activities]
Classic Classroom Activities. Weiss, Renee, et. al. Oxford University Press. [Information gap activitiesincluding crossword puzzles, picture differences, and gaps based on realia.]
Stepping Out. Bunn, Christine and Seymour, Sharon. Addison-Wesley Longman. [Classic, intermediate-level information gap activities. ]
171
RESOURCES FOR FOCUSED LISTENING ACTIVITIES AND CASSETTES
Most ESL core texts now include focused listening practice as part of their program. The books listedunder the visual and TPR resources are also very useful for focused listening exercises. The resourcesbelow are a very small representation of the variety of listening materials currently available.
Good News, Bad News. News Stores for Listening and Discussion. Barnard, Roger.Oxford University Press.
Listen For It. Richards, Jack, et. al. Oxford University Press.
The Oxford Picture Dictionary Teacher’s Book and Focused Listening Cassette. andThe Basic Oxford Picture Dictionary Teacher’s Resource Book and Focused Listening Cassette. OxfordUniversity Press. [Tapescripts and cassettes for everything from simple listen and point activities tomulti-tasked listening.]
People at Work. Sather, Edgar. Prolingua Associates Publishers. [High-intermediate to advanced-levelauthentic interviews.]
Say What You Feel. Weinstein, Nina. Heinle and Heinle. [Clues to listening for affective language.]
RESOURCES FOR JIGSAW/READING ACTIVITIES
Beginning Stories from the Heart. Magy, Ronna. Linmore Publishing.Stories from the Heart.--------------------------------------------------------[Authentic student writing.]
Clues to Culture. Hartmann, Pamela. Random House. [High interest readings with a mystery attached.]
Collaborations 1,2 and 3. Huizenga, Jann and Weinstein-Shr, Gail. Heinle and Heinle. [Numerous low-level readings and writing prompts as well as wonderful black and white photos.]
Easy True Stories. Heyer, Sandra. Prentice Hall Regents. [extremely high interest stories, Beg.Low]True Stories in the News. -------------------------------------[Beg. High]More True Stories in the News. -------------------------------[Beg. High]Even More True Stories. ---------------------------------------[Intermediate]
Read All About It. Howard, Lori. Oxford University Press. [High interest, low-level jigsaw material.]
RESOURCES FOR WRITING ACTIVITIES
Many of the reading resources above are also excellent resources for writing activities.
Multi-Cultural Writing Workshop. Blanton, Linda Lonon and Lee, Linda. Heinle and Heinle.[Wonderful lists of writing and thinking strategies at the back of the book.]
Share Your Paragraph. Rooks, George M.. Prentice Hall Regents.

172
RESOURCES FOR WRITING ACTIVITIES (continued)
Starting Lines. Blot, David and Davidson, David M.. Heinle and Heinle. [Beg.]Write from the Start. ---------------------------------------------------------------[Beg. High]Put it in Writing. --------------------------------------------------------------------[Intermediate][All three books use high interest picture cues, easy-to-follow models, and authentic writing cues]
Stories To Tell Our Children. Weinstein-Shr, Gail. Heinle and Heinle. [Moving, authentic studentwriting.]
RESOURCES FOR TEAM TASKS:
Caring and Sharing in the Foreign Language Classroom. Moskowitz, Gertrude. Newbury Press.
Communication in English. Glowacki, Kenneth. Linmore Publishing. [Numerous cooperative activities]
A Conversation Book. Carver, Tina Kasloff and Fotinos, Sandra Douglas. [Excellent resource for surveysand interviews.]
Cooperative Learning. Kagan, Dr. Spencer. Kagan Cooperative Learning. [Not an ESL text, but anexcellent resource for the original activity types and the rationale for using them.]
Index Card Games and Activities for English. Pro Lingua Associates. 1993
Look Who’s Talking. Bassano, Sharron and Christison, Mary Ann. Alta Books.Purple Cows and Potato Chips -------------------------------------------------------
Talk Your Head Off. West, Brana Rish. Prentice Hall Regents.
RESOURCES FOR PROBLEM SOLVING ACTIVITIES AND ROLEPLAYS
Problem Solving: Critical Thinking and Communication Skills. Little, Linda and Greenberg, Ingrid.Prentice Hall Regents.. [Accessible for intermediate level-learners but also a great resource forBeg.-high level teachers who want to relate the problems rather than have students read them.]
The Oxford Picture Dictionary Teacher’s Book. Adelson-Goldstein, Jayme, Shapiro, Norma and Weiss,Renee. Oxford University Press. [75 problem solving activities in as many topic areas.]
Classic Classroom Activities. Weiss, Renee, et. al. Oxford University Press. [12 topic-based, highly structured roleplays.
The Listening and Speaking Activity Book. Goldman, Rheta et. al.. Oxford University Press. [Materialsfor Garage Sale, Health Fair and Restaurant roleplays.]
173
INTERNET RESOURCES
Dave’s ESL Cafe-http://eslcafe.com features a multipurpose web page for teachers and students.
Intercultural Press: www.interculturalpress.com has many publications which assist teachers inCross-cultural training.
TESOL.com-TESOL’s official website with links to many other ESL sites.
Many books are online as well with quizzes and teaching suggestions. Examples include Focus onGrammar, Shortcuts, and The Oxford Picture Dictionary. By logging onto the book’s website, you canoften find links to other useful ESL sites.
SUPPLEMENTAL MATERIALS
Consumer Information Catalog Ph.:1-888-878-3256: Web site: www.puebleo.gas.gov
American Red Cross-Family Disaster Plan and Personal Survival GuideStock No. 202-422; Form 933, Revised 7/89.
American Red Cross-27 Things to Help You Survive an EarthquakeForm 914; Revised 7/88.
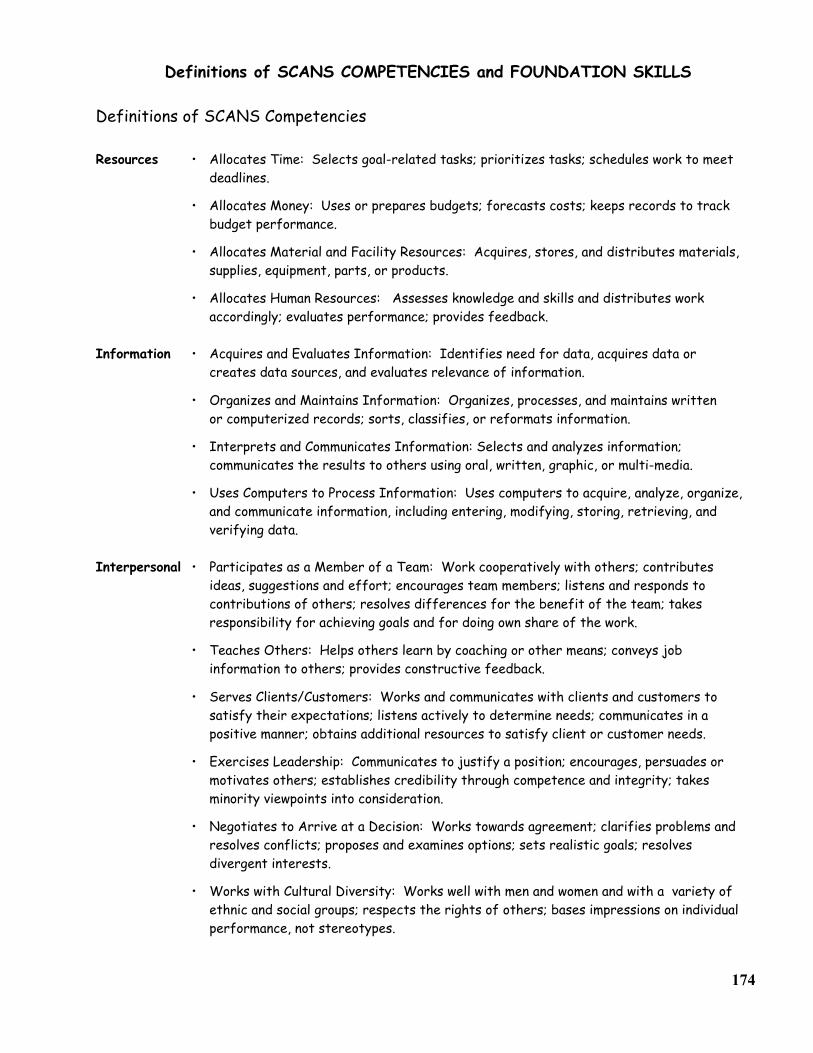
Definitions of SCANS COMPETENCIES and FOUNDATION SKILLS
Definitions of SCANS Competencies
Resources • Allocates Time: Selects goal-related tasks; prioritizes tasks; schedules work to meet deadlines.
• Allocates Money: Uses or prepares budgets; forecasts costs; keeps records to trackbudget performance.
• Allocates Material and Facility Resources: Acquires, stores, and distributes materials,supplies, equipment, parts, or products.
• Allocates Human Resources: Assesses knowledge and skills and distributes workaccordingly; evaluates performance; provides feedback.
Information • Acquires and Evaluates Information: Identifies need for data, acquires data orcreates data sources, and evaluates relevance of information.
• Organizes and Maintains Information: Organizes, processes, and maintains written or computerized records; sorts, classifies, or reformats information.
• Interprets and Communicates Information: Selects and analyzes information;communicates the results to others using oral, written, graphic, or multi-media.
• Uses Computers to Process Information: Uses computers to acquire, analyze, organize,and communicate information, including entering, modifying, storing, retrieving, andverifying data.
Interpersonal • Participates as a Member of a Team: Work cooperatively with others; contributesideas, suggestions and effort; encourages team members; listens and responds tocontributions of others; resolves differences for the benefit of the team; takes
responsibility for achieving goals and for doing own share of the work.
• Teaches Others: Helps others learn by coaching or other means; conveys jobinformation to others; provides constructive feedback.
• Serves Clients/Customers: Works and communicates with clients and customers tosatisfy their expectations; listens actively to determine needs; communicates in apositive manner; obtains additional resources to satisfy client or customer needs.
• Exercises Leadership: Communicates to justify a position; encourages, persuades ormotivates others; establishes credibility through competence and integrity; takesminority viewpoints into consideration.
• Negotiates to Arrive at a Decision: Works towards agreement; clarifies problems andresolves conflicts; proposes and examines options; sets realistic goals; resolvesdivergent interests.
• Works with Cultural Diversity: Works well with men and women and with a variety ofethnic and social groups; respects the rights of others; bases impressions on individualperformance, not stereotypes.
174
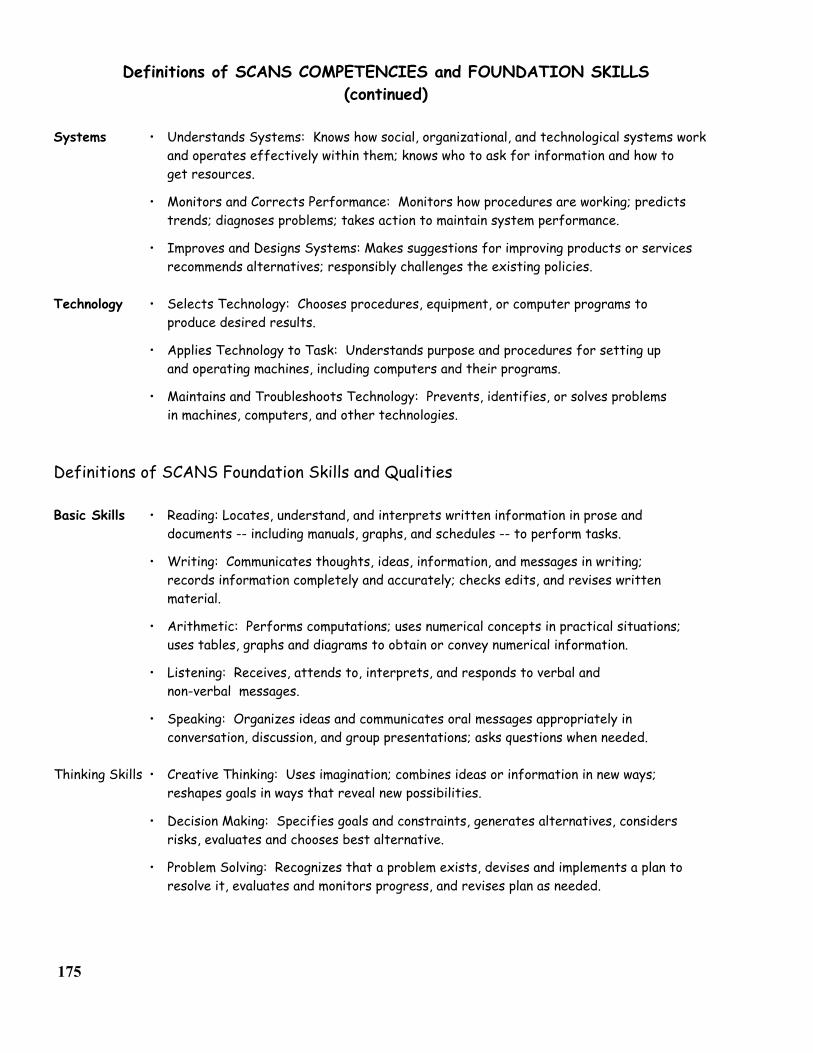
Definitions of SCANS COMPETENCIES and FOUNDATION SKILLS(continued)
Systems • Understands Systems: Knows how social, organizational, and technological systems work and operates effectively within them; knows who to ask for information and how to
get resources.
• Monitors and Corrects Performance: Monitors how procedures are working; predictstrends; diagnoses problems; takes action to maintain system performance.
• Improves and Designs Systems: Makes suggestions for improving products or servicesrecommends alternatives; responsibly challenges the existing policies.
Technology • Selects Technology: Chooses procedures, equipment, or computer programs toproduce desired results.
• Applies Technology to Task: Understands purpose and procedures for setting up and operating machines, including computers and their programs.
• Maintains and Troubleshoots Technology: Prevents, identifies, or solves problemsin machines, computers, and other technologies.
Definitions of SCANS Foundation Skills and Qualities
Basic Skills • Reading: Locates, understand, and interprets written information in prose anddocuments -- including manuals, graphs, and schedules -- to perform tasks.
• Writing: Communicates thoughts, ideas, information, and messages in writing;records information completely and accurately; checks edits, and revises writtenmaterial.
• Arithmetic: Performs computations; uses numerical concepts in practical situations; uses tables, graphs and diagrams to obtain or convey numerical information.
• Listening: Receives, attends to, interprets, and responds to verbal andnon-verbal messages.
• Speaking: Organizes ideas and communicates oral messages appropriately inconversation, discussion, and group presentations; asks questions when needed.
Thinking Skills • Creative Thinking: Uses imagination; combines ideas or information in new ways;reshapes goals in ways that reveal new possibilities.
• Decision Making: Specifies goals and constraints, generates alternatives, considersrisks, evaluates and chooses best alternative.
• Problem Solving: Recognizes that a problem exists, devises and implements a plan toresolve it, evaluates and monitors progress, and revises plan as needed.
175
Definitions of SCANS COMPETENCIES and FOUNDATION SKILLS(continued)
• Seeing Things in the Mind's Eye: Organizes and processes symbols, pictures, graphs;visualizes outcomes from blueprints, diagrams, flow charts, recipes, etc.
• Knowing How to Learn: Can use learning techniques to apply and adapt new knowledgeand skills in both familiar and changing situations.
• Reasoning: Uses underlying principles to solve problems; uses logic to draw conclusions.
Personal • Responsibility: Works hard to be excellent; sets high standards of attendance,Qualities punctuality, enthusiasm, and optimism in approaching tasks.
• Self-Esteem: Has a positive view of self; knows own skills and abilities; is aware ofimpact on others.
• Social: Demonstrates friendliness, adaptability, empathy and politeness; relates well to others; asserts self appropriately; takes an interest in others.
• Self-Management: Assesses own knowledge, skills and abilities accurately; sets personalgoals; responds to feedback unemotionally; is a self-starter.
• Integrity/Honesty: Can be trusted; recognizes personal and societal values; chooses ethical course of action.
176