Embed Size (px)
Citation preview
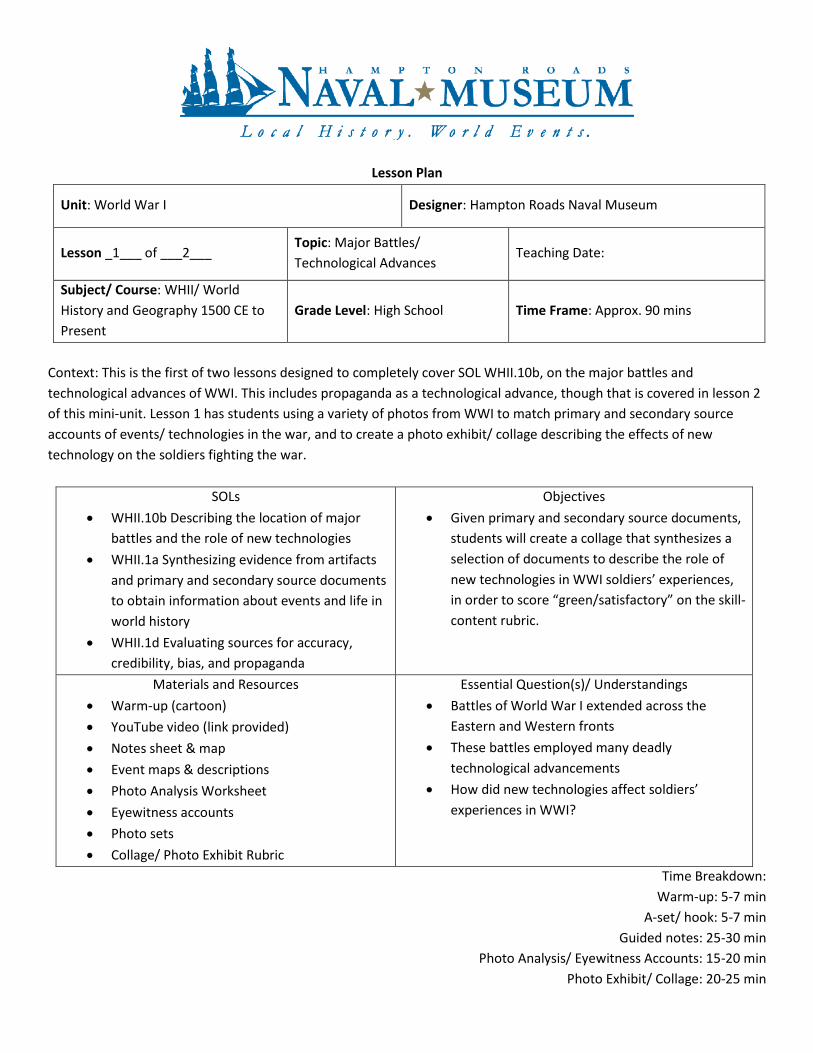
Lesson Plan
Unit: World War I Designer: Hampton Roads Naval Museum
Lesson _1___ of ___2___ Topic: Major Battles/
Technological Advances Teaching Date:
Subject/ Course: WHII/ World
History and Geography 1500 CE to
Present
Grade Level: High School Time Frame: Approx. 90 mins
Context: This is the first of two lessons designed to completely cover SOL WHII.10b, on the major battles and
technological advances of WWI. This includes propaganda as a technological advance, though that is covered in lesson 2
of this mini-unit. Lesson 1 has students using a variety of photos from WWI to match primary and secondary source
accounts of events/ technologies in the war, and to create a photo exhibit/ collage describing the effects of new
technology on the soldiers fighting the war.
SOLs
WHII.10b Describing the location of major
battles and the role of new technologies
WHII.1a Synthesizing evidence from artifacts
and primary and secondary source documents
to obtain information about events and life in
world history
WHII.1d Evaluating sources for accuracy,
credibility, bias, and propaganda
Objectives
Given primary and secondary source documents,
students will create a collage that synthesizes a
selection of documents to describe the role of
new technologies in WWI soldiers’ experiences,
in order to score “green/satisfactory” on the skill-
content rubric.
Materials and Resources
Warm-up (cartoon)
YouTube video (link provided)
Notes sheet & map
Event maps & descriptions
Photo Analysis Worksheet
Eyewitness accounts
Photo sets
Collage/ Photo Exhibit Rubric
Essential Question(s)/ Understandings
Battles of World War I extended across the
Eastern and Western fronts
These battles employed many deadly
technological advancements
How did new technologies affect soldiers’
experiences in WWI?
Time Breakdown:
Warm-up: 5-7 min
A-set/ hook: 5-7 min
Guided notes: 25-30 min
Photo Analysis/ Eyewitness Accounts: 15-20 min
Photo Exhibit/ Collage: 20-25 min
Exit Ticket: 5-7 min
Instructional Procedures:
Warm-up: Students will analyze political cartoon.
A-set: Students will watch short video showing elements of life in the trenches during WWI and discuss the weapons and
other images as well as the attitudes of the soldiers.
Guided Notes: Students will examine maps and short secondary-source descriptions of key battles/ events of WWI to
complete a guided notes chart and locations map. Alternatively, teacher may present information to class, if desired or if
additional time is needed elsewhere in the lesson, more scaffolding is needed with maps, etc.
Photo Analysis: Teacher will present and model photo analysis tool (National Archives’ is provided, but not required).
Students will analyze approximately 5 photos showing various new technologies of WWI (tanks, trench warfare, gas,
machine guns, submarines) using the analysis tool. Additionally, students will be provided with brief eyewitness
accounts related to each of the technologies, and determine which image(s) best fit with each description. Teacher will
debrief findings with students and discuss effects of those technologies during the war. Suggested photo-account
matches are:
Account #1- Photo #1
Account #2- Photo #17
Account #3- Photo #28
Account #4- Photo #29
Account #5- Photo #9
Account #6- Photo #7
However, these may be adjusted as desired to scaffold the activity.
Historical “Photo Exhibit”/ Collage: Students will develop a collage or exhibit, either on poster paper or online (ex,
Glogster.com) that combines WWI-era photos, primary and secondary source excerpts, and their own analysis/
interpretation thereof, to answer the question, “How did new technology influence soldiers’ experiences in WWI?”
Students will choose additional photos from a predetermined set to analyze and include in their project. If time and
resources permit, students may do additional research and/or create their collages online, but outside resources are not
necessary. Sample rubric for evaluation is attached.
Exit Ticket: Questions for students—Which image did you find the most interesting/ compelling/ etc.? Why do you think
you had that response to that picture? What did it tell you about WWI?
Which technology do you believe was the most important in WWI? Why?
Assessment
Formative
Warm-up (previous learning)
Student participation in group discussion
Photo/ Eyewitness account match & explain
Photo Exhibit/ Collage- daily objective
Exit Ticket
Summative
SOL section quiz is included in Lesson 2 of this set
Attachments:
-Warm up cartoon
-YouTube link (a-set/ hook video suggestion)
-Guided notes sheet/ guided notes map
-WWI Event Secondary source sets- map & description (6 sets)
-Photo Analysis Tool
-Eyewitness Accounts set (6)
-WWI Primary source photos (40)
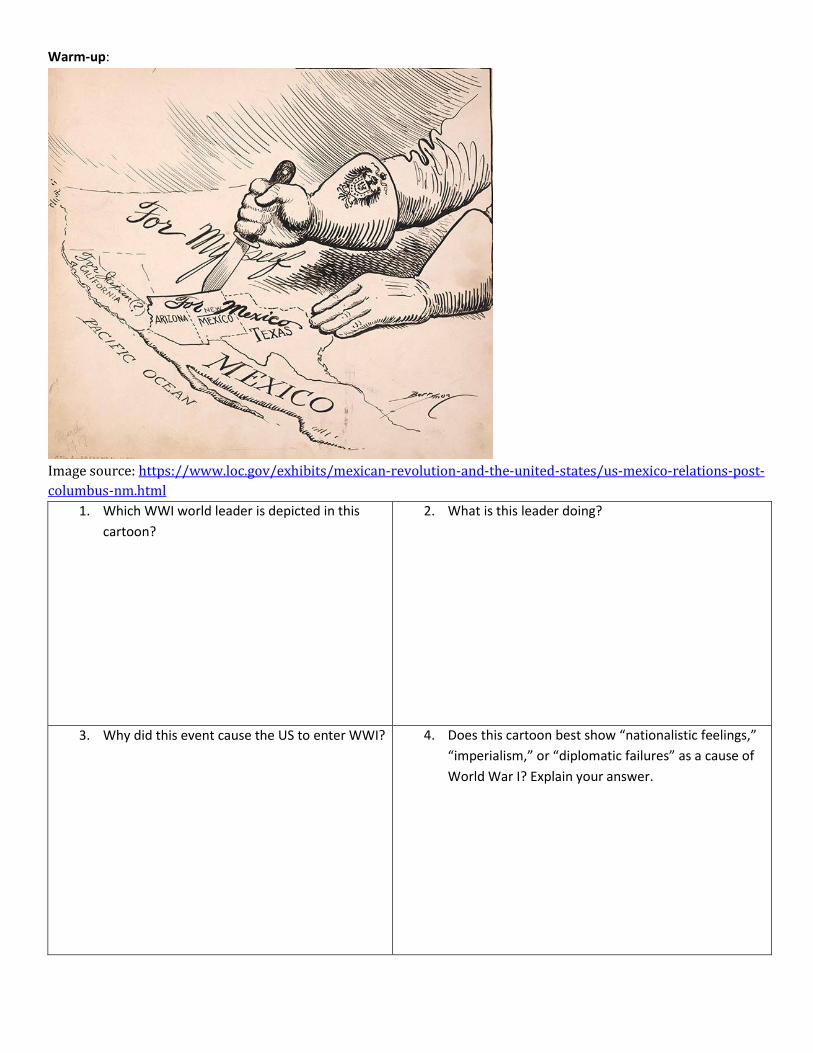
Warm-up:
Image source: https://www.loc.gov/exhibits/mexican-revolution-and-the-united-states/us-mexico-relations-post-
columbus-nm.html
1. Which WWI world leader is depicted in this
cartoon?
2. What is this leader doing?
3. Why did this event cause the US to enter WWI?
4. Does this cartoon best show “nationalistic feelings,”
“imperialism,” or “diplomatic failures” as a cause of
World War I? Explain your answer.
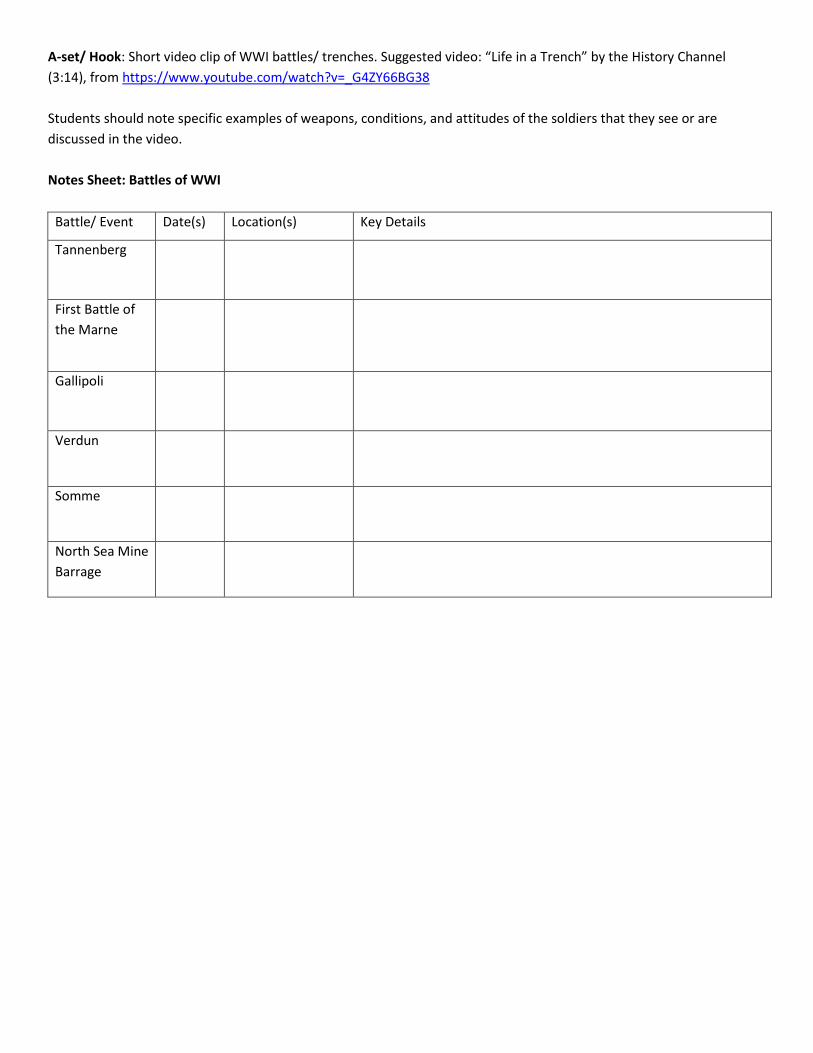
A-set/ Hook: Short video clip of WWI battles/ trenches. Suggested video: “Life in a Trench” by the History Channel
(3:14), from https://www.youtube.com/watch?v=_G4ZY66BG38
Students should note specific examples of weapons, conditions, and attitudes of the soldiers that they see or are
discussed in the video.
Notes Sheet: Battles of WWI
Battle/ Event Date(s) Location(s) Key Details
Tannenberg
First Battle of
the Marne
Gallipoli
Verdun
Somme
North Sea Mine
Barrage
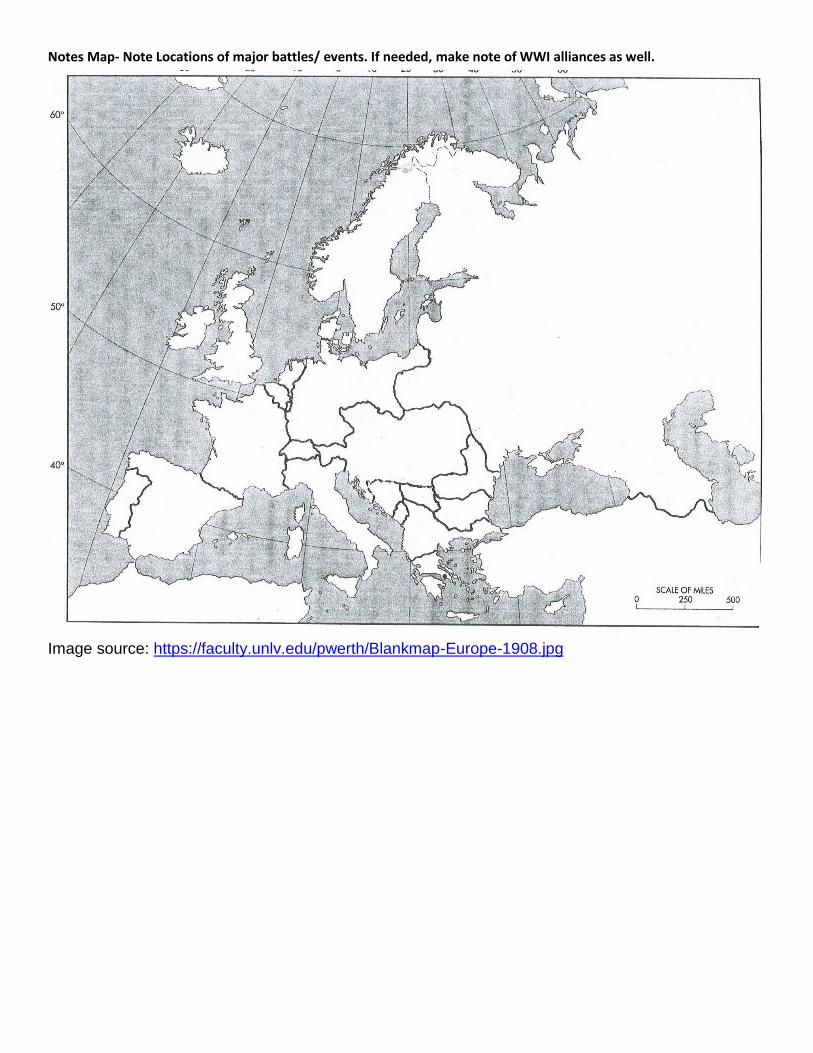
Notes Map- Note Locations of major battles/ events. If needed, make note of WWI alliances as well.
Image source: https://faculty.unlv.edu/pwerth/Blankmap-Europe-1908.jpg

Suggested materials for use in guided notes:
Battle of Tannenberg
Image source: CIA, via http://www.vox.com/a/world-war-i-maps
“The German war plan committed the bulk of the Empire's forces to the Western Front, leaving just one
German army in the East to face Russia's First and Second Armies. Combined with the defeat at the battle of
the Marne, a victory by the numerically superior Russian forces could have crushed the German war effort in
its crib. Instead, the Germans were victorious. The Russians scored a tactical victory at Gumbinnen, but
instead of pressing the advantage, they waited for the Second Army to arrive. The Germans audaciously
moved south to face the Second Army before it could combine its strength with the First. German forces were
aided by exceedingly poor Russian communication security — Russian troops hadn't mastered even basic
cryptography, so German intelligence was aware of how poorly coordinated the two Russian armies were.
Victory at Tannenberg set the stage for a subsequent German victory over the First Army at the Battle of
Mausurian Lakes. Those two wins prevented the Russians from taking strategic initiative against Germany in
the East.”
Source: http://www.vox.com/a/world-war-i-maps
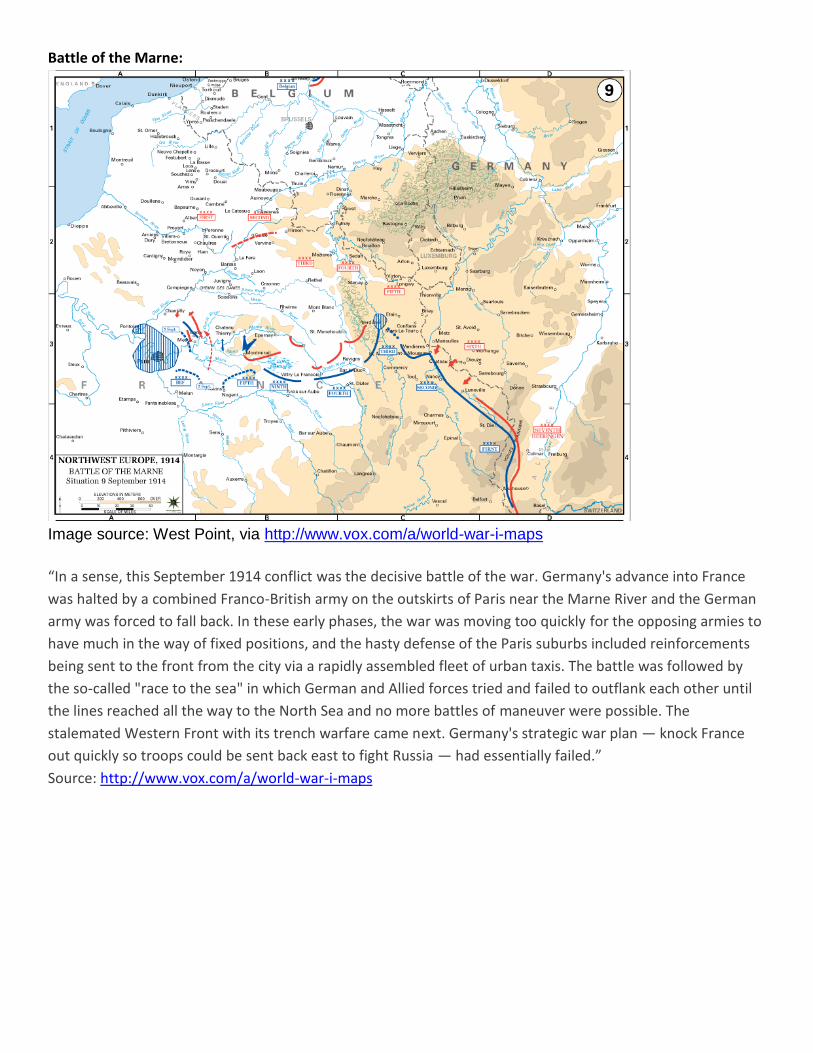
Battle of the Marne:
Image source: West Point, via http://www.vox.com/a/world-war-i-maps
“In a sense, this September 1914 conflict was the decisive battle of the war. Germany's advance into France
was halted by a combined Franco-British army on the outskirts of Paris near the Marne River and the German
army was forced to fall back. In these early phases, the war was moving too quickly for the opposing armies to
have much in the way of fixed positions, and the hasty defense of the Paris suburbs included reinforcements
being sent to the front from the city via a rapidly assembled fleet of urban taxis. The battle was followed by
the so-called "race to the sea" in which German and Allied forces tried and failed to outflank each other until
the lines reached all the way to the North Sea and no more battles of maneuver were possible. The
stalemated Western Front with its trench warfare came next. Germany's strategic war plan — knock France
out quickly so troops could be sent back east to fight Russia — had essentially failed.”
Source: http://www.vox.com/a/world-war-i-maps

Gallipoli Campaign:
Image source: http://www.vox.com/a/world-war-i-maps
“British forces, with assistance from the French navy, hatched a daring plan for an amphibious assault on the
Gallipoli Peninsula in Turkey in the winter of 1915. Had they succeeded in capturing the peninsula, Allied naval
forces could have sailed through the Dardanelles Strait up into the Sea of Marmara and supported an attack
on the Ottoman Empire's capital of Istanbul. That would have opened the door to direct Allied communication
between the Western and Eastern Fronts. Instead, Turkey kept the Allied troops bottled up and after months
of fighting, they retreated in early 1916. Heavy participation of volunteers from Australia and New Zealand in
the campaign makes it an iconic moment in those nations' military histories even as the Turkish victory is
celebrated in that country.”
Source: http://www.vox.com/a/world-war-i-maps
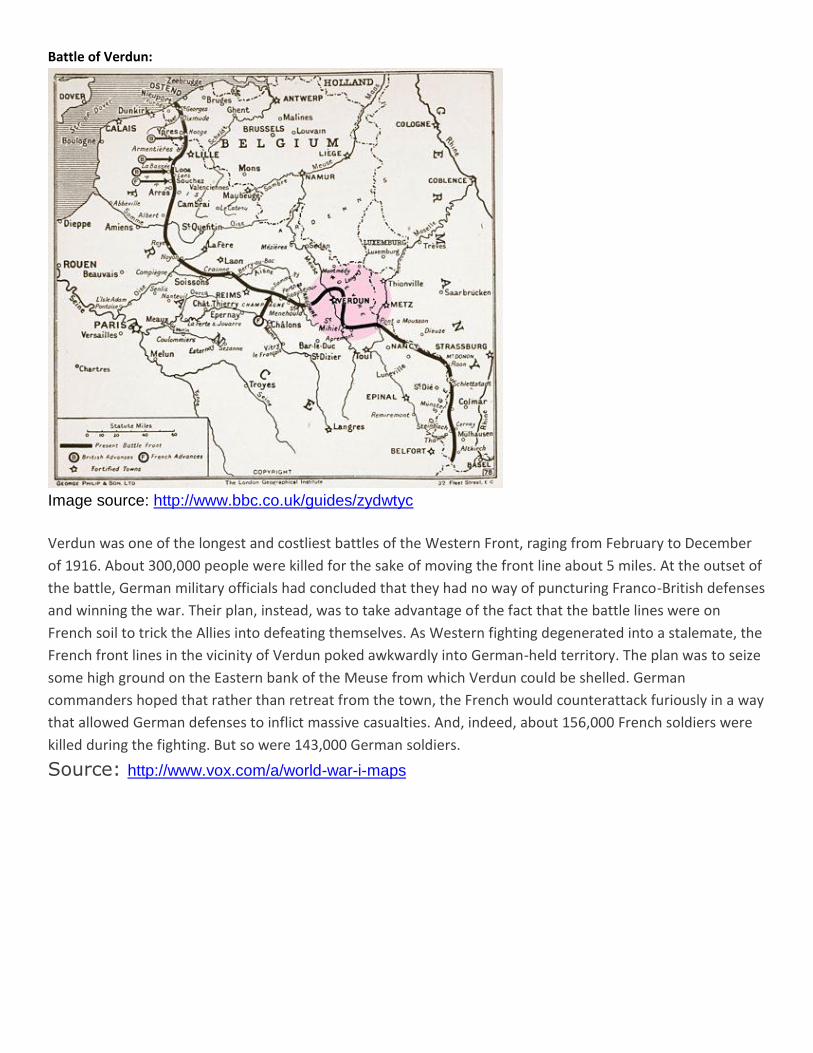
Battle of Verdun:
Image source: http://www.bbc.co.uk/guides/zydwtyc
Verdun was one of the longest and costliest battles of the Western Front, raging from February to December
of 1916. About 300,000 people were killed for the sake of moving the front line about 5 miles. At the outset of
the battle, German military officials had concluded that they had no way of puncturing Franco-British defenses
and winning the war. Their plan, instead, was to take advantage of the fact that the battle lines were on
French soil to trick the Allies into defeating themselves. As Western fighting degenerated into a stalemate, the
French front lines in the vicinity of Verdun poked awkwardly into German-held territory. The plan was to seize
some high ground on the Eastern bank of the Meuse from which Verdun could be shelled. German
commanders hoped that rather than retreat from the town, the French would counterattack furiously in a way
that allowed German defenses to inflict massive casualties. And, indeed, about 156,000 French soldiers were
killed during the fighting. But so were 143,000 German soldiers.
Source: http://www.vox.com/a/world-war-i-maps
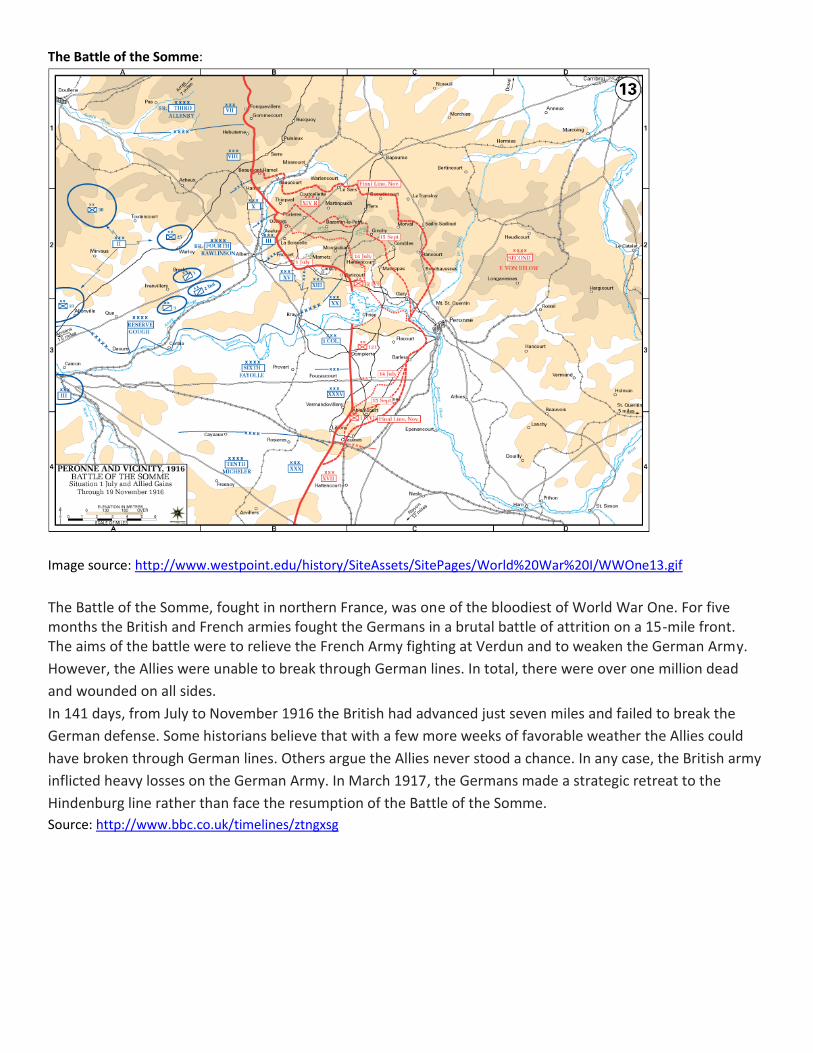
The Battle of the Somme:
Image source: http://www.westpoint.edu/history/SiteAssets/SitePages/World%20War%20I/WWOne13.gif
The Battle of the Somme, fought in northern France, was one of the bloodiest of World War One. For five months the British and French armies fought the Germans in a brutal battle of attrition on a 15-mile front. The aims of the battle were to relieve the French Army fighting at Verdun and to weaken the German Army.
However, the Allies were unable to break through German lines. In total, there were over one million dead
and wounded on all sides.
In 141 days, from July to November 1916 the British had advanced just seven miles and failed to break the
German defense. Some historians believe that with a few more weeks of favorable weather the Allies could
have broken through German lines. Others argue the Allies never stood a chance. In any case, the British army
inflicted heavy losses on the German Army. In March 1917, the Germans made a strategic retreat to the
Hindenburg line rather than face the resumption of the Battle of the Somme.
Source: http://www.bbc.co.uk/timelines/ztngxsg
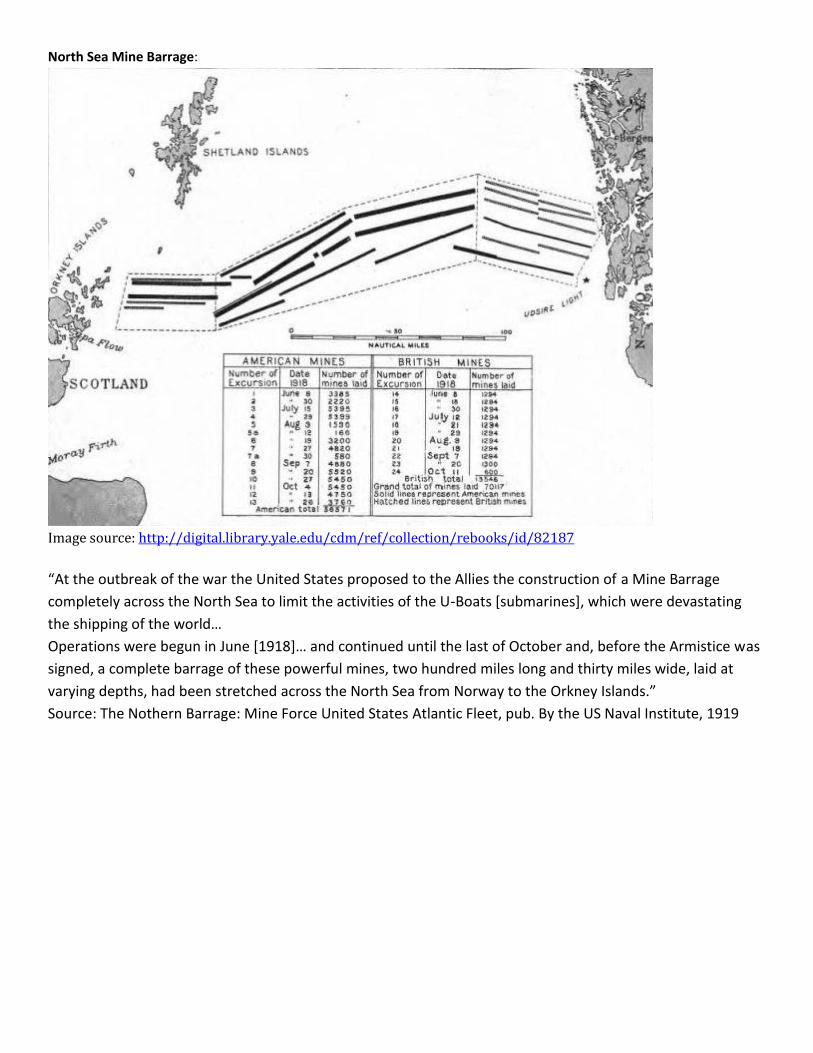
North Sea Mine Barrage:
Image source: http://digital.library.yale.edu/cdm/ref/collection/rebooks/id/82187
“At the outbreak of the war the United States proposed to the Allies the construction of a Mine Barrage
completely across the North Sea to limit the activities of the U-Boats [submarines], which were devastating
the shipping of the world…
Operations were begun in June [1918]… and continued until the last of October and, before the Armistice was
signed, a complete barrage of these powerful mines, two hundred miles long and thirty miles wide, laid at
varying depths, had been stretched across the North Sea from Norway to the Orkney Islands.”
Source: The Nothern Barrage: Mine Force United States Atlantic Fleet, pub. By the US Naval Institute, 1919
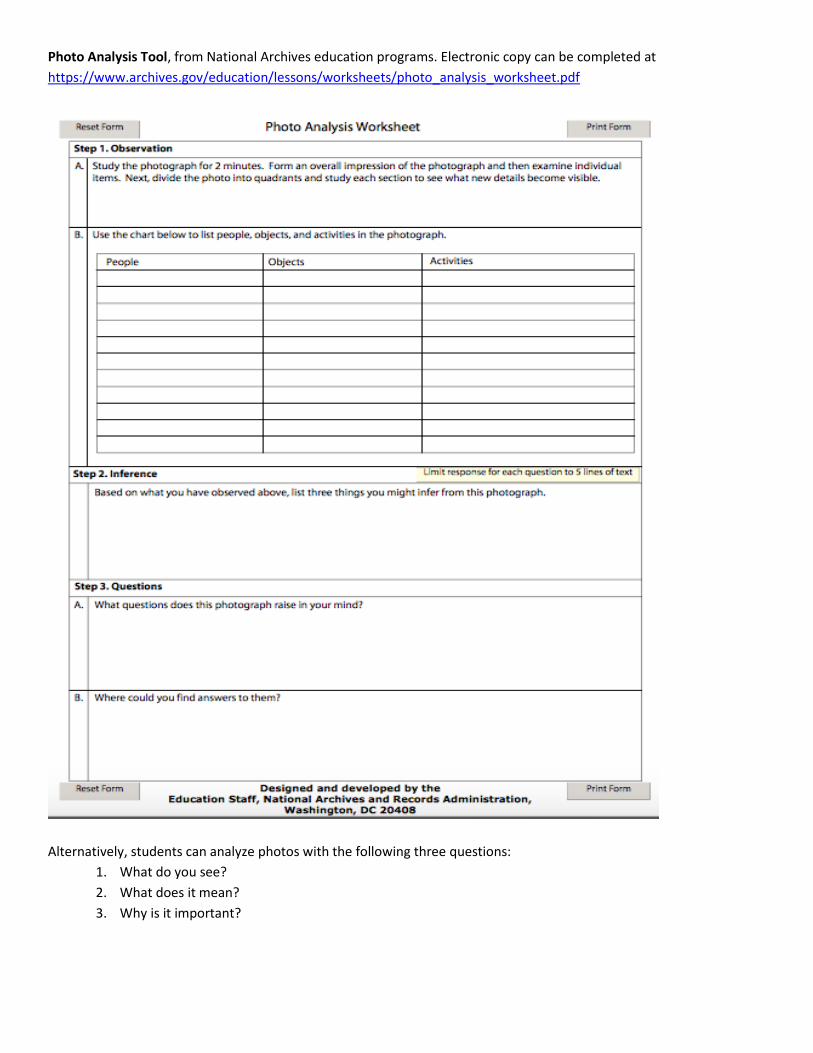
Photo Analysis Tool, from National Archives education programs. Electronic copy can be completed at
https://www.archives.gov/education/lessons/worksheets/photo_analysis_worksheet.pdf
Alternatively, students can analyze photos with the following three questions:
1. What do you see?
2. What does it mean?
3. Why is it important?
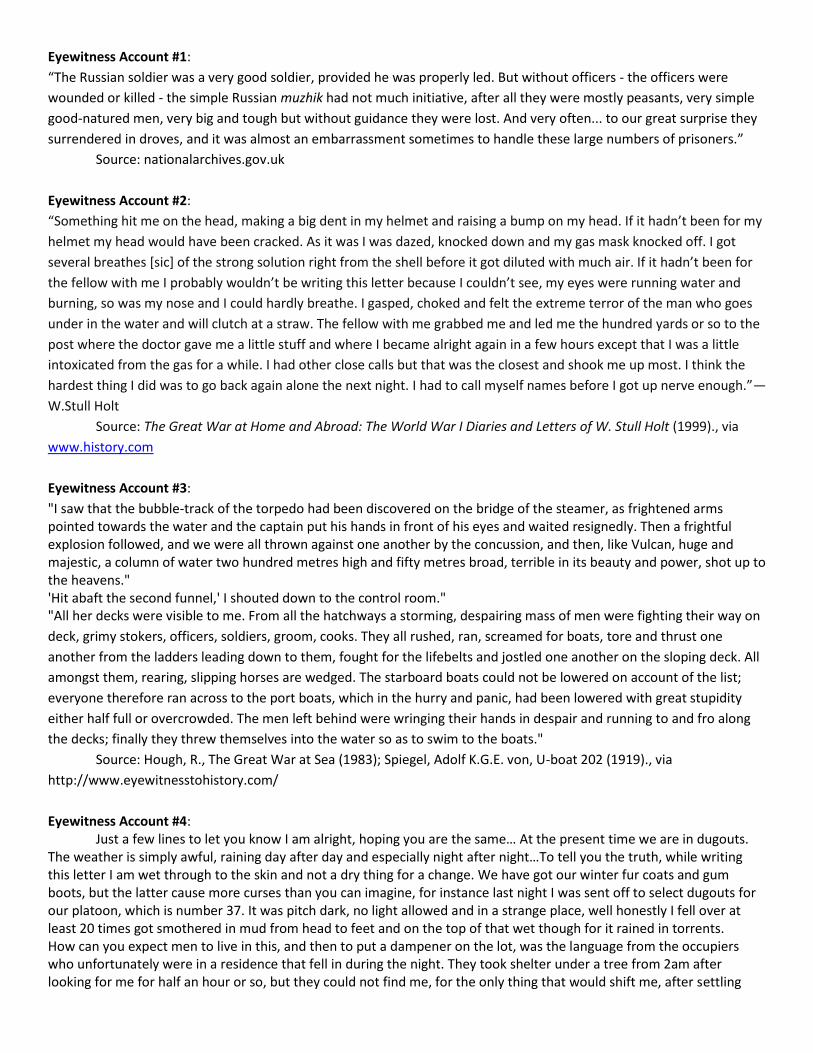
Eyewitness Account #1:
“The Russian soldier was a very good soldier, provided he was properly led. But without officers - the officers were
wounded or killed - the simple Russian muzhik had not much initiative, after all they were mostly peasants, very simple
good-natured men, very big and tough but without guidance they were lost. And very often... to our great surprise they
surrendered in droves, and it was almost an embarrassment sometimes to handle these large numbers of prisoners.”
Source: nationalarchives.gov.uk
Eyewitness Account #2:
“Something hit me on the head, making a big dent in my helmet and raising a bump on my head. If it hadn’t been for my
helmet my head would have been cracked. As it was I was dazed, knocked down and my gas mask knocked off. I got
several breathes [sic] of the strong solution right from the shell before it got diluted with much air. If it hadn’t been for
the fellow with me I probably wouldn’t be writing this letter because I couldn’t see, my eyes were running water and
burning, so was my nose and I could hardly breathe. I gasped, choked and felt the extreme terror of the man who goes
under in the water and will clutch at a straw. The fellow with me grabbed me and led me the hundred yards or so to the
post where the doctor gave me a little stuff and where I became alright again in a few hours except that I was a little
intoxicated from the gas for a while. I had other close calls but that was the closest and shook me up most. I think the
hardest thing I did was to go back again alone the next night. I had to call myself names before I got up nerve enough.”—
W.Stull Holt
Source: The Great War at Home and Abroad: The World War I Diaries and Letters of W. Stull Holt (1999)., via
www.history.com
Eyewitness Account #3:
"I saw that the bubble-track of the torpedo had been discovered on the bridge of the steamer, as frightened arms pointed towards the water and the captain put his hands in front of his eyes and waited resignedly. Then a frightful explosion followed, and we were all thrown against one another by the concussion, and then, like Vulcan, huge and majestic, a column of water two hundred metres high and fifty metres broad, terrible in its beauty and power, shot up to the heavens." 'Hit abaft the second funnel,' I shouted down to the control room." "All her decks were visible to me. From all the hatchways a storming, despairing mass of men were fighting their way on
deck, grimy stokers, officers, soldiers, groom, cooks. They all rushed, ran, screamed for boats, tore and thrust one
another from the ladders leading down to them, fought for the lifebelts and jostled one another on the sloping deck. All
amongst them, rearing, slipping horses are wedged. The starboard boats could not be lowered on account of the list;
everyone therefore ran across to the port boats, which in the hurry and panic, had been lowered with great stupidity
either half full or overcrowded. The men left behind were wringing their hands in despair and running to and fro along
the decks; finally they threw themselves into the water so as to swim to the boats."
Source: Hough, R., The Great War at Sea (1983); Spiegel, Adolf K.G.E. von, U-boat 202 (1919)., via
http://www.eyewitnesstohistory.com/
Eyewitness Account #4: Just a few lines to let you know I am alright, hoping you are the same… At the present time we are in dugouts.
The weather is simply awful, raining day after day and especially night after night…To tell you the truth, while writing this letter I am wet through to the skin and not a dry thing for a change. We have got our winter fur coats and gum boots, but the latter cause more curses than you can imagine, for instance last night I was sent off to select dugouts for our platoon, which is number 37. It was pitch dark, no light allowed and in a strange place, well honestly I fell over at least 20 times got smothered in mud from head to feet and on the top of that wet though for it rained in torrents. How can you expect men to live in this, and then to put a dampener on the lot, was the language from the occupiers who unfortunately were in a residence that fell in during the night. They took shelter under a tree from 2am after looking for me for half an hour or so, but they could not find me, for the only thing that would shift me, after settling
down, if I may call it that, would be a ‘Jack Johnson’ (shelling)and then I would have no option. While in the trenches last week John and I were up to our knees in water and got our gum boots half full. The line is a bit quiet lately and only now and again do we get a shelling, but one gets used to it. After our stretch this time I shall be looking forward for a short leave for I have been here nearly three months now and we stand a good chance. Well I must now conclude…Yours sincerely Jack Symons
Source: http://www.nationalarchives.gov.uk/education/resources/letters-first-world-war-1915/trenches-knees-
water/
Eyewitness Account #5:
“All this time the shells were going over, so I thought it was as far as we were going to go for the time being… You could
hear our guns were firing from a long way back and the shells were going a long way ahead—big ones… It carried on and
on until you got so used to the bombardment that your brain seemed—not asleep exactly—but all boggled with the
terrible noise… And there was blokes laying everywhere… to might right—there was bodies everywhere and the troops
trying to advance had to jump over them… The machine gun bullets was like a hailstorm. I could see near four hundred
yards ahead and to my right, I reckon, and there wasn’t a man upright in the middle of No Man’s Land. And yet those
poor old Newfoundlanders went straight on. You had to admire them. But thinking about it later, I could weep… [I was
trapped in a shell-hole, with a German machine-gunner targeting me]. I knew what he was doing. I was a machine-
gunner meself, wasn’t I? He’d be holding the two handles of his gun, then he’d tap, tap so it played right across the top
of the hole; then he’d turn the wheel at the bottom to lower the barrel and then he’d tap, tap the other side to bring it
back again… I waited all day and it was a long, long day. And it was hot… [I saw] one man who lost his head and stood up
and tried to run back. He’d got a terrible wound in his leg and what with the heat and everything I expect he’d gone
[crazy]… He didn’t get far. He got peppered. He was dead. “
Source: I Survived, Didn’t I? The Great War Reminiscences of Private ‘Ginger’ Byrne
Eyewitness Account #6:
"We heard strange throbbing noises, and lumbering slowly towards us came three huge mechanical monsters such as we had never seen before. My first impression was that they looked ready to topple on their noses, but their tails and the two little wheels at the back held them down and kept them level. Big metal things they were, with two sets of caterpillar wheels that went right round the body. There was a huge bulge on each side with a door in the bulging part, and machine guns on swivels poked out from either side. The engine, a petrol engine of massive proportions, occupied practically all the inside space. Mounted behind each door was a motor-cycle type of saddle, seat and there was just about enough room left for the belts of ammunition and the drivers… Instead of going on to the German lines the three tanks assigned to us straddled our front line, stopped and then opened up a murderous machine gun fire, enfilading us left and right. There they sat, squat monstrous things, noses stuck up in the air, crushing the sides of our trench out of shape with their machine guns swiveling around and firing like mad… Although, what with the sounds of the engines and the firing in such an enclosed space, no one in the tank could hear him, they finally realised they were on the wrong trench and moved on, frightening the Jerries out of their wits and making them scuttle like frightened rabbits. One of the tanks got caught up on a tree stump and never reached their front line and a second had its rear steering wheels shot off and could not guide itself The crew thought it more prudent to stop, so they told us afterwards, rather than to keep going as they felt they might go out of control and run on until they reached Berlin.” Source: Bert Chaney's account appears in Moynihan, Michael (ed.) People at War 1914-1918 (1973); Liddell Hart,
Basil, The Tanks vol. 1 (1959). Via http://www.eyewitnesstohistory.com/
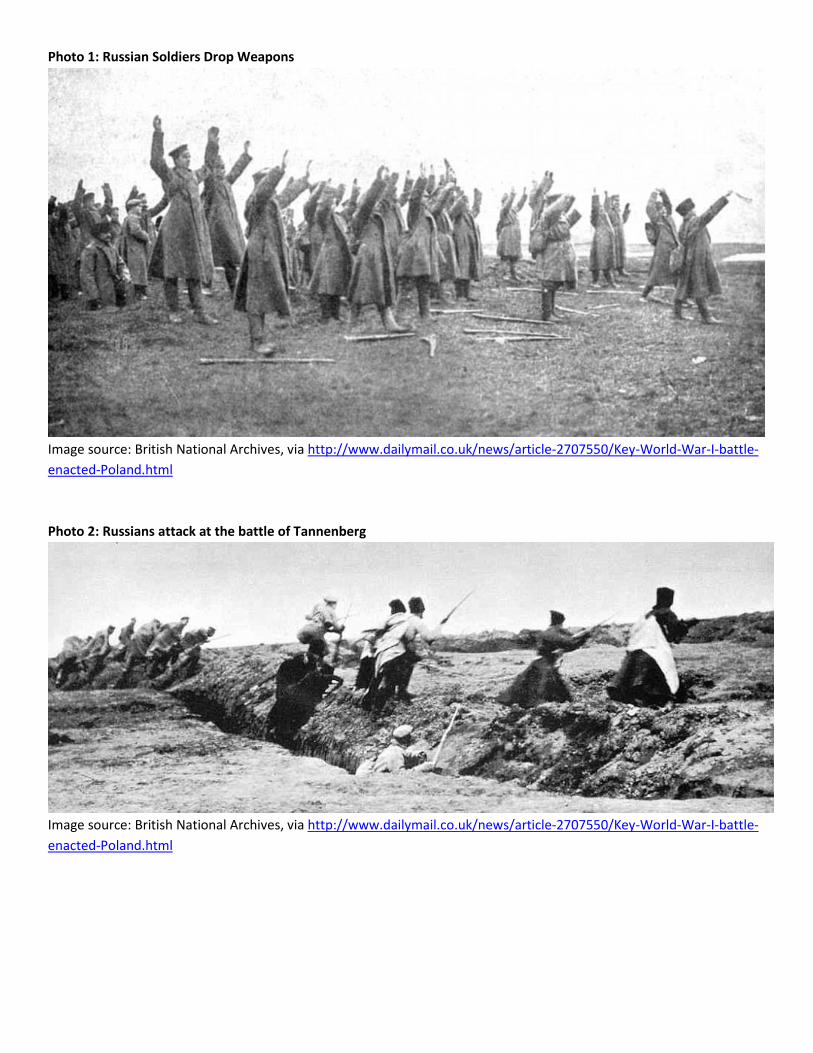
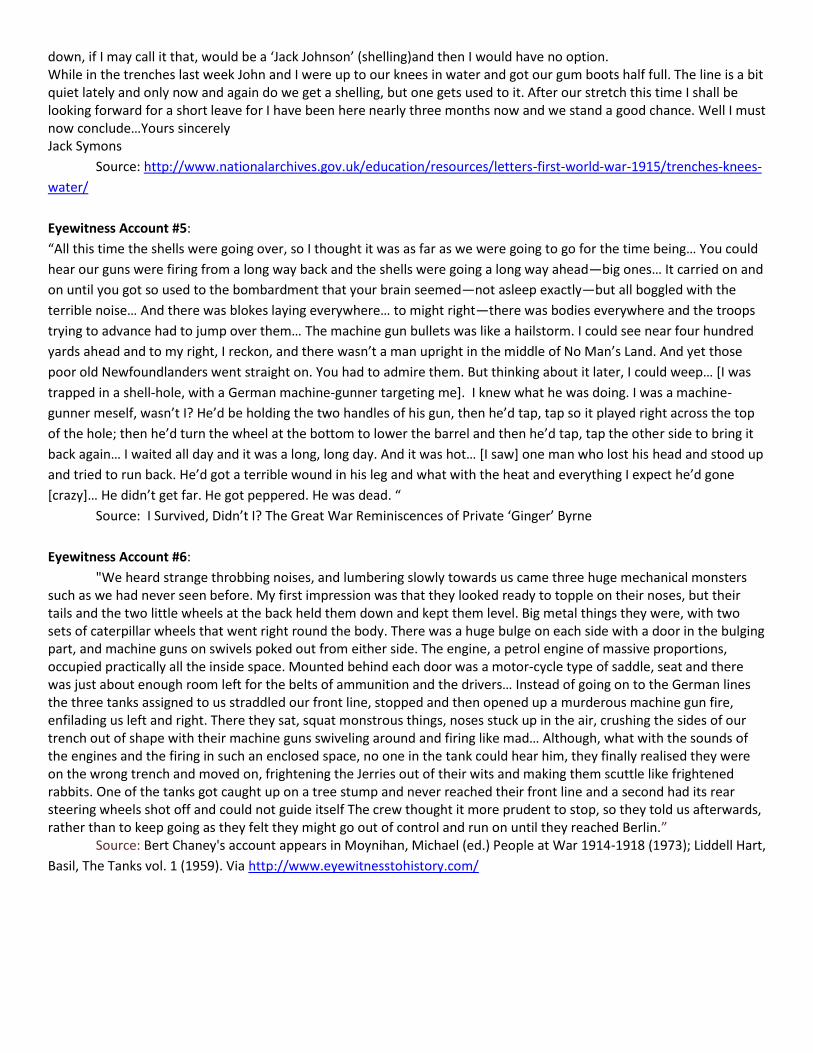
Photo 1: Russian Soldiers Drop Weapons
Image source: British National Archives, via http://www.dailymail.co.uk/news/article-2707550/Key-World-War-I-battle-
enacted-Poland.html
Photo 2: Russians attack at the battle of Tannenberg
Image source: British National Archives, via http://www.dailymail.co.uk/news/article-2707550/Key-World-War-I-battle-
enacted-Poland.html
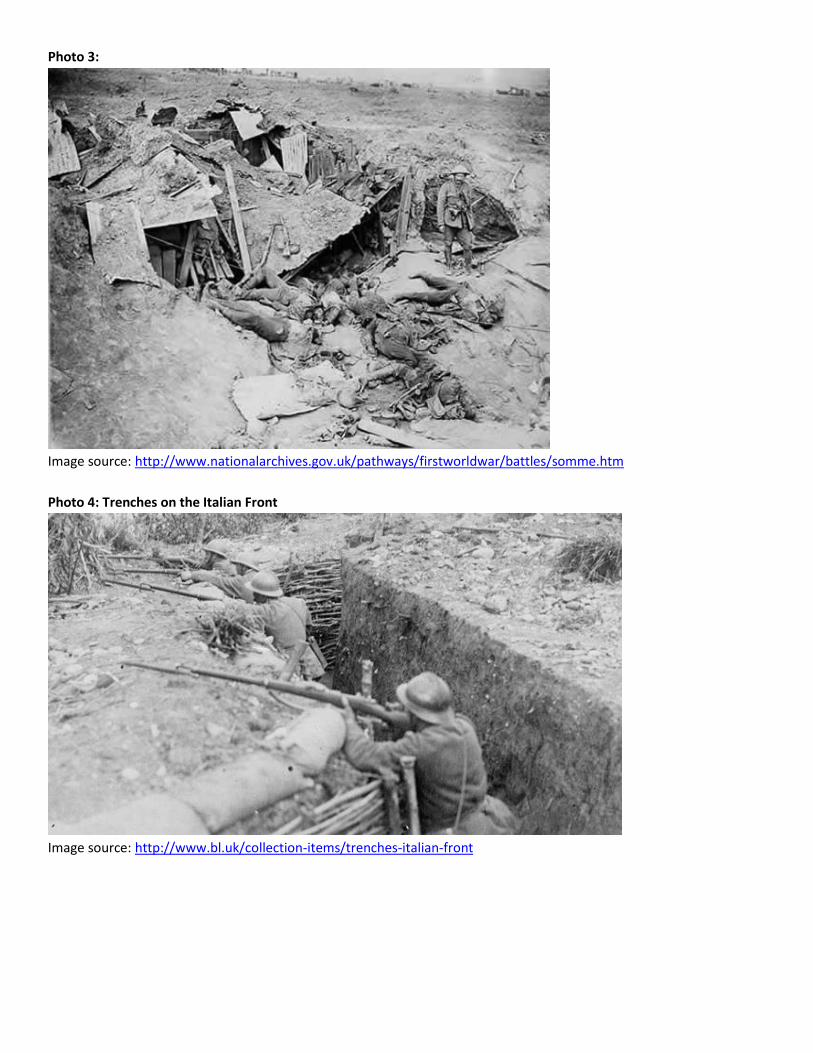
Photo 3:
Image source: http://www.nationalarchives.gov.uk/pathways/firstworldwar/battles/somme.htm
Photo 4: Trenches on the Italian Front
Image source: http://www.bl.uk/collection-items/trenches-italian-front
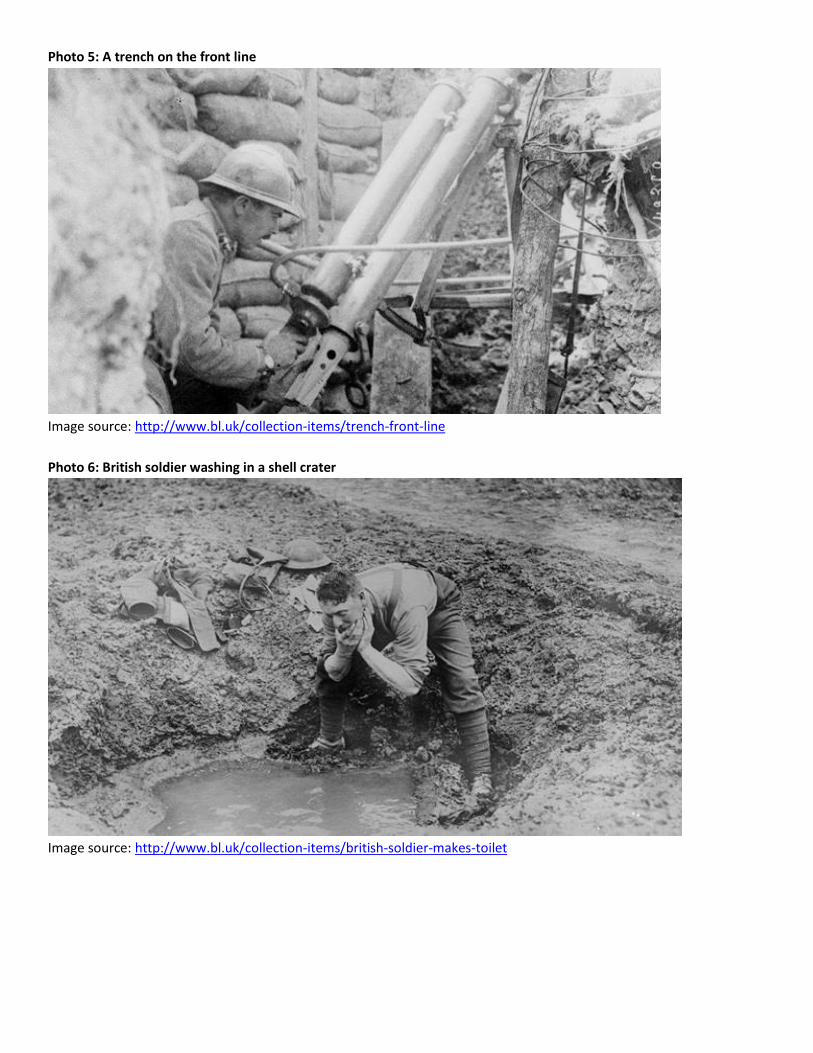
Photo 5: A trench on the front line
Image source: http://www.bl.uk/collection-items/trench-front-line
Photo 6: British soldier washing in a shell crater
Image source: http://www.bl.uk/collection-items/british-soldier-makes-toilet
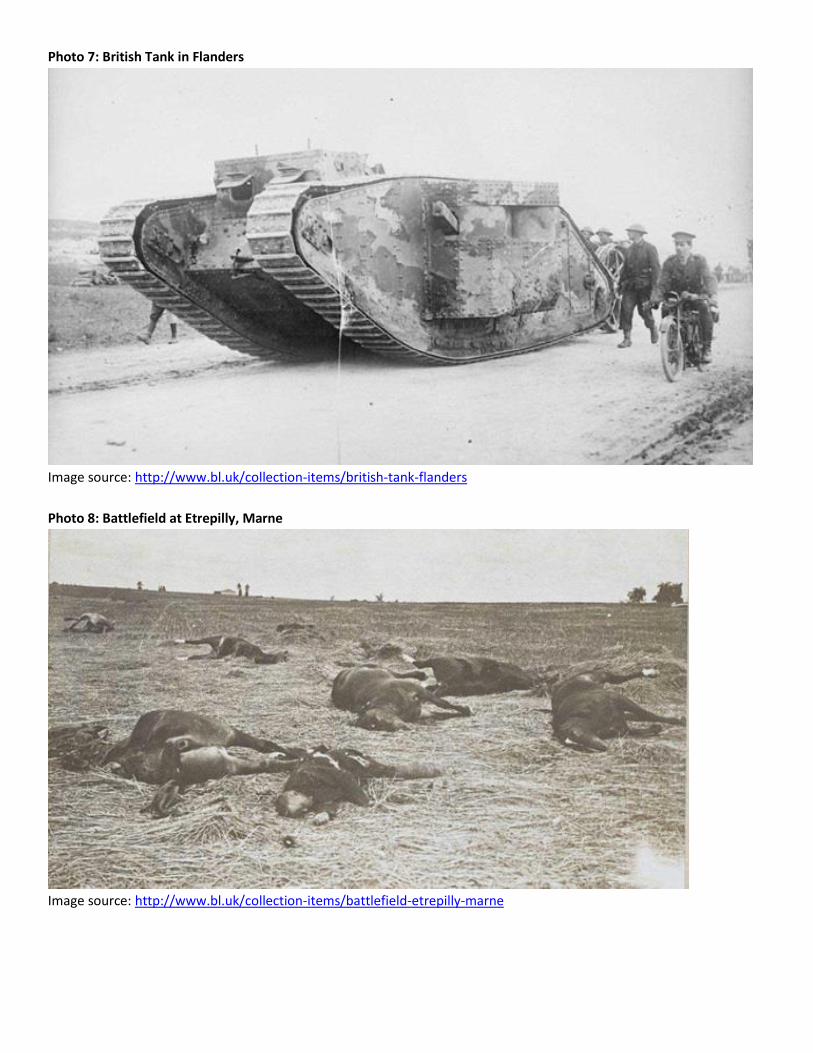
Photo 7: British Tank in Flanders
Image source: http://www.bl.uk/collection-items/british-tank-flanders
Photo 8: Battlefield at Etrepilly, Marne
Image source: http://www.bl.uk/collection-items/battlefield-etrepilly-marne
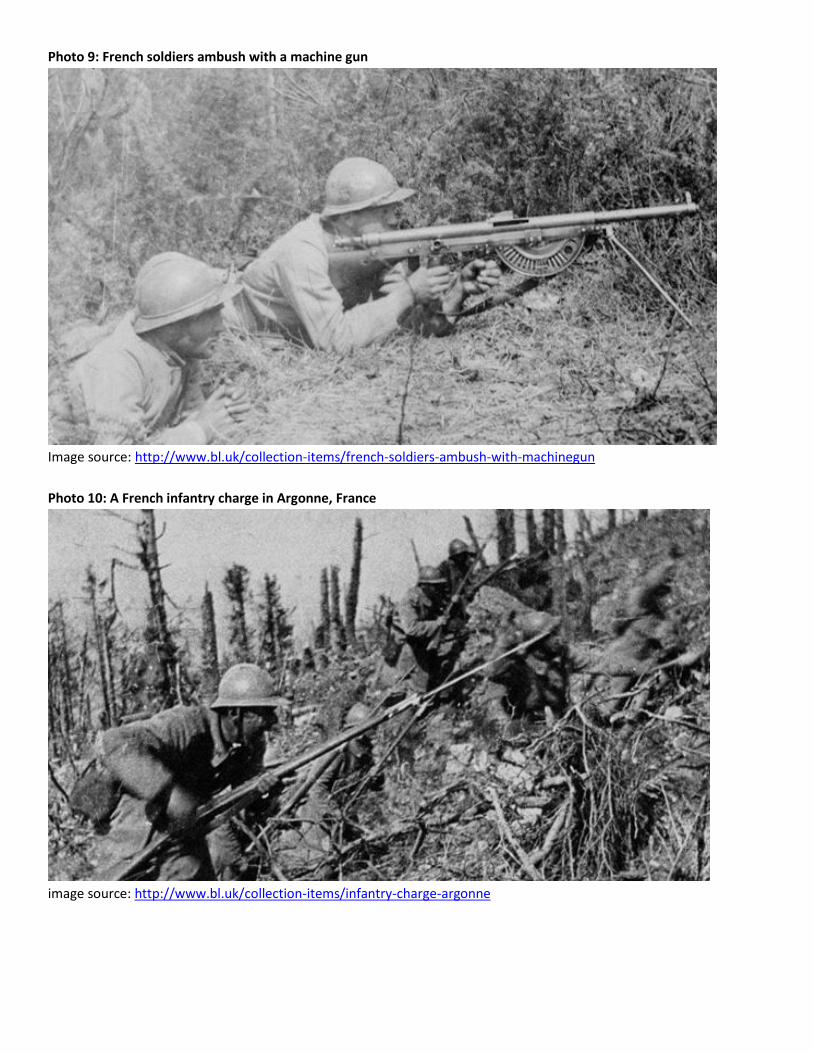
Photo 9: French soldiers ambush with a machine gun
Image source: http://www.bl.uk/collection-items/french-soldiers-ambush-with-machinegun
Photo 10: A French infantry charge in Argonne, France
image source: http://www.bl.uk/collection-items/infantry-charge-argonne
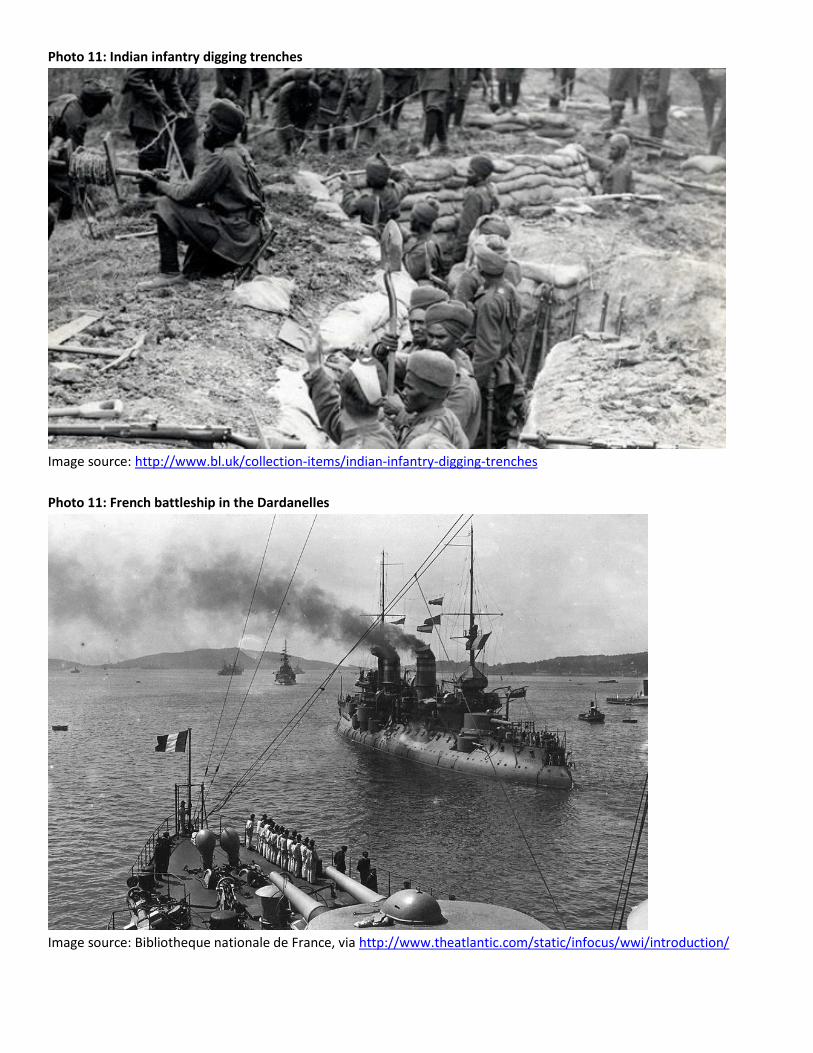
Photo 11: Indian infantry digging trenches
Image source: http://www.bl.uk/collection-items/indian-infantry-digging-trenches
Photo 11: French battleship in the Dardanelles
Image source: Bibliotheque nationale de France, via http://www.theatlantic.com/static/infocus/wwi/introduction/
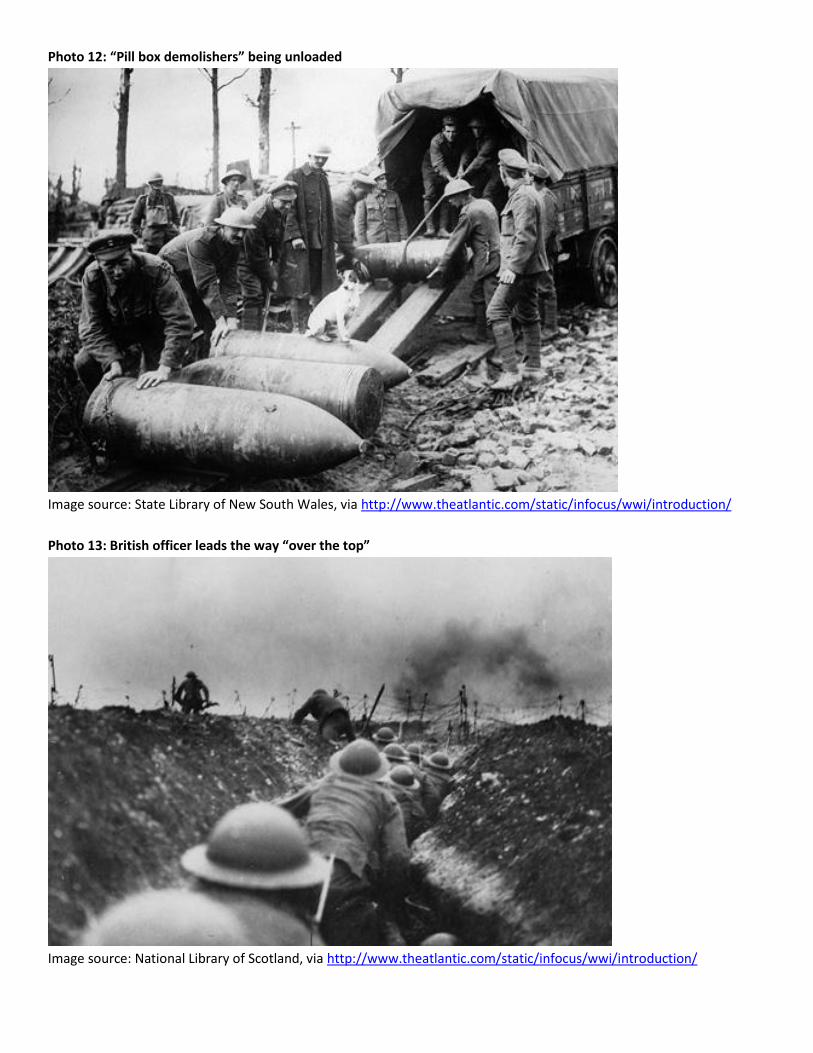
Photo 12: “Pill box demolishers” being unloaded
Image source: State Library of New South Wales, via http://www.theatlantic.com/static/infocus/wwi/introduction/
Photo 13: British officer leads the way “over the top”
Image source: National Library of Scotland, via http://www.theatlantic.com/static/infocus/wwi/introduction/
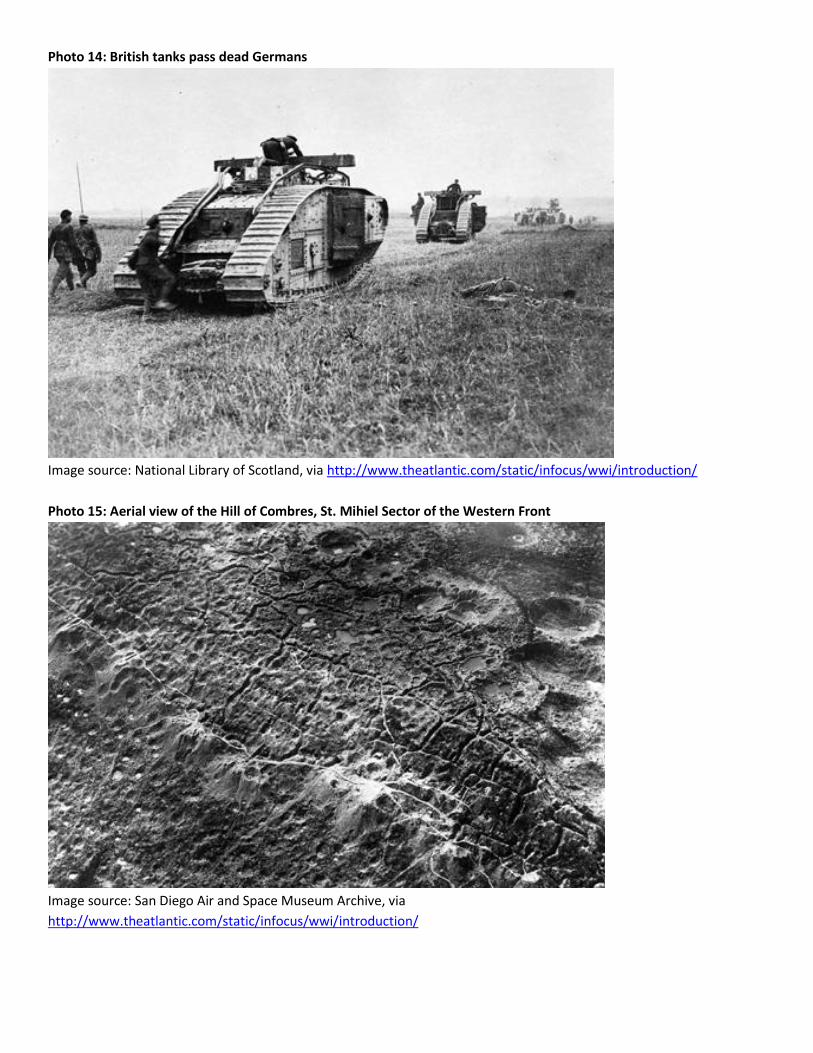
Photo 14: British tanks pass dead Germans
Image source: National Library of Scotland, via http://www.theatlantic.com/static/infocus/wwi/introduction/
Photo 15: Aerial view of the Hill of Combres, St. Mihiel Sector of the Western Front
Image source: San Diego Air and Space Museum Archive, via
http://www.theatlantic.com/static/infocus/wwi/introduction/
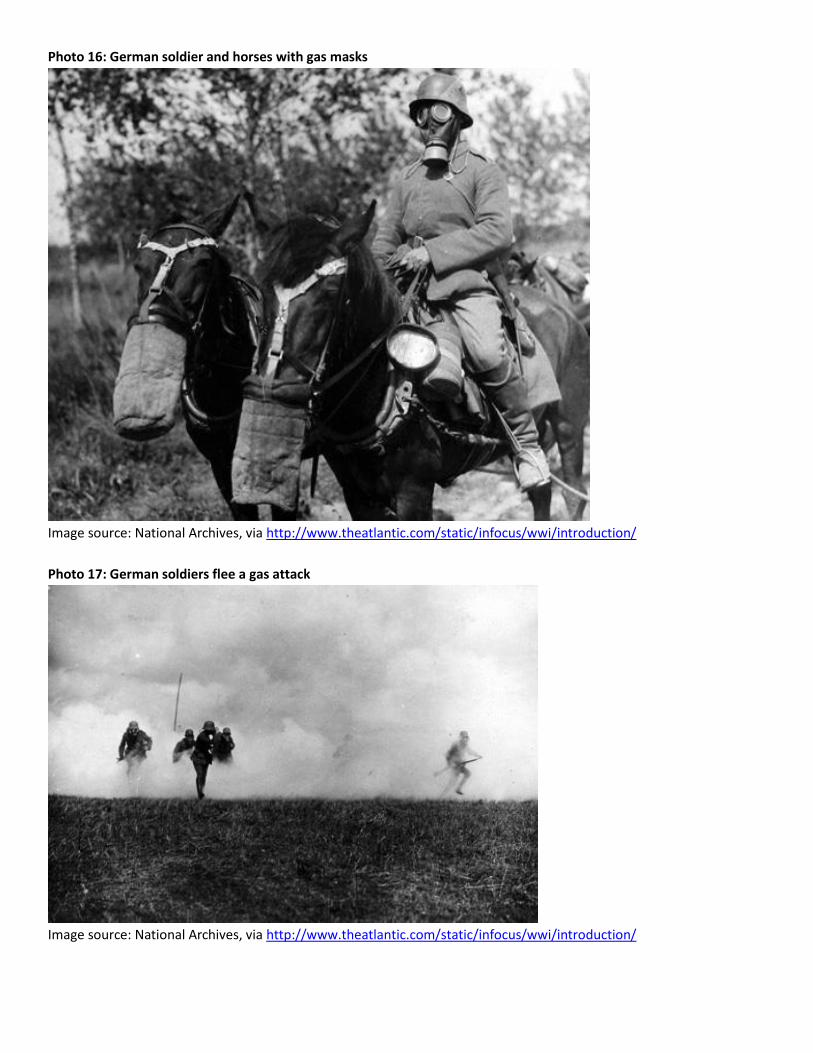
Photo 16: German soldier and horses with gas masks
Image source: National Archives, via http://www.theatlantic.com/static/infocus/wwi/introduction/
Photo 17: German soldiers flee a gas attack
Image source: National Archives, via http://www.theatlantic.com/static/infocus/wwi/introduction/
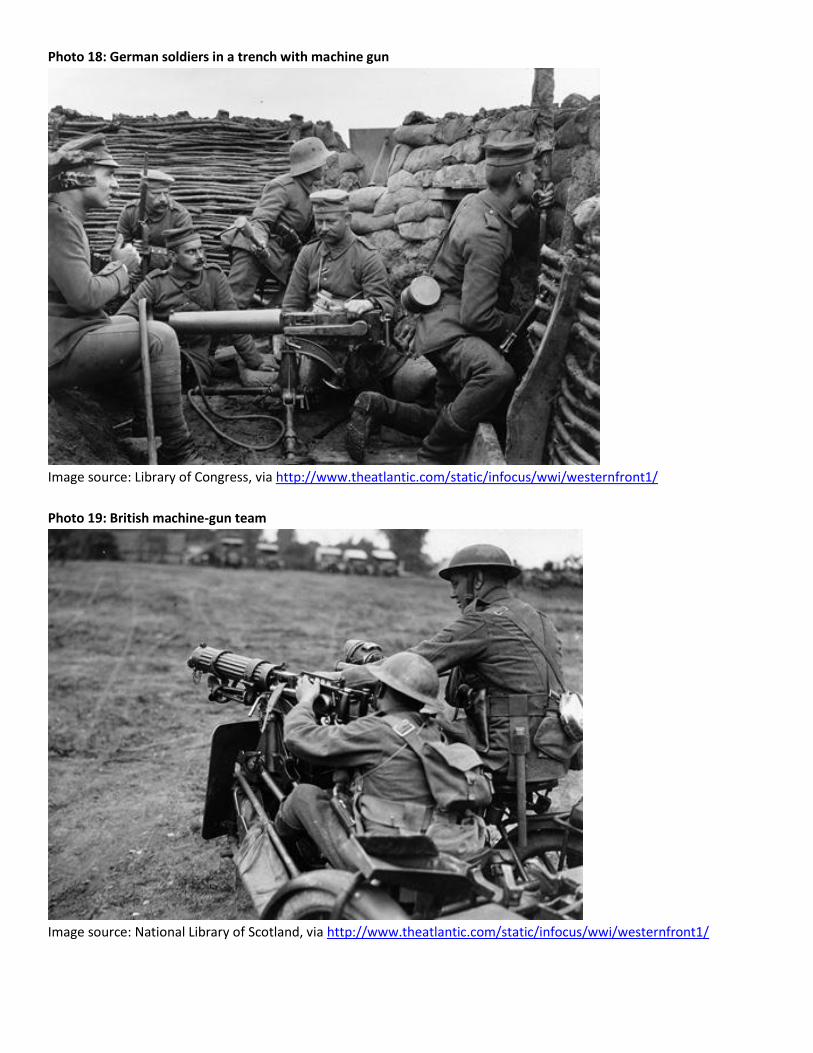
Photo 18: German soldiers in a trench with machine gun
Image source: Library of Congress, via http://www.theatlantic.com/static/infocus/wwi/westernfront1/
Photo 19: British machine-gun team
Image source: National Library of Scotland, via http://www.theatlantic.com/static/infocus/wwi/westernfront1/
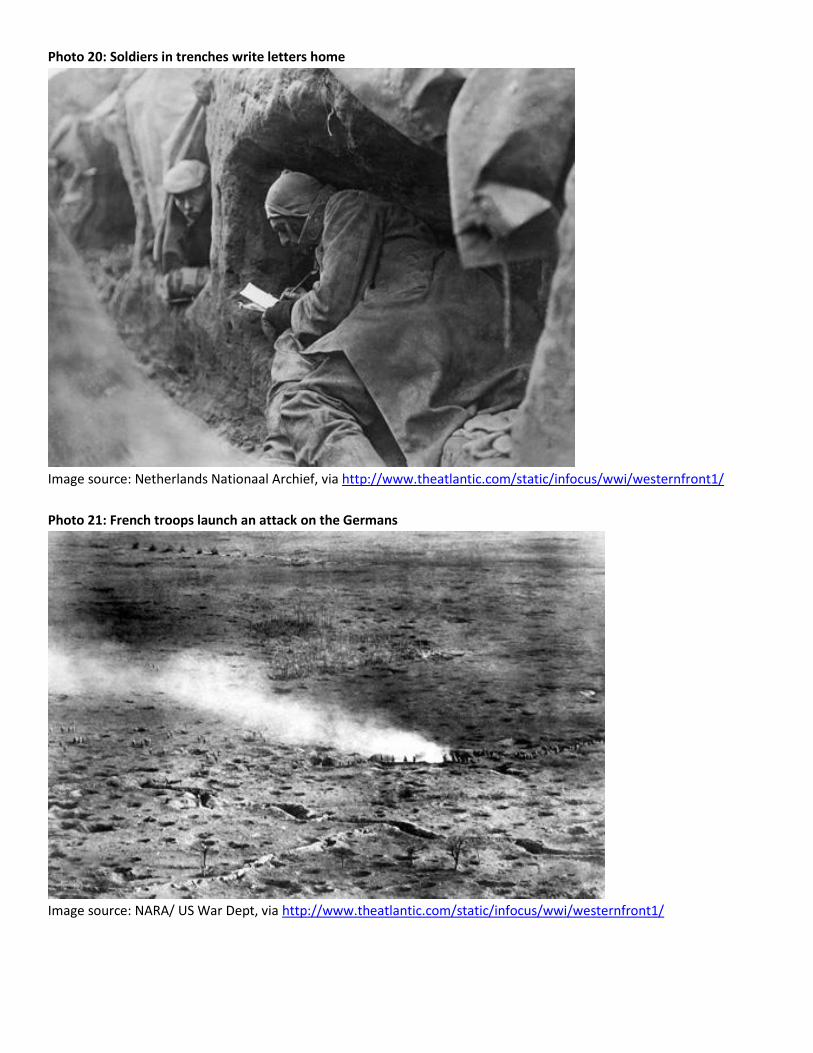
Photo 20: Soldiers in trenches write letters home
Image source: Netherlands Nationaal Archief, via http://www.theatlantic.com/static/infocus/wwi/westernfront1/
Photo 21: French troops launch an attack on the Germans
Image source: NARA/ US War Dept, via http://www.theatlantic.com/static/infocus/wwi/westernfront1/
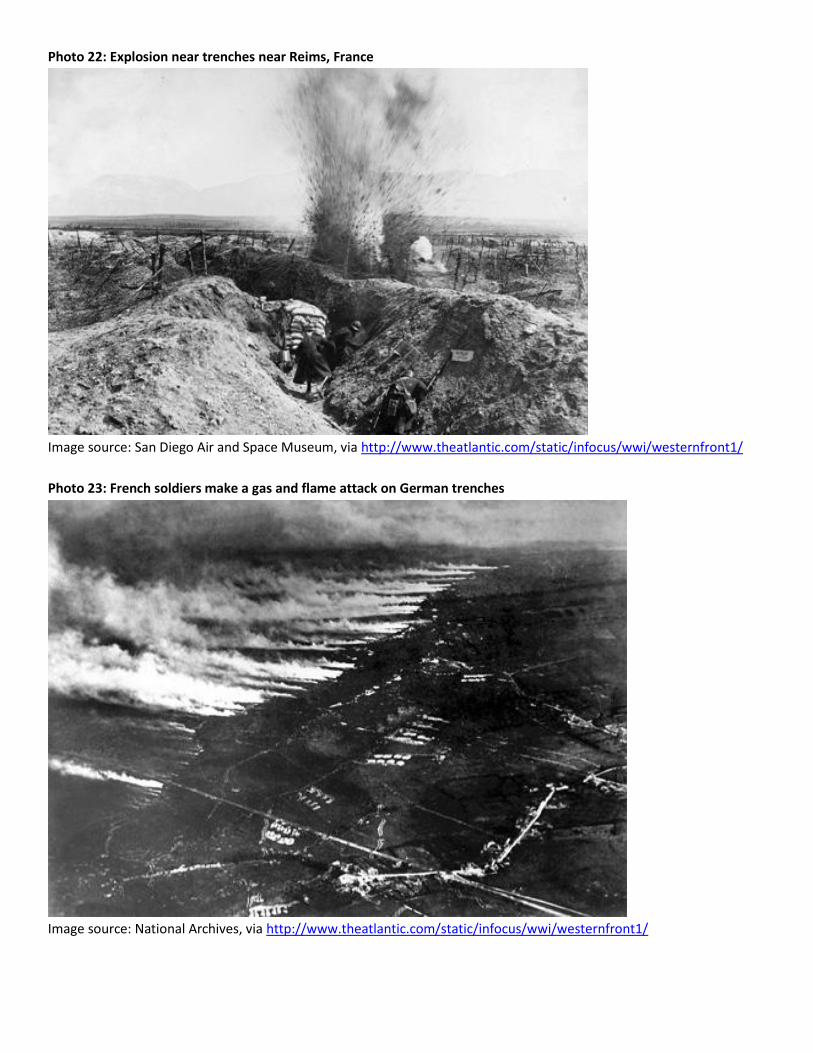
Photo 22: Explosion near trenches near Reims, France
Image source: San Diego Air and Space Museum, via http://www.theatlantic.com/static/infocus/wwi/westernfront1/
Photo 23: French soldiers make a gas and flame attack on German trenches
Image source: National Archives, via http://www.theatlantic.com/static/infocus/wwi/westernfront1/
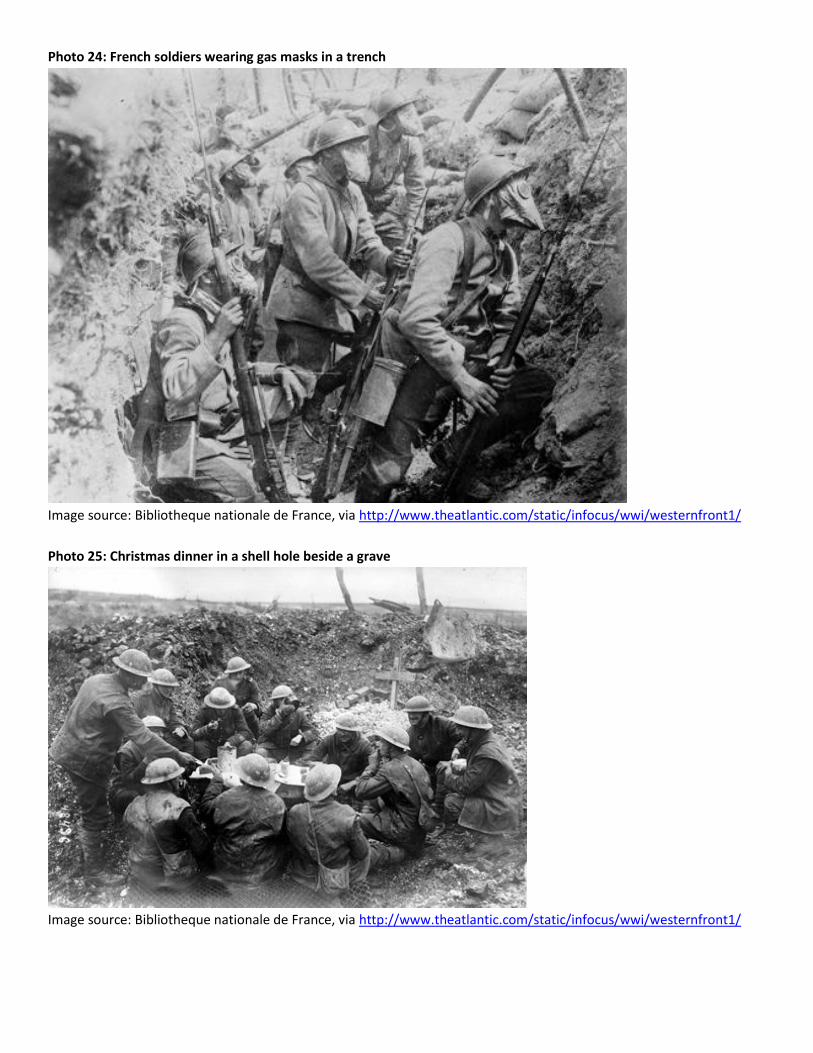
Photo 24: French soldiers wearing gas masks in a trench
Image source: Bibliotheque nationale de France, via http://www.theatlantic.com/static/infocus/wwi/westernfront1/
Photo 25: Christmas dinner in a shell hole beside a grave
Image source: Bibliotheque nationale de France, via http://www.theatlantic.com/static/infocus/wwi/westernfront1/
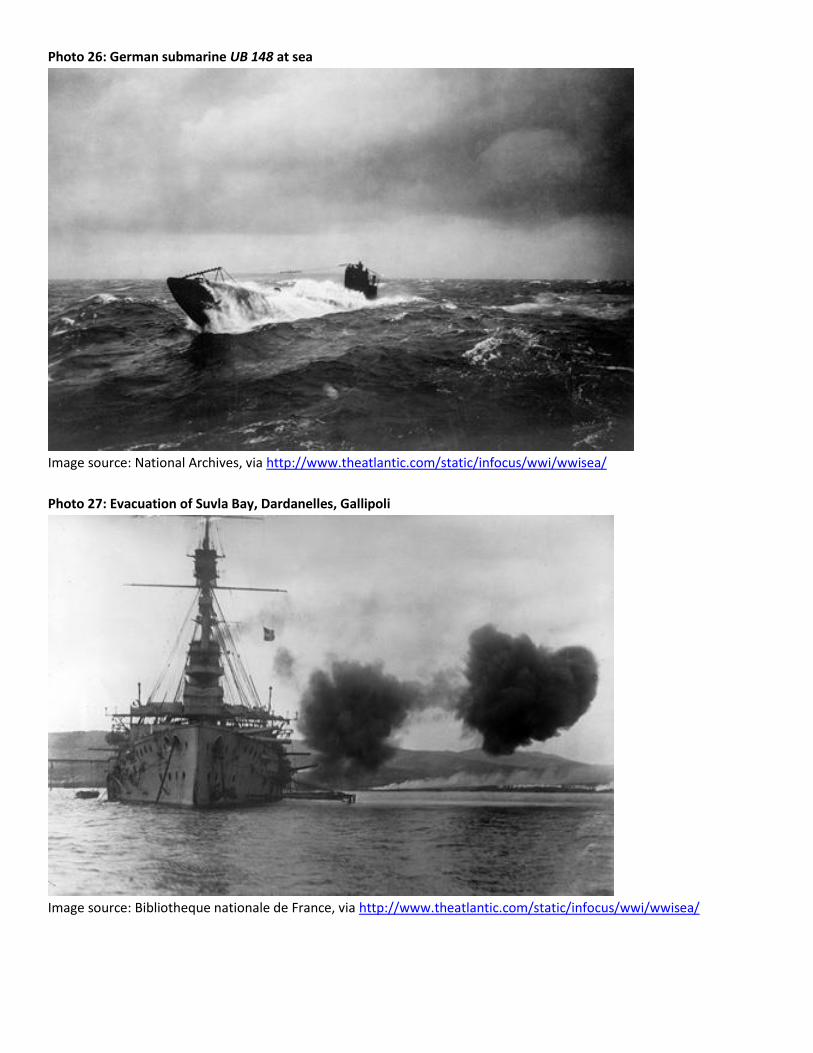
Photo 26: German submarine UB 148 at sea
Image source: National Archives, via http://www.theatlantic.com/static/infocus/wwi/wwisea/
Photo 27: Evacuation of Suvla Bay, Dardanelles, Gallipoli
Image source: Bibliotheque nationale de France, via http://www.theatlantic.com/static/infocus/wwi/wwisea/
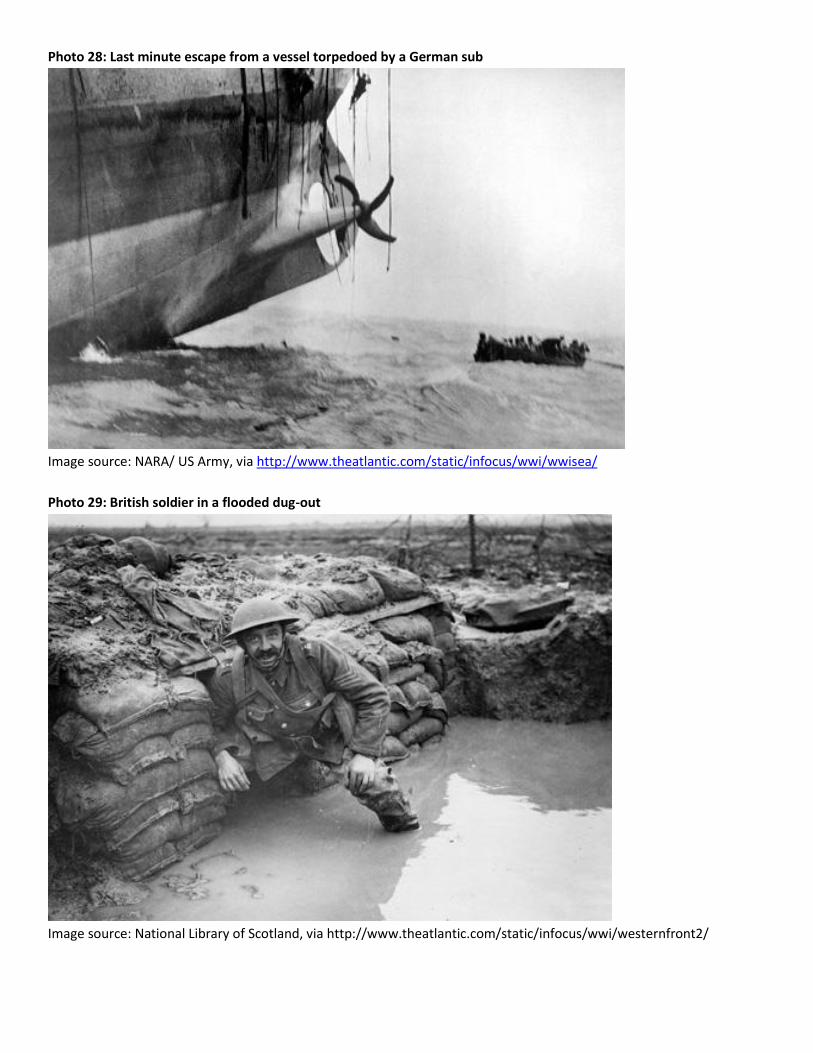
Photo 28: Last minute escape from a vessel torpedoed by a German sub
Image source: NARA/ US Army, via http://www.theatlantic.com/static/infocus/wwi/wwisea/
Photo 29: British soldier in a flooded dug-out
Image source: National Library of Scotland, via http://www.theatlantic.com/static/infocus/wwi/westernfront2/
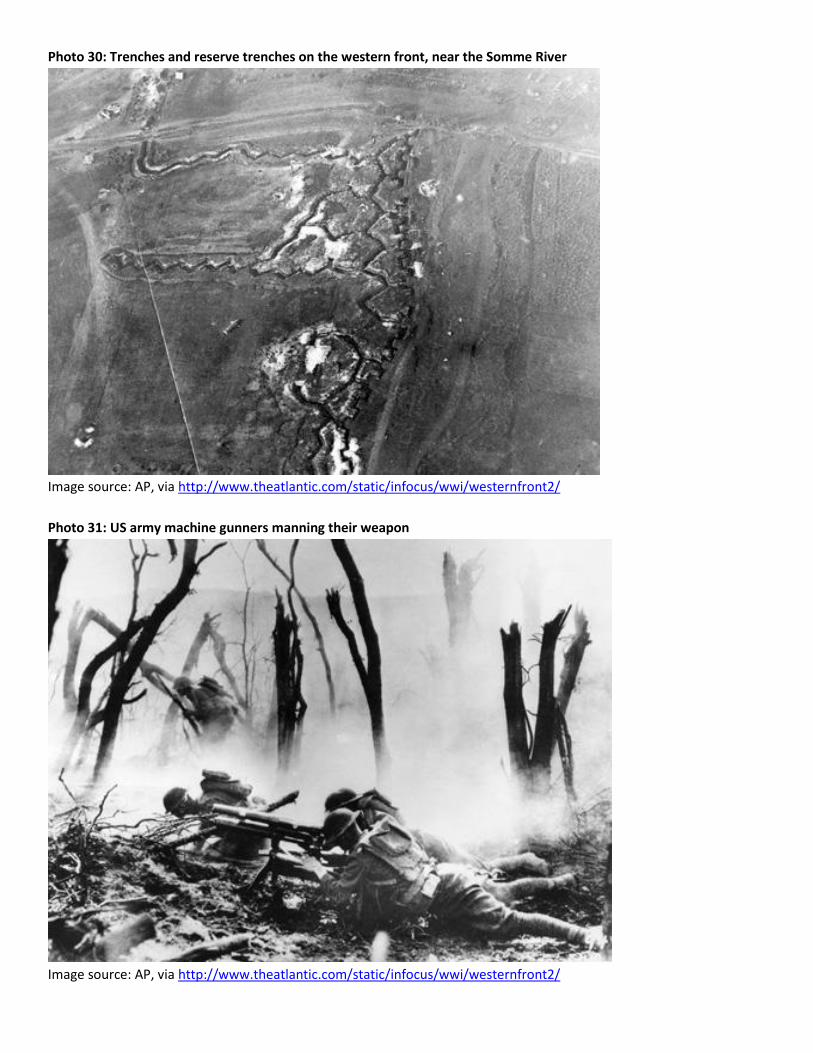
Photo 30: Trenches and reserve trenches on the western front, near the Somme River
Image source: AP, via http://www.theatlantic.com/static/infocus/wwi/westernfront2/
Photo 31: US army machine gunners manning their weapon
Image source: AP, via http://www.theatlantic.com/static/infocus/wwi/westernfront2/
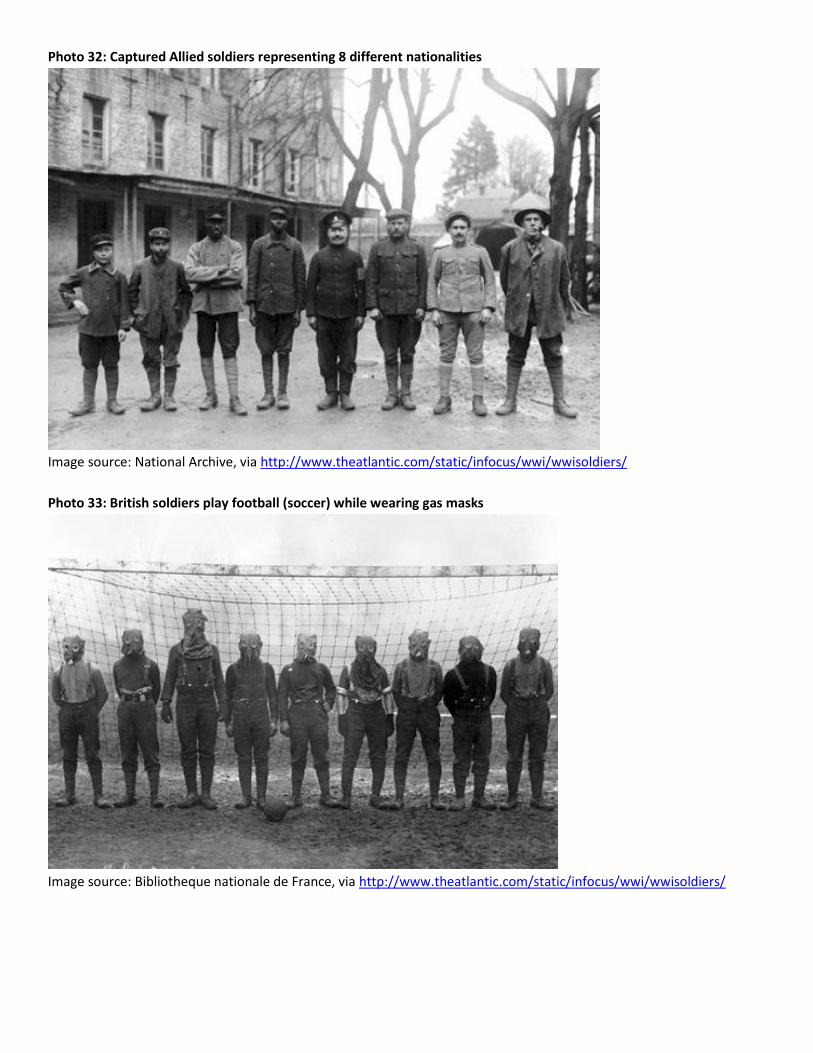
Photo 32: Captured Allied soldiers representing 8 different nationalities
Image source: National Archive, via http://www.theatlantic.com/static/infocus/wwi/wwisoldiers/
Photo 33: British soldiers play football (soccer) while wearing gas masks
Image source: Bibliotheque nationale de France, via http://www.theatlantic.com/static/infocus/wwi/wwisoldiers/
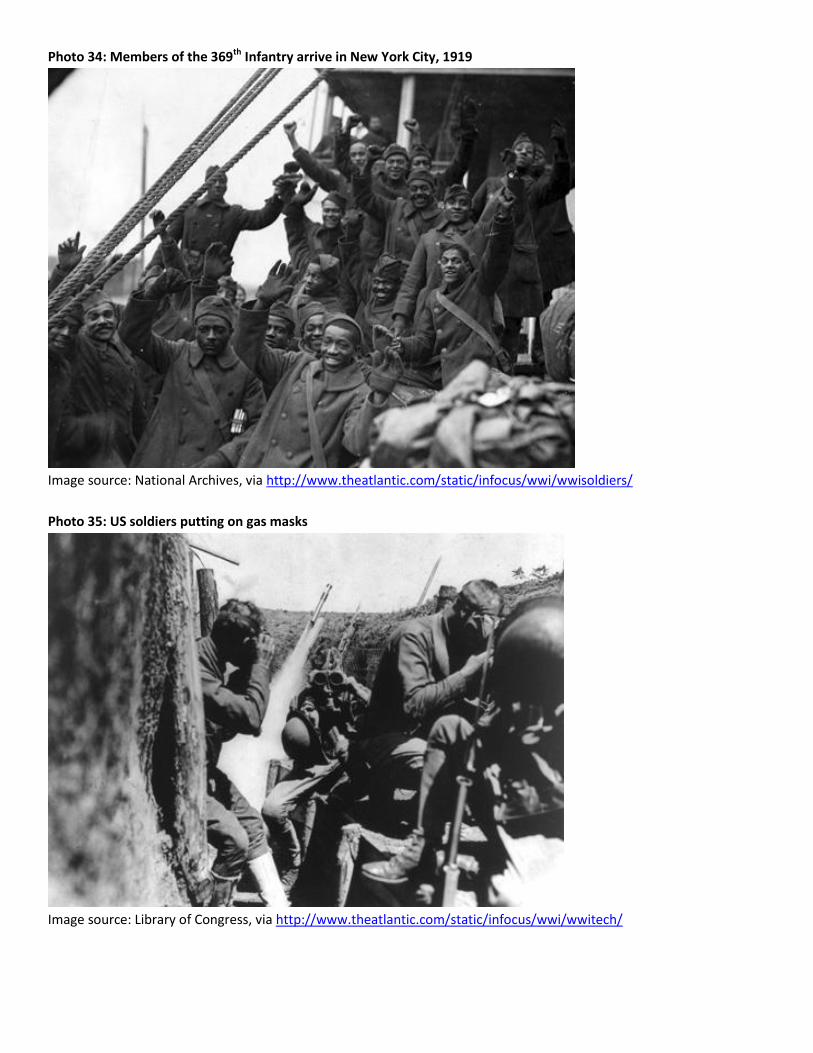
Photo 34: Members of the 369th Infantry arrive in New York City, 1919
Image source: National Archives, via http://www.theatlantic.com/static/infocus/wwi/wwisoldiers/
Photo 35: US soldiers putting on gas masks
Image source: Library of Congress, via http://www.theatlantic.com/static/infocus/wwi/wwitech/
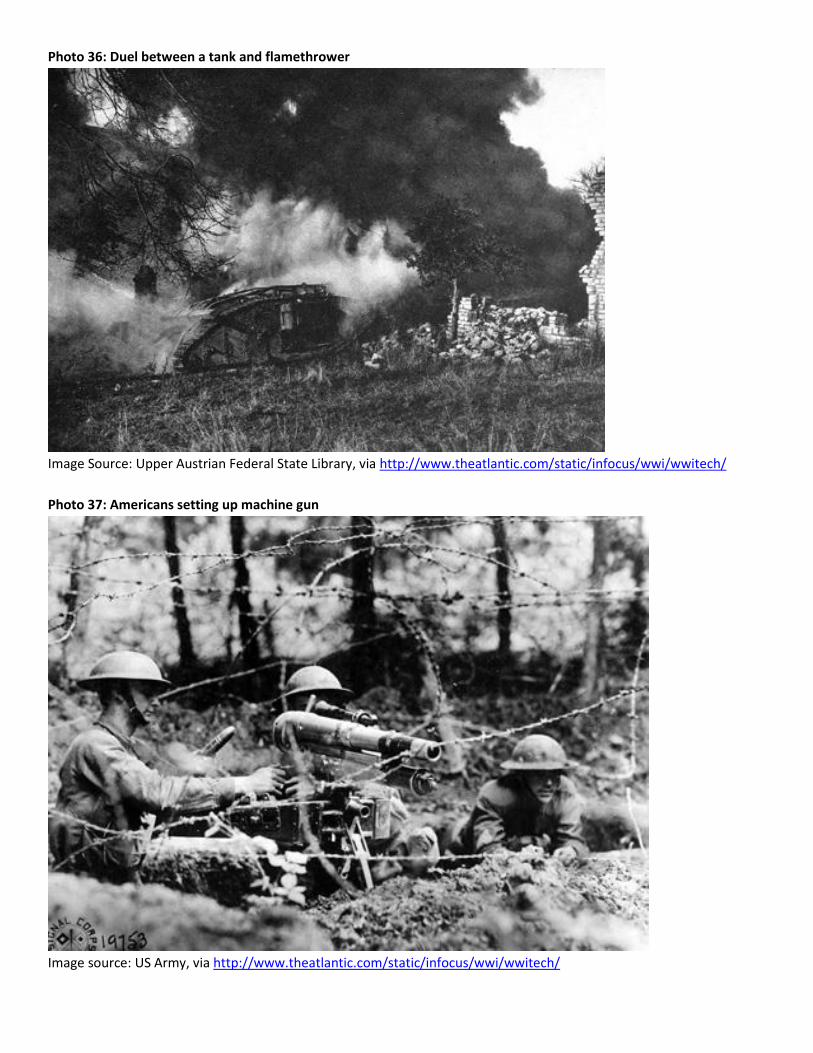
Photo 36: Duel between a tank and flamethrower
Image Source: Upper Austrian Federal State Library, via http://www.theatlantic.com/static/infocus/wwi/wwitech/
Photo 37: Americans setting up machine gun
Image source: US Army, via http://www.theatlantic.com/static/infocus/wwi/wwitech/
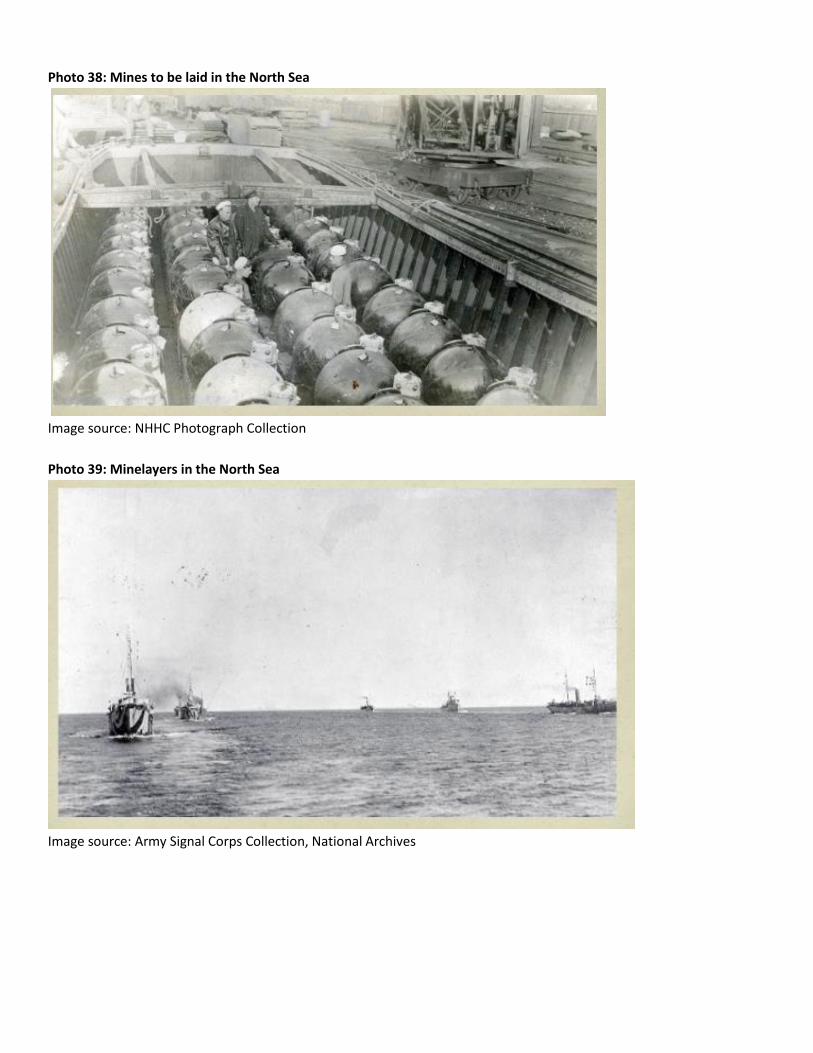
Photo 38: Mines to be laid in the North Sea
Image source: NHHC Photograph Collection
Photo 39: Minelayers in the North Sea
Image source: Army Signal Corps Collection, National Archives
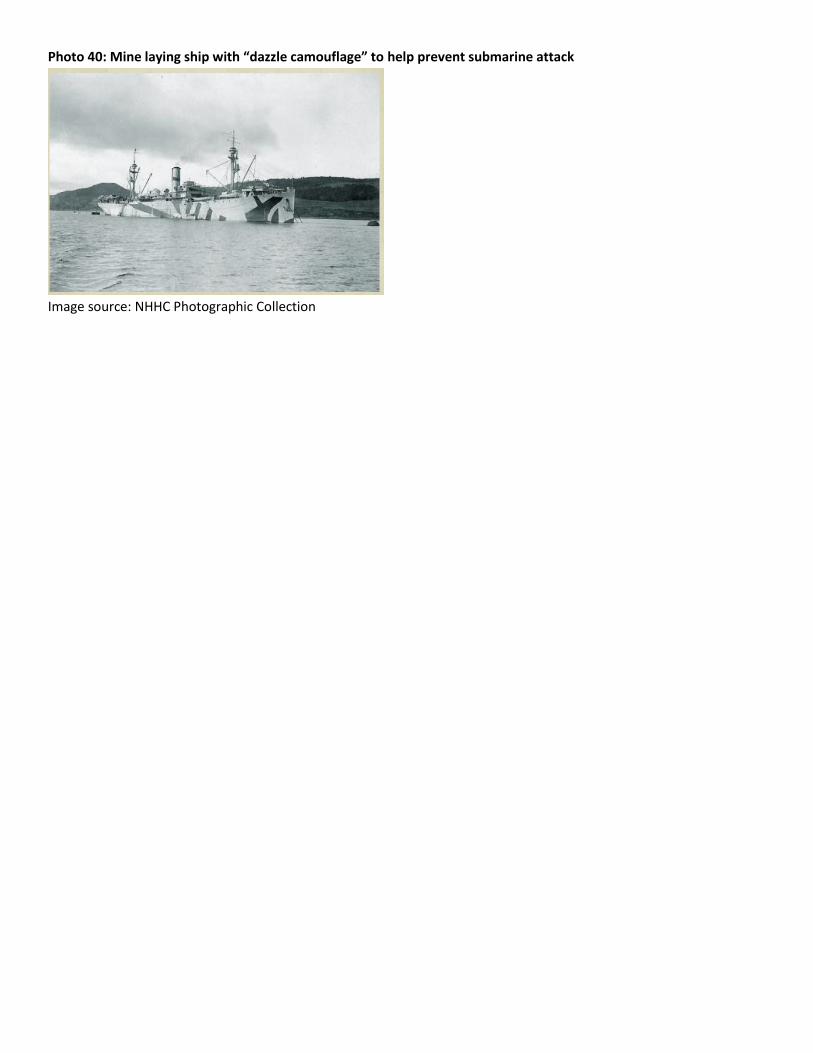
Photo 40: Mine laying ship with “dazzle camouflage” to help prevent submarine attack
Image source: NHHC Photographic Collection
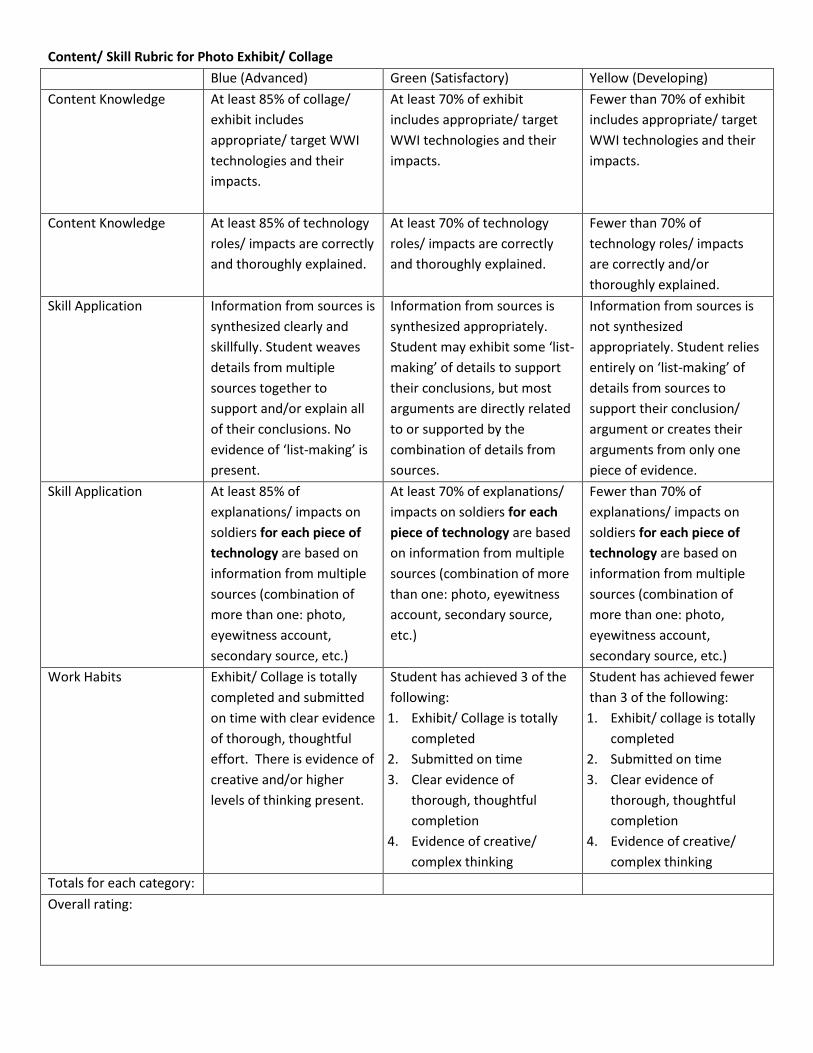
Content/ Skill Rubric for Photo Exhibit/ Collage
Blue (Advanced) Green (Satisfactory) Yellow (Developing)
Content Knowledge At least 85% of collage/
exhibit includes
appropriate/ target WWI
technologies and their
impacts.
At least 70% of exhibit
includes appropriate/ target
WWI technologies and their
impacts.
Fewer than 70% of exhibit
includes appropriate/ target
WWI technologies and their
impacts.
Content Knowledge At least 85% of technology
roles/ impacts are correctly
and thoroughly explained.
At least 70% of technology
roles/ impacts are correctly
and thoroughly explained.
Fewer than 70% of
technology roles/ impacts
are correctly and/or
thoroughly explained.
Skill Application Information from sources is
synthesized clearly and
skillfully. Student weaves
details from multiple
sources together to
support and/or explain all
of their conclusions. No
evidence of ‘list-making’ is
present.
Information from sources is
synthesized appropriately.
Student may exhibit some ‘list-
making’ of details to support
their conclusions, but most
arguments are directly related
to or supported by the
combination of details from
sources.
Information from sources is
not synthesized
appropriately. Student relies
entirely on ‘list-making’ of
details from sources to
support their conclusion/
argument or creates their
arguments from only one
piece of evidence.
Skill Application At least 85% of
explanations/ impacts on
soldiers for each piece of
technology are based on
information from multiple
sources (combination of
more than one: photo,
eyewitness account,
secondary source, etc.)
At least 70% of explanations/
impacts on soldiers for each
piece of technology are based
on information from multiple
sources (combination of more
than one: photo, eyewitness
account, secondary source,
etc.)
Fewer than 70% of
explanations/ impacts on
soldiers for each piece of
technology are based on
information from multiple
sources (combination of
more than one: photo,
eyewitness account,
secondary source, etc.)
Work Habits Exhibit/ Collage is totally
completed and submitted
on time with clear evidence
of thorough, thoughtful
effort. There is evidence of
creative and/or higher
levels of thinking present.
Student has achieved 3 of the
following:
1. Exhibit/ Collage is totally
completed
2. Submitted on time
3. Clear evidence of
thorough, thoughtful
completion
4. Evidence of creative/
complex thinking
Student has achieved fewer
than 3 of the following:
1. Exhibit/ collage is totally
completed
2. Submitted on time
3. Clear evidence of
thorough, thoughtful
completion
4. Evidence of creative/
complex thinking
Totals for each category:
Overall rating:


![Summary Sheet of [REDACTED] Lesson Plan/media/Files/Standards/Professional...Lesson Plan: Candidate will develop a lesson plan in accordance with Hunter’s lesson plan design. Additionally,](https://img.pdfslide.us/doc/110x75/5e5dd8ad01175e06a234aee5/summary-sheet-of-redacted-lesson-mediafilesstandardsprofessional-lesson.jpg)