Embed Size (px)
Citation preview
AIR FORCE SCHOOL HASIMARA
Lesson Plan
Board: CBSE | Class: VIII| Subject: Maths
Chapter Name: Playing With Numbers
Time Allotted For The Lesson
This lesson is divided across five modules. It will be completed in five class meetings
Prerequisite Knowledge
Playing With Numbers: Class VI
Short Description Of The Lesson
In this lesson, learners will be taught to express a number in its general form. They will also learn to use the general form of numbers to solve number tricks and puzzles. Moreover, the learners will also be explained the use of the general form of numbers to find the logic behind the tests of divisibility by 2, 3, 5, 9 and 10.
Objectives Express a number in its general form mbers to explain the
logic behind number tricks
number puzzles
logic behind the test of divisibility by 10, 5 and 2 rs to explain the
logic behind the test of divisibility by 3 and 9
Aids Relevant Modules from Teach Next Other Audio Visual Aids Access the videos relevant to the chapter ‘Playing With Numbers’ from the Library resources. Aids Non-Technical None
Procedure Teacher-Student Activities A. Warm-up Session Begin the lesson by conducting either of the following mathematical tricks: Trick 1
Ask a learner to think of any two-digit number. Let’s say, the number selected by the learner is 36. Now, tell the learner that you can show him/her how to get number 363636 from number 36. This is how the trick works. Ask the learner to multiply the selected number with 3. In this case, 36 multiplied with 3 gives the answer 108. Now, multiply this number with 7, which will give the answer 756. Then, ask the learner to multiply 756 with 13 and finally multiply the result with 37. The learner will get 363636 as the answer. You may try this trick on different learners. Trick 2 Ask each learner to think of any three-digit number. The learners should not tell you the numbers they have picked. Now, ask them to add 7 to their number, and then multiply the resulting number with 2. Thereafter, tell the learners to subtract 4 from the result. Now, ask them to divide the result by 2. Finally, ask them to subtract the number they had thought of from the resulting number. On doing so, all the learners will get 5 as their answer. This is how the trick works. Suppose a learner has selected number 123. Now, adding 7 to 123 gives 130 and multiplying this number with 2 gives the answer 260. Thereafter, subtracting 4 from 260 gives 256 and then dividing this number by 2 results in 128. Further, subtracting 128 from 123 (the number the learner had originally thought of) gives 5 as the answer. After mentioning the tricks, tell the learners that these mathematical tricks are based on multiplication, division, addition and subtraction.
B. Group Activity: Numbers and General Form In this activity, learners will write numbers in their general forms and vice versa. Teacher’s Notes Note: This activity consists of two parts. Part 1 Divide the class into small groups. Now, speak out a random number and ask them to express the given number in its general form. Give points to the group that answers correctly. You may have multiple rounds of this activity. Time the activity and reward the winner. Part 2 Shuffle the members to form new groups. Now, speak out a general form of a number and ask the groups to identify the number. Give points to the group that answers correctly. You may have multiple rounds of this activity. Time the activity and reward the winner. C. Game: Find the Numbers

In this activity, learners will be asked to find numbers from their general forms. Teacher’s Notes Prior to the session, divide the class into small groups. Ask each group to come up with a game in which the numbers are used in their general forms. The actual numbers should not be revealed. The team member should read out the general form of a number, while the other groups have to identify the number. After identifying the correct number, the team member should give the next clue. The group that finds answers for all clues will be declared the winner. One such game is provided as an example. Example of Game: Save the Children ‘Famous Four’ is a group of four friends who are on a mission. Their mission is to rescue two children who have been kidnapped and locked in a house. As the Famous Four set on their mission, a beggar comes forward and gives them the clue – a blue car with number MAX 5 x 100 + 3 x 10 + 8 x 1. When the groups find the number from the given general form, they will get the next clue. Now, the beggar tells them that the car had stopped at a petrol pump. The Famous Four rush to the petrol pump, where they get to know that the car was heading towards street number 1 x 10 + 6 x 1. The groups have to identify the number from the given general form to get the next clue. Now, with this piece of information, the Famous Four search for the street. Once the Famous Four enter the street, they meet a young security guard at the gate. They ask him if he has D. Presentation: Number Tricks and Puzzles In this activity, learners will be asked to explain the maths behind number tricks and puzzles. Teacher’s Notes Divide the class into two groups – A and B. Group A – Number Tricks Group B – Number Puzzles Ask the groups to prepare a presentation on the topics provided. In the presentation, the groups have to explain the use of general form of numbers to solve number tricks and puzzles. After the presentation, you may provide some number puzzles and ask the learners to solve them in the class.
E. Charts on Divisibility Tests In this activity, learners will be asked to explain the test of divisibility of numbers. Teacher’s Notes Divide the class into small groups. Ask each group to prepare a
chart that explains the use of the general form of numbers in finding out the logic behind the tests of the divisibility (of numbers by 2, 3, 5, 9 and 10). Later, the charts can be displayed in the class.
F. Activity on Divisibility of Numbers In this activity, learners will make a number such that it is divisible by 2, 3, 5, 9 and 10. Teacher’s Notes Provide a list of incomplete numbers. Ensure that each number has an empty space. Now, ask the learners to fill in the blank with an appropriate number(s) in order to make it divisible by 2/3/5/9/10. For example, you may give the number ‘65_13’ and ask the learners to fill in the blank so that the number becomes divisible by 9. The answer is ‘3’.
Supplemental Activities
Ask the learners to do the following activities:
taught in the class. ou
may ask your friends to solve these puzzles. -known mathematical
genius and calculating prodigy. You may also buy some of her books, such as Puzzles to Puzzle You, Book of Numbers, More Puzzles and Figuring: The Joy of Numbers.
Expected Outcome After studying this chapter, learners will be able to express a number in its general form. They will also be able to use the general form of numbers to solve number tricks and puzzles. Moreover, they will be able to explain the use of the general form of numbers to find the logic behind the tests of divisibility by 2, 3, 5, 9 and 10.
Student Derivable
Assessment Class Test, extra questions from refreshers and Teach Next Module.
AIR FORCE SCHOOL HASIMARA
Lesson Plan
Board: CBSE | Class: VIII| Subject: Maths
Chapter Name: Cubes and Cube Roots
Time Allotted For The Lesson
This lesson is divided across three modules. It will be completed in three class meetings.
Prerequisite Knowledge
Exponents and Powers: Class VII Squares and Square Roots: Class VIII
Short Description Of The Lesson
In this lesson, learners will be introduced to the concepts of cube numbers (or perfect cubes) and cube roots. They will also learn about the patterns in cube numbers. Moreover, they will learn to calculate the cube root of a perfect cube and the perfect cube number that is nearest to a given non-perfect cube number.
Objectives erfect cubes
method
non-perfect cube number e cube roots using the estimation method
Aids Relevant Modules from TeachNext Audio Visual Aids Access the videos relevant to the chapter ‘Cubes and Cube Roots’ from the Library resources. Aids Nontechnical None
Procedure Teacher-Student Activities A. Warm-up Session Begin the class by narrating the history of cubes and cube roots. Tell your students that the method for finding the cube root of large numbers was known to the great Indian mathematician Aryabhata. This method is explained in ‘Ganitapada’, the mathematical section of the ‘Aryabhatiya’. The following verse in ‘Ganitapada’ explains the method. Also, tell them the interesting fact that the Sanskrit word ‘Ghhana’ for ‘cube’ has two meanings, just like the word ‘cube’ in modern mathematics. ‘Ghhana’ means the number multiplied by itself three times as well as the 3-dimensional cubical structure. After the warm-up session, play all modules in TeachNext. B. Search for Cubes In this activity, students will calculate the cubes of given numbers. Teacher’s Notes Make chits with different numbers written on them. Divide the class into two groups and ask a student from each group to select a chit for his/her group. The students in the group need to calculate the cube of the number on the chit. Provide scores to the teams. Continue this activity till all chits are exhausted. C. Patterns in Cube Numbers In this activity, students will use the patterns in cube numbers to perform certain calculations. Teacher’s Notes Make chits with different numbers written on them (for example, 53 and 64). Divide the class into two groups and ask a student from each group to select a chit for his/her group. Based on the number written on the chit, the students in the group need to do either of the following calculations:
Give them scores as per the correct answers. Continue this activity till all chits are exhausted. Additionally, ask each group to make a presentation on the patterns in cube numbers. D. Quest for Cube Roots In this activity, students will calculate the cube roots of given numbers using the appropriate method. If the number is not a perfect cube number, then they also need to find out the nearest
perfect cube number. Teacher’s Notes Make flash cards with different perfect cube numbers and a few non-perfect cube numbers written on one side. On the other side of these cards, write the answers. Divide the class into two groups. Ask a student from each group to select a card for his/her group. The students in the group need to find the cube root of the number on the card using any of the following methods:
If the number is not a perfect cube number, the students need to find out the smallest natural number by which the given number should be divided or multiplied to make it a perfect cube number. Give the bonus marks to the group if they correctly find the nearest cube number. Continue this activity till all the cards are exhausted.
Supplemental Activities
Provide the list of the following perfect cubes to your students and ask them to plot the numbers on the graph using MS Excel: 1, 8, 27, 64, 125, 216, 343, 512, 729, 1000, 1331, 1728, 2197, 2744, 3375, 4096, 4913, 5832, 6859, 8000, 9261, 10648, 12167, 13824, 15625, 17576, 19683, 21952, 24389, 27000, 29791, 32768, 35937, 39304, 42875, 46656, 50653, 54872, 59319, 64000, 68921, 74088, 79507, 85184, 91125, 97336, 103823, 110592, 117649, 125000, 132651, 140608, 148877, 157464, 166375, 175616, 185193, 195112, 205379, 216000, 226981 and 238328. Ask them to observe the pattern of the line graph.
Expected Outcome After completing the lesson, learners should be able to explain the concepts of cube numbers (or perfect cubes) and cube roots. They should also be able to explain the patterns in cube numbers. Moreover, they should be able to calculate the cube root of a perfect cube and the perfect cube number that is nearest to a given non-perfect cube number.
Student Derivables
Assesment Class Test, extra questions from refreshers and Teach Next Module.
AIR FORCE SCHOOL HASIMARA
Lesson Plan
Board: CBSE | Class: VIII| Subject: Maths
Chapter Name: Factorisation
Time Alloted For The Lesson
This lesson is divided across four modules. It will be completed in four class meetings.
Prerequisite Knowledge
Short Description Of The Lessson
In this lesson, learners will study the factorisation of algebraic expressions. They will also learn to factorise algebraic expressions using different methods, such as identifying common factors, regrouping the terms and using algebraic identities. Moreover, they will learn to divide an algebraic expression by another algebraic expression.
Objectives the common factors
the terms
algebraic identities
ession by another algebraic expression
Aids Relevant Modules from Teach Next Other Audio Visual Aids Access the videos relevant to the lesson ‘Factorisation’ from the Library resources. Aids No technical None

Procedure Teacher-Student Activities A. Warm-up Session Begin the lesson with a quiz activity. You can include questions that will help students recall the prior learning of algebraic expressions. You can ask the students to give the examples of simple algebraic expressions and then identify the terms in the expression and the factors in the terms. Also, ask the students to identify if a given expression is a monomial, binomial or trinomial. Additionally, you can hold a quiz on algebraic identities. The LHS of an identity can be given and the students can be asked to write the RHS. Then, talk about the aim of factorisation, which is to reduce something to its basic building blocks and includes factorising numbers to prime numbers or polynomials to irreducible polynomials. B. Chit Activity In this activity, students need to factorise algebraic expressions. Teacher’s Notes Divide the class into a few groups and prepare chits with algebraic expressions written on them (one expression on each chit). Also, mention the method (identifying common factors or regrouping the terms) to be used by the students to factorise the expressions. Now, present the chits to a group and ask any student from the group to pick up a chit and write the expression on the board. His/her group needs to solve the expression using the method mentioned on the chit. Carry out the activity with other groups as well. C. Flashcard Activity In this activity, students need to factorise algebraic expressions using appropriate identities. Teacher’s Notes Divide the class into a few groups and prepare flashcards with algebraic expressions written on them. Write an expression on each card. Now, show a card to a group and ask a student from the group to identify the algebraic identity that can be used to factorise the expression. Thereafter, the same student should write the expression and the identity on the board and factorise the expression using the identity. Continue the activity with other groups. D. Dividing Algebraic Expressions In this activity, students need to divide an algebraic expression
by another algebraic expression. Teacher’s Notes Write down two monomials on the board and ask the students to divide one by the other. Then, write down a polynomial and a monomial on the board and ask the students to divide the polynomial by the monomial using the methods of taking out the common factor and cancellation. Also, include problems where a polynomial needs to be divided by another polynomial. The students can solve the problems in their exercise books.
Supplemental Activities
Ask the students to fill in the blanks in the grid after factoring the given expressions.
Expected Outcome After studying this lesson, learners should be able to factorise algebraic expressions using different methods, such as identifying common factors, regrouping the terms and using algebraic identities. They should also be able to divide an algebraic expression with another algebraic expression.
Student Deliverables
w questions given by the teacher – Division of algebraic
expressions
Assessment Class Test, extra questions from refreshers and Teach Next Module.
AIR FORCE SCHOOL HASIMARA
Lesson Plan
Board: CBSE | Class: VIII| Subject: Maths
Chapter Name: Rational Numbers
Time Allotted For The Lesson
This lesson is divided across seven modules. It will be completed in seven class meetings.
Prerequisite Knowledge
Whole Numbers: Class VI Integers : Class VI Integers: Class VII Rational Numbers: Class VII
Short Description Of The Lesson
This lesson will introduce the learners to the basic properties of operations on rational numbers. They will also recall their knowledge of these properties with respect to whole numbers and integers. They will learn to represent rational numbers on a number line. Moreover, they will also learn to find rational numbers between two rational numbers.
Objectives mbers, integers and rational numbers under various mathematical operations
integers and rational numbers under various mathematical operations
under various mathematical operations
integers and rational numbers under various mathematical operations
he associative property for rational numbers under various mathematical operations
numbers, integers and rational numbers
numbers under various mathematical operations
addition for rational numbers
subtraction for rational numbers nal numbers on a number line
Aids Relevant Modules from Teach Next Access the videos relevant to the chapter ‘Rational Numbers’ from the Library resources. Aids No technical None
Procedure Teacher-Student Activities A. Warm-up Session Begin the session by drawing a number line on the board. Call a few students one by one and ask them to represent whole numbers, natural numbers, integers, fractions and rational numbers on the number line. Thereafter, recall the basic properties of rational numbers. B. Quiz: Properties of Integers and Whole Numbers In this activity, students will revise the properties for whole numbers and integers. Teacher’s Notes Recall the properties of integers and whole numbers. Then, divide the class into two groups and organise a quiz. Ask the students from both the groups about the following properties of whole numbers and integers:
plicative Identities
C. Presentations on Properties In this activity, groups of students will deliver presentations on different properties of rational numbers. Teacher’s Notes Divide the class into five groups and assign the following properties to the groups:
inverse properties
Ask the students to explain the properties using examples. Since the presentation is very comprehensive, more than one student can be asked to present it. The students can use either
chart papers or MS PowerPoint for their presentations. The charts used in the presentation can be put up in the class later. After the presentation, give a few questions to the students to solve using these properties. D. Chit Game In this activity, students will represent rational numbers on a number line. Further, they will also find rational numbers between two given rational numbers. Teacher’s Notes Make a few chits and write a rational number on each chit. Put these chits in a bowl. Now, call any student from the class to pick up a chit from the bowl and read the number on the chit. Then, he/she needs to draw the number line on the board and represent the number on it. Similarly, you can carry out this activity with other students. Prepare some more chits, but this time write two rational numbers per chit. Call a student to pick up a chit and find the rational numbers between two rational numbers on the chit.
Supplemental Activities
Ask the students to perform the following activities:
mbers and without using these properties. Which method is easier? Share your thoughts with the class.
Expected Outcome After studying this lesson, students will be able to recall basic properties of operations pertaining to whole numbers and integers. They will be able to explain various properties of operations on rational numbers and solve expressions using these properties. They will also be able to represent rational numbers on a number line and find rational numbers between two rational numbers
Student Deliverables
Assessment Class Test, extra questions from refreshers and Teach Next Module.
AIR FORCE SCHOOL HASIMARA
Lesson Plan
Board: CBSE | Class: VIII| Subject: Maths
Chapter Name: Practical Geometry
Time Alloted For The Lesson
This lesson is divided across four modules. It will be completed in four class meetings.
Prerequisite Knowledge
Practical Geometry: Class VII Understanding Quadrilaterals: Class VIII
Short Description Of The Lesson
In this lesson, students will learn to construct unique quadrilaterals when measurements of their sides, diagonals and angles are given.
Objectives sides are given
and a diagonal are given
sides and a diagonal are given
sides and two diagonals are given
adjacent sides and the measures of three angles are given
hen the lengths of its three sides and the measures of two included angles are given
Aids Relevant Modules from Teach Next Other Audio Visual Aids Access the videos relevant to the chapter ‘Practical Geometry’ from the Library resources. Aids Non-Technical None
Procedure Teacher-Student Activities A. Warm-up Session Begin the lesson by holding a quiz pertaining to the following topics:
B. Scrapbook: Construction of Quadrilaterals In this activity, learners will construct quadrilaterals. Teacher’s Notes In the class, demonstrate the construction of a quadrilateral in the following cases:
three angles are known. nd the measures of two
included angles are known. After the demonstration, provide a set of measurements for each criterion and ask the learners to construct the quadrilaterals in their books. Thereafter, ask the groups to exchange the collages and the measurements. The groups have to draw a replica of the collage by constructing the quadrilaterals based on the measurements given. D. Competition: Designing Your Kite In this activity, learners will be asked to construct a kite. Teacher’s Notes Materials Required:
Hold a kite designing competition in the class. To begin with, ask the learners to construct a kite on a chart paper (the learners can decide the measurements of their kites) with the help of a compass and a ruler. After constructing the kite, the learners need to cut out the kite and decorate it. Reward the three most innovative designs. Later, the kites can be displayed in the class.
Supplemental Activities
Ask learners to check objects in their houses that have shapes of quadrilaterals. Then, ask them to record the measurements (the lengths of sides and the measures of the angles) of these
objects. Thereafter, the learners need to draw these objects in their books. If the quadrilaterals are too big to be drawn in their books, they can scale them down by converting the measurements from inches to centimetres. For example, if one side of a rhombus shaped floor tile measures 6 inches and one of the diagonal measures 8 inches, then the learner has to construct a rhombus in his/her book with the sides measuring 6 centimetres and one diagonal measuring 8 centimetres.
Expected Outcome After studying this chapter, learners will be able to construct unique quadrilaterals when measurements of their sides, diagonals and angles are given.
Student Deliverables
Assessment Class Test, extra questions from refreshers and Teach Next Module.
AIR FORCE SCHOOL HASIMARA
Lesson Plan
Board: CBSE | Class: VIII| Subject: Maths
Chapter Name: Data Handling
Time Alloted For The Lesson
This lesson is divided across four modules. It will be completed in four class meetings.
Prerequisite Knowledge
Data Handling: Class VII
Short Description Of The Lesson
This lesson will introduce students to grouped frequency distribution tables, histograms, pie charts and probability. They will learn to organise data in a grouped frequency distribution table and use this data to draw a histogram. They will also be taught to create a pie chart and calculate probability of an event. Moreover, they will learn to interpret data from frequency distribution tables and graphs.
Objectives
graph
t and the
width of a class interval
distribution table
om a given pie chart
event
Aids Relevant Modules from Teach Next Other Audio Visual Aids
Access the videos relevant to the chapter ‘Data Handling’ from the Library resources. Aids Non technical None
Procedure Teacher-Student Activities A. Warm-up Session Begin the lesson by showing the students a collage of data, pictograms, bar graphs and double bar graphs that they have learnt in the previous class. You may show the data of weather in a few cities over a period, the sales figures of a company and the runs scored by a few batsmen. Ask the students to interpret the data in the tables and graphs. Talk about different types of graphs which can be used to represent data. B. Bar Graphs and Double Bar Graphs In this activity, students will draw bar graphs and double bar graphs. Teacher’s Notes Divide the class into two groups and ask them to collect data about the favourite cartoon characters of the students in their respective groups. Each student can choose any one cartoon character from the list of six or seven popular characters. For example, Tom and Jerry, Shin Chan, Doraemon, Ben-10, He-Man and G.I. Joe. In this way, ask both the groups to collect data, make a frequency distribution table and then represent data on bar graphs. Later, ask both the groups to exchange data and make double bar graphs. C. Grouped Frequency Distribution Table and Histogram In this activity, students will organise data in a grouped frequency distribution table. They will also draw and interpret histograms. Teacher’s Notes Divide the class into two groups and ask them to collect data regarding the distance travelled by students from their house to the school. Ask both the groups to collect and organise the data using a grouped frequency distribution table. Then, you can ask volunteers from both the groups to come and present their table. At this point, ask the volunteers and the other members of the group questions on the upper and lower class limit, class width and so on. Next, ask the groups to represent the data (organised in the frequency distribution table) by drawing histograms. You can also call volunteers from the two groups and ask them to interpret the data from the histogram prepared by the other
group. D. Circle Graph or Pie Charts In this activity, students will draw and interpret circle graphs or pie charts. Teacher’s Notes Tell the students about circle graphs or pie charts. In a pie chart, a circle is divided into several segments or sectors and each sector represents one piece of data. The angle of each of these segments is proportional to the value of the piece of data. Tell the students that the earliest pie chart was prepared by the Scottish engineer and political economist William Playfair in his book the Statistical Breviary. Interestingly, over the years, the principles of making a pie chart have essentially remained the same. Show a few pie charts to the students and ask them to interpret the data depicted by these charts. Teach the students the method to prepare pie charts. Then, divide the class into two groups and ask them to collect information about how different students commute to school. For example, on foot, bicycle, car, school bus, rickshaw or shared cab. Alternatively, you may provide the data and ask the groups to represent it on a pie chart. Once the charts are prepared, discuss them in the class. E. Probability In this activity, students will learn about various concepts pertaining to chance and probability. Teacher’s Notes Prepare a spinning wheel with a pointer and four sectors of different colours (for example, yellow, green, red and blue). Then, spin the wheel and explain the concepts of random experiment, outcome, event and probability. Now, ask the students to prepare a spinning wheel with eight sectors as follows: two sectors in red, three sectors in yellow, one sector in green and two sectors in blue. Divide the class into groups and ask all these groups to spin the wheel 25 times and record their findings. Discuss other examples of probability and ask the students to think of different activities in which they are likely to get different outcomes. For example, drawing a particular card from a pack of cards. You can also tell the students about the history of the probability theory. The concepts of probability have been in practice over thousands of years. However, probability emerged as a specialised branch of Mathematics only around the mid-
seventeenth century.
Supplemental Activities
Ask the students to perform the following activities:
components (carbohydrates, proteins, vitamins, roughage and minerals) in our daily diet.
share the information with the class.
Expected Outcome After studying this lesson, students will be able to organise data in a grouped frequency distribution table and use this data to draw a histogram. They will also be able to create a pie chart and calculate the probability of an event. Moreover, they will learn to interpret data from frequency distribution tables and graphs.
Student Deliverables
After studying this lesson, students will be able to organise data in a grouped frequency distribution table and use this data to draw a histogram. They will also be able to create a pie chart and calculate the probability of an event. Moreover, they will learn to interpret data from frequency distribution tables and graphs.
Assessment Class Test, extra questions from refreshers and Teach Next Module.
AIR FORCE SCHOOL HASIMARA
Lesson Plan
Board: CBSE | Class: VIII| Subject: Maths
Chapter Name: Introduction to Graphs
Time Alloted For The Lesson
This lesson is divided across four modules. It will be completed in four class meetings.
Prerequisite Knowledge
Handling Data: Class V Data Handling: Class VI Data Handling: VII Data Handling: VIII
Short Description Of The Lesson
In this lesson, learners will be introduced to the different types of graphs and their uses. They will also learn to plot and interpret line graphs. Moreover, they will be taught the concept of coordinates and the use of coordinates and the Cartesian system in plotting linear graphs.
Objectives
he
Cartesian system
variables
Cartesian system
Aids Relevant Modules from TeachNext
Other Audio Visual Aids Access the videos relevant to the chapter ‘Introduction to Graphs’ from the Library resources.
Aids Nontechnical None
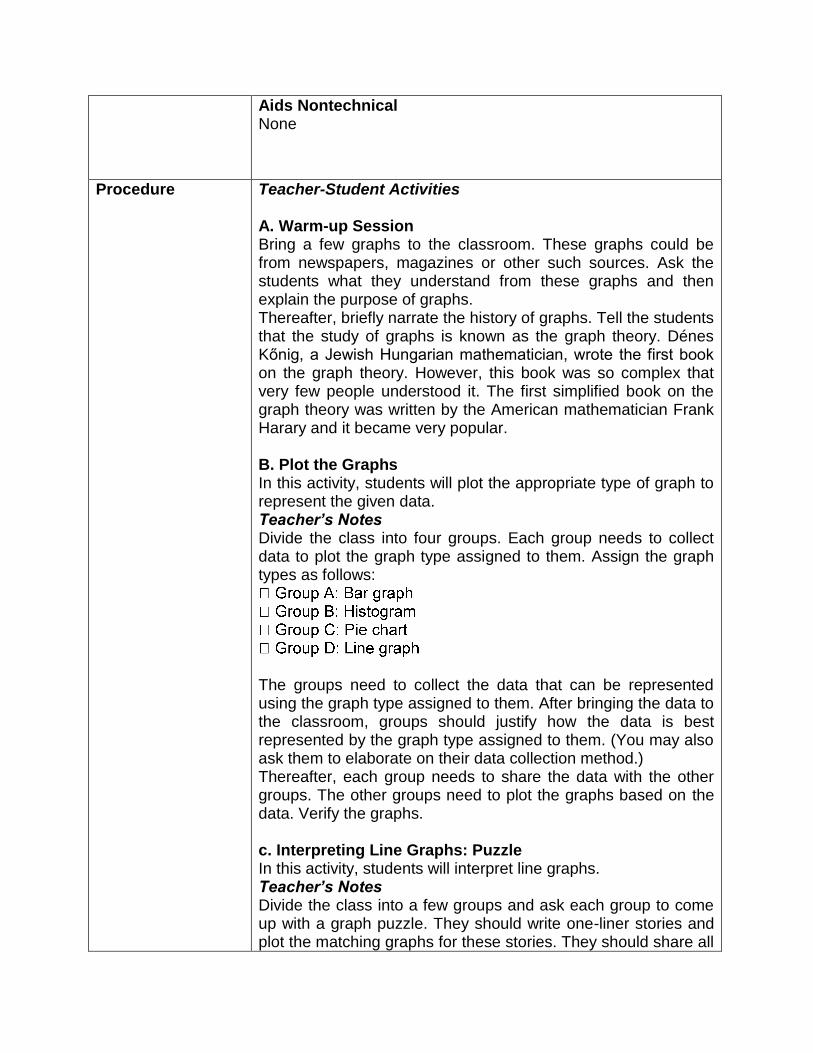
Procedure Teacher-Student Activities A. Warm-up Session Bring a few graphs to the classroom. These graphs could be from newspapers, magazines or other such sources. Ask the students what they understand from these graphs and then explain the purpose of graphs. Thereafter, briefly narrate the history of graphs. Tell the students that the study of graphs is known as the graph theory. Dénes Kőnig, a Jewish Hungarian mathematician, wrote the first book on the graph theory. However, this book was so complex that very few people understood it. The first simplified book on the graph theory was written by the American mathematician Frank Harary and it became very popular. B. Plot the Graphs In this activity, students will plot the appropriate type of graph to represent the given data. Teacher’s Notes Divide the class into four groups. Each group needs to collect data to plot the graph type assigned to them. Assign the graph types as follows:
The groups need to collect the data that can be represented using the graph type assigned to them. After bringing the data to the classroom, groups should justify how the data is best represented by the graph type assigned to them. (You may also ask them to elaborate on their data collection method.) Thereafter, each group needs to share the data with the other groups. The other groups need to plot the graphs based on the data. Verify the graphs. c. Interpreting Line Graphs: Puzzle In this activity, students will interpret line graphs. Teacher’s Notes Divide the class into a few groups and ask each group to come up with a graph puzzle. They should write one-liner stories and plot the matching graphs for these stories. They should share all
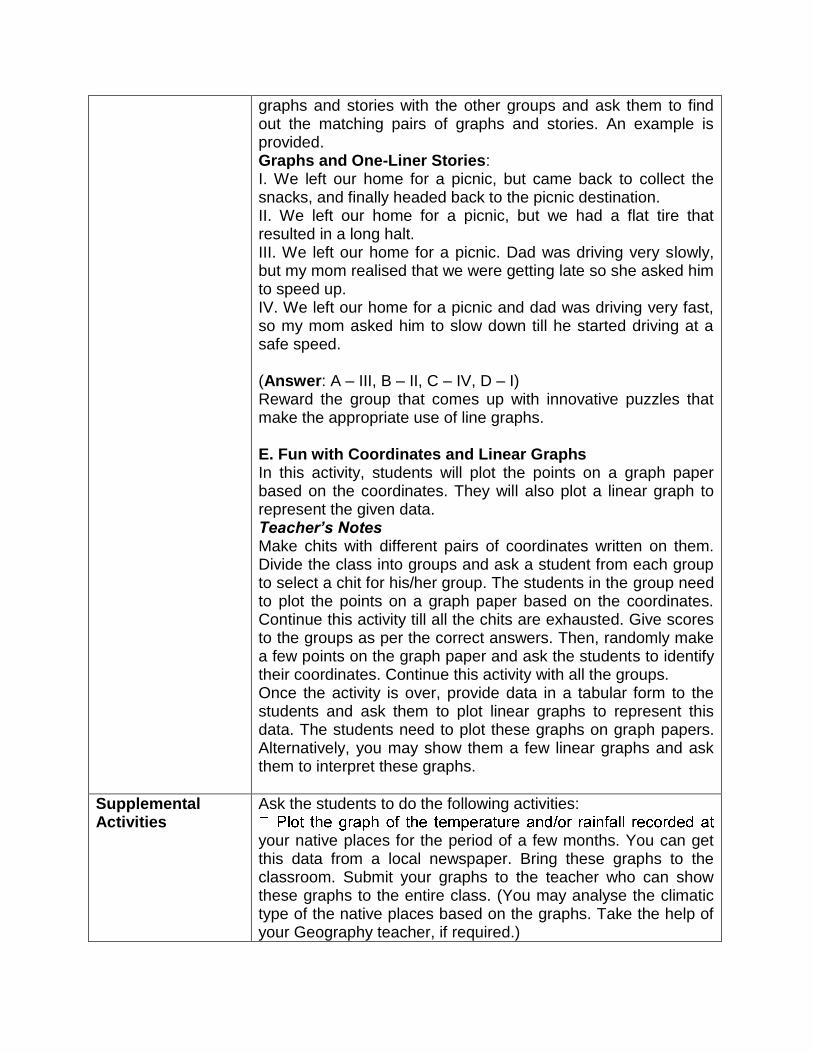
graphs and stories with the other groups and ask them to find out the matching pairs of graphs and stories. An example is provided. Graphs and One-Liner Stories: I. We left our home for a picnic, but came back to collect the snacks, and finally headed back to the picnic destination. II. We left our home for a picnic, but we had a flat tire that resulted in a long halt. III. We left our home for a picnic. Dad was driving very slowly, but my mom realised that we were getting late so she asked him to speed up. IV. We left our home for a picnic and dad was driving very fast, so my mom asked him to slow down till he started driving at a safe speed. (Answer: A – III, B – II, C – IV, D – I) Reward the group that comes up with innovative puzzles that make the appropriate use of line graphs. E. Fun with Coordinates and Linear Graphs In this activity, students will plot the points on a graph paper based on the coordinates. They will also plot a linear graph to represent the given data. Teacher’s Notes Make chits with different pairs of coordinates written on them. Divide the class into groups and ask a student from each group to select a chit for his/her group. The students in the group need to plot the points on a graph paper based on the coordinates. Continue this activity till all the chits are exhausted. Give scores to the groups as per the correct answers. Then, randomly make a few points on the graph paper and ask the students to identify their coordinates. Continue this activity with all the groups. Once the activity is over, provide data in a tabular form to the students and ask them to plot linear graphs to represent this data. The students need to plot these graphs on graph papers. Alternatively, you may show them a few linear graphs and ask them to interpret these graphs.
Supplemental Activities
Ask the students to do the following activities:
your native places for the period of a few months. You can get this data from a local newspaper. Bring these graphs to the classroom. Submit your graphs to the teacher who can show these graphs to the entire class. (You may analyse the climatic type of the native places based on the graphs. Take the help of your Geography teacher, if required.)
during different time in a day. Share the graph with other students in the class and ask them to interpret the graph.
Expected Outcome After completing the lesson, learners should be able to explain the different types of graphs and their uses. They should also be able to plot and interpret line graphs. Moreover, they should be able to explain the concept of coordinates. They will also be able to use the coordinates and the Cartesian system to plot a linear graph.
Student Deliverables
Assessment Class Test, extra questions from refreshers and Teach Next Module.
AIR FORCE SCHOOL HASIMARA
Lesson Plan
Board: CBSE | Class: VIII| Subject: Maths
Chapter Name: Squares and Square Roots
Time Alloted For The Lesson
This lesson is divided across eight modules. It will be completed in eight class meetings.
Prerequisite Knowledge
Exponents and Powers: Class VII
Short Description Of The Lesson
In this lesson, learners will be introduced to the concepts of square numbers (or perfect squares) and square roots. Additionally, they will learn about the patterns and properties of square numbers. They will also learn to calculate the square of a number as well as the square root of a perfect square.
Objectives on why certain numbers are at the unit place of
a perfect square
numbers and the digit at the unit place of their squares
of numbers and at the end of their squares
numbers have odd squares
numbers is a square number that there are ‘2n’ non-square numbers between n2
and (n + 1)2, if n and (n + 1) are two consecutive numbers
starting from 1 is equal to n2 tten as
the sum of two consecutive positive integers
itself
for finding such triplets
provided
subtraction method and the prime factorisation method
method
a given non-perfect square number to make it a perfect square number
division method
Aids Relevant Modules from TeachNext
Other Audio Visual Aids Access the videos relevant to the chapter ‘Squares and Square Roots’ from the Library resources. Aids Non technical None
Procedure Teacher-Student Activities A. Warm-up Session Begin the class by narrating the history of squares and square roots. Tell your students that the archaeological evidences indicate that squares and square roots were used by ancient people across different cultures. The tablets belonging to the Babylonian period, dating back to1800 BC and 1600 BC, depict square roots. Even the papyrus from 1650 BC indicates that the Egyptians were aware of extracting square roots. Babylonian Tablet Egyptian Papyrus The Indian and the Chinese also knew about squares and square roots. In fact, the Indians had the knowledge of the theoretical as well as the practical aspects of these concepts as evident from ‘Sulbha Sutras’ (written in 800-500 BC or earlier). Moreover, Aryabhata knew the method of calculating the square roots of larger numbers. This method is described in his famous work ‘Aryabhatiya’. The following verse in ‘Ganitapada’, the mathematical section of the ‘Aryabhatiya’, explains the square root extraction method.
Later, this method was introduced to the Europeans by the Italian architect Cataneo in 1546. B. Fun with a Chessboard In this activity, students will learn about the concepts of square numbers (or perfect squares) and square roots. Teacher’s Notes Bring a chessboard to the class. A chessboard is made up of 32 black and 32 white squares arranged in eight rows and columns. Ask the class to assume that each small square has sides measuring 1 inch. Ask your students what will be the area of squares lining any one side of the chessboard (answer: 8 square inches). Then, ask them to calculate the area of the entire chessboard (answer: 64 square inches). Using these two numbers and the chessboard, explain the concepts of square numbers and square roots. After the explanation, give some numbers to the students and ask them to work out if these numbers are perfect squares. C. Properties of Square Numbers In this activity, students will make presentations on the properties of square numbers. Teacher’s Notes Divide the class into four group and ask them to make the following presentations:
on why certain numbers are at the unit place of a perfect square
numbers and the digit at the unit place of their squares
end of numbers and at the end of their squares
and odd numbers have odd squares Once they have made their presentations, give them a few examples to solve. Refer to the Exercises section in the TeachNext box for practice questions. D. Patterns in Square Numbers In this activity, students will design activities on various patterns in square numbers. Teacher’s Notes Divide the class into four groups. Each group needs to come up with activities/questions on various patterns seen in square numbers:
is a square number. -square numbers between n2 and
(n + 1)2, if n and (n + 1) are two consecutive numbers. tarting

from 1 is equal to n2.
sum of two consecutive positive integers. The students need to share the activities and problems with the entire class. The activities can be conducted in the class, while the questions can be solved either in the class or given as homework. E. Search for Square Give them scores as per the correct answers. Pythagorean Triplets will fetch them bonus points. The system of bonus points will work as follows. If the number on the card is part of a Pythagorean Triplet and the group correctly identifies such number and finds the corresponding triplet, then it will get bonus marks. Continue this activity till all the chits are exhausted. F. Quest for Square Root: Activity In this activity, students will calculate the square roots of given numbers using the appropriate method. In case the number is not a perfect square, they will need to find out the nearest perfect square number. Teacher’s Notes Make flash cards with various perfect square numbers and a few non-perfect square numbers written on one side. Make a few cards with perfect square decimal numbers as well. On the other side of all the flash cards, write the answers. Divide the class into three groups. Ask one student from each group to select a card for his/her group. The students in the group need to find the square root of the number on the card using any of the following methods:
g division method Although they have freedom to use any method, it is mandatory to use each method at least once during the entire activity. If the number is a non-perfect square number, they need to find out the smallest number that needs to be added to or subtracted from the number to make it a perfect square number. Continue this activity till all the cards are exhausted.
Supplemental Activities
Ask your students to do the following activities:
They can draw such patterns on a chart paper as well.
patterns are given in the table. 1 x 1 11 x 11 111 x 111
7 x 7 67 x 67 667 x 667
9 x 9 99 x 99 999 x 999
1111 x 1111 11111 x 11111
6667 x 6667 66667 x 66667
9999 x 9999 99999 x 99999
In this activity, students will calculate the squares of given numbers. They will also work out a Pythagorean Triplet when one of its numbers is provided.
Expected Outcome After completing the lesson, learners should be able to explain the concepts of square numbers (or perfect squares) and square roots. They should also be able to explain the patterns and properties of square numbers. They should also be able to calculate the square of a number as well as the square root of a perfect square.
Student Deliverables
Assessment Class Test, extra questions from refreshers and Teach Next Module.
AIR FORCE SCHOOL HASIMARA
Lesson Plan
Board: CBSE | Class: VIII| Subject: Maths
Chapter Name: Algebraic Expressions and Identities
Time Alloted For The Lesson
This lesson is divided across six modules. It will be completed in six class meetings.
Prerequisite Knowledge
Algebraic Expressions: Class VII
Short Description Of The Lesson
In this lesson, learners will be taught to represent an algebraic expression on a number line. They will study about terms, factors and coefficients of expressions. They will also learn about the different types of algebraic expressions and will learn to identify like and unlike terms in an expression. Further, they will be introduced to the standard identities and will learn to solve algebraic expressions using these identities.
Objectives and coefficients of an algebraic expression
or trinomial given algebraic expression is a polynomial
expression
Aids Audio Visual Aids Relevant Modules from TeachNext
traction of Algebraic Expressions
Access the videos relevant to the lesson ‘Algebraic Expressions and Identities’ from the Library resources. Aids Non technical None
Procedure Teacher-Student Activities A. Warm-up Session Begin the session with a simple activity to help students recall their prior knowledge about algebraic expressions. Divide the class into a few groups. Write an algebraic expression on the board and ask the students from a group to come one by one to the board and write the constants, variables, operators, terms, factors and coefficients in the expression on the board. You can give a score of one point for each question correctly answered. That is, if the students in the group identify the constants, variables, operators, terms, factors and coefficients correctly,
the team will get six points. Conduct the similar activity with other groups. The team that gets the maximum correct answers will be the winner. B. Quiz In this activity, students will answer questions pertaining to algebraic expressions. Teacher’s Notes Divide the class into a few groups. The quiz can include the following types of questions. You can write an expression on the board and ask a student to identify if the expression is a polynomial. The student also needs to justify the answer. Next, you can write an expression and ask a student to identify if it is a monomial, binomial or trinomial. Also, ask them to identify the like and unlike terms in the expression. You can also write a simple expression on the board and ask a student to represent it on a number line. Additionally, ask students to write down expressions with one and two variables on the board. The team that gets maximum correct answers will be the winner. C. Activity for Addition and Subtraction of Expressions In this activity, students need to add algebraic expressions or subtract an algebraic expression from another algebraic expression. Teacher’s Notes Ask a student to write an algebraic expression on the board. Now, ask another student to write another expression on the board with some like terms (from the first expression). Then, ask the second student to add the two expressions. The same activity can be conducted for the subtraction of expressions. D. Activity for Multiplication of Expressions In this activity, students need to multiply algebraic expressions. Teacher’s Notes Discuss situations where the multiplication of algebraic expressions is required. Then, draw a rectangle on the board and write down its length and breadth in terms of algebraic expressions. Thereafter, ask the students to find the area of the rectangle. Similarly, you can draw a cuboid and write its length, breadth and height in terms of algebraic expressions and ask the students to calculate the volume of the cuboid. Additionally, you can ask students to write algebraic expressions on the board and multiply them. For example, you can begin by asking the students to write down monomials and then multiply them. You
can also ask them to write binomials and trinomials on the board and multiply these expressions. Multiplication can be carried out between the different types of polynomials, namely monomials, binomials and trinomials. E. Identity Activity In this activity students need to solve problems using the standard identities. Teacher’s Notes You can first derive the standard identities. Then, write down a problem on the board and ask the students to name the standard identity to be used to solve the problem. Thereafter, ask all the students to solve the problem in their notebook using the identity. Additionally, you can ask each student to derive the four identities on a chart paper and place the chart paper on their study table or any other suitable place for easy reference.
Supplemental Activities
Ask the students to solve a few expressions using identities. Then, they can share their problems and answers with their neighbour and ask him/her to recognise the identities that have been used to solve the problems.
Expected Outcome After studying this lesson, learners will be able to represent an expression on a number line. They will be able to identify the terms, factors, coefficients of terms, like and unlike terms of expressions. They will also be able to identify different types of algebraic expressions and use standard identities to solve algebraic expressions.
Student Deliverables
sing the standard identities
Assessment Class Test, extra questions from refreshers and Teach Next Module.
AIR FORCE SCHOOL HASIMARA
Lesson Plan
Board: CBSE | Class: VIII| Subject: Maths
Chapter Name: Direct and Inverse Proportions
Time Alloted For The Lesson
This lesson is divided across two modules. It will be completed in two class meetings.
Prerequisite Knowledge
Ratios and Proportions: Class VI Fractions and Decimals: Class VII Comparing Quantities: Class VII Comparing Quantities: Class VIII
Short Description Of The Lessons
In this lesson, learners will be introduced to the concepts of direct and inverse proportions. Additionally, they will learn to use proportions to find the values that are either directly or inversely proportional to each other.
Objectives
each other oncept of inverse proportion
each other
Aids Audio Visual Aids Relevant Modules from Teach Next
Other Audio Visual Aids Access the videos relevant to the chapter ‘Direct and Inverse Proportions’ from the Library resources. Aids No technical None
Procedure Teacher-Student Activities A. Warm-up Session Begin the class by asking the students the following puzzle:
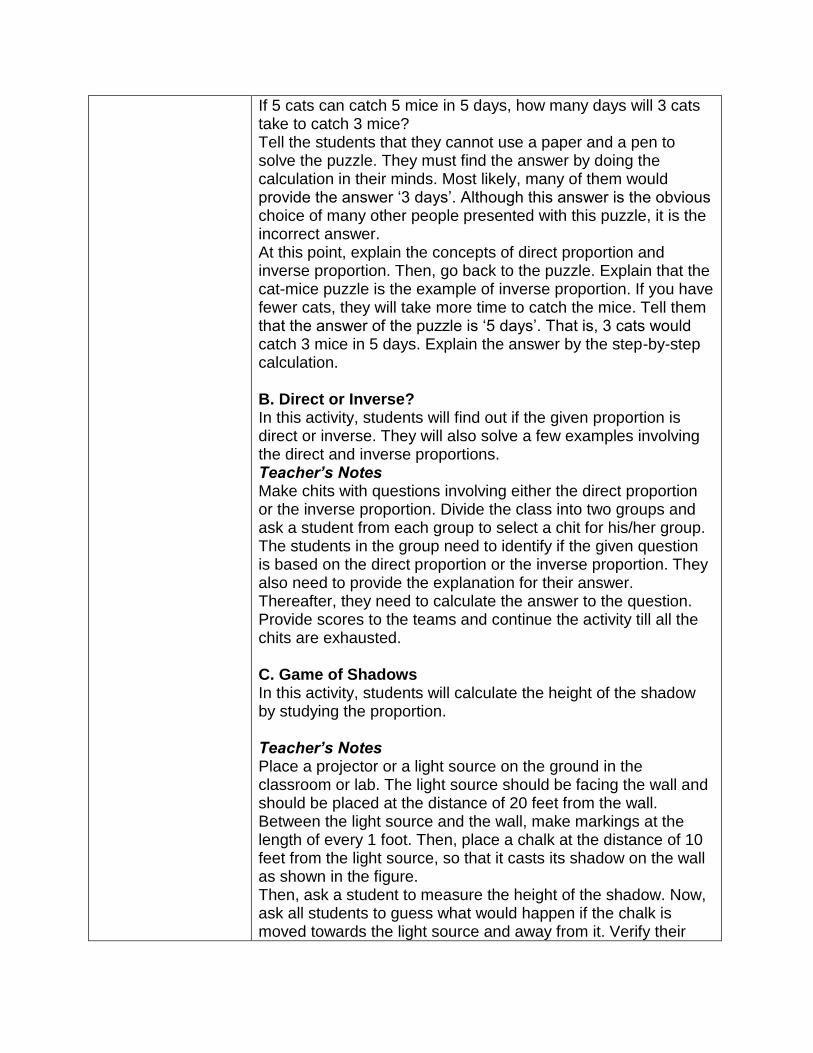
If 5 cats can catch 5 mice in 5 days, how many days will 3 cats take to catch 3 mice? Tell the students that they cannot use a paper and a pen to solve the puzzle. They must find the answer by doing the calculation in their minds. Most likely, many of them would provide the answer ‘3 days’. Although this answer is the obvious choice of many other people presented with this puzzle, it is the incorrect answer. At this point, explain the concepts of direct proportion and inverse proportion. Then, go back to the puzzle. Explain that the cat-mice puzzle is the example of inverse proportion. If you have fewer cats, they will take more time to catch the mice. Tell them that the answer of the puzzle is ‘5 days’. That is, 3 cats would catch 3 mice in 5 days. Explain the answer by the step-by-step calculation. B. Direct or Inverse? In this activity, students will find out if the given proportion is direct or inverse. They will also solve a few examples involving the direct and inverse proportions. Teacher’s Notes Make chits with questions involving either the direct proportion or the inverse proportion. Divide the class into two groups and ask a student from each group to select a chit for his/her group. The students in the group need to identify if the given question is based on the direct proportion or the inverse proportion. They also need to provide the explanation for their answer. Thereafter, they need to calculate the answer to the question. Provide scores to the teams and continue the activity till all the chits are exhausted. C. Game of Shadows In this activity, students will calculate the height of the shadow by studying the proportion. Teacher’s Notes Place a projector or a light source on the ground in the classroom or lab. The light source should be facing the wall and should be placed at the distance of 20 feet from the wall. Between the light source and the wall, make markings at the length of every 1 foot. Then, place a chalk at the distance of 10 feet from the light source, so that it casts its shadow on the wall as shown in the figure. Then, ask a student to measure the height of the shadow. Now, ask all students to guess what would happen if the chalk is moved towards the light source and away from it. Verify their
answers by moving the chalk towards and away from the light source by 1 foot. Now, place the chalk at the distance of one foot from the light source and measure the height of the shadow. Then, move the chalk away from the light source by another foot and measure the height of the shadow. Keep moving the chalk by a foot and each time measure the height of its shadow. Continue to take such measurements till you reach midway from the wall. Ask the students to calculate the proportion between the distance of the chalk from the light source and the height of its shadow. Now, ask them to estimate the height of the shadow, based on the calculated proportion, if we keep moving the chalk away from the light source. Verify the estimated height by actually moving the chalk and measuring the height of the shadow.
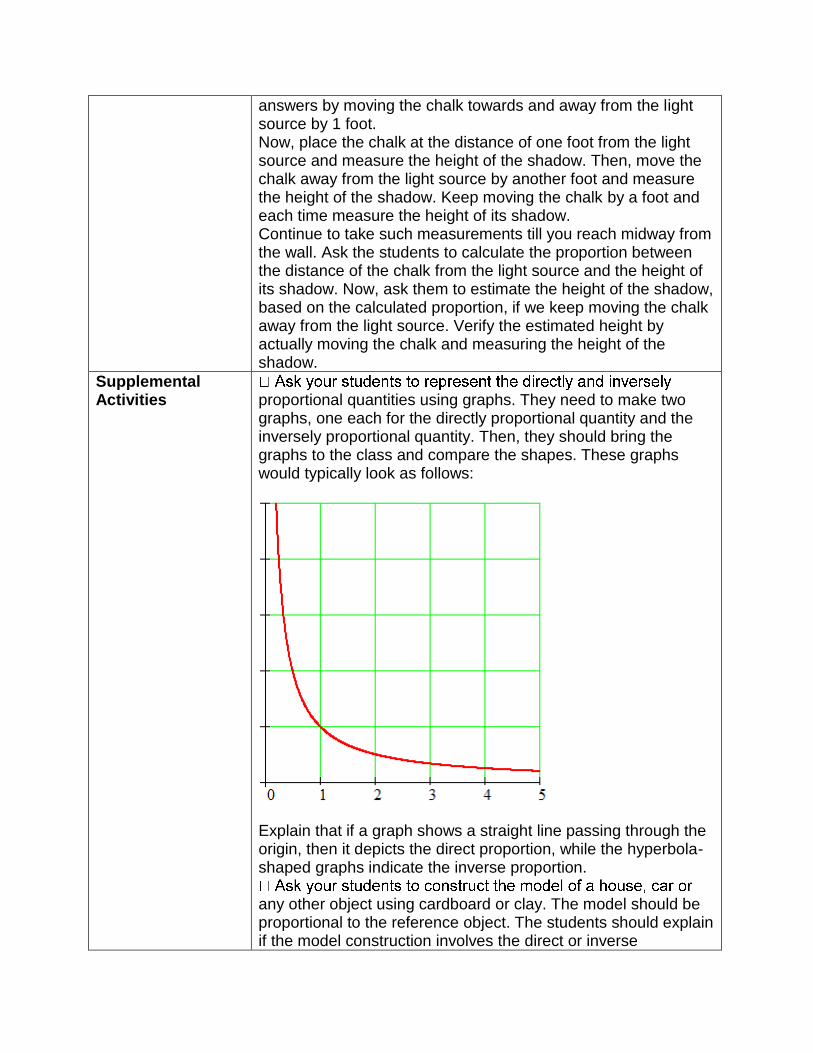
Supplemental Activities proportional quantities using graphs. They need to make two
graphs, one each for the directly proportional quantity and the inversely proportional quantity. Then, they should bring the graphs to the class and compare the shapes. These graphs would typically look as follows:
Explain that if a graph shows a straight line passing through the origin, then it depicts the direct proportion, while the hyperbola-shaped graphs indicate the inverse proportion.
any other object using cardboard or clay. The model should be proportional to the reference object. The students should explain if the model construction involves the direct or inverse
proportion and state the exact proportion that they have used while making the model.
proportions, there are other two types of proportions: compound proportion and continued proportion. Explain them that the proportion that involves two or more quantities is known as compound proportion. While, two or more quantities are said to be in a continued proportion if the 1st quantity is related to the 2nd quantity, which, in turn, is related to the 3rd quantity and so on. Ask them to find out a few examples of these types of proportions.
Expected Outcome After completing the lesson, learners should be able to explain the concepts of direct and inverse proportions. Additionally, they should be able to use proportions to find the values that are either directly or inversely proportional to each other.
Student Deliverables
None
Assessment Class Test, extra questions from refreshers and Teach Next Module.
AIR FORCE SCHOOL HASIMARA
Lesson Plan
Board: CBSE | Class: VIII| Subject: Maths
Chapter Name: Linear Equations in One Variable
Time Alloted For The Lesson
This lesson is divided across four modules. It will be completed in four class meetings.
Prerequisite Knowledge
Simple Equations: Class VII
Short Description Of The Lesson
In this lesson, students will learn to solve linear equations in one variable. In addition, students will use linear equations to solve word problems. Moreover, they will learn to solve non-linear equations by reducing such equations to a linear form.
Objectives the transposition method or by
performing mathematical operations on both sides of the equation
-linear equations by reducing them to linear
equations
Aids Audio Visual Aids Relevant Modules from Teach Next
-Linear Equations Other Audio Visual Aids Access the videos relevant to the lesson ‘Linear Equations in One Variable’ from the Library resources. Aids No technical None
Procedure Teacher-Student Activities
A. Warm-up Session Begin the lesson by writing down a few expressions and equations on the board. Then, ask the students to identify the equations and give reasons to support their answers. Thereafter, lead into the lesson.
B. Presentation: Linear Equations in One Variable In this activity, students will explain the concept of ‘linear equations in one variable’. Teacher’s Notes Make a few chits and write down different types of equations [equations in one variable, equations in two variable, polynomials and so on] on each chit. Divide the class into small groups and present a chit to each group. The groups have to identify the equations in one variable and give reasons to support their answers.
C. Group Activity: Find the Value of the Variable In this activity, students will solve linear equations and find the value of their variables. Teacher’s Notes Write down a few linear equations on the board. Form pairs of students and ask them to find the value of the variable present in the equation. The pair that gets maximum correct answers will be declared the winner.
D. Solving Practical Problems on Equations In this activity, students apply linear equations to solve word problems. Teacher’s Notes Make a few chits and write a word problem on each one of them. Add all chits into a bowl. Divide the class into small groups. Ask a member from each group to pick up a chit from the bowl and solve the word problem written on it. The group that solves the problem in the shortest time will be declared the winner.
E. Solving Non-Linear Equations In this activity, students will solve non-linear equations by reducing them to linear equations. Teacher’s Notes Draw two columns on the board. On one side of the column, write down four to five non-linear equations
Supplemental Activities
Ask the students to research on how linear equations are represented using graphs.
Expected Outcome After studying this lesson, students will be able to solve linear equations in one variable as well as use linear equations to solve word problems. Moreover, they will also learn to solve non-linear equations by reducing such equations to a linear form.
Student Deliverables
None
Assessment Class Test, extra questions from refreshers and Teach Next Module.
AIR FORCE SCHOOL HASIMARA
Lesson Plan
Board: CBSE | Class: VIII| Subject: Maths
Chapter Name: Understanding Quadrilaterals
Time Alloted For The Lesson
This lesson is divided across seven modules. It will be completed in seven class meetings.
Prerequisite Knowledge
Basic Geometrical Ideas: Class VI Understanding Elementary Shapes: Class VI Lines and Angles: Class VII Congruence of Triangles: Class VII
Short Description Of The Lesson
In this lesson, students will be introduced to the various geometrical shapes, such as polygons, quadrilaterals and parallelograms. Moreover, students will also get acquainted with the properties of different types of quadrilaterals and parallelograms.
Objectives number of sides
gon
a polygon
t to
its sides, diagonals and angles
parallelogram
parallelogram
rectangle and a parallelogram
Aids Relevant Modules from Teach Next
Other Audio Visual Aids Access the videos relevant to the lesson ‘Understanding Quadrilaterals’ from the Library resources. Aids Non-Technical None
Procedure Teacher-Student Activities
A. Warm-up Session Ask students to observe their surroundings and cite the different geometrical shapes visible to them. The students can also observe their school building and note the various geometrical shapes seen in the architecture. Thereafter, lead into the lesson.
B. Flash Card Activity In this activity, students will identify the different polygons based on the number of sides. Teacher’s Notes Draw/paste images of polygons with different number of sides on flash cards. Display the flash cards one by one in the classroom. Ask the students to name the polygons.
C. Group Activity: Making Polygons In this activity, students will be asked to make different types of polygons. Teacher’s Notes Divide the class into small groups. Ask each group to use ice cream sticks to make the following types of polygons:
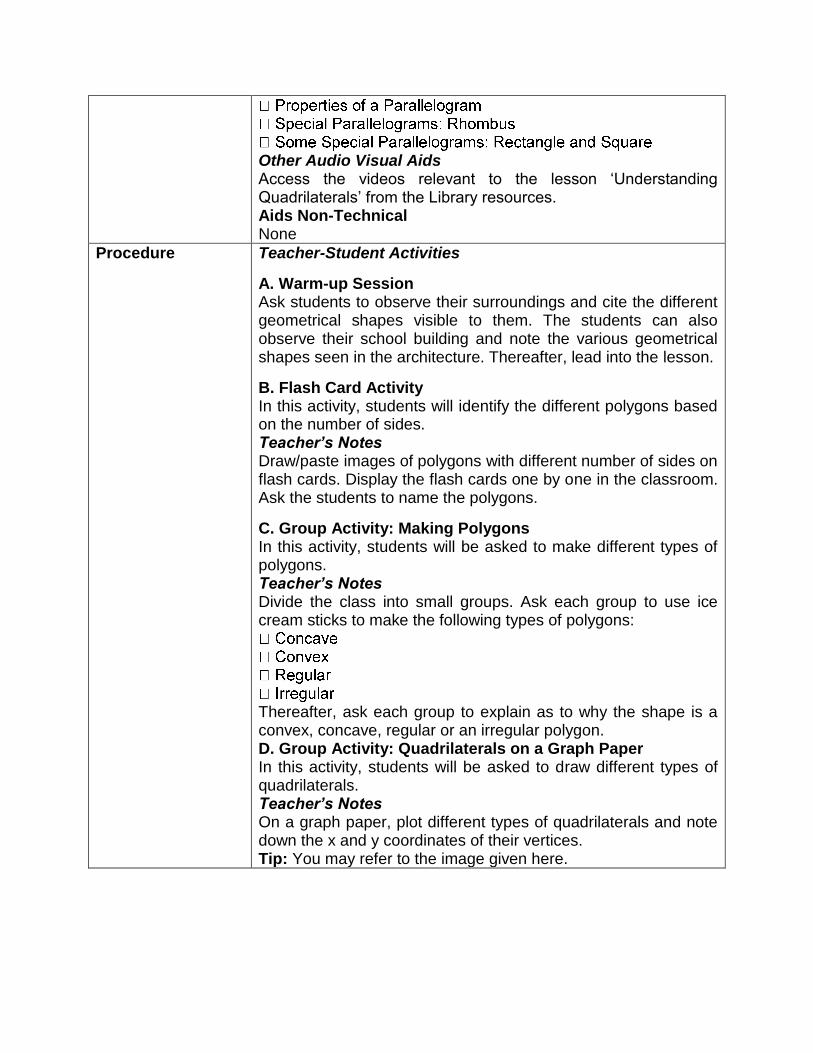
Thereafter, ask each group to explain as to why the shape is a convex, concave, regular or an irregular polygon. D. Group Activity: Quadrilaterals on a Graph Paper In this activity, students will be asked to draw different types of quadrilaterals. Teacher’s Notes On a graph paper, plot different types of quadrilaterals and note down the x and y coordinates of their vertices. Tip: You may refer to the image given here.
For instance, the coordinates of the vertices of the square at the bottom-left side are as follows: (5,1), (7,1), (7,3) and (5,3) In the next part of the activity, write the x and y coordinates of the quadrilaterals on the board. Provide a graph paper to each student and ask him/her to draw the quadrilaterals referring to the coordinates given on the board. The students also need to mention the name of the quadrilateral plotted on the graph paper.
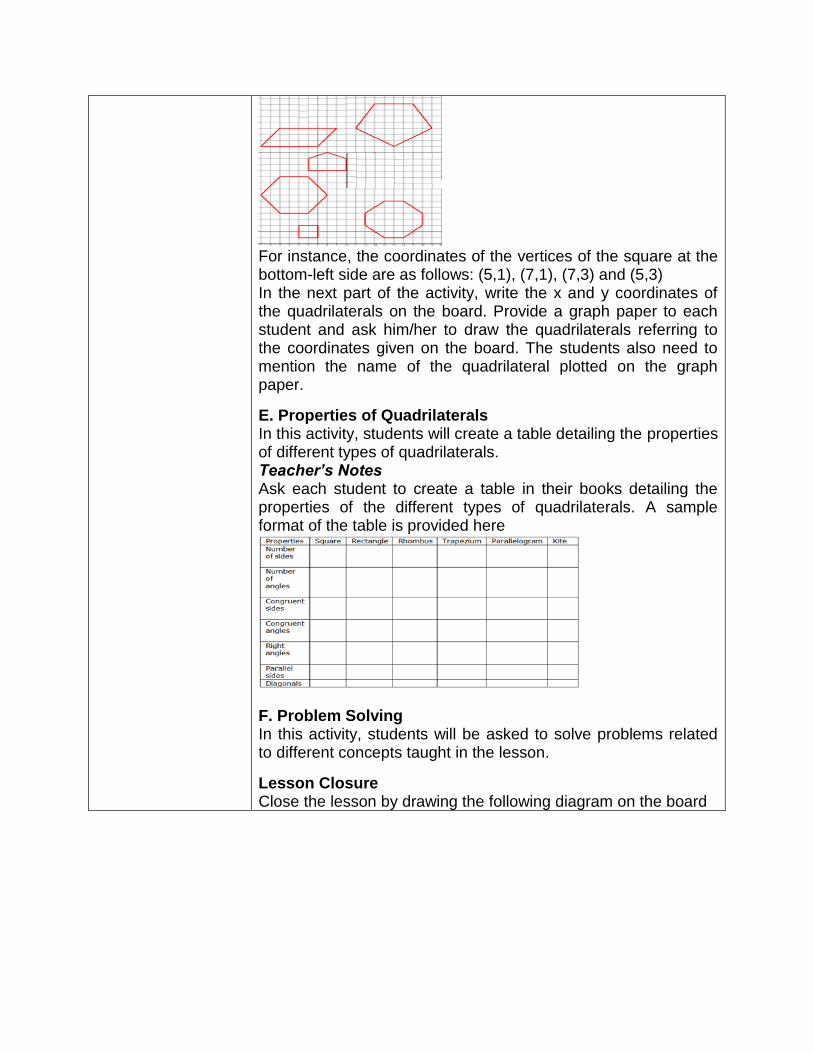
E. Properties of Quadrilaterals In this activity, students will create a table detailing the properties of different types of quadrilaterals. Teacher’s Notes Ask each student to create a table in their books detailing the properties of the different types of quadrilaterals. A sample format of the table is provided here
F. Problem Solving In this activity, students will be asked to solve problems related to different concepts taught in the lesson.
Lesson Closure Close the lesson by drawing the following diagram on the board
Ask the students to explain the relationship between the different geometrical figures by looking at the diagram.
Supplemental Activities
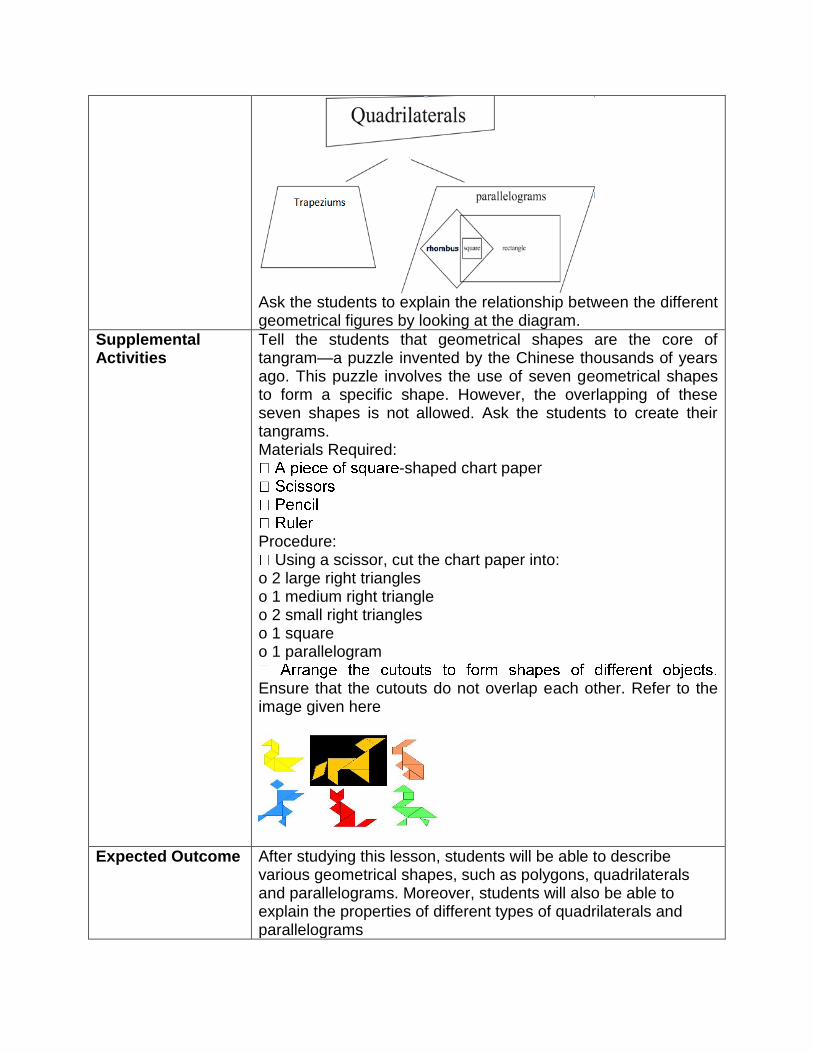
Tell the students that geometrical shapes are the core of tangram—a puzzle invented by the Chinese thousands of years ago. This puzzle involves the use of seven geometrical shapes to form a specific shape. However, the overlapping of these seven shapes is not allowed. Ask the students to create their tangrams. Materials Required:
-shaped chart paper
Procedure: Using a scissor, cut the chart paper into:
o 2 large right triangles o 1 medium right triangle o 2 small right triangles o 1 square o 1 parallelogram
Ensure that the cutouts do not overlap each other. Refer to the image given here
Expected Outcome After studying this lesson, students will be able to describe various geometrical shapes, such as polygons, quadrilaterals and parallelograms. Moreover, students will also be able to explain the properties of different types of quadrilaterals and parallelograms
Student Deliverables
Table on Properties of Quadrilaterals
Assessment Class Test, extra questions from refreshers and Teach Next Module.
AIR FORCE SCHOOL HASIMARA
Lesson Plan
Board: CBSE | Class: VIII| Subject: Maths
Chapter Name: Exponents and Powers
Time Alloted For The Lesson
This lesson is divided across three modules. It will be completed in three class meetings.
Prerequisite Knowledge
Exponents and Powers: Class VII
Short Description Of The Lesson
In this lesson, learners will be introduced to the concept of multiplicative inverse. They will learn to calculate the value of a number with negative exponents. They will also verify if the laws of exponents are applicable to the numbers with negative exponents. Moreover, they will learn to compare the standard forms of very small or very large numbers.
Objectives umber with negative exponents
s are applicable to the numbers with negative exponents
standard forms and vice versa r very large
numbers
Aids Relevant Modules from Teach Next
Other Audio Visual Aids Access the videos relevant to the chapter ‘Exponents and Powers’ from the Library resources. Aids No technical None
Procedure Teacher-Student Activities
A. Warm-up Session Begin the class by recalling the knowledge of students about exponents and powers. The main points covered in Class VII are as follows:
comparing numbers in their exponential forms
form
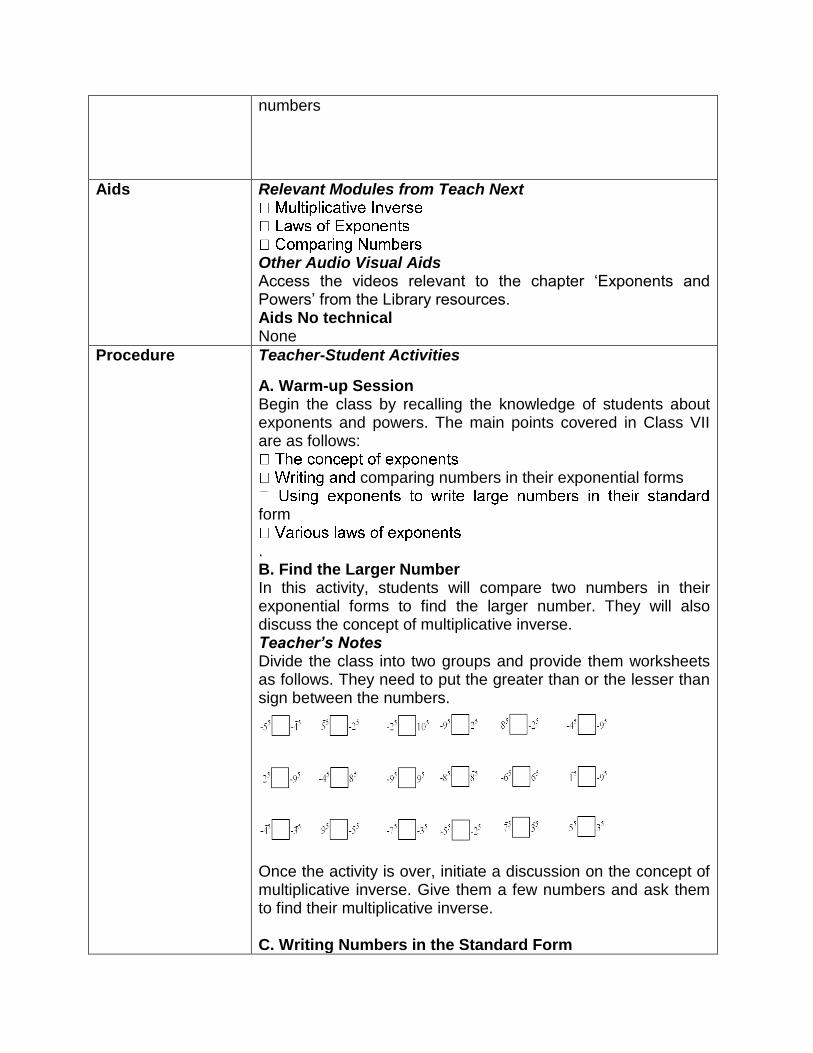
. B. Find the Larger Number In this activity, students will compare two numbers in their exponential forms to find the larger number. They will also discuss the concept of multiplicative inverse. Teacher’s Notes Divide the class into two groups and provide them worksheets as follows. They need to put the greater than or the lesser than sign between the numbers.
Once the activity is over, initiate a discussion on the concept of multiplicative inverse. Give them a few numbers and ask them to find their multiplicative inverse. C. Writing Numbers in the Standard Form
In this activity, students will write a few very small numbers in their standard form. Teacher’s Notes
Give a few small numbers to students and ask them to write these numbers in their standard forms. For example, you may provide them with the following facts about the animal cells and ask them to convert these small numbers into their standard forms. Before converting numbers into their standard forms, they need to convert the units from micrometre and nanometre to metre (conversion scale: 1 micrometre = 10−6 metre and 1 nanometre = 10−9 metre). Cell Organelles Approximate Size Cell Nucleus 5 to 10 micrometres Nucleolus 1 micrometres Nuclear Envelope 40 nanometres Nuclear Pores 120 nanometres Cell Membrane 6 to 7 nanometres Ribosome 25 nanometres Lysosome 200 to 400 nanometres Golgi Complex 2500 nanometres
Supplemental Activities
Ask the students rewrite the following numbers in their decimal form:
-5 -9
-6 -9 -8 -7
-9
Expected Outcome After completing the lesson, learners should be able to explain the concept of multiplicative inverse. They should also be able to calculate the value of a number with negative exponents. They should also be able to verify if the laws of exponents are applicable to the numbers with negative exponents. Additionally, they should also be able to compare the standard forms of very small or very large numbers.
Student Deliverables
Assessment Class Test, extra questions from refreshers and Teach Next Module.
AIR FORCE SCHOOL HASIMARA
Lesson Plan
Board: CBSE | Class: VIII| Subject: Maths
Chapter Name: Mensuration
Time Alloted For The Lesson
This lesson is divided across five modules. It will be completed in five class meetings.
Prerequisite Knowledge
Area and Perimeter: Class V Volume and Nets: Class V Understanding Elementary Shapes: Class VI Perimeter and Area: Class VII Visualising Solid Shapes: Class VII Visualising Solid Shapes: Class VIII Understanding Quadrilaterals: Class VIII
Short Description Of The Lesson
In this lesson, students will learn to calculate the area of quadrilaterals and polygons. They will also learn to calculate the surface area and volume of solids, such as cubes, cuboids and cylinders. Moreover, they will derive the formulae for calculating the area of quadrilaterals and polygons and the surface area of solids.
Objectives area of quadrilaterals
parallelogram, rhombus and trapezium
trapezium plain the method for calculating the area of polygons
the lateral surface area of cubes and cuboids a
of cubes and cuboids
oblique cylinders
area and the total surface area of a cylinder the total surface
area of a cylinder
volume
Aids Relevant Modules from TeachNext
ce Area of Cubes and Cuboids
Other Audio Visual Aids Access the videos relevant to the chapter ‘Mensuration’ from the Library resources. Aids Non technical None
Procedure Teacher-Student Activities
A. Warm-up Session Begin the lesson by briefly recalling the prior knowledge of learners about quadrilaterals, polygons and solids. Ask them questions about the methods to calculate the area of squares, rectangles and circles. Also, ask them about the classification of polygons and the types of quadrilaterals. Finally, recall their knowledge about the volume of solids and their nets.
B. Area of Quadrilaterals: Presentations and Activity In this activity, students will make presentations on deriving the formulae for calculating the area of quadrilaterals. They will also calculate the area of quadrilaterals using these formulae. Teacher’s Notes Divide the class into three groups and ask them to make presentations as follows:
a for calculating the area of
parallelograms.
rhombus.
trapezium.
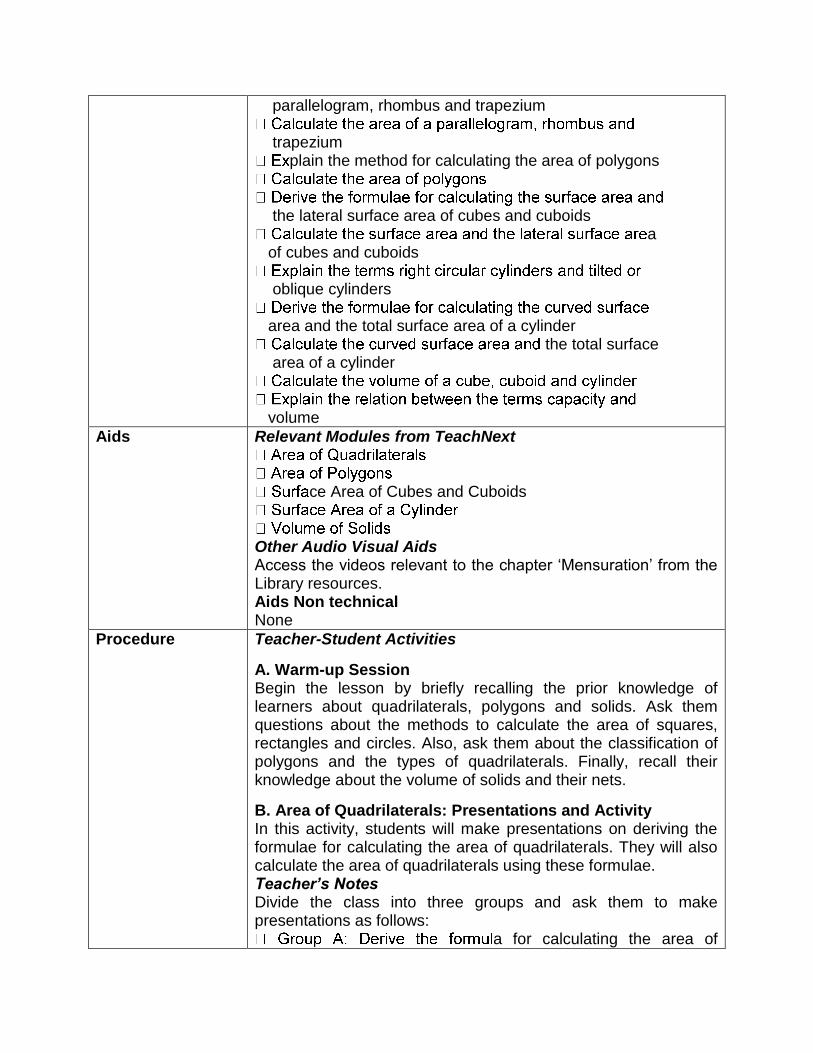
Once the presentations are done, provide each group with a few quadrilaterals, which are cut out from paper or cardboard. Ask them to trace the outlines of the quadrilaterals on graph papers to find their areas as shown here. Then, they should use the formulae (derived in presentations) to calculate the areas of the
Then, they should use the formulae (derived in presentations) to calculate the areas of the same quadrilaterals. Ask them to compare the areas that they have obtained by these two methods. C. Area of Polygons: Activity In this activity, students will calculate the areas of various polygons. Teacher’s Notes Cut out different polygons from paper or cardboard and write the required measurements on them. Make multiple copies of each polygon. Divide the class into a few groups and distribute a copy of each polygon to all the groups. Each group needs to figure out the simplest way to calculate the area of each polygon by dividing it into triangles and quadrilaterals and then adding up the area of all these triangles and quadrilaterals. D. Surface Area and Volume of Solids In this activity, students will calculate the surface area of solids. They will also make presentations on deriving the formulae for calculating the surface area of solids. Moreover, they will calculate the volume of solids. Teacher’s Notes Bring a few cartons that are shaped like a cube, cuboid and cylinder in the class. Ask the students to cut open the cartons on all sides to make a flat two-dimensional shape (the net of the three-dimensional solid). Then, they should measure the dimensions of rectangles, squares and/or circles in these nets
and calculate their areas. Alternatively, they may also trace the outlines of the nets on graph paper to calculate their area. Then, they should add up the areas of rectangles, squares and/or circles in the nets to find the surface area of the solid. Now, divide the class into two groups and ask each group to make presentations as follows:
and the lateral surface area of cubes and cuboids.
area and the total surface area of cylinders. Now, they should calculate the total surface area and the lateral surface area of cartons by using these formulae. Ask the students to compare the answers obtained by the two methods.
Supplemental Activities
Ask the students to do the following activities: uch as cubes, cuboids and cylinders.
Bring these solids to the classroom and exchange them with classmates. Calculate the surface area and the volume of the solids that you have received.
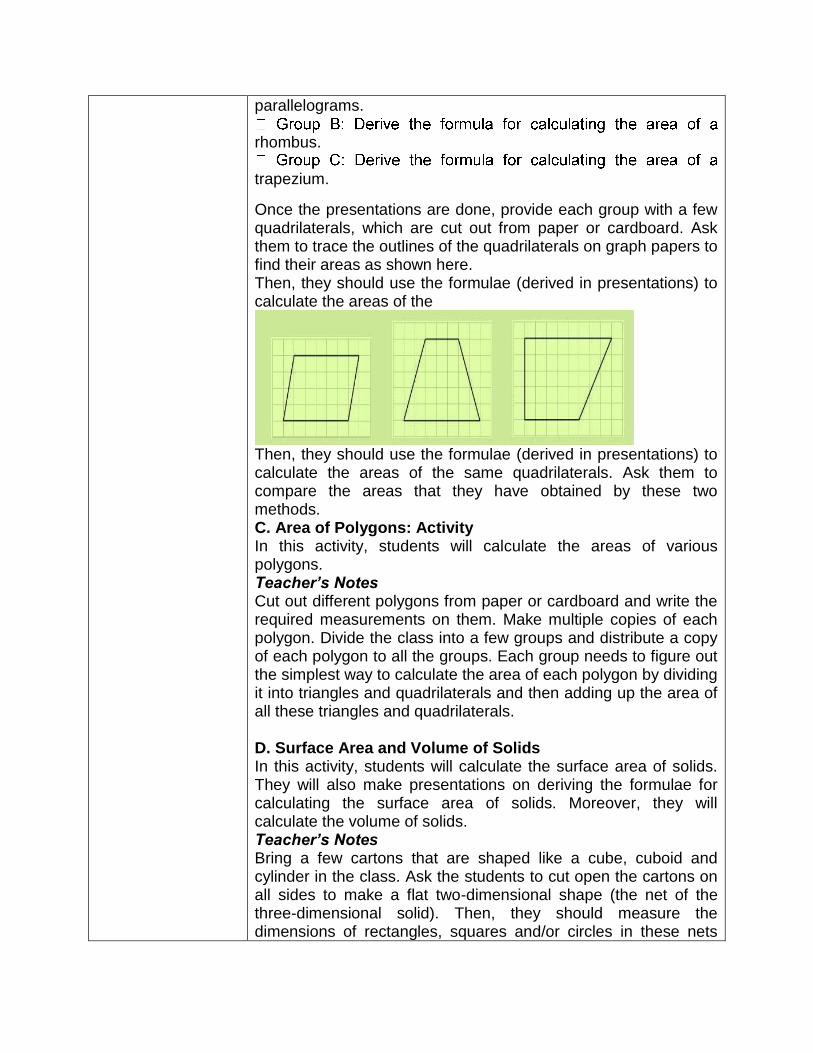
your classmates to calculate the areas of these polygons by using the triangulation method. Here is an example of the image of a polygon as well as the same image after it has been divided into smaller triangles (using the triangulation method). Adding up the area of smaller triangles will give the total area of the polygon.
Expected Outcome
After completing the lesson, learners should be able to calculate the area of quadrilaterals and polygons. They should also be able to calculate the surface area and the volume of solids, such After completing the lesson, learners should be able to calculate
the area of quadrilaterals and polygons. They should also be able to calculate the surface area and the volume of solids, such as cubes, cuboids and cylinders. Moreover, they should be able to derive the formulae for calculating the area of quadrilaterals and polygons and the surface area of solids.
Student Deliverables quadrilaterals
of solids
Assessment Class Test, extra questions from refreshers and Teach Next Module.
AIR FORCE SCHOOL HASIMARA
Lesson Plan
Board: CBSE | Class: VIII| Subject: Maths
Chapter Name: Visualising Solid Shapes
Time Alloted For The Lesson
This lesson is divided across three modules. It will be completed in three class meetings.
Prerequisite Knowledge
Visualising Solid Shapes: Class VII
Short Description Of The Lesson
In this lesson, learners will study to recognise two-dimensional and three-dimensional objects. They will learn about the different views of three-dimensional objects. They will also learn about maps and the differences between a map and a picture. Further, they will study about polyhedrons and the Euler’s formula.
Objectives - dimensional object
te between a picture and a map
different objects
rify Euler’s formula for the given solids
Aids Relevant Modules from Teach Next -Dimensional Shapes
Audio Visual Aids Access the videos relevant to the lesson ‘Visualising Solid Shapes’ from the Library resources. Aids Nontechnical None
Procedure Teacher-Student Activities
A. Warm-up Session Begin the lesson with a simple activity to help students recall two and three-dimensional objects.
Teacher’s Notes Get a few two-dimensional and three-dimensional objects to the classroom and ask the students to recognise these objects. You can also call a few students and ask them to draw three-dimensional shapes (cube, cuboid, cylinder and so on) on the board, name the shapes and recognise the two-dimensional shapes in them. Additionally, present the students with a few nested shapes and ask them to recognise the shapes in them. B. Viewing Three-Dimensional Shapes In this activity, students will be given various three-dimensional objects and they need to draw the front, side and top views of these objects. Teacher’s Notes Talk to the students about perspective and how objects look different when viewed from different positions and angles. Then, divide the students into groups of around four students in each group. Get a few three-dimensional objects to the classroom and present each group with an object. Now, ask each student of a group to draw the three views of the object. Once a group is done with drawing the views, exchange the object with another group. Some of the objects that can be brought to the classroom are toys of different shapes, flower vase, bowl, old mobile, computer mouse, photo frame, alarm clock and so on. C. Map Activity In this activity, students need to interpret a map and draw a map using
proper scale and symbols. Teacher’s Notes Begin the activity by drawing a simple picture of the classroom on one side of the board and a simple map of the classroom using symbols on the other side. Discuss the differences between the two and the advantages of a map over a picture. You can also get an atlas to the classroom and show the students different types of maps drawn to different scales. Also, present maps like the agricultural or the mineral map of a state and ask the students to interpret these maps. Thereafter, assign a project on a map creation. Ask each student to draw a map of their locality on a chart paper. The map should be drawn to scale using symbols and appropriate labels. D. Flashcard Activity - Polyhedron In this activity, students need to identify if a given three-dimensional shape is a polyhedron. If it is a polyhedron, ask them to categorise the polyhedron as convex or non-convex, regular or non-regular and as a prism or a pyramid. Teacher’s Notes Explain the concept of polyhedrons and non-polyhedrons to the students with the help of images. Also, talk about prisms, pyramids, convex, non-convex, regular and non-regular polyhedrons. Show images for all types of polyhedrons. Create flashcards with the images of non-polyhedrons and the different types of polyhedrons on them. Divide the class into a few groups. Pick out a flashcard and show it to a group. Ask the students to identify if the image on the card is that of a polyhedron. If it is a polyhedron, ask the students to categorise the polyhedron as convex or non-convex, regular or non-regular and as a prism or a pyramid. E. Activity for Euler’s Formula In this activity, students will have to verify the Euler’s formula for a given polyhedron. They also need to verify if a given three-dimensional shape is a polyhedron using the Euler’s formula. Teacher’s Notes For this activity, you can make use of the flashcards used in the previous activity. Show the images of the polyhedrons one by one to the students and ask them to verify the Euler’s formula for each polyhedron. You can also draw a few three-dimensional solids on the board and ask the students to verify if these solids are polyhedrons by using the Euler’s formula.
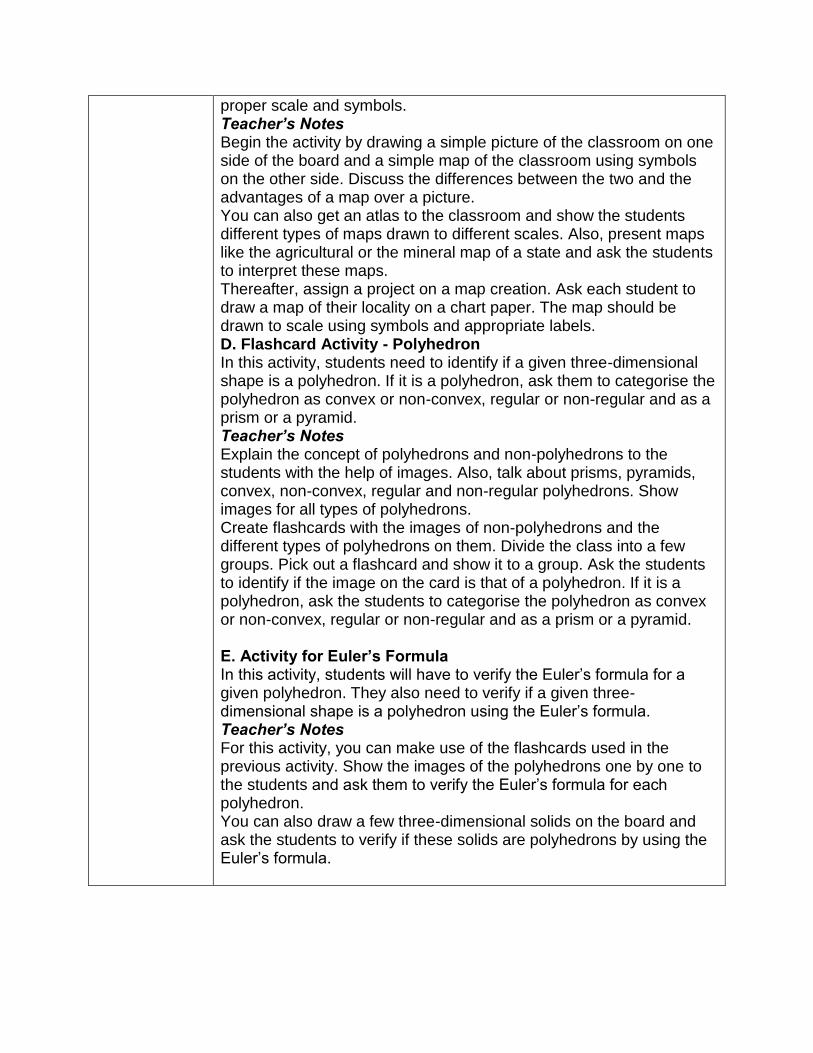
Supplemental Activities
Ask the students to create 3-D paper models of different polyhedrons. The students need to first create the net of a polyhedron and then join it to create the polyhedron. Once done, ask them to verify the Euler’s formula. The nets for some of the polyhedrons are as shown
Expected Outcome
After studying this lesson, the learners will be able to recognise two-dimensional and three-dimensional objects. They must be able to draw the different views of three-dimensional objects. They will also be able to draw and interpret maps and cite the differences between a map and a picture. Further, they will be able to identify the different types of polyhedrons and verify the Euler’s formula.
Student Deliverables
Assessment Class Test, extra questions from refreshers and Teach Next Module.
AIR FORCE SCHOOL HASIMARA
Lesson Plan
Board: CBSE | Class: VIII| Subject: Maths
Chapter Name: Comparing Quantities
Time Alloted For The Lesson
This lesson is divided across six modules. It will be completed in six class meetings.
Prerequisite Knowledge
Comparing Quantities: Class VII
Short Description Of The Lesson
In this lesson, learners will learn to compare quantities using ratios and percentages. They will also learn to calculate the change in percentage of a quantity. They will be taught about the concepts of discount, overhead charges, profit, loss, sales tax, value added tax, compound interest and conversion period. Moreover, they will be explained the method to derive the compound interest formula and calculate the compound interest for different conversion periods using this formula.
Objectives percentages
profit and loss
late profit or loss and its percentage
or VAT
tax) or the final price of the item when the other two figures are known
plain the difference between simple interest and compound interest
calculation
compound interest formula
conversion periods
calculations
Aids Relevant Modules from TeachNext
Other Audio Visual Aids Access the videos relevant to the chapter ‘Comparing Quantities’ from the Library resources. Aids Nontechnical None
Procedure Teacher-Student Activities A. Warm-up Session Begin the class by recalling students’ knowledge about comparison of quantities. Ask them a few questions on comparing quantities using ratios and proportions. Then, lead into the lesson. After the warm-up session, play all modules in Teach Next. B. Discounts and Profit: Game In this activity, students will apply their knowledge of
percentages, profit, loss and discounts. This activity is similar to the activity that they had participated in the previous class. Teacher’s Notes The instructions for the game are as follows. Set up shops: Set up different ‘shops’ in your classroom. These shops should sell different items that consumers typically buy in a market, such as clothes, shoes, bags, groceries, electronic goods and home appliances. Students should cut out the pictures of such items from newspaper advertisements and use them as ‘goods’. Use ‘play money’ as currency. In case, ‘play money’ is not available, you may create currency notes of different denominations from paper or cardboard and use them as ‘play money’. A few students should run shops and others should be consumers. Decide the prices: The shopkeepers need to attach price tags to each item they are selling. For example, the price of a bag can be Rs 300. One item should be kept in multiple shops and each shop owner has the freedom to fix its price. You need to help all shopkeepers to come up with very close prices so that selecting the cheapest deal becomes a bit challenging for consumers. You also need to decide the cost price for each item. The shopkeepers need to take care that the selling price is more than the cost price so that they can make profit. Declare discounts: Shopkeepers can declare discounts on a few items in their shops. For example, they can declare that their customers would get 25% concession on a bag worth Rs 300. The shopkeepers need to ensure that the selling price after concessions is more than the cost price (or they would incur loss). Start the business: Now, the game setup is ready and it is the time to start the business. Consumers must visit different shops and buy items from the shops that are selling them at the cheapest prices. They have freedom to decide what they are going to buy and in what quantity. However, they need to exhaust all ‘play money’ given to them (or as much as possible). Game over: Once the activity is over, check who has bought items at the cheapest price. Also, ask the shopkeepers to calculate their profit or loss. Based on these figures, explain to consumers and shopkeepers how they could have done better. Tip: Limit the number of items in shops to minimum as too many items would make the activity very complex for the students.
C. Activity: VAT In this activity, students will calculate the original price of the item, VAT (or sales tax) or the final price after adding VAT (or sales tax) when the other two figures are known. Teacher’s Notes
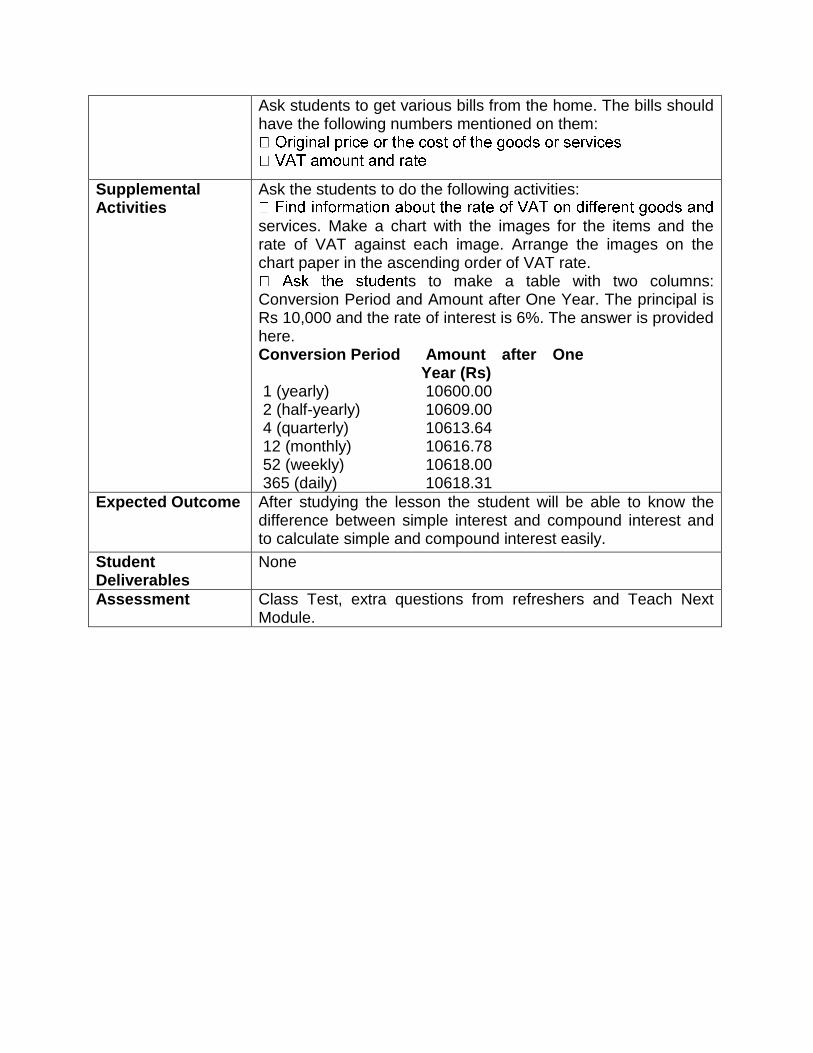
Ask students to get various bills from the home. The bills should have the following numbers mentioned on them:
Supplemental Activities
Ask the students to do the following activities:
services. Make a chart with the images for the items and the rate of VAT against each image. Arrange the images on the chart paper in the ascending order of VAT rate.
ts to make a table with two columns: Conversion Period and Amount after One Year. The principal is Rs 10,000 and the rate of interest is 6%. The answer is provided here. Conversion Period Amount after One
Year (Rs) 1 (yearly) 10600.00 2 (half-yearly) 10609.00 4 (quarterly) 10613.64 12 (monthly) 10616.78 52 (weekly) 10618.00 365 (daily) 10618.31
Expected Outcome After studying the lesson the student will be able to know the difference between simple interest and compound interest and to calculate simple and compound interest easily.
Student Deliverables
None
Assessment Class Test, extra questions from refreshers and Teach Next Module.