Embed Size (px)
Citation preview
Fermentation For Life Lesson 9 By Terry Willard ClH, PhD; Malcolm Saunders, Pedro Acuna Simple Cheeses
©2017 Wild Rose College of Natural Healing and Light Cellar 1 All Rights Reserved.
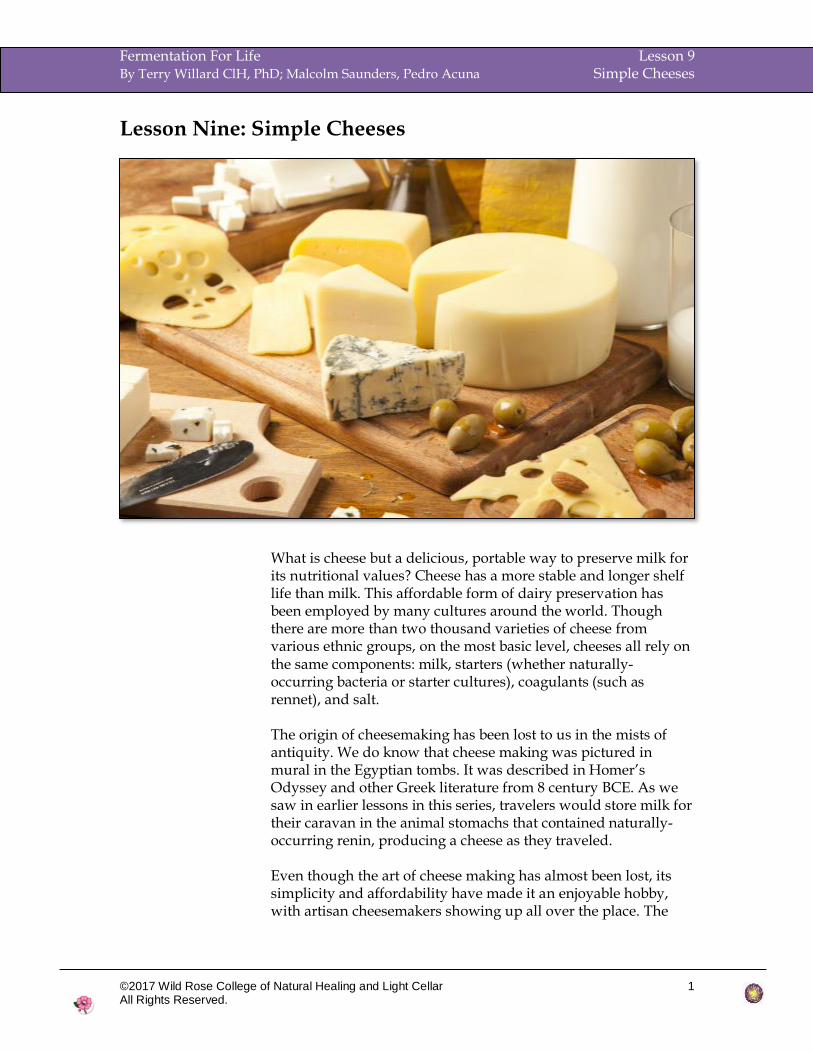
Lesson Nine: Simple Cheeses
What is cheese but a delicious, portable way to preserve milk for its nutritional values? Cheese has a more stable and longer shelf life than milk. This affordable form of dairy preservation has been employed by many cultures around the world. Though there are more than two thousand varieties of cheese from various ethnic groups, on the most basic level, cheeses all rely on the same components: milk, starters (whether naturally-occurring bacteria or starter cultures), coagulants (such as rennet), and salt. The origin of cheesemaking has been lost to us in the mists of antiquity. We do know that cheese making was pictured in mural in the Egyptian tombs. It was described in Homer’s Odyssey and other Greek literature from 8 century BCE. As we saw in earlier lessons in this series, travelers would store milk for their caravan in the animal stomachs that contained naturally-occurring renin, producing a cheese as they traveled. Even though the art of cheese making has almost been lost, its simplicity and affordability have made it an enjoyable hobby, with artisan cheesemakers showing up all over the place. The
Fermentation For Life Lesson 9 By Terry Willard ClH, PhD; Malcolm Saunders, Pedro Acuna Simple Cheeses
©2017 Wild Rose College of Natural Healing and Light Cellar 2 All Rights Reserved.
basics are easy. To be an artisan, however, takes time and patience. The process always begins with milk. Then, either natural bacteria starts to work on the milk, or a starter culture is added. These bacteria act on the milk sugar (lactose), converting it to lactic acid. This is the sweet secret of cheese making. The sugar provides food for the bacteria in the starter culture, which is added to the milk. The starter culture digests the sugar and produces acid. This acid production begins the process that will eventually turn the milk into cheese. Truly, it is the control of this acid production that the cheesemaker needs to learn to regulate to become consistently successful. As you might have noticed, this can be very exciting news to some lactose-sensitive people. Cheese, just like yogurt and kefir, has way less lactose than many other dairy products. Much of the lactose is used up in the process of creating the cheese. It should be remembered though that there are many forms of dairy sensitivities or allergies, and so cheese consumption only allows some people to be able to tolerate dairy. If a person is sensitive or allergic to the milk protein (casein) then they might even become more intolerant to cheeses. Some people can consume certain types of cheese, but not others. Probably the simplest example of cheese making is Queso blanco (Queso = Spanish for cheese; blanco = white) that can be found throughout Mexico and Latin America. It is a very simple cheese made with whole cow’s milk and coagulated with vinegar. The milk is heated, then the acid (vinegar) is added and stirred to distribute. Almost like magic, curds begin to appear from the depths of the white liquid. With only a little stirring, there are fluffy curds floating in clear, yellowish whey. Drain the curds and toss them with salt, and you’ve got cheese. Queso blanco is not complex in terms of flavor, but its simplicity demonstrates the fundamental action that takes place in transforming milk into cheese. Not all cheeses are formed as easily, but by following the steps and stages presented in this course, you’ll gain a rounded understanding of how cheeses of varying degrees of complexity stem from this common foundation.
Fermentation For Life Lesson 9 By Terry Willard ClH, PhD; Malcolm Saunders, Pedro Acuna Simple Cheeses
©2017 Wild Rose College of Natural Healing and Light Cellar 3 All Rights Reserved.
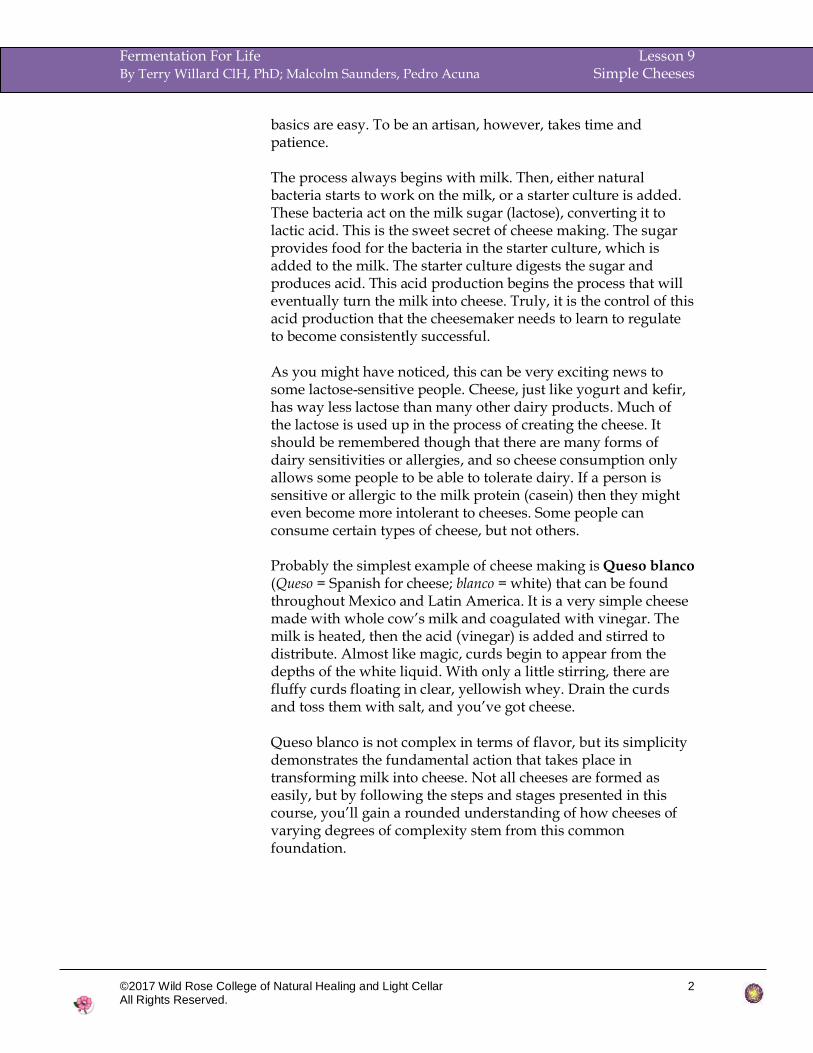
Queso blanco
Prep Time: 1 hour
Cook Time: 10 minutes
Total Time: 1 hour, 10 minutes
Yield: About 8 oz queso fresco cheese
Ingredients:
• 1/2 gallon whole milk
• 1/2 cup whipping cream
• 1 tablespoon salt
• 4-5 tablespoons vinegar (apple cider or distilled white vinegar)
Preparation:
1. Place the milk, cream, and salt in a large pot, and heat over medium heat.
2. Heat, stirring, until temperature reaches 190 F (88C; or almost to a boil). Remove from heat.
3. Stir in the vinegar, one tablespoon at a time. Small curds will begin to form. Stir gently for 5 minutes or so, then let mixture cool for 10 minutes more.
4. Line a large colander with 2-3 layers of cheesecloth. Pour milk mixture slowly into the colander, letting the whey (clear liquid) drain away.
5. When most of the whey has drained off and cheese is cool enough to handle, lift the edges of the cheesecloth up and twist, wrapping the cheese securely inside the cheesecloth. Squeeze off excess whey. Hang cheesecloth "bag" over the sink and let the whey drain for about an hour.
6. At this point, once the cheese is well-drained, you can store the cheese in the refrigerator, in an airtight container.
7. How to press the curds to make a firmer, molded cheese: Place a ring mold (or clean, empty metal can with lids removed) on a baking sheet or flat dish. Spoon curds inside of the ring. Cover them with a piece of wax paper, then use another can or something heavy to press down on them. It's ideal if you can find something that will just fit inside the circumference of the ring or can. One solution is to cut a circle of heavy cardboard that is just smaller than the circumference of the ring/can. Place the cardboard circle on top of the wax
Fermentation For Life Lesson 9 By Terry Willard ClH, PhD; Malcolm Saunders, Pedro Acuna Simple Cheeses
©2017 Wild Rose College of Natural Healing and Light Cellar 4 All Rights Reserved.
paper, then use something like a smaller can to provide the weight on top. (The cardboard circle will help distribute the
weight more evenly). 8. Place cheese in the refrigerator and press for 3-4 hours, or
overnight. Remove mold and wrap cheese with saran wrap or place in an airtight container. Store cheese for up to 1 week in the refrigerator.
Cheese is the perfect Do It Yourself project (DIY) As a DIY project, we will be looking at making small batches. Approximately 4 liters (1 gallon) will make about 0.5 Kg (1 pound) hard cheese and up to 1 Kg (2 pounds) of fresh soft cheese. There are a few basic steps to cheesemaking, and they are the same no matter what kind of cheese you want to create. Once you have mastered those steps, you can make anything, from French brie to Greek mizithra.
The Basics
As with dealing with any of the fermentations, it is important to make sure everything is properly sanitized.
Equipment:
• Butter muslin (4 to 6 meters) and cheesecloth (4 to 6 meters)
• Colander or strainer (made of plastic or another nonreactive material) for draining curds
• Curd cutting knife or 10-inch cake decorating spatula
• Cutting boards or cheese boards: food-grade boards to fit draining trays
• Disposable vinyl or food-service gloves
• Draining bowl or bucket: a large, nonreactive, food-grade vessel for catching up to 2 gallons of whey
• Cheese mats (plastic): to drain molded curds
• Draining rack: nonreactive material, to sit inside draining tray
• Draining trays: food-grade plastic trays or rimmed quarter-sheet or half-sheet baking pans
• Flexible wire stainless steel whisk with a long handle
• Flexible blade rubber spatulas
• Instant-read kitchen or dairy thermometers
• Ladle or skimmer (stainless steel or other nonreactive material) for removing curds from whey
• Molding and shaping devices
Fermentation For Life Lesson 9 By Terry Willard ClH, PhD; Malcolm Saunders, Pedro Acuna Simple Cheeses
©2017 Wild Rose College of Natural Healing and Light Cellar 5 All Rights Reserved.
• Paper towels
• Ripening boxes: food-grade storage boxes with lids
• Spoons: large nonreactive metal, wood, or plastic spoons for stirring; one slotted and one not
• Stainless steel pots: a 6-quart pot for working with 1 gallon of milk; a 10-quart pot for working with 2 gallons; a 12-quart pot for making a water bath for indirect heating
• Stainless steel measuring spoons that include the very important ⅛ teaspoon
• Wrapping materials: re-sealable bags, plastic wrap, and aluminum foil
• Weights: such as foil-wrapped bricks, heavy skillets, or empty milk containers filled with water (see Pressing Cheese)
For several the formulas, you will also need the following:
• An atomizer or fine spray bottle: used for spraying mold solution on surface-ripened cheeses
• A cheese press (see Pressing Cheese): 2-gallon capacity
• Technique: Waxing Cheese
• Heat-resistant waterproof gloves of rubber or neoprene: used for handling hot curds for stretched-curd cheeses
• Hygrometer: a tool for measuring relative humidity; very helpful for monitoring the environment in which cheeses ripen
• pH strips or pH meter: used to measure the acidity of curds in some recipes, especially stretched-curd cheeses
• Specialty wrapping materials: cheese paper There are a wide variety of styles, tastes, smells, looks, and consistencies to a finished cheese; from soft to hard, sharp to mild, and wet to dry. Traditionally, cheese is made by culturing milk either by encouraging natural enzymes and bacterial action (in raw milk), or by using the culture of your choice (in pasteurized milk). A coagulant, such as rennet, lemon juice, or vinegar is then added, causing the milk protein casein to curdle and separate as a white, firm curd from the clear, watery whey. The curd is then cut, using a specialized curd cutter, or a really long kitchen knife, into smaller cubes (now curds), to be mashed and formed to your specific style. Next you either lightly drain the curds and crumble them to use as a soft cheese, or spread (press) the curds, using a cheese press. Curds are compressed in a cheese press for as long as the specific style requires, then wrapped in some type of bandage or cloth, sometimes brined or rubbed in butter or lard, and put into a dark, cool environment to age naturally for as long as needed.
Fermentation For Life Lesson 9 By Terry Willard ClH, PhD; Malcolm Saunders, Pedro Acuna Simple Cheeses
©2017 Wild Rose College of Natural Healing and Light Cellar 6 All Rights Reserved.
Steps and ingredients may vary, but the fundamentals stay the same:
1. Milk 2. Starter culture 3. Coagulant 4. Salt
Milk The unique protein structure of milk enables coagulation, allowing for the preservation of milk as a food source in the form of cheese. By understanding the components of milk and how they behave you will understand the process of coagulation. Milk is composed of water, proteins including caseins, lactose (milk sugar), and milk fat (also known as butterfat). Butterfat is the lovely taste globules that contribute so much to your cheese’s final flavor. Because milk is the primary ingredient in cheese, choosing high-quality producers and buying as close to the source as possible will help ensure a great final product. The primary animal milks used for cheese making are cattle, goats, and sheep. The type of milk used for cheese making does not determine the style of cheese. In fact, all of these sources of milk are used for all styles of cheese. That said, there are general differences among the milks produced by different animals. Cow’s milk is sweet, creamy, and buttery, with a fat content of 3.25 percent by weight. Goat’s milk has a tangy, citrusy, almost barnyard quality with a slightly higher fat content than cow’s milk. Sheep’s milk is the richest, at 7.4 percent milk fat by weight, appears golden and oily, and has a gamey flavor. The milks always have a fuller flavor when the animals are fed their natural diet. While we will be using animal dairy for most cheese, we will also include a non-dairy nut cheese alternative. The textures and yields of the cheeses will differ from one milk to another. Goat’s milk, having smaller fat particles than cow’s or sheep’s milk, will produce smaller and softer curds. Sheep’s milk will produce a higher yield than the other two milks. If you are substituting sheep’s or goat’s milk for cow’s milk, reduce the amount of rennet by 10 to 15 percent. If you are substituting cow’s milk for goat’s milk, increase the amount of rennet by 10 to 15 percent. Whether you are working with raw or pasteurized milk, find a reputable source for locally produced, high-quality milk. Once you have a source you like for making cheese, stick with it. Always read the labels for processing procedures and sell-by dates, and always buy the freshest milk available and keep it refrigerated. Avoid milks or creams that have stabilizers
Fermentation For Life Lesson 9 By Terry Willard ClH, PhD; Malcolm Saunders, Pedro Acuna Simple Cheeses
©2017 Wild Rose College of Natural Healing and Light Cellar 7 All Rights Reserved.
or thickeners added, as these additives can inhibit proper coagulation and curd development.
Starter Cultures The starter/culture you choose will determine the taste, texture, and aroma of your final cheese. Some cultures may help create holes, such as those in Swiss cheese, and others may help create just the right flavor for a classic Gruyère. But all cultures can usually separate nicely into two large temperate-sensitive groups that we saw in earlier lessons:
• Mesophilic culture, that performs at an optimum temperature of around 85°F, and
• Thermophilic culture, that performs at an optimum temperature between 108° and 112°F.
In both types of culture, there are numerous strains ranging from moderate to speedy acid production.
When you purchase the culture, you are buying an isolated, pure strain of culture optimized for the type of cheese you wish to achieve. When following a cheese recipe, look for the type of starter culture the ingredient list calls for.
Coagulant
Coagulants are added after the culturing of the milk and are used to solidify milk protein into cheese curds. The most common coagulant is rennet, a naturally occurring enzyme called rennin, which is harvested from the stomach linings of un-weaned calves, kids, or lambs. Some people believe that calf rennet produces better, high-quality aged cheese. There are also vegetarian rennet substitutes, harvested from safflower seeds, thistle, and fig, or grown in laboratories on grain-based substrates. Animal rennet can be purchased in tablet or liquid form. Liquid is easier to work with and usually works faster within the milk, but rennet tablets can be found easily and inexpensively at most grocery stores, and have a longer shelf life. In general, 1/2 of a rennet tablet is equal to 1/4 teaspoon of liquid rennet. Rennet tablets must be crushed and added to a small amount of warm water, according to the amount called for in your cheese recipe. If you dilute liquid rennet or dissolve a rennet tablet in water, make sure your water is unchlorinated, because chlorine will kill the enzyme and render your rennet useless.
Fermentation For Life Lesson 9 By Terry Willard ClH, PhD; Malcolm Saunders, Pedro Acuna Simple Cheeses
©2017 Wild Rose College of Natural Healing and Light Cellar 8 All Rights Reserved.
Other coagulants, such as vinegar and lemon juice, are for use in specific recipes and not a substitute for animal coagulant, as the two types of coagulants work differently.
Secondary Cultures: Molds and Bacteria
Most frequently used in bloomy-rind and washed- or smeared-rind cheeses, secondary cultures are bacteria, molds, and yeasts that act in the cheese-ripening phase. The veins of mold and the distinct flavors of a blue cheese are caused by secondary cultures, as is the fuzzy white rind on Brie. These cultures are added directly to the milk, added between layers of curds, or sprayed or rubbed on the surface of the cheese as it ripens. In washed-rind cheeses, the ripening cultures are also rubbed onto the surface of the rind periodically as the cheese ages. Many cheeses utilize a combination of secondary cultures and enzymes. Flavor-enhancing bacteria such as Propionibacterium shermanii are also useful as ripening cultures.
Salt Salt is not used during the cheese making process merely for flavor enhancement. Salt is a natural preservative and a very important element in good cheese making. Salt helps to dry the curds during draining, controlling moisture and causing the curds to shrink. You should not use iodized salt, because iodine harms the growth of the cheese culture, and can slow down the aging process drastically. Specialized cheese salt, which is un-iodized and has a coarser grind, is available at cheese making supply shops and websites. But any coarse, non-iodized salt will work just as well.

Fermentation For Life Lesson 9 By Terry Willard ClH, PhD; Malcolm Saunders, Pedro Acuna Simple Cheeses
©2017 Wild Rose College of Natural Healing and Light Cellar 9 All Rights Reserved.
Feta
Maturing time: 3 days
Yield: approximately 2 x 350g cheese. Feta is a heavily salted cheese that originated in Greece.
Ingredients
• 4 liters of unhomogenized milk or living milk
• 100 ml premade Mesophilic Aromatic or Mesophilic Homo-fermentative culture
• 1 ml rennet
• 1 pinch lipase
• Sea Salt (don’t use iodized salt)
• Cool distilled water / cool purified water / Spring water
Method
1. The day before you plan on making Feta cheese, prepare 100ml of Mesophilic Aromatic or Mesophilic Homo-fermentative starter. To do this, mix approximately 1+ smidgen of starter with 100ml of unhomogenized milk or living milk. Incubate this for 10 hours in a yogurt maker. Cover and refrigerate the starter until you are ready to use it. It will last for 48 hours.
2. Pour milk into saucepan and heat on high until it reaches
32C (90F). 3. Transfer the milk into a 10 liter container. 4. Add 100 ml premade starter. Stir in thoroughly. 5. Dilute 1 pinch of lipase in 20ml of cool water and added it to
the milk. Stir in thoroughly. 6. Dilute 1ml of rennet in 10ml of cool water. Pour this solution
into the milk and gently stir with an up-and-down motion for several minutes.
7. Cover the container and allow the milk to rest for 90 minutes. 8. After the rennet has curded the milk, place a knife into the
curd and tip to the side. If the curd parts well, it is ready to cut. If you find it is still runny, leave it for another 10 minutes or more.
9. If the curd is ready, then cut the curd into 1-inch slices, then the slices into 1-inch cubes. Rest for 5 minutes.
10. Slide a slotted spoon down the side of the vat and place under curd. Slowly lifting and jiggling, bring the spoon to the

Fermentation For Life Lesson 9 By Terry Willard ClH, PhD; Malcolm Saunders, Pedro Acuna Simple Cheeses
©2017 Wild Rose College of Natural Healing and Light Cellar 10 All Rights Reserved.
surface. Continue through until all of the curd has been turned. Rest for 1 hour.
11. Repeat step 10. 12. Repeat step 10 a second time. 13. Using a slotted spoon and small jug, remove as much whey
as possible. 14. Using a slotted spoon, fill each cheese hoop to the top. 15. Invert the hoop every hour for 6 hours. 16. Leave the cheese overnight at room temperature. 17. Remove the cheese from the hoops and leave it on the drying
racks at room temperature for 24-48 hours. 18. Prepare a brine solution by mixing 120g of salt with 1 liter of
distilled water. 19. Store the cheese in the fridge in the brine solution for up to 2
months. Change the brine solution every 2 to 3 weeks.
Fermentation For Life Lesson 9 By Terry Willard ClH, PhD; Malcolm Saunders, Pedro Acuna Simple Cheeses
©2017 Wild Rose College of Natural Healing and Light Cellar 11 All Rights Reserved.
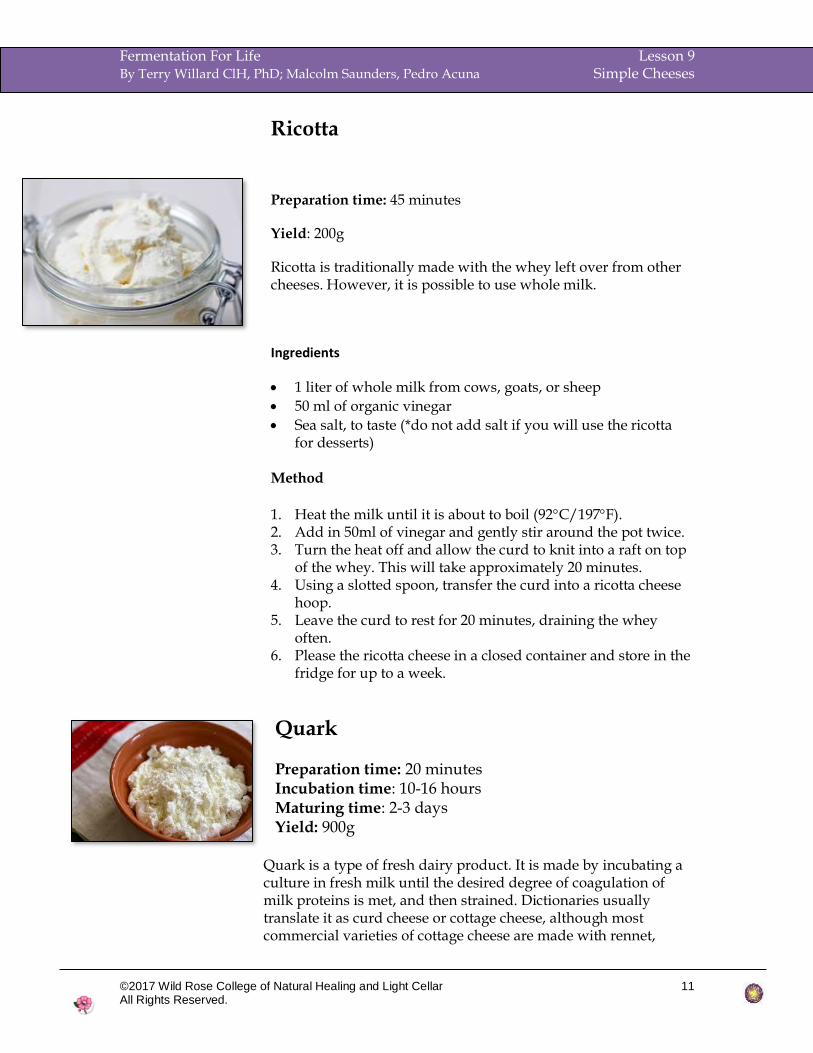
Ricotta
Preparation time: 45 minutes
Yield: 200g
Ricotta is traditionally made with the whey left over from other cheeses. However, it is possible to use whole milk.
Ingredients
• 1 liter of whole milk from cows, goats, or sheep
• 50 ml of organic vinegar
• Sea salt, to taste (*do not add salt if you will use the ricotta for desserts)
Method
1. Heat the milk until it is about to boil (92C/197F). 2. Add in 50ml of vinegar and gently stir around the pot twice. 3. Turn the heat off and allow the curd to knit into a raft on top
of the whey. This will take approximately 20 minutes. 4. Using a slotted spoon, transfer the curd into a ricotta cheese
hoop. 5. Leave the curd to rest for 20 minutes, draining the whey
often. 6. Please the ricotta cheese in a closed container and store in the
fridge for up to a week.
Quark Preparation time: 20 minutes Incubation time: 10-16 hours Maturing time: 2-3 days Yield: 900g
Quark is a type of fresh dairy product. It is made by incubating a culture in fresh milk until the desired degree of coagulation of milk proteins is met, and then strained. Dictionaries usually translate it as curd cheese or cottage cheese, although most commercial varieties of cottage cheese are made with rennet,
Fermentation For Life Lesson 9 By Terry Willard ClH, PhD; Malcolm Saunders, Pedro Acuna Simple Cheeses
©2017 Wild Rose College of Natural Healing and Light Cellar 12 All Rights Reserved.
whereas traditional quark is not. It is soft, white and unaged, similar to some types of fromage blanc. It is distinct from ricotta because ricotta is made from scalded whey. It is similar to the Indian Chakka. Quark usually has no rennet or salt added.
Ingredients
• 2 liters of whole milk from cows (non-homogenized)
• 2 dashes of freeze dried Mesophilic Aromatic starter
Instructions 1. Heat the milk until it is 40C/104F and turn the heat off. 2. Add Mesophilic Aromatic starter and gently stir around the
pot several times. 3. Incubate in yogurt maker for 10-16 hours or until the desired
degree of fermentation is reached. 4. Keep it in the fridge until chilled to increase your yield. 5. Invert into a cheesecloth lined colander. 6. Hang the cheese in cheesecloth to drain for 24-48 hours in the
fridge.
Fermentation For Life Lesson 9 By Terry Willard ClH, PhD; Malcolm Saunders, Pedro Acuna Simple Cheeses
©2017 Wild Rose College of Natural Healing and Light Cellar 13 All Rights Reserved.
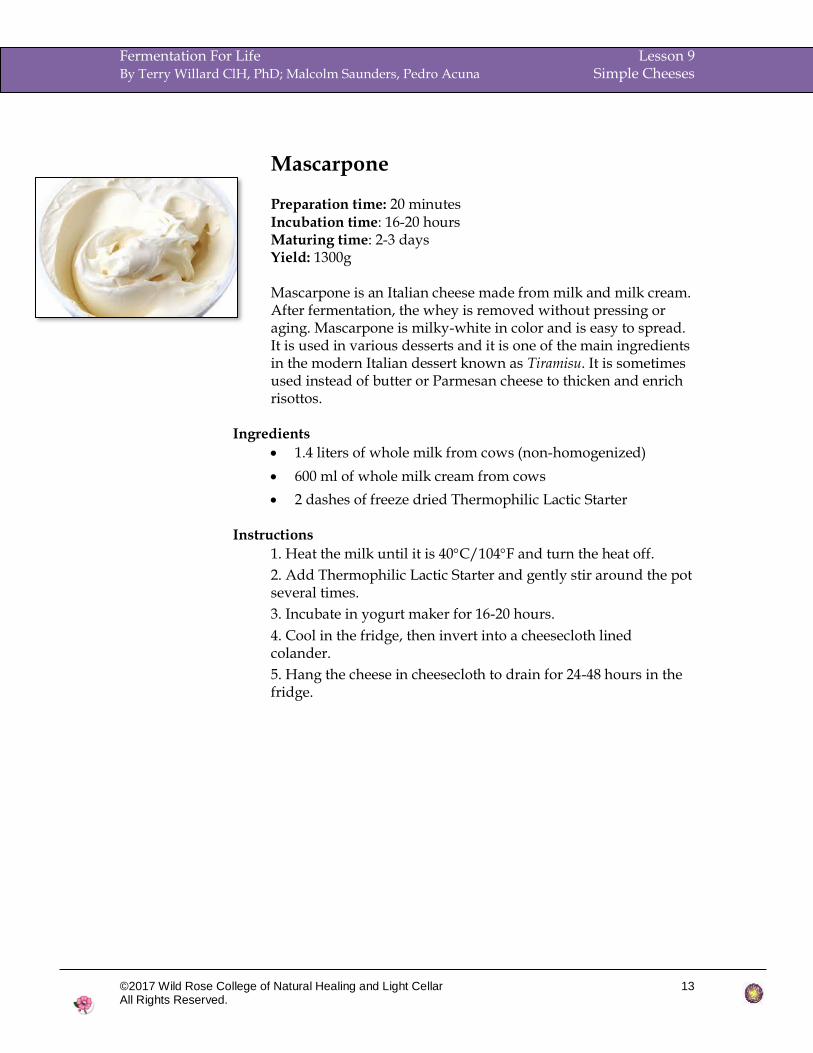
Mascarpone Preparation time: 20 minutes Incubation time: 16-20 hours Maturing time: 2-3 days Yield: 1300g Mascarpone is an Italian cheese made from milk and milk cream. After fermentation, the whey is removed without pressing or aging. Mascarpone is milky-white in color and is easy to spread. It is used in various desserts and it is one of the main ingredients in the modern Italian dessert known as Tiramisu. It is sometimes used instead of butter or Parmesan cheese to thicken and enrich risottos.
Ingredients
• 1.4 liters of whole milk from cows (non-homogenized)
• 600 ml of whole milk cream from cows
• 2 dashes of freeze dried Thermophilic Lactic Starter
Instructions
1. Heat the milk until it is 40C/104F and turn the heat off.
2. Add Thermophilic Lactic Starter and gently stir around the pot several times.
3. Incubate in yogurt maker for 16-20 hours.
4. Cool in the fridge, then invert into a cheesecloth lined colander.
5. Hang the cheese in cheesecloth to drain for 24-48 hours in the fridge.
Fermentation For Life Lesson 9 By Terry Willard ClH, PhD; Malcolm Saunders, Pedro Acuna Simple Cheeses
©2017 Wild Rose College of Natural Healing and Light Cellar 14 All Rights Reserved.
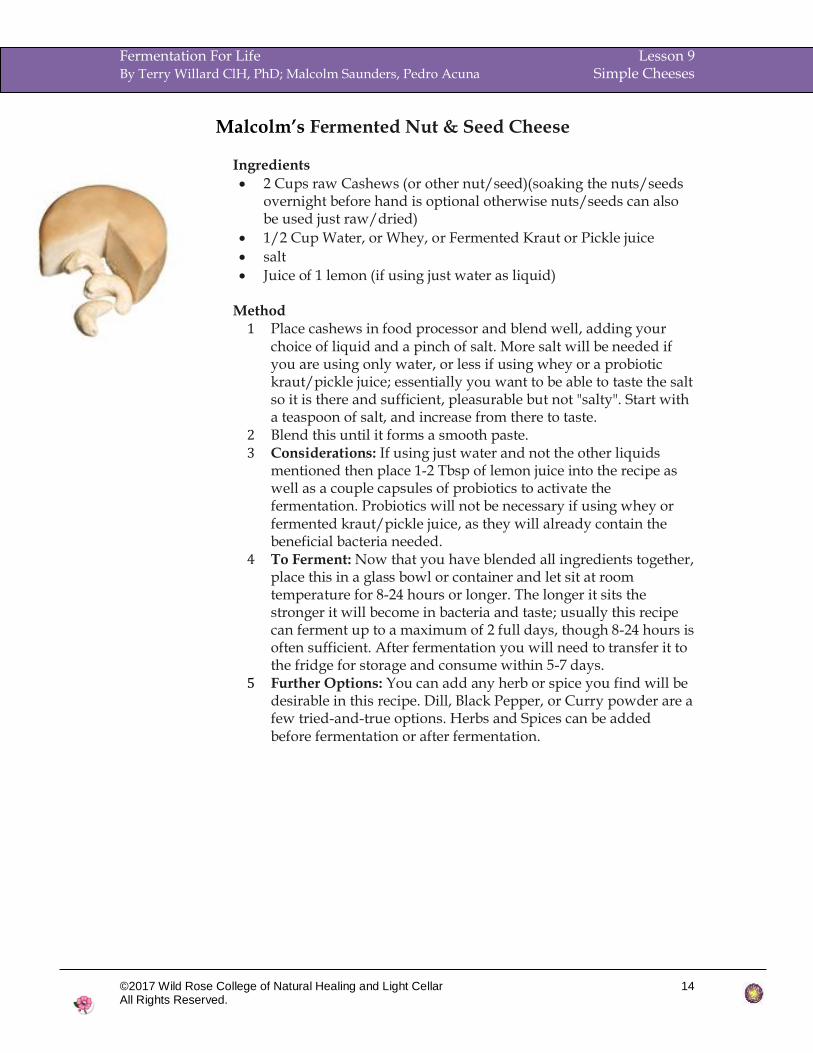
Malcolm’s Fermented Nut & Seed Cheese
Ingredients
• 2 Cups raw Cashews (or other nut/seed)(soaking the nuts/seeds overnight before hand is optional otherwise nuts/seeds can also be used just raw/dried)
• 1/2 Cup Water, or Whey, or Fermented Kraut or Pickle juice
• salt
• Juice of 1 lemon (if using just water as liquid)
Method 1 Place cashews in food processor and blend well, adding your
choice of liquid and a pinch of salt. More salt will be needed if you are using only water, or less if using whey or a probiotic kraut/pickle juice; essentially you want to be able to taste the salt so it is there and sufficient, pleasurable but not "salty". Start with a teaspoon of salt, and increase from there to taste.
2 Blend this until it forms a smooth paste. 3 Considerations: If using just water and not the other liquids
mentioned then place 1-2 Tbsp of lemon juice into the recipe as well as a couple capsules of probiotics to activate the fermentation. Probiotics will not be necessary if using whey or fermented kraut/pickle juice, as they will already contain the beneficial bacteria needed.
4 To Ferment: Now that you have blended all ingredients together, place this in a glass bowl or container and let sit at room temperature for 8-24 hours or longer. The longer it sits the stronger it will become in bacteria and taste; usually this recipe can ferment up to a maximum of 2 full days, though 8-24 hours is often sufficient. After fermentation you will need to transfer it to the fridge for storage and consume within 5-7 days.
5 Further Options: You can add any herb or spice you find will be desirable in this recipe. Dill, Black Pepper, or Curry powder are a few tried-and-true options. Herbs and Spices can be added before fermentation or after fermentation.