Embed Size (px)
Citation preview

UNITED STATES MARINE CORPS ENGINEER EQUIPMENT INSTRUCTION COMPANY
MARINE CORPS DETACHMENT
FORT LEONARD WOOD, MISSOURI 65473-8963
LESSON PLAN
DIESEL ENGINES
NCOM-C01
ENGINEER EQUIPMENT MECHANIC NCO
A16ACU1
REVISED 02/3/2014
APPROVED BY _________________________ DATE _______________

INTRODUCTION (10 MIN)
(ON SLIDE #1)
1. GAIN ATTENTION.
INSTRUCTOR NOTE
Computer aided graphic Intro to Diesel Failure Analysis 1.23 minutes.
Who in this class would like to ride a horse to work every day?
Better yet who in this class would like to try and move tons of dirt
with a horse and wagon? I don’t think that would be too much fun or
very productive do you?
_____________________________________________________________________
_____________________________________________________________________
_______________________________________
(ON SLIDE #2)
2. OVERVIEW. Good morning/afternoon class, my name is
_______________. The purpose of this period of instruction is to
familiarize the student with advanced techniques of isolation,
identification, diagnosis, and repair of diesel engine malfunctions.
(ON SLIDE #3)
INSTRUCTOR NOTE
Introduce learning objectives.
3. LEARNING OBJECTIVES.
a. TERMINAL LEARNING OBJECTIVE.
(1) Provided a service request, malfunctioning intake/exhaust
system, appropriate tools, and references, conduct advanced repair to
equipment intake/exhaust system to restore proper function.(1341-
MANT-2003)
(2) Provided a service request, malfunctioning fuel system,
appropriate tools, and references, conduct advanced repair to
equipment fuel system to restore proper function. (1341-MANT-2004)
(3) Provided a service request, malfunctioning coolant system,
appropriate tools/test equipment, and references, conduct advanced

repair of coolant system, to restore system to proper function.(1341-
MANT-2005)
(4) Provided a service request, a malfunctioning diesel engine,
appropriate tools and equipment, and the references, repair a diesel
engine to restore engine to proper function. (1341-MANT-2006)
(ON SLIDE #4)
b. ENABLING LEARNING OBJECTIVES.
(1) Without the aid of reference, identify the characteristics
of a diesel engine per the FOS3007NC. (1341-MANT-2006a)
(2) Without the aid of reference, identify the characteristics
of an intake/exhaust system per the FOS3007NC. (1341-MANT-2003a)
(3) Without the aid of reference, identify the characteristics
of a fuel system per the FOS3007NC. (1341-MANT-2004a)
(4) Without the aid of reference, identify the characteristics
of a cooling system per the FOS3007NC. (1341-MANT-2005a)
(5) With a caterpillar C6.6 engine, tools, TMDE, and
references, disassemble the intake/exhaust system per the RENR9722-01
and SENR9968-02. (1341-MANT-2003b)
(6) With a caterpillar C6.6 engine, tools, TMDE, and
references, disassemble the cooling system per the RENR9722-01 and
SENR9968-02. (1341-MANT-2005b)
(7) With a caterpillar C6.6 engine, tools, TMDE, and
references, disassemble the fuel system per the RENR9722-01 and
SENR9968-02. (1341-MANT-2004b)
(8) With a caterpillar C6.6 engine, tools, and references,
disassemble the engine per the RENR9722-01 and SENR9968-02. (1341-
MANT-2006b)
(9) With a disassembled caterpillar C6.6 engine, tools, TMDE,
and references, assemble the engine per the RENR9722-01 and SENR9968-
02. (1341-MANT-2006c)
(10) With a caterpillar C6.6 engine, tools, TMDE, and
references, assemble the fuel system per the RENR9722-01 and
SENR9968-02. (1341-MANT-2004c)
(11) With a caterpillar C6.6 engine, tools, TMDE, and
references, assemble the cooling system per the RENR9722-01 and
SENR9968-02. (1341-MANT-2005c)

(12) With a caterpillar C6.6 engine, tools, TMDE, and
references, assemble the intake/exhaust system per the RENR9722-01
and SENR9968-02. (1341-MANT-2003c)
(13) With an assembled caterpillar C6.6 engine, tools, TMDE,
and references, test the engine per RENR9722-01 and SENR9968-02.
(1341-MANT-2006d)
(ON SLIDE #5)
4. METHOD/MEDIA . This period of instruction will be taught using the
lecture method with aid of power point presentation, videos,
instructor demonstrations, and practical applications.
INSTRUCTOR NOTE
Explain Instructional Rating Forms to the students.
(ON SLIDE #6)
5. EVALUATION. There will be a fifty question, multiple choice,
closed book examination and a Hands-on evaluation of proper diesel
engine trouble shooting procedures. Refer to the training schedule
for day and time.
6. SAFETY/CEASE TRAINING (CT) BRIEF. In case of fire exit the
building and assemble in the parking lot for a head count. There is
no safety brief associated with this lecture portion. There will be a
safety brief given before certain demonstrations and practical
applications.
(ON SLIDE #7)
TRANSITION: Now that you understand the purpose of this presentation,
the terminal learning objective, enabling learning objective, how the
period of instruction will be taught, and how you’ll be evaluated,
let’s begin with a discussion of some of the recent developments in
diesel technology.
_____________________________________________________________________
_____________________________________________________________________
_____________________________________________________________________

BODY (76 HRS 40 MIN)
1. DIESEL ENGINE CONSTRUCTION (2 hrs)
(ON SLIDE #8)
INSTRUCTOR NOTE
Computer aided graphic Hot Parts 1.37 minutes.
(ON SLIDE #9)
a. Background. Because the most widely used piston engine is the
four-stroke cycle liquid cooled, it will be used as the focus of
discussion.
(1) Attached to diesel engines is a certain mystique that makes
owners and mechanics alike call for professional help at the first
sign of trouble. There is, in fact, something intimidating about an
engine that has no visible means of ignition, the torque
characteristics of a bull ox, and fuel-system tolerances expressed as
wavelengths of light.
(2) Yet, working on diesels is no more difficult than servicing
the current crop of gasoline engines. In some ways, the diesel is an
easier nut to crack—symptoms of failure are less ambiguous,
specifications are more complete, and the quality of design and
materials is generally superior. Nothing in human experience quite
compares to the frustration created by an engine that refuses to
start. By the same token, no music is sweeter than the sound of an
engine that you have just repaired.
(3) Emphasis here is on the uniquely diesel aspects of the
technology diagnostics, fuel systems, turbocharging, and the kind of
major engine work not often languished on gasoline engines. The
emphasis here is on how things work. What is not understood cannot be
fixed, except by accident or through an enormous expenditure of time
and parts. Combined in this discussion is “how-to” information with
theory. The recipes change with engine make and model; however, the
theory has currency for all.
(4) The computer revolution has impacted truck, bus, some
marine, and many stationary engines. First encounters with computer-
controlled engines can send mechanics into culture shock. None of the
old rules apply, or that is the way it seems. Actually these “green”
engines are still diesels and subject to all the ills that
compression ignition is heir to. But the control hardware is
electronic, and that is where new skills and new ways of thinking are
required.

(ON SLIDE #10)
INSTRUCTOR NOTE
Computer aided graphic Iron and steel 1.18 minutes.
b. Cylinder Blocks. The cylinder, or the engine block, is the
basic foundation of virtually all engines. The block in most engines
is a solid casting made of cast iron that contains the crankcase,
cylinders, and coolant passages (air cooled engines will be covered
later).
(ON SLIDE #11)
INSTRUCTOR NOTE
Computer aided graphic Casting 0.56 minutes.
(1) Construction. The cylinder block is a one piece casting
that is usually an iron alloy containing nickel and molybdenum. This
is the best overall material for cylinder blocks. It provides
excellent wearing qualities, low material and production costs, and
it only changes dimensions minimally when heated.
(ON SLIDE #12)
(2) Cylinders. The cylinders are bored right into the block
(Figure4). A good cylinder must be round, not varying in diameter and
be uniform for its entire length.
(ON SLIDE #13)
(3) Cylinder Sleeves. Cylinder sleeves or liners commonly
are used to provide a wearing surface other than the cylinder block
for the pistons to ride against. This is important for the following
reasons:
(a) Alloys of steel can be used that will wear longer
than the surfaces of the cylinder block. This will increase engine
life while keeping production costs down.
(b) Because the cylinders wear more than any other
area of the block, the life of the block can be extended greatly by
using sleeves. When overhaul time comes, the block then can be
renewed by merely replacing the sleeves. For this reason, sleeves are
very popular in large diesel engines, for which the blocks are very
expensive.

(c) Using a sleeve allows an engine to be made of a
material such as aluminum (as is the case for air cooled engines) by
providing the wearing qualities necessary for the cylinder that the
aluminum cannot.
(d) Whatever method is used to secure the sleeve, it
is very important that the sleeve fits tightly. This is important so
that the sleeve may transfer its heat effectively to the water
jackets. The following are the three basic ways of securing the
sleeves in the cylinder block:
(ON SLIDE #14)
1 Different ways to secure the sleeves.
a Pressing in a sleeve that is tight enough
to be held in by friction.
b Providing a flange at the top of the block
that locks the sleeve in place when the cylinder head is bolted into
place. This is more desirable than a friction fit, because it locks
the sleeve tightly.
c Casting the sleeve into the cylinder wall.
This is a popular means of securing the sleeve in an aluminum block.
(ON SLIDE #15)
c. Crankcase. The crankcase is the part of the cylinder block
that supports and encloses the crankshaft. It is also where the
engine’s lubricating oil is stored. The upper part of the crankcase
usually is part of the cylinder block, while the lower part is
removable (oil pan or oil reservoir).
(ON SLIDE #16)
d. Cylinder Heads. The cylinder head is a separate one-piece
casting that bolts to the top of the cylinder block.
(1) Construction. The cylinder head is made almost
exclusively from cast iron on Engineer Equipment. The cylinder head
seals the end of the cylinder. This serves to provide a combustion
chamber for the ignition of the fuel and to hold the expansive forces
of the burning gases so that they may act on the piston. There is an
opening to position the fuel injector in the combustion chamber
(additional information on combustion chambers will be covered in the
air induction portion).

(ON SLIDE #17)
(2) Valves and Ports. The cylinder head on overhead valve
configurations supports the valves and has the ports cast into it.
(Valves are covered during the Air & Exhaust System).
(ON SLIDE #18)
(3) Sealing. Cylinder heads on liquid-cooled configurations
are sealed to the cylinder block by the head gasket. The head gasket
usually is made of two sheets of soft steel that sandwich a layer of
asbestos. Steel rings are used to line the cylinder openings. They
hold the tremendous pressures created on the power stroke. Holes are
cut in the gasket to mate the coolant and lubrication feed holes
between the cylinder block and the cylinder head.
(ON SLIDE #19)
INSTRUCTOR NOTE
Image of camshaft and tappets.
(ON SLIDE #20)
INSTRUCTOR NOTE
Computer aided graphic camshaft 2.28 minutes.
e. Camshafts and Tappets. The camshaft provides for the opening
and closing of the engine valves. The tappets or the lifters are the
connecting link between the camshaft and the valve mechanism.
(ON SLIDE #21)
(1) Camshaft Construction. Camshafts usually are made from
cast or forged steel. The surfaces of the lobes are hardened for long
life.
(ON SLIDE #22)
(2) Camshaft Support. The camshaft is supported, and
rotates, in a series of bearings along its length. The bearings
usually are pressed into their mountings and made of the same basic
construction as crankshaft bearings. The thrust, or the back and
forth movement, usually is taken up by the thrust plate, which bolts
to the front of the engine block. Any forward thrust loads are then
taken up by the front camshaft bearing journal. The drive gear or
sprocket then is fitted to the front of the camshaft. Its rear

surface rides against the thrust plate to take up any rearward
thrust.
(ON SLIDE #23)
(3) Driving the Camshaft. Camshafts may be driven by gears,
belts, or chains. However, Heavy Industrial Diesels rely exclusively
on gears. A gear on the crankshaft meshes directly with another gear
on the camshaft. The gear on the crankshaft and camshaft are made of
steel. The gears are helical in design. Helical gears are used
because they are stronger, and they also tend to push the camshaft
rearward during operation to help control thrust.
(ON SLIDE #24)
(4) Timing Marks. The camshaft and the crankshaft always
must remain in the same relative position to each other. Because the
crankshaft must rotate twice as fast as the camshaft, the drive
member on the crankshaft must be exactly one-half as large as the
driven member on the camshaft. In order for the camshaft and
crankshaft to work together, they must be in the proper initial
relation to each other. This initial position between the two shafts
is designated by marks that are called timing marks. To obtain the
correct initial relationship of the components, the corresponding
marks are aligned at the time of assembly.
(ON SLIDE #25)
(5) Auxiliary Camshaft Functions. The camshaft, after being
driven by the crankshaft, in turn drives other engine components.
(a) The oil pump.
(b) The fuel transfer pump. This is usually
accomplished by machining an extra lobe on the camshaft to operate
the pump.
(c) On diesel engines, the camshaft often is utilized
to operate the fuel injection system.
(ON SLIDE #26)
INSTRUCTOR NOTE
Computer aided graphic Lifters 0.11 minutes.
f. Tappets. Tappets (or lifters) are used to link the camshaft
to the valve mechanism. The bottom surface is hardened and machined
to be compatible with the surface of the camshaft lobe. Tappets may
be solid or hydraulic. However, Heavy Industrial Diesel’s rely
exclusively on solid tappets.
(ON SLIDE #27)
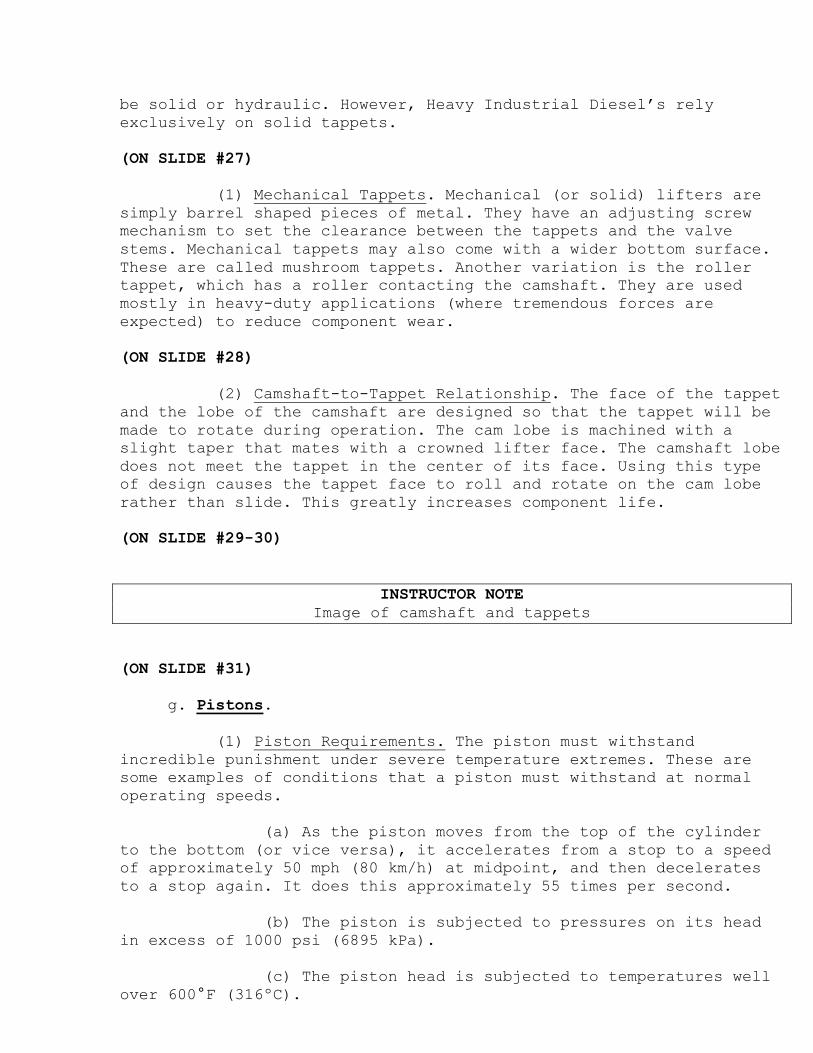
(1) Mechanical Tappets. Mechanical (or solid) lifters are
simply barrel shaped pieces of metal. They have an adjusting screw
mechanism to set the clearance between the tappets and the valve
stems. Mechanical tappets may also come with a wider bottom surface.
These are called mushroom tappets. Another variation is the roller
tappet, which has a roller contacting the camshaft. They are used
mostly in heavy-duty applications (where tremendous forces are
expected) to reduce component wear.
(ON SLIDE #28)
(2) Camshaft-to-Tappet Relationship. The face of the tappet
and the lobe of the camshaft are designed so that the tappet will be
made to rotate during operation. The cam lobe is machined with a
slight taper that mates with a crowned lifter face. The camshaft lobe
does not meet the tappet in the center of its face. Using this type
of design causes the tappet face to roll and rotate on the cam lobe
rather than slide. This greatly increases component life.
(ON SLIDE #29-30)
INSTRUCTOR NOTE
Image of camshaft and tappets
(ON SLIDE #31)
g. Pistons.
(1) Piston Requirements. The piston must withstand
incredible punishment under severe temperature extremes. These are
some examples of conditions that a piston must withstand at normal
operating speeds.
(a) As the piston moves from the top of the cylinder
to the bottom (or vice versa), it accelerates from a stop to a speed
of approximately 50 mph (80 km/h) at midpoint, and then decelerates
to a stop again. It does this approximately 55 times per second.
(b) The piston is subjected to pressures on its head
in excess of 1000 psi (6895 kPa).
(c) The piston head is subjected to temperatures well
over 600°F (316ºC).

(ON SLIDE #32)
INSTRUCTOR NOTE
Computer aided graphic Pistons 0.59 minutes.
(2) Construction Materials. When designing pistons, weight
is a major consideration. This is because of the tremendous inertial
forces created by the rapid change in piston direction. For this
reason, it has been found that aluminum alloys are the best material
for piston construction. A very high strength-to-weight ratio,
lightweight, excellent conductor of heat, and is machined easily make
aluminum alloys very attractive to engine manufacturers. Pistons also
are manufactured from cast iron. Cast iron is an excellent material
for pistons in very low speed engines, but it is not suitable for
higher speeds because it is a very heavy material.
(ON SLIDE #33)
(3) Controlling Heat Expansion. Pistons must have features
built into them to help them control expansion. Without these
features, pistons would fit loosely in the cylinders when cold, and
then bind in the cylinders as they warm up. This is a problem with
aluminum, because it expands so much. To control heat expansion,
pistons may be designed with the following features:
(ON SLIDE #34)
(a) It is obvious that the crown (head) of the piston
will get hotter than the rest of the piston. To prevent it from
expanding to a larger size than the rest of the piston, it is
machined to a diameter that is smaller than the skirt area.
(ON SLIDE #35)
(b) Cam Grinding. By making the piston egg-shaped, it
will be able to fit the cylinder better throughout its operational
temperature range. A piston of this configuration is called a cam-
ground piston. Cam-ground pistons are machined so that their diameter
is smaller parallel to the piston pin axis than it is perpendicular
to it. When the piston is cold, it will be big enough across the
larger diameter to keep from rocking. As it warms up, it will expand
across its smaller diameter at a much higher rate than at its larger
diameter. This will tend to make the piston round at operating
temperature.
(ON SLIDE #36)
(2) Skirted Pistons. The purpose of the piston skirt is to
keep the piston from rocking in the cylinder.
(ON SLIDE #37)
Some piston skirts have large portions of its skirt removed in the
non thrust areas. Removal of the skirt in these areas serves the
following purposes:
(a) Lightens the piston, which, in turn, increases the
speed range of the engine.
(b) Reduces the contact area with the cylinder wall,
which reduces friction.
(c) Allows the piston to be brought down closer to the
crankshaft without interference with its counterweights.
(ON SLIDE #38)
(3) Strength and Structure. When designing a piston, weight
and strength are both critical factors. Two of the ways pistons are
made strong and light are as follows:
(a) The head of the piston is made as thin as is
practical. To keep it strong enough, there are ribs cast into the
underside of it.
(b) The areas around the piston pin are reinforced.
These areas are called the pin bosses.
(ON SLIDE #39)
(4) Coatings. Pistons that are made from aluminum are
usually treated on their outer surfaces to aid in engine break-in and
increase hardness. The following are the most common processes for
treatment of aluminum pistons.
(a) The piston is coated with tin so that it will work
into the cylinder walls as the engine is broken in. This process
results in a more perfect fit, shortening of the break-in period, and
an Increase in overall engine longevity.
(b) The piston is anodized to produce a harder outside
surface. Anodizing is a process that produces a coating on the
surface by electrolysis. The process hardens the surface of the
piston. This helps it resist picking up particles that may become
embedded in the piston, causing cylinder wall damage.

(ON SLIDE #40)
(5) Top Ring Groove Insert. The top ring groove is very
vulnerable to wear for the following reasons:
(a)It is close to the piston head, subjecting it to
intense heat.
(b) The top compression ring is exposed directly to
the high pressures of the compression stroke. To remedy the potential
problem of premature top ring groove wear, some aluminum pistons are
fitted with an insert in the top ring groove. The insert usually is
made from nickel iron. Because of the better wear qualities, the ring
groove will last longer than if the ring fit directly against the
aluminum.
(ON SLIDE #41)
h. Piston Rings.
(1) Purpose. There are three main purposes for piston
rings.
(a) They provide a seal between the piston and the
cylinder wall to keep the force of the expanding combustion gases
from leaking into the crankcase from the combustion chamber. This
leakage is referred to as blowby. Blowby is detrimental to engine
performance because the force of the exploding gases will merely
bypass the piston rather than push it down. It also contaminates the
lubricating oil.
(b) They keep the lubricating oil from bypassing the
piston and getting into the combustion chamber from the crankcase.
(c) They provide a solid bridge to conduct the heat
from the piston to the cylinder wall. About one-third of the heat
absorbed by the piston passes to the cylinder wall through the piston
rings.
(ON SLIDE #42)
(2) Description. There are 2 types of piston rings
Compression and oil control rings. Piston rings are secured on the
pistons by fitting into grooves. There may be two or three
compression rings followed by an oil control ring on the bottom. They
are split to allow for installation and expansion, and they exert an
outward pressure on the cylinder wall when installed. They fit into
grooves that are cut into the piston, and are allowed to float freely
in these grooves. A properly formed piston ring, working in a
cylinder that is within limits for roundness and size, will exert an

even pressure and a solid contact with the cylinder wall around its
entire circumference. There are two basic classifications of piston
rings.
(ON SLIDE #43)
(3) Top Compression Ring. The compression ring seals the
force of the exploding mixture into the combustion chamber. There are
many different cross sectional shapes of piston rings available. The
various shapes of rings all serve to preload the ring so that its
lower edge presses against the cylinder wall.
(a) Functions of the top compression ring.
1 The pressure from the power stroke will force
the upper edge of the ring into contact with the cylinder wall,
forming a good seal.
2 As the piston moves downward, the lower edge of
the ring scrapes, from the cylinder walls, any oil that manages to
work past the oil control rings.
3 On the compression and the exhaust strokes, the
ring will glide over the oil, increasing its life.
(4) Second Compression Ring. The primary reason for using a
second compression ring is to hold back any blowby that may have
occurred at the top ring. A significant amount of the total blowby at
the top ring will be from the ring gap. For this reason, the top and
the second compression rings are assembled to the piston with their
gaps 60 degrees offset with the first ring gaps.
INSTRUCTOR NOTE
This is a good time to reemphasize that piston construction is
significantly different between engine manufactures (Detroit Diesel,
Cummins, and Caterpillar) and even among different engine families.
Some pistons may have 3, 4, or even 5 compression rings.
(ON SLIDE #44)
INSTRUCTOR NOTE
Computer aided graphic Oil Control Ring 0.16 minutes.
(5) The Oil Control Ring. The oil control ring keeps the
engine’s lubricating oil from getting into the combustion chamber by
controlling the lubrication of the cylinder walls. They do this by

scraping the excess oil from the cylinder walls on the down stroke.
The oil then is forced through slots in the piston ring and the
piston ring groove. The oil then drains back into the crankcase. The
rings are made in many different configurations that can be one-piece
units or multipiece assemblies. Regardless of the configuration, all
oil control rings work basically in the same way.
(ON SLIDE #45)
(6) Ring Gap. The split in the piston ring is necessary for:
(a) Installing the ring on the piston.
(b) Allowing for expansion from heating. The gap must
be such that there is enough space so that the ends do not come
together as the ring heats up. This would cause the ring to break.
(ON SLIDE #46)
(7) Ring Expanders. Expander devices are used in some
applications. These devices fit behind the piston ring and force it
to fit tighter to the cylinder wall. They are particularly useful in
engines where a high degree of cylinder wall wear exists.
(ON SLIDE #47)
(8) Piston Ring Wear-in. When piston rings are new, a
period of running is necessary to wear the piston rings a small
amount so that they will conform perfectly
to the cylinder walls.
(a) The cylinder walls are surfaced with a tool called
a hone. The hone leaves fine scratches (called a cross hatch pattern)
in the cylinder walls. The piston rings are made with grooves in
their faces. The grooved faces of the piston rings rubbing against
the roughened cylinder walls serve to accelerate ring wear during the
initial stages, and speed wear-in. As the surfaces wear smooth, the
rings will be worn in.
(b) Extreme pressure may be applied to high spots on
the piston rings during the wear-in period. This can cause the piston
rings to overheat at these points and cause damage to the cylinder
walls in the form of rough streaks. This condition is called
scuffing. New piston rings are coated with a porous material such as
graphite, phosphate, or molybdenum. These materials absorb oil and
serve to minimize scuffing. As the rings wear in, the coatings wear
off.
(c) Some piston rings are chrome plated. Chrome-plated
rings generally provide better overall wearing qualities. They also

are finished to a greater degree of accuracy, which lets them wear in
faster.
(ON SLIDE #48)
INSTRUCTOR NOTE
The Piston Pins are the next component in engine construction we’ll
cover. It is important to keep in mind that there are two acceptable
methods of fitting piston pins into pistons; heating the piston or
cooling the pin. NEVER FORCE A PISTON AND PIN TOGETHER! SEVERE DAMAGE WILL
RESULT!
i. Piston Pins.
(1) Purpose. The piston pin serves to connect the piston to
the connecting rod. It passes through the pin bosses in the piston
and the upper end of the connecting rod. The full-floating piston
pins pivot freely in the connecting rod and the piston pin bosses.
The outer ends of the piston pins are fitted with lock rings to keep
the pin from sliding out and contacting the cylinder walls.
(ON SLIDE #49)
(2) Construction. A piston pin must be hard to provide the
desired wearing qualities. At the same time, the piston pin must not
be brittle. To satisfy the overall requirements of a piston pin, it
was found that a casehardened steel pin is best. Case hardening is a
process that hardens the surface of the steel to a desired depth. The
pin is also made hollow to reduce the overall weight of the
reciprocating mass.
(ON SLIDE #50)
INTERIM TRANSITION: We have just covered components of the combustion
chamber, are there any questions? If not go ahead and take a ten
minute break.
_____________________________________________________________________
_____________________________________________________________________
_____________________________________________________________________
(BREAK – 10 Min)
INTERIM TRANSITION: Before the break we finished combustion chamber
components, are there any questions? If not lets move onto connecting
rods.
_____________________________________________________________________
_____________________________________________________________________
_____________________________________________________________________

(ON SLIDE #51)
j. Connecting Rods.
(1) Purpose. The connecting rods connect the pistons to the
crankshaft. They must be extremely strong to transmit the thrust of
the pistons to the crankshaft, and to withstand the inertial forces
of the directional changes of the pistons.
(ON SLIDE #52)
(2) Construction. The connecting rods are normally in the
form of an I-beam. This design gives the highest overall strength and
lowest weight. They usually are made of forged steel, but may be made
of aluminum in small engines. The upper end attaches to the piston
pin, which connects it to the piston. The lower end is attached to
the crankshaft. The lower bearing hole in the connecting rod is split
so that it may be clamped to the crankshaft. Because the lower end
has much greater movement than the upper, the hole is much larger.
This provides much greater bearing surface.
(ON SLIDE #53)
k. Crankshaft.
(ON SLIDE #54)
INSTRUCTOR NOTE
Computer aided graphic reciprocating motion to rotary motion 0.29
minutes.
(1) Purpose. The crankshaft is the part of the engine that
transforms the reciprocating motion from the pistons to rotating
motion.
(ON SLIDE #55)
(2) Construction. Crankshafts are made from forged or cast
steel. The forged steel unit is the stronger of the two. It usually
is reserved for commercial and military use. The cast unit is used
primarily in light and regular duty gasoline engines.
(ON SLIDE #56-58)
INSTRUCTOR NOTE
Computer aided graphic Crankshafts 0.13 minutes.

After the rough forging or casting is produced, it becomes a finished
product by going through the following steps:
(a) All surfaces are rough machined.
(b) All holes are located and drilled.
(c) The crankshaft, with the exception of the bearing
journals, is plated with a light coating of chrome.
(d) The bearing journals are case–hardened.
(e) The bearing journals are ground to size.
(f) Threads are cut into necessary bolt holes.
(ON SLIDE #59)
(3) Throw Arrangements. The arrangement of the throws on
the crankshaft determines the firing order of the engine. The
position of the throws for each cylinder arrangement is paramount to
the overall smoothness of operation.
(ON SLIDE #60)
(a) In-line cylinder engines have one throw for each
cylinder. This is a very common arrangement that is built in four and
six cylinder configurations. The four cylinder crankshaft has its
throws offset by 180º while the six cylinder design has its throws
offset by 120º.
(ON SLIDE #61)
(b) V-type engines have two cylinders operating off of
each throw. The two end throws are on one plane offset 180 degrees
apart. The two center throws are on another common plane. They are
also offset 180 degrees apart. The two planes are offset 90 degrees
from each other.
(ON SLIDE #62)
(c) The crankshaft is supported in the crankcase and
rotates in the main bearings. The connecting rods are supported
on the crankshaft by the rod bearings.
INSTRUCTOR NOTE
BEARINGS ARE COVERED IN GREAT DETAIL DURING THE LUBRICATION SECTION.

(ON SLIDE #63)
(4) Crankshaft Vibration. A crankshaft is very prone to
vibration because of its shape, extreme weight, and the tremendous
forces acting on it. The following are three basic areas that are of
concern when considering vibration in crankshaft design.
(ON SLIDE #64)
(a) Imbalance Vibration. An inherent problem with a
crankshaft is that it is made with offset throws. The weight of the
throws tends to make the crankshaft rotate elliptically. This is
aggravated further by the weight of the piston and the rod. To
eliminate the problem, weights are positioned along the crankshaft.
One weight is placed 180 degrees away from each throw. They are
called counterweights and are usually part of the crankshaft.
(ON SLIDE #65)
INSTRUCTOR NOTE
Computer aided graphic Crankshaft Deflection 0.45 minutes.
(b) Deflection Vibration. The crankshaft will have a
tendency to bend slightly when subjected to the tremendous thrust
from the piston. This deflection of the rotating member will cause a
vibration. This vibration is minimized by heavy crankshaft
construction and sufficient support along its length by bearings.
(ON SLIDE #66)
INSTRUCTOR NOTE
Computer aided graphic Crankshaft Torsion 0.37 minutes.
(3) Torsional Vibration. Torsional vibration occurs when
the crankshaft twists because of the power stroke thrusts. It is
particularly noticeable on engines with long crankshafts, such as in-
line engines. It is a major reason why in-line, eight-cylinder
engines are no longer produced. The vibration is caused by the
cylinders furthest from the crankshaft output. As these cylinders
apply thrust to the crankshaft, it twists, and as the thrust
decreases, the crankshaft unwinds. The twisting and unwinding of the
crankshaft produces a vibration.
(ON SLIDE #67)
l. Vibration Dampener.

(1) Purpose. There are a few variations of the vibration
dampener, but they all accomplish their task in basically the same
manner. The use of a vibration damper at the end of the crankshaft
opposite the output end will serve to absorb some torsional
vibration.
(ON SLIDE #68)
(2) Construction. The engine damper is usually composed of
bonded rubber surrounded by a steel ring. As vibrations hit the
engine damper, they cause the bonded rubber to flex and stretch. This
process absorbs the vibrations and changes them to heat. Reducing
these vibrations also helps extend the life of the main bearings
which hold the crankshaft in place.
(ON SLIDE #69)
Whenever a sudden change in crankshaft speed occurs, it causes the
friction clutch to slip. This is because the outer section of the
damper will tend to continue at the same speed. The slippage of the
clutch serves to absorb the torsional vibration. Another type of
damper links the two pieces together with rubber.
(ON SLIDE #70)
When the engine is running, the crankshaft vibrates due to the
flexing of the crankshaft in response to the impulses created as the
connecting rods push on the crankshaft. By absorbing more of the vibrations, engine response becomes smoother.
(ON SLIDE #71)
m. Flywheel.
(1) Purpose. The flywheel stores energy from the power
strokes, and smoothly delivers it to the drive train of the vehicle.
It mounts on the end of the crankshaft, between the engine and the
transmission.
(ON SLIDE #72)
(2) Construction. The flywheel on large, low- speed engines
usually is made of cast iron. This is desirable due to the heavy
weight of the cast Iron, which helps the engine maintain a steady
speed.
(a) Manual Transmission. When the vehicle is equipped
with a manual transmission, the flywheel serves to mount the clutch.

(b) Automatic Transmission. When the vehicle is
equipped with an automatic transmission, the flywheel(flex plate)
serves to support the front of the torque converter. On some
configurations, the flywheel (flex plate)is combined with the torque
converter.
(ON SLIDE #73)
INSTRUCTOR NOTE
Computer aided graphic induction heating 0.51 minutes.
(3) Starter Ring Gear. The outer edge of the flywheel is
lined with gear teeth. They are to engage the drive gear on the
starter motor.
(4) Operation. For every two revolutions that the
crankshaft makes, it only receives one power stroke lasting for only
one-half of one revolution of the crankshaft for each cylinder. This
means that the engine must coast through one and one-half crankshaft
revolutions in every operating cycle. This would cause the engine to
produce very erratic power output. To solve this problem, a flywheel
is added to the end of the crankshaft. The flywheel, which is very
heavy, will absorb the violent thrust of the power stroke. It will
then release the energy back to the crankshaft so that the engine
will run smoothly.
(ON SLIDE #74)
INSTRUCTOR NOTE
Flywheel Pic
A good understanding of Failure Analysis will help the student
recognize not only what is broke and why, but also what caused it to
break and what can be reused. Each student will take something
different from this part of the lecture.
IT SHOULD BE APPROACHED AS AN OPPORTUNITY FOR A GROUP DISCUSSION.
(ON SLIDE #75)
n. Failure Analysis. Failure analysis is an advanced method of
determining the “root cause” of a malfunction or complaint. It is
needed when things are broken, deformed, or worn excessively. It is a
process of determining the cause of a failure from the type of damage
evident in the failed component, in addition to other information
surrounding the failure. It is important that all possible
information about the failure be gathered and considered in the

conclusion. Any failures that significantly caused the sequence of
events for the failure should be identified. The material failure
should also be described using the standard nomenclature and plain
language. A knowledgeable approach to failure analysis and the use of
clinical methods during repair will assure the mechanic of success.
(1) Depending on the circumstances of the situation, the
extent of damage, and the duties assigned will determine how much
failure analysis the mechanic can perform. Some typical applications
may include:
(2) Product Quality Deficiency Reporting. The provision for
including deficiency reporting is important because it frequently
identifies the weak link in the chain. It may be possible, for
example, to redesign a component with a greater margin of tolerance
to correct a specific deficiency.
(3) Defense Reutilization Management. Occasionally an end
item will be sent to DRMO because it is less expensive to replace it
than it is to repair it. If the mechanic is estimating this cost, he
will prepare the inspection paperwork. If components can be salvaged
from the equipment, he will be required to make a determination on
what to salvage. (This also applies to combat assessment and repair.)
(4) Safety Investigations. There may be no evidence
supporting human causes, and a material failure may be the only
specific event that can be found with certainty.
(5) Letters of Abuse. When a component has catastrophically
failed, and must be rebuilt, a letter listing the causes of failure,
corrective action, and command endorsement usually accompanies the
component.
(6) Frequent Component Failure. When a specific item of
equipment has repeated failure of the same component(s), obviously
the mechanic is correcting the symptom not the “root cause”. This can
be as simple as frequent battery failure to as complex as
transmission replacement.
(7) Often insignificant details can provide a major clue in
the reconstruction of the failure to determine its cause. When making
a failure analysis, review and consider all of the related
components. In many situations, a condition causing one part to fail
is likely to cause some damage to the other components that will
provide a clue to the cause of the failure. Frequently, the evidence
of seating patterns, clogging of filters, and other evidence thus
found will provide valuable aids in the solution of problems.
(8) Experience in evaluating damage patterns can be most
helpful in performing a failure analysis. Capability is needed for

recognizing and distinguishing the different kinds of damage
patterns. Associations of these with previous experience of similar
patterns, wherein the cause of the failure was known, permit an
assignment of the probable cause of the failure.
(9) Considerable judgment is required as different types of
damage are frequently superimposed over each other. For example, a
set of failed bearings can show severe scratching, with one or more
of them showing heavy discoloration and evidence of lack of
lubrication. Both conditions could have contributed to the failure;
but since lack of lubrication is more likely to cause immediate and
total destruction, this is the more logical cause of failure.
(10) In situations where the failed component is totally
disintegrated, little evidence is left to indicate the cause of
failure. In these situations, a particularly close inspection must be
made of the other components for evidence of what damaging condition
existed to cause the failure. The principle objective in determining
the cause of failure is to direct corrective action toward preventing
recurrences.
INSTRUCTOR NOTE
Computer aided graphic getting and inspecting parts 3.04 minutes.
(11) When failure analysis is required a few simple
precautions will make the mechanic’s job a success.
(a) DO NOT DESTROY EVIDENCE—GO SLOWLY AND OBSERVE ALL
CONDITIONS.
(ON SLIDE #76-77)
(b) Inspect the parts and their condition before,
during, and after removal.
(c) Remove and arrange all parts as they operate.
Observe respective part conditions—amount and condition of lubricant
present, burrs, cuts or particles in evidence, condition of journals,
fillets, and so forth.
(d) Clean and mark the parts to permanently indicate
positions. (Letters and numerals is a good system.)
(e) Inspect all related parts for condition and
unusual circumstances.

(ON SLIDE #78)
(f) Use the information in the maintenance record (if
available), whatever you can learn of operator, and the condition of
the parts you have removed to diagnose the cause of failure.
(g) Correct the cause of the failure before
reassembly.
(ON SLIDE #79)
TRANSITION: Over the past 2 hours we have reviewed the function and
construction of cylinder blocks, heads, camshafts, tappets, piston
assemblies, crankshafts, vibration dampeners, and flywheels moving.
Are there any questions? I have some questions for you.
_____________________________________________________________________
_____________________________________________________________________
_____________________________________________________________________
Opportunity for questions.
1. QUESTIONS FROM THE CLASS:
2. QUESTIONS TO THE CLASS:
Q: Which engine component receives the reciprocating force and
transforms it to a rotary motion to drive the power train?
A: Crankshaft
Q: Which engine component stores inertia to transmit mechanical force
evenly to the power train during engine operation and reduce engine
vibration?
A: Flywheel
Q: What are the three causes of vibration associated with the
crankshaft?
A: Its shape, extreme weight, and the tremendous forces acting on it.
Q: What are the features built into the piston to provide for heat
expansion.
A: Crown(head) and cam grinding.
Q: What is the purpose of the piston rings?
A: Seals between the cylinder walls and piston containing compression
and combustion gases, keeps lubricating oil out of combustion
chamber, and provide a means to conduct heat from piston to cylinder
walls.
Q: What part of the piston is strengthened to support the piston pin?
A: Piston pin boss
Q: What term is used to describe improper break-in of a new engine
that results in rough streaks on the cylinder walls?
A: Scuffing
Q: What is the purpose of the cylinder block?

A: Acts as a connecting point for all other engine components.
Q: What are three reasons for using cylinder sleeves?
A; Extend life of a cylinder block, Block can be renewed by replacing
sleeve, allows engine to be made of lighter material like aluminum.
Q: What is the purpose of the cylinder head?
A: Seals the end of the cylinder ensuring an air tight combustion
chamber for igniting fuel and focuses on expansive forces to act on
pistons.
Q: What is the purpose of the camshaft?
A: Provides opening and closing of the engine valves.
(BREAK – 10 Min)
TRANSITION: Any more questions? If not let’s take a quiz.
_____________________________________________________________________
_____________________________________________________________________
_____________________________________________________________________
INSTRUCTOR NOTE:
Hand out quiz for diesel engine construction.
(ON SLIDE #80)
QUIZ (30min)
Hand out quiz for diesel engine construction. Give the students 20
minutes to complete and review it with the students after.
(BREAK – 10 Min)
TRANSITION: Any questions concerning the quiz? If not let’s talk
about Diesel engine principles.
_____________________________________________________________________
_____________________________________________________________________
_____________________________________________________________________
(ON SLIDE #81)
INSTRUCTOR NOTE
Computer aided graphic Clockwork engine 0.19 minutes.

2. DIESEL ENGINE PRINCIPLES OF OPERATION (2hrs)
(ON SLIDE #82)
INSTRUCTOR NOTE
Computer aided graphic moving engine (no sound looping).
a. Internal Combustion Engine versus External Combustion Engine.
(1) Internal Combustion Engine. An internal combustion
engine is any engine in which the fuel is burned within it. A four–
stroke–cycle engine is an internal combustion engine because the
combustion chamber is located within the engine.
(ON SLIDE #83)
(2) External Combustion Engine. An external combustion
engine is an engine in which the fuel is burned outside of the
engine. A steam engine is a perfect example. The fuel is burned in an
outside boiler, where it makes steam. The steam is piped to the
engine to make it run.
(ON SLIDE #84)
INSTRUCTOR NOTE
Computer aided graphic 3D combustion chamber (looping graphic no
sound).
b. Reciprocating Motion to Rotary Motion.
(1) The operation of the piston engine can best be
understood by comparing it to a simple cannon. A cannon barrel,
charge of gunpowder, and a cannonball, the gunpowder is ignited. The
gunpowder burns very rapidly and as it burns there is a rapid
expansion of the resulting gases. This rapid expansion causes a
tremendous increase in pressure that forces the cannonball from the
barrel. The cannon barrel has been replaced by a cylinder and a
combustion chamber. The cannonball has been replaced by a piston.
(ON SLIDE #85)
INSTRUCTOR NOTE
Computer aided graphic 3D 4 stroke.

(2) The force of the piston acting in a downward motion is
of little value if it is to turn the wheels of the vehicle. In order
to utilize this straight line or reciprocating motion, it must be
transformed into rotary motion. This is made possible through the use
of a crankshaft. The crankshaft, as the name implies, is a shaft
connected to the driving wheels of a vehicle through the drive train
on one end. On the other end of the shaft is a crank with a crankpin
offset from the shaft’s center.
(ON SLIDE #86)
INSTRUCTOR NOTE
In a gasoline engine, ignition is started by the ionization (and
heat) of air as electricity jumps from the negative to the positive
electrode of the spark plug. In a diesel combustion chamber the
ignition of fuel is NEARLY SPONTANEOUS. This means that the leading
edge of the fuel spray causes a rise in pressure and heat igniting
the rest of the fuel producing the characteristic diesel “KNOCK”.
c. Action in the Cylinder.
(1) When the piston is at its highest point in the
cylinder, it is in a position called top dead center (TDC). When the
piston is at its lowest point in the cylinder, it is in a position
called bottom dead center (BDC). As the piston moves from top dead
center to bottom dead center or vice versa, the crankshaft rotates
exactly one-half of a revolution. Each time the piston moves from top
dead center to bottom dead center, or vice versa, it completes a
movement called a stroke. Therefore, the piston completes two strokes
for every full crank-shaft revolution.
(ON SLIDE #87)
There are four definite phases of operation that an engine
goes through in one complete operating cycle. Each one of these
operating phases is completed in one piston stroke. Because of this,
each operating phase is also referred to as a stroke. Because there
are four strokes of operation, the engine is referred to as a four-
stroke cycle engine. The four strokes are intake, compression, power,
and exhaust. Because there are four strokes in one operating cycle,
it may be concluded that there are two complete revolutions.
(ON SLIDE #88)
(2) Diesel engine four stroke cycle.

INSTRUCTOR NOTE
Computer aided graphic intake stroke 0.25 minutes.
(a) Intake. The piston is at top dead center at the
beginning of the intake stroke. As the piston moves downward, the
intake valve opens. The downward movement of the piston draws air
into the cylinder. As the piston reaches bottom dead center, the
intake valve closes. The intake stroke ends here.
(ON SLIDE #89)
INSTRUCTOR NOTE
Computer aided graphic compression stroke 0.42 minutes.
(b) Compression. The piston is at bottom dead center
at the beginning of the compression stroke. The piston moves upward,
compressing the air. As the piston reaches top dead center, the
compression stroke ends.
(ON SLIDE #90)
INSTRUCTOR NOTE
Computer aided graphic fuel injection - power stroke 0.29 minutes.
(c) Power. The piston begins the power stroke at top
dead center. Air is compressed in the upper cylinder at this time to
as much as 500 psi (3448 kPa). The tremendous pressure in the upper
cylinder brings the temperature of the compressed air to
approximately 1000ºF (538ºC). The power stroke begins with the
injection of a fuel charge into the engine. The heat of compression
ignites the fuel as it is injected. The expanding force of the
burning gases pushes the piston downward, providing power to the
crankshaft. The power generated in a diesel engine is continuous
throughout the power stroke. This contrasts with a gasoline engine,
which has a power stroke with rapid combustion in the beginning and
little or no combustion at the end.
(ON SLIDE #91)
INSTRUCTOR NOTE
Computer aided graphic exhaust stroke 0.29 minutes.

(d) Exhaust. As the piston reaches bottom dead center
on the power stroke, the power stroke ends and the exhaust stroke
begins. The exhaust valve opens and the piston pushes the burnt gases
out through the exhaust port. As the piston reaches top dead center,
the exhaust valve closes and the intake valve opens. The engine is
now ready to begin another operating cycle.
(ON SLIDE #92)
INSTRUCTOR NOTE
Computer aided graphic air – fuel – heat – combustion 0.38 minutes.
(e) The fuel Injected into the combustion chamber must
be mixed thoroughly with the compressed air and distributed as evenly
as possible throughout the chamber if the engine is to function at
maximum efficiency. The well designed diesel engine uses a combustion
chamber that is designed for the engine’s intended usage. The
injectors used in the engine should complement the combustion
chamber. The combustion chambers described in the following
paragraphs are the most common and cover virtually all of the designs
that are used in current automotive designs.
(ON SLIDE #93)
INSTRUCTOR NOTE
Combustion chamber design is significant. All Marine Corps equipment
employs an open combustion chamber design. This subject should be
approached with the student gaining a more thorough understanding of
how diesel ignites and how the shape of the combustion chamber
influences ignition lag. Emphasis MUST be placed on these factors
that affect power from the engine:
Compression ratio and speed (covered here).
Fuel type, quality, temperature, timing, and spray (covered during
the fuel class).
Intake air density, temperature, and removal of inert (burnt) exhaust
gasses (covered during the air and exhaust class).
d. Combustion chamber design. There are three distinct
combustion chamber designs used in diesel engines: Pre-combustion
chamber, Turbulence Chamber, and Open combustion chamber. Open
combustion chamber will be our main focus.

(ON SLIDE #94)
(1) The open chamber is the simplest form of chamber. It is
only suitable for slow-speed, four-stroke cycle engines, but is used
widely in two-stroke cycle diesel engines.
(ON SLIDE #95)
(2) In the open chamber, the fuel is injected directly into
the space at the top of the cylinder.
(ON SLIDE #96)
(3) The combustion space, formed by the top of the piston
and the cylinder head, is usually shaped to provide a swirling action
of the air as the piston comes up on the compression stroke. There
are no special pockets, cells, or passages to aid the mixing of the
fuel and air.
(ON SLIDE #97)
(4) This type of chamber requires a higher injection
pressure and a greater degree of fuel atomization than is required by
other combustion chambers to obtain an acceptable level of fuel
mixing.
(ON SLIDE #98)
(5) This chamber design is very susceptible to ignition
lag. Ignition lag is the time between fuel injection and combustion
in a diesel engine
(ON SLIDE #99)
INSTRUCTOR NOTE
Computer aided graphic diesel ignition 0.11 minutes.
e. Diesel Engine Characteristics.
(1) The fuel and air mixture is ignited by the heat
generated by the compression stroke in a diesel engine. The diesel
engine needs no ignition system. For this reason, a diesel engine is
referred to as a compression ignition engine (CI).
(ON SLIDE #100)

INSTRUCTOR NOTE
Computer aided graphic compressing air 0.11 minutes.
(2) The air is compressed to as high as one-twentieth of
its original volume in a diesel engine. The diesel engine must
compress the mixture this tightly to generate enough heat to ignite
the fuel or fuel oil as it is injected.
(ON SLIDE #101)
INSTRUCTOR NOTE
Computer aided graphic fuel injection 1.19 minutes.
(3) A diesel engine takes in only air through the intake
port. Fuel is put into the combustion chamber directly through an
injection system. The air and fuel then mix in the combustion
chamber.
(4) The engine speed and the power output of a diesel
engine are controlled by the quantity of fuel admitted to the
combustion chamber. The amount of air is constant. This is only for
naturally aspirated.
(ON SLIDE #102)
INSTRUCTOR NOTE
Computer aided graphic End of the Cycle 0.38 minutes
f. Advantages.
(1) The diesel engine is much more efficient than most
other engine types. This is due to the much tighter compression of
the fuel and air. The diesel engine produces tremendous low-speed
power. This makes the engine very suitable for large trucks.
(2) The diesel engine requires no ignition tune-ups because
there is no ignition system.
(3) Because diesel fuel is of an oily consistency and less
volatile than fuel sources, it is not as likely to explode in a
collision.
(ON SLIDE #103)

g. Disadvantages.
(1) The diesel engine must be made very heavy to have
enough strength to deal with the tighter compression of the fuel and
air mixture.
(2) The diesel engine is very noisy.
(3) Combustion of diesel fuel creates a large amount of
fumes mainly due to the presence of sulfur and benzene in the fuel.
(This topic will be covered in more detail in the Air and Exhaust
system class and the Fuel system class.)
(4) Because diesel fuel is not very volatile, it is
difficult to start a diesel engine in cold weather.
(5) A diesel engine operates well only in low speed ranges
in relation to other engines. This creates problems when using them
in applications that require a wide speed range.
(ON SLIDE #104 & #105)
h. Multi-cylinder Engine Vs. Single-Cylinder Engine.
(1) The rotation of a crankshaft is measured by breaking up
one revolution into 360 equal parts. Each part is called a degree.
The standard starting point is with the piston at top dead center.
This is expressed as 180 degrees of crankshaft rotation. We also can
recall that there are two complete crankshaft revolutions for every
four-stroke operating cycle. This is expressed as 720 degrees of
crankshaft rotation.
(ON SLIDE #106)
(2) Power Overlap. In a simple four-stroke cycle engine,
the power stroke produces a driving force that rotates the
crankshaft. This means that out of a 720-degree operating cycle,
there are only 180 degrees when the crankshaft actually receives any
driving force. In reality, the power stroke is actually even shorter.
This is due to the fact that engineers have found that an engine will
run better if the exhaust valve is set to begin opening approximately
four-fifths of the way through the power stroke. This reduces the
power stroke still further, to approximately 145 degrees. When the
engine runs, it has to rely on power that is stored in the flywheel
from the power stroke to push it through the 575 degrees remaining in
the operating cycle. A much smoother running engine can be made by
making it a multi cylinder engine.

(ON SLIDE #107)
(3) A multi cylinder engine is actually more than one
engine, all operating a common crankshaft. Engines are usually built
using four, six, or eight-cylinders. Whenever engines are built with
more than one cylinder, it is important that the cylinders give their
power strokes in equal increments of crankshaft rotation.
(4) The equally spaced power strokes in a four-cylinder
engine reduce the periods when the flywheel is carrying the engine.
With four power strokes for every 720 degrees of rotation, one can be
made to begin every 180 degrees. This leaves the engine with four
equally spaced periods of 35 degrees each that the flywheel must
carry the crankshaft.
(ON SLIDE #108)
(5) If the engine has more than four cylinders, the power
strokes overlap, meaning that before one power stroke is finished,
another one begins. A six-cylinder engine has a 25-degree power
overlap between cylinders. An eight-cylinder engine has an even
larger 55-degree power overlap. It becomes very obvious that the more
cylinders that an engine has, the smoother the power delivery will
be.
(6) It also is obvious that the most practical way to
increase the power output of an engine is to make a lot of small
cylinders instead of one big one. A multi cylinder engine is not only
smoother but more reliable also. This is because each piston weighs
less than a comparable size single-cylinder engine. The constant
changing of direction of the piston causes more bearing wear if the
piston is excessively heavy Also, the single-cylinder engine is not
as smooth, which will decrease not only the life of the engine, but
also the equipment that it is operating.
(ON SLIDE #109)
INTERIM TRANSITION: Over the past 45 minutes we have reviewed
everything that creates the right conditions in the combustion
chamber favorable for harnessing mechanical power from diesel fuel.
At this time are there any questions? Take a ten minute break.
_____________________________________________________________________
_____________________________________________________________________
_____________________________________________________________________
(BREAK – 10 Min)
INTERIM TRANSITION: Did anyone think of any more questions while on
break? Let’s talk about engine measurement

_____________________________________________________________________
_____________________________________________________________________
_____________________________________________________________________
(ON SLIDE #110)
i. Engine Measurement.
(1) Bore. The bore is the diameter of the cylinder.
(2) Stroke. The stroke is the distance that the piston
travels as it moves from top dead center to bottom dead center.
(3) Piston Displacement. Piston displacement is the volume
of space that the piston displaces as it moves from top dead center
to bottom dead center. The piston displacement is used to express
engine size.
(ON SLIDE #111)
(4) Compression Ratio. The compression ratio is the method
that is universally used to measure how tightly the mixture is
squeezed during the compression stroke. Diesel engines commonly use a
compression ratio of 13:1 or as high as 23:1.
(5) Measuring Compression Ratio. The compression ratio is
found by measuring the volume that the mixture occupies when the
piston is at bottom dead center and dividing it by the volume that
the mixture occupies when the piston is at top dead center. For a
given engine cylinder, the volume of the space occupied by the
mixture is 480 cubic centimeters (cc) when the piston is at bottom
dead center. As the piston moves to top dead center, the mixture is
squeezed into an area with a volume of 60 cc. Example 480cc divided
by 60 cc gives you 8cc. Compression ratio= 8 to 1.
(ON SLIDE #112)
(6) Effect of Compression Ratio. As the compression ratio
is increased, the mixture is squeezed into a tighter space. This
means that there is a higher initial pressure at the start of the
power stroke and that the burning gases have further to expand. For
these reasons, any increase in compression ratio will cause an
increase in engine power output.
(ON SLIDE #113)
(7) Factors Limiting Compression Ratio. Diesel engines
employ high compression ratios to generate the heat necessary for
ignition. In theory, diesel compression ratios could be higher to

increase in power output. However, ratios higher than 23: 1 would
take a tremendous amount cranking force, and once started the
terrific pressures inside the combustion chamber would push the
metallurgy of cylinder liners to the extreme.
INSTRUCTOR NOTE
“Why can’t gasoline engines have higher compression ratios?” should
prompt a class discussion. The appropriate answer is “Because a
gasoline engine will have pre-ignition and could very easily develop
a ‘Dieseling’ condition.”
(ON SLIDE #114)
INSTRUCTOR NOTE
Computer aided graphic force 0.16 minutes.
j. Work. Work is the transfer of energy or movement of a body
against an opposing force. Work is measured in units of foot pounds
(Newton meters). One foot pound of work is the equivalent of lifting
a 1-lb. weight 1 ft. When sliding something horizontally, work is
measured by the force required to move the object multiplied by the
distance that it is moved. Note that work is always the force exerted
over a distance. Also note that if there is no movement of the
object, then there is no work accomplished, no matter how much force
is applied.
(ON SLIDE #115)
k. Energy. Energy is the ability to do work. Energy takes many
forms, such as heat, light, sound, stored energy (potential), or an
object in motion (kinetic energy). Energy performs work by changing
from one form into another. To illustrate this, consider the
operation of a dozer. From start to finish, it will do the following.
(1). When it is sitting still and not running, it has
potential energy stored in the fuel.
(2). To set it into motion, the diesel is burned, changing
its potential energy into heat energy. The dozer engine then
transforms the heat energy from the burning fuel into kinetic energy
by forcing the dozer into motion.
(3). The action of stopping the dozer is accomplished by
the brakes. By the action of friction, the brakes will transform the
kinetic energy of the dozer back into heat energy. When all of this
kinetic energy is transformed into heat energy, the dozer will be

stopped. The heat energy will then dissipate into the air. It is very
easy to see that work was accomplished when the dozer was set into
motion. It may not be as easy to see that work was also accomplished
to stop the dozer. Because stopping requires applying a force over a
distance, it also fits the definition of work.
(ON SLIDE #116)
l. Power. Power is the rate of work. Engines are rated by the
amount of work that they can do in 1 minute. The unit of measure for
rating engines is called horsepower. The horsepower unit was
developed about the time that steam engines were being developed.
Through testing, it was found that the average horse could lift a
200-lb. weight to a height of 165 ft in 1 minute. The equivalent of
one horsepower can be reached by multiplying 165 ft by 200 lb. (work
formula) for a total of 33,000 ft lb. per minute or multiplying 550
lb by 60 seconds.
(ON SLIDE #117)
(1) Indicated Horsepower. Indicated horsepower is the power
developed inside of the engine based on the pressure developed in the
cylinders. It is always much higher than the brake horsepower because
it does not consider friction or the inertia of the reciprocating
masses within the engine.
(2) Friction Horsepower. Efficiency is the relationship
between results obtained and the effort required to obtain those
results. For example, if a 90-lb. box was lifted with a rope and
pulley, it would require a force of 100 lb. Therefore: output / input
90 lb. 100 lb. The above results simply mean that only 90 percent of
the total effort used for lifting the box actually went to that task.
The remainder, or 10% of the effort, was lost to frictional forces
within the pulley system.
(ON SLIDE #118)
(3) Mechanical Efficiency. Mechanical efficiency within
the engine is the relationship between the actual power produced in
the engine (indicated horsepower) and the actual power delivered at
the crankshaft (brake horsepower). The actual power at the crankshaft
is always less than the power produced within the engine. Mechanical
efficiency is calculated by dividing the brake horsepower by the
indicated horsepower. This is due to frictional losses between the
many moving parts. Also in four-stroke cycle engines, a great deal of
horsepower is used to drive the valve train.

(ON SLIDE #119)
INSTRUCTOR NOTE
Computer aided graphic Torque 0.12 minutes.
m. Torque Effect. Torque is a force that, when applied, tends to
result in the twisting of the object rather than its physical
movement. When measuring torque, the force that is applied must be
multiplied by the distance from the axis of the object. Because the
force in pounds (Newtons) is multiplied by distance in feet (meters),
torque is expressed in terms of pound feet (Newton meters). When
applying torque to an object, the force and the distance from the
axis will be dependent on each other. Work can only be produce when
torque is greater than the resistance. For example, if a 100-ft lb.
torque is applied to a nut, a 100-lb. Force would be applied if the
wrench were 1-ft long. If a 2-ft-long wrench were used, a 50-lb.
force is all that would be necessary.
(ON SLIDE #120)
n. Torque-Horsepower-Speed (RPM) Relationship. As illustrated in
the example horsepower will continue to increase with speed even
after torque begins to fall off. The reason that this happens is
because horsepower is dependent on speed and torque. The horsepower
will continue to increase due to the speed increase offsetting the
torque decrease. At a point, however, the torque begins to fall off
so sharply that the increase in speed cannot offset it and horsepower
also falls off. The brake-horsepower can clearly show that
horsepower, speed, and torque are all dependent on each other.
(ON SLIDE #121-122)
INSTRUCTOR NOTE
Image of Cummins engine
(ON SLIDE #123)
INTERIM TRANSITION: Thus far, we have discussed diesel engine
construction and principles of operation. Are there any questions?
Take a ten minute break.
_____________________________________________________________________
_____________________________________________________________________
_____________________________________________________________________
(BREAK - 10 MIN)

(ON SLIDE #124)
INTERM TRANSITION: Before the break we discussed diesel engine
construction and principles of operation. Are there any other
questions? If not let’s move on to a demonstration of how to start
and run your engines.
_____________________________________________________________________
_____________________________________________________________________
_____________________________________________________________________
INSTRUCTOR NOTE
Perform the Following demonstration. Have students take breaks as
required or as Instructed.
DEMONSTRATION. (3 HRS) Introduce the students in groups of no more
than 5 to the engine that they will be using during the disassembly
and reassembly process. The engine starter and 2 12 volt batteries
will be required. Will demonstrate with one group at a time. All
other groups will be in the classroom with study material.
STUDENT ROLE: The students will become familiar with and see how to
start their engine. They should also ask any questions at this time.
INSTRUCTOR ROLE: Demonstrate how to correctly run the engines for
the students.
1. 1st step- Have students get two 12v batteries, fuel can with fuel
from hazmat and the starting switch from the tool room.
2. 2nd step- Have students ensure that all engine radiators are full
prior to starting the engine.
3. 3rd step- Hook batteries and start switch to engine. Start engine.
1. Safety Brief: Make sure students know how to hook up the
batteries correctly. At all times proper PPE will be worn. Make sure
to stay clear of the fan and all hot components. Exhaust fan should
be on at all times that the engine is running.
2. Supervision and Guidance: The instructor will hook up the engine
start switch to the starter and hook up the two 12 volt batteries to
the starter also. Start engine and show the students that it runs
prior to their disassembly.
3. Debrief: (If applicable) (Allow students the opportunity to
comment on what they experienced and/or observed. Provide overall
feedback, guidance on any misconceptions, and review the learning
points of the demonstration.
QUESTIONS FROM THE CLASS:

QUESTIONS TO THE CLASS:
Q: Describe three characteristics unique to a Diesel Engine.
A: Uses compression to generate heat used to ignite fuel air mixture,
has high compression ratio and is built out of heavy materials to
withstand the high compression.
Q: In which type of combustion chamber design has the combustion
chamber formed in the piston head?
A: Open Chamber
Q: Describe four ADVANTAGES of a Diesel Engine.
A: More efficient than most other engines, requires no-ignition tune
up, diesel fuel is less volatile, and they produce tremendous low-
speed power.
Q: Define the term Power Overlap.
A: Before one power stroke ends, another one begins.
Q: Define the term mechanical efficiency.
A: The relationship between the power produced in the engine and the
actual power delivered at the crankshaft.
Q: The force that tends to result in the twisting of the object
rather than its physical movement.
A: Torque
Q: What is method that is used to measure how tightly the mixture is
squeezed during the compression stroke?
A: Compression Ratio
TRANSITION: Any more questions? If not let’s take a quiz.
_____________________________________________________________________
_____________________________________________________________________
_____________________________________________________________________
QUIZ (30min)
Hand out quiz for diesel engine principles of operation. Give the
students 20 minutes to complete and review it with the students
after.
(BREAK - 10 MIN)
TRANSITION: Any more questions? If not let’s talk about the
intake/exhaust system.
_____________________________________________________________________
_____________________________________________________________________
_____________________________________________________________________
(ON SLIDE #125)

3. DIESEL ENGINE INTAKE AND EXHAUST SYSTEM OPERATION AND
TROUBLESHOOTING (2hrs)
(ON SLIDE #126)
INSTRUCTOR NOTE:
Hello Kitty
(ON SLIDE #127)
a. Vacuum in Cylinder on the Intake Stroke.
(1) The Atmosphere. The earth is surrounded by an ocean of
air that is known as the atmosphere. Because it is colorless and
odorless, people are not always aware of it. However, the atmosphere
does have weight.
(2) Atmospheric Pressure. Elevation is always referred to
in relation to the level of the ocean. This is known as sea level.
Because the atmosphere extends for many miles above the earth, the
weight of all of this air creates a large force on the earth’s
surface. In fact, the weight of the air creates a pressure of
approximately 14.7 PSI or 1 Bar on all things at sea level. As the
elevation increases, this atmospheric pressure progressively
decreases.
(ON SLIDE #128)
(3) Vacuum in the Cylinder. When the piston moves downward
on the intake stroke, it may appear that it is sucking the mixture
into the cylinder. Actually, what is really happening is that by the
piston moving downward, it is making a larger space in the cylinder
that contains nothing (a vacuum). The atmospheric pressure outside
the cylinder will then push its way in through the intake port,
filling the cylinder.
(ON SLIDE #129)
(4) Volumetric Efficiency.
(a) General. Volumetric efficiency is a way of
measuring an engine’s ability to take in, or aspirate, its intake. As
the piston moves down on the intake stroke, atmospheric pressure will
push the intake into the cylinder. Theoretically, the volume of air
that enters the engine for each intake stroke would be exactly equal
to the displacement of the cylinder engine type directly affects how
well this actually occurs.

(ON SLIDE #130)
Diesel engines breathe well because they are un-throttled. The speed
of the engine is proportional to the amount of fuel injected unlike
the gasoline engine in which the speed of the engine is proportional
to the fuel – air mixture that enters the cylinder. Diesel engines
always take in more air than what is required for combustion. Since
all that is needed is more fuel, it is easy to understand how a
diesel can “runaway”.
(ON SLIDE #131)
(b) Measuring Volumetric Efficiency. Volumetric
efficiency is expressed as a ratio of the amount of air that enters
the cylinders on the intake stroke to the amount of mixture that the
cylinders could actually hold.
(ON SLIDE #132)
The following factors will decrease volumetric efficiency:
(1) The shorter the duration of the intake stroke
(higher RPM) the lower the efficiency.
(2) As the air passes through the engine on its
way to the cylinder, it picks up heat. As the air heats up, it
becomes less dense. This means that less air actually enters the
cylinder.
(3) Sharp bends, obstructions, rough surfaces on
the walls of the intake ports, or improper valve lash settings will
slow down the intake air, decreasing volumetric efficiency.
(4) Elevation also affects volumetric efficiency.
An increase in elevation will decrease the density of air.
(ON SLIDE #133)
(5) Increasing Volumetric Efficiency. Any increase in
volumetric efficiency will increase engine performance. Volumetric
efficiency may be increased by doing the following.
(a) Keep the intake air cool. By ducting intake air
from outside of the engine compartment, the intake air can be kept
cooler. The cooler the air is, the higher the volumetric efficiency
will be. This is because a cool air is denser or more tightly packed.
(b) Modify the intake passages. Any changes to the
intake passages that make it easier for the air to flow through will
cause an increase in volumetric efficiency. Other changes include

reshaping ports to smooth out bends, reshaping the back of the valve
heads, or polishing the inside of the ports.
(c) Altering the time that the valves open or how far
they open, volumetric efficiency can be improved.
(d) Turbocharging, the volumetric efficiency figure
can be brought to over 100 percent.
(ON SLIDE #134)
b. Valves. The I-head configuration is the most popular for current
diesel engines and gets its name from the letter formed by the piston
and the valve. These engines have their camshafts located in their
cylinder blocks. These engines are also known as the overhead valve
(ohv) engines. A typical ohv cylinder head is shown. The camshaft
operates the valves through the lifter, push rod, and rocker arm.
(ON SLIDE #135)
(1) Purpose. Each cylinder in a four-stroke cycle engine
must have one intake and one exhaust valve to allow fresh (oxygen
rich) air into each cylinder, and allow burnt (inert) gasses to
escape. The valves are commonly of the poppet design. The word poppet
is derived from the popping action of the valve. The valve shape that
is used in a given engine design is dependent upon the requirements
and combustion chamber shape.
(ON SLIDE #136)
(2) Construction. Construction and design considerations
are very different between intake and exhaust valves. The difference
is based on their temperature operating angles. Intake valves are
kept cool by the incoming intake air. Exhaust valves are subject to
intense heat from the burnt gases that pass by it. The temperature of
the exhaust valve can be in excess of 1,300 ºF (704.4 ºC). Intake
valves are made of a nickel chromium alloy. Exhaust valves are made
of a silichrome alloy. Some exhaust valves use a special hard facing
process that keeps the face of the valve from taking on the shape of
the valve seat at high temperatures. Stems may be hollow and filled
with sodium to improve heat transport and transfer.
(ON SLIDE #137)
Older air cooled engines used exhaust valves were hollowed out and
partially filled with metallic sodium. The sodium, which liquefied at
operating temperatures, splashed between the valve head, where it
picked up heat, and the valve stem, where the heat is transferred to
the valve guide.

(ON SLIDE #138)
(3) Valve Seats. The valve seats are very important, as
they must match the face of the valve head to form a perfect seal.
The seats are made so that they are concentric with the valve guides;
that is, the surface of the seat is an equal distance from the center
of the guide all around.
(ON SLIDE #139)
There are three common angles that are used when machining the valve
seat; they are 15, 30, and 45 degrees (dependent on manufacturer
specs.). The face of the valve is usually ground with a ½º to a 1º
difference to help the parts seat quickly.
(ON SLIDE #140)
By reducing the contact area, the pressure between the mating parts
is increased, thereby forming a better seal. The valve seats can be
either part of the cylinder head or separate inserts. Valve seat
inserts generally are held into the head by an interference (squeeze)
fit. The head is heated in an oven to a uniform high temperature and
the seat insert is shrunk by cooling it in dry ice. While the two
parts are at opposite temperature extremes, the seat insert is
pressed into place.
(ON SLIDE #141)
(4) Valve Guides. The valve guides are the parts that
support the valves in the head and are machined to a fit with a few
thousandths of an inch clearance from the valve stem. Valve guides
may be cast integrally with the head, or they may be removable.
Removable valve guides are usually press fitted into the head. This
close clearance is important for the following reasons:
(a) It keeps the lubricating oil from getting into the
combustion chamber.
(b) It keeps exhaust gases from getting into the
crankcase area past the exhaust valve stems during the exhaust
stroke.
(c) It keeps the valve face in perfect alignment with
the valve seat.
(ON SLIDE #142)
(5) Valve Springs, Retainers, and Seals. The valve assembly
is completed by the spring, retainer, and seal. Before the spring and
the retainer fit into place, a seal is placed over the valve stem.

The seal acts like an umbrella to keep the valve operating mechanism
oil from running down the valve stem and into the combustion chamber.
(ON SLIDE #143)
The spring, which keeps the valve in a normally closed position, is
held in place by the retainer. The retainer locks onto the valve stem
with two wedged-shaped parts that are called valve keepers.
(ON SLIDE #144)
INSTRUCTOR NOTE
Computer aided graphic valve keeper 0.10 minutes.
(ON SLIDE #145)
(6) Valve Rotators.
(a) Purpose. It is common in heavy-duty applications
to use mechanisms that make the exhaust valves rotate. They keep
carbon from building up between the valve face and seat, which could
hold the valve partially open, causing it to burn.
(ON SLIDE #146)
(b) Types.
(1) The release-type rotator releases the spring
tension from the valve while open. The valve then will rotate from
engine vibration.
(2) The positive rotator is a two-piece valve
retainer with a flexible washer between the two pieces. A series of
balls between the retainer pieces roll on machined ramps as pressure
is applied and released from the opening and the closing of the
valve. The movement of the balls up and down the ramps translates
into rotation of the valve.
(ON SLIDE #147)
(7) Valve Train. It is obvious that it is very important to
operate the valves in a timed sequence. If the exhaust valve opened
in the middle of the intake stroke, the piston would draw burnt gases
into the combustion chamber with a fresh air. As the piston continued
to the power stroke, there would be nothing in the combustion chamber
that would burn. The valves in overhead valve engines use additional

components to link the camshaft to the valves. Overhead valve engines
use push rods and rocker arms.
(ON SLIDE #148)
INSTRUCTOR NOTE
Computer aided graphic pushrods 0.11 minutes.
(a) Push Rods. Push rods usually are constructed of
hollow steel. Most air-cooled engines use the push rods to supply
lubricant to the upper valve mechanism.
(ON SLIDE #149)
INSTRUCTOR NOTE
Computer aided graphic rocker arms 0.35 minutes.
(b) Rocker Arms. Rocker arms are manufactured of
steel, aluminum, or cast iron. The most common for current use are
cast iron rockers. They are used in larger, low-speed engines. They
almost always pivot on a common shaft.
(ON SLIDE #150)
INSTRUCTOR NOTE
Computer aided graphic valve adjustment 2.35 minutes.
(c) Adjusting Clearance. The provision for adjusting
valve clearance on solid tappet, valve-in-head engines is usually in
the form of a screw on the rocker arm. On overhead valve (or push rod
engines), there is usually a screw-type adjustment where the push rod
actuates it. The adjusting screw can either be of the self-locking
type, or have a jam nut to lock it.
(ON SLIDE #151)
INSTRUCTOR NOTE
Computer aided graphic gear train timing 0.08 minutes.

(d) The crankshaft must make two complete revolutions
to complete one operating cycle. Using these two facts, a camshaft
speed must be exactly one-half the speed of the crankshaft. To
accomplish this, the timing gears are made so that the crankshaft
gear has exactly one-half as many teeth as the camshaft gear. The
timing marks are used to put the camshaft and the crankshaft in the
proper position to each other.
(ON SLIDE #152)
(8) Valve Timing.
(a) General. Valve timing is a system developed for
measuring in relation to the crankshaft position (in degrees), the
points when the valves open, how long they stay open, and when they
close. Valve timing is probably the single most important factor in
tailoring an engine for specific needs. By altering valve timing, an
engine can be made to produce its maximum power in a variety of,
speed ranges. The following factors together make up a valve
operating sequence.
1 Opening and Closing Point. The opening and
closing points are the positions of the crankshaft (in degrees) when
the valve just begins opening and just finishes closing.
2 Duration. Duration is the amount of crankshaft
rotation (in degrees) that a given valve will remain open. It can be
modified to change power output. (EX Larger Cam)
3 Valve Overlap. Valve overlap is a period in the
four-stroke cycle when the intake valve opens before the exhaust
valve closes.
(ON SLIDE #153)
(9) Valve Timing Considerations. Throughout the crankshaft
revolution, the speed of the piston changes. From a stop at the
bottom of the stroke, the piston will reach its maximum speed halfway
through the stroke and gradually slow to a stop as it reaches the end
of the stroke. The piston will behave exactly the same on the down
stroke. There are two periods of crankshaft rotation in which there
is almost no perceptible movement of the piston. One of these periods
begins at approximately 15º to 20º before top dead center and ends at
approximately 15º to 20º after top dead center. The other period
begins at approximately 15º to 20º before bottom dead center and ends
at approximately 15º to 20º after bottom dead center. These two
periods of crankshaft rotation are utilized when establishing a valve
timing sequence as follows.

(a) During the period that occurs at top dead center,
valve overlap is introduced to increase volumetric efficiency. By
opening the intake valve before the exhaust valve is closed, the
intake is pulled in by the momentum of the exiting exhaust gas. The
intake coming in also helps to sweep or scavenge the cylinder of
exhaust gases. Because the overlap occurs during one of the periods
of little piston movement, there is no problem with exhaust being
pushed into the intake port or exhaust gas being pulled into the
cylinder through the exhaust port by the piston.
(b) During the period that occurs at bottom dead
center, the pressure remaining in the cylinder at the end of the
power stroke is utilized by opening the exhaust valve early. When the
exhaust valve opens, the pressure in the cylinder starts pushing the
exhaust gas out of the cylinder. Because the final 15º to 20º of the
power stroke have almost no piston movement, there is no problem with
exhaust being drawn in by the piston. As stated earlier, engines can
be designed to produce power in a specific speed range by altering
valve timing. By increasing the valve duration and overlap, an engine
can be made to produce more power in the higher speed ranges. This is
because the exiting exhaust gas will have more inertia, making its
scavenging effect last longer. This same engine will run poorly at
low speed due to the piston having a tendency to pull exhaust back
into the cylinder and blow it back up into the intake port.
(ON SLIDE #154)
INSTRUCTOR NOTE
The Marine Corps current stock of construction equipment has only two
examples of naturally aspirated diesel engines the 7½ Ton Crane
(Cummins B 3.9 L) and the ACE (Cummins 903).
(ON SLIDE #155)
INTERIM TRANSITION: Are there any questions? If not take a break.
_____________________________________________________________________
_____________________________________________________________________
_____________________________________________________________________
(BREAK 10min)
INTERIM TRANSITION: Any more questions before we move on.
_____________________________________________________________________
_____________________________________________________________________
_____________________________________________________________________

(ON SLIDE #156)
c. Turbocharging/Supercharging.
(ON SLIDE #157)
INSTRUCTOR NOTE
Computer aided graphic air intake1 0.18 minutes.
(1) Turbocharging is a method of increasing engine
volumetric efficiency by forcing the air into the intake rather than
merely allowing the pistons to draw it in naturally. Turbocharging in
some cases will push volumetric efficiencies over 100 percent.
Engines must be modified to operate properly in some cases, because
the extra air will cause higher compression pressures.
(ON SLIDE #158)
INSTRUCTOR NOTE
Computer aided graphic turbochargers 0.20 minutes.
(2) A turbocharger uses the force of the engine exhaust
stream to force the air into the engine. It consists of a housing
containing two chambers. One chamber contains a turbine that is spun
as hot exhaust gases are directed against it. The turbine shaft
drives an impeller that is located in the other chamber. The spinning
impeller draws an air and forces it into the engine. Because the
volume of exhaust gases increases with engine load and speed, the
turbocharger speed will increase proportionally, keeping the manifold
pressure boost fairly uniform.
(ON SLIDE #159)
INSTRUCTOR NOTE
Computer aided graphic wastegates 0.15 minutes.

(3) A device known as a waste gate is installed on
turbocharged engines to control manifold pressure. It is a valve
that, when open, allows engine exhaust to bypass the turbocharger
turbine, effectively reducing intake pressure. The waste gate valve
is operated by a diaphragm that is operated by manifold pressure. The
diaphragm will open the waste-gate valve whenever manifold pressure
reaches the desired maximum.
(ON SLIDE #160)
INSTRUCTOR NOTE
Computer aided graphic after coolers 0.27 minutes.
(4) Many late model engines which are turbocharged employ
an after cooler to further improve the engine efficiency. After
coolers (also called inter coolers or heat exchangers) are small
radiators positioned between the compressor housing of the
turbocharger and the inlet manifold of the engine.
(a) Water cooled intercoolers are the design common to
industrial diesel engines. Coolant enters the intercooler and passes
through the core tubes and back into the cylinder block or cylinder
head. Air from the turbocharger (compressor) flows around the tubes
and is cooled before it enters the inlet manifold. This increases the
power output by about 10% to 20% because the incoming air is cooled
to within 40° F of the engine coolant temperature and, therefore,
more air enters the cylinders.
(b) The result is lower cylinder pressure, more
effective cooling of the cylinder components, and a lower exhaust gas
temperature. Without the intercooler, the air temperature entering
the intake manifold would increase sharply because of the compression
of the air and because of heat from the turbocharger. This would
result in a loss in air density and power, and elevated cylinder and
exhaust gas temperatures.(approximately 1° increase in air intake
temperature will increase the exhaust temperature increases by 3° F).
(ON SLIDE #161)
INSTRUCTOR NOTE
Until very recently off highway trucks and construction equipment
diesel engines have been immune to emission controls, however Tier II
(and Tier III in 2006) EPA engine emission controls have impacted the
design and diagnostics of our equipment.

(5) Exhaust emissions. When the fuel is burned in the
combustion chamber, the ideal situation would be to have the fuel
combine completely with the oxygen from the intake air. The carbon
would then combine to form carbon dioxide (CO2), the hydrogen would
combine to form water (H20), and the nitrogen that is present in the
intake air would stand alone. The only other product present in the
exhaust would be any oxygen from the intake air that was not used in
the burning of the fuel.
(ON SLIDE #162)
In a real life situation however, this is not what happens. The fuel
never combines completely with the oxygen and undesirable exhaust
emissions are created as a result. Normally a diesel engine has more
air available than what is used and the fuel delivery system is
precisely timed to be injected when combustion chamber pressure and
temperature is optimal for complete burning of the fuel. Major
pollutants include:
(a) Carbon Monoxide (CO). Carbon monoxide is formed as
a result of combustion chamber pressures (temperatures) that are too
low. A cold engine will produce more Carbon Monoxide until it reaches
operating temperature when emissions will become extremely low.
Carbon monoxide is a colorless, odorless gas that is poisonous.
(b) Nitrogen oxides (NOx). Oxides of nitrogen are
formed when the nitrogen and oxygen in the intake air combine due to
the high temperatures of combustion. Oxides of nitrogen are harmful
to all living things.
(c) Sulfur dioxide (SO2) is generated from the sulfur
present in diesel fuel. The concentration of SO2 in the exhaust gas
depends on the sulfur content of the fuel. Sulfur dioxide is a
colorless toxic gas with a characteristic, irritating odor. Oxidation
of sulfur dioxide produces sulfur trioxide which is the precursor of
sulfuric acid. Sulfur oxides have a profound impact on environment
being the major cause of acid rain.
(ON SLIDE #163)
(d) Hydrocarbons (HC). Hydrocarbons are unburned fuel.
They are particulate in form (solid) and, like carbon monoxide, they
are manufactured by combustion chamber pressures (temperatures) that
are too low. Hydrocarbons are harmful to all living things. In any
urban area where vehicular traffic is heavy, hydrocarbons in heavy
concentrations react with sunlight to produce a brown fog known as
photochemical smog.
(ON SLIDE #164)
1 Diesel particulate matter (DPM), is defined by
the EPA regulations as a complex aggregate of solid and liquid
material. Diesel particulates are very fine. The carbon particles may
have a diameter of 0.01 - 1 micron range. As such, diesel particulate
matter is almost totally inhalable and has a significant health
impact on humans. It has been classified by several government
agencies as either "human carcinogen" or "probable human carcinogen".
It is also known to increase the risk of heart and respiratory
diseases.
(ON SLIDE #165)
2 Polynuclear Aromatic Hydrocarbons (PAH) are
hydrocarbons containing two or more benzene rings. Many compounds in
this class are known human carcinogens. PAH’s in the exhaust gas are
split between gas and particulate phase. The most harmful compounds
of four and five rings are present in the organic fraction of DPM
(SOF).
(ON SLIDE #166)
(6) Controlling of Exhaust Emissions. The control of
exhaust emissions is a very difficult job. To eliminate carbon
monoxide and hydrocarbon emissions, the temperatures of the
combustion chamber would have to be raised to a point that would melt
pistons and valves. This is compounded with the fact that oxides of
nitrogen emissions go up with any increases in combustion chamber
temperatures. Knowing these facts, it can be seen that auxiliary
emission control devices are necessary.
(a) Draft Tube System. Older engines used a very
simple system that vented blowby to the atmosphere through a draft
tube. The draft tube extends from an area of the crankcase that is
above oil level to a point of exit that project straight downward
under the equipment. The outlet of the tube is cut on a slant upward
toward the rear of the equipment. With this shape outlet, suction is
created by the forward movement of the equipment. Circulation of
fresh air will occur in the crankcase with the addition of a breather
cap also located at a point on the crankcase above oil level.
(b) The negative pressure created at the end of the
draft tube will cause air to be drawn In through the crankcase
breather. A wire mesh filter is built into the breather to keep dirt
out of the crankcase.
(c) The draft tube contains a sediment chamber and a
wire mesh filter at the point where it attaches to the crankcase. Its

purpose is to trap any oil that tries to leave through the draft tube
and return it to the crankcase.
(d) By strategic location of the breather cap and
draft tube and the use of baffles, a complete purging of crankcase
blowby fumes is ensured. The draft tube system is obsolete now
because it discharged excessive hydrocarbon emissions directly into
the atmosphere. It also did not keep the crankcase as clean as the
positive crankcase ventilation system. This is because it relied on
the movement of the vehicle to activate it. As a result of this,
draft tube-equipped engines were very prone to sludge buildup.
(7) Positive Crankcase Ventilation (PCV) System. The
positive crankcase ventilation system utilizes turbocharger vacuum to
purge the crankcase of blowby fumes. The fumes are then aspirated
back into the engine where they are reburned.
(a) A hose is tapped into the crankcase at a point that
is well above the engine oil level. The other end of the hose is tapped
into the piping before the turbocharger.
(b) An inlet breather is installed on the crankcase in
a location that is well above the level of the engine oil. The inlet
breather also is located strategically to ensure complete purging of
the crankcase by fresh air.
(c) The areas of the crankcase where the hose and the
inlet breather are tapped have baffles to keep the motor oil from
leaving the crankcase.
(d) A flow control valve (called a PCV valve) is
installed in the line that connects the crankcase to vacuum. It is
and serves to avoid the air mixture by doing the following:
(ON SLIDE #167)
(8) Waste Gate Solenoid. The waste gate solenoid allows the
ECM to control the speed of the Turbocharger, therefore, controlling
the amount of air going into the intake manifold.
(ON SLIDE #168)
(9) Exhaust Smoke Diagnosis. Good mechanics go into action
quickly, making simple observations and tests that set limits to the
problem. A strong familiarization with how the components work
together will help the mechanic to limit tests to the most likely
cause. Diaphragm

(ON SLIDE #169)
NEVER ASS-U-ME corrective action based on this initial indication,
only which tests should be performed first before making a diagnosis.
(a) Distinguishing between conditions that affect all
cylinders and those that affect one or two is a simple first step.
1 General malfunctions discolor the whole exhaust
stream such as too much advance on pump timing will send all
cylinders into detonation.
2 Single cylinder malfunctions can generate puffs
of smoke such as the clatter caused by a faulty injector will be
limited to the associated cylinder.
(b) After determining whether it’s one or all
cylinders, the next step is to determine why. White smoke means one
or more fueled, but misfiring cylinders, and usually accompanies cold
starts (in a warm engine it may indicate low compression). Black
smoke is the sooty residue of partially burned (high HC’s) fuel,
normally present during hard acceleration. Blue, blue-white, or gray-
white results from lube-oil combustion.

(ON SLIDE #170)
BLACK or DARK GRAY SMOKE
Symptom Probable cause Remedial action
Smokes under load,
especially at high and
medium speed. Engine
quieter than normal.
Injector pump timing
retarded. Set timing.
Smokes under load,
especially at low and
medium speed. Engine
noisier than normal.
Injector pump timing
advanced. Set timing.
Smokes under load at
all speeds, but most
apparent at low and
medium speeds. Engine
may be difficult to
start.
Weak cylinder
compression.
Repair engine.
Smokes under load,
especially at high
speed.
Restricted air
cleaner.
Clean / replace
air filter
element.
Smokes under load,
noticeable loss of
power.
Turbocharger
malfunction.
Check boost
pressure.
Smokes under load,
especially at high and
medium speeds.
Power may be down.
Dirty injector,
nozzle (s).
Clean/replace
injectors.
Smokes under load,
especially at low and
medium speeds. Power
may be down.
Clogged / restricted
fuel lines.
Clean/replace fuel
lines.
Puffs of black smoke,
sometimes with blue or
white component.
Engine may knock.
Sticking injectors. Repair/replace
injectors.

(ON SLIDE #171)
BLUE, BLUE-GRAY, or GRAY-WHITE SMOKE
Symptom Probable cause Remedial action
Whitish or blue smoke
at high speed and
light load, especially
when engine is cold.
As temperature rises,
smoke color changes to
black. Power loss
across the RPM band,
especially at full
throttle.
Injector pump timing
retarded.
Set timing.
Whitish or blue smoke
under light load after
engine reaches
operating temperature.
Knocking may be
present.
Leaking injector(s). Repair / replace
injector(s).
Blue smoke under
acceleration after
prolonged period at
idle. Smoke may
disappear under steady
throttle.
Worn rings /
cylinder.
Overhaul / rebuild
engine.
Light blue or whitish
smoke at high speed
under light load.
Pungent odor.
Over-cooling. Replace
thermostat.
(ON SLIDE #172)
INTERIM TRANSITION: So far we have discussed diesel engine intake and
exhaust systems. Are there any other questions? If not let’s take a
break and then we will move on to the practical application of
removing the intake and exhaust systems.
_____________________________________________________________________
_____________________________________________________________________
_____________________________________________________________________
(BREAK 10min)
INTERIM TRANSITION: Any more questions before we move on to the
practical application of removing the intake and exhaust systems.
_____________________________________________________________________
_____________________________________________________________________
_____________________________________________________________________
(ON SLIDE #173)
INSTRUCTOR NOTE
Perform the following practical application Removal of intake and
exhaust systems. Have students take breaks as required or as
instructed.
PRACTICAL APPLICATION (4 HRS) In groups no larger than 5 the students
will have their assigned toolboxes, technical manuals and assigned
engines with work stations. There will be at least one instructor
supervising the exercise. The purpose of this practical application
is to remove the intake and exhaust systems.
PRACTICE: In their groups the students will follow the technical
manuals to disassemble and remove the intake and exhaust systems on
their assigned engines.
PROVIDE HELP: The instructor may assist in the disassembly process if
needed.
1. Safety Brief: At all times proper PPE will be worn to include
safety boots. Safety glasses will be worn anytime fuel or liquid
under pressure is being used.
2. Supervision and Guidance: The instructor will walk around to the
different groups and supervise the disassembly, answering any
questions the students may have.
(ON SLIDE #174)
TRANSITION: Over the past 1.15 hours we have reviewed engine
respiration and how the components work together, are there any
questions? I have some questions for you and then we will take a
quiz.
_____________________________________________________________________
_____________________________________________________________________
_____________________________________________________________________
Opportunity for questions.
1. QUESTIONS FROM THE CLASS:
2. QUESTIONS TO THE CLASS:

Q: How can a diesel engine’s Volumetric Efficiency be increased above
100%?
A: Turbocharging
Q: What component is designed to ensure quick sealing of the
combustion chamber after gases have been evacuated?
A: Interference angle of the valves
Q: What are four poisonous gasses found in diesel exhaust?
A: Carbon Monoxide, Nitrogen Oxide, Sulfur Dioxide, Diesel
Particulate Matter
Q: What are the four conditions that will decrease Volumetric
Efficiency?
A: Shorter duration of the intake stroke, Hotter air less dense,
Obstructions on the walls of the intake ports, and elevation.
Q: Describe the three conditions of valve timing that are modified to
change the power output of a diesel engine?
A: Valve opening and closing points, how long a given valve will stay
open (duration), and valve overlap.
Q: What are the two periods when there is virtually no piston
movement?
A: 15-20 degrees before and after bottom dead center and 15-20
degrees before and after top dead center.
INSTRUCTOR NOTE:
Handout quiz for diesel engine intake and exhaust system operation
and troubleshooting
(ON SLIDE #175)
QUIZ (30min)
Hand out quiz for diesel engine intake and exhaust system operation
and troubleshooting quiz. Give the students 20 minutes to complete
and review it with the students after.
(ON SLIDE #176)
TRANSITION: Now that we have covered the intake and exhaust of the
engine let’s take a break and then we will look at how all the
internal components stay lubricated.
_____________________________________________________________________
_____________________________________________________________________
_____________________________________________________________________
(BREAK 10 min)

TRANSITION: Any more questions before we move on?.
_____________________________________________________________________
_____________________________________________________________________
_____________________________________________________________________
(ON SLIDE #177)
4. DIESEL ENGINE LUBRICATION SYSTEM OPERATION AND TROUBLESHOOTING
(2hrs)
(ON SLIDE #178)
INSTRUCTOR NOTE
Computer aided graphic wear analysis 1.15 minutes.
Computer aided graphic lubrication purpose 0.10 minutes.
Computer aided graphic friction 0.21 minutes.
(ON SLIDE #179)
a. Purpose. The lubrication system in an engine supplies a
constant supply of oil to all moving parts. This constant supply of
fresh oil is important to minimize wear, flush bearing surfaces
clean, and remove the localized heat that develops between moving
parts as a result of friction. In addition, the oil that is supplied
to the cylinder walls helps the piston rings make a good seal to
reduce blowby.
(ON SLIDE #180)
b. Engine Oil Characteristics. The primary function of engine
oil is to reduce friction between moving parts (lubricate). Friction,
in addition to wasting engine power, creates destructive heat and
rapid wear of parts. The greater the friction present between moving
parts, the greater the energy required to overcome that friction. The
increase in energy adds to the amount of heat generated, causing
moving parts that are deprived of oil to melt, fuse, and seize after
a very short period of engine operation. The effectiveness of a
modern lubrication system makes possible the use of friction-type
bearings in an engine. Friction between the pistons and the cylinder
walls is severe, making effective lubrication of this area
imperative. Lubrication of the connecting rod and main bearings is
crucial because of the heavy loads that are placed on them. There are
many other less critical engine parts that also need a constant
supply of oil, such as the camshaft, valve stems, rocker arms, and
timing gears.
(1) Oil as a Lubricant.

(a) Every moving part of the engine is designed to
have a specific clearance between it and the bearing it moves on. As
oil is fed to the bearing it forms a film, preventing the rotating
part from actually touching the bearing.
(b) As the part moves, the film of oil acts as a
series of rollers. Because the moving parts do not actually touch
each other, friction is reduced greatly.
INSTRUCTOR NOTE
Computer aided graphic using plasti-gauge 1.49 minutes.
(ON SLIDE #181)
(c) It is important that sufficient clearance be
allowed between the part and the bearing. Otherwise the film might be
too thin. This would allow contact between the parts, causing the
bearing to wear or burn up.
(d) It also is important that the clearance not be too
large between rotating parts and their bearings. This is true
particularly with heavily loaded bearings like those found on the
connecting rods. The heavy loads could then cause the oil film to be
squeezed out, resulting in bearing failure.
(ON SLIDE #182)
(2) Oil as a Coolant. Engine oil circulated throughout the
engine also serves to remove heat from the friction points. The oil
circulates through the engine and drains to the sump. The heat picked
up by the oil while it is circulated is removed by airflow around the
outside of the sump. In some instances where the sump is not exposed
to a flow of air, it is necessary to add an oil cooling unit that
transfers the heat from the oil to the engine cooling system.
(ON SLIDE #183)
(3) Oil Contamination. Oil does not wear out but it does
become contaminated. When foreign matter enters through the air
intake, some of it will pass by the piston rings and enter the
crankcase. This dirt, combined with foreign matter entering through
the crankcase breather pipe, mixes with the oil, and when forced into
the bearings, greatly accelerates wear. Water, one of the products of
combustion, will seep by the piston rings as steam and condense in
the crankcase. The water in the crankcase then will emulsify with the
oil to form a thick sludge. Products of fuel combustion will mix with
the oil as they enter the crankcase through blowby. The oil, when

mixed with the contaminants, loses its lubricating qualities and
becomes acidic. Engine oil must be changed periodically to prevent
contaminated oil from allowing excessive wear and causing etching of
bearings.
(ON SLIDE #184)
Oil contamination is controlled in the following ways.
(a) Controlling engine temperature. A hotter running
engine burns its fuel more completely and evaporates the water
produced within it before any appreciable oil contamination occurs.
(b) The use of oil filters removes particles from the
oil before it reaches the bearings, minimizing wear.
(c) An adequate crankcase ventilation system will
purge the crankcase of blowby fumes effectively before a large amount
of contaminants can mix with the oil.
(d) The use of air intake filters trap foreign
material and keeps it from entering the engine.
(ON SLIDE #185)
(4) Oil Dilution. Engine oil thins out when mixed with
fuel, causing a dramatic drop in its lubricating qualities. Some of
the causes of oil dilution are the following.
(a) Failed fuel injectors causing an over rich mixture
and an abundance of unburned fuel to leak past the piston rings into
the crankcase.
(b) Failed fuel injection pump. There are some fuel
injection pumps (such as the distributor type) that have the oil and
fuel in close proximity. When these types of pumps fail the crankcase
can and will fill with fuel.
(c) An engine with a malfunctioning thermostat or an
engine that is operated for only short durations will never reach a
sufficient temperature to burn the fuel completely. A small amount of
oil dilution occurs in all engines from initial startup through warm
up. When the engine reaches its operational range 180°F (82.2°C) to
200°F (93.3°C)), however, this condition is corrected as the excess
fuel vaporizes in the crankcase and is carried off by the crankcase
ventilation system.

(ON SLIDE #186)
INSTRUCTOR NOTE
Computer aided graphic acid and contaminants in the
Oil .17 minutes
INSTRUCTOR NOTE
If the engines are taken apart and if time permits, each group can
check the bearing clearances on one crank shaft journal.
(5) American Petroleum Institute (API) Rating System. The
API system for rating oil classifies oil according to its performance
characteristics. The higher rated oils contain additives that provide
maximum protection against rust, corrosion, wear, oil oxidation, and
thickening at high temperatures. The higher the alpha designation,
the higher quality the oil is.
(ON SLIDE #187)
(6) Oil Viscosity. The viscosity of oil refers to its
resistance to flow. When oil is hot, it will flow more rapidly than
when it is cold. In cold weather, therefore, oil should be thin (low
viscosity) to permit it to retain its film strength. The ambient
temperature in which a vehicle operates determines weather an engine
oil of high or low viscosity should be used. If, for example, too
thin an oil were used in hot weather, consumption would be high
because It would leak past the piston rings easily. The lubricating
film would not be heavy enough to take up bearing clearances or
prevent bearing scuffing. In cold weather, heavy oil would not give
adequate lubrication because its flow would be sluggish; some parts
might not receive oil at all.
(ON SLIDE #188)
(a) Oils are graded according to their viscosity by a
series Society of Automotive Engineers (SAE) numbers. The viscosity
of the oil will increase progressively with the SEA number. An SAE 4
oil would be very light (low viscosity) and SAE 90 oil would be very
heavy (viscosity). It should be noted that the SAE number of the oil
has nothing to do with the quality of the oil. The viscosity number
of the oil is determined by heating the oil to a predetermined
temperature and allowing it to flow through a precisely sized orifice
while measuring the rate of flow. The faster oil flows, the lower the

viscosity. Any oil that meets SAE low temperature requirements will
be followed by the letter W (winter). An example would be SAE 10W.
(b) Multiweight Oils. Multiweight oils are
manufactured to be used in most climates because they meet the
requirements of a light oil in cold temperatures and of a heavy oil
in hot temperatures. Their viscosity rating will contain two numbers.
An example of this would be 10W-30. An oil with a viscosity rating of
10W-30 would be as thin as a 10W weight oil at 0ºF (-17.7ºC) and 30
weight at 210 degrees F
(c) Detergent Oils. Detergent oils contain additives
that help keep the engine clean by preventing the formation of sludge
and gum.
(ON SLIDE #189)
INTERIM TRANSITION: Now that we have covered what oil is and what it
does are there any other questions? Let’s go ahead and take a 10
minute break.
_____________________________________________________________________
_____________________________________________________________________
_____________________________________________________________________
(BREAK – 10 Min)
TRANSITION: Before the break we talked about the purpose of the
lubrication system and what oil is and what it does. Now let’s talk
about the different types of oil pumps.
_____________________________________________________________________
_____________________________________________________________________
_____________________________________________________________________
(ON SLIDE #190)
c. Oil Pumps
(1) Rotor-Type Oil Pump. Oil pumps are mounted either
inside or outside of the crankcase, depending on the design of the
engine. They are usually mounted so that they can be driven by gear
directly from the camshaft. The rotor oil pump makes use of an inner
rotor with lobes that match similarly shaped depressions in the outer
rotor. The inner rotor is off center from the outer rotor. The inner
rotor is driven and, as it rotates, it carries the outer rotor around
with it. The outer rotor floats freely in the pump body.
(ON SLIDE #191)

(2) Crescent-Type Oil Pump. The crescent pump is
advantageous in situations where high delivery rate of oil is
required, particularly at low engine speeds. The basic principle is
the same; two rotating wheels build oil pressure near the delivery
nozzle. Movements of the two wheels are in tandem as opposed to
contrary wheel movements in the gear and rotary pumps. Due to size
difference of the two wheels, oil is carried to the delivery nozzle
and pressure created by gradually reducing the size of the
containment area or the crescent formed between the two wheels.
(ON SLIDE #192)
(3) Gear-Type Oil Pump. Gear pumps operate on the water
wheel principle. They have two wheels to create high pressure in the
oil pan and inject the oil into all areas that need lubrication. As
the engine will be operating at high speeds, high pressure is
required for the oil to reach all moving parts in the engine. Two
interlocking wheels inside the pump draw oil from the pan and force
it into relatively smaller area and build the required pressure. The
movements of the wheels or gears and the sides of the pump are so
designed that when high pressure is formed near the delivery nozzle,
oil will not flow back into the oil pan.
(ON SLIDE #193)
(4) Oil Strainer and Pickup. Most manufactures of in-line
and V-type engines place at least one oil strainer or screen in the
lubrication system. The screen is a fine mesh bronze screen that is
located in the oil pump on the end of the oil pickup tube. The oil
pickup tube then is threaded directly into the pump inlet or may
attach to the pump by a bolted flange. A fixed-type strainer, like
the one described, is located so that a constant supply of oil will
be assured. The oil strainer is used to filter out larger particles
or contaminates.
(ON SLIDE #194)
INSTRUCTOR NOTE
Computer aided graphic abrasive and erosive wear 2.31 minutes.
e. Oil Filters.
(1) Purpose. The oil filter removes most of the impurities
that have been picked up by the oil as it is circulated through the
engine. The filter is mounted outside of the engine and is designed
to be replaceable readily.

(ON SLIDE #195)
(2) Filter Configurations. There are two basic filter
element configurations: the cartridge type and the sealed canister
type.
(a) The cartridge-type filter element fits into a
permanent metal container. Oil is pumped under pressure into the
container, where it passes from the outside of the filter element to
the center. From here the oil exits the container. The element is
changed easily by removing the cover from the container when this
type of filter is used.
(b) The sealed canister-type filter element is
completely self-contained, consisting of an integral metal container
and filter element. Oil is pumped into the container on the outside
of the filter element. The oil then passes through the filter medium
to the center of the element, where it exits the container. This type
of filter is screwed onto its base and is removed by spinning it off.
(3) Filter Medium Materials.
(a) Cotton waste or resin-treated paper are the two
most popular filter mediums. They are held in place by sandwiching
them between two perforated metal sheets.
(b) Some heavy-duty applications use layers of metal
that are thinly spaced apart. Foreign matter is strained out as the
oil passes between the metal layers.
(ON SLIDE #196)
INSTRUCTOR NOTE
Computer aided graphic full flow system 0.08 minutes.
(4) Filter System Configuration. The full-flow system is
the most popular in current engine design. All oil in a full-flow
system is circulated through the filter before it reaches the engine.
When a full-flow system is used, it is necessary to incorporate a
bypass valve in the oil filter to allow the oil to circulate through
the system without passing through the element in the event that it
becomes clogged. This will prevent the oil supply from being cut off
to the engine.
(ON SLIDE #197)

INSTRUCTOR NOTE
Computer aided graphic by-pass valves 1.33 minutes.
f. Pressure Regulator. The oil pump will produce pressures in
great excess. This excess pressure, if uncontrolled, would cause
excess oil consumption due to flooded cylinder walls and leakage
through oil seals. A spring-loaded regulator valve is installed in
the lubrication system to control pump pressure. The valve will open
as the pressure reaches the value that is determined by the spring,
causing excess oil to be diverted back to the crankcase.
(ON SLIDE #198)
g. Crankshaft Bearings (Friction Type). The crankshaft is
supported in the crankcase and rotates in the main bearings. The
connecting rods are supported on the crankshaft by the rod bearings.
One of the main bearings serves as the thrust bearing which prevents
excessive axial movement. There are also anti friction type bearings
such as ball bearings but they are not used as crankshaft bearings.
(ON SLIDE #199)
(1) Construction. Crankshaft bearings are made as precision
inserts. They simply slip into place in the upper and lower halves of
the shells. When the halves are clamped together, they form a
precision bearing that will be a perfect fit for a properly sized
shaft. The bearing inserts and the mating surface that hold them must
be sized perfectly. The insert merely slips into place and is held
from turning by the locating tab. The crankshaft sits on the lower
bearing shelf.
(ON SLIDE #200)
(2) Materials. Most bearings begin with a steel backing to
give them rigidity. The lining then is applied to the steel backing.
The lining usually consists of an alloy of copper, tin, and lead. The
lining also may be made of babbit. Babbit is a popular bearing
material that is an alloy consisting of copper, tin, and antimony.
The lining thickness usually ranges from 0.002 to0.005 in. (0.051 to
0.127 mm). The bearing then is coated with either aluminum or tin to
a thickness of approximately 0.001 in. (0.025 mm).
(ON SLIDE #201)
(3) Bearing Requirements. Bearings must be able to support
the crankshaft rotation and deliver power stroke thrusts under the
most adverse conditions. A good bearing must have the following
qualities.

(ON SLIDE #202)
INSTRUCTOR NOTE
Computer aided graphic stress wear 2.40 minutes.
(a) Strength. Engine bearings are constantly subjected
to tremendous forces from the thrust of the power strokes. The
bearings must be able to withstand these loads without spreading out
or cracking.
(ON SLIDE #203)
INSTRUCTOR NOTE
Computer aided graphic lubrication corrosion 1.59 minutes.
(b) Corrosion resistance. The bearing must be
resistant to moisture and acids that always are present in the
crankcase.
(ON SLIDE #204)
INSTRUCTOR NOTE
Computer aided graphic adhesive wear 1.52 minutes.
(c) Antiscuffing. The bearing surface should be able
to absorb enough oil to keep It from scuffing during startup, or any
other time when It must run momentarily without an oil supply.
(ON SLIDE #205)
INSTRUCTOR NOTE
Computer aided graphic embedability 0.49 minutes.

(d) Embedabillty. The surface of the bearing must be
soft enough to allow particles of foreign matter to embed themselves
and prevent damage of the shaft journal.
(ON SLIDE #206)
(e) Conformability. The bearing must be able to
conform or fit itself to the surface of the crankshaft Journal.
(ON SLIDE #207)
INSTRUCTOR NOTE
Computer aided graphic conductivity 0.24 minutes.
(f) Conductivity. The bearings must be able to conduct
heat to the connecting rod so that they will not overheat.
(g) Resistance to Heat. The bearing must be able to
maintain all of these characteristics throughout its entire operating
temperature range.
(ON SLIDE #208)
INSTRUCTOR NOTE
Computer aided graphic lubrication cavitation erosion wear 3.11
minutes.
(4) Connecting Rod Lubrication. The connecting rod bearings
fit into the lower end of the connecting rod. They are fed a constant
supply of oil through a hole in the Crankshaft Journal. A hole in the
upper bearing half feeds a passage in the connecting rod to provide
oil to the piston pin.
(ON SLIDE #209)
(5) Crankshaft Main Bearings. The upper halves of the main
bearings fit right into the crankcase, and the lower halves fit into
the caps that hold the crankshaft in place.
The main bearings have holes drilled in their upper halves through
which a supply of oil is fed to them. The crankshaft has holes
drilled in the journals that receive oil from the main bearings to
feed the rod bearings. It is a common practice to cut a groove In the
center of the main bearing Inserts. This supplies a more constant
supply of oil to the connecting rod bearings.

(ON SLIDE #210)
INSTRUCTOR NOTE
Computer aided graphic thrust bearing 0.11 minutes.
One of the main bearings also serves as a thrust bearing. This
controls back and forth movement of the crankshaft. This thrust
bearing is characterized by side flanges.
(ON SLIDE #211)
h. Lubrication System. A complete pressurization of lubrication
is achieved in the force-feed lubrication system. Oil is forced by
the oil pump from the crankcase to the main bearings and the camshaft
bearings. The connecting rod bearings are also fed oil under pressure
from the pump. Oil passages are drilled in the crankshaft in order to
lead oil to the connecting rod bearings. The passages deliver oil
from the main bearing journals to the rod bearing journals. In some
engines, these openings are holes that index (line up) once for every
crankshaft revolution. In other engines, there are annular grooves in
the main bearings through which oil can feed constantly into the hole
in the crankshaft. The pressurized oil that lubricates the connecting
rod bearings goes on to lubricate the pistons and walls by squirting
out through strategically drilled holes. This lubrication system is
used in virtually all engines that are equipped with semi or full
floating piston pins.
(ON SLIDE #212)
INTERIM TRANSITION: Over the past 1.15 hours we have reviewed engine
lubrication, how frictional losses are minimized, and how engine life
is maximized. Are there any questions? If not take a 10 minute break.
_____________________________________________________________________
_____________________________________________________________________
_____________________________________________________________________
(BREAK – 10 Min)
INTERIM TRANSITION: Before the break we discussed the purpose and
components of the lubrication system let’s move on to the practical
application of removing the oil pan and pump.
_____________________________________________________________________
_____________________________________________________________________
_____________________________________________________________________
(ON SLIDE #213)

INSTRUCTOR NOTE
Perform the following practical application drainage and removal of
the oil pan and pump. Allow students to take breaks as required or as
instructed.
PRACTICAL APPLICATION (4 HRS) In groups no larger than 5 the students
will have their assigned toolboxes, technical manuals and assigned
engines with work stations. There will be at least one instructor
supervising the exercise. The purpose of this practical application
is to remove and drain the engine oil pan and pump.
PRACTICE: In their groups the students will follow the technical
manuals to drain and remove the engine oil pan and pump on their
assigned engines.
PROVIDE HELP: The instructor may assist in the disassembly process if
needed.
1. Safety Brief: At all times proper PPE will be worn to include
safety boots. Safety glasses will be worn anytime fuel or liquid
under pressure is being used.
2. Supervision and Guidance: The instructor will walk around to the
different groups and supervise the disassembly answering any
questions the students may have
(ON SLIDE #214)
TRANSITION: We just completed the practical application for removal
of the oil pan and pump is there any other questions? If not I have
some questions for you and then you will take a quiz.
_____________________________________________________________________
_____________________________________________________________________
_____________________________________________________________________
Opportunity for questions.
1. QUESTIONS FROM THE CLASS:
2. QUESTIONS TO THE CLASS:
Q: What is the purpose of the lubrication system?
A: Supplies a constant supply of oil to all moving parts of the
engine.
Q: What the three functions of the lubricating system?
A: Minimize wear, flush bearing surfaces clean, remove localized heat
between moving parts caused by friction.

Q: What are three causes for dilution of lube oil in a diesel engine?
A: Failed Fuel injectors, failed fuel pump, malfunctioning thermostat
or a engine that operates for only short periods of time.
Opportunity for questions.
Q: What friction bearing trait allows particles of foreign matter to
embed themselves and prevent damage of the shaft journal?
A: Embedability
Q: What friction bearing trait resists tremendous forces from the
thrust of the power strokes?
A: Strength
(ON SLIDE #215)
QUIZ (30min)
Hand out quiz for diesel engine lubrication system operation and
troubleshooting quiz. Give the students 20 minutes to complete and
review it with the students after.
(ON SLIDE #216)
TRANSITION: Are there any questions? If not let’s take a break.
_____________________________________________________________________
_____________________________________________________________________
_____________________________________________________________________
(BREAK 10 min)
TRANSITION: Let’s begin this absolutely vital part of the diesel
engine and answer a few questions about our source of energy; Diesel
Fuel.
_____________________________________________________________________
_____________________________________________________________________
_____________________________________________________________________
(ON SLIDE #217)
INSTRUCTOR NOTE
Computer aided graphic intro fuel system 0.37 minutes.
5. DIESEL ENGINE FUEL SYSTEM OPERATION AND TROUBLESHOOTING
(1hr 50min)
(ON SLIDE #218)

a. Thermal Efficiency. Thermal efficiency is the relationship
between actual heat energy stored within the fuel and the power
produced in the engine (indicated horsepower). The thermal efficiency
figure indicates how much of the potential energy contained in the
fuel actually is used by the engine to produce power and how much
energy is lost through heat.
(ON SLIDE #219)
There is an extremely large amount of energy from the fuel that is
lost through heat in an internal combustion engine. This unused heat
that is produced while the engine is producing power is of no value
to the engine and must be removed from it.
(1) The heat is dissipated in the following ways.
(a) The cooling system removes heat from the engine to
control engine operating temperature.
(b) A major portion of the heat produced by the engine
exits through the exhaust system.
(c) The engine radiates a portion of the heat to the
atmosphere.
(d) A portion of this waste heat may be channeled to
the passenger compartment to heat it.
(e) The lubricating oil in the engine removes a
portion of the waste heat.
(ON SLIDE #220)
(2) In addition to energy lost through wasted heat, there
are the following inherent losses in the piston engine.
(a) Much energy is consumed when the piston must
compress the mixture on the Compression stroke.
(b) Energy from the fuel is consumed to push the
exhaust gases out of the cylinder.
(ON SLIDE #221)
b. Characteristics of Diesel Fuel. Fuels used in modern high-
speed diesel engines are derived from the middle distillate fraction
of crude oil.
(ON SLIDE #222)

The middle distillates span the boiling range between gasoline and
heavy residual oil, and typically include kerosene, jet fuel
(aviation kerosene), diesel fuel, and burner fuel (home heating oil).
Although large, slow-speed diesel engines used in stationary and
marine applications will burn almost any grade of heavy oil, the
smaller, high-speed diesel engines used in most military equipment
require middle distillate diesel fuels. These fuels must meet
exacting specification requirements to ensure proper engine
performance.
(ON SLIDE #223)
(1) Cleanliness. Fuel cleanliness is an important
characteristic of diesel fuel because the extremely close fit of the
injector parts can be damaged by particles.
(a) Dirt or sand particles in the fuel cause scoring
of the injector parts, leading to poor performance.
(b) Moisture in the fuel can also damage of injector
parts when corrosion occurs.
(ON SLIDE #224)
(2) Stability. Fuel stability is its capacity to resist
chemical change caused by oxidation and heat. Good oxidation
stability means that the fuel can be stored for long periods without
formation of gum or sludge. Good thermal stability prevents the
formation of carbon in hot parts such as fuel injectors. Carbon
deposits disrupt the spray patterns and cause inefficient combustion.
(ON SLIDE #225)
(3) Cloud point. The lowest temperature to which the fuel
can be subjected before it begins to cloud or form paraffin crystals
is the cloud point. This is very important if an item of equipment is
operated during cold weather. The paraffin or wax will clog fuel
filters and cause an engine to shutdown.
(ON SLIDE #226)
(4) Viscosity. The viscosity of a fluid is an indication of
its resistance to flow. This means that a fluid with a high viscosity
is heavier than a fluid with a low viscosity. The viscosity of diesel
fuel must be low enough to flow freely at its lowest operational
temperature, yet high enough to provide lubrication to the moving
parts of the finely machined injectors. The fuel must also be
sufficiently viscous so that leakage at the pump plungers and
dribbling at the injectors will not occur. Viscosity will also

determine the size of the fuel droplets, which, in turn, govern the
atomization and penetration qualities of the fuel injector spray.
(ON SLIDE #227)
INSTRUCTOR NOTE
Computer aided graphic sulfur2 0.21 minutes.
(5) Sulfur. All diesel fuels contain a certain amount of
sulfur, but high sulfur content is detrimental and will cause early
engine failure. Sulfur does not burn except at extremely high
temperatures, so in many cases it simply accumulates in the engine
oil and forms sulfuric acid by combining with moisture during the
combustion process. High sulfur content fuels require shorter times
between engine servicing.
(ON SLIDE #228)
INSTRUCTOR NOTE
Computer aided graphic fuel injection2 0.30 minutes.
(6) Ignition Quality. The ignition quality of a fuel is its
ability to ignite spontaneously under the conditions existing in the
engine cylinder. The spontaneous-ignition point (flash point) of a
diesel fuel is a function of the pressure, temperature, and time.
(ON SLIDE #229)
(a) The yardstick that is used to measure the ignition
quality of a diesel fuel is the cetane-number scale. The cetane
number of a fuel is obtained by comparing it to the operation of a
reference fuel. The reference fuel is a mixture of alpha-
methylnaphthalene, which has virtually no spontaneous-ignition
qualities, and pure cetane, which has what are considered to be
perfect spontaneous-ignition qualities.
(b) The percentage of cetane is increased gradually in
the reference fuel until the fuel matches the spontaneous-ignition
qualities of the fuel being tested. The cetane number then is
established for the fuel being tested based on the percentage of
cetane present in the reference mixture.

(c) Cetane is not the same as octane. Octane is used
to rate gasoline and represents the ability of gasoline to resist
rapid burning.
(ON SLIDE #230)
(7) Knocking. Diesel engines have a tendency to produce a
knock that is noticeable particularly during times when the engine is
under a light load. This knocking occurs due to a condition known as
“ignition delay” or “ignition lag”.
(1) When the power stroke begins, the first molecules of
fuel injected into the combustion chamber must first vaporize and
superheat before ignition occurs.
(2) During this period, a quantity of unburned fuel builds
up in the combustion chamber. When ignition occurs, the pressure
increase causes the built-up fuel to ignite instantly. This causes a
disproportionate increase in pressure, creating a distinct and
audible knock.
(3) The sudden ignition of the diesel fuel when injected
into the combustion chamber causes a pressure wave.
(4) Increasing the compression ratio of a diesel engine
will decrease ignition lag and the tendency to knock. This is
opposite of a gasoline engine, whose tendency to knock will increase
with an increase in compression ratio.
(5) Knocking in diesel engines is also affected by the type
of combustion chamber, airflow within the chamber, injector nozzle
type, air and fuel temperature, and the cetane number of the fuel.
(ON SLIDE #231)
INSTRUCTOR NOTE
Diesel fuel image.
(ON SLIDE #232)
c. Fuel circuit components.
(1) Fuel Tank. The location of the fuel tank is dependent
on utilizing an area that is protected from flying debris, shielded
from collision damage, and one that is not subject to bottoming. A
fuel tank can be located just about anywhere in the equipment that
meets these requirements.

(a) Construction. Fuel tanks take many forms in
military equipment the most common material for fuel tanks is thin
sheet metal. The walls of the tank are manufactured with ridges to
give them strength. Internal baffles are sometimes installed in the
tank to prevent the fuel from sloshing and to increase overall
strength.
(b) Filler Pipe. A pipe is provided for filling the
tank or cell that is designed to prevent fuel from being spilled into
the passenger, engine, or cargo compartment. The filler pipes used on
military vehicles are designed to allow their tanks to be filled at a
rate of at least 50 gallons per minute.
(c) Fuel return line. The return line is normally
located near the top of the fuel tank. Since diesel fuel is used to
cool and lubricate the internal components of the system, returning
fuel carries heat to the tank to be dissipated.
(d) Fuel supply line. The supply line is normally
located just above the bottom of the fuel tank. This location is
ideal to allow sediment to fall to the bottom of the tank without it
being drawn into the fuel system.
(e) Drain plug. A threaded drain-plug is usually
provided at the bottom of the tank for draining and cleaning.
(ON SLIDE #233)
(2) Fuel Tank Ventilation. The most common methods of
venting a fuel tank are either venting the fuel tank cap to the
atmosphere, or providing a line to the fuel tank that vents at a
point that is high enough to prevent water from entering during
fording operations. The following are reasons why a fuel tank needs
a good ventilation system:
(a) Air must be allowed to enter the tank as the fuel
is pumped out. Without ventilation of the tank, the pressure in the
tank would drop to the point where the fuel pump would not be able to
draw any more fuel from it. In some cases, the higher pressure around
the outside of the tank could cause it to collapse.
(b) Temperature changes cause the fuel in the tank to
expand and contract. Absence of a ventilation system could cause
excessive or insufficient fuel line pressure.
(3) Fuel Gage Provision. A provision usually is made to
install a fuel gage. This provision is normally in the form of a
flanged hole.
(ON SLIDE #234)
INSTRUCTOR NOTE
Computer aided graphic no fuel bypass 0.12 minutes.
d. Fuel filtration. Thorough and careful filtration is necessary
to keep diesel engines efficient. Diesel fuels are more viscous than
gasoline and contain more gums and abrasive particles that may cause
premature wear of injection components. The abrasives may consist of
material that is difficult to eliminate during refining, or they even
may enter the tank during careless refueling. Whatever the source, it
is imperative that means be provided to protect the system from
abrasives.
(ON SLIDE #235)
(1) Types. Diesel engine designs usually include two
filters (primary and secondary) in the fuel supply systems to protect
the closely fitted parts in the pumps and nozzles. Additional
filtering elements are frequently installed in the system to provide
additional protection.
(2) Diesel fuel filters are referred to as full-flow
filters, because all the fuel must pass through them before reaching
the injection pumps. A diesel fuel filter usually incorporates a
drain valve where foreign matter and water that settles to the bottom
of the bowl can be removed.
(ON SLIDE #236)
e. Fuel transfer (lift) pump.
(1) Fuel injection pumps must be supplied with fuel under
pressure for the following reasons:
(a) The injection pumps lack the suction ability to
draw fuel from the tank by themselves.
(b) It is important to supply fuel to the injection
pump in excess so that fuel may be used to cool and lubricate the
system before bypassing it back to the tank.
(c) Without a supply pump, the system would lose its
prime whenever the pump is in the no-delivery mode. The supply pumps
in use generally are of the positive displacement type with a
performance that is independent of any reasonable variations in
viscosity, pressure, or temperature of the fuel.

(2) Types. In a majority of the equipment, the fuel supply
pump is built into the injection pump unit. This cuts down on fuel
tubing and the complexity of the equipment, and allows the supply
pump to share the same engine power takeoff as the injection pump.
However, the pump may be located on the engine block and driven by an
eccentric lobe on the engine cam shaft.
(ON SLIDE #237)
INSTRUCTOR NOTE
Computer aided graphic rotor pump 0.17 minutes.
(a) Vane-type supply pump. An integral steel rotor and
shaft, one end supported in the pump flange and the other end in the
cover, revolves in the body, the bore of which is eccentric to the
rotor. Two or more sliding vanes are placed at equal distances apart
in slots in the rotor and are pressed against the body bore by
springs in the slots or centrifugal force. When the shaft is rotated,
the vanes pick up fuel at the inlet port and carry it around the body
to the outlet side, where the fuel is discharged. Pressure is
produced by the wedging action of the fuel as it is forced toward the
outlet port by the vane.
(ON SLIDE #238)
(b) Plunger-type supply pump. The plunger follows the
camshaft by the force of its plunger spring. As the follower comes
off the high point of the cam lobe, the plunger moves toward the
retracted position, this plunger movement creates suction in the pump
chamber. This causes fuel to enter through the inlet valve. As the
cam lobe comes around again, it forces the plunger upward. This
forces the fuel out of the chamber through the outlet valve and the
injection pump. The cam follower drives the plunger through a spring.
The spring is calibrated so that it will flex rather than drive the
plunger when the pressure in the pump chamber reaches the desired
maximum. This effectively regulates pump pressure.
(ON SLIDE #239)
(c) Gear-type supply pump. In this type, a primary
gear, driven by an external member, drives a companion gear. Fuel is
forced into the pump cavity, around each gear, and out the other side
into the fuel passages. The pressure is derived from the action of
the meshed gear teeth, which prevent fuel from passing between the
gears, and forces it around the outside of each gear instead. The
pump incorporates a pressure relief valve, which is a spring-loaded

ball that rises when the desired pressure is reached and allows the
excess oil to be delivered to the inlet side of the pump.
(ON SLIDE #240)
(d) Piston-type supply pump (Figure 9. The fuel pump
is moved by a cam on the camshaft of the fuel injection pump or the
engine. As the cam lobe rotates towards the transfer pump, the push
rod and piston are forced into the pump causing the fuel to open the
pumping check valve. As the cam lobe rotates away, spring force
pushes the push rod out opening the outlet check valve for fuel
delivery while the piston draws fuel in through the inlet check
valve.
(ON SLIDE #241)
(e) Electric-powered lift pump. Fuel flow begins as
the fuel lift pump pulls fuel from the supply tank. This electric
lift pump supplies low-pressure fuel (10 to 12 psi) to the filter
head, through the filter, and then to the electronic distributor
injection pump. The electronic distributor pump builds the high
injection pressures required for combustion and routes the fuel
through individual high-pressure fuel lines to each injector.
(ON SLIDE #242)
(f) High pressure pump. This pump draws fuel and
brings it up to injection pressure. Fuel at injection pressure is
sent to the “common rail” where it is made available to each
injector. Each injector draws fuel from the rail by a high pressure
line. Since there is always injection pressure in the rail, the
injectors have the ability to draw fuel at any time.
(ON SLIDE #243)
INSTRUCTOR NOTE
Computer aided graphic amount of fuel 0.19 minutes.
(1) Engine speed in a diesel is controlled by the amount of
fuel injected. The injection, therefore, is designed to supply the
maximum amount of fuel that will enable it to operate at full load
while reaching a predetermined maximum speed (rpm). If, however, the
maximum fuel charge were supplied to the cylinders while the engine
was operating under a partial or unloaded condition, the result would
be over speeding and catastrophic failure. Thus, it can be seen that
the ECM must control the amount of fuel injected in order to control
the engine speed.

(ON SLIDE #244)
g. Fuel Injection Principles.
(1) Method. In engineer equipment the most common method of
delivering fuel to the combustion chamber is solid injection, where
direct mechanical pressure is placed on the fuel itself to force it
into the combustion chamber.
(ON SLIDE #245)
(2) Fuel Atomization and Penetration. The fuel spray
entering the combustion chamber must conform to the chamber’s shape
so that the fuel particles will be well distributed and thoroughly
mixed with the air. The amount of fuel pressure for injection is
dependent on the pressure of the air in the combustion chamber, and
the amount of turbulence in the combustion space. The shape of the
spray is determined by the degree of atomization and penetration
produced by the orifice through which the fuel enters the chamber.
(a) Atomization is the term used to indicate the size
of the droplets the fuel is broken down into.
(b) Penetration is the distance from the orifice that
the fuel droplets attain at a given phase of the injection period.
The dominant factors that control penetration are the length of the
nozzle orifice, the diameter of the orifice outlet, the viscosity of
the fuel, and the injection pressure of the fuel.
(c) Increasing the ratio of the length of the orifice
to its diameter will increase penetration and decrease atomization.
(d) Decreasing this ratio will have an opposite
effect. Because penetration and atomization are opposed mutually and
both are important, a compromise is necessary if uniform fuel
distribution is to be obtained.
(ON SLIDE #246)
(3) Function of the diesel injection systems. If the four
basic functions of diesel fuel injection are kept in mind while
studying the operation of the systems, it will be easier to
understand how they work. The four basic functions are:
(a) Time. The timing of fuel injected into the
cylinder is very important during engine starting, full load, and
high speed operation. Diesel engines start best when fuel is injected
at or very close to top dead center (TDC), since it is at this point
that air in the chamber is the hottest. After the engine is started
and running at high speed, the injection timing may have to be
advanced to compensate for injection lag, ignition lag, and other
factors that influence combustion within the engine cylinder.
(b) Atomize. The fuel must be atomized when it is
injected into the combustion chamber since unatomized fuel will not
burn easily. The degree of atomization required will vary from engine
to engine depending on the combustion chamber design.
(c) Meter. The fuel injection system must measure the
fuel supplied to the engine very accurately since fuel requirements
vary greatly with engine speed. Fuel is metered within the injection
pump or injector by measuring it as it fills the pumping chamber
(inlet metering) or as it leaves the pumping element (outlet
metering).
(d) Pressurize. The fuel system must pressurize the
fuel to open the injection nozzle or the injector tip. In addition to
the pressure required to open the nozzle, some pressure is required
to inject fuel into the combustion chamber to offset the pressure of
compression.
(ON SLIDE #247-248)
INTERIM TRANSITION: Over the past hour we have talked about some of
the fuel system components. Are there any other questions? Let’s go
ahead and take a tem minute break.
_____________________________________________________________________
_____________________________________________________________________
_____________________________________________________________________
(BREAK – 10 Min)
INTERIM TRANSITION: Before the break we talked about some of the fuel
system components. The principles of fuel injection is built on
fundamental hydraulic principles, and if this is kept in mind,
understanding how the fuel systems found in Marine Corps Engineer
Equipment work will be much easier. First let’s review the pressure
timed (common rail system).
_____________________________________________________________________
_____________________________________________________________________
_____________________________________________________________________
(ON SLIDE #249)
h. Pressure-Timed (PT) Injection System.
(1) Features of a Common Rail System (PT). On the C6.6
model engine, the ECM has new software for more accurate timing
control. It has a high-pressure fuel system to deliver adequate
amounts of fuel at any given time. The new 4 valve head allows for
better volumetric efficiency.
(ON SLIDE #250)
(2) Overall System Operation. The pressure-timed injection
system (also known as a common rail system) has a metering system
that is based on the principle that the volume of liquid flow is
proportional to the fluid pressure, the time allowed to flow, and the
size of the passage the liquid flows through.
(ON SLIDE #251)
(3) Pump Facts. The common rail system is a self bleeding
system. This means you DO NOT crack the fuel lines to let out excess
air. Failure to do so will result in serious injury. If fuel pump is
removed, fuel lines must be replaced. Ensure fuel pump is timed to
the engine and locked into place before removal.
(ON SLIDE #252)
The operation of the system is as follows:
(a) A fuel tank with a vented filler cap stores the
fuel supply.
(b) Fuel is supplied from the tank to the pressure-
timed gear (PTG) pump through the delivery line. An in-line filter is
placed in series in the line to trap foreign matter and moisture.
(c) An internal bleed line from the PTG pump is
provided to bleed off excess fuel so that operating pressures can be
regulated. (Self-Bleeding)
(d) The PTG pump delivers controlled amounts of fuel
from the ECM to the pressure-timed delivery (PTD) injectors.
(e) Delivery of fuel to the PTD injectors is through a
common-rail type delivery line.
(f) A common-rail type return line connects the PTD
injectors to the fuel tank so that excess fuel may be diverted back
to the fuel tank.
(ON SLIDE #253)
(4) PTG (Pressure Timed Gear) Injection Pump (Figures 13
and 14). The PTG pump is driven directly by the engine at a one-to-
one speed ratio.
(ON SLIDE #254)
(a) Operation and Construction.
1 The gear-type pump draws fuel from the supply
tank and forces it through the pump filter screen to the governor. It
is driven by the pump main shaft and picks up and delivers fuel
throughout the fuel system. A pulsation damper mounted to the gear
pump contains a steel diaphragm that absorbs pulsations and smoothes
fuel flow through the fuel system.
(ON SLIDE #255)
2 The PTG pumps are equipped with a bleed line
that is attached to the engine injector return line. This prevents
excessive fuel temperature within the fuel pump by using the surplus
fuel as a coolant. The bleed line functions primarily when the pump
throttle is set at idle speed, but gear pump output is high due to
engine operating speed, as occurs during downhill operation. A
special check valve is used in the gear pump to accomplish the bleed
action.
3 The governor controls the flow of the fuel from
the gear pump, as well as the maximum and idle speeds. The mechanical
governor is actuated by a system of springs and weights and has two
functions:
a The governor maintains sufficient fuel for
idling with the throttle control in idle position.
b It restricts fuel to the injectors above
maximum rated rpm.
3 During operation between idle and maximum
speeds, fuel flows through the governor to the injectors in
accordance with the engine requirements, as controlled by the
throttle and limited by the size of the idle spring plunger counter
bore. When the engine reaches governed speed, the governor weights
move the governor plunger, and fuel flow to the injectors is
restricted. At the same time, another passage opens and dumps the
fuel back into the main pump body. In this manner, engine speed is
controlled and limited by the governor, regardless of throttle
position. Fuel leaves the pump, flows through the shutdown valve,
inlet supply lines, and to the injectors.
4 The fuel shutdown valve is located on top of
the fuel pump. It shuts off fuel to the injectors. With the master
switch on, the solenoid opens the valve. With the switch off, the
spring loaded valve returns to the OFF position. In case of an
electrical failure, rotation of the manual knob clockwise will permit
fuel to flow through the valve. The knob is located on the front of
the valve.
(ON SLIDE #256)
(5) PTD (Pressure Timed Delivery) Injector. A PTD injector
is provided at each engine cylinder to spray the fuel into the
combustion chambers. PTD injectors are of the unit type, operated by
an engine-based camshaft.
(ON SLIDE #257)
(a) Fuel flows from a connection at the top of the
fuel pump shutdown valve through a supply line into the lower drilled
passage in the cylinder head at the front of the engine.
(b) A second drilling in the head is aligned with the
upper injector radial groove to drain away excess fuel.
(ON SLIDE #258)
(c) A fuel drain at the flywheel end of the engine
allows return of the unused fuel to the fuel tank.
(d) Decreasing fuel injector travel would (overtime)
foul the injector and decrease engine speed. There are four phases of
injector operation:
(ON SLIDE #259)
1 Metering. This phase begins with the plunger
just beginning to move downward and the engine is on the beginning of
the compression stroke. The fuel is trapped in the cup, the check
ball stops the fuel from flowing backwards, and the fuel begins to be
pressurized.
(ON SLIDE #260)
2 Pre-injection. The plunger is almost all the
way down, the engine is almost at the end of the compression stroke,
and the fuel is being pressurized by the plunger.
(ON SLIDE #261)
(e) Injection. The plunger is almost all the way down,
the fuel is injected out the eight orifices, and the engine is on the
very end of the compression stroke.
(ON SLIDE #262)
(f) Purging. The plunger is all the way down,
injection is finished, and the fuel is flowing into the injector, and
out through the fuel drain. The cylinder is on the power stroke.
During the exhaust stroke, the plunger moves up and waits to begin
the cycle all over again.
(ON SLIDE #263)
INSTRUCTOR NOTE
Computer aided graphic inspecting fuel lines for leaks 0.30 minutes.
(ON SLIDE #264)
i. Inline Injection System.
(1) Overall system operation (Figure 21, schematic
representation only).
(a) The fuel transfer pump and the fuel filters
provide a low-pressure supply of fuel to the multiple unit injection
pump.
(b) The multiple unit injection pump contains an
individual injection pump for each engine cylinder. Fuel is delivered
to the injectors at each cylinder from the injection pumps in a timed
sequence and a regulated amount based on accelerator pedal position
and engine speed.
(c) The injectors receive fuel charges from their
respective injection pumps and spray it into the combustion chambers
in a spray pattern that is tailored to provide the best overall
performance for their particular application.
(ON SLIDE #265)
(2) Governor servos and solenoids.
(a) Hydraulic servo (Caterpillar). The servo consists
basically of a hydraulic piston and an oil control valve (the
cylinder). The servo gives hydraulic assistance to the mechanical
governor force to move the fuel rack.

(ON SLIDE #266)
(b) Dashpot (Caterpillar). The dashpot helps the
governor better control speed when there are sudden speed and load
changes by dampening the movement of the governor spring. If the
governor movement is slow, the dashpot gives no restriction to the
change in governor linkage position, but if there is sudden movement
in the “FUEL OFF” direction of governor position, the dashpot will
move slowly due to supply oil movement through a the needle valve.
(ON SLIDE #267)
(c) Fuel ratio control (Caterpillar). The fuel ratio
control limits the amount of fuel to the cylinders during an increase
of engine speed to reduce exhaust smoke.
1 While the engine is stopped, the fuel ratio
control stem is in the fully extended position allowing maximum fuel
to the engine for easier starts.
2 With the engine running, oil fills the pressure
oil chamber.
3 When the governor is moved to increase fuel to
the engine, the fuel ratio control stem limits the movement of the
fuel rack in the “FUEL ON” direction in proportion to the inlet air
pressure in the air chamber.
4 The fuel ratio control is designed to restrict
fuel until the air pressure in the inlet manifold is high enough for
complete combustion. It prevents large amounts of black exhaust smoke
caused by an air-fuel mixture with too much fuel. When engine speed
or load is increased rapidly, it is possible for a standard
(unlimited) governor to supply more fuel than can be burned with
the amount of available air too much smoke and poor acceleration
are the result. The fuel ratio control works to limit the movement
of the governor terminal shaft in the increase fuel direction as
a direct result of inlet manifold pressure. Thus, fuel which can
be burned is limited to the air available for combustion as the
engine speed is increased. This gives more complete combustion
and keeps smoke to a minimum while acceleration is improved.
(ON SLIDE #268)
(d) Aneroid (Bosch). The aneroid (also called Air Fuel
ratio Control A.F.C.is a diaphragm air fuel ratio control usually
mounted on the governor housing, but it can be mounted on the front
of the pump as well. It is operated by boost pressure from the intake
manifold. Like the fuel ratio control used by Caterpillar, the

aneroid eliminates unnecessary smoke by limiting control rack
movement until sufficient manifold pressure is built up in the intake
manifold to effectively burn a full charge of fuel.
(ON SLIDE #269)
(3) The Multiple Unit Injection Pump.
(a) The multiple unit injection pump contains an
individual plunger-type injector pump for each cylinder. These pumps
are arranged in a line so that they may be driven by a common
camshaft.
(ON SLIDE #270)
(b) The lobes of the camshaft are arranged so that
they operate the injection pumps in a sequence that coincides with
the firing order of the engine.
(c) This camshaft is driven by the engine through
gears at a speed of exactly one-half that of the crankshaft. This
exact speed is maintained so that the injectors will each deliver
their fuel charge at the beginning of their respective cylinder’s
power stroke. Power strokes occur during every other crankshaft
revolution in a four-stroke cycle diesel engine.
(ON SLIDE #271)
(d) Excess fuel flows from the injection pump through
the relief valve and back to the fuel tank.
(e) The pumps consist of a finely fitted plunger that
is actuated by the camshaft against the force of the plunger spring.
(ON SLIDE #272)
(f) The bore that the plunger rides in has two
passages machined into it. One of these passages is the delivery
port, through which the pump is filled. The other passage is the
spill port, through which excess fuel is discharged. Fuel flows into
the pump cavity through the uncovered delivery port and out of the
pump cavity through the uncovered spill port when the plunger is
fully in its return position. The pump cavity is always kept full as
the fuel flows through. The plunger moves up in its bore as it is
actuated by the camshaft, sealing the ports. The fuel that is trapped
in the cavity is forced out of the pump and to its respective
injector.
(g) The pump plunger has a rectangular slot cut into
it that leads from the top face, down the side, and finally
connecting to a helical shaped cavity. In operation, the slot will
allow fuel to pass to the bypass helix. As the bypass helix passes
over the spill port, it will allow a portion of the fuel charge to
bypass rather than being injected into the engine cylinder. Either
the outer pump sleeve or the inner plunger is made to rotate and will
have gear teeth around its outer diameter. A horizontal toothed rack
meshes with these gear teeth to rotate either the sleeve or plunger.
(ON SLIDE #273)
INSTRUCTOR NOTE
Image of inline injection pump.
(ON SLIDE #274)
(h) By moving the rack back and forth, the delivery
and spill ports are changed in relation to the bypass helix on the
pump plunger. This enables the volume of fuel injected to the volume
of fuel injected to the cylinders to be varied by changing the
effective length of the pump stroke (the length of the pump stroke
that occurs before the spill port is uncovered by the bypass helix).
The rack extends down the whole row of Injection pumps so that they
are all operated simultaneously. The end result is that the Injection
pumps can be moved from full to no-fuel delivery by moving the rack
back and forth. The movement of the rack is controlled by the
governor.
(ON SLIDE #275)
(i) When the plunger begins its pump stroke it covers
both ports. When this happens, the pressure exerted on the fuel
causes the spring-loaded delivery valve to lift off of Its seat,
thereby permitting fuel to discharge into the tubing that leads to
the spray nozzle.
(j) At the instant that the bypass helix uncovers the
spill port, the fuel begins to bypass. This causes the pressure in
the pump cavity to drop. The high pressure in the delivery line
combined with spring pressure causes the delivery valve to close.
(k) When the delivery valve closes, it prevents fuel
from the line from draining back into the pump, which could cause the
system to lose its prime. As the delivery valve seats, it also serves
to reduce pressure in the delivery line. The delivery valve has an
accurately lapped displacement piston Incorporated into It to
accomplish pressure relief. The pressure is relieved in the line by
the increase in volume as the delivery valve seats.

(ON SLIDE #276)
INSTRUCTOR NOTE
Image Large Diesel Engine.
(ON SLIDE #277)
j. Distributor systems.
(1) Overall system operation.
(a) The distributor system and pump develops pressure
for injection through a single or paired set of plungers which are
then timed to the injectors by means of a distributor.
(ON SLIDE #278)
(b) Most modern pumps discharge from one side of the
plunger, which rotates to align the discharge point with a fixed
distributor head.
(ON SLIDE #279)
(c) The major advantage of this type of system is each
cylinder receives precisely the same amount of fuel. The economic
advantage is that a single plunger or plunger set costs less than the
alternative scheme of individual plungers for each cylinder.
(d) The most significant disadvantage is the pumping
elements are susceptible to wear from a lack of lubrication due to
improper viscosity of the fuel. Since all lubrication for the pump
comes from the diesel fuel, an improper grade of fuel will cause
early failure due to lower fuel viscosity.
(ON SLIDE #280)
(2) Single plunger distributor pump.
(a)Construction.
1 Shut off solenoid 2 Control Lever 3 Mechanical Governor
4 Feed Pump 5 Feed Pump 6 Roller Holder
7 Cam Disk 8 Timing Advance Mechanism
9 Control Sleeve 10 Plunger 11 Delivery Valve
(ON SLIDE #281)
(b) Operation.

1 The single plunger distributor pump combines
transfer and high pressure pump functions in a single unit. A cam
disk, driven from the engine at a two to one ratio, is pinned to the
plunger, which has a reciprocating and rotary motion.
2 Lobes on the cam disk cause the plunger to
reciprocate, alternately drawing fuel and pressurizing it. The
plunger also rotates with the cam disk to align its discharge grove
successively with each of the injector ports on the pump body.
3 The control sleeve limits the plungers
effective stroke. The distance the plunger moves is fixed by the cam
lobes; the effective stroke is determined by the position of the
control sleeve.
4 Moving the sleeve to the right uncovers the
spill port, before the beginning of injection, reducing the amount of
fuel delivered. Conversely, moving it to the left blocks the spill
port , so that more of the charge is delivered.
5 The pump also includes a timing advance
mechanism, which initiates injection early by advancing the plunger
carrier assembly relative to the cam plate during high speed
operation. Like most such mechanisms, the unit takes its cue from the
increase in pump pressure at speed.
6 The shutoff solenoid is normally closed. When
electricity is applied, the plunger opens the fuel delivery passage
for normal operation.
(ON SLIDE #282)
INTERIM TRANSITION: Over the 20 minutes we have reviewed the
components, operation, troubleshooting, and repair of the distributor
fuel system. Are there any questions? Take a 10 minute break.
_____________________________________________________________________
_____________________________________________________________________
_____________________________________________________________________
(BREAK – 10 Min)
TRANSITION: Before the break we discussed distributor type fuel
pumps. Are there any other questions? Now let’s find out what happens
after the fuel pump has stepped up injection pressure, metered the
amount of fuel, and timed it to coincide with TDC on the compression
stroke. The last phase is atomization. This is accomplished by the
multiple unit injectors.

_____________________________________________________________________
_____________________________________________________________________
_____________________________________________________________________
(ON SLIDE #283)
k. Multiple Unit Fuel Injector. For proper engine performance,
the fuel must be injected into the combustion space in a definite
spray pattern. This is accomplished by the fuel Injector.
(1) The fuel enters the injector body through the high-
pressure Inlet. At the moment that the pressure developed by the
injection pump exceeds the force exerted by the pressure adjusting
spring, the nozzle valve will be lifted off of its seat, resulting in
the injection of fuel into the cylinder. The valve opening pressure
depends greatly on the engine combustion chamber requirements.
(ON SLIDE #284)
INSTRUCTOR NOTE
Computer aided graphic fuel nozzles 0.14 minutes.
(2) Injector Nozzles. Because of the widely differing
requirements in the shapes of the fuel spray for various chamber
designs and the wide range of engine power demands, there is a large
variety of injector nozzles in use. Hole nozzles are generally used
in open chamber engines and therefore will be the focus of this
discussion.
(ON SLIDE #285)
(a) The hole nozzles have one or more spray orifices
that are straight, round passages through the tip of the nozzle body
beneath the valve seat. The spray from each orifice is relatively
dense and compact, and the general spray pattern is determined by the
number and the arrangement of the holes.
(b) As many as 18 holes are provided in larger
nozzles, and the diameter of these drilled orifices may be as small
as 0.006 in. (0.152 mm). The spray pattern may not be symmetrical,
where the spray pattern is off to one side so as to deposit the fuel
properly in the spherical combustion chamber.
(c) The size of the holes determines the degree of
atomization attained. The smaller the holes, the greater the
atomization; but if the hole is too small, it will be impossible to
get enough fuel into the chamber during the short time allowed for
injection. If the hole is too large, there will be an over rich
mixture near the nozzle tip and a lean mixture at a distance from it.
(d) Using multiple holes in the injector tips usually
overcomes both difficulties because the holes can be drilled small
enough to provide proper atomization and a sufficient number can be
provided to allow the proper amount of fuel to enter during the
injection period.
(ON SLIDE #286)
(3) Injector spray patterns. Proper fuel delivery to the
combustion chamber is vital to the combustion process in a diesel
engine.
(ON SLIDE #287)
A malfunctioning injector will not thoroughly mix the fuel with air
for complete combustion, not deliver a proportional amount of fuel to
the amount air, or not quickly start and stop injection.
(ON SLIDE #288)
INSTRUCTOR NOTE
Computer aided graphic testing fuel injectors 0.21 minutes.
(ON SLIDE #289)
l. Cold Weather Starting Aids. Diesel engines are very difficult
to start in cold weather. The two most popular methods of assisting a
diesel engine in starting are:
(1) The two most popular methods of assisting a diesel
engine in starting are:
(a) Preheating. To preheat the induction air in the
intake manifold so that adequate vaporization will take place for
combustion. Glow plugs and intake-air heaters are electric heating
elements that heat the air inhaled by the cylinders and use the same
direct current battery power as the cranking motor.
(ON SLIDE #290)
(b) Injecting a fuel into the engine that remains
impulsive enough in cold weather to initiate combustion.
1 The ether injection system assists in the cold
weather starting of a diesel engine by injecting ether into the

intake manifold. Ether, which is very explosive, will vaporize
readily in cold weather, initiating combustion.
2 With this method of cold starting, the engine
MUST BE CRANKING and used sparingly, otherwise the possibility of
“vapor lock” exists. High compression diesel engines will pre-
detonate on ether which causes gases and other materials to blow past
the rings. It will also remove the oil from the cylinder walls and
cause the engine to lock up from lack of lubrication damaging the
rings and scoring the cylinder walls.
3 Requiring ether to start on a regular basis is
a sign of a worn out engine, with little compression, poor injectors,
fouled or out of adjustment valves, cracked heads, bad gaskets or a
variety of other problems.
(ON SLIDE #291)
4 Ether starting fluid should NEVER be used with
an electronically controlled engine. The uncontrolled combustion WILL
damage the engine’s sensors or at a minimum throw them out of
calibration.
5 The two methods should NEVER be combined. Ether
can ignite in the intake manifold of an engine that is also using an
intake heater or glow plugs, cause catastrophic engine failure, and
personal injury.
(2) Cold weather starting systems may contain a coolant
temperature sensor that will keep the system from functioning when
coolant temperature is above 50°F (100C).
(ON SLIDE #292)
INSTRUCTOR NOTE
Computer aided graphic listen closely to the customer 1.31 minutes.
(ON SLIDE #293)
INTERIM TRANSITION: Over the past 2 hours we have reviewed diesel
inline and distributor fuel system operation concepts that aid in
diagnosing and troubleshooting engine malfunctions caused by
incorrect fuel delivery to the engine. Are there any questions? Lets
take a 10 minute break.
_____________________________________________________________________
_____________________________________________________________________
_____________________________________________________________________

(BREAK – 10 MIN)
INTERIM TRANSITION: Before the break we discussed the different types
and components of the diesel engine fuel systems. Are there any other
questions? If not, let’s move on to the practical application of
removing the fuel system.
_____________________________________________________________________
_____________________________________________________________________
_____________________________________________________________________
(ON SLIDE #294)
INSTRUCTOR NOTE
Perform the following practical application. Allow students to take
breaks as required or as instructed.
PRACTICAL APPLICATION (4 HRS) In groups no larger than 5 the students
will have their assigned toolboxes, technical manuals and assigned
engines with work stations. There will be at least one instructor
supervising the exercise. The purpose of this practical application
is to remove the fuel pump, all fuel lines and fuel filter.
PRACTICE: In their groups the students will follow the technical
manuals to remove the fuel pump, fuel lines and fuel filter on their
assigned engines.
PROVIDE HELP: The instructor may assist in the disassembly process if
needed.
1. Safety Brief: At all times proper PPE will be worn to include
safety boots. Safety glasses will be worn anytime fuel or liquid
under pressure is being used.
2. Supervision and Guidance: The instructor will walk around to the
different groups and supervise the disassembly answering any
questions the students may have.
(ON SLIDE #295)
TRANSITION: Over the past 8 hours we have reviewed diesel inline and
distributor fuel system operation and did a practical application to
remove the fuel system. Are there any questions? I have some
questions for you and then we will take a quiz.
_____________________________________________________________________
_____________________________________________________________________
_____________________________________________________________________

Opportunity for questions.
1. QUESTIONS FROM THE CLASS:
2. QUESTIONS TO THE CLASS:
Q: Explain thermal efficiency.
A: Relationship between actual heat energy stored within the fuel and
the power produced in the engine
Q: When do diesel engines produce a “knock”?
A: Under a light load.
Q: What is cloud point?
A: The lowest temperature to which the fuel can be subjected before
it begins to cloud or form paraffin crystals is the cloud point
Q: What characteristic of diesel fuel refers to its ability to ignite
spontaneously?
A: Ignition quality
Q: Name the fuel tank components.
A: Filler pipe, fuel return line, fuel supply line, drain plug.
Q: What are the four types of supply pumps?
A: Vane, Plunger, Gear, Piston
Q: Why are diesel fuel filters referred to as full-flow?
A: Because all the fuel must pass through it before reaching the fuel
injection pump.
Q: What is the purpose of the Anneroid?
A: Reduce exhaust smoke
Q: What affect will changing the effective length of the plunger
stroke of an inline pump have on the engine?
A: Increasing the stroke will increase engine speed
Q: What is the purpose of the Anneroid?
A: Reduce exhaust smoke
Q: What affect will changing the effective length of the plunger
stroke of an inline pump have on the engine?
A: Increasing the stroke will increase engine speed
Q: What kind of injector nozzle is generally used in open chamber
engines?
A: Hole nozzles
Q: What are the two most popular ways of assisting a diesel engine to
start?
A: Pre heaters and glow plugs
Q: Can you use ether to start a engine with glow plugs?
A: No either can be ignited in the intake manifold by the glow plugs.
(ON SLIDE #296)
QUIZ (30min)

Hand out quiz for diesel fuel system operation. Give the students 20
minutes to complete and review it with the students after.
(ON SLIDE #297)
(BREAK 10 min)
TRANSITION: Now that we have covered the fuel system and all of its
components let’s talk a little about the cooling system.
_____________________________________________________________________
_____________________________________________________________________
_____________________________________________________________________
INSTRUCTOR NOTE
Computer aided graphic intro to cooling 1.12 minutes.
(ON SLIDE #298)
6. DIESEL ENGINE COOLING SYSTEM OPERATION AND TROUPLESHOOTING
(1hr 50min)
(ON SLIDE #299)
a. Principles of the Cooling System. All internal combustion
engines are equipped with some type of cooling system because of the
high temperatures they generate during operation. High temperatures
are necessary to generate the high gas pressures that act on the head
of the piston. Power cannot be produced efficiently without high
temperatures. However, it is not possible to use all of the heat of
combustion without harmful results. The temperature in the combustion
chamber during the burning of the fuel is well above the melting
point of iron. Therefore, if nothing is done to cool the engine
during operation, valves will burn and warp, lubricating oil will
thin and break down, and bearings and pistons will overheat,
resulting in engine seizure.
(ON SLIDE #300)
Heat is moved from hot spots in the engine in the following ways.
(1) Conduction. Heat is a form of energy, and when it comes
into contact with matter it makes the atoms and molecules move. Once
atoms or molecules are moving,
they collide with other atoms or molecules, making them move too. In
this way, the heat is transferred through matter.

(2) Convection. Convection occurs when a substance that can
flow, like water or air is heated. When this medium is heated it
becomes less dense (lighter) and rises. As it rises it forces the
surrounding medium down and closer to the heat source. This sets up a
circular heating and cooling motion of the fluid medium.
(3) Radiation. Radiation happens when heat moves as energy
waves, called infrared waves, directly from its source to something
else. This is how the heat gets from the Sun to the Earth. All hot
things radiate heat to cooler things. When the heat waves hit the
cooler material, they make the molecules of the cooler object speed
up. When the molecules of that material speed up, the object becomes
hotter.
(ON SLIDE #301)
(4)There are other sources of heat dissipation for the
engine in addition to the cooling system.
(a) The exhaust system dissipates as much, if not
more, heat than the cooling system, although that is not its purpose.
(b) The engine oil removes heat from the engine and
dissipates it to the air from the sump or oil cooler.
(c) A measurable amount of heat is dissipated to the
air through radiation from the engine.
(ON SLIDE #302)
b. Air Cooled Engines.
(1) Air cooling is most practical for small vehicles and
equipment because no radiator or hoses are required. Air cooling
generally will not be used wherever water cooling is practical. This
is because air is not a good conductor of heat causing the engine to
run at uneven temperatures. Additionally, extensive use of aluminum
is required to dissipate heat.
(ON SLIDE #303)
(2) An air-cooled engine uses air as the principal cooling
medium. Air-cooled engines are very easily identified by separate
finned cylinders, finned cylinder heads, and in most cases, large
cooling fans and extensive duct work.
(3) The primary means of removing heat from an air-cooled
engine is by dissipation to the air. The cooling fan/flywheel causes
a constant flow of air over and around the cylinders and cylinder

heads. The duct work directs this flow of air to engine components.
The finned design of these components adds a tremendous amount of
surface area to them so that they are able to dissipate an adequate
amount of heat.
(ON SLIDE #304)
(4) An air cooling system must be controlled to prevent
overcooling of the engine. To accomplish this, a system of
thermostatically controlled doors is usually incorporated into the
ducting. The thermostat is usually a bellows that is filled with
butyl alcohol. As the thermostat heats up, it opens the temperature
control doors through linkage. When the doors are open, all of the
cooling air is diverted through the engine cooling fins. When the
doors are closed, all cooling air bypasses the engine and no cooling
takes place. To maintain uniform engine temperature, the thermostat,
in most cases, will position the doors so that part of the cooling
air bypasses and part of it cools. The thermostat, in the event of
failure, is designed to open the doors fully to prevent overheating.
(5) Because an air cooling system does not employ a liquid
coolant, it often is assumed that air alone acts as the cooling
medium. However, this is not true because the fuel and the
lubrication systems also help in cooling the engine. The lubrication
system of an air-cooled engine always utilizes an air-cooling system.
There is also a certain amount of cooling as the fuel vaporizes in
the intake manifolds and combustion chambers.
(6) Many air-cooled engines utilize an oil cooler to help
in the cooling process. The oil cooler unit usually is located in the
ducting so that it is exposed to the forced air from the cooling fan.
(ON SLIDE #305)
(7) Cylinder Heads. The cylinder head is a separate one-
piece casting that bolts to the top of the cylinders on an air-cooled
engine.
(ON SLIDE #306)
(a) Construction. The cylinder heads on air-cooled
engines are made almost exclusively from aluminum. This is due to the
fact that aluminum will conduct heat approximately three times as
fast as cast iron. This is a critical consideration with air cooling.
(b) Sealing. Cylinder heads on air-cooled
configurations are sealed to the tops of the cylinders by soft metal
rings.
(ON SLIDE #307)

(8) Cylinders. The cylinders on air-cooled engines are
separate from the crankcase. They usually are made of forged steel.
This material is most suitable for cylinders because of its excellent
wearing qualities, and its ability to withstand the high temperatures
that air-cooled cylinders do obtain. The cylinders have rows of deep
fins cast into them to dissipate engine heat. The cylinders commonly
are mounted by securing the cylinder head to the crankcase with long
studs, and sandwiching the cylinders between the two. Another way of
mounting the cylinders is to bolt them to the crankcase, and then
secure the heads to the cylinders.
(ON SLIDE #308)
(9) Crankcase.
(a) Purpose. The crankcase is the basic foundation of
all air-cooled engines. It is made as a one- or two-piece casting
that supports the crankshaft, provides the mounting surface for the
cylinders and the oil pump, and has the lubrication passages cast
into it.
(ON SLIDE #309)
(b) Construction. Crankcases in air-cooled engines are
made of aluminum because it has the ability to dissipate large
quantities of heat. There is usually are movable lower half to the
crankcase that holds the reservoir of lubricating oil. It commonly is
referred to as the oil pan. On air-cooled engines, the oil pan
usually is cast aluminum. Its surface is covered with fins. The oil
pan on an air-cooled engine plays a key role in the removal of waste
heat from the engine through its lubricating oil.
(ON SLIDE #310)
INTERIM TRANSITION: So far we have covered cooling principals and air
cooled engines. Let’s take a tem minute break.
_____________________________________________________________________
_____________________________________________________________________
_____________________________________________________________________
(BREAK – 10 Min)
INTERIM TRANSISTION: Before the break we covered the cooling
principles applied to air cooled engines, now let’s next apply the
principles to the more common liquid cooled engine.
_____________________________________________________________________
_____________________________________________________________________
_____________________________________________________________________

(ON SLIDE #311)
INSTRUCTOR NOTE
Computer aided graphic cooling system overview 0.11 minutes.
(ON SLIDE #312)
c. Liquid Cooled Engines.
(1) Overview. A simple liquid-cooled cooling system
consists of a liquid medium, radiator, coolant pump, piping, fan,
thermostat, and a system of jackets and passages in the cylinder head
and cylinder block through which the coolant circulates. Cooling of
the engine parts is accomplished by keeping the coolant circulating
and in contact with the metal surfaces to be cooled.
(ON SLIDE #313)
(2) Liquid coolant mediums. Liquid is the most popularly
used cooling system. A liquid cooling system provides the most
positive cooling and is best for maintaining an even engine
temperature. The liquid in a cooling system must perform four key
functions:
(ON SLIDE #314)
(a) Absorb and transfer heat. The amount of heat a
liquid can readily absorb and release is directly proportional to the
efficiency of the cooling system.
(ON SLIDE #315)
(b) Freeze protection. When equipment is operated in
areas where the temperature is extremely low, an antifreeze solution
must be added to the coolant.
(ON SLIDE #316)
(c) Corrosion resistance. The cooling system must be
free of rust and scale in order to maintain its efficiency. The use
of inhibitors or rust preventatives will reduce or prevent corrosion
and the formation of scale. Inhibitors are not cleaners and therefore
will not remove rust and scale that have already accumulated.
Additionally, electrolysis occurs in an engine that has two
dissimilar metal, such as aluminum and iron, components in a liquid
that carries an electrical current. Just like a battery, one of the
metals acts like a positive plate and the other like the negative
plate. During electrolysis, metal leaves one of the “plates” and is
deposited on the other. Most commercially available antifreeze
solutions contain corrosion inhibitors.
(ON SLIDE #317)
INSTRUCTOR NOTE
Computer aided graphic cooling cavitation erosion 2.53.
(d) Erosion and cavitation resistance. As coolant is
moved through the cooling system it is subjected to different
temperatures and pressures. When liquid is moved through a low
pressure/high temperature area, gas bubbles form in the liquid. Once
those bubbles pass into a high pressure area (after the water pump
for example), they implode causing the surrounding material to be
damaged from the tremendous force of the implosion.
(ON SLIDE #318)
(3) Types of additives and coolants.
(a) Water is able to absorb more heat per gallon than
any other liquid engine coolant and allows the soluble additives to
be mixed together. Under standard conditions, water boils at 212º F
(100º C) and freezes at 32º F (0º C).
1 When water boils it expands, changes to steam,
and is less capable of heat transfer. Coolant that boils in an engine
will develop into pockets of steam displacing the liquid coolant and
causing a significant loss of cooling efficiency. The physical change
from liquid to gas is dependent on the pressure of the water.
2 When water freezes, it increases in volume
approximately 9%. The expansion of the freezing water can easily
crack engine blocks, cylinder heads, and radiators. To prevent this
core (“freeze”) plugs are cast into the block and designed to rupture
before the block cracks.
(ON SLIDE #319)
(b) Coolant additive package. There are a variety of
additives that are included in engine coolant. Because of the
tendency of water in the coolant to corrode or rust metal, the
addition of inhibitors is required. Other than inhibitors, a coolant

additive contains absorbers and buffers, cavitation retarders,
corrosion inhibitors for aluminum, electric galvanic activity
preventers, antifoam additives, and dyes. Typical coolant additives
may include:
1 Borax: Acid neutralizer.
2 Phosphate: Acid buffer and cavitation retarder.
3 Sodium silicate: Aluminum protection.
4 Sodium nitrate: Solder corrosion.
5 Trizoles: Galvanic corrosion inhibitor.
6 Sodium hydroxide: pH stabilizer (usually 10 – 11).
7 Phosphorescent dye: Ultraviolet leak detector
(various colors are for identification purposes only).
(ON SLIDE #320)
(c) Inorganic Additive Technology (IAT) coolants. IAT
coolants have been around for generations. The most commonly used one
has been Ethylene Glycol (antifreeze compound). It has an extremely
high boiling point, does not evaporate in use, is non-corrosive, has
no odor, and gives a maximum protection against freezing to - 65°F (
- 53.8°C) when it is mixed to a solution of 60 percent with 40
percent water. If the proportions of ethylene glycol are raised above
60% in the solution, it will result in a higher freezing point for
the solution, and consequently give less freeze protection. If a 100%
solution of ethylene glycol were used, its freezing point would be 0º
F (-18º C) and though it wouldn’t freeze solid it would form a slush
and clog the cooling system. It also contains silicates that form a
protective barrier on everything in the cooling system to prevent
corrosion and erosion, and it contains phosphates to keep the ph
level high enough to prevent the coolant from becoming acidic.
(d) Organic Additive Technology (OAT) coolants.
Although their freezing/boiling protection is similar to IAT
coolants, the newer OAT coolants (such as Propylene Glycol) work
differently. Aluminum and ferrous metals form a surface layer of
corrosion in the presence of moisture (even the little bit of
moisture in the air). OAT coolants anneal (toughen) this metal oxide
layer into a thin surface coating that protects against further
corrosion.
(e) Hybrid Organic Additive Technology (HOAT)
coolants. HOAT coolants use silicate and organic acid corrosion
inhibitors in combination to protect against freezing, corrosion, and

erosion of Aluminum, Iron, and Iron Alloys. Many HOAT coolants
contain an additives package to meet manufacture specifications based
on the operating conditions, construction, and maintenance
considerations to ensure efficient cooling system operation. For
example Caterpillar® recommends the use of “Extended Life Coolant”,
it is a deep violet color, protects aluminum (the radiator), and
should not require changing more frequently than 6,000 hours or 6
years (according to the 420 DIT LO).
(ON SLIDE #321)
(4) Types of liquid cooling systems. There are three
movement methods in liquid cooling systems employed by engineer
equipment.
(a) Open-type cooling system. This is the simplest
type of liquid cooling system, and is found on earlier equipment
models. As the temperature of the cooling system rises, the pressure
also rises. This will open the pressure valve in the radiator cap,
causing coolant to exit through the overflow tube, thus venting
excess pressure. The overflow line usually extends down the side
radiator, and empties to the ground if the radiator is overfill or
the cooling system overheats.
(ON SLIDE #322)
(b) Closed-type cooling system. The system is designed
to maintain a completely full radiator at all times. This will
increase the efficiency of the system by allowing a maximum amount of
coolant in the system during all operating conditions. As the
temperature of the cooling system rises, the pressure will also rise.
This will open the pressure valve in the pressure cap, causing
coolant to exit through the overflow tube, thus venting excess
pressure. The overflow line is connected to the bottom of a coolant
recovery tank to catch and hold any expelled coolant. As the
temperature of the coolant drops, the corresponding drop in pressure
causes atmospheric pressure to push the coolant in the recovery tank
back into the cooling system through the open vacuum valve in the
pressure cap. During an overheating condition, the closed cooling
system prevents coolant loss through the overflow line by collecting
it in the recovery tank.
(ON SLIDE #323)
(c) Thermo-siphoning. In a liquid cooling system, the
downward flow of coolant through the radiator creates what is known
as a thermo-siphon action. This was mostly used in early engine
application. This simply means that as the coolant is heated in the
jackets of the engine, it expands. As it expands, it becomes less
dense and therefore lighter. This causes it to flow out of the top
outlet of the engine and into the top tank of the radiator. As the
coolant is cooled in the radiator, it again becomes more dense and
heavier. This causes the coolant to settle to the bottom tank of the
radiator. The heating in the engine and the cooling in the radiator
therefore creates a natural circulation that aids the water pump.
(ON SLIDE #324)
INSTRUCTOR NOTE
Computer aided graphic coolant pump 0.12 minutes.
(5) Coolant pump. The pump draws the coolant from the
bottom of the radiator, forces it through the water jackets and
passages, ejects it into the top of the radiator, where heat from the
coolant is removed as it passes through a set of tubes to the bottom
of the radiator, and the cooling cycle begins again.
(a) All modern cooling systems have water pumps to
circulate the coolant. The pump is usually located on the front side
of the engine block. The pump is a non-positive displacement
centrifugal type and has an impeller with blades that force coolant
outward as the impeller rotates. It usually is driven by the engine
crankshaft through a belt, but may also be driven through timing
gears on the crank shaft.
(ON SLIDE #325)
(b) Advantages of a centrifugal pump as a water pump
are that it is inexpensive, circulates great quantities of coolant
for its size, isn’t clogged by small amounts of foreign matter, and
permits a limited amount of thermo-siphon action after the engine is
shut down to help prevent boil over.
(ON SLIDE #326)
(c) The pump housing usually is cast from iron or
aluminum. The impeller can be made from iron, aluminum, or plastic.
It rides on a shaft that is supported in the housing on a sealed
double row ball bearing. The pump shaft also has a spring-loaded seal
to prevent coolant leakage.
(ON SLIDE #327)
(d) The most common cause of pump failure occurs when
coolant seeps past the seal, damages the bearings, and leaks out of
the pump through the “weep hole”.
(ON SLIDE #328)

(5) Coolant Bypass. The engine is designed so that the
water pump will circulate coolant within the water jackets whenever
the thermostat is closed. This is important to keep pistons and
valves from overheating even though the engine is below operating
temperature. It also reduces warm up time.
(ON SLIDE #329)
(6) Cylinder block. The water passages in the cylinder
block and cylinder head form the engine water jacket. In the majority
of cylinder blocks the water jacket completely surrounds all
cylinders along their full length. Within the jacket, narrow passages
are provided between cylinders for coolant circulation. However, in
some engine configurations the cylinder bores are attached to each
other and a coolant passageway is not provided between bores. An
engine of this design often is referred to as having siamese
cylinders. This type of engine tends to operate with cylinder
temperatures slightly higher between the bores, and cooler where
water jackets come in contact with the bores.
(ON SLIDE #330)
(7) There are two types of cylinder sleeves: the wet and
the dry type.
(a) The dry type is a sleeve that presses into a full
cylinder that completely covers the water jacket. Because the sleeve
has the block to support it, it can be very thin.
(b) The wet sleeve also presses into the cylinder. The
difference is that the water jacket is open in the block and is
completed by the sleeve. Because it gets no central support from the
block, the wet sleeve must be made thicker than a dry sleeve. Also,
because the sleeve completes the water jacket, it must fit so as to
seal in the coolant.
(ON SLIDE #331)
(8) Cylinder head. In the cylinder head, the water jacket
covers the combustion chambers at the top of the cylinders and
contains water passages around the valve seats when they are located
in the head. In addition, all engines are provided with water
passages around the exhaust valve seat. This provides cooling for the
valve when it comes in contact with the seat. The coolant flows from
the cylinder block up into the cylinder head through passages called
water transfer ports. A tight seal at the ports between the cylinder

head and block is very important. The watertight seal at the ports,
as well as the gastight seal at the combustion chamber openings, is
obtained with one large cylinder-head gasket.
(ON SLIDE #332)
(9) Thermostat. The water pump starts the coolant
circulating through the system as soon as the engine is started, no
matter how low the temperature. Therefore, it is necessary to install
a thermostat to ensure quick warm up and prevent overcooling in cold
weather. A thermostat regulates engine temperature by automatically
controlling the amount of coolant flowing from the engine block to
the radiator core.
(ON SLIDE #333)
(a) Construction. The pellet type, which is the most
commonly used thermostat because its accuracy is unaffected by modern
pressurized cooling systems, consists of a valve that is operated by
a piston or a steel pin that fits into a small case containing a
copper impregnated wax pellet. When the engine is cold, the wax
pellet is contracted and the spring pushes the valve closed. The wax
pellet expands as the engine heats up, pushing the valve open against
the force of the spring. The pellet-type thermostat will maintain a
constant temperature by varying the size of the valve opening.
(ON SLIDE #334)
INSTRUCTOR NOTE
Computer aided graphic temperature regulator 1.13 minutes.
(b) Operation. The thermostat is merely a heat-
operated unit that controls a valve between the engine block and the
radiator. It usually is located in series with the engine coolant
outlet in a casing called the thermostat housing. The thermostat, by
design, is made so that if it fails, it will be in the opened
position so as to allow the free circulation of coolant through the
engine.
(c) Thermostat heat ranges. Manufactures use a variety
of thermostats that allow the coolant to operate at different
temperatures. The standard heat ranges are available from 160°F
(71°C) to 210°F (99.8°C).
(ON SLIDE #335)
INSTRUCTOR NOTE

Computer aided graphic testing a thermostat 0.29 minutes.
(ON SLIDE #336)
(10) Cooling fan and shrouding. The fan ensures airflow
through the radiator. The fan pulls or pushes a large volume of air
through the radiator core so that engine heat can be dissipated
effectively. In most cases the fan works in an enclosure called a
shroud to ensure maximum efficiency of the fan. There are three
methods of driving a fan:
(ON SLIDE #337)
(a) Direct drive fan. Driven directly by a belt ran
off the crankshaft.
(b) Electrically motorized fan. The fan blade is
mounted on the motor shaft. The motor and fan blade assembly then is
mounted directly behind the radiator core. The fan receives electric
current through the ignition switch and a temperature sensitive
switch located at the bottom of the radiator. The purpose of this
radiator thermal switch is to turn on the fan to provide cooling
whenever the temperature of the coolant reaches approximately 210°F
(98.8°C). This serves to allow the fan to run only when needed. Some
models incorporate a timed relay that allows the fan to run for a
short time after engine shutdown. This, in conjunction with thermo-
siphon action in the cooling system, helps to prevent boil over after
engine shutdown.
(ON SLIDE #338)
(c) Hydraulically motorized fan. The vehicle’s
cooling fan is driven by a hydraulic motor. A thermostatically, or
electrically, controlled proportional pressure control valve
modulates the fan speed depending on a temperature reading. In a cold
condition, the fan idles with very low power consumption. During the
hot condition, the maximum fan speed is controlled by a pressure
control valve, which adjusts the fan speed to meet the cooling needs
of the total system. Every system has a temperature, which allows for
the most efficient performance. The thermovalve, or an electronic
control system, attempts to maintain the system at the optimum
temperature.
(ON SLIDE #339)
(11) Radiator. The radiator is situated in front of the
cooling fan. It consists of two tanks with a heat exchanging core
between them. The upper tank contains an outside pipe called an
inlet. The filler neck is placed on the top of the upper tank and

attached to this filler neck is an outlet to the overflow pipe. The
lower tank also contains an outside pipe that serves as the
radiator's outlet. Operation of the radiator is as follows.
(a) The upper tank collects incoming coolant and,
through the use of an internal baffle, distributes it across the top
of the core.
(b) The core is made up of numerous rows of small
vertical tubes that connect the upper and lower radiator tanks.
Sandwiched between the rows of tubes are thin sheet metal fins. As
the coolant passes through the tubes to the lower tank the fins
conduct the heat away from it and dissipate this heat into the
atmosphere. The dissipation of the heat from the fins is aided by
directing a constant airflow between the tubes and over the fins.
(c) The lower tank collects the coolant from the core
and discharges it to the engine through the outlet pipe.
(d) The overflow pipe provides an opening from the
radiator for escape of coolant or steam if pressure in the system
exceeds the regulated maximum. This will prevent rupture of cooling
system components.
(ON SLIDE #340)
INSTRUCTOR NOTE
Computer aided graphic Radiator cap 0.36 minutes.
(12) Radiator Pressure Cap. Modern liquid cooling systems
use a pressurized cooling system that allows a certain amount of
pressure to develop within the system as its temperature goes up. The
increase in pressure will raise the boiling point of the coolant
proportionally, helping to prevent boiling over.
(ON SLIDE #341)
(a) Construction. The cap contains two spring-loaded
valves that are normally closed, sealing the system.
(b) Operation. The larger of these two valves is the
pressure valve and the smaller is the vacuum valve. The pressure
valve acts as a safety valve that will vent any pressure over the
rated maximum through the overflow pipe. The vacuum valve allows air
to enter the system as the engine cools down. This is to prevent
atmospheric pressure from collapsing the hoses.

(ON SLIDE #342)
(13) Expansion tank. Some equipment uses an expansion tank
in their cooling systems. The expansion tank is mounted in series
with the upper radiator hose. It is used to supply extra room for
coolant expansion and generally takes the place of the upper radiator
tank. The radiator pressure cap and the overflow line also are
mounted on the expansion tank.
(ON SLIDE #343)
(14) Accessory heat exchangers.
(a) Operator compartment heater core. The heater core
is a small heat exchanger (radiator) that engine coolant is
circulated through. It is usually located inside or near the
operator’s compartment and provides the operator’s compartment with
heat. An electrical blower motor passes air across the fins of the
heater core, transferring heat from the engine to warm the operator’s
cab.
(ON SLIDE #344)
(b) Oil Coolers. Some configurations do not allow
sufficient airflow around the crankcase to allow the oil to dissipate
heat. Engines in heavy duty and desert use must be able to dissipate
more heat from their oil than normal airflow is able to. An oil
cooler is installed in all of these cases.
(ON SLIDE #345)
INSTRUCTOR NOTE
Computer aided graphic cooling system service 3.02.
(ON SLIDE #346)
INSTRUCTOR NOTE
“Burping the radiator” is when the mechanic periodically squeezes the
radiator hoses while the engine is running to remove air pockets in
the engine.
(ON SLIDE #347)
INTERIM TRANSITION: Over the past 2 hours we have covered the cooling
systems, are there any questions? Take a 10 minute break.

_____________________________________________________________________
_____________________________________________________________________
_____________________________________________________________________
(BREAK – 10 MIN)
INTERIM TRANSITION: Before the break we covered the different types
of cooling systems and how they work. Are there any other questions?
Now let’s move into the practical application to remove the radiator
and water pump.
_____________________________________________________________________
_____________________________________________________________________
_____________________________________________________________________
(ON SLIDE #348)
INSTRUCTOR NOTE
Perform the following practical application removal of the radiator
and water pump. Allow students to take breaks as required or as
instructed.
PRACTICAL APPLICATION (4 HRS) In groups no larger than 5 the students
will have their assigned toolboxes, technical manuals and assigned
engines with work stations. There will be at least one instructor
supervising the exercise. The purpose of this practical application
is to remove the radiator and water pump.
PRACTICE: In their groups the students will follow the technical
manuals to remove the radiator and water pumps on their assigned
engines.
PROVIDE HELP: The instructor may assist in the disassembly process if
needed.
1. Safety Brief: At all times proper PPE will be worn to include
safety boots. Safety glasses will be worn anytime fuel or liquid
under pressure is being used.
2. Supervision and Guidance: The instructor will walk around to the
different groups and supervise the disassembly answering any
questions the students may have.
(ON SLIDE #349)
INTERIM TRANSITION: Over the past four hours we completed the
practical application for the removal of the radiator and water pump.
Are there any questions? If not we will take a quiz and then move
into the final practical application the completion of the tear down
and the rebuilding of your engines.

_____________________________________________________________________
_____________________________________________________________________
_____________________________________________________________________
(ON SLIDE #350)
QUIZ (30min)
Hand out quiz for diesel cooling system. Give the students 20 minutes
to complete and review it with the students after.
(ON SLIDE #351)
(BREAK 10 min)
(ON SLIDE #352)
INTERIM TRANSITION: Are there any questions? Now let’s move into the
final practical application the completion of the tear down and the
rebuilding of your engines.
_____________________________________________________________________
_____________________________________________________________________
_____________________________________________________________________
INSTRUCTOR NOTE
Have students perform the final practical application, the completion
of the engine tear down and rebuild. Allow students to take breaks as
required or as instructed.
PRACTICAL APPLICATION (42 HRS) In groups no larger than 5 the
students will have their assigned toolboxes, technical manuals and
assigned engines with work stations. There will be at least one
instructor supervising the exercise. The purpose of this practical
application is to complete the engine tear down and rebuild.
PRACTICE: In their groups the students will follow the technical
manuals and the instructor’s direction to complete the engine tear
down. Once the tear down is complete the students will in groups
assemble their engines making all proper adjustments in order for the
engine to run properly.
PROVIDE HELP: The instructor may assist in the disassembly process if
needed.
1. Safety Brief: At all times proper PPE will be worn to include
safety boots. Safety glasses will be worn anytime fuel or liquid
under pressure is being used.

2. Supervision and Guidance: The instructor will walk around to the
different groups and supervise the disassembly answering any
questions the students may have.
(ON SLIDE #353)
TRANSITION: For the last 42 hours we completed the engine tear down
and rebuild practical application. Are there any questions? If not I
have some questions for you.
_____________________________________________________________________
_____________________________________________________________________
_____________________________________________________________________
Opportunity for questions.
1. QUESTIONS FROM THE CLASS:
2. QUESTIONS TO THE CLASS:
Q: What are the 3 ways heat is removed from the engine?
A: Conduction, convection, radiation.
Q: What are the cylinder heads on air-cooled engines made out of?
A: Aluminum
Q: What are the four functions that liquid coolant must perform?
A: Absorb and transfer heat, freeze protection, corrosion resistance
and erosion and cavitation protection.
Q: What are the two types of cooling systems?
A: Open and closed type.
Q: What type of pump is the engine water pump?
A: Centrifugal.
(ON SLIDE #354)
SUMMARY: (5 Min)
Over the past ten days we have covered diesel engine construction,
principals of operation, intake and exhaust, lubrication, fuel, and
cooling system operation. With all the information that you have
received I am confident that you will be able to conduct your job
with higher efficiency. At this time fill out any IRF’s that you have
after that take a ten minute break.
REFERENCES:
FOS3007NC Engines
RENR9722-01 Disassembly and Assembly Caterpillar C6.6 Industrial
Engine

SENR9968-02 Systems Operation Testing and Adjusting Caterpillar C6.6
Industrial Engine