Embed Size (px)
Citation preview
Lesson 2: Creating a Blog
If you open these PDF lesson files in Adobe Acrobat, most
browsers, or in Word, you’ll be able to copy content and paste
it into WordPress. Makes things easier than having to type it
in. (I don’t recommend Word, though, because some
formatting will be a bit off due to the way Word imports a
PDF file.)
If you aren’t able to copy text from this PDF file, please post a
message in the Discussion Area and let me know what app
you’re using.
Chapter 1: Introduction Welcome back! I hope the first lesson gave you a feel for the ways WordPress can help you
create attractive and effective Web pages.
At the start of this lesson, we're going to step back from WordPress for a moment to discuss
organizing and planning a website. It's important to define goals and lay the groundwork before
you add pages and posts. So we'll review our expectations and brainstorm how to best meet
those goals.
Then, I'll introduce the site style known as a blog. By the end of this lesson, you'll be able to use
WordPress to publish and categorize blog posts and control how your visitors respond to them.
In Lesson 1, I described a blog as a type of website featuring time-sensitive entries that appear
in chronological order, usually with the most recent on top. Sort of like a diary. By contrast, a
traditional website has much static information—content that doesn't change much.
As recently as 20 years ago, blogs didn't exist. Now there are more than 100 million of them.
Thanks to WordPress and other personal publishing platforms, blogging caught fire in the early
2000s as a way for nontechnical people to share their observations and opinions with Internet
visitors.
Today, all kinds of sites include a blog component because developers have discovered that it's
a useful addition to a static website. Here's why.
• A blog's an ideal format for organizing and presenting timely information. For instance, your blog might include information on upcoming community events or commentary on recent news stories.
• A blog provides an interactive feature—a way for website visitors to provide
feedback.
• Because most bloggers update content regularly, a blog can rank higher in search
engines. That means it generates more page hits and may help build a larger audience. Even if the blog is only a component of a larger traditional site.
In fact, almost any kind of website can benefit from a blog component. Businesses use blogs to
introduce new products, announce new programs and personnel, and point out their strengths
(by publishing vignettes about satisfied customers, for example). Community and organizational
websites have blogs aimed at recruiting volunteers, soliciting contributions, and reporting on
new programs. Even if your goal is to build a traditional website, including a blog can add an
important dimension to your online presence.
So let's get started on a blog! First we'll map out the project. Then we'll compose and format
posts. We'll also set up your WordPress website to encourage a dialog with your visitors.
Chapter 2: Setting Goals and Planning We'll get back to our project website in the next chapter. First, let's do some important
planning.
Now that you have the framework of a WordPress website, let's discuss how you're going to
structure your course project, Pets to Go. I find that before I start any new project, answering
these questions keeps me on track:
1. What's my goal? What do I want this site to accomplish?

In this case, let's assume my organization decided to create a website to increase
the adoption rate of dogs and cats. We would measure its success by comparing the
number of pet adoptions before and after it goes online.
When creating your website, your objectives might be more involved. For
example, let's suppose you're opening an art gallery. You might want to
publicize the new business and recruit future exhibitors. If you make recruiting
a part of your goal, you will remember to focus on how your site can help you
find those artists.
2. Would this project be more effective as a website, a blog, or both?
Recall that traditionally, blogs published time-sensitive information from a
personal perspective and encouraged comments from visitors. Websites were
static—their content didn't change much and focused on presenting
information, not soliciting feedback. But the distinction between websites and
blogs has blurred, thanks in large part to the ability of WordPress to produce
hybrid sites that combine static pages and time-sensitive posts.
Our goal is to offer pets for adoption. That means the site must feature both static
and time-sensitive elements:

Since we'll include about the same number of pages and posts, this project will
be effective as a hybrid. This format lets us update which animals are available
for adoption (in the blog portion) and present static information (in the website
portion).
As we move through the course, you'll see that WordPress is well equipped to
handle both blog and website formats.
3. What kind of presentation would be most effective?
One of the big pluses of using WordPress is that you don't have to spend hours
working on your website's appearance. On the self-hosted WordPress.org
platform, you can choose from literally thousands of professionally designed
themes. Themes come in all kinds of designs, colors, and column
configurations. And you can "audition" any or all of them with a click of your
mouse button.
We'll have plenty of pet photos to provide visual interest, so we should
probably keep the design simple. A horizontal menu bar near the top of the
page helps visitors get around the site. And since we want to present a clean,
uncluttered look, there's no reason to include more than two columns (page
divisions) on any page or post. So that's what we'll be looking for when it
comes time to choose a theme.
4. Should we encourage visitor feedback?
Involving website visitors can create a loyal community of users who could
increase the site's exposure through word of mouth. But a word of caution: If
the site becomes too popular, you may need to call on more people to help you
screen the feedback.
5. Which special functions would help our visitors?
In this case, we want to make it easy for people to decide whether to adopt from
us. We also want to streamline the adoption process. To fulfill those goals, we
might consider:
• A newsletter subscription form
• A contact form to allow visitors to ask for information not provided on the
website
• A pre-adoption application, so we can screen potential applicants
• A calendar of upcoming events
• A way to contribute money online
Can you think of anything else that would be useful?
We'll see which of these functions are available when we take a closer look at the
back-end features in WordPress.
6. Are there features we can add to make our site more useful to the people we want to serve?
We could ask a local vet to contribute regular posts. We could check out
YouTube for videos to use on the website. We could ask people who have
adopted pets from us to share their experiences in blog posts. Do you have
other suggestions?
I've asked all these questions to demonstrate what you should be thinking about before you
begin to set up your own WordPress blog or website. By planning ahead, you'll save time and
spare yourself aggravation. Asking these questions also helps you define your objectives.
It doesn't matter whether you're selling a product or service, promoting a business or
organization, or just letting your friends know how that pet rabbit is doing. First decide what
you want your website to accomplish, and then outline the most effective ways of getting there.
OK, we've put together a solid plan for our new website/blog. Now we'll do some hands-on
work.

Chapter 3: Creating a Post A blog is a collection of individual entries, known as posts. We're going to create a post for our
class project—a website called Pets to Go, designed for a fictitious organization that offers dogs
and cats for adoption.
Pets to Go will be a hybrid (a combination blog and website). The plan is to devote the blog
portion to descriptions and photos of pets available for adoption, and to use the static pages for
information about the shelter and the pet adoption process.
Since dogs and cats are the blog's focus, we'll begin by entering profiles of some of our furry
friends.
The first step is to reopen the WordPress administrative back end.
If you created a desktop shortcut or browser bookmark to your site's WordPress administration
area, click it now. Otherwise, in your browser’s address bar, type your blog address plus /wp-
admin, so it looks like this:
For SiteGround users: http://xxx.sg-host.com/wp-admin
When using your own domain: http://xxx.com/wp-admin
(In each case, replace xxx with your real domain’s name –which will be your first name with some
additional characters. You wrote down this important URL in Lesson 1.)
1. Log into the back end, and go to the WordPress menu (the far left column of the
Dashboard page).
2. Click Posts > All Posts. If you see any sample posts titled "Hello World!" or
"WordPress Resources at SiteGround," delete them: Hover your mouse cursor over
the title, and click the Trash link that appears below the title.
3. Now go to the top of the screen and click the Add New button (next to Posts).

This opens the Add New Post screen. (If you see a message that begins "SG
CachePress," click the link to hide that notice.) The top of the screen should look
like the page pictured below.
Add New Post screen
Under the "Add New Post" heading, you'll see a text box that says Enter title here.
4. Click inside the box and type Your Kids Will Love This Dog. (Or copy and paste this
text from this lesson.)

5. Below the title is the text box where you add your content. It looks like any word
processing or email editor.
6. Click the Preview button in the top-right corner. This will open the page in a new
browser tab to let you see the post how it will look on the Web page to your
visitors.
7. Now it's time to enter the content. Go back to the WordPress back end page (it’s
the tab in your browser just to the left of the preview page’s tab). You can begin
either by typing inside the text box or by pasting text that you've previously written
and saved in an editing application or Microsoft Word. To save time, I've provided
some content below. ***Select it by highlighting it with your mouse,
and then copy and paste it into the text box on the Add New Post page. (For
a refresher on how to copy and paste, visit the Supplementary Material
area.)
*** Unless you have opened this PDF file in Word or
some other editable program, you won’t be able to copy
any text from this PDF file. In that case,
remember you can always copy text from the lesson
version that’s on the website. Thanks!
RASCAL: 7 years old, neutered male, yellow Lab, 75 lbs.
Rascal was "surrendered" to us by his owner, who had lost his home to
foreclosure. He's great with other dogs, and he loves people, going for walks,
running, and playing Frisbee. He's good with children and enjoys riding in the
car. He has a cute habit of standing on his haunches and gently giving you his
front paws. Rascal shouldn't go to a home with cats, because he tends to chase
them.

Our vet has taken care of all Rascal's vaccinations, removed his dewclaws, and
microchipped him. He'd make a wonderful family dog.
If you're interested in Rascal, please call Donna at Pets to Go—(555) 555-5555.
Let's see how it looks online. Find the Publish box at the top of the right column. Click the blue
Publish button. When the screen refreshes, click View Post (over on the left, just above your
Page Title field).
Check out the information on the top of the post: This is known as metadata and includes the
author's name and the publish date. The Edit Post button is visible only on your computer,
because you're logged in to WordPress. No one else can see it. Click the Edit Post button to
return to the back end version of the post.
Let’s add another post? We'll follow the same steps:
1. Click the Add New button next to Edit Post (just above your Page Title field). Or go
to the WordPress Menu on the left and click Posts > Add New.
2. In the Enter Title text field on the new Add New Post screen, type A High-Energy
Bundle of Fun.
3. ***Copy and paste the text below, or try writing your own post.
CINDY: 3 years old, spayed female, Shepherd mix, 40 lbs.
Cindy came to us because her family was splitting up. She's never gotten the
attention a young dog needs.
Cindy is super playful. She loves toys, and her favorite game is fetch. She's a
smart cookie and adapts well to positive training. She already knows "sit,"
"down," "stay," "shake," and "sit pretty," and she's learning more fun tricks like
"roll over." Cindy is house-trained, rides well in the car, and enjoys being
brushed and groomed. She behaves well around the house and respects her
boundaries.
This special girl needs an adult-only home with people who have experience
with large dogs, so she can continue to develop into a well-adjusted dog. Cindy
needs someone who'll give her very clear rules, lots of love, and plenty of
exercise. In return, she'll be your loyal friend for life.
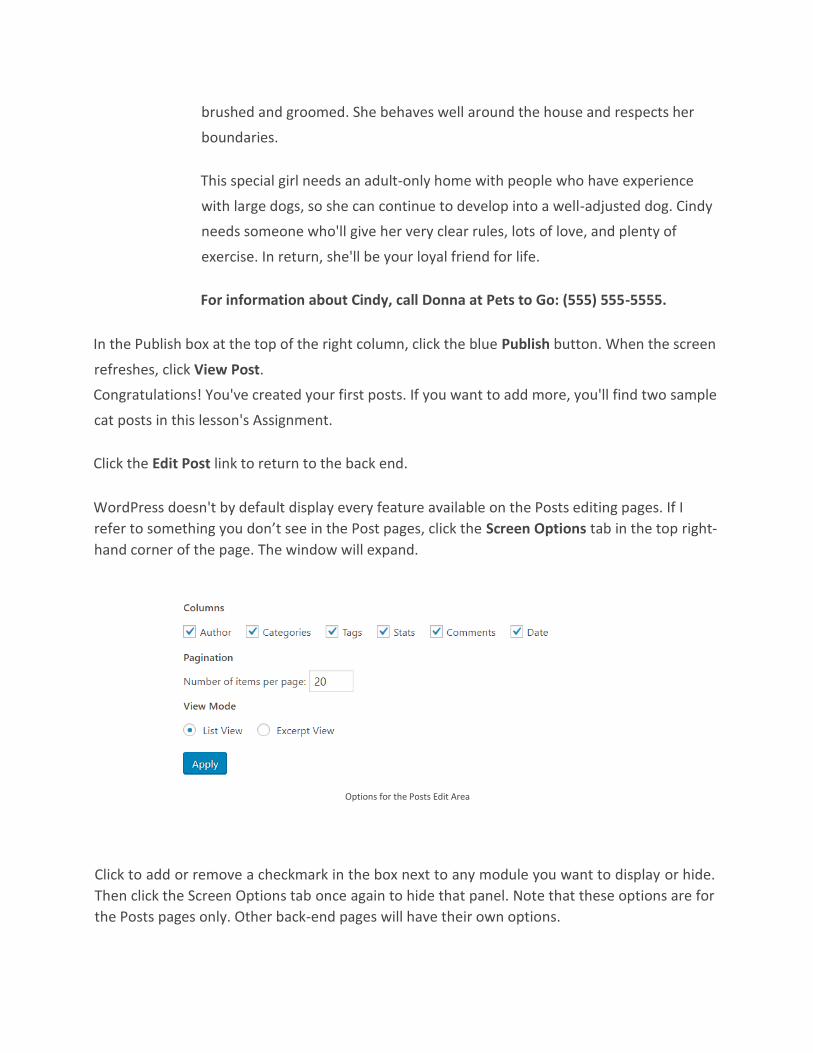
For information about Cindy, call Donna at Pets to Go: (555) 555-5555.
In the Publish box at the top of the right column, click the blue Publish button. When the screen
refreshes, click View Post.
Congratulations! You've created your first posts. If you want to add more, you'll find two sample
cat posts in this lesson's Assignment.
Click the Edit Post link to return to the back end.
WordPress doesn't by default display every feature available on the Posts editing pages. If I
refer to something you don’t see in the Post pages, click the Screen Options tab in the top right-
hand corner of the page. The window will expand.
Options for the Posts Edit Area
Click to add or remove a checkmark in the box next to any module you want to display or hide.
Then click the Screen Options tab once again to hide that panel. Note that these options are for
the Posts pages only. Other back-end pages will have their own options.
Publishing a Post
We've already used the WordPress Publish function to save our first posts. Now let's explore
some other publishing options.
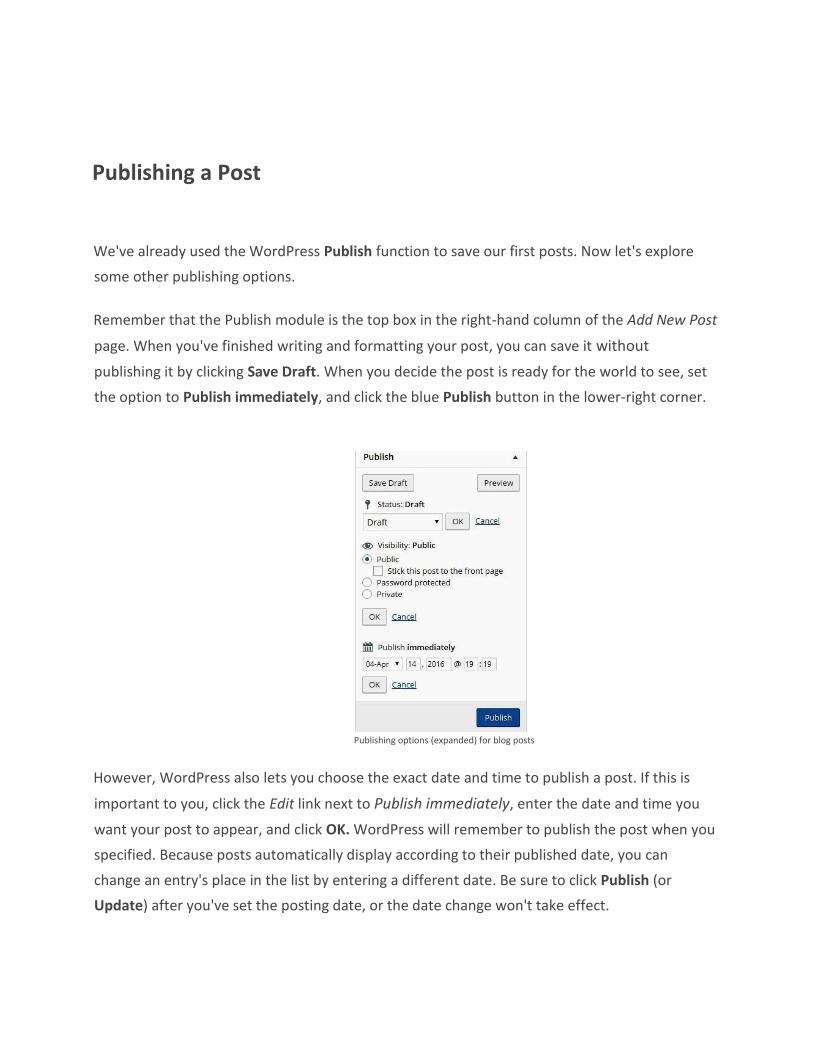
Remember that the Publish module is the top box in the right-hand column of the Add New Post
page. When you've finished writing and formatting your post, you can save it without
publishing it by clicking Save Draft. When you decide the post is ready for the world to see, set
the option to Publish immediately, and click the blue Publish button in the lower-right corner.
Publishing options (expanded) for blog posts
However, WordPress also lets you choose the exact date and time to publish a post. If this is
important to you, click the Edit link next to Publish immediately, enter the date and time you
want your post to appear, and click OK. WordPress will remember to publish the post when you
specified. Because posts automatically display according to their published date, you can
change an entry's place in the list by entering a different date. Be sure to click Publish (or
Update) after you've set the posting date, or the date change won't take effect.
After you've published a page or post, you can always go back and make changes. But after first
publishing, you no longer see the blue Publish button. It will change to an Update button
instead. But as always, if you make any changes be sure to click that button after making your
edits, or the changes won't be saved.
Password Protecting Your Posts By default, the Visibility option (in the Publish module) is Public, allowing everybody to see the
entry you just published.
But what if you've written a post that you don't want to share with everyone? If you click Edit
(next to Visibility: Public), WordPress gives you some options:
• You can set a password for the post and give that password only to the people you
want to access it. To do that, click the radio button next to Password protected.
Type the password in the text box that opens.
• You could keep the post out of public view by clicking Private. I don't recommend
this, however, because there's really no reason to create a post if you want to keep
it hidden. And chances are if you make a post private, you'll even forget about it
yourself!
In Lesson 1, we discouraged search engines from visiting our site, listing our location as a work-
in-progress. It's also possible to hide the website from visitors by displaying an "Under
Construction" screen. It can be installed as a plugin, which I'll demonstrate later in the course.
Now that you've published a couple of posts, it's time to think about how to organize them.
We'll tackle that in the next chapter.
Chapter 4: How Can You Organize Posts?
Remember that blogs automatically sort and display entries chronologically. But even more
important than classifying posts by date is being able to arrange them by subject. The

WordPress Categories function lets you organize your site so visitors can do subject searches.
All this brings your blog closer to a classic online forum.
Depending on the theme (in other words, the WordPress template you're using), category lists
may show up in a sidebar menu, in the horizontal navigation bar under the header, or in both
places. We’ll have much more to say about templates shortly.
The default WordPress installation contains just one category for posts—Uncategorized—that
can't be deleted. As you add information, you can create new categories and assign one or
more categories to each post. Any post that you don't assign a category to gets the label
Uncategorized.
Let's look at our Pets to Go website to see how this works. So far, we've added two posts about
dogs up for adoption, but we'll also want to feature cats. Suppose someone comes to our site
looking for a dog. Without putting our adoptable dogs into their own category, the visitor would
have to look through every post to find what they want. But if we add a category called Dogs,
the visitor can narrow the search.
If you want, you can even create second-level posts in a category hierarchy. For example, we
can subdivide the Dogs category into two subcategories—Puppies and Mature Dogs. The visitor
could click the Dogs category to view all the available dogs . . . or, to narrow the search, she
could click the Puppies subcategory. Always try to make maneuvering your site efficient for
visitors.
Creating Categories and Subcategories You can add categories as you're creating a post, but I prefer to organize categories on the Posts
> Categories screen. To get there, click Posts, then Categories in the WordPress menu.
We'll first add the main categories, Dogs and Cats:
1. Type Dogs into the Name field.
2. Then type dogs into the Slug field.

3. Leave the Parent drop-down box displaying "None." That will make Dogs a parent
category that can include child subcategories under it.
4. Click the Add New Category button.
Now repeat these steps for a Cats category (end by clicking Add New Category).
Let's add sub-categories now:
1. Type Puppies into the Name field; and puppies into the Slug field.
2. But this time, select Dogs from the Parent drop-down window.
Adding a sub-category
The trick to creating a sub-category is simply to select a Parent category for it.
3. Click Add New Category.
Now you can add Mature Dogs as a subcategory under Dogs. When you've finished that, add
Kittens and Mature Cats as subcategories under Cats. Here's how the table on the right side of
the Categories will look when you're done:

Category listing
To edit or delete any category or subcategory, put your cursor on the name, and click the
option, which will appear underneath.
One more step: We must go back to each post and assign the categories. On the Menu, click
Posts > All Posts:
One of the nice things about WordPress is that there are often two or more ways to do the
same task. For example, we could assign categories to posts by opening each Edit Post screen
and working in the Categories module. But I think it's easier to use the Quick Edit feature on the
Posts > All Posts screen. Hover your cursor under the first post title (A High-Energy Bundle of
Fun), and click Quick Edit.
That opens a panel allowing you to change the post's title or slug, its publish date, to password
protect the post, allow visitor comments, and assign categories. Because this post is about a
mature dog, we'll go to the Categories area in the center of the panel, and check the boxes next
to Dogs and Mature Dogs. You can also use the scroll bar to see, then remove, the check next to
Uncategorized. Click the blue Update button when you're done . . . and move on to categorize
the other post.

The expanded Quick Edit panel
Besides categories, WordPress gives you yet another tool—called tags—to help visitors zoom in
on specific information within your posts. For example, the Pets to Go site already contains a
parent category called Dogs with the subcategories Puppies and Mature Dogs. You know that
many visitors like to search by breed, but you don't want to make your category lists unwieldy
by adding too many topics. By making the dog's breed a tag to an individual post, you'll help the
visitor find the kind of dog he's looking for without diluting the categories.
Here's how to add a tag to a post. Hover your mouse over the Your Kids Will Love This Dog
entry. Click Quick Edit.
Want to give it a try? Open the post about Rascal, and type Yellow Lab in the tag name box.
Click Update. The post will now display Yellow Lab as a tag. When visitors click the tag, they'll
see other posts that share the same tag— and that helps them narrow their choices quickly.
It's possible to display every post tag in the site's sidebar (a narrower column that sits next to or
below the main content area on the Web page). That would allow a visitor to see a list of every
post containing the tag, when the visitor clicks that tag. You'll find out how to do that later in
the course.
Confused about the difference between categories and tags? Think about categories as a blog's
table of contents. In contrast, tags are like the items listed in the index. In other words,
categories tend to be broad, and tags tend to be very specific.

Very good! Now that we've created an easy way for our visitors to find the subjects they're
looking for, I'll show you how to set up WordPress to handle visitors' comments.
Managing Feedback One of a blog's most compelling features is its ability to stimulate a dialog among its readers. By
allowing website visitors to comment on your entries—and on other visitors' comments—you
can create a loyal community of participants.
But encouraging feedback can also lead to unwanted consequences, including inappropriate
comments and spam. Fortunately, WordPress comes with lots of options to manage and control
responses.
You can set these options to work globally (so they apply to the entire blog) or by individual
post. We'll start with the site-wide controls.
Setting Global Options for Comments Let's start by setting options that will apply to every blog post you create.
1. Go to your WordPress menu (over on the left).
2. Use the menu to open the Settings > Discussion screen.
The Discussion Settings screen lets you specify your preferences about how visitors can
comment on blog posts. It's designed to keep spam and inappropriate material from appearing
on your blog. Choose the settings illustrated below. If you don't like the way they filter your
blog's comments, you can always change the settings later.

Part of Discussion settings screen
This configuration will require anyone who wants to comment to provide an e-mail address. It
will also keep all comments unpublished unless or until you approve them. (WordPress will send
you an e-mail whenever someone submits a comment.)
Requiring an e-mail address will likely result in fewer posts, but the ones you get will be of
higher quality. Why? Because the person posting knows that you can report inappropriate posts
or spam to that person's Internet service provider—and many ISPs delete the accounts of
members who cause this kind of trouble. There's a similar trade-off with requiring approval of
comments. It will take longer for users to see the comments, but they'll be of better quality
because you will have deleted all the off-topic posts, advertisements, and other inappropriate
messages.
After you've made your choices, scroll down and click Save Changes at the bottom of the page.

Once you start receiving comments, they'll appear in a module titled Recent Comments on your
Dashboard page. From there, you'll be able to open a Comments page, where you can accept,
edit, or delete the feedback.
Setting Options for an Individual Post
You just specified how you want to handle all the posts in your blog. But what if you want to
handle responses to individual posts in a different way?
To override the global settings and customize the way you want to deal with an individual post,
you need to open that post for editing. In the Menu, click Posts, and then click the title of the
post to be reconfigured.
To try this out, let's look at the "A High-Energy Bundle of Fun" post you entered earlier (the one
about Cindy).
1. Open the Edit Post page by clicking Posts > All Posts in the WordPress menu, and
then hover your mouse over the post's title.
2. Click Quick Edit.
3. Over to the right, below the Tags field, uncheck the box next to Allow Comments.
You can also control trackbacks and pingbacks (they tell you when other blogs have linked to
yours). Let's leave that box checked.
Click Update in the Publish box to save your change. Once again, always remember to click
Update (or a similar button) to save any edits, or they’ll be ignored.
Then click View . There won't be a "Leave a Reply" box on the Web page, as there is on the
other post.
Thanks to this modification, the Discussion specifications for this post now overrides the global
settings on the Discussion Settings screen.
Time now to head over to Chapter 5 for a review of what you've accomplished!
Chapter 5: Summary Summary You probably know a lot more about blogs and posts than when we started! You've learned
when to use posts and how to create entries by adding text. You also refined the posts and
reviewed the publishing options that WordPress offers. And finally, you discovered all the ways
you can handle visitors' comments. How will you use these skills in your own Web projects?
For more information and further practice, be sure to visit the Supplementary
Material links, the Frequently Asked Questions section, and the lesson Assignment.
Next time, we'll examine how to build static websites. We'll also discuss situations in which it's
more appropriate to use a Web page than a blog post. I look forward to seeing you there.


![ReadWriter: Task Automation and Feedback Support for ...portant decision for bloggers. Blog Muse [7] allows enter-prise bloggers to benefit from readers’ topic suggestions. ReadWriter](https://img.pdfslide.us/doc/110x75/6031efda2dec816d8368f21b/readwriter-task-automation-and-feedback-support-for-portant-decision-for-bloggers.jpg)