Embed Size (px)
Citation preview
© 2004-2005 Shamsa Gilani 1
Lesson 1: Introduction
Objectives: Students will:• Familiarize themselves with questions that will guide our unit• Articulate their own ideas and questions about specific concepts related to Plate
Tectonics on a KWL chart
Activities:
Distribute the Plate Tectonics Guiding Questions sheet and give students a few minutesto read it silently.
Check for understanding by having students shout out some guiding questions. Brieflyreiterate what is on the Guiding Questions sheet to make sure that students have a clearsense of what is to come in the next few days. This should generate some excitementabout the topic.
Ask students if they are familiar with a KWL chart. If they know the purpose behind theKWL activity, go ahead and distribute the KWL sheet. If they are not, explain thepurpose behind the activity. Draw three columns on the board and explain what the “K,”the “W,” and the “L” stand for:K= What do I know or think I know?W= What do I want to know?L= What have I learned?
Tell them that they will be filling out the last column (L) at the end of the unit andexplain how it will help them and you assess their progress.
Distribute the KWL sheet and give students a few minutes to fill it out.
Draw a class KWL chart on a big white poster paper. Ask students what they wrote intheir individual charts. Fill out the class chart based on student responses. Hang this chartin a conspicuous place in the classroom and leave it there till the end of the unit.
Assessment: The KWL chart serves as a major assessment tool in this unit. Studentscome back to this chart at the end of the unit and fill out the “L” column. They reflectback and see if their knowledge and understanding has increased or stayed the same.Student responses on this sheet would also help me see if any “incorrect” knowledge isreplaced by “correct” knowledge. I will use the attached rubric (adapted from FOSSgeneral assessment rubric) to assess their understanding.
Homework: No homework is assigned
Materials: Plate Tectonics Guiding Questions sheet KWL sheet for each student White poster paper and markers
© 2004-2005 Shamsa Gilani 2
Plate Tectonics Guiding Questions
Have you ever wondered about the following?
1. Where do rocks you see around you come from?2. How do mountains, such as the Himalayas form?3. What causes earthquakes and why are some places, like
California, more prone to earthquakes than others?4. How do volcanoes form and where does lava come from?5. What will you find if you keep digging into the earth? What
lies beneath the surface of the earth?
We will be able to answer these questions as we proceed withour unit on Plate Tectonics. We will make some fascinatingdiscoveries, such as the fact that the continent we are standingon is actually moving! We will discover that the NorthAmerican continent will not be in its present position millionsof years from now. We will also discover that the Himalayas arerising higher each year!
Let’s begin our journey.
© 2004-2005 Shamsa Gilani 3
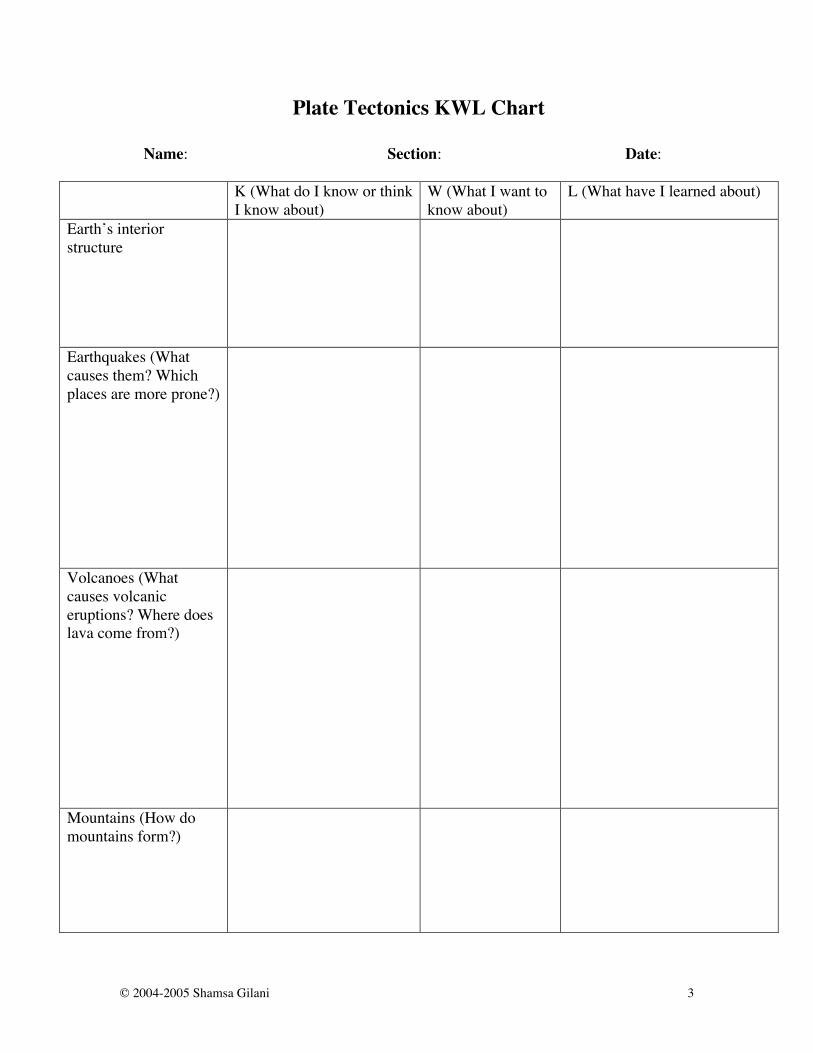
Plate Tectonics KWL Chart
Name: Section: Date:
K (What do I know or thinkI know about)
W (What I want toknow about)
L (What have I learned about)
Earth’s interiorstructure
Earthquakes (Whatcauses them? Whichplaces are more prone?)
Volcanoes (Whatcauses volcaniceruptions? Where doeslava come from?)
Mountains (How domountains form?)

© 2004-2005 Shamsa Gilani 4
KWL Rubric∗
3 Student shows strong understanding of conceptsrelated to the four questions. All importantinformation is included in the “L” column.
2 Student shows fairly good understanding ofconcepts related to the four questions. Minorpieces of information have been left out in the“L” column.
1 Student shows limited understanding ofconcepts related to the four questions. There aresignificant mistakes and misconceptions.Important pieces of information have been leftout in the “L” column.
∗ Adapted from FOSS general assessment rubric
© 2004-2005 Shamsa Gilani 5
Lesson 2: Earth’s Layers
Standard:• Describe the layers of the solid earth, including the lithosphere, the hot convecting
mantle, and the dense metallic core
Objectives: Students will:
• Describe earth’s layers in terms of properties and scientific names• Give examples of objects from daily life that can be used to study the internal
structure of the Earth
Activities:
Distribute the Eating the Earth sheet. Give each student one-half of an apple and ask themto draw and color their apple model on the space provided on the sheet.
Explain to them that the apple they are holding is a model, which represents the layeredstructure of the earth. Tell them that the skin of the apple represents the outermost hard androcky layer of the earth, the crust (just like the crust of bread or pizza). On their drawing,ask students to write down what the apple skin represents (the crust) and have themdescribe the crust (hard and made up of rocks).
Explain to them that the meat of the apple represents the mantle and it is the layer wherelava is generated. Tell them that unlike the crust, the mantle is composed of rock, which issofter and tends to flow (fluid molten rock). On their drawing, ask students to write downwhat the meat of the apple represents (the mantle) and have them describe the mantle (fluidmolten rock).
Ask students to speculate why rocks in the mantle, which are deeper than the crustal rocks,tend to flow. Some students may mention heat. Explain to them that the temperatureincreases as we go deeper into the earth.
Bring students’ attention to the core of the apple and explain that the core represents thecore of the earth. Point out that unlike the core of the apple, the core of the earth is dividedup into two layers, a liquid outer core and a solid inner core. Tell students that unlike thecrust and the mantle, which are made of rocks, the core is metallic: it is composed of ironand nickel (liquid state in the outer core and solid state in the inner core). On their drawing,ask students to write down what the core of the apple represents (the outer core and theinner core) and the composition of each layer (solid iron and nickel, and liquid iron andnickel).
Draw a cross section of the earth on the board (showing all the layers without labels) andask students to copy this drawing on the Eating the Earth sheet. Have students label all thelayers on their drawing.
© 2004-2005 Shamsa Gilani 6
Tell students that they are welcome to eat their apples.
Assessment: I will look at students’ completed Eating the Earth sheet and their responsesto the homework question to assess their understanding of Earth’s layers.
Homework: Students will answer the following questions for homework:
Read the question carefully and answer all three parts of the question.In class today, we used the apple model to study the internal structure of Earth.1. List three other objects that can be used as models to study the internal layered structureof Earth (objects should not include an apple!)2. For each object, explain why the object can serve as a model to study the structure of theEarth.3. For each object, also point out a weakness of your model (why the object does notrepresent the Earth accurately)
Materials: Apples (enough to let each student have one-half of an apple) A Knife for the teacher Eating the Earth sheet (one per student) Color pencils∗
∗ The apple activity has been adapted from Scott Johnson’s earth science lessons. Scott Johnson is anelementary school teacher at Lincoln Elementary in Grand Forks, and a member of the Volcano WorldDevelopment team. The lesson can be found at:http://volcano.und.nodak.edu/vwdocs/vwlessons/lessons/Ch1CMB/Handson1.html
© 2004-2005 Shamsa Gilani 7
Eating the Earth
Name Section: Date:
Draw your apple model here. Label the parts of the apple and write down the names andproperties of earth’s layers that are represented by these apple parts.
Draw the cross section of the Earth here and label each layer.
© 2004-2005 Shamsa Gilani 8
Earth’s Layers Homework
Name Section: Date:
Read the question carefully and answer all three parts of the question.In class today, we used the apple model to study the internal structure ofEarth.1. List three other objects that can be used as models to study the internal
layered structure of Earth (objects should not include an apple!).
2. For each object, explain why the object can serve as a model to study thestructure of the Earth.
3. For each object, also point out a weakness of your model (why the objectdoes not represent the Earth accurately).
© 2004-2005 Shamsa Gilani 9
Lesson 3: The lithosphere and plates
Standard:• Describe the layers of the solid Earth, including the lithosphere, the hot
convecting mantle, and the dense metallic core
Objective: Students will:• Describe the lithosphere as the part of the Earth that is broken into big slabs,
called plates, which fit together like puzzle pieces, and that these plates movearound to cause changes on the Earth’s surface.
Activities:
Distribute the Earth’s Plates worksheet.
Tap a hard-boiled brown egg on a hard surface until a pattern of cracks is produced.Using a permanent marker, outline some of the cracks. Explain to students that the crustand the uppermost part of the mantle are brittle and can fracture at certain places just likethe cracked eggshell. Point out the outlined cracked pieces on the eggshell and explain tostudents that as a result of fracturing, the earth’s surface is broken up into sections orpieces called, “plates,” that fit together like puzzle pieces.
Crack some more eggs and pass them out to students to explore. Ask students to sketchthe cracked shell on their worksheet and have them write down what the cracked shellpieces represent (Earth’s plates). Explain to students that the layers of the earth that formthe plates are the crust and the uppermost part of the mantle, collectively known as thelithosphere. Have students write this down on their worksheet.
Explain to students that unlike the shell pieces, the lithospheric plates move aroundslowly on their own, which brings about changes on the earth’s surface. Ask students topredict what would happen if they moved the cracked pieces of the eggshell around.Have students do this. Ask them about their observations (observations would vary).Students should understand that similar to the changes that were brought about on thesurface of the egg by moving the cracked shell pieces, Earth’s surface also experienceschanges due to movement of Earth’s plates.
Have students turn to page 101 of their FOSS Earth History books and bring theirattention to the map of Earth’s lithospheric plates. Explain to them that the black borderson the map indicate Earth’s plate boundaries. Explain to students that Earth’s plates cancollide into one another, move away from each other, or slide past each other.Ask students to predict the outcome of these movements (earthquakes, mountainbuilding, rift valleys, formation of new ocean floor) and have them write their predictionson their worksheet. Have students share their responses with the entire class.
Have students clean up and return their eggs to the appropriate area.
© 2004-2005 Shamsa Gilani 10
Assessment: I will look at students’ completed Earth’s Plates worksheet to assess theirunderstanding.
Homework: Students will read the first four paragraphs of the section tilted “Earth’sDynamic Systems,” (pages 100-101) from the FOSS Earth History book.
Materials:
Earth’s Plates worksheet for each studentA hard-boiled brown egg for each student and the teacherA permanent markerFOSS Earth History textPaper towels ∗
∗ The boiled egg demonstration has been adapted from Activity 2, page 36 of Ford, B. A. (1998). ProjectEarth Science: Geology. Virginia: National Science Teachers Association.
© 2004-2005 Shamsa Gilani 11
Earth’s PlatesName Section: Date:
What do the cracked shell pieces represent?
The crust and the uppermost part of the mantle form Earth’s plates. What are these layerscollectively known as?
What might you expect to see at a point on Earth where two plates collide?
What might you expect to see at a point on Earth where two plates move away from eachother?
What might you expect to see at a point on Earth where two plates slide past each other?
Sketch the cracked eggshell here
© 2004-2005 Shamsa Gilani 12
Lesson 7: Tracking Earthquakes
Standard:• Describe how the movement of the Earth’s crustal plates causes both slow
changes in the earth’s surface (e.g., formation of mountains and ocean basins) andrapid ones (e.g., volcanic eruptions and earthquakes).
Objectives: Students will:• Investigate the relationship between location of earthquakes and the location of
Earth’s tectonic boundaries.• Relate the location of earthquakes to Earth’s plate boundaries.
Activities:
Distribute the Tracking Earthquakes Pre-investigation Questions worksheet.
Using a computer, computer projector, and a screen show students a map that showsearthquake activity over the last 8-30 days from the following USGS website:
http://neic.usgs.gov/neis/qed/(This world map also shows the location of Earth’s tectonic boundaries).
Explain to students that the yellow lines indicate Earth’s plate boundaries and the circularspots indicate location of recent earthquakes around the world. Explain to students thatthe different colors on the map are there to indicate the depth of the earthquake beneaththe surface of the Earth. Tell students to ignore the colors for the time being and focus onthe location of earthquakes. Ask them if they see a pattern. Ask them to describe thepattern of the earthquakes (the earthquakes follow the edges of Earth’s plate boundaries).Ask them to describe it on their worksheet. Ask them if they see some earthquakes thatdo not follow the regular pattern followed by most earthquakes (yes, may be two orthree). Ask them to write their responses on their worksheet.
Explain to them that scientists used a similar map of Earth’s largest earthquakes todetermine the location of Earth’s plate boundaries. Tell them that the fact that mostearthquakes are located on plate boundaries is a powerful piece of evidence for theexistence of Earth’s plates.
Tell them that over the next seven days they will pretend to be seismologists (scientistswho study earthquakes) and collect earthquake data from the following NationalEarthquake Information website:
http://neic.usgs.gov/neis/bulletin/
Show them what the earthquake activity chart looks like on the website. Thoroughlyexplain the different elements on the chart (date, time, magnitude, location).
© 2004-2005 Shamsa Gilani 13
Use a globe to explain latitude and longitude. Briefly tell them that the magnitude is ameasure of the size of the earthquake. Use a couple of examples from the chart to helpthem understand that an earthquake with a greater magnitude is bigger than theearthquake with a smaller magnitude. Tell them that they will be tracking earthquakes,which have a magnitude 4.5 or greater, over the next seven days.
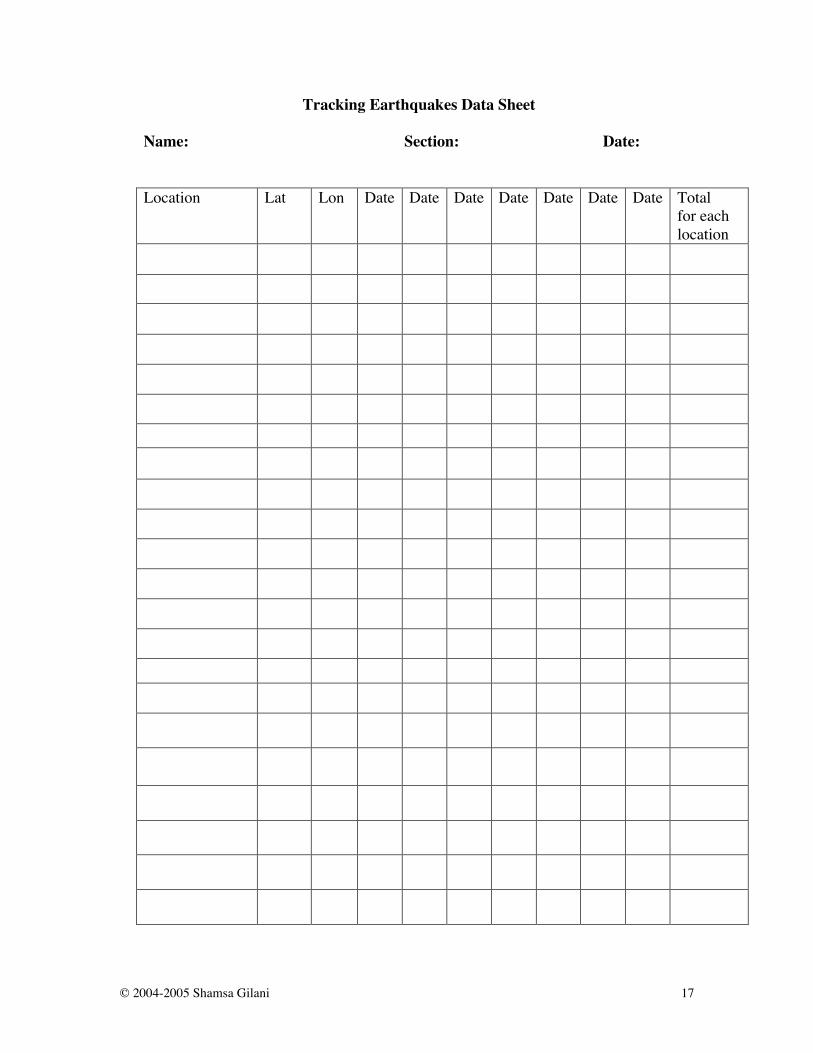
Show them the data sheet they will use to record their data. Explain each element on thedata sheet. Distribute data sheets. Tell them that they will use a dot to indicate oneearthquake at a particular location on a particular day, and two dots to indicate twoearthquakes, and so on. Using the data sheet transparency, show them what the data sheetshould look like after they are finished recording their data.
Ask for a volunteer to draw a blown up version of the data sheet that will hang in aconspicuous place in the classroom while the project is in progress.
Tell students that for the next seven days, they will have the computer and projectorready at the beginning of every class period. Tell them that whoever enters the class firstwill get an opportunity to use the computer and display the earthquake data on the screenfor the whole class. Tell that that you will give them a few minutes to record the data ontheir data sheets.
Recruit a volunteer who will be responsible for updating the class data sheet.
For the next seven days, students will record earthquake data.
On the seventh day, after students have entered their final data, have them total thenumber of earthquakes at each location and have them enter their answers on their datasheet.
Distribute maps on which students will be mapping their data (this map also showsEarth’s plate boundaries).
Using an overhead transparency of the map, show students how they will use the latitudeand longitude information to indicate the position of an earthquake on their maps. Tellthem how they will account for the frequency of earthquakes at a particular location(concentric circles). Tell them that they will draw a tiny circle to indicate one earthquakeat a particular location and another circle outside of the smaller circle to indicate twoearthquakes at a location. Show them on the transparency what the circle would look likefor a place that has one earthquake versus a place that has two or three earthquakes.Invite a couple of students to come to the front and map a couple of earthquake locations(from their data) on the transparency.
Give students time to map their data. Tell them to use a pencil.
(It would also be ideal to obtain a class size map of Earth’s tectonic boundaries and mapearthquake data on it as well and then display this map in the classroom).
© 2004-2005 Shamsa Gilani 14
After students have finished mapping their data, have them analyze their data and studytheir maps to get them ready to answer the post-investigation questions.
Distribute the Post-investigations sheet.
Have them answer the post investigation questions on the sheet.
Assessment: I will look at student responses on the Post-Investigation sheet to see if mylearning objectives for them have been met. I will assess their work based on the attachedrubric. I will share this rubric with them before they start collecting earthquake data. Iwill also ask them if they want to add anything to this rubric or would like changes madeto this rubric. I will explain each category in the rubric and emphasize what students needto do to get a 4 on their work. I will ask them to keep this rubric handy and advise themto refer to it while working on this project.
Homework: I will ask students to work on the post-investigation questions at home. Thefollowing day I will discuss the questions that students have difficulty understanding oranswering.
Materials:Tracking Earthquakes Pre-investigation Questions sheets for each studentA computer with Internet accessA computer projectorAn overhead projectorData sheet transparencyData sheets (one per student)Big poster paper and markers to draw the class data sheetWorld’s tectonic boundary map transparencyWorld’s tectonic boundary maps (one per student)Class size world map of Earth’s tectonic boundaries (optional but ideal)Tracking Earthquakes Post-investigation Questions sheets (one per student)Rubric handouts (one per student)∗
∗ This lesson has been adapted from Barbara Linsley’s lesson titled “Tracking Earthquakes around theWorld,” which can be found at http://school.discovery.com/lessonplans/activities/trackingearthquakes/.Linsley is an Earth science online teacher for Discovery Channel School and technology trainer/teacher forOntario-Montclair School District, Ontario, California.
© 2004-2005 Shamsa Gilani 15
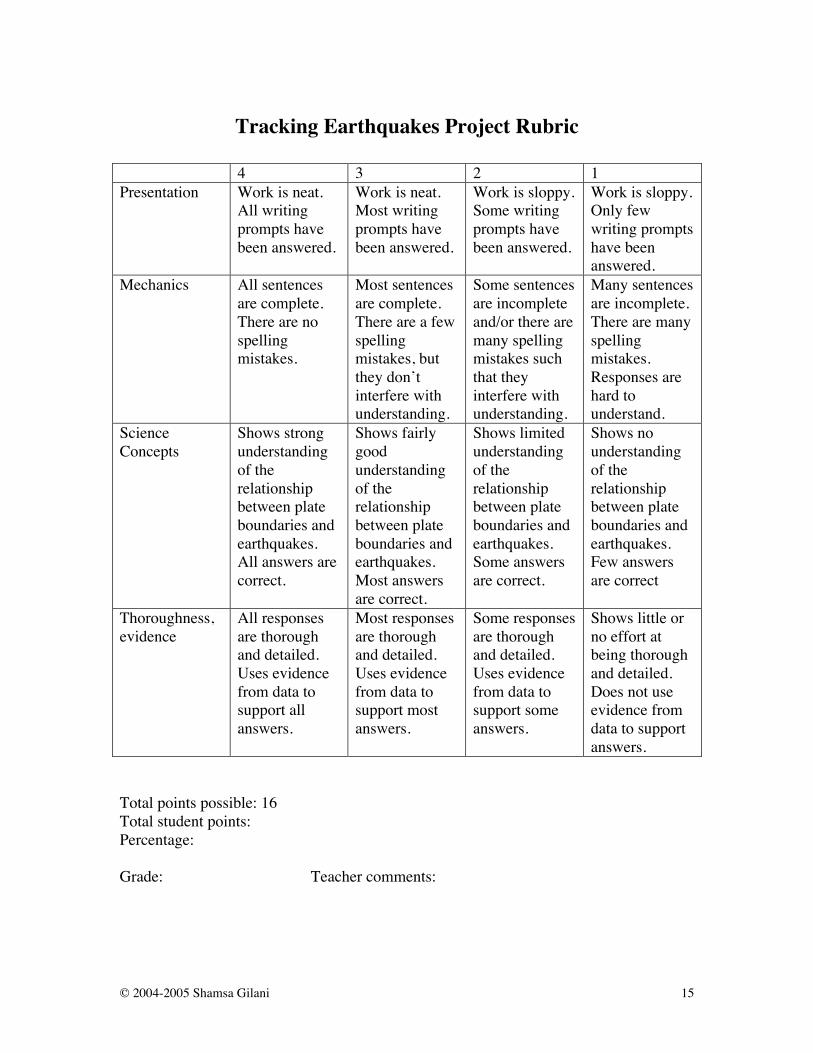
Tracking Earthquakes Project Rubric
4 3 2 1Presentation Work is neat.
All writingprompts havebeen answered.
Work is neat.Most writingprompts havebeen answered.
Work is sloppy.Some writingprompts havebeen answered.
Work is sloppy.Only fewwriting promptshave beenanswered.
Mechanics All sentencesare complete.There are nospellingmistakes.
Most sentencesare complete.There are a fewspellingmistakes, butthey don’tinterfere withunderstanding.
Some sentencesare incompleteand/or there aremany spellingmistakes suchthat theyinterfere withunderstanding.
Many sentencesare incomplete.There are manyspellingmistakes.Responses arehard tounderstand.
ScienceConcepts
Shows strongunderstandingof therelationshipbetween plateboundaries andearthquakes.All answers arecorrect.
Shows fairlygoodunderstandingof therelationshipbetween plateboundaries andearthquakes.Most answersare correct.
Shows limitedunderstandingof therelationshipbetween plateboundaries andearthquakes.Some answersare correct.
Shows nounderstandingof therelationshipbetween plateboundaries andearthquakes.Few answersare correct
Thoroughness,evidence
All responsesare thoroughand detailed.Uses evidencefrom data tosupport allanswers.
Most responsesare thoroughand detailed.Uses evidencefrom data tosupport mostanswers.
Some responsesare thoroughand detailed.Uses evidencefrom data tosupport someanswers.
Shows little orno effort atbeing thoroughand detailed.Does not useevidence fromdata to supportanswers.
Total points possible: 16Total student points:Percentage:
Grade: Teacher comments:
© 2004-2005 Shamsa Gilani 16
Tracking Earthquakes Pre-investigation Questions
Name Section: Date:
1. On the map your teacher has displayed, what do you notice about the location ofearthquakes?
2. Do you see earthquakes that do not follow this pattern? How many suchearthquakes do you see?
© 2004-2005 Shamsa Gilani 17
Tracking Earthquakes Data Sheet
Name: Section: Date:
Location Lat Lon Date Date Date Date Date Date Date Totalfor eachlocation
© 2004-2005 Shamsa Gilani 18
Tracking Earthquakes Post-investigation Questions
Name: Section: Date:
A seismologist’s job (any scientist’s job) is not only to collect data, but also to study thisdata. Put on your seismologist hat and get to work.Use your data sheet and map to answer the following questions. Answer in completesentences and be thorough and specific with your responses. Remember you need to bethorough to earn full credit. So work carefully.
1. Which location (s) had the highest number of earthquakes? How many earthquakes didthis location (s) experience?
2. Which location (s) had the lowest number of earthquakes? How many earthquakes didthis location (s) experience?
3. On your earthquake map, do you see earthquakes following a pattern? If so, describethis pattern.
© 2004-2005 Shamsa Gilani 19
4. What does this pattern (that you described in the last question) tell you about therelationship between the location of earthquakes and the location of Earth’s plateboundaries?
5. Why do you think the earthquakes follow this pattern? (Think about what may behappening at the plate boundaries).
6. Check your earthquake map to see if the location (s) with the highest number ofearthquakes follows the pattern you described in question 3. Now, use your answer toquestion 5 to give a reason why this location (s) might have experienced the highestnumber of earthquakes.
© 2004-2005 Shamsa Gilani 20
7. Check your earthquake map to see if the location (s) with the lowest number ofearthquakes follows the pattern you described in question 3. Now, use your answer toquestion 5 to give a reason why this location (s) might have experienced the lowestnumber of earthquakes.
8. Would you prefer to live in a place that is located on one of Earth’s plate boundaries?If yes, why? If not, why not?
© 2004-2005 Shamsa Gilani 21
Lesson 8: Pangaea and plate motion
Standard:• Describe how the movement of the Earth’s crustal plates causes both slow
changes in the earth’s surface (e.g., formation of mountains and ocean basins) andrapid ones (e.g., volcanic eruptions and earthquakes).
Objective: Students will:• Relate the breakup of the supercontinent Pangaea to plate motion
Activities:
Distribute paper cutouts of continents. Each student should have cutouts for each of theseven continents.
Explain to students that the continents have not always been in their present position. Tellthem that millions of years ago, the continents were clumped together into one giantsupercontinent, Pangaea. Ask students to color their continent paper cutouts and try to fitthem all together into one giant continent. Have them stick their supercontinents on theirPangaea and Plate motion worksheet.
Show students an animation of Pangaea breaking up and the continents drifting to theirpresent positions. The animation can be found at the following web site:http://www2.nature.nps.gov/geology/usgsnps/animate/pltecan.html (animation # 08.gif)
Have students compare their Pangaea map with the current world map (direct them to theworld map hanging in the classroom).
Ask them if they notice any difference in the position of continents. Have them writetheir answers on their worksheet.
Next, ask them if they can use their knowledge of lithospheric plates and plate motion toexplain this difference. Have them write their explanations on their worksheet. Then,have them share their responses with the entire class.
Assessment:I will look at their responses to the questions on the Pangaea and Plate motion worksheetto assess their understanding.
Homework: No homework
Materials:Pangaea and plate motion worksheet for each studentPaper cutouts of seven continents for each studentA computer with Internet accessA computer projector
© 2004-2005 Shamsa Gilani 22
A class world map showing the current position of continents and oceans∗
∗ The paper cutout activity is adapted from Barbara Linsley’s lesson titled “Tracking Earthquakes aroundthe World,” which can be found at http://school.discovery.com/lessonplans/activities/trackingearthquakes/.Linsley is an Earth science online teacher for Discovery Channel School and technology trainer/teacher forOntario-Montclair School District, Ontario, California.
© 2004-2005 Shamsa Gilani 23
Pangaea and Plate MotionName Section: Date:
Stick your supercontinent, Pangaea, on this page.
© 2004-2005 Shamsa Gilani 24
Compare your Pangaea map with the current world map (Refer to the class world map).
What is different about the position of continents between the two maps?
Using your knowledge of lithospheric plates and plate motion, explain the reason for thisdifference.
© 2004-2005 Shamsa Gilani 25
Lesson 10: Importance of Plate Tectonics
Standard:• Describe how the movement of the Earth’s crustal plates causes both slow
changes in the earth’s surface (e.g., formation of mountains and ocean basins) andrapid ones (e.g., volcanic eruptions and earthquakes).
Objective: Students will• Explain the importance of the Plate Tectonics Theory. They will understand the
relevance of Plate Tectonics for people.
Activities:
Start the class by saying the following:
“We have been talking about Earth’s plates and how they move. We have also beentalking about how mountains form, why earthquakes occur, and why volcanoes erupt.”
Then pose the following questions to the class:
“So why should we care about all this? Why do scientists try to understand plate motion?What is the relevance of all this for people like you and me?
Write these questions on the board.
Ask students to discuss these questions in pairs and tell them to jot down their ideas on apiece of paper.
Float around the room to listen in on student discussions.
After a few minutes, ask each pair to share its ideas with the whole class. Make a list ofthese ideas on the board.
Preview the Forces of Nature film to be watched at the Museum of Science. Explain howthe film follows three scientists at work (a volcanologist, a meteorologist, and aseismologist).
Tell students to keep in mind the questions they discussed at the beginning of the lessonwhile watching the film.
Take students to the Museum of Science to watch the film.
After students have watched the film, distribute the Importance of Plate Tectonicsworksheet. Have students discuss the questions on this worksheet in pairs. Tell studentsto write their responses on the worksheet while they discuss the questions.
© 2004-2005 Shamsa Gilani 26
After students have discussed all the questions, read each question out loud and haveeach pair share its response to that question with the whole class.
Assessment: I will look at student responses on the Importance of Plate Tectonicsworksheet to assess their understanding.
Homework: No homework
Materials:Importance of Plate Tectonics worksheet for each student
Preparation for the Museum of Science trip:Arrange transportationReserve movie ticketsGo over behavior expectations, and emphasize the importance of safe behaviorMake students aware of consequences for inappropriate behaviorTell students whether to bring lunchTell students to dress appropriatelyGive permission slips to be signed by parentsArrange chaperonesMake sure you take a First Aid kit with you.∗
∗ Forces of Nature is a film produced by the National Geographic Society, which can beviewed at the Museum of Science in Boston. The script of the film can be found at thefollowing website: http://www.mos.org/doc/1363?id=557
© 2004-2005 Shamsa Gilani 27
Importance of Plate Tectonics
Name: Section: Date:
1. Imagine that you are a seismologist (an earthquake specialist). How does yourwork affect people?
2. As a seismologist, do you care about Plate Tectonics? If yes, why? If no, whynot?
3. Now, imagine that you are a volcanologist (a volcano expert). How does yourwork affect people?
© 2004-2005 Shamsa Gilani 28
4. As a volcanologist do you care about Plate Tectonics? If yes, why? If no, whynot?
5. Use your responses to questions 1, 2, 3 and 4 to explain the importance of thePlate Tectonics Theory.