Embed Size (px)
Citation preview

Gibson LP STD LTD Manual v1.0 Page 1
LLeess PPaauull SSttaannddaarrdd 22001100 LLTTDD
OOwwnneerrss MMaannuuaall

Gibson LP STD LTD Manual v1.0 Page 2
Important Safety Instructions We value you as a customer—and want our products to give you an inspiring, and gratifying, experience. So, to insure your safety and protect your investment in the Gibson Les Paul Standard 2010 Limited guitar, please read and follow all safety warnings and operating instructions before using this product, and keep all documentation for future reference. Environmental Factors Heat and moisture can harm your Gibson Les Paul Standard 2010 Limited. Please do not install or operate this guitar near sources of moisture, such as sinks, damp basements, leaky roofs, etc. and never store it near heat sources, such as heaters or radiators. Both you and your Les Paul Standard 2010 Limited will be much happier if you store and operate this product under safe conditions. R.I.P. Audio Interface (SOLD SEPERATELY) *RIP (Robot Interface Pack): NOT INCLUDED. *Please note: throughout this manual any and all reference to the RIP audio interface is subject to the separate purchase of the RIP box available only through Gibson Gear at Gibson.com Power Sources Use only the power source included in the Les Paul Standard 2010 Limited package. Make sure any power supply cords are not located where they are likely to be safety hazards, such as on the floor where people might walk, or in locations where they may receive pressure from items placed upon or against them. Also, be very careful with any power source connections, such as where the AC adapter connects to the wall outlet. If this is jostled loose, the *RIP audio interface included with Les Paul Standard 2010 Limited may experience extreme power differentials, which can potentially harm you and the product. Service Please do not attempt to service the Les Paul Standard 2010 Limited or any of its accessories yourself. Opening any of these up may expose you to high voltages (besides, there are no user‐serviceable parts), so let our expert technicians handle any repairs for you. Speaking of experts, always send the Les Paul Standard 2010 Limited or *RIP audio interface to an authorized service technician if any of the following occurs (contact numbers for service centers are at the end of this section):
Any foreign object (especially liquid) has gotten inside Les Paul Standard 2010 Limited or its accessories
Les Paul Standard 2010 Limited or its accessories have been exposed to water, dropped, or otherwise damaged
A marked change in Les Paul Standard 2010 Limited’s performance

Gibson LP STD LTD Manual v1.0 Page 3
You hear anything rattling around inside if you shake the Les Paul Standard 2010 Limited gently Warranty Protection It is extremely important to us that you are satisfied with Les Paul Standard 2010 Limited. Register it and activate your warranty protection by mailing the warranty card included with Les Paul Standard 2010 Limited to Gibson USA, Department W, P.O. Box 100087, Nashville, TN 37210‐0087. If you encounter any kind of problem, contact us as soon as possible so we can make things right. Once your warranty protection is active, the Les Paul Standard 2010 Limited's electronic components are warranted to be free from defects in materials and workmanship for a period of one (1) year from the date of original purchase. Your warranty covers the cost of both labor and materials on any repair deemed necessary by our Customer Service Representative for the warranty period, subject to the limitations below. Please note that our warranty belongs to the original retail purchaser only, and may not be transferred or assigned to subsequent owners. If the Les Paul Standard 2010 Limited malfunctions as a result of faulty materials or workmanship, Gibson will determine whether repair or replacement is more appropriate. In case the original materials are no longer available for repair, Gibson reserves the right to use materials regularly utilized at the time of repair. If we determine that replacing the Les Paul Standard 2010 Limited best serves your interests, or in the unlikely event that it is destroyed, lost, or damaged beyond repair while in our possession for repairs, we will replace the product. If it is no longer available, it will be replaced with the most similar product whose value does not exceed your original product’s purchase price. Remember—as a necessary condition to the warranty coverage described in this section, you must activate your warranty by mailing the warranty card included with Les Paul Standard 2010 Limited to Gibson USA, Department W, P.O. Box 100087, Nashville, TN 37210‐0087. Warranty Limitations Unfortunately, it is not possible for your product warranty to cover any of the following:
Any product that has been altered or modified in any way, or upon which any serial or registration number has been tampered with or altered in any way.
Any product whose warranty card has been altered or contains false information. Any product that has been damaged due to misuse, negligence, accident or improper operation
or storage. Any product damaged during shipment. Inspect the package immediately upon receipt, and
notify the carrier immediately if there is damage. Any product damaged as a result of extreme temperature, humidity, or the use of an improper
power source.

Gibson LP STD LTD Manual v1.0 Page 4
Any product not purchased through an authorized dealer, or any product that has had repairs, modifications or alterations made by an unauthorized service technician.
Wear and tear based on normal usage. Factory installed electronics after more than one year following the original date of purchase.
Gibson makes no other express warranty of any kind. All implied warranties, including warranties of merchantability and fitness for a particular purpose that exceed the specific provisions of the warranty, are expressly and specifically disclaimed and excluded from the warranty. Note, however, that some states and/or countries do not allow the exclusion or limitation of implied warranties, so this paragraph may not apply to you. In particular, if you purchased your product outside of the United States, contact your local distributor for the handling and resolution of all warranty issues, as the warranty described here is not always applicable. And of course, Gibson shall not be liable for any special, indirect, consequential, incidental or other similar damages to you or to any third party, including, without limitation, damages for loss of profits or business, or damages resulting from use or performance of the product, whether in contract or tort, even if Gibson or its authorized representative has been advised of the possibility of such damages, and Gibson shall not be liable for any expenses, claims or suits arising from or relating to any of the foregoing. To obtain warranty service, contact the service center nearest you: US (Toll Free) 1‐800‐4GIBSON US (Local) 1‐615‐871‐4500 Email ‐ [email protected] Europe 00800‐4GIBSON1 Email ‐ [email protected] Japan Email ‐ [email protected] China 800‐820‐8841 (in China only) Email ‐ [email protected] Please do not send a unit in for repair before contacting your customer service center. They will advise you of the proper procedure for a quick and efficient repair, as well as provide information on where and how to send your Les Paul Standard 2010 Limited.
0 Limited! Gibson® is a trademark of the Gibson Guitar Corp.

Gibson LP STD LTD Manual v1.0 Page 5
Introduction: Welcome to the Les Paul Standard 2010 Limited The Les Paul Standard 2010 Limited is Gibson's (fourth) generation “Robot” guitar. Building on the success of the original Robot Guitar, the groundbreaking Dark Fire, and its predecessor the Dusk Tiger, the Les Paul Standard 2010 Limited represents the apex of today's technology matched with the Les Paul tradition of finely‐crafted guitars. Some of the Les Paul Standard 2010 Limited's standout features include:
Third‐generation Robot Tuning TechnologyTM for automatic, accurate tuning Instantly selectable choice of tunings (standard and alternate tunings) Chameleon Tone TechnologyTM delivers iconic guitar sounds without digital modeling The Les Paul Standard 2010 Limited is equally at home in live performance or recording
environments The Master Control Knob (MCK) includes a sophisticated display to help you select different
tunings, sounds, and functions. The pickup switch toggle is also a knob (“Piezo blend”) that, when turned, determines the blend
of magnetic and Piezo pickup sounds Les Paul Standard 2010 Limited is set up with advanced PLEK technology for exceptional
playability Companion software includes Gibson Chameleon Editor for creating custom sounds and tunings
available at Gibson.com Software is compatible with Mac OS X and Windows XP, Vista, and Windows 7 User‐replaceable, long‐life battery—even switch easily in the middle of a gig. Simplified “operating system” where the most common functions are extremely easy to access.
Most importantly, the Les Paul Standard 2010 Limited is an inspiring guitar that plays and feels like some of the finest Les Paul’s you've ever played. Les Paul Standard 2010 Limited offers so much you'll need time to learn its features. This manual, written by Les Paul Standard 2010 Limited owners for Les Paul Standard 2010 Limited owners, will help make that process as simple as possible. All of us at Gibson hope that you get the same joy out of playing Les Paul Standard 2010 Limited that we've had in creating it. We appreciate your confidence in Gibson. Should you encounter problems, our support staff is always ready to help you resolve any issues. Welcome to the Gibson family, and to the innovative world of Les Paul Standard 2010 Limited.

Gibson LP STD LTD Manual v1.0 Page 6
Chapter 1: Les Paul Standard 2010 Limited Chapter 1: Les Paul Standard 2010 Limited Essentials 1.0 STOP: Charge Les Paul Standard 2010 Limited's Battery Before Use! Les Paul Standard 2010 Limited contains an internal, user‐replaceable, rechargeable battery that must be charged to use the Piezo pickup, Chameleon Tone Technology, or Robot Tuning Technology. Using only the magnetic pickups does not require power. Please charge the battery fully when you first receive Les Paul Standard 2010 Limited. The Quick Start guide gives battery basics, while Appendix C describes how to optimize battery performance in greater detail. To charge the battery, remove the battery plate from Les Paul Standard 2010 Limited's back, place the battery in the external charger (supplied), and plug the supplied AC adapter into the charger. The adapter is an international type that accommodates 100‐240V, 50/60Hz. The charger's LED will shine red when charging, and green when the battery is charged. An additional battery is supplied in the Les Paul Standard 2010 Limited accessory pack; if you need more batteries, they are available from stores such as Radio Shack (part #55029788). 1.1 The Master Control Knob The Les Paul Standard 2010 Limited's four knobs are (going from neck to bridge) neck pickup volume, bridge pickup volume, Master Control Knob (MCK), and tone control. The MCK is a sophisticated “push‐pull” knob with an illuminated interactive display called the Display Matrix. The display shows Les Paul Standard 2010 Limited's status as you select tunings, sounds, and more with the knob. It is your primary way of interacting with Les Paul Standard 2010 Limited's operating system. Pulling the MCK up (furthest from the guitar body) activates it and applies power to Les Paul Standard 2010 Limited.

Gibson LP STD LTD Manual v1.0 Page 7
Pushing down on the MCK (pushing toward the body until it clicks) turns off Les Paul Standard 2010 Limited, and stores the current tuning and sound for recall next time you power‐up. (However, it's possible to specify a custom default tuning for power‐up using setup functions in the Red Bank; see Section 6.2, Function1). When turned off, Les Paul Standard 2010 Limited goes into Les Paul mode, where the guitar electronics are deactivated. In this mode Les Paul Standard 2010 Limited acts and sounds like a standard Les Paul guitar.
1.1.1 The MCK's “Enter” Function The MCK can turn to make selections, but also responds to pressing on the knob's center. This is very much like hitting “Enter” on a computer keyboard, so we refer to pressing on the knob's center as “pushing Enter.” You can rotate the MCK to make various selections, and “enter” your choices in two ways: Some functions require a brief, momentary press on the MCK's Display Matrix, while some less‐used functions require a press longer than one second (but don't press too hard, as this will push the MCK all the way in to the off position). The manual specifies when to use which type of press. 1.1.2 MCK Details The MCK's outer ring of LEDs indicates the MCK's position and when tuning, indicates the status of various strings. MCK positions are identified by symbols and letters.
• Position/String LEDs. These 10 LEDs surround the MCK's edge. After pulling the MCK out, rotating the knob to a particular LED chooses a specific sound, function, or string.
• b# symbol. Rotating the MCK fully counter‐clockwise to accesses this position, which is used often with Red Bank operations.
• Rotating Arrow symbol. The text refers to this symbol as the “Rotating Arrow.” • Guitar symbol. Shows the status of the Piezo pickup, e.g., whether it's available to be blended
in with the magnetic pickup and whether its companion onboard EQ is on or off. This is set in the accompanying Gibson Chameleon Editor software.

Gibson LP STD LTD Manual v1.0 Page 8
• Pickup symbol. This indicates the status of Les Paul Standard 2010 Limited's magnetic pickups—whether they're operating as standard pickups, using coil switching to obtain different sounds, and whether the onboard EQ section is on or off. This is set in the accompanying Gibson Chameleon Editor software.
• Variable color Display Matrix. This provides feedback on several aspects of Les Paul Standard 2010 Limited: For example, it changes color to indicate which Bank is selected, identifies particular parameters, shows the battery charge, and more.
• Peg symbol. The text refers to this symbol as the “Peg.” • | symbol. The text refers to this as the “|” symbol.
1.2 Les Paul Standard 2010 Limited Banks Les Paul Standard 2010 Limited has four operating modes, which you choose with the MCK. Each mode corresponds to color‐coded Bank of MCK settings: Blue (Tuning) Bank. When turned on for the first time, Les Paul Standard 2010 Limited defaults to this bank. The Blue Bank allows selecting standard tuning (e.g., E‐A‐D‐G‐B‐e) as well as any of 10 alternate tunings. The default is the most recently‐selected tuning, unless you've specified a different power‐on default (called the Instant Access Tuning) using the Red Bank's setup functions (Section 6.2, Function 1). The MCK display shows the tuning preset ID associated with the current switch position; leaving the MCK in that position for more than 300ms loads the indicated tuning preset. Selecting a particular tuning sends signals to the RoboHeads that tune the strings automatically. The selected tuning will remain until either changed to a different Blue Bank tuning, or you switch to the Yellow Bank and choose a preset with a different tuning. For more on tuning, see section Chapter 2. Green (Tone) Bank. Here you can select any of 10 guitar sounds by turning the MCK. The default is the sound that was selected prior to powering‐down Les Paul Standard 2010 Limited when you last used it. The MCK display shows the sound preset ID associated with the current switch position; leaving the MCK in that position for more than 200ms loads the indicated sound preset. These presets can be the iconic guitar sounds shipped with Les Paul Standard 2010 Limited, or you can replace them with your own custom sounds by creating new sounds with the Gibson Chameleon Editor (see its dedicated manual) and transferring these to Les Paul Standard 2010 Limited. Note that you can change sound independently of tuning by using the Green Bank to select a sound, and tuning independently of the sound by using the Blue Bank to select a tuning. An additional 11th position, obtained by turning the MCK fully counter‐clockwise, checks the battery charge. Yellow (Preset) Bank. This Bank stores 88 custom user presets, arranged as 8 User Banks of 11 presets. Each preset can contain its own sound, tuning, and preset ID symbol. Les Paul Standard 2010 Limited
Gibson LP STD LTD Manual v1.0 Page 9
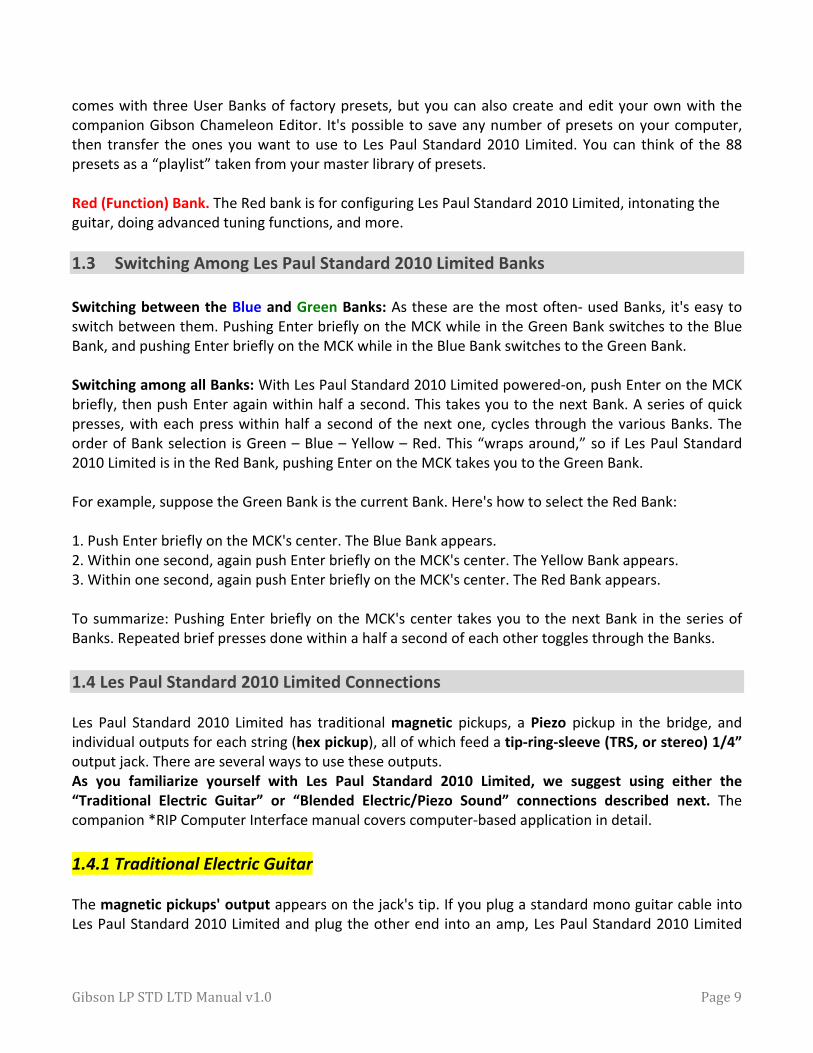
comes with three User Banks of factory presets, but you can also create and edit your own with the companion Gibson Chameleon Editor. It's possible to save any number of presets on your computer, then transfer the ones you want to use to Les Paul Standard 2010 Limited. You can think of the 88 presets as a “playlist” taken from your master library of presets. Red (Function) Bank. The Red bank is for configuring Les Paul Standard 2010 Limited, intonating the guitar, doing advanced tuning functions, and more. 1.3 Switching Among Les Paul Standard 2010 Limited Banks Switching between the Blue and Green Banks: As these are the most often‐ used Banks, it's easy to switch between them. Pushing Enter briefly on the MCK while in the Green Bank switches to the Blue Bank, and pushing Enter briefly on the MCK while in the Blue Bank switches to the Green Bank. Switching among all Banks: With Les Paul Standard 2010 Limited powered‐on, push Enter on the MCK briefly, then push Enter again within half a second. This takes you to the next Bank. A series of quick presses, with each press within half a second of the next one, cycles through the various Banks. The order of Bank selection is Green – Blue – Yellow – Red. This “wraps around,” so if Les Paul Standard 2010 Limited is in the Red Bank, pushing Enter on the MCK takes you to the Green Bank. For example, suppose the Green Bank is the current Bank. Here's how to select the Red Bank: 1. Push Enter briefly on the MCK's center. The Blue Bank appears. 2. Within one second, again push Enter briefly on the MCK's center. The Yellow Bank appears. 3. Within one second, again push Enter briefly on the MCK's center. The Red Bank appears. To summarize: Pushing Enter briefly on the MCK's center takes you to the next Bank in the series of Banks. Repeated brief presses done within a half a second of each other toggles through the Banks. 1.4 Les Paul Standard 2010 Limited Connections Les Paul Standard 2010 Limited has traditional magnetic pickups, a Piezo pickup in the bridge, and individual outputs for each string (hex pickup), all of which feed a tip‐ring‐sleeve (TRS, or stereo) 1/4” output jack. There are several ways to use these outputs. As you familiarize yourself with Les Paul Standard 2010 Limited, we suggest using either the “Traditional Electric Guitar” or “Blended Electric/Piezo Sound” connections described next. The companion *RIP Computer Interface manual covers computer‐based application in detail. 1.4.1 Traditional Electric Guitar The magnetic pickups' output appears on the jack's tip. If you plug a standard mono guitar cable into Les Paul Standard 2010 Limited and plug the other end into an amp, Les Paul Standard 2010 Limited

Gibson LP STD LTD Manual v1.0 Page 10
(even when not powered‐on) acts just like a traditional Les Paul electric guitar. When powered‐on, you can use the Robot Tuning and Chameleon Tone Technology, as well as mix in the Piezo pickup sound. 1.4.2 Blended Electric/Piezo Sound 1. Use a standard guitar cord to connect Les Paul Standard 2010 Limited to your amplifier. 2. Pull the MCK out, tune Les Paul Standard 2010 Limited, and select a sound, as described in the Quick Start guide. 3. When powered‐on, Les Paul Standard 2010 Limited's output carries a mix of the magnetic and Piezo pickup signals, with the balance determined by the blend control (pickup switch toggle). Turn the toggle clockwise for more Piezo sound, or counter‐clockwise for more magnetic sound. Note: There is an option to determine if the Piezo out appears on the tip and/or ring of the stereo cable or neither. See Section 6.2, Functions 2 and 3. 1.4.3 Using the Gibson LP‐Z Low Impedance Output Circuit Les Paul Standard 2010 Limited's output jack is a “combo” type that provides a standard 1/4” guitar output or Gibson's exclusive low‐impedance, balanced output LP‐Z circuit. To activate the LP‐Z output, set the switch (to the left of the output jack) in the down position. The green LED next to the switch will illuminate. Plug the appropriate plug into the Les Paul Standard 2010 Limited's output. For driving a standard amp, use a 1/4” stereo or mono guitar cable. For the LP‐Z output, you will need either a custom length XLR male‐to‐male XLR cable, or use a standard XLR male‐XLR‐female mic cables in conjunction with an XLR male‐to‐male adapter (e.g. Radio Shack part #274‐015). Caution: When plugging the LP‐Z output into a mic input, never turn on the input's phantom power. This may damage the Les Paul Standard 2010 Limited output. 1.4.4 (OPTIONAL) Computer‐Based Systems for Live and Studio Here's an overview to provide a hint of what Les Paul Standard 2010 Limited can do when connected to a computer. For more information on the many possibilities offered by combining Les Paul Standard 2010 Limited with a computer, see the companion *RIP Computer Interface manual.
• For a basic computer‐based live performance setup, load Guitar Rig 4 Pro into a laptop or other computer. This software turns your computer into a “virtual guitar rack” with dozens of

Gibson LP STD LTD Manual v1.0 Page 11
virtual amp and effect options, while the *RIP interface provides an input for Les Paul Standard 2010 Limited along with mono or stereo outputs for your mixer, PA, or active speakers.
• For a computer‐based live performance setup that takes advantage of Les Paul Standard 2010 Limited's eight outputs and individual string processing possibilities, load Ableton Live Lite 8 Gibson Studio Edition into a laptop or other computer. Again, the *RIP provides physical inputs and outputs for the “virtual rack.” All eight Les Paul Standard 2010 Limited signals are available in Ableton Live's eight channels, and you can load plug‐ins like Guitar Rig 4, or the plug‐ins included in Ableton Live, to process these signals (e.g., octave dividers on only the lower strings with magnetic pickups going through an amp emulation, etc.). Live provides the routing and mixing for all these signals, which then go to your amplification system via the *RIP's stereo output.
• For a computer‐based studio setup, *RIP provides an interface between your guitar and computer, sending all guitar outputs through the FireWire connector directly to your computer. Any modern “digital audio workstation” program such as Ableton Live, Cakewalk Sonar, MOTU Digital Performer, Apple Logic, etc. will recognize these outputs, and allow you to route, process, mix, and record them within the audio software you're using (called the “host program”). Because the *RIP also acts as a high‐quality computer interface/sound card, your host program will be able to send its output through the FireWire cable to the *RIP. From there, the *RIP's stereo output jacks can patch directly to a set of active monitor speakers (or to a mixer, headphone distribution amp, etc.).
Chapter 2: Les Paul Standard 2010 Limited Robot Tuning Functions To start playing, pull the MCK out. Les Paul Standard 2010 Limited defaults to the most recently‐selected tuning and sound; out of the box, this is standard E‐A‐D‐G‐B‐e tuning and sound 1. The MCK Display Matrix shows the letter “S” to represent Standard tuning. The default tuning is called the Instant Access Tuning (the default sound is called the Instant Access Sound). You can change the default Instant Access Tuning (for example, an alternate tuning) rather than the most recently‐selected tuning and even the calibration if you want “A” to be something other than 440Hz, by using the Red Bank's setup functions (see Chapter 6). 2.0 Tuning Les Paul Standard 2010 Limited to the Instant Access Tuning Once the Les Paul Standard 2010 Limited is in default mode from pulling the MCK out, here's how to tune to the selected Instant Access Tuning.
1. Strum all six strings normally at the neck pickup position—not too hard or soft. Do not fret any strings, or touch the neck, while tuning.

Gibson LP STD LTD Manual v1.0 Page 12
2. The RoboHeads will turn robotically, and the MCK's String LEDs will shine various colors to indicate tuning status. Here's what the colors mean: ● Red: String not in tune, or not yet tuned ● Yellow: RoboHeads are turning to tune the string. If the corresponding RoboHead is not turning when its LED flashes yellow, there is a physical or electrical problem. ● Green: Individual string in tune ● All LEDs green: Tuning is complete ● White: Short circuit detected. Check if a string touches the tail piece, the bridge, a fret, or another string; make sure that strings are cut close to the posts, and that all strings are in the bridge saddle's center. If any part of a string touches something metallic that's not in the normal string path, that string cannot be tuned. 3. When the guitar is in tune, all LEDs will turn off and Les Paul Standard 2010 Limited will switch to the Green Bank so you can select a Chameleon tone. If all the LEDs don't turn off, strum all six strings again. This may be necessary if the guitar is considerably out of tune. It should take only one or two strums for Les Paul Standard 2010 Limited to tune itself; pause briefly (2‐3 seconds) between strums.
Notes:
● Turning the MCK during tuning cancels that tuning. ● Pushing Enter while tuning switches Les Paul Standard 2010 Limited to the Green Bank. ● If you don't want to tune Les Paul Standard 2010 Limited but go immediately to select a sound, instead of strumming strings to initiate the tuning process, push Enter briefly to switch to the Green Bank.
2.1 Instant Access Alternate Tuning To choose a tuning other than the default Instant Access Tuning:
1. Pull the MCK out. The Blue Bank appears by default. 2. Instead of strumming the strings, turn the MCK to the position that represents the tuning you want (refer to the following chart). 3. After waiting more than 300ms so that the tuning can load, strum the strings, and the RoboHeads will tune Les Paul Standard 2010 Limited to the pitches required for the selected alternate tuning. 4. The string colors indicate the tuning status, as described in the previous section. 5. When Les Paul Standard 2010 Limited is tuned, the string LEDs will all light solid green, then Les Paul Standard 2010 Limited will switch automatically to the Green Bank.
MCK position Name Tuning (low string to high) Peg Standard Tuning E A D G B e i Dropped D D A D G B e C Double Dropped D D A D G B D E Open E Major E B E G# B e A Open A Major E A E A C# e

Gibson LP STD LTD Manual v1.0 Page 13
D Open D Major D A D F# A D G Open G Major D G D G B D B E Flat Tuning Eb Ab Db Gb Bb eb e Open E Minor E B E G B E
Arrow Low D D G C F A D Circle DADGAD DADGAD
MCK position Name Tuning (low string to high)
2.2 Manual RoboHead Tuning You can tune the Les Paul Standard 2010 Limited’s RoboHeads by hand as an alternative to using Robot tuning technology. Caution: Never use a manual or mechanical string winding tool, or attempt to tune the RoboHeads manually while they are operating robotically. Either one of these operations can permanently damage the RoboHeads. Unlike conventional tuning keys, RoboHeads all turn in the same direction. The RoboHead tuner posts have locking nuts to secure the end of each string during tuning operations. Robot technology includes special options for changing strings (see Sections 5.6, 5.7, and 5.8), as this is much faster than changing strings manually. Gibson strongly advises using these functions when changing strings not only because it's faster and more convenient, but because they minimize RoboHead wear.
Chapter 3: Les Paul Standard 2010 Limited Chameleon Tone Technology 3.0 About Chameleon Tone Technology Les Paul Standard 2010 Limited can offer a huge variety of guitar sounds, from traditional to groundbreaking, thanks to Chameleon Tone Technology. Each sound can have a unique combination of the following sound shaping options, all of which can be edited with the companion Gibson Chameleon Editor software:
● Magnetic pickup coil settings (single, humbucking, parallel, series, or out‐of‐phase) ● Magnetic pickup 4‐stage parametric equalizer settings (the EQ settings affect both pickups) ● Magnetic pickup EQ bypass/active ● Piezo pickup 4‐stage parametric equalizer settings ● Piezo pickup EQ bypass/active ● Piezo pickup status (on/off) ● Sound ID (identifies the sound but doesn't affect tone)

Gibson LP STD LTD Manual v1.0 Page 14
Because Les Paul Standard 2010 Limited doesn't use digital modeling, the signal path is all analog. Furthermore, the Piezo pickup output can supplement the magnetic pickups for an acoustic type of sound. Note: ● Les Paul Standard 2010 Limited remembers the most recently‐stored Chameleon magnetic pickup coil configuration, even with no power. This is because Les Paul Standard 2010 Limited's Chameleon Tone technology uses special latching relays that “remember” their most recent state. 3.1 Choosing Chameleon Tones 1. Pull the MCK out, choose a tuning Preset if desired or use the Instant Access Tuning, and tune the guitar as described in Chapter 2. When tuning is complete, Les Paul Standard 2010 Limited will switch to the Green Bank for Chameleon Tone selection. 2. To choose a different Chameleon Tone setting, turn the MCK to the position that represents the sound you want (refer to the following chart). After the MCK stays in a position for more than 200ms, that sound will be loaded. Notes:
● In this chart, “PU” refers to the recommended pickup (N = neck, B = bridge, M = middle position, P = piezo) to obtain the specified sound. However, choosing different pickups will give other sounds that are equally useful. ● To obtain these sounds, the tone controls should be fully clockwise, and the piezo pickup should not be blended in (except for Position A).
MCK Pos
Tone PU Comments
1 LP 1958 N ’58 Les Paul character 2 LP 1955 N ’55 Les Paul 3 LP 1955 BM ’55 Les Paul character with Bridge or Middle pickup 4 LP Rhythm B ‘58/’60 Les Paul character, good for ‘80s heavy rhythm5 335 N Also try middle position; good 335 character 6 Funky N “Stratified” funky sound 7 Funky B “Stratified” sharp rhythm sound 8 Twang B Twangy “Telecasted” sound 9 Twang N Carved midrange, smooth and transparent highs A Acoustic N Set piezo level 25‐30%, neck volume to taste Circle Battery ‐ Green = full, yellow = mid, red = low
MCK Pos Tone PU Comments
3.2 Battery Charge Indicator

Gibson LP STD LTD Manual v1.0 Page 15
Rotating the MCK fully counter‐clockwise while in the Green Bank brings up the battery charge indicator. This shows two lines of green dots, two lines of yellow dots, and two lines of red dots. • • • • • • • • • • • • • • • • • • • • • • • • If all lines are lit, the battery is at full charge. Fewer lines indicate a more depleted battery. Here's how to interpret what the lines are telling you.
● 1 or 2 red bars = low charge ● 2 red bars plus 1 or 2 yellow bars = medium charge. Charging is not essential, but will improve performance because all six RoboHeads will be activated only if the charge is 50% or above. With charges below 50%, the RoboHeads will take longer to tune because all six can't be active at once. ● 2 red bars, 2 yellow bars, one or 2 green bars = high charge (recommended for best performance)
3.3 About Les Paul Mode In addition to the Chameleon Tone possibilities, there is also a mode that causes Les Paul Standard 2010 Limited's pickups to work like a Les Paul: The bridge pickup coils are wired in series and humbucking, while the neck pickup uses the north coil only (single coil). Les Paul Standard 2010 Limited enters this mode automatically when turned off. 3.3.1 About the Wiring in Les Paul Controls The volume controls in a classic Les Paul interact with each other when the pickup toggle is in the middle position (i.e., selecting both pickups). Due to this interaction, if either the neck or bridge volume control is at “0” (all the way down), the signal is grounded and you will not hear any output— regardless of the other control's setting. If you want to change the mix of the magnetic pickups with the pickup toggle in the middle position, start with both magnetic pickup volume controls on “5” (up halfway), then adjust to taste. 3.4 Other Factors Affecting Chameleon Tone There are very significant differences in each Les Paul Standard 2010 Limited Chameleon Tone setting. The tones were worked on for some time in studio settings to match vintage guitars. However, note that a guitar's tone results from a combination of factors. For example, putting a single coil in a guitar does not necessarily make it sound like the classic guitars that use single coil pickups. The four main factors influencing tone are:

Gibson LP STD LTD Manual v1.0 Page 16
• The position of the transducer (pickup) between the nut and bridge • The pickup characteristics (coil windings, wire, magnets, etc.) • Guitar construction details, including wood type • Post‐processing of the guitar (e.g., the amp you use, or adding effects in the studio)
The guitar construction imparts a characteristic tone by altering the vibrating string's frequency response. It's possible to re‐create this characteristic frequency curve by using very precise equalizer circuits; Les Paul Standard 2010 Limited does this primarily by using two 4‐band parametric equalizers to mold the frequency response. (The reason for using analog technology is that digital processing requires converting analog signals into digital streams, and then converting back to analog. This introduces a delay that players often find disconcerting.) The placement of the pick up coils and their construction allows Les Paul Standard 2010 Limited to reproduce phase and other tone modifying affects. Finally, remember that the classic Chameleon sounds require that no Piezo sound is blended in, and the tone controls should be up full. But with so many options available to change tone in addition to the Chameleon Tones, it's possible to stray from the original, classic sounds. This makes it easy to create useful variations on these classic sounds for even more tonal possibilities, but if Les Paul Standard 2010 Limited doesn't sound quite like the guitar you're trying to emulate, make sure you have the pickup switch, Piezo blend, and tone controls set properly. Also, remember that any post processing you use (i.e., anything the modifies the tone after the signal leaves the guitar, like your amplifier) impacts the sound. Some “classic” guitar sounds result from combining the guitar sound with a particular amplifier —for example, a Les Paul going through a British stack will sound very different compared to going through an American combo amp. The bottom line is that each Chameleon Tone setting is very different, and factors other than the guitar itself can change these sounds even further.
Chapter 4: The Yellow Bank, User Banks, and User Chapter 4: The Yellow Bank, User Banks, and User Presets Presets The Yellow Bank consists of several different elements.
● The Yellow Bank contains eight User Banks. You select a particular User Bank in the Red (Function) Bank (Section 5.9). ● Each User Bank can hold 11 presets, so given that there are eight User Banks, the Yellow Bank can hold a total of 88 presets. ● You can combine a custom sound and tuning within a single preset.
The Gibson Chameleon Editor makes it easy to create, store, back up, and share custom presets for the Yellow Bank (as well as the Blue and Green Banks). If you don't have access to a computer, it is possible to create presets for the Yellow Bank (see Section 5.4) but the process is more tedious, and doesn't allow access to several useful functions. Conceptually, many Les Paul Standard 2010 Limited owners treat the Yellow Bank as a “playlist” of presets for live performance. For example, the first Yellow Bank might contain presets for the first and
Gibson LP STD LTD Manual v1.0 Page 17
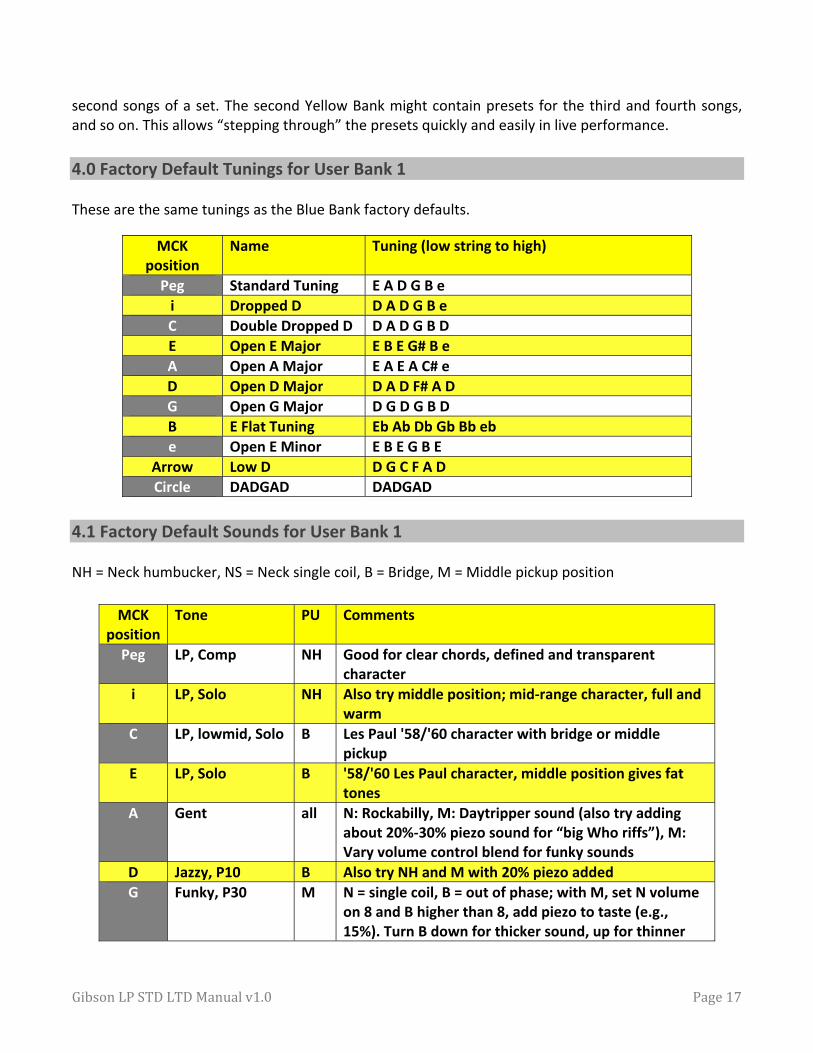
second songs of a set. The second Yellow Bank might contain presets for the third and fourth songs, and so on. This allows “stepping through” the presets quickly and easily in live performance. 4.0 Factory Default Tunings for User Bank 1 These are the same tunings as the Blue Bank factory defaults.
MCK position
Name Tuning (low string to high)
Peg Standard Tuning E A D G B e i Dropped D D A D G B e C Double Dropped D D A D G B D E Open E Major E B E G# B e A Open A Major E A E A C# e D Open D Major D A D F# A D G Open G Major D G D G B D B E Flat Tuning Eb Ab Db Gb Bb eb e Open E Minor E B E G B E
Arrow Low D D G C F A D Circle DADGAD DADGAD
4.1 Factory Default Sounds for User Bank 1 NH = Neck humbucker, NS = Neck single coil, B = Bridge, M = Middle pickup position
MCK position
Tone PU Comments
Peg LP, Comp NH Good for clear chords, defined and transparent character
i LP, Solo NH Also try middle position; mid‐range character, full and warm
C LP, lowmid, Solo B Les Paul '58/'60 character with bridge or middle pickup
E LP, Solo B '58/'60 Les Paul character, middle position gives fat tones
A Gent all N: Rockabilly, M: Daytripper sound (also try adding about 20%‐30% piezo sound for “big Who riffs”), M: Vary volume control blend for funky sounds
D Jazzy, P10 B Also try NH and M with 20% piezo added G Funky, P30 M N = single coil, B = out of phase; with M, set N volume
on 8 and B higher than 8, add piezo to taste (e.g., 15%). Turn B down for thicker sound, up for thinner

Gibson LP STD LTD Manual v1.0 Page 18
sound. B Twang, Smooth NS Rich, jazzy “Telecasted” sound e Twang, Sharp NS Sharp attack
Arrow Acoustic, P10‐30 NS Set piezo level 25‐30%, neck volume to taste Circle Reso Slide M B up full, N volume 5, adjust B level for desired
character. 4.2 Factory Default Sounds for User Bank 2
MCK position Tone Comments Peg LS Original Dark Fire sound i Metal Original Dark Fire sound C Funky Original Dark Fire sound E Gibson Original Dark Fire sound A Twang Original Dark Fire sound D Rock Original Dark Fire sound G Acoustic Original Dark Fire sound B Blues Original Dark Fire sound
e Gibson Original Dark Fire sound Arrow Gibson Original Dark Fire sound Circle Gibson Original Dark Fire sound
4.3 Factory Default Sounds for User Bank 3
MCK position Tone Comments Peg 335 By Chris & Peter Weihe, created with Dark Fire i Funky By Chris & Peter Weihe, created with Dark Fire C LP 1955 P90 By Chris & Peter Weihe, created with Dark Fire E LP 1958 By Chris & Peter Weihe, created with Dark Fire A Acoustic Original Dark Fire sound D Twang Original Dark Fire sound G Blues Original Dark Fire sound B Rock Original Dark Fire sound e L5 Original Dark Fire sound
Arrow Metal Original Dark Fire sound Circle Gibson Original Dark Fire sound
Chapter 5: Red Bank general Functions

Gibson LP STD LTD Manual v1.0 Page 19
General Functions Les Paul Standard 2010 Limited defaults to settings that are well‐suited to the vast majority of players. However, it is possible to change many of these defaults via Function Mode (Red Bank). Function Mode is also where you can change strings easily, intonate your strings, activate a chromatic tuner, and more. The general procedure is to enter Function Mode, choose the MCK position that corresponds to a particular function, push Enter for more than one second, then edit the selected function. 5.0 Entering Function Mode ● If Les Paul Standard 2010 Limited is not powered‐up, pull the MCK out and push Enter four times in quick succession. ● If Les Paul Standard 2010 Limited is already in a Bank other than the Red Bank, push Enter in quick succession until the Red Bank appears. 5.1 Selecting a Function Once Les Paul Standard 2010 Limited is in Function Mode, rotate the MCK to choose the position that corresponds to a particular function. Upon selecting a position, the Display Matrix will show a red letter for the function ID, then scroll through a series of white letters that give an abbreviated function name. The following chart shows the details. MC Pos. ID Abbreviation Function MCK Pos. ID Abbreviation Function Peg T TUNER Chromatic tuner function I I INT Adjust LP STD 2010 Limited intonation C C CUS Create custom tuning E R REF Sets reference pitch (e.g., A = 440) A Up arrow UP Tune replacement string(s) up to pitch D Down arrow DWN Tune string(s) down for removal G U USR Access user banks The following describes the various functions. 5.2 Chromatic Tuner (Position = Peg, ID = T) The chromatic tuner detects a plucked string and displays the nearest note and frequency offset compared to that note.

Gibson LP STD LTD Manual v1.0 Page 20
The center display can define the note in one of two modes:
● Note Mode: Shows the note's letter name ● Frequency Mode: Shows the note's frequency in Hertz. The frequency's numbers scroll in sequence, accurate to one place to the right of the decimal point. In other words, if you fret A = 440, the display will show 4‐4‐0‐.‐0 The outer LEDs can show the offset in two different modes: ● Offset Mode: The length of the “bar” made up of multiple LEDs indicates the relative offset, with a longer bar indicating more offset. ● Strobe Mode: A rotating pattern shows the relative offset, with a faster rotation indicating more offset.
In either case, the color of the outer ring of LEDs provides a rough indication of pitch.
● Red: Pitch is flat ● Yellow: Pitch is sharp ● Green: Pitch is correct
For example, if in strobe mode the pattern rotates slowly and the LEDs are red, then the string is slightly flat. 5.2.1 Tuner Step‐by‐Step
1. While in the Red Bank, rotate the MCK to the Peg position. 2. Push Enter for more than one second 3. Push Enter briefly to toggle between Offset Mode (display shows “O”) or Strobe Mode (display shows (“S”). This preference is stored when you turn off Les Paul Standard 2010 Limited. 4. Rotate the MCK fully counter‐clockwise. 5. Push Enter briefly to toggle between Note Mode (display shows “N”) or Frequency Mode (display shows “F”). This setting is not stored; Note Name is the default. 6. Pluck a string (open or fretted) and observe the readout. Continue to pluck strings as needed. 7. To exit tuner mode, rotate the MCK to any position other than fully clockwise or fully counter‐clockwise, and push Enter briefly.
5.3 Intonation (Position = I, ID = I) When strings aren't properly intonated the octave (12th fret) is off‐pitch compared to the open string. When correctly intonated, the octave is exactly one octave above the open string. Les Paul Standard 2010 Limited's intonation function makes intonating guitar strings easy. Each string has an intonation screw on the part of the bridge that faces away from the pickups. Adjusting these screws clockwise or counterclockwise adjusts the intonation; Les Paul Standard 2010 Limited will tell you exactly how much you need to turn these screws, and in which direction. Notes:

Gibson LP STD LTD Manual v1.0 Page 21
● You will need a small screwdriver to adjust the bridge's saddle adjustment screws. ● Be careful when fretting strings. You can easily change a fretted string's pitch by up to 10 cents by fretting with more or less force, and the position where you press down on the string affects pitch. For best results, use a consistent force and position. Also, during intonation you may notice that it takes a little bit longer to detect the pitch. This is normal, as Les Paul Standard 2010 Limited switches automatically to a special high‐accuracy mode.
5.3.1 Intonation Step‐by‐Step
1. In the Blue or Yellow Bank, choose a tuning. For general intonation, Gibson recommends using the standard tuning. However, using alternate tunings can throw off intonation. If you want perfect intonation for an alternate tuning, select that tuning prior to doing intonation. 2. Choose the Red Bank by initiating a series of brief, successive pushes on Enter until the Red Bank appears. 3. While in the Red Bank, rotate the MCK to the | position. 4. Push Enter for more than one second; all string LEDs change to red. 5. Pluck the string you want to intonate. 6. When tuning is complete, the corresponding LED changes color to Yellow. 7. Wait for about five seconds, then fret the same string at the 12th fret and pluck the string again. 8. The system will measure the pitch, and display the needed changes on the MCK. 9. Observe whether the rotating pattern goes clockwise and green or counterclockwise and red, as this indicates whether the bridge intonation screw needs to be turned clockwise or counterclockwise respectively. Also observe the green number in the Display Matrix's center, as this number shows how many half‐turns the screw should be turned. 10. Turn the screw as indicated, then repeat the procedure starting at step 5. If the corresponding string LED turns yellow, continue with the intonation procedure. If the corresponding string LED turns blue, the string is intonated properly. 11. Proceed to adjust intonation on the other strings. When all strings are intonated, the corresponding string LEDs turn blue, and the MCK exits intonation mode. If you want to exit before intonating all strings, simply rotate the MCK.
5.4 Custom Tuning (Position = C, ID = C) The easiest way to create custom tunings is with the Gibson Chameleon Editor. However, if you do not have access to a computer, it is possible to create custom tunings within Les Paul Standard 2010 Limited itself. 5.4.1 Custom Tuning Preset Creation Step‐by‐Step Select a sound from the Green Bank. This is the sound that will be associated with your custom tuning.
1. Tune strings to the desired pitches.

Gibson LP STD LTD Manual v1.0 Page 22
2. Choose the Red Bank by initiating a series of brief, successive pushes on Enter (each press should be within a half‐second of the previous press) until the Red Bank appears. 3. While in the Red Bank, rotate the MCK to the C position. 4. Push Enter for more than one second; all string LEDs change to red to indicate the system is ready to determine the string pitches. 5. Pluck each string individually to ensure the most accurate pitch detection. After the pitch has been detected, its associated LED will turn green. Damp the string you plucked, then move on to the next string. 6. After detecting all string pitches, Les Paul Standard 2010 Limited clears all string LEDs and switches automatically to the first User Bank of the Yellow Bank. 7. An outer LED will glow yellow to indicate where the custom tuning preset will be stored. If you want to save the custom tuning to a different preset, rotate the MCK to a different position. 8. Press Enter briefly to store the custom tuning in the selected preset (pressing Enter for more than one second exits the custom tuning function without storing the preset.). The custom tuning, and the Green Bank sound you selected in step 1, are now stored in this preset. The allowed string pitch ranges (with frequencies rounded off to the nearest Hertz) are:
String Lowest Pitch Highest Pitch
String Lowest Pitch Highest Pitch E A1 (55Hz) Ab2 (104Hz) A D2 (73Hz) Db3 (139Hz) D G2 (97Hz) Gb3 (185Hz) G C3 (130Hz) B3 (247Hz) B E3 (164Hz) Eb4 (312Hz) E A3 (220Hz) Ab4 (416Hz)
5.5 Setting a Reference Pitch (Position = E, ID = R) Although the most common tuning reference is A=440Hz, it's not the only one (e.g., some orchestras tune to A=442Hz). Or a piano may be in tune with itself, but not tuned exactly to A=440Hz. For these situations, Les Paul Standard 2010 Limited can tune to any arbitrary reference. The basic process is to tune Les Paul Standard 2010 Limited to the desired tuning, adjust one string to the reference pitch, then instruct Les Paul Standard 2010 Limited to tune the remaining strings relative to the reference string. 5.5.1 Setting a Reference Pitch Step‐by‐Step
1. Choose one of the stored tunings (e.g., Standard tuning) and tune Les Paul Standard 2010 Limited to it.

Gibson LP STD LTD Manual v1.0 Page 23
2. Tune one string (we'll call it the “reference string”) to the desired reference pitch. For example, if you're tuning to a piano that's in tune with itself but is overall an 1/8th of a tone flat, tune the reference string to the piano so that the reference string is 1/8th tone flat. 3. Choose the Red Bank by initiating a series of brief, successive pushes on Enter until the Red Bank appears. 4. While in the Red Bank, rotate the MCK to the E position. 5. Push Enter for more than one second; the outer E LED shines red. 6. All string LEDs change to red to indicate that the system is ready to determine the reference string pitch, and the Peg LED shines magenta. 7. Pluck the reference string. Its corresponding LED turns green after Les Paul Standard 2010 Limited has analyzed the pitch. 8. Pluck each remaining string individually to ensure the most accurate pitch detection. After a string's pitch is properly tuned, its associated LED will turn green. Damp the string you plucked, then move on to the next string until all strings are tuned to the new reference. 9. When all strings are in tune, Les Paul Standard 2010 Limited automatically switches back to Function Select mode in the Red Bank.
Once completed, the reference tuning stays active until the system is turned off or you select a different tuning. Notes:
● During pitch detection, Les Paul Standard 2010 Limited checks that the resulting tuning is within the allowed pitch ranges, as specified in section 5.4.1 on Custom Tuning Preset Creation. ● If a reference tuning is still active when selecting the same tuning for retuning, the display will show the preset ID briefly in red when entering the tuning function, then change to blue. This reminds you that Les Paul Standard 2010 Limited is set to a specific reference tuning.
5.6 Replacing Strings: General Guidelines Because each key turns extremely slowly when tuned by hand, Les Paul Standard 2010 Limited's Red Bank includes two modes to speed up, and automate, the string‐changing process. Reminder: Do not use manual or mechanically‐powered “string winder” tools. The two modes are:
• Single String Up Mode (for replacing individual strings, or replacing strings one at a time after removing all strings)
• String Down Mode (for removing all strings at the same time) You may want to “break in” your strings by tugging gently on them, and also perform multiple tunings until they've stabilized—just like changing strings on a conventional guitar. Also, use strings with ends that fit completely within the bridge end holes and do not short out to the bridge. For best results when changing strings, please follow these steps carefully.
1. Manually rotate each tuner until the hole in the string binding post provides a straight path for threading each new string.

Gibson LP STD LTD Manual v1.0 Page 24
2. Guide each string through your tailpiece, over the center of each saddle (where contact is essential), through the nut slot, then straight through the post hole. 3. Pull the string slightly to take up any slack, then tighten down the post hole's locking nut. 4. Cut the extra length off each string close to the post; if one string contacts another, the system may function improperly. Also, do not use any strings which have frayed wraps at the ball end (Les Paul Standard 2010 Limited will not function if any part of the string touches beyond its insulated holder), and don't let steel bottleneck slides contact the strings during tuning operations. 5. Manually turn each tuning peg to tighten the string tension—just enough for the Piezo bridge to accurately "read" the string pitch. 6. Let Les Paul Standard 2010 Limited take care of the rest, as we'll find out next.
5.7 All Strings Down Mode (Position = D, ID = Down Arrow) When changing an entire set of strings, String Down Mode causes all RoboHeads to de‐tension all strings at the same time so that you can remove them all. 5.7.1 Detuning All Strings Step‐by‐Step
1. Choose the Red Bank by initiating a series of brief, successive pushes on Enter until the Red Bank appears. 2. While in the Red Bank, rotate the MCK to the D position. 3. Push Enter for more than one second; the outer E LED shines red. 4. All Les Paul Standard 2010 Limited strings are tuned down in pairs, until either the user leaves the String Down function by turning the MCK, or until a short circuit occurs due to a detuned string touching another string.
5.8 Single String Up Mode (Position = A, ID = Up Arrow) This mode is useful when replacing all strings after the All Strings Down function, or replacing a broken string. Caution: Single String Up Mode does not target any pitch but simply puts tension on the string. Do not press the MCK too many times in Step (5) below, or the string could snap from over‐tightening. Two or at most three presses should put enough tension on the new string for it to tune with standard tuning operations. Also, remember that no tuning functions work if any portion of the string shorts to the bridge base or adjacent strings. 5.8.1 Tuning Up Strings Step‐by‐Step
1. Choose the Red Bank by initiating a series of brief, successive pushes on Enter until the Red Bank appears.

Gibson LP STD LTD Manual v1.0 Page 25
2. While in the Red Bank, rotate the MCK to the A position. 3. Push Enter for more than one second; the outer string LEDs will shine red. 4. Rotate the MCK to the string position corresponding to the string you want to tune up. The string LED will shine blue. 5. Push Enter briefly on the MCK, and the string will be tuned up in pitch by approximately five semitones. 6. If necessary, tune up other strings as well. 7. When the strings have some degree of tension on them, push Enter for more than one second to exit single string up mode. 8. To choose a tuning for finalizing the tuning process, select the Blue or Yellow Bank (whichever has the desired tuning) by initiating a series of brief, successive pushes on Enter until the Blue or Yellow Bank appears. 9. Tune Les Paul Standard 2010 Limited normally.
Note:
● If a string is very loose, it may short out to a different string, or a different RoboHead tuner. The MCK will advise you of this condition by showing the string LED in white. Tune the string up manually until it no longer shorts out, then proceed as described above.
5.9 Yellow Bank User Bank Selection (Position = G, ID = U) The Yellow Bank has eight User Banks, each of which has 11 presets. When you select the Yellow Bank, it defaults to whatever User Bank has been selected using this function (if no User Bank has ever been selected, the Yellow Bank defaults to User Bank 1). 5.9.1 Selecting a Yellow Bank User Bank Step‐by‐Step
1. Choose the Red Bank by initiating a series of brief, successive pushes on Enter until the Red Bank appears. 2. While in the Red Bank, rotate the MCK to the G position. 3. Push Enter for more than one second; the Display Matrix shows the currently selected User Bank in yellow. 4. Rotate the MCK to select the desired User Bank (1‐8). The outer LED that corresponds to the bank you've selected will shine blue. If you turn the MCK to an invalid position (i.e., above 8), the Display Matrix shows “X.” 5. After selecting the desired User Bank, push Enter briefly to activate the User Bank. The Display Matrix shows the User Bank number in green briefly before exiting to the Red Bank. Now when you select the Yellow Bank, the outer LED that corresponds to the selected User Bank will shine yellow, and remain selected until you repeat the above procedure to select a different User Bank.
Chapter 6: Red Bank Setup Functions

Gibson LP STD LTD Manual v1.0 Page 26
The setup menu allows access to setup parameters and functions that control the system behavior. 6.0 Entering Function Mode
● If Les Paul Standard 2010 Limited is not powered‐up, pull the MCK out and push Enter four times briefly, in quick succession. Each press must be within a half‐second of the previous press. ● If Les Paul Standard 2010 Limited is already in a Bank other than the Red Bank, push Enter briefly in quick succession until the Red Bank appears.
6.1 Selecting Setup Mode
1. Once Les Paul Standard 2010 Limited is in the Red Bank, rotate the MCK fully counter‐clockwise to the b# position. The Display Matrix shows a filled‐in circle. 2. Push Enter for longer than one second; the Display Matrix shows a while “enter” symbol (an arrow with a right‐angle tail). 3. Push Enter again for longer than one second. The Display Matrix now shows a cyan enter symbol 4. To change a setup parameter, you first need to enter its ID number, and then the value. Enter ID numbers sequentially by turning the MCK to the first digit and pushing Enter briefly. If the ID number has two digits, rotate the MCK to the next digit and push Enter briefly. If the ID number has three digits, rotate the MCK again to the third digit, and push Enter briefly. When you press Enter after selecting a digit, the number in the Display Matrix flashes red briefly for confirmation. 5. After entering the ID number, turn the MCK fully counterclockwise to the Enter position (cyan arrow with right‐angle tail) and push Enter briefly. The MCK will show the entered ID number, then a question mark to indicate that you can now enter the parameter value. 6. Enter the parameter value the same way as you entered the setup function ID: Rotate the MCK to the desired number, and push Enter briefly (repeat for multi‐digit values). After pushing Enter, the number in the Display Matrix will flash red for confirmation. 7. After entering the value, turn the MCK fully counter‐clockwise to the Enter position (cyan arrow with right‐angle tail) and push Enter briefly. The Display Matrix will show the entered parameter value, then flash all outer LEDs green to confirm that the value has been accepted. 8. Exit the Setup menu by pushing Enter for more than one second.
The following set of tables shows the various user‐editable Functions available in Function Mode, but please notes the following important points. Note 1: The function's “clickstream” shown in each chart abbreviates the MCK operations needed to edit the function. To save space and text:
● It's assumed you've already completed steps 1‐3 under Selecting Setup Mode. ● The § symbol means, “rotate the MCK fully counter‐clockwise then push Enter briefly.”

Gibson LP STD LTD Manual v1.0 Page 27
Example: 1 § 0 § means “Enter 1 to specify the function ID, rotate the MCK fully counterclockwise then push Enter briefly, enter 0 to specify the parameter value, then rotate the MCK fully counter‐clockwise and push Enter momentarily.”
Note 2: Some functions are “on/off” types (value of 0 or 1), while some have a range of values. For example, Function 21's parameter value can range from 15 to 225. In this case the parameter value is shown as a range, e.g., 15‐225. Note 3: “Reset” functions have two parameter value options: “Y” for Yes (this is similar to when a PC asks “Are You Sure?”), and “N” for No. To proceed with the reset, push Enter briefly while the Display Matrix shows “Y,” then rotate the MCK fully counterclockwise and push Enter briefly as in Step 7 above. 6.2 Available Functions and Values Function 1 Instant Access function: Controls startup behavior Default = 1Value Result Clickstream0 Starts up in Chameleon (sound/Green Bank) mode 1 § 0 §1 Starts up with last completed tuning 1 § 1 §2 through12 Starts up with corresponding Tune mode (Blue Bank) preset 1 § 2‐12 § Function 2 Piezo out mono signal on tip: Set up Piezo out signal Default = 1Value Result Clickstream0 No Piezo out signal on tip when Piezo pickup is switched on 2 § 0 §1 Piezo out signal routed to tip when Piezo pickup is switched on 2 § 1 §Note: This relates only to Piezo Out Mono where all six strings are mixed. Piezo Out Hex is never routed to the tip. Function 3 Piezo out mono signal on ring: Set up Piezo out signal Default = 1Value Result Clickstream0 No Piezo out signal on ring when Piezo pickup is switched on 3 § 0 §1 Piezo out signal routed to ring when Piezo pickup is switched on 3 § 1 §Note: This relates only to Piezo Out Mono where all six strings are mixed. Piezo Out Hex is never routed to the tip. Function 4 Inactivity timeout: Determines required inactivity time before shutdown Default = 10Value Result Clickstream1 through 255 Sets required inactvity time before shutdown (in minutes) 4 § 1‐255 § Function 10 Tuning precision: Sets up tuning precision and performance Default = 5Value Result Clickstream0 to 8 Trades off tuning speed for accuracy. 0 = least accurate, 8 = most accurate 10 § 0‐9 §Note: 0 gives fastest tuning with 2.5 cent accuracy, 8 gives slowest tuning with 0.2 cent accuracy Function 11 Runtime correction: Set up RoboHead runtime correction Default = 1Value Result Clickstream0 Turns off runtime correction (not recommended) 11 § 0 §1 Monitoring RoboHeads generates correction data for different string gauges 11 § 1 §Note: It takes up to 10 tunings to match the RoboHead movement to a specific string gauge

Gibson LP STD LTD Manual v1.0 Page 28
Function 12 E‐Function correction: Compensates for different strum levels when tuning Default = 1Value Result Clickstream0 Switches off compensation to give an extremely slight speed increase when tuning 12 § 0 §1 Switches compensation on to allow a wider variation in strum levels 12 § 1 §Note: When set to 0, you need to strum the strings gently during tuning Function 13 Tuning mute: Disables audio output when RoboHeads are tuning Default = 1Value Result Clickstream0 You hear the string pitches change during the tuning process 13 § 0 §1 When the RoboHeads are tuning, the audio output is muted 13 § 1 §Note: A setting of zero can produce interesting sounds as the strings tune themselves Function 14 Tune count: Have tuning process happen once, or repeat Default = 1Value Result Clickstream0 Tunes once 14 § 0 §2 or 3 Tuning process restarts one or two more times after first tuning is complete 14 § 2‐3 §Note: This function is intended for very low tunings where two tunings might be necessary to reach proper pitch. Function 15 Global calibration: Sets global calibration for all presets Default = 4400Value Result Clickstream4440 Sets A = 440.0 Hz as calibration standard 15 § 4§4§0§0 §xxxx “xxxx” can be a value from 4300 (430Hz) to 4499 (449.9Hz) 15 § x§x§x§x §Note: Resolution is 0.1Hz so you need to enter four numbers Function 16 Chromatic tuner mute: Mutes audio when using chromatic tuner Default = 1Value Result Clickstream0 Audio is not muted when using the chromatic tuner 16 § 0 §1 Audio is muted when using the chromatic tuner 16 § 1 §1 Function 17 Clipping correction Default = 1Value Result Clickstream0 Clipping correction is disabled (not recommended) 17 § 0 §1 Enables clipping correction to improve E‐function correction accuracy 17 § 1 §Note: Deviations in the signal strength of individual piezo pickups can influence the precision of the E‐function correction.Enabling clipping correction minimizes this error by monitoring the signal strength over time (specifically the time a string is clipping), then using the results to improve the E‐function correction. Function 18 Neck tension correction Default = 1Value Result Clickstream0 Neck tension correction is turned off 17 § 0 §1 Neck tension correction is turned on 17 § 1 §Note: Changing a single string's pitch will alter the neck tension, and thus influence the pitch of other strings. With this option activated, the expected influence of changing the pitch of one string is calculated for all other strings. If the accumulated changes for a string already considered in tune exceed a certain threshold (1 cent with highest sensitivity), the tuning process for this string restarts. Example: Retuning all strings in most cases will result in changes equal to or less than 1 cent per string. This will not have a noticeable effect on neck tension, so all strings will only be tuned once. If changing from normal tuning to dropped D, the low E string will be detuned 200 cents. This will have a noticeable influence on the other strings; so after the low E string has been tuned, all other strings are marked as out‐of‐tune again. This option will increase the tuning accuracy, but might have a slight impact on the tuning performance, depending on the order in which the strings are tuned. In the worst case, it will behave like “TuneCount = 2.”

Gibson LP STD LTD Manual v1.0 Page 29
Function 19 Neck tension sensitivity Default = 9Value Result Clickstream0 through 9 Sets degree of string sensitivity to other strings' pitch changes 19 § 0‐9 §Note: This determines how strongly one string's pitch change is taken into consideration for the other strings. 0 = Lowest sensitivity, strings are rarely retuned, lowest precision but best performance. 9 = Highest sensitivity, strings are often retuned, best precision, but potentially worse performance. Function 20 Instant Access Tuning time Default = 100Value Result Clickstream50 through 255 Sets time in ms/10 between system activation and start of the IAT process 20 § 50‐255 § Function 21 Tuning select time Default = 35Value Result Clickstream15 through 255 Sets time in ms/10 between selecting a tuning and when tuning begins 21 § 15‐255 §Note. Sets the time between selecting a tuning with the MCK and actually starting the tuning process. Increasing the time reduces the stress on the relays that are switched when starting the tuning process, as fewer activations take place when scrolling slowly through the menu. This setting has an effect in Tune Mode and in Preset Mode if “Preset Bank Mode” is set to Preset Activation. Function 22 Sound select time Default = 10Value Result Clickstream1 through 255 Sets time in ms/10 between selecting a sound and activating it 22 § 15‐255 §Note: This option determines whether the tuning process starts automatically when entering Tune Mode (Blue Bank). If value = 1, the tuning process starts automatically. If value = 0, the behavior is the same as Preset Mode (Yellow Bank) and the tuning process beings only after selecting a tuning Function 23 Auto retune Default = 1Value Result Clickstream0 Auto retune is disabled 23 § 0 §1 Auto retune is enabled 23 § 1 §Note: This option determines whether the tuning process starts automatically when entering Tune Mode (Blue Bank). If value = 1, the tuning process starts automatically. If value = 0, the behavior is the same as Preset Mode (Yellow Bank) and the tuning process beings only after selecting a tuning. Function 24 Preset bank mode Default = 0Value Result Clickstream0 Loads sound and tuning in Preset Mode (Yellow Bank) 24 § 0 §1 Loads sound only in Preset Mode (Yellow Bank) 24 § 1 §Note: This switch determines how a preset is loaded in Preset Mode (Yellow Bank). If value = 0, both the preset tuning and sound are activated. This causes the system to start the tuning process on preset activation. If value = 1, only the preset's sound is loaded. Activating the tuning is still possible by pushing Enter for more than one second.
Following are additional setup mode functions for doing a variety of system resets; these follow the same basic procedures as the previous setup functions.

Gibson LP STD LTD Manual v1.0 Page 30
Caution: The following setup functions are servicing procedures, and are included for completeness. Be aware that resetting sounds, tunings, or user banks will delete any custom sounds, tunings, or user bank settings you've created. Before doing any resets, Gibson advises saving all custom sounds using the Gibson Chameleon Editor software. Function 99 Display software version: Shows Dusk Tiger's current software Result Clickstream Show current Dusk Tiger software version 99 §Note: There is no default as this is a read‐only parameter Function 101 Reset tuning config data: Resets to standard tuning, default precision, etc. Result ClickstreamStep 1 Do the clickstream on the right, then rotate the MCK fully counter‐clockwise 101 §Step 2 Press the Display Matrix momentarily, then wait for the red “?” to appear Step 3 Rotate MCK to the cyan “Y” (“Yes”), then press the Display Matrix momentarily Step 4 Rotate MCK to the “Enter” sign, then press the Display Matrix momentarily Step 5 To exit, push Enter for more than one second. Note: If you change your mind about resetting, in Step 3, choose “N” (“No”) instead of “Y.” Function 102 Reset tunings: Resets all Blue Bank tunings to factory defaults Result ClickstreamStep 1 Do the clickstream on the right, then rotate the MCK fully counter‐clockwise 102 §Step 2 Press the Display Matrix momentarily, then wait for the red “?” to appear Step 3 Rotate MCK to the cyan “Y” (“Yes”), then press the Display Matrix momentarily Step 4 Rotate MCK to the “Enter” sign, then press the Display Matrix momentarily Step 5 To exit, push Enter for more than one second. Note: If you change your mind about resetting, in Step 3, choose “N” (“No”) instead of “Y.” Function 103 Reset sounds: Resets all Green Bank sounds to factory defaults Result ClickstreamStep 1 Do the clickstream on the right, then rotate the MCK fully counter‐clockwise 103 §Step 2 Press the Display Matrix momentarily, then wait for the red “?” to appear Step 3 Rotate MCK to the cyan “Y” (“Yes”), then press the Display Matrix momentarily Step 4 Rotate MCK to the “Enter” sign, then press the Display Matrix momentarily Step 5 To exit, push Enter for more than one second. Note: If you change your mind about resetting, in Step 3, choose “N” (“No”) instead of “Y.” Function 104 Reset presets: Resets all Yellow Bank presets to factory defaults Result ClickstreamStep 1 Do the clickstream on the right, then rotate the MCK fully counter‐clockwise 104 §Step 2 Press the Display Matrix momentarily, then wait for the red “?” to appear Step 3 Rotate MCK to the cyan “Y” (“Yes”), then press the Display Matrix momentarily Step 4 Rotate MCK to the “Enter” sign, then press the Display Matrix momentarily Step 5 To exit, push Enter for more than one second. Note: If you change your mind about resetting, in Step 3, choose “N” (“No”) instead of “Y.” Function 105 Reset modifiers: Resets runtime correction and calibration data Result ClickstreamStep 1 Do the clickstream on the right, then rotate the MCK fully counter‐clockwise 105 §

Gibson LP STD LTD Manual v1.0 Page 31
Step 2 Press the Display Matrix momentarily, then wait for the red “?” to appear Step 3 Rotate MCK to the cyan “Y” (“Yes”), then press the Display Matrix momentarily Step 4 Rotate MCK to the “Enter” sign, then press the Display Matrix momentarily Step 5 To exit, push Enter for more than one second. Note: If you change your mind about resetting, in Step 3, choose “N” (“No”) instead of “Y.” Function 106 Reset stepper configuration: Resets RoboHeads' speed and acceleration Result ClickstreamStep 1 Do the clickstream on the right, then rotate the MCK fully counter‐clockwise 106 §Step 2 Press the Display Matrix momentarily, then wait for the red “?” to appear Step 3 Rotate MCK to the cyan “Y” (“Yes”), then press the Display Matrix momentarily Step 4 Rotate MCK to the “Enter” sign, then press the Display Matrix momentarily Step 5 To exit, push Enter for more than one second. Note: If you change your mind about resetting, in Step 3, choose “N” (“No”) instead of “Y.” Function 109 Reset all: Resets all configuration data to the factory defaults Result ClickstreamStep 1 Do the clickstream on the right, then rotate the MCK fully counter‐clockwise 109 §Step 2 Press the Display Matrix momentarily, then wait for the red “?” to appear Step 3 Rotate MCK to the cyan “Y” (“Yes”), then press the Display Matrix momentarily Step 4 Rotate MCK to the “Enter” sign, then press the Display Matrix momentarily Step 5 To exit, push Enter for more than one second. Note: If you change your mind about resetting, in Step 3, choose “N” (“No”) instead of “Y.”
Appendix A: Les Paul Standard 2010 Limited Electronics Block Diagram

Gibson LP STD LTD Manual v1.0 Page 32
This diagram indicates signal flow within Les Paul Standard 2010 Limited's electronics. Note that the magnetic pickups and Piezo pickup have their own equalizers, and that the Piezo blend circuit is post‐equalizer. In Hex Mode, the *RIP Computer Interface does sophisticated analog signal multiplexing in order to have the Piezo pickup and the individual hex pickups available on a single conductor (i.e., the stereo cable's ring connection).
Appendix B: Alternate Tuning Tricks

Gibson LP STD LTD Manual v1.0 Page 33
You may fret individual strings while tuning, which can allow for alternate tuning techniques that differ from simply loading a tuning in the Blue or Yellow Bank. Here are some examples of how to use this technique. Note: It's important to fret the strings very accurately, and strum gently and precisely—especially when frequencies are being measured. Tuning Individual Strings Down Suppose you want to tune to Dropped D tuning instantly.
1. Activate Les Paul Standard 2010 Limited's standard EADGBe tuning but don't strum yet. 2. Fret the low E on the 2nd fret and strum the strings. 3. Les Paul Standard 2010 Limited will tune to Dropped D tuning.
You may use this technique for all tunings / strings that are at lower pitch than the tuning you are using. Tuning Multiple Strings Down If you want to tune more than one string down to a certain pitch, you may fret and strum string by string. Let´s do an Eb (Hendrix tuning) with this technique.
1. Activate Les Paul Standard 2010 Limited's standard EADGBe tuning but don't strum yet. 2. Fret the low E at the 1st fret and pluck only that string. Les Paul Standard 2010 Limited will tune the low E string to Eb. 3. Fret the A string at the 1st fret and pluck only that string. Les Paul Standard 2010 Limited will tune the A string to Ab. 4. Fret the D string at the 1st fret and pluck only that string. Les Paul Standard 2010 Limited will tune the D string to Db. 5. Continue fretting strings at the 1st fret and plucking individual strings.
Appendix C: Battery and Power Management
Appendix C: Battery and Power Management
Gibson LP STD LTD Manual v1.0 Page 34
Les Paul Standard 2010 Limited’s power source is an on‐board, rechargeable, Lithium Ion (Li‐Ion) 7.4V battery. Les Paul Standard 2010 Limited can tune itself up to 500 times on a single charge, and recharges in about 70 minutes. Caution: Because this battery is a precision device, please follow these instructions carefully on charging, storage, and optimizing performance. Low Battery Warning Indicator The MCK Pickup symbol (next to the Guitar symbol):
• Shines orange when the battery has about 30 minutes of charge left • Turns red when the charge level is too low for Les Paul Standard 2010 Limited to operate
properly. In this state Les Paul Standard 2010 Limited switches off the Piezo out and onboard EQ, and the RoboHeads switch into “hibernation” mode where they will not tune the guitar. If the red charge level symbol appears, begin charging Les Paul Standard 2010 Limited immediately.
If you turn on Les Paul Standard 2010 Limited and the Display Matrix shows nothing but yellow dots (or if this appears during the course of playing), then the battery is fully discharged. At this point you must recharge the battery. System Shutdown Remember to shut off Les Paul Standard 2010 Limited when finished by pushing the MCK all the way in. This prevents discharging the battery unnecessarily. Les Paul Standard 2010 Limited will shut off automatically if there's no activity for an amount of time you specify (Section 6.2, Function 4). Optimizing Battery Life Proper care extends the battery’s life, keeps it operating at optimum efficiency, and preserves the highest possible storage capacity. Please observe the following.
• Charge the battery fully before using Les Paul Standard 2010 Limited. Even if Les Paul Standard 2010 Limited seems charged upon arrival, that was done for testing at the factory. Initially charge Les Paul Standard 2010 Limited for at least an hour.
• Caution: Do not use any charger other than the one supplied with Les Paul Standard 2010 Limited. Li‐Ion batteries require specific charge rates.
• Avoid full discharges that drain the battery completely. Li‐Ion batteries like to be discharged somewhat, then recharged back to full capacity. Les Paul Standard 2010 Limited provides a good environment for Li‐Ion batteries, as you’ll typically discharge it about halfway during the length of a concert. Charging the battery back to full charge after playing provides optimum battery life.

Gibson LP STD LTD Manual v1.0 Page 35
• Avoid elevated temperatures. You don’t want to expose any guitar to high temperatures, but this also shortens battery life dramatically.
• Store the battery properly. If you won’t be playing Les Paul Standard 2010 Limited for several weeks or more, discharge the battery partway (about 40‐50% of its full charge), remove the battery, and store it in a cool, but not cold, place. Do not store the battery either fully charged or fully discharged. Either one can shorten battery life considerably.
• After taking a battery out of storage, charge it fully before playing Les Paul Standard 2010 Limited. This promotes longer battery life.
• Once the battery is fully charged, disconnect the charger. Li‐Ion batteries are “smart” and you can’t really overcharge them. However, leaving them connected to a charger when fully charged uses power unnecessarily.
• These tips don’t necessarily apply to laptop computers. Even if a laptop uses an Li‐Ion battery, there are computer‐specific considerations. Follow the computer manufacturer’s instructions for proper laptop battery care.
Tech Tip: About Charge/Discharge Cycles An Li‐Ion battery is typically rated for 300‐500 charge/discharge cycles. In other words, you can discharge the battery at least 300 times and charge it back up again before its useful life is over. If you play Les Paul Standard 2010 Limited and discharge it 50% during a concert, then charge it to full capacity, that is only half of a charge/discharge cycle. If you play Les Paul Standard 2010 Limited every day and discharge it to 75% of capacity then charge it back to 100%, it would take four days before the battery would experience a full charge/discharge cycle. However, a battery has a finite life regardless of whether you’ve used up the full number of charge/discharge cycles—after about 2‐3 years its internal resistance rises to the point where it can no longer deliver its rated voltage. It’s important to remember that Li‐Ion batteries like “exercise.” Leaving a battery on a charger all the time will lead to lower performance than doing some degree of charging and discharging.
Appendix D: Troubleshooting
Appendix D: Troubleshooting
Gibson LP STD LTD Manual v1.0 Page 36
If you encounter problems with Les Paul Standard 2010 Limited, Gibson recommends that you take it to an authorized service center. Although there are some procedures you can try yourself, be careful—if you have any doubt about your ability to do any of these fixes, please consult Gibson tech support. One or more strings don't seem to tune correctly, but the rest do. There can be several possible reasons for this problem:
• The nut slot too high and there's too much friction • The lock nut on the string post is not tight enough • The string was strummed too hard, causing it to go sharp • A sticky string bar in the saddle causes pitch detection to fail • The accuracy setting needs to be higher; the accuracy setting is too low (Section 6.2, Function
10) • E‐Function Correction is enabled (refer to Section 6.2, Function 12) • The tailpiece is set too low, so the string touches the bridge base and shorts out to it.
Observe what happens when you try to tune the problematic string. Here's what should happen:
• You strum, the respective string LED should start flashing red to indicate that pitch detection is active.
• After 1 second, the LED should start flashing yellow (information is being sent to the neck CPU, and the RoboHead starts to move).
• After tuning the string, the string's LED turns green to indicate the string is in tune. If not, try these fixes:
• Remove the problematic string and make sure the string bar is not inclined in the saddle, and that you can move the string bar up and down a little bit; it must not be sticky in its saddle. Sometimes just “unsticking” the string bar is enough to solve the problem.
• Re‐string the string and tap the string bar gently. Check that the string bar is not inclined and that the lock nut on the tuner post is set tight.
• Reset the tuning system (Section 6.2, Function 101), afterward disable E‐Function correction (this must be done manually; refer to Section 6.2, Function 12).
• If you are still having problems at this point, change accuracy settings to a higher level (refer to Section 6.2, Function 10).
• If all else fails, tune the problematic string to your liking, and save as a Custom tuning preset.

Gibson LP STD LTD Manual v1.0 Page 37
My headstock hit against the wall, and now one of the Powertune heads doesn't work. If you hear a winding noise but the RoboHead doesn't move, it might be a connection issue from the powerhead to the neck circuitry. Inspect the tuning peg that doesn't work. If its case is rotated, rotate the RoboHead back to its original position (level with the back plate with the lit up G); this should fix the problem. Then, tighten the nut to make sure the RoboHead stays in this position. Avoid over tightening—do not exceed 1 ft/pound torque maximum. For a “tighter” rhythm guitar part when recording, I wanted to remove the A, G, and (high) e strings because I kept hitting them accidentally, but then the tuning system didn't work. Why? The strings carry low voltages and data, as well as provide grounding. The E, D, and B strings are ground. The A, G, and high e strings carry a positive voltage and data. By removing those three strings, there was no way for the tuning system to provide data on how to tune the strings. The string LEDs are flashing white, and tuning doesn't work at all. A white flashing string LED indicates a short circuit. The strings carry power and data to the neck, so even if only one string is touching a hardware part (bridge, tailpiece, even a fret bar) or another string, the tuning system won't work. Also note that if the Gibson "G" on the neck electronic cover does not start flashing once you activate the system, it is most likely that there is also a white LED on the MCK flashing to indicate there's a short circuit, and therefore, no power going to the neck electronics. Please check the following:
• The string ball ends must not touch the tailpiece at all. • The strings must be in the middle position of each string bar. • Look at the tuner posts; the strings must not touch each other, so cut all string ends very close
to its post. • Check the tailpiece and bridge height, then adjust if needed.
When I tune the RoboHeads manually, the process seems extremely slow. The gear ratio in the RoboHeads is 24:1, so you need to turn the tuning peg 24 times to get one complete rotation of the string post. This is one reason why Gibson recommends using the Robot tuning options, especially when re‐stringing. Please see Sections 5.6, 5.7, and 5.8 for more information.