Embed Size (px)
Citation preview
Legato NetWorker®
Module for EMC CLARiiON® for Oracle®
Administrator’s Guide
Release 1.0
Legato NetWorker®
Release 7.0
Disaster Recovery Guide
© 2003, Legato Systems, Inc. All rights reserved. This product may be covered by one or more of the following patents: U.S. 5,359,713; 5,519,853; 5,649,152; 5,799,141; 5,812,748; 5,835,953; 5,978,565; 6,073,222; 6,085,298; 6,145,089; 6,308,283; 6,324,654; 6,338,126. Other U.S. and international patents pending.
Legato NetWorker, Release 7.0, Disaster Recovery Guide
March 2003
22-1949-06
Legato and the Legato logo are registered trademarks, and Legato NetWorker, NetWorker, LM:, Celestra, GEMS, SmartMedia, Co-StandbyServer, RepliStor, SnapShotServer, QuikStartz, SAN Academy, AlphaStor, ClientPak, Xtender, XtenderSolutions, DiskXtender, ApplicationXtender, ArchiveXtender, and EmailXtender are trademarks or registered trademarks of Legato Systems, Inc. This is a nonexhaustive list of Legato trademarks, and other trademarks may be the property of their respective owners.
The following may be trademarks or registered trademarks of the companies identified next to them, and may be used in this document for identification purposes only.
Acrobat, Adobe / Adobe Systems, Inc.Apple, Macintosh / Apple Computer, Inc.AIX, DB2, DB2 Universal Database, DYNIX, DYNIXptx, IBM, Informix, Lotus, Lotus Notes, OS/2, PTX, ptx/ADMIN, Raid Plus, ServeRAID, Sequent, Symmetry, Tivoli, / IBM CorporationInstallShield / InstallShield Software CorporationUNIX / X/Open Company Ltda
Access Logix, Celerra, CLARiiON, EMC, EMC2, MirrorView, MOSAIC:2000, Navisphere, SnapView, SRDF, Symmetrix, TimeFinder / EMC CorporationDate ONTAP, NetApp, NetCache, Network Appliance, SnapMirror, SnapRestore / Network Appliance, Inc.DLTtape / Quantum CorporationFujitsu / Fujitsu, Ltd.Hewlett-Packard, HP, HP-UX, HP Tru64, HP TruCluster / Hewlett-Packard CompanyIntraNetWare, NetWare, Novell / Novell, Inc.Microsoft, MS-DOS, SQL Server, Windows, Windows NT / Microsoft CorporationIntel / Intel CorporationLinux / Linus TorvaldsNetscape, Netscape Navigator / Netscape Communications CorporationIRIX, OpenVault, SGI / Silicon Graphics, Inc.Oracle, Oracle8i, Oracle9i / Oracle CorporationRed Hat / Red Hat, Inc.R/3, SAP / SAP AGCaldera Systems, SCO, SCO OpenServer, UnixWare / Caldera, Inc.SPARC / SPARC International, Inc.b
Solaris, Solstice Backup, Sun, SunOS, Sun StorEdge / Sun Microsystems, Inc.REELbackup, StorageTek / Storage Technology CorporationSybase / Sybase, Inc.VERITAS / VERITAS Software CorporationUnicenter / Computer Associates International, Inc.Turbolinux / Turbolinux, Inc.SuSE / SuSE, Inc.Check Point, FireWall-1 / Check Point Software Technologies, Ltd.
Notes:
a. UNIX is a registered trademark in the United States and other countries, licensed exclusively through X/Open Company, Ltd.
b. Products bearing SPARC trademarks are based on an architecture developed by Sun Microsystems, Inc.
All other brand or product names may be trademarks or registered trademarks of their respective owners.
Legato Systems, Inc. End-User License AgreementTHIS PRODUCT CONTAINS CERTAIN COMPUTER PROGRAMS AND OTHER PROPRIETARY MATERIAL, THE USE OF WHICH IS SUBJECT TO THIS END-USER LICENSE AGREEMENT (THE “AGREEMENT”). DO NOT PROCEED WITH THE INSTALLATION OF THIS PRODUCT UNTIL YOU (LATER DEFINED AS LICENSEE) HAVE READ THIS AGREEMENT AND AGREE TO BE BOUND BY AND BECOME A PARTY TO THIS AGREEMENT. BY PROCEEDING WITH THE INSTALLATION OF THIS PRODUCT (OR AUTHORIZING ANY OTHER PERSON TO DO SO), YOU AND YOUR COMPANY ACCEPT THIS AGREEMENT AND YOU REPRESENT THAT YOU ARE AUTHORIZED TO DO SO. IF YOU ARE ACCESSING THE PRODUCT ELECTRONICALLY INDICATE YOUR ACCEPTANCE OF THESE TERMS BY SELECTING THE “ACCEPT” BUTTON AT THE END OF THE AGREEMENT. IF YOU DO NOT AGREE TO THE TERMS OF THIS AGREEMENT, YOU MAY RETURN THIS PRODUCT, ALL MEDIA AND DOCUMENTATION, AND PROOF OF PAYMENT, TO THE PLACE YOU OBTAINED THEM FOR A FULL REFUND WITHIN THIRTY (30) DAYS OF FIRST ACQUIRING THIS PRODUCT OR, IF THE PRODUCT IS ACCESSED ELECTRONICALLY, SELECT THE “DECLINE” BUTTON AT THE END OF THIS AGREEMENT AND RETURN PROOF OF PAYMENT IN ACCORDANCE WITH THE ABOVE REFERENCED RETURN/REFUND PROCESS. WRITTEN APPROVAL IS NOT A PREREQUISITE TO THE VALIDITY OR ENFORCEABILITY OF THIS AGREEMENT AND NO SOLICITATION OF ANY SUCH WRITTEN APPROVAL BY OR ON BEHALF OF LEGATO SHALL BE CONSTRUED AS AN INFERENCE TO THE CONTRARY. IF YOU HAVE ORDERED THIS PRODUCT, LEGATO’S ACCEPTANCE IS EXPRESSLY CONDITIONAL ON YOUR ASSENT TO THESE TERMS TO THE EXCLUSION OF ALL OTHER TERMS; IF THESE TERMS ARE CONSIDERED AN OFFER BY LEGATO, ACCEPTANCE IS EXPRESSLY LIMITED TO THESE TERMS.
1. DEFINITIONS
1.1 Authorization Code: means the code provided to Licensee by Legato for permanent authorization to use the Software. The Authorization Code is provided to Licensee once the Enabler Code is registered with Legato.
1.2 Documentation: means any user reference materials on any media, provided by Legato for use with the Software.
1.3 Enabler Code: means the code provided by Legato for activation of the Software.
1.4 Licensee: means the person or entity acquiring this License or for whom this License was acquired.
1.5 Software: means the object code copy of the software program provided to You in association with this Agreement, together with the associated original electronic media and all accompanying manuals and other documentation, and together with all enhancements, upgrades, and extensions thereto that may be provided by Legato to You from time to time.
2. OWNERSHIP AND ADMINISTRATION OF SOFTWARE
2.1 Ownership and Title. As between the parties, Legato, and its licensors, own and shall retain all right, title, and interest in and to: (i) the Software including all intellectual property rights embodied therein; (ii) all of the service marks, trademarks, trade names, or any other designations associated with the Software; and (iii) all copyrights, patent rights, trade secret rights, and other proprietary rights relating to the Software.
2.2 Software Activation. Legato employs Enabler Codes and Authorization Codes that enable the use of the Software. The Software is shipped in a "Media Kit" which consists of object code software on CD-ROM and an Enabler Code for initial activation of the Software or the Software and Enabler Code may be delivered electronically. Once Legato receives confirmation from Licensee that the Enabler Code is installed and is provided with the host ID information, Legato will provide the Authorization Code to Licensee. Legato administers the generation and distribution of Enabler and Authorization Codes, which administration may be modified by Legato from time to time.
2.3 Administration of Software. Legato may include on the media with the Software additional computer programs which are not currently licensed for use by Licensee and to which the Enabler Code or Authorization code will not permit access. Inclusion of such additional computer programs in no way implies a license from Legato and access or use of such programs is strictly prohibited unless Licensee procures the right to use any such program and the applicable Enabler Code is provided thereto.
3. LICENSE GRANT
3.1 Grant. Legato grants to Licensee a nonexclusive, nontransferable, nonsublicensable, perpetual, unless terminated in accordance with the provisions of this Agreement, license (the “License”) to (i) use the Software installed in accordance with the Documentation and only on the licensed computer solely for its own internal operations; and (ii) move the Software temporarily in case of computer system malfunction. The License granted under this Agreement does not constitute a sale of the Software or any portion or copy of it. Licensee may not use the Software on more than one computer system unless otherwise specifically authorized by an explicit Software product, or additional licenses for additional computers are purchased. Rights not expressly granted are reserved by Legato. Where the Software is provided to Licensee at no charge for evaluation purposes only, the License granted is limited to a continuous thirty (30) day period,
commencing with the acceptance of this Agreement (the "Evaluation Period"). At the conclusion of the Evaluation Period, Licensee agrees to destroy the Software and certify its destruction to Legato, in writing, within ten (10) days, or shall return the Software to Legato or purchase a perpetual license.
3.2 Copies. Licensee may make copies of the Software provided that any such copy is: (i) created as an essential step in utilization of the Software on the licensed computer and is used in no other manner; or (ii) used for archival purposes to back up the licensed computers. All trademark and copyright notices must be reproduced and included on such copies. Licensee may not make any other copies of the Software.
3.3 Restrictions on use. Licensee shall not, and shall not aid, abet, or permit any third party to: (i) decompile, disassemble, or otherwise reverse engineer or attempt to reconstruct or discover any source code or underlying ideas or algorithms of the Software by any means whatsoever; (ii) remove any identification, copyright, or other notices from the Software; (iii) provide, lease, lend, use for timesharing or service bureau purposes; (iv) create a derivative work of any part of the Software; or (v) develop methods to enable unauthorized parties to use the Software. If EC law is applicable, the restrictions in Section 3.3 (i) are limited so that they prohibit such activity only to the maximum extent such activity may be prohibited without violating the EC Directive on the legal protection of computer programs. Notwithstanding the foregoing, prior to decompiling, disassembling, or otherwise reverse engineering any of the Software, Licensee shall request Legato in writing, to provide Licensee with such information or assistance and Licensee shall refrain from decompiling, disassembling, or otherwise reverse engineering any of the Software unless Legato cannot or has not complied with such request in a commercially reasonable amount of time.
3.4 Purchase Orders. Nothing contained in any purchase order, acknowledgment, or invoice shall in any way modify the terms or add any additional terms or conditions to this Agreement.
3.5 Updates. This section applies if the Software acquired is an update to the original Software (the “Update”). An Update does not constitute a legally licensed copy of the Software unless purchased as an Update to a previous version of the same Software. The Update may only be used in accordance with the provisions of this Agreement. The Update, together with the original Software, constitutes one (1) legally licensed copy of the Software.
3.6 Evaluation License. This Section applies if the Software is being used for an initial thirty (30) day evaluation period. The license is valid only for a period of thirty (30) days from the delivery of the Software, and is designed to allow Licensee the right to evaluate the Software during such period. In the event that Licensee desires to enter into a longer-term license agreement with Legato, Licensee shall obtain an appropriate Enabler and Authorization Code in accordance with Section 2.2 above, upon payment of applicable fees, which authorizes use of the Software after such evaluation period, but only subject to all of the terms and conditions of this Agreement. In the event Licensee determines not to enter into a licensing transaction with Legato at the end of such thirty (30) day evaluation period, then Licensee’s rights under this Agreement shall terminate automatically and Licensee shall promptly return to Legato or destroy all copies of the Software and so certify to Legato.
4. MAINTENANCE AND SUPPORT
4.1 Legato has no obligation to provide support, maintenance, upgrades, modifications, or new releases under this Agreement. Legato may provide such services under separate agreement.
5. LIMITED WARRANTY
5.1 Media and Documentation. Legato warrants that if the media or documentation are damaged or physically defective at the time of delivery of the first copy of the Software to Licensee and if defective or damaged product is returned to Legato (postage prepaid) within thirty (30) days thereafter, then Legato will provide Licensee with replacements at no cost.
5.2 Limited Software Warranty. Subject to the conditions and limitations of liability stated herein, Legato warrants for a period of thirty (30) days from the delivery of the first copy of the Software to Licensee that the Software, as delivered, will materially conform to Legato’s then current published Documentation for the Software. This warranty covers only problems reported to Legato during the warranty period. For customers outside of the United States, this Limited Software Warranty shall be construed to limit the warranty to the minimum warranty required by law.
5.3 Remedies. The remedies available to Licensee hereunder for any such Software which does not perform as set out herein shall be either repair or replacement, or, if such remedy is not practicable in Legato’s opinion, refund of the license fees paid by Licensee upon a return of all copies of the Software to Legato. In the event of a refund this Agreement shall terminate immediately without notice
6. TERM AND TERMINATION
6.1 Term. The term of this Agreement is perpetual unless terminated in accordance with its provisions.
6.2 Termination. Legato may terminate this Agreement, without notice, upon Licensee’s breach of any of the provisions hereof.
6.3 Effect of Termination. Upon termination of this Agreement, Licensee agrees to cease all use of the Software and to return to Legato or destroy the Software and all Documentation and related materials in Licensee’s possession, and so certify to Legato. Except for the License granted herein and as expressly provided herein, the terms of this Agreement shall survive termination.
7. DISCLAIMER AND LIMITATIONS
7.1 Warranty Disclaimer. EXCEPT FOR THE LIMITED WARRANTY PROVIDED IN SECTION 5 ABOVE, LEGATO AND ITS LICENSORS MAKE NO WARRANTIES WITH RESPECT TO ANY SOFTWARE AND DISCLAIMS ALL STATUTORY OR IMPLIED WARRANTIES, INCLUDING WITHOUT LIMITATION WARRANTIES OF MERCHANTABILITY, FITNESS FOR A PARTICULAR PURPOSE, OR ARISING FROM A COURSE OF DEALING OR USAGE OF TRADE AND ANY WARRANTIES OF NONINFRINGEMENT. ALL SOFTWARE IS PROVIDED “AS IS” AND LEGATO DOES NOT WARRANT THAT THE SOFTWARE WILL MEET ANY REQUIREMENTS OR THAT THE OPERATION OF SOFTWARE WILL BE UNINTERRUPTED OR ERROR FREE. ANY LIABILITY OF LEGATO WITH RESPECT TO THE SOFTWARE OR THE PERFORMANCE THEREOF UNDER ANY WARRANTY, NEGLIGENCE, STRICT LIABILITY OR OTHER THEORY WILL BE LIMITED EXCLUSIVELY TO THE REMEDIES SPECIFIED IN SECTION 5.3 ABOVE. Some jurisdictions do not allow the exclusion of implied warranties or limitations on how long an implied warranty may last, so the above limitations may not be applicable.
8. LIMITATION OF LIABILITY
8.1 Limitation of Liability. EXCEPT FOR BODILY INJURY, LEGATO (AND ITS LICENSORS) WILL NOT BE LIABLE OR RESPONSIBLE WITH RESPECT TO THE SUBJECT MATTER OF THIS AGREEMENT UNDER ANY CONTRACT, NEGLIGENCE, STRICT LIABILITY, OR OTHER LEGAL OR EQUITABLE THEORY FOR: (I) ANY INDIRECT, SPECIAL, INCIDENTAL OR CONSEQUENTIAL DAMAGES, HOWEVER CAUSED AND WHETHER OR NOT ADVISED IN ADVANCE OF THE POSSIBILITY OF SUCH DAMAGES; OR (II) DAMAGES FOR LOST PROFITS OR LOST DATA; OR (III) COST OF PROCUREMENT OF SUBSTITUTE GOODS, TECHNOLOGY, SERVICES, OR RIGHTS; OR FOR AMOUNTS IN EXCESS OF THOSE RECEIVED BY LEGATO FOR THE PARTICULAR LEGATO SOFTWARE THAT CAUSED THE LIABILITY. Because some jurisdictions do not allow the exclusion or limitation of incidental or consequential damages, Legato's liability in such jurisdictions shall be limited to the extent permitted by law.
9. MISCELLANEOUS
9.1 Governing Law. This Agreement shall be governed by the laws of the State of California, as applied to agreements entered into and to be performed entirely within California between California residents, without regard to the
principles of conflict of laws or the United Nations Convention on Contracts for the International Sale of Goods.
9.2 Government Restricted Rights. This provision applies to Software acquired directly or indirectly by or on behalf of any government. The Software is a commercial software product, licensed on the open market at market prices, and was developed entirely at private expense and without the use of any government funds. All Software and accompanying Documentation provided in connection with this Agreement are “commercial items,” “commercial computer software,” and/or “commercial computer software documentation.” Any use, modification, reproduction, release, performance, display, or disclosure of the Software by any government shall be governed solely by the terms of this Agreement and shall be prohibited except to the extent expressly permitted by the terms of this Agreement, and no license to the Software is granted to any government requiring different terms. Licensee shall ensure that each copy used or possessed by or for any government is labeled to reflect the foregoing.
9.3 Export and Import Controls. Regardless of any disclosure made by Licensee to Legato of an ultimate destination of the Products, Licensee will not directly or indirectly export or transfer any portion of the Software, or any system containing a portion of the Software, to anyone outside the United States (including further export if Licensee took delivery outside the U.S.) without first complying with any export or import controls that may be imposed on the Software by the U.S. Government or any country or organization of nations within whose jurisdiction Licensee operates or does business. Licensee shall at all times strictly comply with all such laws, regulations, and orders, and agrees to commit no act which, directly or indirectly, would violate any such law, regulation or order.
9.4 Assignment. This Agreement may not be assigned or transferred by Licensee without the prior written consent of Legato, which shall not be unreasonably withheld. Legato may assign or otherwise transfer any or all of its rights and obligations under this Agreement upon notice to Licensee.
9.5 Sole Remedy and Allocation of Risk. Licensee's sole and exclusive remedies are set forth in this Agreement. This Agreement defines a mutually agreed-upon allocation of risk, and the License price reflects such allocation of risk.
9.6 Equitable Relief. The parties agree that a breach of this Agreement adversely affecting Legato’s intellectual property rights in the Software may cause irreparable injury to Legato for which monetary damages may not be an adequate remedy and Legato shall be entitled to equitable relief in addition to any remedies it may have hereunder or at law.
9.7 No Waiver. Failure by either party to enforce any provision of this Agreement will not be deemed a waiver of future enforcement of that or any other provision, nor will any single or partial exercise of any right or power hereunder preclude further exercise of any other right hereunder.
9.8 Severability. If for any reason a court of competent jurisdiction finds any provision of this Agreement, or portion thereof, to be unenforceable, that provision of the Agreement will be enforced to the maximum extent permissible so as to effect the intent of the parties, and the remainder of this Agreement will continue in full force and effect.
10. ENTIRE AGREEMENT
10.1 This Agreement sets forth the entire understanding and agreement between the parties and may be amended only in a writing signed by authorized representatives of both parties. No vendor, distributor, dealer, retailer, sales person, or other person is authorized by Legato to modify this Agreement or to make any warranty, representation, or promise which is different than, or in addition to, the warranties, representations, or promises made in this Agreement. No preprinted purchase order terms shall in any way modify, replace, or supersede the terms of this Agreement.
Legato NetWorker, Release 7.0Disaster Recovery Guide 5
Contents
Preface ......................................................................................................... 15.
Audience.......................................................................................................................... 15.
Product Documentation ................................................................................................... 15.
Conventions..................................................................................................................... 16.
Information and Services................................................................................................. 17.
General Information .................................................................................................. 17.
Technical Support ..................................................................................................... 17.
Licensing and Registration........................................................................................ 18.
Customer Feedback ........................................................................................................ 18.
Chapter 1: Introduction............................................................................... 19.
What Is a Disaster? ......................................................................................................... 19.
Disaster Recovery Guide Overview................................................................................. 20.
Chapter 2: Preparing for a Disaster........................................................... 21.
Preparing for Disaster...................................................................................................... 21.
Gathering the Key Information......................................................................................... 22.
Hardware Information................................................................................................ 22.
Software Information ................................................................................................. 23.
Chapter 3: UNIX Disaster Recovery........................................................... 25.
Disaster Recovery Procedures........................................................................................ 26.
Replacing a Hard Drive ................................................................................................... 27.
Prerequisites ............................................................................................................. 27.
Replacing the Hard Drive .......................................................................................... 27.
Completing the Recovery Process............................................................................ 28.
Installing and Configuring the UNIX Operating System................................................... 28.
Legato NetWorker, Release 7.0Disaster Recovery Guide
Contents
6
Prerequisites..............................................................................................................28.
How to Install and Configure the UNIX Operating System ........................................29.
Task 1: Install the Operating System ..................................................................30.
Task 2: Configure the Operating System ............................................................30.
Task 3: Configure the Devices and Test the Operating System .........................31.
Completing the Recovery Process ............................................................................32.
Recovering a NetWorker Server ......................................................................................32.
Prerequisites..............................................................................................................32.
How to Recover a NetWorker Server ........................................................................32.
Task 1: Install the NetWorker Server Software ...................................................33.
Task 2: Configure NetWorker Device Resources ...............................................34.
Task 3: Locate the Server’s Bootstrap Save Set ID............................................34.
Task 4: Recover the NetWorker Server Bootstrap..............................................36.
Task 5: Rename the NetWorker Server Configuration Files ...............................37.
Task 6: Recover All Client File Indexes ..............................................................38.
Task 7: Recover the Application and User Data .................................................39.
Task 8: Perform a Test Backup and Recovery ...................................................39.
Recovering a NetWorker Storage Node...........................................................................40.
Prerequisites..............................................................................................................40.
How to Recover a NetWorker Storage Node.............................................................40.
Task 1: Install the NetWorker Storage Node.......................................................41.
Task 2: Recover the Application and User Data .................................................41.
Task 3: Perform a Test Backup and Recovery ...................................................42.
Recovering a NetWorker Client........................................................................................43.
Prerequisites..............................................................................................................43.
How to Recover a NetWorker Client..........................................................................43.
Task 1: Install NetWorker Client..........................................................................43.
Task 2: Recover the Application and User Data .................................................44.
Task 3: Perform a Test Backup and Recovery ...................................................45.
Contents
Legato NetWorker, Release 7.0Disaster Recovery Guide 7
Chapter 4: Windows Disaster Recovery ................................................... 47.
Disaster Recovery Summary Procedures ....................................................................... 48.
NetWorker Server Recovery Summary Procedure ................................................... 48.
NetWorker Client or Storage Node Recovery Summary Procedure ......................... 50.
Disaster Recovery of Multiple Computers ....................................................................... 51.
Disaster Recovery of Clustered Computers.............................................................. 52.
Replacing a Hard Drive ................................................................................................... 52.
Performing Windows ASR Recovery............................................................................... 53.
OEM Recovery CD Limitations ................................................................................. 53.
ASR Recovery Requirements ................................................................................... 54.
Task 1: Perform an ASR Recovery of the NetWorker Client Computer.................... 54.
Task 2: Restore Components that Require Special Handling................................... 55.
Task 3: Verify the NetWorker Client Recovery.......................................................... 56.
Repairing a Windows NT 4.0 Operating System Installation........................................... 57.
Repairing Windows NT 4.0 ....................................................................................... 57.
Creating an ERD from the REPAIRDISK Save Set............................................ 57.
How to Use the NetWorker User Program to Create an ERD...................... 58.
How to Use the NetWorker recover Command to Create an ERD .............. 58.
How to Use the ERD to Repair the Windows NT 4.0 Installation ....................... 59.
Recovering a Windows Installation.................................................................................. 60.
Recovery Requirements............................................................................................ 60.
How to Recover the Windows Operating System ..................................................... 61.
Task 1: Install the Windows Operating System .................................................. 62.
Task 2: Configure the Devices and Test the Operating System......................... 65.
Recovering a NetWorker Server...................................................................................... 66.
NetWorker Server Recovery Requirements.............................................................. 66.
How to Recover a Windows 2000 NetWorker Server ............................................... 67.
Task 1: Install the NetWorker Server Software .................................................. 67.
Task 2: Configure the NetWorker Server ........................................................... 68.
Task 3: Locate the NetWorker Server Bootstrap Save Set ID............................ 70.
Legato NetWorker, Release 7.0Disaster Recovery Guide
Contents
8
Task 4: Recover the NetWorker Server Bootstrap..............................................72.
Task 5: Rename the Resource Configuration Files ............................................74.
Task 6: Reset and Inventory the Autochanger....................................................74.
How to Reset and Inventory an Autochanger with Removable Storage Disabled........................................................................................................74.
How to Reset and Inventory an Autochanger with Removable Storage Enabled...........................................................................................75.
Task 7: Recover the NetWorker Server’s Client File Indexes .............................76.
Task 8: Recover the NetWorker Server Data......................................................78.
Task 9: Restore the Removable Storage Jukebox Configuration .......................80.
Task 10: Verify the NetWorker Server Recovery ................................................81.
Recovering a NetWorker Client or Storage Node ............................................................82.
Partial Recovery of a NetWorker Storage Node........................................................82.
Task 1: Satisfy the NetWorker Client or Storage Node Recovery Requirements......83.
Task 2: Reinstall the NetWorker Client or Storage Node Software ...........................83.
Task 3: Recover the NetWorker Client or Storage Node Data ..................................84.
Task 4: Verify the NetWorker Client or Storage Node Recovery...............................86.
Recovery of DHCP and WINS Databases .......................................................................87.
How to Recover a DHCP Database ..........................................................................88.
How to Recover a WINS Database ...........................................................................88.
Chapter 5: NetWare Disaster Recovery .....................................................89.
Replacing a Hard Drive ....................................................................................................90.
Obtain the Hard Drive Information.............................................................................90.
Replace the Hard Drive .............................................................................................90.
Completing the Recovery Process ............................................................................91.
Recovering the NetWare Operating System....................................................................91.
Prerequisites .............................................................................................................91.
How to Recover the NetWare Operating System ......................................................92.
Task 1: Install the Operating System ..................................................................92.
Task 2: Configure the Operating System ............................................................93.
Contents
Legato NetWorker, Release 7.0Disaster Recovery Guide 9
Task 3: Test the Operating System and Configure Devices............................... 94.
Completing the Recovery Process............................................................................ 94.
Recovering a NetWare NetWorker Server ...................................................................... 94.
Prerequisites ............................................................................................................ 95.
How to Recover a NetWare NetWorker Server......................................................... 95.
Task 1: Install the NetWorker Software .............................................................. 96.
Task 2: Configure NetWorker Device and Client Resource ............................... 96.
Task 3: Locate the Server’s Bootstrap Save Set ID ........................................... 97.
Task 4: Recover the NetWorker Server Bootstrap ............................................. 97.
Task 5: Rename the NetWorker Server Configuration Files .............................. 99.
Task 6: Recover the NetWorker Server Data ..................................................... 99.
Task 7: Restore NDS Data ............................................................................... 100.
Task 8: Complete the Server Recovery............................................................ 101.
Recovering a Replicated NDS Partition......................................................................... 102.
How to Recover a NetWare 4.10 SYS Volume....................................................... 102.
Task 1: Recover the NetWare 4.10 SYS Volume............................................. 102.
Task 2: Restore the SMS Remote File System ................................................ 104.
Task 3: Complete the Recovery of the NetWare 4.10 SYS Volume................. 105.
How to Recover a NetWare 4.11, NetWare 5.0, or IntraNetWare Server SYS Volume............................................................................................................ 105.
Task 1: Recover the NetWare SYS Volume..................................................... 106.
Task 2: Install the Operating Systems.............................................................. 107.
Task 3: Complete the NetWare SYS Volume Recovery................................... 108.
Chapter 6: Microsoft Cluster Disaster Recovery (Windows NT 4.0)..... 111.
Recovering One Node in a Cluster................................................................................ 111.
Task 1: Evict Node_B from the Cluster ................................................................... 112.
Task 2: Reinstall Windows NT 4.0 and MSCS on Node_B..................................... 112.
Task 3: Reinstall the NetWorker Software .............................................................. 113.
Task 4: Recover the Data on Node_B .................................................................... 113.
Recovering a Cluster Shared Disk ................................................................................ 113.
Legato NetWorker, Release 7.0Disaster Recovery Guide
Contents
10
Task 1: Take the Dependent Resources Offline......................................................113.
Task 2: Replace the Hard Drive ..............................................................................114.
Task 3: Recover the Data to the Shared Disk .........................................................115.
Task 4: Configure the Cluster to Include the Shared Disk.......................................115.
Replacing the Quorum Disk and Recovering Its Data....................................................116.
About the Quorum Resource...................................................................................116.
How to Replace the Quorum Disk and Recover Its Data ........................................117.
Recovering the MSCS Cluster Configuration.................................................................117.
Task 1: Recover the System State and Quorum Data ............................................118.
Task 2: Replace the Quorum Data with the Recovered Quorum Data....................118.
Task 3: Evict Node_B from the Cluster ...................................................................119.
Task 4: Install the Cluster Software and Patches on Node_B.................................119.
Performing a Cluster-Wide Recovery.............................................................................119.
Task 1: On Node_A, Install and Configure the Software.........................................120.
Task 2: On Node_B, Install and Configure the Software.........................................121.
Task 3: Install and Configure NetWorker.................................................................121.
Task 4: Perform a Disaster Recovery......................................................................122.
Task 5: Check and Reassign the Drive Assignments..............................................122.
Task 6: Recover the Data........................................................................................123.
Task 7: Check the Disk Signatures .........................................................................123.
Task 8: Join Node_B to the Cluster.........................................................................124.
Chapter 7: Microsoft Cluster Disaster Recovery (Windows 2000 and .NET) .........................................................................127.
Prerequisites ..................................................................................................................127.
Recovering a Failed Quorum Disk .................................................................................128.
How to Recover a Failed Quorum Disk ...................................................................128.
Recovering One Cluster Node .......................................................................................129.
How to Recover One Cluster Node .........................................................................129.
Recovering Multiple Cluster Nodes................................................................................132.
How to Recover Multiple Cluster Nodes..................................................................132.
Contents
Legato NetWorker, Release 7.0Disaster Recovery Guide 11
Chapter 8: Sun Cluster Disaster Recovery ............................................. 135.
Prerequisites.................................................................................................................. 135.
Restoring a Single Cluster Node ................................................................................... 135.
How to Restore a Single Cluster Node ................................................................... 136.
Restoring an Entire Cluster ........................................................................................... 136.
How to Restore an Entire Cluster............................................................................ 136.
Task 1: Replace the Damaged Hardware ........................................................ 137.
Task 2: Install the Software .............................................................................. 137.
Task 3: Recover the Data................................................................................. 138.
Chapter 9: HP TruCluster Disaster Recovery ......................................... 139.
Prerequisites.................................................................................................................. 139.
Record Information.................................................................................................. 139.
Back Up the Cluster ................................................................................................ 140.
Restoring One or More Nodes in a Cluster ................................................................... 140.
How to Restore One or More Nodes in a Cluster.................................................... 141.
Task 1: Replace the Damaged Hardware ........................................................ 141.
Task 2: Verify Hardware Mappings .................................................................. 141.
Task 3: Partition the Down Node’s Boot Drive ................................................. 141.
Task 4: Update the Cluster Configuration ........................................................ 141.
Task 5: Recover the Node-Specific Data ......................................................... 142.
Restoring an Entire Cluster ........................................................................................... 143.
How to Restore an Entire Cluster............................................................................ 143.
Task 1: Replace the Damaged Hardware ........................................................ 144.
Task 2: Verify Hardware Mappings .................................................................. 144.
Task 3: Install and Configure the Cluster Software .......................................... 144.
Task 4: Install the NetWorker Software ............................................................ 145.
Task 5: Configure NetWorker Device and Autochanger Resources ................ 146.
Task 6: Locate the Server’s Bootstrap Save Set ID ......................................... 146.
Task 7: Recover the Server’s Bootstrap........................................................... 147.
Legato NetWorker, Release 7.0Disaster Recovery Guide
Contents
12
Task 8: Locate the Server’s Client File Index Save Set IDs..............................148.
Task 9: Recover the Server’s Client File Index .................................................149.
Task 10: Re-create the Cluster .........................................................................150.
Task 11: Recover the Cluster Data ...................................................................150.
Chapter 10: HP-UX Cluster Disaster Recovery .......................................153.
Recovering a Single Cluster Node.................................................................................153.
How to Recover a Single Cluster Node ...................................................................153.
Performing a Cluster-Wide Recovery.............................................................................154.
How to Perform a Cluster-Wide Recovery...............................................................154.
Task1: Install the Software................................................................................154.
Task 2: Restore the Cluster Database ..............................................................154.
Task 3: Start the Cluster ...................................................................................155.
Task 4: Restore the Data ..................................................................................156.
Chapter 11: Legato AAM for AIX, HP-UX, and Linux Disaster Recovery......................................................................................157.
Recovering a Single Cluster Node.................................................................................157.
How to Recover a Single Cluster Node ...................................................................157.
Performing a Cluster-Wide Recovery.............................................................................159.
How to Perform a Cluster-Wide Recovery...............................................................159.
Task 1: Install the Software...............................................................................159.
Task 2: Restore the Cluster ..............................................................................160.
Task 3: Configure NetWorker Software as a Highly Available Application .......161.
Task 4: Restore the Data ..................................................................................162.
On the Primary Node..................................................................................162.
On Each of Remaining Node in the Cluster................................................162.
Task 5: Start the Cluster Software on Each Node ............................................163.
Renaming the Resource Directory .................................................................................164.
Contents
Legato NetWorker, Release 7.0Disaster Recovery Guide 13
Chapter 12: HACMP for AIX Disaster Recovery ..................................... 165.
Recovering a Single Node............................................................................................. 165.
How to Recover a Single Node ............................................................................... 166.
Recovering an Entire Cluster......................................................................................... 166.
How to Perform a Cluster-Wide Recovery .............................................................. 166.
Task 1: Install the Software .............................................................................. 166.
Task 2: Restore the Cluster Database ............................................................. 166.
Task 3: Start the Cluster................................................................................... 167.
Task 4: Restore the Data.................................................................................. 167.
Glossary..................................................................................................... 169.
Index........................................................................................................... 185.

Legato NetWorker, Release 7.0Disaster Recovery Guide
Contents
14
Legato NetWorker, Release 7.0Disaster Recovery Guide 15
Preface
This guide contains information on how to prepare for a disaster before one strikes and how to recover from a disaster.
Using the Legato NetWorker® software to back up data is the first step in a disaster recovery program. The next step is deciding how to recover data after a disaster.
AudienceThe information in this guide is intended for the following audiences:
• System administrators who perform backup and recovery procedures, and maintain the safety of the data located over a network
• Managers who want to learn how to implement a disaster recovery program
• Users who are responsible for implementing disaster recovery plans and procedures
Product DocumentationLegato offers an extensive archive of product documentation at its web site www.legato.com. Most of the documents are in Adobe Acrobat Portable Document Format (PDF), and can be viewed by downloading and installing the Adobe Acrobat Reader. The Reader is available in the /viewers/acroread directory on the Legato Documentation Suite CD-ROM, or directly from Adobe at www.adobe.com. To install and use the Reader on the preferred platform, refer to the instructions in the CD-ROM’s /viewers/acroread/readme.txt file or at the Adobe web site.
Legato NetWorker, Release 7.0Disaster Recovery Guide
Conventions
16
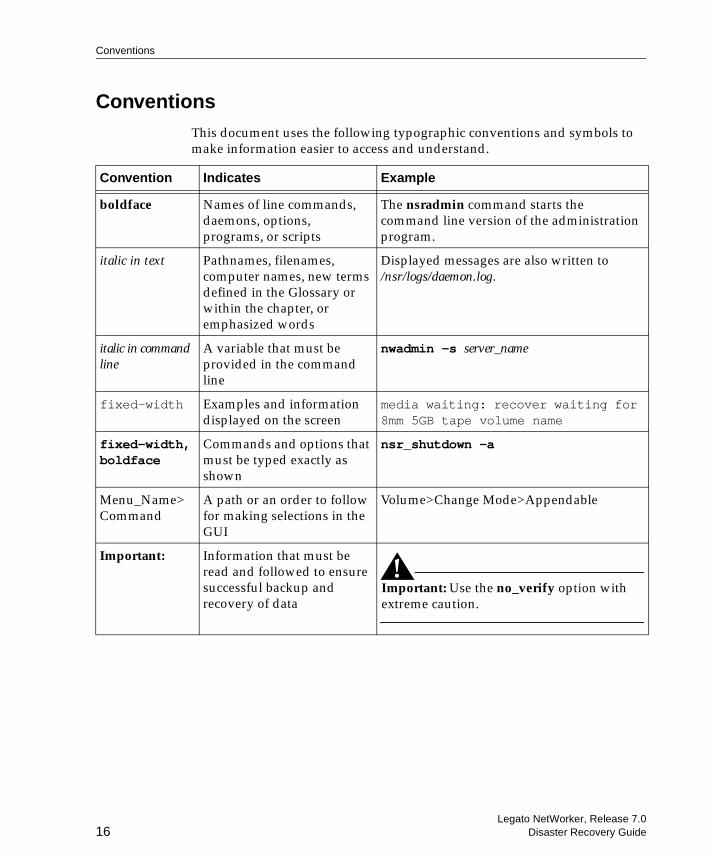
ConventionsThis document uses the following typographic conventions and symbols to make information easier to access and understand.
Convention Indicates Example
boldface Names of line commands, daemons, options, programs, or scripts
The nsradmin command starts the command line version of the administration program.
italic in text Pathnames, filenames, computer names, new terms defined in the Glossary or within the chapter, or emphasized words
Displayed messages are also written to /nsr/logs/daemon.log.
italic in command line
A variable that must be provided in the command line
nwadmin -s server_name
fixed-width Examples and information displayed on the screen
media waiting: recover waiting for 8mm 5GB tape volume name
fixed-width, boldface
Commands and options that must be typed exactly as shown
nsr_shutdown -a
Menu_Name>Command
A path or an order to follow for making selections in the GUI
Volume>Change Mode>Appendable
Important: Information that must be read and followed to ensure successful backup and recovery of data
Important: Use the no_verify option with extreme caution.
Preface
Legato NetWorker, Release 7.0Disaster Recovery Guide 17
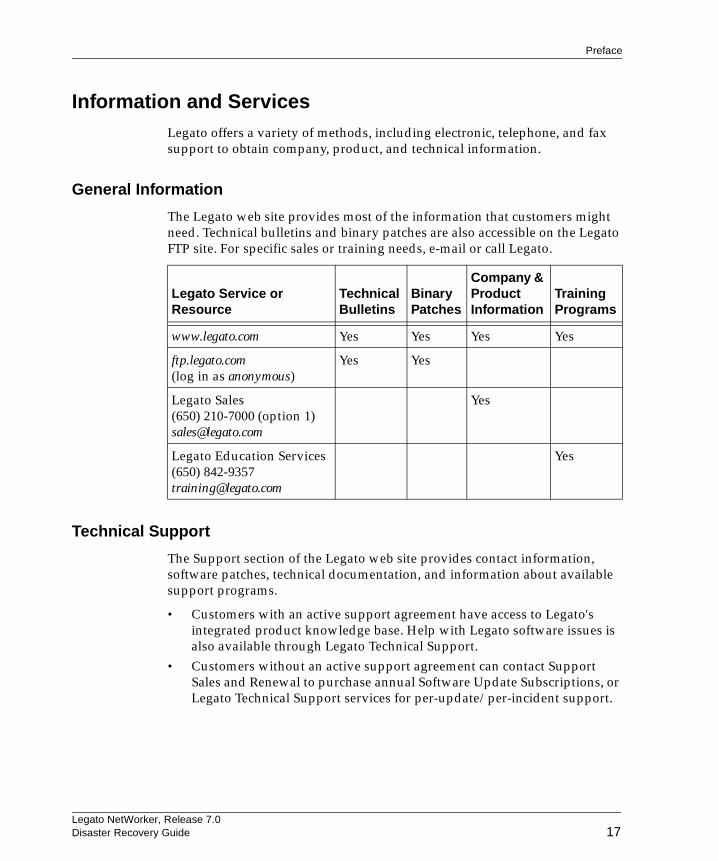
Information and ServicesLegato offers a variety of methods, including electronic, telephone, and fax support to obtain company, product, and technical information.
General Information
The Legato web site provides most of the information that customers might need. Technical bulletins and binary patches are also accessible on the Legato FTP site. For specific sales or training needs, e-mail or call Legato.
Technical Support
The Support section of the Legato web site provides contact information, software patches, technical documentation, and information about available support programs.
• Customers with an active support agreement have access to Legato's integrated product knowledge base. Help with Legato software issues is also available through Legato Technical Support.
• Customers without an active support agreement can contact Support Sales and Renewal to purchase annual Software Update Subscriptions, or Legato Technical Support services for per-update/per-incident support.
Legato Service or Resource
Technical Bulletins
Binary Patches
Company & Product Information
Training Programs
www.legato.com Yes Yes Yes Yes
ftp.legato.com(log in as anonymous)
Yes Yes
Legato Sales(650) 210-7000 (option 1)[email protected]
Yes
Legato Education Services(650) [email protected]
Yes
Legato NetWorker, Release 7.0Disaster Recovery Guide
Licensing and Registration
18
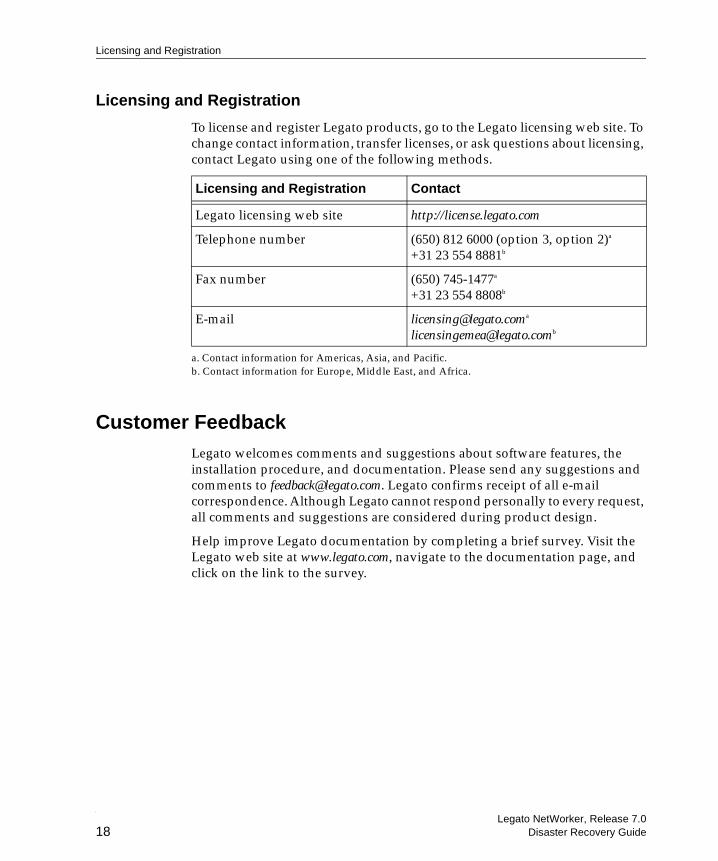
Licensing and Registration
To license and register Legato products, go to the Legato licensing web site. To change contact information, transfer licenses, or ask questions about licensing, contact Legato using one of the following methods.
Customer FeedbackLegato welcomes comments and suggestions about software features, the installation procedure, and documentation. Please send any suggestions and comments to [email protected]. Legato confirms receipt of all e-mail correspondence. Although Legato cannot respond personally to every request, all comments and suggestions are considered during product design.
Help improve Legato documentation by completing a brief survey. Visit the Legato web site at www.legato.com, navigate to the documentation page, and click on the link to the survey.
Licensing and Registration Contact
Legato licensing web site http://license.legato.com
Telephone number (650) 812 6000 (option 3, option 2)a
+31 23 554 8881b
a. Contact information for Americas, Asia, and Pacific.b. Contact information for Europe, Middle East, and Africa.
Fax number (650) 745-1477a
+31 23 554 8808b
E-mail [email protected]
Legato NetWorker, Release 7.0Disaster Recovery Guide 19
Chapter 1: Introduction
The Legato NetWorker Disaster Recovery Guide, Release 7.0 provides step-by-step instructions for recovering from a disaster on supported NetWorker 7.x client and server platforms.
This chapter includes the following sections:
• “What Is a Disaster?” on page 19• “Disaster Recovery Guide Overview” on page 20
What Is a Disaster?For the purpose of this guide, a disaster is any situation in which the day-to-day access to data (for example, working files, software programs, or system files) is disrupted. A disaster can also damage network components, such as data, devices, hardware, media, and software.
A disaster can result from any of the following:
• Computer viruses that can corrupt data• Hardware and software failures• Infrastructure interruptions, inconsistencies, or loss of services, such as
communication or network connections
The degree of loss during a disaster can range from one or more files to an entire computer system. The severity of the disaster determines the procedures necessary to recover data.
Note: The term autochanger refers to a variety of backup devices: autoloader, carousel, datawheel, jukebox, library, and near-line storage.
Legato NetWorker, Release 7.0Disaster Recovery Guide
1
Disaster Recovery Guide Overview
20
Disaster Recovery Guide OverviewThe guide includes the following topics to help you prepare for and perform a recovery of NetWorker servers, clients, and storage nodes:
• “Chapter 2: Preparing for a Disaster” on page 21• “Chapter 3: UNIX Disaster Recovery” on page 25• “Chapter 4: Windows Disaster Recovery” on page 47• “Chapter 5: NetWare Disaster Recovery” on page 89• “Chapter 6: Microsoft Cluster Disaster Recovery (Windows NT 4.0)” on
page 111• “Chapter 7: Microsoft Cluster Disaster Recovery (Windows 2000 and
.NET)” on page 127• “Chapter 8: Sun Cluster Disaster Recovery” on page 135• “Chapter 9: HP TruCluster Disaster Recovery” on page 139• “Chapter 10: HP-UX Cluster Disaster Recovery” on page 153• “Chapter 11: Legato AAM for AIX, HP-UX, and Linux Disaster
Recovery” on page 157• “Chapter 12: HACMP for AIX Disaster Recovery” on page 165
Legato NetWorker, Release 7.0Disaster Recovery Guide 21
Chapter 2: Preparing for a Disaster
This chapter contains information on preparing for a disaster.
This chapter includes the following sections:
• “Preparing for Disaster” on page 21• “Gathering the Key Information” on page 22
If you are viewing the online version of this guide, print out a hard copy and store it in a safe location.
Preparing for DisasterYou should back up important data on a scheduled basis. The more time and effort you invest in incorporating, maintaining, and testing a backup solution, the better prepared you are in the event of a disaster.
Ensure that servers are backed up regularly using a backup group. Otherwise, a bootstrap is not saved (backups performed using the command line or the NetWorker User program do not save the NetWorker server bootstrap). You should also use a local backup device on the server to back up the server’s bootstrap.
Always perform a scheduled backup of the NetWorker server after upgrading to a new release of NetWorker software. This ensures that an upgraded version of the bootstrap is saved.
The bootstrap information can be printed from the savegrp.log file, which is located in the nsr directory. For instructions on how to configure the NetWorker software to send bootstrap information directly to a printer or to a specified e-mail address, refer to the appropriate Administrator’s Guide. If the bootstrap is backed up to a pool other than the preconfigured pools, save the name of the pool along with the bootstrap.
Legato NetWorker, Release 7.0Disaster Recovery Guide
2
Gathering the Key Information
22
To recover from network-related disasters, you must have access to key information related to each computer that needs protection. Maintain a copy of this information on-site for easy access by those assigned to perform disaster recovery.
Important: Having the correct information on hand in case a disaster occurs is a key element in recovering from a disaster as quickly as possible.
Enact strict guidelines regarding the access, maintenance, and usage of this information, and maintain the information in an on-site location that is the most resistant to disaster.
Gathering the Key InformationMaintain accurate records for each hardware, software, network, device, and media component.
Hardware Information
Maintain the following up-to-date information regarding computer hardware:
• Filesystem configuration• Fully qualified domain names, IP addresses, and hostnames• For Domain Name System (DNS) clients, maintain the DNS host’s
internet address and hostname• Hard drive configuration• Media device names• Hardware vendor contact information and contract number• Configuration information for each piece of hardware, both active and
inactive, within the organization or organizational site
To obtain hardware information for the following operating systems:
• NetWare, see “Obtain the Hard Drive Information” on page 90• UNIX, see “Prerequisites” on page 27• Windows, see “Replacing a Hard Drive” on page 52
Legato NetWorker, Release 7.0Disaster Recovery Guide
Chapter 2: Preparing for a Disaster
2
23
Software Information
Maintain the following up-to-date information regarding computer software:
• Copies of the original operating system media and patches (and where they are located)
• Software enabler and authorization codes• Software vendor contact information and contract number
• The operating system version and patches installed• Operating system configuration• Emergency media that can be used to restore a computer in the event of a
disaster• NetWorker bootstrap information for each NetWorker server• Kernel configuration and location• Device drivers• A list of any Windows volume mount points.
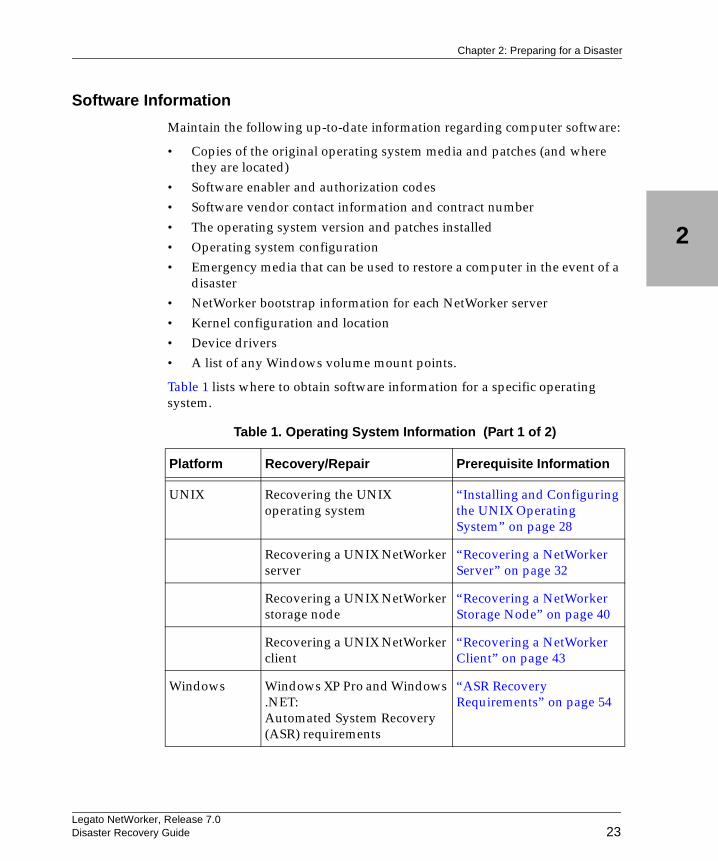
Table 1 lists where to obtain software information for a specific operating system.
Table 1. Operating System Information (Part 1 of 2)
Platform Recovery/Repair Prerequisite Information
UNIX Recovering the UNIX operating system
“Installing and Configuring the UNIX Operating System” on page 28
Recovering a UNIX NetWorker server
“Recovering a NetWorker Server” on page 32
Recovering a UNIX NetWorker storage node
“Recovering a NetWorker Storage Node” on page 40
Recovering a UNIX NetWorker client
“Recovering a NetWorker Client” on page 43
Windows Windows XP Pro and Windows .NET:Automated System Recovery (ASR) requirements
“ASR Recovery Requirements” on page 54
Legato NetWorker, Release 7.0Disaster Recovery Guide
2
Software Information
24
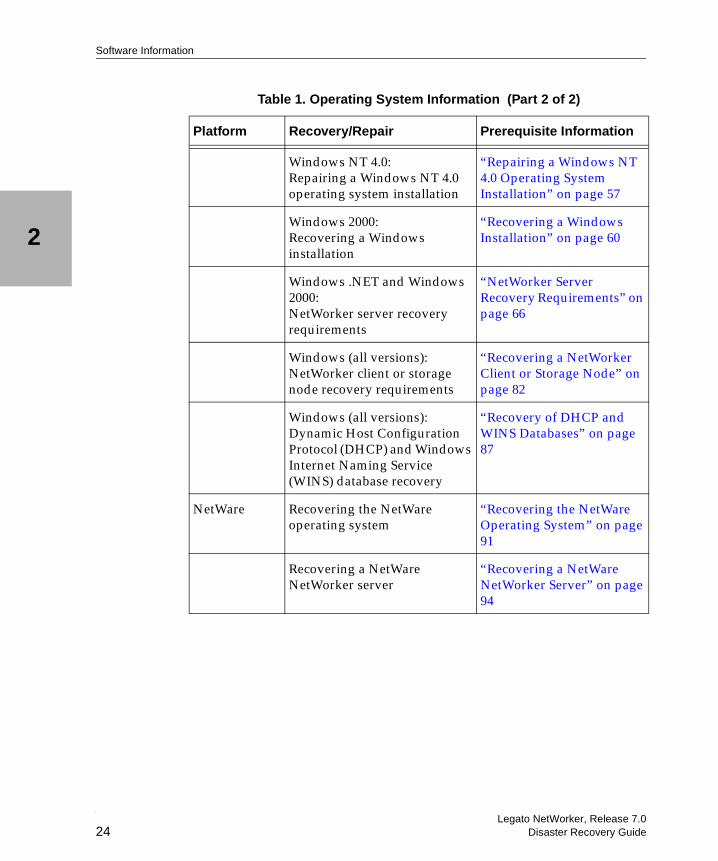
Windows NT 4.0:Repairing a Windows NT 4.0 operating system installation
“Repairing a Windows NT 4.0 Operating System Installation” on page 57
Windows 2000:Recovering a Windows installation
“Recovering a Windows Installation” on page 60
Windows .NET and Windows 2000:NetWorker server recovery requirements
“NetWorker Server Recovery Requirements” on page 66
Windows (all versions):NetWorker client or storage node recovery requirements
“Recovering a NetWorker Client or Storage Node” on page 82
Windows (all versions):Dynamic Host Configuration Protocol (DHCP) and Windows Internet Naming Service (WINS) database recovery
“Recovery of DHCP and WINS Databases” on page 87
NetWare Recovering the NetWare operating system
“Recovering the NetWare Operating System” on page 91
Recovering a NetWare NetWorker server
“Recovering a NetWare NetWorker Server” on page 94
Table 1. Operating System Information (Part 2 of 2)
Platform Recovery/Repair Prerequisite Information
Legato NetWorker, Release 7.0Disaster Recovery Guide 25
Chapter 3: UNIX Disaster Recovery
This chapter explains how to recover from a disaster on a UNIX server, client, or storage node host computer running NetWorker 7.x software.
This chapter includes the following sections:
• “Disaster Recovery Procedures” on page 26• “Replacing a Hard Drive” on page 27• “Installing and Configuring the UNIX Operating System” on page 28• “Recovering a NetWorker Server” on page 32• “Recovering a NetWorker Storage Node” on page 40• “Recovering a NetWorker Client” on page 43
Legato NetWorker, Release 7.0Disaster Recovery Guide
3
Disaster Recovery Procedures
26
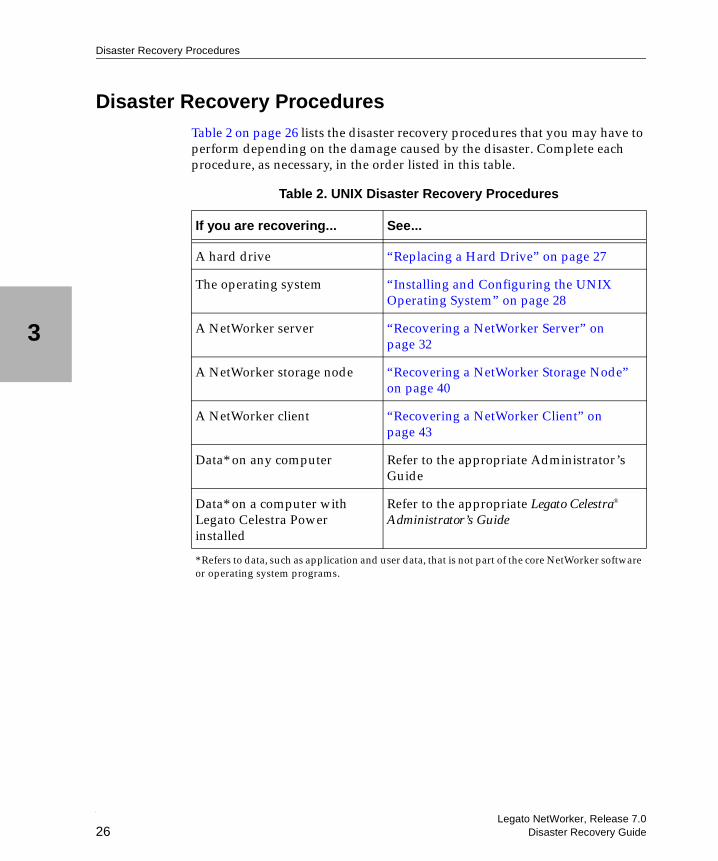
Disaster Recovery ProceduresTable 2 on page 26 lists the disaster recovery procedures that you may have to perform depending on the damage caused by the disaster. Complete each procedure, as necessary, in the order listed in this table.
Table 2. UNIX Disaster Recovery Procedures
If you are recovering... See...
A hard drive “Replacing a Hard Drive” on page 27
The operating system “Installing and Configuring the UNIX Operating System” on page 28
A NetWorker server “Recovering a NetWorker Server” on page 32
A NetWorker storage node “Recovering a NetWorker Storage Node” on page 40
A NetWorker client “Recovering a NetWorker Client” on page 43
Data* on any computer Refer to the appropriate Administrator’s Guide
Data* on a computer with Legato Celestra Power installed
Refer to the appropriate Legato Celestra® Administrator’s Guide
* Refers to data, such as application and user data, that is not part of the core NetWorker software or operating system programs.
Legato NetWorker, Release 7.0Disaster Recovery Guide
Chapter 3: UNIX Disaster Recovery
3
27
Replacing a Hard DriveThe following sections provide important information to be aware of when replacing a hard drive as part of a disaster recovery:
• “Prerequisites” on page 27• “Replacing the Hard Drive” on page 27• “Completing the Recovery Process” on page 28
Prerequisites
To help ensure that you are prepared to replace and reconfigure a hard drive, maintain a current record of the system information. Obtain the following information using the appropriate operating system commands:
• Size of the drive• Filesystem volume information• Volume label assigned to each disk partition• How the disk is partitioned• How the disk is loaded• The size of the disk• Each logical volume (size and label)• Each filesystem
Note: Though it does not affect NetWorker operation, you could also note any use of mirroring, Redundant Array of Independent Disk (RAID), striping, compression, or volume sets.
Replacing the Hard Drive
If one or more hard drives fail, refer to the appropriate operating system documentation and hard drive vendor documentation for detailed instructions on how to replace the hard drives.
Important: To ensure that you can recover all of the drive’s data, install a new drive that is the same size or larger than the original drive.
Legato NetWorker, Release 7.0Disaster Recovery Guide
3
Completing the Recovery Process
28
Completing the Recovery Process
To complete the recovery process after replacing the hard drive, recover the following:
1. The UNIX operating system, if necessary. For information, see “Installing and Configuring the UNIX Operating System” on page 28.
2. The NetWorker software corresponding to the type of NetWorker computer you are recovering. For more information, see:
• “Recovering a NetWorker Server” on page 32.• “Recovering a NetWorker Storage Node” on page 40.• “Recovering a NetWorker Client” on page 43.Each of the preceding procedures describe how to recover the NetWorker software as well as the computer’s application and user data.
Installing and Configuring the UNIX Operating SystemThe following sections provide information on reinstalling and configuring the UNIX operating system:
• “Prerequisites” on page 28• “How to Install and Configure the UNIX Operating System” on page 29• “Completing the Recovery Process” on page 32
Prerequisites
To recover the operating system, record the following information and ensure that it is current:
• Version and patch level of the operating system• Installation path of the operating system• TCP/IP properties:
– Adapter type– IP address– Default gateway– Subnet mask– DNS server
Legato NetWorker, Release 7.0Disaster Recovery Guide
Chapter 3: UNIX Disaster Recovery
3
29
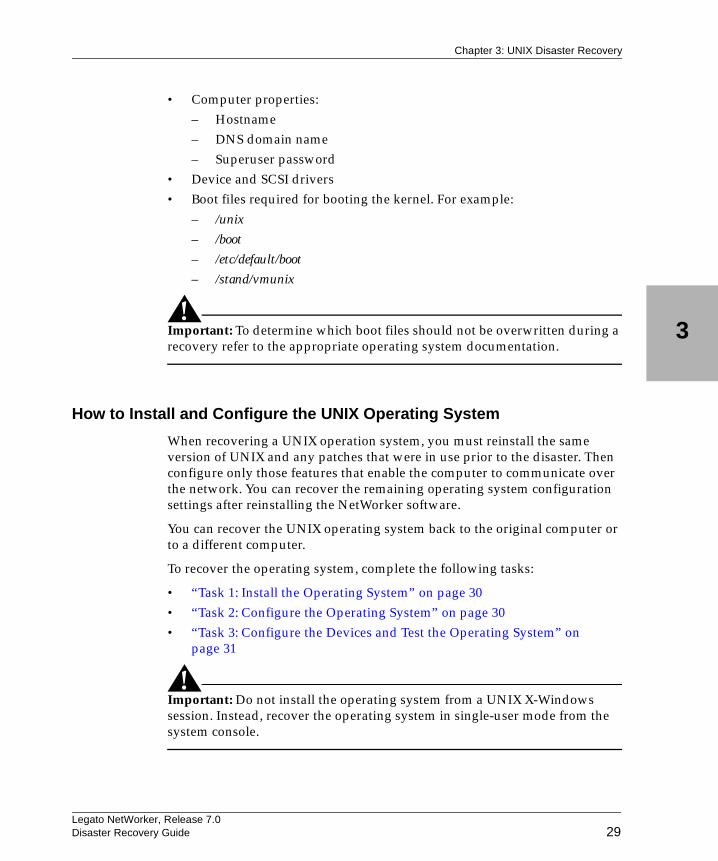
• Computer properties:– Hostname– DNS domain name– Superuser password
• Device and SCSI drivers• Boot files required for booting the kernel. For example:
– /unix
– /boot
– /etc/default/boot
– /stand/vmunix
Important: To determine which boot files should not be overwritten during a recovery refer to the appropriate operating system documentation.
How to Install and Configure the UNIX Operating System
When recovering a UNIX operation system, you must reinstall the same version of UNIX and any patches that were in use prior to the disaster. Then configure only those features that enable the computer to communicate over the network. You can recover the remaining operating system configuration settings after reinstalling the NetWorker software.
You can recover the UNIX operating system back to the original computer or to a different computer.
To recover the operating system, complete the following tasks:
• “Task 1: Install the Operating System” on page 30• “Task 2: Configure the Operating System” on page 30• “Task 3: Configure the Devices and Test the Operating System” on
page 31
Important: Do not install the operating system from a UNIX X-Windows session. Instead, recover the operating system in single-user mode from the system console.
Legato NetWorker, Release 7.0Disaster Recovery Guide
3
Prerequisites
30
Task 1: Install the Operating System
To install the operating system:
1. Install the same version and patch level of the UNIX operating system. Specify the same installation locations that were used in the predisaster installation of the operating system. For installation information, refer to the appropriate UNIX documentation.
If you want to upgrade the operating system, recover the predisaster version of the operating system before performing any upgrades.
2. Re-create all of the filesystems that were previously on the computer.
The filesystems must be:• The same filesystem type.• At least the same partition size as the original to hold all of the data
that was previously backed up.At a minimum, configure the root volume group and kernel parameters, such as asynchronous I/O. If the resources are available, reconstruct nonroot volume group filesystems and logical volumes.
Task 2: Configure the Operating System
To configure the operating system:
1. Configure the network exactly as it was before the disaster. If you do not, the NetWorker software will treat the computer as a new computer. If the computer has a different host ID, you must reregister the NetWorker software. For information on registering the NetWorker software, refer to the appropriate Legato NetWorker Installation Guide.
2. If you are recovering the operating system to a different computer, assign the same hostname to the new computer. Otherwise, you will not be able to recover the NetWorker indexes associated with the original computer.
3. Configure the date and time as they were before, including the time zone.
4. Install any additional UNIX components or services before recovering the computer’s data.
5. Reboot the computer.
Legato NetWorker, Release 7.0Disaster Recovery Guide
Chapter 3: UNIX Disaster Recovery
3
31
Task 3: Configure the Devices and Test the Operating System
To configure the devices and test the operating system:
1. Configure any devices the NetWorker software requires, for example SCSI pass-through devices for autochangers. For information about configuring devices, refer to the Legato NetWorker Administrator’s Guide, UNIX Version.
2. Test that the:
• Name to Address resolution and TCP/IP are functioning properly. To test these, run ping on the server to reach a client, and then run ping on a client to reach the server.
• Operating system is functioning properly.• Tape drive is functioning properly. To test this, run the mt
commands.• Operating system recognizes devices. If the operating system is not
recognizing devices, you might need to:– Load the SCSI driver.– Install the device driver software.– Modify the device configuration files to enable the computer to
communicate with the device during recovery. For details on modifying the device configuration files, refer to the Legato NetWorker Administrator’s Guide.
3. Ensure that the block size mode for tape devices used with NetWorker is set to variable. Otherwise, data recovery may fail. The procedure for setting the device block size varies depending on your operating system. For example, to set the tape device block size on an AIX system:
a. Open the IBM System Management Interface Tool (SMIT) and select the Devices box in the System Management section near the bottom of the SMIT window.
b. Select Tape Drive.c. Select Change/Show Characteristics of a Tape Drive. This brings up a
list of tape drives.d. Select a tape drive from the list. The attributes of the selected tape
drive will display.e. Ensure that the BLOCK size (0=variable length) (Num.) is set to 0.f. Repeat step d and step e for each tape drive the NetWorker software
uses.For information about setting the tape device block size on the operating system, refer to the operating system documentation.
Legato NetWorker, Release 7.0Disaster Recovery Guide
3
Completing the Recovery Process
32
Completing the Recovery Process
To complete the recovery process after installing and configuring the operating system, use the following procedures, depending on the type of NetWorker computer you are recovering. These procedures describe how to recover the NetWorker software as well as the computer’s application and user data:
• “Recovering a NetWorker Server” on page 32.
• “Recovering a NetWorker Storage Node” on page 40.• “Recovering a NetWorker Client” on page 43.
Recovering a NetWorker ServerThe following sections provide information on recovering a NetWorker server:
• “Prerequisites” on page 32• “How to Recover a NetWorker Server” on page 32
Prerequisites
Before you can recover the NetWorker server, be sure that the UNIX operating system is installed on the computer. For information about reinstalling the UNIX operating system, see “Installing and Configuring the UNIX Operating System” on page 28.
To recover the NetWorker server, you need the following:
• Version and patch level of the NetWorker server software.• Original directory location to which the NetWorker server was installed.• NetWorker server installation media.• Backup or clone volumes containing the NetWorker server bootstrap and
indexes.• Name of any links to NetWorker directories. An example of a typical link
from a NetWorker directory to a user directory is /nsr to /usr/nsr.
How to Recover a NetWorker Server
This section describes how to recover the NetWorker server back to the original computer.
Legato NetWorker, Release 7.0Disaster Recovery Guide
Chapter 3: UNIX Disaster Recovery
3
33
Important: If the NetWorker server was also a Legato License Manager server, the License Manager lictype.res file is not restored when the server is restored. This is because the License Manager files and directories are not considered part of the NetWorker server. After recovering the NetWorker server, you must explicitly recover the License Manager as a client of the NetWorker server.
To recover a NetWorker server, complete the following tasks:
• “Task 1: Install the NetWorker Server Software” on page 33• “Task 2: Configure NetWorker Device Resources” on page 34• “Task 3: Locate the Server’s Bootstrap Save Set ID” on page 34• “Task 4: Recover the NetWorker Server Bootstrap” on page 36• “Task 5: Rename the NetWorker Server Configuration Files” on page 37• “Task 6: Recover All Client File Indexes” on page 38• “Task 7: Recover the Application and User Data” on page 39• “Task 8: Perform a Test Backup and Recovery” on page 39
Task 1: Install the NetWorker Server Software
To install the NetWorker server software:
1. Install the same version of the NetWorker server software into its original location. When you install the NetWorker server software, the NetWorker client is also installed. For installation instructions, refer to the appropriate Legato NetWorker Installation Guide.
Note: If you want to upgrade the NetWorker server, first recover the server to its original state, then perform the upgrade.
2. Install any NetWorker patches that were installed prior to the disaster.
3. Re-create any links to the NetWorker directories such as the directories containing NetWorker index and configuration files.
Legato NetWorker, Release 7.0Disaster Recovery Guide
3
Prerequisites
34
To re-create links to NetWorker directories:a. Stop the NetWorker daemons by entering the nsr_shutdown
command at the command line:# nsr_shutdown -a
b. Move the files to their original location.c. Create the links from the /nsr directory to the original location.d. Restart the NetWorker server by first entering the nsrexecd
command and then entering the nsrd command, for example:# nsrexecd
# nsrd
Note: You can also restart the NetWorker server by running the NetWorker startup script for the appropriate platform.
Task 2: Configure NetWorker Device Resources
To configure the NetWorker software:
• Configure the device resources.– If you want to recover data using a stand-alone device, ensure that a
resource for the stand-alone device exists (this is defined in the /nsr/res directory). If a resource for the stand-alone device does not exist, create it using the NetWorker Administrator program.
– If you want to recover data using an autochanger, ensure that an autochanger resource exists (this is defined in the /nsr/res directory). If the autochanger resource does not exist, create it using the jbconfig command. For information about using the jbconfig command, refer to the Legato NetWorker Administrator’s Guide.Reset the autochanger using the nsrjb -vHE command. This command resets the autochanger, ejects backup volumes, reinitializes the element status, and checks each slot for a volume.If the autochanger does not support the -E option, initialize the element status using sjiielm (on Linux, use ielem).Inventory the autochanger using the nsrjb -I command. This helps you determine whether the volumes required to recover the bootstrap are located inside the autochanger.
Task 3: Locate the Server’s Bootstrap Save Set ID
The bootstrap contains the media database, the resource database, and the server index.
Legato NetWorker, Release 7.0Disaster Recovery Guide
Chapter 3: UNIX Disaster Recovery
3
35
Important: If you routinely move NetWorker backup media to an offsite location for safekeeping, and a subsequent file recover operation generates a mount request, the recover operation waits until an operator mounts the request media. To avoid delays when recovering files, use the mminfo -mv command to list the media that is associated with the file you want to recover and to retrieve the media from the offsite storage before starting the recover.
To locate the save set ID of the most recent bootstrap (if you do not already have this information):
1. Insert the most recent media or clone volumes used for scheduled backups into the appropriate device.
2. At the command line, switch to the directory where the NetWorker binaries and executables are located.
3. If you are using an autochanger, insert the first volume of the bootstrap save set into the first drive of the autochanger using the following command:
nsrjb -lnv -S slot -f device_name
where:– slot is the slot where the first volume is located.– device_name is the pathname for the first drive. You can obtain the
device_name using the inquire command.
4. Use the scanner -B command to determine the save set ID of the most recent bootstrap on the media. For example:
Solaris:scanner -B /dev/rmt/0hbn
Linux:scanner -B /dev/nst0
If you do not locate the save set ID of the most recent bootstrap on the most recent media, run the scanner -B command on preceding media to locate the save set ID of the most recent bootstrap.
5. Record both the bootstrap save set ID and the volume label from the output.
Legato NetWorker, Release 7.0Disaster Recovery Guide
3
Prerequisites
36
Task 4: Recover the NetWorker Server Bootstrap
You can use the mmrecov command to recover the NetWorker server bootstrap.
Note: In NetWorker release 6.0 and later, the mmrecov command is only used to recover the NetWorker server’s media database and resource database; the nsrck command is used to recover the server’s client file indexes.
To recover the NetWorker server bootstrap:
1. Use the mmrecov command to recover the NetWorker server’s bootstrap (media database and resource database). For example:
mmrecov
Output similar to the following appears:mmrecov: Using madrid.spain.com as server
Important: The mmrecov command overwrites the server’s media database. It does not overwrite the resource database, instead mmrecov recovers it to the resource directory, res.R. For syntax and option information about mmrecov, refer to the Legato Command Reference Guide.
2. If the server has multiple devices configured and enabled, the following message appears. If you receive this message, enter the name of the device you are using for the recovery.
What is the name of the device you plan on using [/dev/rmt/0hbn]? /dev/rmt/0hbn
3. When the following message appears, enter the save set ID for the latest bootstrap. If you are recovering a cloned version of the bootstrap, specify the save set ID associated with the clone.
Enter the latest bootstrap save set ID []: 20076
4. When the following message appears, enter the file number to begin the recovery. If unknown, press [Enter].
Enter starting file number (if known) [0]: 130
5. When the following message appears, enter the first record number to begin the recovery. If unknown, press [Enter].
Enter starting record number (if known) [0]: 0
6. When the following message appears, follow the prompt:
Legato NetWorker, Release 7.0Disaster Recovery Guide
Chapter 3: UNIX Disaster Recovery
3
37
Please insert the volume on which save set id 20076 started into /dev/rmt/0hbn.
Once you have loaded the appropriate volume, the following message appears:Scanning /dev/rmt/0hbn for save set 20076; this might take a while...
NetWorker then scans the volume for the appropriate save set and recovers it. The NetWorker media database and resource database are recovered when the following message appears:If your resource files were lost, they are now recovered in the ‘res.R’ directory. Copy or move them to the ‘res’ directory, after you have shut down the service. Then restart the service.
Otherwise, just restart the service.
If the on-line index for the server-name was lost, it can be recovered using the nsrck command.
Task 5: Rename the NetWorker Server Configuration Files
Because the configuration files cannot be reliably overwritten while the NetWorker software is running, mmrecov recovered the res directory as res.R by default. In addition, mmrecov might have recovered another server’s configuration file in this directory.
To rename the configuration files:
1. Stop the daemons by entering the nsr_shutdown command at the command line:
nsr_shutdown -a
2. Rename the existing /nsr/res directory to /nsr/res.orig:
mv res res.orig
3. Rename the recovered /nsr/res.R directory to /nsr/res:
mv res.R res
4. Restart the NetWorker server by first entering the nsrexecd command, then entering the nsrd command, for example:
nsrexecd
nsrd
Legato NetWorker, Release 7.0Disaster Recovery Guide
3
Prerequisites
38
Note: You can also restart the NetWorker server by running the NetWorker startup script for the appropriate platform.
5. After verifying that the NetWorker configurations are correct, remove the /nsr/res.orig directory.
6. Run the nsrjb -HE command to reset the autochanger.
7. If you are using an autochanger, run the nsrjb -Iv command to reinventory the autochanger; or run the nsrjb -Iv -S command to reinventory only the affected slots.
Task 6: Recover All Client File Indexes
Once you recover the server’s media database and resource database, recover all client file indexes on the NetWorker server. You will recover one client file index for each NetWorker client that the NetWorker server backed up.
Note: Because a NetWorker server always has the NetWorker client installed, this task includes recovering the client file index for the NetWorker server.
To recover all client file indexes:
1. Enter the nsrck -L7 command:
nsrck -L7 client_name
2. If you are using a cloned version of the client file index, the NetWorker server may prompt you to load an original volume (not the clone volume).
To use the clone:a. Enter [Ctrl]+[c] to exit out of nsrck and verify that the pending
original volume message has terminated. b. Delete the records of the original volumes using the nsrmm -d
volume_name command. For example:The NetWorker server requests the original volume mars.1. Because this volume is not available, delete the mars.1 volume from the media database using the following command:
nsrmm -d mars.1
c. Enter the nsrck -L7 command: nsrck -L7 client_name
Note: Although you must recover a computer’s client file index before you can select individual files to recover, you can recover an entire save set on a computer by using a save set recover.
Legato NetWorker, Release 7.0Disaster Recovery Guide
Chapter 3: UNIX Disaster Recovery
3
39
Task 7: Recover the Application and User Data
To recover the application and user data that was on the NetWorker server:
1. Log in as root.
2. Load and inventory the devices. This ensures that the NetWorker server can recognize the location of each volume.
Note: If you load a clone volume, you must either delete the original volume from the media database or mark it as suspect in the media database. If you are using a clone volume, it will be used for the remainder of the recovery process.
3. Run the nwrecover program.
4. Mark all of the directories or files that you want to recover.
Important: Do not recover any UNIX operating system boot files that should not be overwritten during a recovery. For more information on boot files, see “Prerequisites” on page 28.
5. Click Start to begin the recovery.
Note: By default, the directed recover option is enabled when you install the NetWorker client. If the directed recover option was disabled on the client before the disaster, you need to explicitly set this option to disable directed recoveries to this client. This option is set through the nsradmin command. For more information about setting the disable directed recover option on the NetWorker client, refer to the Legato NetWorker Administrator’s Guide, UNIX Version.
Task 8: Perform a Test Backup and Recovery
To test the server recovery process:
1. Perform a test backup or recovery to make sure the server is fully recovered.
2. Verify that the server and its associated clients are included in a scheduled backup.
Legato NetWorker, Release 7.0Disaster Recovery Guide
3
Recovering a NetWorker Storage Node
40
Recovering a NetWorker Storage NodeThe storage node allows you to access the volumes on which the backups for all of the network computers reside. If the storage node experiences a disaster, it must be recovered before you can restore application and user data to other computers on the network.
The following sections provide information on recovering a NetWorker storage node:
• “Prerequisites” on page 40• “How to Recover a NetWorker Storage Node” on page 40
Prerequisites
Before recovering the NetWorker storage node, ensure that the UNIX operating system is installed on the computer and that the NetWorker server is functional and available on the network.
If you need to reinstall the UNIX operating system, see “Installing and Configuring the UNIX Operating System” on page 28.
If you need to recover the NetWorker server, see “Recovering a NetWorker Server” on page 32.
Additionally, ensure that you have the following:
• Hostname of the NetWorker server.• Version and patch level of the NetWorker storage node software that was
on the computer before the disaster occurred.• Name of any links to NetWorker directories. An example of a typical link
from a NetWorker directory to a user directory is /nsr to /usr/nsr.
How to Recover a NetWorker Storage Node
This section describes how to recover a NetWorker storage node computer back to the original computer or to a different computer.
To recover a NetWorker storage node, complete the following tasks:
• “Task 1: Install the NetWorker Storage Node” on page 41• “Task 2: Recover the Application and User Data” on page 41• “Task 3: Perform a Test Backup and Recovery” on page 42
Legato NetWorker, Release 7.0Disaster Recovery Guide
Chapter 3: UNIX Disaster Recovery
3
41
Task 1: Install the NetWorker Storage Node
To install the NetWorker storage node software:
1. Install the same version of the NetWorker storage node software into its original location.
Note: If you want to upgrade the storage node software, first recover the storage node to its original state, and then perform the upgrade.
2. Install any NetWorker backup utility patches that were installed prior to the disaster.
3. Re-create any links to NetWorker directories.
4. Optionally, use the nwrecover program to perform a test recovery to ensure that the recovery process is functioning properly.
Note: The NetWorker client software is also installed when you install the storage node software.
The storage node can now access volumes that contain backups for other computers on the network. These volumes contain the application and user data that are required to fully recover computers that were protected with the NetWorker client software.
If you want to recover the application and user data for other NetWorker clients, see “Recovering a NetWorker Client” on page 43.
If you want to recover application and user data that was on the storage node computer, see, “Task 2: Recover the Application and User Data” on page 41.
Task 2: Recover the Application and User Data
To recover the application and user data that was on the NetWorker storage node computer:
1. If you need to determine which volumes contain the application and user data backups for this computer, use the mminfo -avot command on the NetWorker server, for example:
# mminfo -avot -c storage_node_name
where storage_node_name is the hostname of the computer whose application and user data you are recovering.
2. Start the nwrecover program on the storage node computer.
3. Mark all of the directories and files that you want to recover.

Legato NetWorker, Release 7.0Disaster Recovery Guide
3
Prerequisites
42
Important: Do not recover any UNIX operating system boot files that should not be overwritten during a recovery. For more information on boot files, see “Prerequisites” on page 28.
4. To set the recover options, select Recover Options from the Options menu.
5. In the Recover Options dialog box, selecting Overwrite Existing File.
Important: If you did not set the recover options, you must select the Overwrite Existing File option when the Naming Conflict dialog box appears during the recovery process. To enable automatic overwriting of files with the same name, select the Suppress Further Prompting option in the Naming Conflict dialog box.
6. Select Start.
7. Reboot the computer when the recovery is complete. The computer should now be restored as it was prior to the disaster.
Note: By default, the directed recover option is enabled when you install the NetWorker client. If the directed recover option was disabled on the client before the disaster, you need to explicitly set this option to disable directed recoveries to this client. This option is set through the nsradmin command. For more information about setting the disable directed recover option on the NetWorker client, refer to the Legato NetWorker Administrator’s Guide, UNIX Version.
Task 3: Perform a Test Backup and Recovery
To test the NetWorker storage node backup and recovery process:
1. Perform a test backup using each of the Legato backup utilities incorporated into the backup solution.
2. Perform a test recovery using the Legato utility used to back up the data. For details, refer to the Legato NetWorker Administrator’s Guide.
Legato NetWorker, Release 7.0Disaster Recovery Guide
Chapter 3: UNIX Disaster Recovery
3
43
Recovering a NetWorker ClientThe following sections provide information on recovering a NetWorker client:
• “Prerequisites” on page 43• “How to Recover a NetWorker Client” on page 43
Prerequisites
Before recovering the NetWorker client, ensure that the UNIX operating system is installed on the computer and that the NetWorker server is functional and available on the network.
If you need to reinstall the UNIX operating system, see “Installing and Configuring the UNIX Operating System” on page 28.
If you need to recover the NetWorker server, see “Recovering a NetWorker Server” on page 32.
Additionally, ensure that you have the following:
• Version and patch level of the NetWorker client.• The name of the computer on which the NetWorker server is running.• Name of any links to NetWorker directories. An example of a typical link
from a NetWorker directory to a user directory is /nsr to /usr/nsr.
How to Recover a NetWorker Client
This section describes how to recover a NetWorker client computer back to the original computer or to a different computer.
To recover a NetWorker client, complete the following tasks:
• “Task 1: Install NetWorker Client” on page 43• “Task 2: Recover the Application and User Data” on page 44• “Task 3: Perform a Test Backup and Recovery” on page 45
Task 1: Install NetWorker Client
To install the NetWorker client software:
1. Install the same version of the NetWorker client into its original location.
Note: If you want to upgrade the client software, first recover the client to its original state, and then perform the upgrade.
Legato NetWorker, Release 7.0Disaster Recovery Guide
3
Prerequisites
44
2. Install any NetWorker backup utility patches that were installed prior to the disaster.
3. Re-create any links to NetWorker directories.
4. Optionally, use the nwrecover program to perform a test recovery to ensure that the recovery process is functioning properly.
Task 2: Recover the Application and User Data
To recover the application and user data:
1. If you need to determine which volumes contain the application and user data backups for this computer, use the mminfo -avot command on the NetWorker server, for example:
# mminfo -avot -c client_name
where client_name is the hostname of the computer whose application and user data you are recovering.
2. Start the nwrecover program on the client computer whose application and user data you are recovering.
3. Mark all of the directories and files that you want to recover.
Important: Do not recover any UNIX operating system boot files that should not be overwritten during a recovery. For more information on boot files, see “Prerequisites” on page 28.
4. To set the recover options, select Recover Options from the Options menu.
5. In the Recover Options dialog box, selecting Overwrite Existing File.
Important: If you did not set the recover options, you must select the Overwrite Existing File option when the Naming Conflict dialog box appears during the recovery process. To enable automatic overwriting of files with the same name, select the Suppress Further Prompting option in the Naming Conflict dialog box.
6. Select Start.
Legato NetWorker, Release 7.0Disaster Recovery Guide
Chapter 3: UNIX Disaster Recovery
3
45
7. Reboot the computer when the recovery is complete. The computer should now be restored as it was prior to the disaster.
Note: By default, the directed recover option is enabled when you install the NetWorker client. If the directed recover option was disabled on the client before the disaster, you need to explicitly set this option to disable directed recoveries to this client. This option is set through the nsradmin command. For more information about setting the disable directed recover option on the NetWorker client, refer to the Legato NetWorker Administrator’s Guide, UNIX Version.
Task 3: Perform a Test Backup and Recovery
To test the NetWorker client backup and recovery process:
1. Perform a test backup using each of the Legato backup utilities incorporated into the backup solution.
2. Perform a test recovery using the Legato utility used to back up the data. For details, refer to the Legato NetWorker Administrator’s Guide.

Legato NetWorker, Release 7.0Disaster Recovery Guide
3
Prerequisites
46
Legato NetWorker, Release 7.0Disaster Recovery Guide 47
Chapter 4: Windows Disaster Recovery
This chapter explains how to recover from a disaster on a host computer in the following configurations:
• NetWorker release 7.x server or storage node on Microsoft Windows .NET or Windows 2000
• NetWorker release 7.x client on Microsoft Windows .NET, Windows XP Professional, Windows 2000, or Windows NT 4.0
Note: The term autochanger refers to a variety of robotic data storage devices, including autoloaders, carousels, datawheels, jukeboxes, and near-line storage.
Note: Although a Microsoft Removable Storage library can be an autochanger or a stand-alone drive, the NetWorker software provides optional Removable Storage support for autochangers only. For more information, refer to the Legato NetWorker Administrator’s Guide, Microsoft Windows Version.
This chapter includes the following sections:
• “Disaster Recovery Summary Procedures” on page 48• “Disaster Recovery of Multiple Computers” on page 51• “Replacing a Hard Drive” on page 52• “Performing Windows ASR Recovery” on page 53• “Repairing a Windows NT 4.0 Operating System Installation” on page 57• “Recovering a Windows Installation” on page 60• “Recovering a NetWorker Server” on page 66• “Recovering a NetWorker Client or Storage Node” on page 82• “Recovery of DHCP and WINS Databases” on page 87

Legato NetWorker, Release 7.0Disaster Recovery Guide
4
Disaster Recovery Summary Procedures
48
Disaster Recovery Summary ProceduresThe following summary procedures are intended to be used as a guide to the detailed procedures required for performing NetWorker disaster recovery on any supported Microsoft Windows platform. Experienced NetWorker administrators may find that these summary procedures are sufficient for most tasks. Users who want more information should refer to the detailed instructions in subsequent sections of this chapter.
NetWorker Server Recovery Summary Procedure
To perform a disaster recovery on a NetWorker server:
1. Replace the hard drive, if necessary. For detailed instructions, see “Replacing a Hard Drive” on page 52.
2. Reinstall the operating system, if necessary. For detailed instructions, see “Recovering a Windows Installation” on page 60.
Note: For a guide to the detailed instructions for each of the remaining steps, see the task list under “Recovering a NetWorker Server” on page 66.
3. Reinstall the NetWorker software, if necessary.
4. Configure the storage device. Depending on the configuration, do one of the following:
• If you are using a stand-alone storage device, configure the device and load the volume that contains the latest bootstrap.
• If you are using an autochanger with Removable Storage disabled, run the following commands from the command prompt:a. Run jbconfig to create a NetWorker Autochanger resource.b. Run nsrjb -vHE to reset the autochanger.c. Run nsrjb -Iv -S # to inventory the backup tape in slot # (the tape
that contains the latest bootstrap).d. Run nsrjb -lnv -S # -f device_name to load the backup tape in slot #
into the device.• If you are using an autochanger with Removable Storage enabled:
a. Use the Microsoft Management Console (MMC) Removable Storage snap-in to inventory the autochanger.
b. Use the NetWorker Administrator program to create a Device resource for each drive in the autochanger.
c. Use the Removable Storage MMC snap-in to mount the tape that contains the bootstrap.
Legato NetWorker, Release 7.0Disaster Recovery Guide
Chapter 4: Windows Disaster Recovery
4
49
Note: If the storage device required for a NetWorker server recovery is connected to a remote storage node, you might have to partially recover the storage node before you can recover the NetWorker server. For more information, see “Partial Recovery of a NetWorker Storage Node” on page 82.
5. If you know the bootstrap save set ID, recover the NetWorker media database and resource configuration files by running the mmrecov command from the command prompt.
If you do not know the bootstrap save set ID:a. Look in the savegrp.log file, or run the scanner -B device_name
command from the command prompt to determine the bootstrap save set ID.
b. Run the mmrecov command to recover the NetWorker media database and resource configuration files.
6. Stop the NetWorker services.
7. Copy the contents of the <NetWorker_install_path>\res.R directory to the <NetWorker_install_path>\res directory.
8. Restart the NetWorker services.
9. Reset and inventory the autochanger, if you are using one. If you are using a stand-alone drive, skip this step and proceed to step 10.
• If Removable Storage is disabled, do the following:a. Run the nsrjb -vHE command to reset the autochanger.b. Run the nsrjb -Iv command to inventory the autochanger.
• If Removable Storage is enabled, do the following:a. In the NetWorker Administrator program, delete the Removable
Storage jukebox through the Autochangers dialog box.b. Create a new Removable Storage jukebox using the jbconfig
command at the command prompt.c. In the NetWorker Administrator program, use the Autochanger
Operations dialog box to reallocate all of the NetWorker volumes from the Import pool.
d. In the NetWorker Administrator program, click Reset in the Autochanger Operations dialog box. Once the reset is complete, click Inventory.
10. Recover the client file indexes by running the nsrck -L7 command from the command prompt.
Legato NetWorker, Release 7.0Disaster Recovery Guide
4
NetWorker Client or Storage Node Recovery Summary Procedure
50
11. Recover the client’s data and SYSTEM save sets using the NetWorker User program.
12. Reboot the computer after the recovery is complete.
13. If you are using an autochanger with Removable Storage enabled:
a. Use the Removable Storage MMC snap-in to mount the tape that contains the bootstrap.
b. Run mmrecov to recover the NetWorker media database and resource configuration files.
c. Stop the NetWorker services.d. Rename <NetWorker_install_path>\res.R to
<NetWorker_install_path>\res.e. Start the NetWorker services.f. On the Autochanger Operations dialog box, click Reset to reset the
jukebox.
14. Verify the recovery.
NetWorker Client or Storage Node Recovery Summary Procedure
Note: In most cases, the NetWorker server should be fully functional before you begin recovery of its associated clients or storage nodes. However, if the storage device required for a NetWorker server recovery is connected to a remote storage node, you might have to partially recover the storage node before you can recover the NetWorker server. For more information, see “Partial Recovery of a NetWorker Storage Node” on page 82.
To perform a disaster recovery on a NetWorker client or storage node:
1. Replace the hard drive, if necessary. For instructions, see “Replacing a Hard Drive” on page 52.
2. To begin the software recovery, do one of the following, depending the Windows version:
• For Windows .NET and Windows XP Professional NetWorker clients only, perform an ASR recovery if possible. This requires a current ASR disk or ASR backup from which you can create an ASR disk. For instructions, see “Performing Windows ASR Recovery” on page 53. If you use the ASR recovery method, you do not need to perform any of the remaining steps in this summary procedure.

Legato NetWorker, Release 7.0Disaster Recovery Guide
Chapter 4: Windows Disaster Recovery
4
51
• For Windows 2000 NetWorker clients (or Windows .NET or Windows XP Professional clients for which an ASR disk or save set is not available), reinstall the operating system if necessary. For instructions, see “Recovering a Windows Installation” on page 60.
• For Windows NT 4.0 NetWorker clients, repair the operating system if necessary. For instructions, see “Repairing a Windows NT 4.0 Operating System Installation” on page 57.
3. Ensure that the recovery requirements are satisfied. For instructions, see “Task 1: Satisfy the NetWorker Client or Storage Node Recovery Requirements” on page 83.
4. Reinstall the NetWorker software, if necessary. For instructions, see “Task 2: Reinstall the NetWorker Client or Storage Node Software” on page 83.
5. Recover the data and SYSTEM save sets using the NetWorker User program. For instructions, see “Task 3: Recover the NetWorker Client or Storage Node Data” on page 84.
6. Reboot the computer after the recovery is complete.
7. Verify the recovery. For instructions, see “Task 4: Verify the NetWorker Client or Storage Node Recovery” on page 86.
Disaster Recovery of Multiple ComputersIf you are performing disaster recovery on more than one computer, recover the computers in the following order:
1. The NetWorker server
2. The NetWorker storage nodes (if any) used by the NetWorker server
3. The NetWorker clients associated with the NetWorker server
Note: If the backup device to be used for the recovery is connected to a storage node, you might have to perform a partial recovery of the storage node before you begin recovery of the NetWorker server. For more information, see “Recovering a NetWorker Client or Storage Node” on page 82.
Legato NetWorker, Release 7.0Disaster Recovery Guide
4
Disaster Recovery of Clustered Computers
52
Disaster Recovery of Clustered Computers
For disaster recovery of a computer that was running NetWorker software in a cluster environment, see the appropriate chapter for procedures:
• “Chapter 6: Microsoft Cluster Disaster Recovery (Windows NT 4.0)”• “Chapter 7: Microsoft Cluster Disaster Recovery (Windows 2000 and
.NET)”
Replacing a Hard Drive
Important: To ensure that you have enough disk space to recover all of the failed hard drive’s data, install a new hard drive with at least as much storage capacity as the original drive.
Recovery of the SYSTEM save sets requires extra disk space for temporary files. The recovery operation might require as much extra disk space as the total size of the SYSTEM save sets. For an estimate, run mminfo from the command prompt and check the size of the SYSTEM save sets. In many cases, about 500 MB of temporary disk space is sufficient.
To replace the failed hard drive, the following information is required:
• The storage capacity of the hard drive being replaced, plus the amount of extra disk space required for temporary files
• The drive letter, size, format, and volume label assigned to each partition on the hard drive being replaced:Windows .NET, Windows XP Professional, and Windows 2000 — This information is available in Control Panel > Administrative Tools > Computer Management > Disk Management.Windows NT 4.0 — This information is available in Start > Programs > Administrative Tools (Common) > Disk Administrator.
Note: Although it will not affect NetWorker operation, you may also want to note any use of mirroring, RAID/striping, compression, or volume sets.
Install, partition, and format the new hard drive. For instructions, refer to the hard drive manufacturer’s documentation and the appropriate Microsoft documentation.
Legato NetWorker, Release 7.0Disaster Recovery Guide
Chapter 4: Windows Disaster Recovery
4
53
Performing Windows ASR RecoveryMicrosoft ASR is a feature of the Windows .NET and Windows XP Professional operating systems. For more information about NetWorker software support for ASR, including procedures for performing ASR backups and creating an ASR disk, refer to the Legato NetWorker Administrator’s Guide, Microsoft Windows Version.
Important: The ASR recovery method is supported only for NetWorker clients on Windows .NET and XP Professional platforms.
ASR recovery is not supported for NetWorker clients operating in a Windows .NET Microsoft Cluster Server (MSCS) environment.
To recover a NetWorker server or storage node, or NetWorker clients operating in a Windows .NET MSCS environment, you must use the legacy NetWorker disaster recovery method. For details, see the appropriate procedure:
• “NetWorker Server Recovery Summary Procedure” on page 48• “NetWorker Client or Storage Node Recovery Summary Procedure” on
page 50.• “Chapter 7: Microsoft Cluster Disaster Recovery (Windows 2000 and
.NET)” on page 127
To use the ASR recovery method, perform these tasks in the specified order:
• “Task 1: Perform an ASR Recovery of the NetWorker Client Computer” on page 54
• “Task 2: Restore Components that Require Special Handling” on page 55• “Task 3: Verify the NetWorker Client Recovery” on page 56
OEM Recovery CD Limitations
Many computer manufactures, such as Dell, Hewlett-Packard, Compaq, and IBM, provide a recovery CD or DVD with each system, which typically includes the Windows OS installation files and any additional software that was included with the system. These recovery disks cannot be used to perform an ASR recovery.
Legato NetWorker, Release 7.0Disaster Recovery Guide
4
ASR Recovery Requirements
54
Important: To perform an ASR recovery, you must have an official Microsoft Windows installation CD for the version of Windows you are recovering. If you have only an OEM recovery CD that includes the Windows installation files, skip this section and proceed to “Recovering a Windows Installation” on page 60. Refer to the OEM documentation as necessary.
ASR Recovery Requirements
To perform an ASR recovery of a NetWorker client host computer, you need:
• The ASR disk for the computer you are recovering. If a current ASR disk or ASR save set is not available for the failed NetWorker client host computer, you must use the legacy NetWorker disaster recovery method. For a guide to the required procedures, see “Recovering a NetWorker Client or Storage Node” on page 82.
• The official Microsoft Windows .NET or Windows XP Professional installation CD for the computer you are recovering
• The latest NetWorker backup for the computer you are recovering
Note: To avoid delays during a recovery, if you routinely move NetWorker backup media to an offsite location for safekeeping, ensure that all necessary volumes are available. To list the media associated with the files you want to recover, run mminfo -mv from the command prompt. For more information about the mminfo command, refer to the Legato Command Reference Guide.
Task 1: Perform an ASR Recovery of the NetWorker Client Computer
To perform an ASR recovery of the NetWorker client computer:
1. On the NetWorker client computer you are recovering, boot from the Windows .NET or Windows XP Professional installation CD.
Note: You may need to run the BIOS setup program to configure the computer to boot from the CD-ROM drive. For the procedure, refer to the computer manufacturer’s documentation.
2. Watch closely at the beginning of the boot process. If prompted, press a key to boot from the CD-ROM drive.
3. During the text-mode phase of Windows setup, watch the lower portion of the screen. When prompted, press [F2] to display the ASR Recovery menu. Follow the instructions on the screen.
Legato NetWorker, Release 7.0Disaster Recovery Guide
Chapter 4: Windows Disaster Recovery
4
55
4. When prompted, insert the ASR disk into the A: drive and press a key to continue. ASR formats the system partition, copies files, and begins the Windows installation.
Note: Due to a Microsoft Windows XP Professional problem, when you are prompted to insert the ASR disk and press a key to continue, you may need to press a key several times before the system recognizes the disk and proceeds with the recovery. This problem does not occur on Windows .NET systems.
5. If you did not select the Pause During Recovery option while creating the ASR disk, a fully automated recovery will be performed; there will be no pause and you will not be prompted to select which save sets to recover.
If you selected the Pause During Recovery option while creating the ASR disk, during the graphical phase of Windows setup, the NetWorker ASR Client dialog box appears. Expand My Computer and mark the save sets you want to recover, then click Continue. For example, mark the following save sets:C:\
D:\
SYSTEM STATE:\
SYSTEM DB:\
SYSTEM FILES:\
Note: For more information about the Pause During Recovery option, refer to the Legato NetWorker Administrator’s Guide, Microsoft Windows Version.
Task 2: Restore Components that Require Special Handling
Important: Due to limitations in Microsoft ASR functionality, the following system state components can not be correctly restored during ASR recovery:
– COM+ Registration Database– Disk Quota Database– Windows Management Instrumentation Database
If the NetWorker client being recovered uses any of these components, after an ASR recovery you must perform the following procedure. If the NetWorker client you are recovering does not use any of these components, skip this task and proceed to “Task 3: Verify the NetWorker Client Recovery” on page 56.
Legato NetWorker, Release 7.0Disaster Recovery Guide
4
Task 3: Verify the NetWorker Client Recovery
56
For NetWorker clients with components that require special handling, do the following after ASR recovery:
1. Log on with administrator privileges to the target computer.
2. Start the NetWorker User program.
3. Click the Recover toolbar button.
4. In the Source Client dialog box, click OK to select the local client.
5. In the Destination Client dialog box, click OK to select the local client.
6. In the Recover window, select the SYSTEM STATE save set and check for the presence of the COM+ Registration Database component; if it is present, mark the SYSTEM STATE save set for recovery.
7. In the Recover window, select the SYSTEM DB save set and check for the presence of the Disk Quota Database and the Windows Management Instrumentation Database. If either component is present, mark the SYSTEM DB save set for recovery.
8. If you marked any save sets for recovery, click the Start toolbar button to begin the recovery.
Task 3: Verify the NetWorker Client Recovery
To verify the NetWorker client recovery:
1. Reboot the NetWorker client host computer and verify that the NetWorker Remote Exec and NetWorker Power Monitor services have started.
Note: You can disable the NetWorker Power Monitor service if it is not needed. For more information, refer to the Legato NetWorker Administrator’s Guide, Microsoft Windows Version.
2. Use the Windows Event Viewer to examine the event logs for errors. In particular, check for:
• Service startup errors related to the Windows system state• Errors regarding the recovery of Windows system-protected filesFor information about how the NetWorker software handles the Windows system state and system-protected files, refer to the Legato NetWorker Administrator’s Guide, Microsoft Windows Version.
3. Verify that any applications (such as Microsoft Office) that were running prior to the disaster have been properly restored. To verify this, start each application and open a previously saved document.
Legato NetWorker, Release 7.0Disaster Recovery Guide
Chapter 4: Windows Disaster Recovery
4
57
Repairing a Windows NT 4.0 Operating System InstallationThis section explains how to use NetWorker software to create a Windows NT 4.0 Emergency Repair Disk (ERD), and how to use the ERD to repair a damaged Windows NT 4.0 operating system installation.
To repair a Windows NT 4.0 operating system installation requires:
• Windows NT 4.0 Setup Disks (three disks)• Windows NT 4.0 installation CD-ROM (same version that was installed
prior to the disaster)• Windows NT 4.0 Service Pack (same level that was installed prior to the
disaster)• One of the following:
– A current Windows NT 4.0 ERD for the computer you are recovering– The NetWorker backup or clone volume that contains the most recent
REPAIRDISK save set for the computer you are recovering• The Administrator account password for the computer you are
recovering (required only if you are repairing the registry or system state)
Repairing Windows NT 4.0
If you do not have a current ERD, see “Creating an ERD from the REPAIRDISK Save Set” on page 57.
If you have a current ERD, see “How to Use the ERD to Repair the Windows NT 4.0 Installation” on page 59.
Creating an ERD from the REPAIRDISK Save Set
If you do not have a current ERD for the computer you are recovering, you can create one using either the NetWorker User program or the <NetWorker_install_path>\bin\recover.exe command.
Because the operating system of the computer you are recovering needs repair, to create an ERD you must use a different NetWorker client computer to perform a directed recovery of the REPAIRDISK save set. Before you begin the directed recovery, ensure that:
• The computer you will use to recover the REPAIRDISK save set is a functional NetWorker for Windows client, connected to the NetWorker server you will use for the recovery.
• The Client resource for the computer you are recovering includes in its Remote Access List the NetWorker server you will use for the recovery.
Legato NetWorker, Release 7.0Disaster Recovery Guide
4
Repairing Windows NT 4.0
58
• The NetWorker server you will use for the recovery includes in its Administrator list the account you will use to recover the REPAIRDISK save set.
For details about meeting these requirements, refer to the Legato NetWorker Administrator’s Guide, Microsoft Windows Version.
How to Use the NetWorker User Program to Create an ERD
To create an ERD using the NetWorker User program:
1. Start the NetWorker User program.
2. Insert a blank, formatted disk in the A: drive.
3. Click the Recover toolbar button.
4. In the Source Client dialog box, select the computer you are recovering and click OK.
5. In the Destination Client dialog box, select the computer you are using to create the ERD and click OK.
6. Mark the REPAIRDISK save set for recovery.
7. From the Options menu, select Recover Options.
8. In the Relocate Recovered Data To dialog box, enter A:\ and click OK.
9. Click the toolbar Start button to begin recovery of the REPAIRDISK save set to the disk in the A: drive.
Important: If the REPAIRDISK save set is larger than 1.44 MB, it will not fit on a disk. This is a known limitation of the Windows NT 4.0 operating system; no workaround is available.
How to Use the NetWorker recover Command to Create an ERD
Important: The NetWorker recover.exe program is located in <NetWorker_install_path>\bin. There is also a Windows system command named recover.exe, located in %SystemRoot%\System32. To avoid executing the Windows version of recover.exe when attempting to execute the NetWorker command, you should do one of the following:
Legato NetWorker, Release 7.0Disaster Recovery Guide
Chapter 4: Windows Disaster Recovery
4
59
• Change to <NetWorker_install_path>\bin before executing the recover.exe command.
• At the command prompt, include the full path and filename to <NetWorker_install_path>\bin\recover.exe.
• Ensure that <NetWorker_install_path>\bin occurs before %SystemRoot%\System32 in your PATH environment variable.
To create an ERD using the NetWorker recover command:
1. On the NetWorker server, insert a blank, formatted disk into the A: drive.
2. Change to the directory that contains the NetWorker binary files. The default location is <NetWorker_install_path>\bin.
3. Recover the REPAIRDISK save set using the recover command as follows:
recover -c failed_hostname
recover> cd /
recover> add REPAIRDISK
recover> relocate a:\
recover> recover
This procedure initiates recovery of the failed computer’s REPAIRDISK save set to the disk in the NetWorker server’s A: drive.
How to Use the ERD to Repair the Windows NT 4.0 Installation
To use the ERD to repair the Windows NT 4.0 installation:
1. On the computer you are recovering, insert Windows NT 4.0 Setup Disk 1 into drive A: and reboot the computer.
2. When prompted, insert Windows NT 4.0 Setup Disk 2 into drive A: and press [Enter].
3. When the Setup Welcome screen appears, press [R] to select the Repair option.
4. Select the appropriate emergency repair options, then select Continue and press [Enter].
5. When prompted, insert Windows NT 4.0 Setup Disk 3 into the A: drive and press [Enter].
6. Insert the ERD into the A: drive and press [Enter].
Legato NetWorker, Release 7.0Disaster Recovery Guide
4
Recovering a Windows Installation
60
7. Follow the prompts on the screen to repair the Windows files:
• Press [Enter] to repair the specified file.• Press [Esc] if you do not want to repair the specified file.
8. Reboot the computer.
9. The operating system should now be functional. If the operating system is not functional, see “Recovering a Windows Installation” on page 60.
If the operating system appears to be functional:• Verify that the network protocols are working properly by running
ping using the NetWorker server’s hostname.• Verify that the name-to-address resolution is working properly by
running nslookup using the NetWorker server’s fully qualified domain name.
For more information about the ping and nslookup commands, refer to the Microsoft documentation.
10. If you are using a device that is not directly supported by Windows NT 4.0, you might need to reinstall the device driver software. For information on device driver software, refer to the device manufacturer’s documentation.
Recovering a Windows InstallationThis section explains how to recover all supported versions of the Windows operating system during disaster recovery of a NetWorker server, storage node, or client host computer. You can recover the Windows operating system to the original computer or to a different computer.
Note: For Windows .NET or Windows XP Professional systems, use the following procedure only as a last resort for recovering a Windows installation. Instead, use the ASR recovery method if possible. For more information, see “Performing Windows ASR Recovery” on page 53.
Recovery Requirements
To recover the Windows operating system, you need to know the following configuration details about the computer immediately prior to the disaster:
• Operating system version and any installed patches, service packs, or option packs
• Path location of the operating system installation

Legato NetWorker, Release 7.0Disaster Recovery Guide
Chapter 4: Windows Disaster Recovery
4
61
• Host properties:– Computer name– Fully qualified domain name– Administrator account password
• TCP/IP properties:– Adapter type
– IP address– Default gateway– Subnet mask– DNS server– WINS server (if used)
• Any other protocols installed• Removable Storage enabled/disabled settings• Virtual memory settings• Date and time properties• Localization properties
How to Recover the Windows Operating System
To recover the operating system, install and configure only the features that enable the computer to communicate over the network. The other Windows configuration settings are restored during the NetWorker recovery.
To recover a Windows installation, perform these tasks in the specified order:
“Task 1: Install the Windows Operating System” on page 62
“Task 2: Configure the Devices and Test the Operating System” on page 65
Important: If you are recovering the operating system to a different computer:• Assign the same computer name to the new computer that was used for
the original computer; otherwise you will not be able to recover data that was backed up using the original computer name.
• Assign the same IP address to the new computer that was used for the original computer; otherwise the NetWorker server will assign the computer a new host ID. If the new computer does not have the same IP
Legato NetWorker, Release 7.0Disaster Recovery Guide
4
Recovery Requirements
62
address as the original computer, you must reregister the NetWorker software. For information on registering NetWorker software, refer to the Legato NetWorker Installation Guide, Windows Version.
Task 1: Install the Windows Operating System
Important: If you want to upgrade Windows during the recovery, first recover the Windows version that was installed immediately prior to the disaster, then upgrade after you have completed the recovery.
To install the Windows operating system:
1. Install the same version of Windows, including any patches, service packs, or option packs in use immediately prior to the disaster.
During the installation, be sure to set the following configuration options as they were prior to the disaster:• Windows installation location• Computer name• Administrator account password• Regional settings• Date and time settings
Note: If the computer you are recovering was a domain controller prior to the disaster, that configuration will be restored later in the recovery process.
2. After you finish installing the operating system, configure the computer as follows:
Windows .NET and Windows .XP Professional: a. Start the Control Panel System tool.b. On the System Properties dialog box, select the Computer Name tab
and click the Change button.c. In the Computer Name Changes dialog box, ensure that the
computer name is correct and that the computer is a member of the correct domain. Click More.
d. In the DNS Suffix and NetBIOS Computer Name dialog box, ensure that the Primary DNS Suffix Of This Computer text box contains the correct domain name (the name that is appended to the hostname to
Legato NetWorker, Release 7.0Disaster Recovery Guide
Chapter 4: Windows Disaster Recovery
4
63
form the fully qualified domain name). For example, the fully qualified domain name for a computer named kingdome, might be kingdome.seattle.washington.com.
e. Start the Control Panel Local Area Connection tool.f. In the Local Area Connection Status dialog box, click properties.g. In the Local Area Connection Properties dialog box, select Internet
Protocol (TCP/IP) and click Properties.
h. In the Internet Protocol (TCP/IP) Properties dialog box, set the TCP/IP properties as they were prior to the disaster, with the same IP address, subnet mask, default gateway, and DNS server.
Windows 2000:a. Start the Control Panel System tool.b. In the System Properties dialog box, select the Network Identification
tab and click Properties.c. In the Identification Changes dialog box, ensure that the computer
name is correct and that the computer is a member of the correct domain. Click More.
d. In the DNS Suffix and NetBIOS Computer Name dialog box, ensure that the Primary DNS Suffix Of This Computer box contains the correct domain name (the name that is appended to the host name to form the fully qualified domain name). For example, the fully qualified domain name for a computer named kingdome, might be kingdome.seattle.washington.com.
e. Start the Control Panel NetWork and Dial-up Connections tool.f. In the Network and Dial-up Connections window, right-click Local
Area Connection and select properties.g. In the Local Area Connection Properties dialog box, select Internet
Protocol (TCP/IP) and click Properties.h. In the Internet Protocol (TCP/IP) Properties dialog box, set the
TCP/IP properties as they were prior to the disaster, with the same IP address, subnet mask, default gateway, and DNS server.
Windows NT 4.0:a. Start the Control Panel Network tool.b. In the Network dialog box, select the Identification tab and ensure
that the computer name and domain are correct.c. Click the Protocols tab, select TCP/IP and click Properties.d. In the Microsoft TCP/IP Properties dialog box, set the TCP/IP
properties as they were prior to the disaster, with the same IP address, subnet mask, default gateway, and DNS server.
Legato NetWorker, Release 7.0Disaster Recovery Guide
4
Recovery Requirements
64
3. In the hosts file (%SystemRoot%\system32\drivers\etc\hosts) make an entry for the NetWorker server to be used in the recovery. NetWorker software requires this entry when:
• DNS is not in use or no DNS server is available• The NetWorker server host you are recovering is also a DNS serverThe entry in the hosts file must include the IP address, the fully qualified domain name, and the computer name, all on the same line. For example:
123.56.890.474 kingdome.seattle.washington.com kingdome
4. Configure the virtual memory as it was prior to the disaster:
Windows .NET and Windows XP Professional:
a. Start the Control Panel System tool.b. In the System Properties dialog box, select the Advanced tab and
click Settings in the Performance section.c. In the Performance Options dialog box, select the Advanced tab and
click Change in the Virtual Memory section.d. In the Virtual Memory dialog box, set the virtual memory options.
Click OK.Windows 2000:
a. Start the Control Panel System tool.b. In the System Properties dialog box, select the Advanced tab and
click Performance Options.c. In the Performance Options dialog box, click Change.d. In the Virtual Memory dialog box, set the virtual memory options.
Click OK.Windows NT 4.0:a. Start the Control Panel System tool.b. In the System Properties dialog box, select the Performance Tab.c. On the Performance tab, click Change.d. In the Virtual Memory dialog box, set the virtual memory options.
Click OK.
5. Reinstall any additional Windows components previously installed through Windows Setup, such as Gateway Services for NetWare.
Note: Do not upgrade OEM drivers for network interface cards (NIC) with the OEM Service Pack version of the NIC drivers.
Legato NetWorker, Release 7.0Disaster Recovery Guide
Chapter 4: Windows Disaster Recovery
4
65
Task 2: Configure the Devices and Test the Operating System
If the computer you are recovering is a NetWorker server or storage node, configure any devices required by the NetWorker software.
To configure the devices and test the operating system:
1. Configure any devices required by the NetWorker software, for example SCSI pass-through devices for autochangers.
2. Ensure that Removable Storage is configured as it was prior to the disaster. To enable or disable Removable Storage:
a. On the desktop, right-click My Computer and select Manage.b. In the left pane of the Computer Management window, expand
Storage\Removable Storage\Physical Locations.c. Right-click the icon for the Removable Storage jukebox and select
Properties.d. If you plan to configure the NetWorker software to use Removable
Storage, select the Enable Library check box in the Properties dialog box.If you do not plan to configure the NetWorker software to use Removable Storage, clear the Enable Library check box in the Properties dialog box.
e. Repeat step c and step d for each stand-alone drive or autochanger connected to the NetWorker server or storage node host computer.
The NetWorker software supports optional use of Removable Storage for autochangers only. Ensure that Removable Storage is disabled for all stand-alone drives. For more information about Removable Storage, refer to the Legato NetWorker Administrator’s Guide, Microsoft Windows Version.
3. Verify the following:
• Operating system is functioning properly.• Network protocols are functioning properly. Test by using the ping
command.• Name to address resolution is correct. Test by using the nslookup
command with the fully qualified domain name of the NetWorker server, storage node, or client you are recovering.
• The operating system recognizes the necessary devices. If the devices are not recognized, you might need to:– Load the SCSI driver.– Install the device driver software.
Legato NetWorker, Release 7.0Disaster Recovery Guide
4
Recovering a NetWorker Server
66
4. To complete the recovery process:
• For a NetWorker server, see “Recovering a NetWorker Server” on page 66.
• For a NetWorker client or storage node, see “Recovering a NetWorker Client or Storage Node” on page 82.
Recovering a NetWorker ServerThis section explains how to recover a NetWorker server on a Windows .NET or Windows 2000 host computer.
Important: Before you begin a NetWorker server recovery, you should understand the information about SYSTEM save sets in the Legato NetWorker Administrator’s Guide, Microsoft Windows Version.
Note: For Windows .NET systems, use the following procedure only as a last resort for recovering a NetWorker server. Instead, use the ASR recovery method if possible. For more information, see “Performing Windows ASR Recovery” on page 53.
NetWorker Server Recovery Requirements
To recover a NetWorker server requires:
• The same release and patch level of the NetWorker software that was in use immediately prior to the disaster
• The installation path of the NetWorker software prior to the disaster• Backup or clone volumes that contain the NetWorker server’s most recent
bootstrap, client file indexes, and filesystem data
Note: To avoid delays during a recovery, if you routinely move NetWorker backup media to an offsite location for safekeeping, ensure that all necessary volumes are available. To list the media associated with the files you want to recover, run mminfo -mv from the command prompt. For more information about the mminfo command, refer to the Legato Command Reference Guide.

Legato NetWorker, Release 7.0Disaster Recovery Guide
Chapter 4: Windows Disaster Recovery
4
67
How to Recover a Windows 2000 NetWorker Server
To recover a Windows 2000 NetWorker server, perform the following tasks in the order specified:
• “Task 1: Install the NetWorker Server Software” on page 67• “Task 2: Configure the NetWorker Server” on page 68• “Task 3: Locate the NetWorker Server Bootstrap Save Set ID” on page 70
• “Task 4: Recover the NetWorker Server Bootstrap” on page 72• “Task 5: Rename the Resource Configuration Files” on page 74• “Task 6: Reset and Inventory the Autochanger” on page 74• “Task 7: Recover the NetWorker Server’s Client File Indexes” on page 76• “Task 8: Recover the NetWorker Server Data” on page 78• “Task 9: Restore the Removable Storage Jukebox Configuration” on page
80• “Task 10: Verify the NetWorker Server Recovery” on page 81
Important: When recovering a NetWorker server that was also being used as a Legato License Manager server (not recommended), the lictype.res file of the Legato License Manager is not restored during the NetWorker server recovery. This is because the Legato License Manager files and directories are not considered part of the NetWorker software. After completing the disaster recovery on the NetWorker server, you must explicitly recover the Legato License Manager as a client of the NetWorker server.
Task 1: Install the NetWorker Server Software
Important: If you updated from NetWorker release 6.x and have not yet performed a scheduled backup of the NetWorker server, reinstall NetWorker release 6.x and use it to recover the bootstrap, then update the NetWorker software and proceed with the recovery.
To install the NetWorker server software:
1. Install to its original path location the release of the NetWorker server software that was in use prior to the disaster. For instructions, refer to the Legato NetWorker Installation Guide, Microsoft Windows Version.
Legato NetWorker, Release 7.0Disaster Recovery Guide
4
NetWorker Server Recovery Requirements
68
During the installation, keep the following points in mind:• If the NetWorker installation kit is available on a shared drive, you
can install it over the network.• To update the NetWorker software, first recover the server to its state
immediately prior to the disaster, then perform the update.• You do not need to reload the license enablers; they will be restored
later in the recovery process.
• Because the NetWorker mmrecov command is case sensitive, the NetWorker installation path must be in the same case as the original. For example, C:\Program Files\Legato\nsr is not same as C:\Program Files\legato\NSR.
2. Install any NetWorker patches that were in use prior to the disaster.
Task 2: Configure the NetWorker Server
To configure the NetWorker server:
1. In the NetWorker Administrator program, open the NetWorker server’s Client resource and verify that the Aliases attribute (in the Preferences tab) contains the correct information. For example, aliases for a computer named kingdome might be:
kingdomekingdome.seattle.washington.com
2. Create and configure the NetWorker server’s Device resources. Do not mount or relabel any volumes in the devices. For more information, refer to the Legato NetWorker Installation Guide, Microsoft Windows Version.
• If you are using an autochanger with Removable Storage disabled:a. Start a Windows command prompt and change to the
<NetWorker_install_path>\bin directory.b. Create and configure the Autochanger resource using the
jbconfig command. Alternatively, you can use the NetWorker Administrator device autodetection feature.
c. Run the nsrjb -vHE command from the command prompt. This resets the autochanger, ejects backup volumes, reinitializes the element status, and checks each slot for a volume. If the
Legato NetWorker, Release 7.0Disaster Recovery Guide
Chapter 4: Windows Disaster Recovery
4
69
autochanger does not support the -E option (to reinitialize the element status), use the sjiielm command to initialize the element status.
d. If you need to determine which volume contains the bootstrap, inventory the autochanger by running the nsrjb -Iv command from the command prompt. If you know the slot number where the bootstrap is located, use the nsrjb -Iv -S # command to inventory that particular slot.
e. If the device the NetWorker server is to use is connected to a remote storage node, the storage node device needs to be configured. For details, refer to the Legato NetWorker Installation Guide, Microsoft Windows Version.
• If you are using an autochanger with Removable Storage enabled:a. On the desktop, right-click My Computer and select Manage.b. In the left pane of the Computer Management window, expand
Storage\Removable Storage\Physical Locations.
c. Right click the icon for the autochanger and select Inventory. d. Minimize (but don’t close) the Computer Management window.e. After the Removable Storage inventory is complete, start the
NetWorker Administrator program and select Devices on the Configure tab.
f. In the Devices window, right-click the Devices icon and select Create.
g. In the Create Devices dialog box, create a stand-alone NetWorker Device resource for each drive in the autochanger.
h. In the Computer Management window, double-click the icon for the autochanger (under Storage\Removable Storage\Physical Locations). Icons for the autochanger’s volumes appear in the right pane.
i. Right-click the icon for the volume that contains the bootstrap and select Mount.
3. In the NetWorker Administrator program, configure the Client resource for the NetWorker server. Set the browse and retention policies to a time value that covers the oldest save sets being using for the recovery. This allows you to recover all of the NetWorker server’s records with the mmrecov command.
Legato NetWorker, Release 7.0Disaster Recovery Guide
4
NetWorker Server Recovery Requirements
70
Important: If the browse and retention policies are not long enough to cover all of the save sets you use, all of the NetWorker server’s records are recovered, but any records that are older than a month are discarded because the default browse policy is one month.
4. If the NetWorker server’s client file index has not been relocated from its original path, or if you are going to recover a relocated client file index from a backup created with NetWorker release 7.x, skip this step and proceed to “Task 3: Locate the NetWorker Server Bootstrap Save Set ID” on page 70.
If you are going to recover the client file index from a backup created with a NetWorker release earlier than 7.x, and you moved the NetWorker server’s client file index path to a different location, you must:a. Edit the Index Path attribute of the NetWorker server’s Client
resource to reflect the correct path.b. Stop and restart the following NetWorker services:
– NetWorker Backup and Recover Server– NetWorker Remote Exec Service
Task 3: Locate the NetWorker Server Bootstrap Save Set ID
If you already know the save set ID of the NetWorker server’s most recent bootstrap, skip this task and go to “Task 4: Recover the NetWorker Server Bootstrap” on page 72.
The bootstrap contains the NetWorker server’s media database and resource configuration files, which are required for a NetWorker server recovery. For more information about the bootstrap, see “Preparing for Disaster” on page 21.
There are two ways to determine the save set ID of the most recent bootstrap:
1. The faster way to determine the bootstrap save set ID is to find it in the <NetWorker_install_path>\logs\savegrp.log file.
By default, the NetWorker server automatically creates a bootstrap save set after each active scheduled backup that includes the server itself as a client. NetWorker software sends a copy of the bootstrap information to the default printer. You can also configure the NetWorker server to e-mail
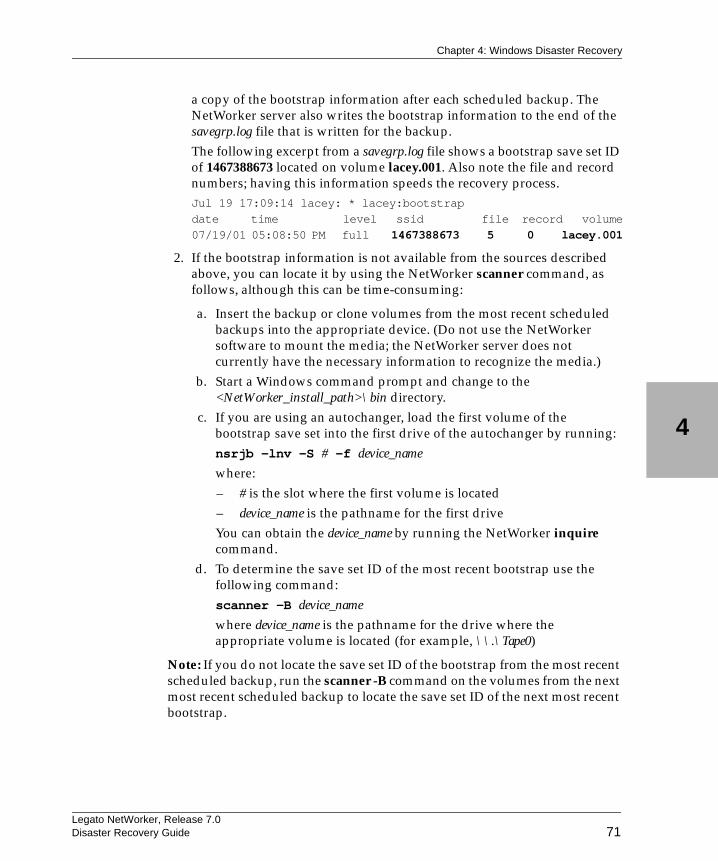
Legato NetWorker, Release 7.0Disaster Recovery Guide
Chapter 4: Windows Disaster Recovery
4
71
a copy of the bootstrap information after each scheduled backup. The NetWorker server also writes the bootstrap information to the end of the savegrp.log file that is written for the backup.The following excerpt from a savegrp.log file shows a bootstrap save set ID of 1467388673 located on volume lacey.001. Also note the file and record numbers; having this information speeds the recovery process.Jul 19 17:09:14 lacey: * lacey:bootstrap
date time level ssid file record volume
07/19/01 05:08:50 PM full 1467388673 5 0 lacey.001
2. If the bootstrap information is not available from the sources described above, you can locate it by using the NetWorker scanner command, as follows, although this can be time-consuming:
a. Insert the backup or clone volumes from the most recent scheduled backups into the appropriate device. (Do not use the NetWorker software to mount the media; the NetWorker server does not currently have the necessary information to recognize the media.)
b. Start a Windows command prompt and change to the <NetWorker_install_path>\bin directory.
c. If you are using an autochanger, load the first volume of the bootstrap save set into the first drive of the autochanger by running:nsrjb -lnv -S # -f device_name
where:– # is the slot where the first volume is located– device_name is the pathname for the first drive You can obtain the device_name by running the NetWorker inquire command.
d. To determine the save set ID of the most recent bootstrap use the following command:scanner -B device_name
where device_name is the pathname for the drive where the appropriate volume is located (for example, \\.\Tape0)
Note: If you do not locate the save set ID of the bootstrap from the most recent scheduled backup, run the scanner -B command on the volumes from the next most recent scheduled backup to locate the save set ID of the next most recent bootstrap.
Legato NetWorker, Release 7.0Disaster Recovery Guide
4
NetWorker Server Recovery Requirements
72
Task 4: Recover the NetWorker Server Bootstrap
In this task, you will recover the bootstrap save set. Recovering the bootstrap overwrites the media database in the <NetWorker_install_path>\mm directory and recovers the resource configuration files to a temporary directory named <NetWorker_install_path>\res.R.
Note: The mmrecov command is used to recover only the media database and resource configuration files. To recover the client file indexes (including the NetWorker server’s own client file index) use the nsrck command. For details about the mmrecov and nsrck commands, refer to the Legato Command Reference Guide.
To recover the bootstrap save set:
1. Load the backup or clone volumes that contain the most recent bootstrap save set. If you ran the scanner command in the previous task, you have already completed this step; proceed to step 2.
If you did not run the scanner command in the previous task, do the following:a. Insert into the storage device the backup or clone volumes that
contain the most recent bootstrap save set. (Do not use the NetWorker software to mount the volume; the NetWorker server does not currently have the necessary information to recognize the media.)
b. If you are using an autochanger, run the following command to load the first volume of the bootstrap save set into the first drive of the autochanger:nsrjb -lnv -S # -f device_name
where:– # is the slot where the first volume is located– device_name is the pathname for the first drive
Note: You can obtain the device_name using the inquire command.
2. To recover the NetWorker server’s bootstrap, run the following command:
mmrecov
3. If you are using clone volumes and have not loaded all of the necessary volumes, mmrecov prompts you for the original volume. In that case:
a. Enter [Ctrl]+[c] to exit mmrecov.b. Delete the records of the original volumes by running the following
command:
Legato NetWorker, Release 7.0Disaster Recovery Guide
Chapter 4: Windows Disaster Recovery
4
73
nsrmm -d volume_name
For example, if the NetWorker software requests the original volume mars.1 but that volume is not available, run the following command to delete mars.1 from the media database:
nsrmm -d mars.1
c. Restart the following NetWorker services:– NetWorker Backup and Recover Server
– NetWorker Remote Exec Serviced. Run the mmrecov command to recover the bootstrap.
4. If the server has multiple devices configured and enabled, the following message appears:
What is the name of the device you plan on using [\\.\Tape1]?
If you receive this message, enter the name of the device you are using for the recovery. For example, enter \\.\Tape0
5. When the following message appears, enter the save set ID for the latest bootstrap. If you are recovering the bootstrap from a clone volume, enter the save set ID associated with the clone.
Enter the latest bootstrap save set ID: 20076
6. When the following message appears, enter the file number to begin the recovery (if known) or accept the default of zero.
Enter starting file number (if known) [0]: 130
7. When the following message appears, enter the first record number to begin the recovery (if known) or accept the default of zero.
Enter starting record number (if known) [0]: 0
8. When the following message appears, ensure that the volume that contains the correct save set is inserted into the correct backup device, then press [Enter]:
Please insert the volume on which save set ID 20076 started into \\.\Tape0. When you have done this, press <RETURN>:
9. Once the appropriate volume is loaded, the following message appears:
Scanning \\.\Tape0 for save set 20076; this may take a while...
Legato NetWorker, Release 7.0Disaster Recovery Guide
4
NetWorker Server Recovery Requirements
74
The NetWorker software scans the volume for the appropriate save set and then begins the recovery. The NetWorker nsrmmdbasm command is used to recover the media database, and the uasm command is used to recover the resource configuration files. You can use the NetWorker Administrator program to monitor the recovery.
Note: The media database might not be on the same volume as the resource configuration files. If this is the case, the recovery pauses and prompts you when additional media is required.
Task 5: Rename the Resource Configuration Files
Because the NetWorker server’s resource configuration files cannot reliably be overwritten while the NetWorker services are running, the mmrecov command recovers the res directory as res.R.
To put the recovered resource configuration files into effect:
1. Stop the following NetWorker services on the NetWorker server:
• NetWorker Backup and Recover Server• NetWorker Remote Exec Service
2. Copy the contents of the <NetWorker_install_path>\res.R directory to the <NetWorker_install_path>\res directory.
3. Restart the NetWorker services.
Task 6: Reset and Inventory the Autochanger
If you are using a stand-alone storage device to perform the recovery, skip this task and proceed to “Task 7: Recover the NetWorker Server’s Client File Indexes” on page 76.
How to Reset and Inventory an Autochanger with Removable Storage Disabled
To reset and inventory an autochanger with Removable Storage disabled:
1. Start a Windows command prompt and change to the directory that contains the NetWorker binary files. The default location is <NetWorker_install_path>\bin.
2. To reset the autochanger, eject volumes, reinitialize the element status, and check each slot for a volume, run the following command:
nsrjb -vHE
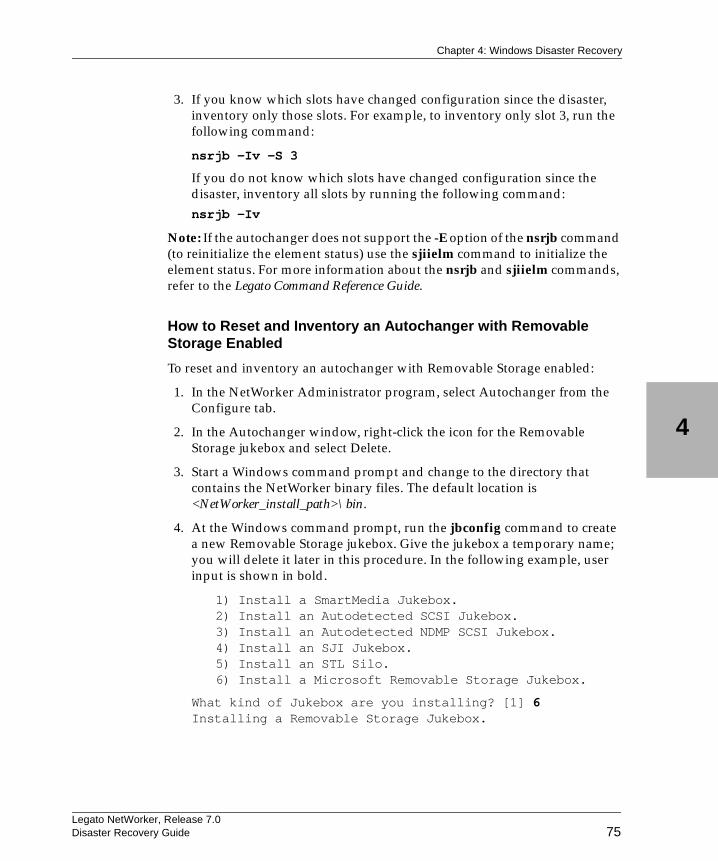
Legato NetWorker, Release 7.0Disaster Recovery Guide
Chapter 4: Windows Disaster Recovery
4
75
3. If you know which slots have changed configuration since the disaster, inventory only those slots. For example, to inventory only slot 3, run the following command:
nsrjb -Iv -S 3
If you do not know which slots have changed configuration since the disaster, inventory all slots by running the following command:nsrjb -Iv
Note: If the autochanger does not support the -E option of the nsrjb command (to reinitialize the element status) use the sjiielm command to initialize the element status. For more information about the nsrjb and sjiielm commands, refer to the Legato Command Reference Guide.
How to Reset and Inventory an Autochanger with Removable Storage Enabled
To reset and inventory an autochanger with Removable Storage enabled:
1. In the NetWorker Administrator program, select Autochanger from the Configure tab.
2. In the Autochanger window, right-click the icon for the Removable Storage jukebox and select Delete.
3. Start a Windows command prompt and change to the directory that contains the NetWorker binary files. The default location is <NetWorker_install_path>\bin.
4. At the Windows command prompt, run the jbconfig command to create a new Removable Storage jukebox. Give the jukebox a temporary name; you will delete it later in this procedure. In the following example, user input is shown in bold.
1) Install a SmartMedia Jukebox.2) Install an Autodetected SCSI Jukebox.3) Install an Autodetected NDMP SCSI Jukebox.4) Install an SJI Jukebox.5) Install an STL Silo.6) Install a Microsoft Removable Storage Jukebox.
What kind of Jukebox are you installing? [1] 6Installing a Removable Storage Jukebox.
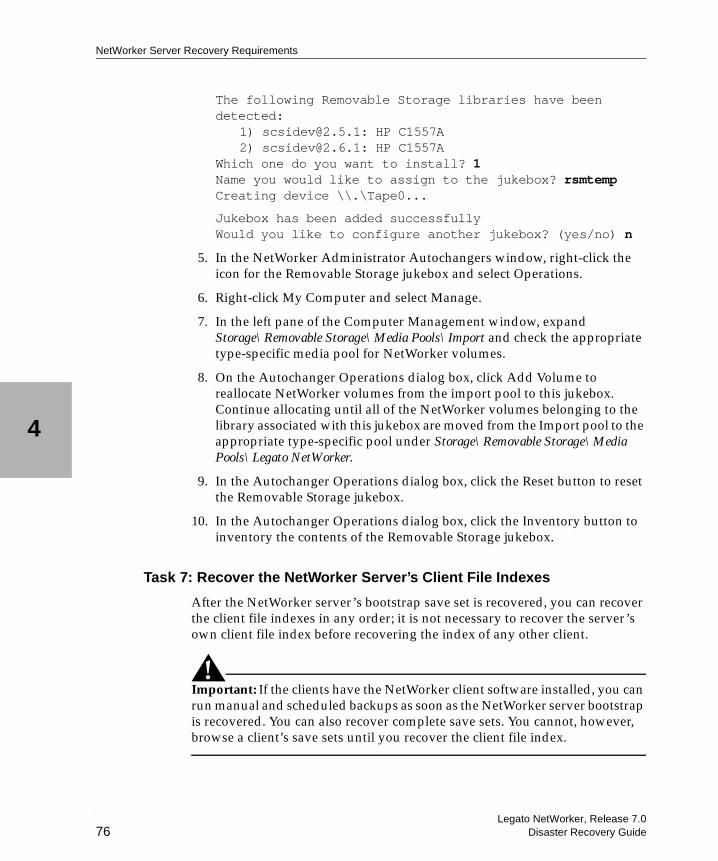
Legato NetWorker, Release 7.0Disaster Recovery Guide
4
NetWorker Server Recovery Requirements
76
The following Removable Storage libraries have been detected:
1) [email protected]: HP C1557A2) [email protected]: HP C1557A
Which one do you want to install? 1Name you would like to assign to the jukebox? rsmtempCreating device \\.\Tape0...
Jukebox has been added successfullyWould you like to configure another jukebox? (yes/no) n
5. In the NetWorker Administrator Autochangers window, right-click the icon for the Removable Storage jukebox and select Operations.
6. Right-click My Computer and select Manage.
7. In the left pane of the Computer Management window, expand Storage\Removable Storage\Media Pools\Import and check the appropriate type-specific media pool for NetWorker volumes.
8. On the Autochanger Operations dialog box, click Add Volume to reallocate NetWorker volumes from the import pool to this jukebox. Continue allocating until all of the NetWorker volumes belonging to the library associated with this jukebox are moved from the Import pool to the appropriate type-specific pool under Storage\Removable Storage\Media Pools\Legato NetWorker.
9. In the Autochanger Operations dialog box, click the Reset button to reset the Removable Storage jukebox.
10. In the Autochanger Operations dialog box, click the Inventory button to inventory the contents of the Removable Storage jukebox.
Task 7: Recover the NetWorker Server’s Client File Indexes
After the NetWorker server’s bootstrap save set is recovered, you can recover the client file indexes in any order; it is not necessary to recover the server’s own client file index before recovering the index of any other client.
Important: If the clients have the NetWorker client software installed, you can run manual and scheduled backups as soon as the NetWorker server bootstrap is recovered. You can also recover complete save sets. You cannot, however, browse a client’s save sets until you recover the client file index.
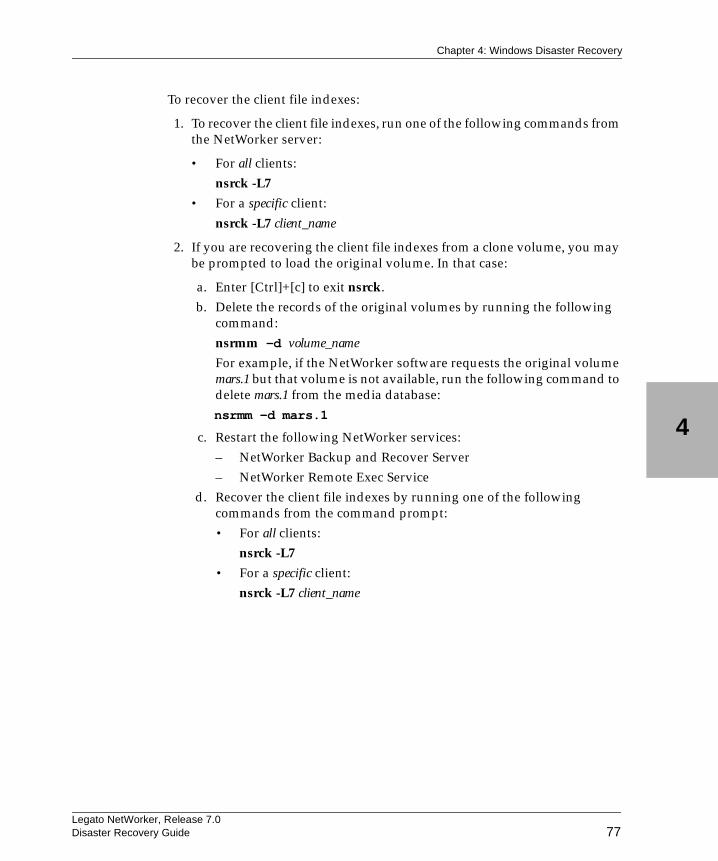
Legato NetWorker, Release 7.0Disaster Recovery Guide
Chapter 4: Windows Disaster Recovery
4
77
To recover the client file indexes:
1. To recover the client file indexes, run one of the following commands from the NetWorker server:
• For all clients:nsrck -L7
• For a specific client:
nsrck -L7 client_name
2. If you are recovering the client file indexes from a clone volume, you may be prompted to load the original volume. In that case:
a. Enter [Ctrl]+[c] to exit nsrck.b. Delete the records of the original volumes by running the following
command:nsrmm -d volume_name
For example, if the NetWorker software requests the original volume mars.1 but that volume is not available, run the following command to delete mars.1 from the media database:
nsrmm -d mars.1
c. Restart the following NetWorker services:– NetWorker Backup and Recover Server– NetWorker Remote Exec Service
d. Recover the client file indexes by running one of the following commands from the command prompt:• For all clients:
nsrck -L7
• For a specific client:nsrck -L7 client_name
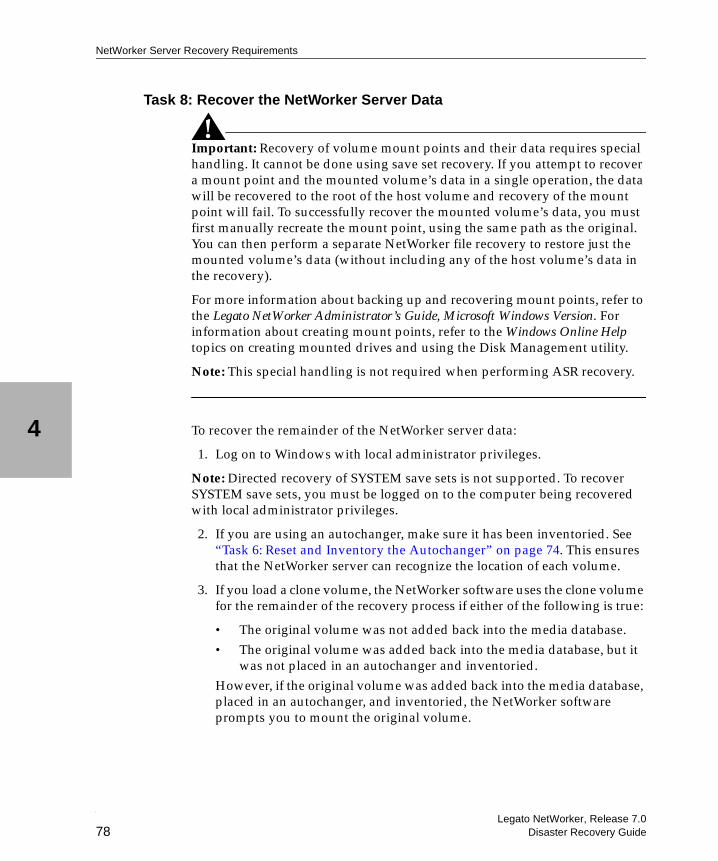
Legato NetWorker, Release 7.0Disaster Recovery Guide
4
NetWorker Server Recovery Requirements
78
Task 8: Recover the NetWorker Server Data
Important: Recovery of volume mount points and their data requires special handling. It cannot be done using save set recovery. If you attempt to recover a mount point and the mounted volume’s data in a single operation, the data will be recovered to the root of the host volume and recovery of the mount point will fail. To successfully recover the mounted volume’s data, you must first manually recreate the mount point, using the same path as the original. You can then perform a separate NetWorker file recovery to restore just the mounted volume’s data (without including any of the host volume’s data in the recovery).
For more information about backing up and recovering mount points, refer to the Legato NetWorker Administrator’s Guide, Microsoft Windows Version. For information about creating mount points, refer to the Windows Online Help topics on creating mounted drives and using the Disk Management utility.
Note: This special handling is not required when performing ASR recovery.
To recover the remainder of the NetWorker server data:
1. Log on to Windows with local administrator privileges.
Note: Directed recovery of SYSTEM save sets is not supported. To recover SYSTEM save sets, you must be logged on to the computer being recovered with local administrator privileges.
2. If you are using an autochanger, make sure it has been inventoried. See “Task 6: Reset and Inventory the Autochanger” on page 74. This ensures that the NetWorker server can recognize the location of each volume.
3. If you load a clone volume, the NetWorker software uses the clone volume for the remainder of the recovery process if either of the following is true:
• The original volume was not added back into the media database.• The original volume was added back into the media database, but it
was not placed in an autochanger and inventoried.However, if the original volume was added back into the media database, placed in an autochanger, and inventoried, the NetWorker software prompts you to mount the original volume.
Legato NetWorker, Release 7.0Disaster Recovery Guide
Chapter 4: Windows Disaster Recovery
4
79
4. Ensure that all drives that contained system information prior to the disaster are accessible. The system information includes the boot partition, system partition, and the partition that contains the databases and database logs for the system state components.
5. Start the NetWorker User program.
6. Click the Recover button.
7. In the Source Client dialog box, select the computer you are recovering and click OK.
8. In the Destination Client dialog box, select the computer you are recovering and click OK.
9. The computer’s directory structure appears in the Recover window.
10. Mark the following save sets for recovery. Ensure that the <NetWorker_install_path> directory is included.
• All local drives• SYSTEM FILES:• SYSTEM DB:• SYSTEM STATE:
Note: To avoid having to reboot twice, restore the SYSTEM STATE save set last. If you recover all save sets in a single operation, the NetWorker User program restores them in the correct order. If you recover save sets in multiple NetWorker User operations, recover the SYSTEM STATE save set last.
The bootstrap and client file indexes are browsable for NetWorker releases earlier than 6.0. If you are recovering a backup from a NetWorker release earlier than 6.0 and you mark for recovery the drive that contains the NetWorker installation directory (the default is %SystemDrive%\Program Files\Legato\nsr) you must unmark the index, mm, res, and bin subdirectories.NetWorker software backs up user profiles in the save set that corresponds to the disk drive on which they are located (for example, the C: save set). To restore user profiles, restore the save set in which they were saved. User profile folders are located in %SystemDrive%\Documents and Settings.
11. Select Recover Options from the Option menu.
12. In the Recover Options dialog box, select Overwrite Existing File.
Legato NetWorker, Release 7.0Disaster Recovery Guide
4
NetWorker Server Recovery Requirements
80
If you do not select Overwrite Existing File, the recovery process pauses before any existing files are overwritten, and a Naming Conflict dialog box appears, prompting you to indicate how the NetWorker software should resolve filename conflicts.
13. Click Start to begin the recovery.
Note: Files in the Windows Recycle Bin are not password protected. If the Password Protection dialog box appears, you can select Recover > OK to recover these files.
14. Check the log file to verify that no error messages were generated during the recovery sessions. The NetWorker software logs information about the recovery process to <NetWorker_install_path>\logs. The log is overwritten each time a recovery is performed. If there are error messages in the log file, you might need to run the recovery again after addressing the source of the errors.
15. After recovery, reboot the computer to completely restore the system-protected files and restart services that were automatically stopped prior to recovery.
Note: By default, the directed recover option is enabled when you install the NetWorker client. If the directed recover option was disabled on the client before the disaster, you need to explicitly set this option to disable directed recoveries to this client. This option is set through the nsradmin command. For more information about setting the disable directed recover option on the NetWorker client, refer to the Legato NetWorker Administrator’s Guide, Windows Version.
Task 9: Restore the Removable Storage Jukebox Configuration
If you are using a stand-alone storage device or an autochanger with Removable Storage disabled, skip this task and go to “Task 10: Verify the NetWorker Server Recovery” on page 81.
To restore an autochanger with Removable Storage enabled:
1. Right-click My Computer and select Manage.
2. In the left pane of the Computer Management window, expand Storage\Removable Storage\Physical Locations.
3. Double-click the icon for your autochanger. Icons for the autochanger’s volumes appear in the right pane.
4. Right-click the icon for the volume that contains the bootstrap and select Mount.
Legato NetWorker, Release 7.0Disaster Recovery Guide
Chapter 4: Windows Disaster Recovery
4
81
5. Start a Windows command prompt and change to the <NetWorker_install_path>\bin directory.
6. From the command prompt, run the following command to recover the NetWorker server’s bootstrap:
mmrecov
7. Stop the following NetWorker services:
• NetWorker Backup and Recover Server• NetWorker Remote Exec Service
8. Rename the <NetWorker_install_path>\res.R directory to <NetWorker_install_path>\res.
9. Restart the NetWorker services.
10. On the Autochanger Operations dialog box, click Reset.
Task 10: Verify the NetWorker Server Recovery
To verify the NetWorker server recovery:
1. Reboot the NetWorker server host computer and verify that the NetWorker Backup and Recover Server, NetWorker Power Monitor, and NetWorker Remote Exec services are started.
2. Use the Windows Event Viewer to examine the event logs for errors. In particular, check for:
• Service startup errors related to the Windows system state• Errors regarding the recovery of Windows system-protected filesFor information about how the NetWorker software handles the Windows system state and system-protected files, refer to the Legato NetWorker Administrator’s Guide, Microsoft Windows Version.
3. Verify that the NetWorker server and its associated clients are included in a scheduled NetWorker backup.
4. Perform a test backup and restore.
5. Verify that any applications that were running prior to the disaster, such as Microsoft Office, have been properly restored. To check this you can start each application and open a file.
6. If the NetWorker server was previously configured as a domain controller, verify that the drives configured to store the Active Directory database and log files have been recovered.
Legato NetWorker, Release 7.0Disaster Recovery Guide
4
Recovering a NetWorker Client or Storage Node
82
Recovering a NetWorker Client or Storage NodeThis section explains how to recover a Windows NetWorker client host computer or a Windows .NET or Windows 2000 storage node host computer.
Notes:
• For Windows .NET and Windows XP Professional systems, use the following procedure only as a last resort for recovering a NetWorker client or storage node. Instead, use the ASR recovery method if possible. For more information, see “Performing Windows ASR Recovery” on page 53.
• Before you begin the recovery procedures, identify all Legato products (such as SmartMedia®, ClientPak®, and NetWorker Modules) and any associated patches that were installed prior to the disaster. You must reinstall any Legato backup software and patches that are unusable or appear to be damaged. For more information, refer to the appropriate product installation guide.
• You can recover a NetWorker client or storage node to the original computer, or to a different computer.
To recover the client or storage node, perform the following tasks in the specified order:
• “Task 1: Satisfy the NetWorker Client or Storage Node Recovery Requirements” on page 83.
• “Task 2: Reinstall the NetWorker Client or Storage Node Software” on page 83.
• “Task 3: Recover the NetWorker Client or Storage Node Data” on page 84• “Task 4: Verify the NetWorker Client or Storage Node Recovery” on page
86
Note: Before you begin recovery of a NetWorker client or storage node, you should understand the information about SYSTEM save sets in the Legato NetWorker Administrator’s Guide, Microsoft Windows Version.
Partial Recovery of a NetWorker Storage Node
In most cases, the NetWorker server should be fully functional before you begin recovery of its associated clients or storage nodes. However, if the storage device required for a NetWorker server recovery is connected to a remote storage node, you might have to partially recover the storage node before you can recover the NetWorker server. In that case:
Legato NetWorker, Release 7.0Disaster Recovery Guide
Chapter 4: Windows Disaster Recovery
4
83
• Install the NetWorker client or storage node software to provide a storage device for the NetWorker server to use. For information, see “Task 2: Reinstall the NetWorker Client or Storage Node Software” on page 83.
• Recover the NetWorker server. For information, see “Recovering a NetWorker Server” on page 66.
• Perform the remaining tasks to recover the client or storage node. For more information, see “Task 3: Recover the NetWorker Client or Storage Node Data” on page 84 and “Task 4: Verify the NetWorker Client or Storage Node Recovery” on page 86.
Task 1: Satisfy the NetWorker Client or Storage Node Recovery Requirements
To recover a NetWorker client or storage node requires:
• The same release and patch level of the NetWorker software that was in use prior to the disaster
• The installation path of the NetWorker software prior to the disaster.• Backup or clone volumes that contain the NetWorker client or storage
node’s data
Note: If you routinely move NetWorker backup media to an offsite location for safekeeping, ensure that you have all necessary volumes available to avoid delays during a recovery. You can run the mminfo -s server -mv command from the command prompt to list the media associated with the files you intend to recover. For details about the mminfo command, refer to the Legato Command Reference Guide.
Task 2: Reinstall the NetWorker Client or Storage Node Software
If the NetWorker client or storage node software is not properly installed and running on the host computer, you must reinstall it, as follows:
1. To install the NetWorker client or storage node software, refer to the appropriate NetWorker installation guide.
• If the NetWorker installation kit is available on a shared drive, you can install it over the network.
• Install the NetWorker software to the same path location it occupied prior to the disaster.
• To update the NetWorker software, first recover the NetWorker client or storage node to its predisaster state, then perform the update.
Legato NetWorker, Release 7.0Disaster Recovery Guide
4
Task 3: Recover the NetWorker Client or Storage Node Data
84
2. Install any NetWorker patches that were installed prior to the disaster.
3. Install the appropriate temporary enabler code for each Legato backup product. For temporary enabler codes, refer to the product installation guide.
4. If you are restoring a NetWorker storage node, ensure that the storage devices the NetWorker server will use are correctly configured. For details, refer to the appropriate NetWorker administrator’s guide.
5. From the NetWorker User program, perform a test recovery to verify that the NetWorker recovery process is functioning properly.
Task 3: Recover the NetWorker Client or Storage Node Data
Important: Recovery of volume mount points and their data requires special handling. It cannot be done using save set recovery. If you attempt to recover a mount point and the mounted volume’s data in a single operation, the data will be recovered to the root of the host volume and recovery of the mount point will fail. To successfully recover the mounted volume’s data, you must first manually recreate the mount point, using the same path as the original. You can then perform a separate NetWorker file recovery to restore just the mounted volume’s data (without including any of the host volume’s data in the recovery).
For more information about backing up and recovering mount points, refer to the Legato NetWorker Administrator’s Guide, Microsoft Windows Version. For information about creating mount points, refer to the Windows Online Help topics on creating mounted drives and using the Disk Management utility.
Note: This special handling is not required when performing ASR recovery.
To recover the NetWorker client or storage node data:
1. Log on to Windows with local administrator privileges.
Directed recovery of SYSTEM save sets is not supported. To recover SYSTEM save sets, you must be logged on to the computer being restored with local administrator privileges.
Legato NetWorker, Release 7.0Disaster Recovery Guide
Chapter 4: Windows Disaster Recovery
4
85
2. Ensure that all drives that contained system information prior to the disaster are accessible. The system information includes the boot partition, system partition, and the partition that contains the databases and database logs for the system state components.
3. Start the NetWorker User program.
4. Click the Recover button.
5. In the Source Client dialog box, select the computer you are recovering and click OK.
6. In the Destination Client dialog box, select the computer you are recovering and click OK.
7. The computer’s directory structure appears in the Recover window. Mark all appropriate save sets for recovery:
Windows .NET, Windows XP Professional, and Windows 2000:• All local drives• SYSTEM STATE:• SYSTEM FILES:• SYSTEM DB: • SHAREPOINT: (for Windows 2000 SharePoint Portal Servers only)Windows NT 4.0:• All local drives• SYSTEM STATE:• REPAIRDISK: (recover only if needed)
Note: To avoid having to reboot twice, restore the SYSTEM STATE save set is last. If you recover all save sets in a single operation, the NetWorker User program restores them in the correct order. If you recover save sets in multiple NetWorker User operations, recover the SYSTEM STATE save set last.
Note: NetWorker software backs up user profiles in the save set that corresponds to the disk drive on which they are located (for example, the C: save set). To restore user profiles, restore the save set in which they were saved. User profile folders are located in:
• Windows .NET, Windows XP Professional, and Windows 2000 — %SystemDrive%\Documents and Settings
• Windows NT 4.0 — %SystemRoot%\profiles
8. Select Recover Options from the Option menu.
9. In the Recover Options dialog box, select Overwrite Existing File.
Legato NetWorker, Release 7.0Disaster Recovery Guide
4
Task 4: Verify the NetWorker Client or Storage Node Recovery
86
If you do not select Overwrite Existing File, the recovery process pauses before any existing files are overwritten, and a Naming Conflict dialog box appears, prompting you to indicate how the NetWorker software should resolve filename conflicts.
10. Click Start to begin the recovery.
Note: Files in the Windows Recycle Bin are not password protected. If the Password Protection dialog box appears, select Recover > OK to recover them.
11. Check the log file to verify that no error messages were generated during the recovery sessions. The NetWorker software logs information about the recovery process to the <NetWorker_install_path>\logs file. This file is overwritten each time a recovery is performed. If there are error messages in the log file, you might need to run the recovery again after addressing the source of the errors.
12. After recovery, reboot the computer to completely restore the system-protected files and restart services that were automatically stopped prior to recovery.
Note: If you perform a complete reinstallation of the Windows operating system during a disaster recovery, the display resolution will be set to default values when the disaster recovery is complete. To reconfigure to the previous display settings, use the Control Panel Display tool. This problem does not occur if you perform an ASR recovery on a Windows .NET or Windows XP Professional NetWorker client.
Note: By default, the directed recover option is enabled when you install the NetWorker client. If the directed recover option was disabled on the client before the disaster, you need to explicitly set this option to disable directed recoveries to this client. This option is set through the nsradmin command. For more information about setting the disable directed recover option on the NetWorker client, refer to the Legato NetWorker Administrator’s Guide, Windows Version.
Task 4: Verify the NetWorker Client or Storage Node Recovery
To verify the NetWorker client or storage node recovery:
1. Reboot the NetWorker client or storage node host computer and verify that the NetWorker Remote Exec service has started.
2. Use the Windows Event Viewer to examine the event logs for errors. In particular, check for:
• Service startup errors related to the Windows system state
Legato NetWorker, Release 7.0Disaster Recovery Guide
Chapter 4: Windows Disaster Recovery
4
87
• Errors regarding the recovery of Windows system-protected filesFor information about how the NetWorker software handles the Windows system state and system-protected files, refer to the Legato NetWorker Administrator’s Guide, Microsoft Windows Version.
3. Ensure that the storage node and the NetWorker server can detect the storage devices the NetWorker server is to use.
4. Perform a test recovery using each of the Legato backup products you have installed. Recover data with the Legato product used to back it up. Refer to the product documentation as necessary.
5. Perform a test backup to the NetWorker server to ensure that the connection between the NetWorker client or storage node and the NetWorker server is working properly.
6. Verify that any applications (such as Microsoft Office) that were running prior to the disaster have been properly restored. To verify this, run each application and open a previously saved document.
7. If you want to use Active Desktop, install it after you have recovered all of the computer’s data.
8. If the NetWorker client or storage node computer was previously configured as a domain controller:
Windows 2000 — Verify that the drives configured to store the Active Directory database and log files have been recovered.Windows NT 4.0 — If the computer is a Primary Domain Controller, synchronize it with the domain. If the computer is a Backup Domain Controller, synchronize it with the Primary Domain Controller.
Recovery of DHCP and WINS DatabasesMicrosoft does not provide an application program interface (API) for backup and recovery of the DHCP and WINS databases. Therefore, these databases are not included in the NetWorker SYSTEM DB save set. However, NetWorker software can be configured to protect these databases.

Legato NetWorker, Release 7.0Disaster Recovery Guide
4
Recovery of DHCP and WINS Databases
88
Important: To recover the DHCP database, you must have a NetWorker backup that includes the %SystemRoot%\System32\dhcp directory. To recover the WINS database, you must have a NetWorker backup that includes a local disk backup of the WINS database. For instructions on configuring DHCP and WINS servers to include these databases in scheduled NetWorker backups, refer to the Legato NetWorker Administrator’s Guide, Microsoft Windows Version.
Note: For Windows .NET, the DHCP and WINS databases are automatically included in ASR backup and recovery; no special handling is required.
How to Recover a DHCP Database
To recover a DHCP database:
1. Using the NetWorker User program, recover the %SystemRoot%\ System32\dhcp directory on the DHCP server.
2. Using Microsoft DHCP administrative tools, restore the DHCP database. For detailed instructions, refer the DHCP database restore procedures in the Microsoft documentation.
How to Recover a WINS Database
To recover a WINS database:
1. Using the NetWorker User program, recover the backup of the WINS database to a drive on the WINS server.
2. Using Microsoft WINS administrative tools, restore the WINS database. For detailed instructions on using Microsoft WINS administrative tools, refer to the Microsoft documentation.
Legato NetWorker, Release 7.0Disaster Recovery Guide 89
Chapter 5: NetWare Disaster Recovery
This chapter provides instructions on how to perform a disaster recovery on a NetWare system using the NetWorker software.
Important: This chapter applies only to NetWorker clients and servers running NetWorker release 4.2.x, NetWare version.
This chapter includes the following sections:
• “Replacing a Hard Drive” on page 90• “Recovering the NetWare Operating System” on page 91• “Recovering a NetWare NetWorker Server” on page 94• “Recovering a Replicated NDS Partition” on page 102
Note: All of the utilities referenced in this chapter are NetWare console utilities.
Legato NetWorker, Release 7.0Disaster Recovery Guide
5
Replacing a Hard Drive
90
Replacing a Hard DriveTo replace a hard drive:
• “Obtain the Hard Drive Information” on page 90• “Replace the Hard Drive” on page 90• “Completing the Recovery Process” on page 91
Obtain the Hard Drive Information
Before you replace the hard drive, you must obtain the following information about the drive:
• Size of the drive• Size, format, and volume label assigned to each drive partition• NetWare Directory Services (NDS), the NDS tree topology, and the
location of server objects, partitions and replicas, and bindery context settings
You can obtain information about each drive using:
• install (or nwconfig on NetWare 5.0). This server utility provides information about each hard drive including each volume segment on the drive.
• netadmin in DOS or the NetWorker Administrator program (nwadmin) in Windows.
• dsrepair. This server utility enables you to perform a check on each partition and replica.
• autoexec.ncf. This file contains the bindery context settings.• ndir. This workstation utility provides information about each volume,
directory, and file on the disk.
Replace the Hard Drive
For detailed instructions on how to replace failed hard drives, refer to the appropriate NetWare documentation and the appropriate hard drive vendor documentation.
Important: Install a new drive that is the same size or larger than the original drive. This will ensure that you can recover all of the drive’s data.

Legato NetWorker, Release 7.0Disaster Recovery Guide
Chapter 5: NetWare Disaster Recovery
5
91
Important: Do not delete any volume objects from the NDS tree. This would eliminate any references that other objects might have to a particular volume.
Completing the Recovery Process
To complete the recovery process after replacing the hard drive, see the following sections:
• “Recovering the NetWare Operating System” on page 91• “Recovering a NetWare NetWorker Server” on page 94• “Recovering a Replicated NDS Partition” on page 102
Note: To recover computer data using NetWorker software, refer to the Legato NetWorker Administrator’s Guide, NetWare Version.
Recovering the NetWare Operating SystemThe following sections contain information about recovering the NetWare operating system:
• “Prerequisites” on page 91• “How to Recover the NetWare Operating System” on page 92• “Completing the Recovery Process” on page 94
Prerequisites
To recover the operating system, you need the following:
• NetWare operating system, license software, patch level, and version• Version and patch level of the MS-DOS software• IPX/SPX and/or TCP/IP properties:
– Adapter type– IPX network number or IP address– Default gateway– Subnet mask– DNS server
Legato NetWorker, Release 7.0Disaster Recovery Guide
5
Prerequisites
92
• Computer properties:– Computer name– DNS domain name– Administrator name and password
• Device and SCSI drivers• Startup files, including autoexec.bat, config.sys, autoexec.ncf, and startup.ncf
How to Recover the NetWare Operating System
This section describes how to recover the NetWare operating system using the NetWorker software. Use this process to recover the NetWare operating system back to the original computer, or to a different computer with the same name.
You can recover the operating system by performing:
• A complete installation using install or nwconfig. In this instance, you perform a complete reinstallation and configuration of the operating system.
• Alternatively, perform a partial installation using install or nwconfig. In this case, install and configure only those files that enable the computer to communicate over the network. Then, recover the remaining operating system and configuration files using the NetWorker software.
To recover the operating system, complete the following tasks:
• “Task 1: Install the Operating System” on page 92• “Task 2: Configure the Operating System” on page 93• “Task 3: Test the Operating System and Configure Devices” on page 94
Task 1: Install the Operating System
To install the operating system:
1. Install MS-DOS, including the AUTOEXEC.BAT and CONFIG.SYS files, into its original location. For details, refer to the MS-DOS documentation.
2. Install the same version and patch level of NetWare using the install or nwconfig program. Install NetWare into its original location with the same:
• Version• Patch level
Legato NetWorker, Release 7.0Disaster Recovery Guide
Chapter 5: NetWare Disaster Recovery
5
93
• Computer name• IPX network number and/or IP addressFor details, refer to the NetWare documentation.If you want to upgrade NetWare, first restore the operating system to its original state, and then perform the upgrade.
3. Install NDS into its original location using the install or nwconfig utility:
• Use the same name as the original tree.• Use the same server name.• Use the same container and Administrator name.• Ensure the Administrator object resides at the same level, in the same
container, as it did in the original tree.For details, refer to the NetWare documentation.
Important: If this server will become the master of the NDS Root partition, during installation, make sure you re-create the Organization object using the same name. If the Organization object does not have the same name, the subtree will contain new empty containers.
Task 2: Configure the Operating System
To configure the operating system:
1. Configure the IPX/SPX and TCP/IP properties exactly as they were configured before. If you do not, the NetWorker software will assign the computer a new host ID. If the computer has a different host ID, you must reregister the NetWorker software. For details, refer to the Legato NetWorker Installation Guide, NetWare Version.
2. If you are recovering to a new computer, assign the same hostname for the new computer. If you do not use the same hostname, you will not be able to recover the NetWorker indexes associated with the original computer.
3. Configure the date and time properties as they were configured before.
4. If you had any additional NetWare components or services, reinstall them before recovering the computer’s data.
5. Restart the computer after installing the NetWare operating system.
Legato NetWorker, Release 7.0Disaster Recovery Guide
5
Completing the Recovery Process
94
Task 3: Test the Operating System and Configure Devices
To test the operating system and configure the devices:
1. Configure any devices the NetWorker software requires. For example, SCSI pass-through devices for autochangers.
2. Perform a test to verify that the:
• Name to Address resolution is correct. Test by running nslookup using the Fully Qualified Domain Name of the NetWare NetWorker backup server, client, or storage node.
• Network protocols are functioning properly.• Operating system is functioning properly.• Time synchronization is functioning properly.• The operating system recognizes the devices. If the operating system
does not recognize the devices, you might need to:– Modify the device configuration files to enable the computer to
communicate with the device during recovery.– Load the SCSI driver and its associated ASPI driver.– Install the device driver.
Completing the Recovery Process
To complete the recovery process after installing and configuring the operating system, use the following procedures, depending on the type of NetWorker computer you are recovering:
• “Recovering a NetWare NetWorker Server” on page 94• “Recovering a Replicated NDS Partition” on page 102
Note: To recover computer data using the NetWorker software, refer to the Legato NetWorker Administrator’s Guide, NetWare Version.
Recovering a NetWare NetWorker ServerThe following sections provide information on recovering a NetWorker server:
• “Prerequisites” on page 95• “How to Recover a NetWare NetWorker Server” on page 95
Legato NetWorker, Release 7.0Disaster Recovery Guide
Chapter 5: NetWare Disaster Recovery
5
95
Prerequisites
To recover the NetWorker server, you need the following:
• Original version and patch level of NetWorker software• Original location of NetWorker software• Backup or clone volumes containing the:
– NetWorker server media manager. By default, this directory is located in the SYS:NSR\MM directory.
Important: Do not attempt to recover the legatomm file manually. Recover this file using the NetWorker Utilities Recover from a Disaster option.
– NetWorker server indexes. By default, this directory is located in the SYS:NSR\INDEX\<server_name> directory.
– NetWorker server configuration files. By default, this directory is located in the SYS:NSR\RES directory.
How to Recover a NetWare NetWorker Server
To recover a NetWorker server, complete the following tasks:
• “Task 1: Install the NetWorker Software” on page 96• “Task 2: Configure NetWorker Device and Client Resource” on page 96• “Task 3: Locate the Server’s Bootstrap Save Set ID” on page 97• “Task 4: Recover the NetWorker Server Bootstrap” on page 97• “Task 5: Rename the NetWorker Server Configuration Files” on page 99• “Task 6: Recover the NetWorker Server Data” on page 99• “Task 7: Restore NDS Data” on page 100• “Task 8: Complete the Server Recovery” on page 101
Legato NetWorker, Release 7.0Disaster Recovery Guide
5
Prerequisites
96
Task 1: Install the NetWorker Software
To install the NetWorker software:
1. Install the same version of NetWorker software into its original location. For installation instructions, refer to the Legato NetWorker Installation Guide, NetWare Version.
• If you want to upgrade the NetWorker server, first recover the server to its original state, and then perform the upgrade.
• You do not need to reload the license enablers if the NetWorker configuration files still exist. By default, the configuration files are located in the SYS:NSR\RES directory.
2. Install any NetWorker patches that were installed prior to the disaster.
Task 2: Configure NetWorker Device and Client Resource
To configure the device and client resource:
1. Configure the Device resource:
Note: If you are recovering data using an autochanger, enter [F4] to verify that the autochanger correctly appears in the Autochanger window.
2. Configure the Client resource associated with the server.
Set the browse and retention policies to a decade. The browse policy is one quarter (four months) by default. This enables you to recover all of the server’s records.
Important: If you do not reset the browse and retention policies, all of the server’s records will be recovered. However, any records that are more than one quarter (four months) old will be discarded, because the browse policy is one quarter by default.
Legato NetWorker, Release 7.0Disaster Recovery Guide
Chapter 5: NetWare Disaster Recovery
5
97
Task 3: Locate the Server’s Bootstrap Save Set ID
This section describes how to locate the save set ID for the NetWorker server’s latest bootstrap. The NetWorker server’s bootstrap contains the server’s online file index, media index, and resource configuration files.
Use the following steps to locate the save set ID of the most recent bootstrap if you do not have this information:
1. Insert the most recent media or clone volumes used for scheduled backups into the appropriate device.
2. At the NetWare system console, switch to the directory where the NetWorker NLMs are located. By default, these files are located in the SYS:NSR\BIN directory.
3. Use the scanner -B command to locate the most recent bootstrap on the media.
Task 4: Recover the NetWorker Server Bootstrap
This section describes how to recover the NetWorker server’s bootstrap. By default, these files reside in the SYS:NSR and SYS:NSR\RES directories, and can be recovered using the NetWorker Utilities program.
To recover the NetWorker bootstrap:
1. Load and inventory the devices. This ensures that the NetWorker software can recognize which slots contain which volumes.
If you load a clone volume into a device, the NetWorker software will use the clone volume for the remainder of the recovery process. You might have to update the volume location to indicate that the original volume is not available.
2. Start the NetWorker Utilities program by entering the following command at the NetWare system console:
load NETUTIL
Important: Disable scheduled backups and do not use the NetWorker software to perform backups or recoveries while running the NetWorker Utilities program. If backup and recovery processes are enabled, the state of the NetWorker indexes will become confused. From the NetWorker Utilities dialog box, select Recover from a Disaster.
Legato NetWorker, Release 7.0Disaster Recovery Guide
5
Prerequisites
98
3. Enter the full name of the backup administrator (for example, “.cn=Admin.O= ‘top level container’”) into the User text box and the appropriate NetWare password into the Password text box and press [Enter].
The Device Selection window appears.
4. From the Device Selection window, select the device you intend to use and press [Enter].
5. Insert the most recent media or clone volumes used for scheduled backups into the appropriate device.
• If you are using a single tape device, manually insert the volume.• If you are using an autochanger, use the autochanger controls to
manually select the slot containing the most recent backup volume.To determine the required backup volume, refer to the printed bootstrap records.
6. Press [Enter] when the following message appears.
Put the volume for disaster recovery in device xxxx and press Enter.
7. Press [Enter] to exit the NetWorker Utilities. The server’s processor will halt with multiple ABENDs.
8. Restart the NetWorker software.
9. From the NetWorker Utilities program, select F3>Operation>Recover.
10. Browse and mark the following files for recovery:
• SYS:NSR\NSR.RES
• SYS:NSR\NSRJB.RES
11. Press [F2] to start the recovery. When messages indicating name conflicts appear, select Rename the Recover File for both files.
12. When recovery is complete, exit the NetWorker Utilities program.

Legato NetWorker, Release 7.0Disaster Recovery Guide
Chapter 5: NetWare Disaster Recovery
5
99
Task 5: Rename the NetWorker Server Configuration Files
To rename the configuration files:
1. Unload all of the associated NLM files using nwdown.
2. Delete the existing files (NSR.RES and NSRJB.RES).
3. Rename the recovered files, which were renamed with a tilde (~) upon restore, to NSR.RES and NRJB.RES.
4. Restart the NetWorker software. This process restores the NetWorker software to its last backup configuration, including passwords, administrator privileges, backup groups, and schedules.
5. Verify that the NetWorker indexes and configuration files are restored. If they are not restored, select Recover from a Disaster from the NetWorker Utilities program, or use an older volume.
Task 6: Recover the NetWorker Server Data
To recover the remainder of the server’s data using the NetWorker Utilities program:
To recover the NetWorker server data:
1. Insert the most recent backup or clone volumes into the device.
2. From the Mount dialog box, select the required volume.
Notice that the volume is now marked (R); this means the volume is write protected.
3. From the [F3] Operation menu, select Recover to display the Client List window.
4. Select the client with the NetWare server name and press [Enter].
Another login window appears.
5. Enter the full name of the backup administrator (for example, “.cn=Admin.O= ‘top level container’”) into the User attribute and the appropriate NetWare password into the Password attribute and press [Enter].
The Browser window appears.
6. Select Schema and mark it for recover to recover all extensions to the NDS schema.

Legato NetWorker, Release 7.0Disaster Recovery Guide
5
Prerequisites
100
7. From the [F2] File menu, select Start Recover, and press [Enter].
8. If you have NDS data to restore, continue with “Task 7: Restore NDS Data” on page 100.
If you do not have any NDS data to restore, continue with “Task 8: Complete the Server Recovery” on page 101.
Task 7: Restore NDS Data
Before performing an NDS backup or recover, refer to the Novell Application Notes section “Backing Up and Restoring Novell Directory Services in NetWare 4.11,” dated October 1996. This document explains concepts and procedures that you need to understand before working with NDS backups and recovers.
On networks with multiple servers, NDS automatically creates replicas (copies) of the NDS database or portions of it (partitions) and stores them on other servers. This process provides a readily available backup if NDS or a partition is damaged. Do not circumvent this replication process.
Whenever possible, use an active replica to restore what was lost from the NDS tree. If this is not feasible, you must restore from a Storage Management Services (SMS) backup in the following way:
1. Restore the NDS information.
2. Restore the filesystem data and trustee rights.
NDS backup and restore is based on object names. The objects must exist in the tree before you can restore the filesystem data and trustee assignments for those objects. NDS should be functional (time and partitions synchronizing normally) before you proceed with a restoration.
To restore NDS data to this server using the NetWorker software:
a. From the [F3] Operation menu, select Save Set Recover, and press [Enter].
b. Select this server’s name as both the source and destination client.c. Enter the full name of the backup administrator, and the password.d. Select the {NDS} save set, and press [Enter] to display versions.e. Select the version with the most recent full backup.
If there are any later save sets with level 1 or incremental backups, recover them from the oldest to the most recent.The NDS is now restored to the state of the most recent backup.
Legato NetWorker, Release 7.0Disaster Recovery Guide
Chapter 5: NetWare Disaster Recovery
5
101
Task 8: Complete the Server Recovery
To complete the recovery of the server:
1. Use NetWorker software to recover the remaining data, including the client file indexes. In the Browser window, mark everything for recovery, and then unmark all still-operational volumes, LEGATOMM, the server’s LEGATODB, NSR.RES, NSRJB.RES, Schema, and NDS.
Important: Recover each client file index by selecting the client folder from the indexes directory. Each client has a legatodb file that is located in SYS:NSR\INDEX\CLIENT-NAME.
If you run out of memory while recovering multiple files, recover one volume at a time.
2. From the [F2] File menu in the Browser window, display the NetWorker Recover Options dialog box. Select Don’t Overwrite Data.
3. Verify the recovered data. From a workstation, use the ndir command or NetWare Administrator (NWAdmin) to check the data, trustee assignments, file ownership, and other related information.
4. Select Cross-Check Index from the Indexes dialog box of the NetWorker Administrator program to compare the index records to the records in the media index.
5. Perform a check to make sure the server is fully recovered:
• Verify that the server and its associated clients are included in a scheduled backup.
• Run dsrepair to verify the integrity of any NDS databases.• Use the NetWorker Administrator program or the ndir workstation
utility to verify the data, trustee assignments, and file ownership.
Legato NetWorker, Release 7.0Disaster Recovery Guide
5
Recovering a Replicated NDS Partition
102
Recovering a Replicated NDS PartitionIf the NetWare server did not contain an NDS partition (replicated or not), do not complete this section. Instead, complete only “Recovering the NetWare Operating System” on page 91 and “Recovering a NetWare NetWorker Server” on page 94.
This section contains the following information on recovering a replicated NDS partition over the network:
• “How to Recover a NetWare 4.10 SYS Volume” on page 102• “How to Recover a NetWare 4.11, NetWare 5.0, or IntraNetWare Server
SYS Volume” on page 105
Important: For NetWare 4.11/IntraNetWare servers, do not delete the server or volume objects for the failed volume from the NDS tree; you do not want to eliminate any references other objects might have to the volume. If you must delete objects on a NetWare 4.11/IntraNetWare server, use the NetWare 4.10 procedure for recovering from a disaster.
How to Recover a NetWare 4.10 SYS Volume
To recover a SYS volume on a NetWare 4.10 server, complete the following tasks:
• “Task 1: Recover the NetWare 4.10 SYS Volume” on page 102• “Task 2: Restore the SMS Remote File System” on page 104• “Task 3: Complete the Recovery of the NetWare 4.10 SYS Volume” on
page 105
Task 1: Recover the NetWare 4.10 SYS Volume
To recover a SYS volume on a NetWare 4.10 server:
1. Use the NetWorker Administrator program or netadmin to delete the volume objects associated with the failed server.
2. Use NDS Manager or partmgr to delete the server object for the failed server. You cannot use netadmin to delete a server object.
Partition Manager displays a warning message; enter Yes to confirm the deletion.
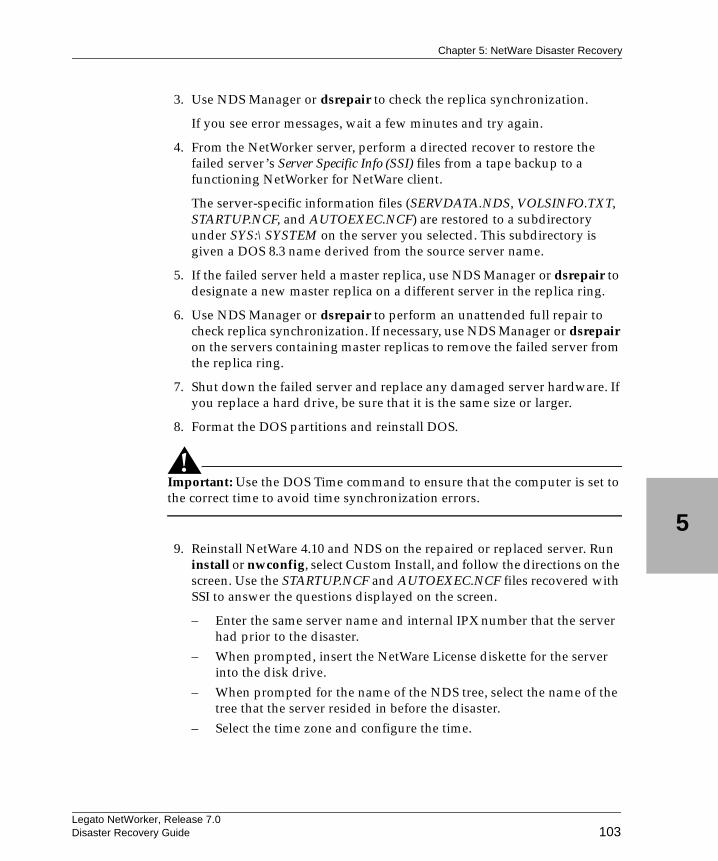
Legato NetWorker, Release 7.0Disaster Recovery Guide
Chapter 5: NetWare Disaster Recovery
5
103
3. Use NDS Manager or dsrepair to check the replica synchronization.
If you see error messages, wait a few minutes and try again.
4. From the NetWorker server, perform a directed recover to restore the failed server’s Server Specific Info (SSI) files from a tape backup to a functioning NetWorker for NetWare client.
The server-specific information files (SERVDATA.NDS, VOLSINFO.TXT, STARTUP.NCF, and AUTOEXEC.NCF) are restored to a subdirectory under SYS:\SYSTEM on the server you selected. This subdirectory is given a DOS 8.3 name derived from the source server name.
5. If the failed server held a master replica, use NDS Manager or dsrepair to designate a new master replica on a different server in the replica ring.
6. Use NDS Manager or dsrepair to perform an unattended full repair to check replica synchronization. If necessary, use NDS Manager or dsrepair on the servers containing master replicas to remove the failed server from the replica ring.
7. Shut down the failed server and replace any damaged server hardware. If you replace a hard drive, be sure that it is the same size or larger.
8. Format the DOS partitions and reinstall DOS.
Important: Use the DOS Time command to ensure that the computer is set to the correct time to avoid time synchronization errors.
9. Reinstall NetWare 4.10 and NDS on the repaired or replaced server. Run install or nwconfig, select Custom Install, and follow the directions on the screen. Use the STARTUP.NCF and AUTOEXEC.NCF files recovered with SSI to answer the questions displayed on the screen.
– Enter the same server name and internal IPX number that the server had prior to the disaster.
– When prompted, insert the NetWare License diskette for the server into the disk drive.
– When prompted for the name of the NDS tree, select the name of the tree that the server resided in before the disaster.
– Select the time zone and configure the time.
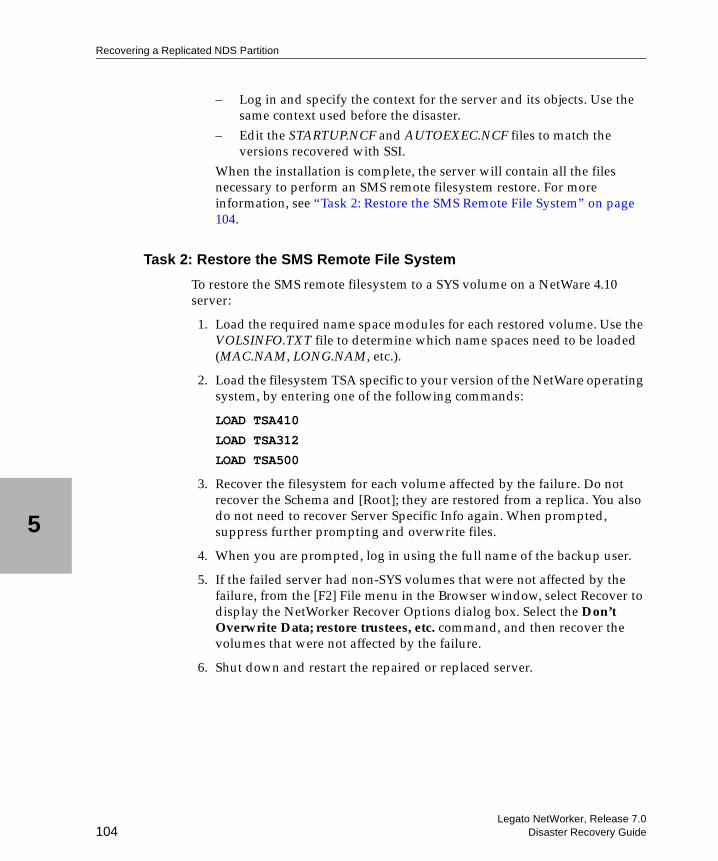
Legato NetWorker, Release 7.0Disaster Recovery Guide
5
Recovering a Replicated NDS Partition
104
– Log in and specify the context for the server and its objects. Use the same context used before the disaster.
– Edit the STARTUP.NCF and AUTOEXEC.NCF files to match the versions recovered with SSI.
When the installation is complete, the server will contain all the files necessary to perform an SMS remote filesystem restore. For more information, see “Task 2: Restore the SMS Remote File System” on page 104.
Task 2: Restore the SMS Remote File System
To restore the SMS remote filesystem to a SYS volume on a NetWare 4.10 server:
1. Load the required name space modules for each restored volume. Use the VOLSINFO.TXT file to determine which name spaces need to be loaded (MAC.NAM, LONG.NAM, etc.).
2. Load the filesystem TSA specific to your version of the NetWare operating system, by entering one of the following commands:
LOAD TSA410
LOAD TSA312
LOAD TSA500
3. Recover the filesystem for each volume affected by the failure. Do not recover the Schema and [Root]; they are restored from a replica. You also do not need to recover Server Specific Info again. When prompted, suppress further prompting and overwrite files.
4. When you are prompted, log in using the full name of the backup user.
5. If the failed server had non-SYS volumes that were not affected by the failure, from the [F2] File menu in the Browser window, select Recover to display the NetWorker Recover Options dialog box. Select the Don’t Overwrite Data; restore trustees, etc. command, and then recover the volumes that were not affected by the failure.
6. Shut down and restart the repaired or replaced server.
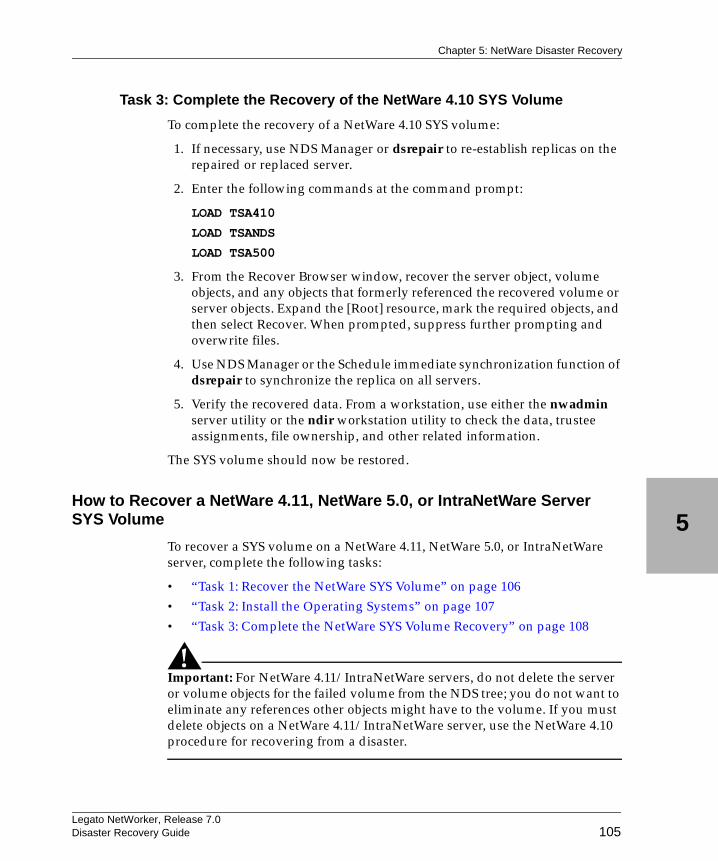
Legato NetWorker, Release 7.0Disaster Recovery Guide
Chapter 5: NetWare Disaster Recovery
5
105
Task 3: Complete the Recovery of the NetWare 4.10 SYS Volume
To complete the recovery of a NetWare 4.10 SYS volume:
1. If necessary, use NDS Manager or dsrepair to re-establish replicas on the repaired or replaced server.
2. Enter the following commands at the command prompt:
LOAD TSA410
LOAD TSANDS
LOAD TSA500
3. From the Recover Browser window, recover the server object, volume objects, and any objects that formerly referenced the recovered volume or server objects. Expand the [Root] resource, mark the required objects, and then select Recover. When prompted, suppress further prompting and overwrite files.
4. Use NDS Manager or the Schedule immediate synchronization function of dsrepair to synchronize the replica on all servers.
5. Verify the recovered data. From a workstation, use either the nwadmin server utility or the ndir workstation utility to check the data, trustee assignments, file ownership, and other related information.
The SYS volume should now be restored.
How to Recover a NetWare 4.11, NetWare 5.0, or IntraNetWare Server SYS Volume
To recover a SYS volume on a NetWare 4.11, NetWare 5.0, or IntraNetWare server, complete the following tasks:
• “Task 1: Recover the NetWare SYS Volume” on page 106• “Task 2: Install the Operating Systems” on page 107• “Task 3: Complete the NetWare SYS Volume Recovery” on page 108
Important: For NetWare 4.11/IntraNetWare servers, do not delete the server or volume objects for the failed volume from the NDS tree; you do not want to eliminate any references other objects might have to the volume. If you must delete objects on a NetWare 4.11/IntraNetWare server, use the NetWare 4.10 procedure for recovering from a disaster.

Legato NetWorker, Release 7.0Disaster Recovery Guide
5
Recovering a Replicated NDS Partition
106
Task 1: Recover the NetWare SYS Volume
To recover a NetWare 4.11 or IntraNetWare SYS volume:
To recover a SYS volume:
1. From the NetWorker server, perform a directed recover to restore the failed server’s Server Specific Info (SSI) files from a tape backup to a functioning NetWorker for NetWare client.
The server-specific information files (SERVDATA.NDS, DSMISC.LOG, VOLSINFO.TXT, STARTUP.NCF, and AUTOEXEC.NCF) are restored to a subdirectory under SYS:\SYSTEM on the client you have selected. This subdirectory is given a DOS 8.3 name derived from the source server name.
Important: For NetWare 4.11/IntraNetWare servers, do not delete the server or volume objects for the failed server from the NDS tree. You do not want to eliminate any references other objects might have to the server. If objects were deleted from the NDS tree, use the NetWare 4.10 procedure for recovering from a disaster.
2. If the failed server held a master replica, use NDS Manager or dsrepair to designate a new master replica on a different server in the replica ring. To determine which replicas were stored on the failed server, refer to DSMISC.LOG.
3. If the failed server also contained any nonmaster replicas, use NDS Manager or dsrepair on the servers containing master replicas to remove the failed server from the replica ring.
A NetWare warning message appears. Continue with the recovery procedure. For more information, refer to “Backing Up and Restoring Novell Directory Services in NetWare 4.11” in Novell Application Notes, October 1996.
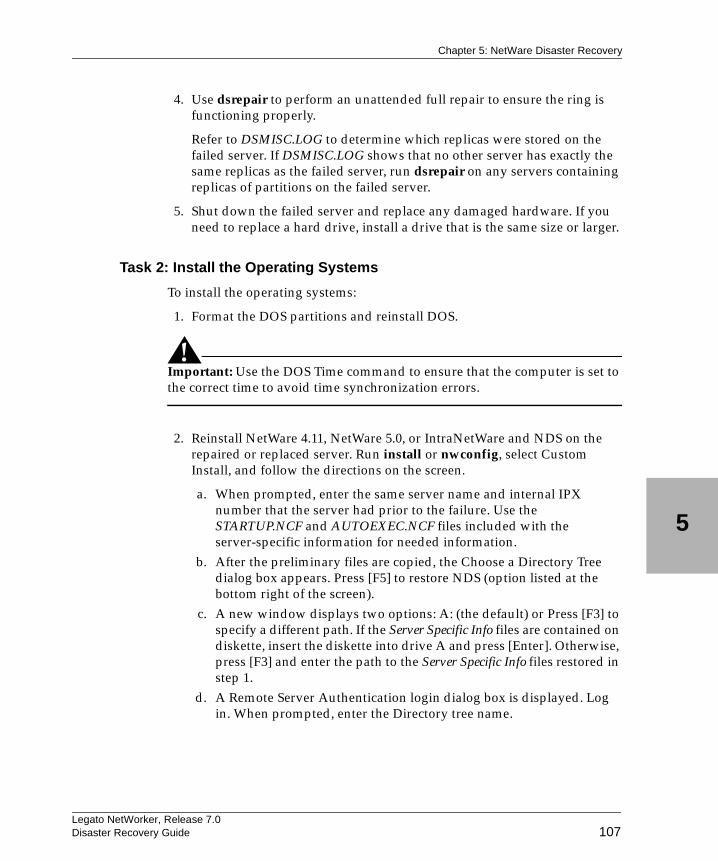
Legato NetWorker, Release 7.0Disaster Recovery Guide
Chapter 5: NetWare Disaster Recovery
5
107
4. Use dsrepair to perform an unattended full repair to ensure the ring is functioning properly.
Refer to DSMISC.LOG to determine which replicas were stored on the failed server. If DSMISC.LOG shows that no other server has exactly the same replicas as the failed server, run dsrepair on any servers containing replicas of partitions on the failed server.
5. Shut down the failed server and replace any damaged hardware. If you need to replace a hard drive, install a drive that is the same size or larger.
Task 2: Install the Operating Systems
To install the operating systems:
1. Format the DOS partitions and reinstall DOS.
Important: Use the DOS Time command to ensure that the computer is set to the correct time to avoid time synchronization errors.
2. Reinstall NetWare 4.11, NetWare 5.0, or IntraNetWare and NDS on the repaired or replaced server. Run install or nwconfig, select Custom Install, and follow the directions on the screen.
a. When prompted, enter the same server name and internal IPX number that the server had prior to the failure. Use the STARTUP.NCF and AUTOEXEC.NCF files included with the server-specific information for needed information.
b. After the preliminary files are copied, the Choose a Directory Tree dialog box appears. Press [F5] to restore NDS (option listed at the bottom right of the screen).
c. A new window displays two options: A: (the default) or Press [F3] to specify a different path. If the Server Specific Info files are contained on diskette, insert the diskette into drive A and press [Enter]. Otherwise, press [F3] and enter the path to the Server Specific Info files restored in step 1.
d. A Remote Server Authentication login dialog box is displayed. Log in. When prompted, enter the Directory tree name.
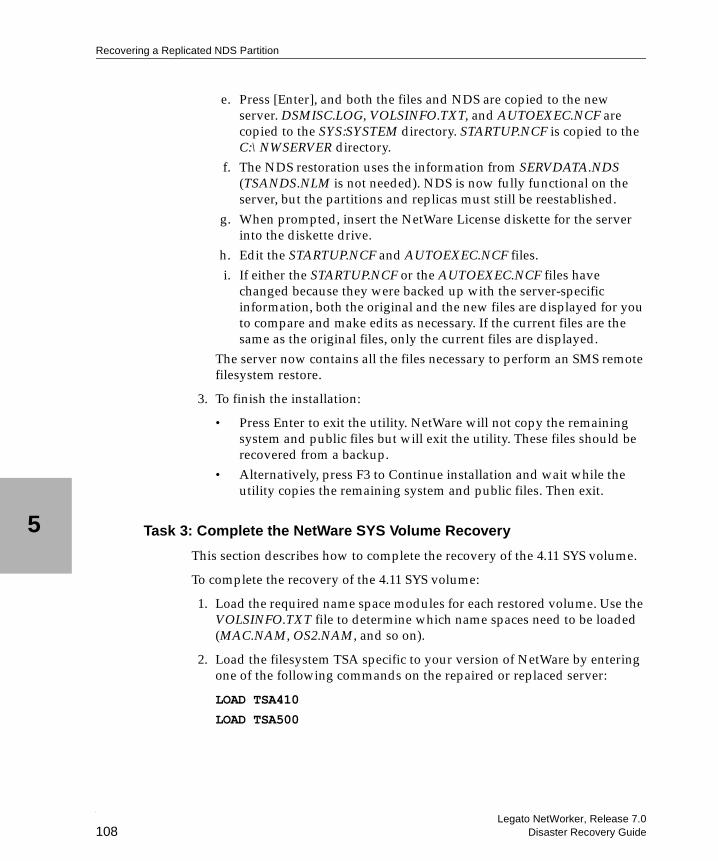
Legato NetWorker, Release 7.0Disaster Recovery Guide
5
Recovering a Replicated NDS Partition
108
e. Press [Enter], and both the files and NDS are copied to the new server. DSMISC.LOG, VOLSINFO.TXT, and AUTOEXEC.NCF are copied to the SYS:SYSTEM directory. STARTUP.NCF is copied to the C:\NWSERVER directory.
f. The NDS restoration uses the information from SERVDATA.NDS (TSANDS.NLM is not needed). NDS is now fully functional on the server, but the partitions and replicas must still be reestablished.
g. When prompted, insert the NetWare License diskette for the server into the diskette drive.
h. Edit the STARTUP.NCF and AUTOEXEC.NCF files.i. If either the STARTUP.NCF or the AUTOEXEC.NCF files have
changed because they were backed up with the server-specific information, both the original and the new files are displayed for you to compare and make edits as necessary. If the current files are the same as the original files, only the current files are displayed.
The server now contains all the files necessary to perform an SMS remote filesystem restore.
3. To finish the installation:
• Press Enter to exit the utility. NetWare will not copy the remaining system and public files but will exit the utility. These files should be recovered from a backup.
• Alternatively, press F3 to Continue installation and wait while the utility copies the remaining system and public files. Then exit.
Task 3: Complete the NetWare SYS Volume Recovery
This section describes how to complete the recovery of the 4.11 SYS volume.
To complete the recovery of the 4.11 SYS volume:
1. Load the required name space modules for each restored volume. Use the VOLSINFO.TXT file to determine which name spaces need to be loaded (MAC.NAM, OS2.NAM, and so on).
2. Load the filesystem TSA specific to your version of NetWare by entering one of the following commands on the repaired or replaced server:
LOAD TSA410
LOAD TSA500
Legato NetWorker, Release 7.0Disaster Recovery Guide
Chapter 5: NetWare Disaster Recovery
5
109
3. Recover the filesystem for each volume affected by the failure. Do not recover the Schema and [Root]; they will be restored from a replica. You also do not need to recover Server Specific Info again. When prompted, suppress further prompting and overwrite files.
If the failed server had non-SYS volumes that were not affected by the failure, no further action is needed because the SERVDATA.NDS file preserves the trustee assignments on these other volumes.
4. Shut down and restart the server.
5. Use NDS Manager or dsrepair to re-establish replicas on the failed server. Use DSMISC.LOG to view a copy of the replica list that resided on the server at the time of backup.
6. Verify the recovered data. From a workstation, use NWAdmin32 or the rights /T /S and ndir commands to check the data, trustee assignments, file ownership, and other related information.

Legato NetWorker, Release 7.0Disaster Recovery Guide
5
Recovering a Replicated NDS Partition
110
Legato NetWorker, Release 7.0Disaster Recovery Guide 111
Chapter 6: Microsoft Cluster Disaster Recovery(Windows NT 4.0)
This chapter describes how to recover one or more computers in a Windows NT 4.0 cluster.
This chapter includes the following sections:
• “Recovering One Node in a Cluster” on page 111• “Recovering a Cluster Shared Disk” on page 113• “Replacing the Quorum Disk and Recovering Its Data” on page 116• “Recovering the MSCS Cluster Configuration” on page 117• “Performing a Cluster-Wide Recovery” on page 119
Important: To ensure proper termination, never power off any node in the cluster unless it is connected with a Y cable.
Recovering One Node in a ClusterNote: In the example used for the following tasks, Node_A is still working and Node_B has failed.
To recover a failed node within a cluster, perform the following tasks:
• “Task 1: Evict Node_B from the Cluster” on page 112• “Task 2: Reinstall Windows NT 4.0 and MSCS on Node_B” on page 112• “Task 3: Reinstall the NetWorker Software” on page 113• “Task 4: Recover the Data on Node_B” on page 113
Legato NetWorker, Release 7.0Disaster Recovery Guide
6
Task 1: Evict Node_B from the Cluster
112
Task 1: Evict Node_B from the Cluster
To evict Node_B from the cluster:
1. Ensure that the cluster resources failed over to Node_A, the working node. This includes the quorum disk and any shared disks.
2. If any of the data that failed over from Node_B to Node_A is corrupt, use the NetWorker software to recover the data.
Note: You may need to shut down some cluster resources that depend on this data.
3. From the Cluster Administrator on Node_A, evict Node_B from the cluster.
4. Shut down Node_B if it is still running and disconnect it from the cluster.
5. Fix or replace the damaged hardware on Node_B, if necessary.
6. Reconnect Node_B to the cluster.
Task 2: Reinstall Windows NT 4.0 and MSCS on Node_B
To reinstall Windows NT and MSCS on Node_B:
1. Install the Windows NT 4.0 Server Enterprise Edition.
2. Apply Windows NT 4.0 service pack 3.
3. Install the MSCS software.
4. If the node had a local tape drive, install the device driver.
5. Install the latest Windows NT 4.0 service pack.
6. Join Node_B to the cluster with Node_A.
7. Assign the same drive letters that were previously assigned to the disk volumes.
Important: Any local drive letters you assign should not conflict with the drive letters assigned to any of the shared disks.
Legato NetWorker, Release 7.0Disaster Recovery Guide
Chapter 6: Microsoft Cluster Disaster Recovery (Windows NT 4.0)
6
113
Task 3: Reinstall the NetWorker Software
To reinstall the NetWorker software, on Node_B:
1. Log on to the same domain as Node_A.
2. Install the NetWorker software. For instructions, refer to the Legato NetWorker Installation Guide, Microsoft Windows Version.
Task 4: Recover the Data on Node_B
To recover the data on Node_B:
1. Recover all the hives in the registry or system state.
2. Use NetWorker to recover any data that is local only to Node_B.
3. Restart Node_B.
4. Verify that the cluster is working properly.
Recovering a Cluster Shared DiskThis section describes how to recover data from a cluster shared disk that is not a quorum disk.
To recover a cluster shared disk, perform the following tasks:
• “Task 1: Take the Dependent Resources Offline” on page 113• “Task 2: Replace the Hard Drive” on page 114• “Task 3: Recover the Data to the Shared Disk” on page 115• “Task 4: Configure the Cluster to Include the Shared Disk” on page 115
Task 1: Take the Dependent Resources Offline
Note: The following procedure outlines the required steps for taking the dependent resources offline. For detailed instructions, refer to the Microsoft Cluster Server documentation.
To take offline all of the resources that are dependent on the shared drive that you are replacing:
1. In the Cluster Administrator program, create a new resource group.
Legato NetWorker, Release 7.0Disaster Recovery Guide
6
Task 2: Replace the Hard Drive
114
2. If the current shared disk’s resource group contains the shared disk and its dependent resources, move the cluster resources that represent the affected shared disk into the resource group you created in the previous step.
3. Take offline the resource group that contains the shared disk.
Note: You do not need to create a new resource group if the shared disk’s resource group only contains resources that depend on it.
Task 2: Replace the Hard Drive
For more information, refer to the Microsoft Cluster Server documentation.
To replace the hard drive:
1. Using the Control Panel Services tool, set the Startup Type of the Cluster Service to Manual.
2. In the Cluster Administrator program, open the Property window for each resource in the resource group. Select the Do Not Restart property from the Advanced window.
3. Remove the shared disk from the dependency list of any resources that depend on the shared disk.
Important: If you fail to perform this step, you may not be able to delete the disk resource in the following step.
4. Delete the cluster resource that represents the shared disk.
5. If required, shut down the nodes.
Note: Refer to the MSCS Cluster Hardware Manual to determine whether you must shut down the nodes before you replace the shared disk.
6. Remove the shared disk and replace it with a new shared disk.
7. If you have shut down the nodes, reboot them.
8. Create the drive volumes and format the new disk as the old one was.
Legato NetWorker, Release 7.0Disaster Recovery Guide
Chapter 6: Microsoft Cluster Disaster Recovery (Windows NT 4.0)
6
115
Task 3: Recover the Data to the Shared Disk
To recover the data that belongs to the shared disk:
1. Ensure that the NetWorker software is properly installed. For details, refer to the Legato NetWorker Installation Guide, Microsoft Windows Version.
2. Using the NetWorker User program, recover all the data that belongs to the shared disk.
Note: If the resource group is a virtual server, you may need to perform a directed recovery. For details, refer to the Legato NetWorker Administrator’s Guide, Microsoft Windows Version.
Task 4: Configure the Cluster to Include the Shared Disk
For more information, refer to the Microsoft Cluster Server documentation.
To configure the cluster to include the shared disk:
1. Using the Control Panel Services tool, start the Cluster Service if it was previously stopped.
2. In the Cluster Administrator program, create a new cluster resource to represent the new disk.
3. Add the cluster resource to the resource group you created in “Task 1: Take the Dependent Resources Offline” on page 113.
If you did not create a new resource group Task 1, add the resource to the resource group where it was before the replacement.
4. Add the shared disk to the dependency list of all the cluster resources that depend on this resource.
5. Start the resource group that contains the shared disk.
6. If you created a new resource group:
a. Move the disk resource and all dependant resources to their original resource group.
b. Delete the now-empty resource group.
7. Ensure that the Startup Type of the Cluster Service is set to Automatic.
8. Ensure that the resource group property is set to Do Not Restart. In most situations, it is unselected.
Legato NetWorker, Release 7.0Disaster Recovery Guide
6
Replacing the Quorum Disk and Recovering Its Data
116
Replacing the Quorum Disk and Recovering Its DataThis section provides information about the quorum resource and explains how to recover a quorum disk’s data.
About the Quorum Resource
If there is a communication failure between the nodes, the MSCS software uses the quorum resource in an arbitration process to determine the members of the cluster nodes. The quorum resource also records changes made to the cluster database when one of the nodes in the cluster is down.
Refer to the Microsoft Cluster Server documentation for detailed information on how to:
• Locate the quorum disk• Locate the quorum data directory• Change the quorum disk designation
Recovering the cluster configuration data on the quorum disk is important during a disaster recovery. Recovery of the quorum resource information is not automatic.
If the quorum disk is owned by a virtual server, configure the virtual server as a NetWorker client. For the client’s Save Set attribute, specify one of the following:
• All• The disk volume or directory that contains the quorum data
If the quorum disk is not owned by a virtual server, configure all the nodes as NetWorker clients. For the Save Set attributes, specify one of the following:
• All (this is preferred)• The disk volume or directory that contains the quorum data
Note: The quorum disk is accessible from only one node at a time. Therefore, the backup will fail over to the node that does not have access to the quorum disk. This is why specifying save set All is preferred over specifying the disk volume or directory that contains the quorum data.
Legato NetWorker, Release 7.0Disaster Recovery Guide
Chapter 6: Microsoft Cluster Disaster Recovery (Windows NT 4.0)
6
117
How to Replace the Quorum Disk and Recover Its Data
To recover the quorum disk’s data:
1. Take offline any cluster resources or applications that depend on the quorum disk’s data.
Important: Do not take the Cluster Service offline.
2. Change the quorum disk’s drive letter and replace the quorum disk with a new disk.
Note: For detailed instructions, refer to the appropriate Microsoft documentation. In particular, refer to Microsoft Knowledge Base article Q280353, How to Change Quorum Disk Designation.
3. If necessary, install the NetWorker software on the node that has access to the quorum disk.
4. Recover any data except the quorum data that resided on the quorum disk prior the disaster.
Important: Do not recover the quorum data.
Recovering the MSCS Cluster ConfigurationThe following procedure is based on these assumptions:
• You have not changed the disk configuration from the time you performed the last backup on the cluster database.
• You have not replaced any hardware, including the shared disk, from the time you performed the last backup on the cluster database.
• Node_A has the latest backup of the system state.• Node_A or a virtual server has the latest backup of the quorum data.
To recover the MSCS cluster configuration, perform the following tasks:
• “Task 1: Recover the System State and Quorum Data” on page 118
Legato NetWorker, Release 7.0Disaster Recovery Guide
6
Task 1: Recover the System State and Quorum Data
118
• “Task 2: Replace the Quorum Data with the Recovered Quorum Data” on page 118
• “Task 3: Evict Node_B from the Cluster” on page 119• “Task 4: Install the Cluster Software and Patches on Node_B” on page 119
Task 1: Recover the System State and Quorum Data
To recover the system state and quorum data:
1. Select a node in the cluster that has the good (and possibly the latest) backup of the system state and the quorum data. (This procedure uses Node_A, for example.)
2. Verify that the Cluster Service is running on Node_A.
3. From Node_A, recover the following:
• System state• Quorum data (If the quorum disk is owned by a virtual server, use
the directed recover procedure. For details, refer to the Legato NetWorker Administrator’s Guide, Microsoft Windows Version.)
Make sure that you recover the quorum data to a different directory on the quorum drive.For example, if the quorum data previously resided in G:\MSCS, recover the data to G:\RECOVER\MSCS.
4. Shut down Node_A.
Important: Do not reboot Node_A.
Task 2: Replace the Quorum Data with the Recovered Quorum Data
To replace the quorum data to Node_B:
1. On Node_B, uninstall the cluster software.
2. Reboot Node_B.
Legato NetWorker, Release 7.0Disaster Recovery Guide
Chapter 6: Microsoft Cluster Disaster Recovery (Windows NT 4.0)
6
119
3. Copy the existing quorum data from its original location to another directory. For example, copy:
G:\MSCS
toG:\TEMP\MSCS
4. Replace the existing quorum data with the recovered quorum data. For example, copy:
G:\RECOVER\MSCS
to G:\MSCS
5. Shut down Node_B.
Task 3: Evict Node_B from the Cluster
To evict Node_B from the cluster:
1. Reboot Node_A.
2. Open the Cluster Administrator and evict Node_B from the cluster.
Task 4: Install the Cluster Software and Patches on Node_B
To install the cluster software and patches on Node_B:
1. Reboot Node_B.
2. Install the cluster software and join it to the cluster in which Node_A is a member node.
3. On Node_B, apply any needed cluster patches and Windows service packs.
4. Verify that the cluster configuration has been successfully recovered.
Performing a Cluster-Wide RecoveryUse the following procedures to perform a complete cluster recovery, including reinstallation of the operating system on all nodes. These procedures describe how to perform a recovery, either using existing hardware or new hardware.
Legato NetWorker, Release 7.0Disaster Recovery Guide
6
Task 1: On Node_A, Install and Configure the Software
120
In the following example:
• Choose the node that has the most up-to-date backup of the cluster database (part of the registry) to serve as Node_A.
• Defective nodes and shared drives have been replaced.
To recover the cluster to new hardware or existing hardware, perform the following tasks:
• “Task 1: On Node_A, Install and Configure the Software” on page 120• “Task 2: On Node_B, Install and Configure the Software” on page 121• “Task 3: Install and Configure NetWorker” on page 121• “Task 4: Perform a Disaster Recovery” on page 122• “Task 5: Check and Reassign the Drive Assignments” on page 122• “Task 6: Recover the Data” on page 123• “Task 7: Check the Disk Signatures” on page 123• “Task 8: Join Node_B to the Cluster” on page 124
Task 1: On Node_A, Install and Configure the Software
To install and configure the software, on Node_A:
1. Make sure the node has been properly:
• Shut down• Connected through the shared disks• Terminated
2. Install Windows NT 4.0 Server Enterprise Edition.
a. Add the server to the domain using the same cluster login account.b. Create the partitions so that the new disk configuration of Node_A
matches the original configuration.c. Use the same IP address and server name (fully qualified DNS
domain name, if used) that were used originally.d. Configure the network adapters and the IP address using the original
settings whenever possible.e. Log on to the domain.
3. Using the Windows NT Disk Administrator, configure the drives to match their previous configuration.
4. Install Windows NT 4.0 Server Enterprise Edition server-specific service packs (Service Pack 3).
Legato NetWorker, Release 7.0Disaster Recovery Guide
Chapter 6: Microsoft Cluster Disaster Recovery (Windows NT 4.0)
6
121
5. Install the MSCS software.
6. Install any required service pack software. Make sure that the version is greater than Service Pack 3.
7. If Node_A is a NetWorker server, configure the tape devices.
8. Log on to Node_A using the cluster account on the domain.
Task 2: On Node_B, Install and Configure the Software
To install and configure the software, on Node_B:
1. Make sure the node has been properly:
• Shut down• Connected through the shared disks• Terminated
2. Install Windows NT 4.0 Server Enterprise Edition.
a. Add the server to the domain using the same cluster login account.b. Create the partitions so the new disk configuration matches the
original configuration.c. Use the same server name (fully qualified DNS if used) and IP
address that were used originally.d. Configure the network adapters and the IP address using the original
settings whenever possible.e. Log on to the domain.
3. Using the Windows NT Disk Administrator, configure the drives to match their previous configuration.
4. Install Windows NT 4.0 Server Enterprise Edition server-specific service packs (Service Pack 3).
Task 3: Install and Configure NetWorker
Install and configure the NetWorker software and any required patches on Node_A and Node_B. For details, refer to the Legato NetWorker Installation Guide, Microsoft Windows Version.
Legato NetWorker, Release 7.0Disaster Recovery Guide
6
Task 4: Perform a Disaster Recovery
122
Task 4: Perform a Disaster Recovery
To perform a disaster recovery:
1. Shut down Node_B.
2. Perform a NetWorker disaster recovery of Node_A. For details, refer to “Chapter 4: Windows Disaster Recovery” on page 47.
3. Restore the following directories:
• Windows NT registry or system state• Windows NT system directorySelect Overwrite and Suppress Messages.
4. Recover the quorum and the shared drives data. Follow the directed recovery procedure. For detailed instructions, refer to the Legato NetWorker Administrator’s Guide, Microsoft Windows Version.
Note: Make sure you restore the \MSCS directory in the quorum to a different location, for example \MSCStemp.
5. Shut down Node_A. Do not reboot Node_A.
a. The system will prompt you to restart. Select Yes.b. Shut down the node when the system is in its reboot cycle.
6. Restart Node_B and log on with Administrator privilege.
7. On the quorum drive:
a. Rename the existing \MSCS directory to \MSCSold.b. Move the restored \MSCS directory that was restored to \MSCStemp
to the \MSCS directory.
8. Shut down Node_B.
Task 5: Check and Reassign the Drive Assignments
If you are replacing the cluster shared disks with new hardware, follow these steps to check and reassign the drive assignments:
1. Reboot Node_A. The drive assignments may have changed. Use the Disk Administrator to reassign the drives to their former drive letters.
2. Using the Control Panel Services tool, set the Cluster Service to Manual startup.
3. Reboot Node_A.
Legato NetWorker, Release 7.0Disaster Recovery Guide
Chapter 6: Microsoft Cluster Disaster Recovery (Windows NT 4.0)
6
123
4. Replace the cluster shared disks.
5. Check the drive assignments through Windows Explorer. The “phantom” drives you see are the original shared disks. These drives cannot be deleted or disconnected from the Windows Explorer.
6. Remove the registry entries for the phantom disks:
a. Use regedit to display the following registry entry:
HKEY_LOCATION_MACHINE\SYSTEM\CurrentControlSet\Services\ Clusdisk\Parameters\Signatures
The numbers listed under Signatures are the drive signatures for the former shared disks. Delete these numbers.
b. Reboot the node.c. Using Windows Explorer, check the status of the disks. There should
no longer be any phantom disks and the new shared disks should have the proper drive letter assignments.The new shared disk signatures are located in the following registry key:HKEY_LOCATION_MACHINE\SYSTEM\CurrentControlSet\Services\Clusdisk\Parameters\AvailableDisks
Task 6: Recover the Data
To recover the data:
1. Use the NetWorker User program to restore the remaining data from tape. Do not restore the following:
• System state• RepairDisk• Windows NT system directoryFor details, refer to “Chapter 4: Windows Disaster Recovery” on page 47.
2. Reboot Node_A.
3. Log on to a domain with Administrator privileges.
Task 7: Check the Disk Signatures
If you are replacing the shared disks, perform the following procedure to check the disk signatures. If you are not replacing the shared disks, skip this task and proceed to “Task 8: Join Node_B to the Cluster” on page 124.
Legato NetWorker, Release 7.0Disaster Recovery Guide
6
Task 8: Join Node_B to the Cluster
124
To check the disk signatures:
1. Replace the cluster shared disks with the new hardware:
a. Using the Control Panel Services tool, start the Cluster Service with the -fixquorum startup option. This option allows you to fix or add a new quorum drive.
b. Start the Cluster Administrator program and attach Node_A to the cluster you are restoring.
c. Create the new disk resource for the quorum drive and place it in the Quorum Group.
Note: For detailed information, refer to Microsoft Knowledge Base article Q280353, How to Change Quorum Disk Designation.
d. From the Cluster Administrator program:– Rename all of the old shared disks. – Create new resources for the physical disks to match the old
shared disks. – Check for dependencies for the physical disk and make the
necessary modifications. e. Create a new group and move all of the old shared disks to this
group. (This is done for cleanup purposes.)
Important: You cannot delete the old shared disks until both nodes are running and both nodes are members of the cluster.
2. Using the Control Panel Services tool, set the MSCS service to Automatic startup.
3. Remove any Startup Parameters that may have been previously set. For example, remove -fixquorum.
Task 8: Join Node_B to the Cluster
To join Node_B to the cluster:
1. On Node_A, use the Cluster Administrator to evict Node_B from the cluster.
2. Restart Node_B.
3. On Node_B, install the MSCS software and rejoin the cluster.
Legato NetWorker, Release 7.0Disaster Recovery Guide
Chapter 6: Microsoft Cluster Disaster Recovery (Windows NT 4.0)
6
125
4. Install the latest service pack software on Node_B. Make sure the version is greater than Service Pack 3.
5. If NetWorker Server is installed in Node_A as a failover server:
a. Install NetWorker server software.b. Register the resource extension. This manages the NetWorker server
resource type in Node_B. For more details, refer to the Legato NetWorker Installation Guide, Microsoft Windows Version.
c. On Node_B, you can choose to:– Configure the tape devices– Install the NetWorker client software
6. Install any NetWorker specific patches.
7. Recover all the data that belongs to Node_B. This includes the system configuration data. For example:
• System State• RepairDisk• Windows NT 4.0 %SystemRoot% directory• C:
8. Reboot Node_B.
9. Verify that the system has been restored to its original state before the disaster.
Legato NetWorker, Release 7.0Disaster Recovery Guide
6
Task 8: Join Node_B to the Cluster
126
Legato NetWorker, Release 7.0Disaster Recovery Guide 127
Chapter 7: Microsoft Cluster Disaster Recovery(Windows 2000 and .NET)
This chapter explains how to recover Microsoft Windows 2000 and Windows .NET MSCS host systems. Familiarity with MSCS concepts and operations is assumed. For complete information about MSCS, refer to the Microsoft documentation.
This chapter includes the following sections:
• “Recovering a Failed Quorum Disk” on page 128• “Recovering One Cluster Node” on page 129• “Recovering Multiple Cluster Nodes” on page 132
PrerequisitesTo recover Windows 2000 or Windows .NET MSCS host systems, ensure that each of the following prerequisites is satisfied:
• The NetWorker software is installed on each cluster node.• Backups that include the SYSTEM save sets (SYSTEM FILES, SYSTEM
DB, and SYSTEM STATE) have been performed on a regular basis by a NetWorker server in the same domain as the cluster nodes. This will help ensure that data is available for recovery to the desired point in time. The Microsoft cluster database is a component of the Windows system state, and as such is automatically included when the SYSTEM STATE save set is specified for backup or recovery.
• During a recovery, the domain controller for the domain to which the cluster nodes belong must be available to authenticate the node joining the cluster.
Legato NetWorker, Release 7.0Disaster Recovery Guide
7
Recovering a Failed Quorum Disk
128
Recovering a Failed Quorum DiskThis section describes the procedure for recovering a failed quorum disk. The procedure requires the following:
• The quorum disk is designated for exclusive use by MSCS.• The quorum disk resides in a drive array that is not a RAID.• A spare disk, identical in type to the quorum disk, must be available to
replace the failed disk. The spare disk must have at least as much total disk space as the quorum disk that is being replaced.
• The new quorum disk must be assigned the same drive letter as the failed disk.
For related information, refer to Microsoft Knowledge Base article Q280353, How to Change Quorum Disk Designation.
How to Recover a Failed Quorum Disk
To recover a failed quorum disk:
1. Close all instances of Microsoft Cluster Administrator.
2. Stop the cluster service on both nodes.
3. Using the Computer Management Services tool, access the Cluster Service Properties dialog box and change the startup type to Manual on both nodes.
4. Power down both nodes and the drive array.
5. Replace the failed quorum disk.
6. Power up both nodes and the drive array.
7. Format the new disk with the same partitioning scheme, disk format, drive letter, and label as the failed quorum disk. Verify that the new disk appears identical on both nodes.
8. On one node, use the Computer Management Services facility to access the Cluster Service Properties dialog box.
9. Add -fixquorum as a start parameter and start the service.
10. Use the Cluster Administrator to rename the failed quorum resource to RemoveMe.
11. Create a new disk resource named:
Diskx
Legato NetWorker, Release 7.0Disaster Recovery Guide
Chapter 7: Microsoft Cluster Disaster Recovery (Windows 2000 and .NET)
7
129
where x is the drive letter of the old quorum disk.
12. Place the new disk resource in the Cluster Group.
13. Bring this disk resource online.
14. Right-click the cluster name and select Properties.
15. Select the Quorum tab and make the new drive the quorum resource.
16. Using the Computer Management Services tool, access the Cluster Service Properties dialog box and:
a. Stop the Cluster service. b. Remove -fixquorum as a start parameter. c. Start the Cluster service.
17. Start the Cluster service on the other node.
18. Delete the RemoveMe resource.
19. Bring the cluster group online.
20. Using the Computer Management Services tool, access the Cluster Service Properties dialog box and change the Cluster service startup type to Automatic on both nodes.
21. Reboot both nodes.
Recovering One Cluster NodeThis section describes how to restore the Cluster Server and cluster database if one of the cluster nodes fails.
Unexpected software behavior, such as corruption of a cluster-critical file, may cause a partitioned cluster, in which one node of the cluster is unaware of the presence of the other operating node. In this situation, each node may attempt to take control of the shared quorum device, thus potentially rendering one node unable to function as a member of the cluster.
How to Recover One Cluster Node
The following procedure is based on an example scenario in which Node_B has failed, and the quorum resource has successfully failed over to Node_A. The operating system on each node is still intact, and therefore does not require recovery. The status of MSCS on Node_B is unknown, so it must be reinstalled (if using Windows 2000) or cleaned up (if using Windows .NET).
Legato NetWorker, Release 7.0Disaster Recovery Guide
7
Recovering One Cluster Node
130
To recover Node_B in this example scenario:
1. Using the Cluster Administrator on Node_A, evict Node_B from the cluster.
2. On Node_B, reinstall or clean up MSCS as follows:
Windows 2000:a. Using the Control Panel Add/Remove Programs tool, uninstall the
Windows component Cluster Service.b. Reboot Node_B.c. Log on to Node_B as Administrator for the domain in which the
cluster nodes reside.d. Using the Control Panel Add/Remove Programs tool, add the
Windows component Cluster Service.Windows .NET:
At the command prompt, run the following command to clean up MSCS:cluster node Node_B /forcecleanup
Important: After reinstalling the Cluster Service (Windows 2000) or cleaning up the Cluster Server (Windows .NET), you must reproduce the preexisting application environment on Node_B so MSCS can administer the applications as it did before the node failed. One way to reproduce the preexisting application environment is to perform disaster recovery procedures for each application that was previously installed on the node.
3. Using the Cluster Administrator, select Join An Existing Cluster and enter the cluster name.
4. Using the Cluster Administrator on Node_A, ensure that Node_B appears available for failover operations.
5. Only Node_A, the node that owns the shared resources, can be running while the cluster database is being recovered. Stop the Cluster service on Node_B using one of the following methods:
• Using the Control Panel Services tool, stop the Cluster service.• At the command prompt, run:
net stop clussvc
6. On Node_A, start the NetWorker User program and click Recover.
7. In the Source Client dialog box, select Node_A.
Legato NetWorker, Release 7.0Disaster Recovery Guide
Chapter 7: Microsoft Cluster Disaster Recovery (Windows 2000 and .NET)
7
131
8. In the Destination Client dialog box, select Node_A.
9. In the Recover window, mark the SYSTEM STATE save set. The cluster database is a component of the Windows system state, and is automatically backed up or restored with the SYSTEM STATE save set.
Note: It is strongly recommended that you restore all of the SYSTEM save sets (SYSTEM STATE, SYSTEM DB, and SYSTEM FILES). For more information, refer to the Legato NetWorker Administrator’s Guide, Microsoft Windows Version.
10. Click Start to begin the recovery.
11. After the recovery, reboot Node_A.
12. Using Cluster Administrator on Node_A, confirm that the cluster resources were restored to the point in time when the backup occurred. If you have been performing regular scheduled backups, this will recover the cluster database to a point in time shortly before the loss of Node_B.
13. Start the Cluster service on Node_B using one of the following methods:
• Using the Control Panel Services tool, start the Cluster service.• At the command prompt, run:
net start clussvc
14. Using the Cluster Administrator on Node_A, monitor the cluster joining status of Node_B.
15. Using the Cluster Administrator on Node_B, verify that the cluster group can be moved between the nodes by right-clicking the group and selecting Move group.
Legato NetWorker, Release 7.0Disaster Recovery Guide
7
Recovering Multiple Cluster Nodes
132
Recovering Multiple Cluster NodesThis section provides general guidelines for performing a cluster recovery in case both cluster nodes fail. In this scenario, the operating system is unusable on each node. Therefore, this recovery procedure includes reinstallation of Windows on each node, as well as NetWorker recovery of the cluster database.
Important: Because cluster configurations vary, it is not possible to provide cluster disaster recovery procedures for every situation. Depending on the particular cluster configuration and the nature of the failure, it might be necessary to vary some of the procedures described in this section.
How to Recover Multiple Cluster Nodes
To perform a complete cluster recovery in the event that both cluster nodes, Node_A and Node_B, have failed:
1. Ensure that the system disk of each node is configured using the same partitioning scheme and drive letter that was in use prior to the loss of the node.
Note: On each cluster node, the repaired or replaced system disk must have the same partitioning scheme, disk format, and drive letter configuration that was in use prior to the node failure. However, drive letter assignments of available volumes during Windows setup may cause the system disk drive letter to change. Therefore, prior to reinstalling the Windows operating system, disconnect the SCSI bus if the shared drives are being enumerated before the local drives.
2. Format and verify the system disk on each node.
3. On each node, reinstall Windows to the partition it occupied before the node failure. During Windows setup on each node, verify that the domain controller is available and that each potential node is able to join.
4. Delete the MSCS folder on the quorum disk.
5. On the quorum disk, run the chkdsk command.
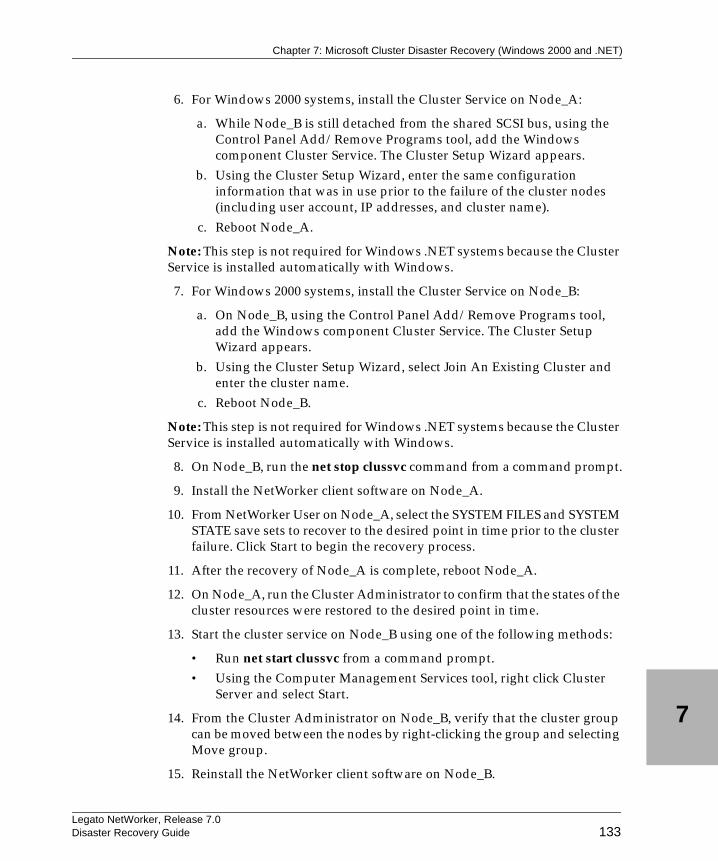
Legato NetWorker, Release 7.0Disaster Recovery Guide
Chapter 7: Microsoft Cluster Disaster Recovery (Windows 2000 and .NET)
7
133
6. For Windows 2000 systems, install the Cluster Service on Node_A:
a. While Node_B is still detached from the shared SCSI bus, using the Control Panel Add/Remove Programs tool, add the Windows component Cluster Service. The Cluster Setup Wizard appears.
b. Using the Cluster Setup Wizard, enter the same configuration information that was in use prior to the failure of the cluster nodes (including user account, IP addresses, and cluster name).
c. Reboot Node_A.
Note: This step is not required for Windows .NET systems because the Cluster Service is installed automatically with Windows.
7. For Windows 2000 systems, install the Cluster Service on Node_B:
a. On Node_B, using the Control Panel Add/Remove Programs tool, add the Windows component Cluster Service. The Cluster Setup Wizard appears.
b. Using the Cluster Setup Wizard, select Join An Existing Cluster and enter the cluster name.
c. Reboot Node_B.
Note: This step is not required for Windows .NET systems because the Cluster Service is installed automatically with Windows.
8. On Node_B, run the net stop clussvc command from a command prompt.
9. Install the NetWorker client software on Node_A.
10. From NetWorker User on Node_A, select the SYSTEM FILES and SYSTEM STATE save sets to recover to the desired point in time prior to the cluster failure. Click Start to begin the recovery process.
11. After the recovery of Node_A is complete, reboot Node_A.
12. On Node_A, run the Cluster Administrator to confirm that the states of the cluster resources were restored to the desired point in time.
13. Start the cluster service on Node_B using one of the following methods:
• Run net start clussvc from a command prompt.• Using the Computer Management Services tool, right click Cluster
Server and select Start.
14. From the Cluster Administrator on Node_B, verify that the cluster group can be moved between the nodes by right-clicking the group and selecting Move group.
15. Reinstall the NetWorker client software on Node_B.

Legato NetWorker, Release 7.0Disaster Recovery Guide
7
Recovering Multiple Cluster Nodes
134
Legato NetWorker, Release 7.0Disaster Recovery Guide 135
Chapter 8: Sun Cluster Disaster Recovery
This chapter explains how to recover one or more computers in a Sun Cluster 3.x environment.
This chapter includes the following sections:
• “Prerequisites” on page 135• “Restoring a Single Cluster Node” on page 135• “Restoring an Entire Cluster” on page 136
PrerequisitesTo help prepare for a disaster, complete the Sun Installation and Planning Configuration worksheets. These worksheets contain information that you can use to restore a cluster to its original configuration. These worksheets are located in the Sun Cluster 3.0 Release Notes.
Additionally, ensure that you regularly back up both physical and virtual NetWorker clients. A physical NetWorker client backs up a physical node. A virtual NetWorker client backs up a highly available Sun Cluster resource application. Examples of applications that can be set up as highly available Sun Cluster resources include a NetWorker server or a web server application.
Restoring a Single Cluster NodeThis section describes how to restore a single cluster node. This scenario assumes that the operating system on the damaged node must be reinstalled.
Legato NetWorker, Release 7.0Disaster Recovery Guide
8
Restoring an Entire Cluster
136
How to Restore a Single Cluster Node
To restore a single node:
1. Replace the damaged node and ensure that it is connected to the network. For information about replacing the hardware and verifying network connections, refer to the Sun Cluster 3.x Hardware Guide and the server documentation.
2. Reinstall the operating system and the Sun Cluster software on the recovered node and reconfigure the node to join the cluster. For detailed instructions, refer to the Sun Cluster Installation Guide.
3. Install the NetWorker software.
Important: The installation steps you perform vary depending on whether the NetWorker server is set up as a highly available Sun Cluster resource or the NetWorker server is set up outside of the cluster. For detailed installation and configuration instructions for Sun Clusters, refer to the Legato NetWorker Installation Guide, Solaris Version.
4. Restore the physical node’s private data using the nwrecover command. Private data is data that is not available to all nodes in the cluster. For information about recovering physical NetWorker clients, refer to the Legato NetWorker Administrator’s Guide, UNIX Version.
Restoring an Entire ClusterThis section describes how to restore an entire cluster.
How to Restore an Entire Cluster
To restore an entire cluster, complete the following tasks:
• “Task 1: Replace the Damaged Hardware” on page 137• “Task 2: Install the Software” on page 137• “Task 3: Recover the Data” on page 138
Legato NetWorker, Release 7.0Disaster Recovery Guide
Chapter 8: Sun Cluster Disaster Recovery
8
137
Important: To help ensure a smooth recovery process, have a copy of the Sun Installation and Planning Configuration worksheets on hand. These worksheets are located in the Sun Cluster 3.0 Release Notes and should be completed before setting up the Sun Cluster.
Task 1: Replace the Damaged Hardware
To replace the damaged hardware:
• Replace all damaged nodes and ensure that network connections are working. For information about replacing the hardware and verifying network connections, refer to the Sun Cluster 3.x Hardware Guide and the server documentation.
Task 2: Install the Software
To install the software:
1. Reinstall and reconfigure the operating system and Sun Cluster software on all cluster nodes. For detailed instructions, refer to the Sun Cluster Installation Guide.
Important: Ensure that you reconfigure the cluster, including the disk device groups and resource groups, exactly as it was before the disaster.
2. Reinstall the NetWorker server software on all cluster nodes and configure the NetWorker server as a highly available Sun Cluster resource.
Important: If the NetWorker server was not set up as a highly available Sun Cluster resource, you need only install the NetWorker client on all cluster nodes. For detailed installation instructions for Sun Clusters, refer to the Legato NetWorker Installation Guide, Solaris Version.
Legato NetWorker, Release 7.0Disaster Recovery Guide
8
Restoring an Entire Cluster
138
Task 3: Recover the Data
This section describes how to recover the NetWorker server as well as the physical and virtual NetWorker clients.
On the primary node for the NetWorker server:
1. Recover the highly available NetWorker server data as you would a stand-alone NetWorker server. For information about recovering a NetWorker server, see “Chapter 3: UNIX Disaster Recovery” on page 25.
This step recovers the media database, resource database, and client file indexes, all of which are used to recover NetWorker clients.
2. Recover the physical and virtual NetWorker clients. For information about recovering physical and virtual NetWorker clients, refer to the Legato NetWorker Administrator’s Guide, UNIX Version.
Legato NetWorker, Release 7.0Disaster Recovery Guide 139
Chapter 9: HP TruCluster Disaster Recovery
This chapter explains how to recover one or more computers in an HP TruCluster Server environment, releases 5.0A to 5.1B.
This chapter includes the following sections:
• “Prerequisites” on page 139• “Restoring One or More Nodes in a Cluster” on page 140• “Restoring an Entire Cluster” on page 143
PrerequisitesPreparing for a disaster involves two major tasks, recording information and backing up the cluster. These tasks are described in the following sections:
• “Record Information” on page 139• “Back Up the Cluster” on page 140
Record Information
This section describes the information required to restore an entire cluster. Keep an up-to-date copy of the following information in a safe place:
• Network settings for each node in the cluster.• Partition information for the disk drives in the system.• Mappings for the managed disks and volumes. To save this information,
open the System Reference Manual (SRM) console and display the output of the Show Devices option. Record this output on paper and store the paper in a safe place.
Legato NetWorker, Release 7.0Disaster Recovery Guide
9
Back Up the Cluster
140
• System topology information. Generate this information using the hwmgr -view command:# hwmgr -view hierarchy > sys_topology_file
where sys_topology_file is a file to which you are saving output from the hwmgr -view hierarchy command.
• The device layer information. Generate this information as follows:# hwmgr -view devices > device_layer
where device_layer is a file to which you are saving output from the hwmgr -view devices command.
Back Up the Cluster
To ensure that the cluster is disaster-ready, perform the following steps:
1. Back up the entire cluster.
a. Set up a NetWorker Client resource for the cluster’s default alias.b. Add the host name of each physical cluster node to the Client
resource’s Remote Access list.c. Specify a save set of All for the Client resource. A save set of All
ensures that filesystems from all nodes are backed up.d. Create a NetWorker Group resource, add the Client resource to this
group, and schedule the group for regular backups.e. Perform at least one full backup.
2. Optionally, back up the stand-alone HP Tru64 boot drive on the cluster’s primary node to a remote NetWorker server. You may need to mount the drive partitions temporarily and execute a manual save.
Restoring One or More Nodes in a ClusterThis section explains how to recover one or more physical nodes in a cluster. If all of the physical nodes in a cluster have been destroyed, see “Restoring an Entire Cluster” on page 143.
Note: To help ensure a successful recovery, have on hand the information listed in the section titled, “Prerequisites” on page 139. This information should have been recorded prior to the disaster.
Legato NetWorker, Release 7.0Disaster Recovery Guide
Chapter 9: HP TruCluster Disaster Recovery
9
141
How to Restore One or More Nodes in a Cluster
To recover one or more physical cluster nodes, complete the following tasks:
• “Task 1: Replace the Damaged Hardware” on page 141• “Task 2: Verify Hardware Mappings” on page 141• “Task 3: Partition the Down Node’s Boot Drive” on page 141• “Task 4: Update the Cluster Configuration” on page 141
• “Task 5: Recover the Node-Specific Data” on page 142
Task 1: Replace the Damaged Hardware
Replace the damaged equipment with the same or similar model equipment as installed previously. Connect all the equipment as previously connected.
Task 2: Verify Hardware Mappings
Open the SRM console on the node you are restoring (down node) and set the logical mappings for the node’s managed disks and volumes to their original settings. To help complete this step, use the information that was recorded from the SRM console prior to the disaster.
Task 3: Partition the Down Node’s Boot Drive
To partition the down node’s boot drive, you need the original node’s partition information. This information should have been recorded prior to the disaster.
Note: Perform this task from a working cluster node.
To partition the down node’s boot drive, use a utility such as diskconfig and specify the original partition settings.
Task 4: Update the Cluster Configuration
To update the cluster configuration, delete the cluster node and then add it back into the cluster. When you add the node back, cluster hardware settings are reinitialized.
Note: Perform this task from a working cluster node.
Legato NetWorker, Release 7.0Disaster Recovery Guide
9
Restoring One or More Nodes in a Cluster
142
To update the cluster configuration:
1. Delete the cluster node:
# clu_delete_member -m member#
where member# is the number of the cluster node.
2. Remove the node’s boot partition domain:
# rmfdmn rootmember#_domain
3. Add the computer back into the cluster using the clu_add_member command. For more information about adding a cluster node, refer to the TruCluster documentation.
Task 5: Recover the Node-Specific Data
Once the cluster node has been added and configured, recover its node-specific data. Node-specific data includes information such as node licenses and volume definitions that would be difficult and time-consuming to replace unless they are recovered.
Note: Perform this task on the down node:
To recover the node-specific data:
1. Boot the cluster node.
# boot -file genvmunix dkc2
where dkc2 is the cluster disk.
2. Use the NetWorker recover command in interactive mode to recover the cluster node data, as shown in the following example.
Note: The force option is used in this step so that the recovered files overwrite the existing files.
# recover -c cluster_default_alias
recover> add /usr/cluster/members/membermember#
recover> add /var/cluster/members/membermember#
recover> add /cluster/members/membermember#/etc
recover> cd /cluster/members/membermember#
recover> delete ddr*
recover> delete gen*
recover> delete dfsl*
Legato NetWorker, Release 7.0Disaster Recovery Guide
Chapter 9: HP TruCluster Disaster Recovery
9
143
recover> delete dvrdevtab*
recover> force
recover> recover
where cluster_default_alias is the name of the cluster and member# is the member ID of the down cluster node.
3. Use the NetWorker recover command to recover the node’s dev and devices directories, as in the following example.
Note: The noforce option is used in this step so that the recovered files do not overwrite the existing files.
# recover -c cluster_default_alias
recover> add /dev /devices
recover> cd /cluster/members/membermember#
recover> add dev devices
recover> noforce
recover> recover
where cluster_default_alias is the name of the cluster and member# is the member ID of the down cluster node.
Note: When prompted to overwrite files, enter N to prevent files from being overwritten.
4. Recompile the kernel using the doconfig command.
Restoring an Entire ClusterThis section explains how to recover an entire cluster that has been destroyed.
Note: To help ensure a successful recovery, have on hand the information listed in the section titled, “Record Information” on page 139. This information should have been recorded prior to the disaster.
How to Restore an Entire Cluster
To recover an entire cluster, perform the following tasks:
• “Task 1: Replace the Damaged Hardware” on page 144• “Task 2: Verify Hardware Mappings” on page 144• “Task 3: Install and Configure the Cluster Software” on page 144
Legato NetWorker, Release 7.0Disaster Recovery Guide
9
Restoring an Entire Cluster
144
• “Task 4: Install the NetWorker Software” on page 145• “Task 5: Configure NetWorker Device and Autochanger Resources” on
page 146• “Task 6: Locate the Server’s Bootstrap Save Set ID” on page 146• “Task 7: Recover the Server’s Bootstrap” on page 147• “Task 8: Locate the Server’s Client File Index Save Set IDs” on page 148• “Task 9: Recover the Server’s Client File Index” on page 149
• “Task 10: Re-create the Cluster” on page 150• “Task 11: Recover the Cluster Data” on page 150
Task 1: Replace the Damaged Hardware
Replace the damaged equipment with the same or similar model equipment as installed previously. Connect all the equipment as previously connected.
Task 2: Verify Hardware Mappings
Open the SRM console and set the logical mappings for each node’s managed disks and volumes to their original settings. To help complete this step, use the information that was recorded from the SRM console prior to the disaster.
Task 3: Install and Configure the Cluster Software
Perform a stand-alone installation of Tru64 on the primary node’s stand-alone boot drive. This task requires the cluster information that was recorded prior to the disaster.
To install and configure the software:
1. Install the base operating system and TruCluster package on the primary node’s stand-alone boot drive. For more information, refer to the TruCluster installation documentation.
2. Configure the network resources.
3. Verify that the system topology matches what you recorded, and the device layer is configured the same, as follows:
# hwmgr -view hierarchy
# hwmgr -view devices
4. If the logical disks are enumerated differently than in the original configuration, manually reapply the original enumeration to the disks.
Legato NetWorker, Release 7.0Disaster Recovery Guide
Chapter 9: HP TruCluster Disaster Recovery
9
145
If you need to remap device numbers, use the -e option with the following command:# dsfmgr -e dsk10 dsk4
where dsk10 is the new disk enumeration value and dsk4 is the original disk enumeration value.Alternatively, if you want to move a device number, use the -m option.# dsfmgr -m dsk10 dsk4
Task 4: Install the NetWorker Software
Perform this task if the NetWorker server was installed as a highly available cluster application. If the NetWorker server is outside the cluster, skip this task and proceed to “Task 9: Recover the Server’s Client File Index” on page 149.
To install NetWorker software:
1. Install the same version of the NetWorker server software. When prompted during the installation, enter the location of the /nsr directory as follows:
/nsr
For more information about installing NetWorker software, refer to the appropriate Legato NetWorker Installation Guide.
2. Install any NetWorker patches that were installed prior to the disaster.
3. If separate filesystems were created for the subdirectories under the original /nsr directory, mount those filesystems under this /nsr directory. Separate filesystems may have been created for subdirectories, such as /nsr/mm or /nsr/index, that became very large.
4. Re-create the cluster’s /nsr directory:
# mkdir -p /cluster_default_alias/nsr
# cd /cluster/members/member0
# ln -s /cluster_default_alias/nsr nsr
# cd /cluster/members/member1
# ln -s /cluster_default_alias/nsr nsr
Legato NetWorker, Release 7.0Disaster Recovery Guide
9
Restoring an Entire Cluster
146
Task 5: Configure NetWorker Device and Autochanger Resources
To configure the Device and Autochanger resources:
• To recover data using a stand-alone device, ensure that the stand-alone Device resource exists (defined in the /nsr/res directory). If the stand-alone Device resource does not exist, create it using the NetWorker Administrator program.
• To recover data using an autochanger, ensure that the Autochanger resource exists (defined in the /nsr/res directory). If the Autochanger resource does not exist, create it using the jbconfig command. For details about using the jbconfig command, refer to the Legato NetWorker Administrator’s Guide, UNIX Version.If you are using an autochanger, reset the autochanger using the nsrjb -vHE command. This command resets the autochanger, ejects backup volumes, reinitializes the element status, and checks each slot for a volume.If the autochanger does not support the -E option, initialize the element status using sjiielm.If you are using an autochanger, inventory the autochanger using the nsrjb -I command. This helps determine whether the volumes required to recover the bootstrap are located inside the autochanger.
Task 6: Locate the Server’s Bootstrap Save Set ID
Perform this task if you need to locate the bootstrap save set ID in order to recover the NetWorker server’s latest bootstrap. If you have a record of the save set ID for the bootstrap, proceed to “Task 7: Recover the Server’s Bootstrap” on page 147.
Important: If you move the NetWorker backup media to an offsite location and a subsequent file recover operation generates a mount request, the recover operation will wait until an operator satisfies the mount request. To avoid delays, use the mminfo -mv command to list the media associated with the file you are recovering. If necessary, retrieve the media from the offsite storage before starting the recover.
To locate the most recent bootstrap save set ID:
1. Insert the most recent media or clone volumes used for scheduled backups into the appropriate device.
Legato NetWorker, Release 7.0Disaster Recovery Guide
Chapter 9: HP TruCluster Disaster Recovery
9
147
2. At the system prompt, switch to the directory where the NetWorker binaries and executables are located.
3. If you are using an autochanger, insert the first volume of the bootstrap save set into the first drive of the autochanger using the following command:
# nsrjb -lnv -S slot -f device-name
where:
– slot is the slot where the first volume is located– device-name is the pathname for the first drive. You can obtain this
device-name using the inquire command.
4. Determine the save set ID of the most recent bootstrap on the media, as follows:
# scanner -B device_name
where device_name identifies a device such as /dev/ntape/tape0_d1.If you do not locate the save set ID of the most recent bootstrap on the most recent media, run the scanner -B command on preceding media to locate the save set ID of the most recent bootstrap.
5. When you see the output, record both the bootstrap save set ID and the volume label.
Task 7: Recover the Server’s Bootstrap
To recover the NetWorker server bootstrap:
1. Use the mmrecov command to recover the NetWorker server’s bootstrap (media database and resource configuration files):
# mmrecov
Important: The mmrecov command overwrites the server’s media database. It does not overwrite the resource configuration files, but instead mmrecov recovers them to the resource directory, res.R. For syntax and option information about mmrecov, refer to the mmrecov man page or the Legato Command Reference Guide.
2. If the server has multiple devices configured and enabled, enter the name of the device you are using for the recovery when the following message appears:
Legato NetWorker, Release 7.0Disaster Recovery Guide
9
Restoring an Entire Cluster
148
What is the name of the device you plan on using /dev/ntape/tape0_d1
3. When the following message appears, enter the save set ID for the latest bootstrap. If you are recovering a cloned version of the bootstrap, specify the save set ID associated with the clone.
Enter the latest bootstrap save set ID []: 20076
4. When the following message appears, enter the file number to begin the recovery. If unknown, press [Enter].
Enter starting file number (if known) [0]: 130
5. When the following message appears, enter the first record number to begin the recovery. If unknown, press [Enter].
Enter starting record number (if known) [0]: 0
6. When the following message appears, follow the prompt:
Please insert the volume on which save set id 20076 started into /dev/ntape/tape0_d1.
Once you have loaded the appropriate volume, the following message appears:Scanning /dev/ntape/tape0_d1 for save set 20076; this might take a while...
NetWorker software then scans the volume for the appropriate save set and recovers it. The NetWorker media database and resource configuration files are recovered when the following message appears:If your resource files were lost, they are now recovered in the ‘res.R’ directory. Copy or move them to the ‘res’ directory, after you have shut down the service. Then restart the service.
Otherwise, just restart the service.
If the on-line index for the server-name was lost, it can be recovered using the nsrck command.
Task 8: Locate the Server’s Client File Index Save Set IDs
Locate the save set IDs of the NetWorker server’s client file index. If there have been incremental backups since the last full backup, you need the save set ID of the last full backup and the save set IDs of each incremental backup since the last full backup.
Legato NetWorker, Release 7.0Disaster Recovery Guide
Chapter 9: HP TruCluster Disaster Recovery
9
149
To locate the client file index save set IDs, use the mminfo command to display the client file index’s save set ID:
# mminfo -av -N index:cluster_default_alias
where cluster_default_alias is the name of the cluster.
Task 9: Recover the Server’s Client File Index
In this task, you recover the most recent client file index from the last full backup and all subsequent incremental backups. The client file index contains detailed information about the backups performed for each NetWorker client.
1. Use the recover command to restore the client file indexes. Recover the most recent full backup first and then recover the subsequent incremental backups from earliest to latest. For example, if the dates for the last full backup and the last two incremental backups are as follows:
• Oct. 15, last full backup• Oct. 16, second to last incremental backup• Oct. 17, last incremental backupthen to restore the client file indexes you would enter the following:# recover -S full_SSID -iY
# recover -S second_last_incremental_SSID -iY
# recover -S last_incremental_SSID -iY
where the _SSID variables are the save set IDs of the last full backup, the second to last incremental backup, and the last incremental backup, respectively.
2. Use the nsrim command to cross-check the media database and index database:
# nsrim -X
3. Use the nsrck command to check and repair the client file indexes if necessary:
# nsrck -L6
4. Verify that the indexes were recovered properly:
# nsrinfo cluster_default_alias
where cluster_default_alias is the name of the cluster.
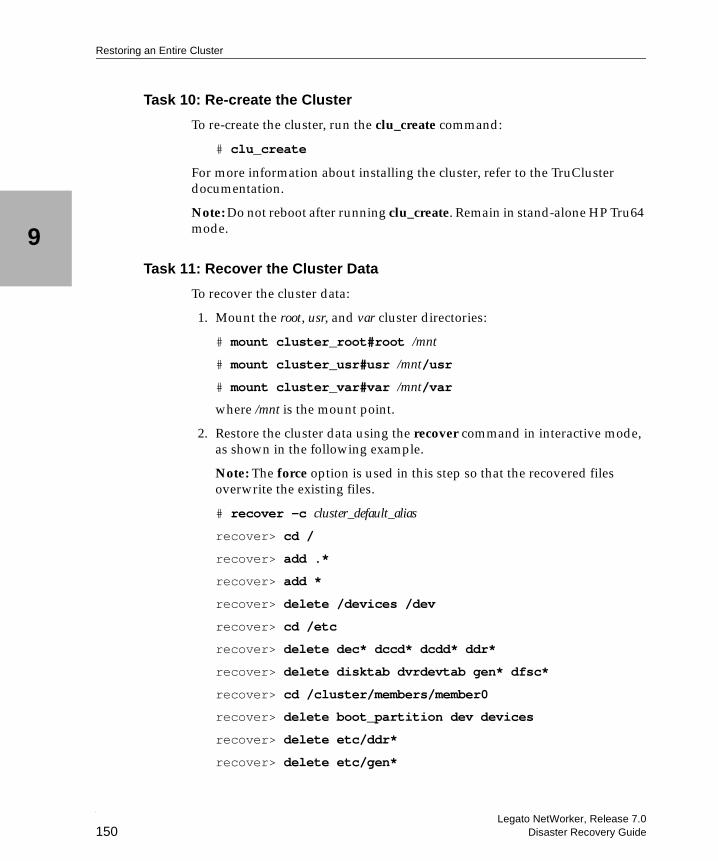
Legato NetWorker, Release 7.0Disaster Recovery Guide
9
Restoring an Entire Cluster
150
Task 10: Re-create the Cluster
To re-create the cluster, run the clu_create command:
# clu_create
For more information about installing the cluster, refer to the TruCluster documentation.
Note: Do not reboot after running clu_create. Remain in stand-alone HP Tru64 mode.
Task 11: Recover the Cluster Data
To recover the cluster data:
1. Mount the root, usr, and var cluster directories:
# mount cluster_root#root /mnt
# mount cluster_usr#usr /mnt/usr
# mount cluster_var#var /mnt/var
where /mnt is the mount point.
2. Restore the cluster data using the recover command in interactive mode, as shown in the following example.
Note: The force option is used in this step so that the recovered files overwrite the existing files.
# recover -c cluster_default_alias
recover> cd /
recover> add .*
recover> add *
recover> delete /devices /dev
recover> cd /etc
recover> delete dec* dccd* dcdd* ddr*
recover> delete disktab dvrdevtab gen* dfsc*
recover> cd /cluster/members/member0
recover> delete boot_partition dev devices
recover> delete etc/ddr*
recover> delete etc/gen*
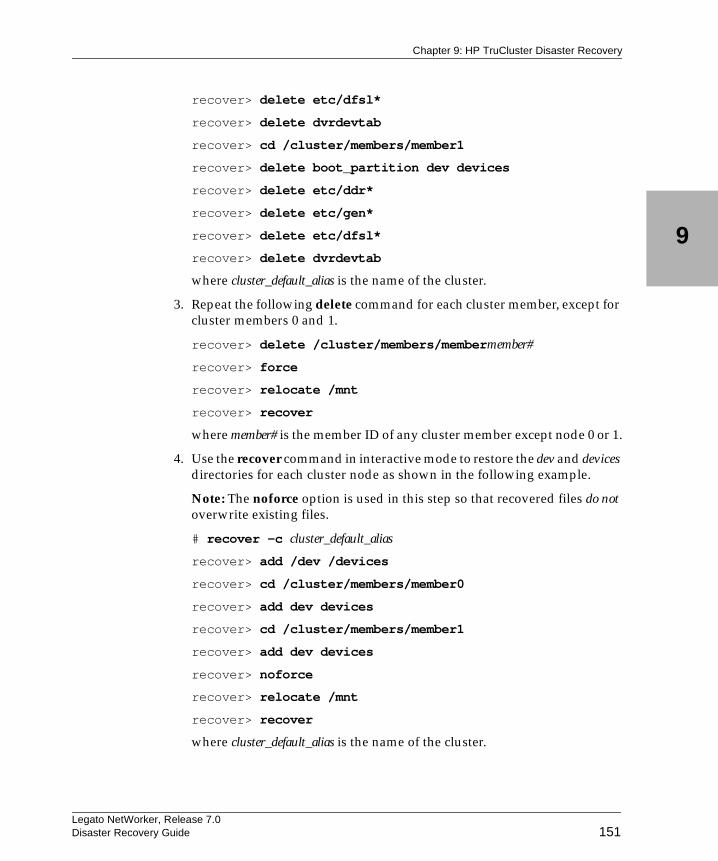
Legato NetWorker, Release 7.0Disaster Recovery Guide
Chapter 9: HP TruCluster Disaster Recovery
9
151
recover> delete etc/dfsl*
recover> delete dvrdevtab
recover> cd /cluster/members/member1
recover> delete boot_partition dev devices
recover> delete etc/ddr*
recover> delete etc/gen*
recover> delete etc/dfsl*
recover> delete dvrdevtab
where cluster_default_alias is the name of the cluster.
3. Repeat the following delete command for each cluster member, except for cluster members 0 and 1.
recover> delete /cluster/members/membermember#
recover> force
recover> relocate /mnt
recover> recover
where member# is the member ID of any cluster member except node 0 or 1.
4. Use the recover command in interactive mode to restore the dev and devices directories for each cluster node as shown in the following example.
Note: The noforce option is used in this step so that recovered files do not overwrite existing files.
# recover -c cluster_default_alias
recover> add /dev /devices
recover> cd /cluster/members/member0
recover> add dev devices
recover> cd /cluster/members/member1
recover> add dev devices
recover> noforce
recover> relocate /mnt
recover> recover
where cluster_default_alias is the name of the cluster.
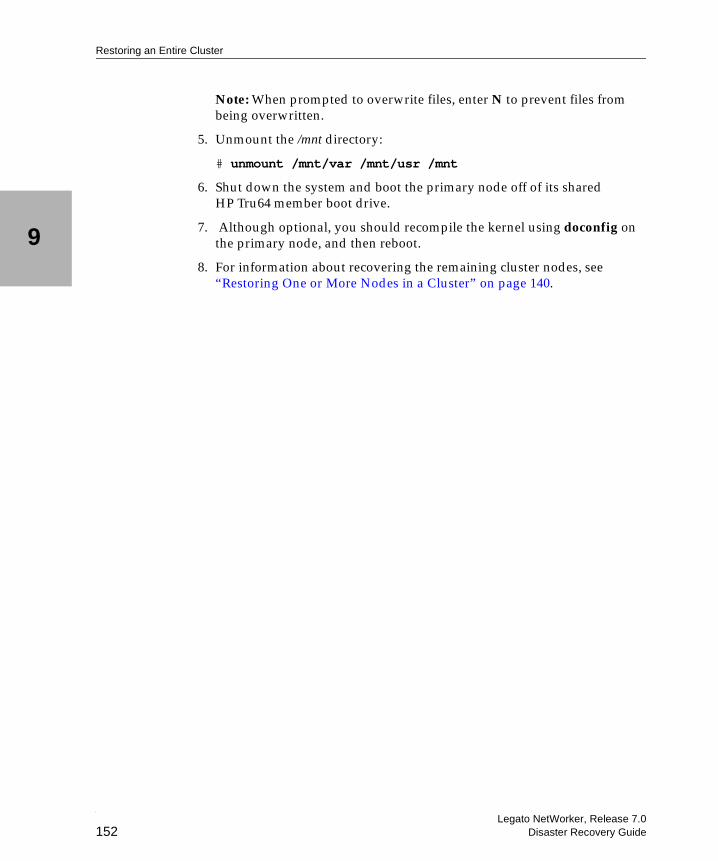
Legato NetWorker, Release 7.0Disaster Recovery Guide
9
Restoring an Entire Cluster
152
Note: When prompted to overwrite files, enter N to prevent files from being overwritten.
5. Unmount the /mnt directory:
# unmount /mnt/var /mnt/usr /mnt
6. Shut down the system and boot the primary node off of its shared HP Tru64 member boot drive.
7. Although optional, you should recompile the kernel using doconfig on the primary node, and then reboot.
8. For information about recovering the remaining cluster nodes, see “Restoring One or More Nodes in a Cluster” on page 140.
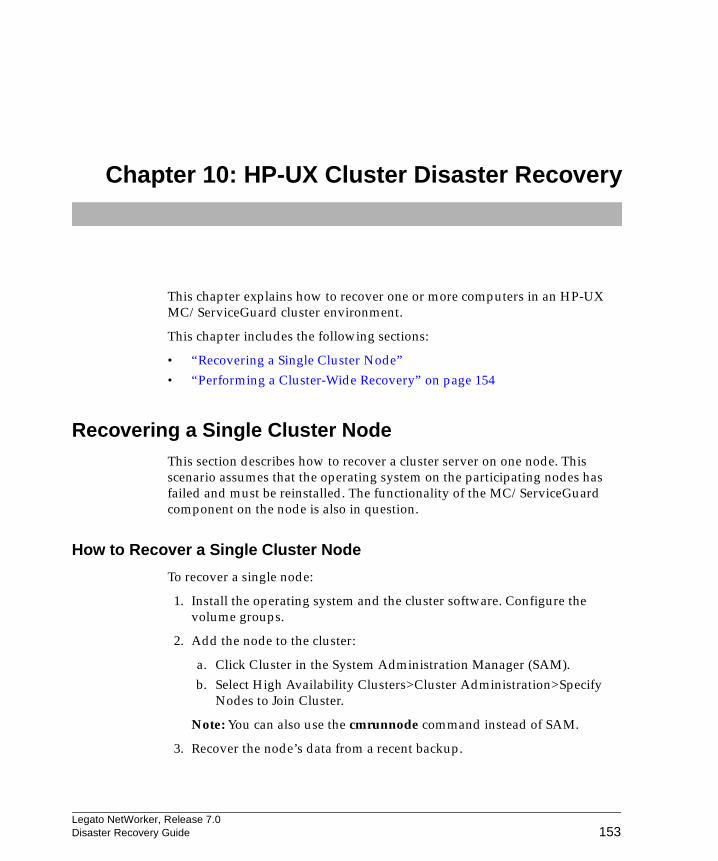
Legato NetWorker, Release 7.0Disaster Recovery Guide 153
Chapter 10: HP-UX Cluster Disaster Recovery
This chapter explains how to recover one or more computers in an HP-UX MC/ServiceGuard cluster environment.
This chapter includes the following sections:
• “Recovering a Single Cluster Node”• “Performing a Cluster-Wide Recovery” on page 154
Recovering a Single Cluster NodeThis section describes how to recover a cluster server on one node. This scenario assumes that the operating system on the participating nodes has failed and must be reinstalled. The functionality of the MC/ServiceGuard component on the node is also in question.
How to Recover a Single Cluster Node
To recover a single node:
1. Install the operating system and the cluster software. Configure the volume groups.
2. Add the node to the cluster:
a. Click Cluster in the System Administration Manager (SAM).b. Select High Availability Clusters>Cluster Administration>Specify
Nodes to Join Cluster.
Note: You can also use the cmrunnode command instead of SAM.
3. Recover the node’s data from a recent backup.
Legato NetWorker, Release 7.0Disaster Recovery Guide
10
Performing a Cluster-Wide Recovery
154
Performing a Cluster-Wide RecoveryThis section describes how to perform a complete cluster recovery, including reinstalling the operating system on all nodes in the cluster.
How to Perform a Cluster-Wide Recovery
To recover an entire cluster, perform the following tasks:
• “Task1: Install the Software” on page 154• “Task 2: Restore the Cluster Database” on page 154• “Task 3: Start the Cluster” on page 155• “Task 4: Restore the Data” on page 156
Task1: Install the Software
To install the software:
1. Install the operating system and cluster software on each node.
2. Install the NetWorker software as required within the HP-UX MC/ServiceGuard cluster environment. For detailed instructions, refer to the Legato NetWorker Installation Guide, HP-UX Version.
Task 2: Restore the Cluster Database
1. Select any node in the cluster and run the NetWorker server and client software on that node.
2. Re-create the cluster configuration and the NetWorker software configuration and control files. The default location for the cluster configuration file is /etc/cmcluster and the default directory for the NetWorker configuration and control files is /etc/cmcluster/NetWorker.
• If you know where the latest save sets are located, use the scanner command to restore the configuration files:# scanner -S saveset_id device_path | uasm -i y -rv
where device_path is the path to the tape device.• If you do not know the save set ID, use the scanner device_path
command to determine the saveset ID, as follows:# scanner device_path > /tmp/savefile 2>&1
Legato NetWorker, Release 7.0Disaster Recovery Guide
Chapter 10: HP-UX Cluster Disaster Recovery
10
155
3. Run the NetWorker NetWorker.cluster script located in the /opt/NetWorker/bin/ directory.
Note: Do not re-create the legato.control and pkg.control files when prompted by the NetWorker.cluster script.
4. If the shared disk has to be replaced, configure the disk and filesystem of the replacement disk.
5. Create the filesystem, as follows:
# vgchange -c n /dev/vg03# vgchange -a y /dev/vg03# newfs -F hfs /dev/vg03/rlvol1# vgchange -a n /dev/vg03
6. Enter the following command to delete the existing cluster and package configurations:
# cmdeleteconf -c cluster1
7. Enter the following command to apply the cluster and package configurations, including the NetWorker package, to all the nodes within the cluster:
# cd /etc/cmcluster# cmapplycomf -C cluster1.ascii -P networker/pkg.conf \ -P other_pkg/other_pkg
8. Run the cmgetconf command to save the new cluster or package ASCII configuration file whenever the cluster or package configuration is created or modified, as follows:
# cmgetconf -c cluster1 cluster1.ascii
# cmgetconf -p networker pkg.conf
These ASCII files can be saved in the /etc/cmcluster directory of a node. Ensure that the NetWorker software backs up /etc/cmcluster so that the configurations can be restored using cmapplyconf whenever necessary.
Task 3: Start the Cluster
To start the cluster, enter the following command:
# cmruncl
This also starts the NetWorker software.
Legato NetWorker, Release 7.0Disaster Recovery Guide
10
Performing a Cluster-Wide Recovery
156
Task 4: Restore the Data
To restore the data:
1. Perform a disaster recovery on the shared disk using mmrecov and recover. For more information about performing a disaster recovery, refer to the Legato NetWorker Administrator’s Guide, UNIX Version.
When you shut down the NetWorker software during this step, use cmhaltpkg and not nsr_shutdown, as follows:# cmhaltpkg networker # exchange -a c /dev/vg03# mount /dev/vg03/lvol1 /vg031# mv /vg031/nsr/res /vg031/nsr/res.old # mv /vg031/nsr/res.R /vg031/nsr/res# umount /vg031# vgchange -a n /dev/vg03# cmmodpkg -e networker (to restart the NetWorker software)
2. Recover the clients' data from recent backups.
Legato NetWorker, Release 7.0Disaster Recovery Guide 157
Chapter 11: Legato AAM for AIX, HP-UX, andLinux Disaster Recovery
This chapter explains how to recover one or more computers in an Automated Availability Manager (AAM) for an AIX, HP-UX, or Linux environment.
This chapter includes the following sections:
• “Recovering a Single Cluster Node”• “Performing a Cluster-Wide Recovery” on page 159• “Renaming the Resource Directory” on page 164
Recovering a Single Cluster NodeThis section describes how to recover a failed node within a cluster. This scenario assumes that the operating system on the participating nodes is intact and will not be recovered. The functionality of the AAM component on the node is in question.
How to Recover a Single Cluster Node
To recover a single node:
1. Install the NetWorker software. For detailed installation and configuration instructions, refer to the appropriate Legato NetWorker Installation Guide.
2. Start the NetWorker client.
3. Using the cluster’s virtual NetWorker server running on an unaffected node, restore the node's data and software from a recent backup. For detailed instructions, refer to the Legato NetWorker Administrator’s Guide, UNIX Version.
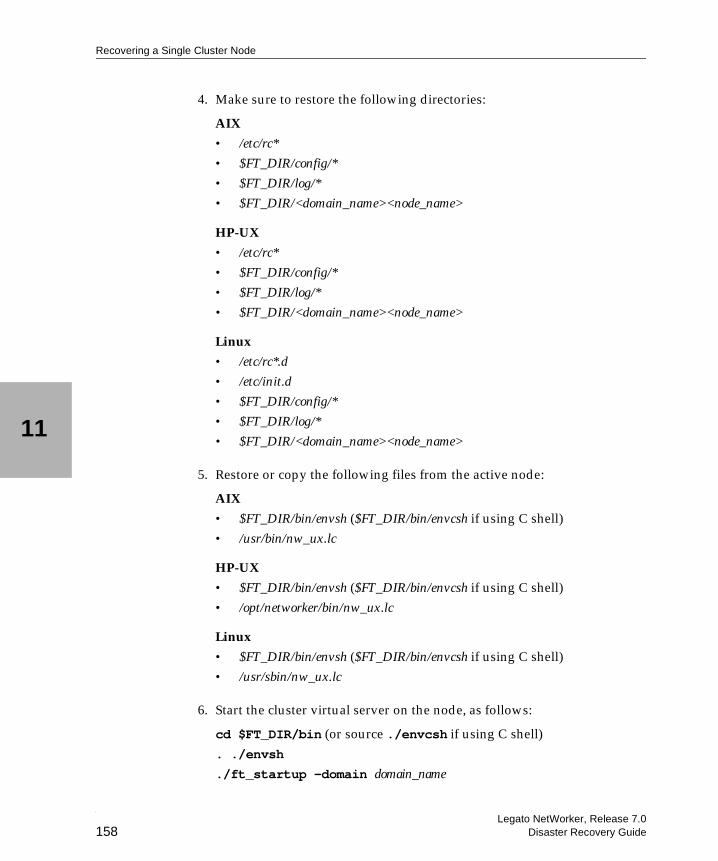
Legato NetWorker, Release 7.0Disaster Recovery Guide
11
Recovering a Single Cluster Node
158
4. Make sure to restore the following directories:
AIX
• /etc/rc*
• $FT_DIR/config/*
• $FT_DIR/log/*
• $FT_DIR/<domain_name><node_name>
HP-UX
• /etc/rc*
• $FT_DIR/config/*
• $FT_DIR/log/*
• $FT_DIR/<domain_name><node_name>
Linux
• /etc/rc*.d
• /etc/init.d
• $FT_DIR/config/*
• $FT_DIR/log/*
• $FT_DIR/<domain_name><node_name>
5. Restore or copy the following files from the active node:
AIX
• $FT_DIR/bin/envsh ($FT_DIR/bin/envcsh if using C shell)• /usr/bin/nw_ux.lc
HP-UX
• $FT_DIR/bin/envsh ($FT_DIR/bin/envcsh if using C shell)• /opt/networker/bin/nw_ux.lc
Linux
• $FT_DIR/bin/envsh ($FT_DIR/bin/envcsh if using C shell)• /usr/sbin/nw_ux.lc
6. Start the cluster virtual server on the node, as follows:
cd $FT_DIR/bin (or source ./envcsh if using C shell). ./envsh
./ft_startup -domain domain_name
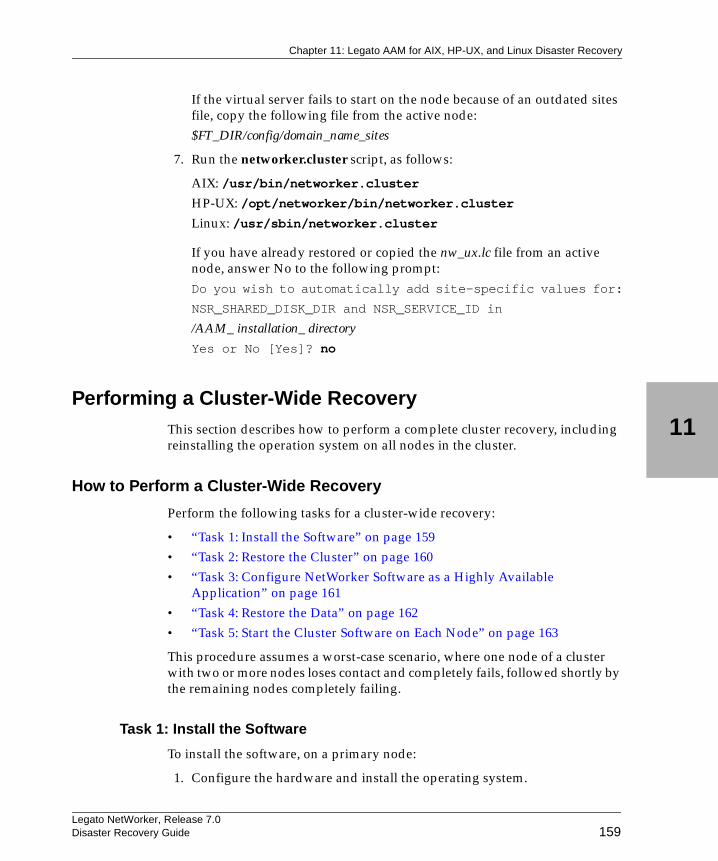
Legato NetWorker, Release 7.0Disaster Recovery Guide
Chapter 11: Legato AAM for AIX, HP-UX, and Linux Disaster Recovery
11
159
If the virtual server fails to start on the node because of an outdated sites file, copy the following file from the active node:$FT_DIR/config/domain_name_sites
7. Run the networker.cluster script, as follows:
AIX: /usr/bin/networker.clusterHP-UX: /opt/networker/bin/networker.cluster
Linux: /usr/sbin/networker.cluster
If you have already restored or copied the nw_ux.lc file from an active node, answer No to the following prompt:Do you wish to automatically add site-specific values for:
NSR_SHARED_DISK_DIR and NSR_SERVICE_ID in
/AAM_ installation_ directory
Yes or No [Yes]? no
Performing a Cluster-Wide RecoveryThis section describes how to perform a complete cluster recovery, including reinstalling the operation system on all nodes in the cluster.
How to Perform a Cluster-Wide Recovery
Perform the following tasks for a cluster-wide recovery:
• “Task 1: Install the Software” on page 159• “Task 2: Restore the Cluster” on page 160• “Task 3: Configure NetWorker Software as a Highly Available
Application” on page 161 • “Task 4: Restore the Data” on page 162• “Task 5: Start the Cluster Software on Each Node” on page 163
This procedure assumes a worst-case scenario, where one node of a cluster with two or more nodes loses contact and completely fails, followed shortly by the remaining nodes completely failing.
Task 1: Install the Software
To install the software, on a primary node:
1. Configure the hardware and install the operating system.
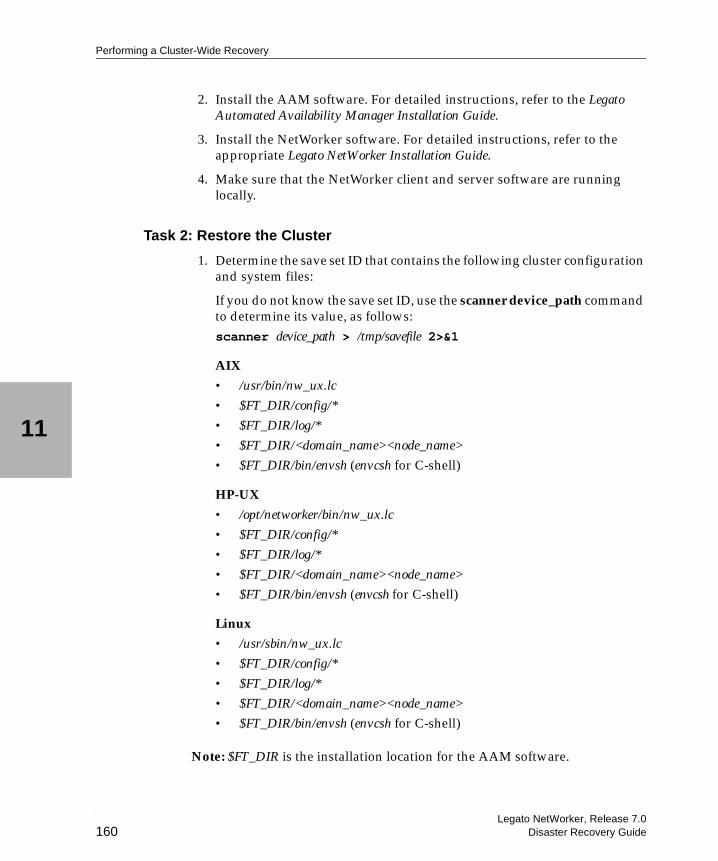
Legato NetWorker, Release 7.0Disaster Recovery Guide
11
Performing a Cluster-Wide Recovery
160
2. Install the AAM software. For detailed instructions, refer to the Legato Automated Availability Manager Installation Guide.
3. Install the NetWorker software. For detailed instructions, refer to the appropriate Legato NetWorker Installation Guide.
4. Make sure that the NetWorker client and server software are running locally.
Task 2: Restore the Cluster
1. Determine the save set ID that contains the following cluster configuration and system files:
If you do not know the save set ID, use the scanner device_path command to determine its value, as follows:scanner device_path > /tmp/savefile 2>&1
AIX
• /usr/bin/nw_ux.lc
• $FT_DIR/config/*
• $FT_DIR/log/*
• $FT_DIR/<domain_name><node_name>
• $FT_DIR/bin/envsh (envcsh for C-shell)
HP-UX
• /opt/networker/bin/nw_ux.lc
• $FT_DIR/config/*
• $FT_DIR/log/*
• $FT_DIR/<domain_name><node_name>
• $FT_DIR/bin/envsh (envcsh for C-shell)
Linux
• /usr/sbin/nw_ux.lc
• $FT_DIR/config/*
• $FT_DIR/log/*
• $FT_DIR/<domain_name><node_name>
• $FT_DIR/bin/envsh (envcsh for C-shell)
Note: $FT_DIR is the installation location for the AAM software.
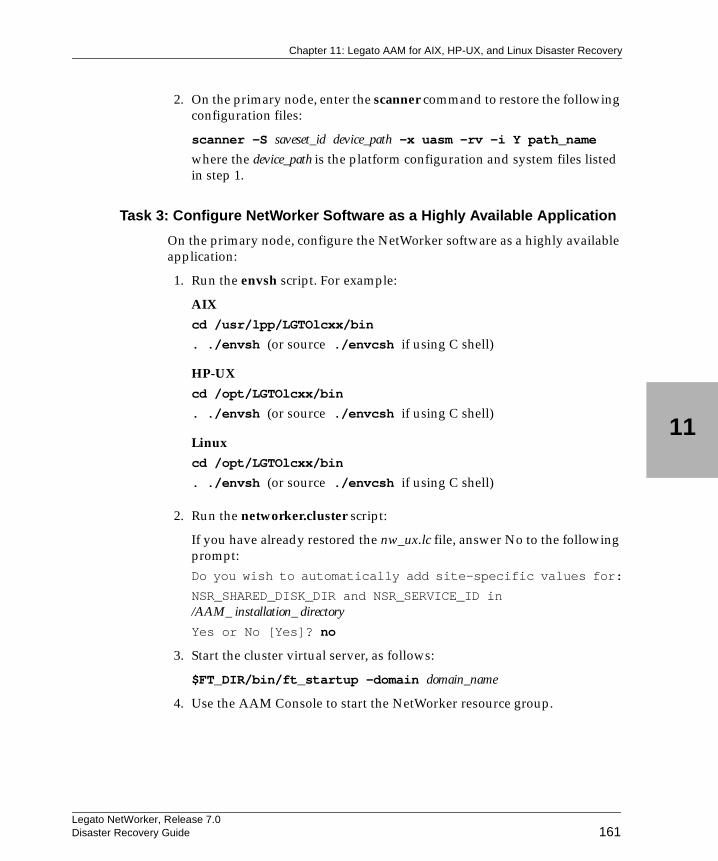
Legato NetWorker, Release 7.0Disaster Recovery Guide
Chapter 11: Legato AAM for AIX, HP-UX, and Linux Disaster Recovery
11
161
2. On the primary node, enter the scanner command to restore the following configuration files:
scanner -S saveset_id device_path -x uasm -rv -i Y path_name
where the device_path is the platform configuration and system files listed in step 1.
Task 3: Configure NetWorker Software as a Highly Available Application
On the primary node, configure the NetWorker software as a highly available application:
1. Run the envsh script. For example:
AIX
cd /usr/lpp/LGTOlcxx/bin
. ./envsh (or source ./envcsh if using C shell)
HP-UX
cd /opt/LGTOlcxx/bin
. ./envsh (or source ./envcsh if using C shell)
Linux
cd /opt/LGTOlcxx/bin
. ./envsh (or source ./envcsh if using C shell)
2. Run the networker.cluster script:
If you have already restored the nw_ux.lc file, answer No to the following prompt:Do you wish to automatically add site-specific values for:
NSR_SHARED_DISK_DIR and NSR_SERVICE_ID in/AAM_ installation_ directory
Yes or No [Yes]? no
3. Start the cluster virtual server, as follows:
$FT_DIR/bin/ft_startup -domain domain_name
4. Use the AAM Console to start the NetWorker resource group.
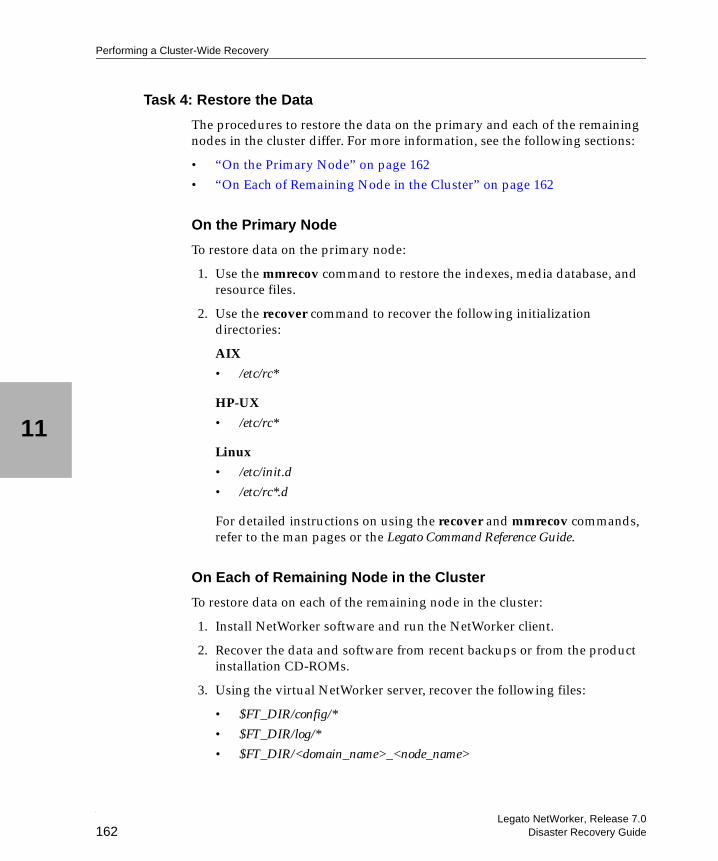
Legato NetWorker, Release 7.0Disaster Recovery Guide
11
Performing a Cluster-Wide Recovery
162
Task 4: Restore the Data
The procedures to restore the data on the primary and each of the remaining nodes in the cluster differ. For more information, see the following sections:
• “On the Primary Node” on page 162• “On Each of Remaining Node in the Cluster” on page 162
On the Primary Node
To restore data on the primary node:
1. Use the mmrecov command to restore the indexes, media database, and resource files.
2. Use the recover command to recover the following initialization directories:
AIX
• /etc/rc*
HP-UX
• /etc/rc*
Linux
• /etc/init.d
• /etc/rc*.d
For detailed instructions on using the recover and mmrecov commands, refer to the man pages or the Legato Command Reference Guide.
On Each of Remaining Node in the Cluster
To restore data on each of the remaining node in the cluster:
1. Install NetWorker software and run the NetWorker client.
2. Recover the data and software from recent backups or from the product installation CD-ROMs.
3. Using the virtual NetWorker server, recover the following files:
• $FT_DIR/config/*
• $FT_DIR/log/*
• $FT_DIR/<domain_name>_<node_name>
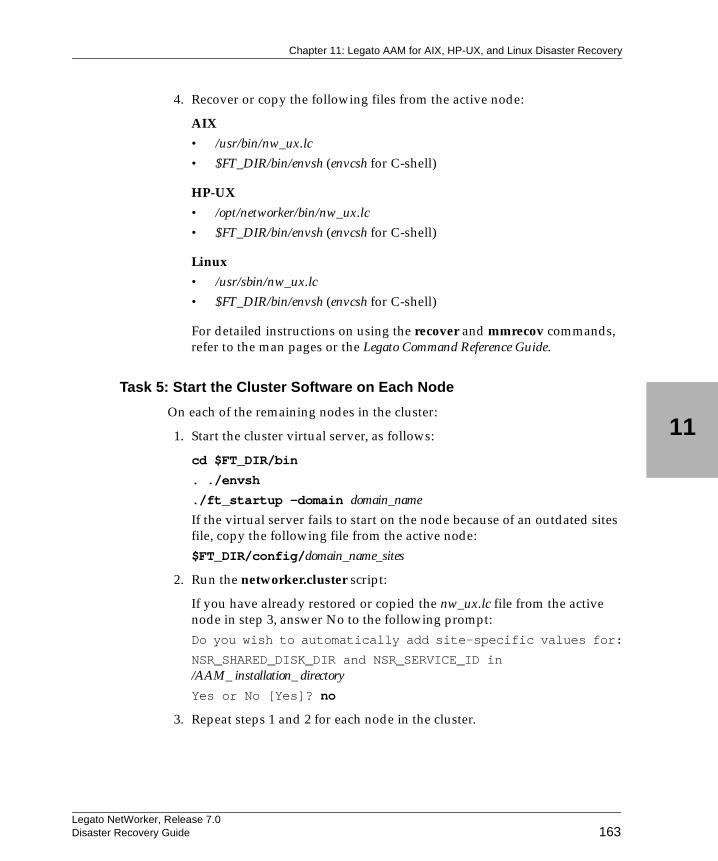
Legato NetWorker, Release 7.0Disaster Recovery Guide
Chapter 11: Legato AAM for AIX, HP-UX, and Linux Disaster Recovery
11
163
4. Recover or copy the following files from the active node:
AIX
• /usr/bin/nw_ux.lc
• $FT_DIR/bin/envsh (envcsh for C-shell)
HP-UX
• /opt/networker/bin/nw_ux.lc
• $FT_DIR/bin/envsh (envcsh for C-shell)
Linux
• /usr/sbin/nw_ux.lc
• $FT_DIR/bin/envsh (envcsh for C-shell)
For detailed instructions on using the recover and mmrecov commands, refer to the man pages or the Legato Command Reference Guide.
Task 5: Start the Cluster Software on Each Node
On each of the remaining nodes in the cluster:
1. Start the cluster virtual server, as follows:
cd $FT_DIR/bin
. ./envsh
./ft_startup -domain domain_name
If the virtual server fails to start on the node because of an outdated sites file, copy the following file from the active node:$FT_DIR/config/domain_name_sites
2. Run the networker.cluster script:
If you have already restored or copied the nw_ux.lc file from the active node in step 3, answer No to the following prompt:Do you wish to automatically add site-specific values for:
NSR_SHARED_DISK_DIR and NSR_SERVICE_ID in/AAM_ installation_ directory
Yes or No [Yes]? no
3. Repeat steps 1 and 2 for each node in the cluster.
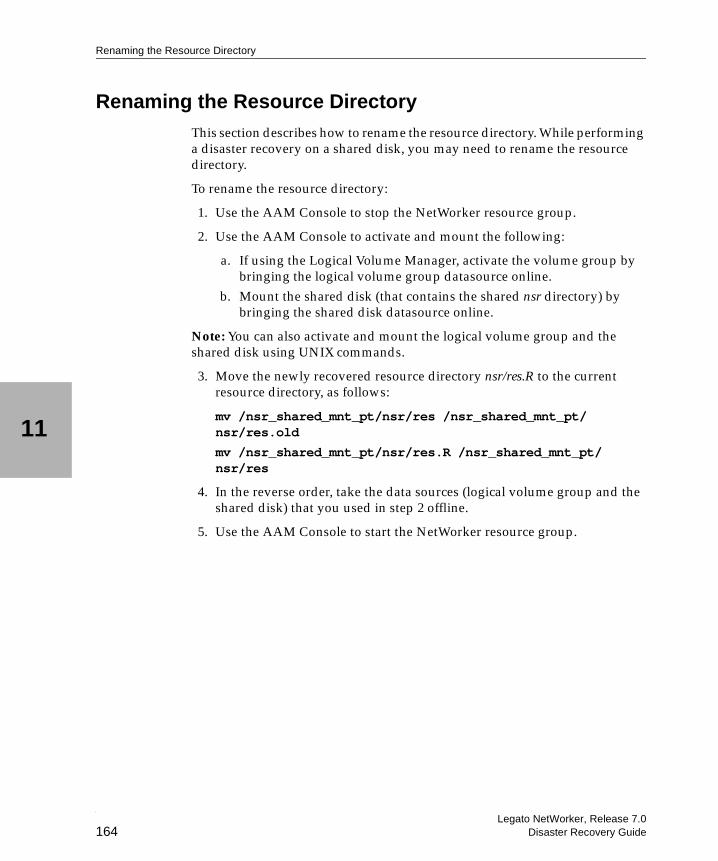
Legato NetWorker, Release 7.0Disaster Recovery Guide
11
Renaming the Resource Directory
164
Renaming the Resource DirectoryThis section describes how to rename the resource directory. While performing a disaster recovery on a shared disk, you may need to rename the resource directory.
To rename the resource directory:
1. Use the AAM Console to stop the NetWorker resource group.
2. Use the AAM Console to activate and mount the following:
a. If using the Logical Volume Manager, activate the volume group by bringing the logical volume group datasource online.
b. Mount the shared disk (that contains the shared nsr directory) by bringing the shared disk datasource online.
Note: You can also activate and mount the logical volume group and the shared disk using UNIX commands.
3. Move the newly recovered resource directory nsr/res.R to the current resource directory, as follows:
mv /nsr_shared_mnt_pt/nsr/res /nsr_shared_mnt_pt/nsr/res.old
mv /nsr_shared_mnt_pt/nsr/res.R /nsr_shared_mnt_pt/nsr/res
4. In the reverse order, take the data sources (logical volume group and the shared disk) that you used in step 2 offline.
5. Use the AAM Console to start the NetWorker resource group.
Legato NetWorker, Release 7.0Disaster Recovery Guide 165
Chapter 12: HACMP for AIX Disaster Recovery
This chapter explains how to recover one or more computers in a High Availability Cluster Multiprocessing for AIX (HACMP for AIX) 4.5 environment.
This chapter includes the following sections:
• “Recovering a Single Node” on page 165• “Recovering an Entire Cluster” on page 166
For detailed installation and configuration instructions, refer to the following documentation:
• Legato NetWorker Installation Guide, AIX Version
• Legato NetWorker Administrator’s Guide, UNIX Version
• HACMP for AIX documentation
Recovering a Single NodeThis section describes how to recover a failed node within a cluster. This scenario assumes that the operating system on the participating nodes is intact and will not be recovered.
Restoring a cluster following a disaster is similar to any NetWorker software restoration. The important difference is that you must synchronize the data in the cluster database.

Legato NetWorker, Release 7.0Disaster Recovery Guide
12
Recovering an Entire Cluster
166
How to Recover a Single Node
To recover a single node:
1. Install the NetWorker software.
2. Start the NetWorker client.
3. From an unaffected node in the cluster, use the virtual NetWorker server to restore the node's data and software from a recent backup.
4. From an unaffected node in the cluster, use the SMIT utility to synchronize the cluster topology and resources.
Recovering an Entire ClusterThis section describes how to perform a complete cluster recovery including reinstallation of the operating system on all nodes in the cluster.
Note: It is unlikely that all the nodes in a cluster would fail simultaneously; but if this does occur, follow this procedure.
How to Perform a Cluster-Wide Recovery
Use the following tasks to perform a cluster-wide recovery:
• “Task 1: Install the Software” on page 166• “Task 2: Restore the Cluster Database” on page 166• “Task 3: Start the Cluster” on page 167• “Task 4: Restore the Data” on page 167
Task 1: Install the Software
To install the software on a primary node:
1. Configure the hardware and install the operating system.
2. Reinstall the HACMP for AIX software.
3. Install the NetWorker software.
Task 2: Restore the Cluster Database
To restore the cluster database:
1. From all nodes in the cluster, make sure that all cluster software is halted.
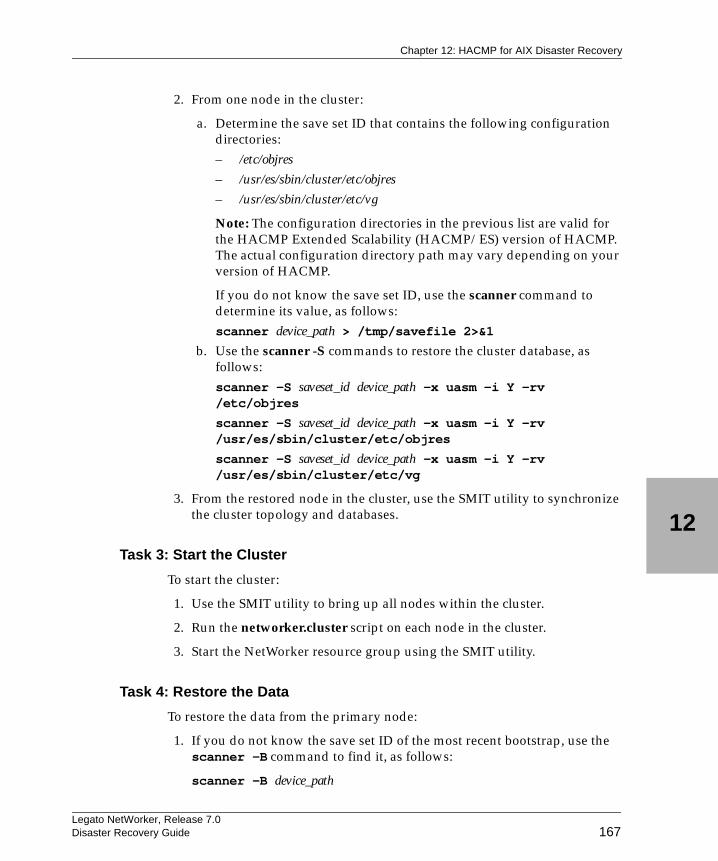
Legato NetWorker, Release 7.0Disaster Recovery Guide
Chapter 12: HACMP for AIX Disaster Recovery
12
167
2. From one node in the cluster:
a. Determine the save set ID that contains the following configuration directories:– /etc/objres
– /usr/es/sbin/cluster/etc/objres
– /usr/es/sbin/cluster/etc/vg
Note: The configuration directories in the previous list are valid for the HACMP Extended Scalability (HACMP/ES) version of HACMP. The actual configuration directory path may vary depending on your version of HACMP.
If you do not know the save set ID, use the scanner command to determine its value, as follows:scanner device_path > /tmp/savefile 2>&1
b. Use the scanner -S commands to restore the cluster database, as follows:scanner -S saveset_id device_path -x uasm -i Y -rv /etc/objres
scanner -S saveset_id device_path -x uasm -i Y -rv /usr/es/sbin/cluster/etc/objres
scanner -S saveset_id device_path -x uasm -i Y -rv /usr/es/sbin/cluster/etc/vg
3. From the restored node in the cluster, use the SMIT utility to synchronize the cluster topology and databases.
Task 3: Start the Cluster
To start the cluster:
1. Use the SMIT utility to bring up all nodes within the cluster.
2. Run the networker.cluster script on each node in the cluster.
3. Start the NetWorker resource group using the SMIT utility.
Task 4: Restore the Data
To restore the data from the primary node:
1. If you do not know the save set ID of the most recent bootstrap, use the scanner -B command to find it, as follows:
scanner -B device_path
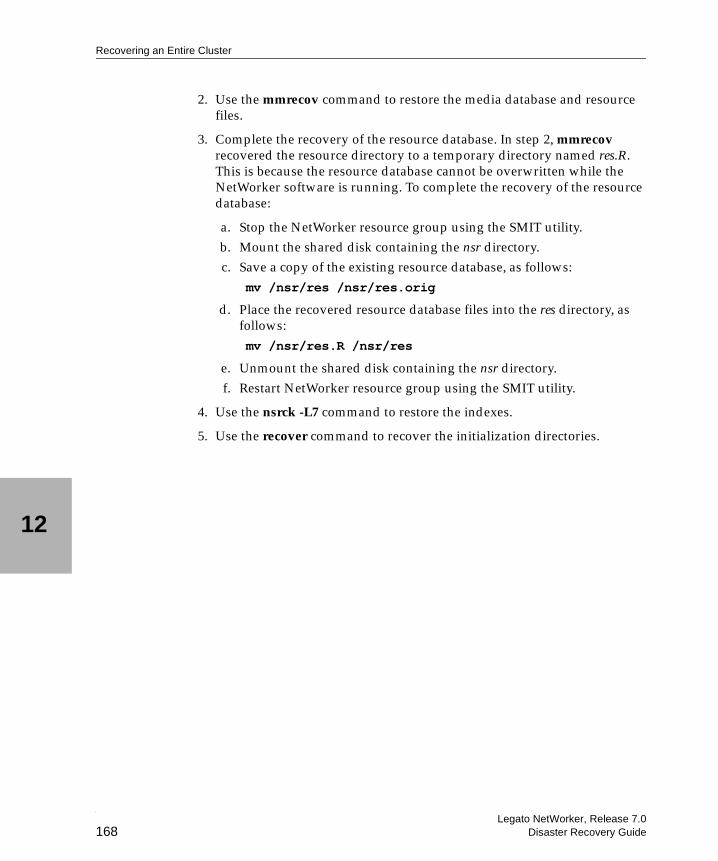
Legato NetWorker, Release 7.0Disaster Recovery Guide
12
Recovering an Entire Cluster
168
2. Use the mmrecov command to restore the media database and resource files.
3. Complete the recovery of the resource database. In step 2, mmrecov recovered the resource directory to a temporary directory named res.R. This is because the resource database cannot be overwritten while the NetWorker software is running. To complete the recovery of the resource database:
a. Stop the NetWorker resource group using the SMIT utility.b. Mount the shared disk containing the nsr directory.c. Save a copy of the existing resource database, as follows: mv /nsr/res /nsr/res.orig
d. Place the recovered resource database files into the res directory, as follows:
mv /nsr/res.R /nsr/res
e. Unmount the shared disk containing the nsr directory.f. Restart NetWorker resource group using the SMIT utility.
4. Use the nsrck -L7 command to restore the indexes.
5. Use the recover command to recover the initialization directories.

Legato NetWorker, Release 7.0Disaster Recovery Guide 169
Glossary
This glossary provides definitions for terms used in this guide.
ACL An abbreviation for access control list. This is a list that specifies the permissions assigned to a specific file or directory.
To recover a file that has an associated ACL, you must either be logged into the system as root, as Administrator, or as the file’s owner.
active group A NetWorker backup group that has its Autostart attribute enabled.
administrator The person normally responsible for installing, configuring, and maintaining NetWorker software.
Administrators group
A Windows NT and Windows 2000 user group whose members have all the rights and abilities of users in other groups, plus the ability to create and manage all the users and groups in the domain. Only members of the Administrators group can modify Windows NT and Windows 2000 operating system files, maintain the built-in groups, and grant additional rights to groups.
agent The term used to denote a cluster server. Also known as a logical server (HP TruCluster), a package (HP-UX), and a virtual server (Microsoft).
Legato NetWorker, Release 7.0Disaster Recovery Guide
Glossary
170
Glo
ssar
y
annotation A comment that you associate with an archive save set to help identify that data later. Annotations are stored in the media index for ease of searching and are limited to 1,024 characters.
archive The process by which NetWorker software backs up directories or files to an archive volume and then grooms them to free disk space. When data is archived, it is written to one or more storage volumes and then marked so that it is never subject to automatic recycling. You can delete the archived files from the client, thus freeing disk space. See also grooming.
archive clone pool A pool composed exclusively of archive clone save sets.
archive pool A volume pool composed exclusively of archive save sets. Archived save sets are in a different format than regular backup save sets, and must be maintained on separate media.
archive volume A tape or other storage medium used to store NetWorker archive data, as opposed to a backup volume.
ASM An abbreviation for application-specific module. An ASM is a program that, when used in a directive, specifies the way that a set of files or directories is to be backed up and recovered. For example, compressasm is a NetWorker directive used to compress and decompress files.
ASM specification
A directive that specifies how files or directories with a matching pattern are backed up. This specification appears in the format:
[+] asm: argument
For more information, refer to the nsr_5 man page or the Legato Command Reference Guide.
attribute A feature of a resource. It is a service or information that the resource provides.
Glossary
Glo
ssary
Legato NetWorker, Release 7.0Disaster Recovery Guide 171
authorization code
A code that is unique to your network that unlocks the software for permanent use.
autochanger A mechanism that uses a robotic arm to move media among various components located in a device, including slots, media drives, media access ports, and transports. Autochangers automate media loading and mounting functions during backup and recovery. The term autochanger refers to a variety of robotic libraries, including autoloader, carousel, datawheel, jukebox, library, and near-line storage.
auto media management
A feature that enables the storage device controlled by the NetWorker server to automatically label, mount, and overwrite a volume it considers unlabeled. Volumes that are eligible for reuse are also automatically recycled.
backup The writing of saved data to a volume.
backup cycle The period of time from one level full backup to the next level full backup.
backup group See group.
backup level See level.
Backup Operators group
A group of Microsoft Windows users who can log on to a domain from a computer or a server, back it up, and restore the data. Backup operators can also shut down servers or computers.
backup volume A tape or other storage medium used to store NetWorker backup data, as opposed to an archive volume.
base enabler code See enabler code.
bootstrap A save set that is essential for the NetWorker disaster recovery procedures. The bootstrap is composed of three components that reside on the NetWorker server: the media database, the resource database, and a server index.
Legato NetWorker, Release 7.0Disaster Recovery Guide
Glossary
172
Glo
ssar
y
browse policy A policy that determines how long entries for backup data remain in the client file index.
carousel A tray or tape cartridge that holds multiple backup volumes.
client A computer that accesses the NetWorker server to back up or recover files. Clients may be workstations, computers, or fileservers.
client file index A database of information maintained by the NetWorker server that tracks every database object, file, or filesystem backed up. The NetWorker server maintains a single client index file for each client computer.
client-initiated backup
See manual backup.
clone The NetWorker process used to make an exact copy of saved data (save sets). You can clone individual save sets or the entire contents of a backup volume. Cloning is different from a simple copy operation carried out on an operating system or hardware device. It is indexed and tracked by NetWorker software in both the client file index and the media database.
clone pool A pool of volumes composed exclusively of cloned data. Three types of clone pools can be used: backup clone, archive clone, and migration clone. Save sets of different types (for example, archive and migration) cannot be intermixed on the same clone volume.
clone volume A volume belonging to a clone pool.
cluster Two or more nodes that are connected and appear to network users as a single, highly available system. A highly available system allows the application services to continue despite most hardware or software failures.
connection port The port NetWorker processes use to perform backup and recovery sessions through a firewall.
Glossary
Glo
ssary
Legato NetWorker, Release 7.0Disaster Recovery Guide 173
consolidate To create a complete backup of a save set by merging the most recent level 1 save set with its corresponding full level save set. For more information, refer to the nsrssc man page or the Legato Command Reference Guide.
continued save set
Data associated with a save set that is continued from a previous volume. Continued save sets are created by the backup server when large save sets are being backed up, cloned, or archived to multiple volumes.
daemon A program that lies dormant waiting for a specified condition to occur.
datawheel See autochanger.
DDS An abbreviation for dynamic drive sharing, which allows NetWorker software to recognize shared drives.
device 1. A storage unit that reads from and writes to storage volumes (see volume). A storage unit can be a tape device, optical drive, autochanger, or file connected to the server or storage node.2. When DDS is enabled, refers to the access path to the physical drive.
DFS An abbreviation for Distributed File System root or child node. DFS is a Microsoft add-on for Windows NT 4.0 Server (Alpha or Intel) or Windows 2000 that allows you to create a logical directory of shared directories that span multiple machines across a network.
DFS component A DFS component is one of the following:• A namespace for files and DFS links, called a DFS
root.• A connection to a shared file or folder, called a DFS
child node
directed recovery A recovery method used to recover data that originated on one computer and re-create it on another computer.
Legato NetWorker, Release 7.0Disaster Recovery Guide
Glossary
174
Glo
ssar
y
directive An instruction that directs the NetWorker software to take special actions on a given set of files for a specified client during a backup.
domain controller A Microsoft Windows computer that stores directory data and manages user interactions with a domain, including logon, authentication, directory searches, and access to other shared resources.
drive When DDS is enabled, refers to the physical backup object, such as a tape drive, disk, or file. See also device.
enabler code A special code provided by Legato that activates the software. The enabler code that unlocks the base features for software you purchase is referred to as a base enabler. Enabler codes for additional features or products (for example, autochanger support) are referred to as add-on enablers.
exit code An indicator that specifies whether a backup or recovery session succeeded. An exit code of zero (0) indicates the session completed successfully. A nonzero exit code indicates the session did not complete successfully.
expiration date The date when the volume changes from read/write to read-only.
expired save set A save set whose browse time has been reached; therefore, it can no longer be browsed. In addition, the save set has been removed from the client file index.
failover In a cluster network, the process of relocating a resource to its redundant or backup component, either because of a hardware or software failure or for administrative purposes.
file index See client file index.
filesystem 1. A file tree that is on a specific disk partition or other mount point.
2. The entire set of all files.
3. A method of storing files.
Glossary
Glo
ssary
Legato NetWorker, Release 7.0Disaster Recovery Guide 175
firewall A system designed to prevent unauthorized access to or from a private network. All messages entering or leaving the intranet pass through the firewall, which examines each message and blocks those that do not meet the specified security criteria. There are several types of firewall techniques. The NetWorker software supports client backups from computers that are protected by packet filtering.
fork A subprocess the NetWorker software creates to perform a requested operation. In instances where a command uses a parallelism value, NetWorker software creates multiple instances of that command. Each instance of the command is identical to the original command and is referred to as a subprocess. Once each subprocess is created, they are run simultaneously.
full backup See level.
grooming The NetWorker process of removing the original files from a local disk after a successful archive operation.
group A client or group of clients configured to start backing up files to the NetWorker server at a designated time of day.
highly available system
A system that allows the application services to continue despite a hardware or software failure. Each cluster node has its own IP address. Each cluster node also has private (local) resources or disks that are available only to that machine.
inactivity timeout An attribute that indicates the number of minutes NetWorker software waits before determining that a client is unavailable for backup.
incremental See level.
jukebox See autochanger.
Legato NetWorker, Release 7.0Disaster Recovery Guide
Glossary
176
Glo
ssar
y
level A measurement that determines how much data NetWorker software saves during a scheduled or manual backup.
A full (f) backup backs up all files, regardless of whether they have changed. Levels one through nine [1-9] back up files that have changed since the last lower numbered backup level. An incremental (incr) backup backs up only files that have changed since the last backup.
library See autochanger.
license enabler The enabler code that enables you to run a feature or product.
Legato License Manager
An application that manages the licenses for all Legato products and features.
local cluster client A NetWorker client that is not permanently bound to a physical machine, but is instead managed by a cluster manager. It can be bound to more than one physical machine in the cluster and can own its own data disks. It is also referred to as a logical or virtual client.
local host The node on which the client or server program is running.
logical server The term used in conjunction with HP TruCluster to denote a cluster server. Also known as an agent (Sun), a package (HP-UX), and a virtual server (Microsoft).
LUS An abbreviation for Legato User SCSI. The LUS driver is used by Legato software products as a proprietary device driver that sends arbitrary SCSI commands to an autochanger.
manual backup A backup that a user requests from the client’s save program. The user specifies participating files, filesystems, and directories. A manual backup does not generate a bootstrap save set.
Glossary
Glo
ssary
Legato NetWorker, Release 7.0Disaster Recovery Guide 177
media The physical storage medium to which backup data is written. NetWorker software supports tape, magnetic or optical disk, and filesystems as backup media. See also volume.
media database A database that contains indexed entries about the storage volume location and the life cycle status of all data and volumes the NetWorker server manages. See also volume.
migration The process of moving data from a local filesystem to storage media in the migration store to free up disk space on the local drive.
multiplexing A NetWorker feature that permits data from more than one save set to be simultaneously written to the same storage device.
NDMP An abbreviation for Network Data Management Protocol, which is a storage management client/server protocol for enterprise-wide backup of network-attached storage. NetWorker software uses NDMP to provide connections to computers with NDMP data modules for tape operations, allowing a significant reduction in network traffic.
near-line storage See autochanger.
NetWorker client See client.
NetWorker server See server.
NetWorker storage node
See storage node.
NFS client A computer that can access files on a network file system (NFS) server.
NFS server A computer that contains exported filesystems that NFS clients can access.
nonclone pool Pools that contain data that has not been cloned.
Legato NetWorker, Release 7.0Disaster Recovery Guide
Glossary
178
Glo
ssar
y
notification A message generated and sent to the NetWorker administrator about important NetWorker events.
online indexes The databases located on the NetWorker server that contain all the information pertaining to the client backups (client file index) and backup volumes (media database).
operator The person who monitors the server status, loads backup volumes into the server devices, and otherwise executes the day-to-day NetWorker tasks.
override A NetWorker feature that allows you to configure a different backup level for a specific date listed in a Schedule resource.
package The term used by HP-UX to denote a cluster server. Also known as an agent (Sun), logical server (HP TruCluster), and virtual server (Microsoft).
packet filtering A method of firewall protection that looks at each packet entering or leaving the network and accepts or rejects it based on user-defined rules. See also firewall.
parallelism A NetWorker feature that enables the NetWorker server to either back up save sets from several clients or many save sets from one client at the same time. Parallelism is also available during recovers.
pathname A set of instructions to the operating system for accessing a file. An absolute pathname tells how to find a file beginning at the root directory and working down the directory tree. A relative pathname tells how to find the file starting where you are now.
physical cluster client
A NetWorker client that is bound to a physical machine in the cluster and can represent its own resources (private or local). It can also be called the physical client.
physical host Any one of the nodes (or machines) that forms the cluster.
Glossary
Glo
ssary
Legato NetWorker, Release 7.0Disaster Recovery Guide 179
policy A set of constraints that specify how long an entry can remain in a client’s online file index. When a policy expires, the save sets associated with that policy are marked recyclable. Each Client resource uses two policies: a browse policy and a retention policy.
pool A feature that enables you to sort backup data to selected volumes. A pool contains a collection of backup volumes to which specific data has been backed up.
probe The process NetWorker software uses to determine the directories or files to back up on each client.
purging The process of deleting all entries for files on the volume from the client file index, but allowing entries for the save sets to remain in the media database.
recover A recovery method that re-creates an image of the client filesystems and database on the NetWorker server.
recyclable save set
A save set whose browse and retention policies have been reached; therefore, the save set has been removed from the media database.
recyclable volume A volume whose data has passed both its browse and retention policies and is now available for relabeling and use by a NetWorker server or storage node.
Registry A database of configuration information central to Windows NT and Windows 2000 operations. It centralizes all Windows settings and provides security and control over system, security, and user account settings.
remote device A storage device that is attached to a NetWorker storage node.
RPC An abbreviation for remote procedure call, which is the protocol the NetWorker server uses to perform client requests over a network.
Legato NetWorker, Release 7.0Disaster Recovery Guide
Glossary
180
Glo
ssar
y
resource A component of the NetWorker software that describes the NetWorker server and its clients. Devices, schedules, clients, groups, and policies are examples of NetWorker resources. Each resource contains a list of attributes that define the parameters to use for the specific NetWorker resource.
resource database A database that contains information about each of the configured backup server’s resources.
resource owner The cluster (logical, not physical) host that owns the resource. If a resource (for example, a shared disk) is not owned by any virtual host, it is assumed to be owned by the local host (physical node) that hosts the resource.
retention policy A policy that determines how long save set entries are retained in the NetWorker server’s media database.
retrieve The process of locating and copying back files and directories that NetWorker software has archived.
retry mechanism The action NetWorker software performs when client operations fail. This situation might occur when the rate of transmission is either low or nonexistent. By using this mechanism, a previously failed operation might be more successful. Another common situation whereby a retry mechanism might succeed is when the client is in a reboot cycle.
root 1. (UNIX only) The UNIX superuser account (with user name “root” and user ID). By extension, the privileged system-maintenance login on any operating system.
2. (Windows NT/Windows 2000 and UNIX) The top node of the system directory structure; the home directory of the root user.
save set A group of files or a filesystem from a single client computer backed up onto storage media.
Glossary
Glo
ssary
Legato NetWorker, Release 7.0Disaster Recovery Guide 181
save set consolidation
The process that merges a level 1 backup with the last full backup of a save set to create a new full backup. See also level.
save set ID An internal identification number that NetWorker software assigns to a save set.
save set recover The recovery of specified save sets to the NetWorker server.
save set status The NetWorker attribute that indicates whether a given save set is restorable, recoverable, or recyclable. The save set status also indicates whether the save set has been successfully backed up.
save stream The data and save set information being written to a storage volume during a backup. A save stream originates from a single save set.
server The computer on a network that runs the NetWorker server software, contains the online indexes, and provides backup and recovery services to the clients and storage nodes on the same network.
server index A database containing information about the server's files that have been backed up during scheduled backups. Also known as the server’s client file index.
service port The port used by a server or storage node to listen for backup and recovery requests from clients through a firewall.
shared disk The storage disk that is connected between multiple nodes in the cluster.
shell prompt A cue for input in a shell window where you enter a command.
silo A repository for holding hundreds or thousands of volumes. Silo volumes are identified by barcodes, not by slot numbers.
skip A backup level in which designated files are not backed up. See also level.
Legato NetWorker, Release 7.0Disaster Recovery Guide
Glossary
182
Glo
ssar
y
SMS An abbreviation for system management software, which is a Microsoft-based software installation system that allows the wide-scale, automatic installation of software products on clients from a single remote server.
SNMP An abbreviation for Simple Network Management Protocol, which is a protocol that defines the communication between a manager (sometimes called a monitor or management station) and an object (the item being managed). NetWorker software uses SNMP to send messages to the administrator about NetWorker events.
ssid See save set ID.
staging The process of moving data from one storage medium to another, less costly medium, and later removing the data from its original location.
stand-alone In a cluster environment, if the NetWorker.clustersvr file is missing at the binary location, the NetWorker server will start in noncluster mode, also called stand-alone mode. The stand-alone mode is sometimes referred to as the server backing up itself.
stand-alone device
A storage device that contains a single drive for backing up data.
storage device The hardware that reads and writes data during backup, recovery, or other NetWorker operations.
storage node A storage device physically attached to another computer whose backup operations are administered from the controlling NetWorker server.
System Reference Manual (SRM) console
The HP TruCluster utility used to manage cluster nodes.
user groups In the NetWorker software, refers to configuration resources that are used to assign users to access control groups and to configure the privileges associated with those groups.
Glossary
Glo
ssary
Legato NetWorker, Release 7.0Disaster Recovery Guide 183
versions The date-stamped collection of available backups for any single file.
virtual cluster client
A NetWorker client that is not permanently bound to a physical machine, but is instead managed by a cluster manager. It can be bound to more than one physical machine in the cluster and can own its own data disks. It is also referred to as a logical cluster client or a virtual client.
virtual server The term used by Microsoft to denote a cluster server. Also known as an agent (Sun), a logical server (HP TruCluster), and a package (HP-UX).
volume A unit of storage media, such as a magnetic tape, an optical disk, or a file. A storage device reads from and writes to volumes, which can be physical units (for example, a labeled tape cartridge) or logical units (for example, optical media can store multiple volumes on a single physical platter).
volume ID The internal identification assigned to a backup volume by NetWorker software.
volume name The name you assign to a backup volume when it is labeled.
volume pool See pool.

Legato NetWorker, Release 7.0Disaster Recovery Guide
Glossary
184
Glo
ssar
y
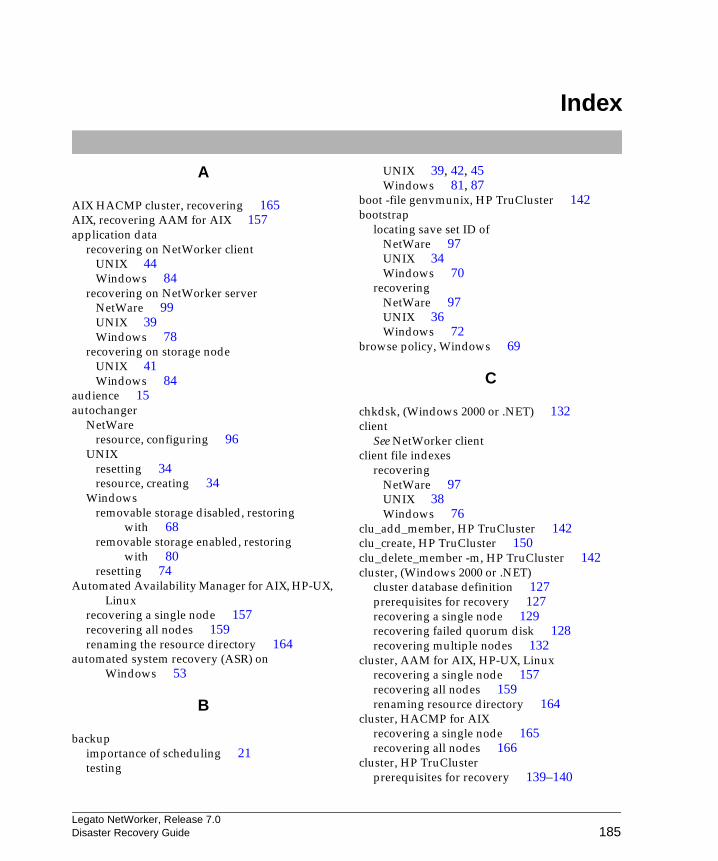
Legato NetWorker, Release 7.0Disaster Recovery Guide 185
Index
A
AIX HACMP cluster, recovering 165AIX, recovering AAM for AIX 157application data
recovering on NetWorker clientUNIX 44Windows 84
recovering on NetWorker serverNetWare 99UNIX 39Windows 78
recovering on storage nodeUNIX 41Windows 84
audience 15autochanger
NetWareresource, configuring 96
UNIXresetting 34resource, creating 34
Windowsremovable storage disabled, restoring
with 68removable storage enabled, restoring
with 80resetting 74
Automated Availability Manager for AIX, HP-UX, Linux
recovering a single node 157recovering all nodes 159renaming the resource directory 164
automated system recovery (ASR) on Windows 53
B
backupimportance of scheduling 21testing
UNIX 39, 42, 45Windows 81, 87
boot -file genvmunix, HP TruCluster 142bootstrap
locating save set ID ofNetWare 97UNIX 34Windows 70
recoveringNetWare 97UNIX 36Windows 72
browse policy, Windows 69
C
chkdsk, (Windows 2000 or .NET) 132client
See NetWorker clientclient file indexes
recoveringNetWare 97UNIX 38Windows 76
clu_add_member, HP TruCluster 142clu_create, HP TruCluster 150clu_delete_member -m, HP TruCluster 142cluster, (Windows 2000 or .NET)
cluster database definition 127prerequisites for recovery 127recovering a single node 129recovering failed quorum disk 128recovering multiple nodes 132
cluster, AAM for AIX, HP-UX, Linuxrecovering a single node 157recovering all nodes 159renaming resource directory 164
cluster, HACMP for AIXrecovering a single node 165recovering all nodes 166
cluster, HP TruClusterprerequisites for recovery 139–140
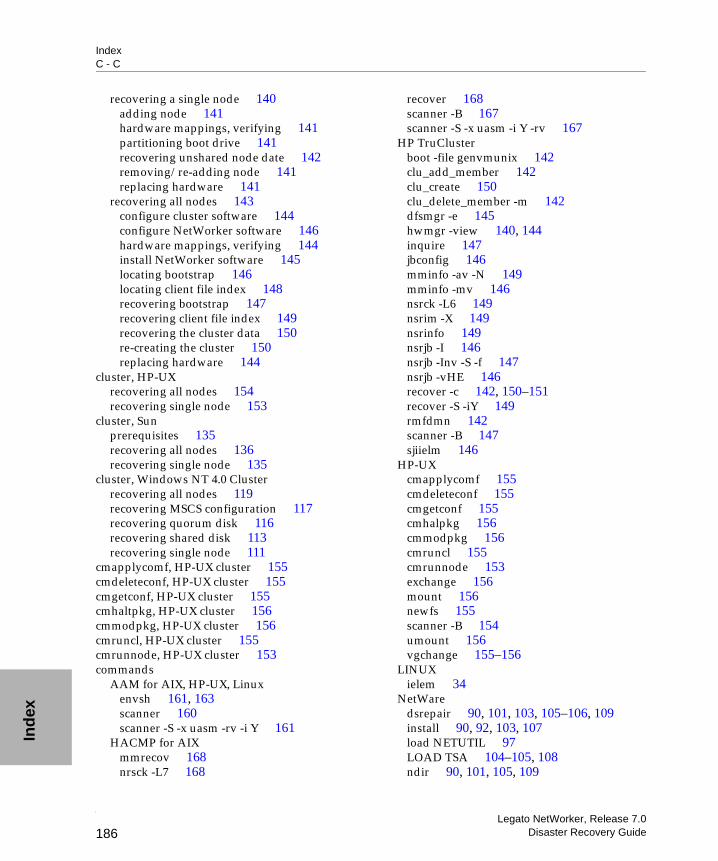
IndexC - C
Ind
ex
Legato NetWorker, Release 7.0Disaster Recovery Guide186
recovering a single node 140adding node 141hardware mappings, verifying 141partitioning boot drive 141recovering unshared node date 142removing/re-adding node 141replacing hardware 141
recovering all nodes 143configure cluster software 144configure NetWorker software 146hardware mappings, verifying 144install NetWorker software 145locating bootstrap 146locating client file index 148recovering bootstrap 147recovering client file index 149recovering the cluster data 150re-creating the cluster 150replacing hardware 144
cluster, HP-UXrecovering all nodes 154recovering single node 153
cluster, Sunprerequisites 135recovering all nodes 136recovering single node 135
cluster, Windows NT 4.0 Clusterrecovering all nodes 119recovering MSCS configuration 117recovering quorum disk 116recovering shared disk 113recovering single node 111
cmapplycomf, HP-UX cluster 155cmdeleteconf, HP-UX cluster 155cmgetconf, HP-UX cluster 155cmhaltpkg, HP-UX cluster 156cmmodpkg, HP-UX cluster 156cmruncl, HP-UX cluster 155cmrunnode, HP-UX cluster 153commands
AAM for AIX, HP-UX, Linuxenvsh 161, 163scanner 160scanner -S -x uasm -rv -i Y 161
HACMP for AIXmmrecov 168nrsck -L7 168
recover 168scanner -B 167scanner -S -x uasm -i Y -rv 167
HP TruClusterboot -file genvmunix 142clu_add_member 142clu_create 150clu_delete_member -m 142dfsmgr -e 145hwmgr -view 140, 144inquire 147jbconfig 146mminfo -av -N 149mminfo -mv 146nsrck -L6 149nsrim -X 149nsrinfo 149nsrjb -I 146nsrjb -Inv -S -f 147nsrjb -vHE 146recover -c 142, 150–151recover -S -iY 149rmfdmn 142scanner -B 147sjiielm 146
HP-UXcmapplycomf 155cmdeleteconf 155cmgetconf 155cmhalpkg 156cmmodpkg 156cmruncl 155cmrunnode 153exchange 156mount 156newfs 155scanner -B 154umount 156vgchange 155–156
LINUXielem 34
NetWaredsrepair 90, 101, 103, 105–106, 109install 90, 92, 103, 107load NETUTIL 97LOAD TSA 104–105, 108ndir 90, 101, 105, 109
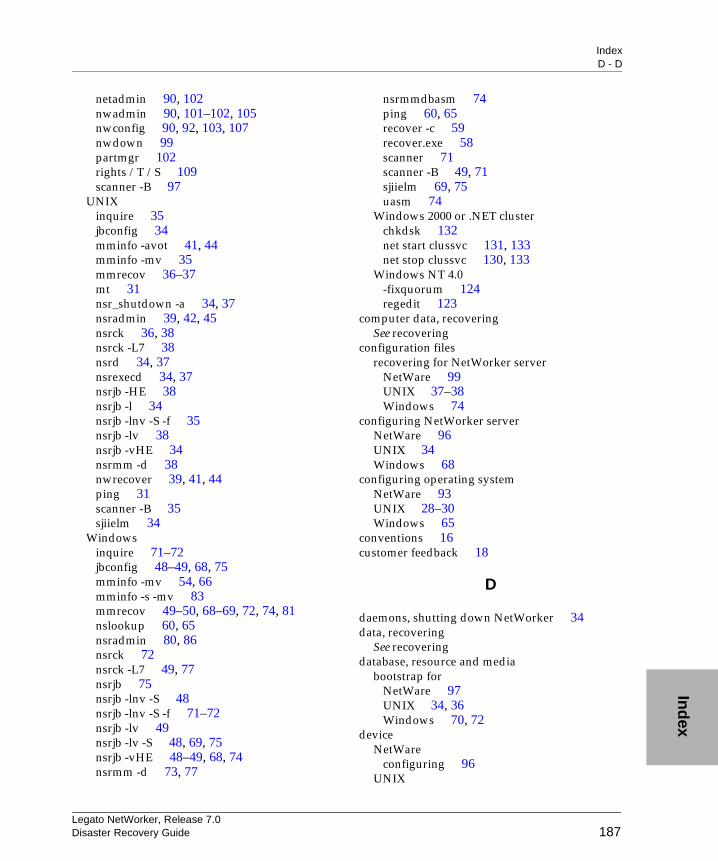
IndexD - D
Ind
ex
Legato NetWorker, Release 7.0Disaster Recovery Guide 187
netadmin 90, 102nwadmin 90, 101–102, 105nwconfig 90, 92, 103, 107nwdown 99partmgr 102rights /T /S 109scanner -B 97
UNIXinquire 35jbconfig 34mminfo -avot 41, 44mminfo -mv 35mmrecov 36–37mt 31nsr_shutdown -a 34, 37nsradmin 39, 42, 45nsrck 36, 38nsrck -L7 38nsrd 34, 37nsrexecd 34, 37nsrjb -HE 38nsrjb -l 34nsrjb -lnv -S -f 35nsrjb -lv 38nsrjb -vHE 34nsrmm -d 38nwrecover 39, 41, 44ping 31scanner -B 35sjiielm 34
Windowsinquire 71–72jbconfig 48–49, 68, 75mminfo -mv 54, 66mminfo -s -mv 83mmrecov 49–50, 68–69, 72, 74, 81nslookup 60, 65nsradmin 80, 86nsrck 72nsrck -L7 49, 77nsrjb 75nsrjb -lnv -S 48nsrjb -lnv -S -f 71–72nsrjb -lv 49nsrjb -lv -S 48, 69, 75nsrjb -vHE 48–49, 68, 74nsrmm -d 73, 77
nsrmmdbasm 74ping 60, 65recover -c 59recover.exe 58scanner 71scanner -B 49, 71sjiielm 69, 75uasm 74
Windows 2000 or .NET clusterchkdsk 132net start clussvc 131, 133net stop clussvc 130, 133
Windows NT 4.0-fixquorum 124regedit 123
computer data, recoveringSee recovering
configuration filesrecovering for NetWorker server
NetWare 99UNIX 37–38Windows 74
configuring NetWorker serverNetWare 96UNIX 34Windows 68
configuring operating systemNetWare 93UNIX 28–30Windows 65
conventions 16customer feedback 18
D
daemons, shutting down NetWorker 34data, recovering
See recoveringdatabase, resource and media
bootstrap forNetWare 97UNIX 34, 36Windows 70, 72
deviceNetWare
configuring 96UNIX
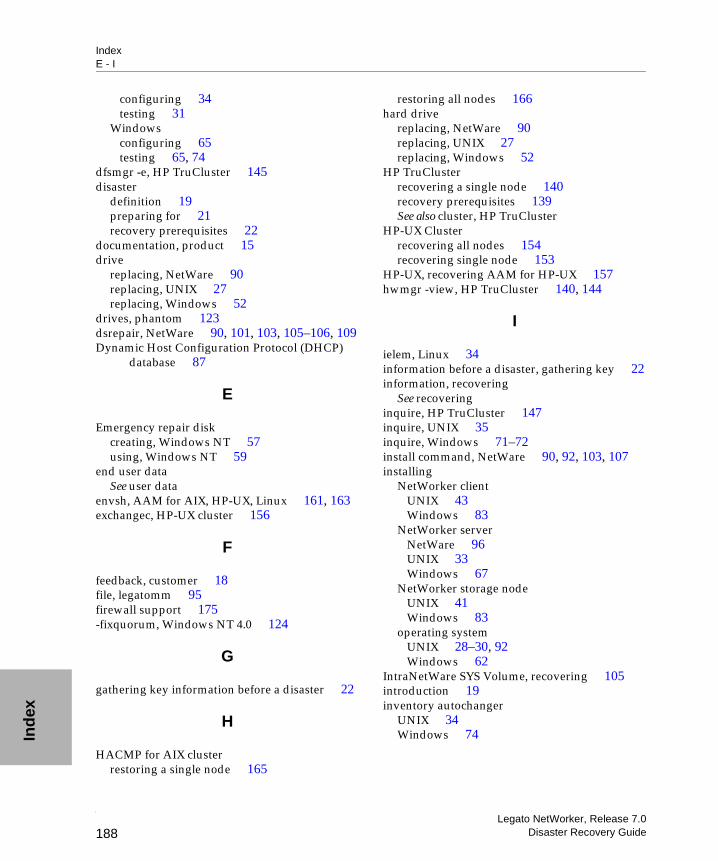
IndexE - I
Ind
ex
Legato NetWorker, Release 7.0Disaster Recovery Guide188
configuring 34testing 31
Windowsconfiguring 65testing 65, 74
dfsmgr -e, HP TruCluster 145disaster
definition 19preparing for 21recovery prerequisites 22
documentation, product 15drive
replacing, NetWare 90replacing, UNIX 27replacing, Windows 52
drives, phantom 123dsrepair, NetWare 90, 101, 103, 105–106, 109Dynamic Host Configuration Protocol (DHCP)
database 87
E
Emergency repair diskcreating, Windows NT 57using, Windows NT 59
end user dataSee user data
envsh, AAM for AIX, HP-UX, Linux 161, 163exchangec, HP-UX cluster 156
F
feedback, customer 18file, legatomm 95firewall support 175-fixquorum, Windows NT 4.0 124
G
gathering key information before a disaster 22
H
HACMP for AIX clusterrestoring a single node 165
restoring all nodes 166hard drive
replacing, NetWare 90replacing, UNIX 27replacing, Windows 52
HP TruClusterrecovering a single node 140recovery prerequisites 139See also cluster, HP TruCluster
HP-UX Clusterrecovering all nodes 154recovering single node 153
HP-UX, recovering AAM for HP-UX 157hwmgr -view, HP TruCluster 140, 144
I
ielem, Linux 34information before a disaster, gathering key 22information, recovering
See recoveringinquire, HP TruCluster 147inquire, UNIX 35inquire, Windows 71–72install command, NetWare 90, 92, 103, 107installing
NetWorker clientUNIX 43Windows 83
NetWorker serverNetWare 96UNIX 33Windows 67
NetWorker storage nodeUNIX 41Windows 83
operating systemUNIX 28–30, 92Windows 62
IntraNetWare SYS Volume, recovering 105introduction 19inventory autochanger
UNIX 34Windows 74
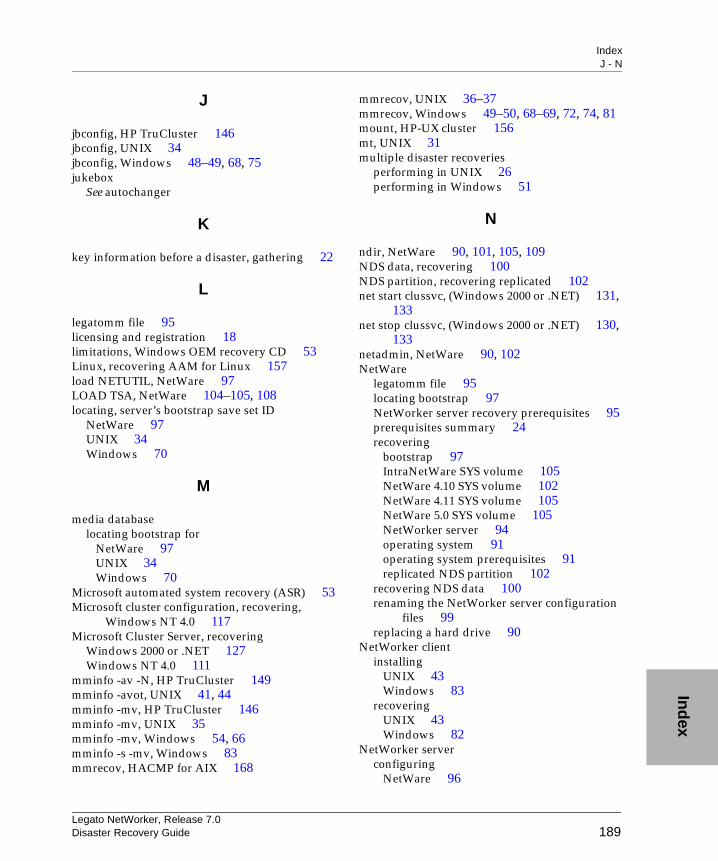
IndexJ - N
Ind
ex
Legato NetWorker, Release 7.0Disaster Recovery Guide 189
J
jbconfig, HP TruCluster 146jbconfig, UNIX 34jbconfig, Windows 48–49, 68, 75jukebox
See autochanger
K
key information before a disaster, gathering 22
L
legatomm file 95licensing and registration 18limitations, Windows OEM recovery CD 53Linux, recovering AAM for Linux 157load NETUTIL, NetWare 97LOAD TSA, NetWare 104–105, 108locating, server’s bootstrap save set ID
NetWare 97UNIX 34Windows 70
M
media databaselocating bootstrap for
NetWare 97UNIX 34Windows 70
Microsoft automated system recovery (ASR) 53Microsoft cluster configuration, recovering,
Windows NT 4.0 117Microsoft Cluster Server, recovering
Windows 2000 or .NET 127Windows NT 4.0 111
mminfo -av -N, HP TruCluster 149mminfo -avot, UNIX 41, 44mminfo -mv, HP TruCluster 146mminfo -mv, UNIX 35mminfo -mv, Windows 54, 66mminfo -s -mv, Windows 83mmrecov, HACMP for AIX 168
mmrecov, UNIX 36–37mmrecov, Windows 49–50, 68–69, 72, 74, 81mount, HP-UX cluster 156mt, UNIX 31multiple disaster recoveries
performing in UNIX 26performing in Windows 51
N
ndir, NetWare 90, 101, 105, 109NDS data, recovering 100NDS partition, recovering replicated 102net start clussvc, (Windows 2000 or .NET) 131,
133net stop clussvc, (Windows 2000 or .NET) 130,
133netadmin, NetWare 90, 102NetWare
legatomm file 95locating bootstrap 97NetWorker server recovery prerequisites 95prerequisites summary 24recovering
bootstrap 97IntraNetWare SYS volume 105NetWare 4.10 SYS volume 102NetWare 4.11 SYS volume 105NetWare 5.0 SYS volume 105NetWorker server 94operating system 91operating system prerequisites 91replicated NDS partition 102
recovering NDS data 100renaming the NetWorker server configuration
files 99replacing a hard drive 90
NetWorker clientinstalling
UNIX 43Windows 83
recoveringUNIX 43Windows 82
NetWorker serverconfiguring
NetWare 96
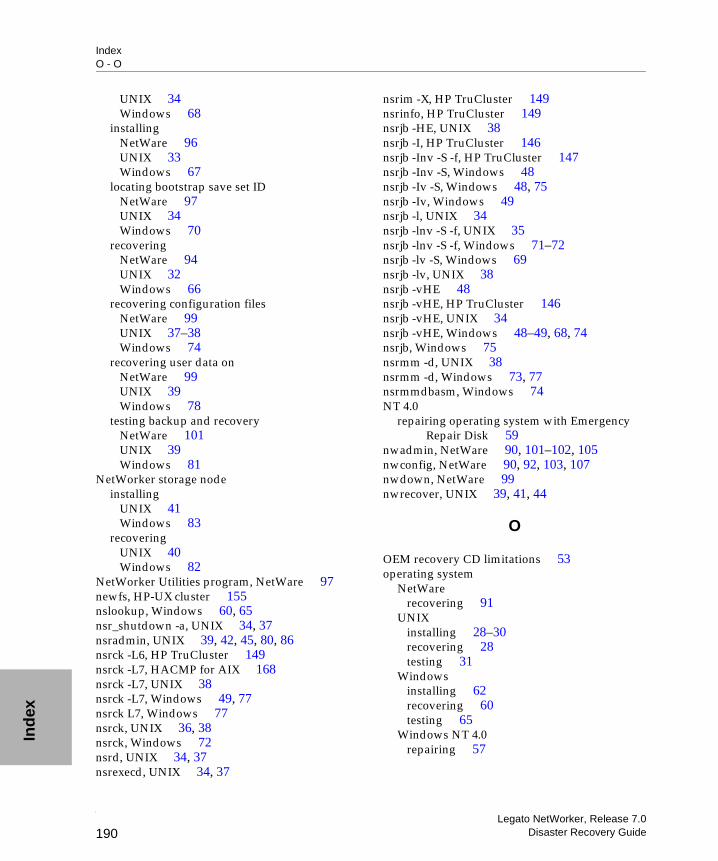
IndexO - O
Ind
ex
Legato NetWorker, Release 7.0Disaster Recovery Guide190
UNIX 34Windows 68
installingNetWare 96UNIX 33Windows 67
locating bootstrap save set IDNetWare 97UNIX 34Windows 70
recoveringNetWare 94UNIX 32Windows 66
recovering configuration filesNetWare 99UNIX 37–38Windows 74
recovering user data onNetWare 99UNIX 39Windows 78
testing backup and recoveryNetWare 101UNIX 39Windows 81
NetWorker storage nodeinstalling
UNIX 41Windows 83
recoveringUNIX 40Windows 82
NetWorker Utilities program, NetWare 97newfs, HP-UX cluster 155nslookup, Windows 60, 65nsr_shutdown -a, UNIX 34, 37nsradmin, UNIX 39, 42, 45, 80, 86nsrck -L6, HP TruCluster 149nsrck -L7, HACMP for AIX 168nsrck -L7, UNIX 38nsrck -L7, Windows 49, 77nsrck L7, Windows 77nsrck, UNIX 36, 38nsrck, Windows 72nsrd, UNIX 34, 37nsrexecd, UNIX 34, 37
nsrim -X, HP TruCluster 149nsrinfo, HP TruCluster 149nsrjb -HE, UNIX 38nsrjb -I, HP TruCluster 146nsrjb -Inv -S -f, HP TruCluster 147nsrjb -Inv -S, Windows 48nsrjb -Iv -S, Windows 48, 75nsrjb -Iv, Windows 49nsrjb -l, UNIX 34nsrjb -lnv -S -f, UNIX 35nsrjb -lnv -S -f, Windows 71–72nsrjb -lv -S, Windows 69nsrjb -lv, UNIX 38nsrjb -vHE 48nsrjb -vHE, HP TruCluster 146nsrjb -vHE, UNIX 34nsrjb -vHE, Windows 48–49, 68, 74nsrjb, Windows 75nsrmm -d, UNIX 38nsrmm -d, Windows 73, 77nsrmmdbasm, Windows 74NT 4.0
repairing operating system with Emergency Repair Disk 59
nwadmin, NetWare 90, 101–102, 105nwconfig, NetWare 90, 92, 103, 107nwdown, NetWare 99nwrecover, UNIX 39, 41, 44
O
OEM recovery CD limitations 53operating system
NetWarerecovering 91
UNIXinstalling 28–30recovering 28testing 31
Windowsinstalling 62recovering 60testing 65
Windows NT 4.0repairing 57
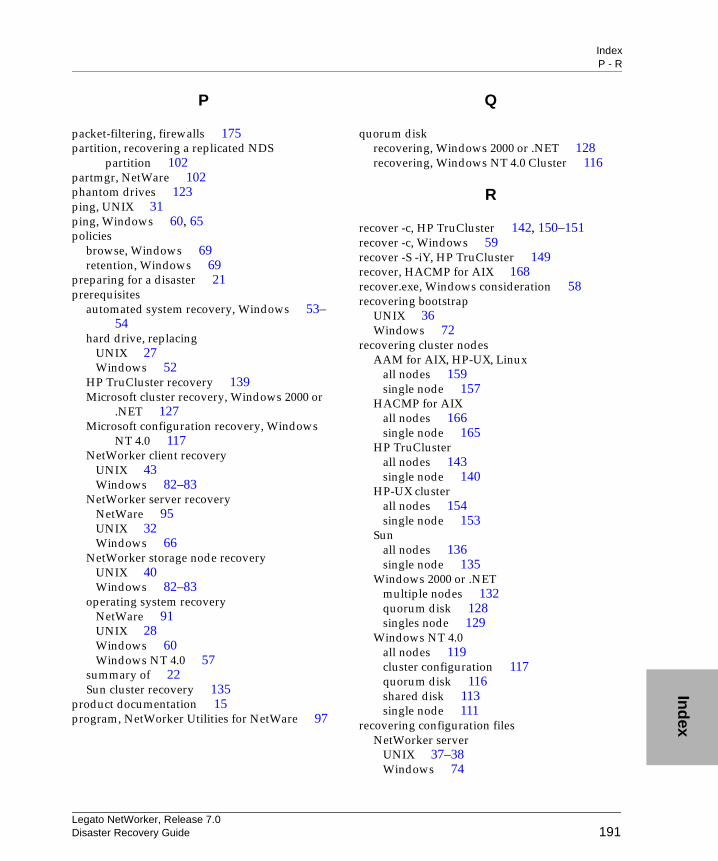
IndexP - R
Ind
ex
Legato NetWorker, Release 7.0Disaster Recovery Guide 191
P
packet-filtering, firewalls 175partition, recovering a replicated NDS
partition 102partmgr, NetWare 102phantom drives 123ping, UNIX 31ping, Windows 60, 65policies
browse, Windows 69retention, Windows 69
preparing for a disaster 21prerequisites
automated system recovery, Windows 53–54
hard drive, replacingUNIX 27Windows 52
HP TruCluster recovery 139Microsoft cluster recovery, Windows 2000 or
.NET 127Microsoft configuration recovery, Windows
NT 4.0 117NetWorker client recovery
UNIX 43Windows 82–83
NetWorker server recoveryNetWare 95UNIX 32Windows 66
NetWorker storage node recoveryUNIX 40Windows 82–83
operating system recoveryNetWare 91UNIX 28Windows 60Windows NT 4.0 57
summary of 22Sun cluster recovery 135
product documentation 15program, NetWorker Utilities for NetWare 97
Q
quorum diskrecovering, Windows 2000 or .NET 128recovering, Windows NT 4.0 Cluster 116
R
recover -c, HP TruCluster 142, 150–151recover -c, Windows 59recover -S -iY, HP TruCluster 149recover, HACMP for AIX 168recover.exe, Windows consideration 58recovering bootstrap
UNIX 36Windows 72
recovering cluster nodesAAM for AIX, HP-UX, Linux
all nodes 159single node 157
HACMP for AIXall nodes 166single node 165
HP TruClusterall nodes 143single node 140
HP-UX clusterall nodes 154single node 153
Sunall nodes 136single node 135
Windows 2000 or .NETmultiple nodes 132quorum disk 128singles node 129
Windows NT 4.0all nodes 119cluster configuration 117quorum disk 116shared disk 113single node 111
recovering configuration filesNetWorker server
UNIX 37–38Windows 74
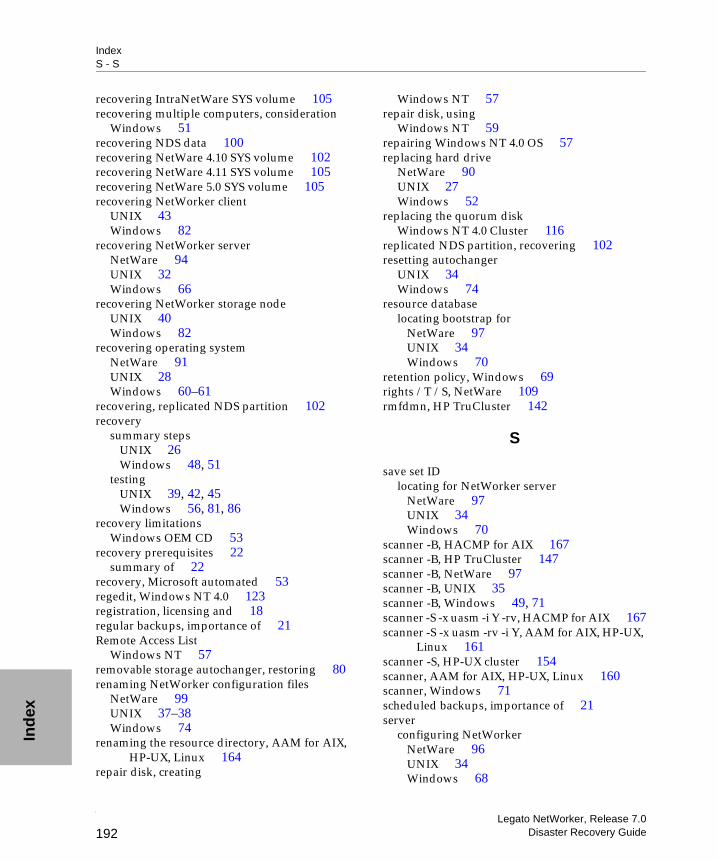
IndexS - S
Ind
ex
Legato NetWorker, Release 7.0Disaster Recovery Guide192
recovering IntraNetWare SYS volume 105recovering multiple computers, consideration
Windows 51recovering NDS data 100recovering NetWare 4.10 SYS volume 102recovering NetWare 4.11 SYS volume 105recovering NetWare 5.0 SYS volume 105recovering NetWorker client
UNIX 43Windows 82
recovering NetWorker serverNetWare 94UNIX 32Windows 66
recovering NetWorker storage nodeUNIX 40Windows 82
recovering operating systemNetWare 91UNIX 28Windows 60–61
recovering, replicated NDS partition 102recovery
summary stepsUNIX 26Windows 48, 51
testingUNIX 39, 42, 45Windows 56, 81, 86
recovery limitationsWindows OEM CD 53
recovery prerequisites 22summary of 22
recovery, Microsoft automated 53regedit, Windows NT 4.0 123registration, licensing and 18regular backups, importance of 21Remote Access List
Windows NT 57removable storage autochanger, restoring 80renaming NetWorker configuration files
NetWare 99UNIX 37–38Windows 74
renaming the resource directory, AAM for AIX, HP-UX, Linux 164
repair disk, creating
Windows NT 57repair disk, using
Windows NT 59repairing Windows NT 4.0 OS 57replacing hard drive
NetWare 90UNIX 27Windows 52
replacing the quorum diskWindows NT 4.0 Cluster 116
replicated NDS partition, recovering 102resetting autochanger
UNIX 34Windows 74
resource databaselocating bootstrap for
NetWare 97UNIX 34Windows 70
retention policy, Windows 69rights /T /S, NetWare 109rmfdmn, HP TruCluster 142
S
save set IDlocating for NetWorker server
NetWare 97UNIX 34Windows 70
scanner -B, HACMP for AIX 167scanner -B, HP TruCluster 147scanner -B, NetWare 97scanner -B, UNIX 35scanner -B, Windows 49, 71scanner -S -x uasm -i Y -rv, HACMP for AIX 167scanner -S -x uasm -rv -i Y, AAM for AIX, HP-UX,
Linux 161scanner -S, HP-UX cluster 154scanner, AAM for AIX, HP-UX, Linux 160scanner, Windows 71scheduled backups, importance of 21server
configuring NetWorkerNetWare 96UNIX 34Windows 68
IndexT - W
Ind
ex
Legato NetWorker, Release 7.0Disaster Recovery Guide 193
installing NetWorkerNetWare 96UNIX 33Windows 67
recovering NetWorkerNetWare 94UNIX 32Windows 66
shutdown NetWorker, UNIX 34services information test 17setting
browse policy, Windows 69retention policy, Windows 69
shutdown NetWorker serverUNIX 34
sjiielm, HP TruCluster 146sjiielm, UNIX 34sjiielm, Windows 69, 75storage node
See NetWorker storage nodesummary recovery steps
UNIX 26Windows 48, 51
Sun clusterrestoring all nodes 136restoring single node 135
support, technical 17SYS volume, recovering
IntraNetWare 105NetWare 4.10 102NetWare 4.11 105NetWare 5.0 105
system recovery, Microsoft automated 53system state, cluster database definition
Windows 2000 or .NET 127
T
technical support 17testing backup and recovery
NetWare 101UNIX 39, 42, 45Windows 81, 87
testing OSNetWare 94UNIX 31Windows 65
TruCluster, recovering 139See also cluster, HP TruCluster
U
uasm, Windows 74umount, HP-UX cluster 156UNIX
configuring operating system 30installing operating system 28–30locating bootstrap 34prerequisites summary 23recovering bootstrap 36recovering NetWorker client 43recovering NetWorker server 32recovering NetWorker storage node 40recovering operating system 30renaming NetWorker server configuration
files 37summary of disaster recovery 26
user datarecovering on NetWorker client
UNIX 44Windows 84
recovering on NetWorker serverNetWare 99UNIX 39Windows 78
recovering on storage nodeUNIX 41Windows 84
Utilities program, NetWare 97
V
vgchange, HP-UX cluster 155–156
W
What is a disaster? 19Windows
automated system recovery (ASR) 53installing operating system 62locating bootstrap 70NT 4.0
repairing OS with Emergency Repair
IndexW - W
Ind
ex
Legato NetWorker, Release 7.0Disaster Recovery Guide194
Disk 59performing multiple disaster recoveries 51prerequisites summary 23recovering a NetWorker server 66recovering bootstrap 72recovering NetWorker client 82recovering NetWorker storage node 82recovering operating system 61renaming NetWorker server configuration
files 74replacing a hard drive 52setting
browse policy 69retention policy 69
summary of disaster recovery 48, 51
Windows Cluster, 2000 or .NETrecovering multiple nodes 132recovering quorum disk 128recovering server 127recovering single node 129recovery prerequisites 127
Windows Cluster, NT 4.0recovering a shared disk 113recovering all nodes 119recovering cluster configuration 117recovering one cluster node 111recovering quorum disk data 116replacing the quorum disk 116
Windows Internet Naming Service (WINS) database 87
Windows NT repair diskcreating 57using 59