Embed Size (px)
Citation preview
Layering Like a Boss! Lesson3:LayeringPaper
www.victoriamarieblog.com LayeringLikeABoss©byVictoriaMarie-Page1
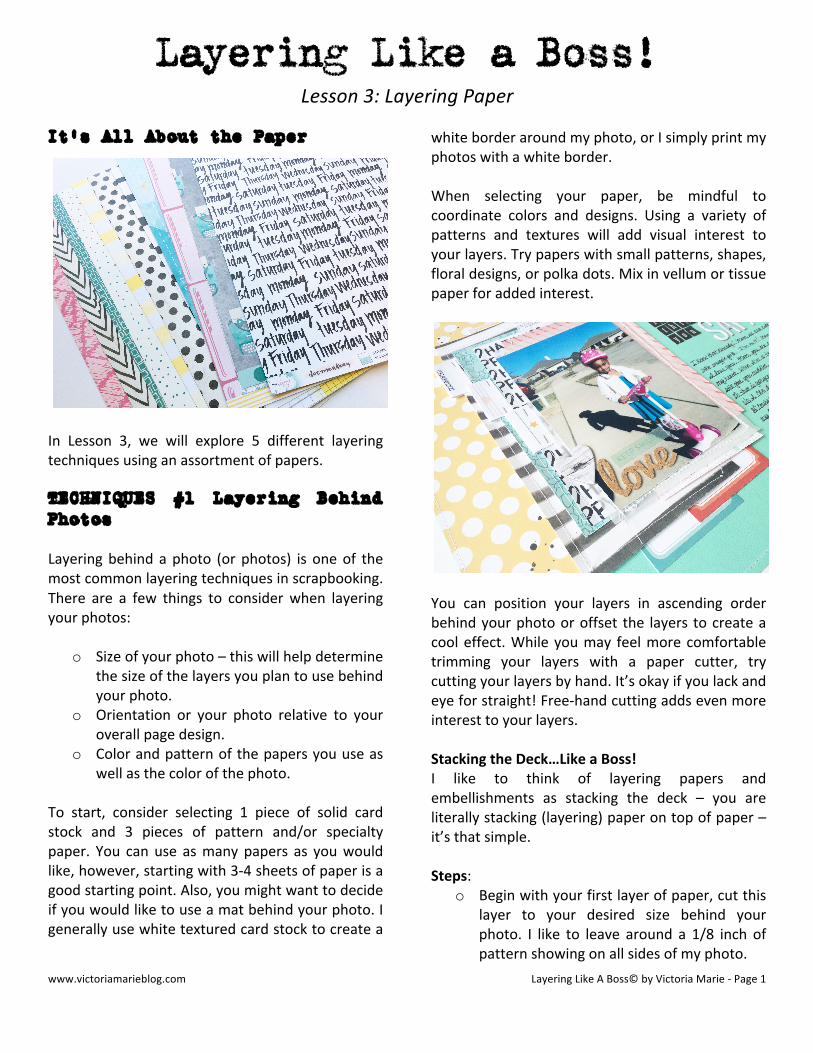
It’s All About the Paper
In Lesson 3, we will explore 5 different layeringtechniquesusinganassortmentofpapers.TECHNIQUES #1 Layering Behind Photos Layeringbehindaphoto (orphotos) is oneof themostcommonlayeringtechniquesinscrapbooking.There are a few things to considerwhen layeringyourphotos:
o Sizeofyourphoto–thiswillhelpdeterminethesizeofthelayersyouplantousebehindyourphoto.
o Orientation or your photo relative to youroverallpagedesign.
o Colorandpatternofthepapersyouuseaswellasthecolorofthephoto.
To start, consider selecting 1 piece of solid cardstock and 3 pieces of pattern and/or specialtypaper. You canuse asmanypapers as youwouldlike,however,startingwith3-4sheetsofpaperisagoodstartingpoint.Also,youmightwanttodecideifyouwouldliketouseamatbehindyourphoto.Igenerallyusewhitetexturedcardstocktocreatea
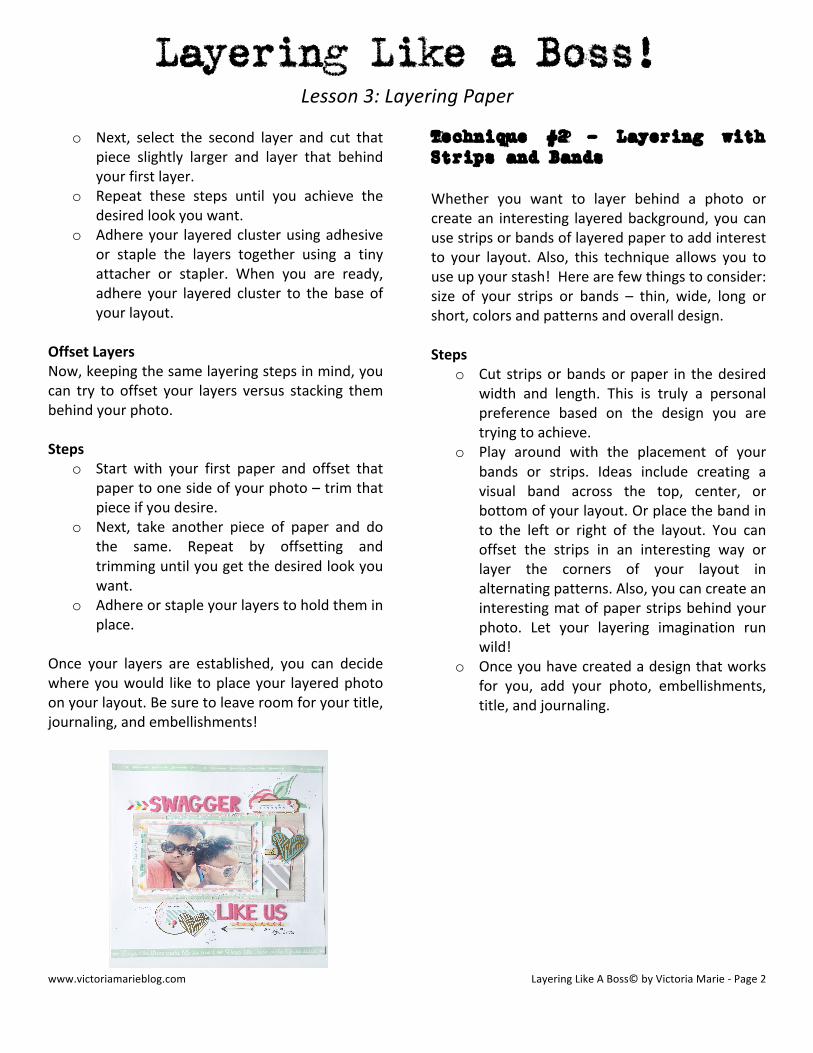
whiteborderaroundmyphoto,orIsimplyprintmyphotoswithawhiteborder.When selecting your paper, be mindful tocoordinate colors and designs. Using a variety ofpatterns and textures will add visual interest toyourlayers.Trypaperswithsmallpatterns,shapes,floraldesigns,orpolkadots.Mixinvellumortissuepaperforaddedinterest.
You can position your layers in ascending orderbehindyourphotooroffset the layers tocreateacooleffect.Whileyoumay feelmorecomfortabletrimming your layers with a paper cutter, trycuttingyourlayersbyhand.It’sokayifyoulackandeyeforstraight!Free-handcuttingaddsevenmoreinteresttoyourlayers.StackingtheDeck…LikeaBoss!I like to think of layering papers andembellishments as stacking the deck – you areliterallystacking(layering)paperontopofpaper–it’sthatsimple.Steps:
o Beginwithyourfirstlayerofpaper,cutthislayer to your desired size behind yourphoto. I like to leave around a 1/8 inch ofpatternshowingonallsidesofmyphoto.
Layering Like a Boss! Lesson3:LayeringPaper
www.victoriamarieblog.com LayeringLikeABoss©byVictoriaMarie-Page2
o Next, select the second layer and cut thatpiece slightly larger and layer that behindyourfirstlayer.
o Repeat these steps until you achieve thedesiredlookyouwant.
o Adhereyour layeredclusterusingadhesiveor staple the layers together using a tinyattacher or stapler. When you are ready,adhere your layered cluster to the base ofyourlayout.
OffsetLayersNow,keepingthesamelayeringstepsinmind,youcan try to offset your layers versus stacking thembehindyourphoto.Steps
o Start with your first paper and offset thatpapertoonesideofyourphoto–trimthatpieceifyoudesire.
o Next, take another piece of paper and dothe same. Repeat by offsetting andtrimminguntilyougetthedesiredlookyouwant.
o Adhereorstapleyourlayerstoholdtheminplace.
Once your layers are established, you can decidewhereyouwould like toplaceyour layeredphotoonyourlayout.Besuretoleaveroomforyourtitle,journaling,andembellishments!
Technique #2 - Layering with Strips and Bands Whether you want to layer behind a photo orcreatean interesting layeredbackground,youcanusestripsorbandsoflayeredpapertoaddinterestto your layout. Also, this technique allows you touseupyourstash!Herearefewthingstoconsider:size of your strips or bands – thin, wide, long orshort,colorsandpatternsandoveralldesign.Steps
o Cut stripsorbandsorpaper in thedesiredwidth and length. This is truly a personalpreference based on the design you aretryingtoachieve.
o Play around with the placement of yourbands or strips. Ideas include creating avisual band across the top, center, orbottomofyourlayout.Orplacethebandinto the left or right of the layout. You canoffset the strips in an interesting way orlayer the corners of your layout inalternatingpatterns.Also,youcancreateaninterestingmatofpaperstripsbehindyourphoto. Let your layering imagination runwild!
o Onceyouhavecreatedadesignthatworksfor you, add your photo, embellishments,title,andjournaling.

Layering Like a Boss! Lesson3:LayeringPaper
www.victoriamarieblog.com LayeringLikeABoss©byVictoriaMarie-Page3
Technique #3 Layering with Shapes
Layeringwithshapescanaddalotofvisualinterestandmovement on a scrapbook page. There are anumberofshapepunches,digitaldiecuts,anddiesonthemarket.Ofcourseanyshapecanbecut toanysizetosuityourdesignpreference.Aswithotherlayeringtechniques,youwillwanttoselectcoordinatingpaperstoachieveaninterestinglayered look. You can create a monotone design,goforanombreeffect,ormixandmatchpatternsandcolors.
Stepso Select a shape to layer on your scrapbook
page.o Die cut or hand cut several pieces of this
shape. You can also usemanufactured diecutshapesaswell.
o Arrange the shapes on your layout in aninteresting pattern, layering the shapes asyougo.
o Repeatuntilyouhaveyourdesiredlook!
Someideasforlayeringincludelayeringshapesinaband going across your page, clustering shapesbehindoraroundyourphoto,orplacingtheshapesinadiagonaldirection.Try this techniquewithanassortmentofshapesinvarioussizesandtextures.
Technique #4 Layering Blocks of Paper You can create beautiful backgrounds by layeringblocksofcoordinatingpaper.Youwillsimply:
o Select that base for your layout – solid orpatternpaper.
o Select a few 3-5 pieces of coordinatingpattern paper. Consider using specialtypapersaswell!
o TIP:Ifyouhave6x6paperpads,thiswillbea good time to use them. Smaller papersare perfect for layered backgrounds. Also,6x6papershavesmallerpatterns,whichareless overwhelming than larger paperswithlargerpatterns.
o Once your papers are selected, simplyposition your layers one on top of theother, offsetting the layers so that eachpatternisshowing.
o You can trim your layers to create yourdesiredlook.
o Addmorepapersorelementsasyoulayer!o Don’t forget to consider your title and
photoplacement.o Once you are satisfiedwith the placement
of your layers, adhere them to yourbackgroundwithyourdesiredadhesive.
Layering Like a Boss! Lesson3:LayeringPaper
www.victoriamarieblog.com LayeringLikeABoss©byVictoriaMarie-Page4
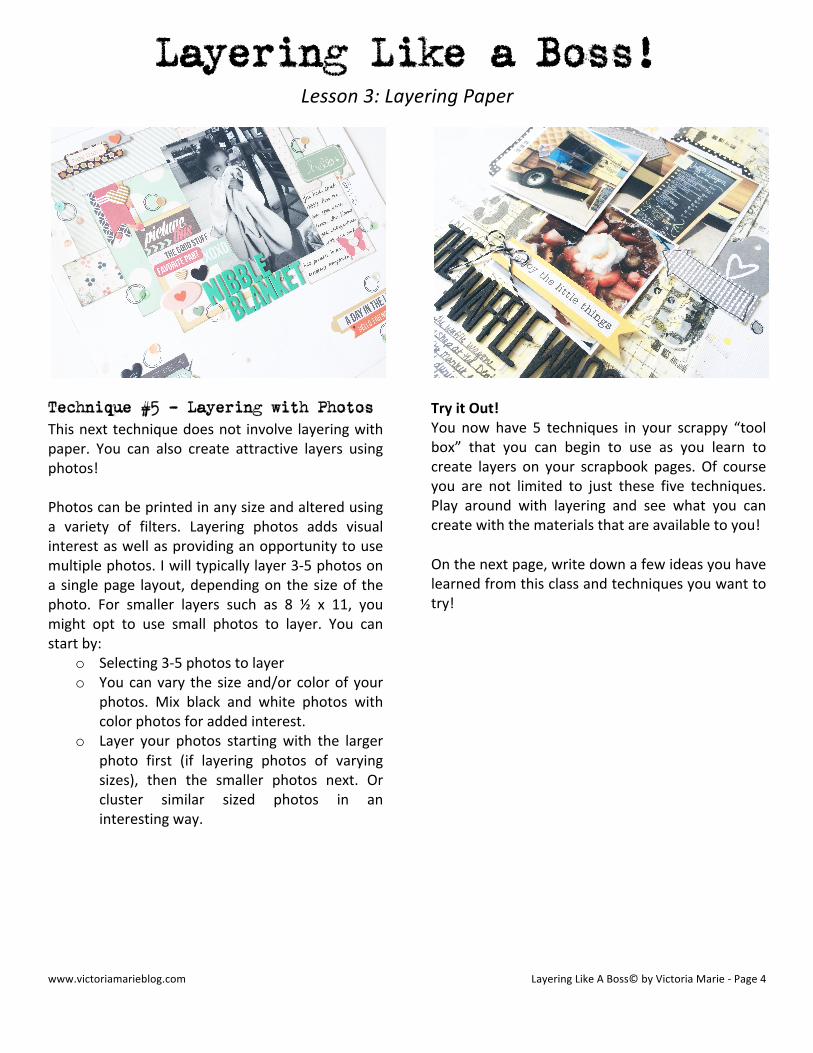
Technique #5 – Layering with Photos Thisnexttechniquedoesnot involve layeringwithpaper. You can also create attractive layers usingphotos!Photoscanbeprintedinanysizeandalteredusinga variety of filters. Layering photos adds visualinterestaswellasprovidinganopportunitytousemultiplephotos.Iwilltypicallylayer3-5photosonasinglepage layout,dependingon thesizeof thephoto. For smaller layers such as 8 ½ x 11, youmight opt to use small photos to layer. You canstartby:
o Selecting3-5photostolayero Youcanvary thesizeand/orcolorofyour
photos. Mix black and white photos withcolorphotosforaddedinterest.
o Layer your photos startingwith the largerphoto first (if layering photos of varyingsizes), then the smaller photos next. Orcluster similar sized photos in aninterestingway.
TryitOut!You now have 5 techniques in your scrappy “toolbox” that you can begin to use as you learn tocreate layers on your scrapbook pages. Of courseyou are not limited to just these five techniques.Play around with layering and see what you cancreatewiththematerialsthatareavailabletoyou!Onthenextpage,writedownafewideasyouhavelearnedfromthisclassandtechniquesyouwanttotry!
Layering Like a Boss! Lesson3:LayeringPaper
www.victoriamarieblog.com LayeringLikeABoss©byVictoriaMarie-Page5
I want to try: o __________________________________
o __________________________________
o __________________________________
o __________________________________
o __________________________________
o __________________________________
o __________________________________
o __________________________________
o __________________________________
o __________________________________
o __________________________________
o __________________________________
o __________________________________
Notes: