Embed Size (px)
Citation preview

1 | P a g e
Launch Your Virtual World Fast
Learn how to build your own virtual world with free open source software
Copyright © 2009 by Michael McAnally, Document Version 1.0 June 30, 2009
Figure 1. Screen shot of a Virtual World Island
PART I - SETTING UP THE SERVER
Back in May of 2007, I heard about a virtual world called SecondLife.com. People were saying it was really great! You could create an avatar and move through a 3D simulation space, much like a video game, but over the Internet in a client-server architecture.
If you understand everything I just said above, then maybe you’re ready to build your own virtual world. It will be moderately difficult, requiring a degree of effort and fully reading this article. So if you don’t like reading technical documentation, or have trouble following detailed instructions, stop right now. If you’re still reading, then let’s begin . . .

2 | P a g e
OPENSIMULATOR
First, Opensimulator.org is a free open source simulator application project which has the capability to create virtual worlds. It is written in the C# language which can run on a Microsoft Windows and Linux OS platform. The choice of “Operating System” to run it on is yours.
I myself have chosen to use Windows 2003 Standard Server, or Windows Vista because of some previous experience I have with these products, and will be making the assumption that you are using a windows OS in this article as well.
OpenSimulator code could be thought of as the derivative open source child of SecondLife, since its design inherits from the original 5 year development efforts, but it appears to be rapidly evolving and feature branching into unique directions.
Now, if you have a dedicated server box, or a powerful desktop (suggest using dual core AMD, or Intel CPUs), then at the time of this writing you can download a copy of a binary install executable from Opensimulator.org. “OpenSim”, as it is affectionately called in the community.
There is also the option to compile one of the C# OpenSim versions as well. That is not explained in detail here, but usually requires (downloading and installing free C# Express from Microsoft, getting a free copy of Tortoise SVN and exporting the code repository, executing the runprebuild.bat, building the opensim.sln in the C# Express IDE, [see Opensimulator.org and the Internet for more detailed information on the subject of building or “compiling” OpenSim from scratch.]) and then you will have a fresh binary build. If you do this, you can then precede with the following setup instructions from here.
However, if you download the provided binaries, all this is usually not necessary unless you wish to develop the OpenSim code.
In the OpenSim binaries, the directory structure has a number of configuration files which need to be properly configured and installed when setting up your virtual world space. One of the first configurations to decide on is “standalone” or “grid” mode.
STANDALONE
Stand alone means your simulation will be inside a home, or LAN (Local Area Network). Although it is possible to run in standalone mode over the Internet, you will need to use command line commands to create logons and manage them manually at the time of this writing. You could integrate your own login authorization system as an add-on later, but that is beyond the scope of this article, and that service is also provided by grid worlds like OSGrid.org (more on this in later articles).
3 | P a g e
GRID
Grid mode means your OpenSim installation is connected to a grid of servers (like OSGrid.org) sharing common grid services such as Assets and Login Ids, allowing the ability for other avatars to come into your virtual space by crossing region boundaries, or through teleportation. Yes, teleportation and flying are things that are possible for your avatar (a virtual world can have different rules than our physical reality, like in the movie “The Matrix”, although Kung Fu moves are not one of the features provided in OpenSim at this time!).
REGION
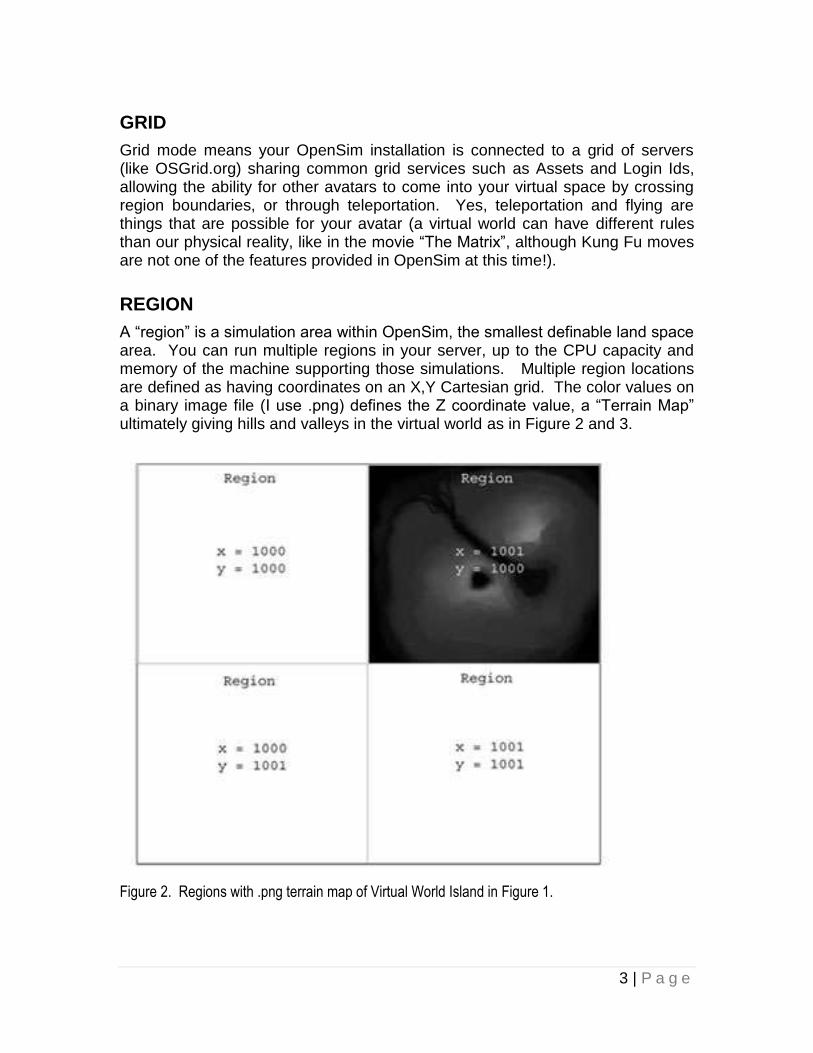
A “region” is a simulation area within OpenSim, the smallest definable land space area. You can run multiple regions in your server, up to the CPU capacity and memory of the machine supporting those simulations. Multiple region locations are defined as having coordinates on an X,Y Cartesian grid. The color values on a binary image file (I use .png) defines the Z coordinate value, a “Terrain Map” ultimately giving hills and valleys in the virtual world as in Figure 2 and 3.
Figure 2. Regions with .png terrain map of Virtual World Island in Figure 1.

4 | P a g e
Figure 3. Viewer screen shots of Virtual Island, high above and below water looking up.

5 | P a g e
DOWNLOAD, INSTALL & CONFIGURE OPENSIM BINARIES
So, now go to Opensimulator.org download and install the “Binaries” to your hard drive. Change the default install to C:\OpenSim
http://opensimulator.org/wiki/Download
Initially for this article we will begin using standalone mode and create one single default region then expand out into a larger virtual world area of multiple regions in following articles.
Standalone mode is set as a parameter inside of your OpenSim.ini file (in the \bin directory of your installation if you did a fresh compile, else in the c:\opensim\ for your binnary). Sometimes you’ll notice this file does not exist, although there may be a file named OpenSim.ini.example. If it doesn’t exist, you’ll want to rename the file to OpenSim.ini removing the “.example” extension from the name. Then open the file in an editor (suggest notepad) search for the parameter “gridmode =”. Make sure the parameter gridmode = false and save the file. See example below.
; Set this to true if you are connecting your OpenSimulator regions to a grid ; Set this to false if you are running OpenSimulator in standalone mode gridmode = false Now run the Opensim.exe application, which opens a command line window. For those using Windows Vista or 7, remember to “Run as Administrator”.

6 | P a g e
THE DEFAULT CONFIGURATION
You will want to take all the defaults, by pressing <enter> to each. This will give you the following default OpenSim user and configuration. Default Region Name: [OpenSim Test] Default Master Avatar Username (First & Last): [Test User] Default Password: [test] Default Region X: [1000] Default Region Y: [1000] Default Internal IP Address for UDP Client Connections: [0.0.0.0] Default Internal Port Address for UDP Client Connections: [9000] (communications port) Default External Host Name: [127.0.0.1] (in this case meaning local host)
You may be asked to give execution permissions and to unblock a firewall port, do so. Once setup is complete type “shutdown” and press enter to safely end the opensim.exe. You now have a default install of OpenSim.
7 | P a g e
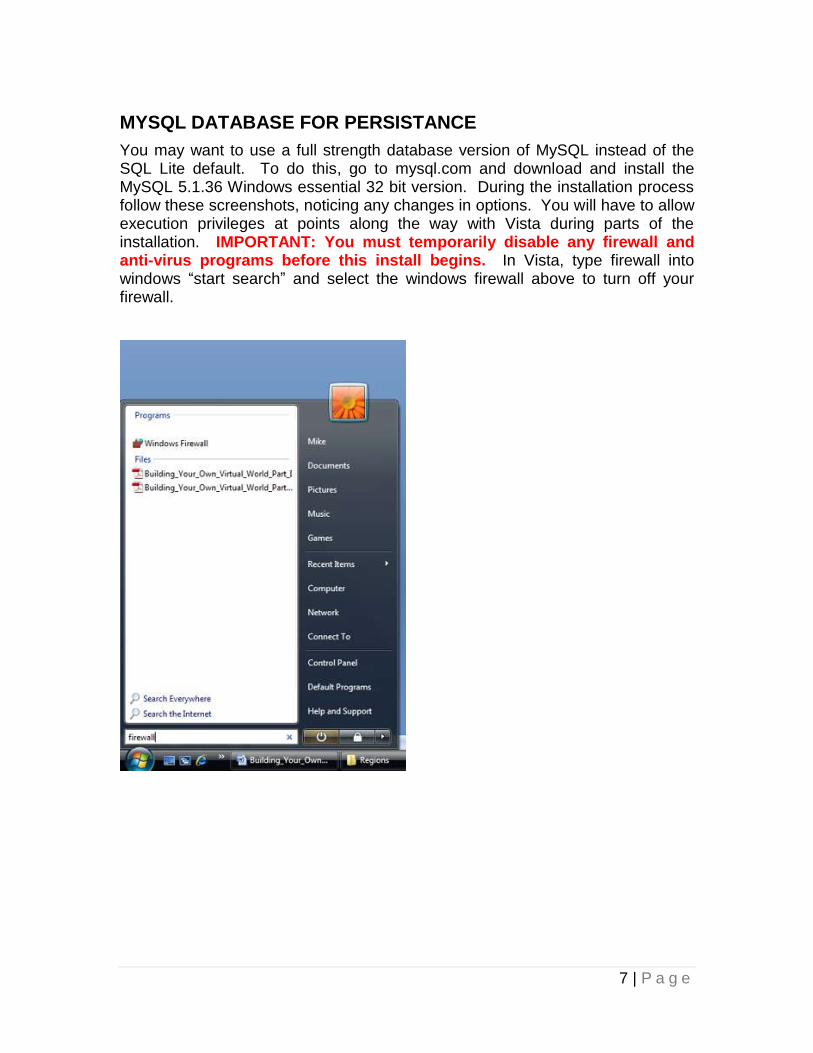
MYSQL DATABASE FOR PERSISTANCE
You may want to use a full strength database version of MySQL instead of the SQL Lite default. To do this, go to mysql.com and download and install the MySQL 5.1.36 Windows essential 32 bit version. During the installation process follow these screenshots, noticing any changes in options. You will have to allow execution privileges at points along the way with Vista during parts of the installation. IMPORTANT: You must temporarily disable any firewall and anti-virus programs before this install begins. In Vista, type firewall into windows “start search” and select the windows firewall above to turn off your firewall.

8 | P a g e
Now download and install MySQL (link below) . . .
http://dev.mysql.com/downloads/mysql/5.1.html#win32

9 | P a g e

10 | P a g e
Select Custom Setup

11 | P a g e

12 | P a g e

13 | P a g e

14 | P a g e

15 | P a g e
Select Server Machine
Select Multifunctional Database

16 | P a g e

17 | P a g e

18 | P a g e
Make sure to include bin directory in windows PATH

19 | P a g e
If you change the password, remember it. The current default root password is blank (nothing), I recommend making it “root” or something else.
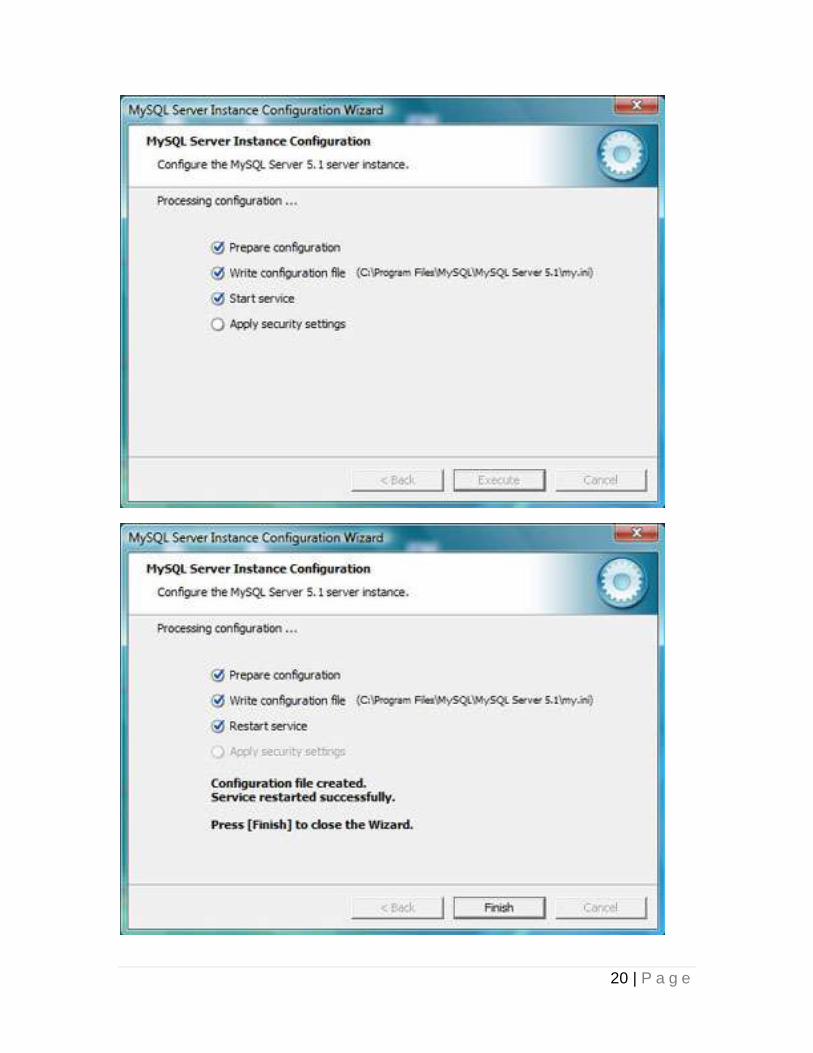
20 | P a g e

21 | P a g e
If everything went ok, remember to turn your firewall and anti-virus back on and proceed to TOAD install next step. If you didn’t disable your firewall and changed the password, then encountered certain problems in the last step, you may find this link of help . . . http://www.liferay.com/web/guest/community/forums/-/message_boards/message/3130292;jsessionid=BF3E00CC4509A2A948B67925A34EEC02
22 | P a g e
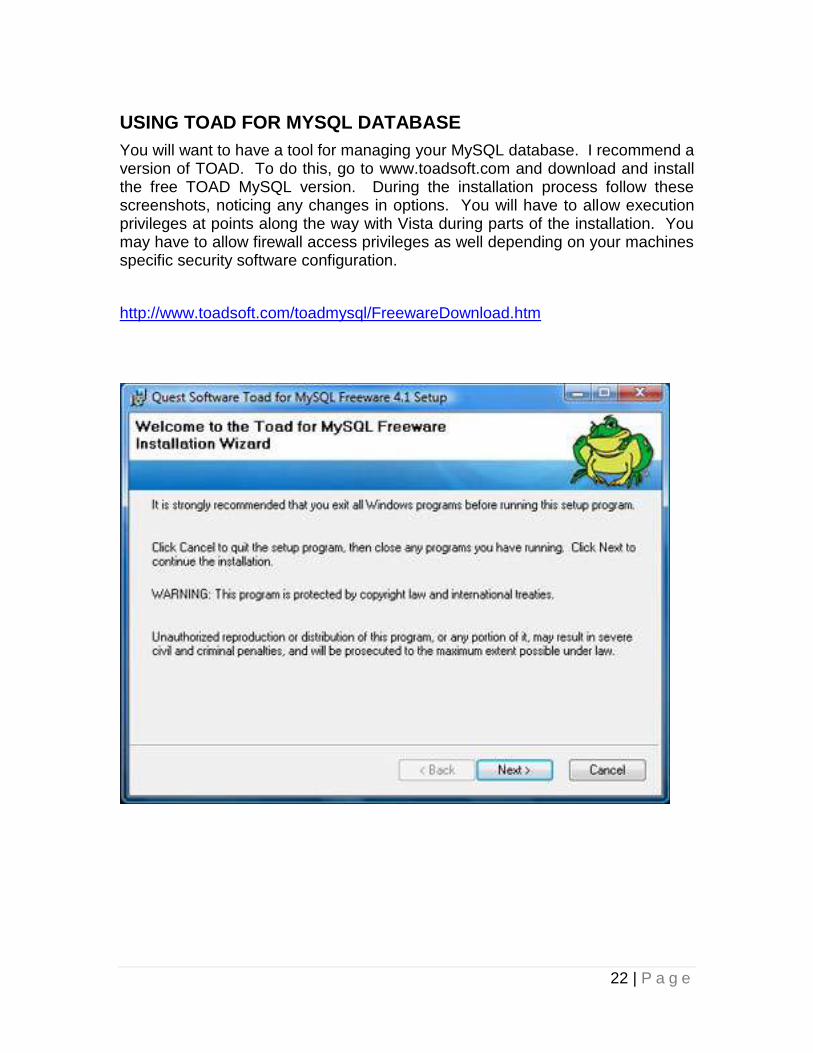
USING TOAD FOR MYSQL DATABASE
You will want to have a tool for managing your MySQL database. I recommend a version of TOAD. To do this, go to www.toadsoft.com and download and install the free TOAD MySQL version. During the installation process follow these screenshots, noticing any changes in options. You will have to allow execution privileges at points along the way with Vista during parts of the installation. You may have to allow firewall access privileges as well depending on your machines specific security software configuration.
http://www.toadsoft.com/toadmysql/FreewareDownload.htm

23 | P a g e

24 | P a g e

25 | P a g e
Add .sql file extension here

26 | P a g e
27 | P a g e
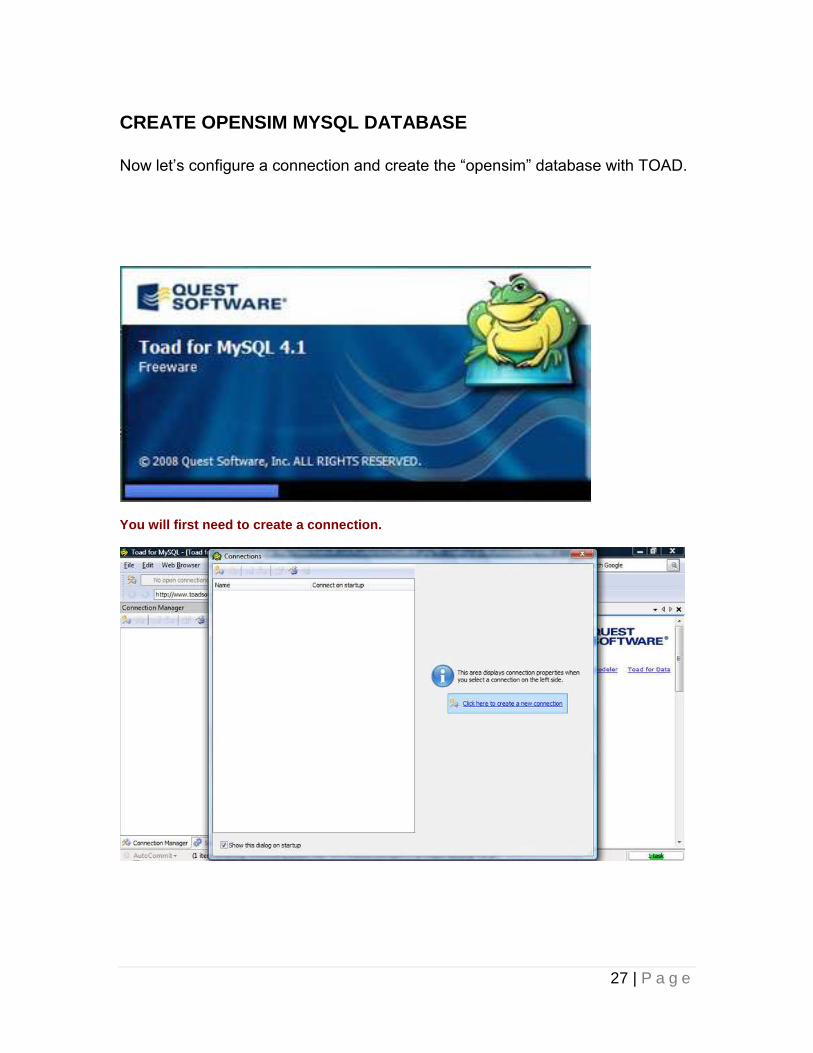
CREATE OPENSIM MYSQL DATABASE
Now let’s configure a connection and create the “opensim” database with TOAD.
You will first need to create a connection.
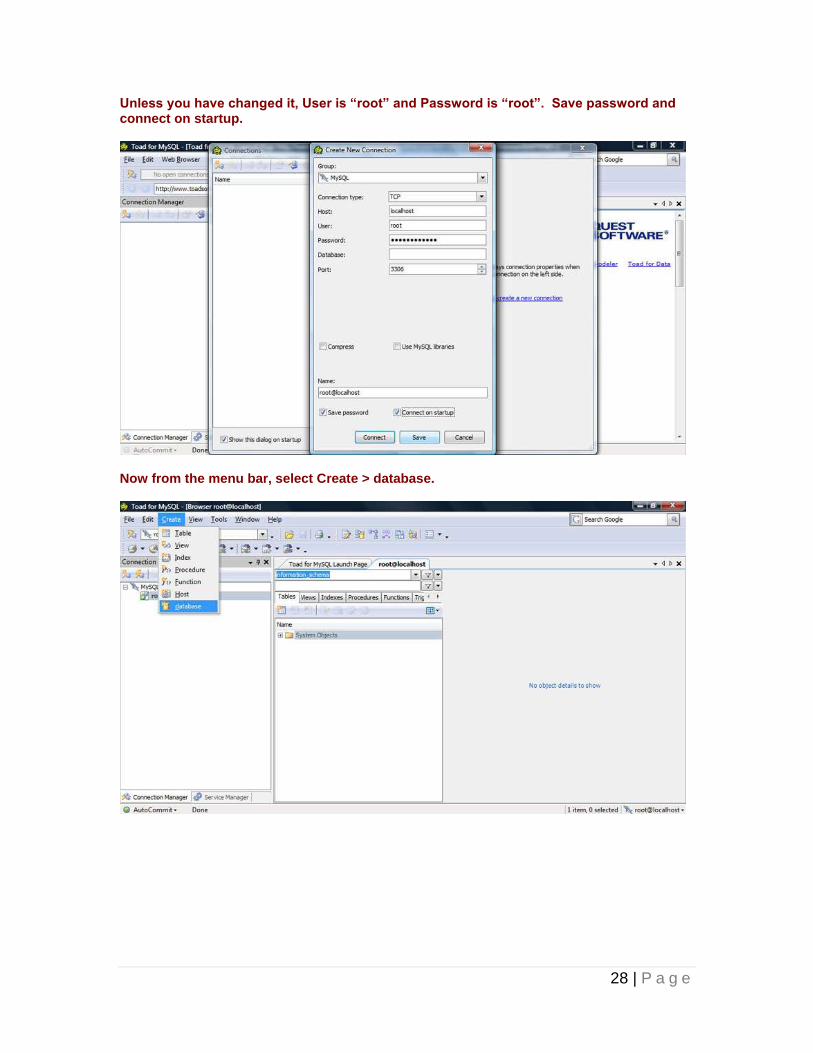
28 | P a g e
Unless you have changed it, User is “root” and Password is “root”. Save password and connect on startup.
Now from the menu bar, select Create > database.

29 | P a g e
Call the name of the database “opensim”.
You can select the new database in the object or database explorer, and notice no tables are present. That will change later when we restart opensim.exe and the tables are created.
30 | P a g e
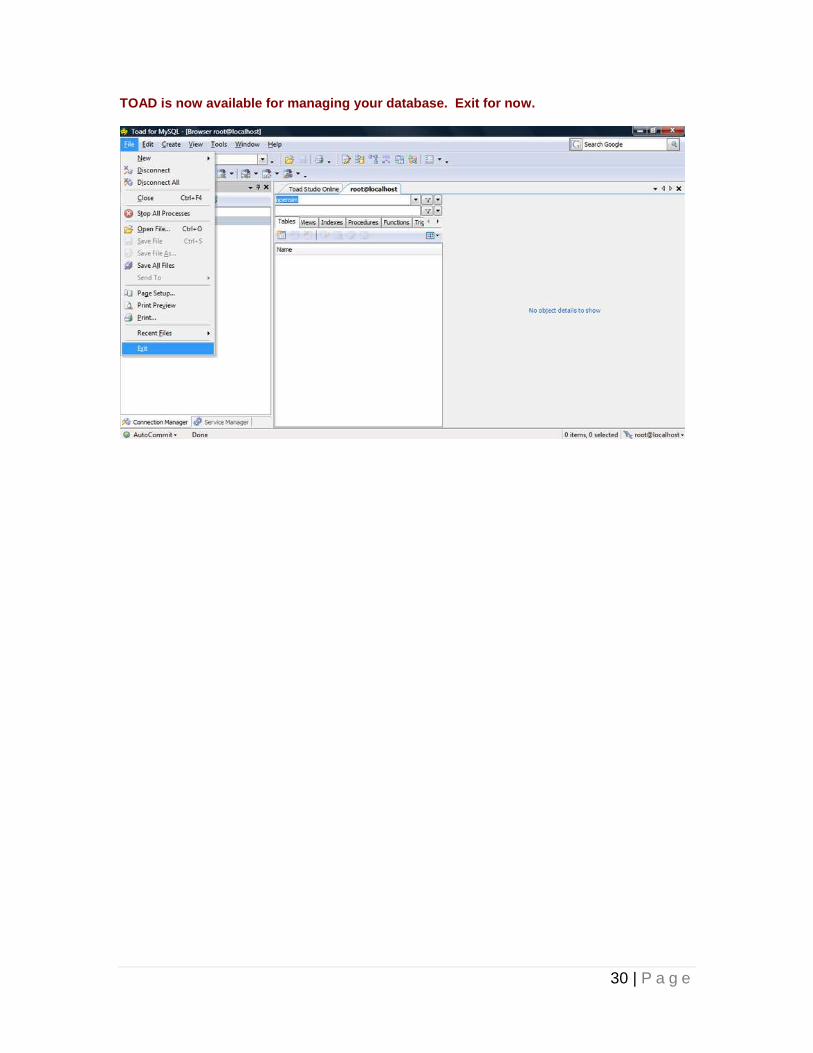
TOAD is now available for managing your database. Exit for now.

31 | P a g e
CONFIGURING THE OPENSIM.INI FILE
Now let’s reconfigure the opensim.ini file to use the MySQL database we have setup in the previous steps. Create a backup file of this opensim.ini before we begin modifying it in case we need to restart fresh again. The steps that follow are a little tricky. Please note that because OpenSim is rapidly evolving the parameters within the opensim.ini file are changing as well, depending on which version of OpenSim you are using. The settings may be different or located in different places. Although reading comment notes in the file may help. The “;” (semicolon) is used to denote the beginning of a commented line. Since we are using stand alone mode, we will configure the prim (primitive objects like squares and spheres) and region storage areas first. Find the ##STORAGE area. Notice that the default is sqlite set for storage_plugin and storage_connection_string. Comment out the sqlite .dll file and connection string URI by putting a “;” in the front of each line, making it a comment. Now “un-comment” the other MySQL storage_plugin and storage_connection_string lines by taking out the “;”. You will now need to modify the following parameters on the storage_connection_string Database=, UserID=, and Password= parameters to the values you setup in the earlier steps while installing MySQL and creating the database. These must be correct or an error will occur and OpenSim will be unable to connect to the MySQL database. The information below is only an example and may look different in your opensim.ini file. Be careful not to delete any other semicolons or quotes within the lines. ; ## ; ## STORAGE ; ## ; *** Prim Storage - only leave one storage_plugin uncommented *** ; --- Null stores nothing - effectively disabling persistence: ;storage_plugin = "OpenSim.Data.Null.dll" ; --- To use sqlite as region storage: ;storage_plugin = "OpenSim.Data.SQLite.dll" ;storage_connection_string="URI=file:OpenSim.db,version=3"; ; --- To use MySQL storage, supply your own connectionstring (this is only an example): ; note that the supplied account needs create privilegies if you want it to auto-create needed tables. storage_plugin="OpenSim.Data.MySQL.dll" storage_connection_string="Data Source=localhost;Database=opensim;User ID=root;Password=root;";

32 | P a g e
Now in the same fashion in the opensim.ini file find the “[StandAlone]” section and modify the asset_plugin, asset_source, inventory_plugin, inventory_source, userDatabase_plugin, and user_source. These lines control the database connections for storing Assets, Inventory and User Logins in your virtual world. Comment out each of the SQLite.dll and un-comment the MySQL.dll’s. Do the same for the source connection strings and replace Database=, UserID=, and Password= parameters with the correct values as you did above. Save the opensim.ini file and execute the opensim.exe. If everything is good it will startup and create tables in the MySQL database. You can view these tables later in TOAD. It’s interesting to see the default data values in the database. [StandAlone] accounts_authenticate = true welcome_message = "Welcome to Rocket Virtual" ; Asset database provider ;asset_plugin = "OpenSim.Data.SQLite.dll" asset_plugin = "OpenSim.Data.MySQL.dll" ; for mysql ; asset_plugin = "OpenSim.Data.NHibernate.dll" ; for nhibernate ; the Asset DB source. This only works for sqlite, mysql, and nhibernate for now ; Asset Source SQLite example ; asset_source = "URI=file:Asset.db,version=3" ; Asset Source NHibernate example (DIALECT;DRIVER;CONNECTSTRING) ; asset_source = "SQLiteDialect;SqliteClientDriver;URI=file:Asset.db,version=3" ; Asset Source MySQL example asset_source = "Data Source=localhost;Database=opensim;UserID=root;Password=root;" ; Inventory database provider ; inventory_plugin = "OpenSim.Data.SQLite.dll" inventory_plugin = "OpenSim.Data.MySQL.dll" ; inventory_plugin = "OpenSim.Data.NHibernate.dll" ; for nhibernate ; Inventory Source NHibernate example (DIALECT;DRIVER;CONNECTSTRING) ; inventory_source = "SQLiteDialect;SqliteClientDriver;URI=file:Inventory.db,version=3" ; Inventory Source MySQL example inventory_source = "Data Source=localhost;Database=opensim;UserID=root;Password=root;" ; User Data Database provider ; ; Multiple providers can be specified by separating them with commas (whitespace is unimportant) ; If multiple providers are specified then if a profile is requested, each is queried until one ; provides a valid profile, or until all providers have been queried.

33 | P a g e
; Unfortunately the order of querying is currently undefined (it may not be the order in which ; providers are specified here). This needs to be fixed ; ;userDatabase_plugin = "OpenSim.Data.SQLite.dll" userDatabase_plugin = "OpenSim.Data.MySQL.dll" ; userDatabase_plugin = "OpenSim.Data.NHibernate.dll" ; for nhibernate ; User Source NHibernate Example (DIALECT;DRIVER;CONNECTSTRING) ; user_source = "SQLiteDialect;SqliteClientDriver;URI=file:User.db,version=3" ; User Source MySQL example user_source = "Data Source=localhost;Database=opensim;UserID=root;Password=root;"
If there is an error and the opensim.exe aborts (ends), then something is usually wrong with the opensim.ini configuration file. Double check all your changes and retry. If you still can’t find the error(s), delete and rename a new opensim.ini from the backup file I asked you to create at the beginning this section and retry. If you were successful, congratulations! You have a MySQL standalone version of OpenSim server and you are ready to move on to the next article. Good job! Copyright © 2009 by Michael McAnally, RocketVirtual.com