Embed Size (px)
Citation preview

Lab manual for Peeking into Computer Science 2nd Ed by Jalal Kawash. http://pages.cpsc.ucalgary.ca/~kawash/peeking.html
Lab Manual
Access Module

Lab manual for Peeking into Computer Science 2nd Ed by Jalal Kawash. http://pages.cpsc.ucalgary.ca/~kawash/peeking.html
Lab 4: Make-Table, Union, and Append Queries
Importing Excel data into Access
Sometimes you start out with a small table in Excel and before you know it your data gets so large; it
becomes easier and more manageable to turn it into a database. This is why it can be useful to import
Excel sheets into Access.
We will be importing the file WebsiteRankings.xslx into a new Database file. Open MS Access and create
a new database. Make sure that you have downloaded the WebsiteRankings file. In the External Data
tab, click the Excel button in the Import group.
Browse to where your Excel file is then click OK.
Click Next. This dialog box is useful when you have more than one sheet in your Excel file.

Lab manual for Peeking into Computer Science 2nd Ed by Jalal Kawash. http://pages.cpsc.ucalgary.ca/~kawash/peeking.html
Select the First Row Contains Column Headings checkbox then click Next. This will set our column
headings as field names in the table that will be created.
The next box allows you to set data types of fields. Select the Student field from the table and change its
data type to Integer. Click Next.

Lab manual for Peeking into Computer Science 2nd Ed by Jalal Kawash. http://pages.cpsc.ucalgary.ca/~kawash/peeking.html
The next screen allows us to create a new primary key. The choices are: Let Access add primary key, I
Choose my own primary key, or No primary key. In this case, we will let Access create a new field for the
primary key. Click Next.
Name your table then click on the Finish button.

Lab manual for Peeking into Computer Science 2nd Ed by Jalal Kawash. http://pages.cpsc.ucalgary.ca/~kawash/peeking.html
This is what the Data table looks like.
Make-table queries
Make table queries obtain data from one or more tables or queries, and then create a new table out of
this data.
Let us create a Class table for the different semesters in our data. The first step in creating a make-table
query is making a Select query with the data that you want in your new table.
Create a new query and add the Data table to the design view. Add the Class field to the Query.

Lab manual for Peeking into Computer Science 2nd Ed by Jalal Kawash. http://pages.cpsc.ucalgary.ca/~kawash/peeking.html
The advantage of creating a Select query first is that you can test it to see if the correct data is going to
be inserted into the new table. Run the query to see the result.
As you can see, this is not the data we want in our Class table.
The easiest way we can get the date we want is by using grouping. Go back to the design view of the
query and group by the Class field.
Lab manual for Peeking into Computer Science 2nd Ed by Jalal Kawash. http://pages.cpsc.ucalgary.ca/~kawash/peeking.html
Now the results make sense.
After you are comfortable with the results of your Select query, go back to the Design view and change it
into a Make-table query. You do this by selecting the Make Table button in the Query Type group.

Lab manual for Peeking into Computer Science 2nd Ed by Jalal Kawash. http://pages.cpsc.ucalgary.ca/~kawash/peeking.html
Enter the table name then click OK.
Now to make the table, click on the Run button in the Results group.
Click Yes on the warning message.
This is what the new table looks like.

Lab manual for Peeking into Computer Science 2nd Ed by Jalal Kawash. http://pages.cpsc.ucalgary.ca/~kawash/peeking.html
Exercise 1
Set the primary key of the Class table as the Class field.
Exercise 2
Create 5 select queries – one for each website column in the Data table. The query result should show
the ID field from the Data table, a new field named “WebsiteRank” which contains either Website1 or
Website2 etc. This will be fixed for each query. The query should also contain the Student ID, as well as
the website name (from that column). To make things clear, this should be the result of the 1st query:

Lab manual for Peeking into Computer Science 2nd Ed by Jalal Kawash. http://pages.cpsc.ucalgary.ca/~kawash/peeking.html
Union queries
Union queries allow you to combine multiple queries into the result of one query. Please note that the
Select queries you would like to combine must have the same number of fields in the result. These fields
must be in the same order and have matching data types.
Let us create a union query to combine the 5 queries you created for the website rankings. Union
queries must be done in SQL.
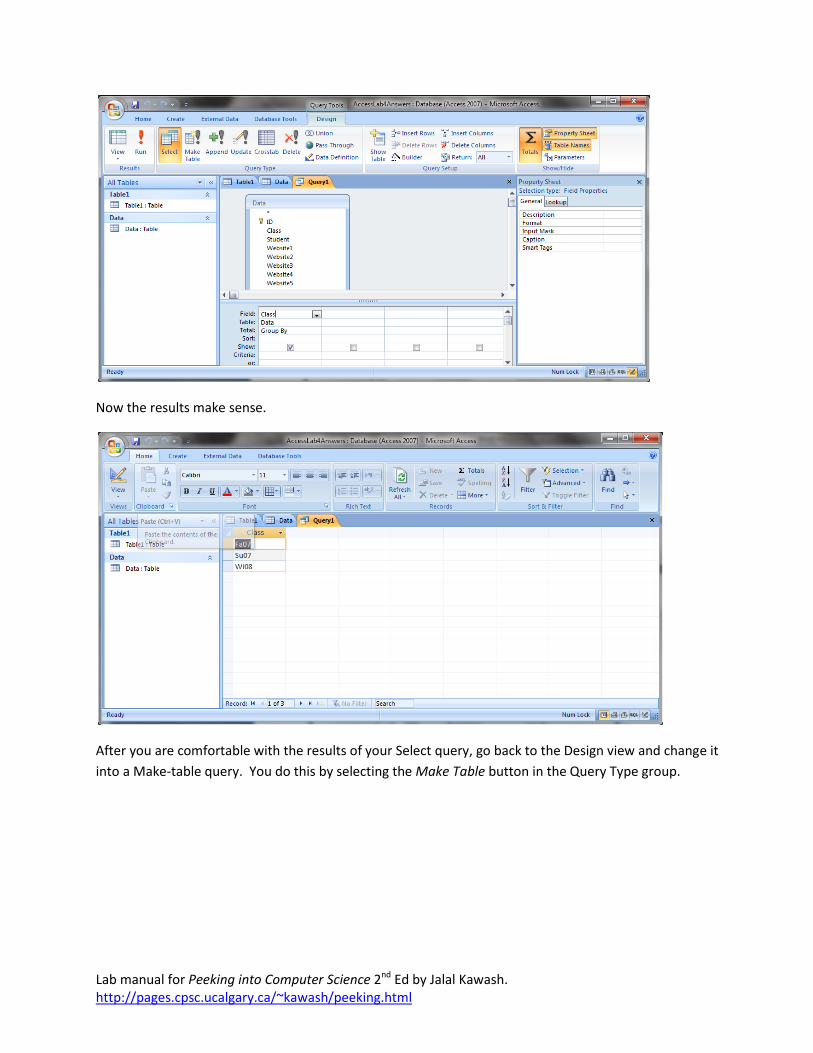
Create a new query and do not add any tables to the design view.
Under the Query Type group, click on the Union button.
Lab manual for Peeking into Computer Science 2nd Ed by Jalal Kawash. http://pages.cpsc.ucalgary.ca/~kawash/peeking.html
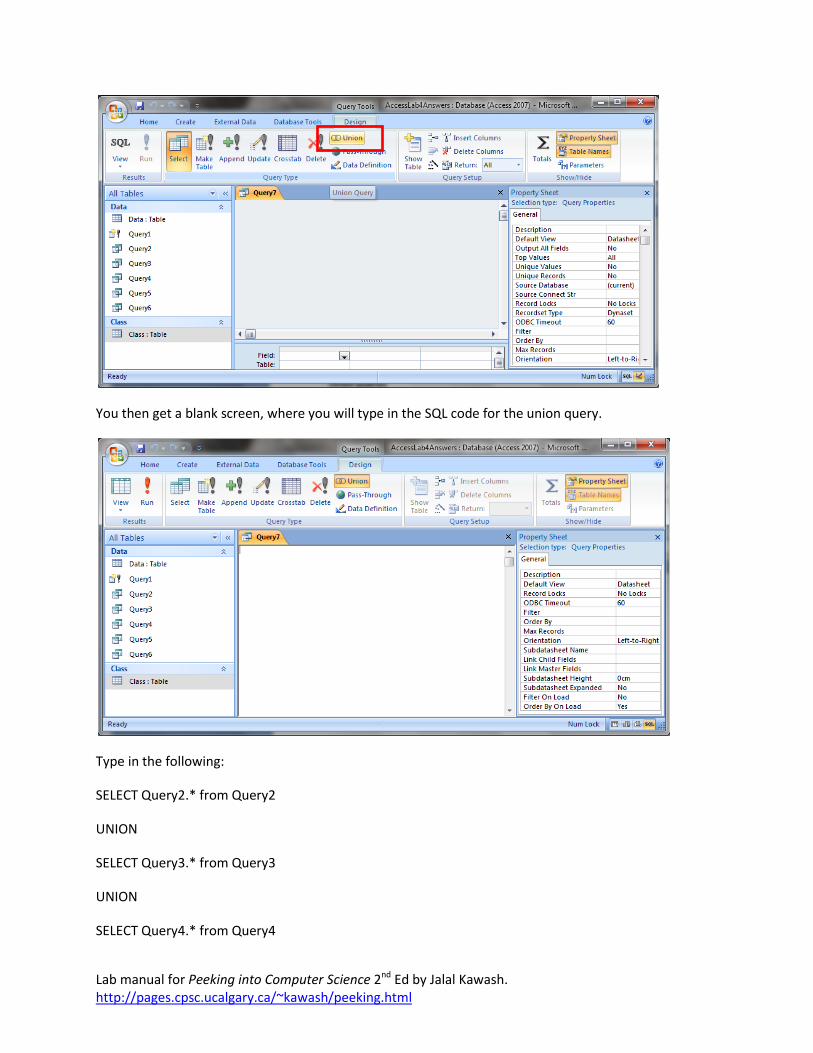
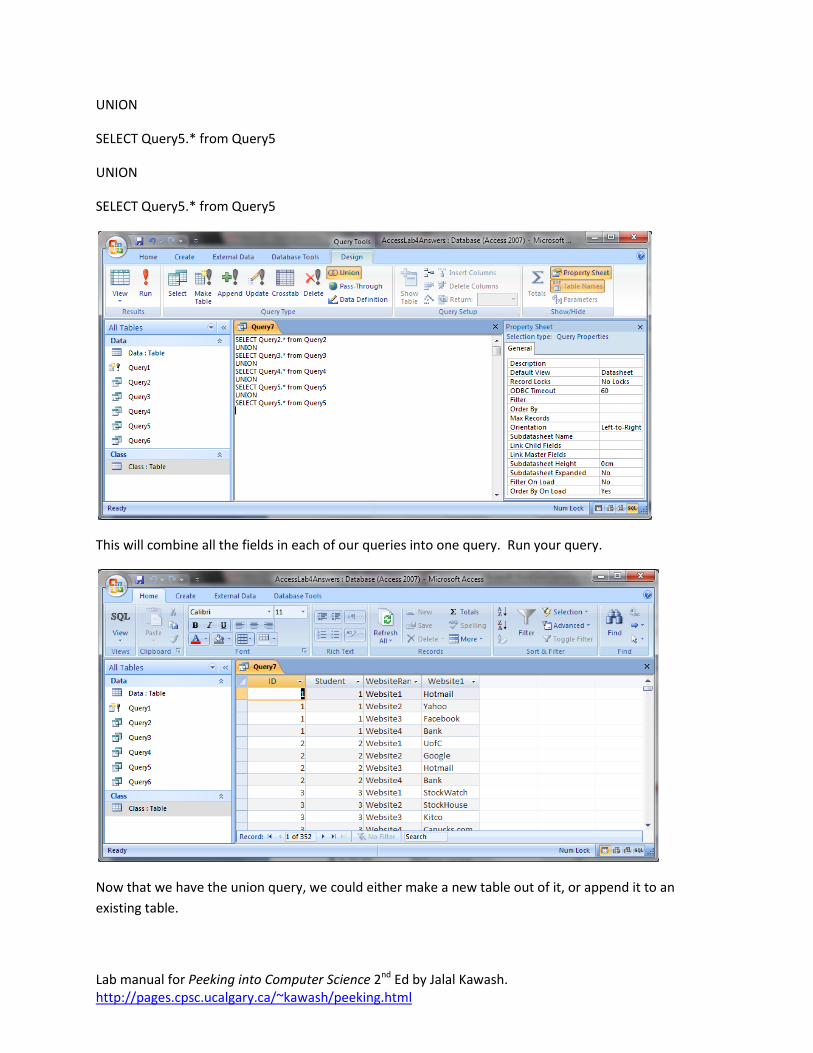
You then get a blank screen, where you will type in the SQL code for the union query.
Type in the following:
SELECT Query2.* from Query2
UNION
SELECT Query3.* from Query3
UNION
SELECT Query4.* from Query4
Lab manual for Peeking into Computer Science 2nd Ed by Jalal Kawash. http://pages.cpsc.ucalgary.ca/~kawash/peeking.html
UNION
SELECT Query5.* from Query5
UNION
SELECT Query5.* from Query5
This will combine all the fields in each of our queries into one query. Run your query.
Now that we have the union query, we could either make a new table out of it, or append it to an
existing table.

Lab manual for Peeking into Computer Science 2nd Ed by Jalal Kawash. http://pages.cpsc.ucalgary.ca/~kawash/peeking.html
Exercise 3
Create a new blank table named WebsiteRankings. The table should have the following fields:
WebsiteRankID (Autonumber), ID (Number), Student (Number), WebsiteRank (Text), WebsiteName
(Text).
Append queries
When you already have an existing table, you can add records to it using an Append query. We are going
to use an append query to add the union query we created into the WebsiteRankings table.
Create a new query and add the union query into the design view. Click the Append button under the
Query Type group.
Select the table WebiteRankings from the menu then click on the OK button.
Now all we need to do is match the union query fields to the table fields.

Lab manual for Peeking into Computer Science 2nd Ed by Jalal Kawash. http://pages.cpsc.ucalgary.ca/~kawash/peeking.html
Run the query and the fields will get appended to the WebsiteRankings table.