Embed Size (px)
Citation preview
VMware White Paper VMware Lab Manager Deployment Guide for BEA Software
VMware® Lab Manager Deployment Guide for BEA Software
VMware White Paper VMware Lab Manager Deployment Guide for BEA Software
VMware® Lab Manager Deployment Guide for BEA Software
VMware White Paper VMware Lab Manager Deployment Guide for BEA Software
Table of Contents 1. Introduction..................................................................................................................................................................1
1.1. What is VMware Lab Manager?.............................................................................................................................. 1 1.2. Lab Manager Usage Scenarios ............................................................................................................................... 2
2. The Architecture of a Lab Manager Setup.................................................................................................3 3. Outline Workflow for Use of Lab Manager ................................................................................................4
3.1. Definitions........................................................................................................................................................................... 4 3.2. A Typical Lab Manager Workflow......................................................................................................................... 5
3.2.1. Detailed Steps in the Workflow........................................................................................................................................... 6 4. Installing Lab Manager...........................................................................................................................................7
4.1. Installing the Lab Manager Server........................................................................................................................ 7 4.1.1. Configuring IIS and ASP.NET on the Lab Manager Server .................................................................................. 7 4.1.2. Installing the Lab Manager Server Software .............................................................................................................11 4.1.3. Installing the Managed Server Agent on an ESX Server Host ........................................................................15 4.1.4. Configuring the Lab Manager Server System ..........................................................................................................17
4.2. Checking the Installation .........................................................................................................................................23 5. Usage Scenarios for Lab Manager................................................................................................................ 24
5.1. Creating and Using a Three-tier Configuration..........................................................................................24 5.1.1. Importing a Template .............................................................................................................................................................25 5.1.2. Installing LM Tools into a Template’s Operating System..................................................................................29 5.1.3. Publishing the Template .......................................................................................................................................................33 5.1.4. Cloning a Template from the Template Library......................................................................................................35 5.1.5. Creating a Configuration.......................................................................................................................................................36 5.1.6. Deploying a Configuration...................................................................................................................................................39 5.1.7. Customizing Templates at Configuration Deployment Time........................................................................42 5.1.8. Installing BEA Software into Machines in Configurations.................................................................................43 5.1.9. Adding a Template to an Existing Configuration ..................................................................................................44 5.1.10. Capturing a Configuration into the Library.........................................................................................................45
5.2. Checking Out a Configuration for Use by a Separate User.................................................................49 5.2.1. Checking Out a Configuration...........................................................................................................................................49 5.2.2. Creating a LiveLink to a Configuration .........................................................................................................................52 5.2.3. Receiving and Acting on a LiveLink................................................................................................................................54 5.2.4. Testing a BEA-based Application .....................................................................................................................................59
5.3. Cloning a Template in a Configuration to Create a Cluster ...............................................................61 5.3.1. Creating a Template from a Machine within a Configuration .......................................................................61 5.3.2 Adding a Template to the Original Configuration ................................................................................................70 5.3.2. Using BEA WebLogic Clusters within a Lab Manager Configuration ........................................................73
6. Lab Manager Housekeeping Features ...................................................................................................... 76 6.1. Using the Activity Log ...............................................................................................................................................76 6.2. Managing Server Pools, Network Pools, and Object Lifetimes.........................................................79
6.2.1. Managing Server and Network Pools............................................................................................................................79 6.2.2. Managing Object Lifetime....................................................................................................................................................83
Appendix A – Best Practices........................................................................................................................................ 87
VMware White Paper VMware Lab Manager Deployment Guide for BEA Software
1. Introduction This deployment guide is intended to be used by people who are configuring or using the VMware® Lab Manager solution to help develop, test and deploy applications and systems that make use of BEA software products. This guide does not replace the Lab Manager product documentation, such as the VMware Lab Manager Installation Guide or the Lab Manager User Guide. Instead it is intended to complement those documents with more guidelines for use of the Lab Manager product in a BEA environment. Both the Lab Manager Installation Guide and User Guide should be read by the appropriate members of the Lab Manager installation and user teams. This document provides a workflow for working with a set of BEA products, in particular BEA WebLogic Server, in the Lab Manager environment. This guide also presents Lab Manager usage scenarios that will be helpful to those who are new to the Lab Manager product. We use BEA WebLogic Server as an example product from the wide BEA product set here for most of our description, but Lab Manager is used with other BEA products such as the AquaLogic family as well.
1.1. What is VMware Lab Manager? VMware Lab Manager is a lab automation and rapid provisioning tool for VMware® Infrastructure environments. It automates the process of provisioning collections of one or more virtual machines (called “configurations”) and enables the lifecycle management of those collections. It simplifies and automates the tasks involved in development and test within the many tiers in a distributed application. Lab Manager can be set up by the IT support engineering team and subsequently used by the developers themselves to provision the configurations they need, with little intervention required from IT engineering. This self-service environment can save a lot of time and effort for everyone in both the development and the IT support organizations. Many modern software systems are composed of multiple tiers or layers. One well-known example of such a software system is the classic three-tier J2EE application, made up of a database server tier, an application server tier, and a presentation tier. In the non-virtualized world these tiers are located on separate machines for performance and scalability reasons. Correspondingly, in the virtual world they can be located on separate virtual machines. Lab Manager allows you to construct complex configurations of several inter-connected virtual machines and treat them as a unit. This configuration can be checked out from the Lab Manager library, deployed on virtual servers, tested and then later undeployed if need be. The lifecycle of these connected virtual machines can be controlled as one unit. When the developer or testing engineer needs to use such a configuration (and to get hold of it in a hurry), Lab Manager can re-create that multiple-machine configuration within minutes and deploy it on a pre-installed group of servers that make up the virtual infrastructure platform (a pool of VMware® ESX Server host machines). This capability reduces the time spent on provisioning by either the IT technical support person (who would have had to find and set up the physical machines) or the development person (who would have had to check that the configuration was exactly what he/she wanted) and therefore saves time, costs and effort. In fact, the Lab Manager product can be used in any environment that requires rapid provisioning of sets of virtual machines, such as a demonstration or classroom training environment, in addition to development and test.
1

VMware White Paper VMware Lab Manager Deployment Guide for BEA Software
1.2. Lab Manager Usage Scenarios Several organizational roles will use the Lab Manager implementation, both within the software development organization and outside of it. These roles depend on the adoption phase that the team is in with respect to Lab Manager, from beginner to advanced user. Any number of roles may be held by one person, of course. The roles that will participate in using Lab Manager include the following: 1. The application developer who needs multiple tiers in an application development project. This person is also responsible for fixing bugs in the application. 2. The application unit/functional testing engineer. This person is likely to be the original application developer in many organizations, who may be using an automated test tool to find bugs in the application. 3. The systems test/QA engineer 4. The configuration management/release management engineer Besides the development and testing staff, other roles in the organization that can use the Lab Manager product are: 1. The IT technical support team (sometimes called “engineering services” or “technical support
services”) 2. The tool acquisition and integration team To help understand how Lab Manager works, this section looks at three usage scenarios that include these roles and explores how each role uses the product in more detail: 1. Traditional Provisioning The developer makes a provisioning request to the IT technical support team, which supplies him/her with the computing infrastructure that he/she needs. Subsequent development of new functionality on that configuration triggers a release of the entire setup to systems testing and QA engineers. When they find a problem, that finding is reported to the developer so that the problem can be fixed. When that fix is complete, the resulting configuration is captured to the Lab Manager library.
2. Developer and Tester-based Provisioning The developer carries out his/her own provisioning step using the Lab Manager browser-based user interface. The developer then deploys that configuration onto a pool of managed servers (ESX Server host machines with a Lab Manager agent installed). As long as the server pool has sufficient capacity and networking capability, the developer need not be concerned with which physical servers are used for his/her deployment. IT Technical support monitors the load on the servers used to run the virtual machines and sets quotas for the developers’ use of the resources. IT technical support maintains a central library of templates and configurations for use by the team of developers. This library relieves the IT technical support team of the virtual machine and configuration provisioning task. 3. Integrated tool environment The testing and QA engineer makes use of test tools that are integrated with the Lab Manager product through its API. The engineer creates a plan for a series of tests and the appropriate configurations are checked out from the Lab Manager library and deployed onto managed servers where they are tested. Once testing is completed, any updates that were made to the virtual machines during the testing phase may be stored back into the Lab Manager library as new versions of the configuration.
2
VMware White Paper VMware Lab Manager Deployment Guide for BEA Software
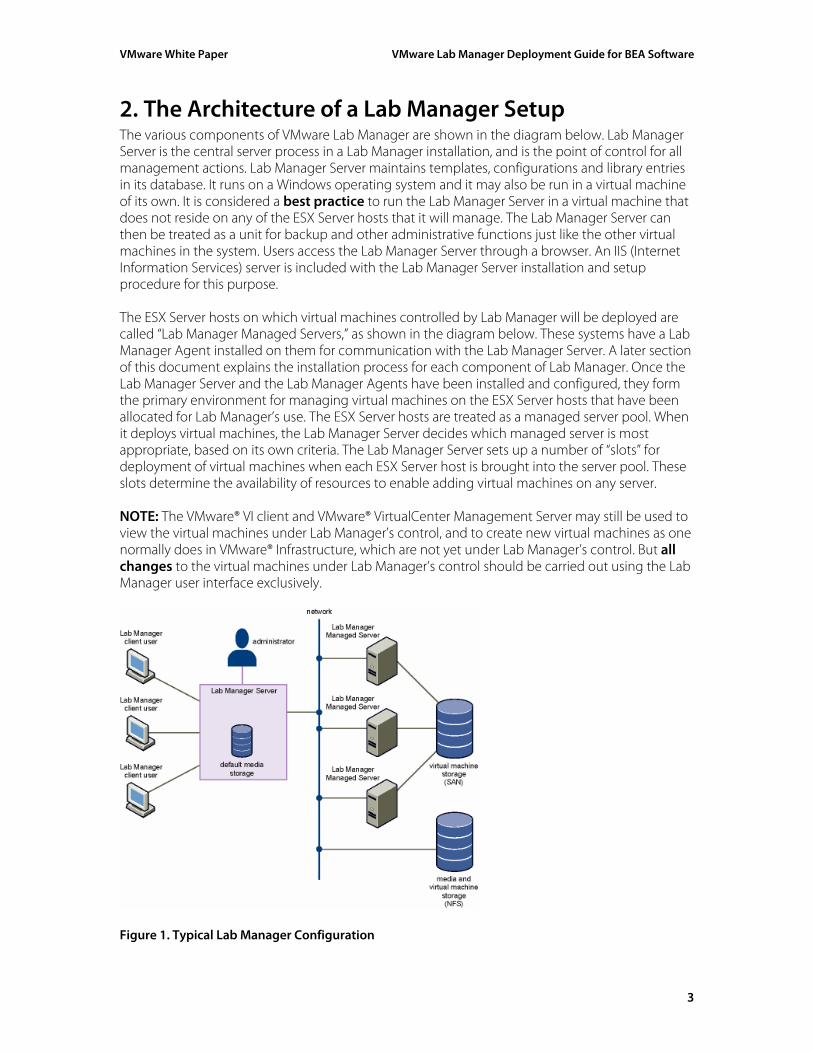
2. The Architecture of a Lab Manager Setup The various components of VMware Lab Manager are shown in the diagram below. Lab Manager Server is the central server process in a Lab Manager installation, and is the point of control for all management actions. Lab Manager Server maintains templates, configurations and library entries in its database. It runs on a Windows operating system and it may also be run in a virtual machine of its own. It is considered a best practice to run the Lab Manager Server in a virtual machine that does not reside on any of the ESX Server hosts that it will manage. The Lab Manager Server can then be treated as a unit for backup and other administrative functions just like the other virtual machines in the system. Users access the Lab Manager Server through a browser. An IIS (Internet Information Services) server is included with the Lab Manager Server installation and setup procedure for this purpose. The ESX Server hosts on which virtual machines controlled by Lab Manager will be deployed are called “Lab Manager Managed Servers,” as shown in the diagram below. These systems have a Lab Manager Agent installed on them for communication with the Lab Manager Server. A later section of this document explains the installation process for each component of Lab Manager. Once the Lab Manager Server and the Lab Manager Agents have been installed and configured, they form the primary environment for managing virtual machines on the ESX Server hosts that have been allocated for Lab Manager’s use. The ESX Server hosts are treated as a managed server pool. When it deploys virtual machines, the Lab Manager Server decides which managed server is most appropriate, based on its own criteria. The Lab Manager Server sets up a number of “slots” for deployment of virtual machines when each ESX Server host is brought into the server pool. These slots determine the availability of resources to enable adding virtual machines on any server. NOTE: The VMware® VI client and VMware® VirtualCenter Management Server may still be used to view the virtual machines under Lab Manager’s control, and to create new virtual machines as one normally does in VMware® Infrastructure, which are not yet under Lab Manager’s control. But all changes to the virtual machines under Lab Manager’s control should be carried out using the Lab Manager user interface exclusively.
Figure 1. Typical Lab Manager Configuration
3
VMware White Paper VMware Lab Manager Deployment Guide for BEA Software
3. Outline Workflow for Use of Lab Manager This section defines the main concepts in the Lab Manager product and discusses them in the context of a typical workflow. Users who are unfamiliar with navigating through the user interface and using the various components of the product in a recognized order will find this section very helpful.
3.1. Definitions Configuration: A group of virtual machines that together represent an application. For example, in a three-tiered application you may have a virtual machine for each tier, such as a database server, an application server, and a browser client. Template: A single baseline virtual machine used to create a new configuration. Templates usually contain the base operating system, any operating system patches and very little other software. You can customize a template when it is added to a configuration within Lab Manager and that configuration is deployed onto managed servers. Customization may include changes to its host name, IP address, SID and other values. These customizations are handled by the VMware® Lab Manager Tools (LM Tools) package, which is installed in the guest operating system of the template. A “template” as used in Lab Manager refers to a base virtual machine that may be used to create configurations, or that may be used to clone new templates from it within the Lab Manager console. The Lab Manager library can store a large collection of templates. These templates are described as being in a published and deployed state (or other combinations of the states below) at any one time. The types of state attributes that can apply to a template in the template library are as follows: Published: the template can be used to build configurations Unpublished: the template can not be used in building configurations Deployed: the template/virtual machine is now executing on a managed server. A deployed template is referred to as a “machine” Undeployed: the template or virtual machine is not currently running on a managed server A template is first deployed so that it can be tested as one unit, independently of any configuration that it may be used in. This initial deployment is to make sure that the operating system in that template is configured correctly, for example. The template must be undeployed in order for it to be published and used in configurations. Workspace: the area within Lab Manager where published templates are brought together to create configurations. Library: a storage place for holding configurations. Once a configuration is captured to the configuration Library in Lab Manager, its constituent virtual machines are not changed again. The full configuration may be deleted from the library, but it may not be otherwise changed. The collection of templates that is managed by Lab Manager is also sometimes referred to as the “Template Library,” and it is separate from the configuration library.
4
VMware White Paper VMware Lab Manager Deployment Guide for BEA Software
3.2. A Typical Lab Manager Workflow This workflow description helps the new Lab Manager user navigate through the various capabilities that are available in the environment. It is not the only workflow for use of Lab Manager, but it is a best practice commonly followed in organizations that use the tool. 1. All Lab Manager virtual machines (now called “templates”) begin their lives in the Lab Manager template library. They enter the template library by one of two methods:
(a) Importing an existing virtual machine from outside of Lab Manager control (if it was created earlier using the VMware VI Client and VirtualCenter server) or
(b) Creating a new, blank virtual machine within Lab Manager itself and then installing the operating system and software on it.
The result in each case is a template. A template is most often composed of a virtual machine with a base operating system and patches configured on it but without any other (application or infrastructure) software installed on it. You must publish a template before it can be used to create configurations. A template must be undeployed before it can be published. 2. Templates are added to configurations in the Workspace area of Lab Manager. You can think of a configuration as a collection of templates (i.e. virtual machines) that work together. In general, you will customize templates used in configurations by setting the host name, IP address, SID, etc. within their guest operating system. Customization is done using the Lab Manager Tools (LM Tools) package. Normally, you will install the LM Tools package in the template’s operating system immediately after template creation time. This early installation of the LM Tools package is a Lab Manager best practice. You may choose not to customize the virtual machine at configuration creation and deployment time – however doing customization manually (rather than using LM Tools to do it) is more difficult to implement with the network fencing facility of Lab Manager. The procedure for doing this manual customization step is outside the scope of this document. Once you have added a template to a configuration AND DEPLOYED the configuration, Lab Manager will not change the personality (i.e. the customized features) of the virtual machine in that configuration entry again. Once the configuration has been created and deployed, therefore, is the best time to install any other software into any template within the configuration that may have dependencies on the host name, IP address or other parts of the system configuration. 3. Application (or other infrastructure, such as WebLogic Server) software is installed, configured and tested on the virtual machines within the configuration. 4. When you finish testing the software in its virtual machines, you can capture a configuration into the configuration library for long term storage and for sharing with other developers or QA/testing personnel. This is sometimes referred to as “checking in” a configuration. Other users can check out a copy of that configuration and deploy it to the managed servers. They then have their own copy of the configuration to work with. At deployment time, the user is not concerned with the managed server or servers on which the configuration is deployed. As long as enough slots are available on the managed servers, Lab Manager itself takes care of the deployment of that configuration.
5
VMware White Paper VMware Lab Manager Deployment Guide for BEA Software
NOTE: A configuration or template can be shared among developers, even if it is not checked into the library, by using the Sharing attribute for templates and configurations. The default value for the Sharing attribute on a newly created template or configuration is “private,” indicating that it is visible only to its creator. Selecting the “make shared” menu item allows a private template or configuration to become a “shared” one that is visible to other users of the template or configuration libraries. However, two users who share a single template or configuration in this way are effectively working on the same thing at once – and so they must be aware of the possibility of making clashing changes to it. On the other hand, users can check out a configuration from the library, and use their own copy of that configuration. This copy is then independent of any other user’s checked out copy of that same configuration. Two separate users can use checked out copies of the same configuration (with the same host names and IP addresses within the configurations) on the same network at the same time. They are segregated from each other by means of a network fence, which makes use of a Lab Manager virtual router. This separation happens automatically when a user deploys a configuration in “fenced mode.” When you are done with testing and making changes to a configuration, you can check in the updated configurations as new Library entries, as required.
3.2.1. Detailed Steps in the Workflow 1. Create templates To start, you can either: (a) Import an existing virtual machine into the template library, or (b) Create a new template/virtual machine in the template library and install an operating system and other software on it. 2. Install VMware® Tools on the guest operating system in the template. 3. Install LM Tools on the template if you want template customization to occur (such as IP address and host name to change when the template is added to a configuration and deployed) 4. Shut down the guest operating system, undeploy the virtual machine, and publish the template. Templates must be undeployed before they can be published. They must be published before they can be used in configurations. 5. If you don't want the virtual machine’s “personality” (its host name, IP address, SID, etc.) to change at configuration deployment time, then carry out the following actions: (a) Go to the template properties area and uncheck the box named "LM Tools Installed." (b) Shut down the guest operating system, undeploy the virtual machine, and publish the template. 6. Create a new configuration: (a) Give the configuration a name and a description. (b) Add one or more templates to the configuration. (c) If you don't have LM Tools installed in the template, you will need to set the IP address of the machine in the Machine Properties area manually or network fencing won't work correctly.
6
VMware White Paper VMware Lab Manager Deployment Guide for BEA Software
7. Install any additional software (such as the BEA software) on top of the operating system in the virtual machine within the configuration. 8. Capture the configuration to the Library. 9. The new configuration will be private by default. It can be set to be shared using the “Make Shared” menu item. 10. Users can check out a configuration, use their new checked out copy, and make changes to it. 11. Users can check in their updated configuration as a new Library entry. 12. Create a LiveLink to a configuration and email it to a co-worker. 13. The co-worker logs in to Lab Manager using a separate user ID and sees the new configuration 14. The co-worker can deploy that configuration in fenced mode, completely independently of any other deployment of the same configuration.
4. Installing Lab Manager Installation of Lab Manager requires completion of two processes: 1. Installation of the Lab Manager Server on a Windows operating system. The Lab Manager Server controls all virtual machines, libraries and deployments and provides the user interface for the product. 2. The installation section for a Managed Server (that is, an ESX Server host machine) that will be under the control of Lab Manager for deploying virtual machines. VMware recommends that you read through the VMware Lab Manager Installation Guide ahead of time to make sure that you have fulfilled all the necessary requirements for the installation process. This document assumes that the reader has gone through the Lab Manager Installation Guide and correctly set up all pre-requisites before beginning the installation.
4.1. Installing the Lab Manager Server This section explains the process to install the Lab Manager Server on a Windows operating system.
4.1.1. Configuring IIS and ASP.NET on the Lab Manager Server Before installing the Lab Manager Server software, you must have IIS and ASP.NET version 2.0.50727 installed and enabled on the Lab Manager Server operating system. Though these programs come with the Windows Server 2003 operating system, they may not have been installed at the same time as Windows Server 2003. You must also have the Microsoft .NET Framework 2.0 installed. To install Internet Information Server (IIS) on a Windows Server 2003 system: 1. Choose Start-> Settings -> Control Panel -> Add or Remove Programs
7
VMware White Paper VMware Lab Manager Deployment Guide for BEA Software
2. In the left pane of the “Add or Remove Programs” dialog box, click the Add/Remove Windows Components icon.
3. In the Windows Components wizard, select the Application Server component. 4. Click Details. 5. Select the ASP.NET and Internet Information Services (IIS) options. 6. Click OK and Next to install the components.
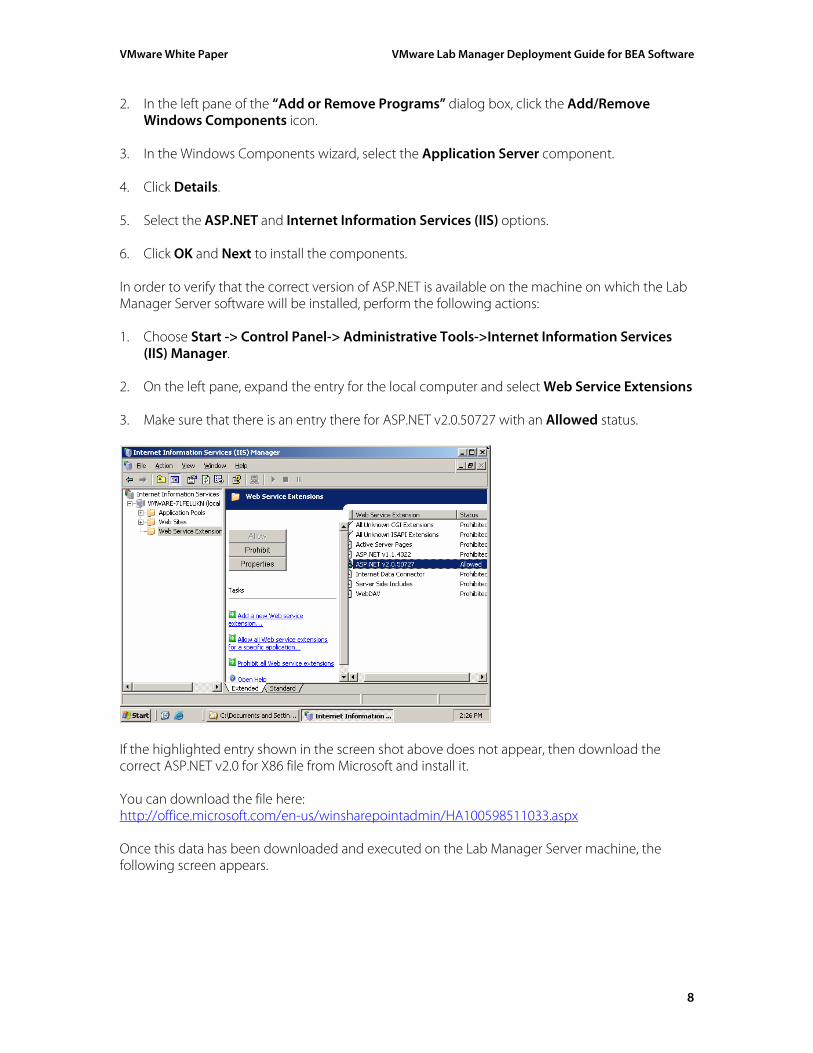
In order to verify that the correct version of ASP.NET is available on the machine on which the Lab Manager Server software will be installed, perform the following actions: 1. Choose Start -> Control Panel-> Administrative Tools->Internet Information Services
(IIS) Manager. 2. On the left pane, expand the entry for the local computer and select Web Service Extensions 3. Make sure that there is an entry there for ASP.NET v2.0.50727 with an Allowed status.
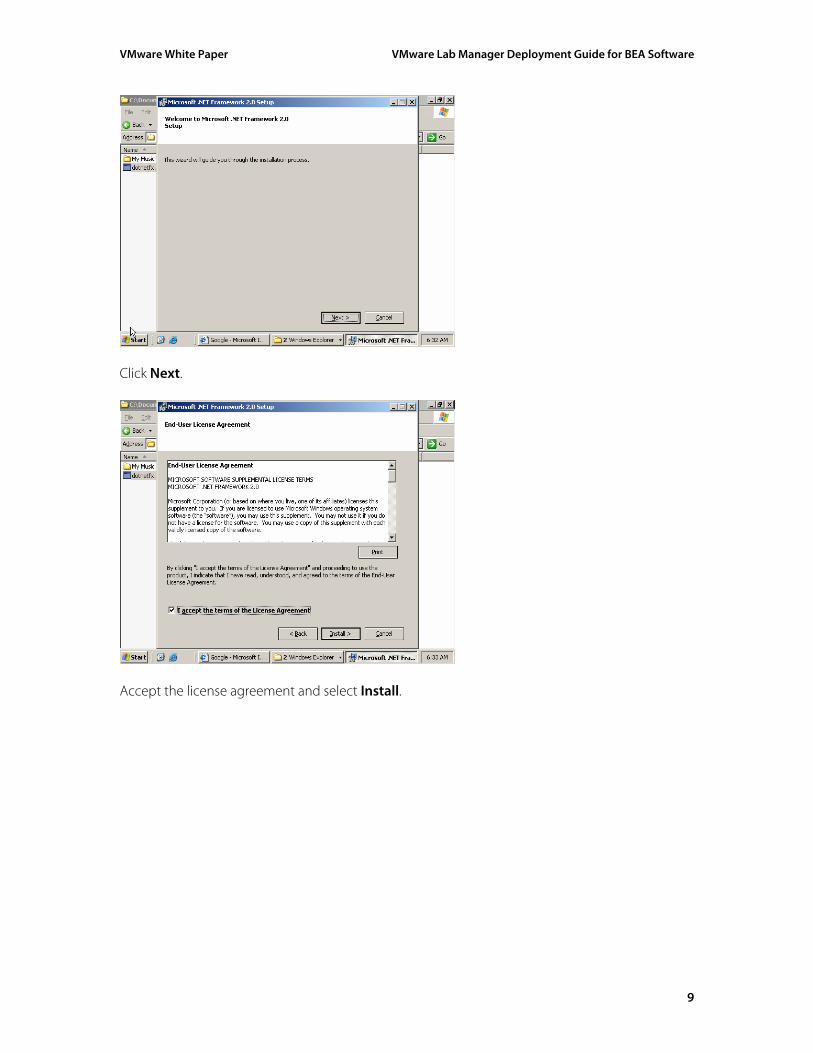
If the highlighted entry shown in the screen shot above does not appear, then download the correct ASP.NET v2.0 for X86 file from Microsoft and install it. You can download the file here: http://office.microsoft.com/en-us/winsharepointadmin/HA100598511033.aspx Once this data has been downloaded and executed on the Lab Manager Server machine, the following screen appears.
8
VMware White Paper VMware Lab Manager Deployment Guide for BEA Software
Click Next.
Accept the license agreement and select Install.
9
VMware White Paper VMware Lab Manager Deployment Guide for BEA Software
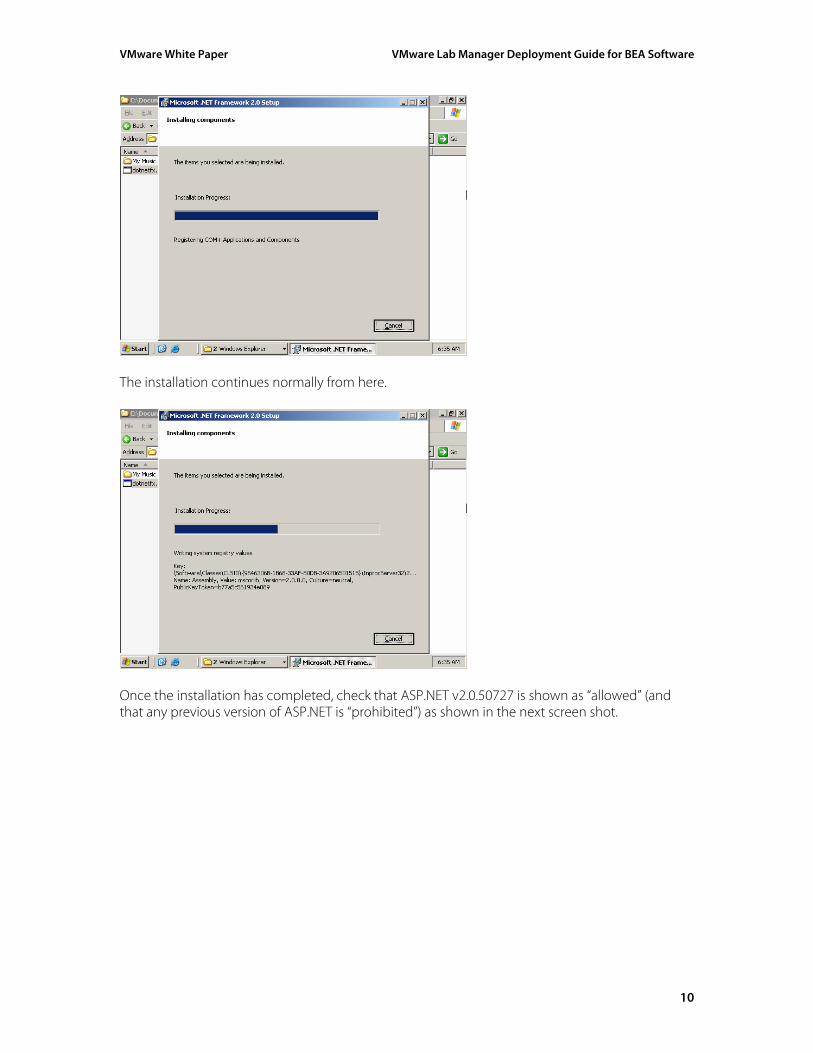
The installation continues normally from here.
Once the installation has completed, check that ASP.NET v2.0.50727 is shown as “allowed” (and that any previous version of ASP.NET is “prohibited”) as shown in the next screen shot.
10

VMware White Paper VMware Lab Manager Deployment Guide for BEA Software
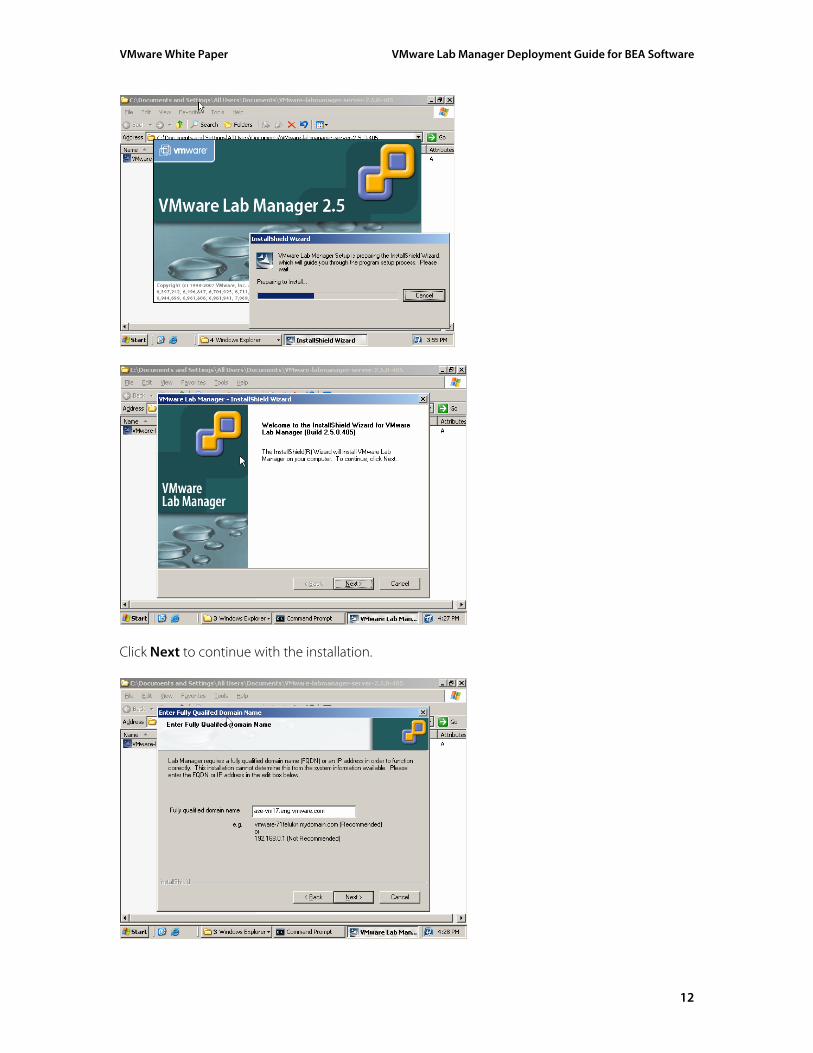
4.1.2. Installing the Lab Manager Server Software In order to install the software, you need to have either a CD with the Lab Manager Server software on it or the file shown below. The CD contains an autorun file that executes automatically once the CD is placed in a drive (and that drive is connected if the installation is being done on a virtual machine). Alternately, you can double-click on the VMware-labmanager-server-2.5.0-405.exe file shown below to begin the installation process.
This action produces the screens shown on the next page.
11
VMware White Paper VMware Lab Manager Deployment Guide for BEA Software
Click Next to continue with the installation.
12
VMware White Paper VMware Lab Manager Deployment Guide for BEA Software
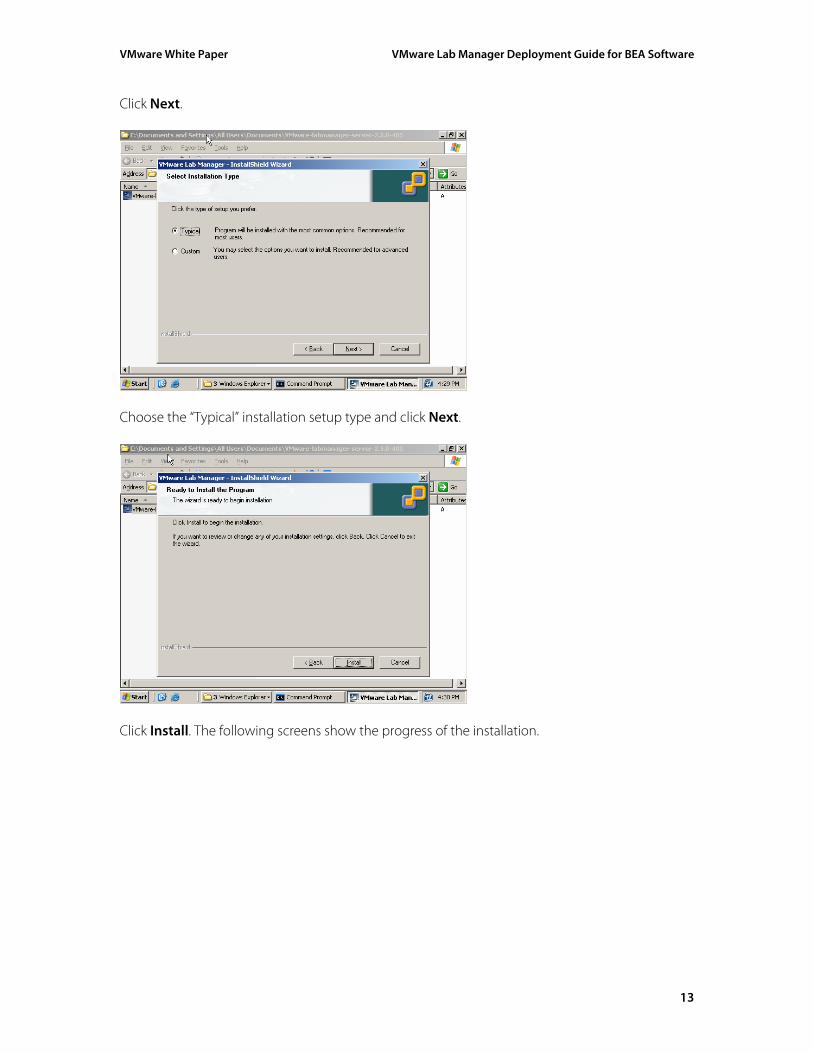
Click Next.
Choose the “Typical” installation setup type and click Next.
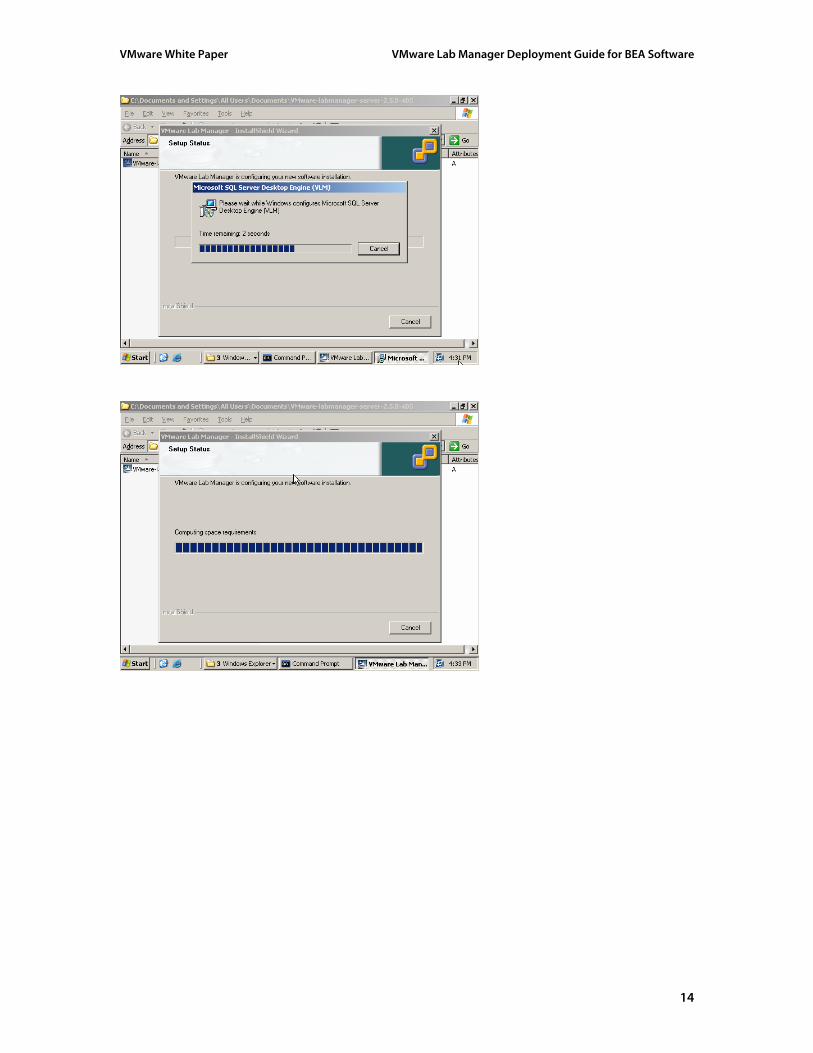
Click Install. The following screens show the progress of the installation.
13
VMware White Paper VMware Lab Manager Deployment Guide for BEA Software
14
VMware White Paper VMware Lab Manager Deployment Guide for BEA Software
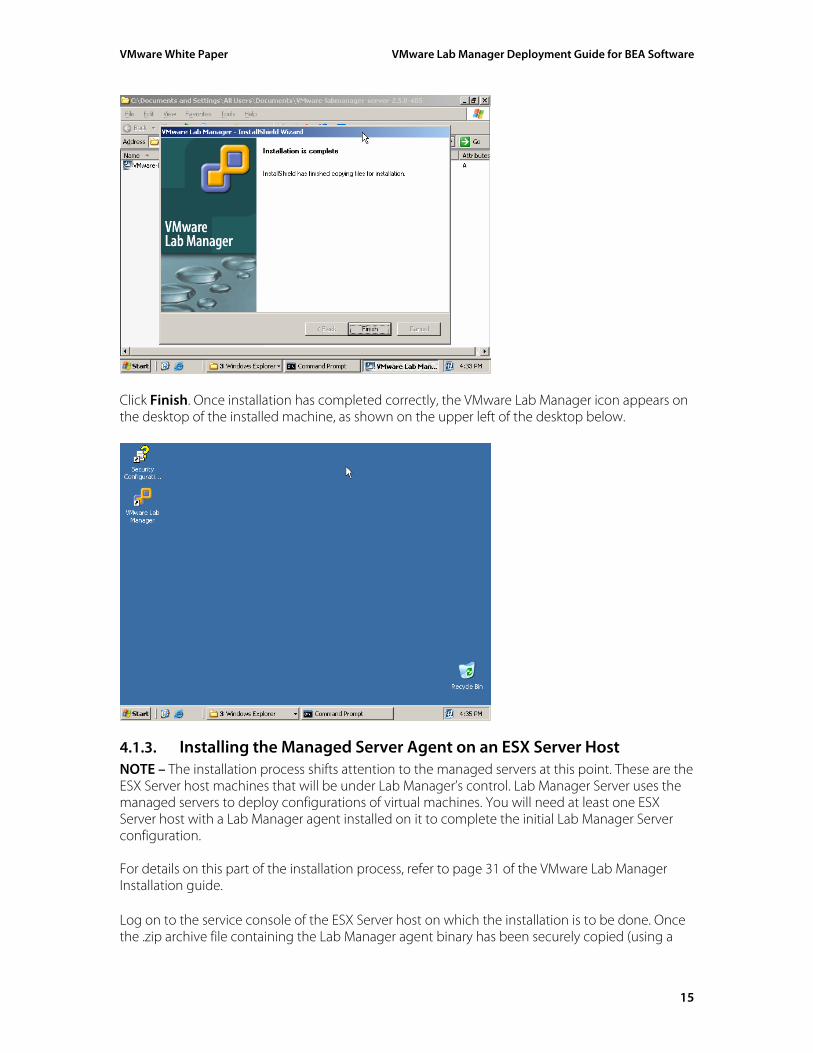
Click Finish. Once installation has completed correctly, the VMware Lab Manager icon appears on the desktop of the installed machine, as shown on the upper left of the desktop below.
4.1.3. Installing the Managed Server Agent on an ESX Server Host NOTE – The installation process shifts attention to the managed servers at this point. These are the ESX Server host machines that will be under Lab Manager’s control. Lab Manager Server uses the managed servers to deploy configurations of virtual machines. You will need at least one ESX Server host with a Lab Manager agent installed on it to complete the initial Lab Manager Server configuration. For details on this part of the installation process, refer to page 31 of the VMware Lab Manager Installation guide. Log on to the service console of the ESX Server host on which the installation is to be done. Once the .zip archive file containing the Lab Manager agent binary has been securely copied (using a
15
VMware White Paper VMware Lab Manager Deployment Guide for BEA Software
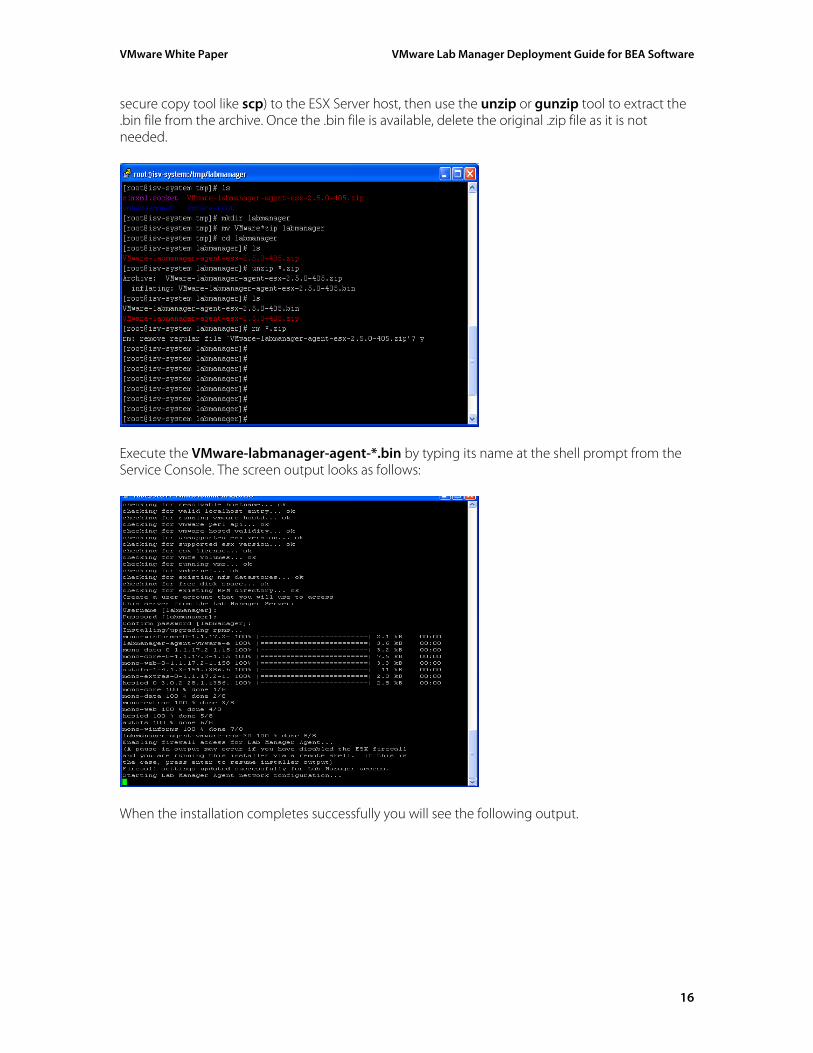
secure copy tool like scp) to the ESX Server host, then use the unzip or gunzip tool to extract the .bin file from the archive. Once the .bin file is available, delete the original .zip file as it is not needed.
Execute the VMware-labmanager-agent-*.bin by typing its name at the shell prompt from the Service Console. The screen output looks as follows:
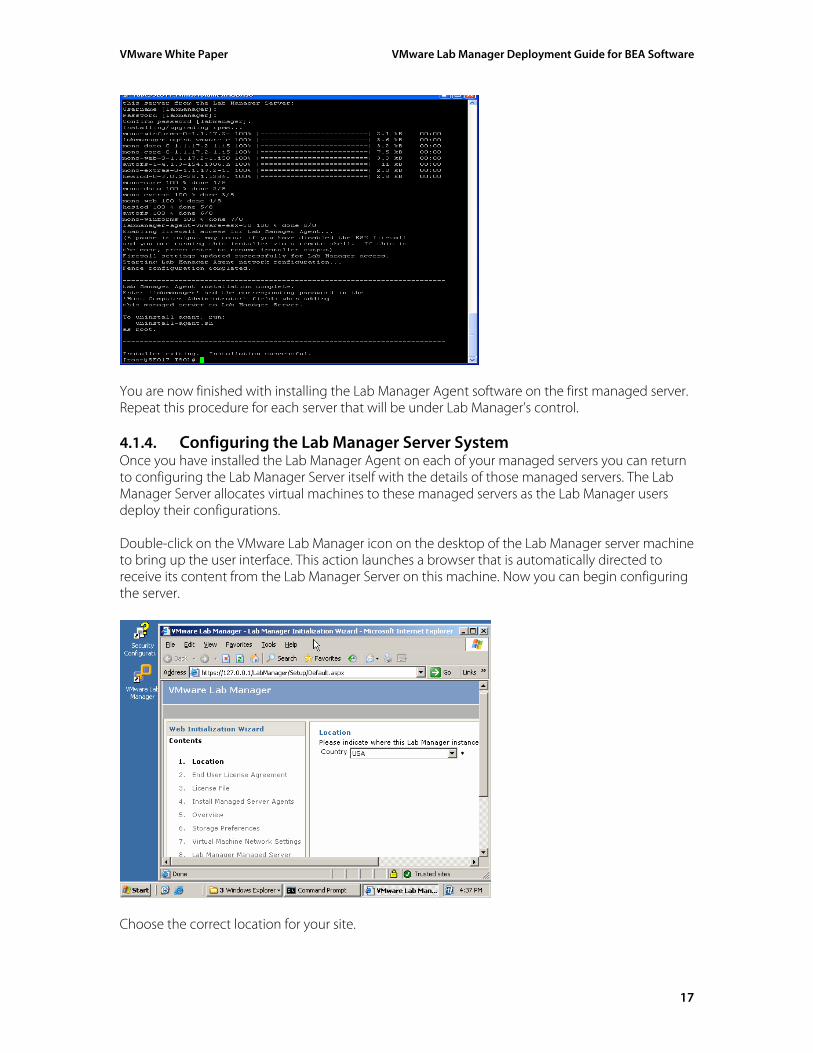
When the installation completes successfully you will see the following output.
16
VMware White Paper VMware Lab Manager Deployment Guide for BEA Software
You are now finished with installing the Lab Manager Agent software on the first managed server. Repeat this procedure for each server that will be under Lab Manager’s control. 4.1.4. Configuring the Lab Manager Server System Once you have installed the Lab Manager Agent on each of your managed servers you can return to configuring the Lab Manager Server itself with the details of those managed servers. The Lab Manager Server allocates virtual machines to these managed servers as the Lab Manager users deploy their configurations. Double-click on the VMware Lab Manager icon on the desktop of the Lab Manager server machine to bring up the user interface. This action launches a browser that is automatically directed to receive its content from the Lab Manager Server on this machine. Now you can begin configuring the server.
Choose the correct location for your site.
17
VMware White Paper VMware Lab Manager Deployment Guide for BEA Software
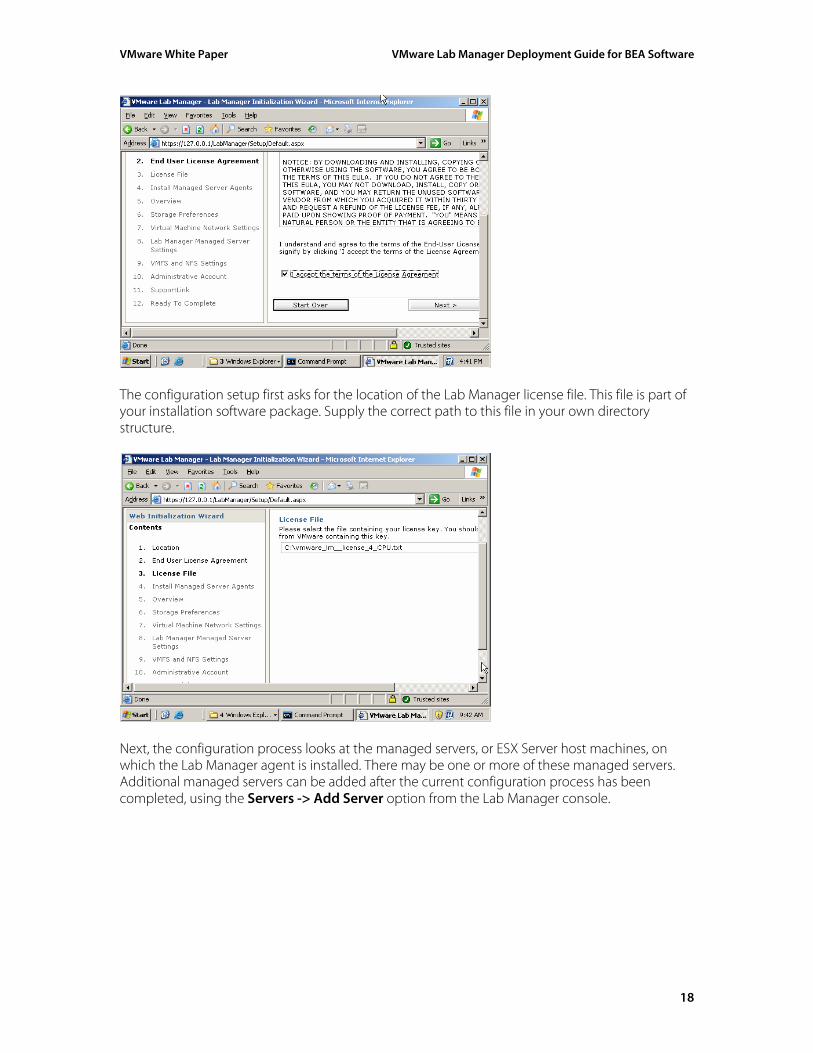
The configuration setup first asks for the location of the Lab Manager license file. This file is part of your installation software package. Supply the correct path to this file in your own directory structure.
Next, the configuration process looks at the managed servers, or ESX Server host machines, on which the Lab Manager agent is installed. There may be one or more of these managed servers. Additional managed servers can be added after the current configuration process has been completed, using the Servers -> Add Server option from the Lab Manager console.
18
VMware White Paper VMware Lab Manager Deployment Guide for BEA Software
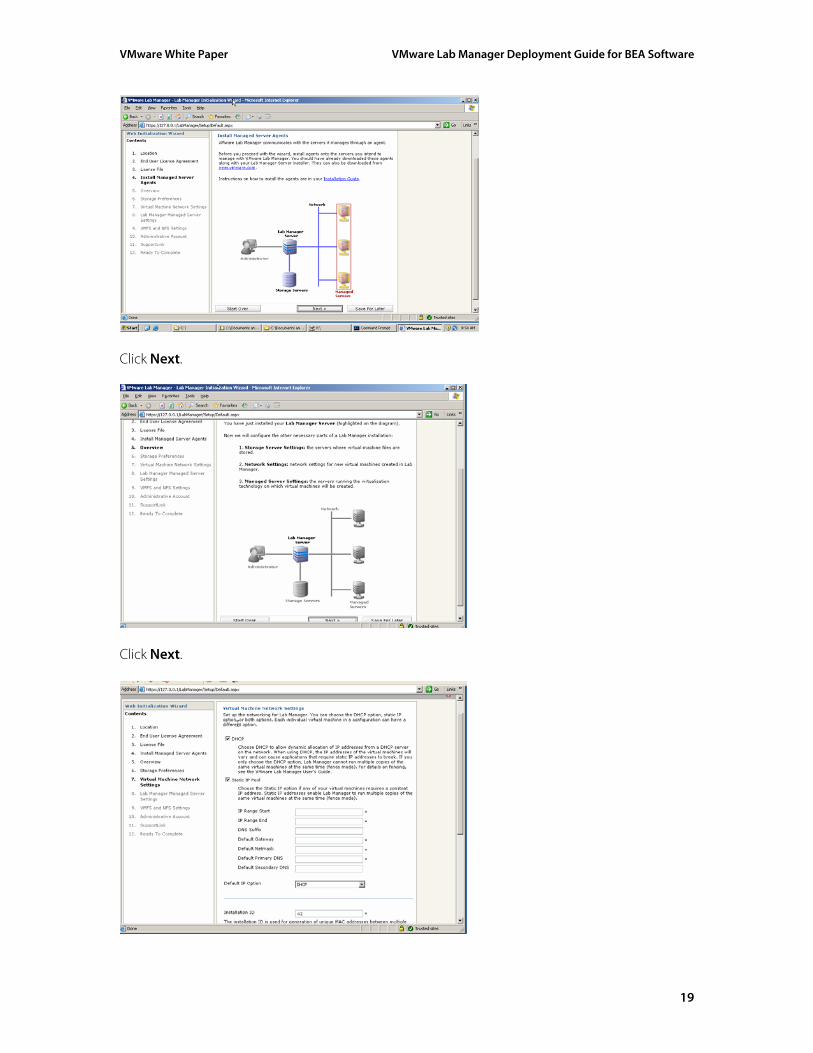
Click Next.
Click Next.
19
VMware White Paper VMware Lab Manager Deployment Guide for BEA Software
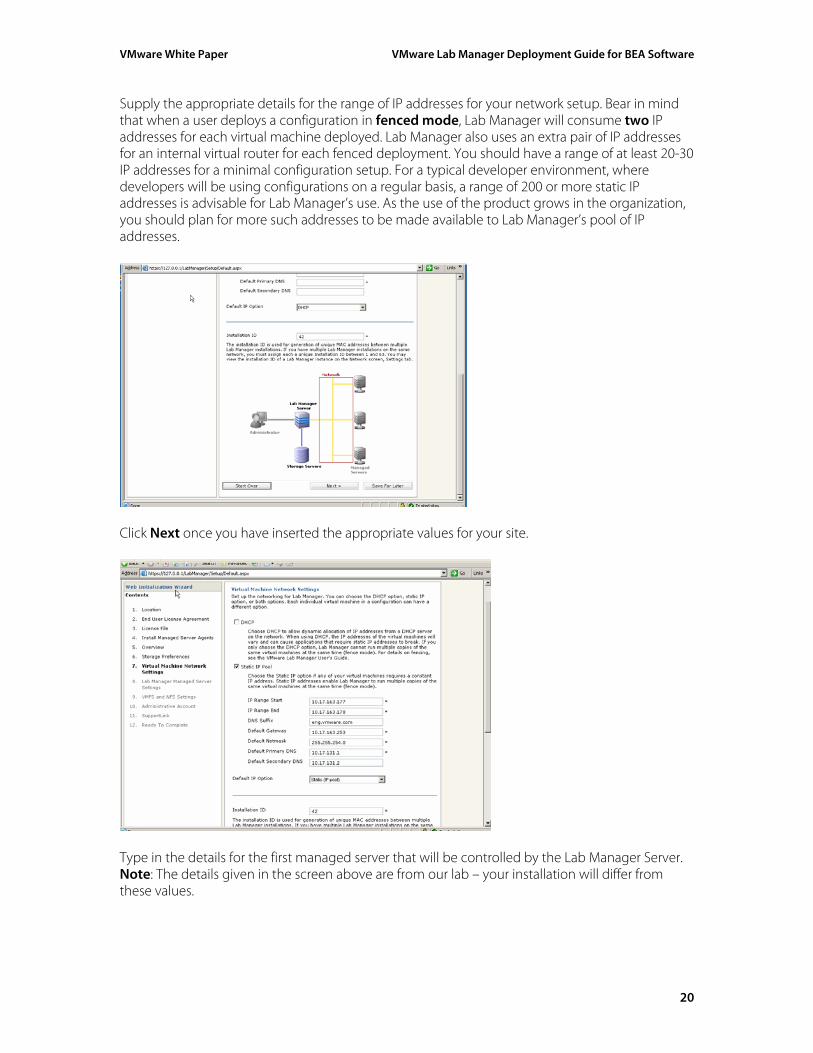
Supply the appropriate details for the range of IP addresses for your network setup. Bear in mind that when a user deploys a configuration in fenced mode, Lab Manager will consume two IP addresses for each virtual machine deployed. Lab Manager also uses an extra pair of IP addresses for an internal virtual router for each fenced deployment. You should have a range of at least 20-30 IP addresses for a minimal configuration setup. For a typical developer environment, where developers will be using configurations on a regular basis, a range of 200 or more static IP addresses is advisable for Lab Manager’s use. As the use of the product grows in the organization, you should plan for more such addresses to be made available to Lab Manager’s pool of IP addresses.
Click Next once you have inserted the appropriate values for your site.
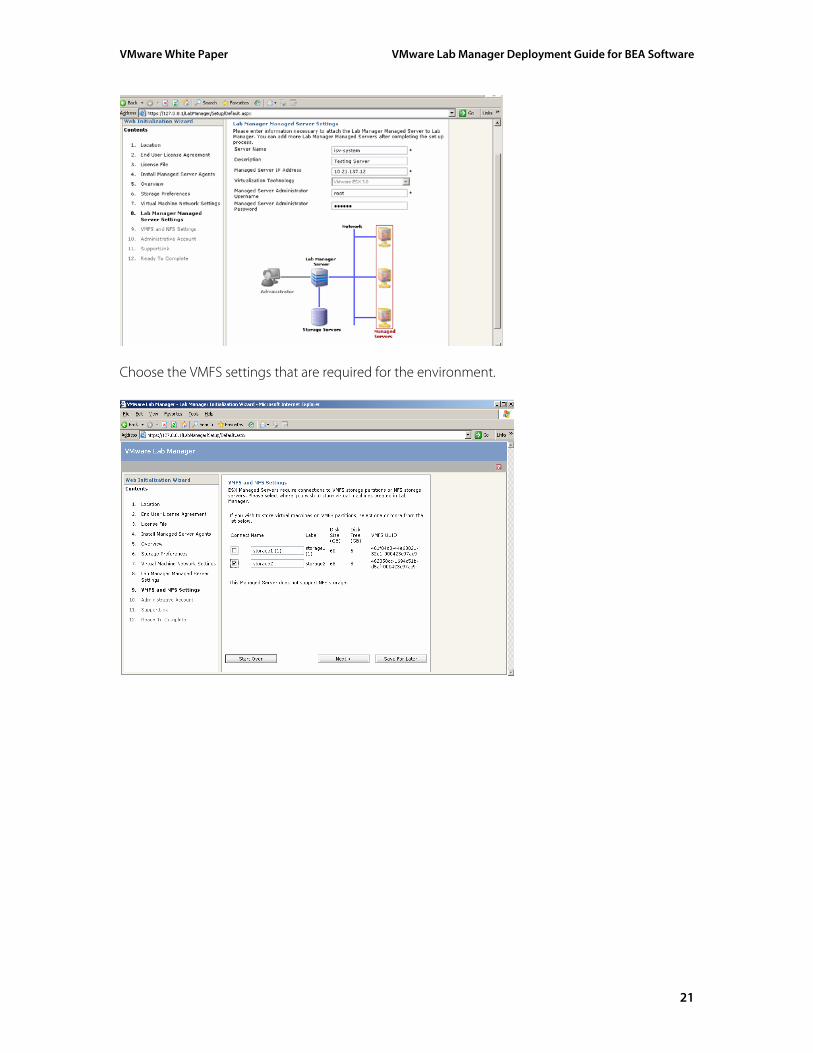
Type in the details for the first managed server that will be controlled by the Lab Manager Server. Note: The details given in the screen above are from our lab – your installation will differ from these values.
20
VMware White Paper VMware Lab Manager Deployment Guide for BEA Software
Choose the VMFS settings that are required for the environment.
21
VMware White Paper VMware Lab Manager Deployment Guide for BEA Software
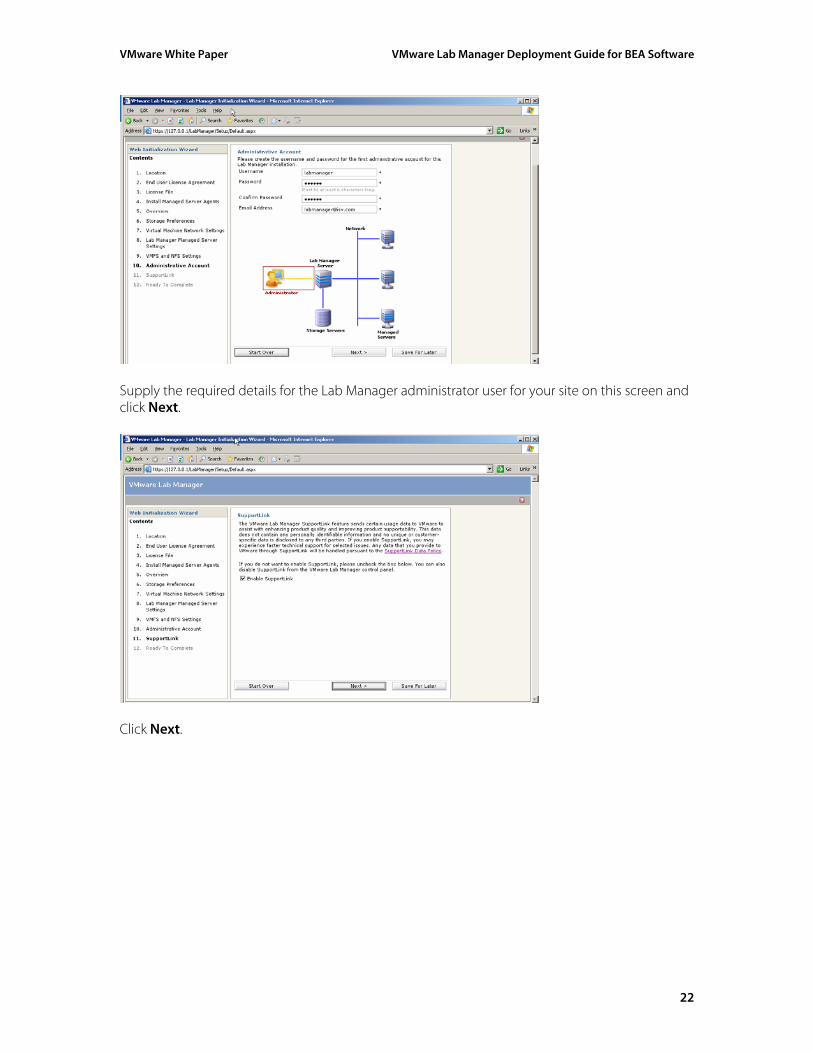
Supply the required details for the Lab Manager administrator user for your site on this screen and click Next.
Click Next.
22
VMware White Paper VMware Lab Manager Deployment Guide for BEA Software
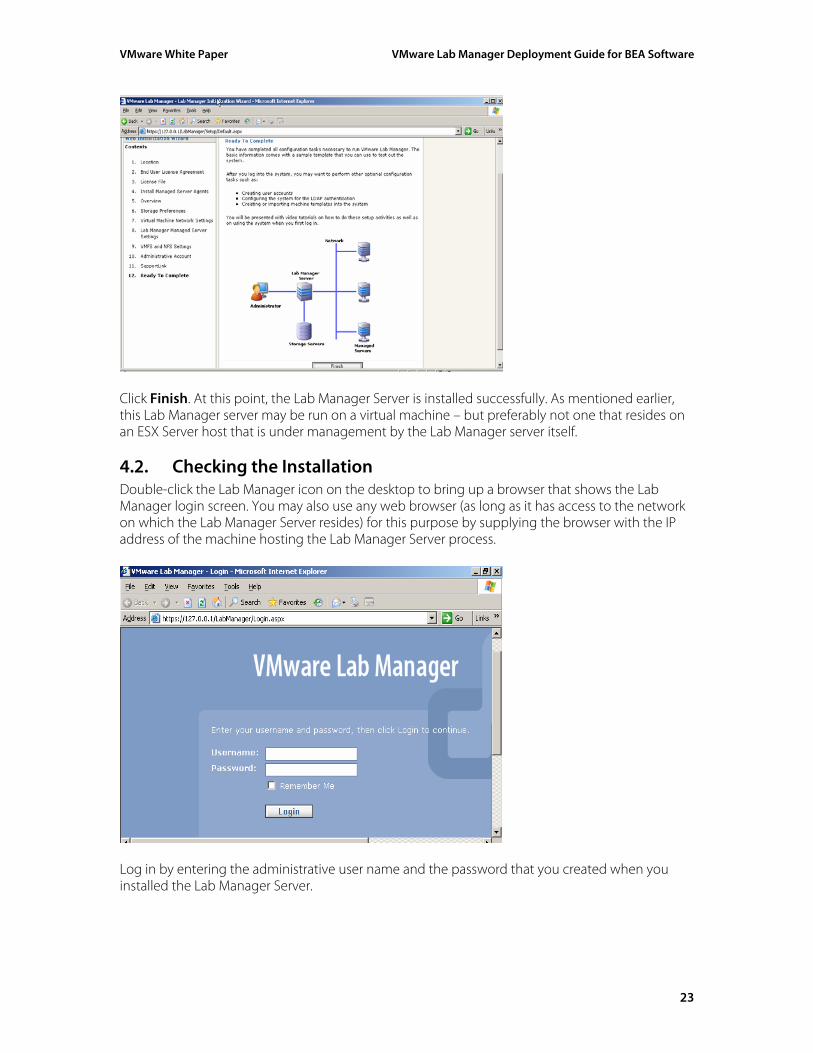
Click Finish. At this point, the Lab Manager Server is installed successfully. As mentioned earlier, this Lab Manager server may be run on a virtual machine – but preferably not one that resides on an ESX Server host that is under management by the Lab Manager server itself.
4.2. Checking the Installation Double-click the Lab Manager icon on the desktop to bring up a browser that shows the Lab Manager login screen. You may also use any web browser (as long as it has access to the network on which the Lab Manager Server resides) for this purpose by supplying the browser with the IP address of the machine hosting the Lab Manager Server process.
Log in by entering the administrative user name and the password that you created when you installed the Lab Manager Server.
23
VMware White Paper VMware Lab Manager Deployment Guide for BEA Software
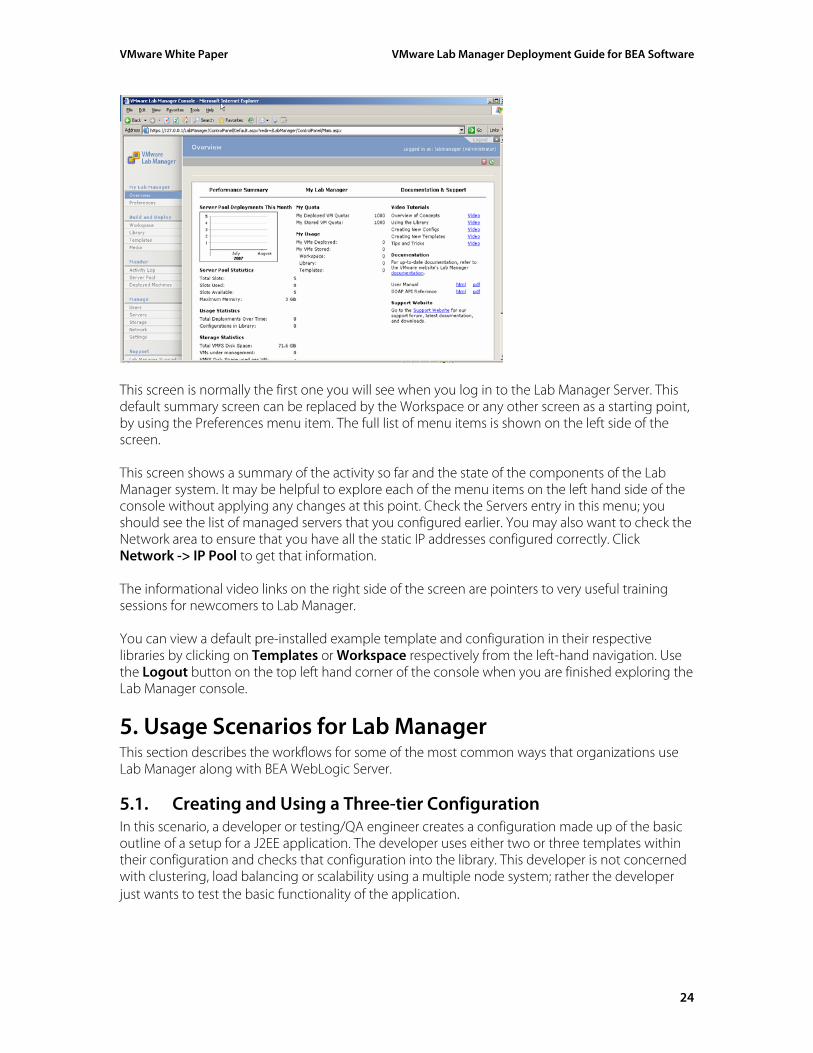
This screen is normally the first one you will see when you log in to the Lab Manager Server. This default summary screen can be replaced by the Workspace or any other screen as a starting point, by using the Preferences menu item. The full list of menu items is shown on the left side of the screen. This screen shows a summary of the activity so far and the state of the components of the Lab Manager system. It may be helpful to explore each of the menu items on the left hand side of the console without applying any changes at this point. Check the Servers entry in this menu; you should see the list of managed servers that you configured earlier. You may also want to check the Network area to ensure that you have all the static IP addresses configured correctly. Click Network -> IP Pool to get that information. The informational video links on the right side of the screen are pointers to very useful training sessions for newcomers to Lab Manager. You can view a default pre-installed example template and configuration in their respective libraries by clicking on Templates or Workspace respectively from the left-hand navigation. Use the Logout button on the top left hand corner of the console when you are finished exploring the Lab Manager console.
5. Usage Scenarios for Lab Manager This section describes the workflows for some of the most common ways that organizations use Lab Manager along with BEA WebLogic Server.
5.1. Creating and Using a Three-tier Configuration In this scenario, a developer or testing/QA engineer creates a configuration made up of the basic outline of a setup for a J2EE application. The developer uses either two or three templates within their configuration and checks that configuration into the library. This developer is not concerned with clustering, load balancing or scalability using a multiple node system; rather the developer just wants to test the basic functionality of the application.
24
VMware White Paper VMware Lab Manager Deployment Guide for BEA Software
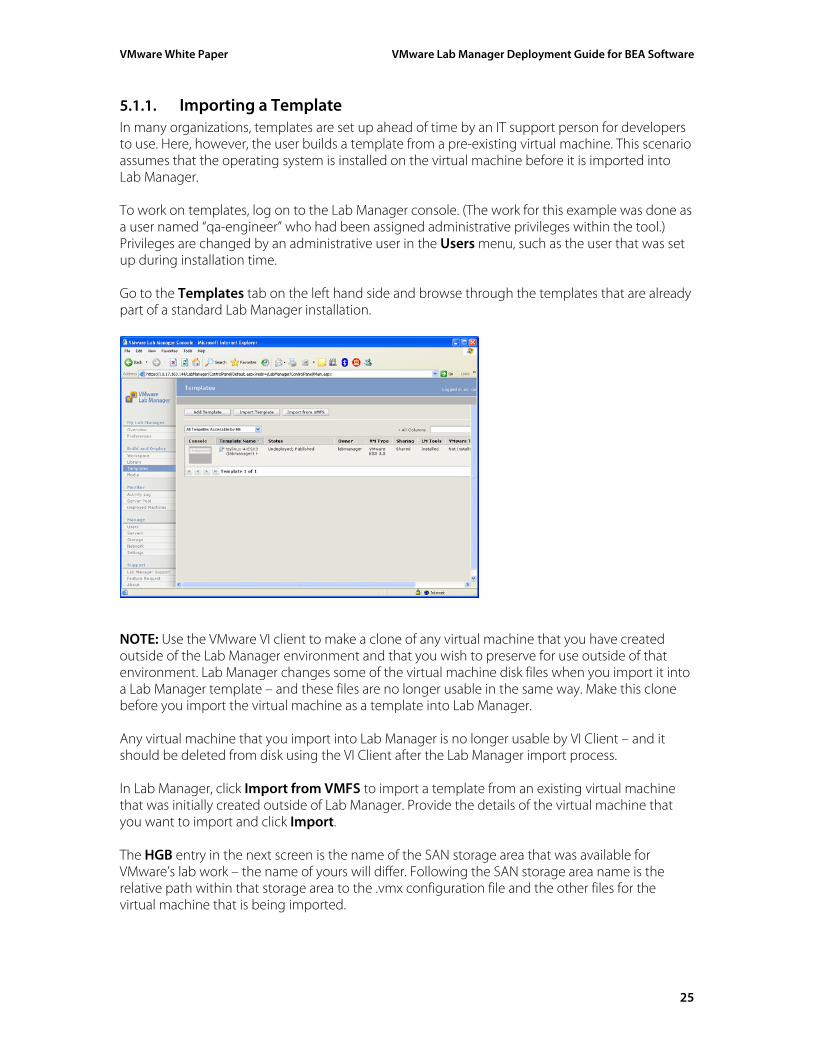
5.1.1. Importing a Template In many organizations, templates are set up ahead of time by an IT support person for developers to use. Here, however, the user builds a template from a pre-existing virtual machine. This scenario assumes that the operating system is installed on the virtual machine before it is imported into Lab Manager. To work on templates, log on to the Lab Manager console. (The work for this example was done as a user named “qa-engineer” who had been assigned administrative privileges within the tool.) Privileges are changed by an administrative user in the Users menu, such as the user that was set up during installation time. Go to the Templates tab on the left hand side and browse through the templates that are already part of a standard Lab Manager installation.
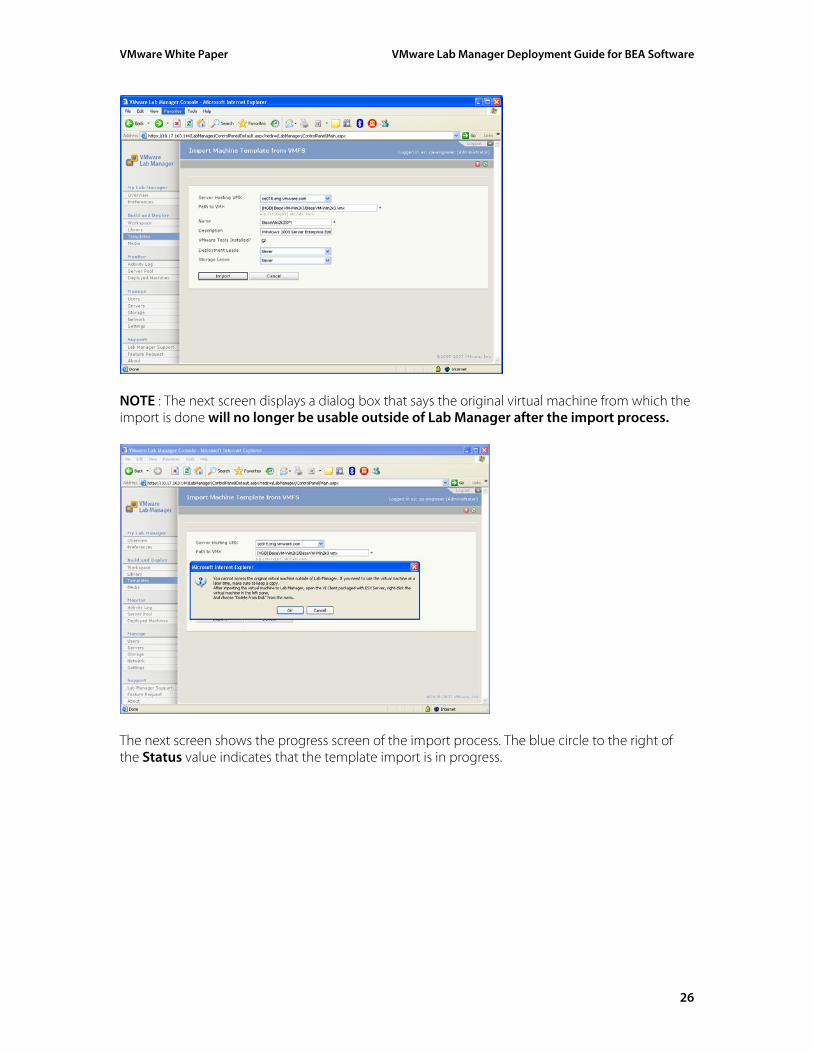
NOTE: Use the VMware VI client to make a clone of any virtual machine that you have created outside of the Lab Manager environment and that you wish to preserve for use outside of that environment. Lab Manager changes some of the virtual machine disk files when you import it into a Lab Manager template – and these files are no longer usable in the same way. Make this clone before you import the virtual machine as a template into Lab Manager. Any virtual machine that you import into Lab Manager is no longer usable by VI Client – and it should be deleted from disk using the VI Client after the Lab Manager import process. In Lab Manager, click Import from VMFS to import a template from an existing virtual machine that was initially created outside of Lab Manager. Provide the details of the virtual machine that you want to import and click Import. The HGB entry in the next screen is the name of the SAN storage area that was available for VMware’s lab work – the name of yours will differ. Following the SAN storage area name is the relative path within that storage area to the .vmx configuration file and the other files for the virtual machine that is being imported.
25
VMware White Paper VMware Lab Manager Deployment Guide for BEA Software
NOTE : The next screen displays a dialog box that says the original virtual machine from which the import is done will no longer be usable outside of Lab Manager after the import process.
The next screen shows the progress screen of the import process. The blue circle to the right of the Status value indicates that the template import is in progress.
26
VMware White Paper VMware Lab Manager Deployment Guide for BEA Software
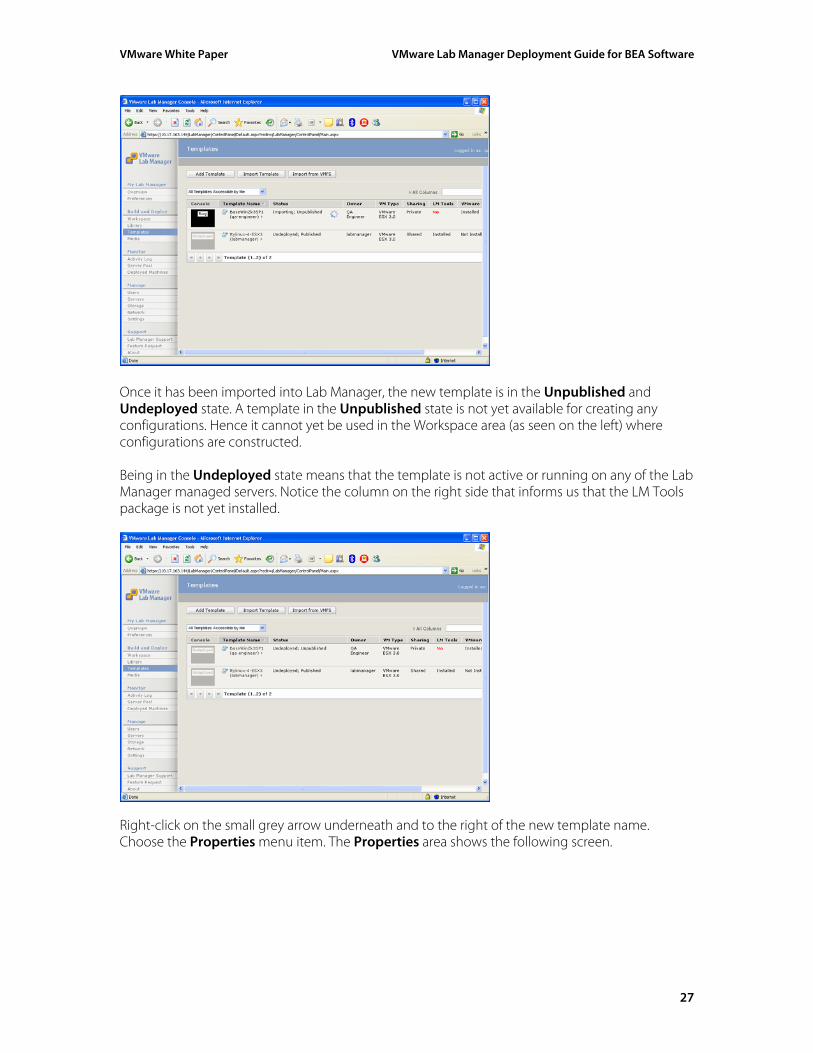
Once it has been imported into Lab Manager, the new template is in the Unpublished and Undeployed state. A template in the Unpublished state is not yet available for creating any configurations. Hence it cannot yet be used in the Workspace area (as seen on the left) where configurations are constructed. Being in the Undeployed state means that the template is not active or running on any of the Lab Manager managed servers. Notice the column on the right side that informs us that the LM Tools package is not yet installed.
Right-click on the small grey arrow underneath and to the right of the new template name. Choose the Properties menu item. The Properties area shows the following screen.
27
VMware White Paper VMware Lab Manager Deployment Guide for BEA Software
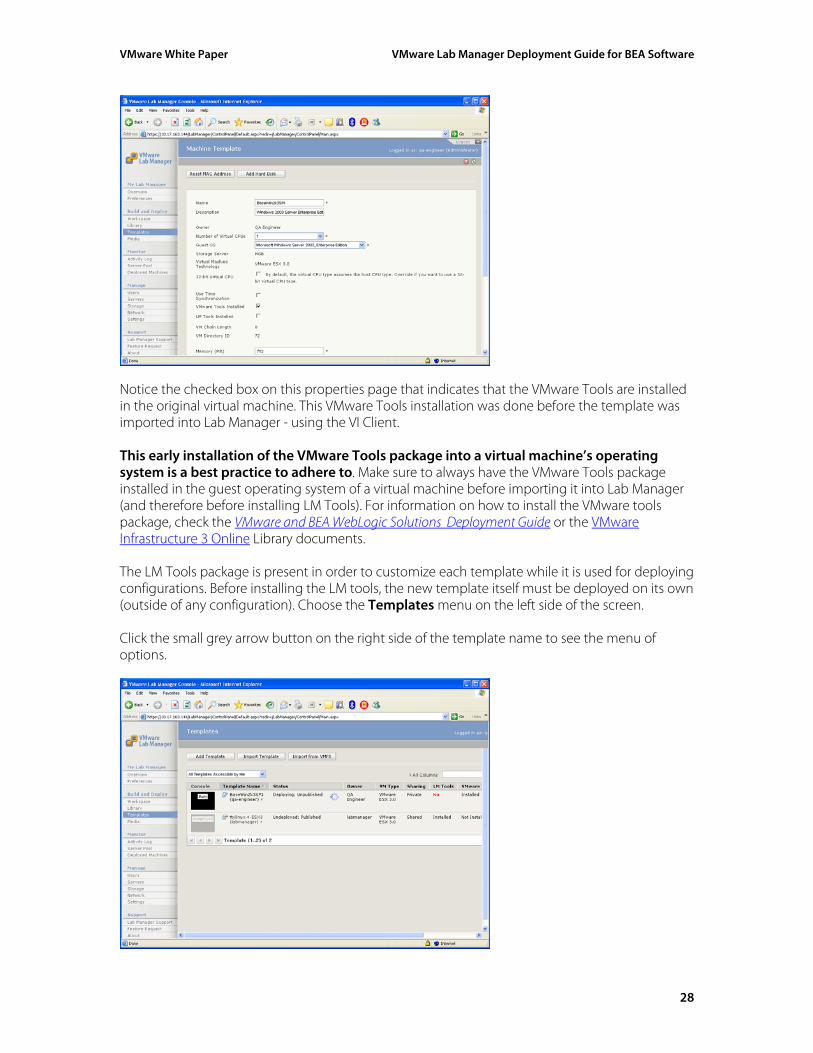
Notice the checked box on this properties page that indicates that the VMware Tools are installed in the original virtual machine. This VMware Tools installation was done before the template was imported into Lab Manager - using the VI Client. This early installation of the VMware Tools package into a virtual machine’s operating system is a best practice to adhere to. Make sure to always have the VMware Tools package installed in the guest operating system of a virtual machine before importing it into Lab Manager (and therefore before installing LM Tools). For information on how to install the VMware tools package, check the VMware and BEA WebLogic Solutions Deployment Guide or the VMware Infrastructure 3 Online Library documents. The LM Tools package is present in order to customize each template while it is used for deploying configurations. Before installing the LM tools, the new template itself must be deployed on its own (outside of any configuration). Choose the Templates menu on the left side of the screen. Click the small grey arrow button on the right side of the template name to see the menu of options.
28
VMware White Paper VMware Lab Manager Deployment Guide for BEA Software
Choose the Deploy menu item from the list. Watch the progress indicator to show the completion of the deployment process. NOTE: Only unpublished templates may be deployed from the template library. Published templates cannot be individually deployed from there. Any published templates are deployed as members of a configuration, when the configuration itself is deployed.
The status field for the template changes from undeployed to deployed. Deployed here means that the template is now running on one of the ESX Server managed servers. On the other hand, its Unpublished status means that it is NOT available for use in creating a configuration.
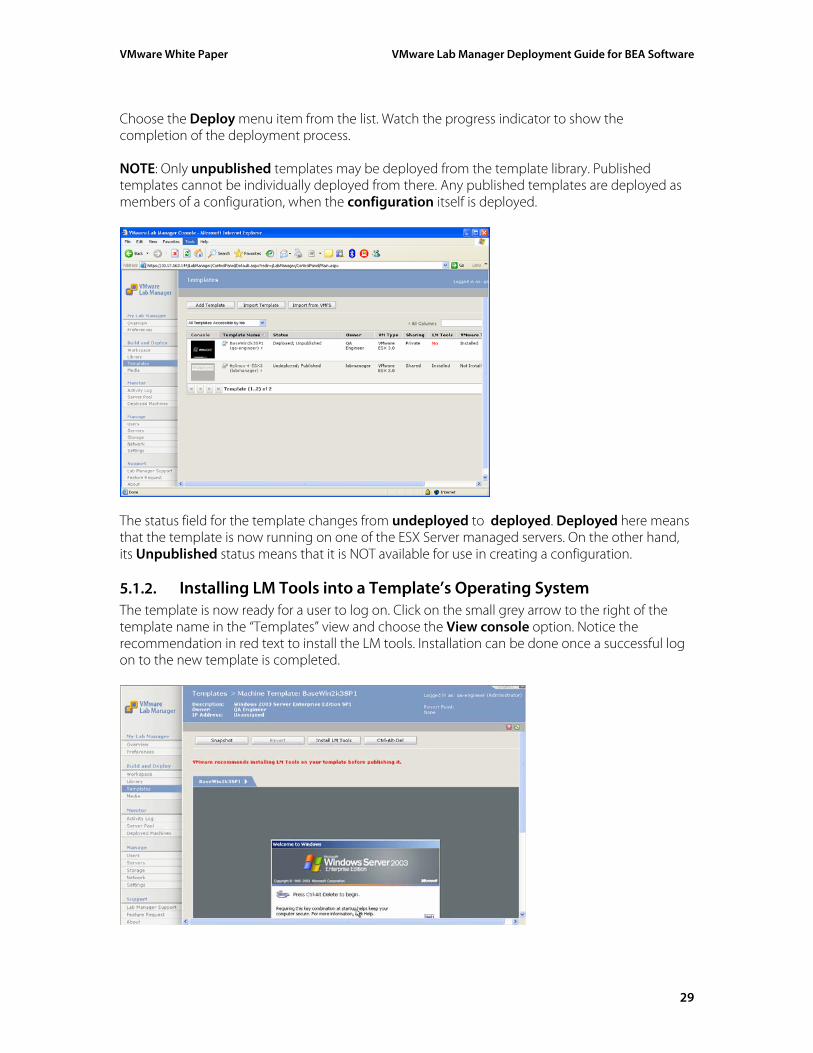
5.1.2. Installing LM Tools into a Template’s Operating System The template is now ready for a user to log on. Click on the small grey arrow to the right of the template name in the “Templates” view and choose the View console option. Notice the recommendation in red text to install the LM tools. Installation can be done once a successful log on to the new template is completed.
29
VMware White Paper VMware Lab Manager Deployment Guide for BEA Software
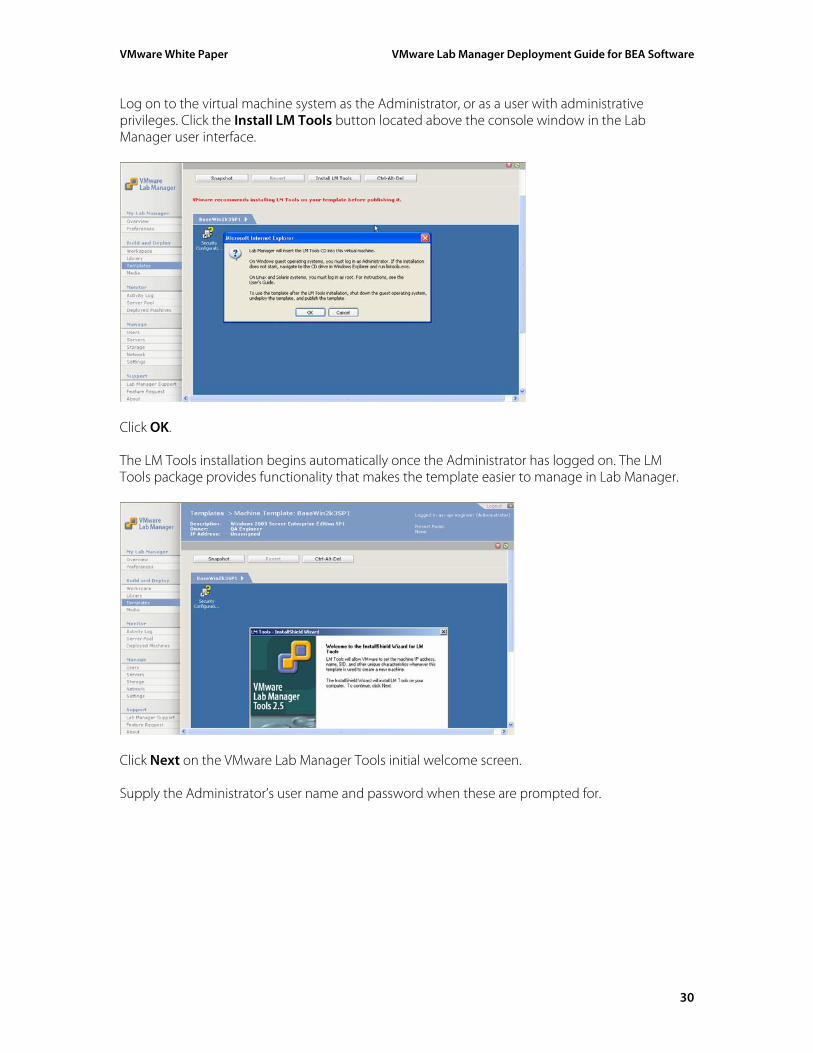
Log on to the virtual machine system as the Administrator, or as a user with administrative privileges. Click the Install LM Tools button located above the console window in the Lab Manager user interface.
Click OK. The LM Tools installation begins automatically once the Administrator has logged on. The LM Tools package provides functionality that makes the template easier to manage in Lab Manager.
Click Next on the VMware Lab Manager Tools initial welcome screen. Supply the Administrator’s user name and password when these are prompted for.
30
VMware White Paper VMware Lab Manager Deployment Guide for BEA Software
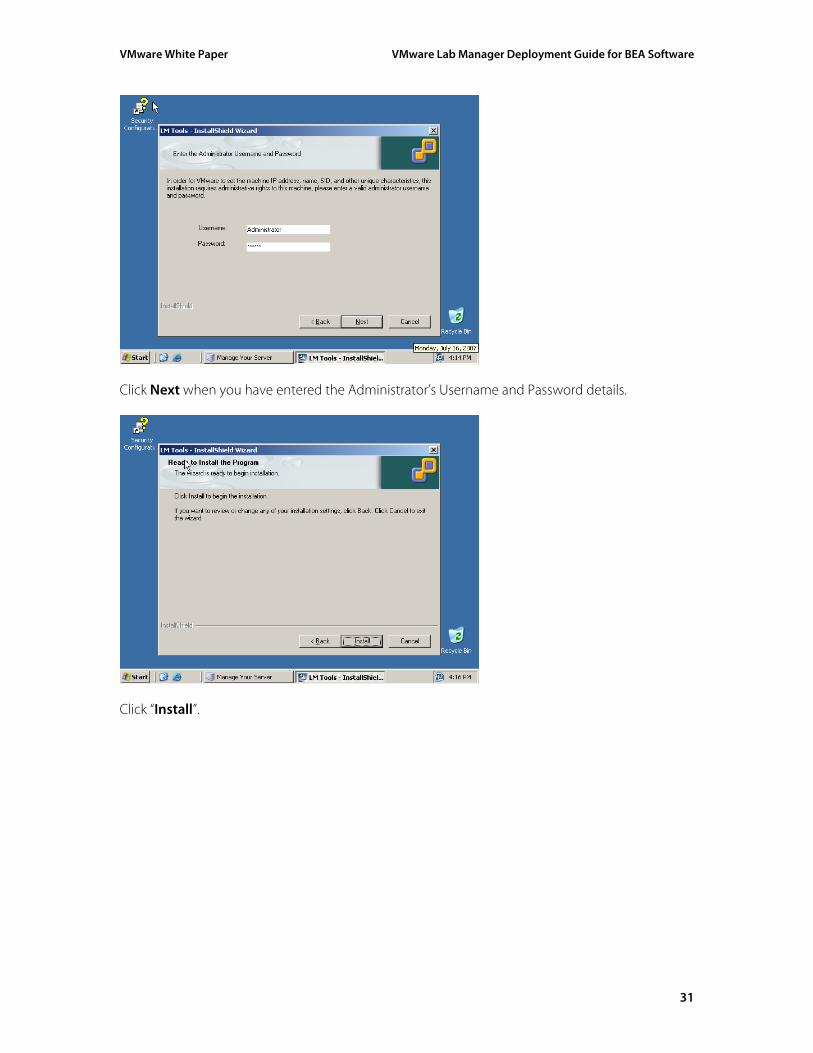
Click Next when you have entered the Administrator’s Username and Password details.
Click “Install”.
31
VMware White Paper VMware Lab Manager Deployment Guide for BEA Software
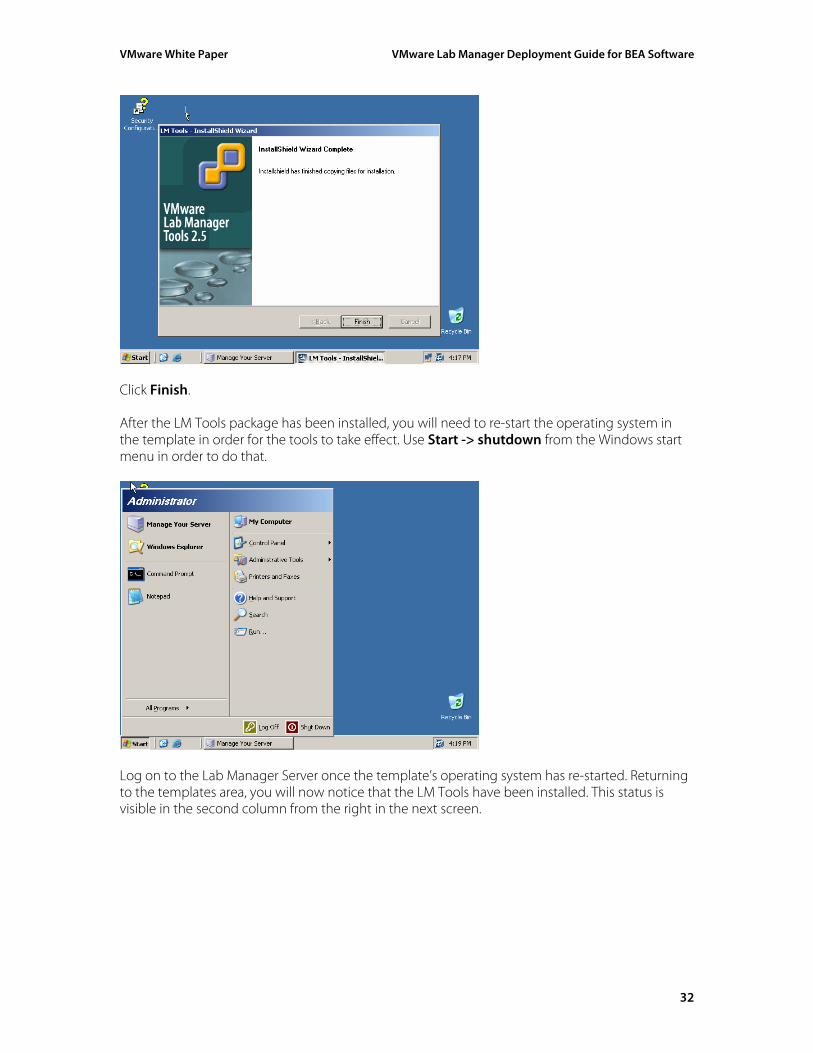
Click Finish. After the LM Tools package has been installed, you will need to re-start the operating system in the template in order for the tools to take effect. Use Start -> shutdown from the Windows start menu in order to do that.
Log on to the Lab Manager Server once the template’s operating system has re-started. Returning to the templates area, you will now notice that the LM Tools have been installed. This status is visible in the second column from the right in the next screen.
32
VMware White Paper VMware Lab Manager Deployment Guide for BEA Software
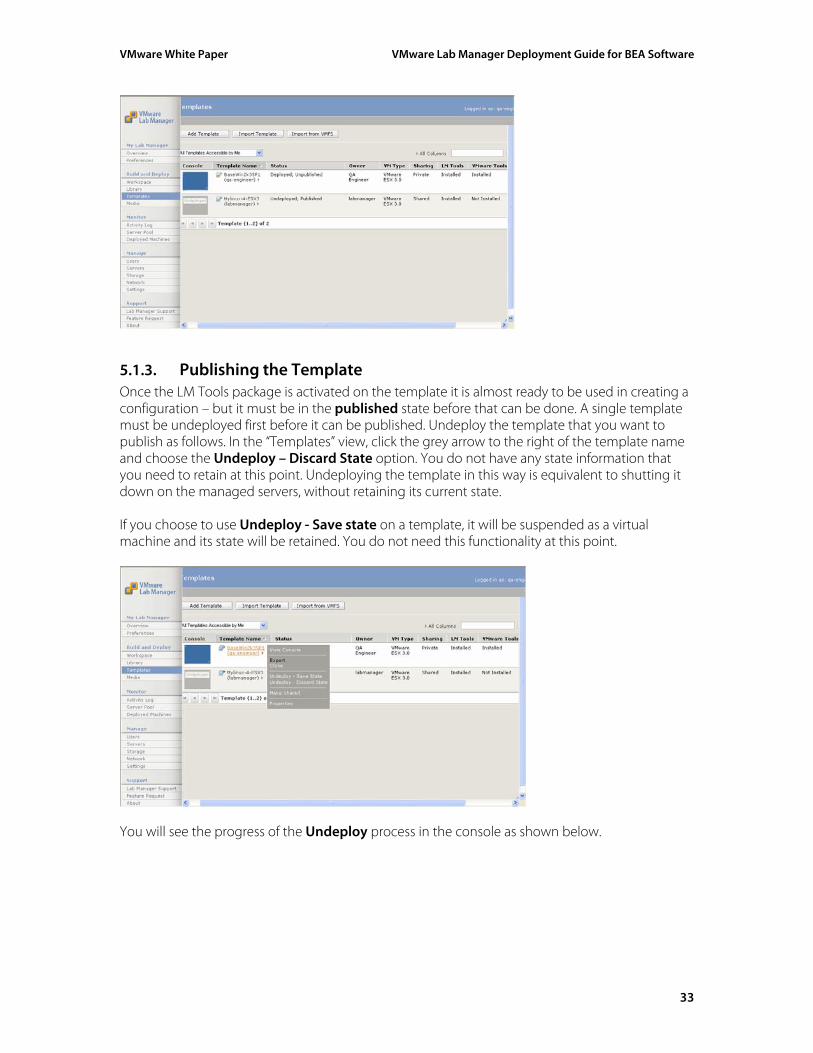
5.1.3. Publishing the Template Once the LM Tools package is activated on the template it is almost ready to be used in creating a configuration – but it must be in the published state before that can be done. A single template must be undeployed first before it can be published. Undeploy the template that you want to publish as follows. In the “Templates” view, click the grey arrow to the right of the template name and choose the Undeploy – Discard State option. You do not have any state information that you need to retain at this point. Undeploying the template in this way is equivalent to shutting it down on the managed servers, without retaining its current state. If you choose to use Undeploy - Save state on a template, it will be suspended as a virtual machine and its state will be retained. You do not need this functionality at this point.
You will see the progress of the Undeploy process in the console as shown below.
33
VMware White Paper VMware Lab Manager Deployment Guide for BEA Software
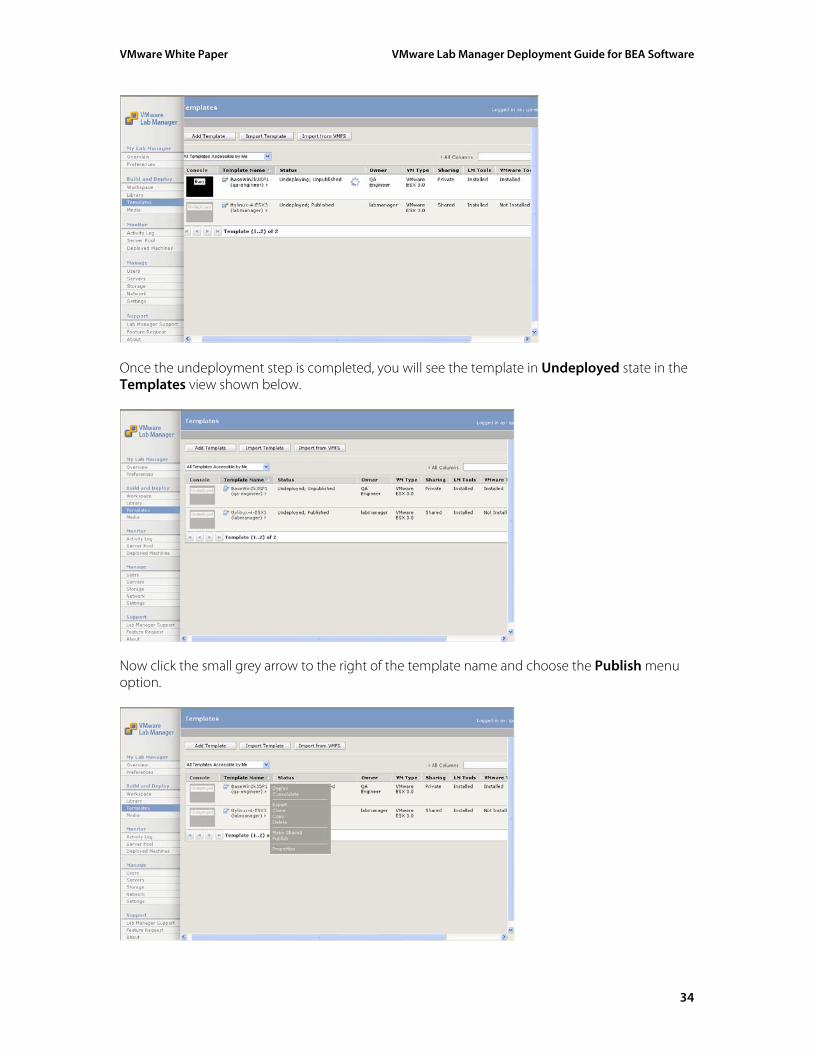
Once the undeployment step is completed, you will see the template in Undeployed state in the Templates view shown below.
Now click the small grey arrow to the right of the template name and choose the Publish menu option.
34
VMware White Paper VMware Lab Manager Deployment Guide for BEA Software
The other options shown on the menu allow you to clone this template. Cloning the templatethis point would not bring a great deal of benefit, as there is more BEA-related software to installed in
at be
it before it can be used. Currently you have a re-usable operating system level mplate.
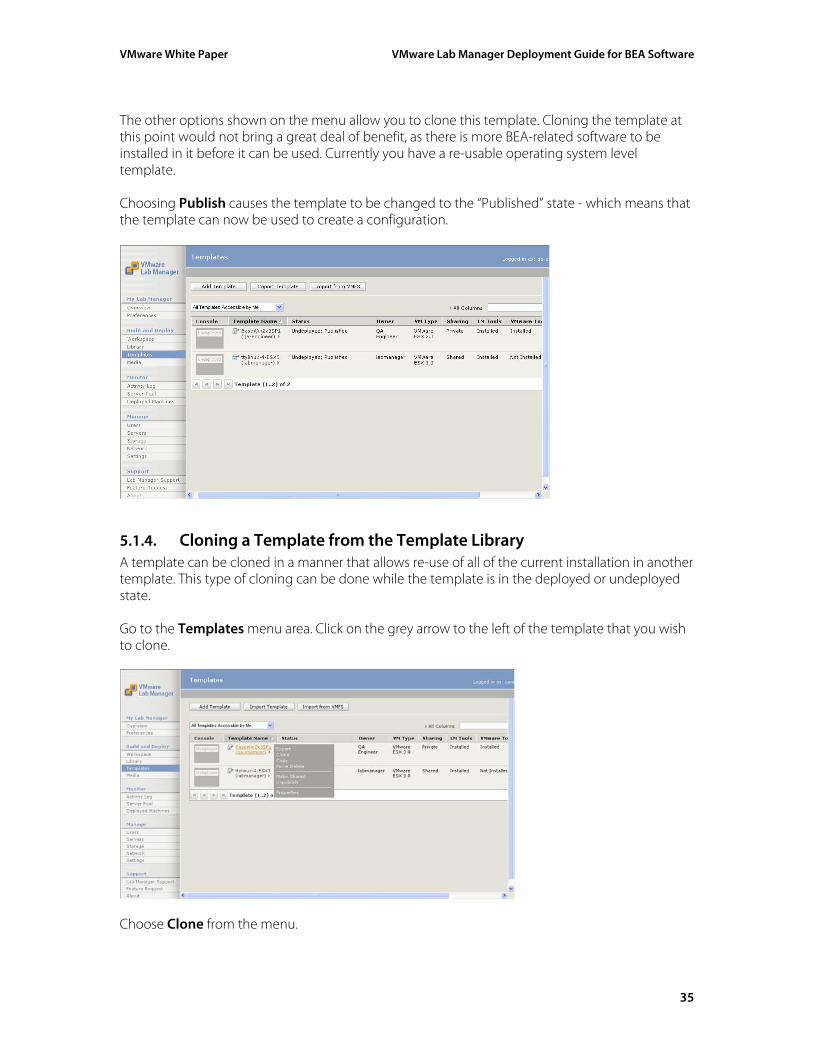
the “Published” state - which means that e template can now be used to create a configuration.
te Choosing Publish causes the template to be changed to th
r te. This type of cloning can be done while the template is in the deployed or undeployed
tate.
menu area. Click on the grey arrow to the left of the template that you wish clone.
5.1.4. Cloning a Template from the Template Library A template can be cloned in a manner that allows re-use of all of the current installation in anothetemplas Go to the Templatesto
Choose Clone from the menu.
35
VMware White Paper VMware Lab Manager Deployment Guide for BEA Software
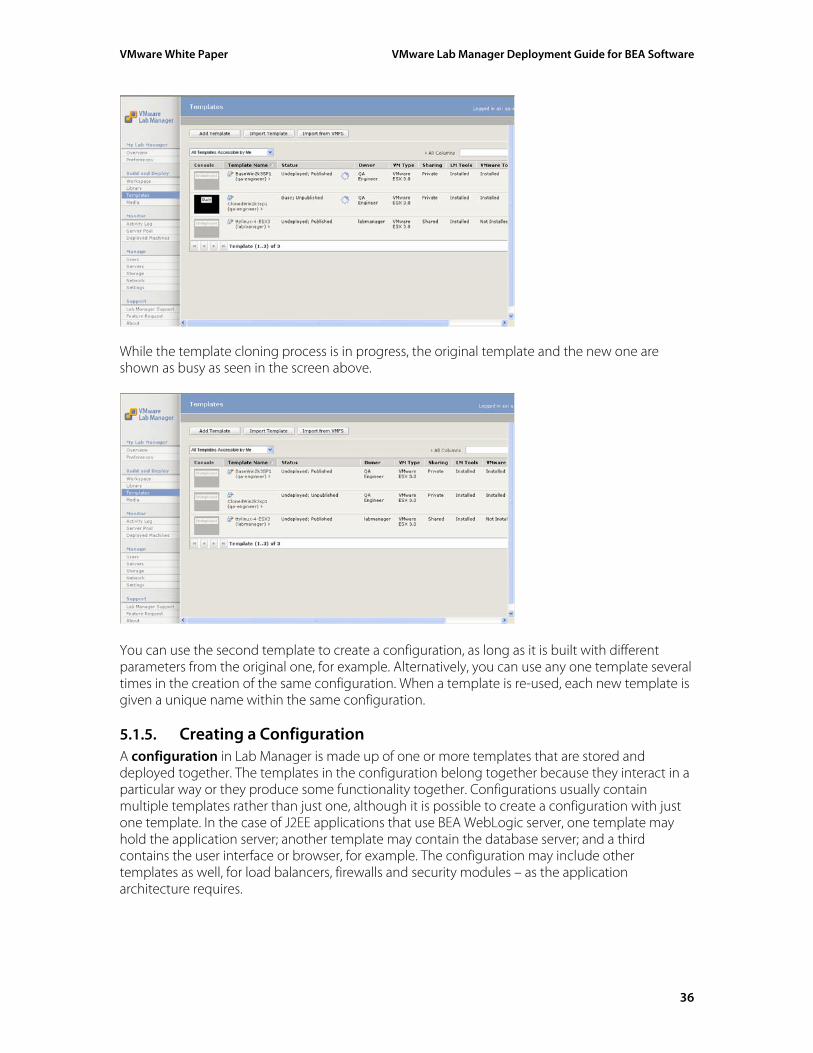
While the template cloning process is in progress, the original template and the new one are shown as busy as seen in the screen above.
You can use the second template to create a configuration, as long as it is built with different parameters from the original one, for example. Alternatively, you can use any one template several times in the creation of the same configuration. When a template is re-used, each new template is given a unique name within the same configuration.
5.1.5. Creating a Configuration A configuration in Lab Manager is made up of one or more templates that are stored and deployed together. The templates in the configuration belong together because they interact in a particular way or they produce some functionality together. Configurations usually contain multiple templates rather than just one, although it is possible to create a configuration with just one template. In the case of J2EE applications that use BEA WebLogic server, one template may hold the application server; another template may contain the database server; and a third contains the user interface or browser, for example. The configuration may include other templates as well, for load balancers, firewalls and security modules – as the application architecture requires.
36
VMware White Paper VMware Lab Manager Deployment Guide for BEA Software
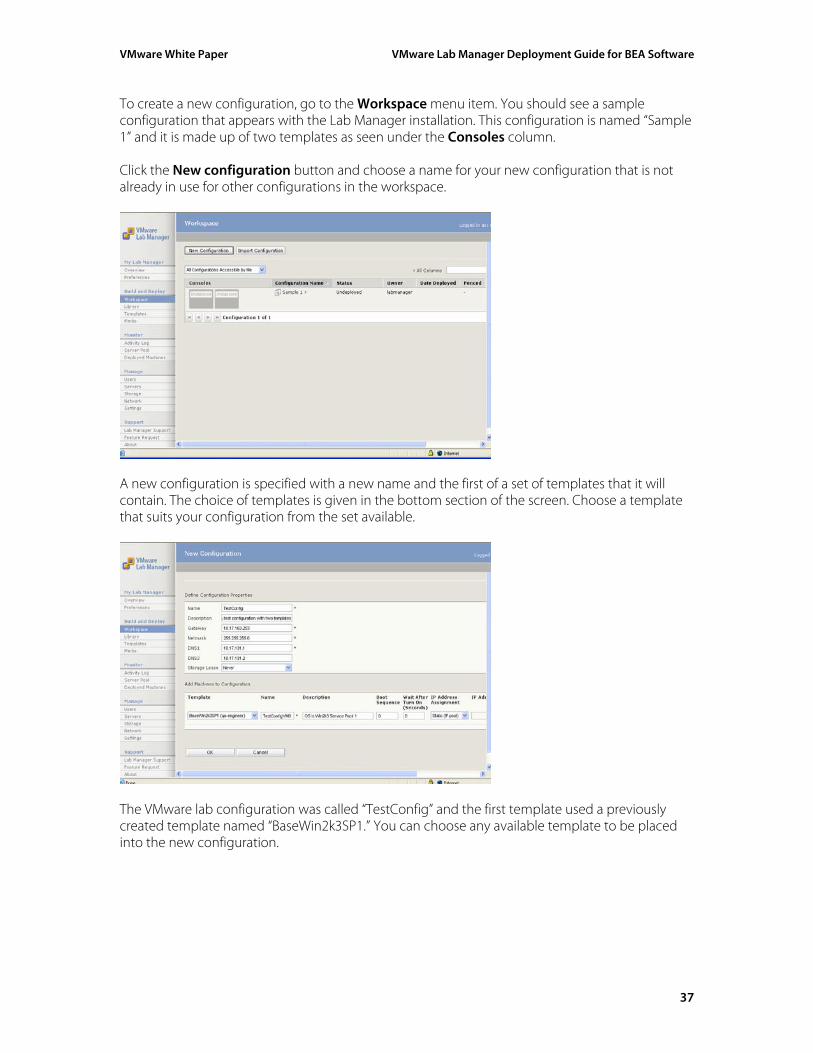
To create a new configuration, go to the Workspace menu item. You should see a sample configuration that appears with the Lab Manager installation. This configuration is named “Sample 1” and it is made up of two templates as seen under the Consoles column. Click the New configuration button and choose a name for your new configuration that is not already in use for other configurations in the workspace.
A new configuration is specified with a new name and the first of a set of templates that it will contain. The choice of templates is given in the bottom section of the screen. Choose a template that suits your configuration from the set available.
The VMware lab configuration was called “TestConfig” and the first template used a previously created template named “BaseWin2k3SP1.” You can choose any available template to be placed into the new configuration.
37
VMware White Paper VMware Lab Manager Deployment Guide for BEA Software
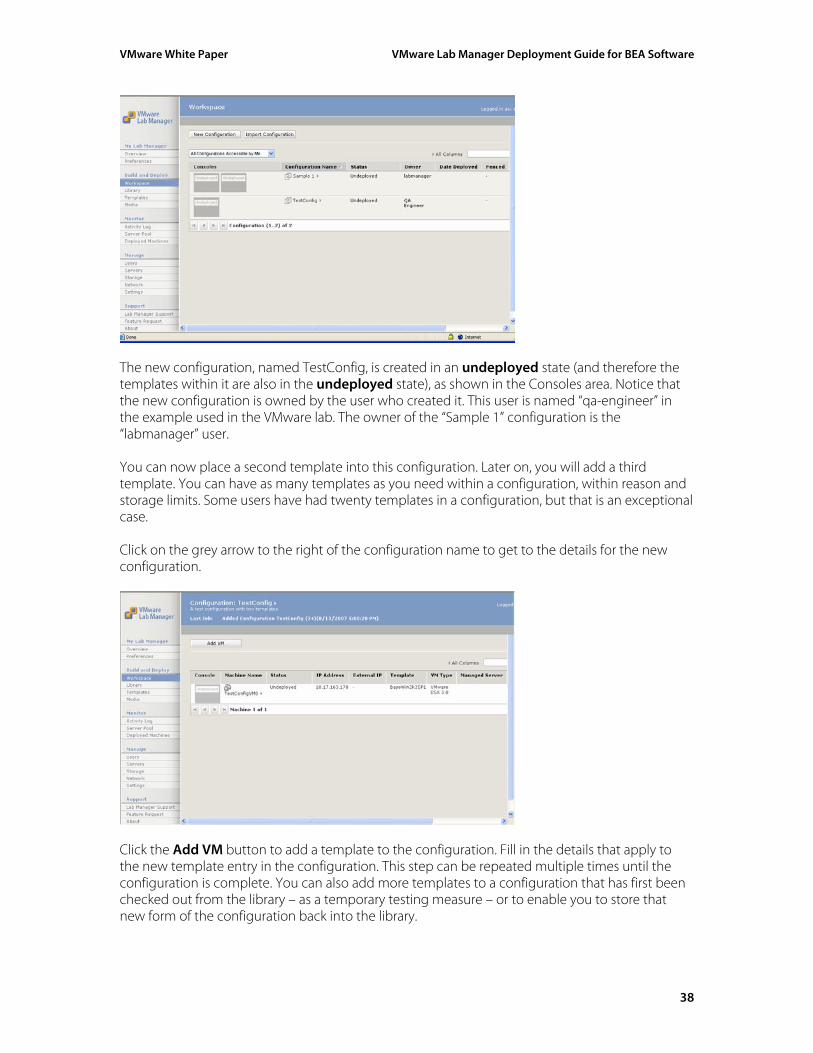
The new configuration, named TestConfig, is created in an undeployed state (and therefore the templates within it are also in the undeployed state), as shown in the Consoles area. Notice that the new configuration is owned by the user who created it. This user is named “qa-engineer” in the example used in the VMware lab. The owner of the “Sample 1” configuration is the “labmanager” user. You can now place a second template into this configuration. Later on, you will add a third template. You can have as many templates as you need within a configuration, within reason and storage limits. Some users have had twenty templates in a configuration, but that is an exceptional case. Click on the grey arrow to the right of the configuration name to get to the details for the new configuration.
Click the Add VM button to add a template to the configuration. Fill in the details that apply to the new template entry in the configuration. This step can be repeated multiple times until the configuration is complete. You can also add more templates to a configuration that has first been checked out from the library – as a temporary testing measure – or to enable you to store that new form of the configuration back into the library.
38
VMware White Paper VMware Lab Manager Deployment Guide for BEA Software
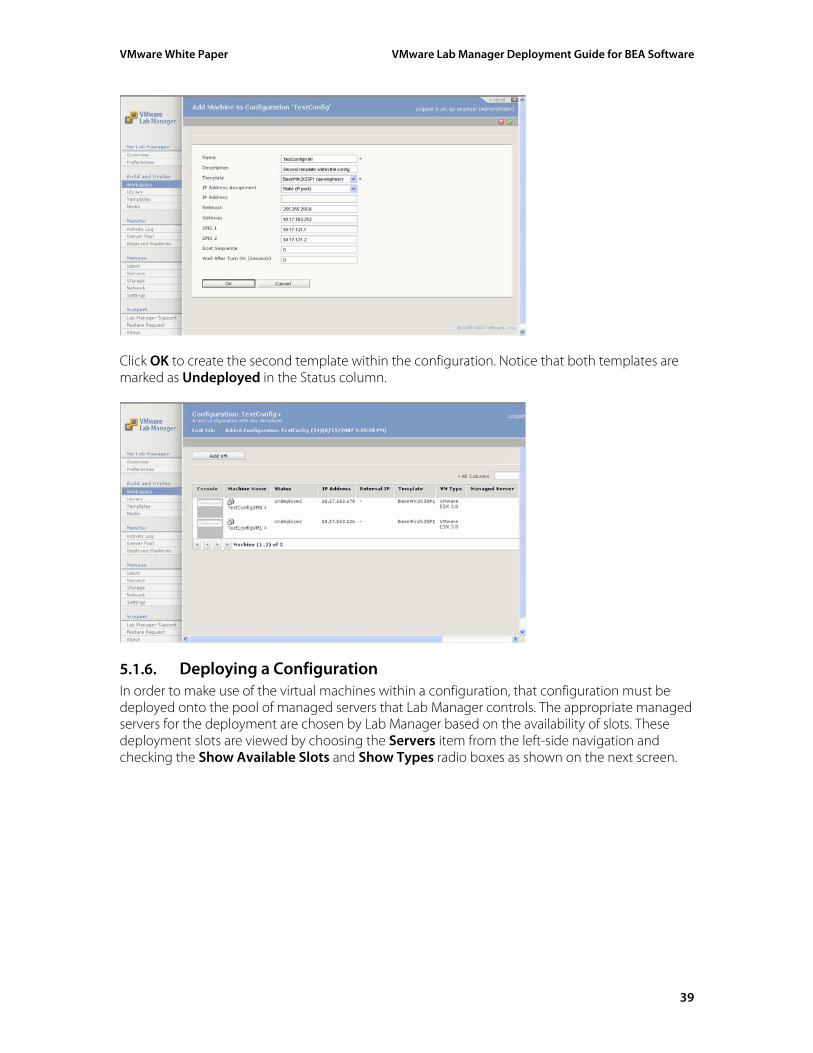
Click OK to create the second template within the configuration. Notice that both templates are marked as Undeployed in the Status column.
5.1.6. Deploying a Configuration In order to make use of the virtual machines within a configuration, that configuration must be deployed onto the pool of managed servers that Lab Manager controls. The appropriate managed servers for the deployment are chosen by Lab Manager based on the availability of slots. These deployment slots are viewed by choosing the Servers item from the left-side navigation and checking the Show Available Slots and Show Types radio boxes as shown on the next screen.
39
VMware White Paper VMware Lab Manager Deployment Guide for BEA Software
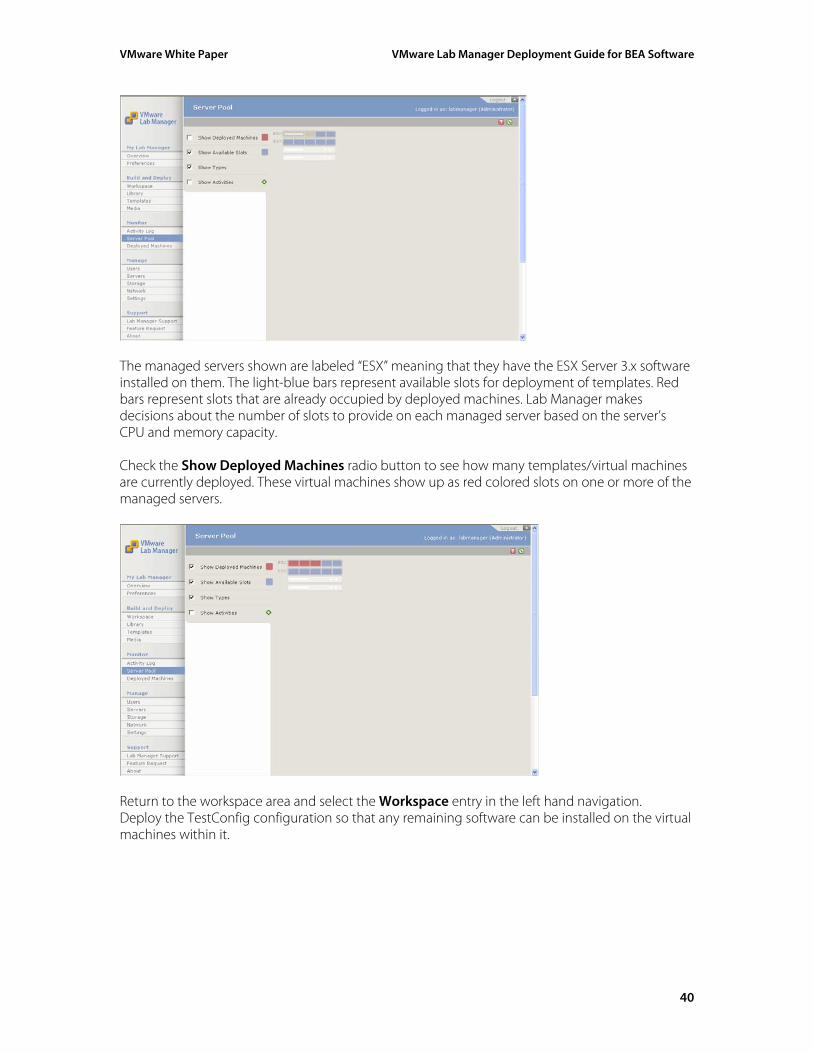
The managed servers shown are labeled “ESX” meaning that they have the ESX Server 3.x software installed on them. The light-blue bars represent available slots for deployment of templates. Red bars represent slots that are already occupied by deployed machines. Lab Manager makes decisions about the number of slots to provide on each managed server based on the server’s CPU and memory capacity. Check the Show Deployed Machines radio button to see how many templates/virtual machines are currently deployed. These virtual machines show up as red colored slots on one or more of the managed servers.
Return to the workspace area and select the Workspace entry in the left hand navigation. Deploy the TestConfig configuration so that any remaining software can be installed on the virtual machines within it.
40
VMware White Paper VMware Lab Manager Deployment Guide for BEA Software
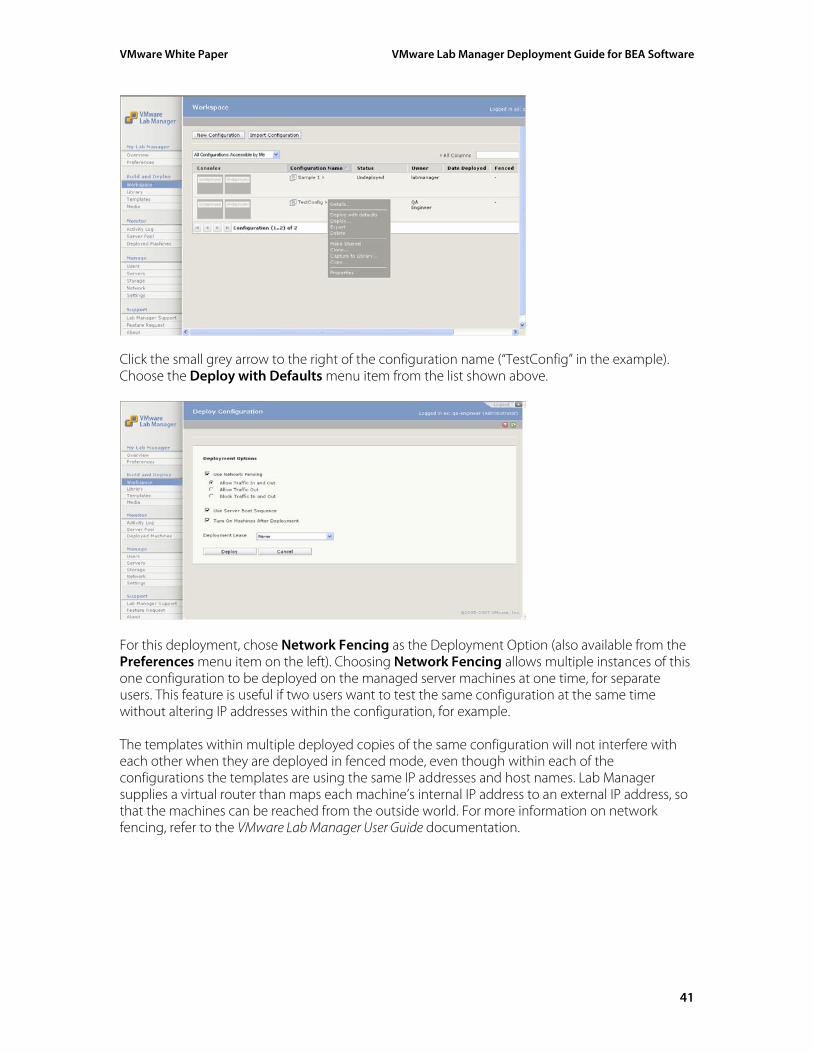
Click the small grey arrow to the right of the configuration name (“TestConfig” in the example). Choose the Deploy with Defaults menu item from the list shown above.
For this deployment, chose Network Fencing as the Deployment Option (also available from the Preferences menu item on the left). Choosing Network Fencing allows multiple instances of this one configuration to be deployed on the managed server machines at one time, for separate users. This feature is useful if two users want to test the same configuration at the same time without altering IP addresses within the configuration, for example. The templates within multiple deployed copies of the same configuration will not interfere with each other when they are deployed in fenced mode, even though within each of the configurations the templates are using the same IP addresses and host names. Lab Manager supplies a virtual router than maps each machine’s internal IP address to an external IP address, so that the machines can be reached from the outside world. For more information on network fencing, refer to the VMware Lab Manager User Guide documentation.
41
VMware White Paper VMware Lab Manager Deployment Guide for BEA Software
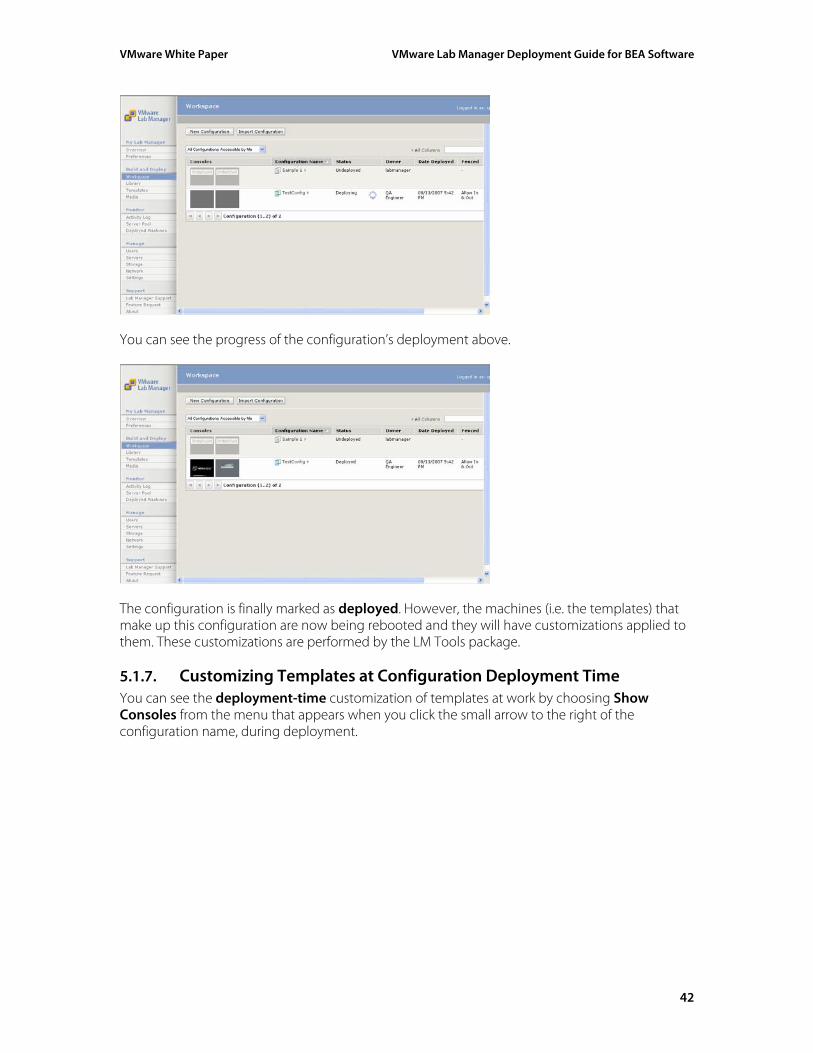
You can see the progress of the configuration’s deployment above.
The configuration is finally marked as deployed. However, the machines (i.e. the templates) that make up this configuration are now being rebooted and they will have customizations applied to them. These customizations are performed by the LM Tools package.
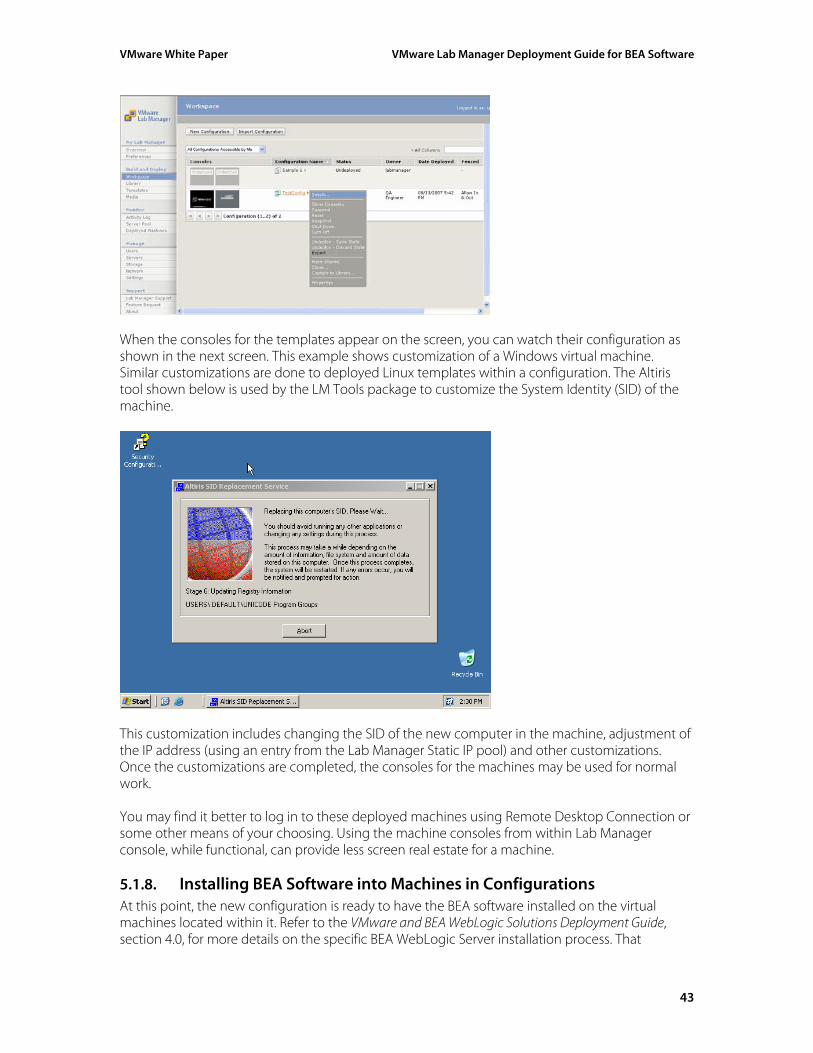
5.1.7. Customizing Templates at Configuration Deployment Time You can see the deployment-time customization of templates at work by choosing Show Consoles from the menu that appears when you click the small arrow to the right of the configuration name, during deployment.
42
VMware White Paper VMware Lab Manager Deployment Guide for BEA Software
When the consoles for the templates appear on the screen, you can watch their configuration as shown in the next screen. This example shows customization of a Windows virtual machine. Similar customizations are done to deployed Linux templates within a configuration. The Altiris tool shown below is used by the LM Tools package to customize the System Identity (SID) of the machine.
This customization includes changing the SID of the new computer in the machine, adjustment of the IP address (using an entry from the Lab Manager Static IP pool) and other customizations. Once the customizations are completed, the consoles for the machines may be used for normal work. You may find it better to log in to these deployed machines using Remote Desktop Connection or some other means of your choosing. Using the machine consoles from within Lab Manager console, while functional, can provide less screen real estate for a machine.
5.1.8. Installing BEA Software into Machines in Configurations At this point, the new configuration is ready to have the BEA software installed on the virtual machines located within it. Refer to the VMware and BEA WebLogic Solutions Deployment Guide, section 4.0, for more details on the specific BEA WebLogic Server installation process. That
43
VMware White Paper VMware Lab Manager Deployment Guide for BEA Software
document provides detailed information on the installation and configuration of BEA WebLogic server on virtual machines. It is a Lab Manager best practice to install any BEA software that is sensitive to host names and IP addresses into machines that are already contained in a configuration and deployed. This practice allows any adjustments to the operating system to be done by the LM Tools package after the virtual machine starts up, when that configuration is deployed for the first time. For each instance of BEA software you will be running, follow the same steps as described in sections 5.1.1 to 5.1.6 to create a template and add it into a configuration. Once the configuration has been deployed, proceed to install the BEA software (which in the example was WebLogic Server) on that machine. One template can be assigned for each node within a multi-node BEA WebLogic server configuration setup. It is useful to name the templates for the roles that will be assigned to them. If you are installing other products from BEA into your virtual machines, please refer to the BEA Installation Guides for those particular products.
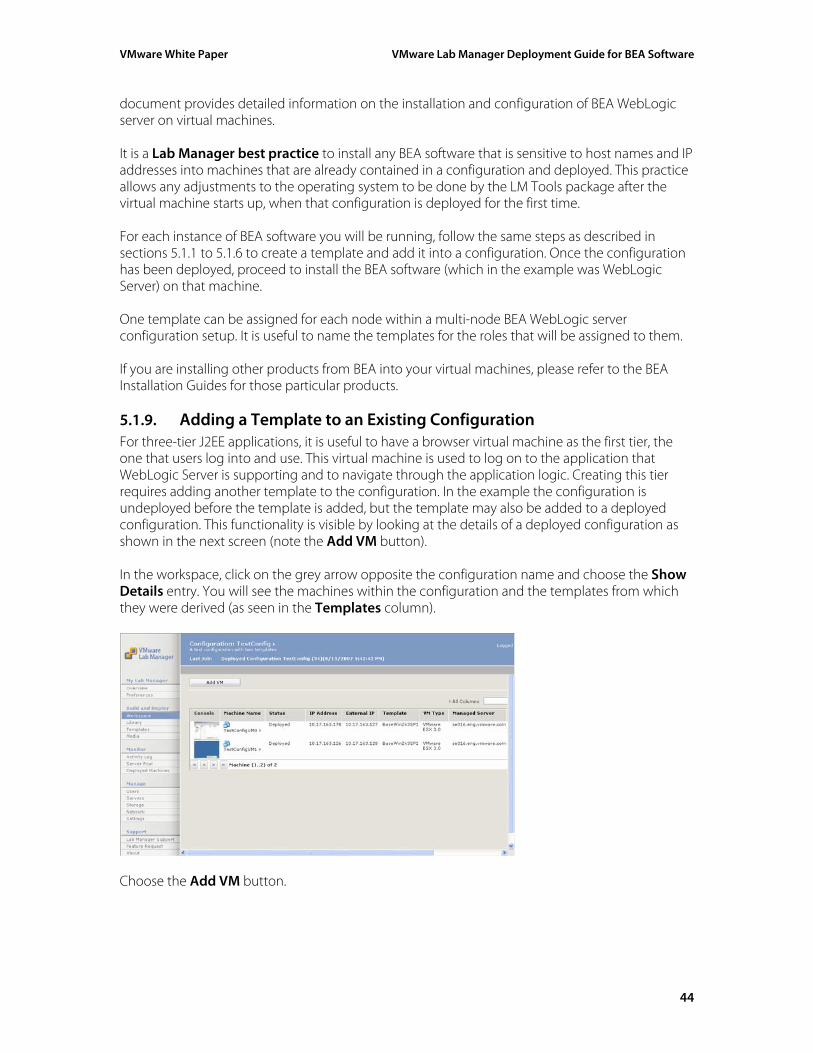
5.1.9. Adding a Template to an Existing Configuration For three-tier J2EE applications, it is useful to have a browser virtual machine as the first tier, the one that users log into and use. This virtual machine is used to log on to the application that WebLogic Server is supporting and to navigate through the application logic. Creating this tier requires adding another template to the configuration. In the example the configuration is undeployed before the template is added, but the template may also be added to a deployed configuration. This functionality is visible by looking at the details of a deployed configuration as shown in the next screen (note the Add VM button). In the workspace, click on the grey arrow opposite the configuration name and choose the Show Details entry. You will see the machines within the configuration and the templates from which they were derived (as seen in the Templates column).
Choose the Add VM button.
44
VMware White Paper VMware Lab Manager Deployment Guide for BEA Software
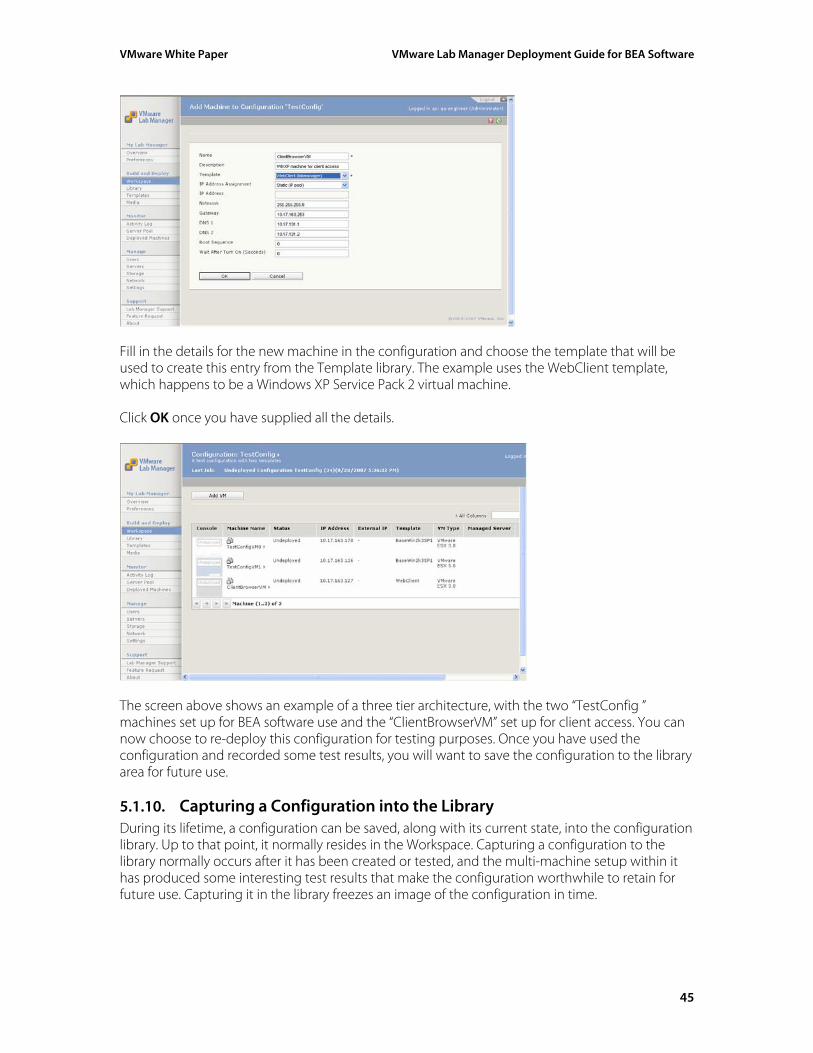
Fill in the details for the new machine in the configuration and choose the template that will be used to create this entry from the Template library. The example uses the WebClient template, which happens to be a Windows XP Service Pack 2 virtual machine. Click OK once you have supplied all the details.
The screen above shows an example of a three tier architecture, with the two “TestConfig ” machines set up for BEA software use and the “ClientBrowserVM” set up for client access. You can now choose to re-deploy this configuration for testing purposes. Once you have used the configuration and recorded some test results, you will want to save the configuration to the library area for future use.
5.1.10. Capturing a Configuration into the Library During its lifetime, a configuration can be saved, along with its current state, into the configuration library. Up to that point, it normally resides in the Workspace. Capturing a configuration to the library normally occurs after it has been created or tested, and the multi-machine setup within it has produced some interesting test results that make the configuration worthwhile to retain for future use. Capturing it in the library freezes an image of the configuration in time.
45
VMware White Paper VMware Lab Manager Deployment Guide for BEA Software
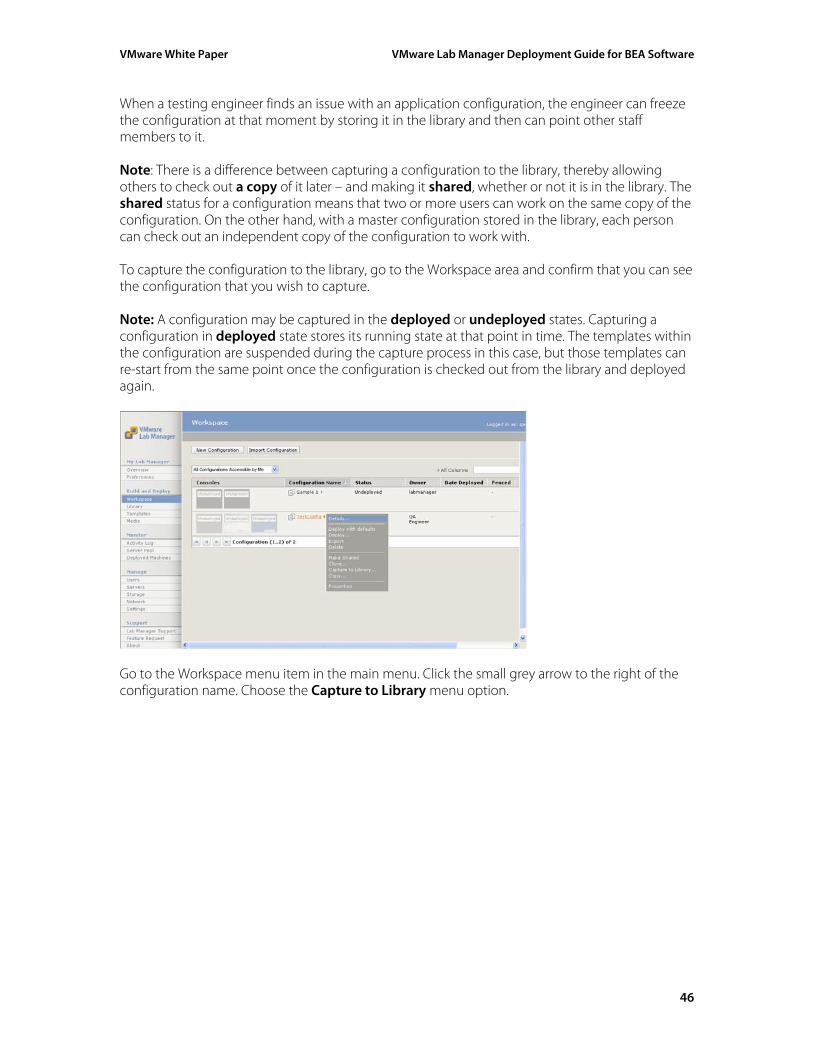
When a testing engineer finds an issue with an application configuration, the engineer can freeze the configuration at that moment by storing it in the library and then can point other staff members to it. Note: There is a difference between capturing a configuration to the library, thereby allowing others to check out a copy of it later – and making it shared, whether or not it is in the library. The shared status for a configuration means that two or more users can work on the same copy of the configuration. On the other hand, with a master configuration stored in the library, each person can check out an independent copy of the configuration to work with. To capture the configuration to the library, go to the Workspace area and confirm that you can see the configuration that you wish to capture. Note: A configuration may be captured in the deployed or undeployed states. Capturing a configuration in deployed state stores its running state at that point in time. The templates within the configuration are suspended during the capture process in this case, but those templates can re-start from the same point once the configuration is checked out from the library and deployed again.
Go to the Workspace menu item in the main menu. Click the small grey arrow to the right of the configuration name. Choose the Capture to Library menu option.
46
VMware White Paper VMware Lab Manager Deployment Guide for BEA Software
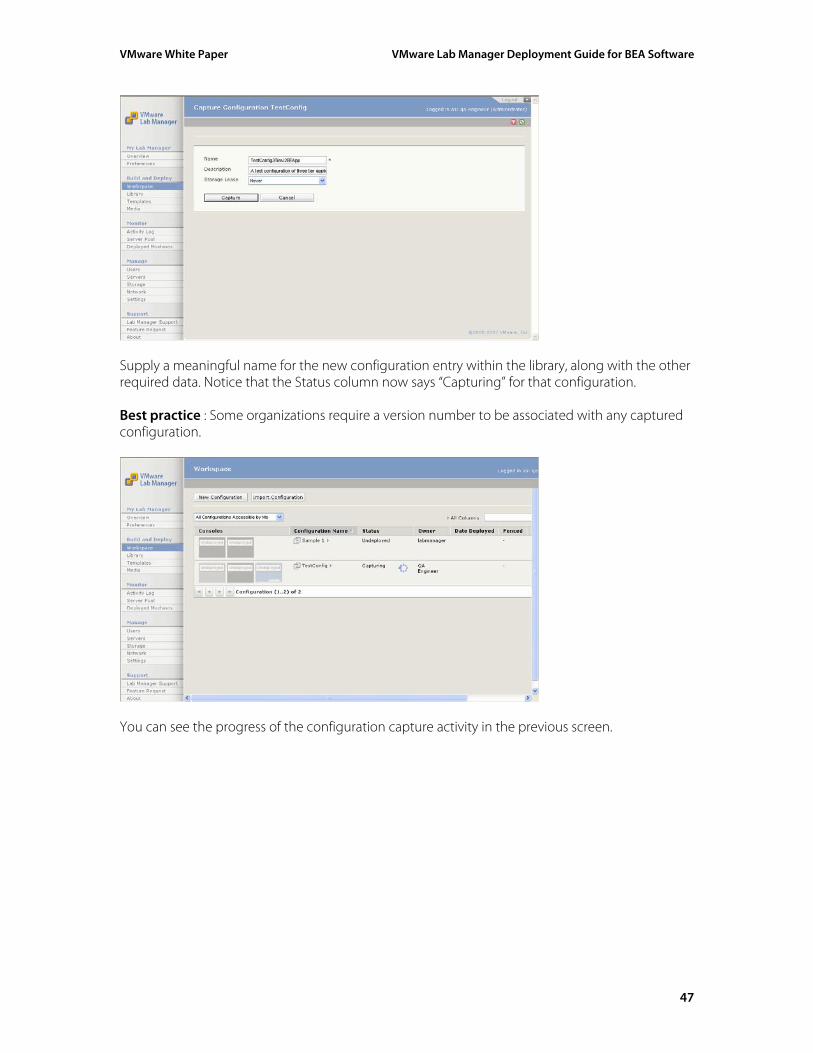
Supply a meaningful name for the new configuration entry within the library, along with the other required data. Notice that the Status column now says “Capturing” for that configuration. Best practice : Some organizations require a version number to be associated with any captured configuration.
You can see the progress of the configuration capture activity in the previous screen.
47
VMware White Paper VMware Lab Manager Deployment Guide for BEA Software
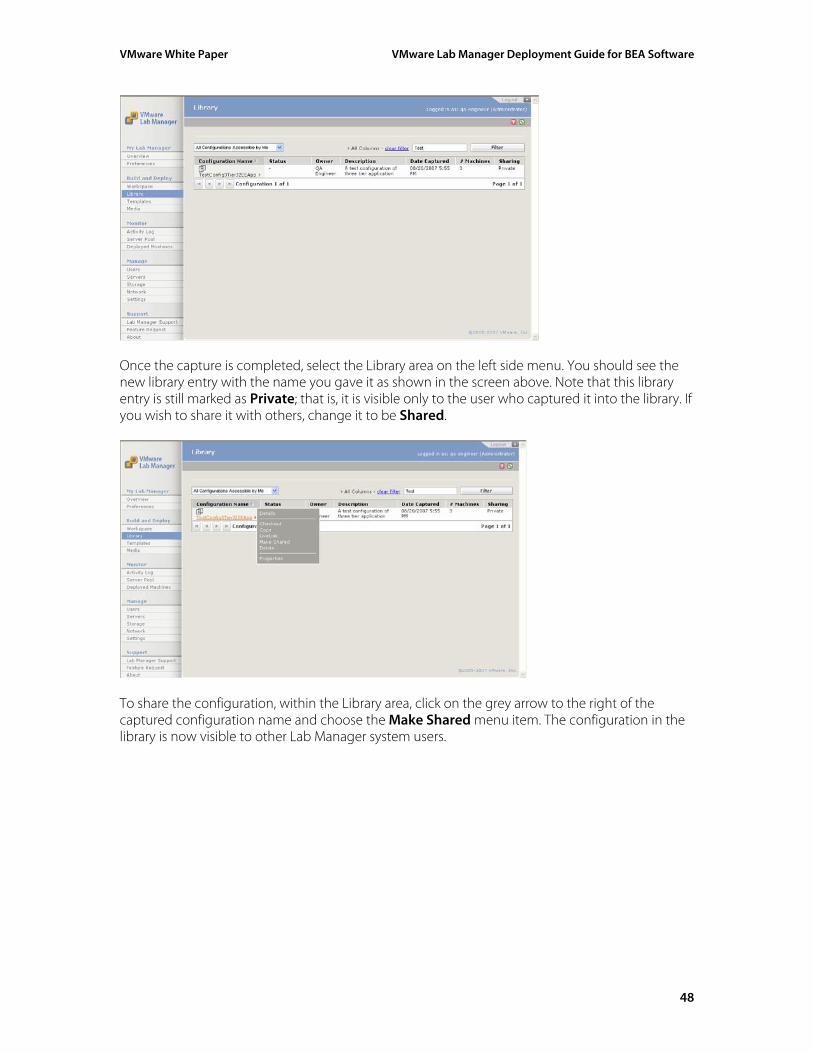
Once the capture is completed, select the Library area on the left side menu. You should see the new library entry with the name you gave it as shown in the screen above. Note that this library entry is still marked as Private; that is, it is visible only to the user who captured it into the library. If you wish to share it with others, change it to be Shared.
To share the configuration, within the Library area, click on the grey arrow to the right of the captured configuration name and choose the Make Shared menu item. The configuration in the library is now visible to other Lab Manager system users.
48
VMware White Paper VMware Lab Manager Deployment Guide for BEA Software
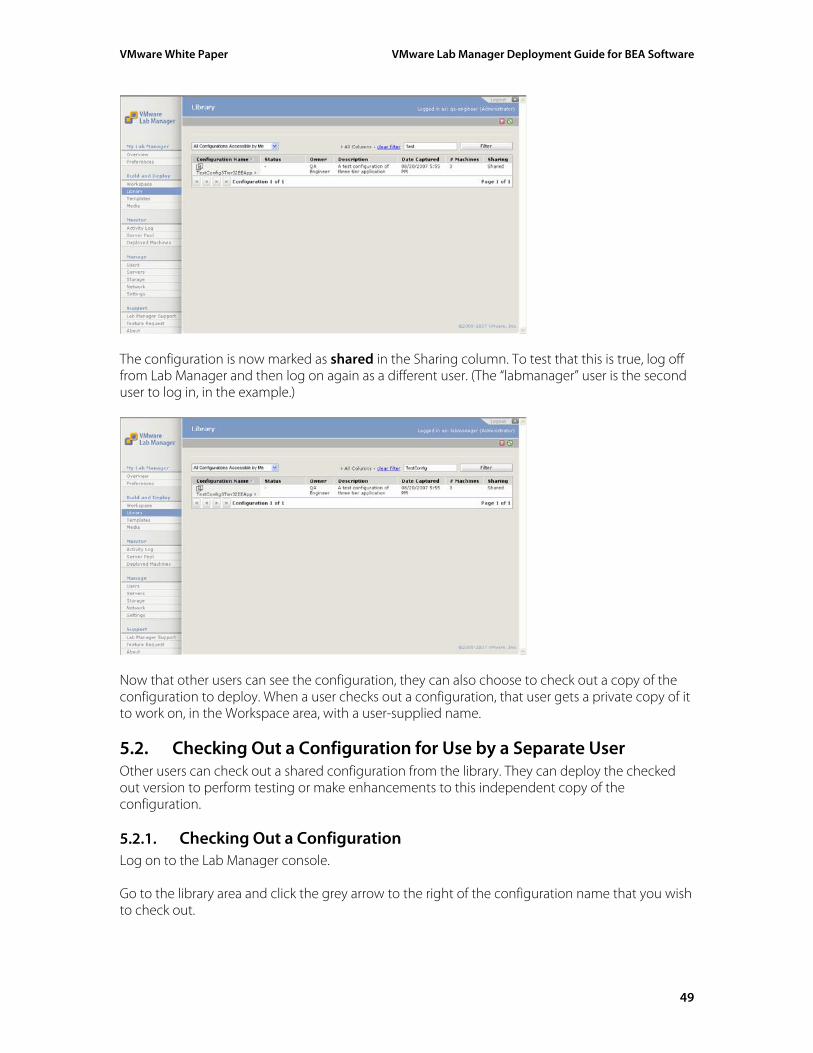
The configuration is now marked as shared in the Sharing column. To test that this is true, log off from Lab Manager and then log on again as a different user. (The “labmanager” user is the second user to log in, in the example.)
Now that other users can see the configuration, they can also choose to check out a copy of the configuration to deploy. When a user checks out a configuration, that user gets a private copy of it to work on, in the Workspace area, with a user-supplied name.
5.2. Checking Out a Configuration for Use by a Separate User Other users can check out a shared configuration from the library. They can deploy the checked out version to perform testing or make enhancements to this independent copy of the configuration.
5.2.1. Checking Out a Configuration Log on to the Lab Manager console. Go to the library area and click the grey arrow to the right of the configuration name that you wish to check out.
49
VMware White Paper VMware Lab Manager Deployment Guide for BEA Software
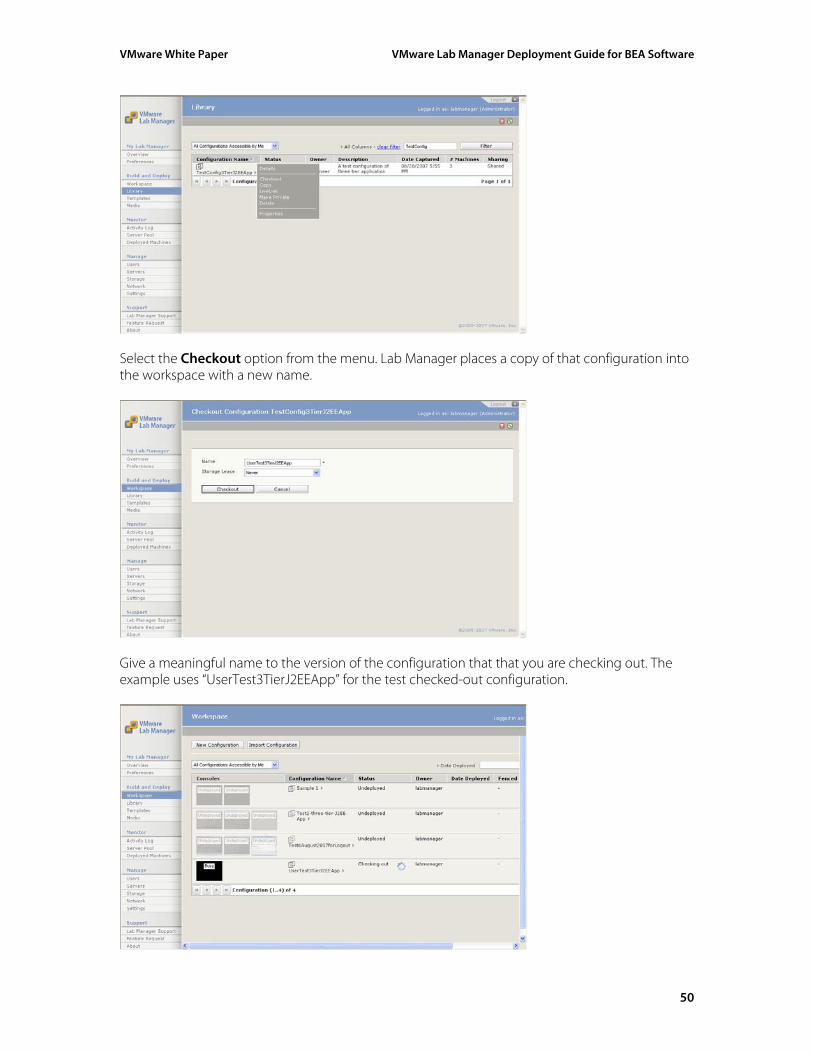
Select the Checkout option from the menu. Lab Manager places a copy of that configuration into the workspace with a new name.
Give a meaningful name to the version of the configuration that that you are checking out. The example uses “UserTest3TierJ2EEApp” for the test checked-out configuration.
50
VMware White Paper VMware Lab Manager Deployment Guide for BEA Software
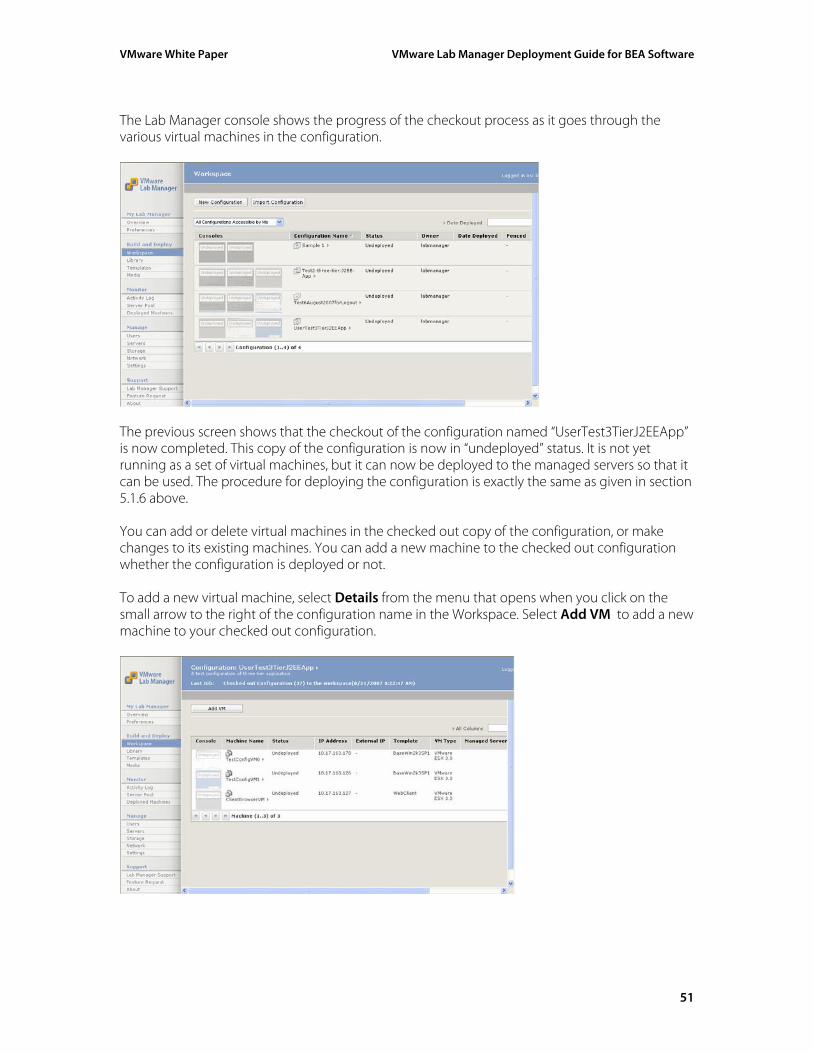
The Lab Manager console shows the progress of the checkout process as it goes through the various virtual machines in the configuration.
The previous screen shows that the checkout of the configuration named “UserTest3TierJ2EEApp” is now completed. This copy of the configuration is now in “undeployed” status. It is not yet running as a set of virtual machines, but it can now be deployed to the managed servers so that it can be used. The procedure for deploying the configuration is exactly the same as given in section 5.1.6 above. You can add or delete virtual machines in the checked out copy of the configuration, or make changes to its existing machines. You can add a new machine to the checked out configuration whether the configuration is deployed or not. To add a new virtual machine, select Details from the menu that opens when you click on the small arrow to the right of the configuration name in the Workspace. Select Add VM to add a new machine to your checked out configuration.
51
VMware White Paper VMware Lab Manager Deployment Guide for BEA Software
Once you have deployed the configuration and performed some testing with it, the changed configuration may be captured, using a separate name, back to the library. That procedure is described in section 5.1.10 above.
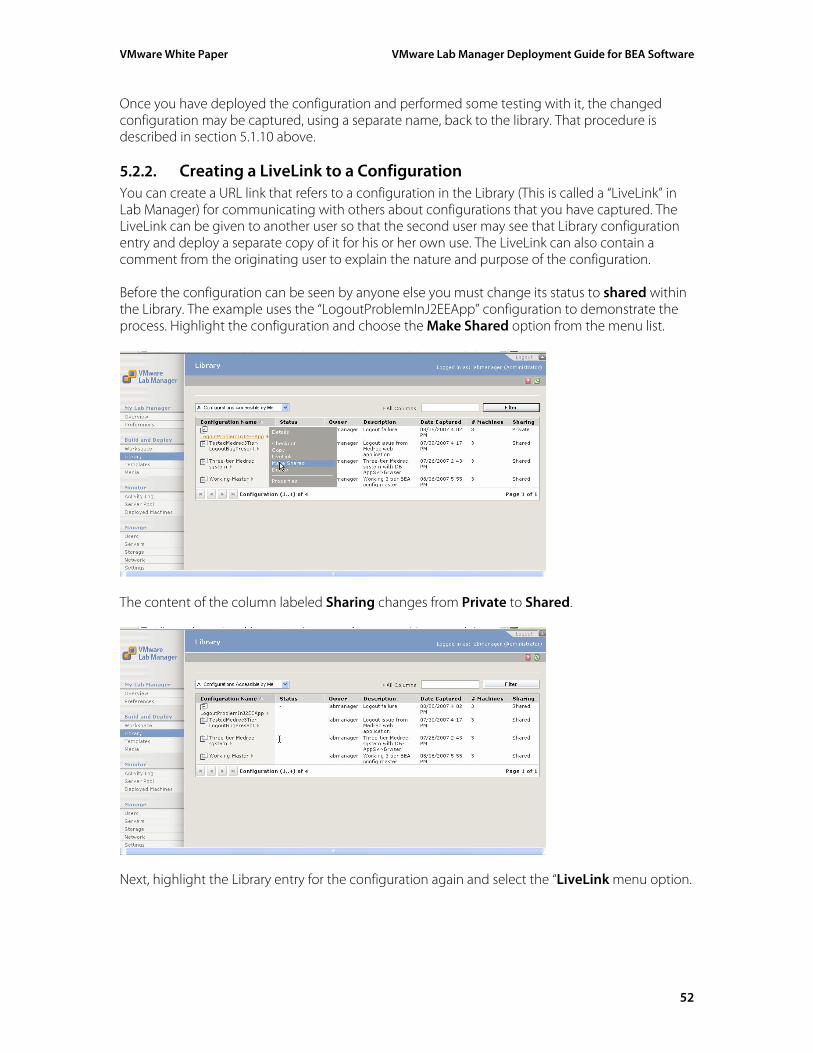
5.2.2. Creating a LiveLink to a Configuration You can create a URL link that refers to a configuration in the Library (This is called a “LiveLink” in Lab Manager) for communicating with others about configurations that you have captured. The LiveLink can be given to another user so that the second user may see that Library configuration entry and deploy a separate copy of it for his or her own use. The LiveLink can also contain a comment from the originating user to explain the nature and purpose of the configuration. Before the configuration can be seen by anyone else you must change its status to shared within the Library. The example uses the “LogoutProblemInJ2EEApp” configuration to demonstrate the process. Highlight the configuration and choose the Make Shared option from the menu list.
The content of the column labeled Sharing changes from Private to Shared.
Next, highlight the Library entry for the configuration again and select the “LiveLink menu option.
52
VMware White Paper VMware Lab Manager Deployment Guide for BEA Software
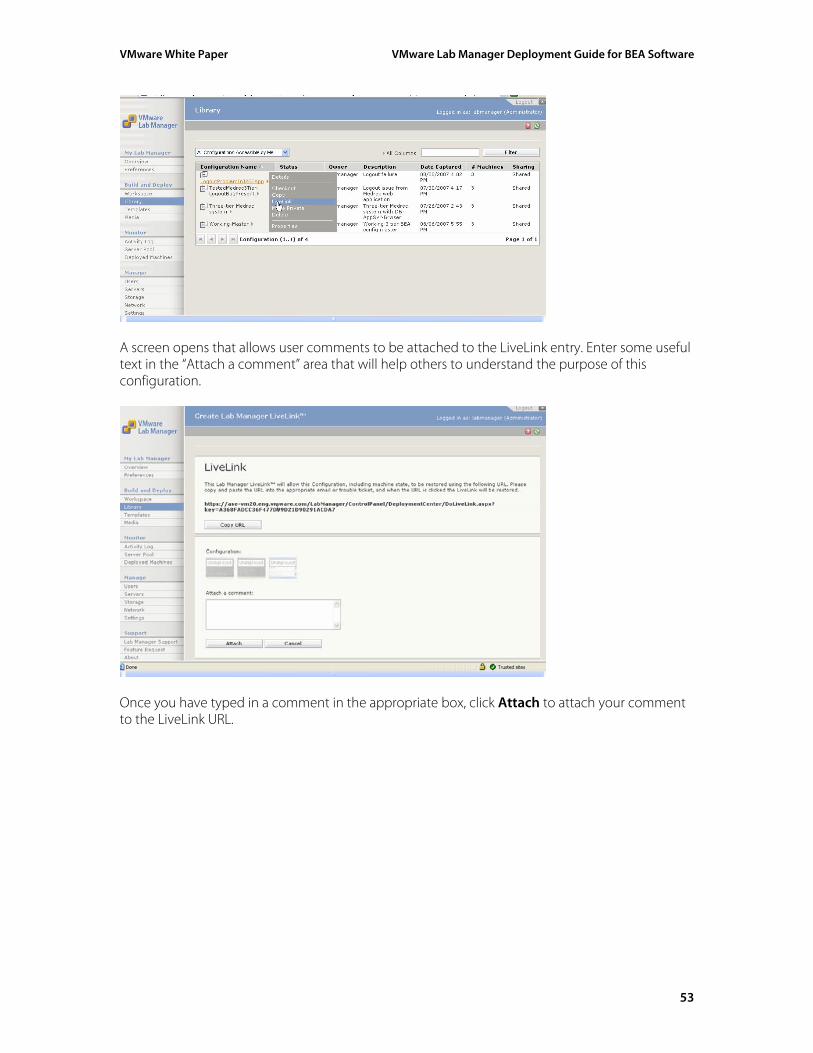
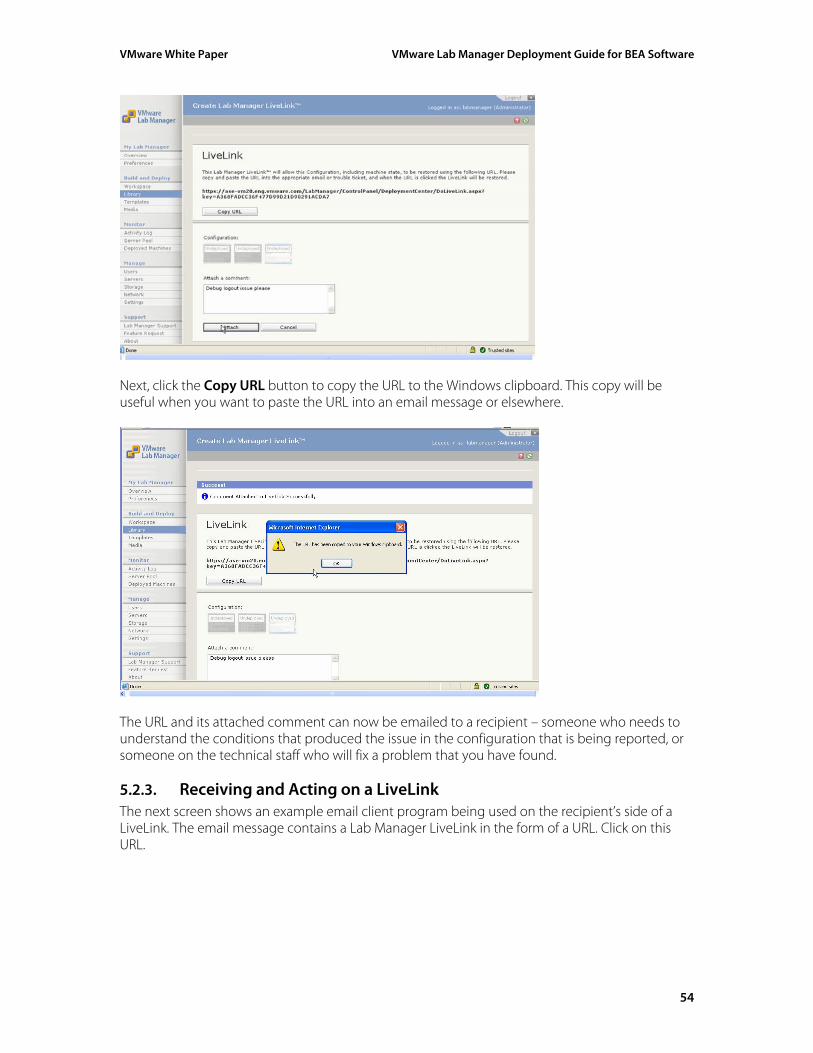
A screen opens that allows user comments to be attached to the LiveLink entry. Enter some useful text in the “Attach a comment” area that will help others to understand the purpose of this configuration.
Once you have typed in a comment in the appropriate box, click Attach to attach your comment to the LiveLink URL.
53
VMware White Paper VMware Lab Manager Deployment Guide for BEA Software
Next, click the Copy URL button to copy the URL to the Windows clipboard. This copy will be useful when you want to paste the URL into an email message or elsewhere.
The URL and its attached comment can now be emailed to a recipient – someone who needs to understand the conditions that produced the issue in the configuration that is being reported, or someone on the technical staff who will fix a problem that you have found.
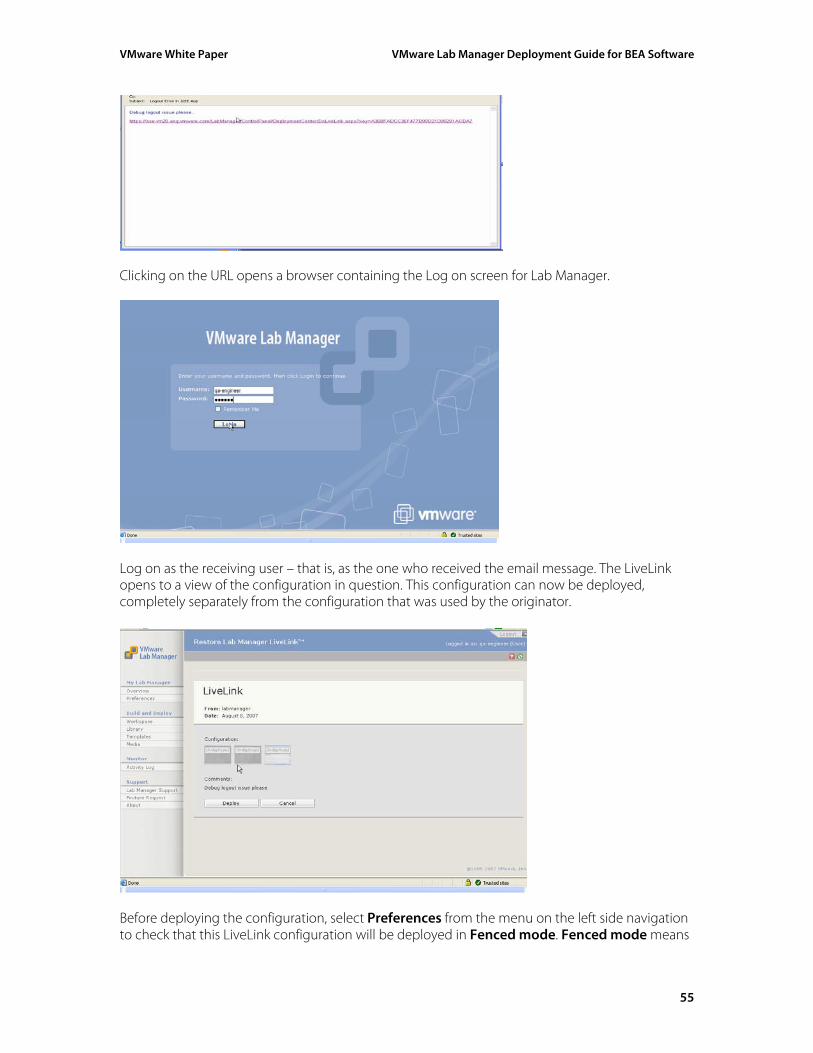
5.2.3. Receiving and Acting on a LiveLink The next screen shows an example email client program being used on the recipient’s side of a LiveLink. The email message contains a Lab Manager LiveLink in the form of a URL. Click on this URL.
54
VMware White Paper VMware Lab Manager Deployment Guide for BEA Software
Clicking on the URL opens a browser containing the Log on screen for Lab Manager.
Log on as the receiving user – that is, as the one who received the email message. The LiveLink opens to a view of the configuration in question. This configuration can now be deployed, completely separately from the configuration that was used by the originator.
Before deploying the configuration, select Preferences from the menu on the left side navigation to check that this LiveLink configuration will be deployed in Fenced mode. Fenced mode means
55
VMware White Paper VMware Lab Manager Deployment Guide for BEA Software
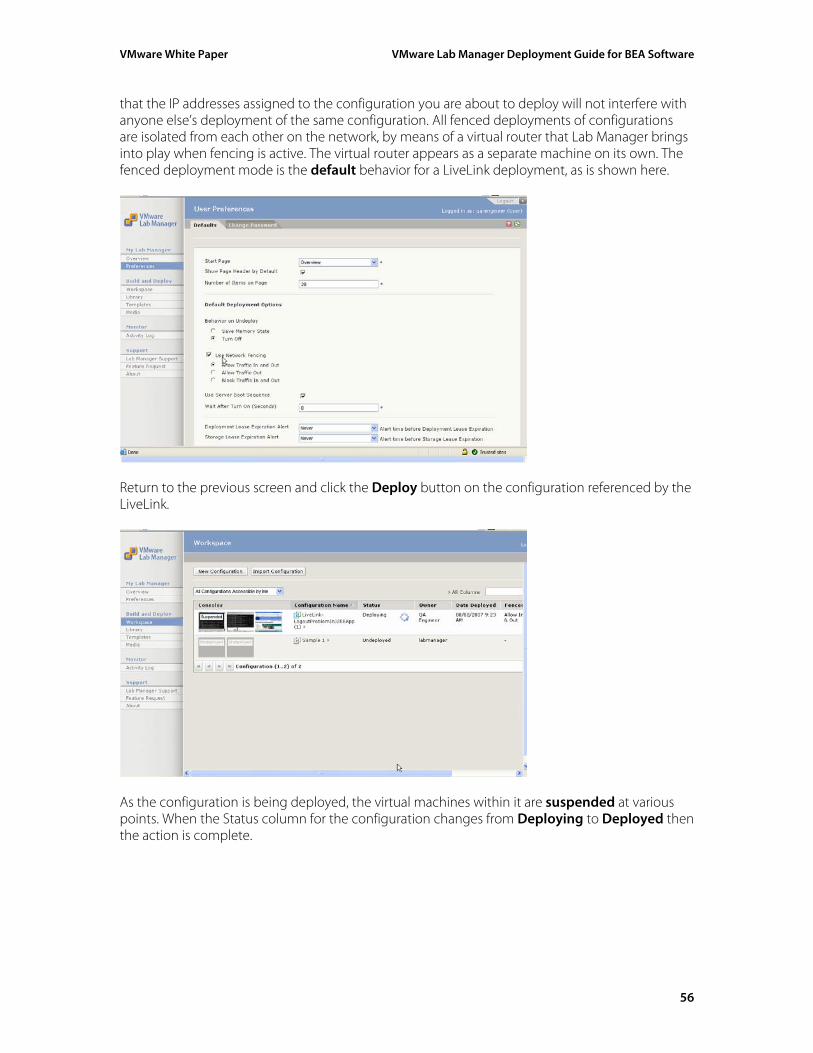
that the IP addresses assigned to the configuration you are about to deploy will not interfere with anyone else’s deployment of the same configuration. All fenced deployments of configurations are isolated from each other on the network, by means of a virtual router that Lab Manager brings into play when fencing is active. The virtual router appears as a separate machine on its own. The fenced deployment mode is the default behavior for a LiveLink deployment, as is shown here.
Return to the previous screen and click the Deploy button on the configuration referenced by the LiveLink.
As the configuration is being deployed, the virtual machines within it are suspended at various points. When the Status column for the configuration changes from Deploying to Deployed then the action is complete.
56
VMware White Paper VMware Lab Manager Deployment Guide for BEA Software
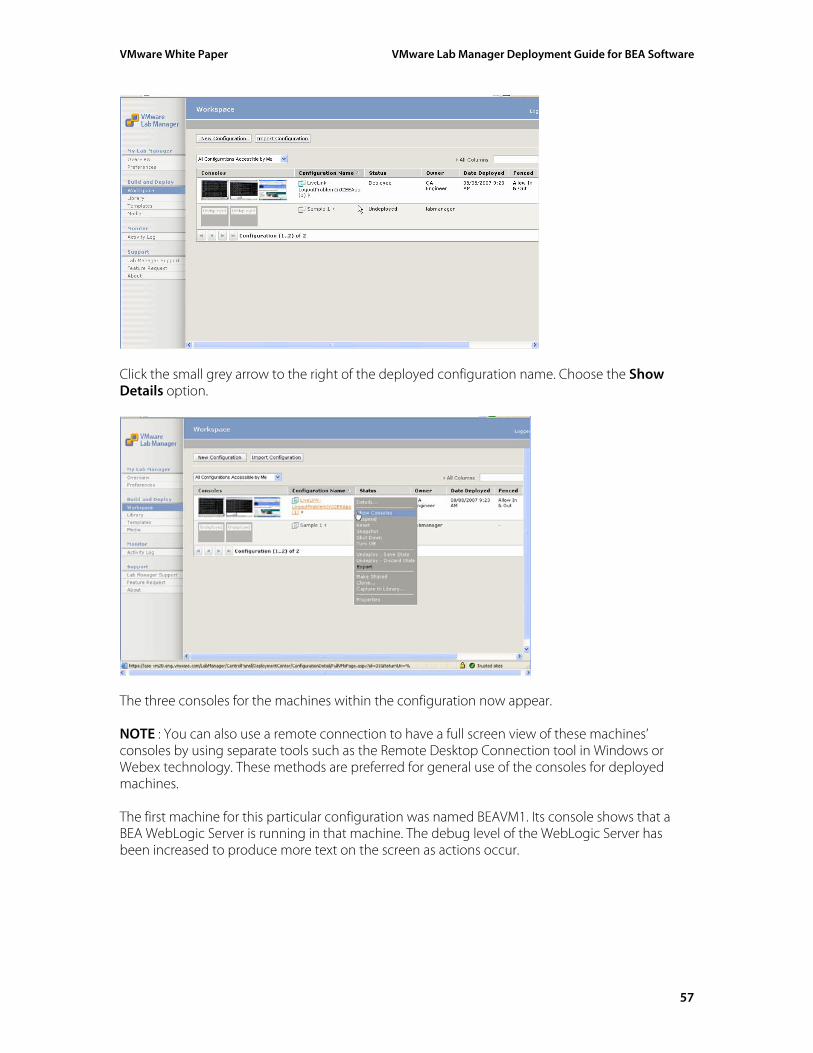
Click the small grey arrow to the right of the deployed configuration name. Choose the Show Details option.
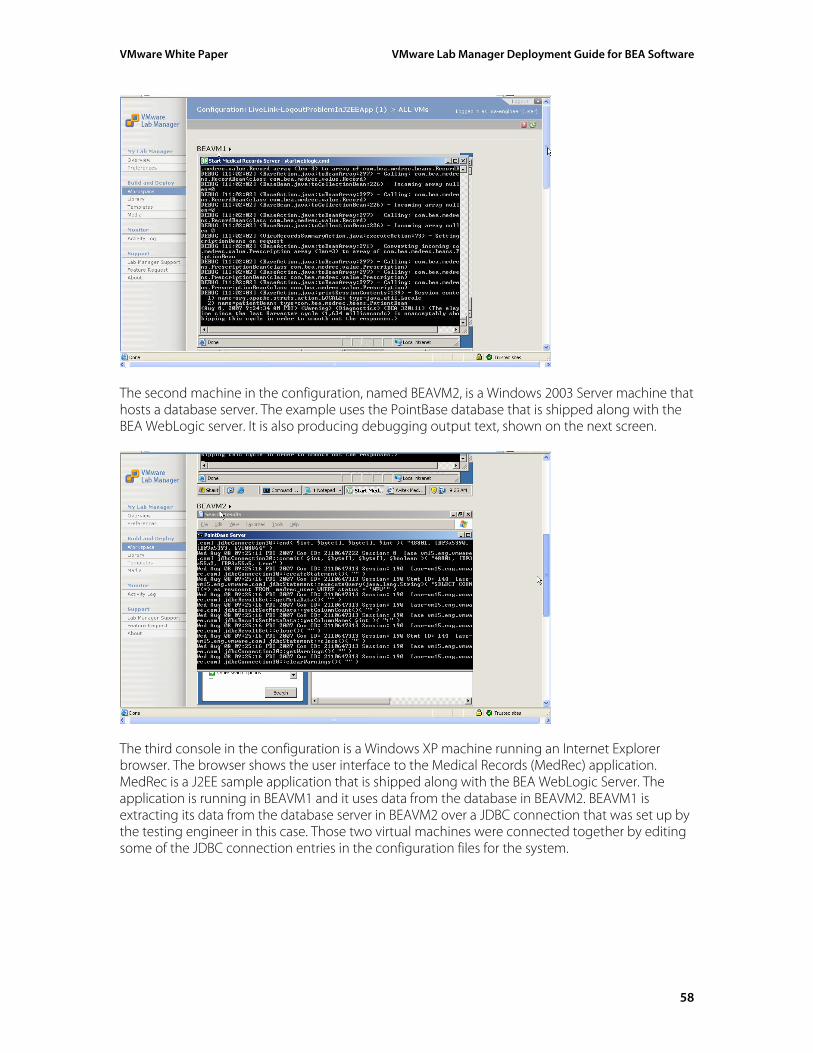
The three consoles for the machines within the configuration now appear. NOTE : You can also use a remote connection to have a full screen view of these machines’ consoles by using separate tools such as the Remote Desktop Connection tool in Windows or Webex technology. These methods are preferred for general use of the consoles for deployed machines. The first machine for this particular configuration was named BEAVM1. Its console shows that a BEA WebLogic Server is running in that machine. The debug level of the WebLogic Server has been increased to produce more text on the screen as actions occur.
57
VMware White Paper VMware Lab Manager Deployment Guide for BEA Software
The second machine in the configuration, named BEAVM2, is a Windows 2003 Server machine that hosts a database server. The example uses the PointBase database that is shipped along with the BEA WebLogic server. It is also producing debugging output text, shown on the next screen.
The third console in the configuration is a Windows XP machine running an Internet Explorer browser. The browser shows the user interface to the Medical Records (MedRec) application. MedRec is a J2EE sample application that is shipped along with the BEA WebLogic Server. The application is running in BEAVM1 and it uses data from the database in BEAVM2. BEAVM1 is extracting its data from the database server in BEAVM2 over a JDBC connection that was set up by the testing engineer in this case. Those two virtual machines were connected together by editing some of the JDBC connection entries in the configuration files for the system.
58
VMware White Paper VMware Lab Manager Deployment Guide for BEA Software
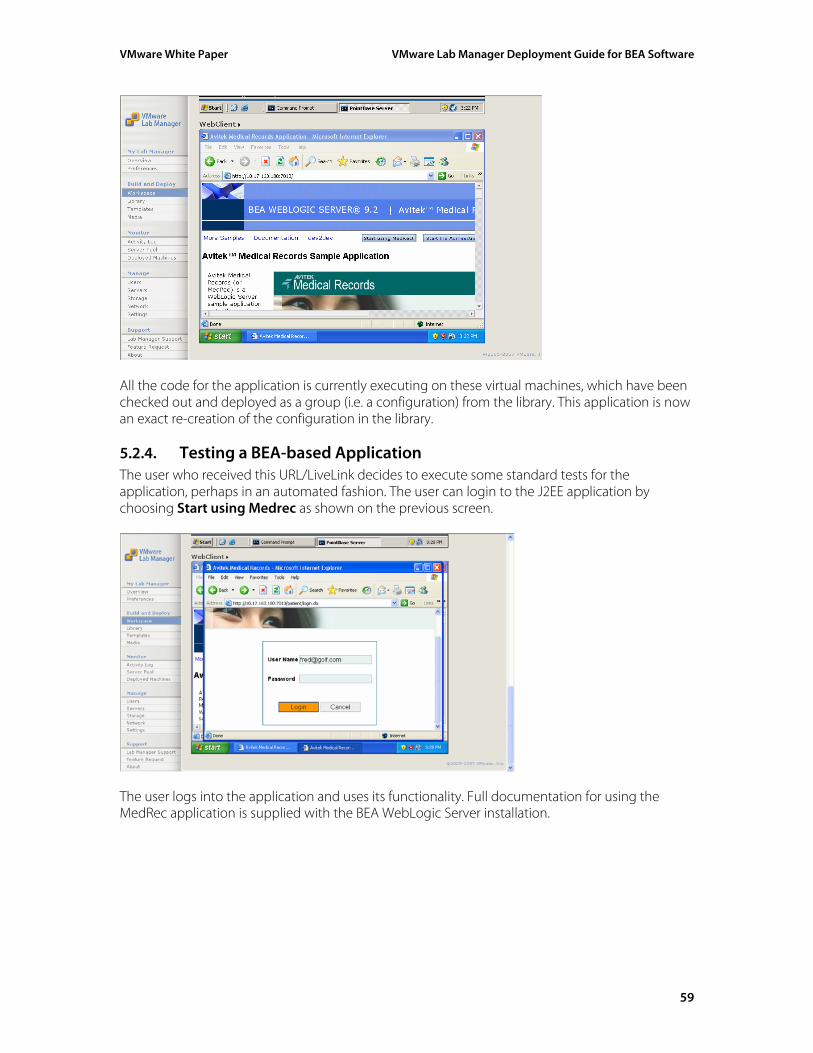
All the code for the application is currently executing on these virtual machines, which have been checked out and deployed as a group (i.e. a configuration) from the library. This application is now an exact re-creation of the configuration in the library.
5.2.4. Testing a BEA-based Application The user who received this URL/LiveLink decides to execute some standard tests for the application, perhaps in an automated fashion. The user can login to the J2EE application by choosing Start using Medrec as shown on the previous screen.
The user logs into the application and uses its functionality. Full documentation for using the MedRec application is supplied with the BEA WebLogic Server installation.
59
VMware White Paper VMware Lab Manager Deployment Guide for BEA Software
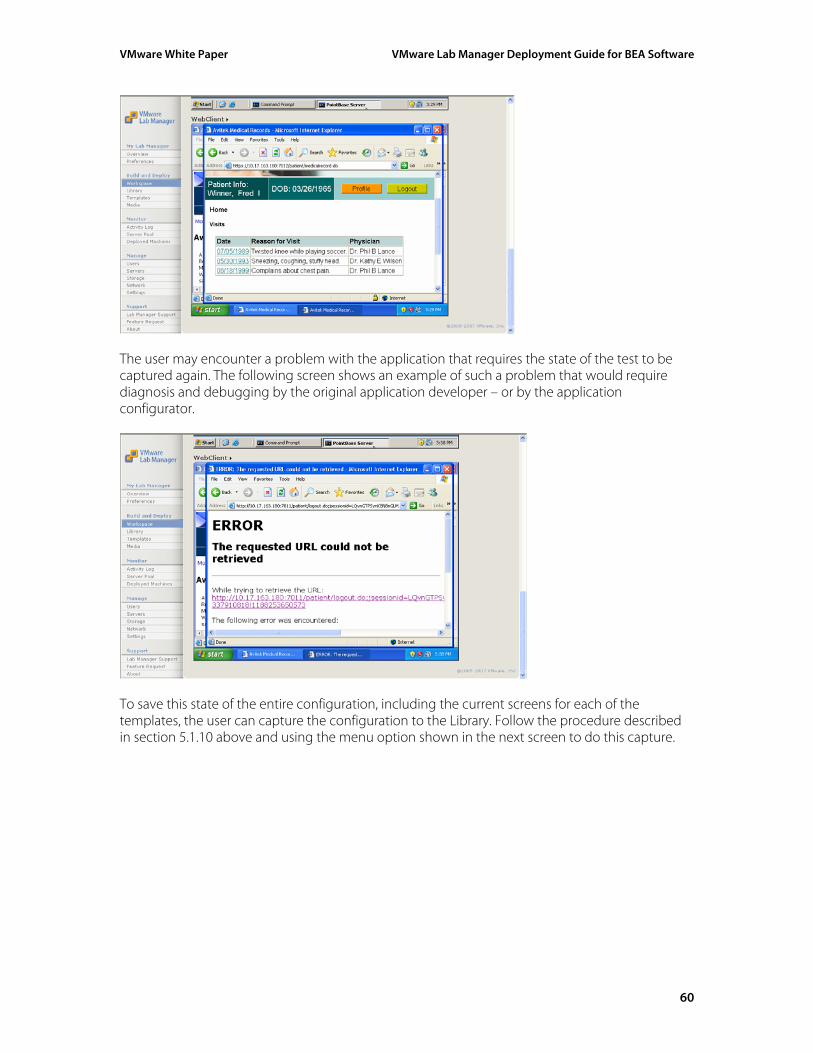
The user may encounter a problem with the application that requires the state of the test to be captured again. The following screen shows an example of such a problem that would require diagnosis and debugging by the original application developer – or by the application configurator.
To save this state of the entire configuration, including the current screens for each of the templates, the user can capture the configuration to the Library. Follow the procedure described in section 5.1.10 above and using the menu option shown in the next screen to do this capture.
60
VMware White Paper VMware Lab Manager Deployment Guide for BEA Software
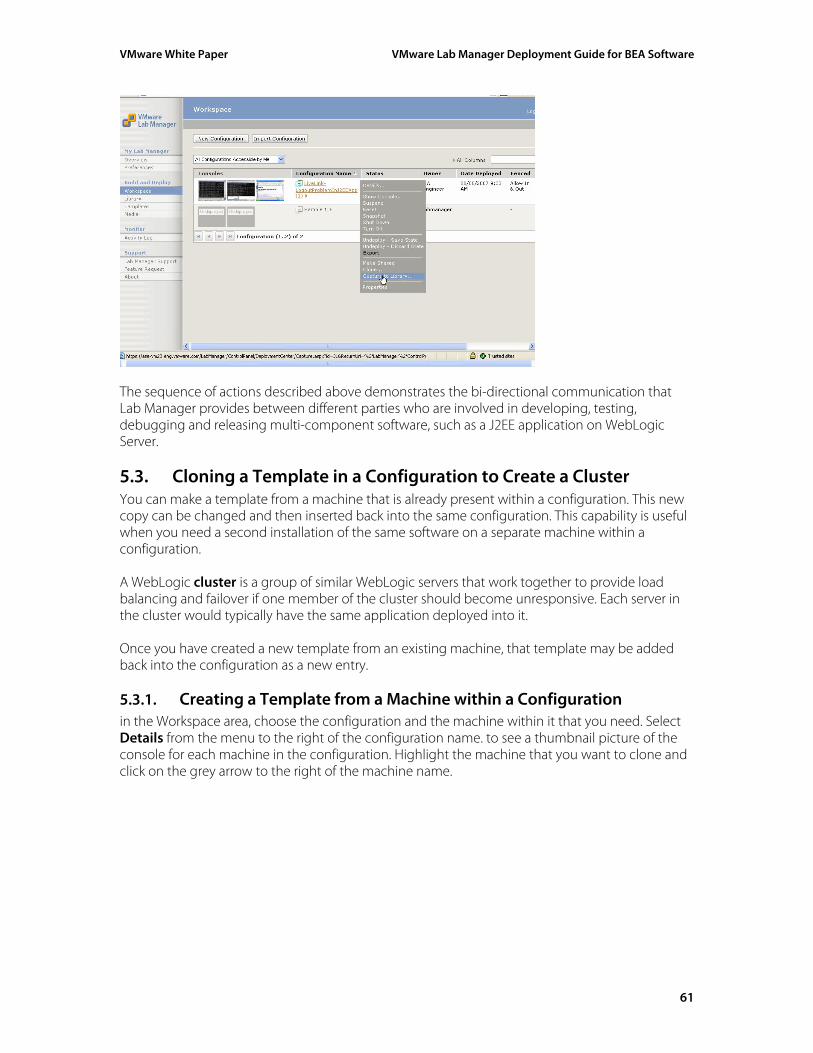
The sequence of actions described above demonstrates the bi-directional communication that Lab Manager provides between different parties who are involved in developing, testing, debugging and releasing multi-component software, such as a J2EE application on WebLogic Server.
5.3. Cloning a Template in a Configuration to Create a Cluster You can make a template from a machine that is already present within a configuration. This new copy can be changed and then inserted back into the same configuration. This capability is useful when you need a second installation of the same software on a separate machine within a configuration. A WebLogic cluster is a group of similar WebLogic servers that work together to provide load balancing and failover if one member of the cluster should become unresponsive. Each server in the cluster would typically have the same application deployed into it. Once you have created a new template from an existing machine, that template may be added back into the configuration as a new entry.
5.3.1. Creating a Template from a Machine within a Configuration in the Workspace area, choose the configuration and the machine within it that you need. Select Details from the menu to the right of the configuration name. to see a thumbnail picture of the console for each machine in the configuration. Highlight the machine that you want to clone and click on the grey arrow to the right of the machine name.
61

VMware White Paper VMware Lab Manager Deployment Guide for BEA Software
Select Add to Templates from the menu.
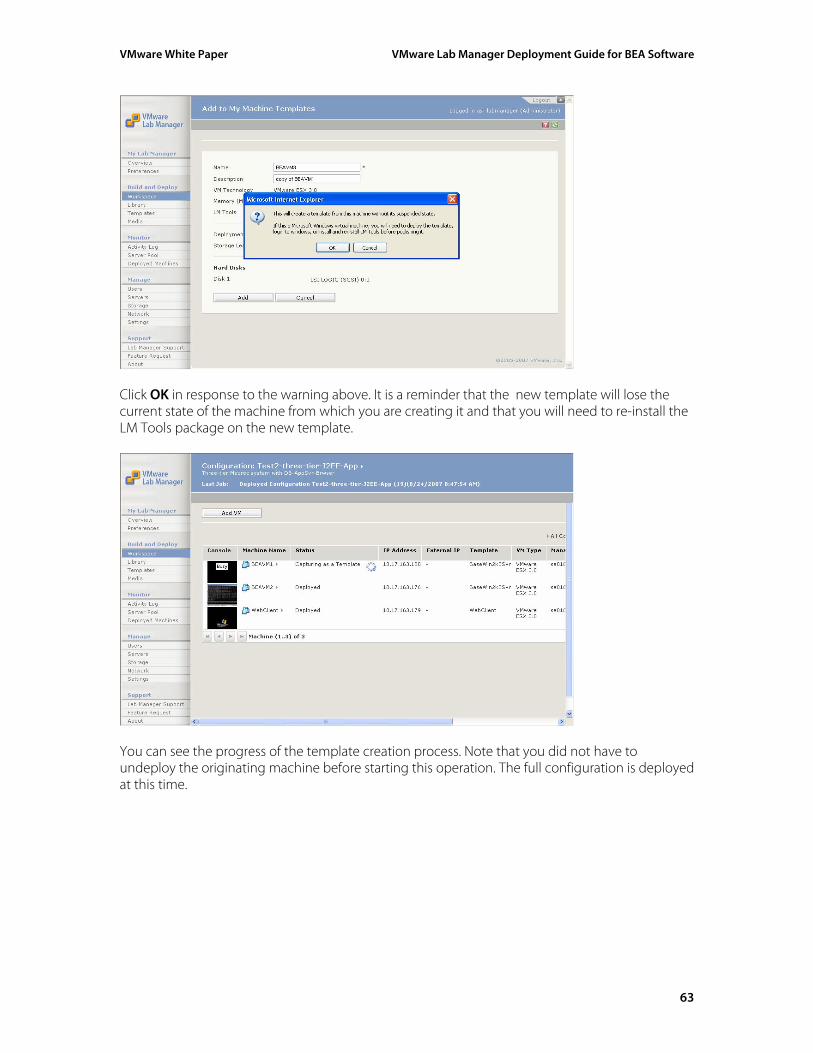
Give the new template a name and description. The new template in the example is named “BEAVM3.”
62
VMware White Paper VMware Lab Manager Deployment Guide for BEA Software
Click OK in response to the warning above. It is a reminder that the new template will lose the current state of the machine from which you are creating it and that you will need to re-install the LM Tools package on the new template.
You can see the progress of the template creation process. Note that you did not have to undeploy the originating machine before starting this operation. The full configuration is deployed at this time.
63
VMware White Paper VMware Lab Manager Deployment Guide for BEA Software
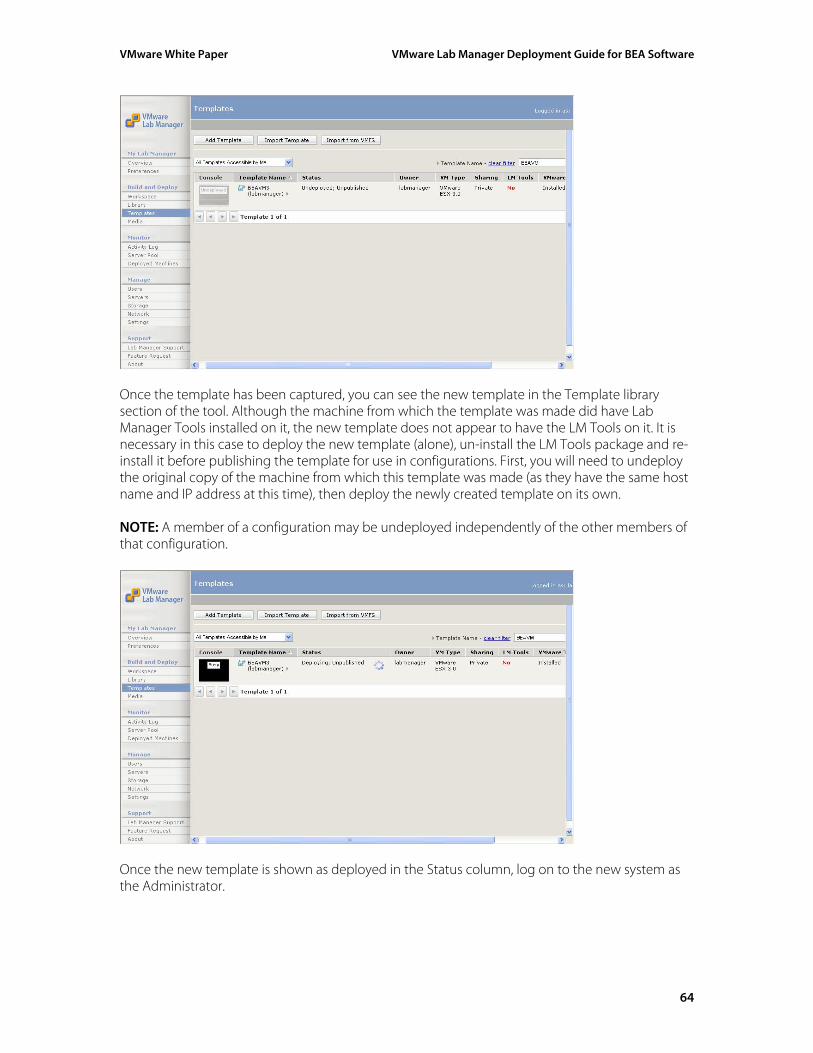
Once the template has been captured, you can see the new template in the Template library section of the tool. Although the machine from which the template was made did have Lab Manager Tools installed on it, the new template does not appear to have the LM Tools on it. It is necessary in this case to deploy the new template (alone), un-install the LM Tools package and re-install it before publishing the template for use in configurations. First, you will need to undeploy the original copy of the machine from which this template was made (as they have the same host name and IP address at this time), then deploy the newly created template on its own. NOTE: A member of a configuration may be undeployed independently of the other members of that configuration.
Once the new template is shown as deployed in the Status column, log on to the new system as the Administrator.
64
VMware White Paper VMware Lab Manager Deployment Guide for BEA Software
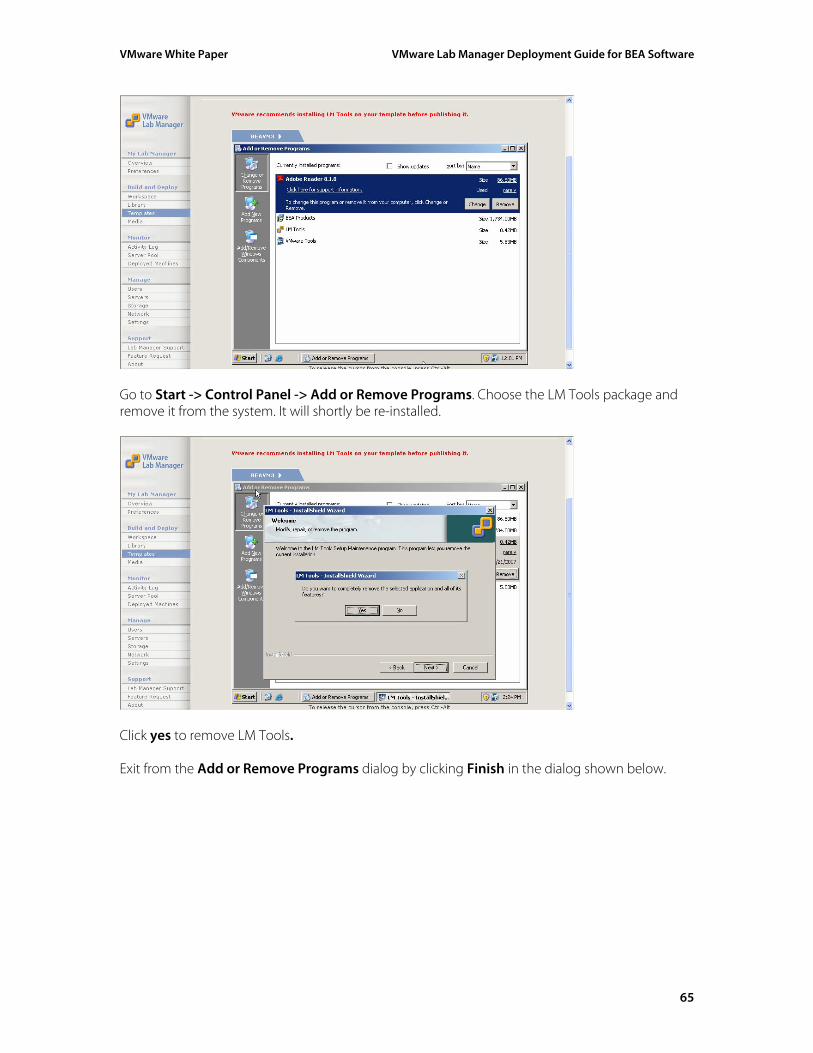
Go to Start -> Control Panel -> Add or Remove Programs. Choose the LM Tools package and remove it from the system. It will shortly be re-installed.
Click yes to remove LM Tools. Exit from the Add or Remove Programs dialog by clicking Finish in the dialog shown below.
65
VMware White Paper VMware Lab Manager Deployment Guide for BEA Software
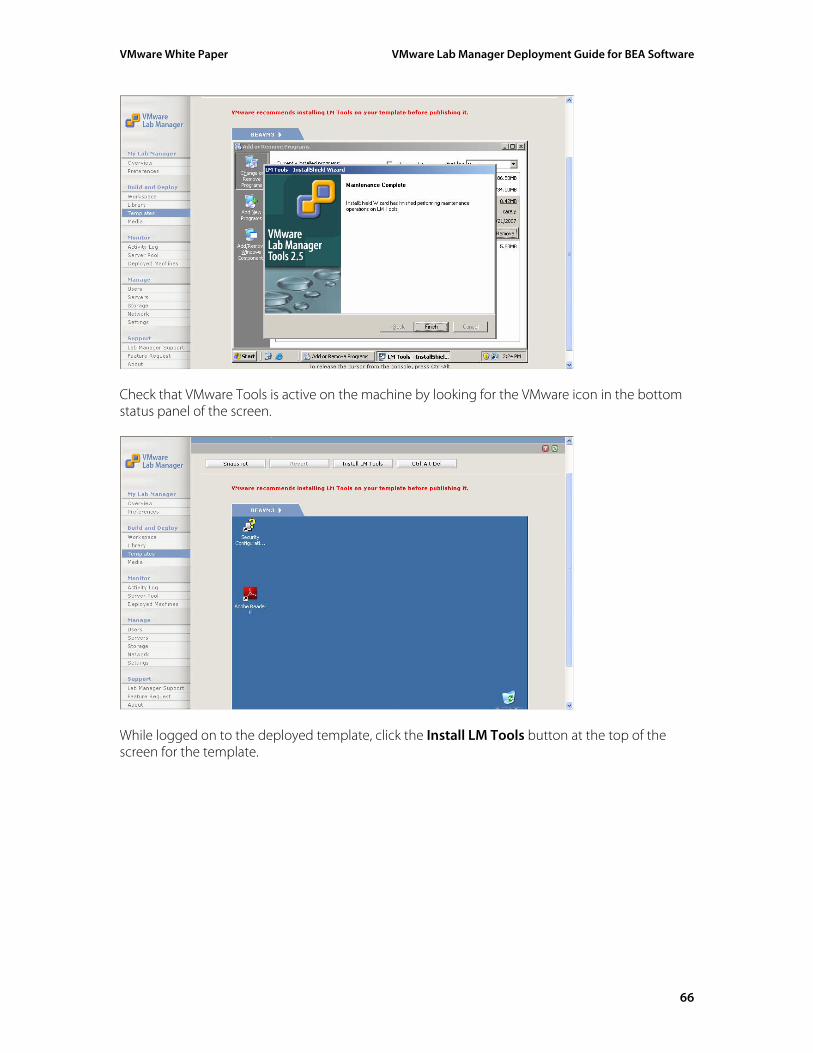
Check that VMware Tools is active on the machine by looking for the VMware icon in the bottom status panel of the screen.
While logged on to the deployed template, click the Install LM Tools button at the top of the screen for the template.
66
VMware White Paper VMware Lab Manager Deployment Guide for BEA Software
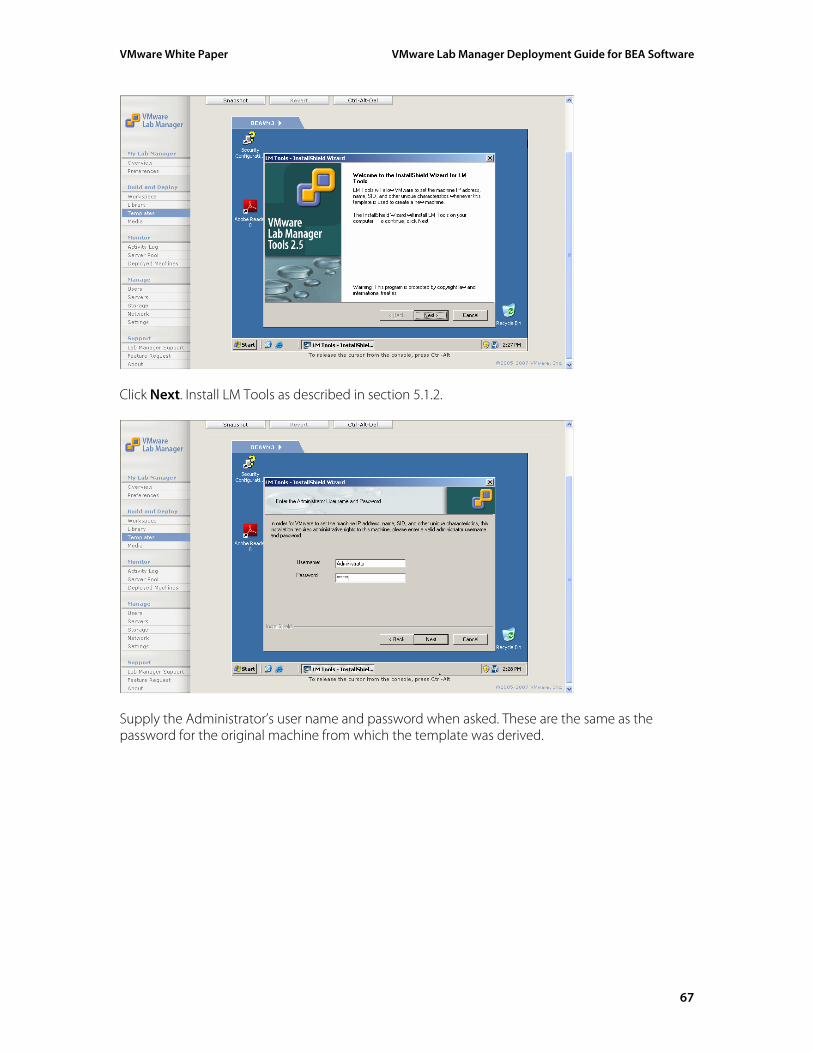
Click Next. Install LM Tools as described in section 5.1.2.
Supply the Administrator’s user name and password when asked. These are the same as the password for the original machine from which the template was derived.
67
VMware White Paper VMware Lab Manager Deployment Guide for BEA Software
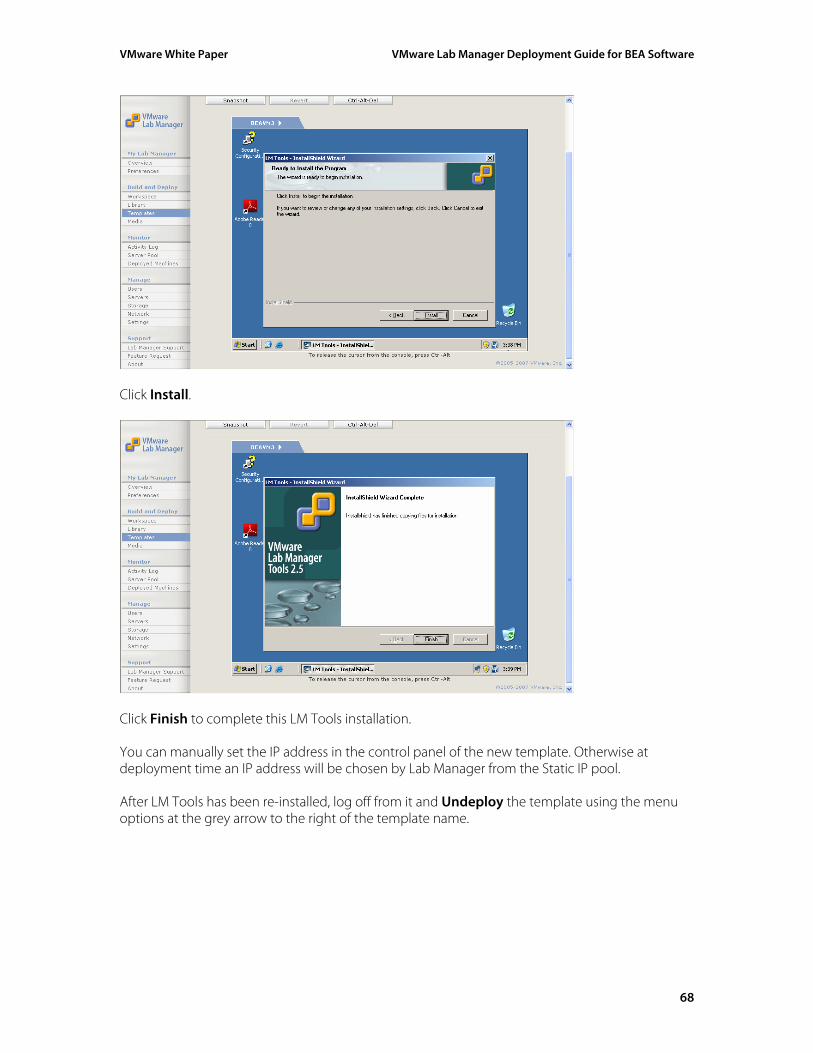
Click Install.
Click Finish to complete this LM Tools installation. You can manually set the IP address in the control panel of the new template. Otherwise at deployment time an IP address will be chosen by Lab Manager from the Static IP pool. After LM Tools has been re-installed, log off from it and Undeploy the template using the menu options at the grey arrow to the right of the template name.
68
VMware White Paper VMware Lab Manager Deployment Guide for BEA Software
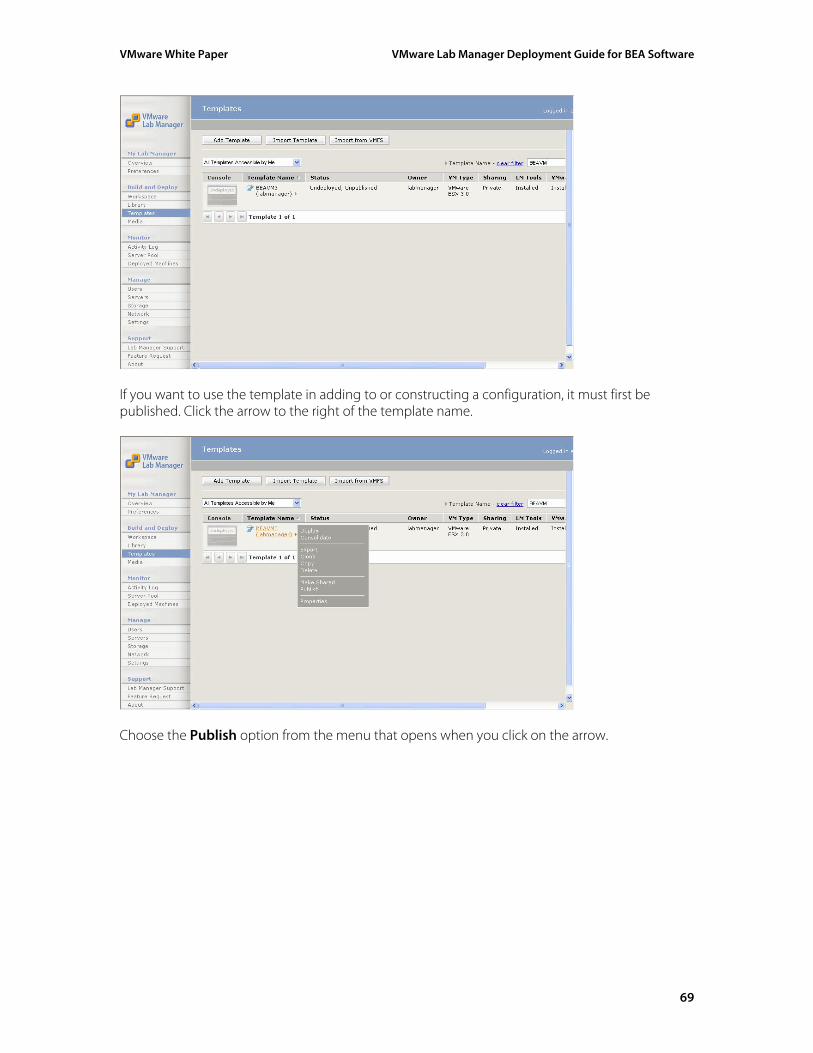
If you want to use the template in adding to or constructing a configuration, it must first be published. Click the arrow to the right of the template name.
Choose the Publish option from the menu that opens when you click on the arrow.
69
VMware White Paper VMware Lab Manager Deployment Guide for BEA Software
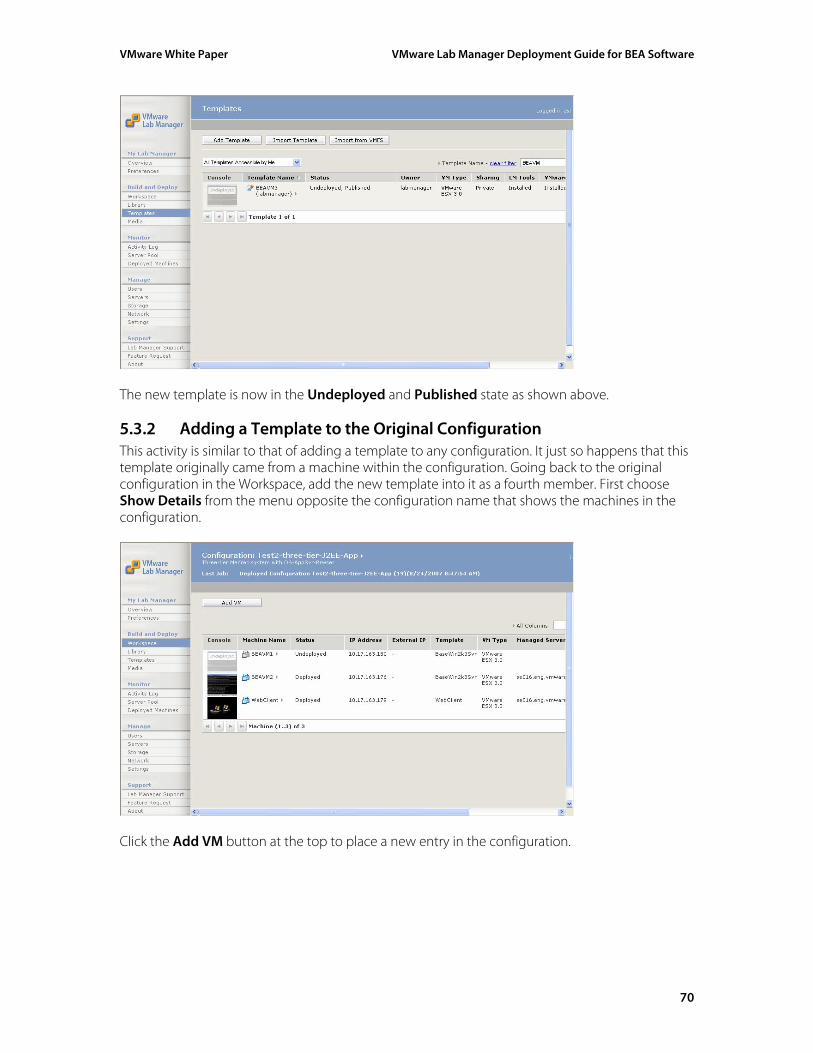
The new template is now in the Undeployed and Published state as shown above.
5.3.2 Adding a Template to the Original Configuration This activity is similar to that of adding a template to any configuration. It just so happens that this template originally came from a machine within the configuration. Going back to the original configuration in the Workspace, add the new template into it as a fourth member. First choose Show Details from the menu opposite the configuration name that shows the machines in the configuration.
Click the Add VM button at the top to place a new entry in the configuration.
70
VMware White Paper VMware Lab Manager Deployment Guide for BEA Software
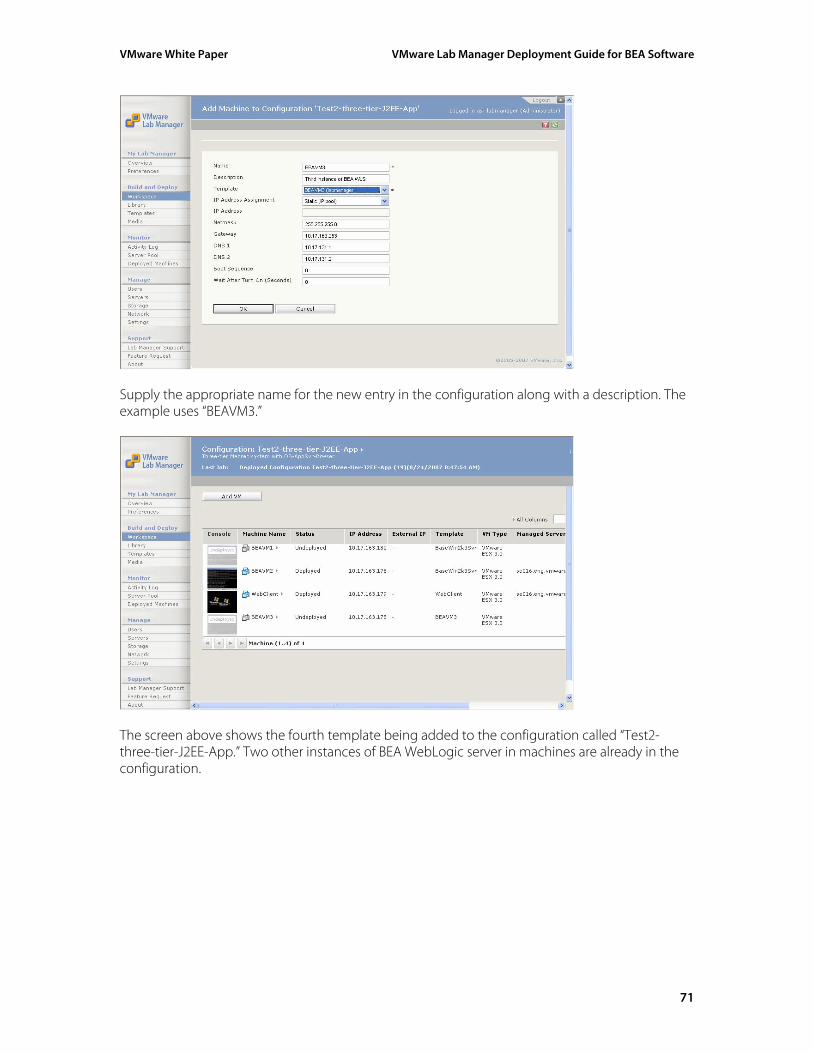
Supply the appropriate name for the new entry in the configuration along with a description. The example uses “BEAVM3.”
The screen above shows the fourth template being added to the configuration called “Test2-three-tier-J2EE-App.” Two other instances of BEA WebLogic server in machines are already in the configuration.
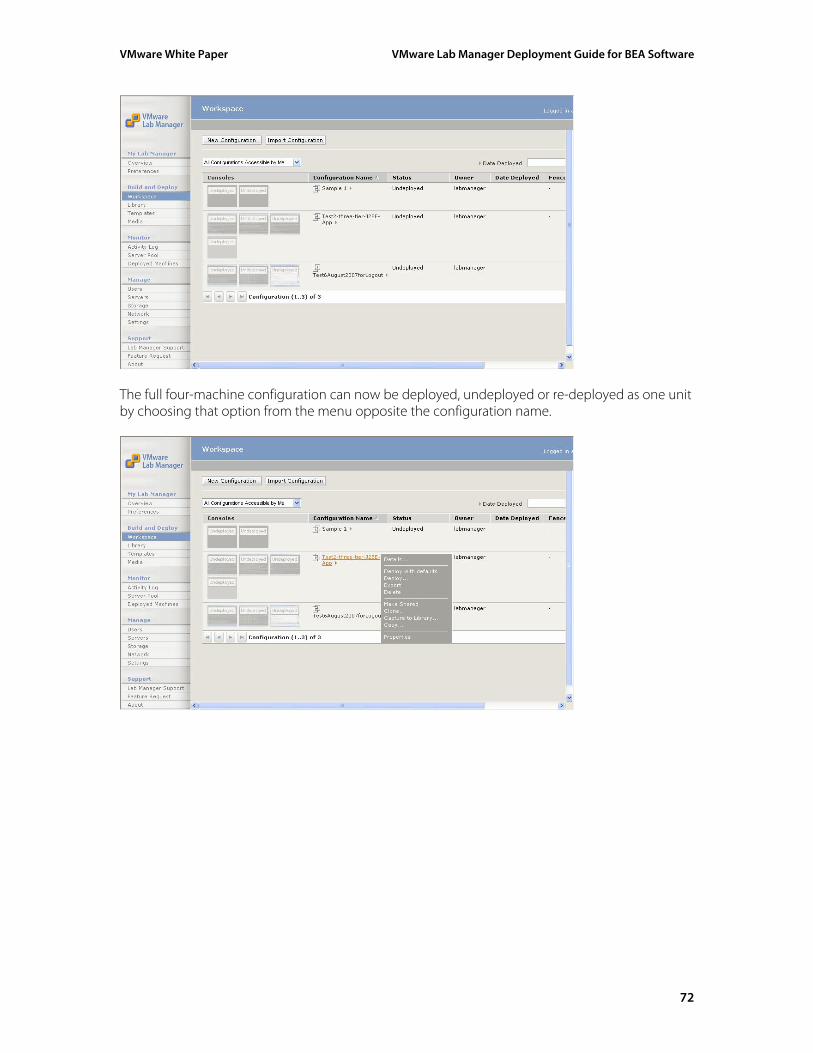
71
VMware White Paper VMware Lab Manager Deployment Guide for BEA Software
The full four-machine configuration can now be deployed, undeployed or re-deployed as one unit by choosing that option from the menu opposite the configuration name.
72
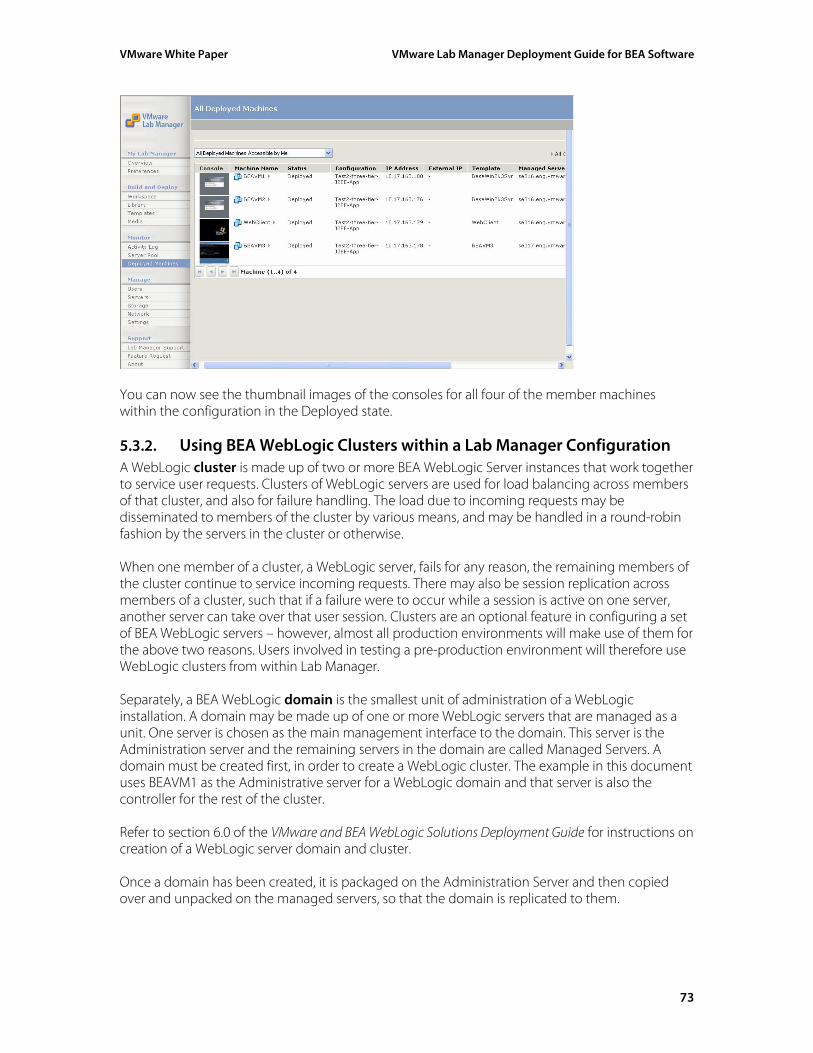
VMware White Paper VMware Lab Manager Deployment Guide for BEA Software
You can now see the thumbnail images of the consoles for all four of the member machines within the configuration in the Deployed state.
5.3.2. Using BEA WebLogic Clusters within a Lab Manager Configuration A WebLogic cluster is made up of two or more BEA WebLogic Server instances that work together to service user requests. Clusters of WebLogic servers are used for load balancing across members of that cluster, and also for failure handling. The load due to incoming requests may be disseminated to members of the cluster by various means, and may be handled in a round-robin fashion by the servers in the cluster or otherwise. When one member of a cluster, a WebLogic server, fails for any reason, the remaining members of the cluster continue to service incoming requests. There may also be session replication across members of a cluster, such that if a failure were to occur while a session is active on one server, another server can take over that user session. Clusters are an optional feature in configuring a set of BEA WebLogic servers – however, almost all production environments will make use of them for the above two reasons. Users involved in testing a pre-production environment will therefore use WebLogic clusters from within Lab Manager. Separately, a BEA WebLogic domain is the smallest unit of administration of a WebLogic installation. A domain may be made up of one or more WebLogic servers that are managed as a unit. One server is chosen as the main management interface to the domain. This server is the Administration server and the remaining servers in the domain are called Managed Servers. A domain must be created first, in order to create a WebLogic cluster. The example in this document uses BEAVM1 as the Administrative server for a WebLogic domain and that server is also the controller for the rest of the cluster. Refer to section 6.0 of the VMware and BEA WebLogic Solutions Deployment Guide for instructions on creation of a WebLogic server domain and cluster. Once a domain has been created, it is packaged on the Administration Server and then copied over and unpacked on the managed servers, so that the domain is replicated to them.
73
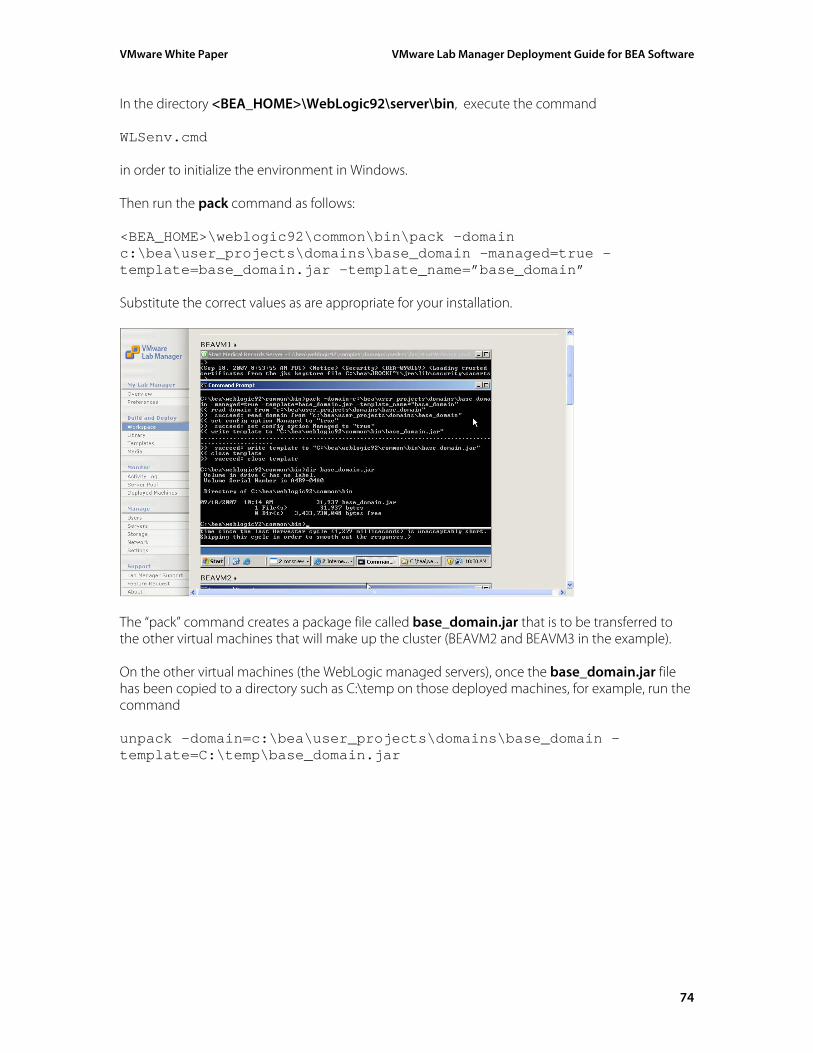
VMware White Paper VMware Lab Manager Deployment Guide for BEA Software
In the directory <BEA_HOME>\WebLogic92\server\bin, execute the command WLSenv.cmd in order to initialize the environment in Windows. Then run the pack command as follows: <BEA_HOME>\weblogic92\common\bin\pack –domain c:\bea\user_projects\domains\base_domain –managed=true –template=base_domain.jar –template_name=”base_domain” Substitute the correct values as are appropriate for your installation.
The “pack” command creates a package file called base_domain.jar that is to be transferred to the other virtual machines that will make up the cluster (BEAVM2 and BEAVM3 in the example). On the other virtual machines (the WebLogic managed servers), once the base_domain.jar file has been copied to a directory such as C:\temp on those deployed machines, for example, run the command unpack –domain=c:\bea\user_projects\domains\base_domain –template=C:\temp\base_domain.jar
74
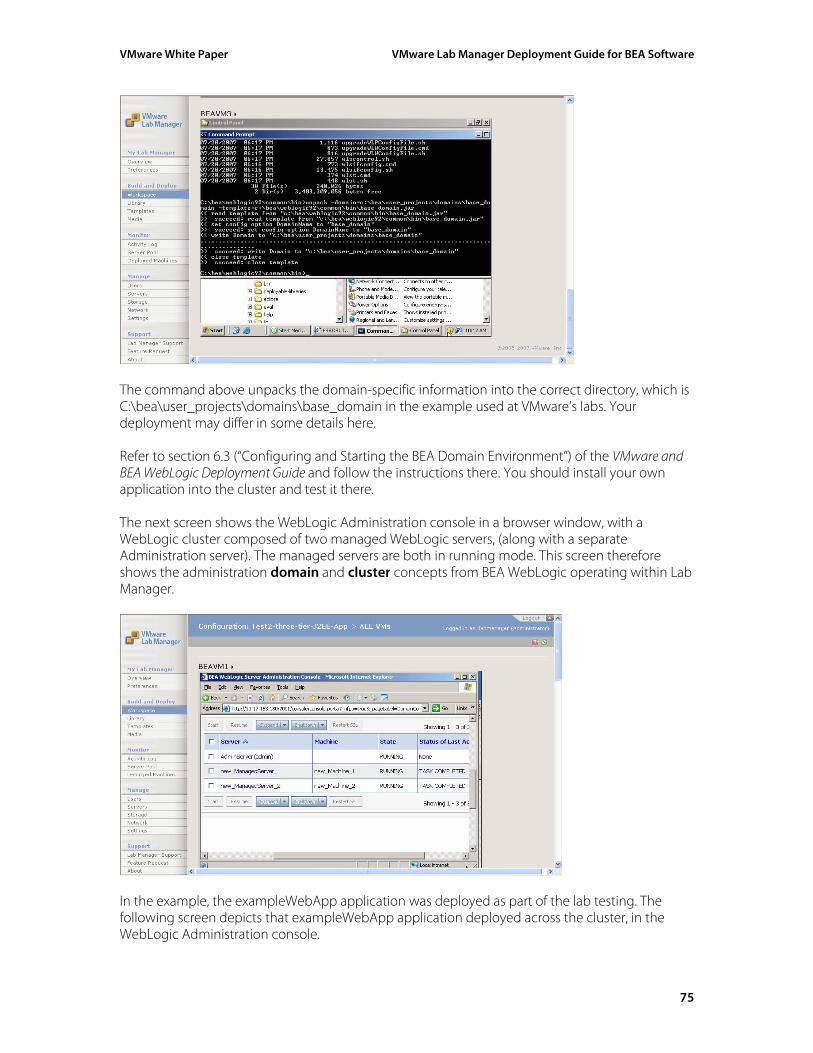
VMware White Paper VMware Lab Manager Deployment Guide for BEA Software
The command above unpacks the domain-specific information into the correct directory, which is C:\bea\user_projects\domains\base_domain in the example used at VMware’s labs. Your deployment may differ in some details here. Refer to section 6.3 (“Configuring and Starting the BEA Domain Environment”) of the VMware and BEA WebLogic Deployment Guide and follow the instructions there. You should install your own application into the cluster and test it there. The next screen shows the WebLogic Administration console in a browser window, with a WebLogic cluster composed of two managed WebLogic servers, (along with a separate Administration server). The managed servers are both in running mode. This screen therefore shows the administration domain and cluster concepts from BEA WebLogic operating within Lab Manager.
In the example, the exampleWebApp application was deployed as part of the lab testing. The following screen depicts that exampleWebApp application deployed across the cluster, in the WebLogic Administration console.
75
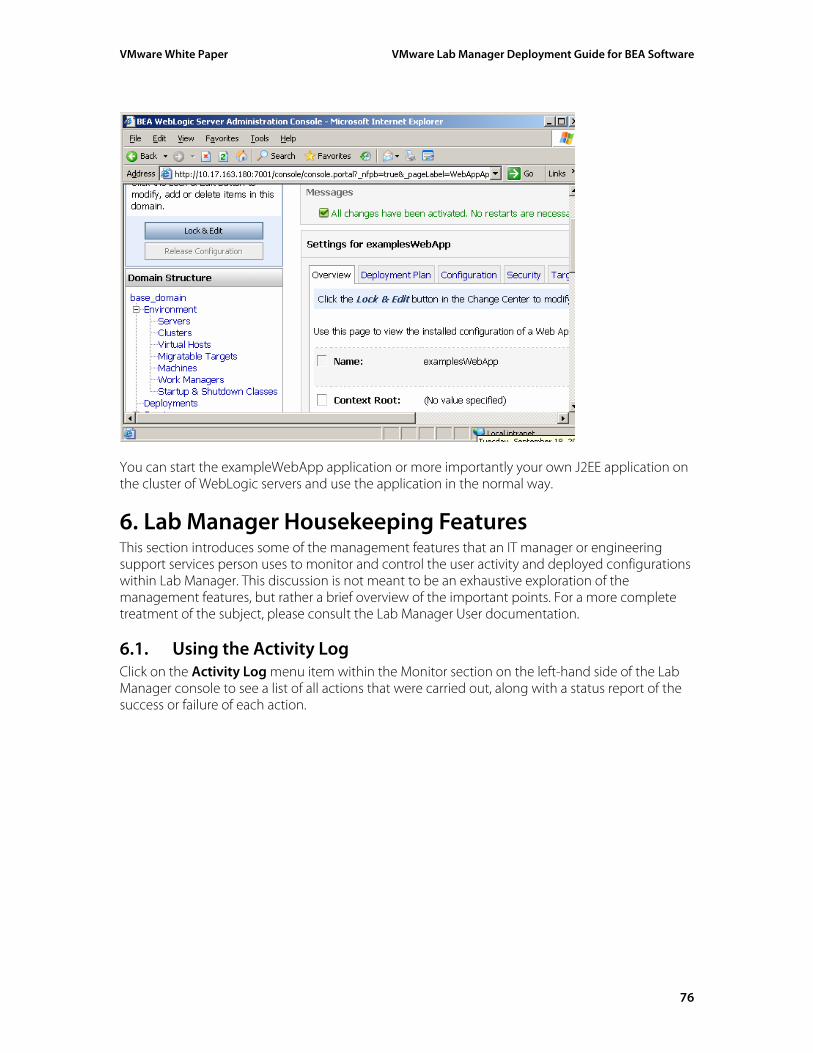
VMware White Paper VMware Lab Manager Deployment Guide for BEA Software
You can start the exampleWebApp application or more importantly your own J2EE application on the cluster of WebLogic servers and use the application in the normal way.
6. Lab Manager Housekeeping Features This section introduces some of the management features that an IT manager or engineering support services person uses to monitor and control the user activity and deployed configurations within Lab Manager. This discussion is not meant to be an exhaustive exploration of the management features, but rather a brief overview of the important points. For a more complete treatment of the subject, please consult the Lab Manager User documentation.
6.1. Using the Activity Log Click on the Activity Log menu item within the Monitor section on the left-hand side of the Lab Manager console to see a list of all actions that were carried out, along with a status report of the success or failure of each action.
76
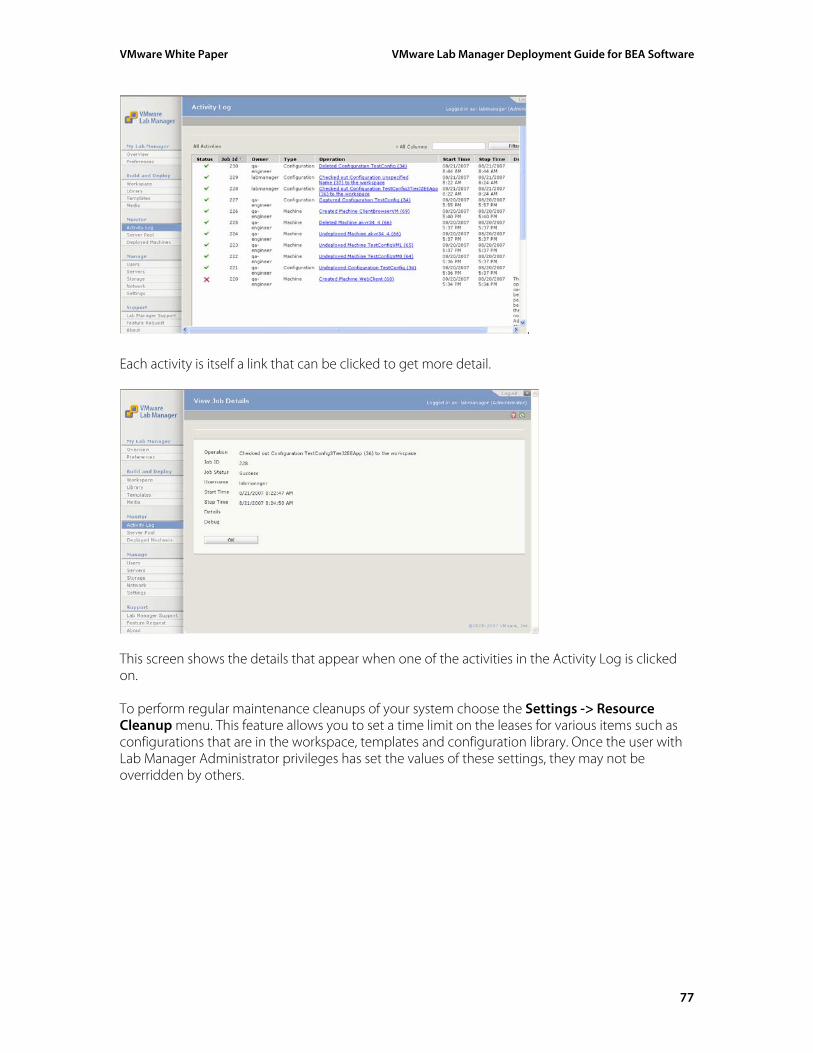
VMware White Paper VMware Lab Manager Deployment Guide for BEA Software
. Each activity is itself a link that can be clicked to get more detail.
This screen shows the details that appear when one of the activities in the Activity Log is clicked on. To perform regular maintenance cleanups of your system choose the Settings -> Resource Cleanup menu. This feature allows you to set a time limit on the leases for various items such as configurations that are in the workspace, templates and configuration library. Once the user with Lab Manager Administrator privileges has set the values of these settings, they may not be overridden by others.
77
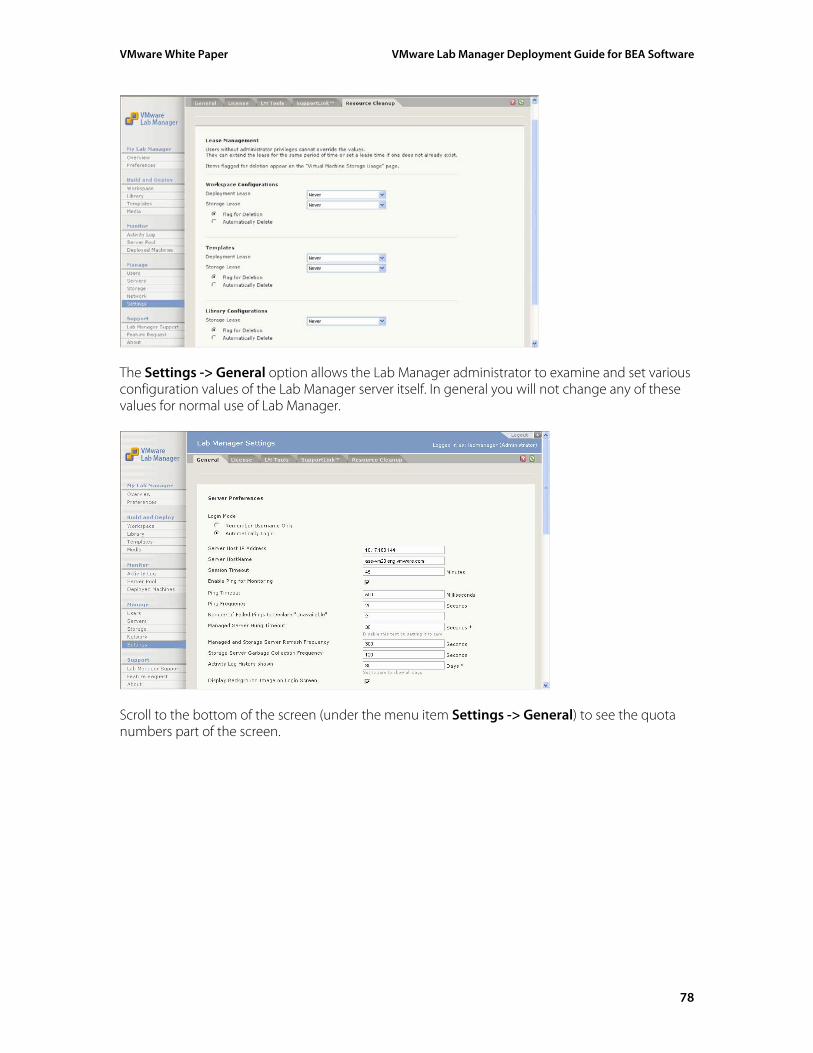
VMware White Paper VMware Lab Manager Deployment Guide for BEA Software
The Settings -> General option allows the Lab Manager administrator to examine and set various configuration values of the Lab Manager server itself. In general you will not change any of these values for normal use of Lab Manager.
Scroll to the bottom of the screen (under the menu item Settings -> General) to see the quota numbers part of the screen.
78
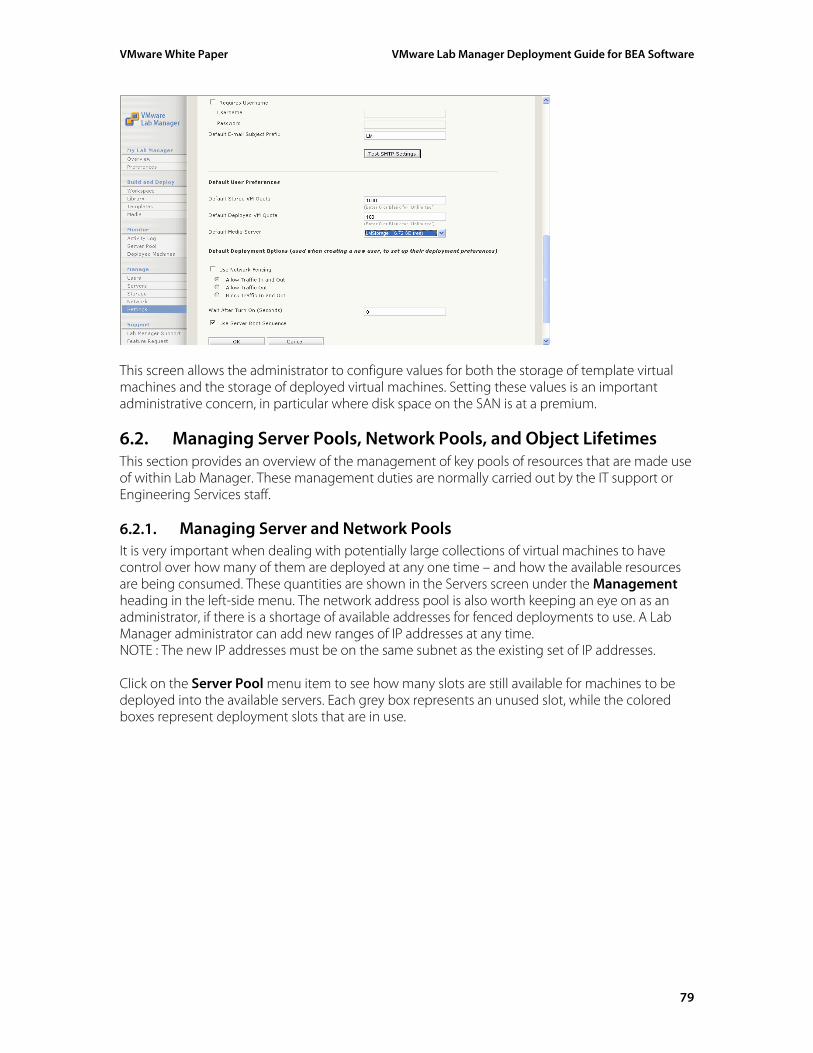
VMware White Paper VMware Lab Manager Deployment Guide for BEA Software
This screen allows the administrator to configure values for both the storage of template virtual machines and the storage of deployed virtual machines. Setting these values is an important administrative concern, in particular where disk space on the SAN is at a premium.
6.2. Managing Server Pools, Network Pools, and Object Lifetimes This section provides an overview of the management of key pools of resources that are made use of within Lab Manager. These management duties are normally carried out by the IT support or Engineering Services staff.
6.2.1. Managing Server and Network Pools It is very important when dealing with potentially large collections of virtual machines to have control over how many of them are deployed at any one time – and how the available resources are being consumed. These quantities are shown in the Servers screen under the Management heading in the left-side menu. The network address pool is also worth keeping an eye on as an administrator, if there is a shortage of available addresses for fenced deployments to use. A Lab Manager administrator can add new ranges of IP addresses at any time. NOTE : The new IP addresses must be on the same subnet as the existing set of IP addresses. Click on the Server Pool menu item to see how many slots are still available for machines to be deployed into the available servers. Each grey box represents an unused slot, while the colored boxes represent deployment slots that are in use.
79
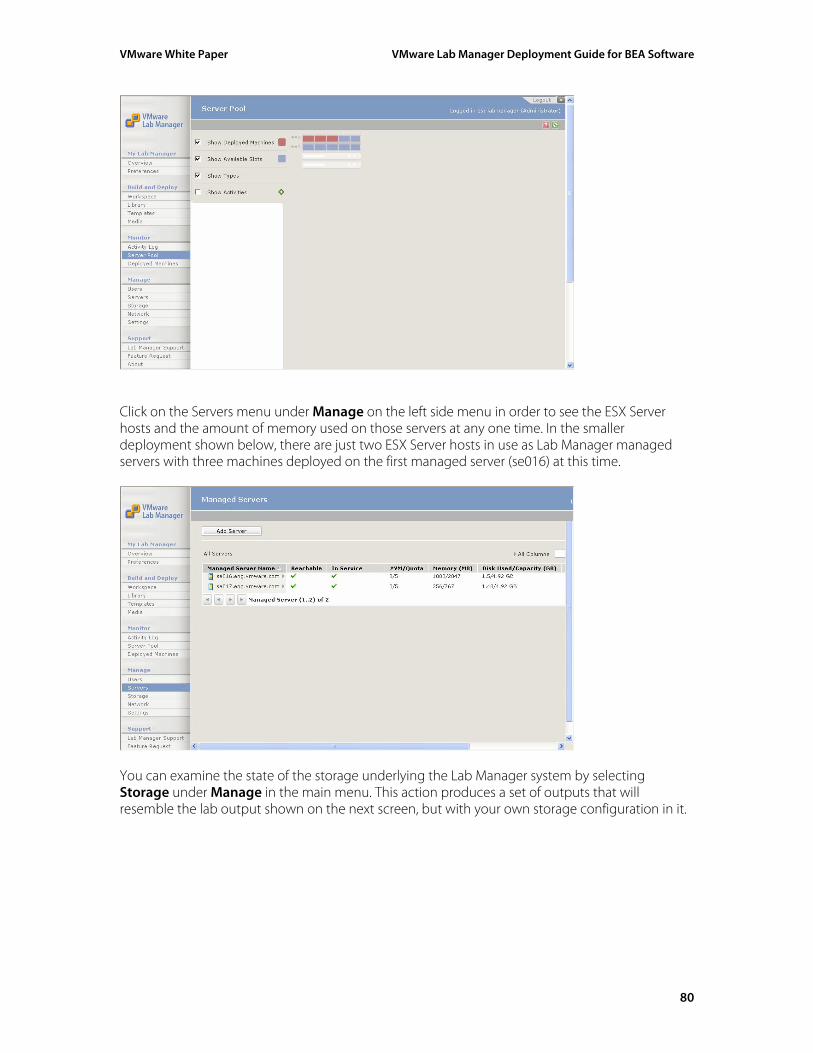
VMware White Paper VMware Lab Manager Deployment Guide for BEA Software
Click on the Servers menu under Manage on the left side menu in order to see the ESX Server hosts and the amount of memory used on those servers at any one time. In the smaller deployment shown below, there are just two ESX Server hosts in use as Lab Manager managed servers with three machines deployed on the first managed server (se016) at this time.
You can examine the state of the storage underlying the Lab Manager system by selecting Storage under Manage in the main menu. This action produces a set of outputs that will resemble the lab output shown on the next screen, but with your own storage configuration in it.
80

VMware White Paper VMware Lab Manager Deployment Guide for BEA Software
The first two entries above represent local storage space on each of the managed servers, whereas the “HGB” entry represents the SAN storage area that they share. Select the network -> IP pool tab option under Manage to see the pool of used and unused IP addresses that are available for use by the Lab Manager server when choosing an IP address for a deployed machine.
. The pool of IP addresses was limited in VMware’s lab work, but if there were some fenced deployments actively used, you would see some new deployed machines using up extra IP addresses on the list. These are the virtual routers that enable a fenced deployment. They usually have names that are prefaced with text such as “advsvr.” These machines are really internal to Lab Manager and not controlled by the end user (other than when fenced mode is chosen for a deployment). IP addresses are only returned to the free pool when all machines are removed from deployment and the configurations that those machines belonged to are also deleted from the workspace area.
81
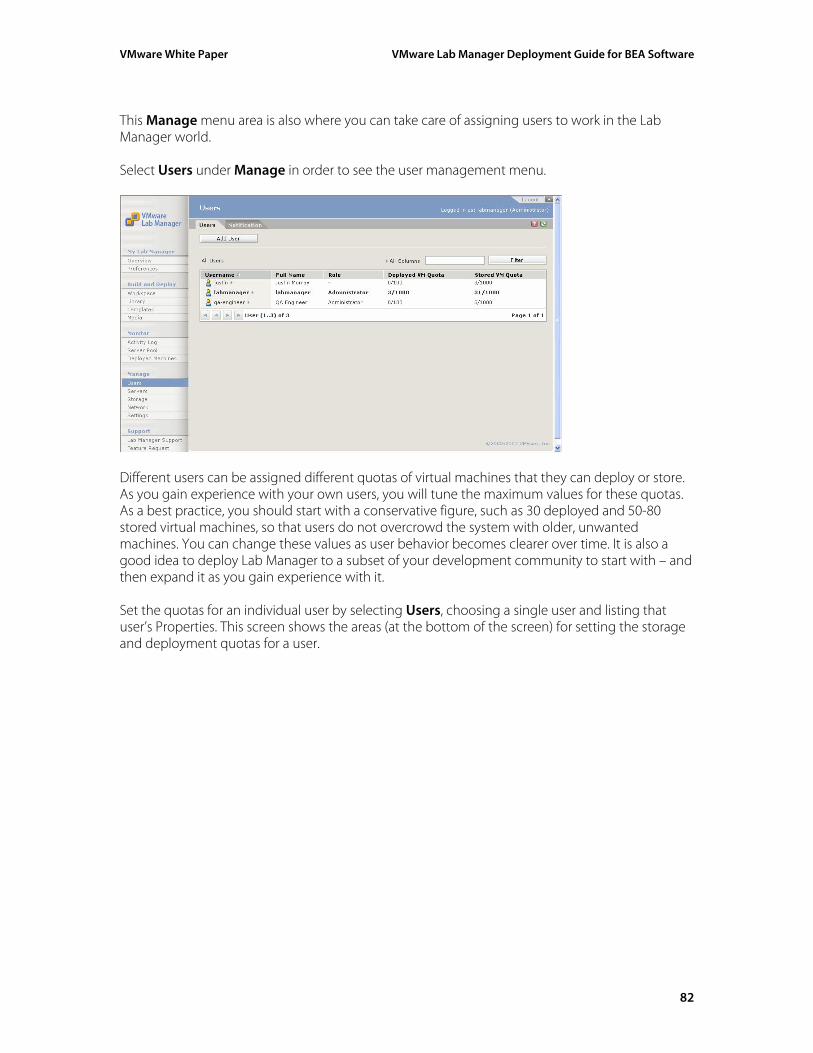
VMware White Paper VMware Lab Manager Deployment Guide for BEA Software
This Manage menu area is also where you can take care of assigning users to work in the Lab Manager world. Select Users under Manage in order to see the user management menu.
Different users can be assigned different quotas of virtual machines that they can deploy or store. As you gain experience with your own users, you will tune the maximum values for these quotas. As a best practice, you should start with a conservative figure, such as 30 deployed and 50-80 stored virtual machines, so that users do not overcrowd the system with older, unwanted machines. You can change these values as user behavior becomes clearer over time. It is also a good idea to deploy Lab Manager to a subset of your development community to start with – and then expand it as you gain experience with it. Set the quotas for an individual user by selecting Users, choosing a single user and listing that user’s Properties. This screen shows the areas (at the bottom of the screen) for setting the storage and deployment quotas for a user.
82
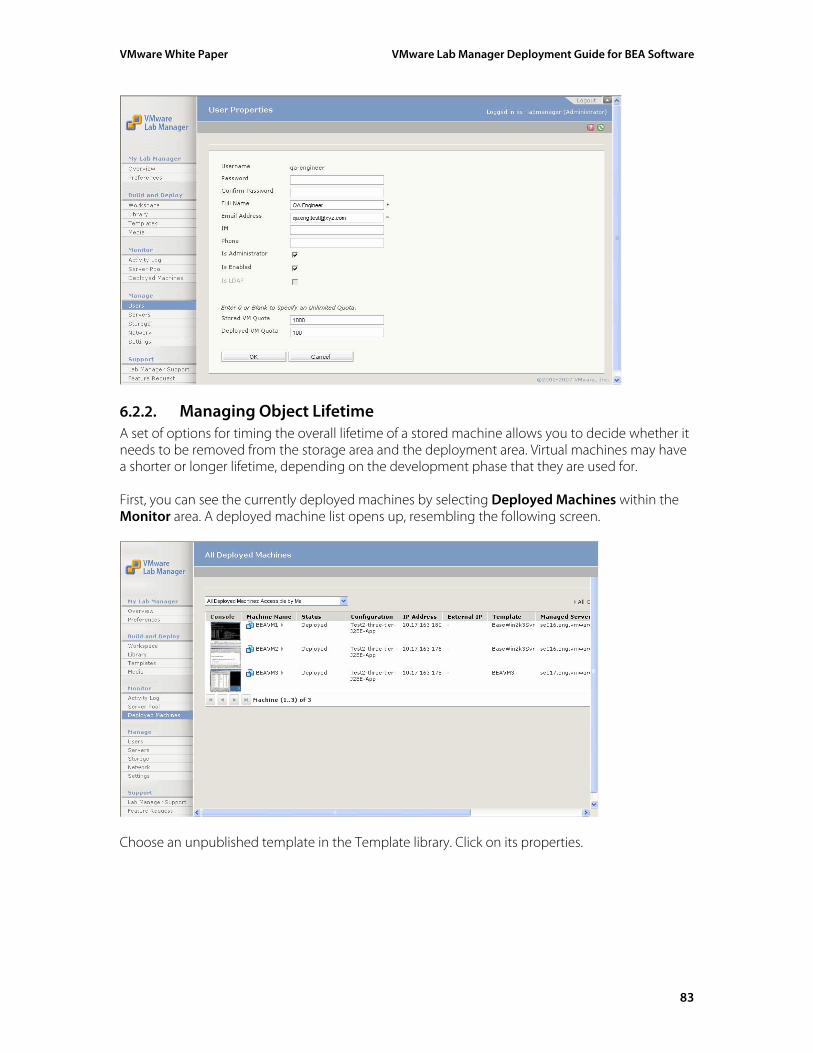
VMware White Paper VMware Lab Manager Deployment Guide for BEA Software
6.2.2. Managing Object Lifetime A set of options for timing the overall lifetime of a stored machine allows you to decide whether it needs to be removed from the storage area and the deployment area. Virtual machines may have a shorter or longer lifetime, depending on the development phase that they are used for. First, you can see the currently deployed machines by selecting Deployed Machines within the Monitor area. A deployed machine list opens up, resembling the following screen.
Choose an unpublished template in the Template library. Click on its properties.
83
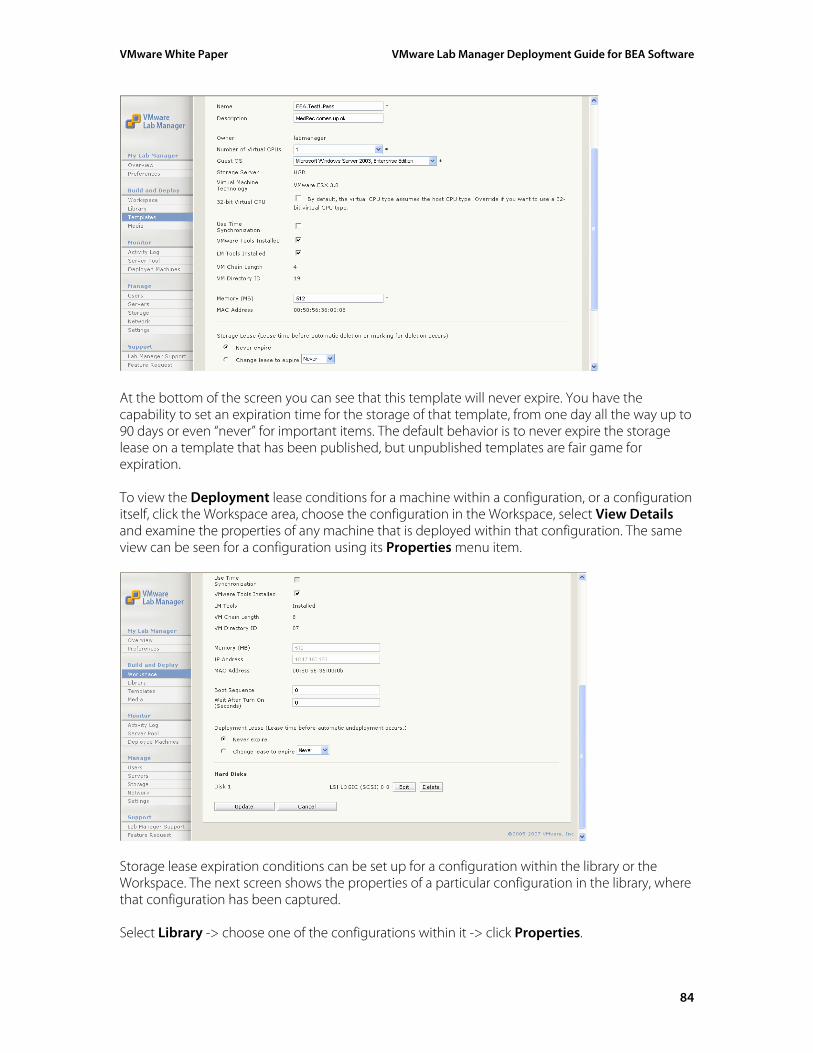
VMware White Paper VMware Lab Manager Deployment Guide for BEA Software
At the bottom of the screen you can see that this template will never expire. You have the capability to set an expiration time for the storage of that template, from one day all the way up to 90 days or even “never” for important items. The default behavior is to never expire the storage lease on a template that has been published, but unpublished templates are fair game for expiration. To view the Deployment lease conditions for a machine within a configuration, or a configuration itself, click the Workspace area, choose the configuration in the Workspace, select View Details and examine the properties of any machine that is deployed within that configuration. The same view can be seen for a configuration using its Properties menu item.
Storage lease expiration conditions can be set up for a configuration within the library or the Workspace. The next screen shows the properties of a particular configuration in the library, where that configuration has been captured. Select Library -> choose one of the configurations within it -> click Properties.
84
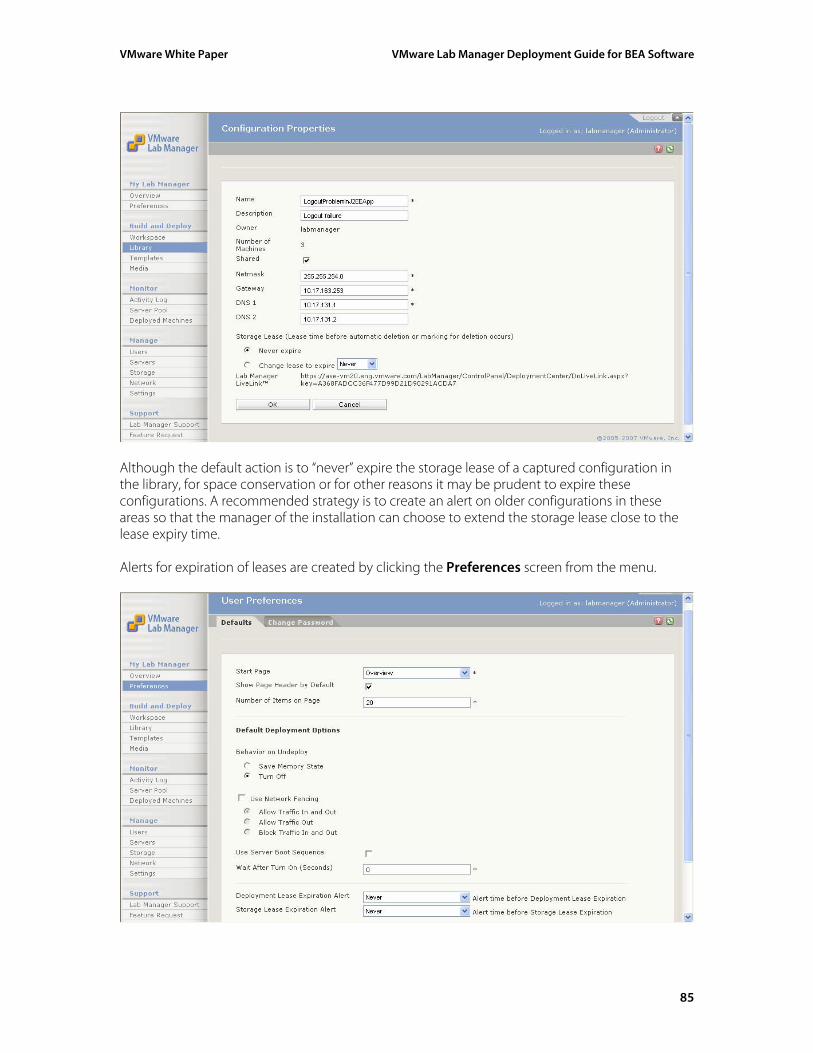
VMware White Paper VMware Lab Manager Deployment Guide for BEA Software
Although the default action is to “never” expire the storage lease of a captured configuration in the library, for space conservation or for other reasons it may be prudent to expire these configurations. A recommended strategy is to create an alert on older configurations in these areas so that the manager of the installation can choose to extend the storage lease close to the lease expiry time. Alerts for expiration of leases are created by clicking the Preferences screen from the menu.
85

VMware White Paper VMware Lab Manager Deployment Guide for BEA Software
As shown at the bottom of the previous screen, the Deployment Lease and Storage Lease Expiration alerts will be triggered before the expiration occurs, giving the administrator time to reset the expiration condition on the object in question. This feature is useful for managing large numbers of templates, deployed machines, or configurations in the workspace and library areas and storage in general.
86
VMware White Paper VMware Lab Manager Deployment Guide for BEA Software
Appendix A – Best Practices At the relevant points in the document, certain best practices relating to specific subjects (such as the best time to install BEA software) have been pointed out. This section adds some more general best practices to that set.
Best Practice: Deployments Deployed configurations occupy some of the disk space, memory and CPU resources of a managed server, even when they are not being actively used for development and testing. For performance reasons it is a best practice to remove any deployments that are not currently in use, rather than leaving configurations or templates in the deployed state when they don’t need to be. This can be done simply by issuing the “Undeploy” action against a deployed configuration. Administrators should train their end user community, usually the developers and testers, to do this regularly. Quotas on deployments in the administration section can be used to determine how many configurations are deployable by any user. To remove a template completely from the Lab Manager system, you will need to delete any configurations from the library that use that template also.
Best practice: Static IP Pools It is wasteful to allow templates and configurations to consume IP addresses within older configurations that are not needed any more. An important best practice is to undeploy these older configurations and templates that are no longer in use and delete them from both the Workspace and the Library in order to free up their allocated IP addresses. Doing this regularly will maintain the pool of free IP addresses in a healthy state.
87
VMware White Paper VMware Lab Manager Deployment Guide for BEA Software
88
VMware, Inc. 3401 Hillview Ave Palo Alto, CA 94304 USA Tel 650-427-5000 Fax 650-427-5001 www.vmware.com © 2007 VMware, Inc. All rights reserved. Protected by one or more of U.S. Patent Nos. 6,397,242, 6,496,847, 6,704,925, 6,711,672, 6,725,289, 6,735,601, 6,785,886, 6,789,156, 6,795,966, 6,880,022, 6,961,941, 6,961,806, 6,944,699, 7,069,413; 7,082,598 and 7,089,377; patents pending.